Thinking of modules: a shell “diary”

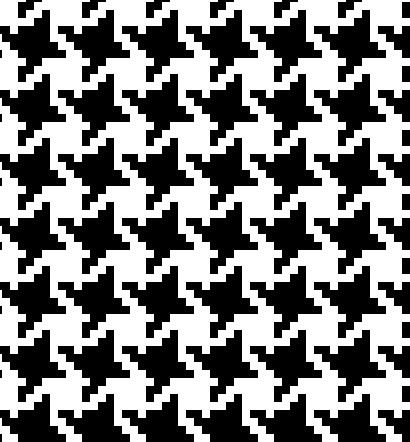
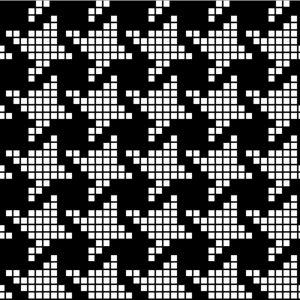
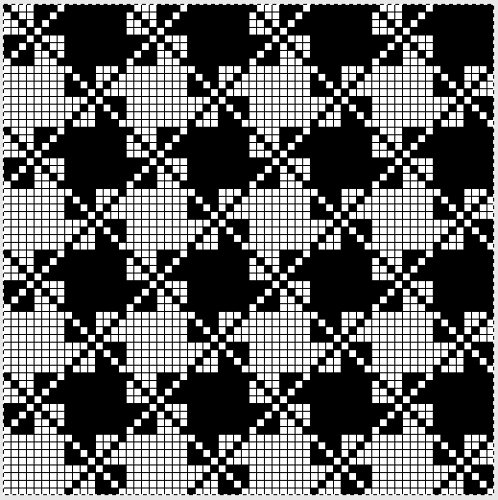
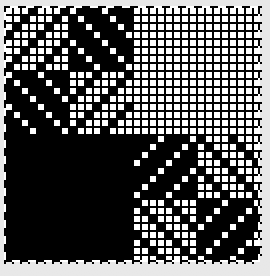
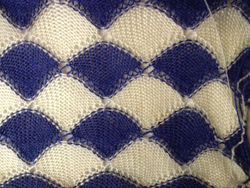
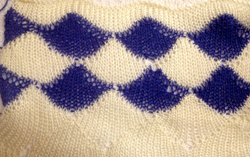
This is the beginning of a thread on modular shapes on the KM. Much is published in the form of both how-tos and patterns for hand knit modules. One of the critical differences between HK and MK as in mosaics is that in HK garter rows may enrich the surface textures. Unless a G carriage is in use, frequent travel between opposing needle beds or turning the work over on the single bed is required on the KM to create the garter rows, which may be considered tedious and impractical rather than impossible. A question from a friend led to my beginning the topic by trying to sort out shell shapes. In the samples below two different weight yarns were used, first because they were conveniently the closest to my yarn mast, and second because contrasting colors are helpful in defining what is going on at the edges of the shapes. The irregularities in spots are operator error, the repeat pictured is sound. This is not a step by step “how-to” for those who have no experience with holding techniques, but rather a starting point for anyone who would like to play with a similar shape
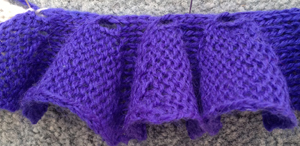
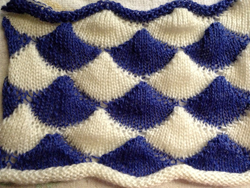
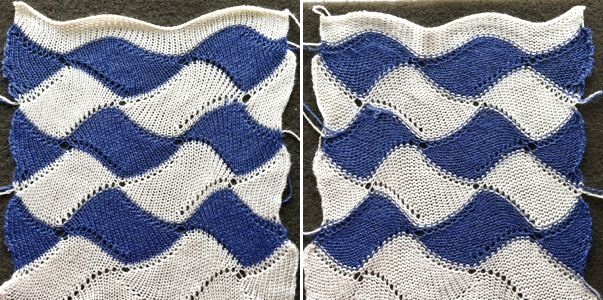
the swatch immediately off the machine has a bit of 3D going on

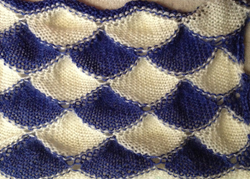
knit side after pressing

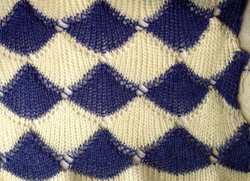
the purl side after pressing

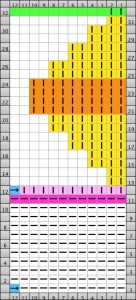
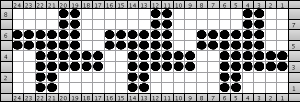
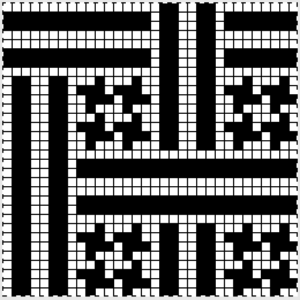
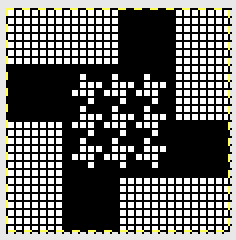
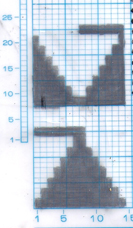
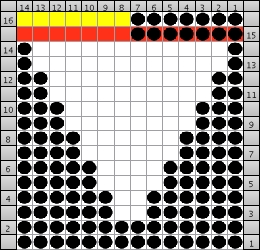
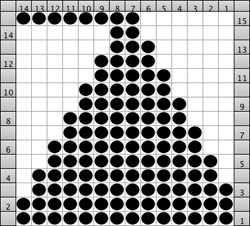
the working repeat: dots represent stitches knitting, blank squares needles in hold for each individual segment

For forming a straight edge at the sides of the finished piece, the first horizontal row of shells must start and end with half a repeat. Set up is on a multiple of 14 stitches. I began working with COR. Stitches are brought into hold consistently on the side opposite to the carriage, when 1 remains at top of half repeat (2 for full repeat), the remaining six of the recently worked repeat and subsequent 14 for the following repeat are pushed into work (21/22 sts), one row is knit across all needles, COL, the 7/8 remaining stitches from the previous group are brought out to hold, the carriage travels back to the opposite side once again on the grouping of 14 stitches, COR, holding pattern resumes opposite carriage, and from right to left. The contrasting color in the second horizontal row of shells begins on left, working on a full 14 stitch repeat, reversing the shaping. I am considering automating the process with slip stitch. The latter would have to occur on an electronic if repeat is to be used as-is since on a punchcard the width would need to be adjusted. If a brick repeat such as above is desired, two different cards or programmed repeats would need working out for the alternate shapes to occur on the same location on the needle bed after completion of each horizontal shell sequence.
It can be helpful to mark up a needle tape or even the needle bed with water-soluble markers to keep track of the repeat’s locations. I used a separate color for each repeat set. A bit of denatured alcohol on a lint-free cloth piece easily removes them. Markings on needle tape pertain to some of my other projects.

An entrelac pretender

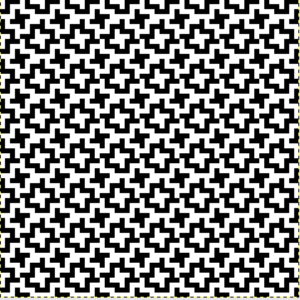
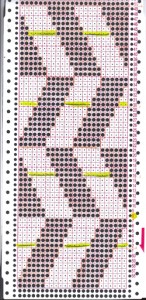
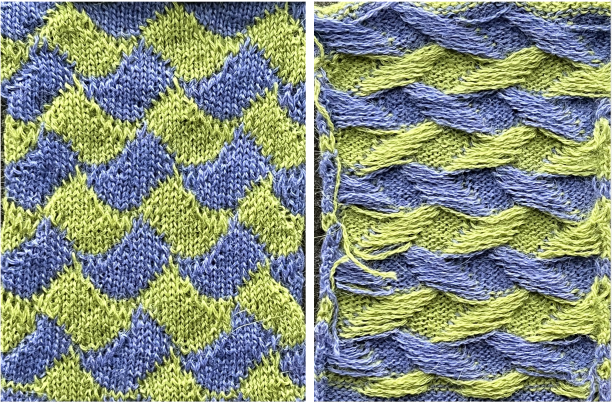
“Automating ” normally labor-intensive hand techniques cannot truly duplicate them. Below is one effort to produce an “entrelac-like” fabric using the slip stitch setting. The biggest advantage of this is the knitting speed as opposed to creating the individual cells using holding and picking up stitches. Some drawbacks: slip stitch floats on the reverse make for a dense fabric, and may be an issue in a garment. There are elongated stitches along the edges of the shapes at the color changes, these cannot be avoided. I am not a fan of the Brother single bed color changer so I opted for changing the color by hand. “Air knitting” helps one sort out where to set up the pattern on the machine. The fabric is knit using the slip setting, so I chose placement on the KM where I had needles selected on each side of the knit on my first row.
The pattern is begun on row 8, card locked, COL.
The first-row preselection is to the right.
COR, card to advance normally, KC set to slip in both directions, change color after 8 rows of knitting, then every 14 rows.
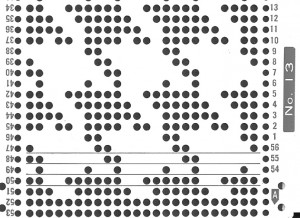
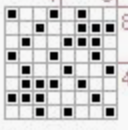
As in any slip-stitch design, punched holes will knit stitches, unpunched holes will skip them, creating floats on the purl side between knit stitches.  The green dot on the right of the card indicates the starting row for the first repeat, row 8, subsequent lines are reminders to change color before knitting across that particular row, taking into account the fact that the card reader is reading below the line of sight on the machine’s exterior.   Note that before the color change the yarn in use will create a float in the area that will be skipped by, and knit in the same area as the subsequent color will; at first, this may seem counter-intuitive, but it is correct, and the effect may be seen on both sides of the swatch.
If changing color by hand, remember to “close the gate” after each color change to avoid dropping the knitting off the machine if the yarn in use moves too far forward to be “caught and knit” by the appropriate needles.
With necessary adjustments in starting row and settings, technically this fabric may be knit on any KM brand.

The yarn in this test is the same alpaca/silk blend used in my shawls, at tension 6. If a color changer is used, the KC row must be from right to left with knitting rows moving left to right and back to the color changer.

2023
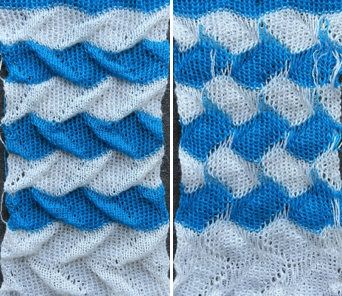
The same repeat may be used double-bed as well, using single or multiple colors, with the potential for variations in striping.
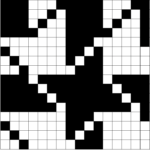
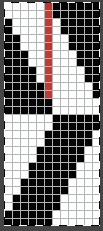
The minimum electronic size repeat is 12X28 pixels.
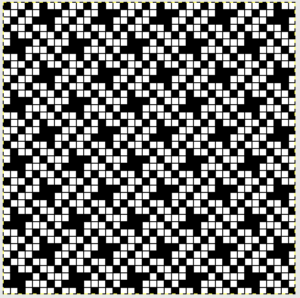
The red cells in the chart indicate the greatest number of rows, 12, that any one stitch will be held until a black pixel knits that same now very elongated stitch on the next pass.  The main bed is set to slip in both directions, and the ribber is set to knit in both with the first and last needle in use on the ribber.
The skipped stitches get quite long, thin yarn may be used but watch for any breaks or issues with gate pegs, adjusting the tension as needed.

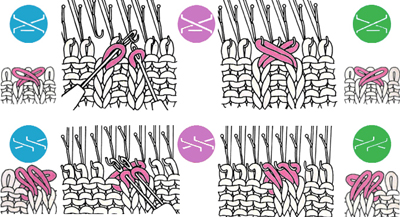
Hand to machine, symbols 4: cables

The following begins to address cable translations. I posted some content on cables in January 2012, but this content follows the present vein.
Blue dots continue to represent the hand-knit symbol, below them the fabric is illustrated as viewed on the knit side.
The pink dots and the images on either side of them the machine knit, or fabric as viewed from the purl side.
In the column on the far right, the green dots and the images below them represent the opposing twist in HK and are illustrated only on their knit side.

To execute combinations in knit-purl on the same side of the knit on the machine, a ribber is required (or a Brother G carriage). Purl stitches are on the main bed, and knit stitches are created by the opposing bed. To match the hand-knit here, crossings are actually made in the same direction in both HK and MK


HK pattern, software charting.

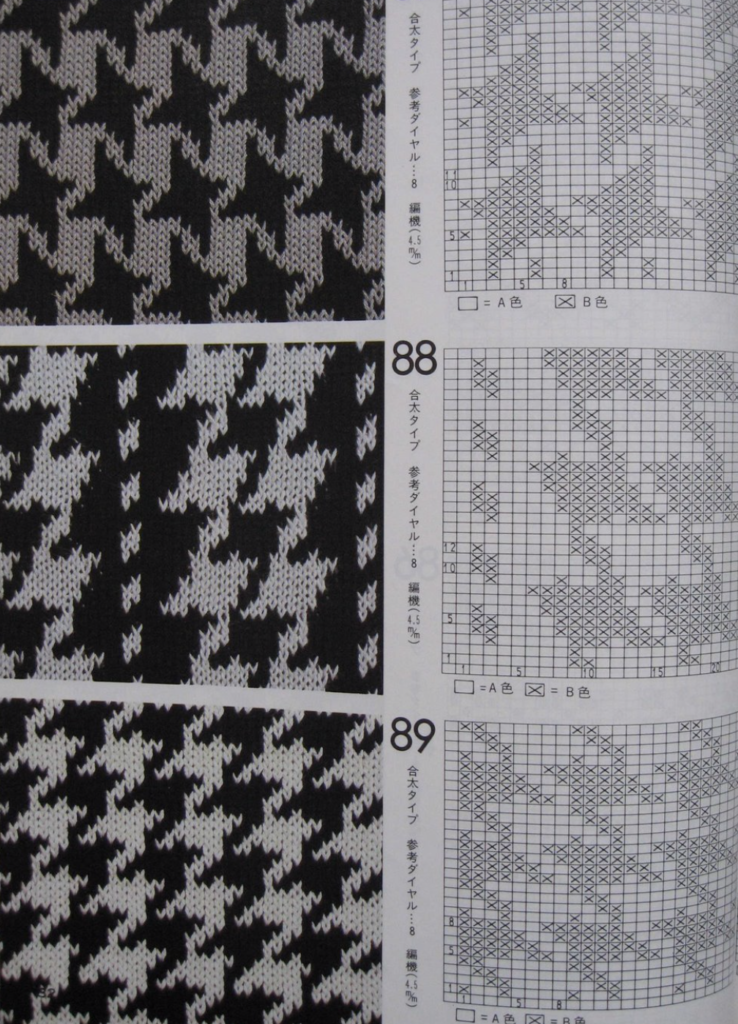
I have reached the point where decades old (89 and earlier) magazines that got “saved” are now being peeked at, and if not given away, then recycled. There may be some bleed through here from pages I have “saved” once again. Browsing through I found some designs not appropriate for machine knitting for one reason or another, but still creating interesting surfaces and the chance to explore using intwined’s other features. The program will create text from a chart, or chart from typed text with some limitations. One of the latter is a very large cable as seen in the attached document. PDF exports can happen within the program if one is specific in the sequencing of creating its documents. The 1989 pattern had only text for the repeat; I typed it, and had the chart pretty much created for me except for the problem row 5. Here is the resulting Intwined created PDF with some of my comments: cable_diamond. The following is the graph I edited, with my illustration for the execution of row 5

the blue line separates the slip stitch section, which can serve as a border on each side of the cable panels, the red lines the edges of the 12 stitches involved in the cable. The green stitches are put on a cable needle and brought to the front of the work, the next 6 stitches are knit first, then the ones from the cable needle to complete the crossing.

the swatch: knit side

the purl side

Hand to machine, symbols 3

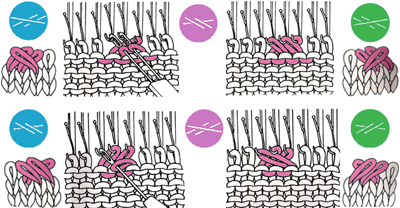
In the following series the blue dots and accompanying diagrams continue to represent the fabric as it would appear on the knit side if hand knit, or after the work is removed from the machine. The pink dots and accompanying graphics represent the matching stitch on the purl side and as it may be executed on the knitting machine to match the original fabric.

A/B revisit increases within the row. The same motion may be used on the KM to increase single stitches at the garment edge, allowing for increases on both sides at the same time (if they always occur mostly on the same side however, one side will have consistently tighter end stitches, and be shorter). C/D revisit slipped stitches. In D the image on the far right shows the position for the needle about to be skipped/slipped. If working slip stitch through hand selection, the needles that are out to 3rd position, or out to “holding” will knit. E/F revisit twisted stitches within any one row.


Revisiting tuck stitch, and ruching: in the tuck stitch formation in A/B, B has the added illustration showing bringing out to “holding”, (D, or E position depending on machine brand) any needle that has multiple loops on it prior to the next row of knitting all stitches. C/D are variants: in addition to combining loops, the top stitch is reformed to show as purl on the knit side, knit on the purl. E/F illustrate ruching where single or multiple stitches are pulled up to gather fabric and create texture, for any desired/varying number of rows

Below the first row illustrates ladders resulting from a few methods in hand-knitting to emptying needles and leaving them out of work (A position) on the KM. The second row represents a wrapped increase on the edge of the knit, on the KM this is known as e wrapping.

Cable crossings may be represented in a variety of ways, below are just a couple; the grayed-out areas after the first chart IMO help define forward-facing stitches on completion of the transfer for the cable, whether on front of the knit or on purl side facing the knitter on the machine.

Other fabrics such as ribs and more on lace will be explored at a later date.

Symbols to punchcard 1

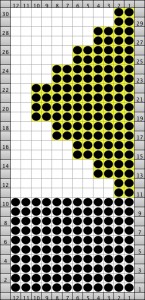
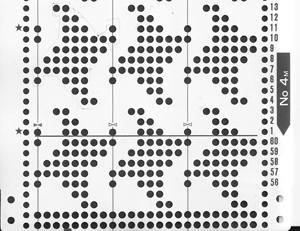
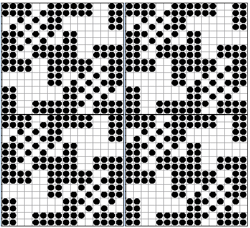
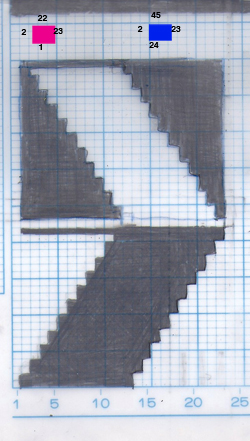
In the chart below pattern repeats take into account the punchcard limitation of 24 stitch maximum repeat. In the sections separated by the color stripe, the bottom shows a purl side symbol chart for slip stitch, the center the purl side symbol chart for brioche/ tuck stitch, the top the repeat punched out for use on the KM with black dots representing punched holes. Keeping in mind there is a 36 row minimum for the card to roll adequately through reader, this repeat would need to be punched 9 times. If one wants to use the color changes in other than totally random manner, then the pattern repeat must be an even number of rows in height. One option is to use double length, but unless the yarn used in the repeat below is very thin, for tuck stitch that may be beyond the limit of the KM. I also prefer when knitting lengths of fabric not to use elongation; for me that makes it easier to correct mistakes. A reminder: the punchcard selection mirrors the design horizontally (particularly noticeable in letters), so the hand knit repeat need not be reversed for a match.

Below is a more manageable tuck repeat reconsidered for color changes (shown in change of ground behind punched holes). The first row selection needs to be from right to left toward the color changer in Japanese machines (Passap is on right, but console takes that into account). This is not the only color change sequence possible, only a place to start.

With very rare exceptions, tuck stitches generally must have a knit stitch/punched hole on either side of the unpunched square. This is because side by side loops jump off on the next pass, rather than knitting off in a group, making a long float in in some cases an interesting mess. Because slip stitch skips needles creating floats rather than depositing loops in needle hooks, the tolerance for side by side slipped stitches if far greater, and the number of rows that the individual stitches are not knit is limited by the strength of the yarn, and the tolerance in the machine. Both tuck and slip stitch fabrics benefit from being evenly weighted, with weights being moved up regularly during knitting. Canceling end needle selection and having the pattern repeats line up with tuck/slip on each edge may produce interesting side edges. If texture is the goal yarns that can be “killed” by pressing/steaming should be avoided.

Pretend/ mock cables 4: revisiting i cords

Knit tubings/ cords of all sizes have been cropping up on runway photos, interlaced with cables, woven basketweave style, and as the “yarn in giant knits”. My category sidebar has a link to my compendium on the subject (Jan 30, 2012), written nearly a year ago, the making of the cords, and some published references. Additional ideas: in wider trims where a single knit stitch is required on the slip pass because the cord is wider than 4-5 stitches, and/or a flatter, single bed cord is required, one can play with a punchcard for the needle selection. Anywhere there is a punched hole in a blank row, the resulting selected needle will knit when the carriage makes a slip pass on that particular design row. Brother machines do not require a whole card to be punched for such trims since the option exists for controlling the slip facility for single rows by selecting only one of the part buttons. The machine will skip white squares in the direction of the pushed cam button, left or right, and knit every stitch traveling in the opposite direction. A punchcard repeat to serve the purpose:

if multiple knit stitches on slip rows are a consideration, in the image below the dashes and dots are representing needles in work, and width of trim, the black dots themselves also the punched holes in the selected area for the trim

a variant across a row, with 3 stitches slipped in between knit ones

the punchcard repeat for a machine such as Studio, where cam operation is different, the following would need to be punched for the required minimum punchcard height

Open tubular knitting using the ribber is possible in nearly every width. The wider the cord, the more it will want to flatten. Wire, various cording, and plastic tubing may all be inserted into the tubes if more sculptural forms are the goal.
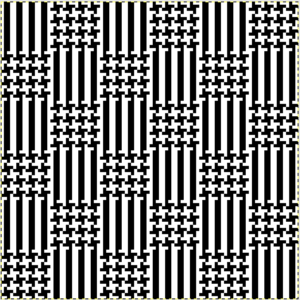
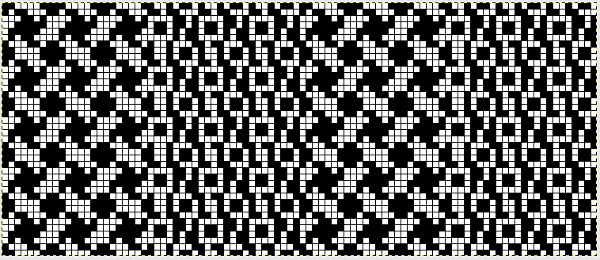
An added note: the easiest cord is a narrow knit strip, knit on at tighter than normal tension, which will roll into itself, helping it retain its shape and in turn be substituted in many of the fabrics using i-cords. For wide strips that need to bend and curve, ribbed strips my work, particularly if knit in English or half English rib. Such ribbed strips may be braided flat, stitched together and in turn applied to sweater panels at their edges, center fronts, etc.

Previous posts: pretend cables 1, a few to try, the making of the cords, and mock aran inspiration from an early Brother Publication

I have been asked about cords on Studio machines. I have not owned or worked on one for many a year. I did find these directions in an early Studio manual available online that may be of help to those trying to create them on that brandTesting concepts need not be done in actual cording. One option is to use an old swatch that can give some markers providing an idea of regular placement. Here I have used a 4 ply yarn as my “cord” to begin to visualize some relative of a swatch found on Spinexpo.com, of which this is a segment, in response to a query I received in a machine knitting group. Eyelets could be created at regular intervals to feed the cord through such as on the left above, where my yarn is stitched through the knit with a needle. Enough length is left free from one anchor point to the next so that the following length of cording may be fed through eyelets to anchor it, be brought around the loop from the previous length, create its own loop, and repeat the process for the desired length.

A few more ideas for cord uses may be found in my post on pretend cables 

Hand to machine, symbols 2

The symbol below usually represents a single increase. In hand knitting such increases may be achieved anywhere in any one row. In machine knitting however,  this may only be done with any ease at garment edges. Machine knitters may be familiar with calling what is depicted below a full fashioned increase. To achieve the latter,  a multiple prong tool is used to move the chosen stitches a number over to the right or to the left. On the machine, the resulting empty needle then needs to be “filled” unless lace holes created without doing so are part of the design; this may be done by picking up the purl bar from the row below. The blue dots represents the HK symbol, the pink the same symbol as it might be represented for MK to achieve the same result. The machine knit illustrations in this series do not factor in automatic patterning: rather,  they show how the stitches would be hand tooled on the machine to achieve similar fabrics.

single increase

brioche/tuck stitch: the first 2 image series show “normal” orientation, the  3rd and 4th series the twisted in front of knit version. In MK the elongated stitch is twisted and returned to its needle; similar fabric may be created  purely through hand technique by using holding on single needles in desired locations. Tucked rows in KM programming are unpunched squares in card, white “squares” in mylars or computer downloads. Using the repeat below, in electronics it is possible to “draw” only the 3 tucked squares, and use color reverse.
slip stitch: the first 2 image series show “normal” orientation. In machine knitting the slipped, elongated stitch is created on knit side, with the remaining “floats/bars” remaining on the purl. In the 3rd and 4th image series the elongated stitch moves to the back of the work, while the “floats/bars” move to knit side of the fabric and form a pattern on it. As with tuck stitches,  rows for slip in KM programming are unpunched squares in card, white “squares” in mylars or computer downloads. Using the repeat below, in electronics it is possible to “draw” only the 2 slipped squares, and use color reverse. Because in this fabric the needles are skipped, not filled with loops, multiple punched holes or white squares may occur side by side. If the goal is to achieve the skip stitch floats appearing on the knit side, retooling by hand is required on all skipped needles prior to the next all knit row.
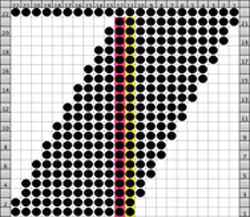
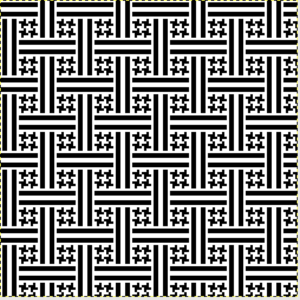
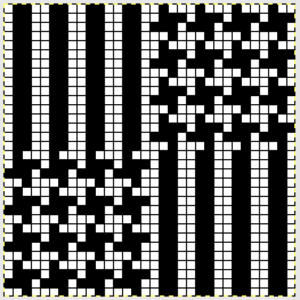
stitches woven through stitches: because of the fixed width stitches must travel with any crossings on the machine there are limits as to how far they are able to move across the bed within any one row. Cables come to mind immediately in terms of stitches crossing; another type of cross weaves stitches through others singly or in sets, which may also be done within rows of long stitches. In the illustration below, one stitch crosses through the center of another. If one is trying to match the hand knit fabric version, then the direction of the “weaving” is reversed as it would be in the case of cabling. Light colors and thick yarn help make the results more visible. This is strictly a hand technique; however, for greater accuracy and speed one may program card or electronics to select either the needle that comes off first, or the pair of needles involved involved with the cross.

an alternative symbol sometimes seem for this stitch

a simply repeat illustrated for KM: since the whole ground is purl, symbols for purl need not be used
.

November 2015 PS: the charts such as the one immediately above were created using Intwined Pattern Studio and my own custom made stitch symbols. The program on Mac not long after became unusable due to the presence of custom made stitches in library, took multiple efforts to restore without their presence, and there have been no updates since then to address this, or any of the other issues. More information and reviews may be found on ravelry.

Hand to machine knitting, symbols 1

One of the critical differences in viewing work as it progresses on the knitting machine is that the “front” view of the fabric unless the work is removed from the needles through a variety of techniques and turned over on the needle bed, is the purl side. Early machine manufacturer punchcard book publications made an effort to help hand knitters make the transition. A chart from brother publishing knit_sym96 illustrates one such effort. Here the middle icon in the how to work column is the stitch formation one would need to achieve on the MK to get the same “look” as the HK samples. Some symbols apply to both types of knitting, some should be mirrored horizontally to make sense, and in the case of the crossing stitches at the top right of the second column, there is a bit of confused identity.

Over the years there has been an interesting transition from handwritten stitch by stitch instructions to the introduction of symbols ranging from homegrown on graph paper, to simple word processing and later software generated ones. Some international differences occurred in published works, and internationally agreed-upon symbols for both knit and crochet eventually evolved. There are many design programs on the market now, I have linked to some in past posts. As knitters have venues for publishing their own repeats and patterns and tools have multiplied, symbols do not always necessarily have the same meaning, and stitch codes are no longer universal.

I have been wanting to find a way other than using excel to build a stitch library usable for machine knitters in an easily accessible program that would do some of the “work” for me. I have experimented with 2 programs. One was knitbird, which I would not recommend for this purpose, the other Intwined Studio which is proving far more flexible and worth the modest investment for me. I work on MacOS10.8, the Intwined version for this OS is beta. There are some small glitches, but this is a tool worth exploring. The option is there to add one’s own symbols to the stitch library. I have begun working on a machine knitting set with icons created in a combination of other programs and Inkscape, the one suggested in the tutorial by the developer. Some charts created with Intwined may be seen in my previous post on sideways pleated skirts. Below is a chart including some MK symbols in my personal library, also using the option to the color background for them in the program itself rather than editing the chart image after the fact.

To download Inkscape: site. The workaround to get the program to work in Mac OS10.8 may be found here.

The combination of color with symbols in published patterns for both hand-knit and crochet is beginning to proliferate. I find the visual color cues help track patterns more easily, have done it in HK in the past, one such example is my chain cable experiment in my January 3rd post.

Some illustrations for lace symbols HK vs MK may be found in my post from February 25, 2012 “back to lace”.

Pleats: automating “pleating”, single bed

This post was originally written in 2013. I found myself reviewing it in 2018, and editing it with the intent to attempt a pleat sample using the Ayab interface. In those days I was using Intwined for some of my charts. The program has since been unsupported for Mac, without upgrades and a series of problems that led to my switching over to excel completely for my charts, and now to Numbers in the latest Mac OS.
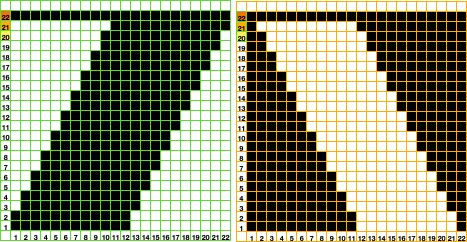
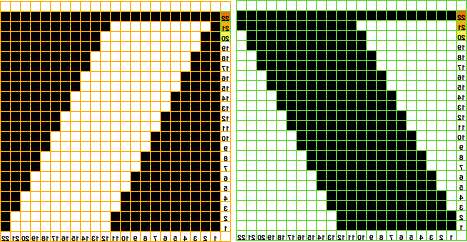
I work primarily on multiple model Brother machines, in this instance the 910. Some of the information provided below may need tweaking for use in other brands KMs. “Automation” of some holding functions may be achieved using slip setting to knit required stitches. Below is the mylar sheet repeat used for my sample swatches. The setup is on working needles 21L, 19R, program for color reverse and twice the height; KCII (cancel end needle selection); first-row needle selection from left to right, and with carriage ending on the right the first set of needles selected will be those that knit, the remaining bed will slip. This is opposite to the configuration familiar in holding, where needles out to E are held, those in B or D will knit (Brother needle position jumped the letter C, they are  A, B, D, E). In this type of knitting, all needles in use on the bed should be cleared with each pass of the carriage.

I have gotten used to keeping programming numbers for  locations on mylar around a square to correspond to the lights surrounding the house icon on the 910 and worked with the following 2 options for my test swatches

In the samples below the first set of every other stitch/ black square in the increasing/decreasing angles were slipped on the non-selected needles to create/mark the inner purl fold, the second set in the area that does straight knitting tucked on non-selected needles to create/mark the knit outer fold. For the latter to occur, the cam buttons need to be switched to tuck <-> for 2 rows, and then back to slip <-> for the remaining knit repeat. Small holes are created at edges of slipped areas as miters are created, as would appear were the fabric created through holding.

A: the alternate fold areas as they appear on the machine during knitting

the fabric after some casual steaming shown on the knit side, the pleating just about doubling on itself

B: with the added knit rows, the swatch before steaming

here is the purl side after some steaming showing the change in overlap

its knit side

both fabrics allowed to “hang”

The look may be varied considerably by changing the sequencing of the number of knit stitches, and the number of plain knit rows between the EON slipped or tucked ones. Electronics facilitate that, and with machines capable of accepting programming of the whole needle bed, there is even greater freedom. The sample above was knit loosely in acrylic, the holes would be less apparent in a tighter knit. If bothersome, they may in theory be “avoided” by factoring in “wrapping” if every row of the repeat is drawn rather than every other. With only 60 squares available on the mylar it is possible to go twice as wide and produce fabric width that may suffice for a skirt’s length. With software that allows for programming the width of the needle bed, possibilities expand even more. When going double wide with a repeat such as the one above, some problems result not so much in the inner fold slipped rows, but in the outer fold of the tuck ones. As in nearly any knitting when needles have 2 side by side loops resting on them, these loops will create a float/ ladder, so the tuck rows will essentially behave like the slipped ones as the double loops are dropped rather than anchored on the subsequent pass of the carriage. In the configuration here if the double-wide button is used, one way to solve that issue would be to bring consistently the same of either of the 2 non selected needles out to D or E position (still faster than hand-selecting repeats by hand for holding), resulting in knit stitches and single tuck loops.

5/18/18  Working out the kinks: the same repeat is redrawn to factor in the reduction of the eyelets at edges of slipped areas: a partial graph showing “automatic wrap”. However, the “wrap” will fail with color reverse, and that first row would have only one stitch knitting. If double wide is used, then the wrap will happen around 2 needles, creating yet another “float”. 

its color reverse 

Plain knit rows (blanks on mylar) may be added at the bottom or top of the repeat to change pleat depth. Here is an amended repeat, discarding the “automatic wrap” idea, first prior to color reverse, then after

 
Those all blank rows would result in no stitches being knit, essentially a 2 row “free” carriage pass, and are removed. The repeat is  now also capable of being knit twice as wide if desired, adding the hand technique on tuck folds

Below the edited repeat begins design using one pixel per stitch and per row. “Automatic” wrap happens as one row is knit, while the next preselects an extra needle. The yarn travels under the extra needle prior to its being knit on the next pass from the opposite side. There will still be an eyelet, a bit larger than hand wrapping, but smaller than without any wrap at all. The EON pixels in the center of the shape are tucked. For that to happen the knit carriage needs to have the cam buttons switched from slip to tuck, and back to slip after the 2-row sequence. The fabric folds out to the knit side. The EON (every other needle) set at the top of the shape is knit in the slip stitch setting, resulting in the fabric folding into the purl side. The process could be reversed to have each fold to the opposite side of the knit.

The carriage needs to be on the opposite side of increases in the number of stitches worked. Here the first preselection row should be from left to right, with carriage traveling to and from the right for the subsequent pairs of rows. 

More variations: the slip stitch configuration below is changed to the same EON selection for 2 rows. The same could be done for the tuck fold. For this repeat, the first preselection row should be from right to the left, making that the side the knit carriage returns to after each pair of rows knit. The sample was knit in a too thin acrylic. Both eyelets and their “wraps are visible, as well as the direction of folds.

These are pleats in a skirt made eons ago, that have retained the fold over the course of many a year 

An added alternative for fold lines: create outside crease transferring EON to make a row of eyelets, create inside crease by knitting the desired row double row with 2 strands of garment yarn. “Automatic” repeat must be adjusted accordingly, whether by redrawing or punching, or using cam settings for the correct stitch formation.

Seaming should be planned on the inner fold of the fabric, depending on whether the purl or knit side is used as the “public” side, the least visible join being one that is grafted ie with Kitchener stitch.

The same principles may be applied to punchcard knitting but because the repeat size is 24 stitches the resulting fabric is one suitable for portions of garments/ accessories, in details such as ruffles and edgings. Punched holes would match the black squares in the color reversed repeats.  “Air” knitting helps determine the exact needle location required, and to decide which side the first row must be selected prior to actual knitting. The image below shows the start of only one possible partial repeat based on the last one above

I usually sample my repeats by using hand selection and holding before committing to drawing on mylar or punching holes. An even number of rows is required in this technique.