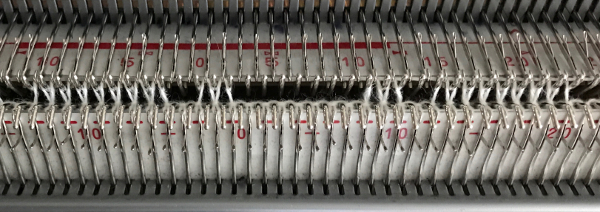
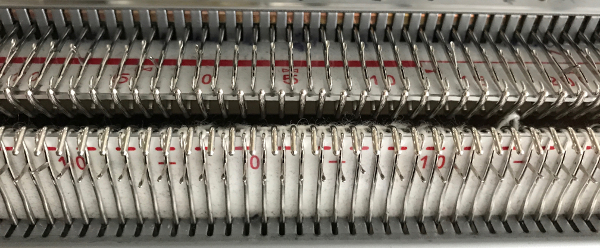
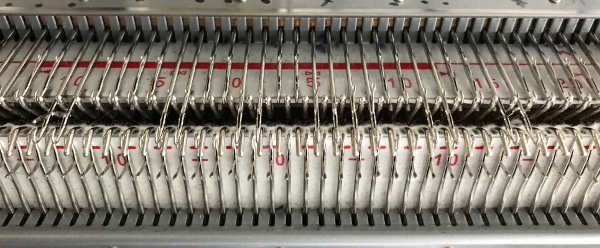
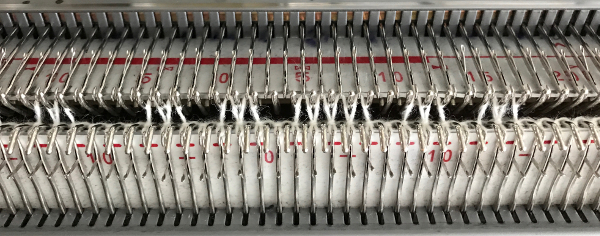
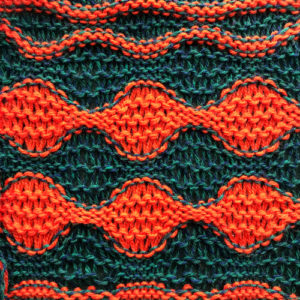
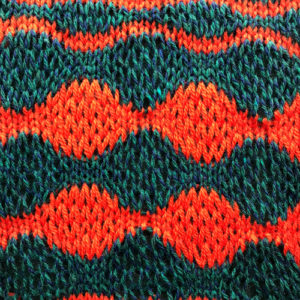
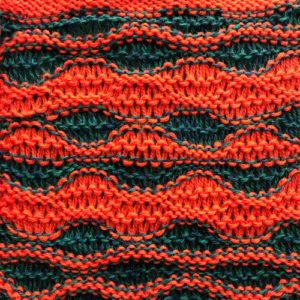
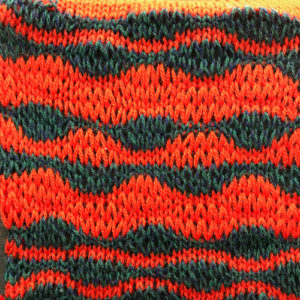
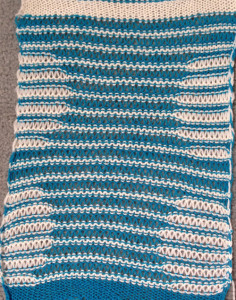
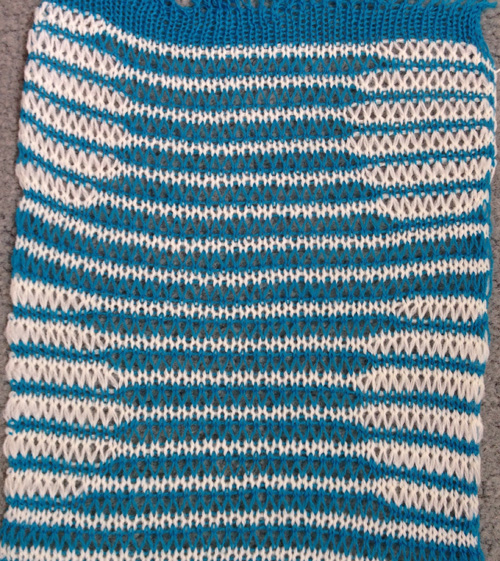
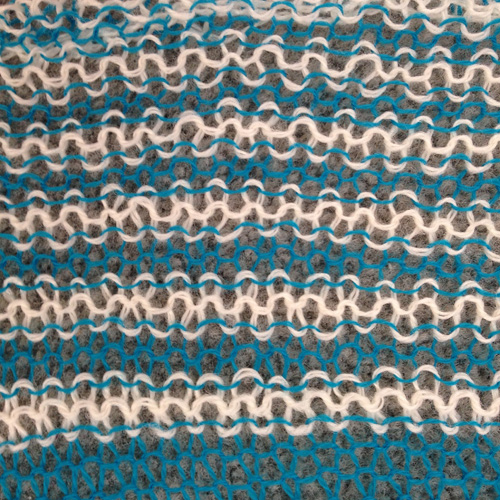
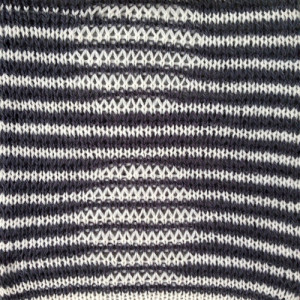
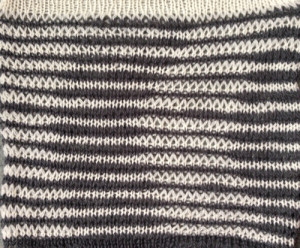
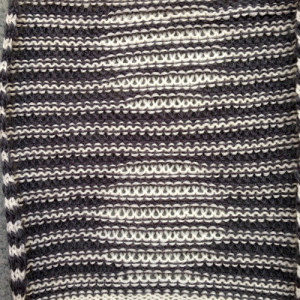
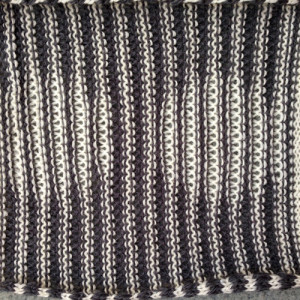
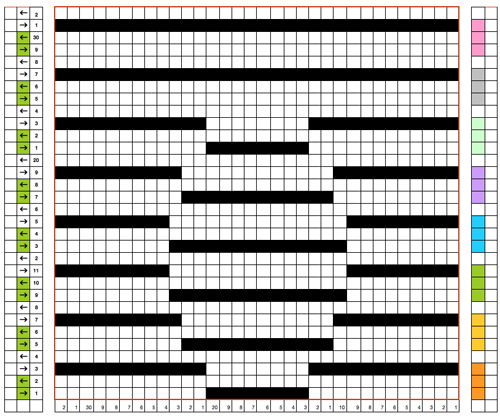
Tuck stitch/ combination fabrics

I am presently attempting to knit my samples using a 910 with an EMS kit Ayab interface. When possible I will provide punchcard, electronic, and Ayab repeats for each.

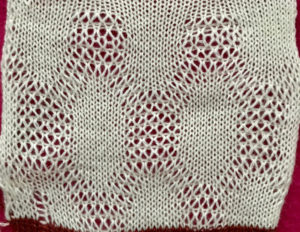
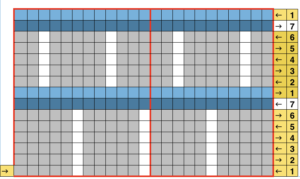
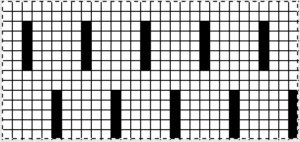
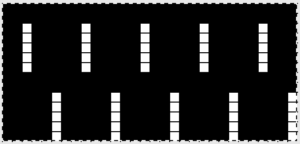
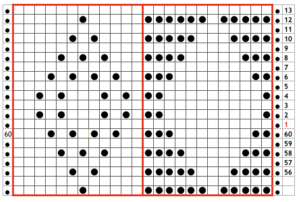
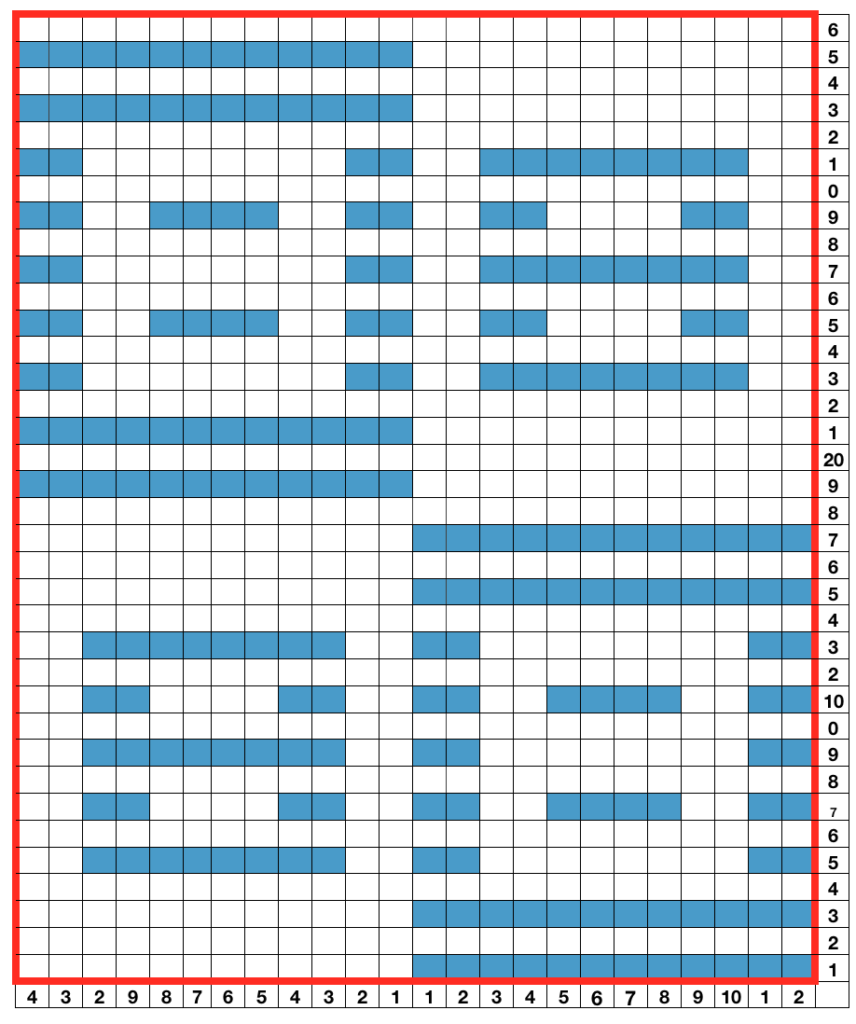
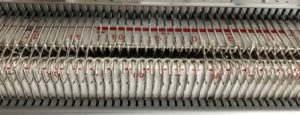
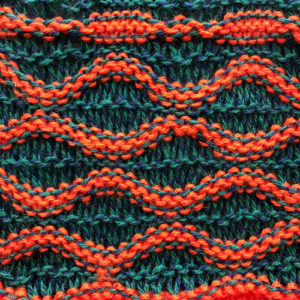
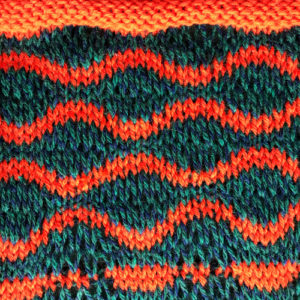
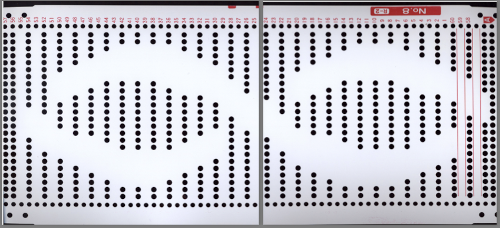
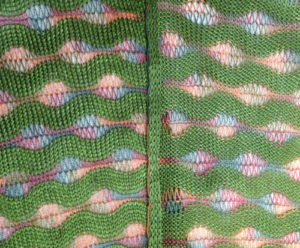
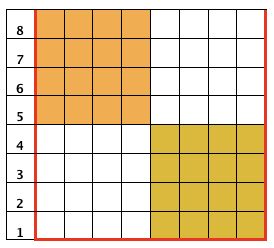
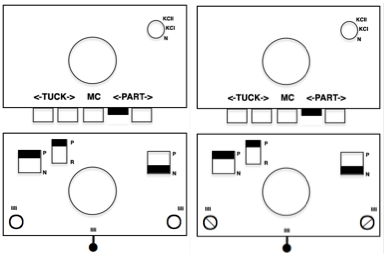
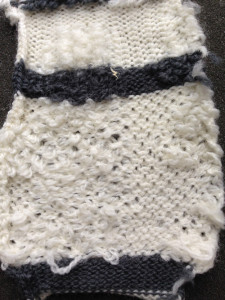
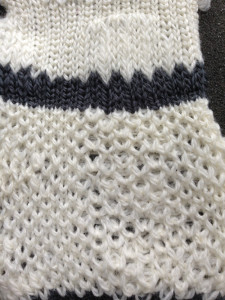
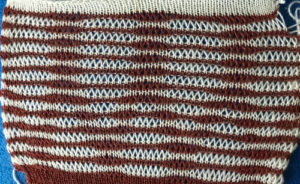
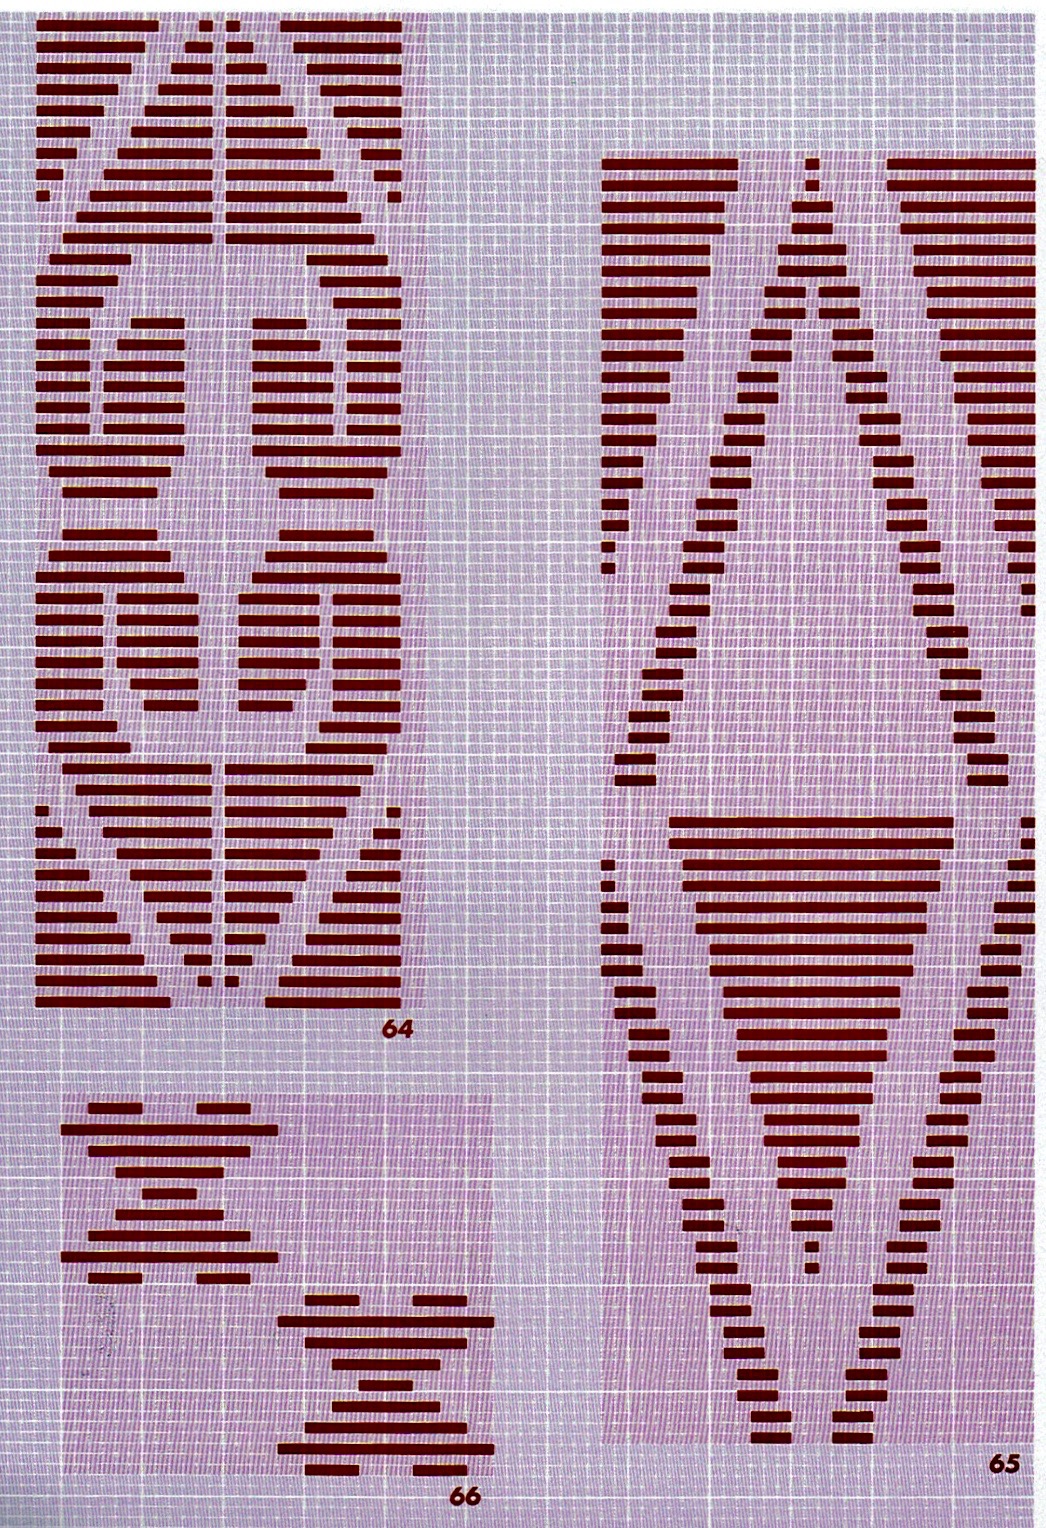
White squares in the first chart represent tuck stitches, the dark blue row, the pass that knits every stitch, the lighter blue the pass that knits and in turn drops every stitch. The main knitting is happening on the top bed. Loops and dropped stitches are formed on the ribber. This pattern is not suitable for use with color changer since patterning for each of the 2 repeat segments occurs over an odd number of rows (7 each, for a repeat total of 14). Punchcard knitters repeat X 3 in height, electronic knitters use only one of the 2 repeats, outlined in red.
Preselect the first row of the pattern from either side on a punchcard machine or an unaltered 910, from left if using ayab.
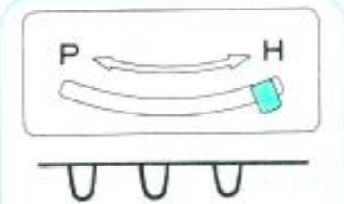
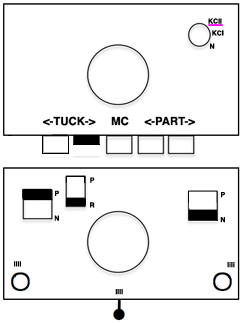
*With the KC set to tuck <– –>, the ribber set to slip <–  –> knit 6 rows. The last row will be all knit (darker blue).  Cancel slip on the ribber carriage, setting it to knit  <– –>
knit one row on both beds to the opposite side (lighter blue, preselection will happen for the first tuck row in the next sequence). Disengage the ribber carriage still set to knit from the KC, take it across the ribber bed to release the loops. Reset the ribber carriage to slip <—->
move the carriage back to reconnect with the KC. ** Tuck sequence begins again. Repeat  * to ** ayab repeat for 30 stitch swatch, requires color invert the same repeat, not requiring color invert after loading into software tuck fabrics are usually more interesting on their purl side  Tuck stitch combined with lace transfers
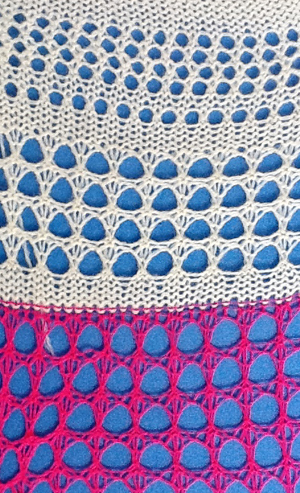
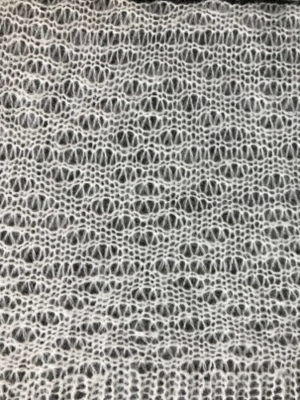
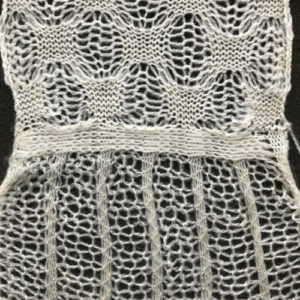
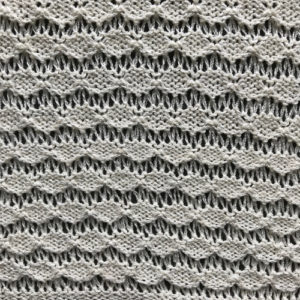
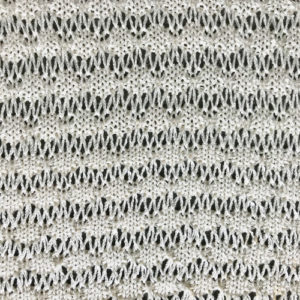
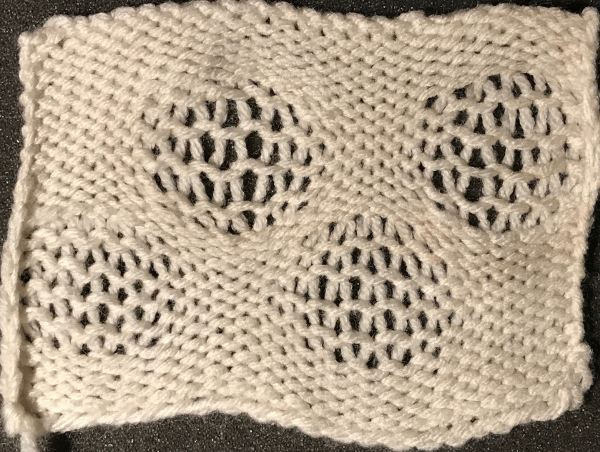
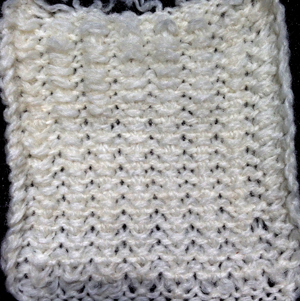
large scale mesh 
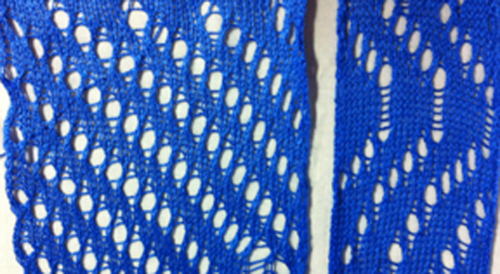
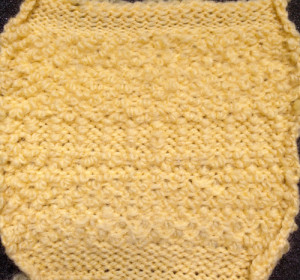
 large-diagonal-eyelets

Drop stitch lace using Ayab software

Some notes on how tubular software color separations such as the one automated in the ayab circular setting may be found in the previous post

In an effort to respond to a request I have had via my blog, I am sharing information on this topic as I have time to explore it. My first attempt when up and running with the Ayab software, was to reproduce an earlier sample I had created as a color separation originally intended for a hand-knit shadow knit experiment.

a chart from that blog post  try_drop_stitchthe resulting hand knit, on the purl side
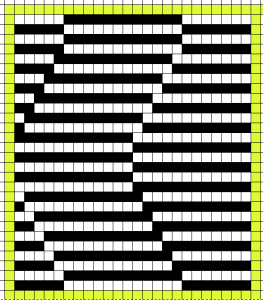
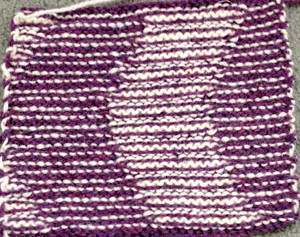
IMG_0823the color-separated sample knit pre ayab the sample knit using the Ayab circular setting
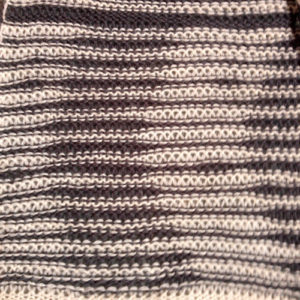
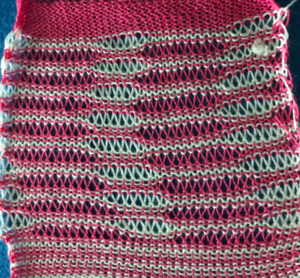
Patterns predawn for shadow knitting, appear to be one published source for interesting 2 color drop stitch variations. What about geometric shapes or developing your own designs? Designs created using this technique lengthen considerably when off the machine. Both color sets of stitches become elongated as they are dropped, and that should be a consideration in planning your design. If your goal is a circle, the actual shape programmed may have to be closer to an egg laid horizontally rather than that of a “true” circle. The fabric also widens considerably when blocked and off the machine, making the cast on and bind off methods considerations another necessity. Design repeats may be drawn in Paintbrush or GIMP (both freeware), or Photoshop. I have been a long time GIMP user, and prefer to use it in tiling repeats as opposed to the copy and paste features in Paintbrush to accommodate the Ayab requirement of programming the repeats horizontally in the width of your piece.

In my previous, how-to posts on designing your own 2 color drop stitch lace, part of the color separation required elongating the design X 2. The starting side in Ayab for needle selection always needs to be from left to right, and elongation of the motif is not required when using the Ayab circular option.

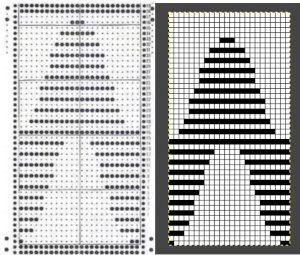
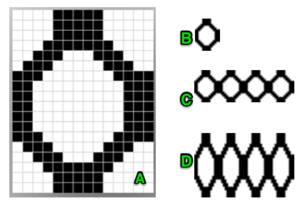
This was my first working repeat, A = repeat charted out. B = the working bitmap or png, etc. (which would be the only requirement for the mylar). C = the image tiled for the chosen number of stitches (again, Ayab requires the repeat to be programmed for the width of your knit piece). D = the image elongated, not usable for this fabric, it results in too much elongation. If you would like a knit border on either side, that can be achieved by having extra stitch(es) in work on the ribbera possible ayab repeat, 56 stitches wide by 36 rows high
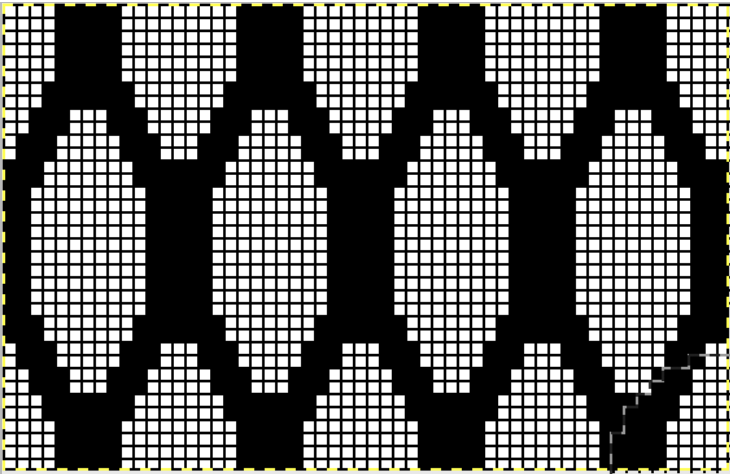
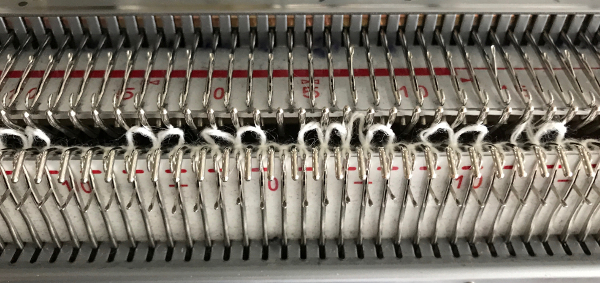
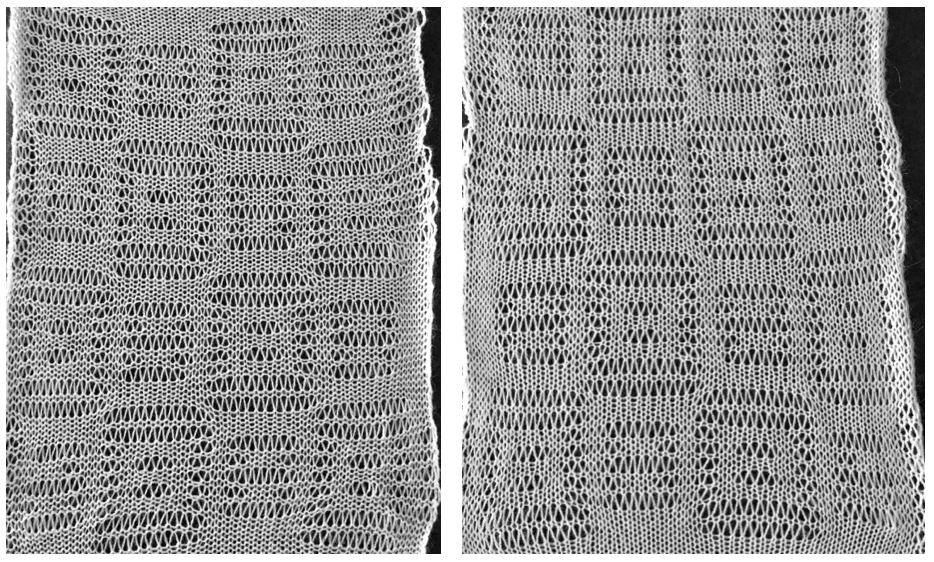
The results up to the point in which I had a yarn caught in brushes and stitches dropping on the left of the needle bed:
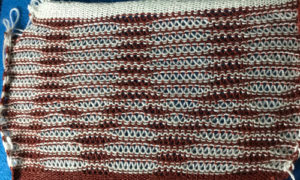
Drop stitch lace has been referred to over the years in other terms as well, such as release stitch, drive lace, and summer fair isle in Passapese. Passap knitters will recognize the results from this first method are akin to those produced using Technique 185.

Getting started: stitches intended to be dropped may be created on either bed. If the ribber is used to create loops, then the technique is a manual one. Using the main bed in Japanese machines to program dropped stitches increases accuracy and ease.

If you are swatching and testing, a permanent cast on is not necessary. The broken toe cast on is one of the two quickest on the Japanese machines, usable on either bed. It is fondly called that because if ribber cast on comb and weights are in the wrong place so that the wrong loops are dropped, everything falls to the floor, and likely on your toes. There is an online video by Diana Sullivan that shows its use for a tighter cast on row in 1X1 rib, but the use here is for a different purpose.

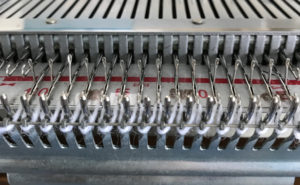
In producing this fabric you are technically knitting every needle rib. Cast on a fairly tight zig-zag row. The ribber comb wire needs to be placed so that it holds down the stitches on the bed on which you need to keep them. The principle and results are akin to the first row knit when you use a single bed cast on comb, and the second pass, with the first knit row anchors open loops before you continue to knit. Any loops not secured by the comb will result in dropped stitches. Any fabric, any time, when 2 stitches are empty side by side, stitches are not formed and the yarn is dropped off them creating a float or ladder.  The red line indicates the ribber wire on top of the ribber loops in the zigzag row, placed so released knitting will be left on the ribber. Black lines your zig-zag yarn loops, blue dots the teeth of your ribber cast on comb. You can check placement by dropping just a few loops on the main bed before hanging your weights on the comb. 

zigzag row showing the placement of cast on comb teeth, on each side of main bed needles
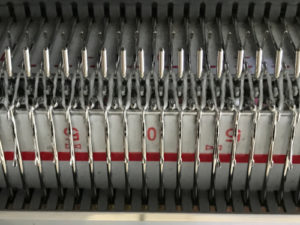
with wire in place, anchoring ribber stitches testing out dropping a few stitches all stitches now on the  ribber in preparation for dropping stitches created on main bed 
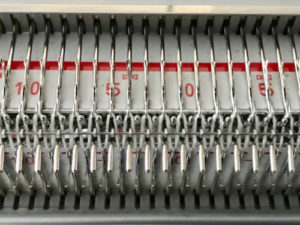
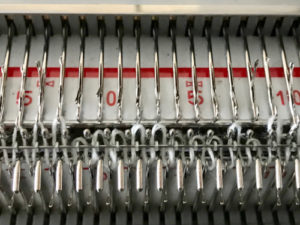
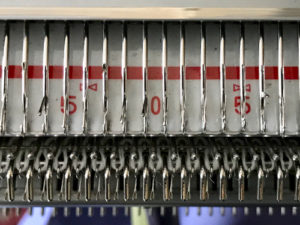
It is possible to also use a wired cast-on comb for an open stitch cast on the top bed only. Remove the wire from the comb. Bring the comb up and between needles to be used, and re-insert wire. Needles and latches will need to travel easily under the wire when the first knit row takes place. 
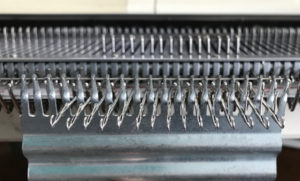
The knit carriage will not clear the comb properly because of the location of its brushes, etc. For the “cast on” row, exchange the sinker plate on your knit carriage for the one normally used with the ribber. The first photo below shows the approximate location for the comb during the first row knit. Needles are centered between the teeth, the teeth themselves line up with gate pegs. The comb needs to be manually held in place since there is no opposing bed in use to help balance it. Working with the ribber up would ease the process in wider pieces of knitting. The ribber sinker plate has no brushes or wheels to anchor knitting on the knitting bed. Any rows knit single bed using it, will need to have needles brought out to hold position prior to knitting each row for all stitches to be formed properly

the comb in position pass is made slowly with the ribber sinker plate in place the comb is dropped  bring all needles out to hold position  knit one more row, returning to starting position change sinker plate on knit carriage if needed, proceed with knitting
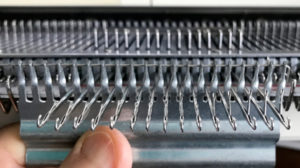
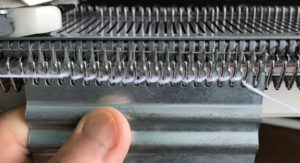
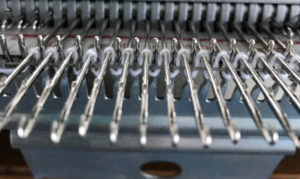
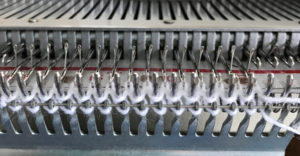
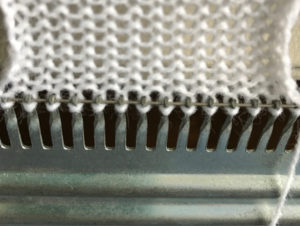
To use the same method with ribber in place: hold the appropriate ribber comb with the bump(s) up facing you, so that the teeth line up with gate pegs as shown above, and so the needles can come through the gaps. Leave the wire in, hold the bump(s) against the ribber, and tilt the comb against the knit bed. Hold the comb high enough to take the carriages across to the opposite side. Move carriages to the other side, drop the comb and weigh it. If continuing on the top bed only drop the ribber, switch sinker plates, and continue to knit.

“bumps”: Brother comb 
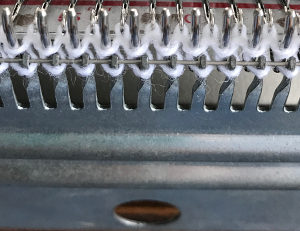
For other purposes and an edge similar to a weaving cast-on executed on Japanese machines use EON for the cast-on row, then bring into work and add the rest of the needles prior to knitting the second row.

Use a cast-on comb appropriate for your knitting machine’s gauge ie 4.5mm, 5mm, etc., the brand is not relevant, only tooth spacing is. It is possible to cut ribber cast on combs into different widths for use when knitting is planned on fewer stitches than those accommodated by their available commercial widths.

As for dropping those loops that will form the long stitches, one can do so manually with improvised tools. For more automatic dropping of stitches using knit carriage in Brother patterning, one may punch a card or draw a mylar with a method akin to color separation. A pass of the KH carriage across the knit is made with no yarn in the feeder, color 2 is actually no yarn/empty from left to right while establishing the proper needle selection on its return. The ribber would need to be reset to slip, or the ribber carriage separated from the knit one for the 2 passes to and from the color changer. This is the “scariest” option by far, more error-prone. It is not applicable when using the circular Ayab setting in creating the fabric. Without a specific tool, all stitches can be brought to E and back to B with a ruler, piece of garter bar, ribber cast on comb, or other handy ‘toy’. Dropping stitches is done while carriages are on the left, after the return to the color changer side. It is possible to modify the Studio accessory used to drop stitches
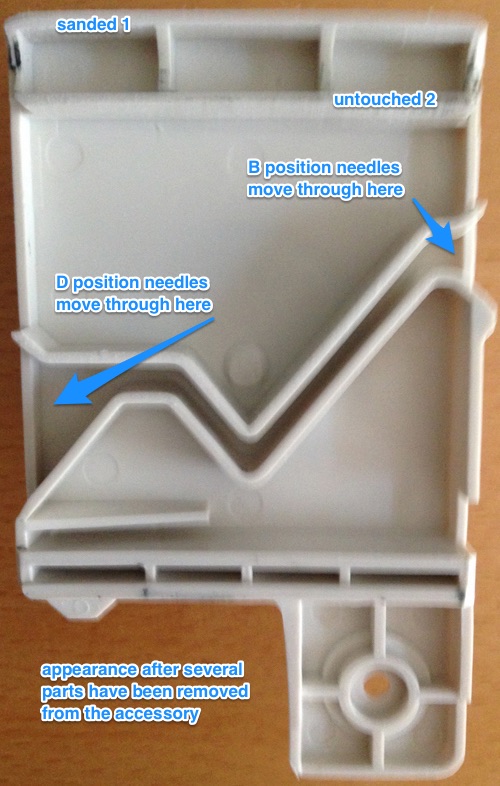
full altered_500

For 2 color drop stitch, the main bed is set to slip in both directions. Because not all needles on the main bed are used for patterning on every row, the KC II setting on the change knob is used, eliminating end needle selection on the 910. The ribber is set to knit every row
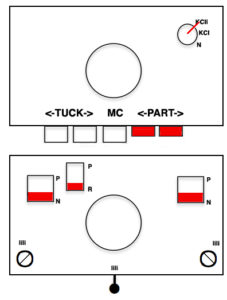
Ayab: begin  your design repeat on your first row, choose its circular setting in machine type pull-down menu on the right
The first design row is preselected left to right
The main bed is set to slip <– –>, change knob on KC II (end needle selection is canceled)
Ribber is set to knit <– –> for the duration
COL: as you go from the left to right, needles are preselected on the top bed, they will knit, picking up loops that you will in turn drop on the subsequent passes of the knit carriage from right to left.
COR, the KC knits on preselected needles as it moves to the left.
Clear the color changer, set up your next color. Drop the stitches knit on that last pass

It may be necessary to push those loops down between the beds before you next pass, remember to pull down on your knitting periodically,  visually check needle alignment on the main bed (all needles in B in the work area)

*With the new color move to the right, preselecting the next row of loops
Knit right to left, picking up loops on preselected needles, change colors, drop stitches,** and repeat * to ** steps in 2-row rotations

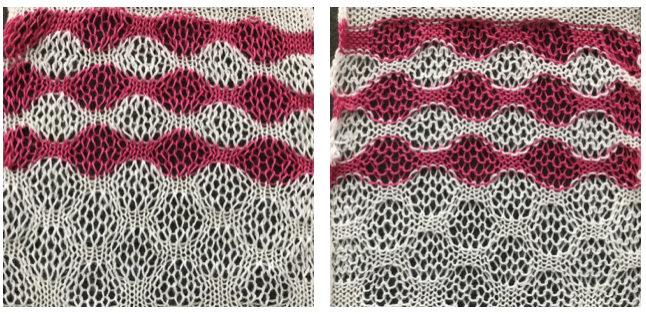
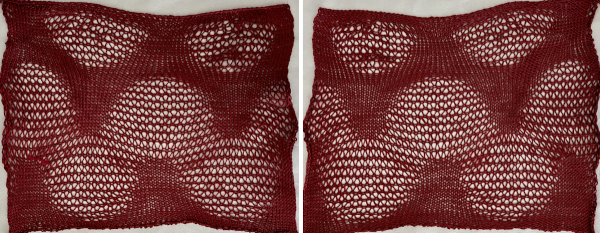
so I want circles, here is my test pattern more like eggs, the black squares in shape appear as drawn on the purl side shapes are reversed as drawn on the knit side 
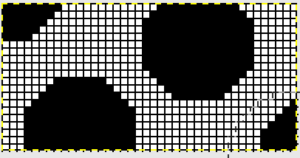
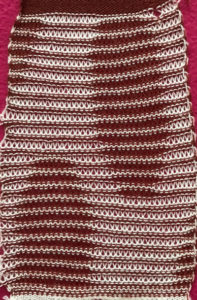
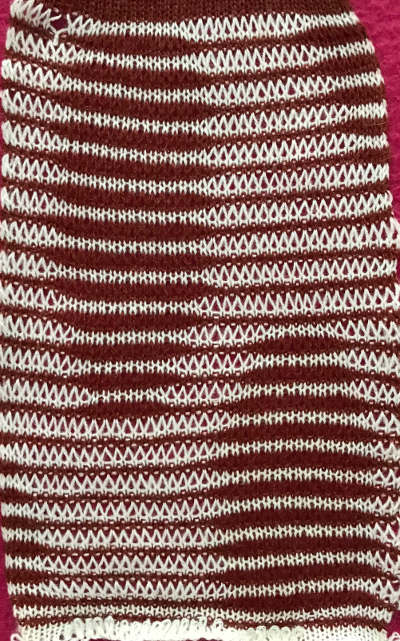
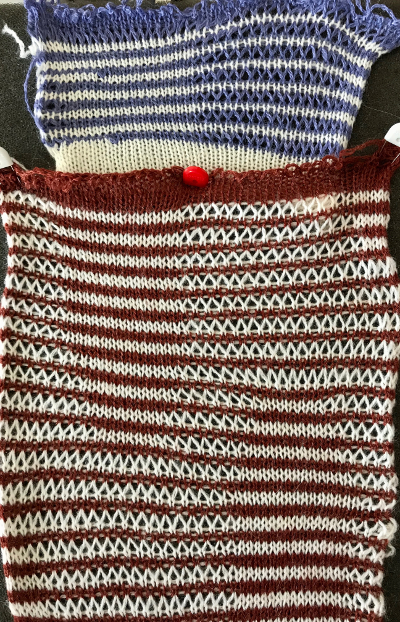
It is possible using the circular setting to drop only one of the 2 colors, whether background or shape. I began by dropping the white ground. I used to encourage students to develop a tune/ repeat in their heads when regular actions needed to be taken. For me, in terms of yarn color,  it was “white, knit, drop”,  “brown =  erase (push back to B), go back”. 1: white travels to the right, needles are pre-selected; 2: white travels to left, picking up loops 3: on left, change color, drop stitches. For brown: 1. travel to the right, needles are preselected 2: on the right, before traveling back to left push all selected needles back to B. Only the ribber knits on the way back to left, so brown will have knit 2 rows with no dropped stitches. I ran out of brown yarn, started over with the blue and white, planning on having the shape drop the stitches. There is a difference in the fabric width with the change in the distribution of stitches. I stopped knitting, not due to any mispatterning, but because I encountered another Ayab behavior that may be well known to punchcard knitters. Due to a yarn mast issue, I moved the knit carriage back to disentangle the yarn, and lo and behold the pattern advanced a row.  Punchcard machines will advance a row with any movement of the carriage outside the edges of the knit. This was never an issue in the unaltered 910. At that point, I stopped knitting. 
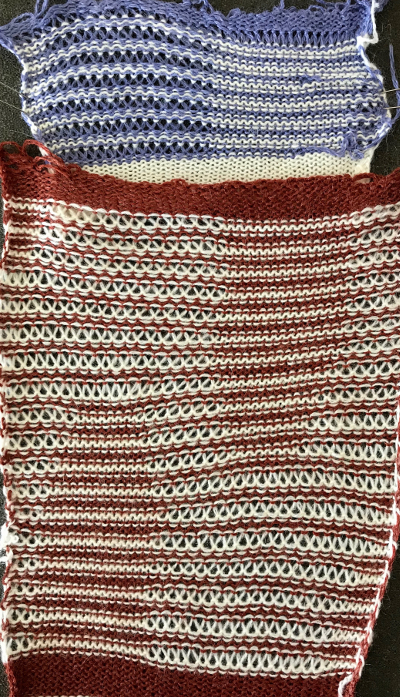
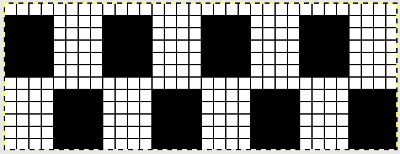
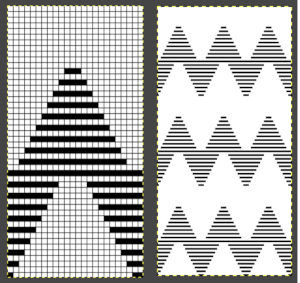
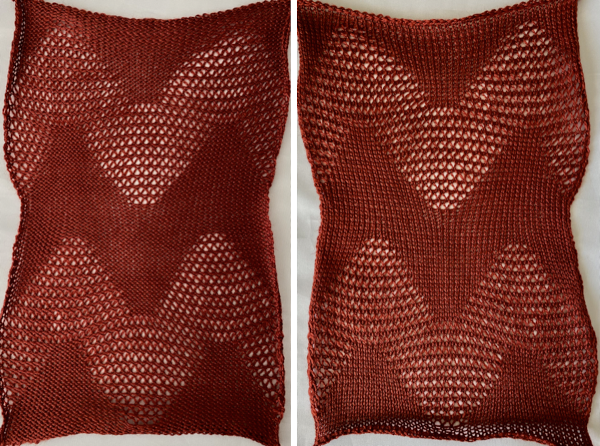
Not fond of stripes? prefer one color? the sample below was worked on 40 stitches in width, using the repeat charted for 56 stitches. Here decisions are made at the design phase of your repeat. For single color, drop stitch use an image double length, and single setting in the Ayab software. The process is the same: *preselect stitches left to right, knit on selected needles right to left, drop loops just picked up traveling to left**, repeat from * to **. Settings are the same as for the 2 color drop stitch, but the elongation depending on the number of stitches dropped is not as noticeable. The texture in my swatch is diminished after a quick press, the yarn is an acrylic blend. The charted repeat illustrated is wider, but I worked it on only the center 40 stitches. As always in slip stitch, the black squares knit and they represent the stitches that are dropped. If you wish to create the long stitches on the ground (white squares),  reverse use Ayab Action Invert prior to knitting

the chart as viewed and explained at the top of the post
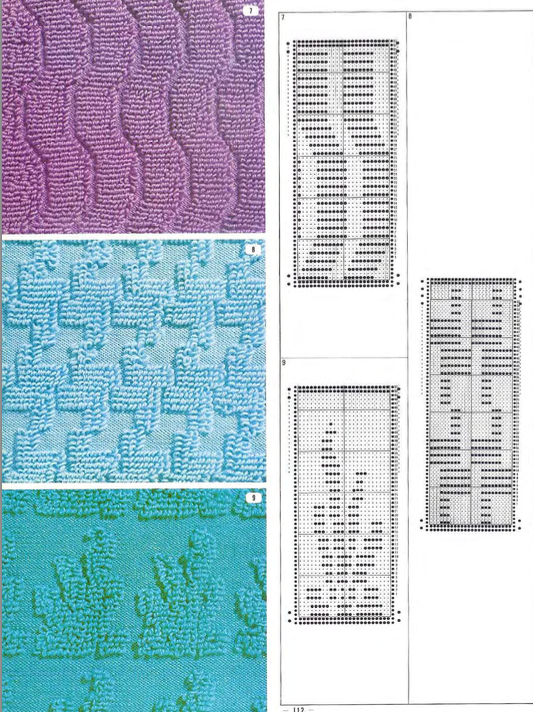
Sources of inspiration from studio publications vary, patterns designed for pile knitting make for suitable one color drop stitch. A partial punchcard repeat
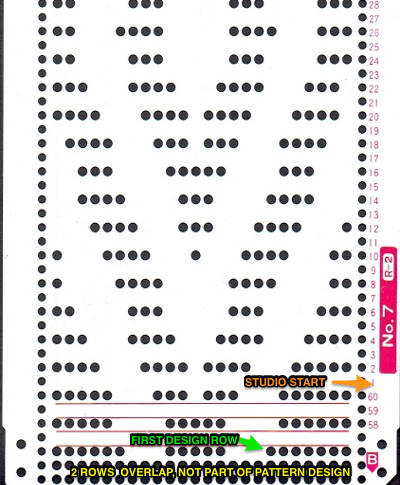
from an electronic collection
and a punchcard pattern book, where markings emulate eyelets, usable only for single color knitting 

Note that in #2 card directly above, there is a solid row at the very start that is a design row (third all punched). In Ayab again, first-row preselection is left to right, you will be picking up loops on preselected needles going from right to left and then dropping them. That first design row needs to have punched holes or black squares/pixels in it. The color separation is essentially done for you in the source image. Do not use circular in Ayab, but rather, use “single” setting and follow instructions for creating the fabric as described above,  with no color changes. The blank punchcard rows match the no selection rows in self-drawn color separations,

If double bed work is daunting, for a different stitch, worked single bed, that may cause interesting distortions in all knit, single bed fabrics see block stitch post.
The self-drawn design repeats for 2 color drop stitch may be offset as well, resulting in colors being dropped alternately.  The design shape needs to be created in 4-row blocks in order for the yarn to make it back and forth to the color changer with both colors to complete one design row. The second pairs of rows in each 4-row block is erased. In this instance as well, rows marked with black squares will pick up loops on the main bed, which are in turn dropped to create the long stitches. The second design repeat is offset to try to get sections of it to create loops to be dropped as well. The final motif must be a multiple of 8 rows in height if it is to be used as Ayab’s infinite repeat in length.
Color changes are indicated in the vertical strip in the center of the design. This was my starting idea
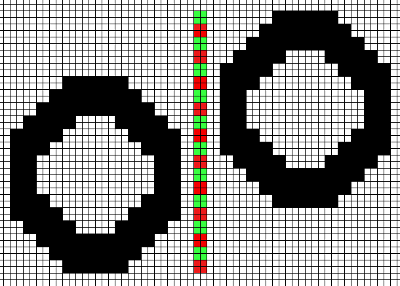
Elongation to 4 rows per block, erasing the second pair of rows for each color on right. The repeat on the right may be used if only one color is to be dropped; the 2 blank rows in the design field represent stitches that will knit only on the ribber for 2 rows. No stitches are dropped in color(s) used in sequential rows of blank squares in all “white” areas of the chart, including multiple rows above and below the design shape. Color changes every 2 rows continue, creating continuous stripes. shapes staggered, visually checking for placement of alternately dropped stitches 
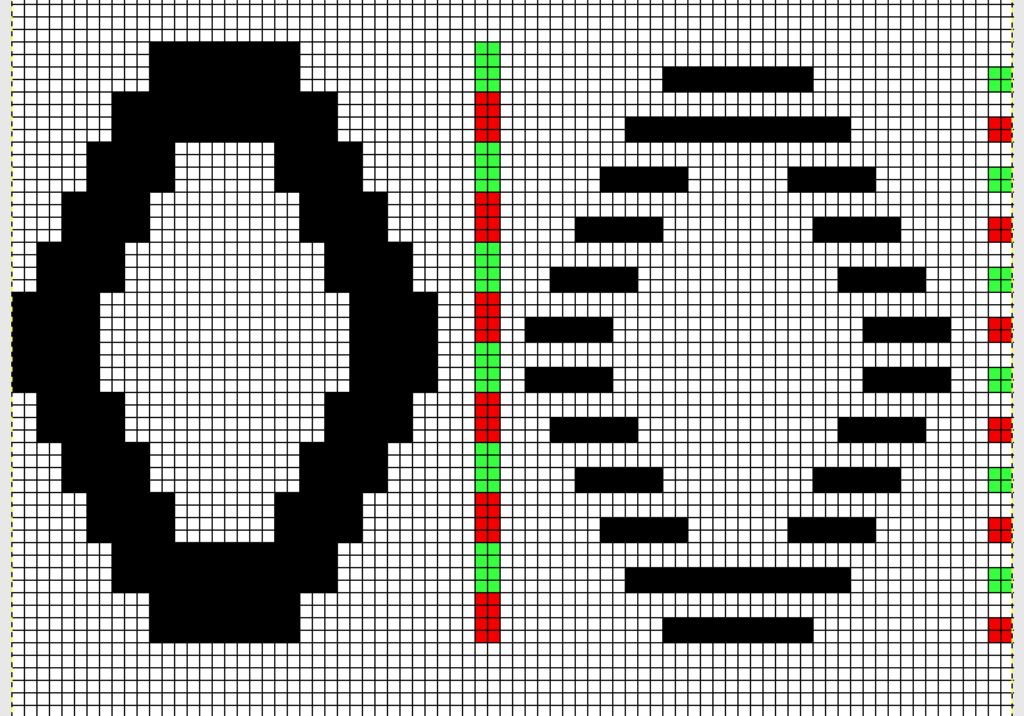
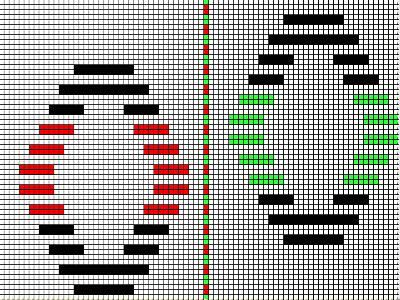
To accommodate the Ayab preselection for the first row to be knit from left to right, move the last blank row in the design to the first-row position. As the carriages travel from left to right and back to the color changer, the stitches will knit 2 rows only on the ribber. Continue knitting in steps as described earlier in the post, changing colors every 2 rows. On a larger knit ground such shapes may be arranged to suit. This was my working repeat, but I used a third fewer stitches in the swatch than in the chart. Note that the images will be reversed on the knit side, so if preferred, use Action Mirror to flip the image horizontally prior to knitting it
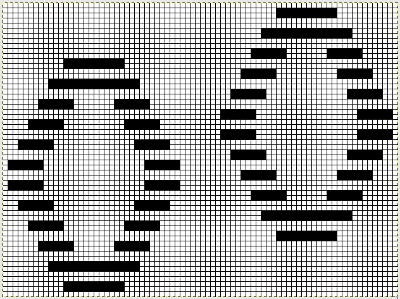
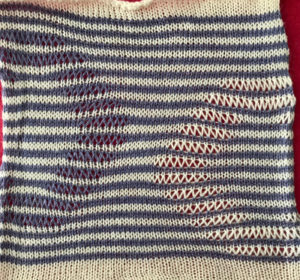
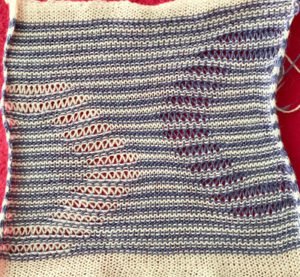
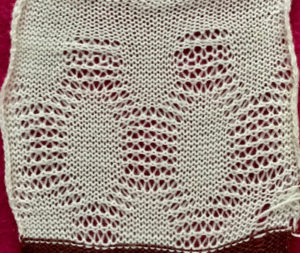
The swatch has been quickly pressed, so the texture is flattened out, but I am reminded of a few shadow knits when viewing its purl side.
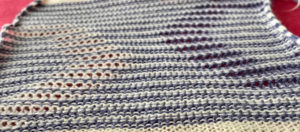
In an unaltered 910 with the ability to double the width of the programmed repeat, mylar users are not excluded from exploring a similar fabric. The repeat above may be rescaled to half the width,  drawn that way, and then use the twice as wide built-in feature. Gimp does an “interesting” thing when scaling this design to half-width, note the right side of each repeat is an odd number of squares, the left side an even. The repeat may be used as-is or redrawn, adding or eliminating black squares if symmetry in each shape matters.  Paintbrush produces the same image, mirrored.
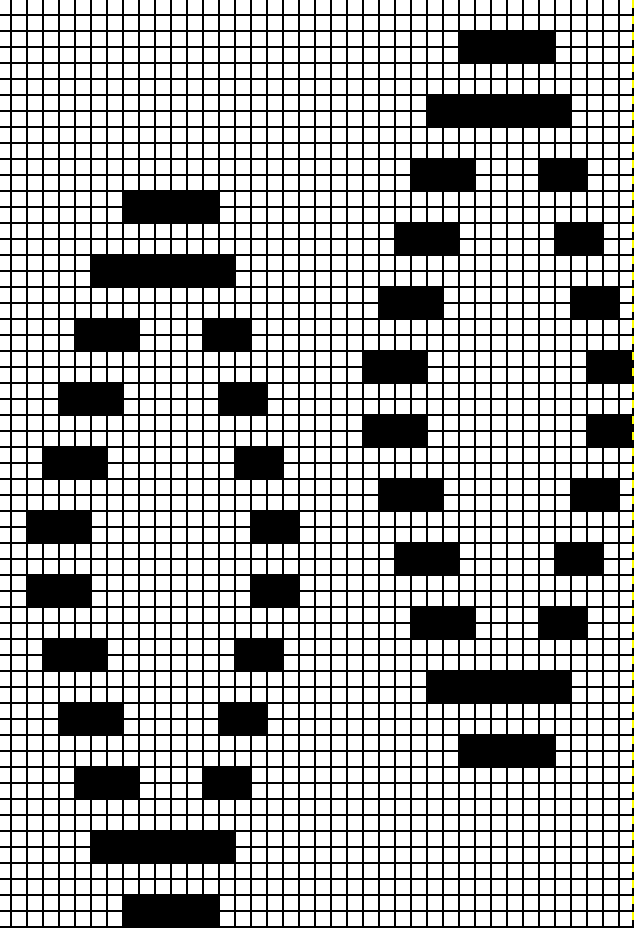
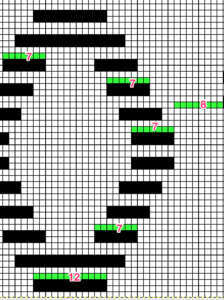
The explanation: further analysis of the original design reveals the fact that some of the pixel numbers in the design black square blocks are uneven in width. In this instance, 3.5 is half of 7, and half pixels cannot be rendered, so the software assigns the split to 4 and 3.  
 

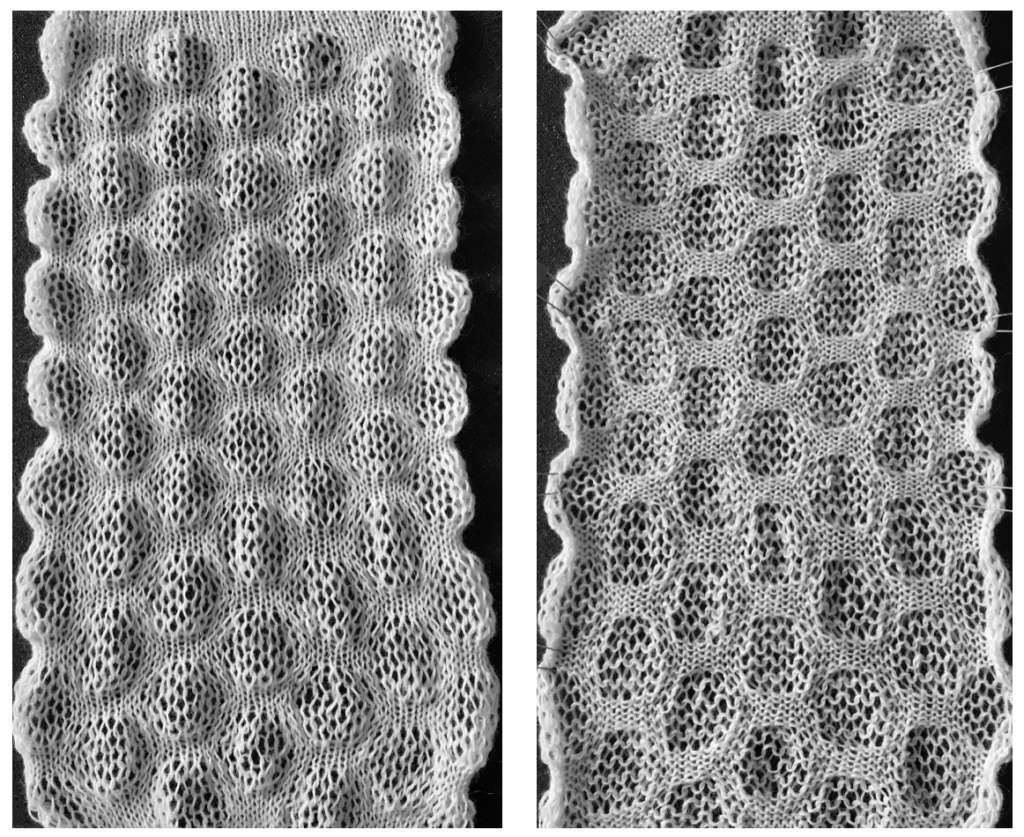
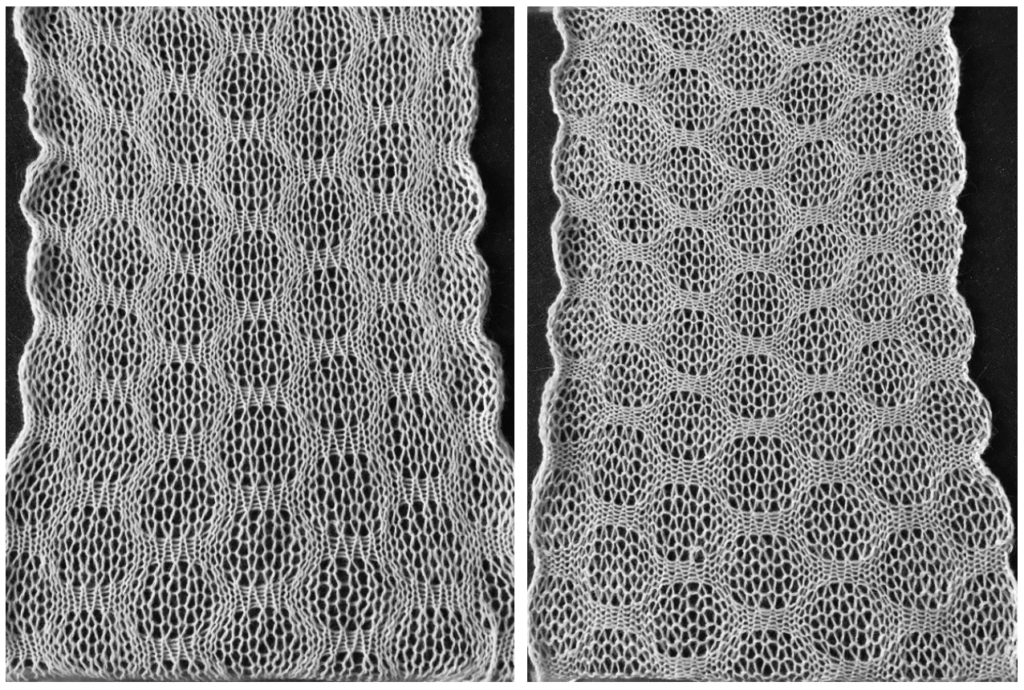
Revisiting drop / release stitch lace 1

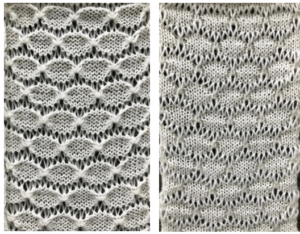
Hand knitters may be familiar with drop-stitch patterns where the yarn is wrapped multiple times around the knitting needle, followed by knit stitch(es). On the next row, when the wrap is reached, the extra wraps are dropped off the needle, and the remaining single loop is knit in a regular manner. On the knitting machine this technique is called drive and mesh lace, release stitch or summer fair isle by Passap, and drop stitch lace in some of the pattern books. Drive lace typically has lines of patterning where loops are formed between rows of all knit stitches. The main fabric, stockinette, is knitted and produced by either bed. Selected needles knit pattern stitches on the other bed for one or more rows, then are dropped from those needles, unraveling back to their starting point, creating the larger, open stitches. Sometimes a distinction is made between terms used, in drive lace the bulk of the punchcard is left blank, and there are far fewer marks than in drive lace. In mesh lace the balance of holes to punched or blank areas is 50/50 or more punched areas than blanks, often the “holes” or black squares are side-by-side.
Drive lace marks out the shape of the pattern, mesh forms the background. Blank rows across the width of the repeat allow the knitting of plain rows between dropped stitches including ones, separating the series of holes, or stabilizing the fabric.
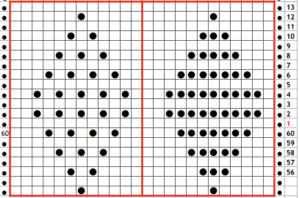
Both types of mesh may be combined in the same fabric, with dropping planned on the same rows. The diamond on the left represents drive lace, and the one on the right is a mesh version. On the right, solid “lines” echo the shape. Repeat is suitable for punch cards but may be altered to suit both cards and electronics. revised with fewer single dots, and solid lines in the ground The fabric may be created both as a hand technique or using automated patterning. In sources that show loops being formed on the ribber, stitches are released by uncoupling the ribber carriage and moving it across the knitting and then back to its original spot, thus dropping the stitches. In Studio machines the P carriage may be used to drop stitches, see previous posts on modifying one for use on Brother KM.
The tension setting on the patterning bed affects the loop size and its tension is frequently one to three numbers looser than the all-knit bed tension. In Brother machines, the ribber knits at a tighter gauge than the main bed, so take that into consideration and adjust it when knitting all knit rows on every needle on the ribber, where the tension may need to be loosened one or more numbers than when knitting same yarn in stocking stitch on the main bed. Matching tension numbers on both beds may provide enough of a difference in stitch size for loop formation. The difference in gauge between the beds also merits calculating adjustments when knitting in circular or U format.
Releasing stitches may happen after every pattern row, after groups of pattern rows (such as bubbles or check patterns), or even at times when knitting is completed. With groups of pattern rows, I have had better results with more frequent stitch releases. Two types of mesh can be created. Stockinette mesh has an equal number of rows on both beds. The result is enlarged stocking stitches along with narrower, single-bed ones on any one row. Half Milano mesh has a horizontal ridge on the purl side with 2 rows knit on the all-knit fabric bed, to every one row on the patterning bed. One of the rows has the patterning bed slip every needle, with the ribber only knitting, the second row forms the combination size stitches as discussed previously. In patterning in Brother KMs, this would need to have such rows added to the programmed design. The fabric is a bit more “stable”. Passap offers multiple techniques for dropping stitches, often referred to as summer fair isle, and using 2 colors per row. Different looks are achieved by changing the built-in technique number, as well as when using a stitch ditcher on every row knit, as opposed to using empty passes of locks to drop the stitches.

Previous posts on the topic
2012/09/24/working-out-the-kinks-in-my-drop-stitch-lace-saga/
2013/10/19/drop-stitch-lace-2-colors-per-row-Japanese-machines
2013/10/16/drop-stitch-lace-2-colors-per-row-passap-km/
2013/10/19/drop-stitch-lace-2-colors-per-row-Japanese-machines/
2015/06/14/geometric-shapes-in-drop-stitch-lace-brother-km/
2015/06/16/geometric-shapes-in-drop-stitch-lace-2-brother-km/
2015/06/18/geometric-shapes-in-drop-stitch-lace-3-end-release/
2018/01/16/drop-stitch-lace-using-ayab-software

knitting patterns with no blank knit rows between loop formation 2015/06/16/geometric-shapes-in-drop-stitch-lace-2-brother-km/
2015/06/18/geometric-shapes-in-drop-stitch-lace-3-end-release/

stitch dropping tools
2012/09/21/knit-bubbles-and-stitch-ditchers-dumpers/
2015/06/10/brother-kms-pile-knitting-ribbed-stitch-dropping-tools/
from an old Studio KM Japanese publication, using their tool and what appears to be a lace repeat

another related fabric: 2017/10/18/revisiting-knit-bubbles-brother-km/
using ribber cast on comb for an open cast on  either bed
2017/02/14/ribber-cast-on-comb-open-stitch-single-bed-cast-on/

Working with positive and negative space variations: the repeat is suitable for any machine, my sample is executed on Brother KM. Since alternate, all blank rows have no needle selection, before knitting that row (ribber only will knit), dropping stitches knit on the main bed on the previous row will not alter the pattern using any method you prefer, set up knitting so all stitches are on the ribber. If you prefer to set up complete repeats prior to watching, “air knitting” prior to ribber set up or using the position option on the main bed if that is available, will help achieve that set knit carriage to KC II (used when patterning does not occur on every needle across the needle bed), both part buttons pushed in for free pass to the opposite side of km, no knitting occurs but the first row of pattern knitting is selected. Ribber is set to N<–> throughout the carriages now move to the opposite side, selected needles on the main bed pick up loops, and nonselected needles stay empty. Ribber knits every stitch using a ribber cast on comb, stitch “dumper”, or another tool, move needles holding stitches forward to drop loops, and return empty needles to work position (B)as carriages move to the opposite side, needles are selected for next row of knit stitches to be knit on main bed carriages now move to the opposite side, loops are picked up on selected needles all needles are now not selected, above stitches/ loops are dropped, needles are returned to B position before the next carriages’ pass carriages move to the opposite side, selecting pattern needles carriages move to the opposite side, picking up loops before carriages move again, drop stitches formed. Watch loops after they are dropped, if tugging knitting it is not enough to pull them out of the way of needles returning to patterning, take a tool, or something like a credit card. Slide it from one side to the other between the beds, thus keeping loops clear away from the main bed

In summary; assuming one is starting on the right side of the machine COR
step 1. <-  the carriages select needles that will form loops
step 2. ->  the carriages knit, picking up loops
step 3. drop the loops just formed, returning all empty needles to the B position
step 4+ repeat 1-3 for the entire length of the piece
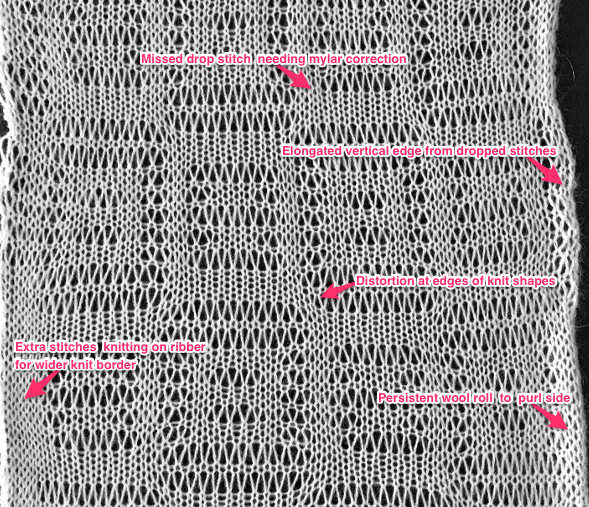
My sample was knit in slightly fuzzy wool. Smooth, thinner yarns result in longer stitches whose patterns get read more easily. Because wool has “memory” the vertical edges tend to roll to the purl side and return to rolling even after heavy pressing and steaming. There are a couple of spots where no long stitch was created due to markings on the mylar not being dark enough.
Other things to consider: this fabric widens when blocked, so cast on, bind off, and beginning and ending edges need to accommodate that. This particular design creates a fairly balanced fabric. In many drop-stitch fabrics, it is recommended that edges contain stitches dropped in the pattern in order to maintain vertical length at the edges. To achieve that, the first and last needles on both sides should be on the main bed. That said, having an all-knit border (stitches knitting only on ribber, no dropped stitches) may work well in your pattern, or pull edges in too tightly when compared to the all-over motif released repeats. Testing on your swatch can be achieved easily by simply taking some needles on the main bed out of work on one side, thus creating the “all-knit border”. The latter can happen by accident if not all needles are returned to the B position properly after dropping stitches.

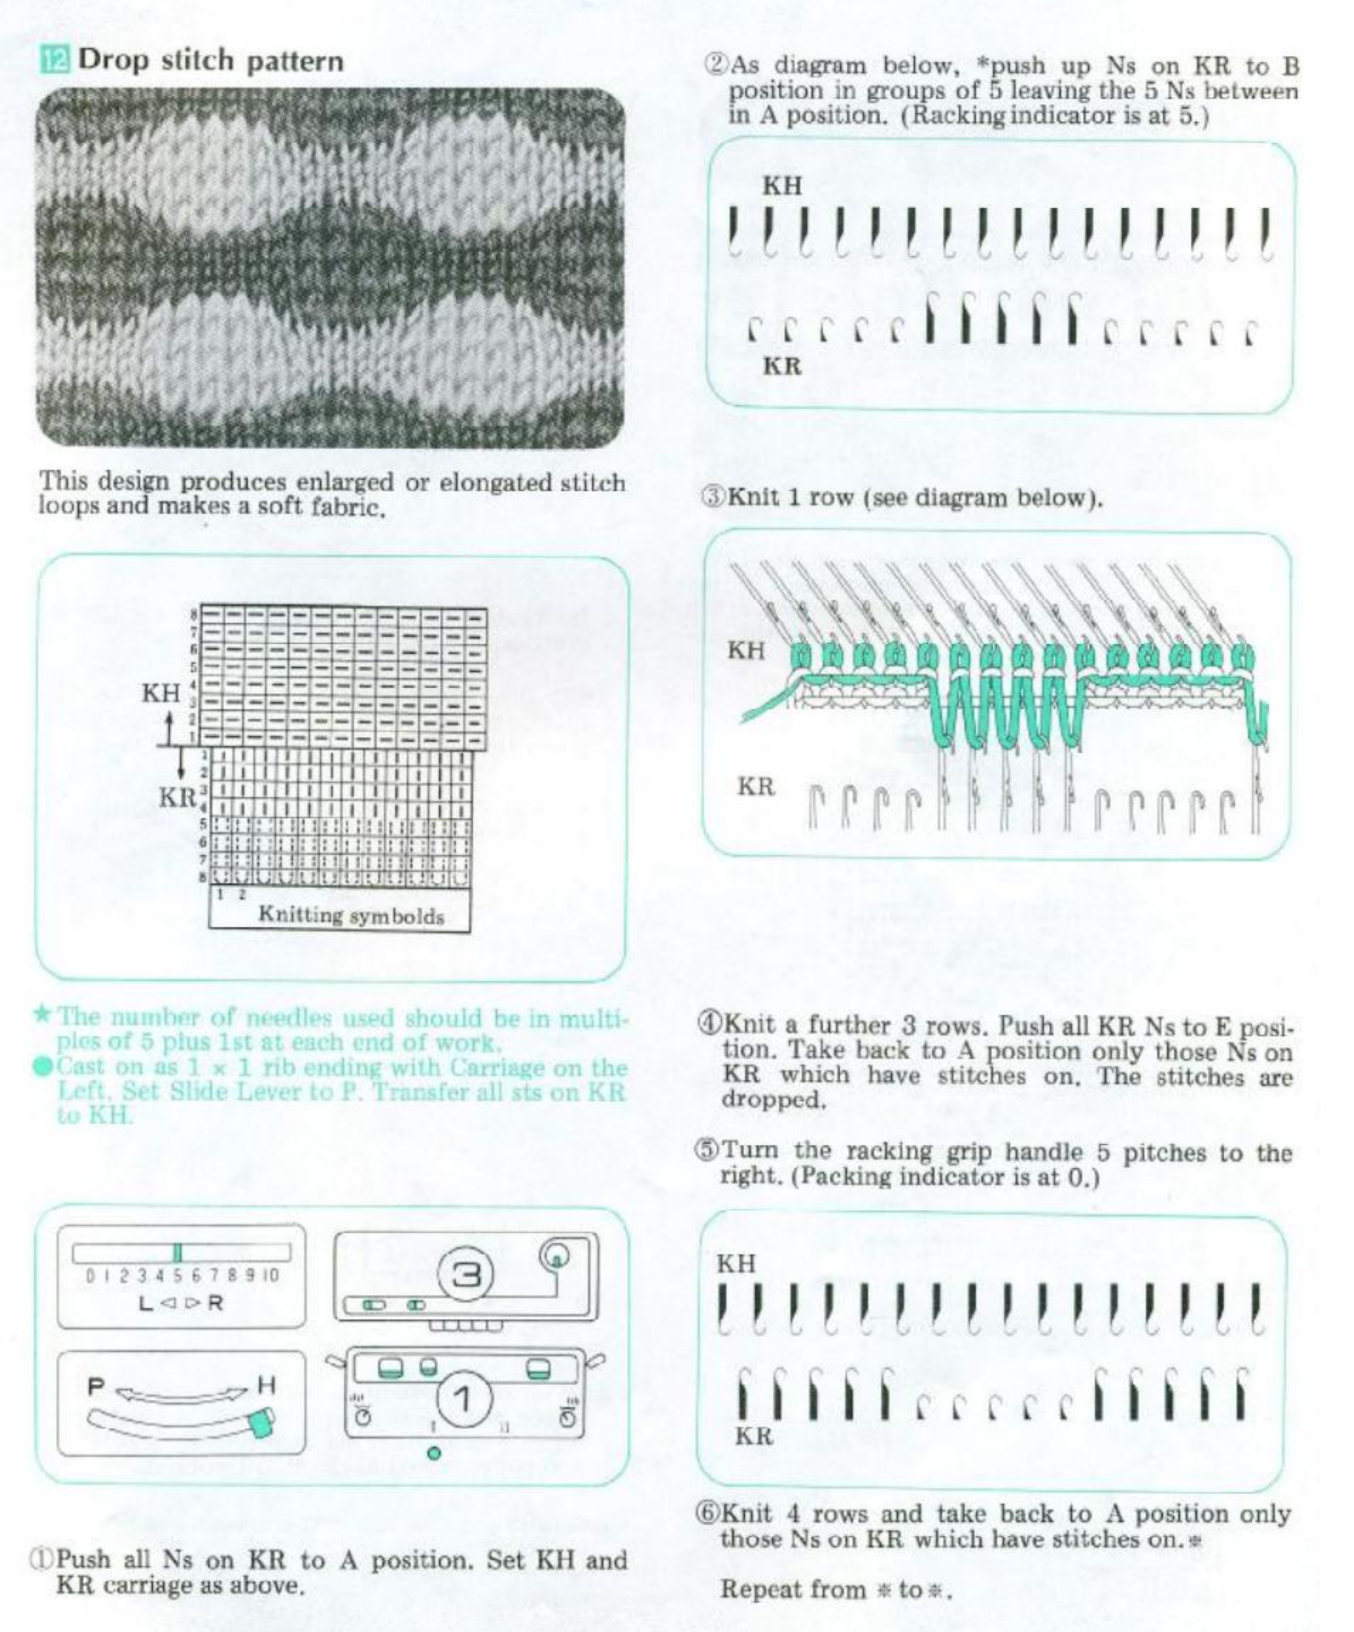
It is possible to produce a drop stitch pattern on the bulky machine or depending on the yarn, knit with heavier yarn on EON on the standard machine. The resulting “patterns” happen with varying the number of rows used to knit in each color, which has not been addressed in previous posts. I prefer to use patterning on the top bed to select needles, but this pattern may also be knit as a hand technique, using the ribber to produce the loops that will be dropped. This page from the ribber techniques book reviews the baseline process and settings

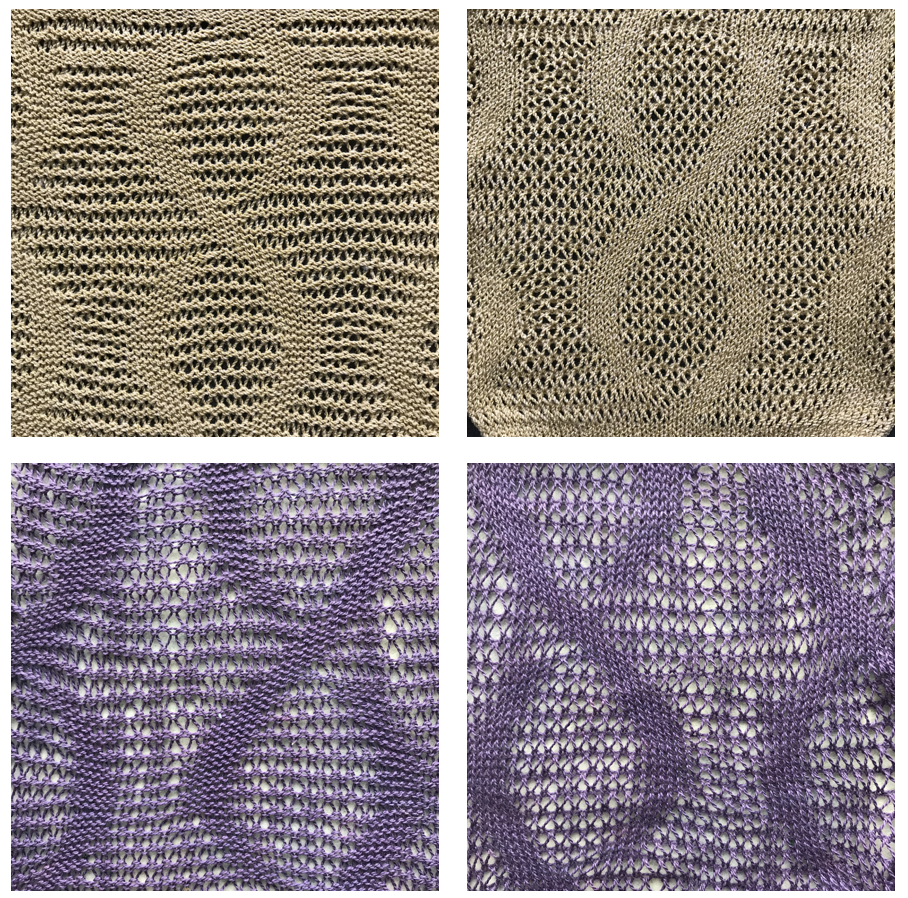
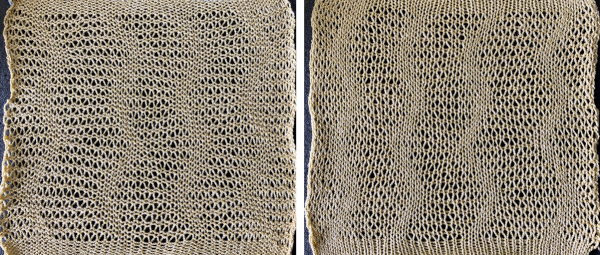
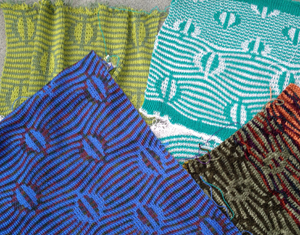
purl side is shown first for each segment, followed by its knit

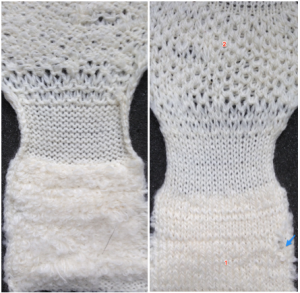
Punchcard knitters are not excluded from creating these fabrics. Some punchcard sets supplied with machine purchases were published for Silver Reed Machines, two such sets are available for download ie. Silver Reed-Singer R-2 Standard Punchcards For SR360 Ribber and the same in a 30 stitch version making them suitable Silver Reed-Singer FRP70 30 Stitch Ribber Punchcards. One such card easily translates to one color drop stitch. Changing fiber content affects the scale of resulting patterns and the size of the dropped stitches, the yellow sample was knit using a wool rayon, and the purple cotton used the same tensions. If using punchcard machines, factory issue punch cards provided with the KM may be usedPlaiting is also possible, but depending on the color choice the pattern may become muddied A slip stitch edge may be planned to keep edges of items such as scarves from rolling consider top and bottom edgings that include the technique (illustrated in the previous postAdding complexity: dropped stitches may be combined with other stitch types, shown here in combination with tuck stitch on the main bed, dropped loops created on the ribber. Stitches are transferred up to the top bed. The KC is set to tuck, the ribber episodically picks up loops across the whole row, and they are dropped on the following pass; it is then set to slip when the main bed is returned to tucking An alternative way to produce this fabric on Brother is to use the knit carriage with no yarn to do the “stitch ditching”. The basic design programmed into any brother machine, electronic or punchcard will need to be altered. The intended design in my sample is a 4 X 4 square, colors represent what would be punched holes, black squares, or pixels. Simple block patterns such as these may be released upon completion of each “square” series, in this case, after 4-row segments. Two rows are added at the top of each “square”, one repeating the motif width, the next completely free of any markings Rows 5 and 6, 11, and 12 are not part of the original repeat. The 5th design row provides needle selection, traveling from right to left. When the carriage passes in turn from left to right with no yarn, those preselected needles will drop while preselecting a blank design row (6) that allows the carriage to return to the left-hand side. As it moves back to the left, the carriage will preselect the first row of the design. With COL yarn is picked up in order to knit the next set of dropped stitches. A color change may be made while the carriage is on the left.
Begin with all stitches transferred and in the work position on the ribber only. Every needle will be in work on both beds for the remaining fabric. The ribber half-pitch lever is on H. With COR set the change knob to KC, preselecting from right to left for the first row to be knit after pushing both part buttons. This allows the KC to travel to the left without forming any loops or stitches, but the preselecting first row of the pattern. Change color if using more than one color, knit 4 rows. color 3 (or 2) can be an empty feeder. Change to color empty so yarn(s) in use are held until picked up again and there is no yarn in the ribbers sinker plate yarn feeder. There are 2 options for dropping stitches. One is to disengage the KC from the ribber, it will be picked up again as you move into the color changer to pick up the yarn once more. The other is to keep the carriages paired, set the ribber to slip for 2 rows, then back to knit as you return to the color changer, pick up the yarn again, and continue to knit. If row count is important ie in making a garment, the row counter gets turned off for the 2 rows when stitches are dropped, remember to turn it back on when knitting the next 4 pattern rows. I personally find this fussier and more error-prone than other methods I have described. My swatch is knit in acrylic thin yarns and lightly steamed, so bubbles have flattened out considerably. The fabric is related to that shown in the ribber techniques book, page 23, created by picking loops up from the ribber combined with racking.
This is my ayab repeat, this time executed by configuring the knitting to begin on the last pattern row 16 for that first preselection row from left to right instead of altering the repeat itself More to try: the typical appearance to look for in the source inspiration is that of single-row horizontal geometric designs with all blank rows separating them from each other.
Studio pile knitting patterns such as those found in may be used as published. It may be worth color inverting or spacing out the designs with many more white squares in between the motifs for more recognizable designs in the dropped stitch areas and for a more stable fabric in repeats such as these. On rows where there are no punched holes, resulting in no preselection in Brother machines, stitches are dropped prior to moving the carriage for preselection of the next row of patterning. The results are easy to test and amend. One such pattern: the original repeat The yarn used here was a softly spun rayon that began eventually to split, and get partially caught up on gate pegs, leading to the ending of the swatch Switching yarns made knitting easier and quicker to produce, planning for a different sort of wave, an amended version of the original design was used Fair Isle
a 24X60 design repeat was randomly chosen and used double length The first pattern row will pick up loops on the top bed, using any tool, drop the loops and return empty needles to the B position.
The next pass will drop the stitches and preselect the next row of loops.
Knit to the opposite side again picking up loops, drop them, return needles to B, repeating the steps.
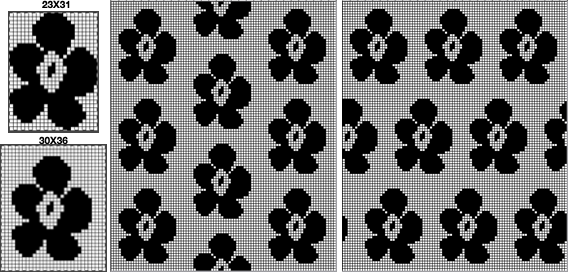
The knit grows in length very quickly, the side edges and cast-on and bind-off methods would need more careful planning in a final project.  On electronic machines, the repeat can be adapted to yield more knit stitches between the flower forms
Beginning with a 23X31 isolated motif,  the shape is expanded to 30X36,   and two potential dispersals with the flower drawn in symmetric repeat in width and height X3  Transfer lace patterns: use patterns that have at least 2 rows knit between repeat segments. The results are likely to be subtle. On electronic machines: cast on as preferred, transfer MB stitches to ribber, where all stitches will be knit on every row. The main bed will be knitting the stitches that will be dropped, the lace carriage will not be used. As the carriage moves across the bed selected “lace” pattern needles will be knit, and the non-selected ones will be skipped. Program the pattern in the usual manner. Set the change knob to KC II to cancel end needle selection, the knit carriage to slip in both directions and continue knitting until all needles are in the B position. At that point disconnect the main bed and ribber carriages, unthread the yarn or have it held for you in the yarn changer. Set the main carriage to knit, move across needles in B, dropping them since no yarn is in use. Bring the disconnected carriage across the knitting again, reconnect to the ribber carriage, and rethread. Set KC to slip again, repeating the process. As an alternative for dropping stitches, leave KC set to slip, and push all needles out to hold. With no yarn in the feeder, any loops will be dropped. Make the 2 passes with KC only as described, reconnect carriages, rethread, and continue until no needles are selected again.
If on an electronic machine with 2 knit carriages available: the number of rows is usually an even number, so an additional knit carriage with no yarn could be positioned on the opposite side to the one selecting pattern, set to do plain knitting, holding no yarn, and it may be used to drop the stitches on “plain knit rows” on lace card without requiring the other additional steps and cam button changes.
Tuck and drop: use color reverse if appropriate (black squares for knit stitches, white for tuck) set up as for other drop stitch fabrics, choose patterns that are broken up by 2 rows of plain knitting between the tuck rows. KC II is used once again. Since in such cards, you one is working with punched holes or black squares, the empty knit carriage alone may be taken across with no yarn, dropping the complete, all knit rows. It is not necessary to change the knit carriage setting from tuck to knit to do so.
Tuck is an alternative option for a free pass as well, realizing that helps avoid errors in patterning by missing resetting the cam buttons between the two functions.
Racking patterns:  a few variations are suggested in Brother punchcard volumes. Sometimes translations are what can be described as interesting. One such pattern Yarn choice as always can make a good deal of difference, here a wool rayon was used. The zig-zags would be more visible if worked using a larger number of all-knit stitches


Revisiting knit “bubbles” brother KM

Sometimes months or even years go by before I revisit previous posts. As I review the information, it may occur to me to think about it further, and /or to present it in a slightly different way. I find it hard to believe how much time has passed since 2013/09/06/more-knit-bubbles/ got published.  Here is another way to look at the fabric on Brother KM. Since I knit on a punchcard model or a 910 electronic one, I will refer to pattern repeats in terms of punched holes or black squares.

Bubbles and drop stitch lace share some of the same principles, the effect is created by stitches that are larger than others. Slip stitch setting can be used to automate needle selection. Black squares or punched holes will knit, unpunched areas or white squares will not, with needles left in the B position. Brother preselects needles for the next row of knitting, so when combining hand techniques with needle selection, one has the option to intervene before the next row in the design is knit. Using the card or mylar to read row 1 of the design helps determine where on the needle bed to set up your repeats. In this instance, the ribber knits every stitch, every row, with one extra needle on the left (or more on each end if preferred) in addition to repeats # required to achieve the desired width. All needles are in work every row on both beds. Main bed knits in response to programming.
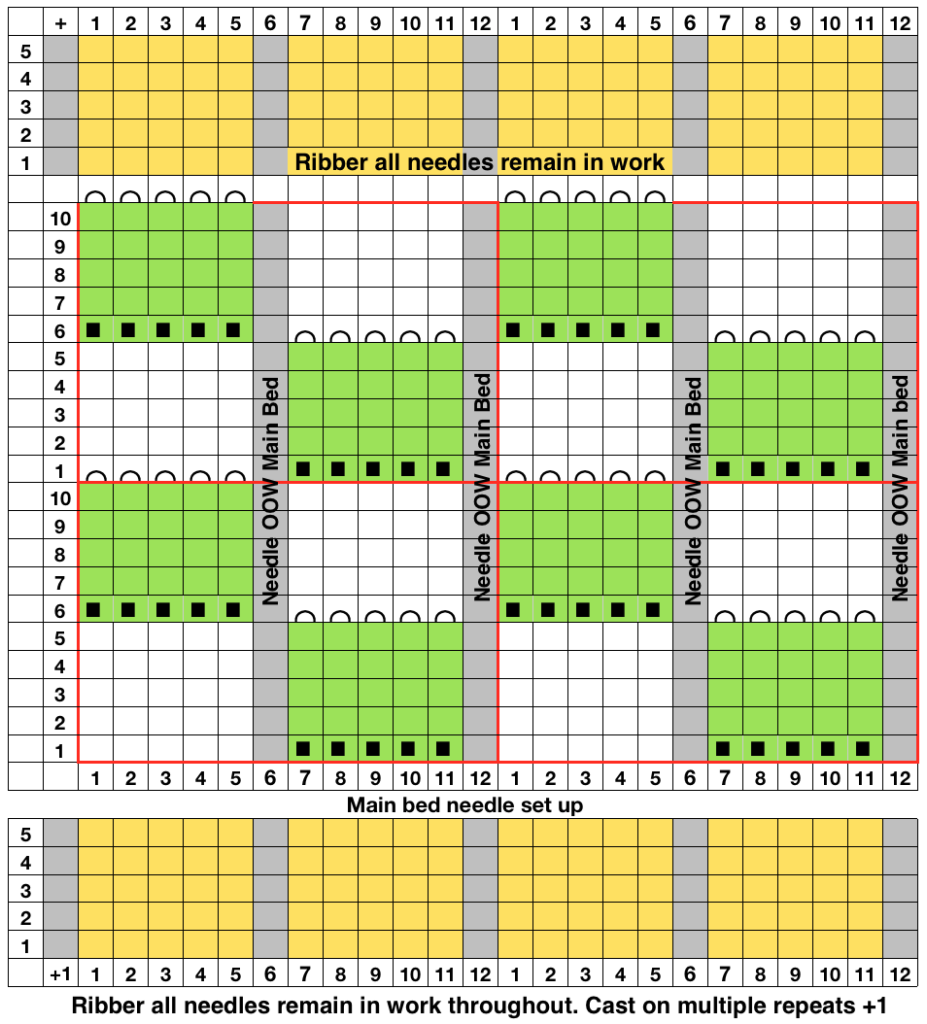
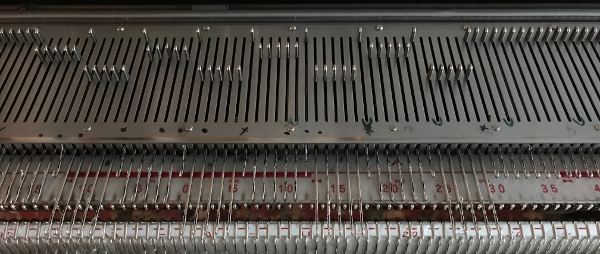
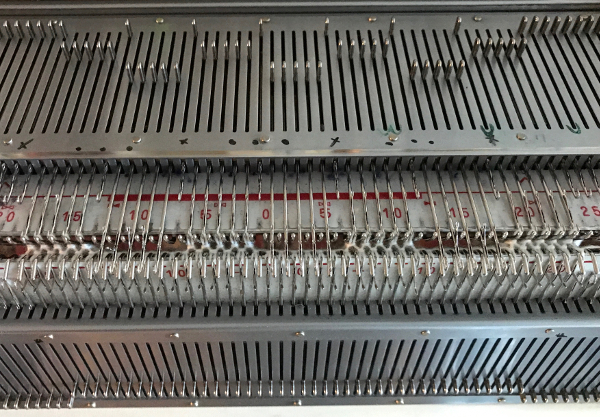
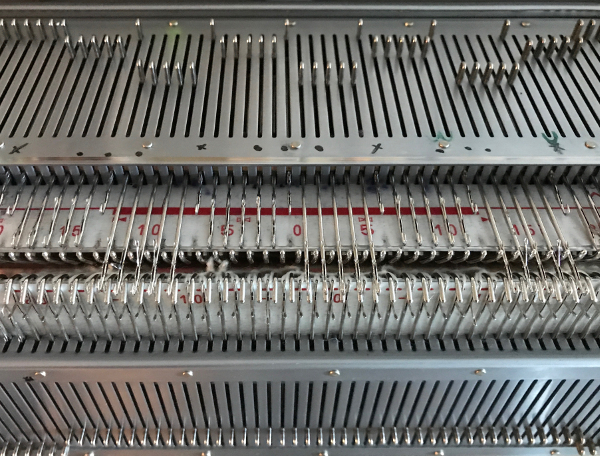
Working in multiple of repeat -1 on the top bed, plus one needle in work at each end on the ribber. Considerations need to be made to align the design properly. The markings on my metal bed are from a different project. The goal is this needle arrangement “air knitting” with carriage set to KC will help identify patterning repeats. Groups of 7 include a needle on each end which will be pushed back to A position in the body of the knit/ NOOW (needle out of work) indicated in the chart for the main bed needle setup the first selection row a needle on either side of the groups of 7 is pushed back to A position, remain there throughout the piecean extra needle is brought into work on the ribber on either side of repeat ends. Machine settings: main bed set to slip <->, ribber set to normal knit
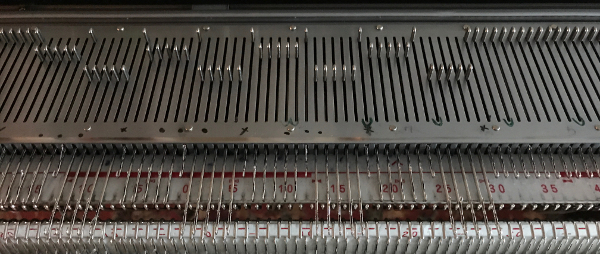
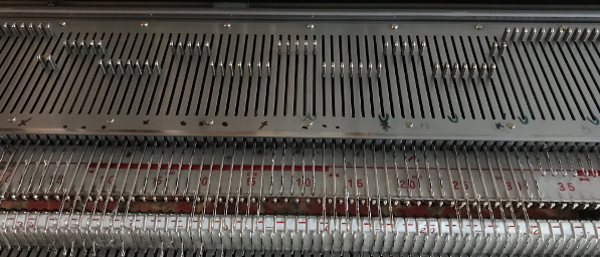
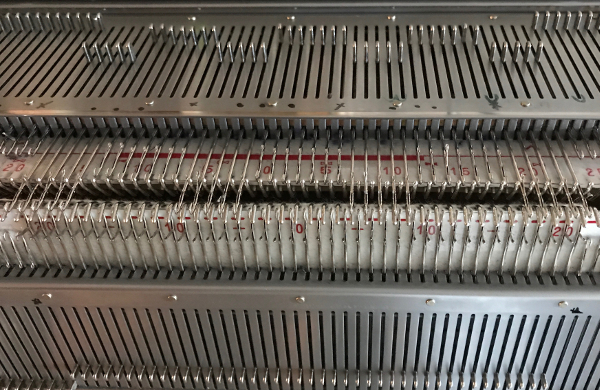
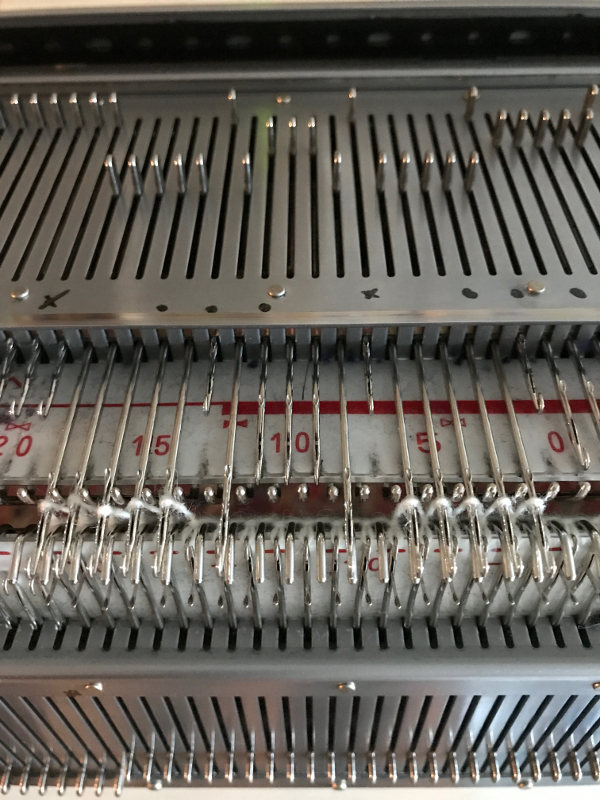
the ribber has now been set up for knitting every needle, every row, with the caston and desired edging completed. The first row is selected on the main bed for pattern knitting. since there are needles out of work and pattern knitting is involved, if KCI is used or end needle selection is not canceled, the end needles on the areas being slipped will be selected to the knitting position, so patterning errors will occur. The first row knit on both beds is shown on the remaining needlesBrother knits a row while preselecting for the next one. Here the needles in B would slip/ not knit on the next row, and needles out to D (Brother skipped the letter C in needle positions) will knit. Before knitting that next row, stitches on the now non-selected needles should be dropped across the bed this shows those stitches have been dropped, their needles are now empty, and returned to B position
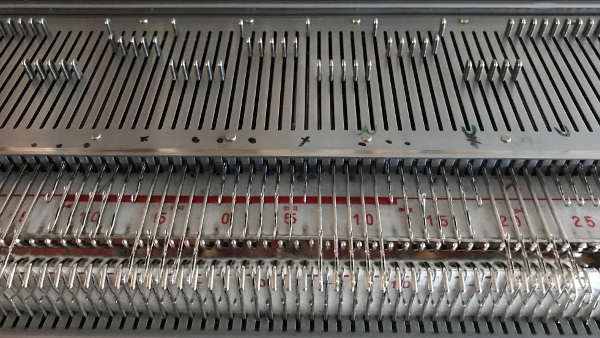
end knitting with the same treatment as it bottom (swatch was simply dropped off).
It is possible with solid geometric shapes such as these to release stitches after each shape. The type of yarn used and loop behavior upon dropping stitches are variables that influence success in doing so (other swatches ).
An acrylic yarn was used: the first image is the fabric’s “relaxed view”.after steaming and pressing
the variation in width is due to adjustments in tension, the swatch folded over itself shows the difference in another way
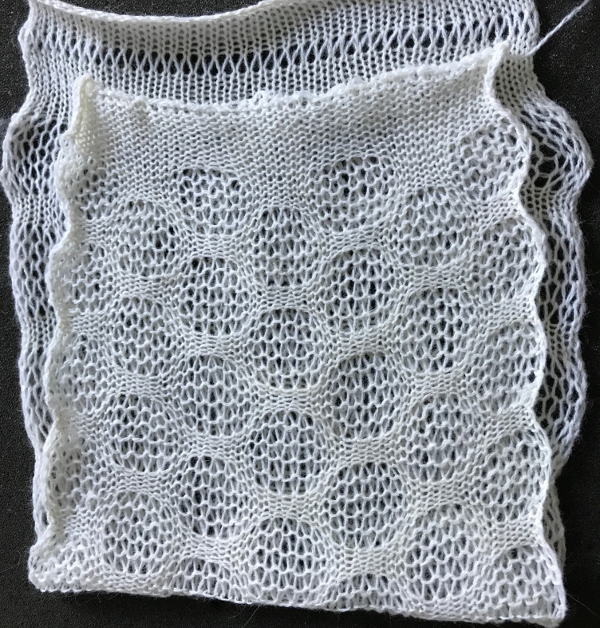
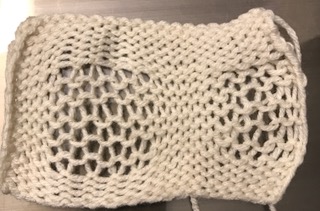
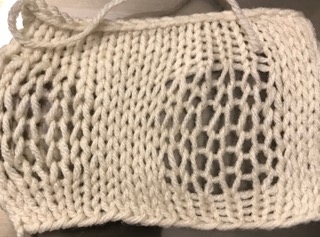
“Camino” bubbles, hand knit

I was written an email asking about the possibility of creating bubbles in hand knitting, this is my attempt, may serve as a starting point for DIY.

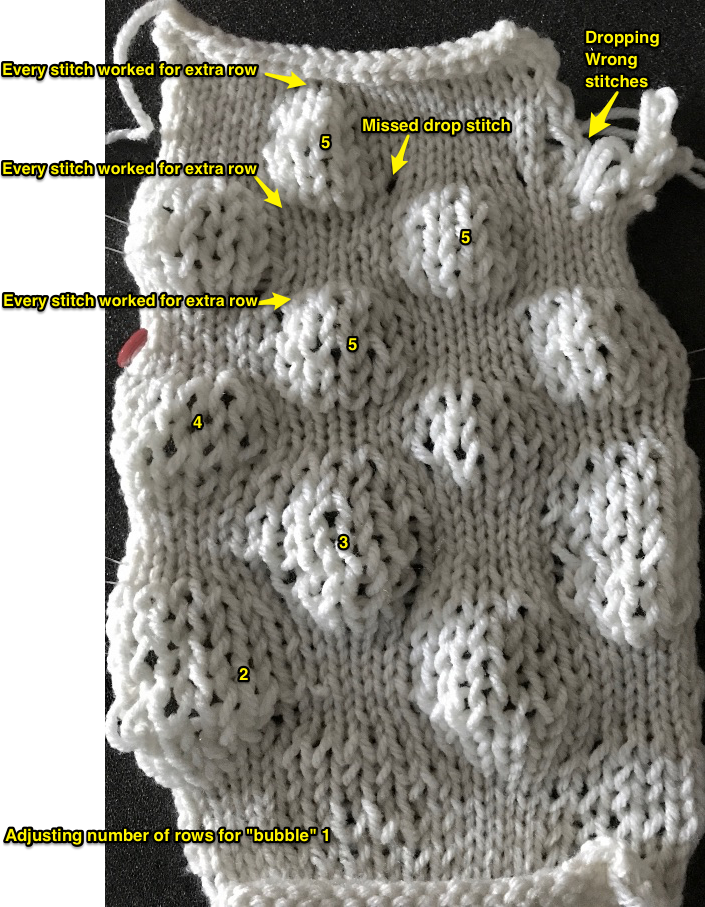
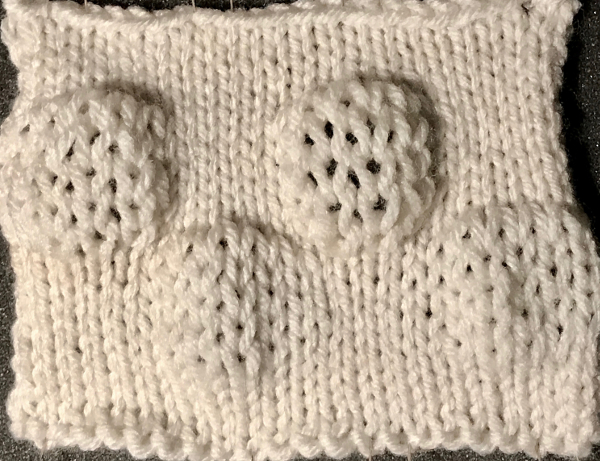
Below a small sample serves as an illustration of my first attempt. It was knit in acrylic,  steamed to the point of death, but shows the type of elongation of the “bubble” stitches using this technique. To keep things simple I stuck to a “square” shape. Stitch counts and placements of shapes may be adjusted to suit. It is possible to knit or purl the yarn overs, unraveling the extra stitches before knitting the original number of stitches when the top of the bubble is reached, but the resulting look is a bit different. It is worth trying, depending on preference for the type of result, or the way one is accustomed to dealing with elongated stitches and yarn overs in hand knitting.

So I now own a new Mac, no longer have Microsoft Office available, and am now working my way through charting diagrams using Mac Numbers.  Below is a  possible working chart with a different stitch count than above. I would suggest larger blocks of all knit stitches and rows between “bubble” repeats
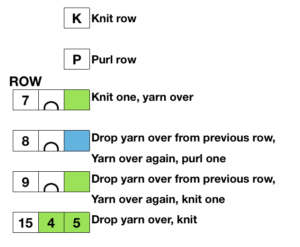
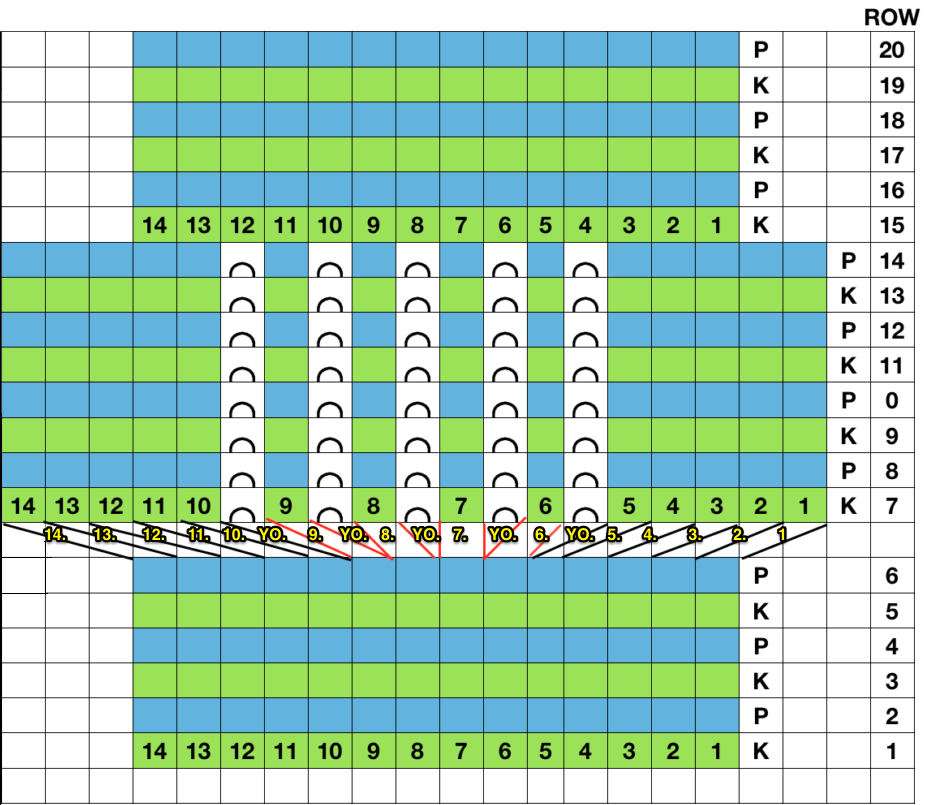
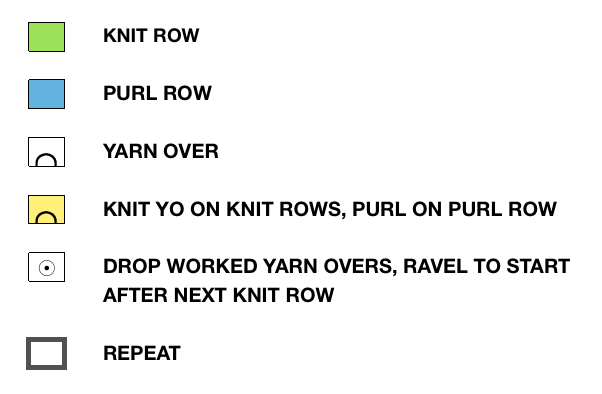
The further step of taking the technique to a brick repeat follows. I have been experimenting with a varied number of rows and stitches. Subsequently, I was happier with knitting or purling the yarn over as an extra stitch/ increase until I had worked the desired number of rows, then dropping those extra stitches, thus working once again on the original number cast on. The shape also seemed a little less square to me if a second row was worked before returning to making yarn overs. A border of more than one stitch on either side helps stabilize the shape edges.

This sample was worked in my “throw away” acrylic 4 ply. To my eye, the most pleasing and effective bubble happened on the least number of rows of dropped stitches (diagram provided above). The top and bottom edge of the “bubble” looked the best when stitches were taken off the needle on one row, and not allowed to “run” to the yarn over row until after the next row was knitted or purled all the way across. That may not be the best idea, especially when working much wider pieces of knitting. Dropping back to yarn over row as you work row 6, 13, etc. of chart provides a more controlled way of checking “runs” for individual stitches, making repairs for any errors easier. Dropping yarn overs with each pass seems to me to be the easiest way to track knitting as it progresses or gets wider, and counting bubble rows is far more easily tracked. Below, variation #5 matches the above chart.
the reverse of the fabric, lightly killed with steaming and pressing 
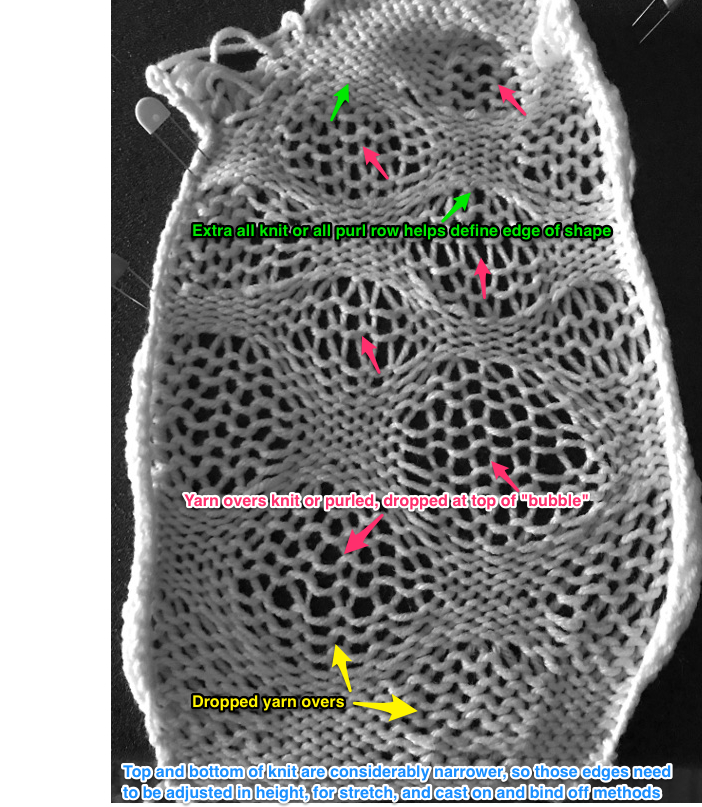
A last swatch: here a row is knit or purled as seen in the chart above after yarn overs and their treatment is completed. If the aim is bubbles which will not be flattened out, dropping the yarn overs on each row worked gives a flatter (bottom of the swatch), less of a “bubble” effect than knitting or purling the yarn over before dropping it at the appropriate point (top of the swatch). If the fabric is to be “killed” as flat as possible, dropping the yarn overs each row may be good enough.


My machine knitting posts on this topic:  https://alessandrina.com/2012/09/21/knit-bubbles-and-stitch-ditchersdumpers/
https://alessandrina.com/2013/09/06/more-knit-bubbles/
https://alessandrina.com/2013/09/07/a-bubbles-cousin/
https://alessandrina.com/2017/10/18/revisiting-knit-bubbles-brother-km/


Carpet or pile stitch knitting on Passap and Brother KMs 2

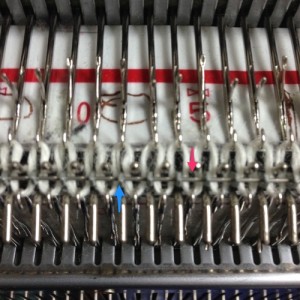
Trial swatches do not necessarily require a permanent edge. The main bed cast on with all open stitches is familiar to knitters accustomed to using a single bed Brother cast on comb. A quick version of the same type of cast-on is also doable when both beds are in use, and the goal is to knit all stitches only on one bed or the other. The broken toe cast on for rib is so-called because if comb and weights are hung in the wrong location on the needle bed when stitches on the opposite bed are dropped, so will the comb be along with weights, heading for your feet. If the ribber is going to be the bed doing the knitting that anchors dropped stitches or pile in Brother kms, please note prongs of ribber comb line up directly in front of main bed needles (blue arrow) and to each side of the loops on ribber bed needles (red arrow). The ribber comb wires will anchor down loops on the needle bed where plain knit rows will be formed. As mentioned above, this method will result in stitches all being open, does not produce a permanent edge, is suitable for quick swatching or for waste yarn at the bottom of the weighted fabric. It is possible to perform this cast on with ribber comb with wire already inserted in both brands, but the broken toe method is potentially less hazardous to needle health. brokent_toe_arrowsAnalyzing what is required to move between km brands with the goal of achieving 2 color or isolated pile motifs: in Passap with the back bed set to FX, one arrow key, EON pusher/ needle selection changes every 2 rows. In Brother, this may be achieved on the main bed by pushing in one tuck button and programming a repeat.  The alternate, adjacent cam button, left in its normal position, will knit every stitch when knitting direction is reversed regardless of whether any needle selection is happening. On the ribber, lili buttons may be used for alternate needle selection. Its levers determine whether tucking or slipping, in one direction or both, occur. The number of stitches on the ribber must be even. An easy visual check is to check markings on needle tape, which consists of what I refer to as dashes and blanks. For an even number begin with one, end with the other.  Passap will automatically revert to the alternate pusher for patterning on the subsequent 2 rows. In using lilis this is not an automatic function, and some handwork is required to obtain the same effect by changing the first needle selection every third row as seen in this post.

If the ribber is chosen as the loop making the bed, the needle selection on it needs to be manual for any pattern other than across whole rows. In my swatch, to knit across all needles the ribber carriage is set to slip in one direction, knit in the other. The all knit rows in pile knitting need to follow the ones with tuck loops on the opposite bed.  Extra needles are on the main bed, which creates fabric backing. The ribber carriage can be disengaged and used to drop stitches after all knit rows on the main bed.

In the actual knitting, if a plain one color pile with plain color backing is the goal, some rules may be broken. The thickest, most stable pile is achieved when the yarn anchoring the loops is as dense as possible. If the goal is to knit every stitch across each row to create loops and in turn drop them, one is, in fact, working an every needle rib. This makes it possible to create tuck loops on either bed creating the backing across the whole row because in fact there are stitches on each side of the tuck loop on the opposing bed anchoring it in place. Normally when 2 or more needles tuck side by side, rather than the stitch formation usually seen in tuck patterning, the loops do not get anchored, drop off, and create a float like those seen in slip stitch patterns.

In my first sample, the fabric is cast on the main bed, the loops are formed on the ribber. The carriages are set for the main bed to tuck traveling to the right, knitting to left. The ribber is set to slip to left, knit to right. The ribber is used to drop the stitches, simply by disengaging it from the main bed and running it across from one side to the other. Dropping stitches occurs (on either bed) after all stitches have been slipped there for one row (no needle selection if patterning). The starting side for my swatches was on the left of the machine. It is helpful to have a ruler or tool to help push loops down between the beds after dropping each row of loops and also to occasionally drop the ribber in order to check whether any loops may be caught on gate pegs.

In this swatch, I had some problems (blue arrow) on the right side related to changes in tension while determining what might be the best. Section 1 has every needle tucking on the main bed. Section (2) begins to try to emulate the Passap pusher selection using an EON 2 row tuck repeat on the main bed, resulting in things going awol and loose, even at the tightest tension possible on the main bed. Any time patterning is used on the main bed, end needle selection is canceled (KCII). The tuck repeat2 row tuck

the settings (here lili buttons are not in use1X1 card MBno lili2

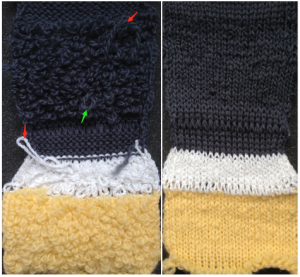
ribber loops2To create every needle loops for pile on the main bed: CO is on the ribber. With settings on the image below left (no lili buttons in use), the ribber tucks loops on every needle traveling to the right, knit all stitches moving to left. Moving to the right the main bed knits on every needle, slips the whole row moving to the left, giving the opportunity to drop stitches off. With settings on below right, lili buttons are in use, and the ribber now produces an EON needle selection, every row. Left alone the selection is what would be seen using the 1X1 card on the main bed, its repeat 1X1tuckloops on MBThe yellow yarn is a 2/8 good quality wool knit at 4.2 on the main bed, 3.2 on the ribber. Switching to a rayon twist of similar thickness created instant havoc. The dark grey was a mill end, tighter twist 2/8 wool. Red arrows show what happens when loops are caught up on gate pegs and not immediately noticed. The green arrow indicates longer loops that can happen when knit stitch on either side on the opposite bed do not knit off properly. The result is a dense wool fabric, so the tendency to roll at the top and bottom of each piece toward the “knit” side of the fabric needs to be considered at the top and bottom edges of finished pieces.

knit with no lili buttons in usemain bed loops2

In 2 color knitting, or creating isolated motifs whether on one color or striped ground, anchoring loops by tucking on every needle is no longer possible, making reverting to EON needle selection on ribber a necessity. The results are dramatically different. These swatches were made using lili buttons or hand selection on ribber, loops on the main bed. If things don’t work in one color, they will not in 2, so one color, every needle pile is a place to start evaluating the results

1X1 lili selection left me with “where are the loops?”white_lili

In the bottom section here I tried 1X1 hand selection for 2 consecutive rows,  the narrow band in center back was back to 1X1 to separate areas using lilis, at the top I used lili buttons and brought an extra needle into work on ribber before traveling to the right every third row (making needles in work on ribber an odd number), returning it to out of work before knitting back to right. Dropping stitches every 4 rows makes tracking the sequence easier. The resulting pile is far more “subtle” than samples worked with every needle tucking on the bed creating the backingyelllow-lili_500

So far I still have had no luck with getting anything that does not look like a variant of drop stitch lace when attempting patterns separated for 2 color knitting, either in embossed one color, or in striped 2 color versions.


Carpet or pile stitch knitting on Passap and Brother KMs 1

Pile, carpet, or loop stitch are terms used for a raised relief fabric made on KMs using both beds, with or without programmed patterning motifs on either bed. Two-color patterns are sometimes also called “punch pile”. Depending on the machine brand and on the thickness of the yarn, loops may be formed every row or every other, varying the pile density. Beds are always at half-pitch, the same setting used for every needle rib. The “needle rule” is disregarded. The first and the last needle are always on the non-patterning bed, to anchor down any loops close to the edge of the fabric. In machines with automatic end needle selection, the function is canceled. Some yarns and designs will even tolerate loops being dropped at the end of knitting. Sometimes dropping them every few rows will work. If any yarn splitting or fussy knitting off because of fiber content occurs, then dropping stitches may be needed after every row of loops formed. If using multiple colors of yarn on either of these 2 brands, having them equal gauge/weight is helpful.

The Passap knitting machines, as well as the Brother, did not have a built-in yarn feeder to facilitate knitting this fabric such as that possible in the Studio brand. Particularly with the advent of the E6000 Passap model, for a while, there was keen interest in how to produce similar fabrics. Susanna Lewis was among the first to describe knitting pile across multiple brands, whether punchcard models or, later, electronics.

The fabric loops are created with one pass of the carriage, the next row of knitting is intended to anchor down those loops, and with no needle or pusher selection, no stitches knit on the patterning bed. This fact gives one the opportunity to drop loops without disturbing pattern selection. Some of my drop stitch lace previous blog posts discuss designing such fabrics. Color separations are required. The E 6000 console performs many of these automatically, one simply has to plug in the appropriate “technique” number. The default DBJ separation made by the console in Brother electronics may not be used because blank rows for no needle selection need to be added in order to attempt the long loop or stitch fabrics. This, in turn, requires the knitter to do the work. Design rows are expanded

  • Graph        Motif        Color
  • Row 1        Row 1       Color 1
  • Row 2        Row 1       Color 2
  • a blank row is inserted  on top of each of the separated rows, so for each 2 color design row, there will now be 4 charted rows

The E 6000 has some built-in technique choice options for knitting and automatically adding blank rows in charts where needed. This allows for the locks, empty of any yarn, to travel from and then back to the color changer achieving stitch dropping. My preference is to work with stitch dropping tools instead of the extra rows “knit” without yarn. Also, if the goal is to work between KM brands, keeping the separations more compact is practical, particularly if one plans to use the end chart with a punchcard or a mylar sheet for programming.

I had tried some pile fabrics on the E 6000 in the past, found the knitting too loose for my liking, but by light felting (wool yarn) result, I had a stable, attractive fabric that could easily be cut and sewn in combination with other knit companion DBJ fabrics. Another option in wearables to add stability may be an iron-on knit interfacing used on areas of pile knit. When I pushed the back bed tension as much as physically possible with the yarn used and was happier with the result. The only problem I encountered was in thinking I could knit a few extra rows on the back bed only before dropping the knit off the machine for inspection. The old adage still applies: if more than a row or 2 are to be knit across all stitches on any single machine bed, each yarn has an optimum tension required for stitches to form properly. Pushing limits will lead to problems. I had a lovely lock jam. For wide ribs, the same principle applies the more stitches on either bed, the closer tension on that bed to what number would apply to stocking stitch on that bed.

CARPET STITCH KNITTING ON PASSAP E-6000 with release stitch tool. Use any 2 color Fairisle pattern from the pattern book that accompanies the machine. Both Passap manuals are now available for free download online. I randomly chose # 1407 for my test.
Start with all stitches on the back bed. If the piece is started with ribbing, transfer all the front bed stitches to the back bed. For test swatches, if open stitches do not matter, it is possible to do a quick single bed cast on the Passap in a couple of ways, the “broken toe” cast on will work across brands. Have an extra needle and pusher on each side of the back bed when setting up work for patterning. Set the back bed tension as tight as possible, with the front bed 1 – 1.5 tension numbers looser than the back bed. As always test a small swatch before committing to a larger one.
Start with all stitches on the back bed, with an extra pusher on each side on the back bed when setting up for patterning

One-color carpet stitch in design:  Technique 256,  handle down, black strippers are recommended. I rarely if ever use black, go for orange first, sometimes combining with one blue or switching to 2 blues if the fabric calls for it. Ignore console instructions. The back bed is set to FX  left arrow key <–, not BX as instructed. Do not use the AX setting by mistake. FX will tuck right to left, knit left to right (toward the color changer, which in Passap sits on the right side rather than on the left as in Brother machines). Knit rows help anchor loops. Back bed pushers are in 1 up, 1 down set up.
Using one arrow key means the same selection is repeated for 2 rows before the switch is made to the adjacent pusher and the corresponding needle.  The front bed is set to LX (slip) throughout. The racking handle is down (setting for every needle rib).  Two rows are knit, then the front bed stitches are dropped (Passap knitting beds are in reverse position to Japanese machines set up with their ribbers). If loops are long they may need to be pushed between the beds before knitting the next row. Passap machines have pushers for this purpose, in Brother rulers or any number of tools may be used for the same purpose.

Two-color carpet stitch:  Technique 185, black (or other) strippers, 184 may also be used, its graphic gives the added reminder for 1X1 pusher set up on the back bed. The back bed tension setting is the same as for the one color pattern, the front bed knits in LX throughout. In theory, stitches may be dropped every 4 rows. Some yarns may split and catch the alternate color requiring dropping after each color is used, others will tolerate much less frequent dropping. It is all an experiment to start with.

Again: the back bed tension must be as tight as possible, the front bed at least 1.5 tension numbers higher until tests determine what is best for the yarn being used. Multiple strands of some thinner yarn may also be worth a shot. Weights are needed on the knitting, no matter what brand machine is in use.

One-color trial: back tension too loose, note change in texture after tightening back lock tension; the loops are formed on the purl side

passap front 1col

passap back 1col

the 2 color version, with adjusted tension on the back bed

Passap front2col

note vertical stripes in backing
passap back 2col

At the end of knitting the pile, add anchoring rows of knitting on the back bed only (tension may need to be changed after a couple of rows), proceed as preferred.

embossed one color pile (black 2/8 wool)Passap black pile

One-color pile, striped background:
Technique 185, black strippers, handle down. Locks set as for above.
Knit two rows with the pile color
Set all front bed pushers down to rest position, change to the second color
Knit 2 rows, the back bed only will knit
Drop the front bed stitches, set all front bed pushers to work position-

Previous posts with info on accessories useful for dropping stitches and loops 1, 2, 3.

This method is a hack intended to emulate pile knitting created on the Studio machine. The ribber features had specific options for such fabrics. These pages are from the Singer SRP-50 ribber manual and one of their punchcard books and share some principles while illustrating setting and card design. Food for thought on any adaptation for use on other brands. Studio settings were reviewed in post-2015/02/20/pile-knitting/.

The comment on this post, clarified in an email, was actually in reference to knitting a solid singlecolor pile on the Passap. Tech 256 is intended to be used with a stitch pattern. This is a fabric that is slow to knit. My Passap had long been unused, and I had issues with yarn splitting and the yarn mast not maintaining even tension, which accounts for the occasionally pulled loops where they did not drop off properly, and the changes in some of the stitch sizes in a few rows on the reverse side. Looking at the Studio information again, I went back to the drawing board for a solution and a proof of concept swatch
1. cast on so that all stitches are on the back bed
2. knit a few rows in stocking stitch sorting the tightest tension at which your yarn will knit, also experiment with the front lock tension in order to produce as large a loop as possible that will also drop off properly, end to  begin your test with locks on the right side: 
3. bring back bed pushers to the up position, set the back lock to EX with the left arrow key. All needles will tuck moving to the left, and knit on their return to the right
3. the front lock is set to CX, it will knit on all needles to the left creating loops on the front bed, while the back lock does the same, slips all needles moving to the right.
When the locks reach the left side there will be loops on every needle on both beds. As they move from left to right, the needles on the back bed will knit, securing the loops there and anchoring the ones on the front bed while the front bed is slipped
4. with locks again on the right side, use stitch ditcher or another tool to drop off loops on the front bed, returning needles to proper work position, follow with a pass using a single eye tool to push loops between the beds, checking that none are left in the needle hooks
*make 2 more passes with locks from and returning to the right, drop off loops**, and continue from * to **
The difference in the size of the long stitches between loop rows in the photo was eliminated by tightening the tension on the back lock,  it is evident that even are anchored even in those segments. As with any fabric, the larger the intended piece, the more likely some further adjustments may have to be made.

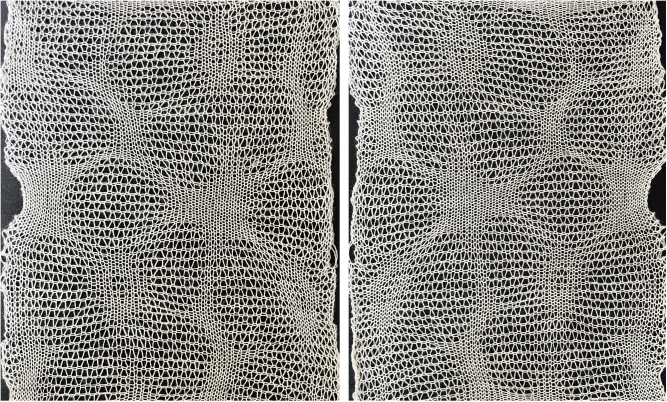
Geometric shapes in drop stitch lace 3, end release

I began to think about color separations again, in reference to pile knitting and returned to the chart used in the circular shape in the #1 blog post in this thread. While studying it, it occurred to me that the fabric might be created by releasing the stitches at the end of the knitting. Brother punchcard books (now downloadable for free online), at the back, usually had a page with “lace-like patterns by KR” illustrating some of the possibilities in what I have been referring to as drop stitch lace. Once again, all stitches are transferred to the non-patterning bed. Selected needles whether by hand or by the machine, are in this instance, not released until the very top of the piece is reached. In long pieces of this type of lace, I find dropping stitches at regular intervals rather than waiting until the end helps things run smoothly, and gives one the episodic opportunity to evaluate proper stitch formation, to move up weights, etc. I found in my first swatch my inexpensive grey wool was really sticky and kept trying to knit with the white after the color was changed, explaining the mess on the left of the purl side image. Also, it pays to have some weight on, or at least to keep an eye on, the color changer side. As yarn colors are carried up (every 2 rows) between color changes if they are not long enough they will pull in the fabric on that side. If the end product is to be gathered at one end i.e. in a skirt, that could be an asset, but not so if the intent is to have it lie flat.

The pattern is programmed beginning on a row with black squares in it, ends on a blank row. The selection row in this instance is done from right to left (toward the color changer), the next color is picked up, and the process repeats every 2 rows. At the desired height I like to have the ribber knit the last row on only its needles before the stitches on the main bed are dropped across the width of the knit. Tugging on the comb and weights will speed things up. The fabric grows significantly in length, so watch where those weights are headed.

my first try, purl side500_991

knit side500_994

Along with changing the “nasty” grey yarn in the next swatch, I moved the knit further away from the color changer, and things went very smoothly. If where the repeat is placed in the knit matters, however, then the needle bed would need to be programmable as well to change the center needle position
500_992

500_993

the illusion knit inspired method of charting and working the released stitches does not work for this technique, the result is simply very large, striped, single color per 2 rows, loose stitches500_995End release does not work in every design. Sometimes in long pieces, portions of some rows will simply not release,  fuzzy yarns may result in the same. In addition, if long stitch shapes are distributed on knit striped grounds, the release needs to happen at a minimum when the top of each shape is reached. A sample with drop-stitch interrupted by all knit rows and with only one color released500_986

Geometric shapes in drop stitch lace 2, Brother KM

Occasionally I do play with hand knitting and charting for it. A couple of years ago I wrote on the topic of  illusion / shadow knitting. The repeat is 24 stitches wide, so it is suitable for use on punchcard machines as well.

a chart from that blog posttry_drop_stitch

the resulting hand knit, on the purl side
IMG_0823

While working out the circle in the previous post it occurred to me that the results were quite similar to shadow knits, where depending on the angle from which the fabric is viewed, images begin to appear in the striped fabric. The above chart is missing those all blank rows that result in no needle selection. The solution for using this type of color separation for drop stitch on the machine is to use double length. Other KM settings remain the same as in the previous post. The first selection row is from left to right. The big difference is that once again, there will be the same needle selection on the next row. With some needles in B and some in D, a slider or pusher will not move across the needle bed. In the past, I tried to drop stitches selectively on the main bed with rulers or whatever was handy. Now, instead, I found pushing the whole row back to B, allowed me to use my new tool to move back and forth across the needle bed, making faster work of the process, and returning needles in position for the next main bed row to be selected on the first pass, knit on the second. The swatch was casually steamed

knit side 500_987

purl side, viewed as it would appear in a sideways knit 500_988

Without the “tool”, all stitches can be brought to E and back to B with a ruler, piece of garter bar, ribber cast on comb, or another handy toy. Dropping stitches is done while carriages are on the right, they return to the left knitting only on the ribber. In the previous post, the ribber only knit first, both beds knit on the second row, and stitches were, in turn, dropped with carriages and yarn on the color changer side (L), after no needle pre-selection across the main bed.

Geometric shapes in drop stitch lace 1, Brother KM

These pattern repeats may become quite large, and are suitable for designing and downloading with software. Testing repeats in a small section to start with insures methods and accuracy when planning the larger ones. Here I would prefer a wider, brick repeat, however, I am working with mylar on a 910 so in this test, settled for a vertical repeat, the result is shown below. The pattern reminds me of shadow knits.

knit side 500_986purl side 500flippedpurl side, as it would appear in a sideways knit 500charting things outcircle drop stitch

As it stands, the repeat is 32 stitches wide, 32 rows high. The colored 3-row segments on right, if collapsed would result in an all-black row, with no overlap. Colors are changed every 2 rows unless the repeat is designed differently. Care is needed on the color changer side, making certain both colors are not picked up together as the color is changed, resulting in the ribber knitting both yarns together. KCII is used, canceling needle selection. An extra needle is put into work at each end on the main bed. This fabric widens considerably, so casting on and binding off need special consideration. Before pattern knitting starts, all stitches must be on the ribber bed alone, with needles in work, but empty, on the main bed.

I chose to knit my swatch with a first-row selection from left to right. The KC is set to slip in both directions, the ribber N/N throughout. This knits all stitches on the ribber, selects needles for main bed stitches to be knit on the next row. On RC 2, selected stitches will knit, while preselection for the next row will place all main bed needles in B position as the carriage moves to the left, leaving them ready to get “dropped”. Use your tool of choice to drop stitches and return them to the B position once again.  Color is changed, and the sequence repeats.

Previous blog posts on the topic: 2 colors per row, Japanese machines, on the Passap, an edging, stitch dropping tools, and occasional bits of info in other threads, ie. on drop stitch “bubbles”.

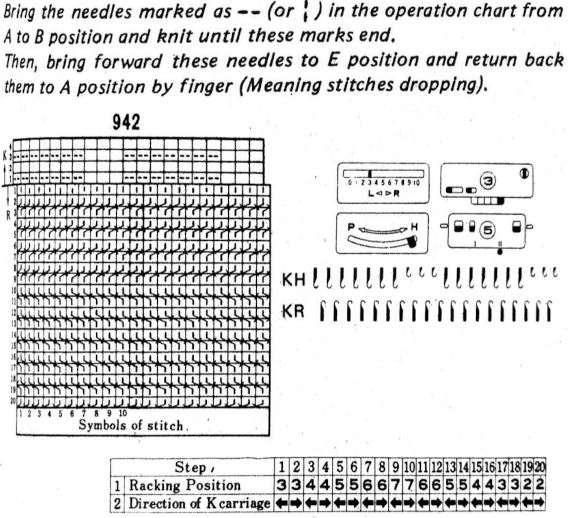
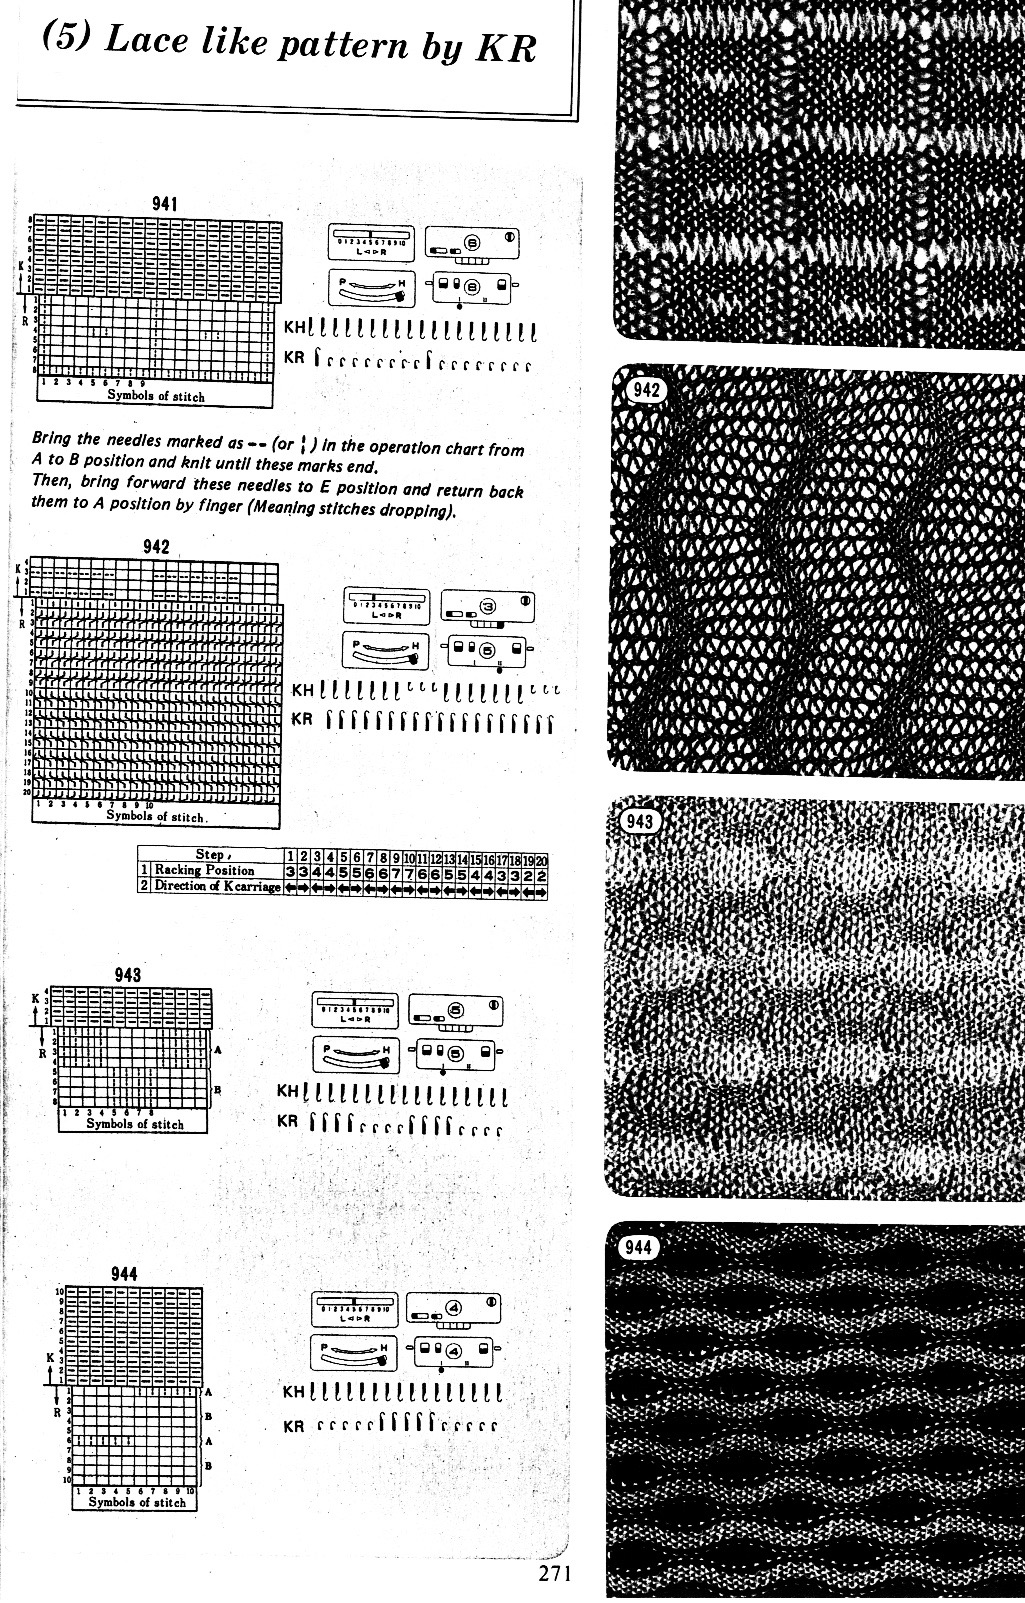
I prefer to automate needle selection whenever possible. Published material often requires hand techniques. Some samples are readily available for inspiration: the first image shows basic settings and some variations from the Brother pattern books. Stitches to be dropped are created on the ribber. Pattern 942 may be released at end of knitting. Cards (or mylars) may be marked to track racking handle positions, addressed in my previous post:  2015/11/07/unconventional-uses-for-punchcards-1/, or rows marked in color for other repetitive functions

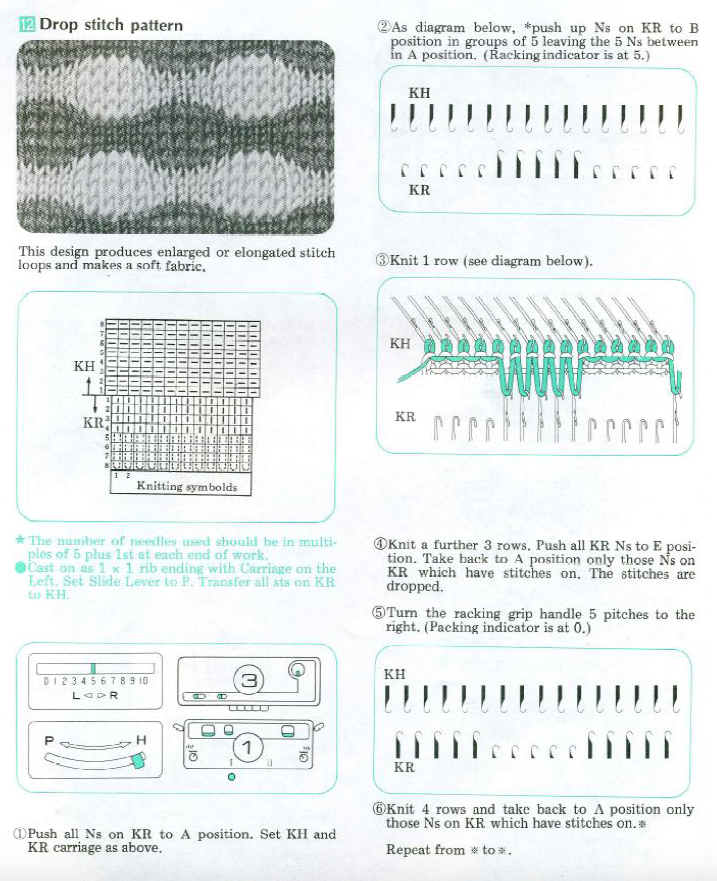
from the ribber techniques book page 23:For a cumulative list of related posts please see: 2017/11/04/revisiting-drop-release-stitch-lace/