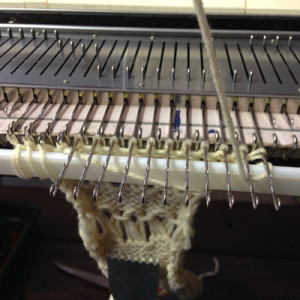
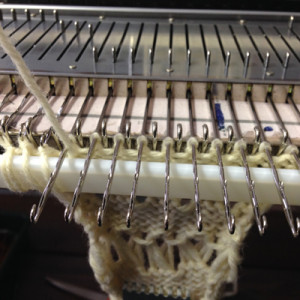
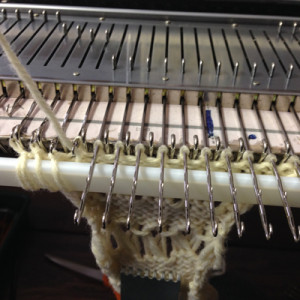
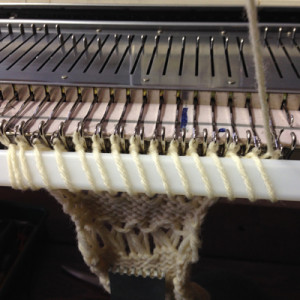
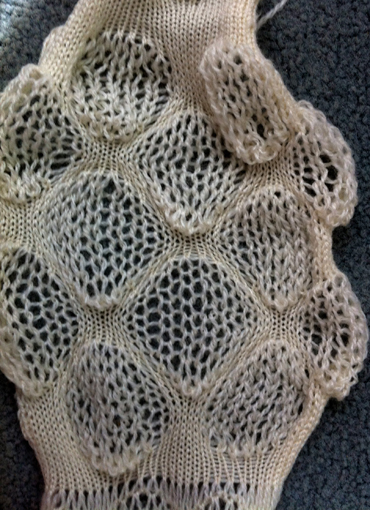
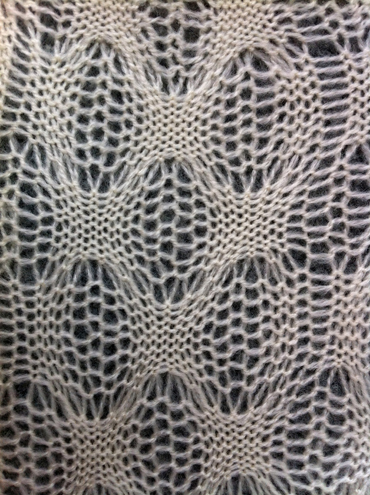
Brother KMs “pile knitting”/ ribber stitch dropping tools

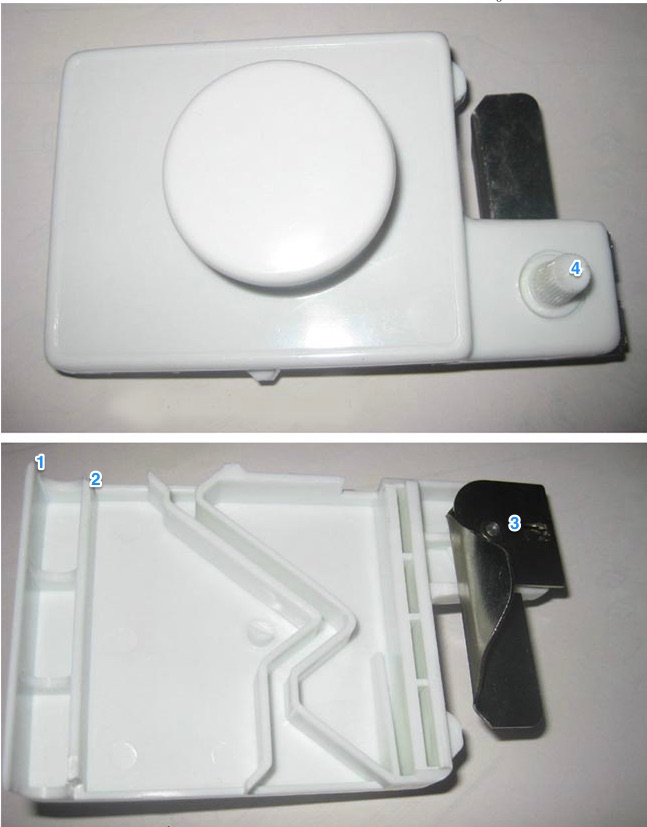
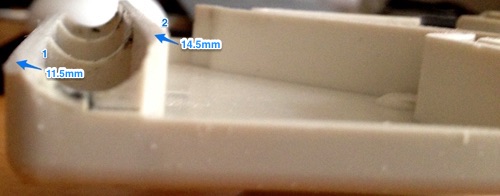
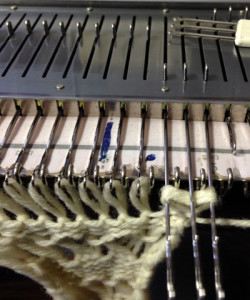
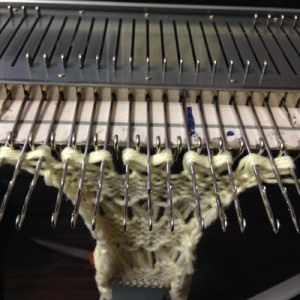
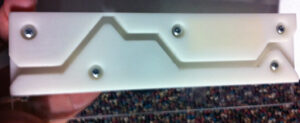
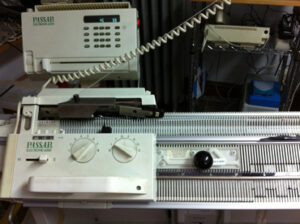
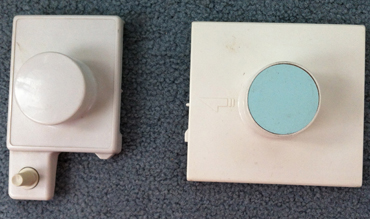
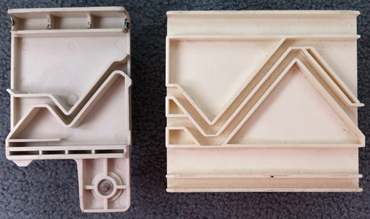
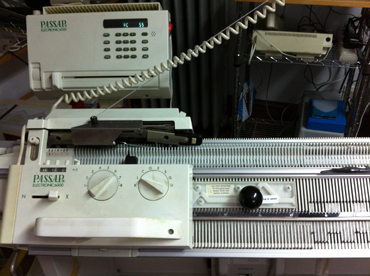
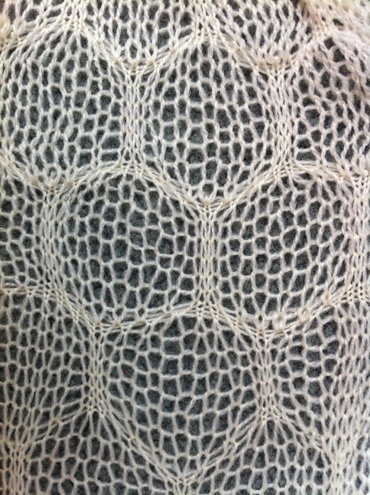
I am pondering returning to some drop stitch lace experiments on my Brother KM, have blogged previously on drop stitch lace, and some of the tools that can help speed up the technique. Studio has marketed a “pile knitting” accessory usable for this purpose, still being manufactured. A recent web search revealed its cost is presently in the range of approximately 13 to 20 dollars per unit. As is, the tool does not work on the brother machine. One of the critical differences between brands is in the shape of the rear rail. Brother kms in addition have an elevated metal piece at the center of km, behind the rear rail and in front of the belt, as seen below in 2 of their different models, that hinders smooth movement by a tool across the length of the space it rests on. extra metalIssues with using the tool as manufactured: its back “rail” (1) is taller than the front (2), keeping the unit from sitting flat on the Brother bed, and also striking the metal rectangle pictured above. The front parts (3) and (4) do not align properly with the metal bed and further, interfere with use. studio p carriage:presser

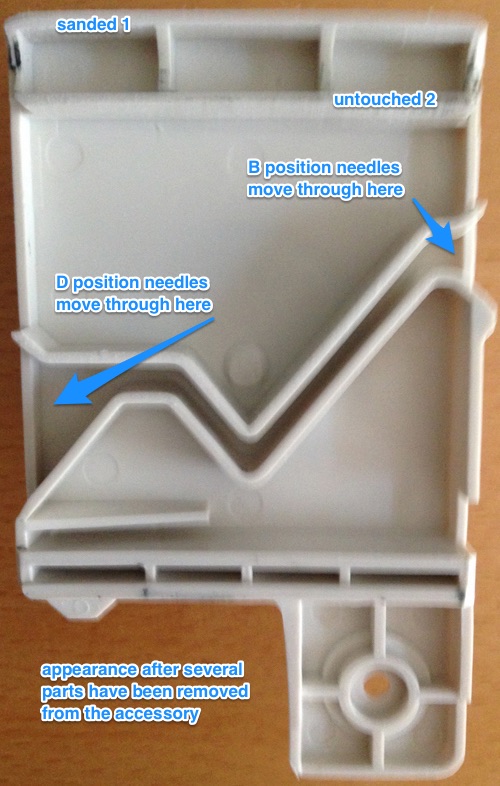
Some sliding of the tool along the Brother metal bed, comparing the placement for areas within which the needles need to move, led to my altering the carriage by trimming the rear rail (1). Initially, I used a handheld electric sander, followed by a nail file to “even” things out rather than making any effort to cut the plastic.

In my revision (1) is now shorter than (2), rather than taller, and flush with the top of the curved ridges between both.

cut_offmm

full altered_500

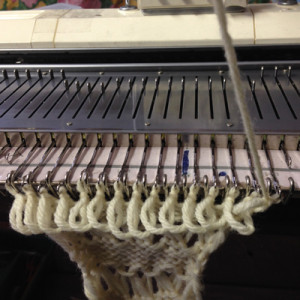
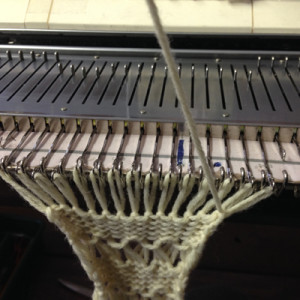
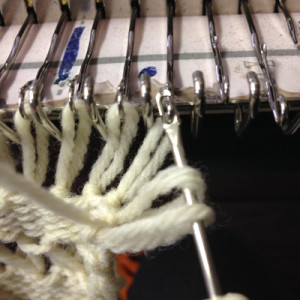
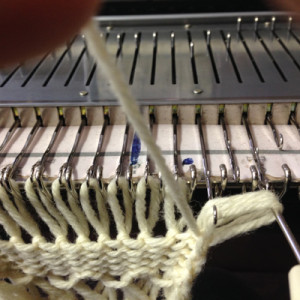
the Brother Bulky 260 “D slider” was supplied with bulky kms1So far I have tried the altered Studio tool out on solid color knitting with hand needle selection. All knitting needs to be on ribber if the main bed is going to make stitches for pile, drop/ long stitch (aka mesh in some references) lace. For a test: with both KC buttons selected to slip, hand select needles for long stitches, put out to holding and knit across all needles. Selected stitches only will have caught loops on the main bed, all stitches knit on the ribber. Using the tool now that needles are back in B on the main bed, passing it from Right to Left brings all needles out to D, traveling back from Left to Right with it realigns them in B, dropping them. B is the needle position for needle selection on rows with no punched holes, black squares, or pixels when programmed patterning is used on the machine.

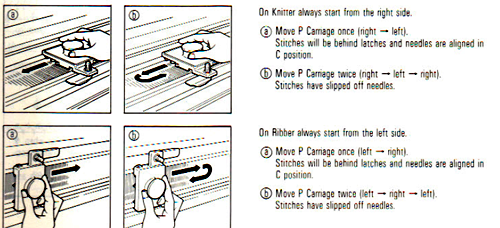
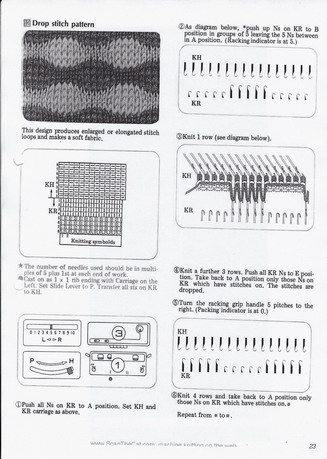
Instructions in the studio manual showing it in use, with all parts in place. A reminder: Studio needle positions are A, B, C, D, while Brother skipped the third letter of the alphabet, using A, B, D, E on its beds.studio directions

Broomstick lace on the knitting machine

Some illustrations of this fabric may be found in my previous posts: forming long loops and stitches using cast on comb and weights or ruler, some long stitch swatches, a few more tips and ideas from the earliest post on the topic.

Here are some ideas on creating a basic 3 loops “broomstick” cross. Most of my teaching has been on 4.5 mm machines, so the above swatches were executed in thinner yarns. For this post, my swatch is knit in a random scrap yarn from my studio, on the 260 Brother Bulky machine.

The basis of this type of stitch is to create long loop stitches, and in turn, to re-hang them in various configurations. The look I prefer among others I have tested, results when loops are hung in on every other needle, whether singly or in groups, and the next row is simply knit. Here, as in any machine-knit fabric, if there are 2 or more empty needles side by side, any other than a single needle must be e wrapped, cast on, or have a loop lifted up from the row below (used in increases), or the result will be a ladder vs. knit stitch formation on that needle.

Begin with waste yarn and some rows of knitting. As long stitches are formed, some weight will be required to keep loops from jumping up, forward, and off the KM. Since you are asking the loops to stretch quite a bit on a fixed-width metal base, some testing is required to determine the best tool for forming the optimum loop length. Yarn thickness factors into this as well. I found knitting stitches back to A loops too short and using a cast on combs and paper clips or any of my rulers made them too long, so I opted for the plastic rod insert from one of my window shades.

I like to work my loops from left to right, so the last row is knit from right to left. They may certainly be formed in either direction. In this instance, COL needs to be returned to the right before resuming knitting. This can happen before or after forming long stitches, by any method you like. Consistency helps eliminate errors.

I bring needles out to hold/ E position, lining them up to form new stitches one at a time, the yarn is brought around to the end of the “ruler”

61guided under the needles yet to be wrapped, resting to the right of the next needle out to E on the left side

59

placed in the needle hook

60

and knit through, repeating the process across the row: the number of loops should match the original number of stitches

63the spacing tool is removed; the next 2 steps  may be easier to perform if the needles are once again brought out to holding / E first

64pulling down on your knit will create the long stitches

65working in groups of 3: remove first 2 loops on right, transfer to needle 3 on left

66

insert tool in the center of the group of 3, lift strands onto needle 1 on right

67

bring center needle (2 of 3) out and over multiple loops, all 3 to E position68

repeat across row 69COR: knit 3 rows (or more, odd #),  ending with COL, so the yarn tail will once again be on the left to begin the process of wrapping.

knit next row carefully, adjust stitch size and loop length if needed

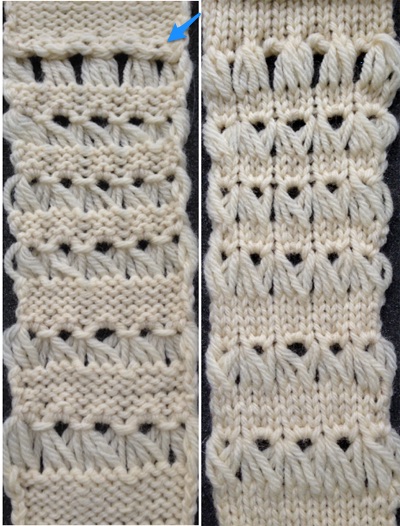
the top row in the photo shows all 3 loops transferred onto the center needle, with crochet cast on  (indicated on purl side by the blue arrow) on all needles involved in the plain knit areas before the next row of knitting

broomstick_23

Hairpin lace diagrams can be a source of design inspiration for designing loop configurations. The crochet cast on any empty needles could be used where chains occur in crochet diagrams, and it needs to be loose enough for the next knit row to be formed easily. In my swatch, I actually had to hand-knit the first/ next row, my carriage jammed in the areas where the triple loops were in needle hooks as well as my cast-on chain.

The number of knit rows between forming the long stitches may be odd or even, providing one gets comfortable with working in both directions. The carriage gets switched frequently from side to side. Sometimes the least likely to drop your work carriage “free pass” is simply to take it off the machine on one side,  bring it to the opposite side, and engage it on the machine once again, with no need to change cam settings or worry about traveling with it across your knit piece.

October 24, 2019: for folks who prefer videos, I recently found a very good youtube series on the technique by Elena Luneva. Knitting takes place on a Studio Machine. The ribber cast-on comb is used to create the loops/ stitches (Studio did not have a single bed accessory for that supposed purpose), the videos add another interesting accessory to use for this purpose on any machine. It is also always fun to watch the way experienced knitters handle everyday tools.

Pile knitting using Studio machines

I live in the northeast US, and the past few weeks have been taken up by a whole lot of time moving snow and not knitting or even thinking about knitting. A Raveler, however, recently asked about pile knitting which got me contemplating knit fabrics again. I thought I would start a thread here on some of the techniques and possibilities involved, editing, and adding further information as I can.

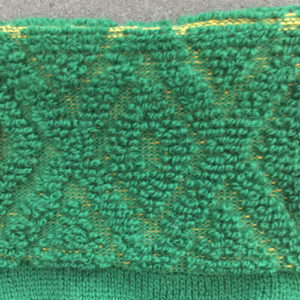
Pile knitting may be done on any machine. The quality of the fabric varies, depending on the method and yarns used. Loops are often created every other row, and “normally do not pull out”. They may be made either on the main bed or on the ribber. Some of the techniques result in a much looser fabric than others. In those instances, using a ground yarn that will felt, and slightly felting the finished knit will make the fabric much more stable. If it is to be used in garments, by default, it is best to make those pieces larger than required, and to plan to use them in cut and sew projects.

Beginning with the machine manuals and suggestions: in Studio/Singer knitting machines the ribber features specific options for such fabrics. These pages are from the Singer SRP-50 ribber manual and one of their punchcard books and share some principles while illustrating setting and card design. Food for thought on any adaptation for use on other brands

Two weights of yarn are used: a lightweight yarn for the pile, and a fine yarn for the background. The usual set up is for every needle rib, half-pitch. The finer yarn is threaded into the auxiliary feeder.

Studio machines use the P Carriage with the P pressor attached to drop the loops. If using a punchcard or mylar, the punched holes create the design, the unpunched holed knit the ground. The Singer P carriage information (from SRP60N ribber manual) singer_PCarriage

knit sample

500_481

500_482

Studio punchcard sets and Volume collections offer many designs and inspiration for DIY. A page from one of their collections

Toyota had a small accessory offered for knitting pile using the ribber and the simulknit setting. Both yarns knit on the main bed, the ribber only catches loops in the “S” yarn. Manual available for Toyota pile knitter 

Kathleen Kinder was credited with first using FI designs for pile knitting, resulting in loops being created in every row rather than every other. In the method, loops are still required to be dropped after every row. Cards with bold areas of each color are most suitable. Since the fabric has a tendency to spread horizontally, doubling the length may become necessary if the goal is to retain more of the motif shape.

A natural follow up is to use double jacquard cards and color separations to achieve multiple color pile. A color changer is a must when using multiple colors. Loops will be formed every row here as well, may be dropped every row, or just before each time the color is changed.

Pre-selection of needles in Brother poses an interesting problem: patterning needs to be retained, dropping stitches disrupts it, and there is no accessory such as the P Carriage to make the process quicker.

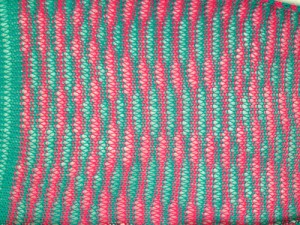
Drop stitch lace, 2 colors per row, japanese machines

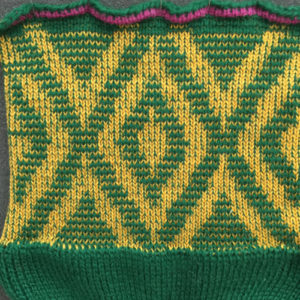
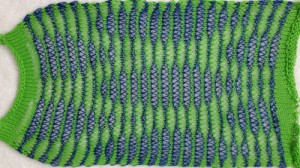
This is an attempt to duplicate the results of Passap tech 185 used in knitting multiple colors per row drop stitch “lace” fabrics.
The method may also be used for more colors per row, expanding the repeats accordingly to the number of colors per row X 2 for each motif row. For example, here 2 colors per row are expanded to 4 rows for each color in length, 3 cols per row would need to be expanded to 6 for each design row.
This fabric widens considerably when completed, so at the top and bottom edges, cast ons and bind offs, need special consideration and planning.

In this instance, the design has been separated for the dbj method wherein each color in each design row knits twice. The second row in each pair of rows is then cleared of any pixels which results in no needle selection, providing an opportunity for the loops formed on the main bed to be dropped with the assistance of a stitch ditcher.
The fabric may also be executed using the original separation, but the opportunity to use an accessory to facilitate stitch dropping is lost’
The method for swatching: cast on for every other needle rib, knit 2 circular rows followed by one row of all knit rib, and transfer all main bed stitches to the ribber. For an open stitch cast on directions and photos see later post.
COR Set up needles on both beds for every needle rib with an extra needle in work at each end on the main bed, cancel end needle selection (KC II). With the main bed needles in the B position, set the knit carriage to slip in both directions so as not to pick up loops across the whole row as the first pass toward the color changer is made, needles will be preselected for the first pattern row
COL: the ribber remains set to knit every needle, the main bed to slip in both directions. A piece of tape in front of needle butts of needles in A position aside from the edge needles in work helps keep from accidentally moving extra needles into work when dropping whole rows of stitches
change color, as the carriage moves to the right, selected needles will pick up loops on the main bed that will form the long stitches when dropped, while the next row of pattern is selected, so by the time the carriage has reached the right side of the machine, needles will have flatlined due to the all blank rows in this type of color separation
COR: use any convenient tool to bring all needles involved out to E, and use the same tool to return all stitches back to the B position, dropping the loops on the main bed which will form the long stitches. With this type of color separation, it is also possible to use a modified Studio P slider Directions on altering the studio tool for use on Brother machines to drop stitches from right to left before continuing to knit.
Check that all needles are empty and that loops free and between the beds.
As the carriage moves to the left again toward the color changer, the ribber only will knit all stitches (does so every row), needles will be preselected for the next row of long stitches, selected needles are not knitting.
Colors are changed every 2 rows
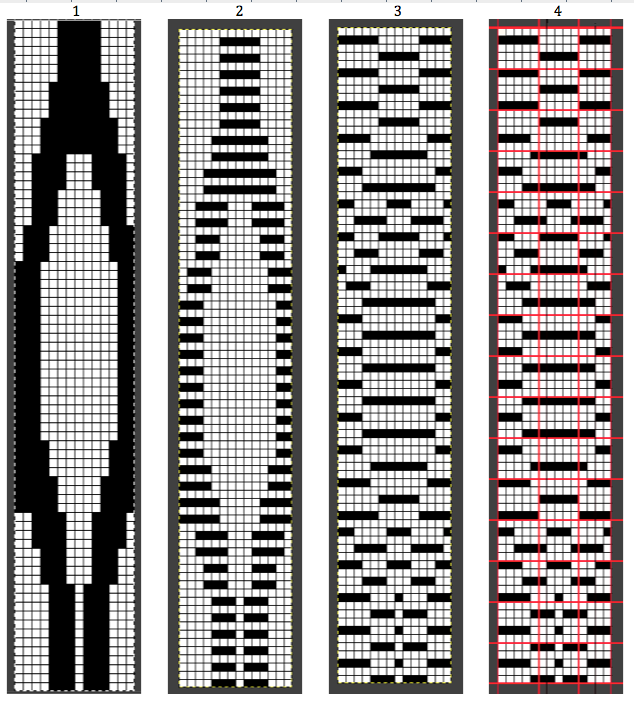
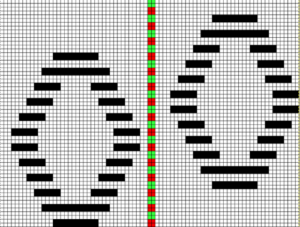
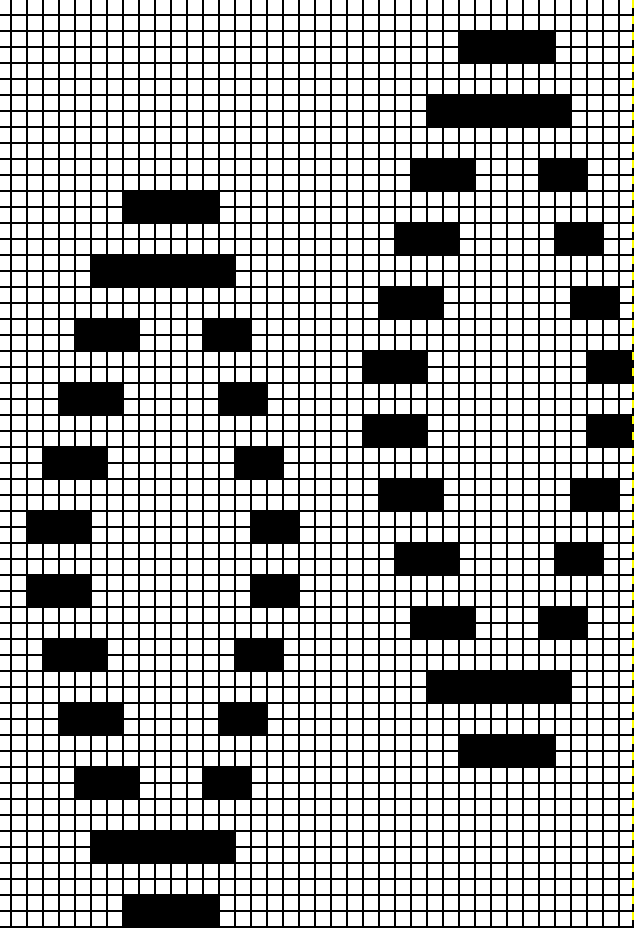
The pattern and the “color separations”, were achieved using GimpImages from left to right
1. motif  lengthened X 4
2. every other row erased (non-selection rows)
3. 2nd pattern row (every other row of design now left) color inverted
4. pattern marked in 5X5 blocks for easier tracking when drawing on the 910 mylar sheet
A downloadable PDF of basic info 185_brother
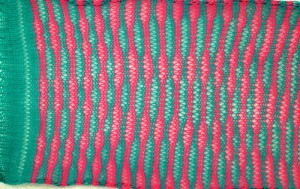
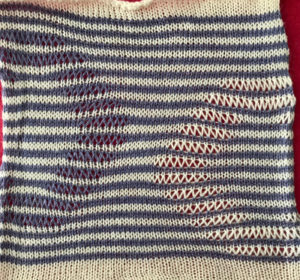
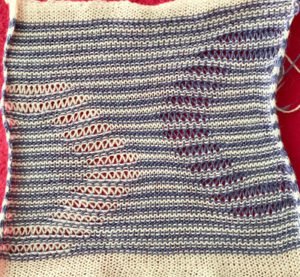
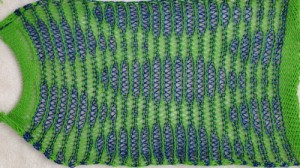
sideway views: knit side purl side The emerging pattern can be seen, and to be noted is the elongation factor involved as in many color separation DBJ fabrics
For a later review of cumulative posts on the topic see: revisiting drop stitch lace 
For the design method for staggered shapes in drop stitch see Ayab software-related post.
In other electronics, a single repeat in both height and width is adequate and machine selections will determine whether the design is knit as a single motif or as all-over patterns.
Ayab’s preselection is always from left to right. In unhacked 910s, the first preselection row can be from right to left, so no accommodations need to be made for shifting the last row to the first of the design repeat.
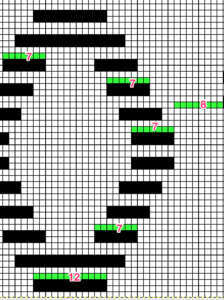
For machines accepting electronic downloads, program the repeat with the first design row containing black squares in it, and adjust the spacing between repeats as preferred. This particular version is 80 stitches wide In an unaltered 910 with the ability to double the width of the programmed repeat, mylar users are not excluded from exploring a similar fabric. The repeat above may be rescaled to half the width,  drawn that way, and then use the twice as wide built-in feature. In Gimp scaling this design to half-width, note the right side of each repeat contains an odd number of squares, the left side an even one. The repeat may be used as-is or redrawn, adding or eliminating black squares if symmetry in each shape matters. The free program Paintbrush produces the same image, mirrored.
The explanation: further analysis of the original design reveals the fact that some of the pixel numbers in the design black square blocks are uneven in width. In this instance, 3.5 is half of 7, and half pixels cannot be rendered, so the software assigns the split to 4 and 3.
A Passap sample

Drop stitch lace, 2 colors per row, Passap KM

A recent Ravelry forum thread resulted in this response from me re drop stitch patterns with multiple colors per row: “some random thoughts on these techniques: they are often much easier on the Passap, particularly the E 6000 because the machine is capable of separating colors for techniques that would require software or lots of hand/brain work to be done manually and entered. The drawback is that the pattern books offer no explanations of the programmable techniques, simply offer a number to the program to reproduce a specific illustration in their publication, and need to be analyzed by DIYers if one chooses to apply them to their own patterns.
Sorting it all out can help reproduce the fabrics when using other KM brands.
In the case of multiple color patterns: to retain some of the knit structure for each color accompanied by long stitches in the same color on any single row, some of the stitches need to be knit only on the ribber or Passap back bed, with the alternating stitches in the same color dropping after they are knit on the patterning bed.
Distinctions are sometimes made in Passap knitting between release stitches and summer fair isle. For these techniques, weights are recommended. All stitches are transferred to the back bed after cast on and before beginning a release pattern.
The racking handle is down, black strippers are recommended.
The back bed pushers must be in the rest position after the pattern is set up.
All stitches are released from the front bed before binding off on the back one.
E6000 Tech 256: knit 2 rows with yarn, 2 without yarn, dropping stitches
Tech 129: N/LX end release, single color
Tech 185: N/LX 2 rows color 1, 2 rows color 2, end release
Self-drawn reader technique for 3 colors  Self-drawn reader technique for 4 colors Tech 117 for color separated designs and entered for 3+4 colorwork. From my E6 manual with my scribbled notes In tech 185 when combining the technique with a stitch pattern, the white squares for each design row K1R, skip 3, the black squares slip for 2R, K1R, skip one, with each 2 col row expanding into 4. Stitches are picked up on patterning bed EOR (odd #), not on even, resulting in both knit and dropped stitches in each color, in the pattern. BX with left arrow key/LX, 2 rows with yarn, 2 with no yarn to drop loops on the front bed. The “long stitch” Tech 184 or “pintuck” Tech 250 may also be used for release stitch.
The front bed stitches must be released before any shaping as well as prior to binding off. The edges of the resulting knits can be uneven. The side opposite that in which color changes are happening, right on Passap, left on Japanese machines, tends to be looser than the other. When color changes happen the floats on the edge between them can pull up the fabric on that side, so a small wight may have to be added and moved up every few rows on that side every few rows to keep that from happening.
Passap knitters: see summer fair isle pp 41-43 E6000 pattern book for illustrations of some 2 colors per design row stitch patterns…I am guessing also that separating colors for selective stitch dropping can help where one wants to retain some stitches while dropping others in that same row using pusher selection selectively (such as in the Superba-inspired bubble sample).
Below is a quick E6 sample: the fabric was pressed, had been much more textured prior to doing so, and is shown in sideways format; casting on and binding off would have to be considered in planning an actual fabric, as the patterned portion is a very different width than simple stocking stitch in the same yarn.
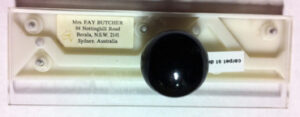
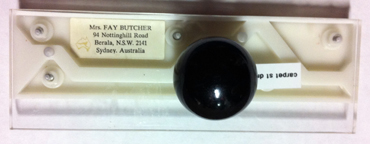
An Australian woman, Faye Butcher, developed a tool intended for dropping stitches without disrupting pusher selection on the front bed It may be used to drop any individual rows, but with some practice, it can be shifted from one side to the other, preceding the locks as they move to the opposite side, dropping loops formed on the previous row ahead of new ones being knit making the process very quick.
The Passap test swatch
purl side knit side Passap stitch formation is more predictable and even than in Brother knitting.  I prefer to drop at regular intervals, in my experience with longer pieces, not all stitches may ravel properly after doing so in a test swatch.
End release does not work in every design,  ie if long stitch shapes are distributed on knit striped grounds.
A Brother sample using the same design repeat as in the Passap swatch.

A bubbles cousin

This is a Superba drop stitch fabric, using the same principles as those in the last post, with a rib stitch outlining the alternating drop stitch shapes on the purl side

directions from the manual

In my knit sample the ribber does all the knitting every row and patterning is accomplished on the main bed, reversing the recommendation in the Superba manual

the new repeat

Set up is so that needle selection position once again begins with 5 stitches on the left, occurs in a multiple of 5, with extra needles in work on ribber on either side

Transfer all stitches to ribber, begin needle selection with first five stitches on left in work, 3 OOW, 5 in work, 3 OOW across the bed as seen in the illustration above, reversing the beds.

The first needle, then every 4th, and last on right on the main bed will never be dropped, are always in work.

When needle selection changes to block number 2 from left, the center 3 sts of every group of 5 every needle rib sections are dropped, the empty 3 needles beginning with the second group from left are brought into work, repeating the process across the bed.

Knitting continues until needle selection changes, *the middle 3 stitches of each 5 stitch EON rib group are dropped, the previously 3 empty needles in the opposing sets are returned to work. Knitting continues until the needle selection changes* and the * * process is repeated.

Cast on and bind off methods are determined by end-use and personal preference

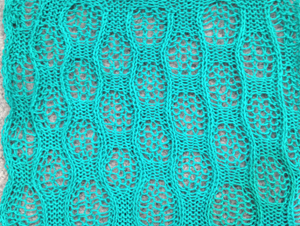
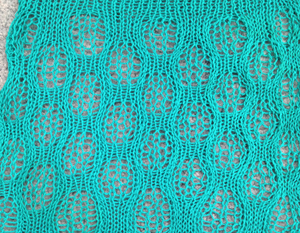
the resulting fabric, purl side

the knit side (not truly reversible as  the swatch in the last post)

a not so bubbly bubble end

More knit bubbles

The topic of “those bubbles” has recently turned up again on Ravelry, where another forum member (Tanya /It makesyousmile) had come across a Russian video by Anna Kovin, with results that closely resembled those in the blue sweater and blankets pictured in my previous post, and poses a great solution for knitting the alternating, the same side knit and purl variants of the stitch. I knit my samples on my Passap, simply because I tend not to keep my ribber on my Brother machine. My production is on a single bed for most pieces in that gauge, and I find it easier to both see and work without the ribber on. That said, the method can work on any machine.

Drop stitch makes for a very loose, wide fabric, so casting on and binding off needs to accommodate that. I often will start with waste yarn, a loose first row, end the piece with a loose row. My bind-off is often around 2 gate pegs or more if needed, and rehanging the bottom and binding off, in the same manner, has top and bottom match. I did not do this in my swatch, and it is easy to see where some of the problems may be.

For swatching I chose to hang the comb with the first knit pass (open cast on trick) on the back bed (would be the main bed on Brother), using a multiple of 5 stitches, knit several rows, and then transferred in a 5/5 rib configuration, sorting out the proper tension for my yarn. I began with 5 stitches on the back bed (main bed in Japanese KM), transferred the next 5 to ribber, and repeated the process across the width of my fabric. The front bed/ ribber was set at half pitch when the pattern was about to start, with an extra needle on left. The portions of the bed that create the long stitches will essentially be knitting an every needle rib, so if point to point is used to make transfers easier, it needs to be changed back to proper pitch for the remainder of the knitting. The swatch does not address the best beginning and end of the fabric for any possible end-use

1. set up 5X5 rib, begin by leaving the first five needles on the main bed (passap back bed)

2. bring all main bed needles into work (ribber needles at this point will be 5 out of work, 5 in across bed)

3. knit 8 rows

4. drop off groups of 5 stitches on the main bed, begin with the second group of 5 from the left, moving across the bed (every needle rib section), pushing groups of needles out of work as they are emptied

5. bring all the ribber needles into work (main bed needles at this point will be 5 out of work, 5 in across bed)

6. knit 8 rows

7. now drop ribber stitches, 5 at a time, begin with first 5 on the left, and continue across the bed, pushing all the needles out of work as they are emptied

repeat the process, beginning with step 2, through 7

the relaxed fabric, the knit blocks alternating knit and purl

the same swatch, illustrating what happens when you press acrylic, and some of the problems to be sorted out in terms of the start and end of any piece in this type of fabric

my previous post

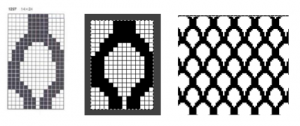
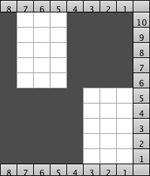
The Brother version, with aid of patterning for needle selection: this particular version of the fabric is actually created by rectangular blocks of every needle rib, with straight side edges. If one wanted recognizable shapes other than this circle illusion, then more hand manipulation would be needed. The chart below illustrates the repeats for my swatch (4 sts X 6 rs or 6 X 6 would be suitable for punchcard KMs). The solid squares represent every needle rib sections, where stitches will be dropped to create the larger ones.

With the machine set to KC and no cam buttons in work, needles are selected, but no patterning occurs. “Air knitting” can help establish where on the needle bed the pattern repeats, and how to set up the needles and stitches to be in sync with selection as the work progresses.

An alternative approach using this method begins with all needles on the main bed in use as opposed to ribber ones as in my Passap test. Once the sequence is understood starting points for creating full needle rib can be varied, as can selecting the first row from either side. For these swatches, I used a thinner yarn, in a bright color, which can help identify any issues in stitch formation, and I began the swatch in rib, to see the effect that might have as well.

my amended repeat
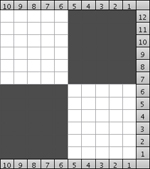
Begin by checking needle selection, set up rib as described at top of the post, beginning the first group of 5 stitches on left with selected needles, next group not selected, etc. If all the steps are repeated beginning on the same side of the KM it does not matter which block of needles are at the opposite end,  allowing for width/gauge adjustment. I like to mark my needle bed with a water-soluble pen so I will be certain to have proper needles in work, not relying on memory or my sometimes “creative note keeping”.

CO ENR (every needle rib) set up with first needle on left in work on ribber, last on right on the main bed, racking at half-pitch: knit 1-row N/N, hang comb and weights, 2 rows circular (using opposite part buttons), follow with one row N/N

rack slightly to the right to make needle transfer easier, set up a multiple of 5 X 5 rib; begin with transferring first 5 on left down to ribber, pushing any empty ribber needles OOW; after the transfer, rack back to the original position so first ribber needle in work will once again be on left

bring all main bed needles into work (ribber needles at this point will be 5 in work, 5 out of work across the bed)

select your first pattern row, KC II (no end needle selection), continue to knit until needle selection changes so the second block from the left on the main bed is selected; nonselected needles on the main bed will now be dropped off, and those same emptied needles will be pushed completely out of work (the first group from left is the starting point here as well)

bring all needles into work on the ribber, knit until needle selection changes with all in main bed needles in B position, at that point I brought all remaining main bed empty needles between them out to hold/ D position in order to drop stitches on ribber between them, using the main bed as a guide, pushing any newly emptied ribber needles completely out of work as stitches were dropped (beginning with the second group of “5” from left)

as one physically looks at the stitches, there will actually be a count of six between MB needles, in my first sample, I dropped in series of 5, always beginning on the same left side.

This swatch shows the resulting fabric. Of note is that one side (marked with red) is holding together along dropped stitches far better than on the right (marked in black), a desirable trait, and not as noticeable in the previous swatch knit on Passap, perhaps because of the difference in the weight of the yarn and stitch size

the result was much improved when only the center 4 of the 6 ribber stitches were dropped, producing a bit of a chain stitch on each side and with a better definition of dropped stitch areas; both sides of the fabric are shown below

at this point all main bed needles are in work, needle selection will once more begin on left; knit until needle selection changes, continue the sequence.

Cast on ENR rib edge has obvious width, bind off is around 2 gate pegs after transferring any remaining ribber stitches up to main bed.

The version of the stitch as worked out by Tanya Cunningham with her shared instructions for what she refers to as “bubble pops” may be found on Ravelry.
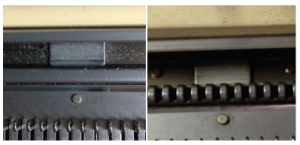
More play with dropped stitches

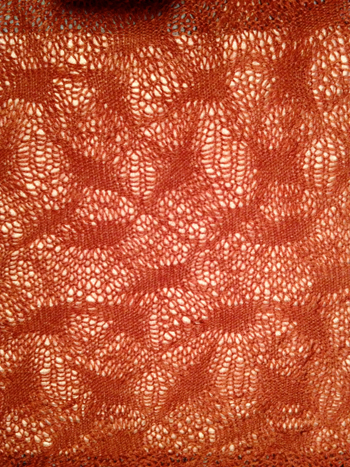
I am interested in trying to introduce designs into drop stitch grounds, and my leaf obsession is at least temporarily back. In working with a vine shape, I found having the vine create the dropped stitches created a too loosely knit, unrecognizable fabric, so on to color reverse. The resulting swatch is a bit of a brain teaser : “find the vine”

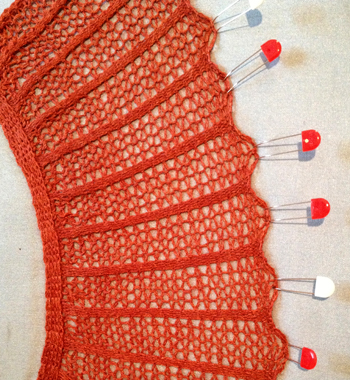
the companion ruffle: these blocking pins are great for blocking, may be pressed over

both were a lesson in gauge; using same tension etc. as in blue shawl this scarf is inches narrower, and the ruffles were not wide enough , will have to be re knit; only difference in fabrics was the change in yarn color, not its composition. “Back to the drawing board”

the finished piece measuring 14 X 74: 2 ways to wear it

Working out the kinks in my drop stitch lace saga

Still geared up for accessories, I felt compelled to come up with an edging: the following is an end stitch release knit. Prior to binding off the “tape” end stitches are transferred to the knitting bed, and then they and the remaining stitches are bound off. The transferred stitches do not drop and create a long stitch double knit segment. I am still working with the white acrylic
bound off and before release with the release starting after release
after pressing: flat, edge stitches too short attached to back bed before knitting pattern  (purl side)knit side alpaca and silk swatch, surprise: this baby knits up/steams fairly flat! The most regular dropped stitches happened when the stitch ditcher was used at least as frequently as every 4 rows, the lock was too hard to push with it resting on the knitting bed before each pass. I thought I might break down and use a built-in technique and my color changer to drop stitches: Technique 256 here I come, and figlet! this is a completely different fabric and there is one row of loops formed for every 4 passes of the lock I now get why some people call drop stitch with this technique mock garter stitch, but that is so not what I was going for, so back to the drawing board for me! I have an idea….
if the repeat is twice as long, and 2 of the 4 rows are knit without yarn, then loops created on the first 2 rows should in theory be dropped. Tech 130 in essence doubles repeat length. Using it and the same back bed pusher arrangement and settings as tech 256 the fabric is much more like the original, but tension now needs to be adjusted, denser knit stitches are now too loose… time for a very long break! you can’t always get what you want, do you sometimes get what you need? Curses! triple the number of stitches and tension problems occur, stitches don’t want to drop in specific areas of knit, now using a combination of empty lock and occasional hand ditching, different yarn, totally different look fabric than on the first sample: here it is on the machine
this shows why any lace needs blocking. Finishing on the Brother: bottom and top of ruffle rehung and cast off around 2 gate-pegs for length matching width of “pleats”; piece and “ruffles” also rehung for the same type of join after 1 row of knitting through both layers. The finished piece measuring 17X60 inches after partial blocking.  A different stitch pattern (E6000 1130) in the white acrylic color striping in the alpaca/silk blend, requiring dealing with yarn ends at color changer side. I had an interesting experience while knitting the one above of both locks jamming in the color changer. So many ways to have fun! and … I still want some bubbles!
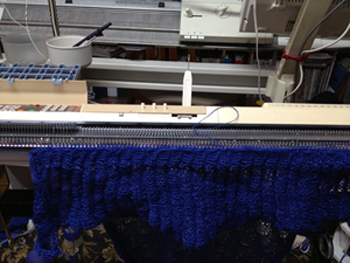
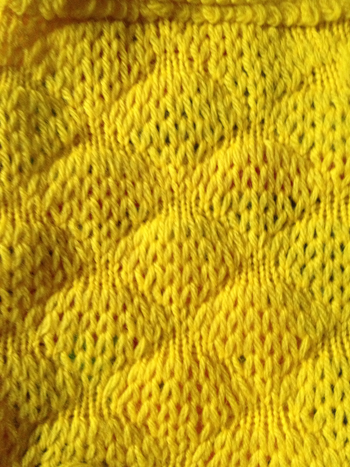
A thicker yarn, larger tension difference between the locks, a bit more bubble on the knit side, but  too  much effort to knit

Knit bubbles and “stitch ditchers/dumpers”

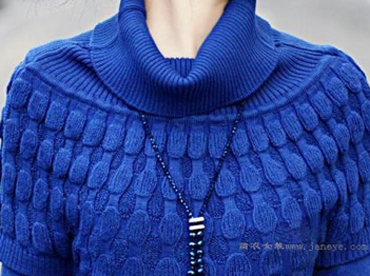
I encountered a photo of a commercial sweater not too long ago while knit surfing the web

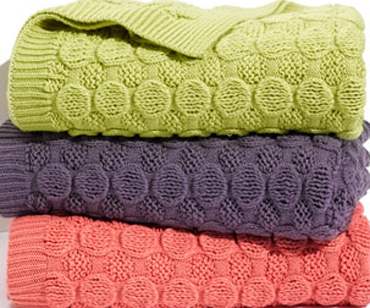
and a bubble blanket available at Nordstrom’s during 2012

I had already been considering laces other than transfer ones for yarns that have been too crotchety to knit in that particular technique, and my Passap has been knitting idol for far too long.  The fabric above seems to alter between purl and knit sequences that would require transferring all stitches to the opposite bed for every other pattern sequence: out of my range of patience and time. The number of fabrics involving “lace” produced using the ribber involves a series of names with sometimes variations simply being specific to the technique performed on a particular brand, though possible on all. On the list: drive lace, pick rib, summer fair isle, drop stitch lace, etc. The above commercially produced knits seemed to be good candidates for drop stitch lace.

Since I recently posted on knitting long loops/stitches single bed, it seems natural to follow up that post as well with creating long stitches using the ribber and using automatic patterning as well. The following photo is familiar to most Brother users:

In this instance the fabric is produced as a hand technique, requiring racking and row counting. The process is easier if all stitches are transferred to ribber in Japanese KMs or back bed on Passap, and long stitches are then created by selected stitches knitting on the opposing bed, and in turn, being dropped. Punching a card, drawing on mylar, or downloading to machines makes it possible to do so in a pattern much more easily.

Punchcard books have several useable examples for such patterns. Two methods of release are used. One is end release, where the pattern is knit until the piece is completed, and stitches are dropped then. This works in friendly yarns and continuous repeats uninterrupted by rows of stocking stitch. If the design is interrupted, then the regular dropping of stitches whether at the end of the repeat or intermittently throughout is either required or preferable, depending on the design.

As for dropping those loops that will form the long stitches, one can do so “manually” with improvised tools. For more “automatic” dropping of stitches using knit carriage in Brother patterning, one may punch a card or draw a mylar with a method akin to the color separation that will allow for a pass of the KH carriage across the knit with no yarn in the feeder, “color 2” is actually “no yarn/empty” while establishing the proper needle selection on its return. Studio selects and knits in the same row, so needle selection disruption is not an issue, and in Passap techniques are built into the console that allows for “free/no yarn” passes. Both instances involve extra “knit” rows per item. Other alternative tools may be used that help the stitch ditching process. Studio brand had their P carriage and Brother their own “D slider” for the bulky KM.

The Studio P carriage pulls needles on the main bed from B to C position going from right to left, then returning them back to B position going from left to right. On the ribber, it may be used to bring the needles up to C position for “safe knitting. (Studio needle positions are A, B, C, D, while Brother skipped the letter C, continuing with D and E). A video from Susan Guagliumi shows a later model than the one pictured below, used as well to bring needles out after hand techniques as opposed to pulling them out by hand or to insure thicker yarn knitting.

The Brother Bulky KR 260 D slider only moves in one direction, from left to right, completing the in and out needle position operation in one pass. End needle selection needs to be canceled. It is not usable on ribbers. After operating it from left to right, it is simply lifted off.  The knit carriage position while the transfers are occurring may vary depending on personal preference and whether the yarn changer is in use or not.

Studio 4.5 mm/ Bro 9 mm bulky viewed from the front

Studio 4.5mm/ Bro 9 mm bulky viewed from the back

Directions on altering the studio tool for use on Brother machines

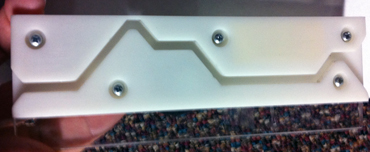
Passap’s need was answered by an Australian woman: Faye Butcher,  who developed the item shown below. Such tools were often discussed in seminars and publications of the time, in conjunction with pile or “carpet” knitting, so “P” for such knitting in Studio, and “carpet stitch tool” for Passap, seen below

front view

rear view

in use on the front rail

If patterning for long stitches occurs on the front bed, the Passap tool sits on the rail where you see it in the photo, it will release all stitches from needles in its path. Often directions for using it recommend its use for 2 passes with locks on right. Passap preselects pushers for the next row of knitting as Brother preselects needles, pushers are below the rail, so in theory, they should be unaffected bypasses of its travels. Once things are up, going, and “working” I have found it possible to align the tool as seen in the photo ahead of the next lock pass, so on the right of the lock from left to right, to its left from right to left, a bit of pressure will keep it in its place, and stitches are released each pass of the lock. This may result in having to operate the lock with one hand. There is also an optimum speed: if the movement is not smooth and regular and needles are jostled, pusher selection may be altered in response, thus resulting in a patterning “mistake” on the next row. Challenging yarns may make this method impossible.

Some samples follow: the yarn used was acrylic, I attempted to press it on swatch completion, and this flattened the fabric considerably. Of note: the disparity in width between the stockinette portions of the swatches, and the dropped stitch segments

too open

a bit closer, much more so before steaming

a “mistake” that may lead to a future accessory, with some revising and planning

I am using Stitch Painter to plot out my repeats, exporting files as .cut files, using wincrea to import them, and downloading to the console with a cable purchased from England. I replaced an ill tower dell with a 64-bit dell laptop half its age, and am now running Windows XP instead of 98! My leaps into the present technologies/software are made using apple products. Technique 129 will work, color may need to be reversed using the alter loop, or within wincrea depending on how the pattern is drawn in the original graph, but that is a topic for another day (see April 2011 post: a bit on Passap for some information on Tech129). Back lock on N throughout, front lock on LX (slip/part on the main bed for Japanese KMs). Single bed slip and tuck stitches may also produce “bubbles” of a different quality.

Coincidentally the 10th-anniversary issue of Knitty has just been released, arriving in my virtual mailbox this AM. There are 2 patterns in the issue that may be of interest, one is tin roof, the other employs ribbed/bobble/bubble for hand knitters. Another hand knit version by Kieran Foley may be found here