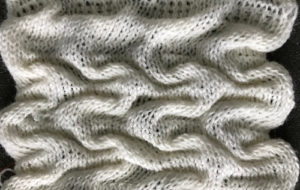
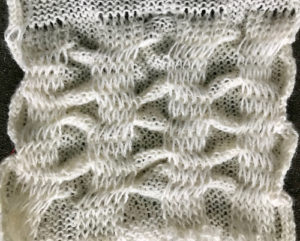
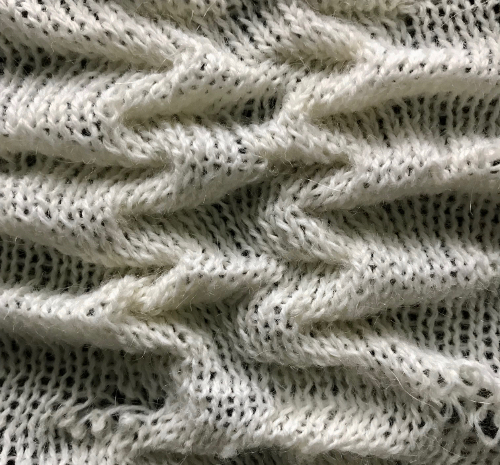
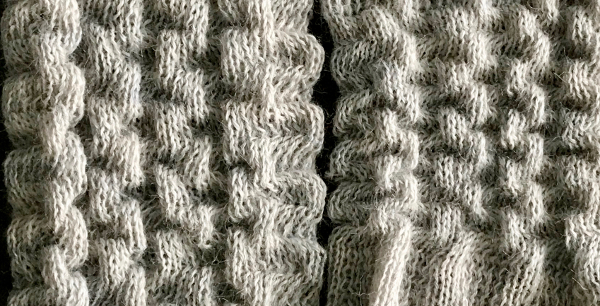
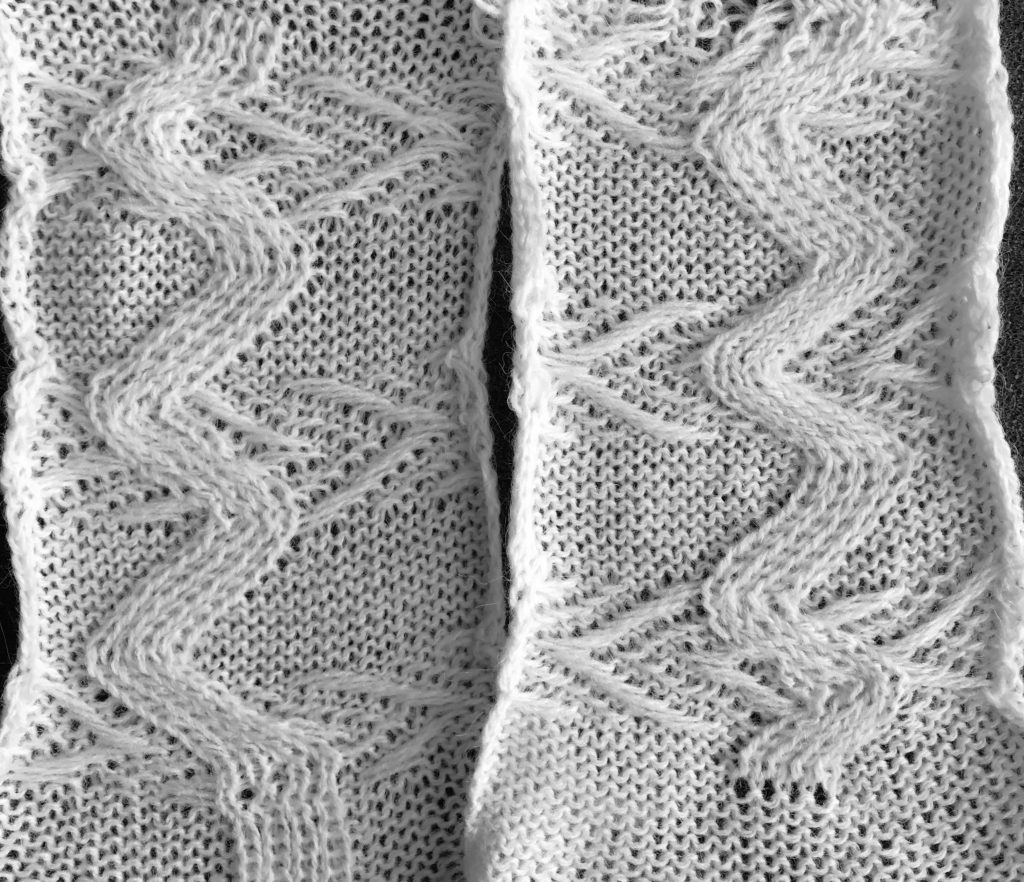
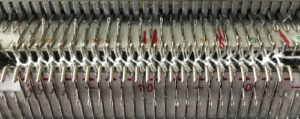
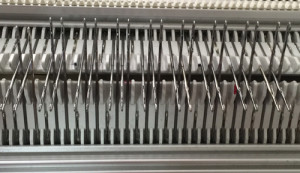
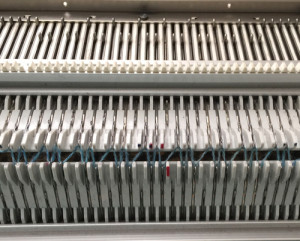
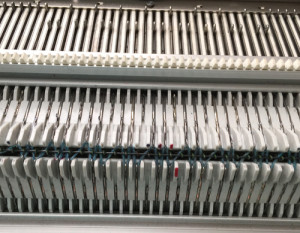
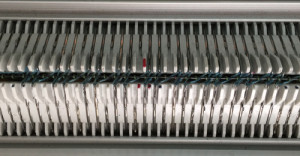
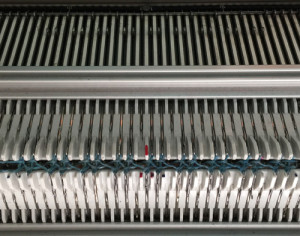
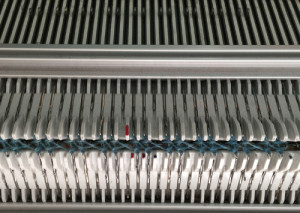
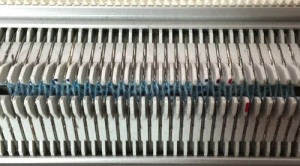
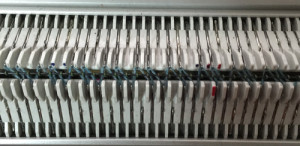
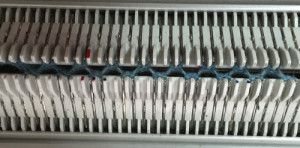
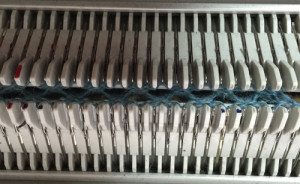
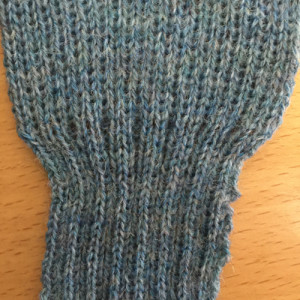
More dragon scales and chevrons in ribbed, racked (4) fabrics

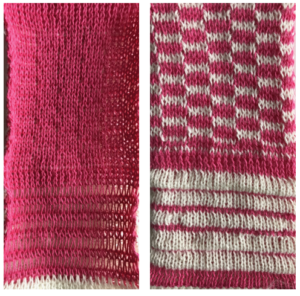
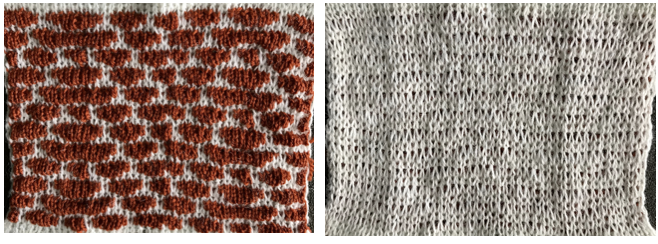
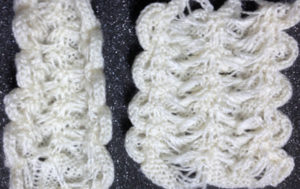
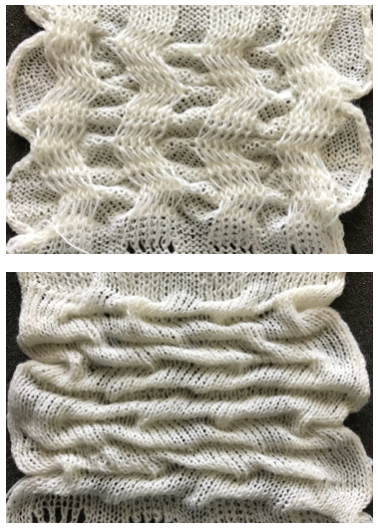
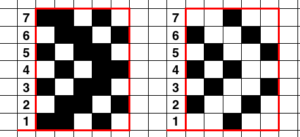
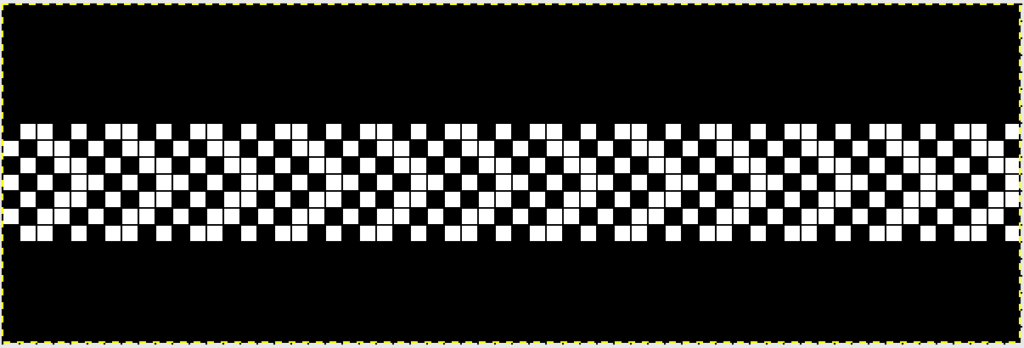
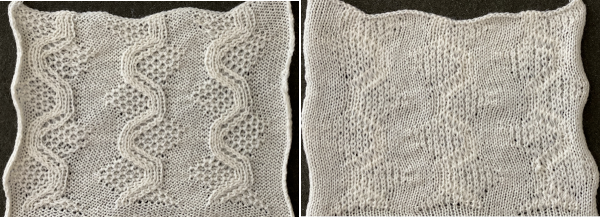
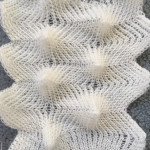
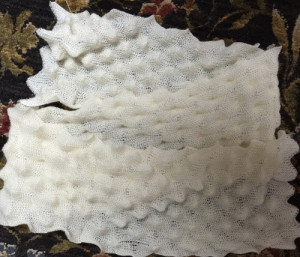
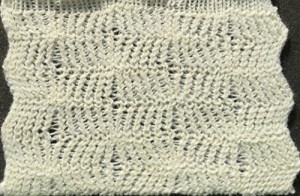
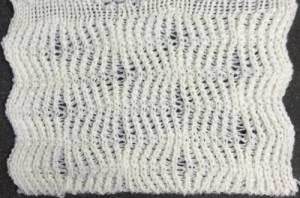
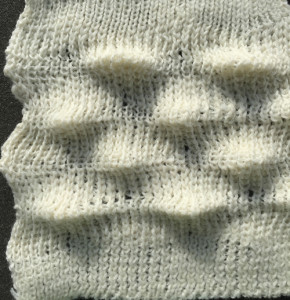
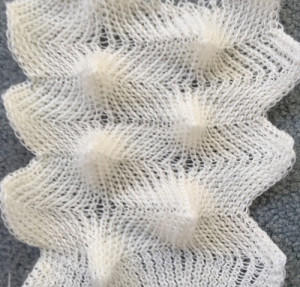
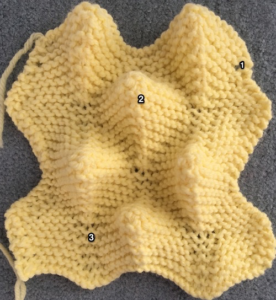
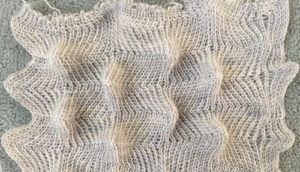
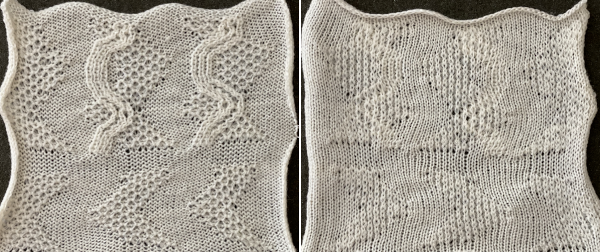
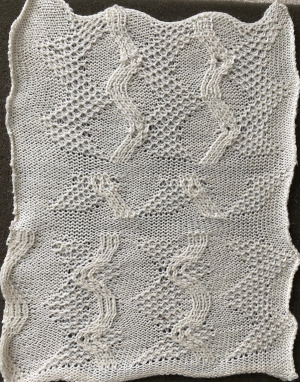
Over the years a variety of fabrics have been named dragon scales or crocodile stitch. Here dragon scales have referred to shapes created using a lace technique and resulting in a pattern such as this

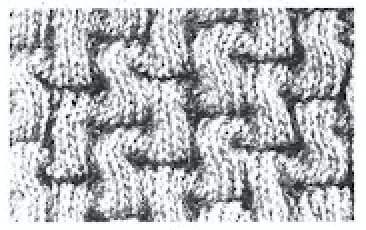
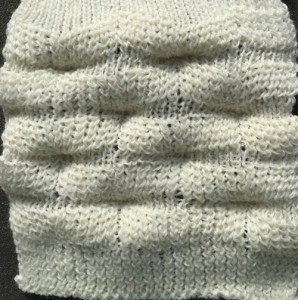
that was followed by hand knit samples and an investigation into possibly creating a ribber fabric with auto shaping resulting in similar protrusion
ribber-pitch-a-bit-on-racking-1-chevrons-horizontal-herringbone/
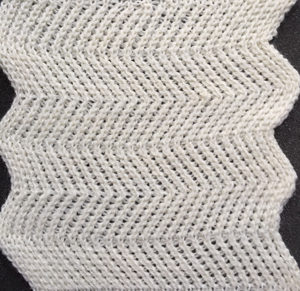
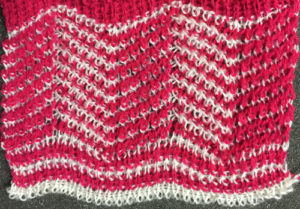
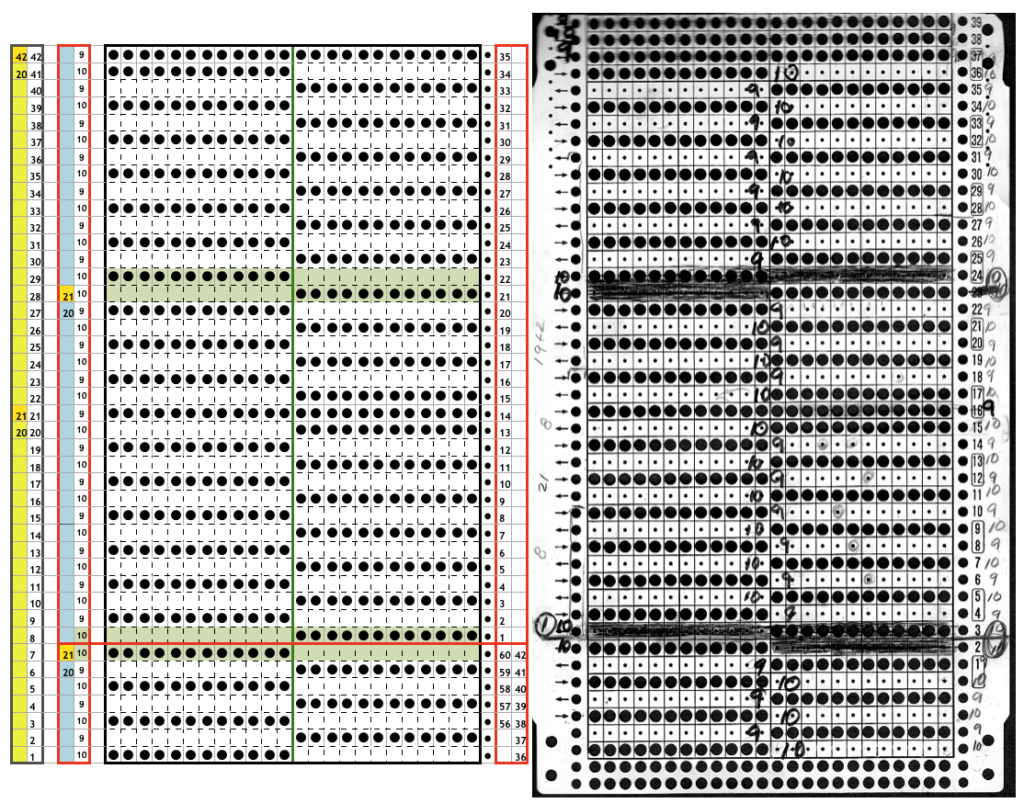
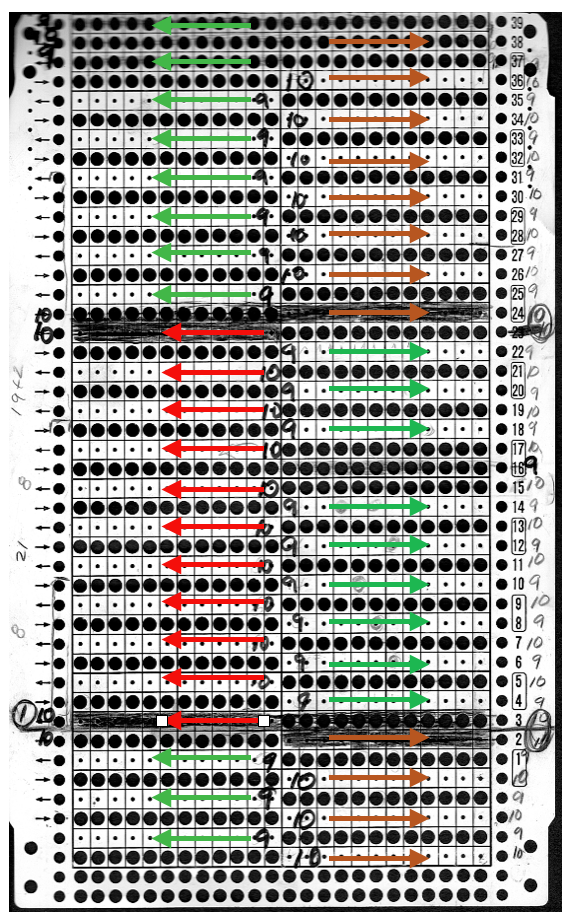
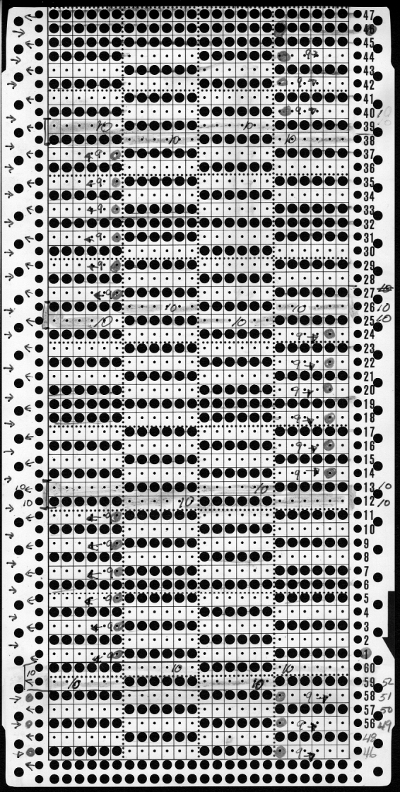
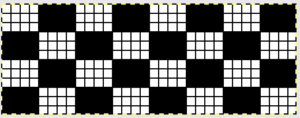
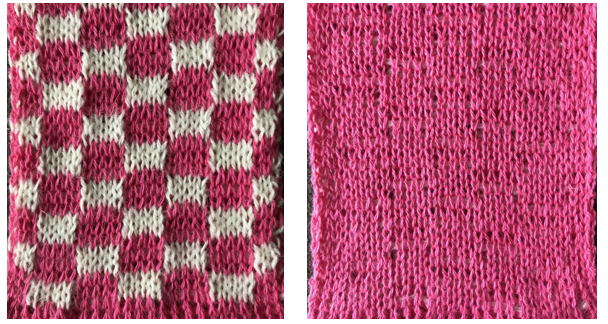
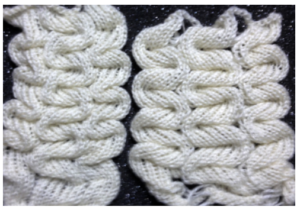
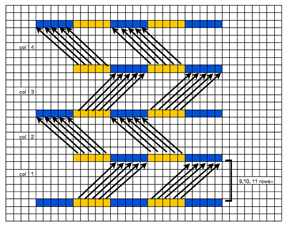
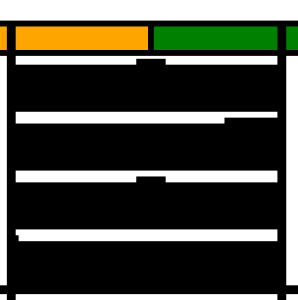
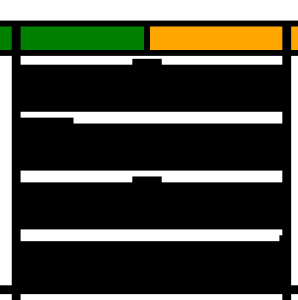
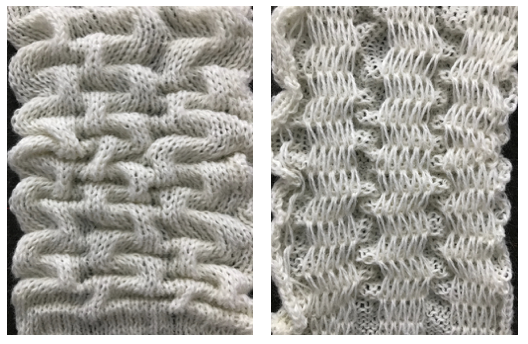
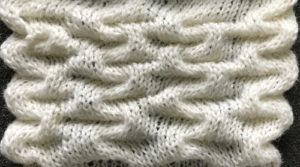
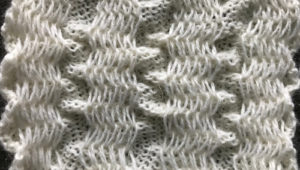
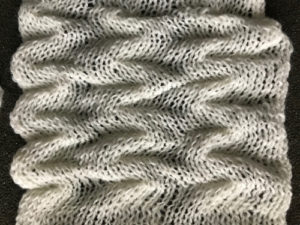
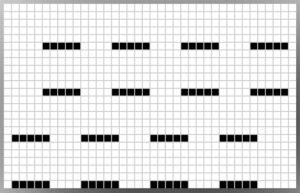
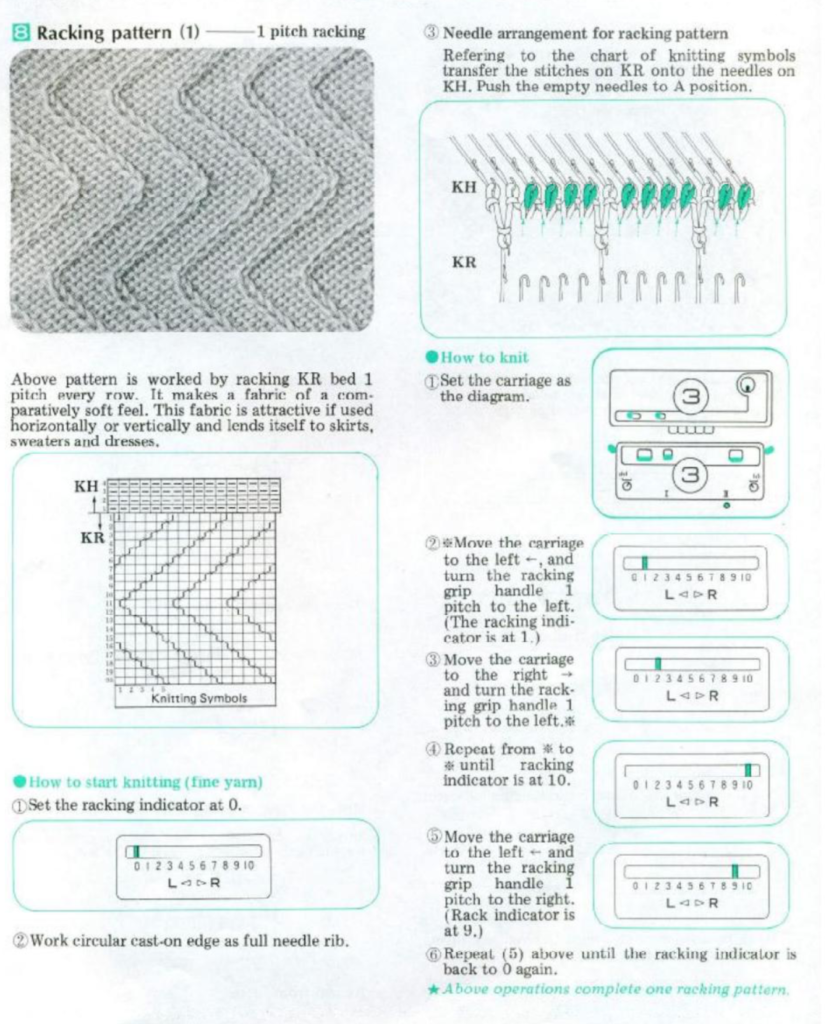
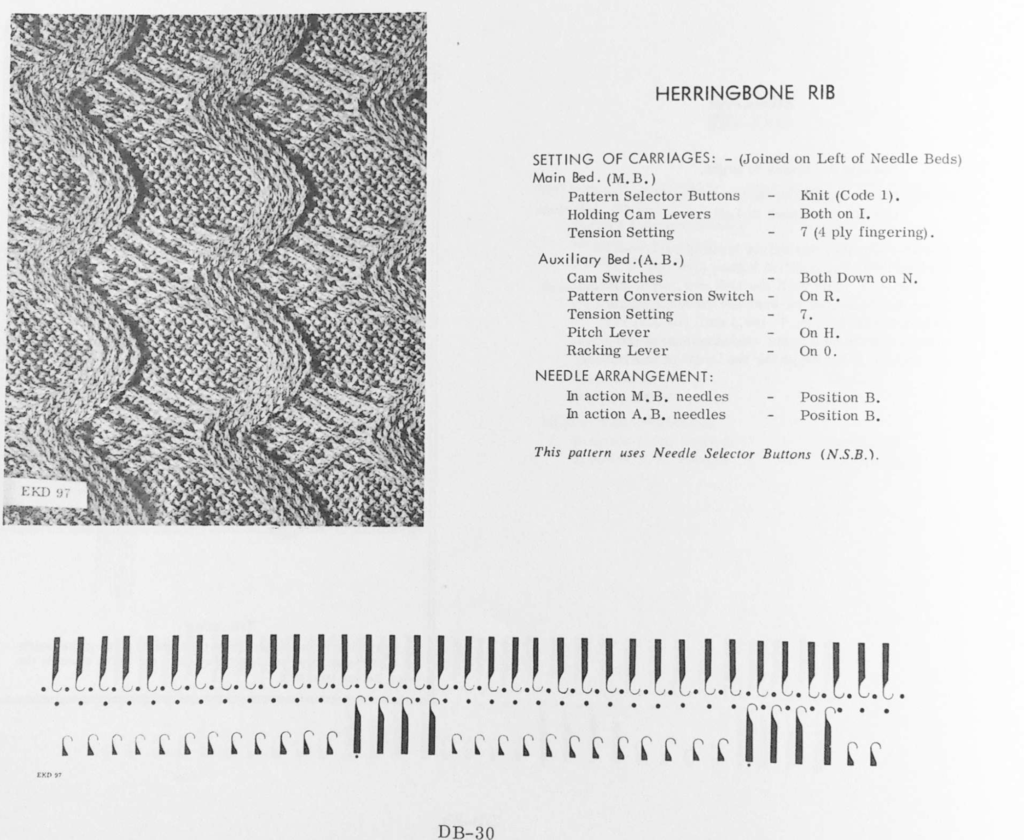
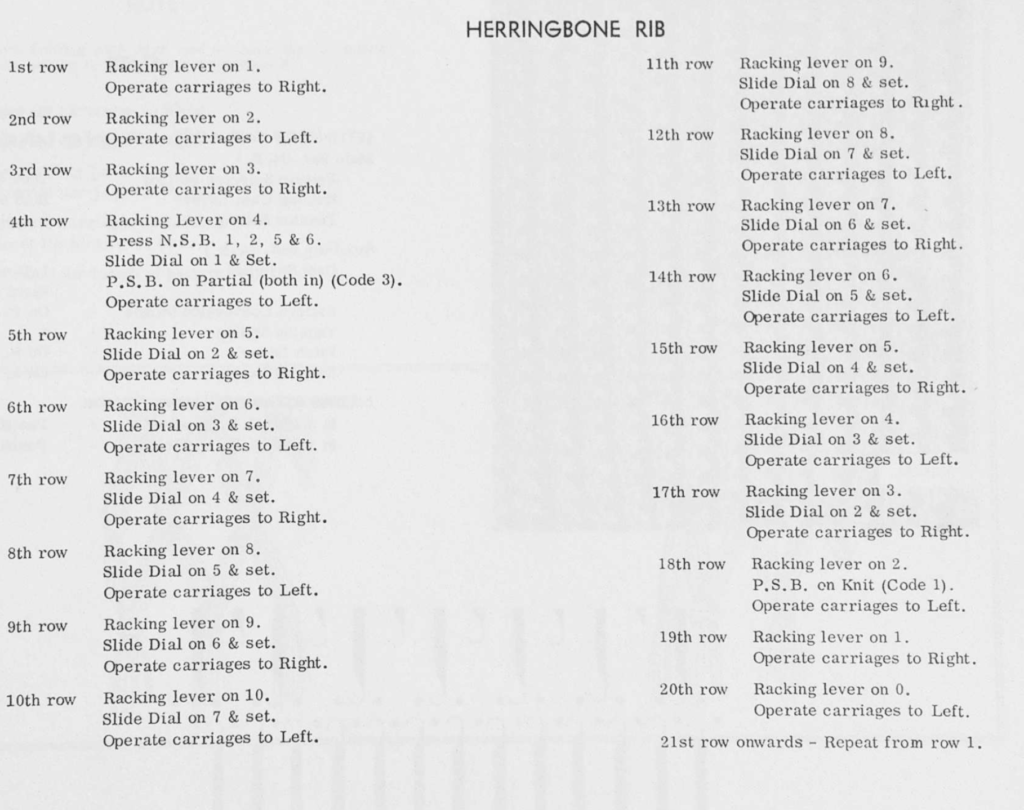
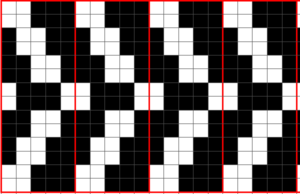
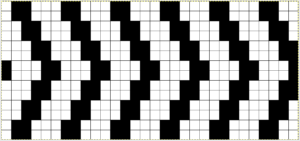
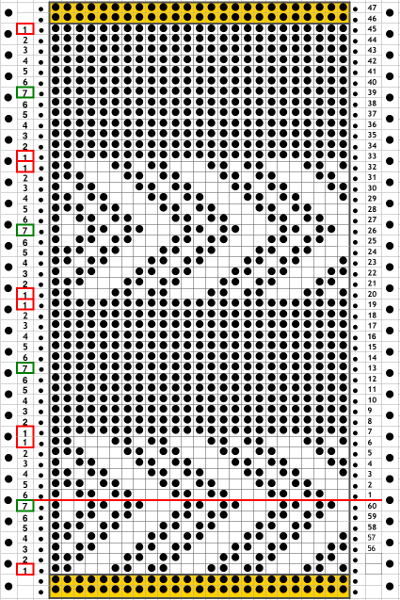
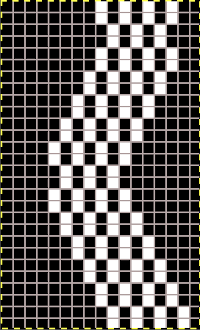
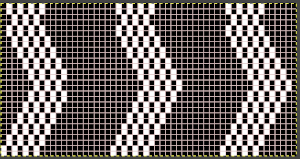
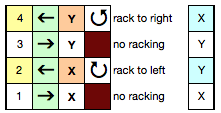
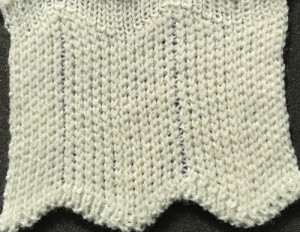
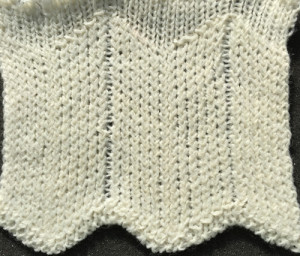
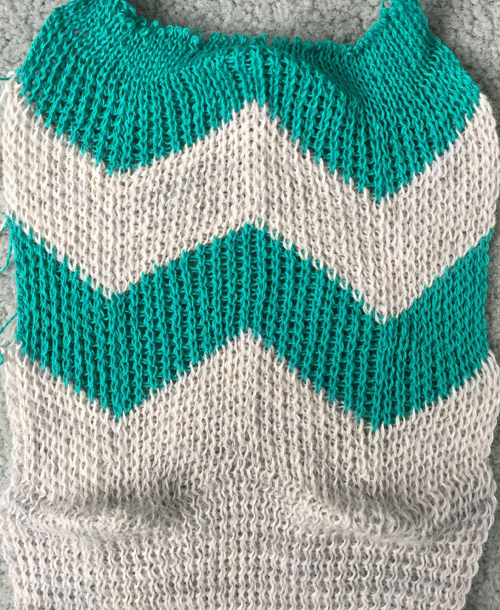
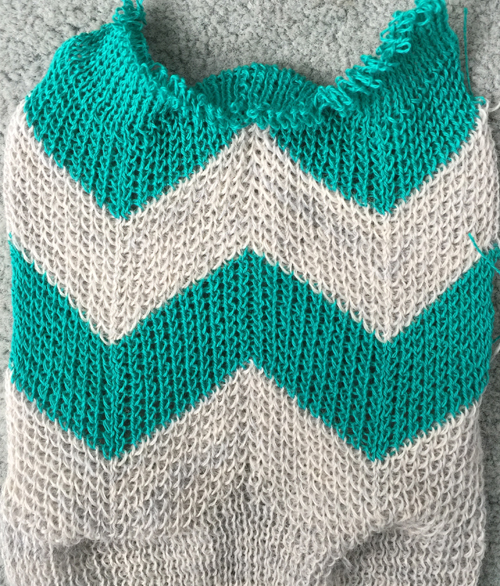
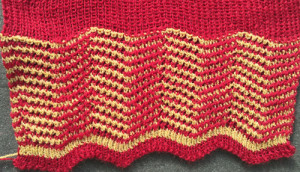
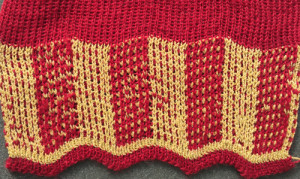
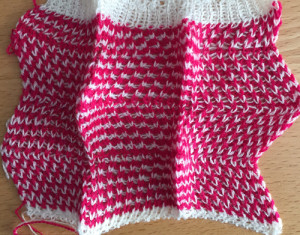
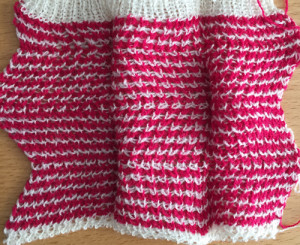
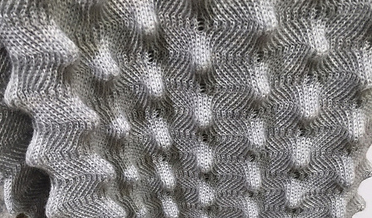
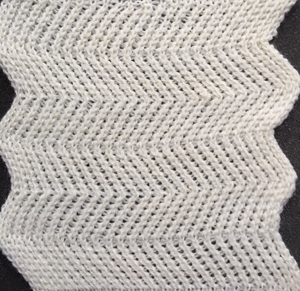
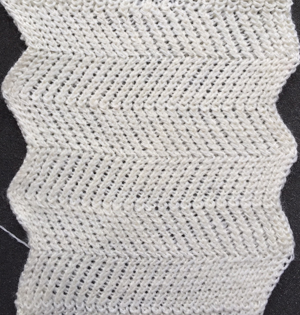
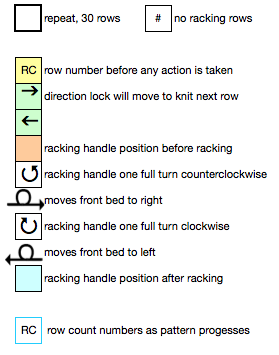
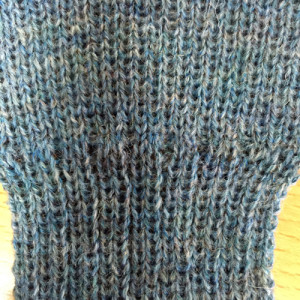
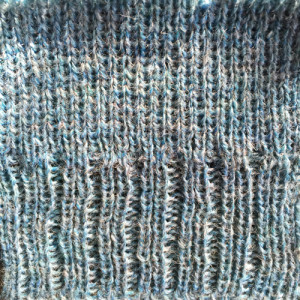
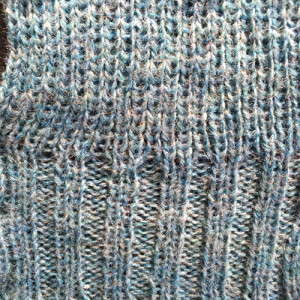
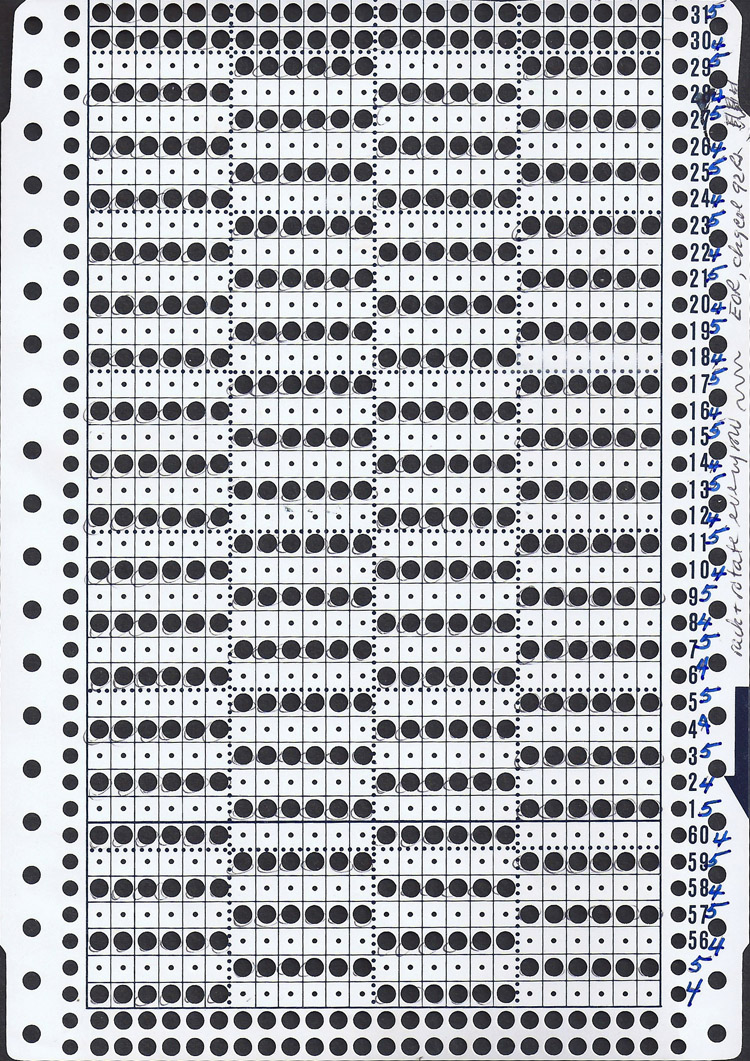
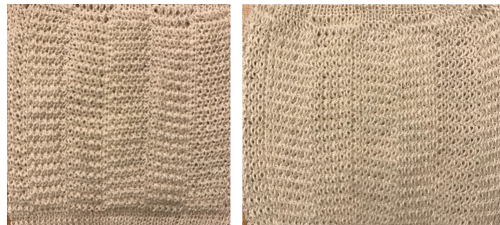
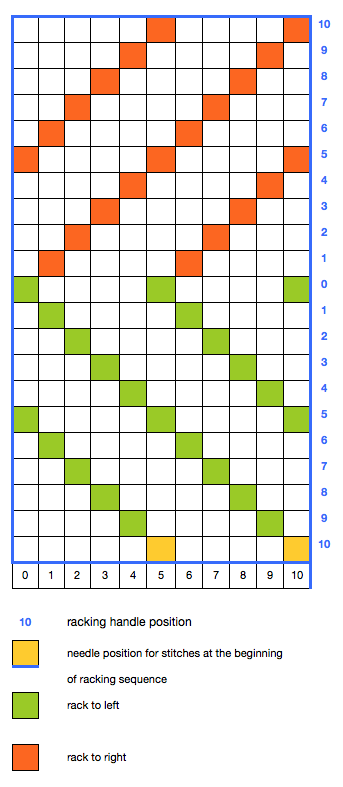
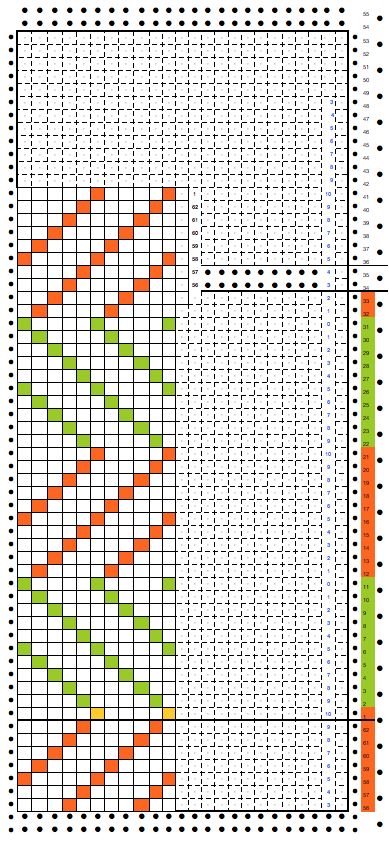
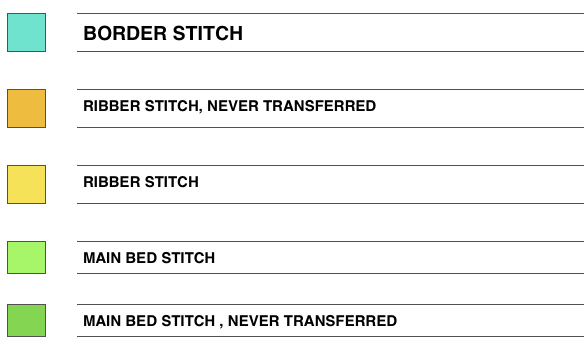
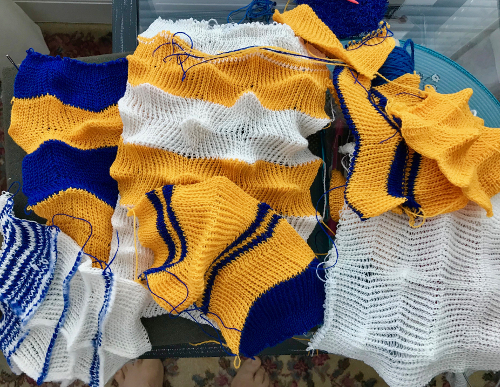
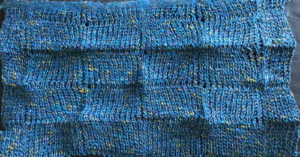
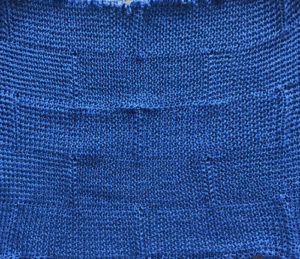
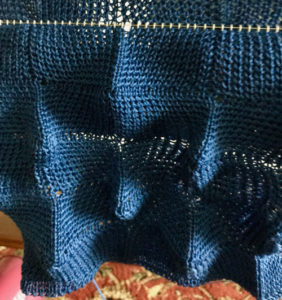
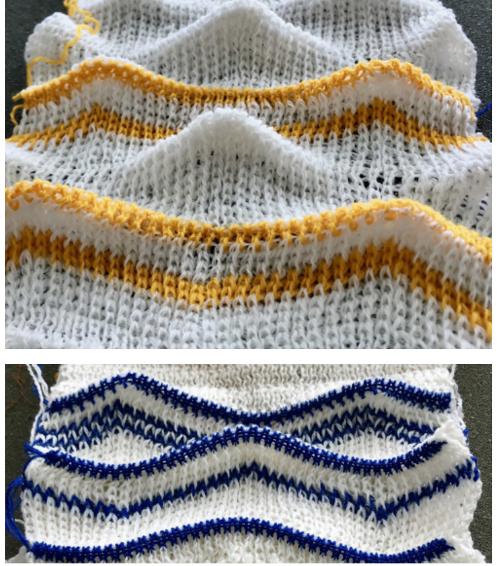
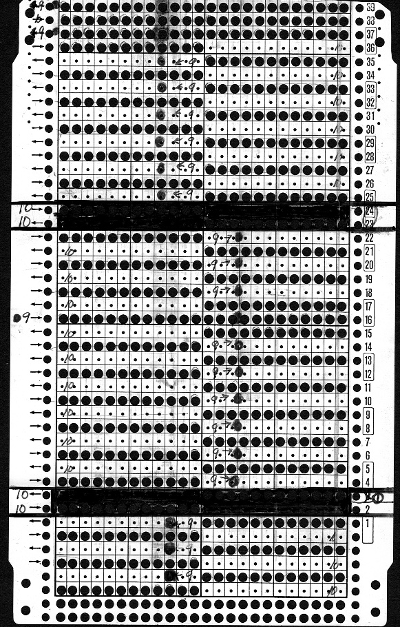
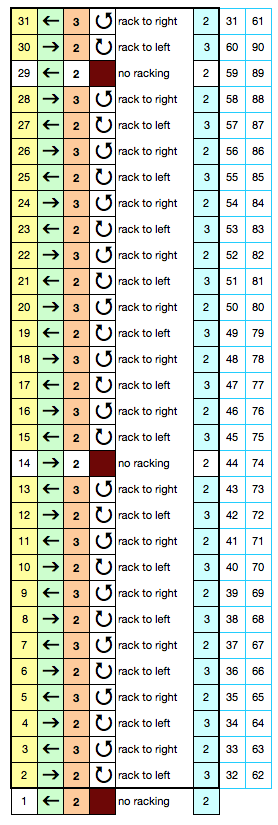
vertical chevrons/ herringbone which eventually led to this, where a reversal in racking periodically shifts the lean in opposite directionsautomating the pattern in half fisherman rib/ mylar repeat tracking shown. Any repeat in a factor of 24 may be used on punchcard machines as well. The start of a series in varied colors and fibers: sometimes I enjoy getting back to the simplicity and predictability of punchcard machines, though punching those cards can be slow and a bit tedious. I am presently curious about striping again, and creating a wider “scale”, with a crisper fold. The chart is for the working idea, the punchcard typical of what some of my cards begin to look like as my work evolves. When marking cards for any action, the fact that the eye is not on the same design row as the reader needs to be taken into consideration. Here racking numbers begin to get marked on what would normally be row one on a factory marked punchcard, 7 rows up for Brother KMs on any other brand punchcard, or card roll # position. Though the final repeat is an even number of rows in height (42) note that each half repeat is not (21). The color changer sits on the left, so the first preselection row is left to right, cam button on KCI to insure end stitches knit. Any color changes happen every even #X rows, so they will technically be in a slightly different spot on the alternate repeat. some of the trial and error, random yarns. The white is a 2/15 wool, the yellow a 2/12, the blue an unknown, also wool. The best of  the lot, but not “there ” yet, going back to one color knitting So then you go for a yummy alpaca and silk, make a racking error and manage to correct the pattern, and lo and behold the yarn breaks halfway across the row a repeat up from there! “They” do keep talking about how relaxing knitting is ;-). Yarn specsFiber Content: 80% Alpaca/20% Silk; Weight: Lace; Gauge: 8 sts = 1″, 1/2-lb cones/3472 YPP (1736 yards/cone)This yarn is an English import, 2675 yards per pound. It felts into a lovely fabric (not the goal here) and knit tolerably well. The fabric is quite stiff, however, and the surface change is minimal and nearly completely lost 2/18 Jaggerspun wool-silk: worth a shot at a scarf. Starting ribber cast on left, followed by 2 circular rows, one closing row right to left, and first KCI row from left to right will set up patterning in tuck so that the direction of the arrows on the left side of the card, lines up with the racking number appropriate for that row prior to knitting it. The fabrics below are as they came off the machine, not blocking of any sort
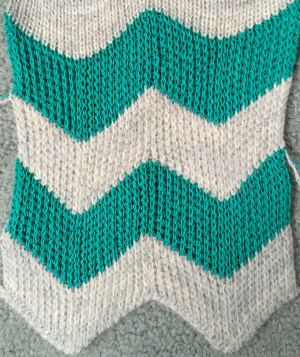
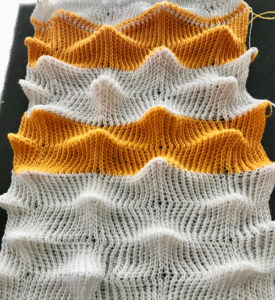
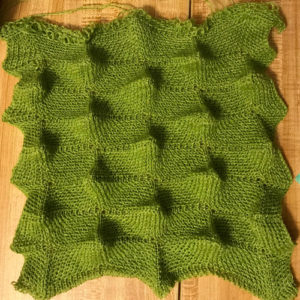
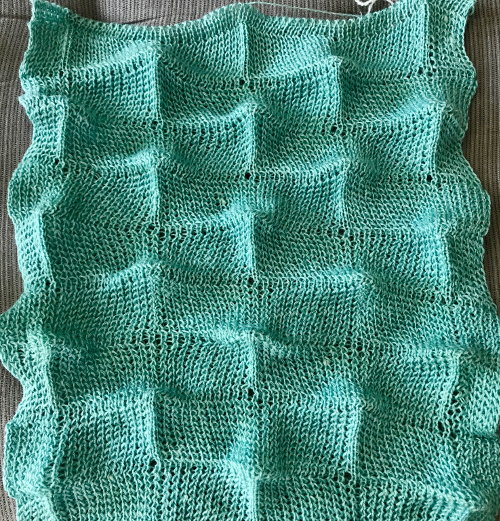
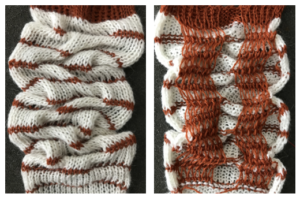
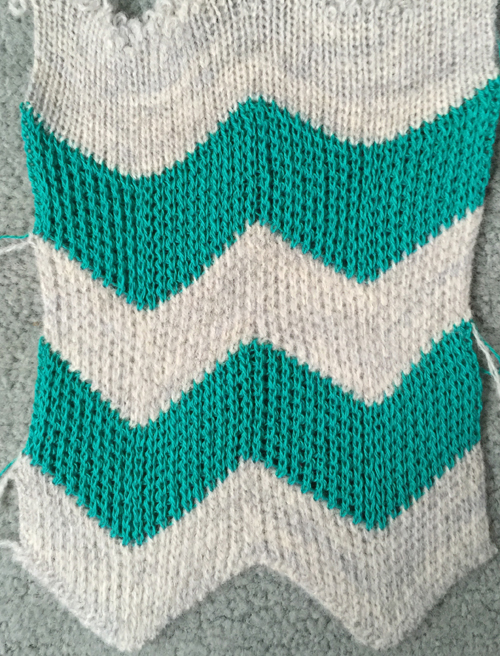
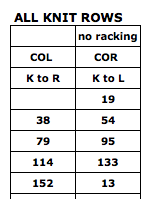
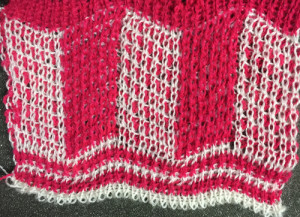
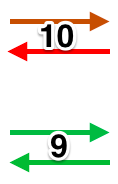
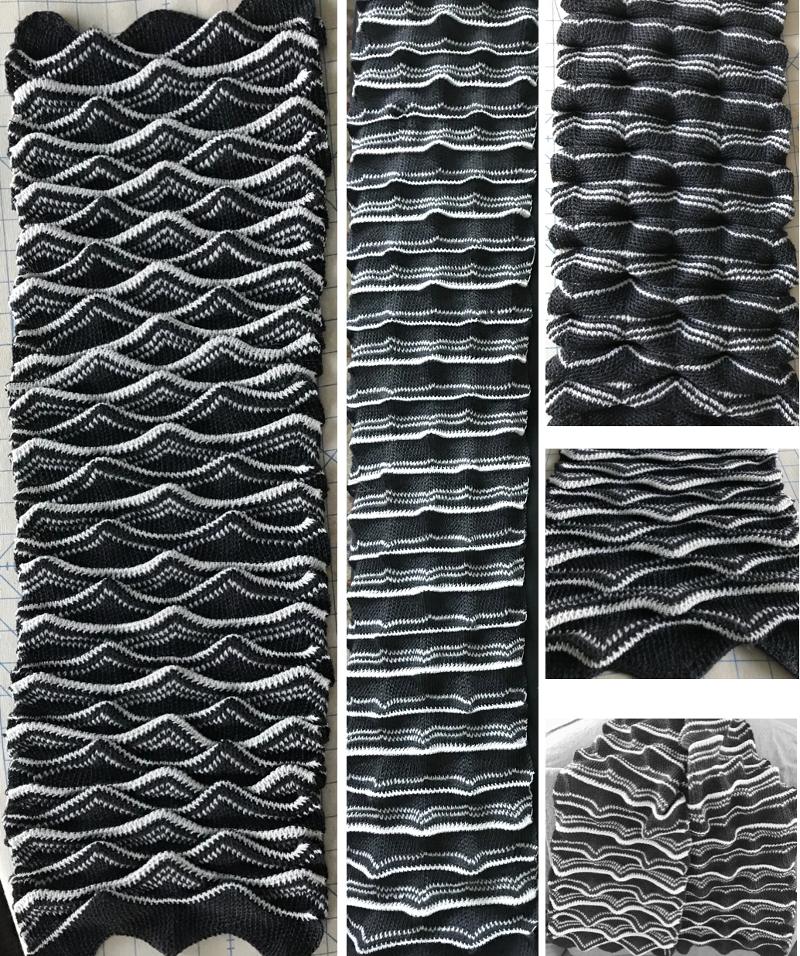
I have some lovely cash wool in 3 colors, 2/48 weight. Using 3 separate strands fed through the yarn feeder separately resulted in uneven feeding, loops, and too many problems. Using 2 strands “worked” easily, but the fabric was nearly flatCautiously winding 3 strands onto a cone prior to knitting gave far more predictable results, and there now is a scarf in progress. The difference in color is due to the lighting at the moment My best advice to anyone attempting this is to knit slowly. The most likely spot for errors in my experience is at the point where 1: no action is taken for a row (or more in later swatches), so racking position remains at 10 for 2 rows, and 2: for racking position 9 the knit carriage position is reversed in each half of the repeat. One can get also reach a left-right rhythm, and without realizing it, begin racking between positions 9 and 8 as opposed to 9 and 10, throwing the pattern off. Another look at racking positions: the numbers reflect racking position before the carriage moves to the opposite side, the arrows the direction in which the carriage will be moving. Once the knit carriage moves the card advances, so glancing at the card after that move will show the action for the next row at eye level, which can be confusing at times. A finished piece, 9.5″ X 64″, in the coned 3 strands of merino. Occasional single strand caught on ribber gate pegs, no yarn feeding issues as such. The fabric has not been blocked in any way, but allowed to “relax”. I like the larger scale of the “scales”, would still like to introduce striping in a way that pleases my eye. The knitting is slow thanks to all the racking but is probably faster than using single-bed holding for similar shapes, with a very different finished look. Future of the fabric TBD. 8/16: interestingly enough when the fabric relaxed, it became quite a bit less 3Dand back to introducing stripes in contrasting color An act of faith after lots of trial and errors and a punchcard redesign, that this may have been worth the effort when done. I am choosing to cut the yarn and weave in ends for longer solid areas, and am giving myself permission to only knit while I feel focused on manual changes in color and racking. It may take a very long time to get to “scarf length” and here is the fabric in a completed piece, about 54 inches in length when off the machine. The top right photo shows reverse side of the piece, the bottom right is how it might appear when worn  Next up was a test on how to use 2 carriages or changing settings, allowing for the turning stripes to help the scale shape bend more outward into a “point”. I found to get the width I needed, along with striping it was simpler to change ribber settings to slip <– –> for all knit rows and retain the use of the color changer on the left.
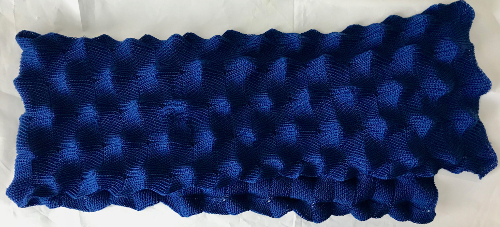
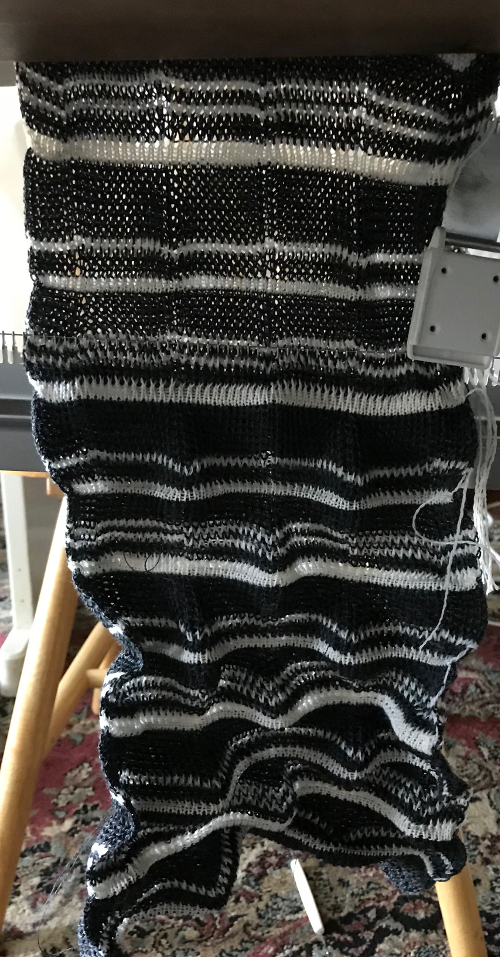
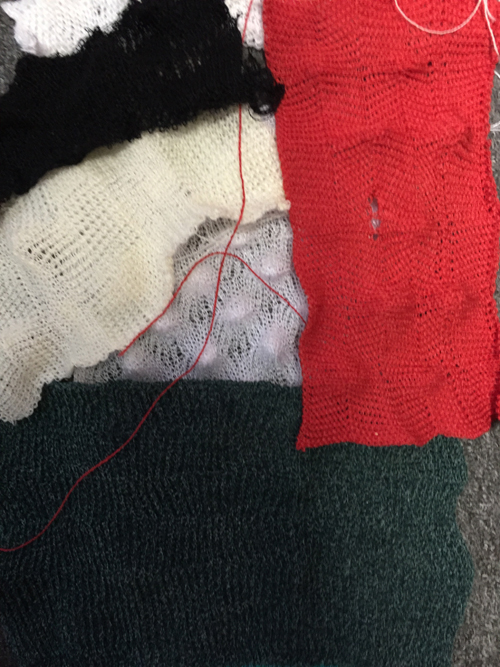
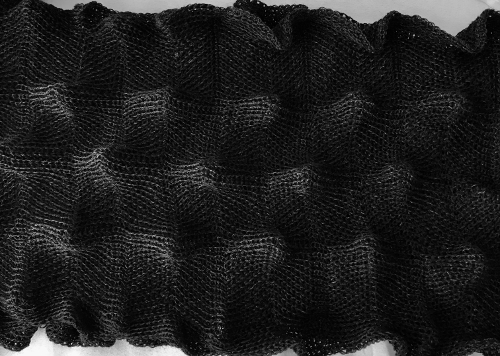
It is easy to share successes. There are also those days however when one should not be anywhere within range of a knitting machine and perseverance does not lead to anything positive. The above scarf was knit in charcoal, using 3 strands of cash wool. Two strands of the blue created a nearly flat fabric, 3 strands did the job. So I now turn to true black and white. Knitting 3 strands of the black was impossible at any tension for any length. Then I noticed the ribber on the right was lower than it should be. It turned out the bolt used to adjust the height of the ribber was loose, and the slightest turn of it loosened it completely. So then it took way too long to get it back in place. Got things back together and set up, and with each movement of the racking handle the ribber dropped on the right. After a lot more fiddling that got me nowhere, I decided to use the ribber for another Brother machine that had not been used for years. That was dry, the grease on it had turned black, and time flew cleaning and oiling and waiting. Back on the machine, the right ribber bracket of the alternate ribber will not allow it to drop on that side so it’s back to grease and patience and yes, I finally got up and running, only now the smell of the oil and lubricants makes me want to leave my apartment. Outdoors the temp is a dozen degrees warmer than inside it and grossly humid. I don’t want my knitting to smell like the solvents either, so the remainder of the day is called in as a period of rest and recreation mixed with a touch of, hopefully, amnesia.

Moving on to the next day: success in one color with no major problems or errors, have a black scarf, 64 inches long with lovely bumps, here as it appears immediately off the machine 8/16: 3D shapes held up very well So what would that true black in the thinner weight do with those stripes in a true white? I found myself forgetting completely to set the carriage to tuck for several tries, then messed up the color-changing sequence. Time for more R&R.
8/7 after several tests with minor variations in the pattern, sorting out yarn weights preferences, I decided to “go” for a version of the same stitch type as the charcoal and white in true black and white. Again, I am not able to use 3 strands of the black Got a third of the estimated desired length knit, and whoopee! about 10 stitches dropped off both beds on the color changer side. Oh, the joys of unraveling several rows of sewing thread weight black yarn, in racked tuck stitch, down to an all knit row in the white to make certain the proper number of stitches are in work on both beds. Got that far, and am ready for more R&R.
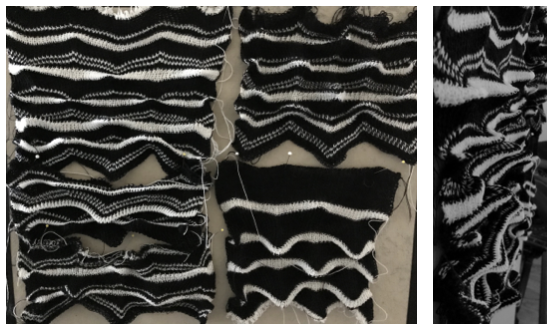
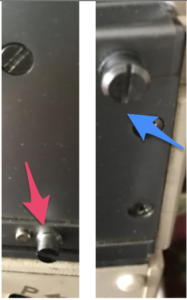
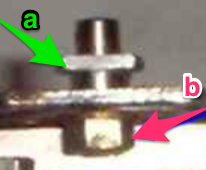
And 8/8 this is the last in the series, at least for a while in true B&W. The 3D pattern is reduced by the weight of the piece as it is worn Just a reminder: the service manual http://machineknittingetc.com/brother-kr120-kr710-kr830-kr850-kr230-kr260-service-manual.html provides information on ribber adjustments. The part in question I believe, is #24, the “slide plate guide stud”. In the image below b= the bolt that became completely loose. I discovered after getting things back together that a, which secures the ribber bracket, is actually directional with a barely perceptible difference in shape, and if accidentally rotated 180, it will keep the ribber bracket from changing height positions and working properly. Rotating it restored expected actions, so now I have 2 well-functioning ribbers to work with.  
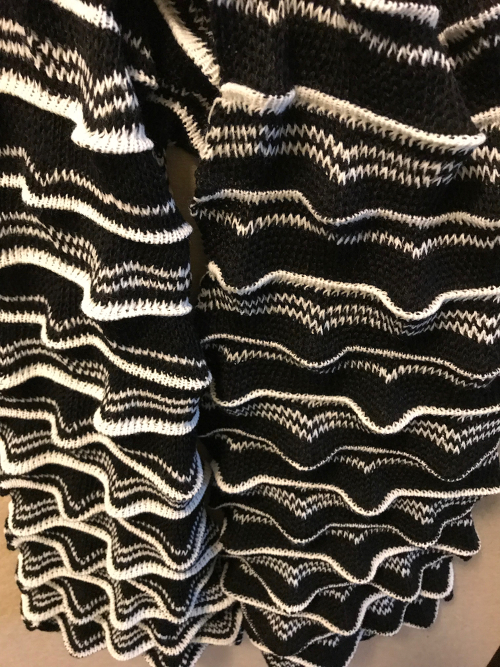
Still at it, 8/16 I now have a lovely, equally bumpy fabric in all 3 colors using 2 strands each of the cash wool at the same tension. The single difference in my execution is that I am now using my alternate KR 850 ribber. The height and other adjustments appear identical to my eye. I am reminded of my teaching days in a Brother punchcard lab, where at times the same model machines might be side by side, and fabric would work perfectly on one machine while not on the other supposedly identical model. Students were not allowed to swap off machines, the one exception being if that was the only way to get the stitch types in their final projects completed after I attempted to work out other possible issues. “They” do keep talking about how relaxing knitting is, but with machine knitting, there are lots of opportunities to wonder about that suggested fact.8/17: complete a royal blue scarf in the smaller scale repeat, previously executed on my 910. The punchcard below it image may be used to achieve the same fabric. 8/18: trucking on, planning a couple of more pieces with the large-scale repeat. It seems I have been having more drat-it moments than one might ever want, resulting in having to discard hundreds of rows of knitting for any number of reasons including racking operator errors. I have also encountered another problem. In the past, I have used cello clear, or a variety of tapes to seal off holes accidentally punched in the wrong place. I very rarely produce multiples of any of my pieces, and my limited edition items were usually knit on an electronic due to its increased ease in adjusting the repeat width and height to suit. Transitioning from the solid repeat to the striped one, I decided to punch out holes on my original card to test my ideas, and when returning to the large scales I was too lazy to punch yet another card, and taped over sections I wanted to eliminate from the selection. Hundreds of rows into yet another piece I began to notice odd behavior in needle selection, which was fully remedied by investing time into punching a new card, and yes, starting over yet again. Note to self: do not do this sort of taping over in the future, no matter what the tape, and especially when knitting multiple pieces thousands of rows in length! 
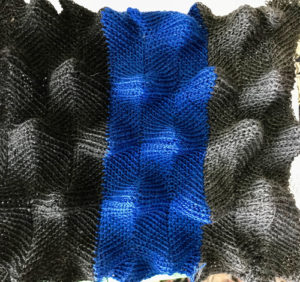
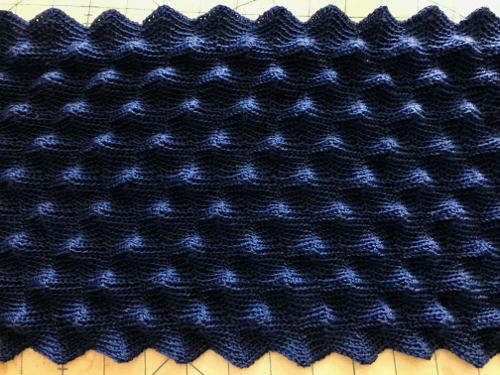
8/21: I am working on a final series of large-scale, single-color scarves. As has often been my experience in knitting long pieces of ribbed fabrics (most of my scarves are 1200 rows or more in length), I have a talent for developing problems after the ¾ point. Two factors that can have an effect on stitches not knitting off properly “suddenly” can be the result of 1: the slide lever setting being changed accidentally when moving ribber sinker plate ie to correct patterning errors and bring it to the opposite side, and the ribber alignment for needle positions relative to each other on opposite beds changing slightly from all the side to side motion in racking nearly every single row.

The slide lever has 3 positions. I have out of habit gotten used to simply leaving it in its center setting (lili) for my knitting, and used to teach students to keep that constant if possible. Sometimes when knitting ribbed cuffs, bands, or collars, I have seen the differences in length and width of them changed for separate pieces and not noticed until one was ready to join pieces.  
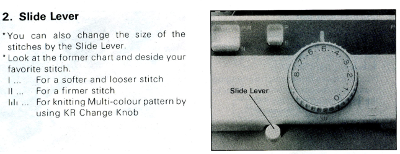
adjusting needle bed positions (for more see https://alessandrina.com/2015/01/13/a-bit-on-ribbers-japanese-kms_-alignment-and-symbols-1/)

The last piece produced by me was in a charcoal color, using the same yarn brand and weight as the black. All things being equal, using the same tension (required to avoid knitting problems), the charcoal version stitches were considerably looser, and longer, also due to changes in gauge. I think the charcoal scarf will put this fabric to rest for me for a very long time. This was my final, pre-punched card, and its markings
Some Passap patterns 2016/01/13/racking-2-vertical-chevrons-herringbone/
and 2016/01/09/ribber-pitch-a-bit-on-racking-1-chevrons-horizontal-herringbone/
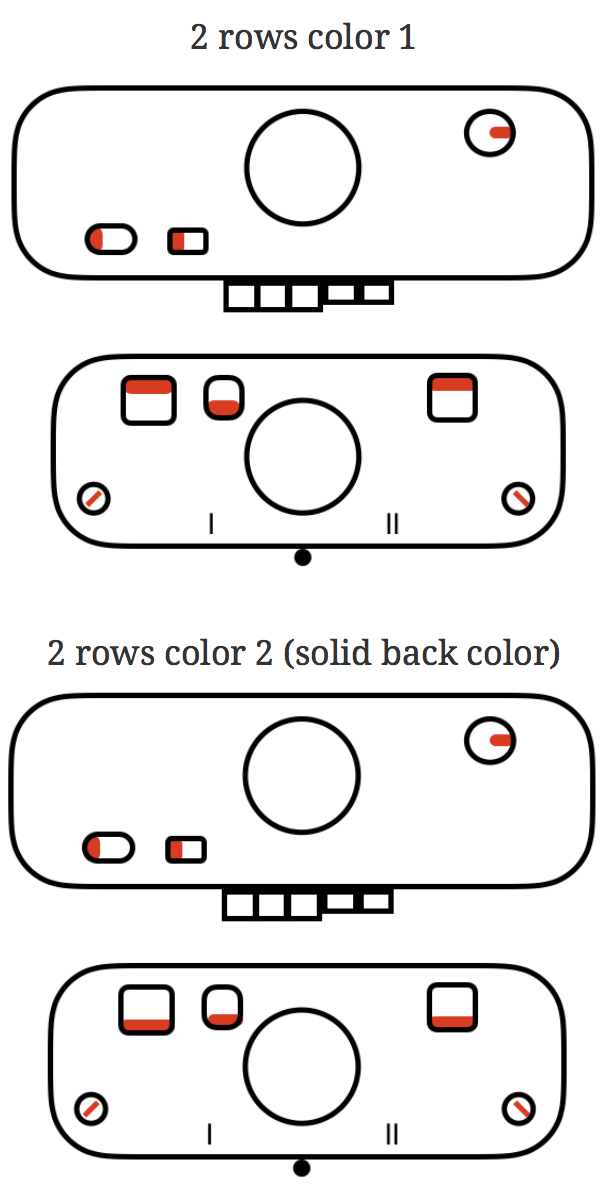
Ribber fabrics produced with 2 knit carriages selecting needles

There are a number of ribber fabrics that are produced by altering the settings on the ribber’s carriage to slip for an even number of rows in both directions. This requires manually changing the ribber setting from slip to knit and back for the length of the piece. In electronic machines, where the pattern advances with every pass of the carriage, there is another option. For example, to produce DBJ with the backing in one color, settings would be changed manually every 2 rows, using the color changer on the left

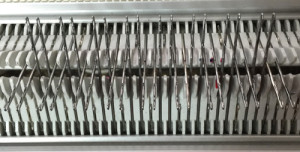
Some things to remember: when 2 carriages are selecting, each carriage needs to move far enough at the end of the needle bed so as not to be locked onto the belt. Extension rails are required. On the Brother ribber bed, there are stops that keep the combined carriages from going off the beds. There is one on each side (magenta arrow on left, the blue arrow on right), and to remove the ribber carriage off its bed, it, in turn, needs to be tilted forward prior to reaching the stops in order to clear them on either side.

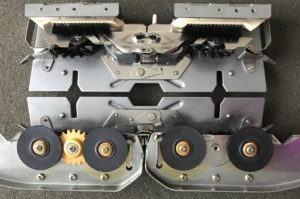
Altering the KC sinker plates and arm: remove 6 small screws from the sinker plates, leaving only their arm

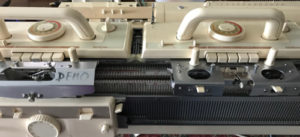
The carriage with the altered sinker plate in place, in turn, will then be used to replace rows that were to be knit with the ribber set to slip in both directions <– –>. In my sample, it operated from the right, with the combined carriages (KC2), from the left. 

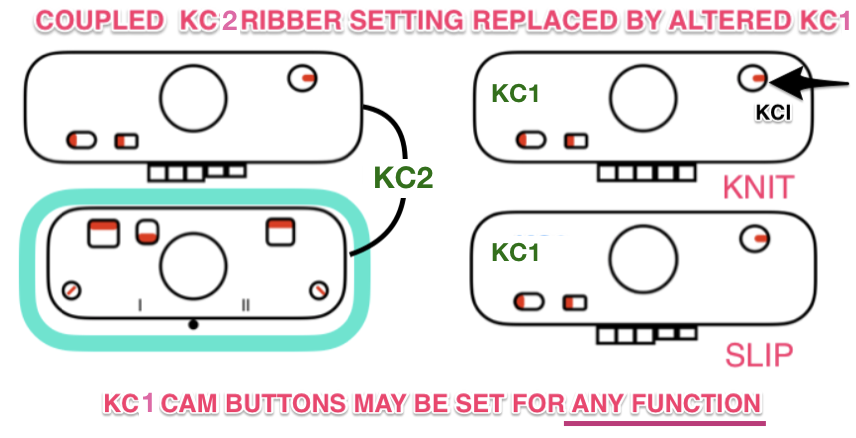
For consistency, I am editing the original post and will continue to refer to the coupled carriages= KC2, the altered single bed one= KC1KC is the abbreviation commonly used in publications for Knit Carriage. The change knob, which affects end needle selection, is marked on the KC as for I (end needle selection, indicated by black arrow) and II (cancel end needle selection). Initials KR in publications are often used to refer to ribber carriage in setting discussions. My beginning swatches were knit using ayab software’s ribber setting, which matches the KRC (2-color double jacquard separation) function in the unaltered 910. With my first try, I made no effort to consider which color gets chosen first in the color separation (ayab = black, 910 = white). There is a limit as to how far the single carriage from the right (KC1) can travel on the needle bed to the left because the combined carriages on the left (KC2) are held in place by the pin.

It would be possible if needed to separate KC2 and push further out on the extension rail, but perhaps not practical, so there are some constraints on the fabric width able to be produced.

My first swatch has some manually created pintucks on the knit side (white only knitting extra rows, joined together by all knit rows with pink). The reverse, purl side, is knit by the ribber set to N/N, all in one color. The stitches held on the ribber while the white only knits on the top bed are visibly elongated (left swatch bottom). There is some color confusion on the knit side on the first couple of rows of DBJ, solved in the second swatch. My repeat for the planned width using Ayab:

Knitting on 910 a single repeat may be programmed, start knitting with color intended for white squares, which will also serve as the solid backing color. For more similarities and differences between the original and the altered 910 see ayab diary post.

To knit using Ayab: begin the knitting with the color intended to be used for areas marked in black squares, which will also serve as the solid backing color. Preselect the first row from left to right with ribber set to knit (N/N), it will remain set that way for the remainder of the process. When on right, set coupled carriages (KC2) to slip <– –>, knit one row to left, both carriages stay on left. Knit the next 2 rows for DBJ using KC1 with altered sinker plate operating from the right, using color intended for areas marked with white squares. The main bed only will knit. Set change knob to end needle select (KC I) to ensure first and last needles in use knit. Return the KC1 to the right, on the extension rail, and knit the next two rows with KC2 operating from left. Repeat, changing carriages and consequently colors every 2 rows.

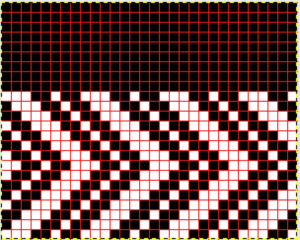
Blisters or pintucks are created when one bed knits more rows than the other, whether as simple knitting or in the pattern. Periodically the knitting is sealed by at least one-row knitting across all stitches on both beds. In this version, sealing rows must occur in pairs to allow for color change. The first chart shows a tentative repeat, planning for black squares to create the blister shapes, drawn in 2-row blocks to allow for color changes every X even number of rowsThe image color inverted, so white areas will create the blisters in slip stitch (col 2) while black squares will knit (col 1)Most published patterns for these fabrics will also include an all knit rows to seal the shapes knit on the main bed only

By using 2 carriages to select needles, one (KC1) may be set to slip <– –>in order to knit X number of rows on the top bed only, while the pairs of carriages (KC2) are set to normal knit on both beds, its cam button set to select needles, KCI. Selection will continue, but no patterning occurs as a result. A proof of concept swatch knit on only 24 stitches, the pink knits for 4 rows, the white for 2; the pink yarn is a cotton, the white an acrylic/wool blend:

An expanded pattern repeat is planned for a larger test swatch. Here there are 2 black squares added at each end of the repeat to ensure that those stitches on the top bed are knit on all slip stitch rows. The new color is wool, this time knit for 6 rows in slip stitch prior to sealing with 2 passes of the combined carriages with the contrasting color.

Single bed slip stitch rows appear on the knit side in color 2, the reverse, purl side is in a single color (1), and formed by the all knit rows. Its stitches are in turn elongated, since they are held and not knit while the opposite bed knits for multiple rows. In the sample, the first and last stitch on each side were on the ribber, creating a single white slip stitch edging. One can adjust such details to suit. The first preselection row was made after cast on with both carriages(KC 2)set to knit, moving from left to right with color 1, where they stay. KC 1 with altered sinker plate was threaded with color 2, and begins from and returns to the left-hand side.

A detailed shot of the edge: note the white, single, elongated stitch uppermost, and the pairs of contrast color ones in the “border” Designs with the deliberate placement of white blocks representing each blister can be created. It is a good idea to test tolerance for each of the yarns involved as a hand tech or repeat such above before planning significantly longer repeats. All black rows are required at intervals if the fabric is to be knit changing ribber settings for all knit rows. The same rows could be left blank if using carriages in the above manner, and lack of needle selection would be an indicator for switching to the double carriages for the 2 sealing rows, while not having to track the count for the slipped ones.

I am always interested in automating stitches to facilitate as many details as possible in creating fabrics that imitate hand techniques, without relying on row counts and a lot (in this instance) of “hooking” stitches up manually. The swatches below were part of a series of posts on ruching as a hand technique

The hand tech chart mirrored, as the springboard for my automated fabric Both led to my exploring the possibility of a cousin, working on the double bed, and using the 2 carriages. The process began with a proof of concept swatch. Two colors were used to highlight what the stitches knit with each of the 2 carriages are doing. Both KC1 and 2 were set to knit in both directions. I began with KC2 knitting the needle set up for the fabric in a dark color, on a small number of stitches

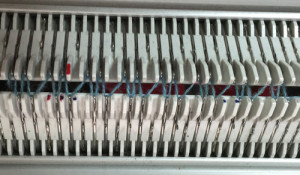
KC2 operated from left, KC1 from the right. With KC2 returned to left, KC1 knit 8 rows. It is best to work out the limit for how many rows will knit on the top bed without stitch problems prior to any automation of functions. *Two rows were knit with KC2 in the dark color, 8 rows with KC1, ribber racked to proper position**, * to** were repeated. The elongation of the stitches on the purl side results from the fact the ribber knits far fewer rows than the main bed, and in addition, the stitches on the row knit on its second pass in the pattern are pulled on across the bed at distances matching the racking positions. The plan is to automate the texture, knit it in one color, and find a way to track correct racking positions: cast on may be in any preferred method. With the pitch set to P, it is easier to transfer stitches between beds to the desired configuration. Every needle is in work on the top bed, for a multiple of 10+6ribber needles with stitches that will be moved with racking
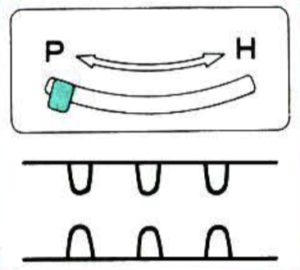
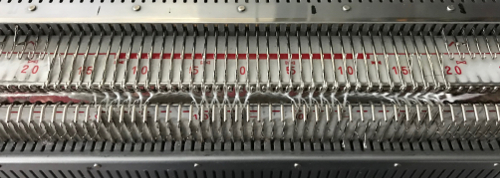
placement of stitches on respective beds
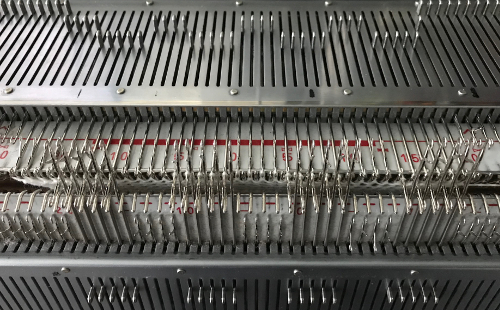
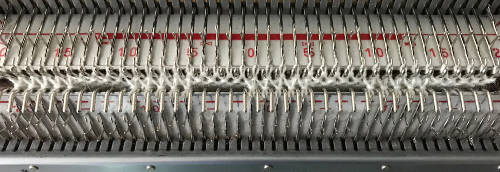
change pitch after transfers, ribber moves slightly to right final configuration prior to patterning and racking sequence begins

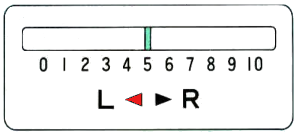
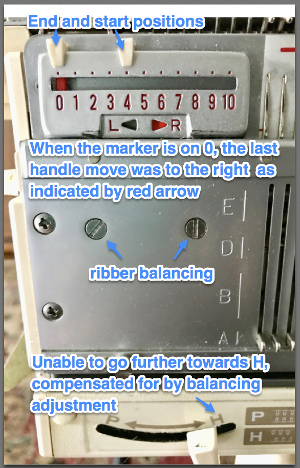
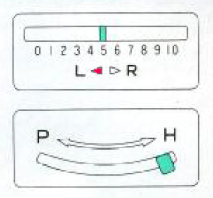
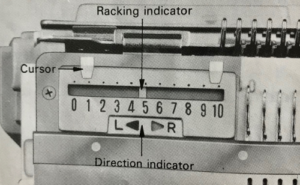
The starting racking position is 5. Racking handle markings for Brother begin with 0 on left, 5 at the center, 10 on right. The ribber is set to half pitch since part of the needle bed will be knitting every needle rib. An often-overlooked clue as to what is happening or is about to is found in the arrows just below the racking position indicator. The red arrow indicates the direction in which the bed was racked on the last move. Since racking for my experiment will only be to 3 different positions, I began by choosing to use 5 pixels center, left, center, right for the full repeat sequence, but later amended the repeat to numbers of pixels equal to specific racking indicator number. The needles will be selected prior to the next row knit, a reminder of racking selection. Sequence will actually be 5, *0, 5, 10, 5,** 0, 5, etc. The racking indicator

My first Ayab repeat was planned for use with 2 carriages: KC1 (single carriage) is set to knit but to not select end needles (KCII), and will be producing the multiple rows gathered to create the blisters/ hems. KC2 (coupled carriages) are also set to select needles, both KC (knit carriage, cam button also on KCII) and KR (ribber carriage) are set for normal knit. They will create the sealed stitches joining up the blisters/ hems. The same color yarn is threaded in both. Blank squares will knit because a carriage set to knit overrides needle selection or lack of it in stitches on needles in the work position. My repeat is 46 stitches wide. Because the knitting is started with the ribber already in racking position 5, the first move in the pattern is turning the handle to the right, toward 0. The concept illustrated
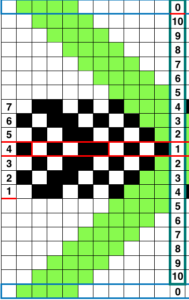
set up and ready to go, racking position 5

4/19/18 As is true in any knitting, things can go quirky. I began to have a single needle on the main bed not knitting on rows knit with the combined carriages, then ran into dropped stitches in racked groups. The problem was initially not with the software but appeared to be a ribber issue, which after checking and balancing was resolved.

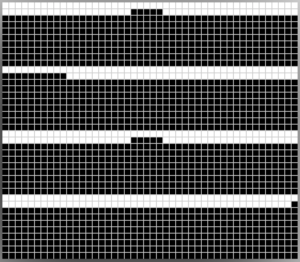
4/22/18 And today’s problem is the software, with persistent, intermittent selection errors. I did achieve a sample by manually pushing wrongly selected needles out to D by hand on problem rows, which tended to be 5 and 7 in all black areas. Some reminders and observations: ayab auto mirrors all images. If this repeat is entered (I added a single square as a marker for racking position 0), the software will actually be knitting this, the “image as it would appear on the knit side of the fabric”. What to program? anticipating the above getting mirrored by the software I entered this resulting in this

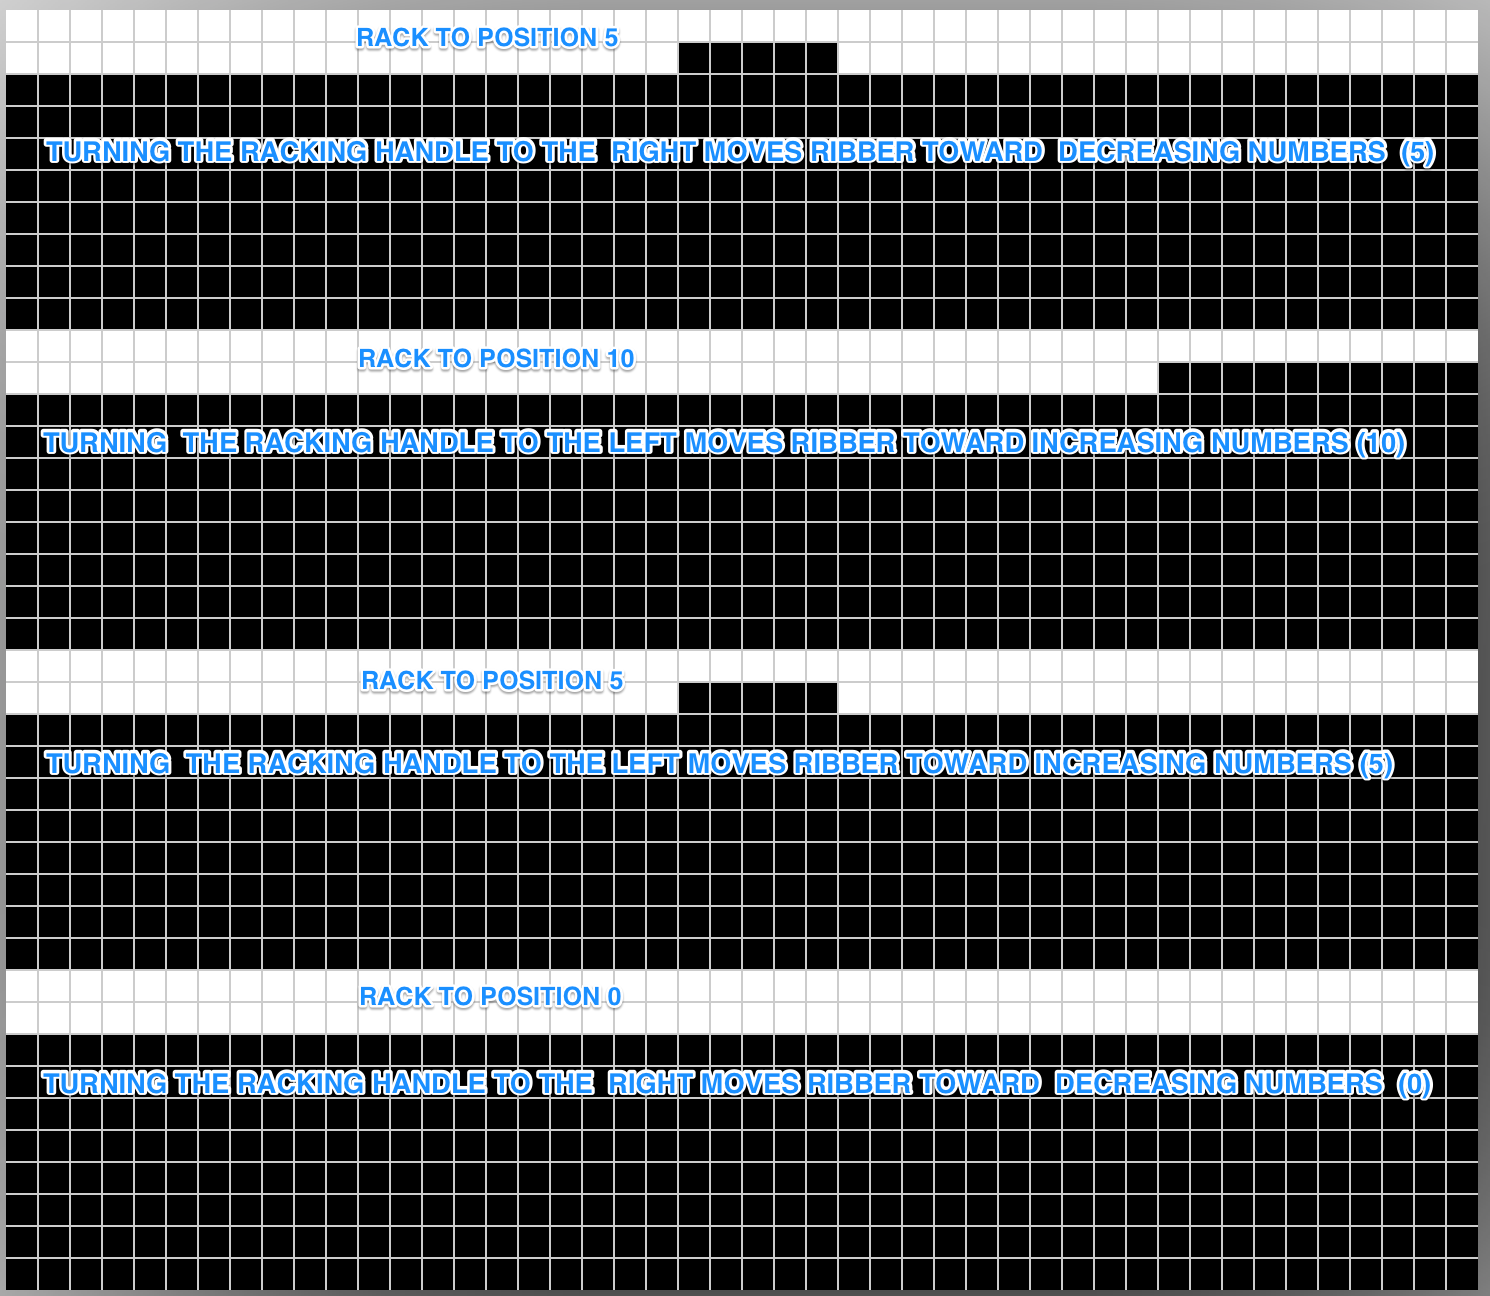
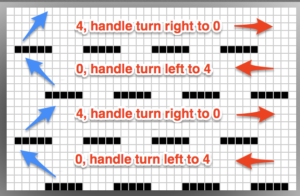
That said, remember that turning the racking handle to the left is toward increasing numbers on the indicator, to the right is toward decreasing numbers. For me that is counterintuitive. Mirroring the image again, and working with the repeat below can help with tracking racking movement even more. With the single dot on right, turn the handle toward it, to the right, and the movement will be towards 0. With the movement of marking row to left, turn racking handle to left, toward 5, and so on.

Next on the drawing board: a fabric using the same technique, but that I might like more. This image was a portion of a greyscale pin of a pattern book from a Russian pinI tested a concept for recreating it as a hand technique, trying to sort out how many rows I could knit before racking and the racking sequence. The best result was with a single sealing row, which in turn required changing the ribber slip setting for one row only,

so it’s back to the drawing board. I think any automation is best done using the ribber to do the all knit rows, the main bed to needle select racking positions. Results will be added to the post on combining KC patterning with racking

The present set up with 2 carriages may be used for solid color backed quilting. Using the altered KC1 operating from the right with no yarn in feeder should work to drop stitches in drop stitch lace where the repeat is altered to allow for the knit carriage with no yarn to do the stitch ditching while selecting needles as well. Related color separation and swatch may be found in the last segment of the post: revisiting-drop-release-stitch-lace/


Combining knit carriage needle selection with racking

4/23/18:  inspiration source is from a Russian pin, bottom left #198

The first swatch, produced with manual selection, and varying the number of rows between racking to establish yarn tolerance

There are single rows of knitting on both beds, so the option of using 2 knit carriages is out of the running. My test swatch had the main bed doing all the knitting, the ribber knitting the joining segments with manual changes in its buttons from slip to knit and back when appropriate. The staring needle arrangement, on “graph paper”, and the subsequent racking positions: the top illustration is for racking position 4, the bottom for racking position 0.A tentative plan of attack: the combined knit and ribber carriages are to be used throughout. The main bed KC is set to knit, but the change knob is set to KCII. The blank squares will actually knit thanks to the setting, the selected needles will indicate the direction in which racking is due to take place prior to knitting the next row. 

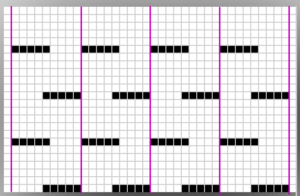
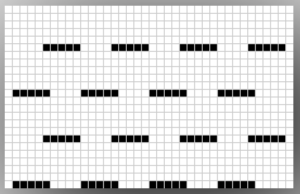
This is the starting ayab repeat, with single repeat segments highlighted (one alone would be adequate for most other electronics). 

You will be working on the purl side of the knit. In what is an increasingly irksome feature to me, Ayab will automatically mirror horizontally any loaded image, so to get the above, you need to actually be either mirroring the image prior to loading it (my preference), or remember to do so through Ayab’s actions after.  Enter this, the ayab screen shows this 

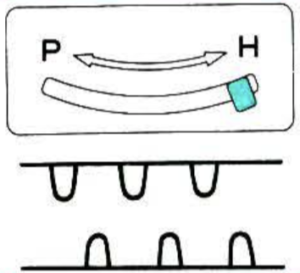
This is what appears on the left side of the Brother ribber. I prefer to rely on other methods to track directions and numbers of positions in racking, but the ribber itself provides some clues. My pitch lever will not move all the way to H, but that is made up for in the ribber adjustments, so it is not a problem. A reminder: turning the racking handle to the left is toward increasing numbers on the indicator, to the right is toward decreasing numbers  The set up for my swatches, and the first row knit on racking position 0.  

The first preselection row in Ayab knits above needles on both beds. With carriage on the right, set the ribber to slip <–  –>, and knit up to the next row where needle pre-selection appears. *Change the ribber button on the side to match the direction in which you will be moving the carriage (left if knitting to left, right if knitting to right) to knit from the slip setting, knit to the opposite side (no more needle selection), change ribber lever back to slip again prior to any more knitting.** Repeat * to **. Position 4:

I began to run into issues with ribber stitches being too tight, this was knit with a tension adjustment, resulting in a less defined texture

Going a different route: another repeat, with each position, repeated once, repeat is pre mirrored  
a swatch with the racking happening only in the center of needles in work

Starting position can be variable. With more stitches cast on, while keeping the same ribber configuration, racking can happen further to the right or to the left. There need to be enough stitches on the main bed so ribber needles do not travel beyond them when racked. The knit bed uses tension close to that used for stocking stitch. The ribber stitch size may need to be adjusted to allow for a wider move toward either side. A looser ribber tension results in a less sculptural surface on the knit side. I have seldom been able to knit more than 6 rows on the main bed with ribber combination stitches on Brother, often maxing out at 4 depending on the yarn. Consistent habits help develop one’s own most meaningful reminders for taking action.

5/12/18 2 more samples. This time racking is done by 3 positions, the ribber setup is with 3 needles out of work, and 5 in work. Set up is with the racking handle on 3, move to and from positions 0 to 3. Knit 4 rows single bed. Rack to the next position. Use ribber set to knit for 2 rows for the sample on left, for a single row for the sample on the right 

A printable “rib setup” to aid in charting  P and H needle configurations, with some space for notes and carriage settings

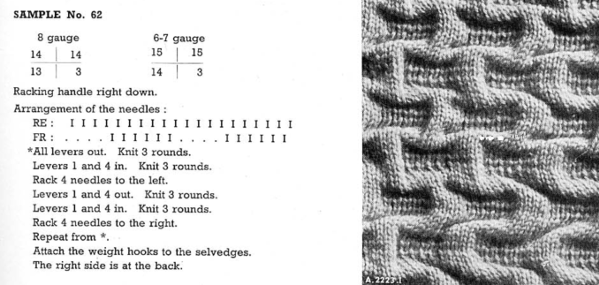
5/8/18 This is from the dubied knitting machine pattern book

My step-by-step interpretation, which may be worked as a hand technique on any machine 
1. racking handle on 0, cast on for every needle rib
2. transfer stitches to the main bed to match the needle arrangement above, and knit 3 rounds
3. set the ribber to slip in both directions, knit 3 rounds
4. rack 4 to the left, set the ribber to knit, knit 3 rounds
5. set the ribber to slip in both directions, knit 3 rounds
6. rack 4 to the right, set the ribber to knit, knit 3 rounds*
repeat steps 3-6
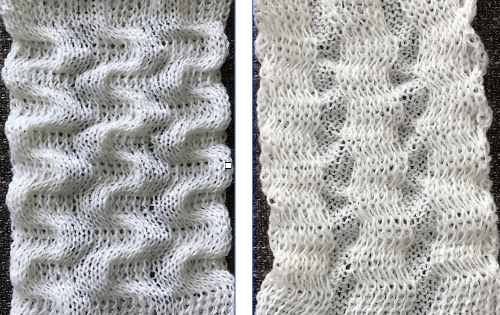
The resulting swatch For a different method of knitting this same fabric, please see Combining knit carriage needle selection with racking 2017

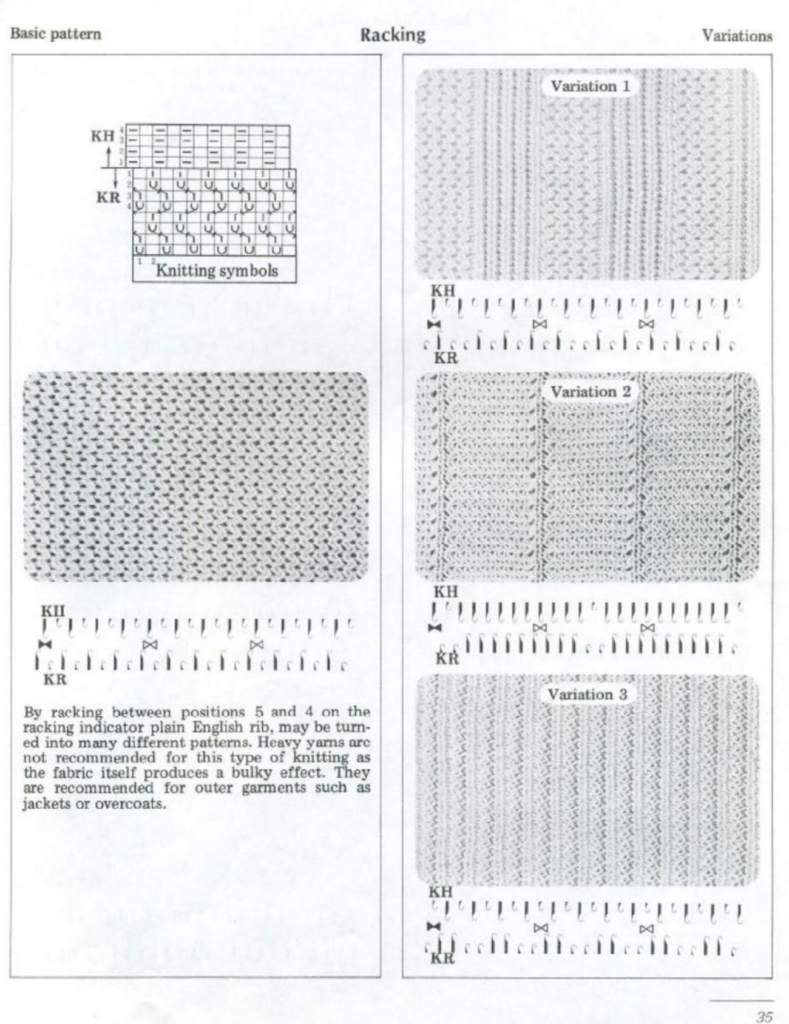
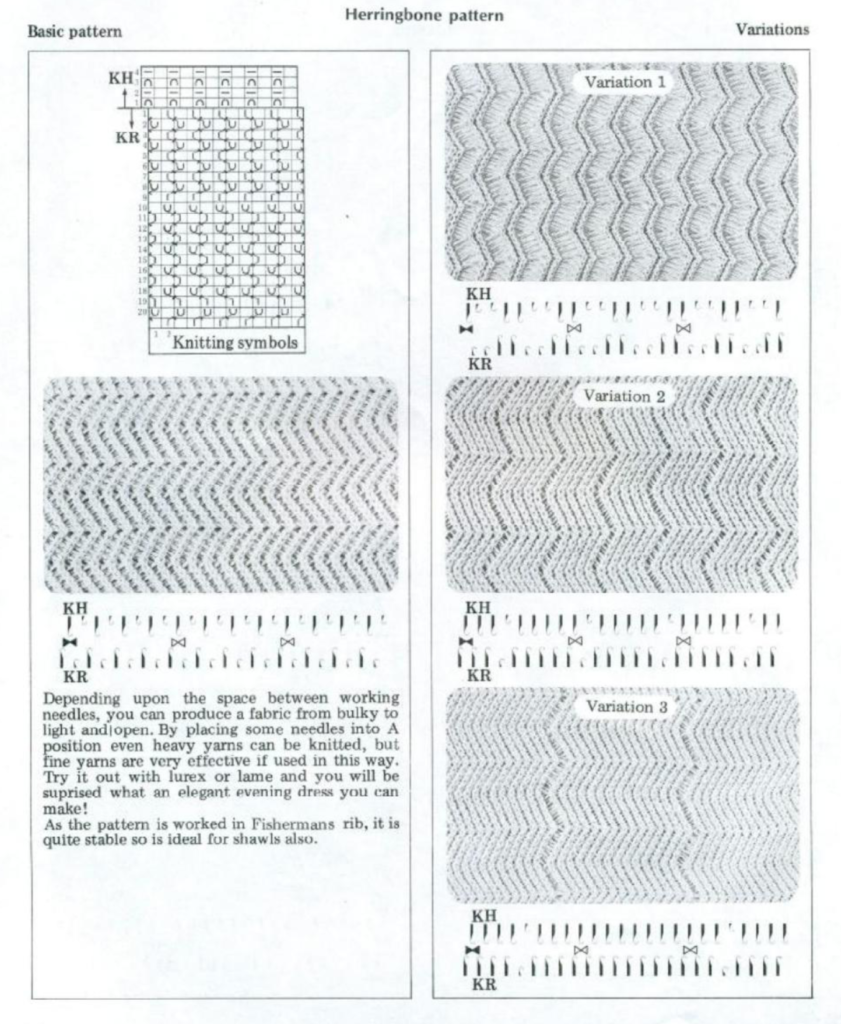
The Brother Ribber Techniques book provides guidelines for variations on this stitch type,  the following among them. It is available for free download online from various sites and is an excellent resource

These images were shared on Facebook, they are from the Empisal ribber stitch book

I have worked with racking in the past but never attempted to have racked shapes interacting with single bed patterning across the width of the piece on the KM. My 910 is presently connected to a Mac via the EMS Ayab kit. Sampling is quick and easy, replacing the mylar. One critical difference is that the repeat used must match the pattern in width numbering the same as the needles in use for the piece, so at least for testing my initial repeats were 30 stitches wide.

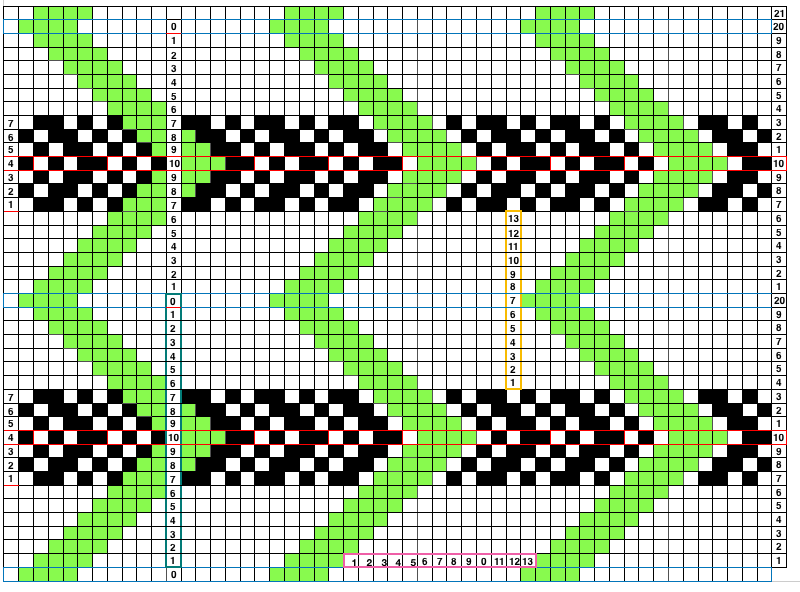
I find trying to chart things out before I actually knit helps me plan and understand what actions I need to take. Mac Numbers is my go-to for charts for the moment.  Here a random slip stitch pattern is put on a knit ground that takes into consideration possible racking positions, with the ideal position for reversing the bend at the center of the chevron pattern. With a bit of planning, punchcard markings or even mylar ones may be used to help with tracking racking numbers for accuracy, but that appears lost using Ayab software

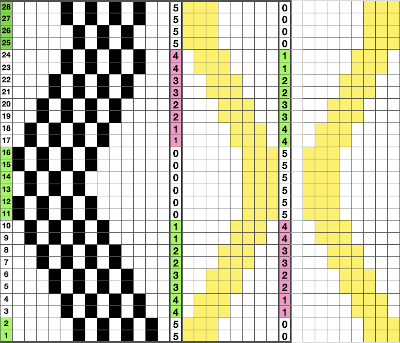
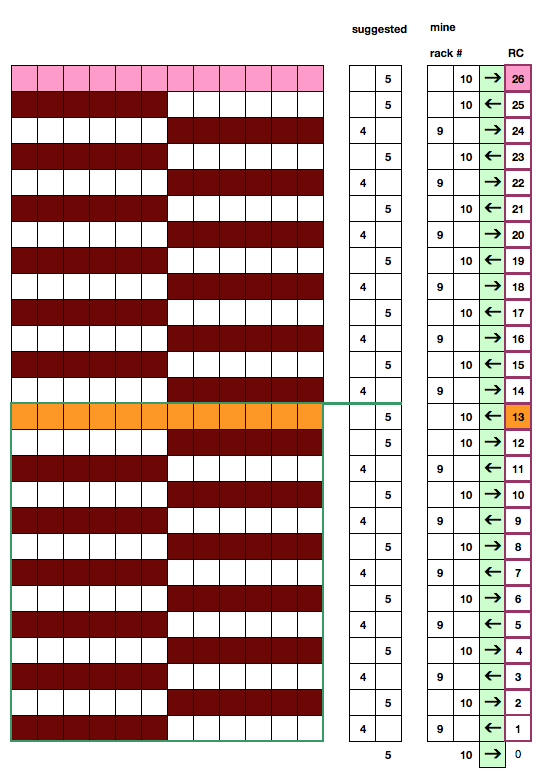
When planning for racking within the width of a piece, the racked columns will extend beyond the vertical edges of the knit. Since this is not about having zigzag edges but keeping the design within the body of the knit, the starting point and spacing for your ribbed stitches matter. Brother racking handle is numbered from 0 to 10. The numbering and direction of movement vary between KM brands. If you begin at 0, you are only allowed to move the ribber to the left, if at 10 the ribber only moves to the right. So that said, the racking sequence in the above illustration should be reversed, traveling from 10 to 0, and back. The green squares represent the direction in which the ribber stitches are moving, and the numbers in the column on the right represent racking handle positions. 

I found this slip stitch repeat produced too little detail in my swatches, but were it reduced for mylar use, it would remain 7 stitches high. It was taken from a punchcard book, so black squares/punched holes represent knit stitches. To match the fabric, in mylar use, the color reverse would do the job. The Ayab kit bypasses both the mylar reader and the programming capacity of the buttons on the left, so double height, double width, color reverse, etc. including the DBJ setting are planned for in the file import into the software. In some instances, Ayab settings (ribber for DBJ, and “circular”) do the work for you. I am using GIMP to create my BMPs. Paintbrush is a free program, still available for Mac, and functional including in High Sierra. It is the program used by some forum members to create their repeats, providing an easy alternative for people who not be used to working with image editing programs.

the slip stitch repeat in its original state: because slipped stitches create their texture on the purl side of the fabric, images do not need to be mirrored for the direction of the texture to be matched using electronic machines 
If the goal is to have the machine take care of keeping track of knit rows for you, without having to make changes in cam buttons, in the mylar a single repeat with blank squares programmed at the top and/or bottom of the repeat could then be knit using color reverse. Here the situation is similar to that of punchcard users who need to punch a hole for every knit stitch but considerably faster. If the original pattern is satisfactory,  planning for all knit rows as automatic needle selection can be done by color reversing the pattern in the software and adding all black rows in the image for download.  
some other all-over variations to try, individually, or even sequentially for slip stitch all-over texture

the first tests, for the various slip stitches, nothing quite “there” yet  
this is getting closer to the goal

The above working repeat and all above swatches were knit with the first preselection row from right to left, not left to right. For these stitches, the starting side does not make a difference. If the pattern, however, was in blocks that were even-numbered in height (2, 4, 6, 8), and the color changer needs to come into play for striping using it, accommodations need to be made so that preselection for row 1 happens from the right side to the left, toward the changer. The programming needs to be set to begin on the very last row, so the repeat returns to row one for preselection from right to left, and knitting rows 1, 2, etc begin with the KC set to appropriate cam buttons, to and from the left side of the KM.

The racking sequence needs to be adjusted to have the points of the zigzag land in the center of both the slip stitch areas and those in plain knit if that is the goal.  I am encountering needle selection issues with my hack, so this fabric is getting put to bed for the moment. In principle, the black squares in the illustration represent knit rows, and their number is easily enough adjusted in height. Punchcard users would need to punch holes for each black square, mylar users can fill in the white squares for a single repeat, add blank rows at the top or bottom, and color reverse when programming. In Ayab software, the repeat has to be drawn for the width of the piece but will repeat “infinitely” in length.

This is a possible punchcard template, with a shorter racking sequence. The Numbered column on left indicates the racking position. Pattern rows are preselected, so racking occurs prior to knitting across each row. I am also in need of purchasing more punchcards or another roll, so there is no test swatch at this moment. The top and bottom rows of punched holes on the colored ground are not part of the repeat, they overlap the first and last 2 rows of design in the punchcard, allowing the pattern to repeat in length. Ascending numbers swing to the left, descending to the right. Rows may be added at the level of #7 (7, 8, 9, 8, 7), so that the center of the swing may then occur on #9 positions in the racking handle, lengthen the card accordingly.5/14/20
Electronic machine models make experimenting easy and quick. Here an all-over tuck stitch is programmed for the base fabric, and racking variations are considered with the goal to cross the base fabric at various points in the patterned areas, or within the knit space alone. With increasing racking indicator numbers the ribber moves to the right, the shape its stitches create on the main bed moves to the left. With decreased racking indicator numbers the ribber moves to the left, the shape its stitches create on the main bed moves to the right. The repeat required mirroring for use in my electronic 930. Experimenting with racking intersecting tuck stitch on multiple repeat png, stitches were picked up on the ribber aside from the first tuck stitch on the right, A, on the center, B, and on the left, C, of the knit stitch groups.
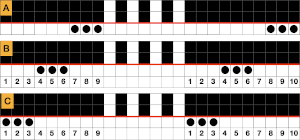
 The tuck pattern tested, racking placed in the center position changing ribber needle positions
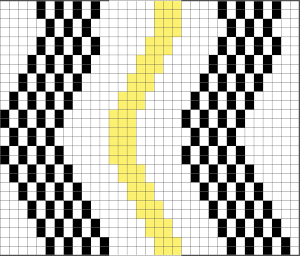
moving toward positioning the racked pattern further into the knit columns. Making the knit columns wider, placing repeats differently. The intended placement of the racked pattern is shown in yellow. Good notes and documentation of the final needle arrangement will make the technique easily reproducible. The needles involved on the top bed always need to be returned to the patterning position after any shares. At any point in the knitting, it is easy enough to transfer stitches on the ribber up to the main bed, drop the ribber down, and check on the placement of the racked pattern. If the place is satisfactory, the moved stitches can be returned to the ribber and the work is continued. If not, transferred stitches can be left on the main bed, other stitches can be shared with the ribber and patterning can continue with racking in the new location. One such adjustment is seen toward the bottom of this swatch. 
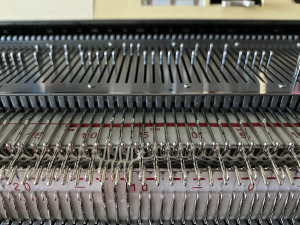
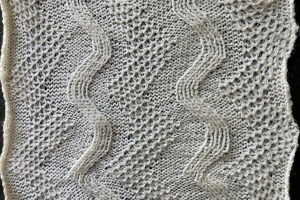
Vertical racking 3: automating half fisherman in pattern (2)

Working with the half fisherman racking discussed in the last post, here is an approach to interpreting the fabric seen below for knitting on a Brother model knitting machine.  500_557For the sample chart, I chose a 12 stitch repeat, making it executable on any knitting machine. The ribber is set to half-pitch. An often-overlooked clue as to what is happening or is about to be found in the arrows just below the racking position indicator. With the latter at 5, the red triangle appears pointing to L. As the bed is racked to position 4, the red arrow now points to the letter R. This is a simple racking pattern involving only the 2 positions, either to R or L

pitch_rack

Once on position 4, the red arrow indicates the direction in which the bed was racked on the last move (R), the “empty” arrow the direction for the next move (L), bringing the position back to 5. More complex patterns require a bit more planning and tracking to avoid errors.

rack2

Racking patterns in books often recommend beginning the fabric with the setting on 5, or the center position for the machine in question.  Doing so allows for balanced edges in patterns that swing by multiple positions in both directions. In this instance, for the sake of avoiding mistakes in as many ways as possible, I would start the pattern on racking position 10. Racking cannot go any further to the right, so no chance for example of racking to 6 rather than 4 in the knitting because of inattention. Having a “cheat sheet” with row numbers where no racking occurs, and the position of the carriage to R or L at their start and or after the knitting is also helpful. I had to lower the tension on both beds considerably to avoid forming loops that in turn got hung up on gate pegs. Especially at the start make certain that the comb and weights drop properly. Using KCI will ensure that the first and last stitch on the main bed always knit. In the patterning used on the Passap back bed (previous post), the groups of needles in each half of the repeat will change to the alternate position with each pass of the lock. On the rows where the back lock is changed to N, selection continues in pattern, but no tucking occurs. In this chart, the pattern is maintained continuously throughout, while blank “remaining” squares are filled in on rows where no tucking or racking occurs = N, every needle knits. In Brother machines, both tuck buttons are pushed in. Selected needles knit, non selected tuck across the row. new program 2symbols

I tested the pattern approach on my 910, with a 38 row, 20 stitch repeat in a random acrylic. I had some issue with some needles not selecting properly, for whatever reason. The repeat was not planned so a full 10 stitches were at each side of the knit, resulting in the difference on the right side of the swatch photo from its left.

larger repeat

half the repeat with color change on a single plain knit row (use of color changer only possible with even row change sequences), the top stripe of the swatch in plain rib

half repeatN1

1rowN1_584

back to scales and knitting them

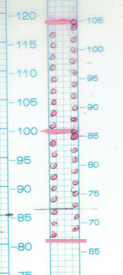
Overall,  wider repeats and thicker yarns gave me harder to knit fabric, with less noticeable pockets and lack of stretch and “bounce”;  ultimately I went back to a 6X6, 12 stitch 2-row sequences illustrated in the chart above. The thinner yarn needs to be with a bit of stretch, and enough strength not to break when ribbed and racked at the tightest possible tension. This is a fabric that requires concentration, having as many clues as possible to help stay on track is useful. If errors are made close enough to the all knit row, it is possible to unravel carefully to that point and continue on. Mylars or punchcards may be marked to reflect racking position. Here the mark on the right = 10, the one on the left = 9. Marks take into consideration that the card reader’ design row and knitter’s eye level row views are not the same.

mylar_marks

A row cheat sheet can help track carriage location for all knit rows. Pictured below is part of mine. Wording for clues or description of sequences should make sense to the person knitting, not necessarily follow a specific formula.

screenshot_34

some of what “did not work”, including a very long swatch with a confusing pattern due to creative operator error

500_591a finished piece with yarn ends not yet woven in500_590

The fabric is tugged lengthwise, left unblocked, and pockets may pop on either side of it, with the majority on one side of the knit as opposed to the other

the start of a series in varied colors and fibers500_604

Racking 2: vertical chevrons/ herringbone +

Here again, half fisherman or full fisherman rib is be used. The zig-zag happens at the top and bottom of the fabric. In half fisherman, the setup is once again for full needle rib. If knitting in one color the sequence is: knit one row, rack a space, knit one row, rack back again (X and Y below represent the 2 racking positions involved screenshot_39

for 2 color fisherman, the sequence is knit 2 rows with col 1, rack one space, knit 2 rows with color 2, rack one space back again

screenshot_41 this fabric is produced in conjunction with a pattern repeat using the principle that black squares knit (pushers up, needles preselected), white squares tuck (pushers down, needles not selected), the repeat is 12 stitches wide, 2 rows high; it is possible to have 6 stitches tucking side by side because this is an every needle rib, and there will be a knit stitch on the opposite bed anchoring down each tuck loop

screenshot_42

screenshot_02

one color half fisherman side one   500_528one color half fisherman side 2500_5292 color setting, color changes every 2 rows, side 1, thinner yarn
500_542
side 2

500_543

2 color version, changing color every 20 rows; racking interrupted with plain knit rows at top and bottom creating horizontal pockets20rows_plain

20rows_plain1

This type of repeat became popular in Passap clubs for use in their Passap ripple afghan. The racking first to the left and knit a row, knit to the right and knit a row, was interrupted after 36 rows, followed by a color change and a no-racking knit row before resuming the previous racking sequences.
When single or multiple odd # of rows with no racking are introduced at intervals the zigzags once again happen at sides rather than top or bottom, with the knitting after the no racking row(s) reversing direction. The yarn used in these swatches is a random acrylic, presses flat, not the best if aiming for any 3D textures; the color difference is due to photos being taken at different times of day

side one 500_530side two500_541

what happens when multiple odd numbers of rows are knit changing back lock set to N (all knit), no tuck stitches. The fabric still swings in opposite directions, and in addition, the all knit rows produce areas that “poke out”, beginning to create scales of sorts

side one 50537side two 500_538back to vertical: full fisherman with color changes every 2 rows, side one 500_539side 2, with a few stitches knit off issues  500_540

it is a matter of personal preference whether the extra effort with full fisherman rib is worth any difference in appearance or result in the final fabrics. Changes in tension, yarn fiber content, and machines used add to the variables. Good notes in trials help one determine predictable results and to choose whether the effort may be worth it or not. Using laborious techniques for borders rather than whole items is always an option.

1/22/2016: half fisherman racked rib knit in thinner yarn, wider # of stitches and more rows in pattern group before single N/N row, no blocking

500_557

500_558same fabric with color change every 2 rows 500_561

500_566

Ribber pitch, a bit on racking 1: chevrons/ horizontal herringbone

A “how might this be done challenge” of late re this fabric brought to mind racked patterns for chevrons, both vertical and horizontal, and the possibility of producing them on home knitting machines. racked_scarf_mediumTo review some of the principles in racking in both Brother and Passap knitting machines: the pitch is the distance between each needle groove along the needle bed is sometimes also referred to as gauge. The size varies between machine brands and types of machines. For example, the Brother bulky has a 9 mm pitch, the Passap a 5 mm one; the larger the pitch number, the thicker the yarn that may be used.

Full pitch lines up needles and gate pegs (or channels) on both beds directly opposite each other. To knit patterns in full pitch, the rule is that for every needle in the working position on the main bed, the corresponding needle on the opposite bed must be out of work, and vice versa. This setting is never used when groups of all needles are in work on both beds. Stitch patterns using this setting are designed to have opposite needles in work on either bed at any one time, but not both at once. The number of maximum needles in use for ribs on both beds will usually total 200 (4.5 mm machines), and the setting accommodates yarns thicker than when every needle is in use.

In half-pitch both bed needles are now offset by half a position, centering them between each other. The full complement of needles for possible use now is potentially 400 (4.5 mm machines); the setting accommodates thinner yarns than one might use on the single bed.

The half pitch lever on Brother may be moved from P to H to change alignments. In Passap the racking handle may be used in an up or down position to do so. The racking or swing lever allows the ribber bed to be swung one full pitch to the right or to the left in a series of stepped moves. The racking handle on Brother machines is located on the left-hand side of the ribber bed. Racking swing indicator positions are numbered 0-10. When the racking indicator has been moved over to the next number, this means the ribber has moved by one full pitch. With the swing indicator at 5, both beds will be centered opposite each other, the usual position. Starting points may vary when racking is used in patterns. Beds cannot be racked with needles in holding, as needles will then crash into each other. It is always a good idea to check ribber alignment before tackling more complex, double bed fabrics. In Passap the racking indicator is situated above the racking handle, and arrows indicate the direction of the last movement. The scale at the top of the front bed shows the possible racking movements from a center point of 0 to 3 to either to right or left of center. I chose to place numbers below the factory ones on the machine from 0 to 7, finding that method easier to follow, since I do not rely on built-in patterns and racking prompts from the console. For the purposes of these swatches, I am reverting to the factory indicators.

In the Passap system, the racking handle has 2 main positions: up, and down. When the racking handle is up needles are directly opposite each other (P pitch in Brother), when it is down the needles are between each other on opposing beds (H on Brother). There are some racking handle positions at different parts of the “clock” that are recommended when using some of the Passap accessories.

Regardless of machine brand needles have 3 basic functions: knit, slip (do not knit), tuck (gather loops). Passap pushers have 3 positions: work, rest, and out of work. When a pusher is in the up position the corresponding needle will knit no matter what the setting on the pattern dial. This is the equivalent of having needle pre-selection on Brother, but forgetting to change cam buttons from the normal knit setting. When a pusher is at rest it will slip or tuck depending on lock setting to AX, DX, or FX (in Brother these would be needles not selected, in B position). If locks are set to C, E, or G, the pushers have no effect on the needles. Pusher positions may be changed manually, automatically by arrow keys (back lock Passap, lili buttons, and lever Brother ribber), automatically by readers whether electronic or punchcard on both brands in the Brother main bed or front bed Passap are in use.  NO pushers are used in N (double or single bed plain knit), CX (tubular), EX (double bed, tuck).

I personally find racking easier in terms of the numbering in Brother brand machines. For these samples, however, I chose to work on my E 6000. Adding tuck to the mix creates more textured surfaces, and a half or full fisherman’s rib where every needle tucks, then knits as the carriage reverses direction on either single or both beds, is a place to start. I have written previously on tracking brother racking sequences using a punchcard numbering system. If no other pattern is used on the main or front beds, needle and pusher selection might be used to track the racking position there as well. These fabrics require concentration. In terms of chevrons, both horizontal and vertical may be produced. Some published sources include a youtube video by Diana Sullivan, knit on a Japanese machine, and a baby blanket in full fisherman rib knit on the Duo 80. The version below is my half fisherman adaptation of the latter. The photos illustrate both sides of the fabric. The racking is done by moving a single of each of only 2 positions to the right or to the left. Single (or multiple, odd-numbered) rows at the end of each sequence place the carriage at its start on the opposite side, rather than altering the numbered sequences as in the Diana video. I began my fabric on Passap racking position 2, to the right of 0, locks set at KX, N, first and last needle in work on the front bed. The back bed tucks every needle right to left, knits them left to right. There is a slight difference in texture between the 2 sides of the fabric.

300_514300_515

activate row counter after CX rows in the cast on, with locks on left, so knitting the racked pattern begins with locks on Right, RC on 1. Below is my working “cheat sheet”

symbols

cheat sheetsettings

For scales and chevrons on Brother machines please see 2018/07/19/more-scales-and-chevrons-in-ribbed-racked-4-fabrics/

Racked ribber cast on and rib configuration tips

This cast-on (on any ribber) is capable of giving a softer, looser start and is good for fabrics that stretch. It is described in most machine knitting manuals.
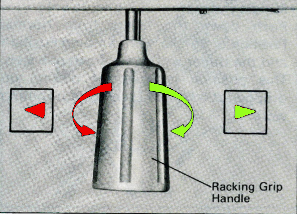
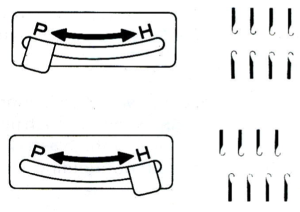
When experimenting, check the alignment of needles physically before proceeding for knitting ribs on all needles. In Brother machines, the racking grip handle is used in creating “racking patterns”. By turning the grip handle the ribber bed is moved to the right or to the left. The racking position is indicated on the racking indicator. Usually casting on is begun with the indicator in the center position, #5. As indicator numbers rise the ribber moves to the left, and as they decrease the ribber moves to the right. The two cursors can be moved and set to use as an index of the racking range. I prefer to track racking positions in other ways ie. with punchcard markings when possible. The arrows L and R indicate the racking movement and will change position after each handle turn reversing direction is completed. The pitch is set to accommodate rib configurations. In the P position needles on each bed “plain and purl” are directly opposite each other and in a collision course. If EON (every other needle) on each bed is in use, then this position is used to center needles on opposite beds between each other. In position H the ribber needles are centered between two main bed needles.
If observing a suggested needle rule, set up needles using it.
Rack one full number to put the needles out of the rule, and knit one row at about 2 numbers tighter than the final setting.
Hang the comb and wights, and rack again to the original position. Add any edge stitches that may be needed for the specific knit fabric. Knit one row across stitches using the final tension setting.
For every needle rib cast on in my sample I began with the racking indicator on 6, COR, knit zigzag row to Left. Note: at the start of the process, on the left side,  the first needle is in work on the top bed.  The ribber is then racked to position 7. The first needle on the left is now in work on the ribber.  A row is knit from left to the right. The ribber is then racked back to its original position (6). The first needle on the left will once again be on the top bed, and the first needle on the ribber to its right Continue in the planned rib.
Often manuals give suggestions as to the “needle rule” for each type of rib. The sequence below is knit on a Passap. It, in theory, would produce a 2X1 “industrial rib that could transition to every needle or main bed knitting without any holes at the transition point. Note here there is a needle in work between each pair of needles on the opposing bed.

IMG_2390“zigzag” row, normal needle position: work slowly, make certain all needles have picked up yarn
1hang comb: the first needle is in work on the back bed on the far left 2rack one full turn to the right: the first needle in work on the front bed is now on the far leftIMG_2382knit one row  4rack back to the original position, and continue plain rib  5There are sources online including videos that recommend circular rows at this point, they are actually unnecessary. The other recommendation made by many after any ribber cast-on is for 3 circular rows. There is no need for the third circular row. It will actually create a visible line across one side of the rib, that is noticeable, and may not be wanted if it is on the “public” side of the finished garment.
To fill in potential holes produced when empty needles are brought back into work, bring all empty needles into work, and tuck one row across both beds, making certain loops are formed on each needle IMG_2391knit 2 rows circular slowly, some needles hold 3 loops of yarn, switch to ENR rib
the result at rest
rib1rib stretchedfirst rib stretchGoing for a rib with more of a 2X2 look: set up needles for rib pattern, there are still 2 needles in work, one not, on each bed. The empty needle space is now at the center of each pair of needles on the opposite bed

IMG_2392rack one full turn to the right, and knit one row IMG_2393hang comb and weights IMG_2396rack back again to “needle rule” position Knit one row at final setting, proceed for ribIMG_2397at the top of the rib knit 2 rows circular, proceed on EN ribIMG_2399

tension adjustments may make a big difference, my samples have been knit at the same tension throughout, and single-ply throughout

the first rib at rest rib2stretched second rib stretchBoth instances produce a reversible rib
Some experimenting is required to achieve cast-on rows in the rib that is not too loose or too tight. In this instance there has to be enough slack in the loops so that there is room for racking one full turn, too much will leave loops. Loops created by cast-ons with deliberately large stitch sizes may, in turn, be chained off with a latch tool. The stretch factor and weight of the resulting rib also need to be in balance with the remaining knit fabric. If “improvising” it is always advisable to keep good notes. Most publications and how-tos are really guidelines, starting points for investigating what may be the best method to use in any one piece.

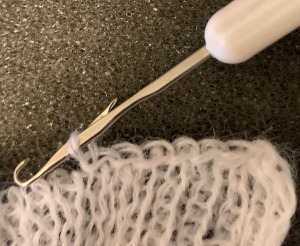
A variation: a racking cast on at a large stitch size can be chained with a latch tool after the work is off the machine to make an edge that nearly matches a chained-off bind-off. It is useful, especially in rib tuck fabrics.
Set up needles in the needle rule and rack out of the needle rule.
Knit one row at a large stitch size, moving slowly to the opposite side. Testing will determine the tension the specific machine will tolerate with the yarn being used.
Check that all needles have picked up loops.
Hang the comb and weights and rack back to the needle rule.
When off the machine, use the method described in the post Ribber cast ons: breaking the “rules”

Unconventional uses for punchcards 1: tracking racking positions in ribbed fabric

In a long-ago post I shared the punchcard image below. The card is used double length throughout. Cast on in your favorite method.  “Memorize” the first row of pattern, set card to advance EOR, set KC to tuck in both directions, set RC (ribber carriage) for normal knitting throughout. This is a racked pattern. The numbers to the right of the card are for the racking position on each visible row (takes into consideration your eyes can view card 7 rows above card reader teeth). There are only 2 positions in this card as written, 4 and 5, so the results are vertical columns in a textured rib

checkerboardthe corresponding swatch, both sides are shown 

The tracking for the racking sequencing may be created for any punchcard, whether punched holes are required in the card for patterning or not. The image below is taken from the Brother Ribber Techniques Book. If KC is used, no holes are punched, and the carriage is set to plain knit, though the card advances, all needles knit. End needle selection is not a factor. page 17

the racking handle movement repeat isolatedworking repeat

In the card, for use on Brother, the first row of the repeat with the machine on racking position 10 would be placed on row one pre-marked position found on stock brother blank cards. Always check markings for your machine. I have a roll purchased for Brother kms specifically that actually are stamped for Studio, with # 1 two rows below where it should be on right.  No holes need to be punched in this instance. Needles are brought into work and filled as illustrated on the ribber book page. Knit one row across stitches with the card set to advance normally. In this instance marking row numbers in preferred colors will indicate when the racking sequence changes direction. Green rows rack to left, orange to right. The racking handle position repeat is 20 rows high (shown on left), a minimum of 36 rows for the card to roll properly) is met by repeating it twice, and the “motif” is broken up to accommodate the fact that the reader is working on 7 rows below the row number visible on the machine exterior. Rows 34 and 35 would become the 2 every square punched rows always placed at the top of pattern cards. The blue numbers on right reflect the racking handle position for that row before the next row is knit. They can be marked on any blank square if the card is blank, or alongside existing row numbers as seen in the punchcard for the checkered swatch. It is helpful to have consistent habits if one needs to stop for any length of time ie. always knit row, rack to position or stop after knitting, rack upon return.whole card
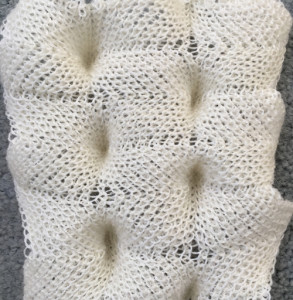
The machine can be set for double length for racking after every 2 rows knit.

Using the method for cables and crossed stitches  (3 posts)

Lace cards on 260 bulky PDF