There are several brand KMs still around and in use, but most are no longer being manufactured. Questions often come up on using one KM brand pattern card on another. Card readers inside the machine are below eye level, so exterior number/other markings on cards or mylars reflect that, providing the knitter with a visual cue as to where they “are” in the repeat. If machines pre-select, the needle selection may not bear any relationship to the actual design row on the punched card or mylar as opposed to what one “sees”. In addition to this variable in lace one often has 2 carriages in use. It is possible to develop cards etc. from lace hand-knitting graphs, but there is enough “going on” so a good place where to start experimenting is with pre-drawn ones. Lace preselection on any single row may have no apparent relationship to where the lace hole will ultimately end up.
Here are some random facts gathered from both sources and experience, they are applicable only if the knit carriage is set for plain knitting and no other function ie. slip or tuck is involved; plain knit rows do not advance the card reading mechanisms. In mixed-structure fabrics, the rules change.
the Brother and Toyota lace cards can be used on studio punchcard machines as long as they are patterns that have 2 blank rows after each transfer sequence
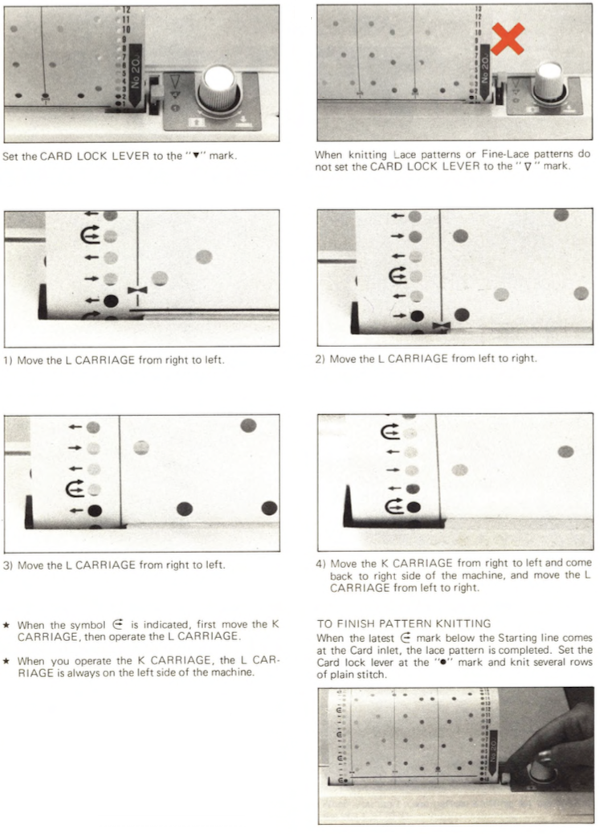
Brother and Toyota have U-shaped arrows to identify when to knit with the knit carriage, both brands read cards 7 rows down
the first row on Brother is transferred from right to left, while on Toyota it is transferred from left to right; Brother and Toyota cards are interchangeable provided the card is mirrored vertically (or a simple cheat: use carriages on opposite sides of usual)
for Studio knitting find the row number of the U-shaped arrow and circle the 2nd and 3d rows below that row that number to identify rows in which the carriage is changed/set to knit
The Brother ends with 2 blank rows
while Studio starts with 2 blank rows
on Studio begin brother card by locking card 4 rows before row 1, on row 3
Brother/Knitking lace carriage does not carry yarn, does not knit or trip the row counter; the stitches get transferred in the direction that the lace carriage is being pushed
Studio/Singer has a lace carriage available that transfers as it knits; on more complex laces one is sometimes instructed to set the carriage not to knit for a specified number of rows, the yarn may be removed, and other adjustments are often required
though Studio and Brother lace cards are not directly interchangeable; aside from the numbering issue the transfer method is different, so a studio lace card “working” on Brother or vice versa is a happy accident and likely to result in a “different” fabric
Brother information is applicable to its “new” clone, Taitexma. The possible settings and symbols: 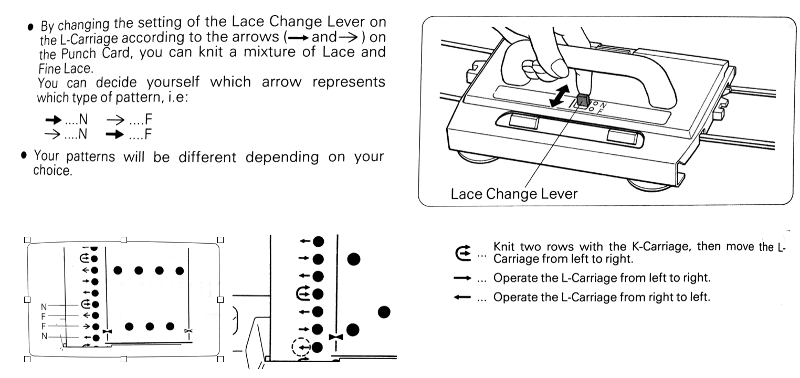
Lace point cams may be used on the punchcard machine to create vertical bands of lace. This is also achievable on the electronic by programming for knit stitches between vertical (or horizontal bands).
More information in posts:
Lace knitting tips including card and electronic markings for transfers and knit rows
Revisiting lace repeats, symbols, and charting
A few references :
Machine Knitting: the Technique of Lace by Kathleen Kinder
Knitting Lace and A Machine Knitter’s Guide to Creating Fabrics by Susanna Lewis
Machine Knitting: the Technique of Pattern Card Design by Denise Musk
John Allen’s Treasury of Machine Knitting Stitches
The Harmony Guide to Machine Knitting Stitches (their Colorful Guide to Machine Knitting Stitches does not include lace)
322 Machine Knitting Stitches (Sterling Publishing,1988)
Both Brother and Studio published punchcard volumes, now out of print.
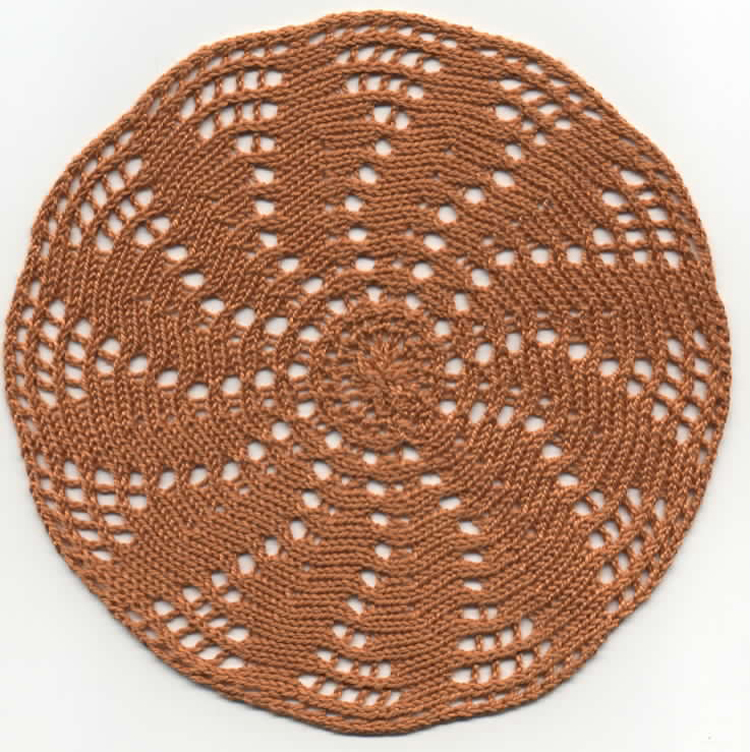
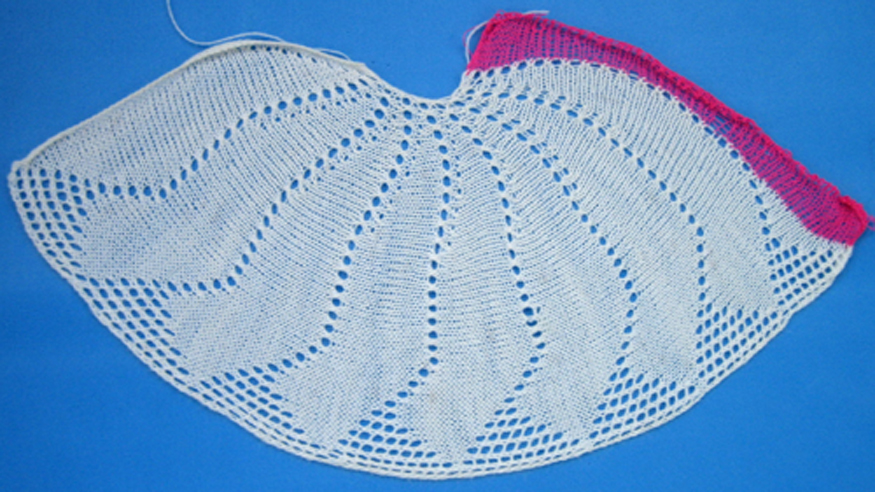
 Any circular knit that is shaped with sideways holding segments will need to be seamed when completed. Taking that into account, at least one row is knit with “doily” yarn from left to right after several rows are knit in waste-yarn before the transfers to create open stitches are begun. It is a personal choice and preference whether upon completion of the required number of segments to join by rehanging open stitches and binding off on the machine or grafting (the method I prefer) with the work off the machine after several rows of waste yarn and dropping the work off the KM.
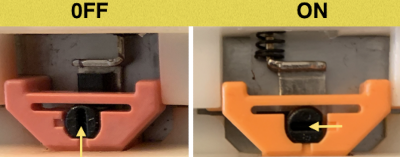
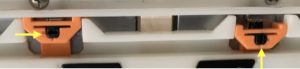
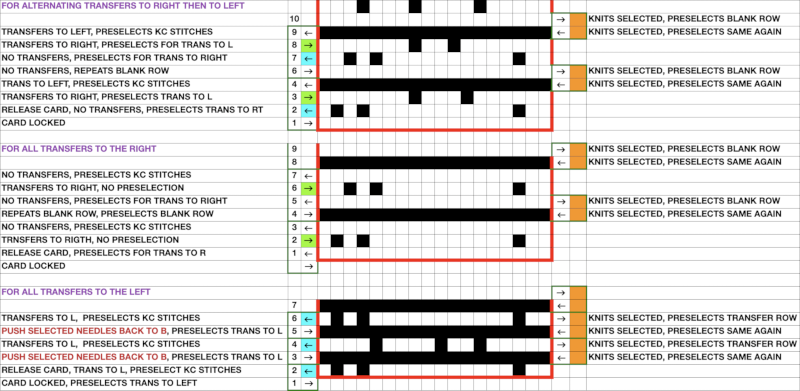 Beginmomg with the LC on the left, the end needle selection is canceled. The two positions in LCs for both punchcard and electronic KMs
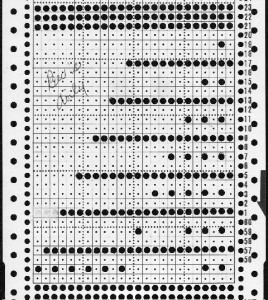
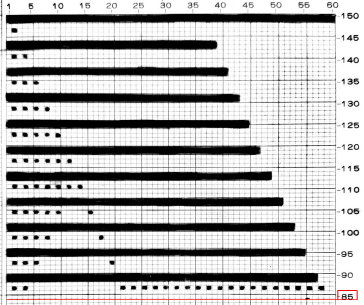
 Back in 2002 exchanges with a fellow member of an Australian Yahoo Group, OzMKers, led to her final edit of this half punchcard repeat for the test doily. All transfers are in the same direction, to the right
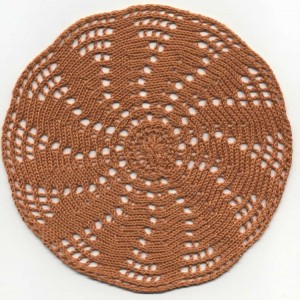
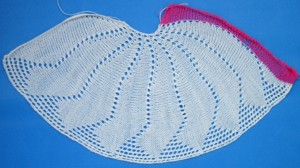
 A 24 stitch sample, knit in cotton yarn. The center of the circle needs to be managed as opposed to simply gathering it in order to keep the finished shape flat.
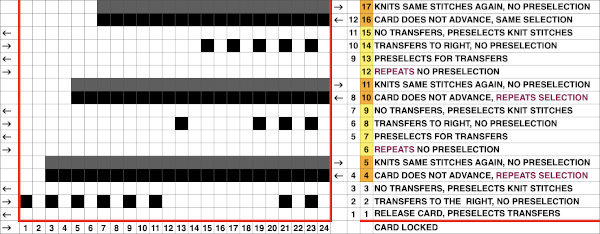
 It is possible for the lace carriage to transfer while at the same time preselecting every needle to be knit by the next pass of the knit carriage from the opposite side. An expanded view of part of the repeat:
 In order to get the repeat working properly, I found I needed to edit out one of the punched holes at the start of each repeat, revised card
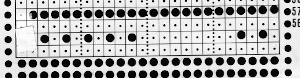
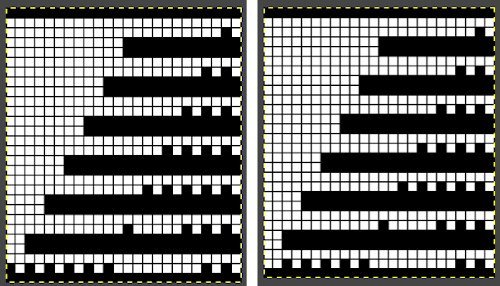 If drawing on the back of mylar for use on the 910, either image may be drawn as is, with the number 1 pattern case “A” selector reverse lever to up position.
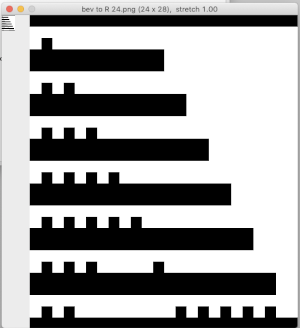
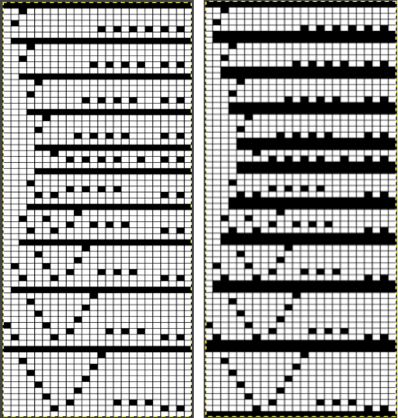
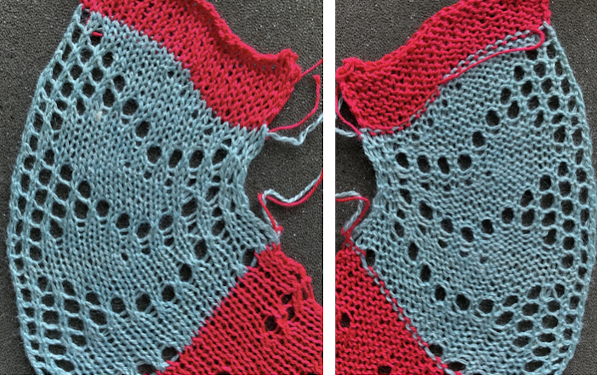 In turn, this repeat as given was used in 2020 for a pattern test on my 930 for all transfers to the left. Note: here the knit stitch black pixels are followed by a blank row, and the transfer marks occur on design row 3, directly below the next series of all black pixels
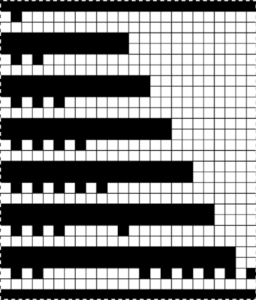 Depending on the machine model, the .png for the repeat may, in turn, need to be mirrored horizontally.
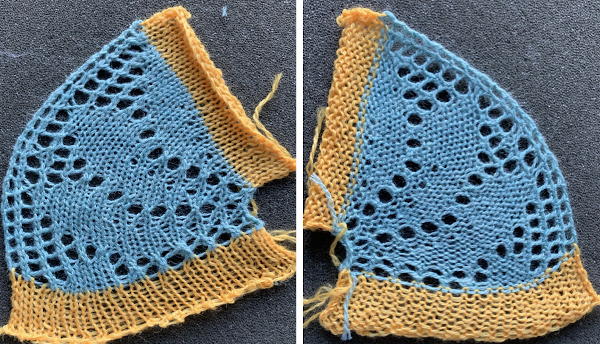 A 40-stitch adaptation from the Bond site to try
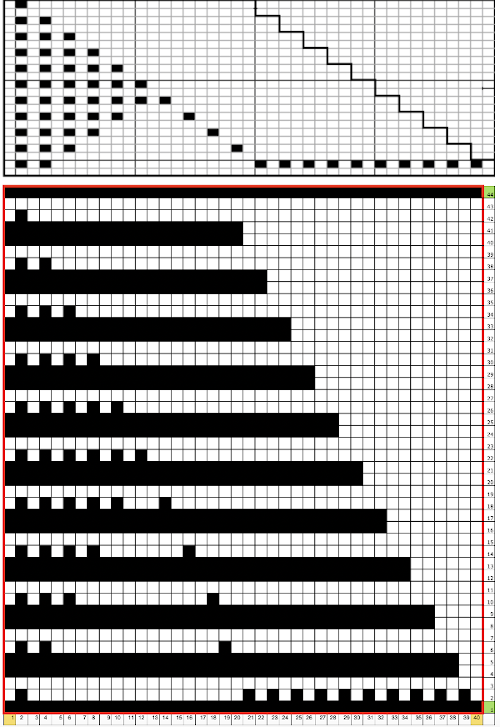
 The electronic repeat as drawn on the mylar,

 Subsequent posts on knit edgings: