Slip-stitch fabrics are capable of creating interesting textures. When blocks of stitches are slipped, the floats that may appear on the purl side are considered problematic by some knitters. One solution is to work using mosaic and maze “floatless FI” designs. This was addressed in previous posts, including color separation methods for planning them, and a variety of knit swatches.
The images below have often appeared in knitting boards on Pinterest, I am returning to the slipstitch design thread.
A Missoni knit  Sportmax Armida sweater
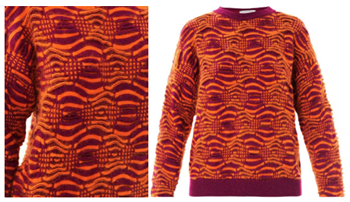
I decided to plan a “square/block” shape to sort out the technique; it could easily be adapted to a diamond one. By necessity, larger repeats need to be executed on an electronic machine whether via mylar or download program. The plan is to change colors by any means available, usually, every 2 or every 4 rows, requiring a motif repeat that totals an even number of rows. In hand-knitting garter stitches can become part of the resulting texture, but they are impractical here. Often commercial knits are produced on machines that can automate many more functions and surfaces per row. The Missoni sweater is a fine knit, and on a detailed examination, reveals lace eyelets in some of the stripes in addition to plain knit and slipped stitches. Not impossible to do on a standard KM “home” electronic, but the simplest way to add lace eyelets would be via hand transfers.
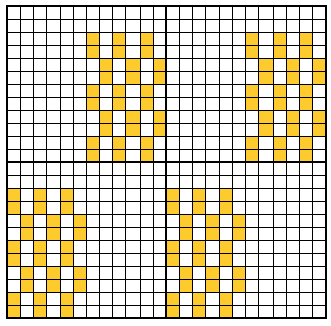
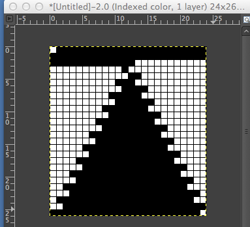
my starting chart

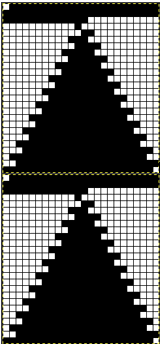
checking that that repeats line up

possible mylar repeats
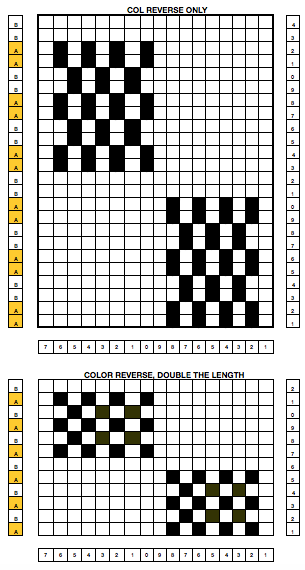
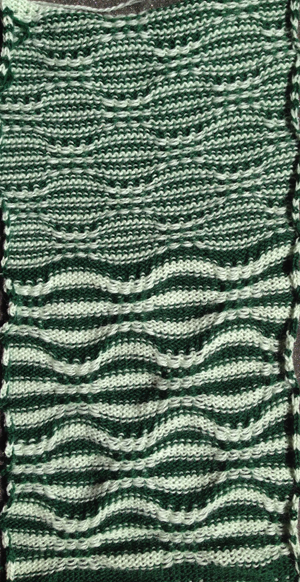
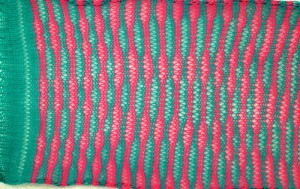
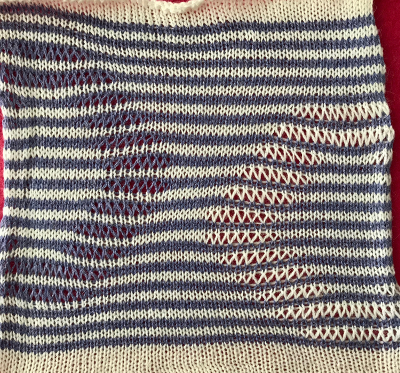
I drew the top repeat above onto mylar for use on a 910. The sample swatch was knit using 2 carriages (and lace extension rails). I selected R 1 from right to left, with the carriage that was to remain on that side, and began knitting with the second carriage, placed on the right, holding the alternate color. There are a few ways to achieve the pre-selection row, depending on the choice of start to the fabric, and whether a color changer as opposed to a second carriage is in use. Contrasting colors help us see and understand stitch formation. For the bottom of the swatch I used double length as well as color reverse, with color (carriage) changes every 4 rows. The top of the swatch is knit with color changes every 2 rows. Slip-stitch is short and thin. Since there are more stitches slipped on the bottom of the swatch, the fabric is pulled in in those areas, making the knit on either side “bubble” in a way that the top of the swatch, do not, and resulting shapes no longer appear as straight lines horizontally.
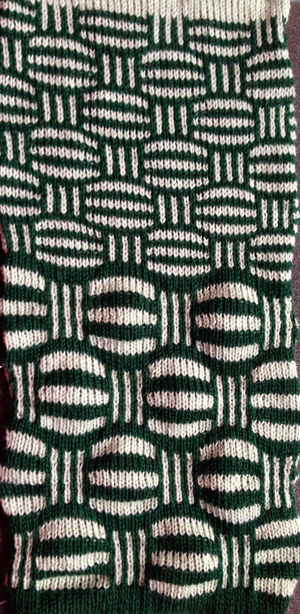 purl side
The single-width blocks that form the stitch pattern are usable for tuck knitting as well. Whether the motif may be elongated on standard machines depends on the yarn thickness used. Tuck-stitch fabric tends to be short and wide so that the finished knit piece will be wider than the slip-stitch version.
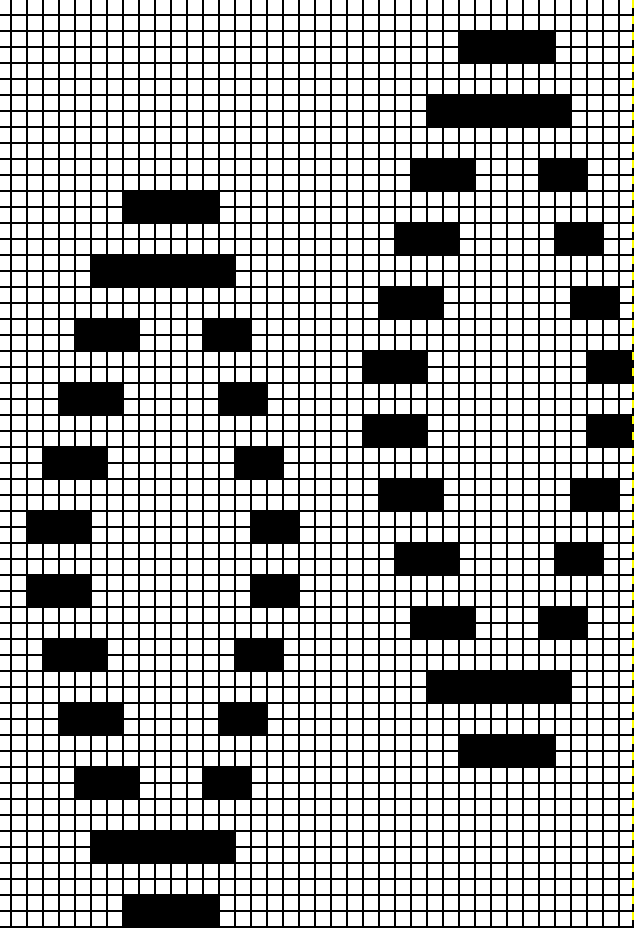
Taking this shape to a punchcard requires editing, and the results are quite different. One sample idea, moving stitch groups around to fit a 24-stitch repeat:
 All the white squares would need to be punched to form knit stitches, the yellow left unpunched, to form the slipped ones, the look of the fabric would be very different.
Previous blog posts on related topics: tuck and slip color striping, block stitch color separations, where the term block stitch is used based on publications that refer to floating, staggered designs rather than to square shapes.
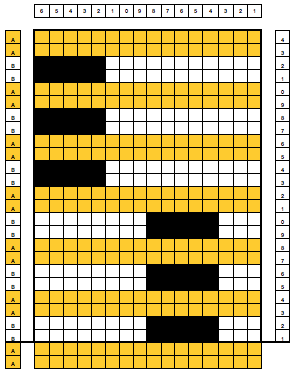
As for creating “solid” block shapes: an initial repeat is charted below, 16 W X 24 H. Black blocks are drawn on mylar or downloaded, is used color reversed with no elongation. Knitting starts with base rows knit in the color that will form the “block” on the knit side of the finished fabric
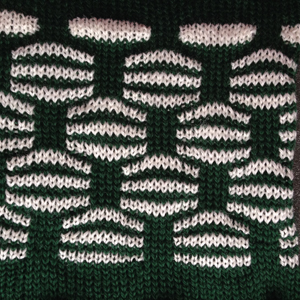
the knit side
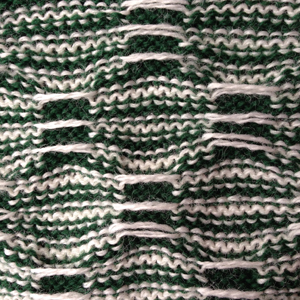
and the purl, note floats as wide as the “block”


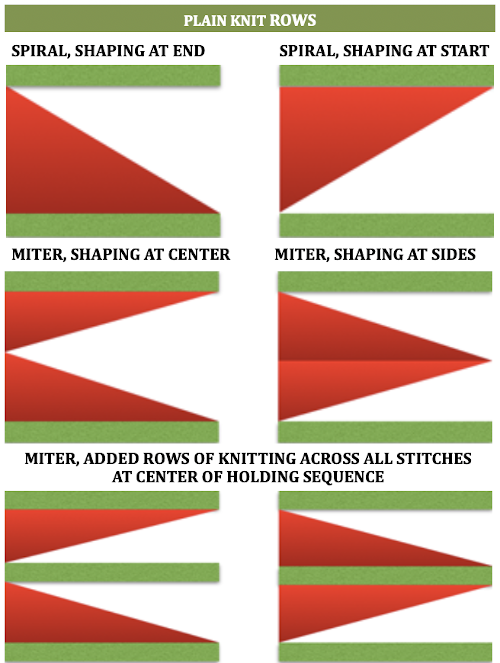 A spiral gore is the first or second half of a miter gore, conversely, a miter gore has 2 consecutive spiral gores, knit in a mirror image.
  GOING ROUND: numbers 1-12 represent knitting sequence for wedges, thicker lines at segment edges = rows across knit width at end of each sequence, 2 rows or many more depending on planned design shape


 the swatch
 its accompanying swatch


 Images from left to right
 purl side
 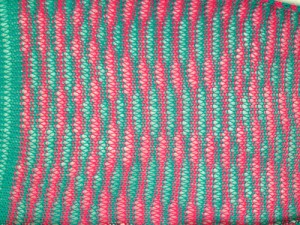 The emerging pattern can be seen, and to be noted is the elongation factor involved as in many color separation DBJ fabrics
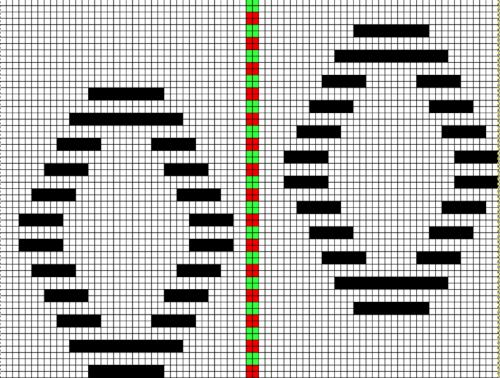

 The explanation: further analysis of the original design reveals the fact that some of the pixel numbers in the design black square blocks are uneven in width. In this instance, 3.5 is half of 7, and half pixels cannot be rendered, so the software assigns the split to 4 and 3.
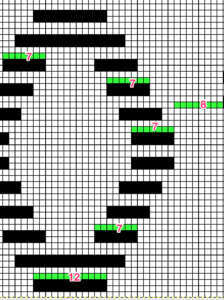 A
A 


