Knit bubbles and “stitch ditchers/dumpers”

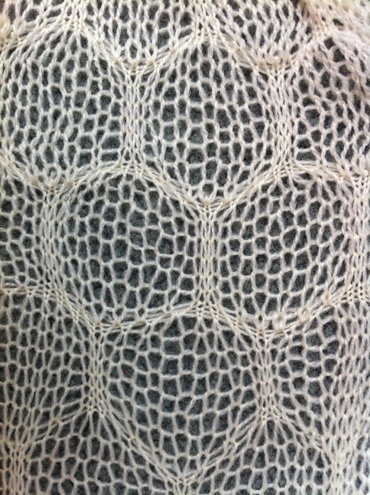
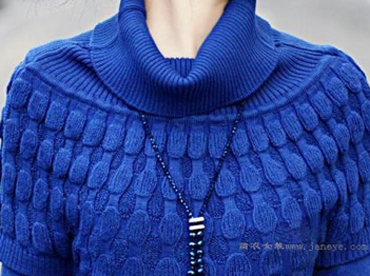
I encountered a photo of a commercial sweater not too long ago while knit surfing the web

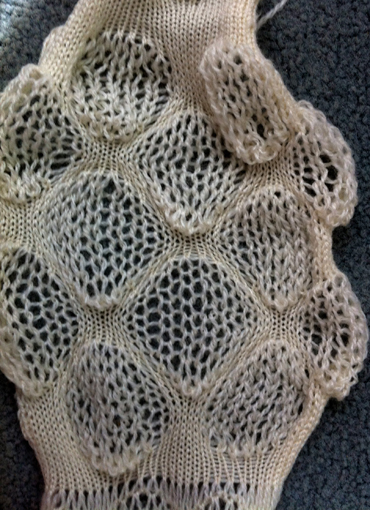
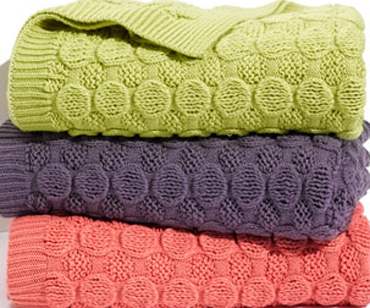
and a bubble blanket available at Nordstrom’s during 2012

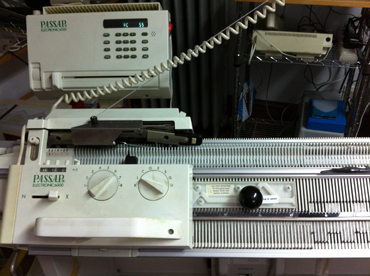
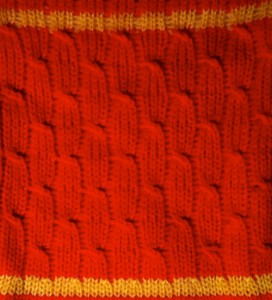
I had already been considering laces other than transfer ones for yarns that have been too crotchety to knit in that particular technique, and my Passap has been knitting idol for far too long.  The fabric above seems to alter between purl and knit sequences that would require transferring all stitches to the opposite bed for every other pattern sequence: out of my range of patience and time. The number of fabrics involving “lace” produced using the ribber involves a series of names with sometimes variations simply being specific to the technique performed on a particular brand, though possible on all. On the list: drive lace, pick rib, summer fair isle, drop stitch lace, etc. The above commercially produced knits seemed to be good candidates for drop stitch lace.

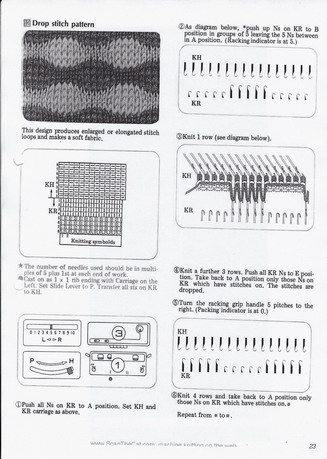
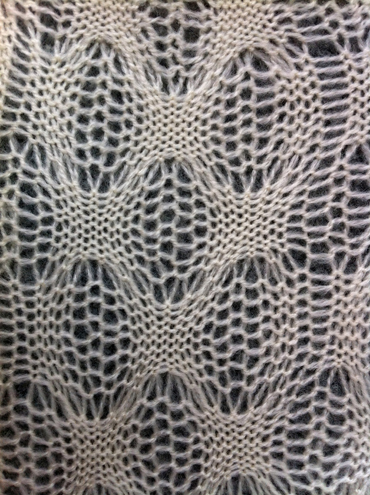
Since I recently posted on knitting long loops/stitches single bed, it seems natural to follow up that post as well with creating long stitches using the ribber and using automatic patterning as well. The following photo is familiar to most Brother users:

In this instance the fabric is produced as a hand technique, requiring racking and row counting. The process is easier if all stitches are transferred to ribber in Japanese KMs or back bed on Passap, and long stitches are then created by selected stitches knitting on the opposing bed, and in turn, being dropped. Punching a card, drawing on mylar, or downloading to machines makes it possible to do so in a pattern much more easily.

Punchcard books have several useable examples for such patterns. Two methods of release are used. One is end release, where the pattern is knit until the piece is completed, and stitches are dropped then. This works in friendly yarns and continuous repeats uninterrupted by rows of stocking stitch. If the design is interrupted, then the regular dropping of stitches whether at the end of the repeat or intermittently throughout is either required or preferable, depending on the design.

As for dropping those loops that will form the long stitches, one can do so “manually” with improvised tools. For more “automatic” dropping of stitches using knit carriage in Brother patterning, one may punch a card or draw a mylar with a method akin to the color separation that will allow for a pass of the KH carriage across the knit with no yarn in the feeder, “color 2” is actually “no yarn/empty” while establishing the proper needle selection on its return. Studio selects and knits in the same row, so needle selection disruption is not an issue, and in Passap techniques are built into the console that allows for “free/no yarn” passes. Both instances involve extra “knit” rows per item. Other alternative tools may be used that help the stitch ditching process. Studio brand had their P carriage and Brother their own “D slider” for the bulky KM.

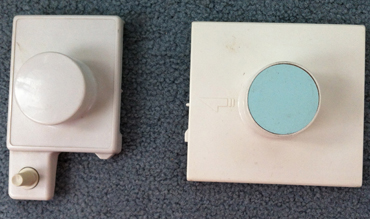
The Studio P carriage pulls needles on the main bed from B to C position going from right to left, then returning them back to B position going from left to right. On the ribber, it may be used to bring the needles up to C position for “safe knitting. (Studio needle positions are A, B, C, D, while Brother skipped the letter C, continuing with D and E). A video from Susan Guagliumi shows a later model than the one pictured below, used as well to bring needles out after hand techniques as opposed to pulling them out by hand or to insure thicker yarn knitting.

The Brother Bulky KR 260 D slider only moves in one direction, from left to right, completing the in and out needle position operation in one pass. End needle selection needs to be canceled. It is not usable on ribbers. After operating it from left to right, it is simply lifted off.  The knit carriage position while the transfers are occurring may vary depending on personal preference and whether the yarn changer is in use or not.

Studio 4.5 mm/ Bro 9 mm bulky viewed from the front

Studio 4.5mm/ Bro 9 mm bulky viewed from the back
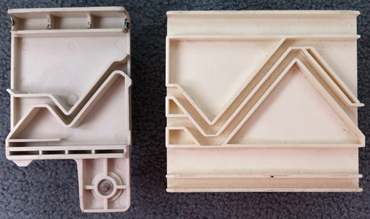
Directions on altering the studio tool for use on Brother machines

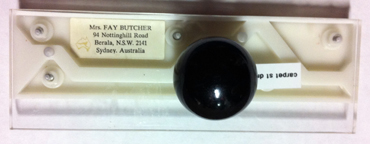
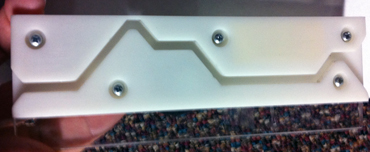
Passap’s need was answered by an Australian woman: Faye Butcher,  who developed the item shown below. Such tools were often discussed in seminars and publications of the time, in conjunction with pile or “carpet” knitting, so “P” for such knitting in Studio, and “carpet stitch tool” for Passap, seen below

front view

rear view

in use on the front rail

If patterning for long stitches occurs on the front bed, the Passap tool sits on the rail where you see it in the photo, it will release all stitches from needles in its path. Often directions for using it recommend its use for 2 passes with locks on right. Passap preselects pushers for the next row of knitting as Brother preselects needles, pushers are below the rail, so in theory, they should be unaffected bypasses of its travels. Once things are up, going, and “working” I have found it possible to align the tool as seen in the photo ahead of the next lock pass, so on the right of the lock from left to right, to its left from right to left, a bit of pressure will keep it in its place, and stitches are released each pass of the lock. This may result in having to operate the lock with one hand. There is also an optimum speed: if the movement is not smooth and regular and needles are jostled, pusher selection may be altered in response, thus resulting in a patterning “mistake” on the next row. Challenging yarns may make this method impossible.

Some samples follow: the yarn used was acrylic, I attempted to press it on swatch completion, and this flattened the fabric considerably. Of note: the disparity in width between the stockinette portions of the swatches, and the dropped stitch segments

too open

a bit closer, much more so before steaming

a “mistake” that may lead to a future accessory, with some revising and planning

I am using Stitch Painter to plot out my repeats, exporting files as .cut files, using wincrea to import them, and downloading to the console with a cable purchased from England. I replaced an ill tower dell with a 64-bit dell laptop half its age, and am now running Windows XP instead of 98! My leaps into the present technologies/software are made using apple products. Technique 129 will work, color may need to be reversed using the alter loop, or within wincrea depending on how the pattern is drawn in the original graph, but that is a topic for another day (see April 2011 post: a bit on Passap for some information on Tech129). Back lock on N throughout, front lock on LX (slip/part on the main bed for Japanese KMs). Single bed slip and tuck stitches may also produce “bubbles” of a different quality.

Coincidentally the 10th-anniversary issue of Knitty has just been released, arriving in my virtual mailbox this AM. There are 2 patterns in the issue that may be of interest, one is tin roof, the other employs ribbed/bobble/bubble for hand knitters. Another hand knit version by Kieran Foley may be found here
“Wisteria” 2

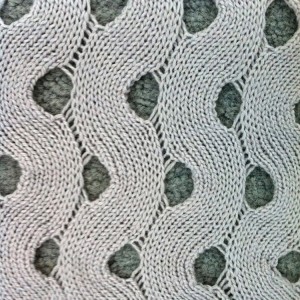
A follow-up to the previous post on the “horizontal cable“: it has a relative that produces a flat or textured “lacey”  fabric depending on the number of rows knit in each segment.
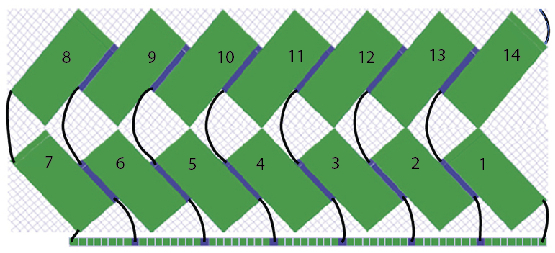
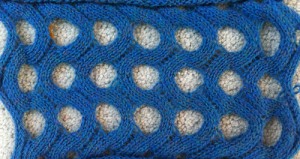
The relative: after some initial rows of knitting (whether waste yarn or edge of actual piece or swatch), beginning with knit carriage on the right-hand side, moving right to left, the knit is created by knitting on a multiple of chosen # of stitches plus needles out of work (OOW, A position). In the instance below a multiple of 9 + 8 is cast on, with an OOW needle (represented by blue) between repeats. The ladders created where needles are in A also make it easier to visually identify stitch groups that need to be moved in/out of work

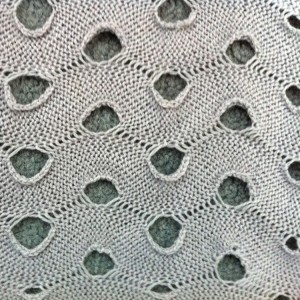
an attempt at a graphic representation of the corresponding knit the swatch knit side, orientation as knit    the swatch purl side, rotated 90 degrees as it would appear in a sideways knit the knit tends to curl along edges to purl side as seen above, could be embellished with stitching for more contrast and color
To knit:
first pattern row:
the numbers in parentheses reflect markings on the last colored image
COR: knit 8 rows on the first group of stitches on the right (1)
push the second group (2) into work and knit 8 rows
push the third group (3) into work and knit one row
push group (1) on its right out to hold, knit 7 rows across the remaining  16 stitches
bring a new group on the left into work, knit one row
bring the group to its right out of work, repeat the process across the  row
when the second to last 2 groups on the left (6 and 7) are reached, knit  8 rows on both,
push the second to the last group out to hold (6)
COL knit 8 rows on the last group on the left (7)
second pattern row:
COL: reverse the process from left to right for the second pattern row, begin by knitting 8 rows once more on the first group on the left (9), that first group will now have been worked for 16 rows
The row that picks up the adjacent group of stitches helps create a joined fabric, with movement resulting from the direction in which each “pattern row” is knit.
Varying the ladder space and the number of rows knit will change the overall look of the fabric.
Turning the fabric sideways after varying the size of the holes across the now horizontal rows could also affect the overall shaping ie narrowing and widening of segments.
Going from larger holes on one side to narrower in the opposite will make the knit “ruffle” on the edge with larger holes, etc.
If one knits vertical segments that are 8-16 rows in turn, cutting the yarn at the end of each sequence, then there will be straight slits/ strips that may, in turn, be left as such when knitting is resumed, twisted in a variety of sequences with alternate groups as one would a cable, rotated on their axis once for 180 exposing some of the back/opposite surfaces of the knit single or multiple times as desired.
A strip of slits may, in turn, be “latched up” in a chain, stitched, or otherwise altered after the knitting is completed.
A sample with wider ladder spacing and a slightly different sequence. Note that the first row of holes is smaller than those achieved when shaping begins to be reversed. Ending the pattern can be planned to match its start.

The making of i-cords

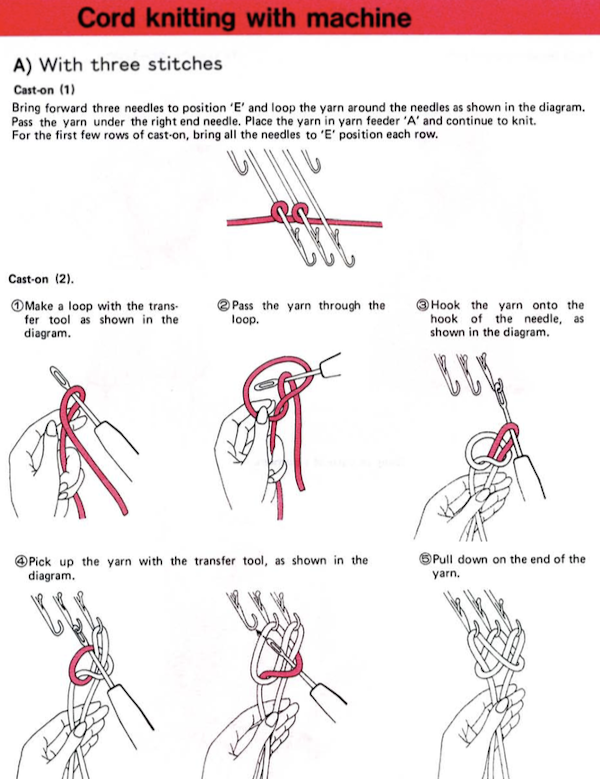
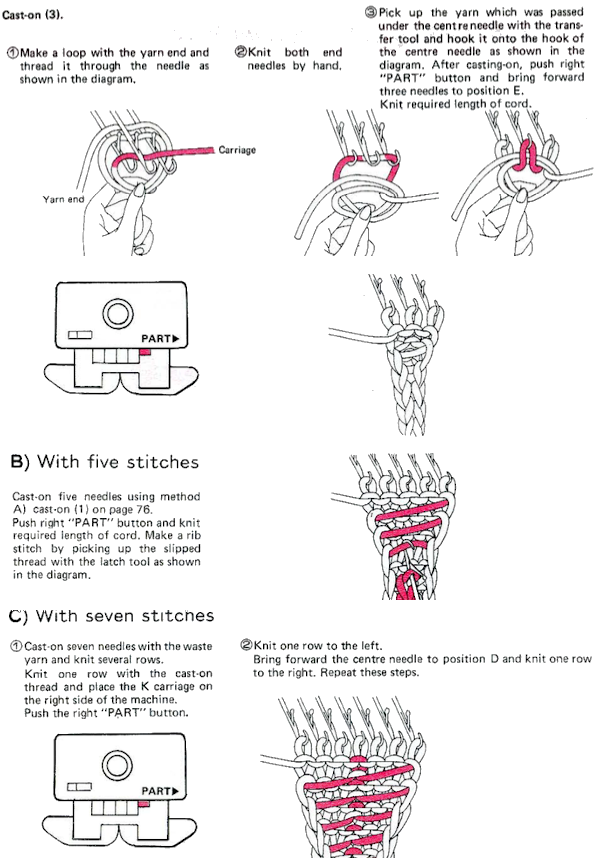
Making narrow tubular cords has also been referred to as spool knitting, corking, French knitting, or tomboy knitting. When using a knitting machine the standard for knitting cords is to operate the carriage so that it knits in one direction, slips in the opposite. Using the e wrap method cast on 3or 4 stitches. Push in the part button on the same side the knit carriage is on ie. if it is on right, push in right part button. Stitches will knit from right to left, slip from left to right creating a float. Since the float is added yarn when knitting is pulled to set it, the gauge on the few stitches will be altered, so it is usually recommended that tension be tightened 1-2 numbers lower than garment tension. The float issue becomes problematic if cording is required that is wider than 4 stitches. Switching to tubular knitting using the ribber will produce tubes of any desired width.
In Japanese machines, the ribber knits tighter than the main bed, if gauge matters a starting point is to loosen ribber tension by approximately 2 numbers. Larger cords tend to flatten, so if a round tube is desired stuffing may be required in the form of cording, plastic tubing that may be joined using appropriate caps from hardware or even pet supply stores, and a range of wires if the intent is to create sculptural forms.
One exception to tightening the tension when knitting cords is when/if they are joined to knit edges in the seam as you knit method.
Addressing the float issue in single bed knitting:
with five stitches the floats could be latched up creating a rib stitch. This same operation in tighter or smaller cords may make them swirl.
If a flatter cord will serve the purpose, an alternative is to have the center stitch knitting on the slip rows. One may accomplish this by hand-selecting needles or using a card. This will seal the tube in the center or periodically across the knit. The punchcard may be locked on any single row with the appropriate holes punched, and the position planned on the needle bed for knitting. The carriage will knit all stitches in one direction, slip/skip all but the stitches where needles are selected in the opposite. Floats may become design elements in some instances; if sewing onto another piece or hanging onto the knit as it progresses they serve as guidelines for doing so. If they are to be applied vertically to a garment, create a ladder to mark your sewing line.
If you are a gadget collector “hand Knitting cord machines” may make them up to 6 stitches in width with the ease of cranking a handle and with a bit of planning wire beaded tubes may be produced on them as well. Some examples are from Bond, Prym, Wyr for knitting metal mesh, and eons ago some companies including Passap and Singer offered their own automatic cord knitters as well.
A recently published hand-knitting book has many ideas for applied i_cords that could also be used on the machine. For speed and simplicity, sometimes flat strips of knitting may be substituted for cords in some designs.
Cords or strips may be used to create mock cables, add color interest, applied as trims, or to the bodies of sweaters or sweater edges. They may be braided, twisted, macraméd, etc.
Some published and online resources on the subject:
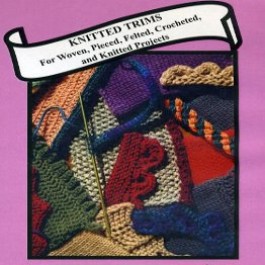
Erica Patberg article in Knitter’s Magazine #104, Fall 2011. She can be found on Ravelry. Cords and strips may be used as trims. Long ago versions were published by teachers in the seminar circuits, one may be found at 1. Ginger Luters is well known to hand knitters for her books such as her “Module Magic”. Apparently, she also has published a book on trims, now available on DVD online that from cover photo appears to include some suited for this topic.

A page that gives a bit of history and illustrations of spool knitters for crafts/ hand knitting may be found at Hub Pages, and on “circular knitting machines” at How to get what you want.
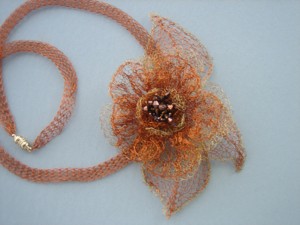
The Wyr knitter is very hard to find. I have knit 32 gauge wire on other knitters with success, so that particular model is not necessary for wire cords as seen in this piece of mine A curly cord version may be found at Techknitting. More ideas and a knitter at Bond America. And lastly, something to make with those Barbie Knitters.
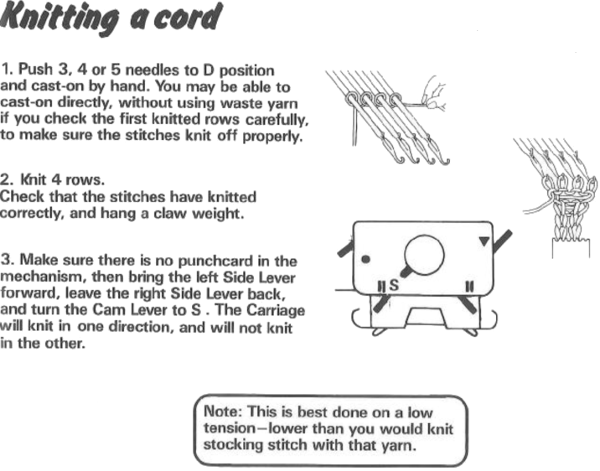
Illustrated how-tos from Brother knitting techniques book and from a Studio publication:

Holding and “cables”

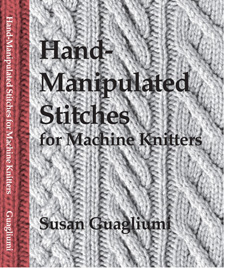
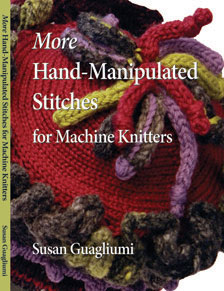
Susan Guagliumi has written 3 books on hand techniques on the knitting machine

her first classic

her previously most recent

published November 2014

Unknown

On her website, some of her articles and Studio KM publications are available for free download. Included are ones discussing a horizontal cable, two-color electronic cable. 11/12/15 Please note: the site now requires subscription and login, links, as posted here as they are, will fail to connect.

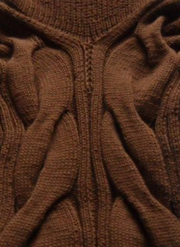
In creating large-scale cables in the past tension changes, supplemental threads, and other ways to compensate for moving a larger number of stitches on a metal bed (things start to get hairy when crosses become larger than 4X4) have been discussed. An interesting, clear, possible solution to produce textures or macro cables such as in this piece

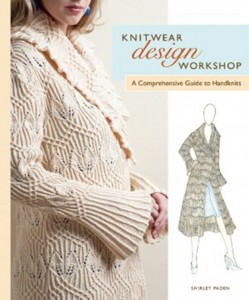
may be found in her books and may be viewed in her youtube video. Handknit interpretations that also add lace to the mix may be found in Shirley Paden‘s portfolio photos of garments, she is the author of


Using punchcards to track cables and twists in pattern 2

This post was originally written intended for punchcard machines only, with the passage of time electronic pattern tracking, samples and associated repeats were shared.
Links to some later posts including cable manipulation and patterning
2023/05/30/a-return-to-plaiting-and-double-bed-hand-transfers/
2021/03/11/slip-stitch-patterns-with-hand-transferred-stitches-double-bed/
2021/02/01/slip-stitch-patterns-with-hand-transferred-stitches/
2021/05/09/double-bed-embossed-patterns/
2012/01/19/using-punchcards-to-track-small-cables-in-pattern-1/ 

2011: Cables seem to be in vogue once again in myriad permutations. They pose some interesting issues when created in machine knitting. Interweave Knits Winter 2011 published an article on “Cables 101” that includes a way to color code and graph cable crossings. “Back in the day” of regular, worldwide machine knitting seminars, several authors provided collections of machine-knit cables including George Le Warre at Passap universities (copyrighted, George presently in England).

Simple crossings are a good place to begin and produce texture. If one is not interested in freeform but rather constant, recurring patterns it is possible to use punchcards to produce visual cues when stitch twists and crossings are to occur. This is not an option in Studio Machines, easy on Brother because of the fact that needles pre-select, and Passap pushers may be used for a similar set of clues with a bit more fiddling.

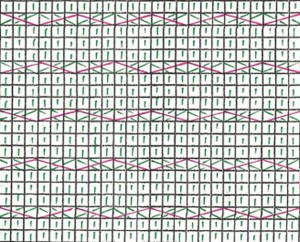
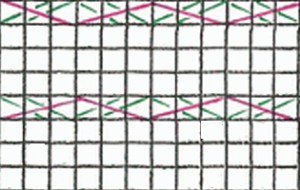
When color-coding information for referencing as one knits, it is possible to be generous with symbols or edit down to bare elements. For example, one way to approach a schematic follows below, where knit stitches are illustrated as well as cable crossings. Red indicates stitches moved to the front, and the green indicates those traveling to the back in each cable set. In hand knitting, vertical or horizontal bars would represent knit and purl stitches. Since these are identical in this HK graph, they could all be eliminated

A

B the isolated repeat

The choice then remains whether or not to revert the crossings to match the HK pattern. One way to do that is simply to reverse positions for colors. The mantra becomes “red moves first, green moves second and over red”.

With all machines, if the knit carriage is left set for normal knit, even if the patterning option is engaged (KCI or KCII if there are any needles out of work) needles will be selected, but the fabric produced is stocking stitch. The usual considerations are in order: the number viewed on the card outside the machine corresponds to the design row being read by the reader, but the punchcard holes in view are not necessarily the same as the design row selected. Because one is producing the cables on the purl side of the knit, if hand knitting charts are used the cables themselves will be mirrored. In many instances, this may not matter, but if one is using the twists for representational crosses ie. in trees, owls, diamonds, and other geometric shapes, it is a good idea to scan the repeat, mirror the image vertically, and then begin translating it into machine knit interpretations. Relatively easy with simple scanning and printing software (ie. the flip horizontal function in Preview, a bit harder by hand.

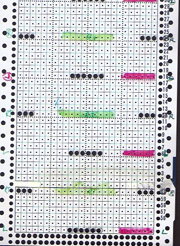
When I can I color code my cards: ie. with lace I draw a line across the card when I reach each knit row sequence with a color pencil. This provides me with an easy-to-follow visual cue as to when the rows must occur, and also facilitates returning to the previous selection sequence when mistakes in patterning occur.

Some basics: with a punchcard, there is no row length limitation, but repeats are limited to 24 or a factor thereof. In this particular use wherever needles are selected, one has a visual reminder to move those needles in the desired direction.

I used the cards below to illustrate the idea in my intro to knitting classes. When needle selection occurs in the first, remove the selected stitches off the machine with a 3 prong tool in each desired location, then insert a second 3 prong tool back through the front of those same stitches, in turn removing from the initial tool used. Rotate the twice transferred stitches 180 degrees consistently either clockwise or counter-clockwise throughout, and return them to their original position on the needle bed. The result is a consistently textured fabric with no counting stitches or rows between repeats.

a swatch using it

This card begins to address regular cable crossings, mine was punched in repeat the full 60 rows. Color may be assigned to help with opposing twists’ directions ie. to left (pink) or to right (green) when the corresponding color bar appears just above the card reader.


Where are they now?

Many of us grey-haired knitters may recall the art to wear movement and some of them became familiar at the height of home machine knitting and seminar circuits. I am beginning a thread that makes an effort to discover them in the present time, will add to this post as I find links. The order is purely random,  includes published teachers and some of the knitters/ fiber artists found in the book documenting the birth of the movement pictured below.

John Allen.  Nicky Hitz Edson.  Some of the thousands of entries that may be found via google for Norma Minkowitz. Jean Williams Cacicedo. Linda Mendelson 

This post was written in 2011. Susanna died in mid-July 2021. A young Ravelry member at the time began this Wiki page with references on her life and work https://en.wikipedia.org/wiki/Susanna_Lewis.