Illusion DIY patterns in crochet

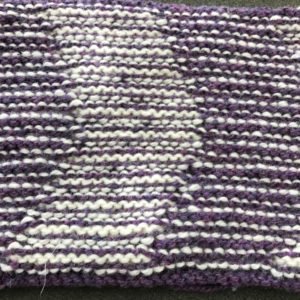
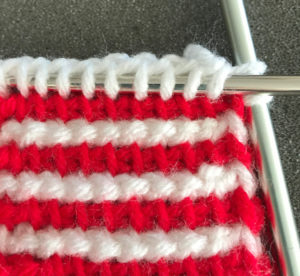
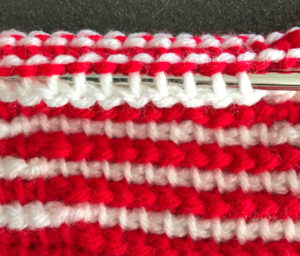
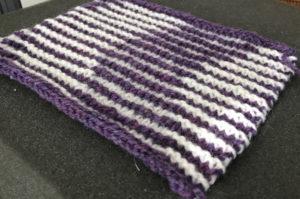
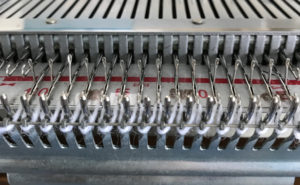
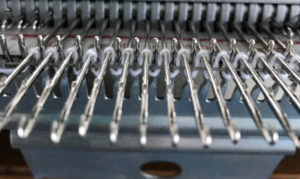
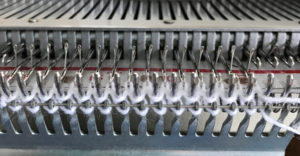
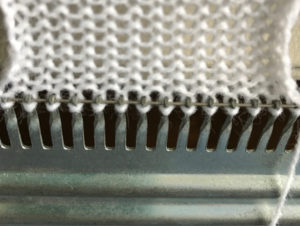
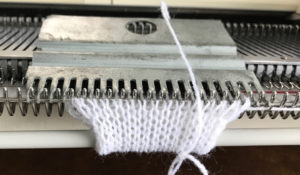
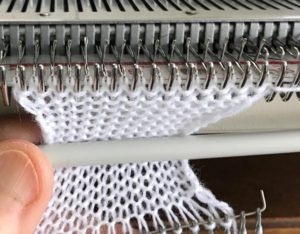
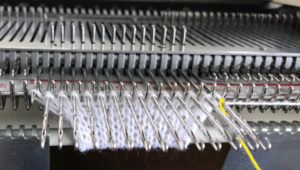
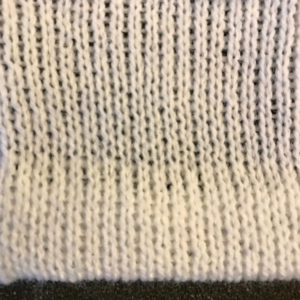
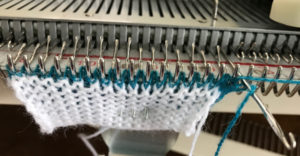
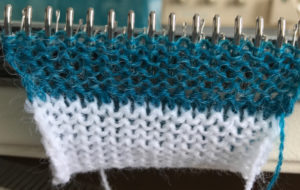
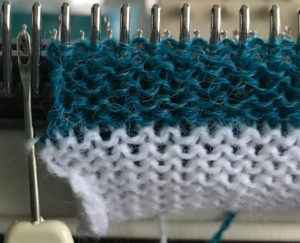
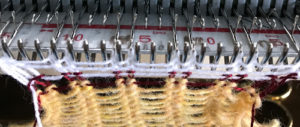
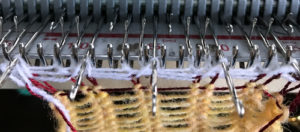
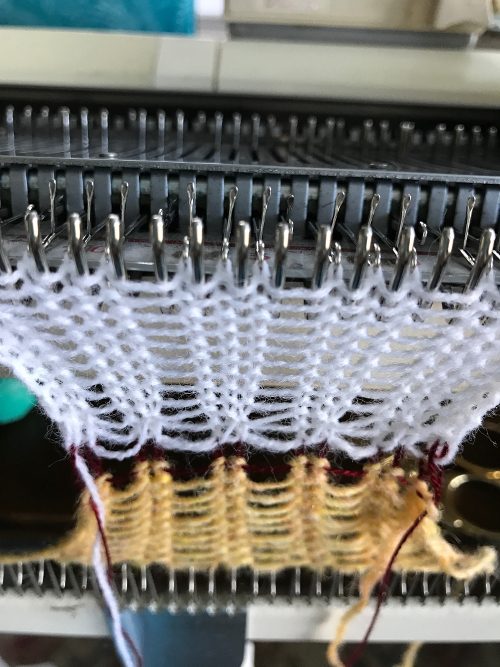
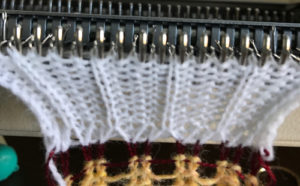
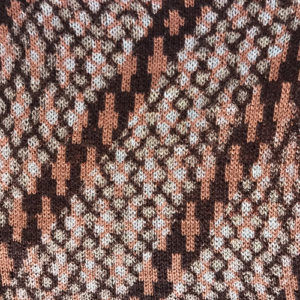
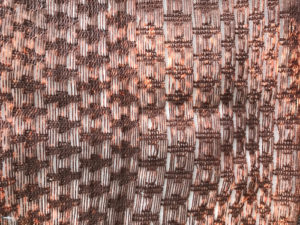
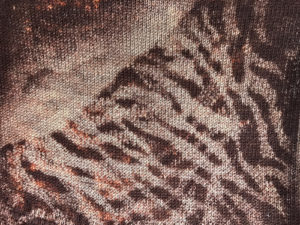
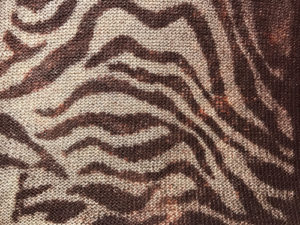
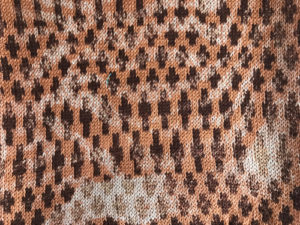
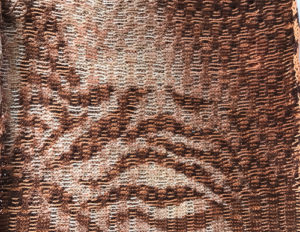
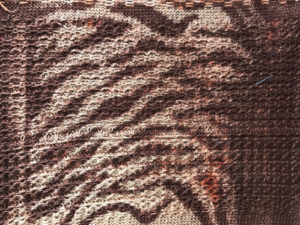
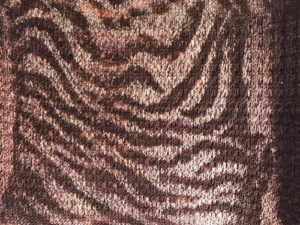
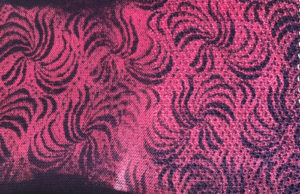
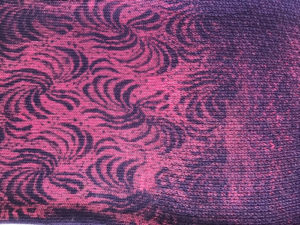
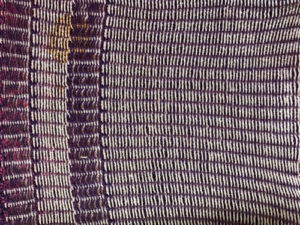
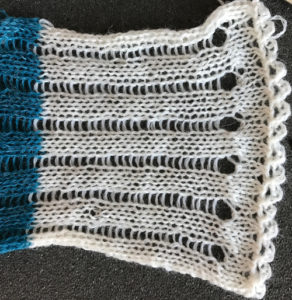
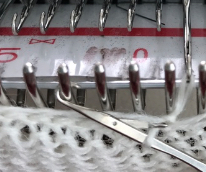
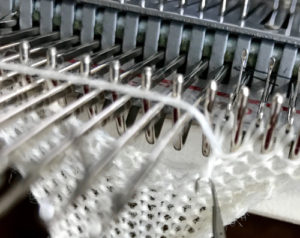
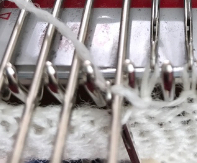
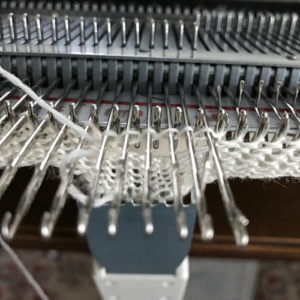
I previously posted on illusion knitting, and on one approach to designing simple patterns using the technique. The first 3 images below are of the swatch illustrating one of my hand knit patterns. 

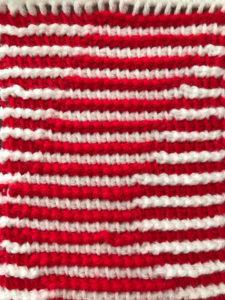
Since I am now involved in a group interested chiefly in crochet, I got curious about executing the fabric in crochet. Part of the problem is that enough texture needs to be created to be able to read the “shadows”. I tried crocheting in different parts of the chain, around the posts in the row below, and ultimately went back to afghan stitch. I had not used the latter since making blankets first for my son, and then for my grandchildren.

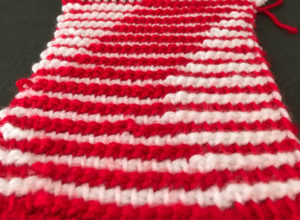
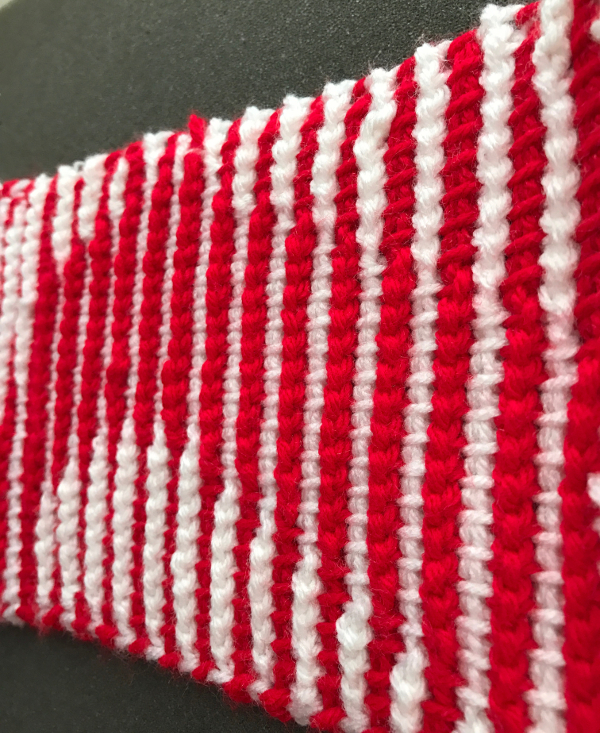
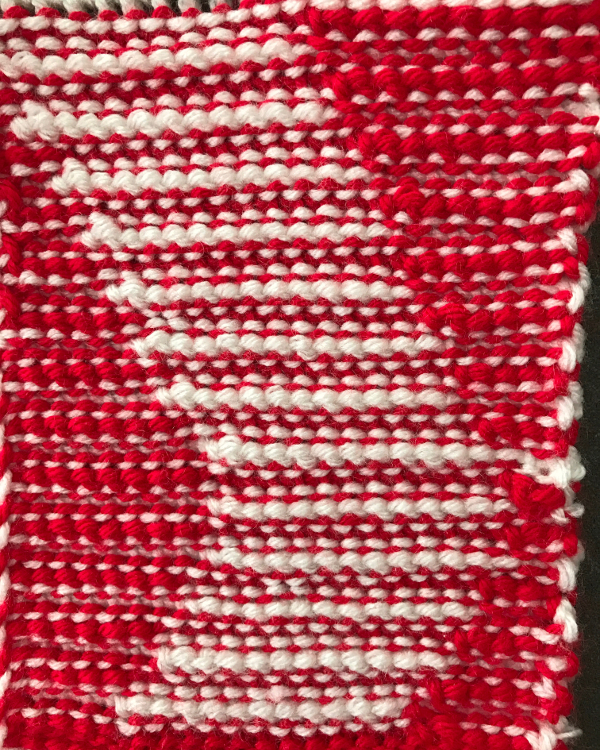
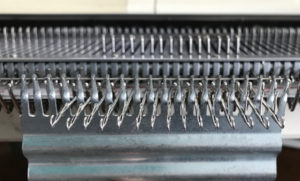
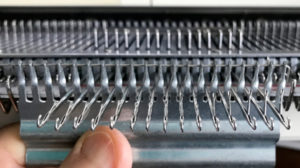
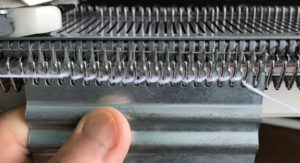
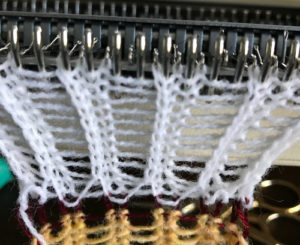
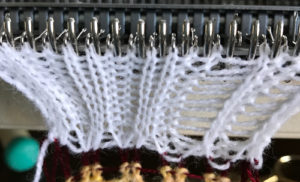
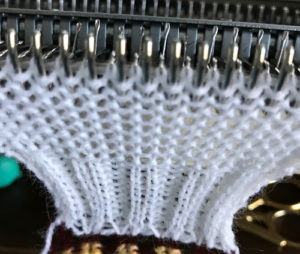
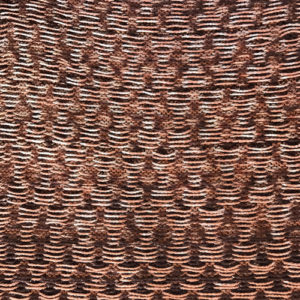
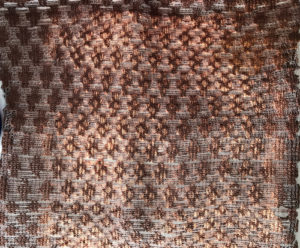
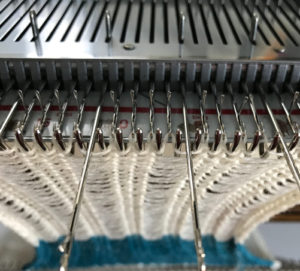
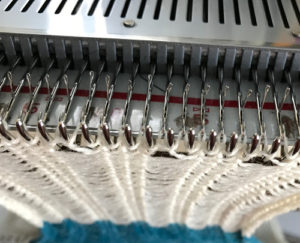
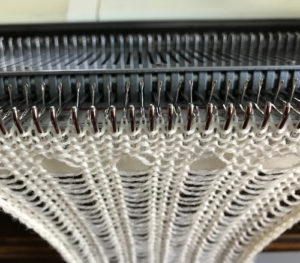
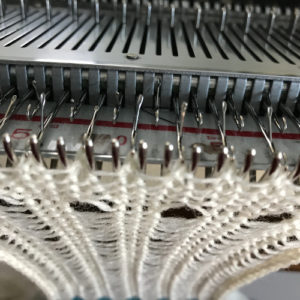
the Tunisian aka afghan stitch fabric as it looks head-on tilted up to its side and its rear view

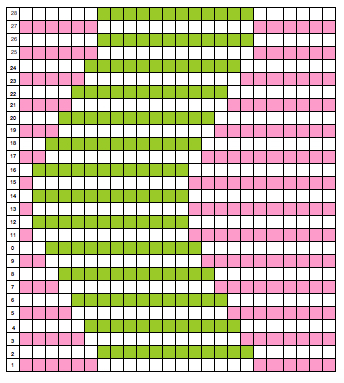
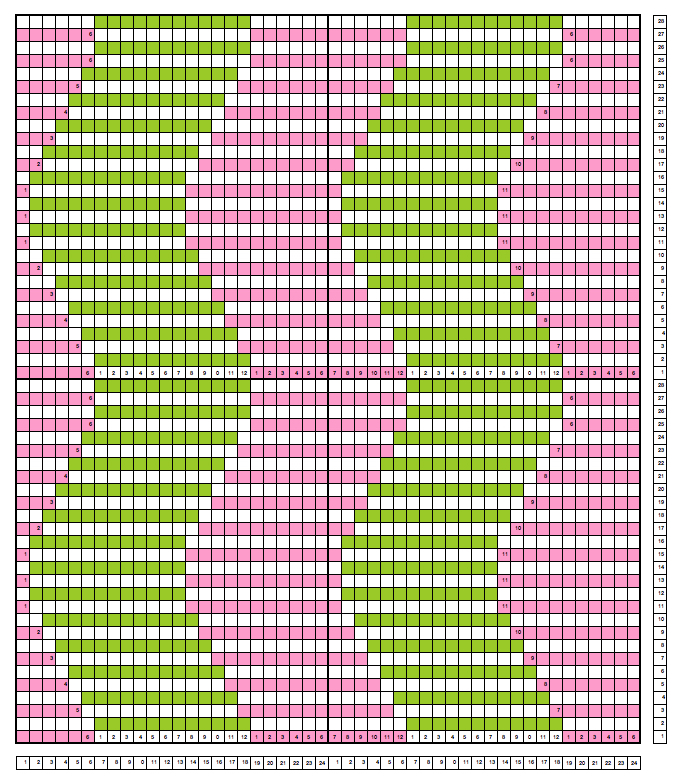
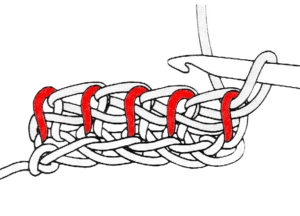
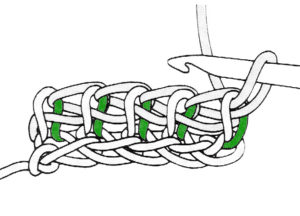
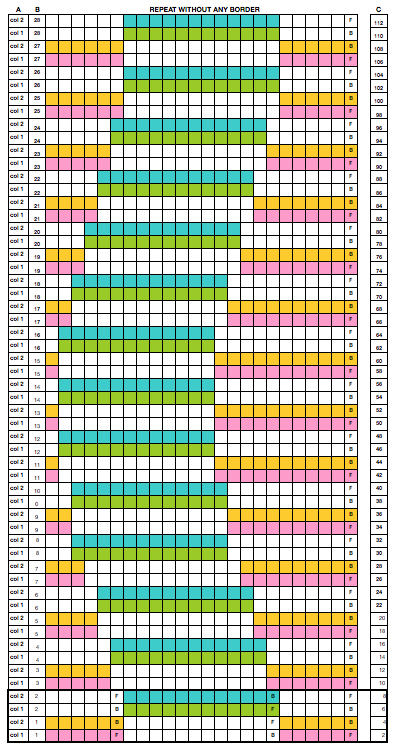
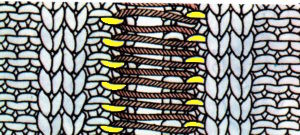
Those of you new to the technique can find some instruction at the Red Heart website, and in a beginning how-to video from Crochetcrowd. I used Tunisian simple and Reverse Tunisian simple stitches to create my pattern. In this technique, chart texture rows are read right to left. The return rows are not illustrated. It takes 2 passes of color one, followed by 2 passes of color 2 to complete one pattern row. Yarn is carried up the side, color is changed in the same manner as in any crochet stitch. In my test swatch, no border stitches were planned for or included. It is always wise to test the repeat in repeat before working the fabric.

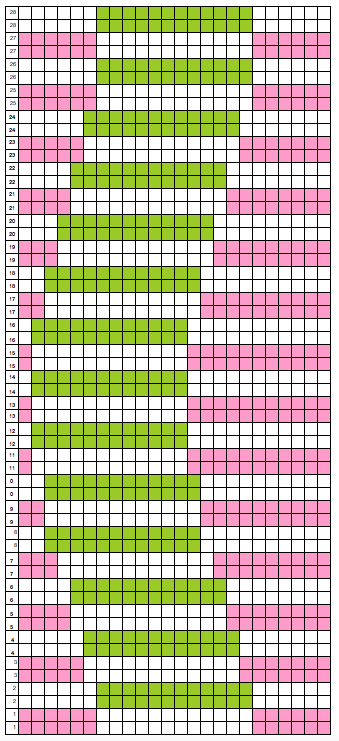
 two passes are needed with each color, so here is the repeat with double length columns     

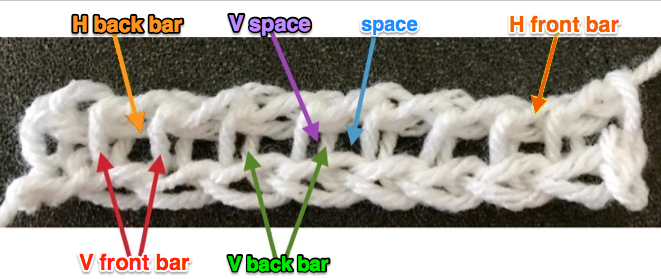
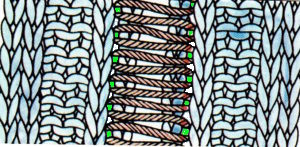
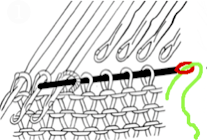
A: color used   B: forward and backward pass for each color   C: number of passes to complete a single repeat. The highlighted box at the bottom indicates a completed single design row. Only 2 colors are in use in the swatch. I found it easier to track my work and the edges where the textures need to meet by using an additional pair of colors in the chart itself. Rather than use the crochet terminology I marked my first stitches with F and B for each color, referencing the front/ forward, and rear/ back vertical loops/ posts respectively. As one moves across the row from right to left, when the color/ texture change is reached, the yarn is brought to the front or the back as needed, and the next color/ texture is worked in the reverse post/ loop.

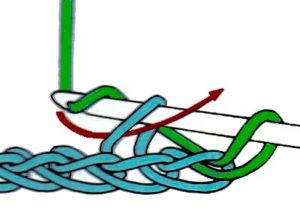
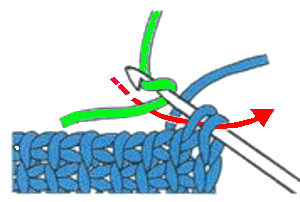
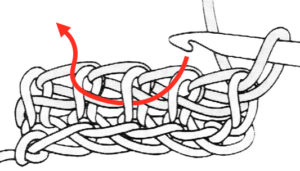
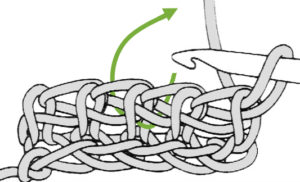
working in back loop only of the starting chain produces a firmer edge at the bottom of the piece return pass every other row, not represented in chart changing color Front, vertical loop Back, vertical loopH: horizontal, V: vertical red indicates hook entrance through the front, green for through back vertical bars respectively, prior to working the next stitch

Both swatches were made using similar weight yarns. The crochet version required more passes back and forth than in knitting, where the work may be turned over and the texture reversed on each knit row. The knit repeat measured approximately 5.5 inches L by approximately 4W, isolating my best guess stitch number equivalent to the crochet one. The crochet swatch measures 7 inches L by 6W.

Return to circles, knit and crochet “pies” 1

I began a series of posts on miters and spirals created on the knitting machine back in 2011. The oldest posts, knitting math and piesback to that pie, a bit of holding, and revisiting miters and spirals to form varied shapes begin to address creating flat circles in machine knitting using holding techniques.

Hand-knitting in circular format and crochet share some similarities. There are 2 methods of constructing circular work in crochet. 1: in rounds, (akin to knit miters in shape) where the end of each circular row is joined up to its own beginning to form a ring. A new starting chain (s) is formed to take the row to the proper height for the next row to remain constant. Depending on the pattern, one has the option of continuing by turning the work or not at the end of each row. Doing so allows the opportunity of altering textures and work on the fronts or backs of stitches. 2: in spirals. Rather than joining the ring, one continues on by going to the tops of the posts in the previous row.

With spirals, it is useful to mark the beginning of each round. Knitting markers shaped like safety pins are handy for that purpose. A line in a contrasting color can also be created using a separate strand of yarn and alternating carrying it back or to the front prior to forming the first stitch in the new row.

As with knitting, crocheted circles are not true circles, but rather, they are polygons. The way to make shapes more circular is to scramble the location of the increase points, putting them in different starting positions in each round (always spacing them equally and keeping the formula). Within limits, one may make the starting number of stitches in the first round a multiple of the number of segments in the finished shape.

With the creation of a flat circle in mind, the number of stitches needed depends on the height of the stitch. The taller the stitch, the greater the number of stitches required. If the stitch stays the same throughout, the number of stitches added on each round is constant. Test work regularly at intervals as the work grows by placing it on a firm, flat surface, to see if working only one stitch into each stitch is required / enough at that point to maintain the shape. The more segments, the smoother the circumference.

Unlike in hand-knitting, the first loop on the hook does not count as a stitch until you make it into something.

Spirals or miters knit on the machine begin with their radius; one possible construction method may be inferred from these images
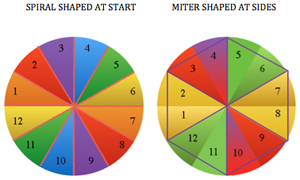
Spreadsheet programs such as Excel and Numbers have pie charts and other tools that can help visualize or even plan the work with symbols. Unlike machine knitting, both crochet and hand knitting may begin and grow from the center out or from the outside in. Calculated shaping with increases or decreases along circumferences at different points on the pie creates the desired shape. For the purposes of this discussion, I will address stitches in US terms. There are various published guidelines with some variations. The fiber content and matching gauge (if required) may need editing of the numbers, but, as starting points:
Single Crochet [sc]: Start with 6 sc and increase 6 sc in each round so that the total stitch count in each round is a multiple of 6
Half Double Crochet [hdc]: multiple of 8
Double Crochet [dc]: Multiple of 12
Treble [tr]: multiple of 16

Some symbols and number of stitches required in base rows in table form, for working from the center out:
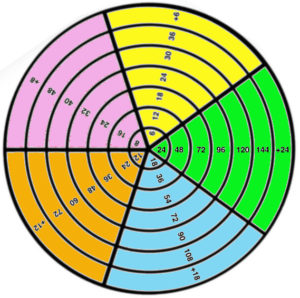
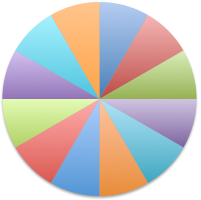
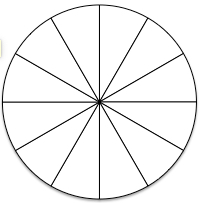
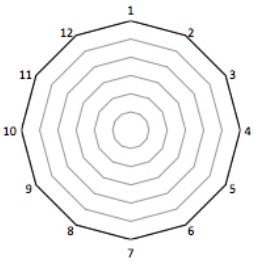
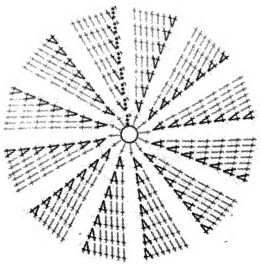
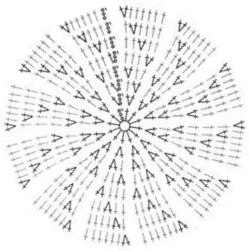
the more wedges in the pie, the smoother the circumference no matter what the method. Single crochet is worked in 6 wedges double crochet in 12 wedges,  wedges may be reduced to simple line segments rounds may also be created to log in and track more details adding wedge outlines before filling in symbols

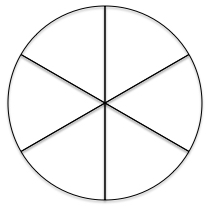
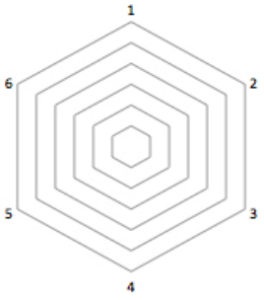
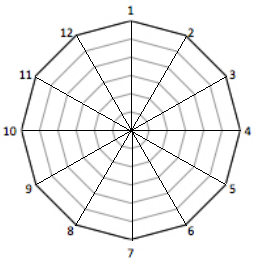
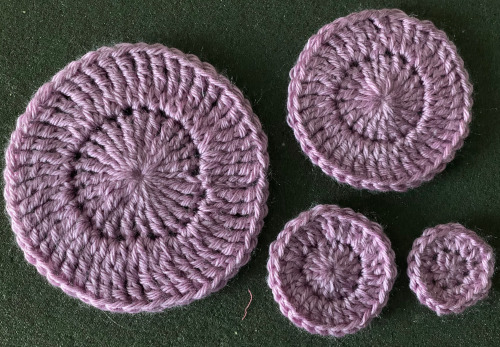
single crochet worked with a slip stitch at the end of each row will produce  points similar to those seen in miters in machine knitting
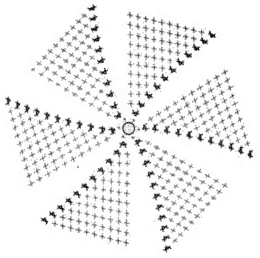
spirals produce a rounder shape double crochet echoes the forms 
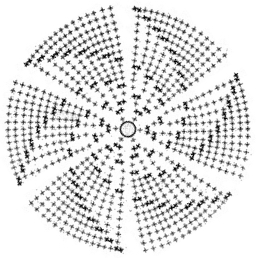
Building your own charts requires vector programs to allow for the rotation of symbols around an axis. My chart was quickly produced in Inkscape, which is free to download for both Mac and PC users. Mac users in addition will also need to download XQuartz to run the program. I created the chart with my own symbols and freeform and laid them down while viewing the grid. It turned out, however, that there are 2 published videos on how to use the program for charting crochet stitches, part 1 and part 2 by StitchesNScraps.com
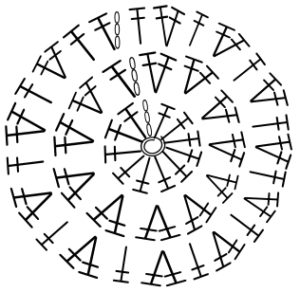
Two YouTube videos on the topic:  using Illustrator CS 5.1, Marnie Mac Lean’s video, and using StitchWorksSoftware. An online generator by Stitch Fiddle, and its associated video.

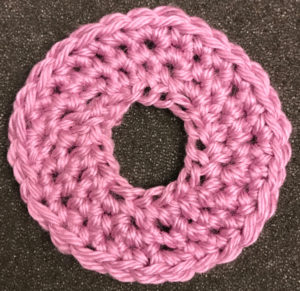
if donuts are the goal: find your round 
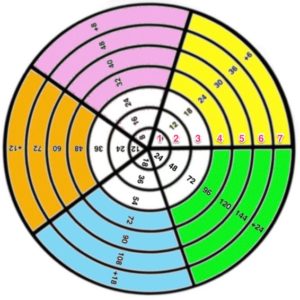
An example: in single crochet, if round 3 had been completed, there would be 18 completed stitches. Chain 18, either slip stitch or continue in a spiral to match the count at that point. For round 4: increase every 4th, round 5: every fifth, round 6: every 6th, and round 7: every 7th stitch. Different stitch heights:
A few sites to see for crochet tutorials:
magic ring start: no chain stitches, no center hole
https://www.youtube.com/watch?v=sLUaywX0-WE
working in spirals
http://snovej.com/archives/freeform-crochet-spiral
a nice ending
https://www.youtube.com/watch?v=W_sW4xX_O70

https://www.youtube.com/watch?v=8L_rtWt78Jw&t=32s
crocheting a flat circle in single crochet: note the start “magic circle”
https://www.youtube.com/watch?v=8oDubbFVE3Y
https://www.youtube.com/watch?v=LZiCnCGP_NQ
changing colors https://www.youtube.com/watch?v=U8cLufFeenU

I tend to swatch in easy-to-see colors, and “friendly” yarn, and use tools that allow moving in and out of stitches easily until I have techniques sorted out. When knitting circles in the round, things get a bit more complex, particularly if one begins introducing items such as round yokes with patterns into garments where gauge matters significantly.

Some of the same principles may be used in hand knitting. For the magic loop start with circular needles: KnitFreedom and on DPs Webs yarn

Ribber cast on comb/ open stitch single bed cast on

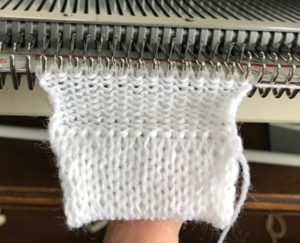
My first encounter using a ribber cast-on comb for open edge single bed knitting was in using the Passap machine. Its use for this purpose is possible on other brands as well. It provides an easy way to deal with waste yarn and weight application on ribbed fabrics.  I like using ribber cast-on combs when knitting single-bed to distribute weight evenly across pieces if needed. A second comb may be inserted as the knitting grows. Weights may then be removed and moved up, and so on. Unevenly distributing weight causes elongated stitches in those areas, and makes shaped knitting unpredictable unless the ratio of weight to the width of knitting is maintained. Here the topic is using the ribber comb in single bed open cast-on and hanging hems.

My Japanese machines are used chiefly for the production of single bed items, so usually they are ribber free. Balancing the ribber on older KMs can be fussy, so once the ribber is up, working, and well-balanced, my recommendation is to leave it in place if it is going to be used on a regular basis.

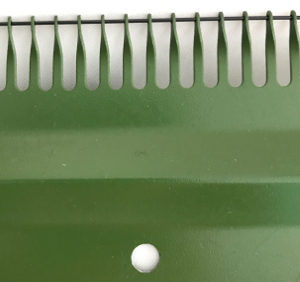
For this technique use a cast-on comb appropriate for your knitting machine’s gauge ie 4.5mm, 5mm, etc., the brand is not relevant, only tooth spacing is. It is possible to cut ribber cast on combs into different widths for use when knitting is planned on fewer stitches than those accommodated by their available commercial widths. In the yarn used in my swatches, I found knitting the first row at stocking stitch tension created large enough stitches for later picking up and hanging the hem. Test your yarn, if necessary use a looser tension for the “cast on” row, and evaluate any inside hem “drop” if a looser stitch size is used.

Remove the wire from the comb. Bring the comb up and between needles to be used, and re-insert the wire. Needles and latches will need to travel easily under the wire when the first knit row takes place. 

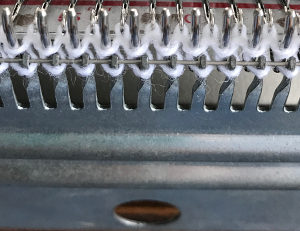
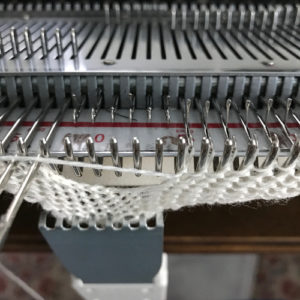
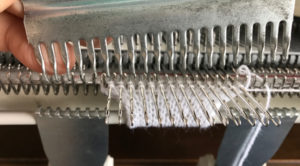
The knit carriage will not clear the comb properly because of the location of its brushes, etc. For the “cast on” row, exchange the sinker plate on your knit carriage for the arm normally used with the ribber. The first photo below shows the approximate location for the comb during the first knit row. Needles are centered between the teeth, and the teeth themselves line up with gate pegs. The comb needs to be manually held in place since there is no opposing bed in use to help balance it. The latter would ease the process in wider pieces of knitting. The ribber sinker plate has no brushes or wheels to anchor knitting on the knitting bed; any rows knit single bed using it, will need to have needles brought out to hold position prior to knitting each row for all stitches to be formed properly
The comb in position:

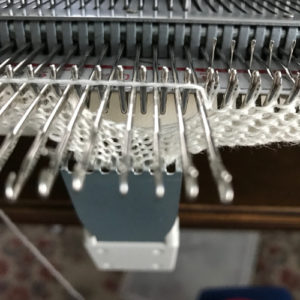
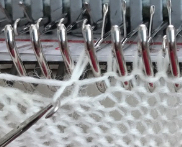
a pass is made slowly with the ribber sinker plate in place the comb is dropped  bring all needles out to hold / E position knit one more row, return to the starting position change the ribber arm to the sinker plate for the knit carriage, and proceed with hem  the comb will then need to be lifted up to close the hem  first rest a knitting needle or similar tool on the open hem  lift comb up enclosing knitting needle, add weights  lift comb perpendicular to needles, move it forward slightly for a better view of stitches needles (red dot) need to enter the stitches through their center (yellow highlight), not their side (orange highlight) or stitches will later drop; push needles through the center of each stitch on comb continue across the bed 

remove the wire from the comb, lift it up and off  remove weights and knitting needle; wrap the cut yarn end around the last needle on that side pick up from the row below to fill in the “missing single stitch” on the opposite side  complete the hem with looser joining row, return to standard tension, continue knitting 

To achieve joining hems in this manner with the ribber in place, though possible on both beds, it is quickest to cast on the back bed (Passap) or on the knit bed (Brother, etc.). Hold the appropriate ribber comb with the bump(s) up facing you, so that the teeth line up as shown above, with the flow combs/ gate pegs, and the needled can come through the gaps. Leave the wire in, hold the bump(s) against the front bed/ ribber, and tilts the comb against the back/ knit bed. Hold the comb high enough to take the lock or carriage across. Take the locks/carriages across to the opposite side, drop the comb and weigh it, and knit 2 rows on Passap before using strippers. In Japanese kms drop the ribber, switch sinker plates, and continue to knit on the main bed.

“bump”: Passap comb“bumps”: Brother comb 

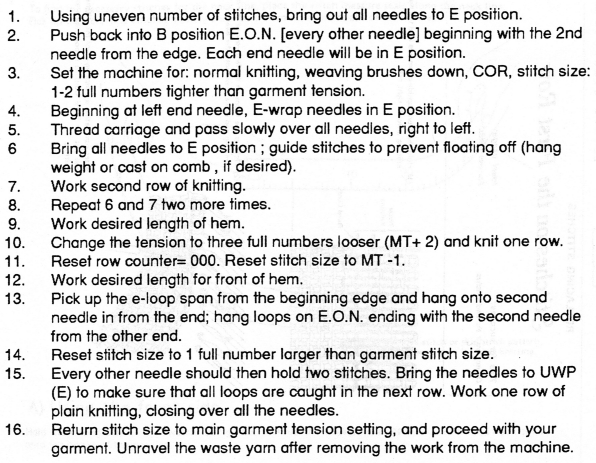
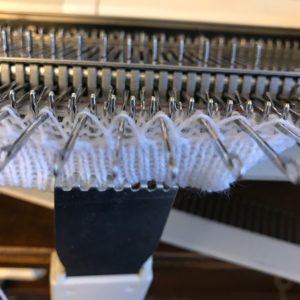
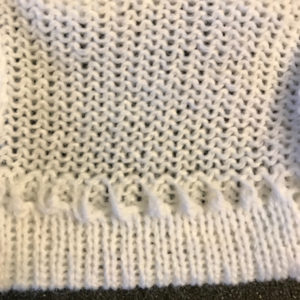
For other purposes and an edge similar to a “weaving cast on”executed on Japanese machines use EON for the “cast on row”  and bring into work the rest of the needles prior to knitting the second row.

Machine knit hems 2

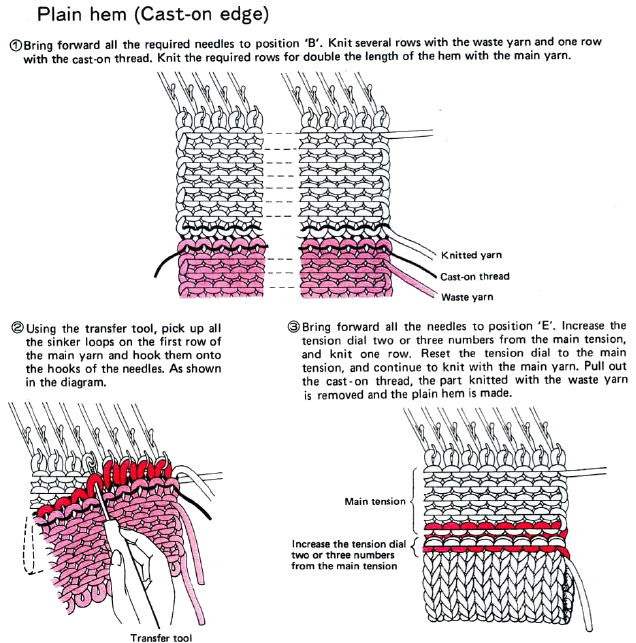
Hems 1: previous post. Guidelines generally given for stocking stitch hems do not take into consideration if the body of the knit is going to be considerably narrower or wider than the stocking stitch, and whether the purl side of the fabric is to be used as the “public side”. In the latter case, the solution is simply to reverse tension changes from the inside to the outside of the hem. For wider or narrower fabrics the number of stitches for the hems may need to be recalculated, depending on whether a series of simple tension adjustments can solve the problem. Fiber content, yarn weight, and even color can affect results, so always test a swatch. It is possible to knit tubular hems using the ribber, but here the discussion is for the single bed only.
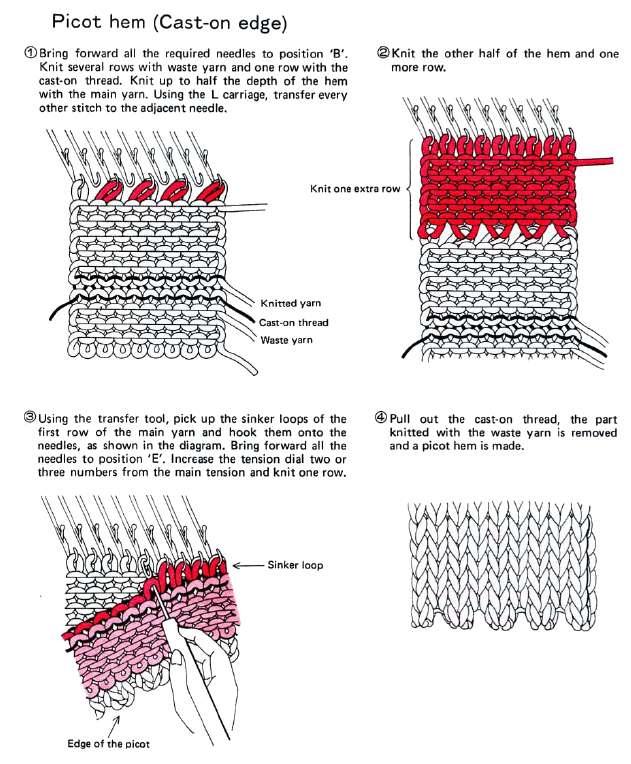
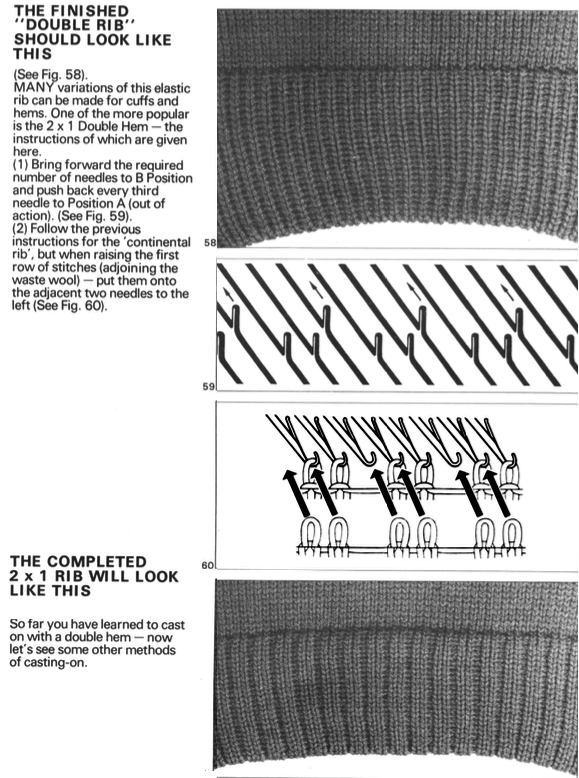
Hems at the beginning: cast on and knit several rows of waste yarn, ending with ravel cord. Following step 1 below: set the stitch dial one number lower than that used originally in stockinette knitting. Knit the number of rows required for the inside of the hem. Loosen tension by 2 numbers for one row  (helps get a neater turning row). Tighten tension by one to the original stockinette tension, and proceed as indicated in steps 2 and 3 below. Illustrations are from Brother techniques Book, pp. 16 and 17.

Picot hems: odd number of needles are required.
1: Cast on an odd number of stitches and knit several rows of waste knitting followed by 1 row knit with ravel cord. Set the stitch dial one full number (guideline) tighter than the main yarn and knit as many rows as required for the depth of the hem.
2: Picots are made by transferring stitches onto adjacent needles, making transfers to either left or right (shown in illustrations below).
3: Reset the stitch dial to stockinette tension and knit the same number of rows. 4: Place the sinker loops on the corresponding needles, making sure to pick up the edge sinker loop as well. Directions usually say to pull our ravel cord at this point,  I like to knit a few rows and to make certain things have knit properly before removing the cord.
5: set the stitch dial 2-3 whole numbers higher than the stocking stitch tension and knit one row. This keeps the joining row from bulging out due to its double thickness.
6: Reset the tension dial to stocking stitch tension and continue to knit.

After transfers, always check that proper transfers have indeed been made and that each needle holds 2 stitches. Bringing all needles out to E before knitting the next row helps facilitate a visual check.

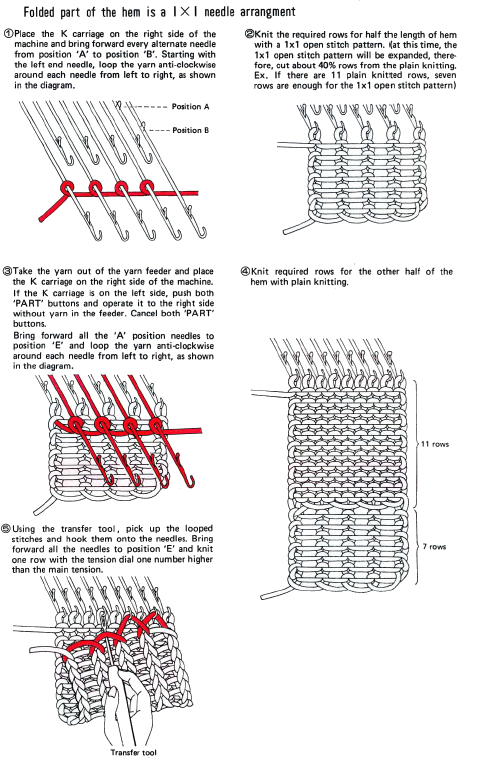
Hems with the 1X1 needle arrangement below will often require at least one more row for the outside of the hem than for the backing since the EON-produced stitches will grow in size and lengthen when the fabric is set
In step number 3 the e-wrapped row essentially casts on those empty needles, so that when the following row is knit, full stitches are formed on each needle, and when the hem is folded any appearance of eyelets is minimized.

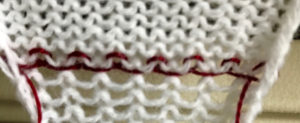
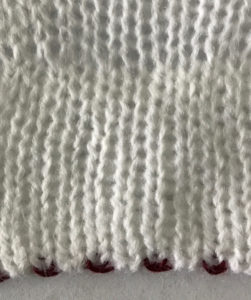
for illustration, the e-wrap row in a contrasting color (white is acrylic fiber)as knitting continues  the hem exterior after some pressing hem interior

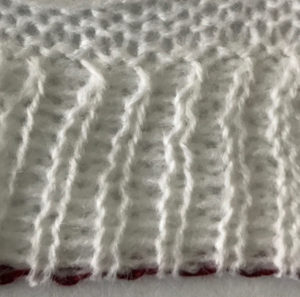
An alternate method to step 3, producing a picot at the turn of the hem: bring empty needles out to hold position, and knit across to the opposite side. With the first pass, loops will form on empty needles, with the second pass reversing direction, an eyelet is formed and full knitting is restored for the outside hem. EON knitting tends to grow in length. I  prefer to reduce EON tension by at least 2 numbers. Test on a swatch to determine the percentage of total rows needed to place the picot at the hem fold rather than having it roll out to the knit side, it will vary depending on the yarn used.

For the picot hem transfers using the lace carriage: after knitting with waste yarn and ravel cord, knit half the depth of the hem. Place the Lace carriage opposite the knit carriage, on either the left or right-hand side. Starting with the second needle from either side, bring forward every other needle to the D position using the 1X1 needle pusher. End needles must be in the B position. Move the lace carriage to the opposite side, every other stitch will now be transferred onto the adjacent needle. Remove the carriage by using the release button, and continue to knit as described above.

Again, I like to knit several rows after picking up stitches and completing the hem before removing the ravel cord and waste yarn.

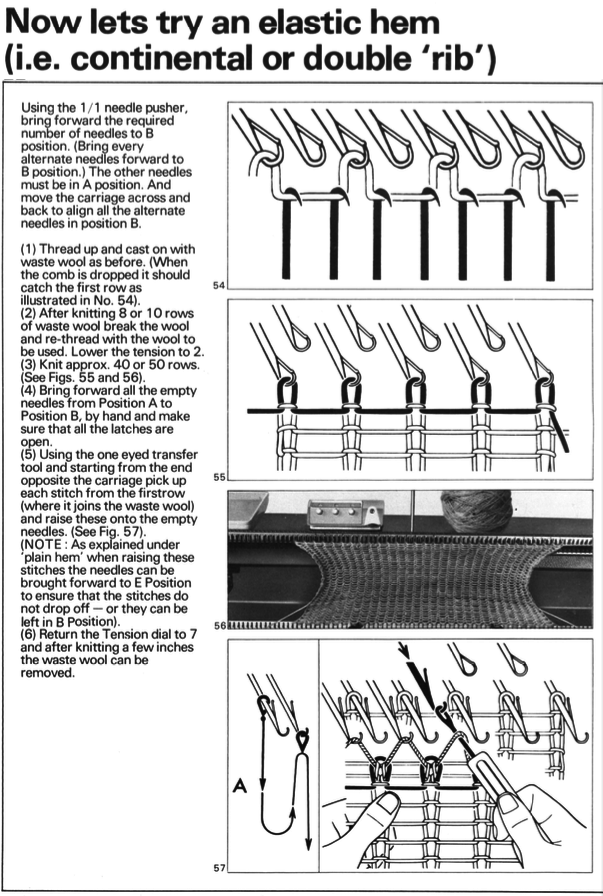
If you prefer not to use waste yarn, for the inside hem on every needle  (method 1 from the previous post). If using the comb: e wrap EON on an odd number of needles, hang the cast-on comb with teeth pointing away from you and proceed as below. Using the cast-on comb to speed up rehanging stitches to close hem: a foreign language video showing its use on the mock rib at the top of socks. The method can be used for any configuration needle setup. It is possible to use ribber cast on combs for the same purpose, I will address that in another post. When EON loops are used to join the hem, the inside of the hem will “drop” some when set, so fewer rows are required on the inside hem.

When hanging any hem, one stitch is lost on the side of the cut yarn end. Also, on the knot side, the stitch may be less noticeable, so you want to make certain that that outside loop/ stitch is also included in the count (green arrow)

I like to secure the main color yarn end as seen below around the adjoining empty needle as seen below

continue knitting forgot ravel cord? find the outside of the last stitch knit  in waste yarn, opposite  yarn ends clip stitch, pull out “ravel cord”, continue knitting
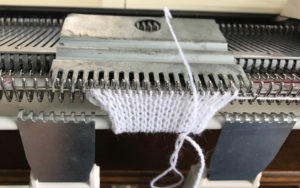
Note: ravel cord ideally should be smooth, nonshedding fiber, and strong enough not to break when pulled on. If like fibers are used and they shed as the cord is removed, you may have tiny fibers of the contrasting color permanently mating with your garment yarn. Check for any knots in the cord at each side of the knit before pulling it out.
Instructions for single-bed mock rib from 

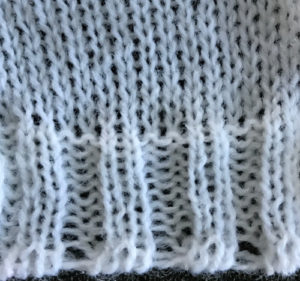
A look at single bed mock rib

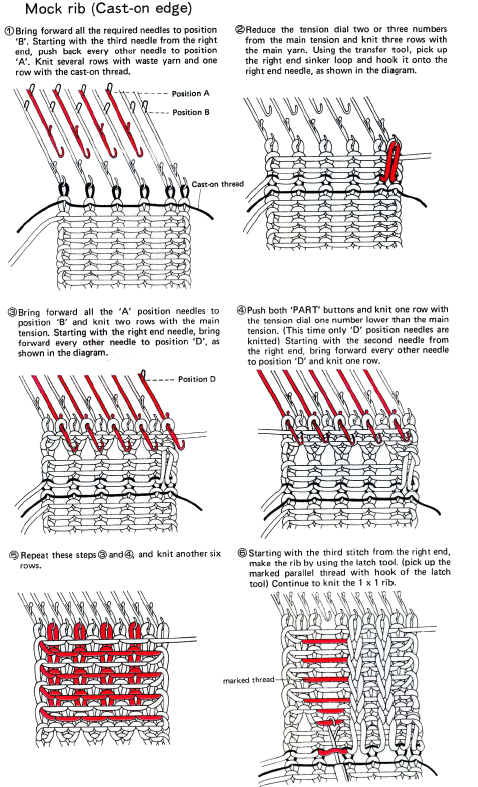
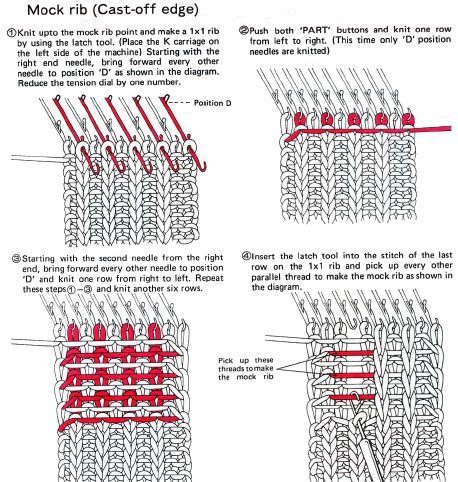
The Brother Knitting Techniques book has a series of illustrations on how to manage a mock rib in various configurations on pages 7-15. The manual is now available for free download online and is an excellent reference.

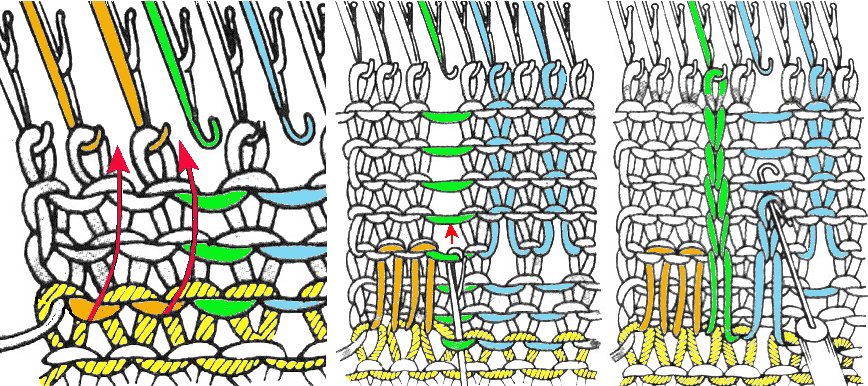
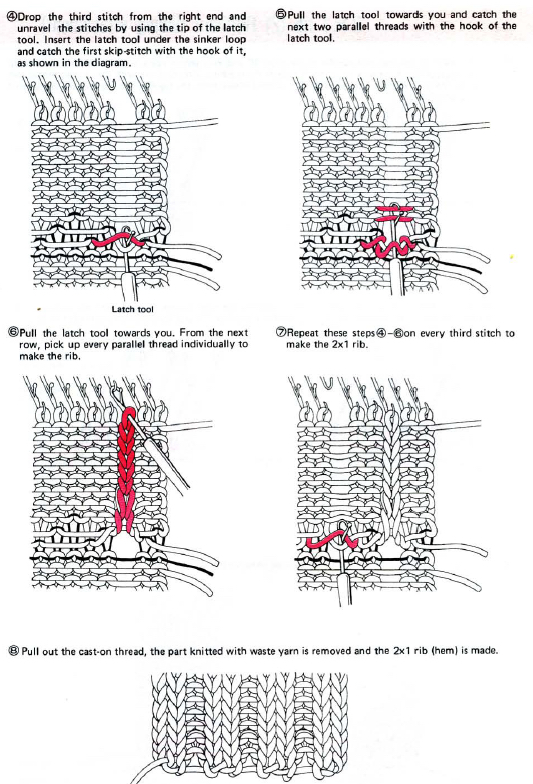
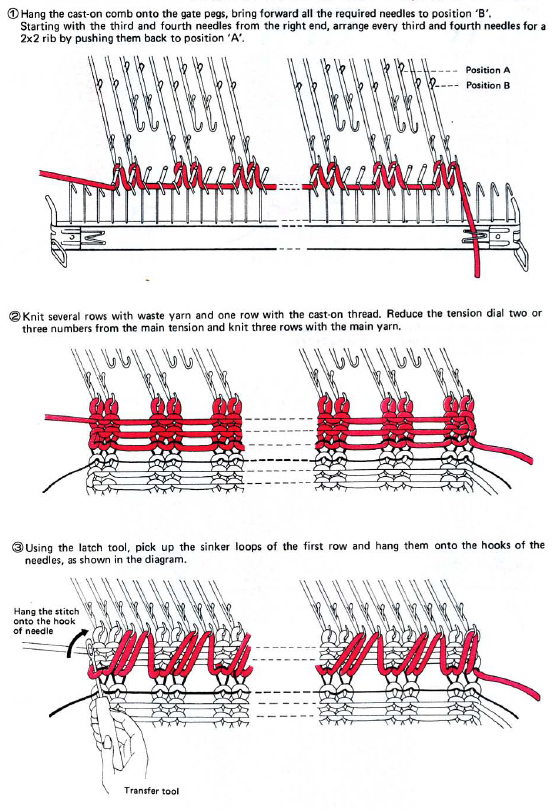
This technique requires a waste yarn start, followed by a row of ravel-cord. The resulting knit creates ladders or stitches that will, in turn, be dropped, then latched up and reformed into knit stitches on the purl ground. Reducing the knit tension by as much as 2-3 numbers is recommended after the ravel cord row.

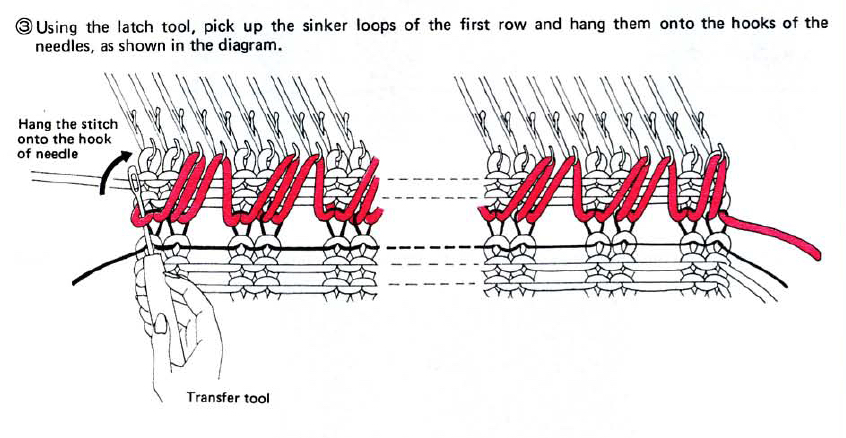
The needles marked in blue and green in the first image below are needles that are pulled back to the A position prior to starting the piece.  After the waste yarn and ravel cord (hatched yellow) start, three rows are knit with the garment yarn. Using a transfer tool, pick up the sinker loops from the first row knit (orange), and hang them on the corresponding needles on the diagram (follow the red arrows).

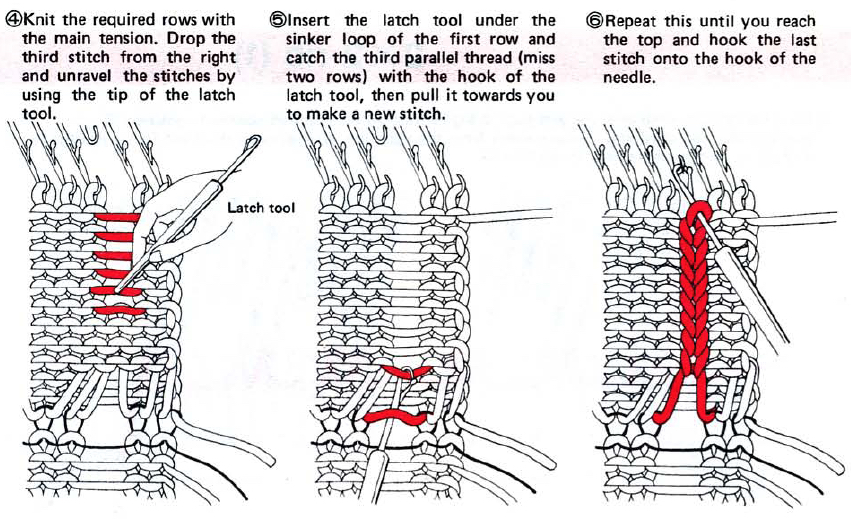
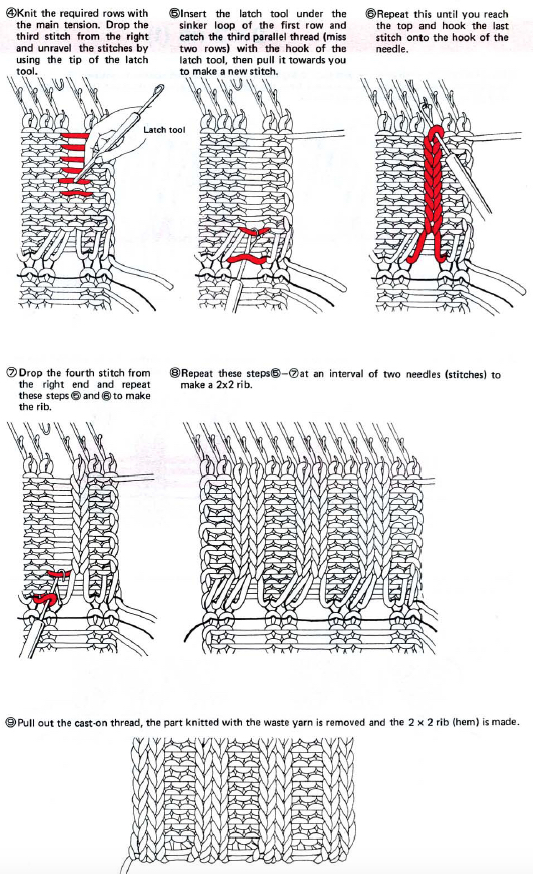
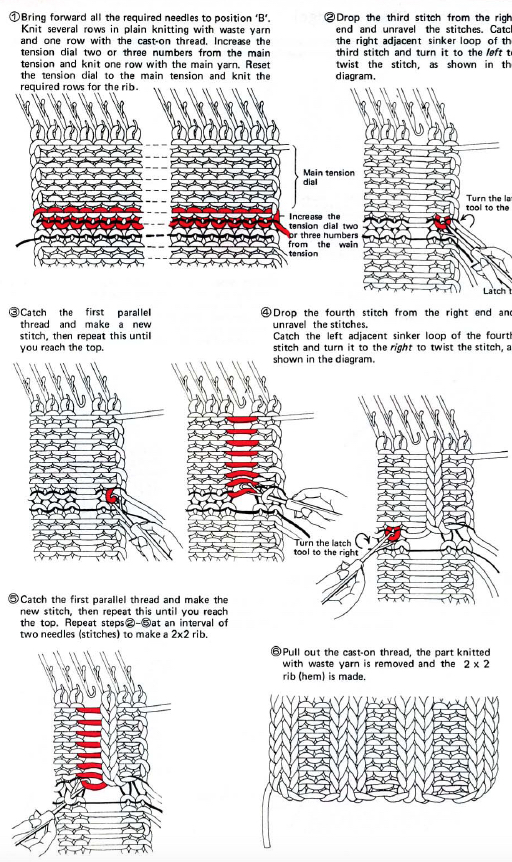
One may at this point continue with needles (green) left out of work, or return the needles (blue) to the work position. If needles are left OOW, ladders will continue to be created. If they are returned to work, a loop is created on the empty needle on the first knit pass, formed into a stitch on the second pass, resulting in an eyelet. Every needle treated in this manner will now be knitting. If stitches rather than ladders are formed for the height of the rib, then those stitches (blue) will need to be dropped, and in turn, latched up. In both instances, the latch tool goes under the first ladder created, and 2 rows are skipped, the latch tool then catches the third parallel row, and pulls it through the first to make the required knit stitch. The process continues up the height of the “rib”. In this illustration, the main yarn begins to knit with COL.
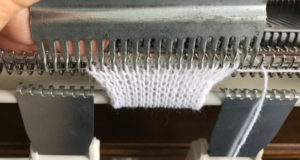
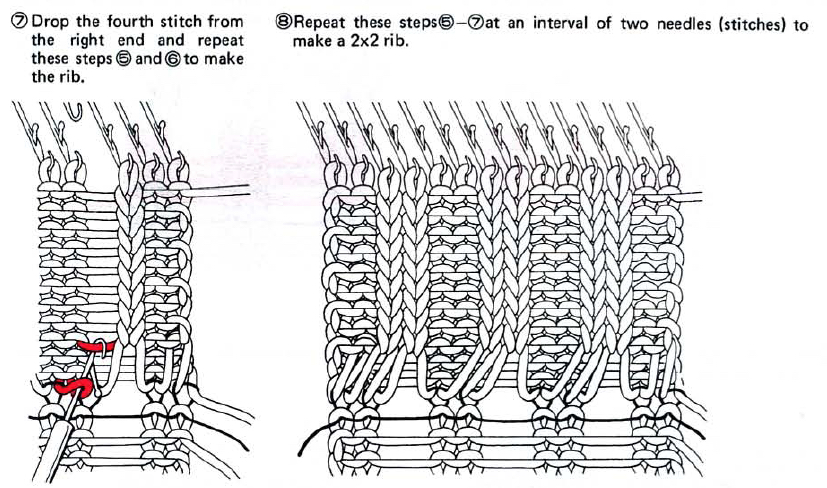
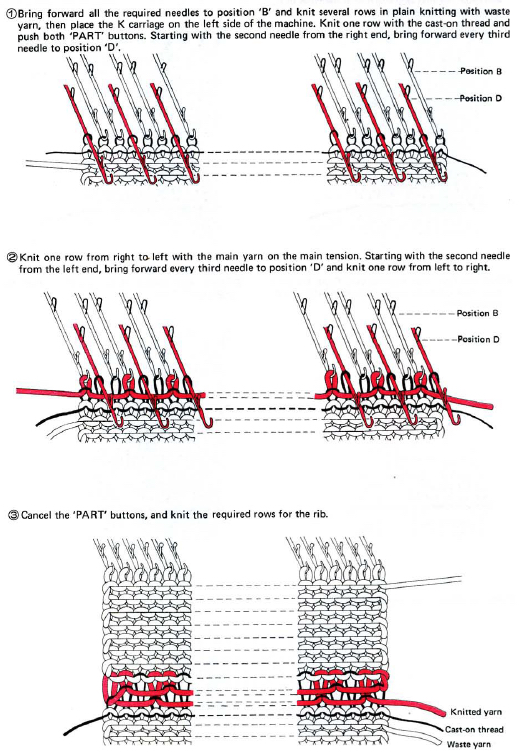
A 2X2 rib is possible. From the Techniques book: cast on with waste yarn and ravel cord (1, 2)

an alternate: cast on with waste yarn and and ravel cord, knit 3 rows

pick up the sinker loop from a knit stitch, hang on 1 of  the 2 NOOW (R)

knit height of the rib 

latch up the ladder as shown in drawings above 

drop/ unravel the second stitch to be latched up (L)
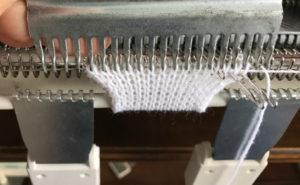
dropped stitches reformed for rib 

continue across the row, then proceed with the main body of the knit 

the rib, off the machine 

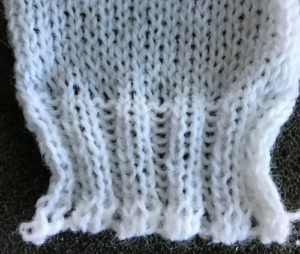
stretched out

My sample was knit in a 2/15 acrylic, a bit thin for this technique, and if pressed, the fabric would be flattened permanently. If the intent is to have the rib retain its “spring and stretch” it is best to use a yarn with memory, such as wool. If slip stitches or FI are to be used for the body of the knit, they will create a much denser fabric. The yarn in the rib may in turn need to be doubled to produce enough substance. As always swatching is recommended before committing to a large piece in any technique.

From the Brother Techniques Book a few more to try: 

2X1 rib using slip setting 

2 X 2 rib: working with Brother cast-on comb, full text  using waste yarn

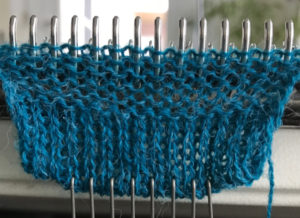
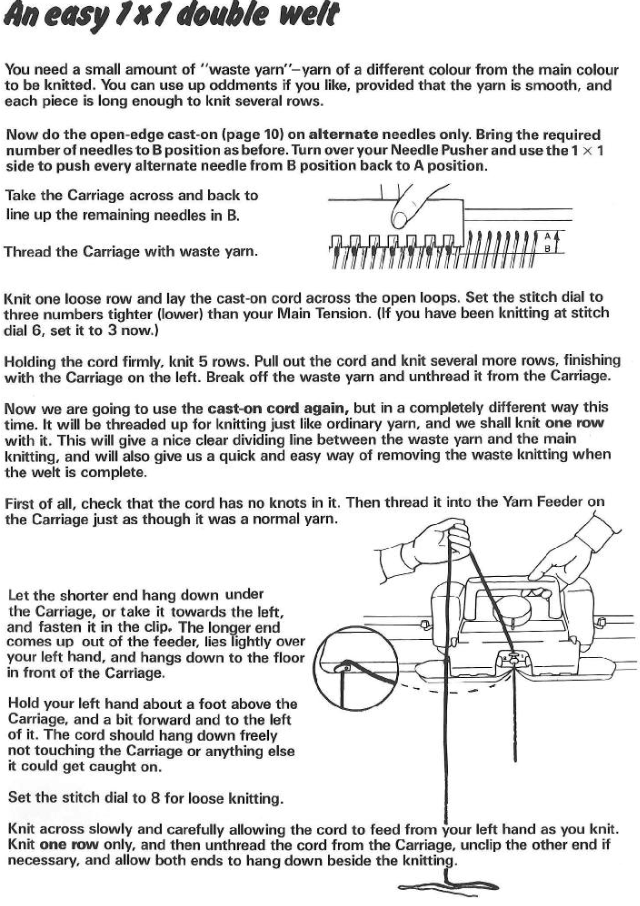
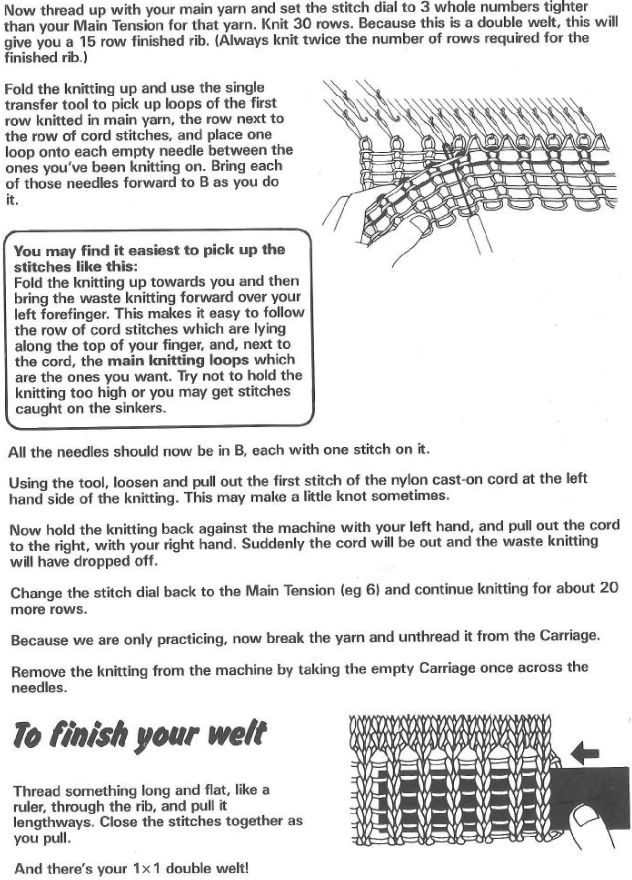
From the KH 800 manual, a double welt. Knitting the single joining row of hems at a looser tension will help the place where the two layers meet lie flatter

Seaming, joining, picking up stitches on knits 2

I have an extensive library of both hand and machine knitting publications. I am not the originator of the base drawings for these illustrations. However, they have been accumulated from various decades-old sources, edited by me for content, color, size, etc. My editing program is Gimp. I will review, alter, or add to this library over time.
Sewn bind-offs on the machine 
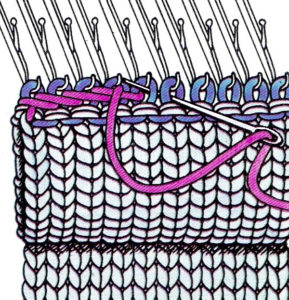
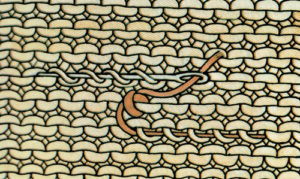
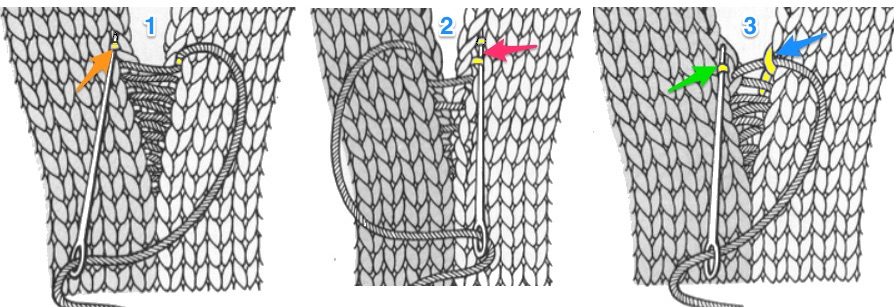
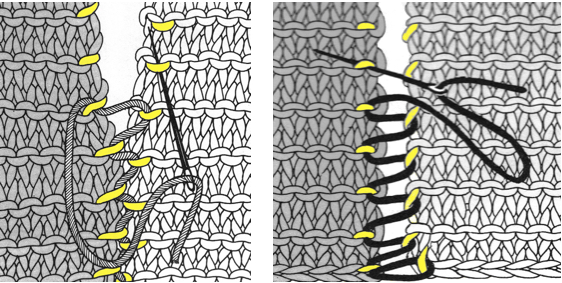
knitting taken off on waste yarn joining a hem open stitches to finished hem crochet bind-off through the top or bottom of stitches in the last row respectively  weaving in yarn ends across a row on the purl side  Mattress stitch: work a few rows with loose stitches so entry and exit points are visible, then pull on yarn and tug on finished segments as you go to adjust stitch size
1. under the single bar between a full knit stitch on either edge of knitting, best for bulkier knits
2. under double bars between a full knit stitch on either edge of knitting, faster on smaller gauge knit
3. worked half a stitch away from the edge, every  row, under the bar on left, loop on the right
4. running stitch along and through the center of edge stitches, alternating sides every row
5. running stitch one full stitch away from the edge, alternating sides every row
6. joining purl stitches in every row

garter stitch 1. mattress stitch, knit side out, one full stitch away from the edge, adding a second strand of yarn to finish the join
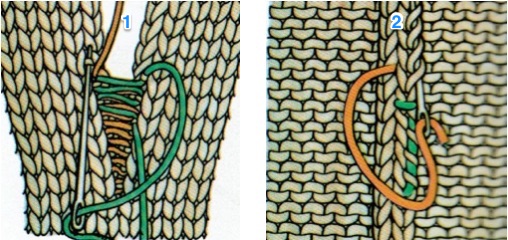
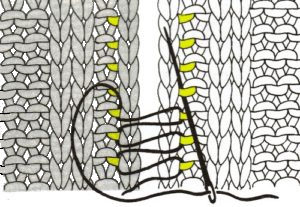
2. weaving in joined yarns along the inseam, traveling in opposite directions

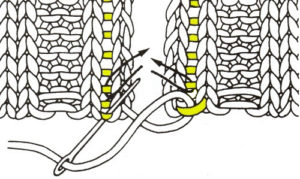
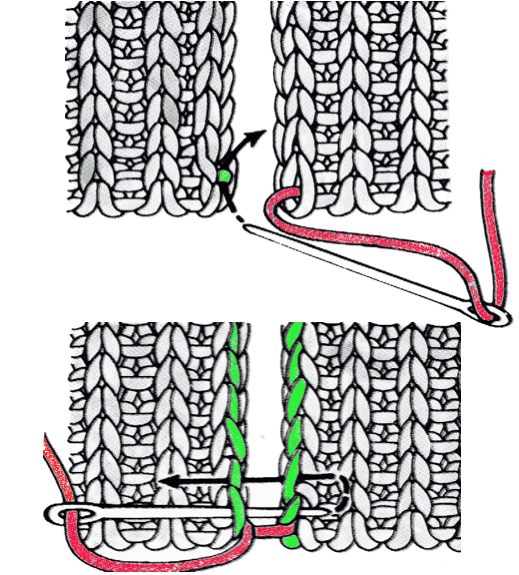
2 X 2 rib ending with one knit stitch  2 X 2 rib ending with 2 knit stitchesrib join through “edge loops” of knit stitches  2 X 2 rib join ending with 2 knit stitches, 1 full stitch from edge 2 X 2 rib join ending with 2 purl stitches, 1 full stitch from edge For more illustrations in addition to the above for joining ribbed stitches see the later 2022 post
Picking up stitches to continue knitting or joining on the machine: straight edges,    curved edges open sts to bound off; bound off sts to bound off  (steps 1 and 2)knit to purl; knit to rib garter-stitch decreasing evenly at intervals across a row grafting with purl side facing if you are left-handed or the yarn end is on the alternate piece,  rotating the image or flipping it horizontally or vertically will provide guidelines.  There are many alternatives for increasing and decreasing stitches. These pages are from the KH 800, a Brother model made in 1970-71, and cover the basics and the often underused technique of using a knitting needle to remove stitches from the machine for any reason, here intended for decreasing evenly across a row as an alternative to scrapping off on waste yarn or using a garter bar.
Long and thin double-pointed needles are best on the standard, and sizing is more flexible when working on the bulky. If a double-pointed one is used, have a needle stopper on one end, and swap it out to the opposite side when shifting stitch positions. The work could be turned over with this technique as well. There are wide varieties of stitch holders that may be used to store or move stitches around when tools with enough prongs to serve the purpose are not available, as well as safety-pin-like plastic ones that can hold single open stitches or serve as markers at the edges of the knit. Sometimes appropriate lengths of ravel cord and a yarn needle can serve the purpose as well.

Seaming, joining, picking up stitches on knits 1

Bleach discharge on knits

I have an I would rather die than dye attitude. Back in late 90s at a Studio Seminar I  attended a workshop on bleach discharge on knits. A sweater using the technique by Dawn Ortel was published in Studio by White Design, Spring/Summer 1995. At some point while still teaching I developed a set of swatches using the technique, removing color from finished fabric rather than adding it. Since then, other alternative, safer  methods and agents for discharge have been developed and become available. For this exercise the mix used was 1 part household bleach and 3 parts water in a spray bottle. Masking tape, stiffened lace, clear stick on shelf liner, rubber templates, and any non porous material may be used as the “stencil”. All non design areas need to be protected. A spray bottle that allows for mist control is required. The activity is best done out of doors. When the color reaction looks as intended, remove any “stencil” carefully to avoid any bleach spilling  onto the rest of your piece. Wash in neutralizing solution of 1 cup white vinegar to 1 gallon of water to halt process.

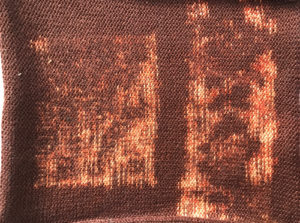
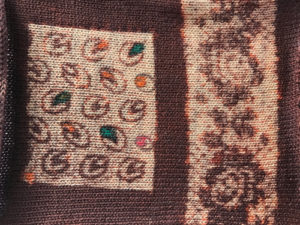
Masking tape was used to create the diagonal stripes below. The original 2 colors used for the FI can be identified in those areas. A rubber “stencil” populated with evenly spaced dots was used in addition. The combination produced the illusion of multiple colors per row. The yarn used was 100% mercerized cotton.

img_4130img_4131here 6 lb fishing line is used as color 2larger shapes: plain knit on FIon slip or tuck patterning plain knit on L / slip stitch on Rlocked FI, wool/rayon as col 2, coffee stain selected areas details (extra colors from fabric markers)

Seaming, joining, picking up stitches on knits 1

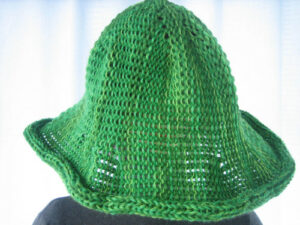
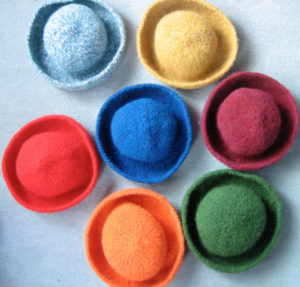
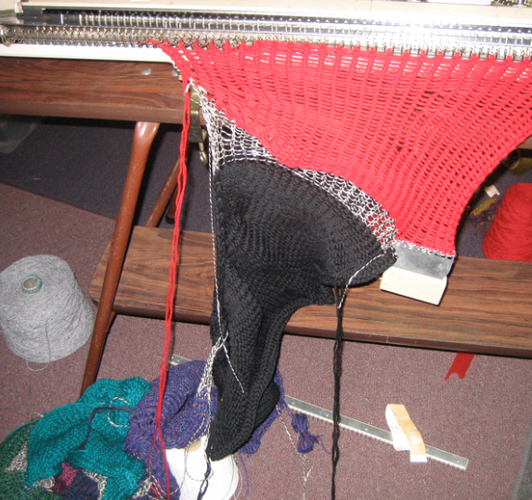
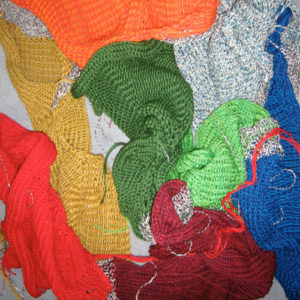
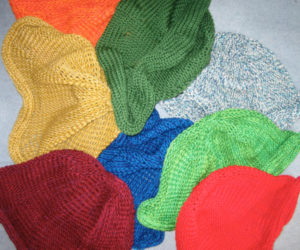
This time of year I am usually producing machine knit felt hats for sale, on my 260 Brother bulky KM. They are knit sideways and require seaming on their completion. Photos of some steps in the process, taken a previous year: screenshot_80screenshot_81screenshot_82for a sense of scale before felting after blocking and drying
screenshot_84My customer handout:
Knitting has traditionally been felted to make it weatherproof, warm, and long-lasting. Examples include Scandinavian mittens, caps, and jerseys, Estonian multicolored jackets, closely-knit felted jackets worn around the North Sea Coast from the 17th century onwards, and knitted and felted Tudor caps.
Wool and hair fibers have microscopic scales, which all point in the same direction, and when such fibers are subjected to heat, moisture, movement, and friction, the fibers will become swollen and soft, and will move against each other in the direction of least resistance. Adjacent scaly surfaces cannot move against one another if the scales on each surface are opposed, and if they are forced to, the scales will lock. Felting is a progressive process that cannot be reversed, only halted.
These hats are knit (or crocheted) in very large, loose stitches. Their shape comes from varying the number of stitches along the surface of the hat, with many more rows on the brim area than on the crown. Most are reversible. In making them, I like to blend many shades of woolen yarn, sometimes adding boucles or mohair. The coloration and stitch structure varies whether viewing the purl or the knit side. The shaping is in the knit.
The large, loosely knit forms are felted by agitation and washing in hot and cold water until the desired shrinkage is obtained. The brim will fold and mold differently depending on whether the hat’s knit or purl side is worn on the outside. No two hats are exactly alike in size or color. They will retain their shape if folded flat and may be cared for as one would care for any fine, washable fabric.
If hand washing: use cool water only, mild soap, do not soak, some molding or blocking may be required.

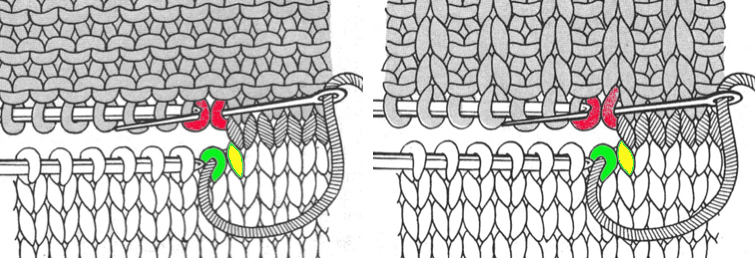
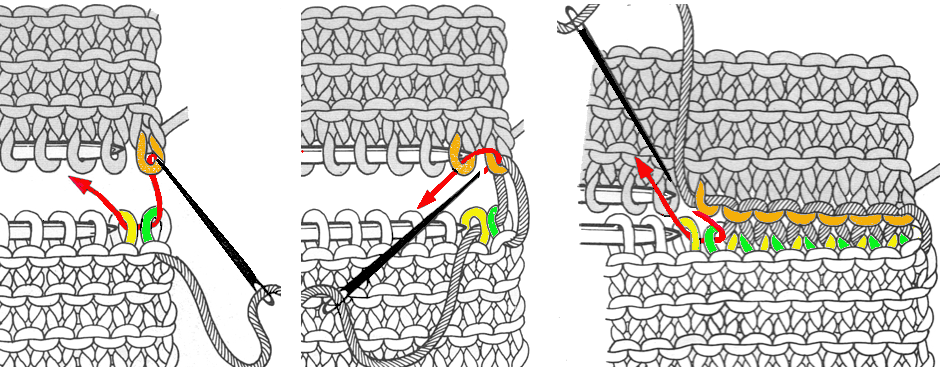
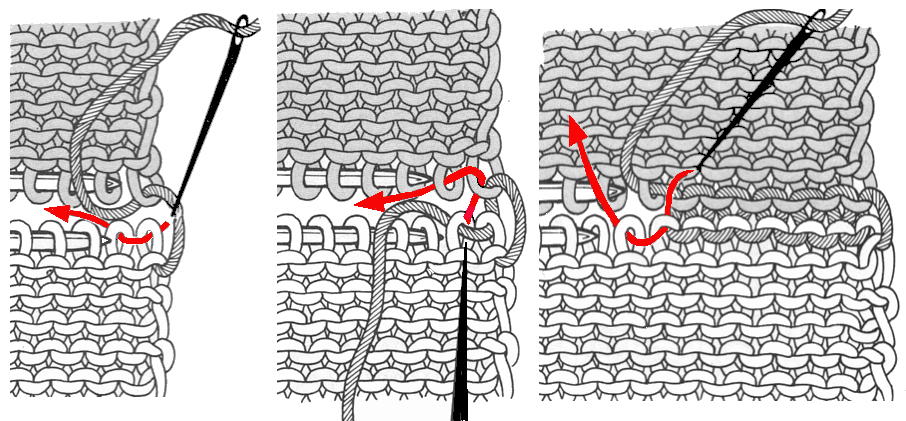
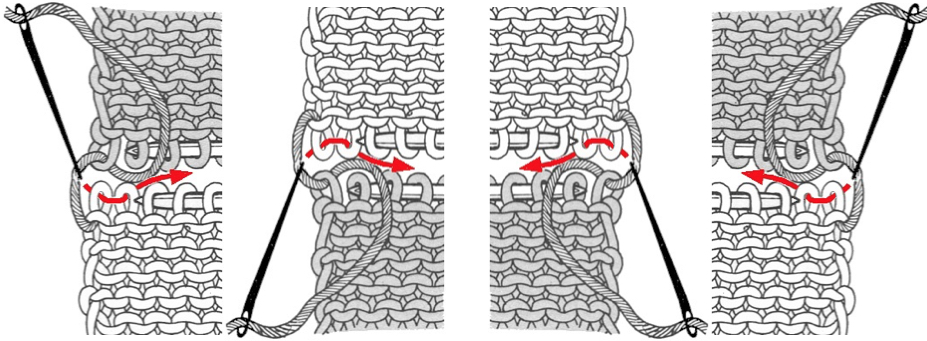
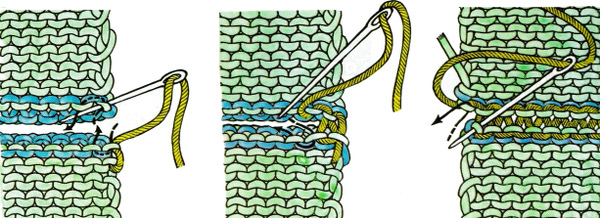
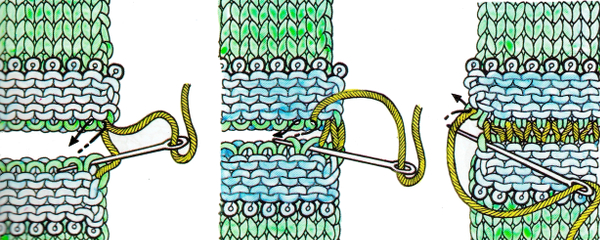
There is a lot published on methods to graft open stitches using Kitchener. Hand-knit magazines both in Britain and here have begun to present joining a variety of pattern stitches with charts that visually clarify the process. A small portion of such a chart: kitchenerWith bulky knits such as my hats, I like to take open stitches onto circulars and sew them together by hand as shown below, beginning on right, and with the knit side facing me.

joining knit ending on waste yarn, purl side facing joining knit ending on waste yarn, knit side facing joining garter stitch ending in waste yarn Diana Sullivan offers youtube videos showing how to join pieces with waste yarn endings with their purl side or knit side facing respectively.

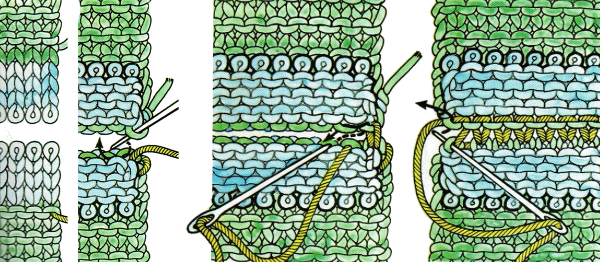
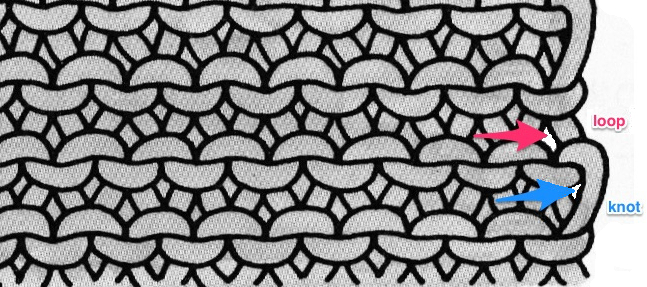
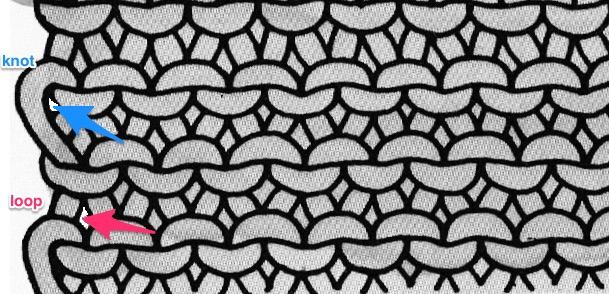
Seam-as-you-knit is an option for joining vertically. It is a technique that may be used to attach bands, parts of a sweater, or strips of knitting, whether for the sake of additional width, changes in color, or attached with purl side facing the knit side if that is the goal.  The piece on the machine is always purl side facing. With each row knit, a “loop” is created on the carriage side, while a “knot” is formed on the opposite side as the row is completed. The process then reverses as the carriage returns to its original position.  The technique may be done on either, or even both sides at once. The first piece(s) is (are) completed and taken off the machine. Begin the join to piece with the cast on row or waste yarn. For a test, with COR: pick up the first knot or loop on the completed piece. Hang it on the left end needle/ stitch on the cast on work (opposite the carriage). Knit 2 rows. Go to the next knot or loop on the completed piece, place it on the same left side needle/ stitch. You are hanging on the far needle opposite the carriage every 2 rows.
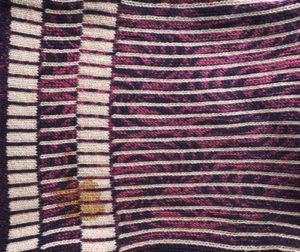
The knit fabric, purl side facing   knot_loopA one-eyed tool is inserted from front to back through either a loop or a knot, and hung on the first needle hook/stitch on the right, left, or even both sides of the piece every 2 rows.    knot_loop2bknot_loop2aJoining “loops” generally works well in standard gauge knitting. On the bulky, or where a “tighter” seam line is needed, join “knots”.
The same method may be used to join the side edge of any piece of knitting to any portion or location on the one in progress.
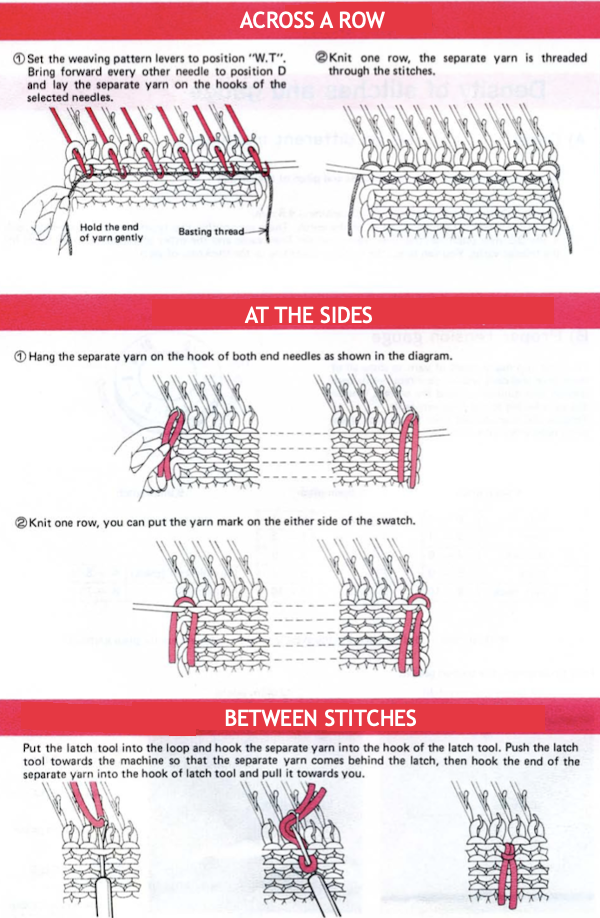
When hems need to be hung at the top of a knit or within its body if only one color is used, if long seams are to be joined, or a width needs to be rehung for joining to match its mate, it is helpful to have yarn markers across the row, or periodically along the sides of the pieces at fixed intervals. These illustrations are from the Brother Knitting techniques Book

MK ladders, and a bit of crochet

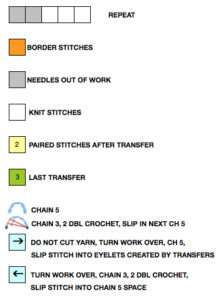
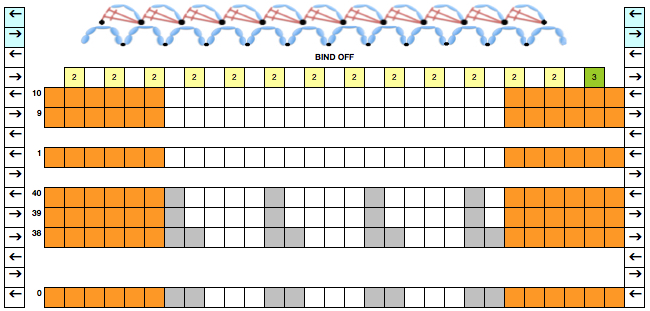
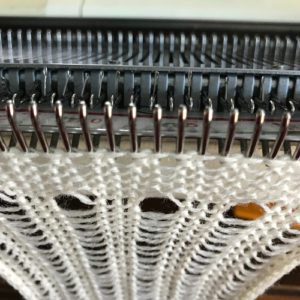
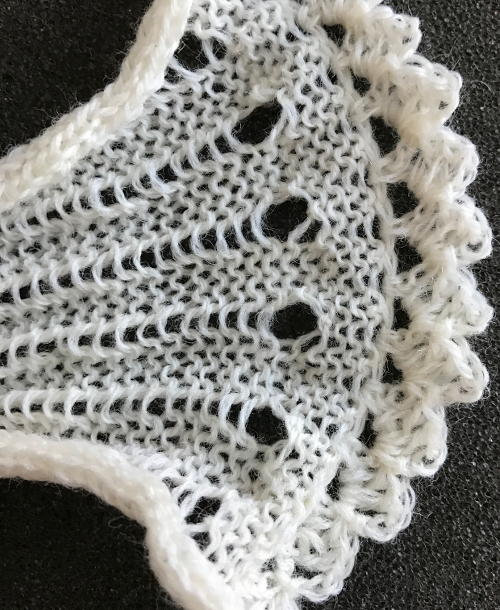
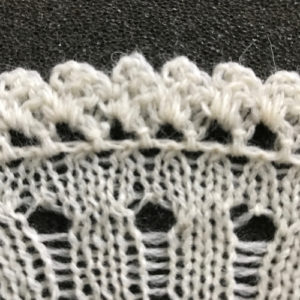
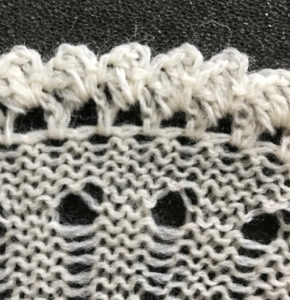
I have recently been thinking about collars and edgings again, this time adding crochet detailing to help cut the edge curl and add interest. In a previous post, I showed an edging done in drop stitch (double bed lace). Here to simplify things, I decided to work with ladder spaces to create the fabric. If a large width of this fabric is required, multiple bands would need to be joined to achieve it, crochet is then applied in turn to the finished knit piece. Seam as you knit can make the joining nearly invisible. Using Excel, I tried to also create crochet symbols using its shapes menu. The number of rows knit in open pattern or all knit prior to binding off is at your discretion, depending on your needs and planned final product. For my sample I began knitting with COR, and to end with COR for bind off row, I chose to work with even numbered groups of rows. Consider fiber content if the intent is to permanently block as flat as possible, or not.

my chart symbols symbols_70

whole_69

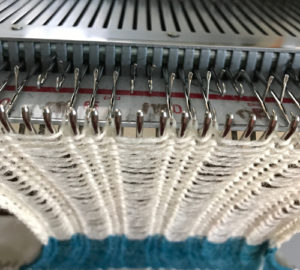
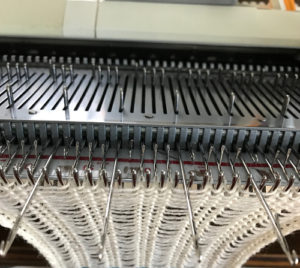
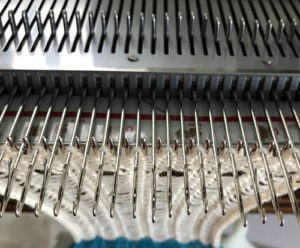
needle set up, waste yarn cast on, knit for the desired length  setup_62img_4095bring one empty needle into work transfer_63img_4096knit one row, bring remaining empty needle into work plain-knit_64img_4097knit one row img_4099knit rows desired for top band img_4100transfer eon from L to the right allk-transfer_65img_4101latch tool bind off around gate pegs for all needles/stitches img_4102

img_4103do not cut yarn, lift work off the machine; turn work over (knit side facing)
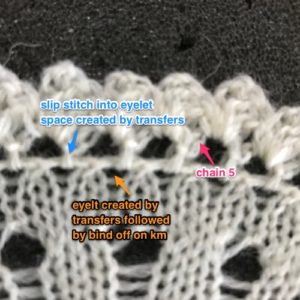
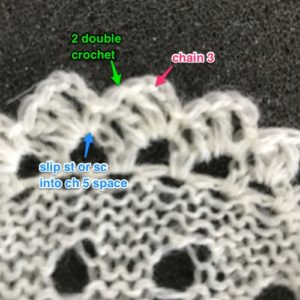
chain 5, slip stitch into eyelet created by transfers, repeat across the knit, end with a slip stitch into last eyelet space detail_4121turn work over (purl side facing once again), chain 3, 2 double crochet, slip stitch into the center of chain 5 space, repeat across the knit, end with a slip stitch into last chain 5 space detail_4120unblocked trim, 2/15 acrylic yarn img_4104

img_4105detail after steaming, the trim is side leaning img_4119

img_4118

To use: rehang open stitches on every needle (or other arrangements) eliminating ladder spaces and bind off,  join to another piece of knitting, etc.
Single bed slits aka horizontal “button holes”

Related blog posts:
2022  More buttonholes and slits with illustrations including ribber variations.
I have previously shared posts exploring assorted meshes including some with large eyelets.
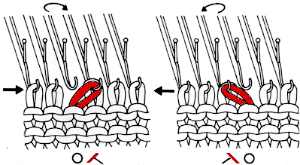
The formation of eyelets is sometimes offered as a buttonhole option in publications, a review of the stitch movements involved and the associated symbols:  The first knit row will form a loop on the empty needle, while the second row knit with the next carriage pass completes the stitch
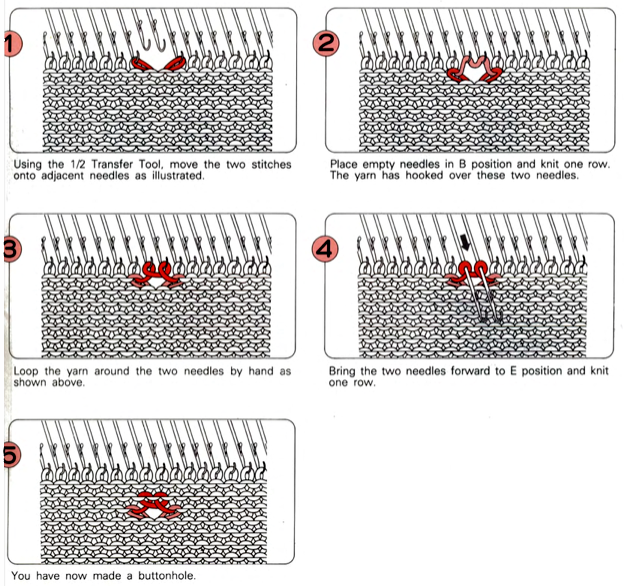
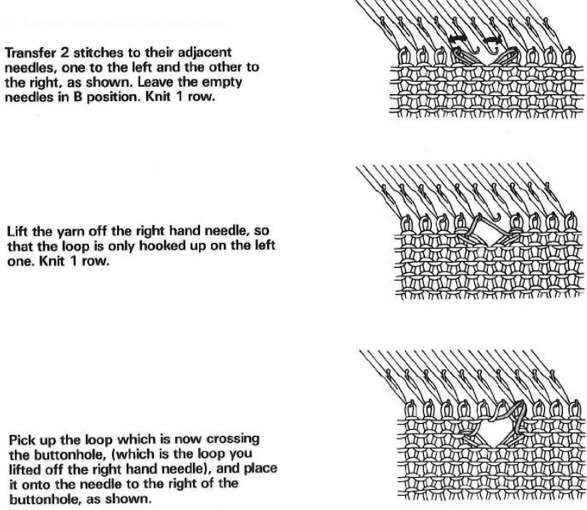
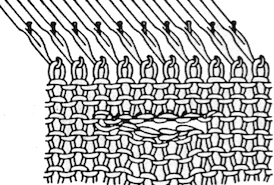
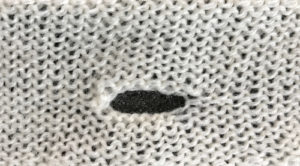
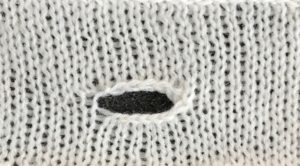
A larger eyelet, with directions found in most manuals, is not really the best option if used as a buttonhole. That said, these 2 methods render round, clean-edge larger eyelets   This version is from the Brother Knitting Techniques Book, begins to address wider openings in knits

screenshot_42Many hand-knitting patterns are published, often in garter stitch, using slits that one may think of as larger “buttonholes” to create a range of interesting fabrics. Trying to produce such slits single bed, without the use of additional strands of yarn and in turn, having yarn ends to weave in, leaves few options.
This method may also be used when creating multiple slits across a row. Holding is used to break the knitting into segments. The drawn illustrations show steps are taken, not needle positions.
COR, for the bottom of the slit:
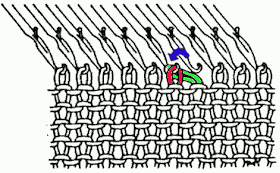
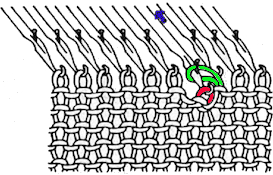
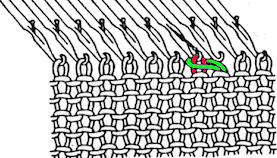
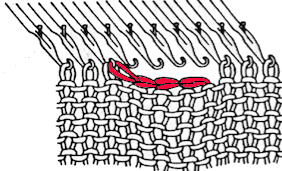
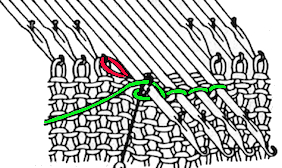
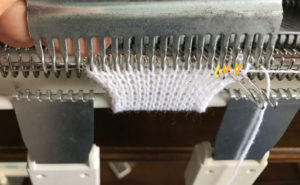
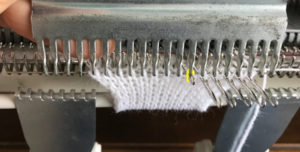
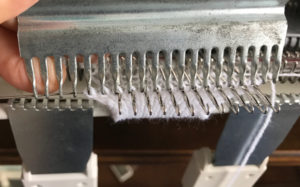
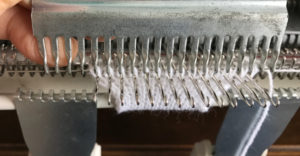
1. transfer the first stitch in the buttonhole group onto the adjacent needle to its right bhole_012. transfer the pair of stitches together onto the now empty needle to their left. The knit carriage, holding the yarn, will be on the rightbhole_023. push the needle forward until the first stitch (green) passes over the needle’s latch bhole_044. push the needle back to the work positionbhole_045. the forward stitch (red) is now knit through the one behind the latch  bhole_05This essentially binds off a stitch.
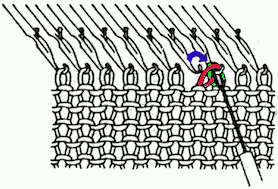
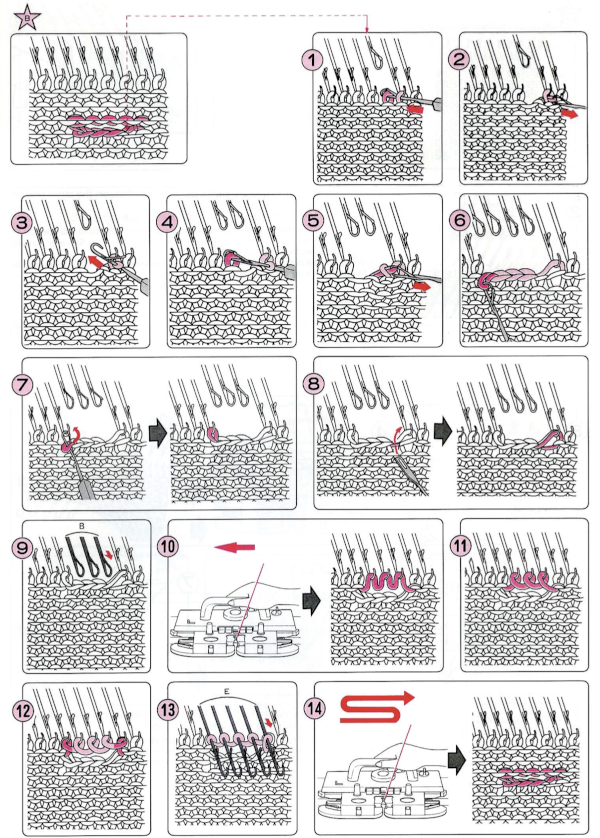
Repeat steps 1-5 until the number of bound-off stitches required is met; the last stitch in the group is then transferred onto the adjacent needle to its left. The bottom edge of the “buttonhole” is now complete. bhole_06aTo make the top edge of the buttonhole/ slit bring its corresponding needles out to hold, and cast on the desired number of stitches with the latch tool from right to left. bhole_07aIn order to best accomplish this with COR set KM for holding, push empty needles back to A position, knit up to now empty “buttonhole” needles img_4069bring empty needles out to hold img_4070insert latch hook from back to front through below the last stitch now knit on the right screenshot_36twist tool clockwise screenshot_37bring empty needles out to hold img_3966come up between the first 2 needles on the group’s right screenshot_38continue with latch tool bind off, the last loop in the chain is hung on needle already holding 2 stitches from the last bind off transfer img_4071tighten up the loop 
img_4072
return “buttonhole”  stitches into needle hooks, back to B position
img_4073COL: set KM to slip in both directions and move to right img_4074COR: cancel holding, adjust tension, knit across remaining stitches to Limg_4075COL: cancel slip <–>, continue knitting screenshot_08img_4077img_4078This version is from an ancient Brother manual, always test techniques on swatches using the yarns intended for the final piece
A hand-knit response to a Pinterest request: variations in rib with holes