Symbols in knitting have evolved considerably through the years since the day when all instructions were longhand and it was abbreviations used that would need de-coding. This is true of cables as well.
I came across a magazine graph that led me to explore its conversions from hand to machine.
In the BW original graph cable stitches are represented by solid lines and dashed lines, and stitches are moved in the direction of the upward slant.
The “needles” with the solid lines will be moved first, and the dashed lines will follow to replace/fill the empty needles.
The repeat below is 64 rows high, so if a card is used it would need to be created in two pieces, the last row on the graph is not part of the repeat itself.
As is seen in knit alphabets, however, punchcard patterns are mirrored vertically when the design is executed.
That needs to be kept in mind if punched holes are used to track the cable repeats, particularly in complex arans.
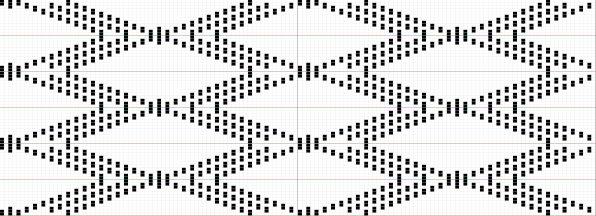
Assuming mirroring is required to match movements in the hand-knit original graph, colored cells representing punched holes in the first colored card repeat are also mirrored. 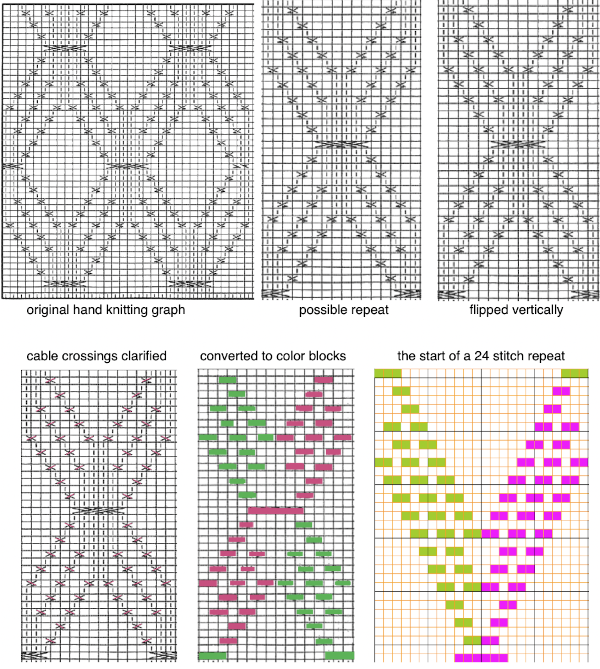 Using the card
green color blocks :
the left half of the crossed stitches are moved first, taken off on the tool, held to the side
the right half of the crossed stitches follow and are placed on the empty needles on the left
the first held stitches in turn are then placed on needles now empty needles on the right
magenta color blocks :
the right half of the crossed stitches are moved first, taken off on the tool, held to the side
the left half of the crossed stitches follow and are placed on the empty needles on the right
the first-held stitches in turn are then placed on needles now empty on the left
The markings on the punchcard machine’s needle tape correspond to needle selection for 24 stitch repeat, and that can be used as a guide, needles selected are intended to move toward the center at the bottom of each half repeat, and away from it in the top half, creating the diamonds.
If electronics are used and the repeats are other than 24 stitches wide, the needle tape may be marked with a water-soluble pen or removable color tape strips may be placed between the needles that are first and last in each repeat.
The initial imagined diamond shape is tiled in width.  The start of a possible chevron shape
 ![]() Those 3X3 cables are likely not easy to knit, especially after only one all-knit row. One alternative would be removing the crossing, disregarding the 6-needle preselection, thus adding another knit row between any 2X2 crossings.
Those 3X3 cables are likely not easy to knit, especially after only one all-knit row. One alternative would be removing the crossing, disregarding the 6-needle preselection, thus adding another knit row between any 2X2 crossings. 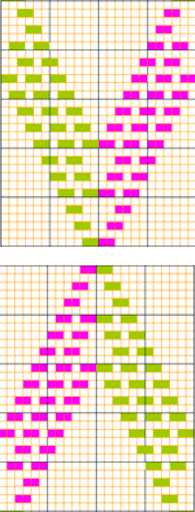 In writing a 2022 post on using Numbers and Gimp for charting cables and revisiting this post I realized there was an alignment error at the top of the punchcard repeat used to knit the earlier associated swatch. The image below now has the problem area in the card marked.
A circle also marks the spot where operator error occurred with some twists made in the wrong direction, 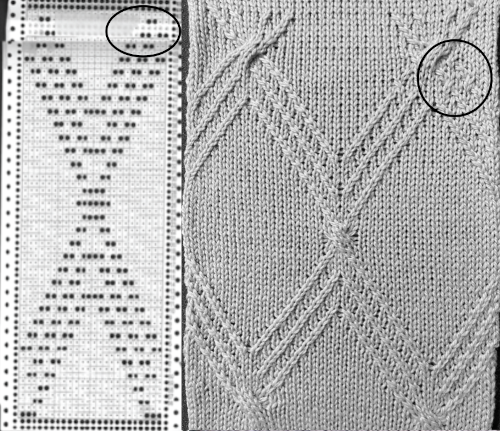 The amended, now rendered 72 rows tall card:
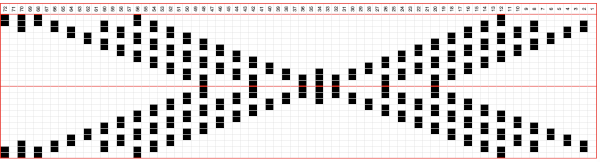
 2024: The result of further editing, a table representing the direction of the stitch brought forward in each crossing, while the magenta numbered cells indicate spots where the crossings begin to reverse direction. All crossings are now planned 1X1.
 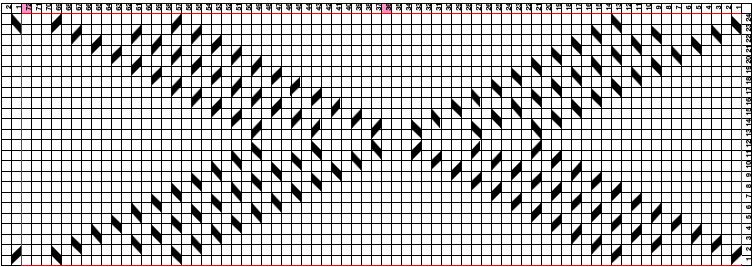 The top 2 rows from the above chart have been shifted down to the bottom to create a point at the start of the diamond shapes, and the resulting repeat is tiled to check alignment and possibly ready for printing a guide.
 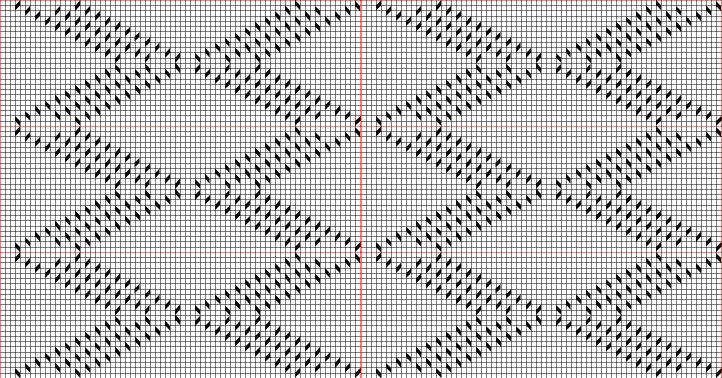 The associated 24X72 PNG
 ![]() and markings in 6 stitch blocks for punchcard users
and markings in 6 stitch blocks for punchcard users 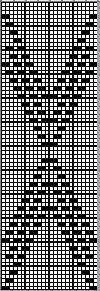 The proof of concept swatch:
Such techniques may be used in isolated portions of garments instead of all over.
A “simplified” interpretation of a similar knit pattern is seen below. 
Using punchcards to track cables and twists in pattern 2
Using punchcards (3) or electronics to track small cables in pattern


 With tubular knit cord in addition to hooking up, anchoring may require some stitching, “seaming as you knit” at planned intervals would make the joins “invisible ”
  Strips using holding techniques or stitches hooked onto the knit to create texture, in turn, joined in the “seam as you knit method”
 Cording may also be inserted into single stitch lace “holes”
 or larger holes created through holding techniques
 Knit i-cords, ribbon, twisted cording, etc. may also be threaded/woven through holes created at cable crossing as a way to add color and dimension to standard cables, mimicking their movement on the fabric. A recent foreign magazine cover including a variant of the above technique