Miters and spirals: visualizing, charting (and more) 2

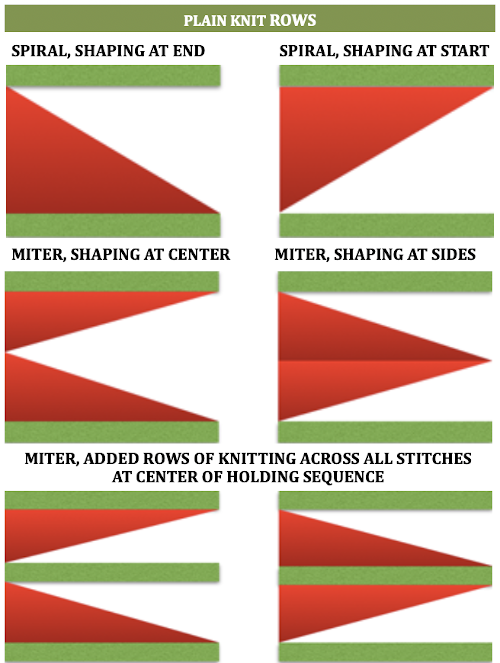
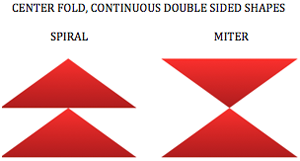
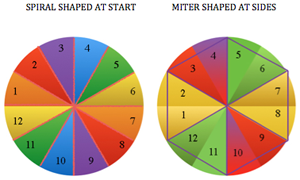
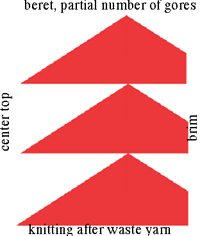
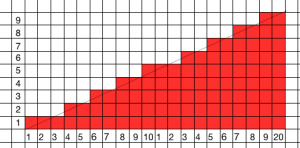
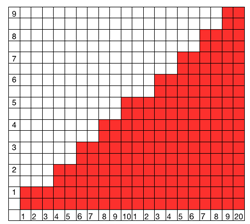
Visualizing the shapes (using charts in Mac Numbers)A spiral gore is the first or second half of a miter gore, conversely, a miter gore has 2 consecutive spiral gores, knit in a mirror image. GOING ROUND: numbers 1-12 represent knitting sequence for wedges, thicker lines at segment edges = rows across knit width at end of each sequence, 2 rows or many more depending on planned design shape

Previous posts on related topics:
2011/06/18/knitting-math-and-pies1/
2011/06/24/taking-it-to-a-garment/
2011/03/29/the-doilies/
2013/12/28/short-rows_-balls-tams-3d-rounds/

Miters and spirals: visualizing, charting (and more) 1

Getting my thoughts together on this topic I searched for any of my previous posts that may be related, here is a list
2013/12/18/holding-stitches-short-rows/
2014/02/24/holdingshort-rows-hand-tech-to-chart-to-automating-with-slip-stitch-1/
2013/12/28/short-rows_-balls-tams-3d-rounds/
2013/01/21/automating-pleating/

Even in my earliest days as a hand knitter, I liked charting out my sweater shapes ie sleeves, necklines, etc on graph paper and tracking my place by marking the appropriate row or every other row on the charted image. Many of the formulas for charting math in garment shaping may be emulated by drawing a line on the chart where each square represents a stitch and a row, connecting points, and filling in squares. Averaging out grid shifts is also the guideline to increasing and decreasing for shaping on pixel charts. Though this may be a bit of egg before the chicken, I got sidetracked playing with software yet again.

GIMP

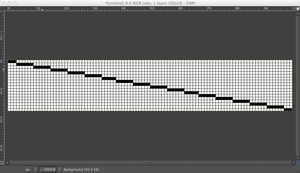
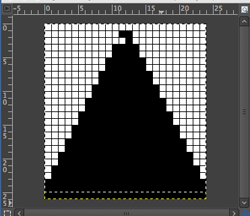
Working premise: using holding to shape a wedge over 36 rows. Stitch multiples  are brought into hold opposite the carriage (floats will be created if they are brought into hold on the carriage side), in the instances below each graph row represents 2 rows knit, my fabric width at the start is 100 sts

Set image size _ pixels equal stitches and rows required

Magnify X 1000 (this is what I prefer for viewing and editing, less magnification may be used)

Activate 1 stitch grid/ show grid/ snap to grid

Make certain the whole image is within your window view

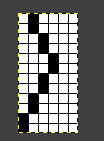
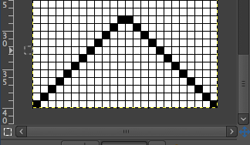
Using line shape: click on the upper left corner, press shift key_a drawing line will appear with a + symbol at its bottom right_click on the first square on the bottom right, a line will appear where black squares represent  # of stitches to be held each row

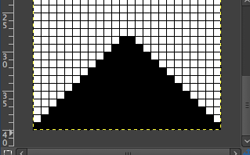
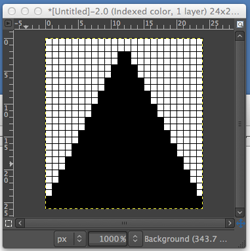
bucket fill in  the appropriate side of the wedge to represent knit stitches

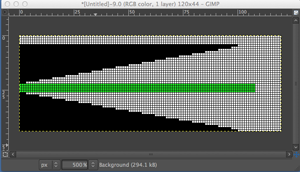
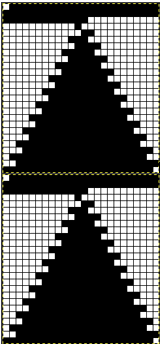
create a new, larger canvas that will accommodate desired multiple stacked repeats and possible knit rows in between shapes in a new window; copy image from the first window, paste  into the new window, move it, and place in the desired location on your  screen

return to the first window, flip the image vertically (image menu/ select transform and direction)

again copy, paste, move into the desired location, and insert knit or (patterned) rows (green) when and if desired. On electronic machines, the final image would have to be doubled in length, so those “knit row” pixels/squares would have to be adjusted accordingly to half the desired number

Row by row charting for double-height to represent each row of actual knitting: the process

starting with a repeat 6X6

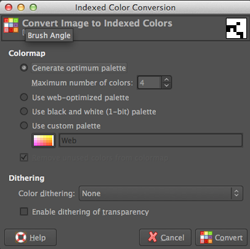
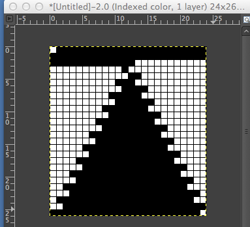
convert image to bitmapped (repeat at upper right below is a different one, should match the one being resized)

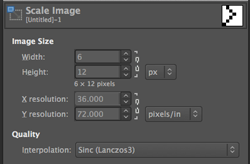
scale image: click on the locked symbol/ chain link, in turn, to alter the aspect ratio, change both pertinent numbers

the repeat twice as long, 6 X 12

going 3D, possible spiral

eliminating squares

shifting things around in order to add “automatic wraps”, begin knit with COL

in further progress

triangle-auto-wrap

stacked repeat

stacked repeat

save in image in format for downloading to machines via cable and knitting using slip stitch setting, or export or screen grab for printing and knitting from chart visually as hand technique. If printing images colored cues may be added for carriage/lock setting or color changes, etc. The question: what about numbers and excel?

NUMBERS

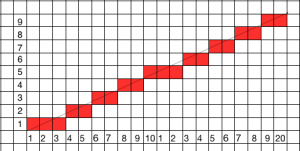
Using the line tool (shapes) will get the line in place, shaping is “eyeballed”

knit squares are filled in

so you want to double the height only? Apple for some reason when they  “upgraded” to the latest version of the program (3.2) has eliminated the split table feature, so the only way I can see is through using the table: add rows above or below in the chart, a new row will be a copy of the selected row

EXCEL

the insert row option will add rows only below selected ones, I have not found a tool equal to the line shape in Numbers

From punchcard to hand technique or hand knit

Emulating the repeat in the post Studio transfer lace knit on Brother 910  and Revisiting use of lace patterns Studio vs Brother machines

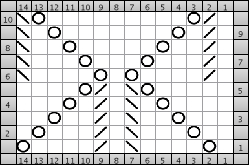
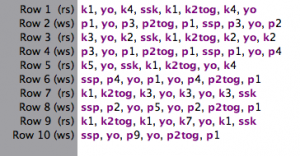
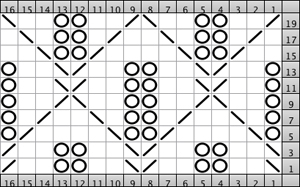
here is a chart for reproducing it as a hand knit, generated in Intwinedthe accompanying text generated by the programexecuting ssp from Knitters Brewing Company

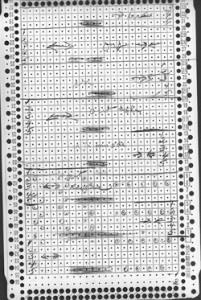
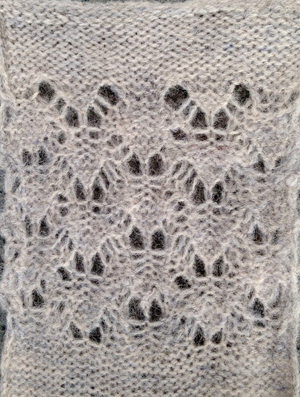
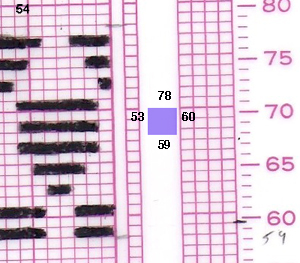
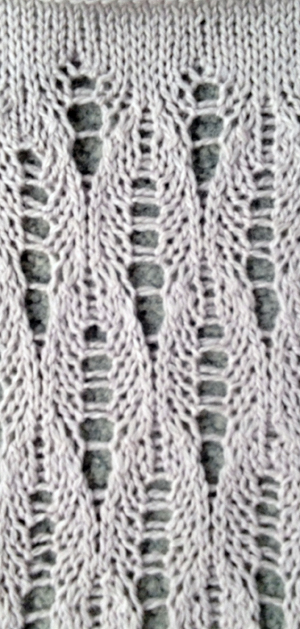
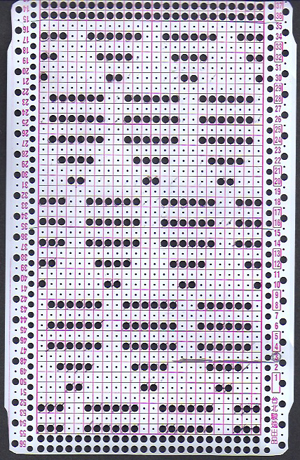
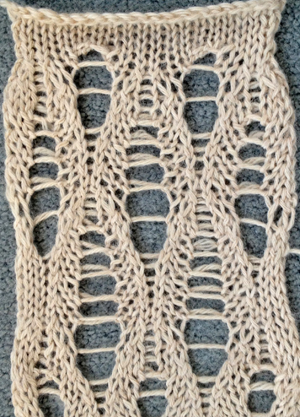
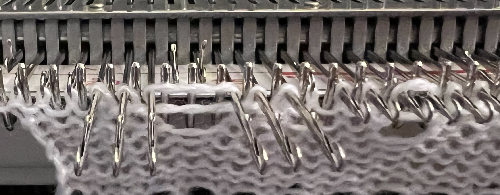
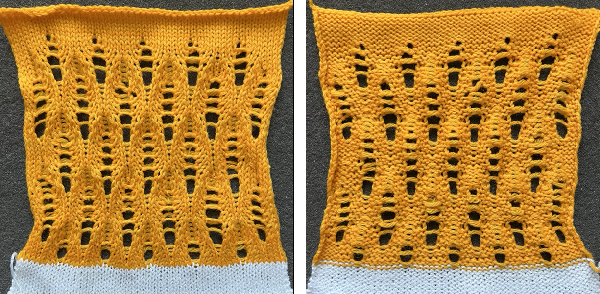
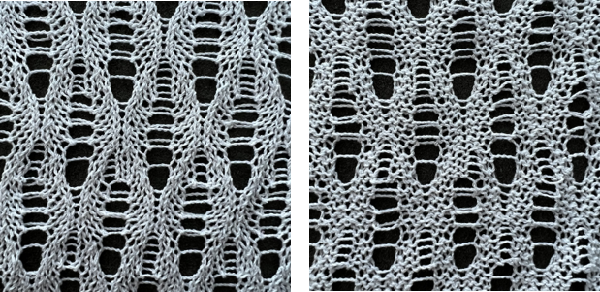
I tried the pattern as a hand knit and had difficulty keeping track of the reversals of twists front and back, so I headed back to my more familiar territory, machine knitting, and to the bulky machine to make the number of transfers a bit more manageable. The repeat is 14 stitches wide, outside the range of an effective repeat for a punchcard, but with transfers every row there is another way to use a card that requires no punching. Observing familiar rules, and text or symbols that are meaningful to us for the particular project (ie also for racking sequences), the card is used for notekeeping rather than needle selection. The carriage is set to KC, set for normal knit, no cam buttons in use. Because no holes are punched, there will be no needle selection. The card is locked on row 1 as usual prior to the first row of any pattern knitting , set to advance normally, and in my scribbly version it reminded me of several things. Each pattern segment is 5 rows, with the dark stripe indicating the beginning of each new segment. The numbers on alternate sides show the number of stitches that need to be transferrd with the aid of tools,  leaving an empty needle that will create the hole, and overlapping stitches on either side of a center point in part of each motif. I worked with 2 repeats. On rows 1-5 as marked on punchcard, stitches were trasferred beginning on the right, toward the right side edge of the knit,  then following the remainder of the partial chart repeat. When the next segment of rows was reached as indicated by numbers appearing on the left of the card, beginning on the right edge again,  the first group of stitches was transferred away from the knit side edge, once again following the chart segment. As the lines of holes begin to show, it is easier to see the direction in which one needs to move as is the resulting pattern. The ridges created as the stitches overlap on either side of the center single knit stitch also can serve as guides in keeping track. I used no weights, just the opposite hand to pull and guide as needed. The number of moves is likely to require a looser tension than usual for any familiar yarn.the swatch, knit side, using worsted weight, tension 6its purl side

Studio transfer lace knit on Brother 910

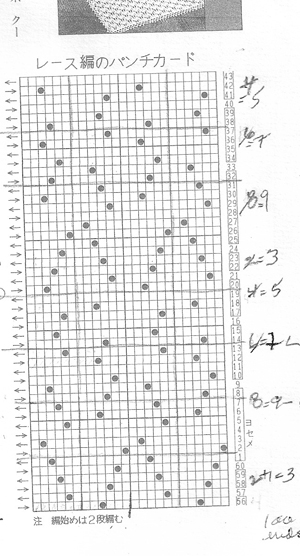
Eons ago I had “saved” a random copy of a japanese punchcard pattern in the someday I will figure it out pile. I was attracted by its opennes and what appeared to look like ladders as well as holes in the small B/W photograph. I have more experience in knitting and understanding of lace now, and in the process of studio clean up and paper possible recycling I found my “future project” and thought I would “tackle” it

the card

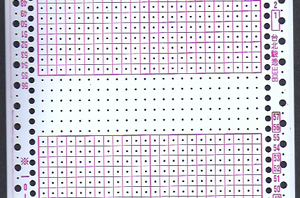
As can be noted in numbered markings, the card is a studio lace card. In addition, between series of transfers there is a single blank row = a single row of knit as opposed to the 2 rows commonly seen in brother’s kms’ lace

my mylar repeat, with notes on R sidebar as to # of LC passes, rows knit

the method: with no repeat adjustments or conversions

I began with lace (LC) carriage on left (OL), knit  (KC) carriage on right (OR). Because a selection row is required for the first transfers row to occur, I added one row to each of the suggested lace pass sequences marked on the punchcard. The LC as a result travels an odd number of rows. It will begin on the side opposite from, and move toward the KC. At the end of each of the odd numbered row sequences it will reach the same side as the KC. At that point there will not be any needle selection. The LC is released from the needle bed, and the KC knits only one row to the opposite side and remains there. The LC returns to the bed opposite to the KC, and the sequence is below is repeated:

LCOL  9 passes, release 
KCOR knit one row to left 
LCOR 7 passes, release
KCOL knit one row to right
LCOL 5 passes, release 
KCOR one row to left 
LCOR 3 passes. release
KCOL knit one row to right 

I used a waste yarn acrylic for my swatch, which became scratchy, flat and stiff, losing any texture when pressed, and shrinking a bit so as to almost looking felted, yet another reminder  test small swatches fefore committing to larger pieces.  Here is the result

knit side

purl side

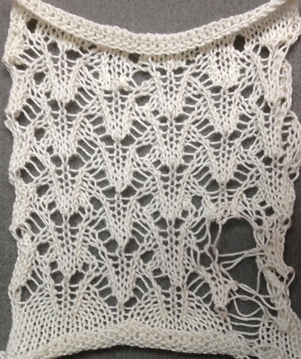
a new day, a different fiber, the joy of not noticing dropped stitches

“unblocked”, rayon yarna bit closer, after light pressing

for sample knit on 930 with img2 track please see later post 

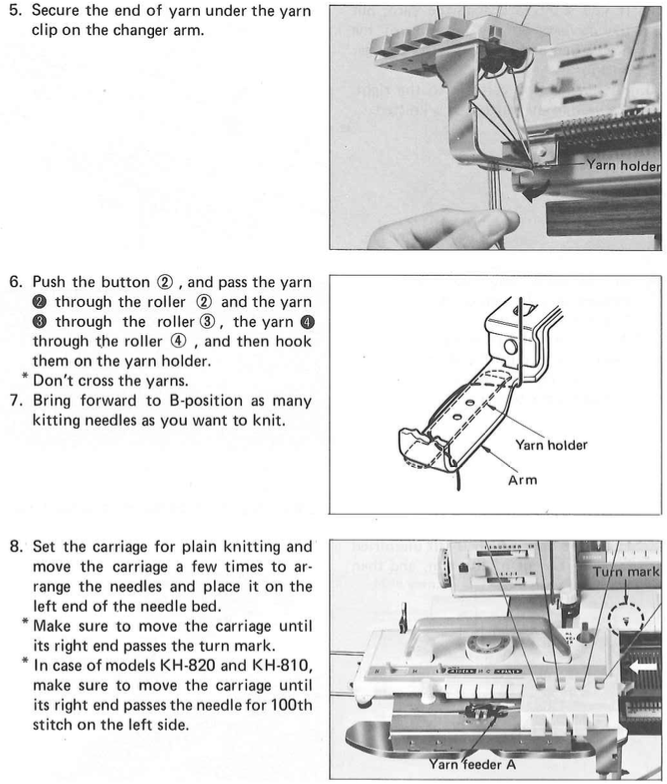
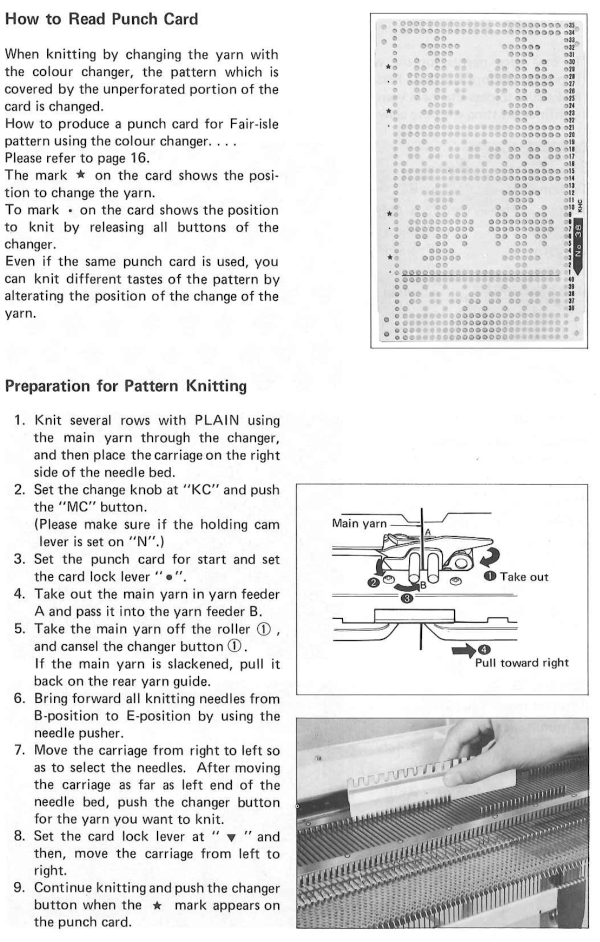
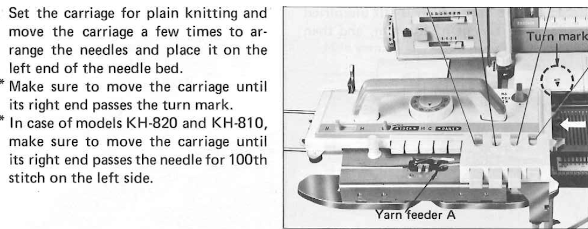
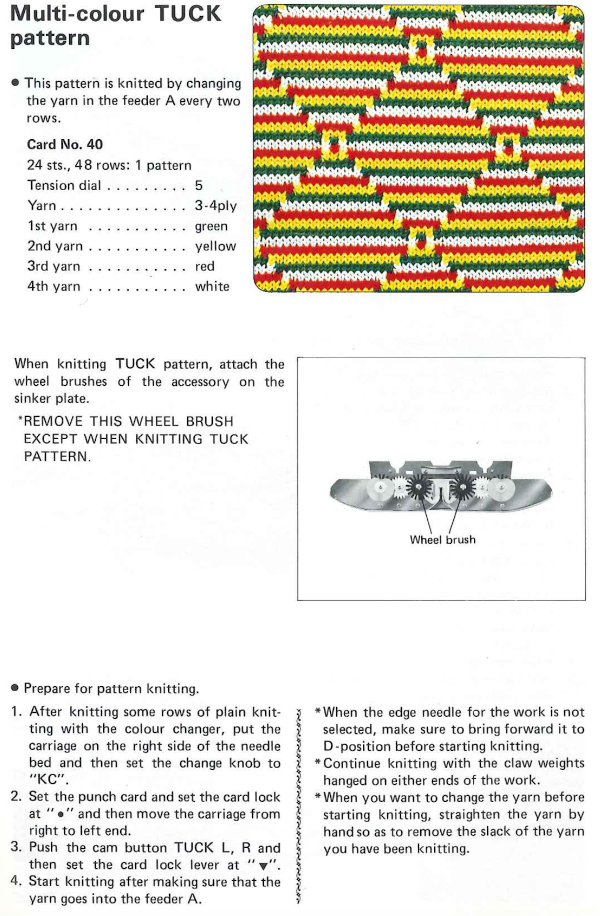
Some notes on machine knitting color changers

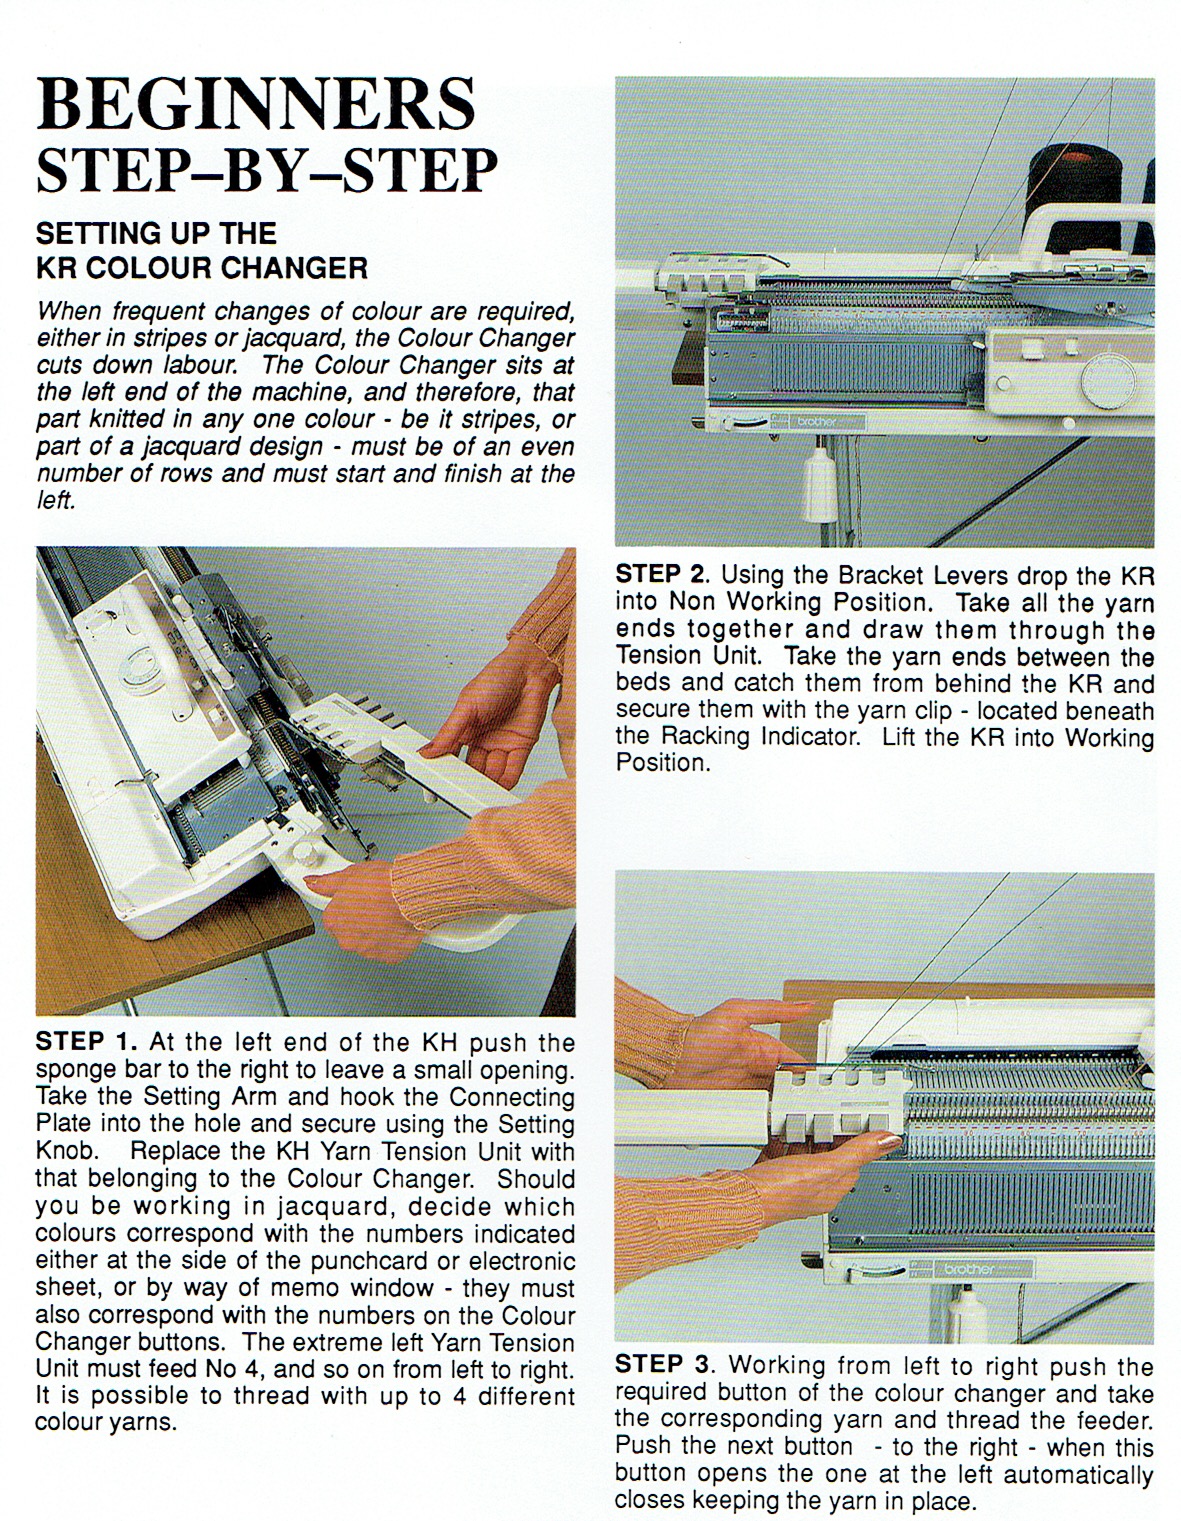
One double-bed example, the Brother 900 E DB changer for use on both standard and bulky

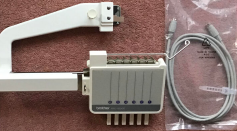
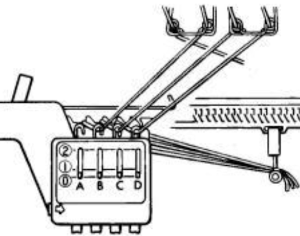
The Studio/singer YC6 may be used either on the single or double bed simply by repositioning one piece. It includes a 4 color tension unit, a special sinker plate,  and a set of cards that are for use only for DBJ.  It has a 4-button yarn changer, which can be set for automatic 2-color changing.
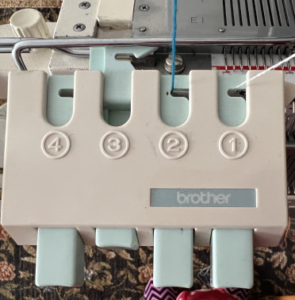
Brother/Knitking comes with a supplementary two-color yarn mast, a special sinker plate, and a four-button changer. A button must be pressed manually for each color change.
To color change on Studio, the next color button is pushed/selected when the KC is on the right, in Brother machines, the button for the next color selection is pushed after the KC is in the yarn changing area after the audible “click” is produced when the carriage has traveled far enough.

The wires and tension units exert more tension on the yarn than standard tension units, which affects gauge so if one is knitting garments, the units should not be changed while working on the same piece, nor should calculations for gauge be used if they were produced in the same yarn, but using the alternate tension unit. Tension may have to be raised by at least one number or more to prevent dropped stitches and obtain the desired feel/drape.

If a carriage jam occurs, the sinker plate needs to be removed before using the release lever for KC.

If using changers for fair isle: in cards punched for FI knitting single bed,  normally the contrast color, corresponding to punchcard holes (black squares on mylar, or pixels, depending on machine and programming) is placed in the B sinker plate feeder, and background yarn in the A.
When using the color changer, the manuals will state that the main color is normally in B while the contrast color is in A, where it can be changed automatically. However, that depends on which part of the design is to include the color striping.  If it is to occur in the motif, the card needs to be modified by being punched in reverse. If the striping is to occur in the background, a standard card and position may be used. If one wishes to alternate, both ground and motif may need to be punched separately as for use in 2 color slip stitch.

More than 2 colors per row require color separations of the original design for knitting with slip stitch setting, carrying one color at a time, in 2-row sequences.

The double bed color changer is used often for DBJ with color-separated cards though other fabric options are possible. It may also be used for single bed work, but the ribber must remain raised and the ribber connecting plate is used. This means that single-bed fair isle knitting is not possible, because there is only one feeder in the ribber connecting plate.
Using the changer is a viable option for knitting striped patterns on bulky machines. There are no brushes to help anchor the knitting like the ones in the single bed sinker plate, so even though the fabrics may be worked only on the top bed, careful choosing of repeat and adequate weighting is required ie in color tuck/slip mosaics, etc, knit with color changes every 2 rows.
I have read that Toyota did not have a color changer due to its built-in simulknit/automatic DBJ, with only 2 colors knit in any one row.

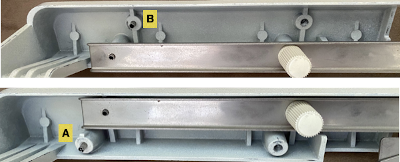
Sometimes metal parts/wires get bent in storage or handling even on ribber sinker plate, and may need a bit of bending and tweaking if colors are not getting properly picked up. Some Brother color changers have small adjustment screws under the arm that may loosen, and change their alignment to the needle bed, which is easily solved by adjusting/tightening the screw. Sinker plates should be cleaned and may be adjusted if required, just like the standard ones.

Some references: Studio YC6, Brother manuals

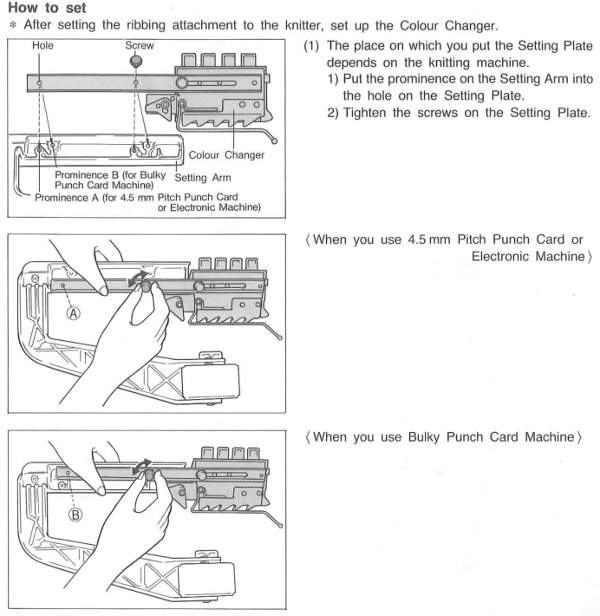
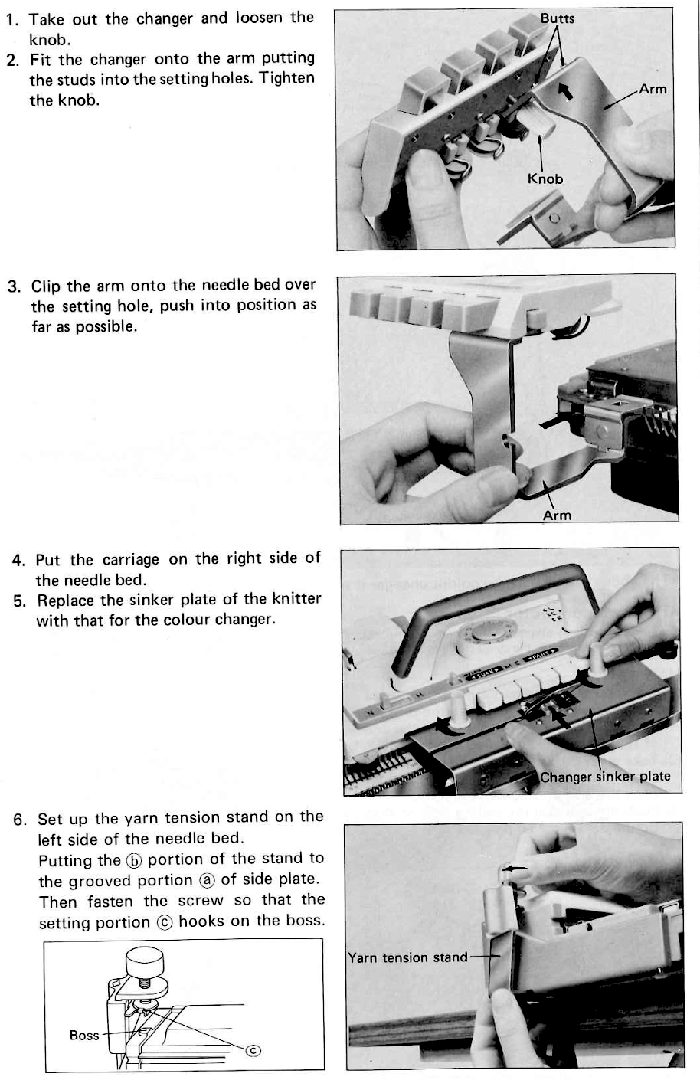
The set up as described in an early Brother Fashion magazine 

from the KRC 900 manual

High tech version: 1 set up 2 in use Automatic knitting system based on the Brother KH-970, consisting of a knitting machine Brother KH-970, set for the ribbing attachment KR-850, KE-100 motor drive, and automatic color changer KRC-1000E (6 color changer). 

The Brother single bed changers are the only ones I know of where the yarn remains in the changer after the color change, never leaving it.
A later post including some single bed color changer info: https://alessandrina.com/2017/05/01/knitting-in-pattern-with-2-carriages-brother-punchcard-kms-2/.
Excerpts from the 820 manual:  The auxiliary yarn tension stand was eliminated when later models introduced a place in the machine casing for the extra mast, my 930 actually offers 2 spots  

It is possible to cast on while the color changer sinker plate is in use, making certain the yarn is used and retained in its proper placement in its roller. I prefer to cast on with the standard sinker plate, knit some rows, weigh the piece, sort the required tension, place the yarn in its position in the changer with COR, and then continue.
It is always a good idea to test color-changing sequences on some waste yarn rows prior to the permanent cast-on of the finished piece.
A common cause of color-changer crankiness is simply not moving far enough to the left before changing colors, a step that definitely requires using that “lace” extension rail.
The use of waste knitting is shown in the directions found in the manual as well.

An added difference between brands, the Studio changer uses letters, and the Brother uses numbers for yarn positions in changers  

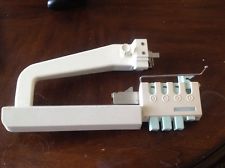
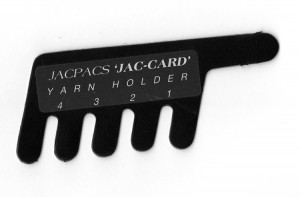
At the opposite end of the spectrum, the image below shows a low-tech “color changer” marketed beginning decades ago, and still available online. It is not practical to use in DBJ knitting because of the issues involved with removing the yarn from the ribber sinker arm in order to switch colors but can be an alternative for working single-bed on multiple gauge machines. It provides a way of holding the yarns that is easier and more successful than some of the other “creative” options for knitters who do not yet own a color changer accessory appropriate for their machine. An improvised “color changer” for knitting multiple color dbj by Chris Burdge, shared in the Ayab FB group.

Holding stitches/ short rows

I am planning a thread on motifs and miters, here is a brief review of holding stitches in preparation: short rows are just that. Instead of going the full width of your stitches across, you knit only a portion of the stitches on the machine, turn, and go back to the beginning, which results in one portion of the fabric knitting more rows than the other side of the fabric. It is also referred to as partial knitting. It is used to create many angles and curves. The machine’s knit carriage needs to be set appropriately; needles pulled to the furthest position (E_Brother_holding lever, D _ Studio _Russell levers, Passap will need pusher adjustments) will not knit. To return stitches to work in increments push stitches back into the upper working position (C or D depending on machine brand). In patterned knitting, stitches must be returned to the proper position for patterning with a transfer tool. In Brother machines needles need to be arranged manually in the proper location for the pattern to knit correctly, Studio machines will do it automatically since they select and knit on the same row. When using holding with the lace carriage held stitches are knit back to A using ravel cord and returned to the needle hooks in work position when they need to be knit. Because knit row sequences are in pairs (or more) there will be slits or “holes” perceived at the edge of the held knitting, these can be considered a design feature or nearly eliminated by “wrapping” the first adjacent held needle before knitting the second row, or knitting one stitch less than the required amount toward the held stitches, and then bringing the remaining needle into work before knitting back. Bringing more than one needle into hold on the carriage side will create “floats, so multiple stitches are usually brought out to hold opposite the carriage. Knits often tend to stretch more in width than in length, so in garments such as pleated skirts, it is likely the piece (knit sideways) will grow in length and tighten in width, with tension and garment weight providing 2 more factors. Large swatches and having them rest in the position in which the knit in the final piece will be worn are a necessity in calculations. Some references:

Settings and images of wrapping to avoid holes: this site is now down, the information may be found in webarchives , will take a little bit of time to load content
http://www.getknitting.com/mk_holdposition.aspx.
Calculating frills and triangles online http://www.getknitting.com/mk_0603frilled.aspx http://www.getknitting.com/ak_0603triangle.aspx

Short row one side only http://needlesofsteel.blogspot.com/2008/10/short-rowing-part-1-one-side-only.html.
Diagonal corner http://needlesofsteel.blogspot.com/2008/10/short-rowing-part-2-knitting-diagonal.html.
Short rowing 2 sides at once http://needlesofsteel.blogspot.com/2008/11/short-rowing-part-3-both-sides-at-once.html.

Shaping shoulders and necklines (Studio) Knitting: site no longer exists http://www.guagliumi.com/free_stuff/downloads.html for PDF download info Machine Geometrics – Susan Guagliumi – Threads magazine, April-May 1987, pp 66-71. The Studio knitting tips series of articles were originally published for dealers only, may now be found in http://machineknittingetc.com/catalogsearch/result/?order=date&dir=desc&q=studio++tips

A Ravelry post on the topic with hints for hand knitting by Rox Knits http://www.ravelry.com/twir/86/ask-a-knitter-26

TechKnitting on HK topic http://techknitting.blogspot.com/2009/10/basic-short-rows-theory-and-method.html
http://techknitting.blogspot.com/2009/10/short-rows-method.html


Using the Brother knitleader: some tips

I recently brought my knitleader out of mothballs after a long period of no use, tend to use the magic formula for most of my simple charting
oh the math! Magic formula
online generators in includes a variety of calculators and methods for designing knit shapes

When using the knit leader you do not have to match the given yarn or gauge for a published patterns, they can be adjusted for size and for the type of yarn used in the specific project.
See Intro to knitting: gauge swatches for added guidelines and tips.

  • Manuals for 6 different knitleader models may be found for free download online at sites such as machineknittingetc.com .
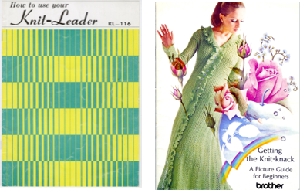
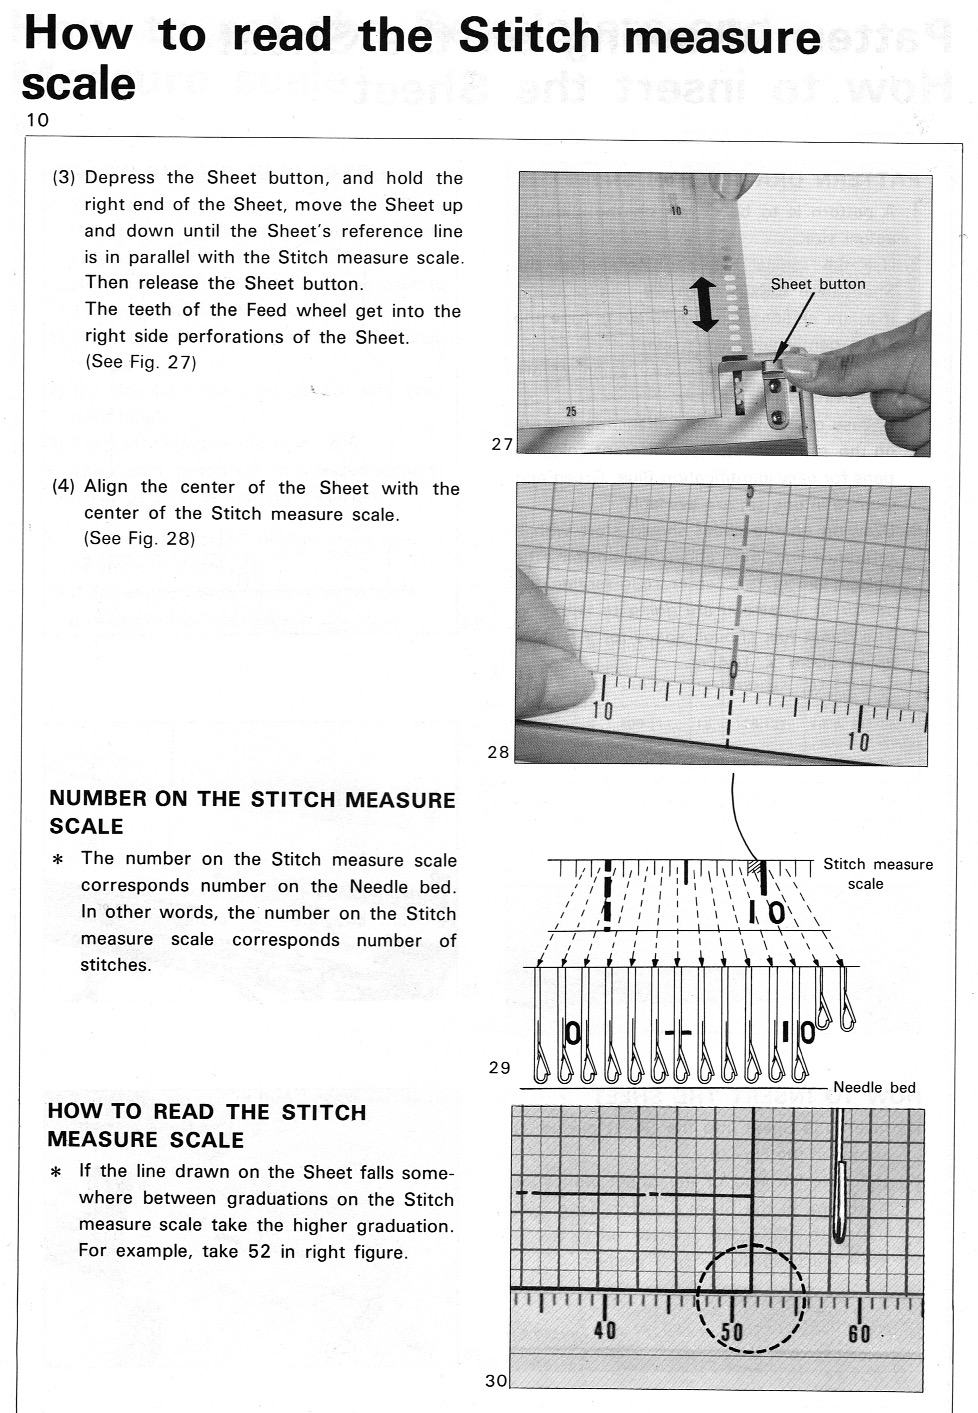
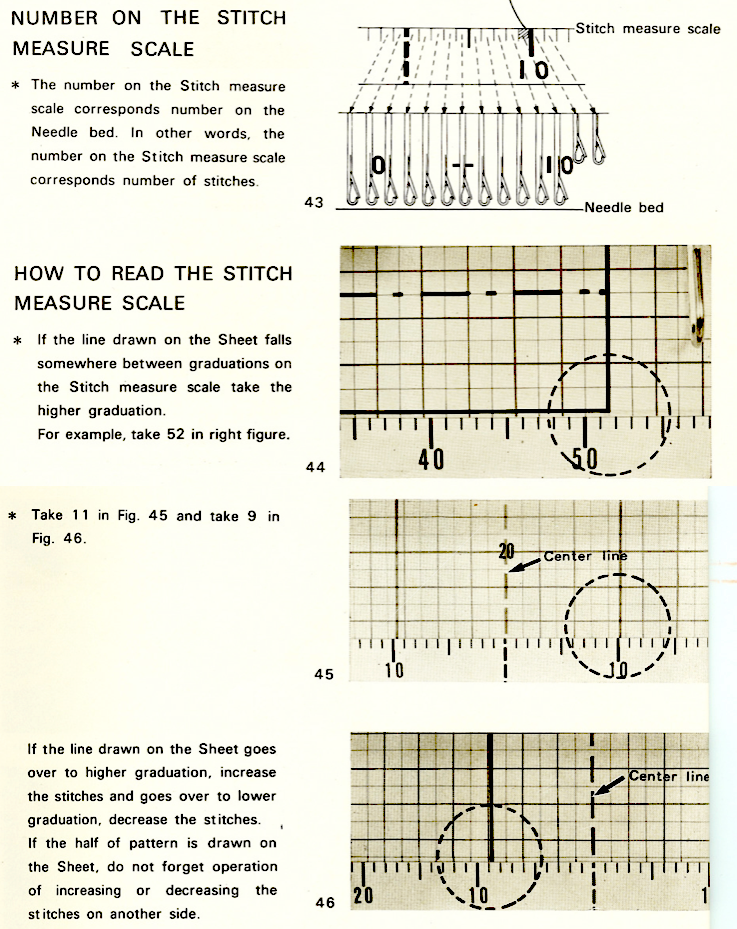
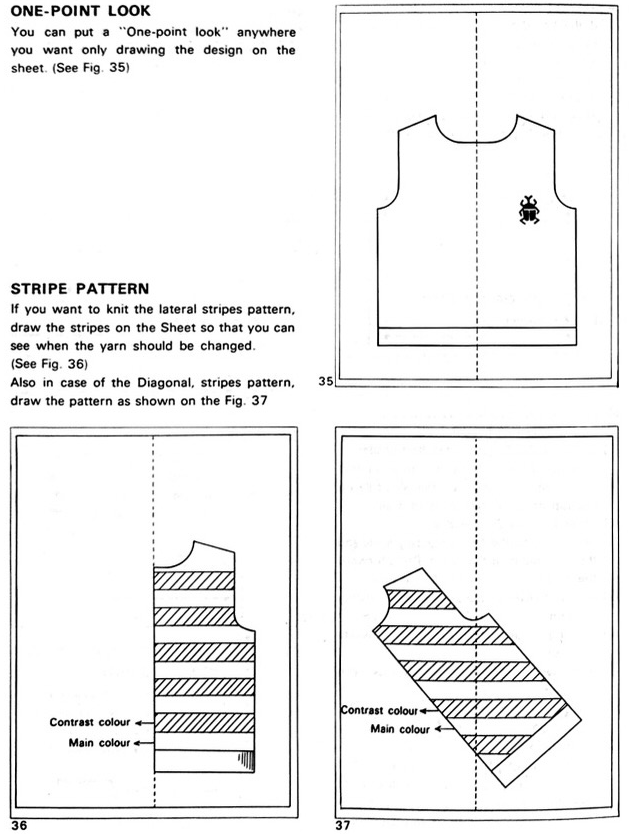
    KL-116 model, and a beginner’s guide to using the knitleader
    Measurements are in mm, and taken with the ruler provided with the accessory or a substitute if the original is missing or lost.
    Drawing on the sheets should start with a reference line at least 2 inches above the bottom of the sheet.
    The midpoint dotted line represents the center of the piece.
    The sheet is divided into 5 mm X5 mm squares and by thicker lines every 5 cm. The drawing space measures 63 cm (app 25 in) X 103-5=98 (app 38.5 in)cm allowing for starting line position.
    The desired shapes are drawn on the sheet in actual size, using any water soluble pen. Multiple garment pieces may be drawn on the same sheet, it is easier to follow the respective lines if they are drawn in different colors.
    Sheets may be used again and/or cleaned for next project. If the drawing happens on the reverse side of the sheet for some reason, take care in cleaning it off, the blue grid may be wiped off and lost in the process.
    Do not bend/ crease mylar sheet or stitch measure scales.
    Waste yarn  and ravel cord are used prior to any permanent cast on to allow for knitting to begin on the starting drawn horizontal start guide line and with the yarn for the project.
    When shaping narrower pieces on one side ie at neckline to shoulder or in holding techniques, be sure to move the carriage until it passes the feeding lever, so as to advance rows accurately.
    These pages,  from my own knitting KL-116 model, show some of the basics related to KL use  Parts:  

From a manual for a different model, shaping suggestions:  Check ruler markings against the gauge swatch after the initial selection. Each ruler offers 4 options in terms of stitch markings, sometimes rotating the ruler or flipping it over to its opposite side is needed for a closer match. Bulky knitting machines use a different set of rulers. Besides the obvious difference in the distances between stitch markings,  the standard rulers are identified by the same number on both sides, 1-20, while bulky rulers advance by single numbers on each sideare numbered 1-24.

Standard machine:
Vertical control: before you can shift gears you must depress the clutch. Tripping the feeding lever will usually release it.
Video on cleaning and lubricating the knitleader  offer hints on maintenance or repair.
Testing for accuracy: set the row regulator to 150 mm and turn the knob 20 rows. The mylar should move the distance between 2 heavy lines, 5cm or approximately 2 in.
After measuring your swatch: draw a small horizontal line on the mylar sheet, followed by a vertical one to match cm +mm measurement for 60 rows, and a small horizontal one again.
Air knit 60 rows, beginning at the bottom mark, and at their completion, the top mark should be reached.
For ruler accuracy: there should be exactly 40 stitches between 0 and 40, lining up the tape on your swatch stitches and corresponding lines should match. If they do not, select another ruler close in range, until they do.
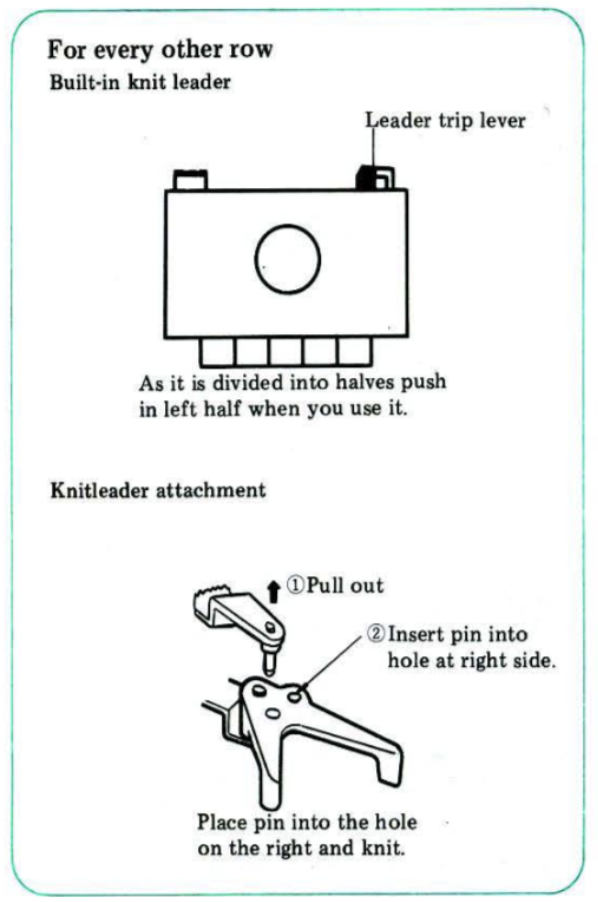
The pin is usually set in the feeding lever in the hole on the left.

The hole on the right is used when the length of 60 rows is less than 6.0 cm, which can occur in textured stitches such as tuck and slip, or fine gauge.  In such cases, the row measurement is doubled, and the pin is inserted in the right side hole.

Single motifs may be placed anywhere on the drawn garment shapes, which in turn may be rotated to any angle required for the specific piece.   Using the knitleader on the bulky:
A different set of rulers for the lower stitch/inch gauges is supplied with the machine purchase.
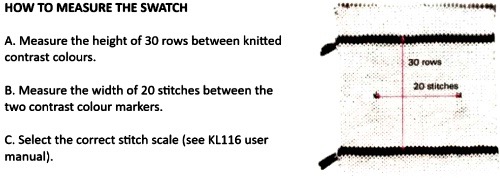
Make swatch as directed. Swatch guidelines from the manual (pp 45-47): I prefer to measure the full width in more than one place, then dividing the chosen result by half rather than relying on 2 single points as shown for the width measurement.
The bulky machine included stitch rulers when purchased new.
There are 2 gauge numbers on each corner instead of 1.
Every 20 stitches and 30 rows should match the numbers used for measurements.
With the pin placed on the left hole of the feeding lever, the arm will be tripped twice with each pass of the carriage.  The shorter tripper on the back left of the knit carriage trips it once, the longer row counter tripper on the right also trips it on the travels from one side to the other.

For ribbed fabrics with high numbers of rows per inch: illustration from Brother ribber techniques book

Using half-scale patterns on brother’s full-scale knitleader.
Make the usual 40 by 60-row swatch (on the bulky 20 X 30 rows), or your preferred size and adjust measurements accordingly.  Measure swatches with any centimeter ruler.
The stitch gauge: 1: follow outline but double the number of stitches indicated at all times, or 2: purchase a set of studio half-scale rulers and the accompanying “green ruler”. The S side of the ruler is used to measure stitch swatches over 20 stitches. The number just inside the right marker corresponds to the number of the correct stitch scale to be selected from the set. Each mark indicates one stitch. Measurements are based on 10 cm (4 inches).
Plastic rulers need to be taped into position. If there is a handy copier, paper rulers can be printed and placed/adjusted to suit, after checking on the accuracy of the reproduced scale.
For the row gauge: On the knitleader, the central peg is normally put in the left hand of the 2 holes on the plastic fingers in the front. If you put it in the right-hand hole, however, the chart only moves every 2nd row, which balances out the 1/2 scale in length. Program as always, setting cm and mm after pressing the clutch, but drop the connecting pin into the right hole of the feed lever.

Every other needle knitting: measure the swatch in the usual way, divide it by 2, and count every other line as a stitch, or use a ruler that factors in the number of needles as “stitches” before needles were put out of work.   If the row count is higher than the highest number available on the regulator, divide the total by 2, and draw the outline half scale.

I like to measure a large swatch and get my final measurements via math to the second decimal point. It is possible on my model to shift tape to change the center 0 position. For sideways knit or wide pieces tracings of rulers can be made with 0 marking at the far left or right as needed. My math starts out with measurements to the second decimal point, rounded off up or down at the last possible minute.
The mylar sheet may be turned over, shiny side down for use in asymmetrical shapes that need reversing/do not have a central axis. Again, take care in cleaning it, the blue grid may be wiped off and lost in the process.

Drawings on mylar may be followed for colored intarsia or intarsia weaving.

Altering the scale of pattern drawings: the studio half-scale ruler was quite handy, pictured

Studio gauge rulers: depending on your machine, there are different numbers of stitches and rows marked. For 4.5 standard gauge you need to isolate 40 stitches and 60 rows; mid-gauge needs 30 stitches and 40 rows, and the bulky needs 20 stitches and 30 rows. To use the rulers:  one side has an “S” and the other side has an “R” marked on it. Place the gauge ruler with the “S” side up to measure stitches. Place the cut edge of the ruler is against your chosen markings for stitches. Where the edge of the yarn marks lay, note the number, this is the value for the stitches in 4 cm.
Flip the gauge ruler over to the “R” or rows side and place it vertically to measure rows. Place the cut edge and the bottom of the first stitch in the main color yarn. Look up to the top where the main color yarn meets the contrasting yarn row, This is the value for rows in 10 cm or 4 inches.

tt-30-stitch_scales / Studio tips and techniques #30, now available for free download online from multiple sites includes more information on their stitch scales

 scale and technical drawing; instructions for creating printable rulers

Water-soluble markers are helpful for colored cues for garment segments, multiple drawings on a single sheet, etc. I use  template marking pencils may also be found in colors

It is possible to use various sources for the pattern drawings. If measurements are given in a diagram they can be drawn as given in inches or centimeters, and matched.
Sewing patterns may be traced, generally the seam allowance is eliminated since knitted pieces are joined by as little as half stitch on each side.
When attempting to match hand knit instructions, match the given gauge with the settings and ruler on the knitleader.
Load a mylar, with a horizontal line 2 inches above the bottom of the sheet as a starting guide. The shape will then be “air knit”.
Begin with the row counter set to 0.
Using a water soluble marker place a dot on the sheet at the original width and then every time shaping in or out is performed.
Marking with an added small line when a row count is reached ie at the start of armhole or neck shaping provides a roll back to point if marking becomes confused or needs to be double checked for any reason.
When all shaping is complete, remove the mylar and connect the dots.
Change the knitleader settings and ruler to match the swatch gauge for the planned piece, insert the mylar, and knit.

A bit of fair isle

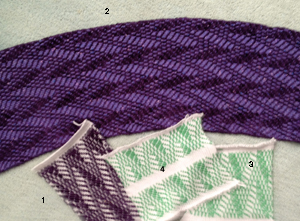
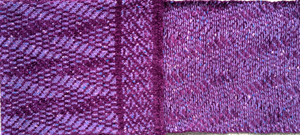
Fair isle accessories, scarves in particular, can be problematic. I tend to make most of my scarves in the 64-72 inch length after blocking, lining them would result in a very heavy scarf. Knit has a tendency to curl to the purl side in length, and toward the knit top and bottom. Rayon chenille is a customer favorite, knitting it double bed in any DBJ variant is nearly impossible on my E 6000 because of shedding and electronic eye reading errors (I would consider ladder DBJ), and I was left with finding a short float pattern that might look acceptable on its reverse, and lie flat. Weaving draft charts can be a great source for repeats for geometric FI knitting. The pattern used below is an adaptation of one. The first swatch (1) looked fine. The long one followed it. When I ironed it, however, I noticed not only a missing black square or 2 in my mylar repeat (hidden by the fuzz of the chenille in the first swatch) but how lovely for it to have a totally curved, far longer edge (if only that was what I wanted)! On analyzing the possible cause I noticed the repeat had many more stitches knit in the chenille than the wool along that edge. Back to the drawing board: the repeat was sorted out using high contrast, smooth yarns (3 and 4), and the pattern was adjusted to a different location on the needle bed. 

Then, I thought I might introduce a border. The chenille is thicker than the wool, so any hem or stocking stitch edge was too wide. I would have preferred to chain behind the knit to help flatten the bottom and top edges and ran into yarn breakage galore. The final piece was made using 1X1 FI in the chenille “solid” color stripe to keep a balanced width and fabric thickness, and cast on and bound off edges were rehung and “bound off” again, to help cut down on their rolling toward the knit. The finished scarf measures 8″X69″, both knit and purl sides are shown below, side edge lengths now match.Assuming one uses a crochet cast on and binds off around gate pegs at the top, a chain is created at both ends, akin to that created in crochet, and one can identify a front loop, a back loop, and the whole chain. Any of the 3 may be “rehung” onto the KM, and the options are to knit a row and bind off again, or simply bind off again, for different looks that start to emulate single crochet a bit and can help stabilize edges or decorate them. It is helpful to keep notes as to the sequence used and which side is facing with each re-hanging.  Audrey Palmer at one point authored the Empisal book of linked edgings ISBN 0969485905. Intended for use with the Empisal (later = Studio) linker, there are lots of interesting uses for combinations of essentially find off techniques, and some resurfaced when she published her books on knit weaving.

The same pattern knit on Passap, using tech 129 and 138; there is a noticeable difference in width and openness of fabric with yarn weight change, and at the top with tucking for twice as many rows. 
A scarf knit in pattern, using tech 138, double bed on Passap KM; lightweight and drape allow it to be wrapped and worn in multiple ways; knit in 16/2 cotton, measures 11 X 76 inches partially blocked

Ladder lace

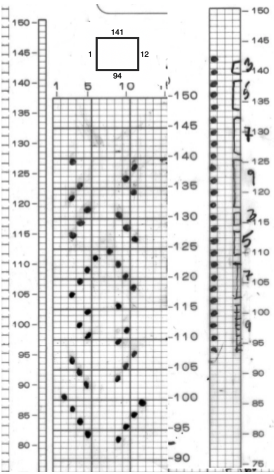
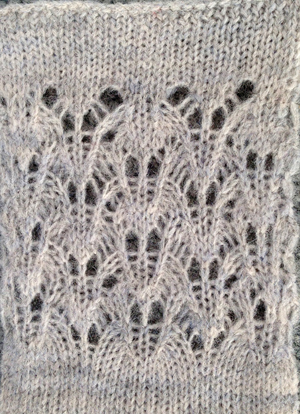
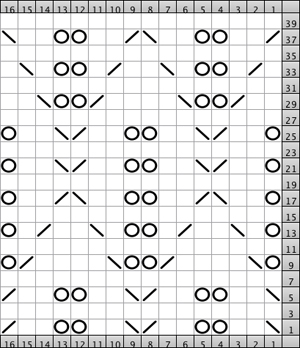
The inspiration: part of a magazine photo  A slightly different approach than in the last post. The tale begins with a hand-knit graph:  expanded to include alternate rows the “graph” paper version   If a punch card is to be used, all colored squares represent punched holes. I used my 910, Studio mylar for my swatch. The mylar repeat and programmed numbers: A png for a single repeat used in the later postThe approach in the execution is a bit different from the previous samples. In this instance, colored squares represent the number of stitches to be moved/the number of prongs on the transfer tool to be used.
The pairs of transfers in the chart are made away from each other, orange to the right, and green to the left.
The transfers produce 2 empty needles side by side, they are left in work, as the next row is knit they will produce loops on each needle.
Side-by-side loops do not make stitches, so subsequent rows will continue the ladder.
It is helpful to use yarn that does not split and get caught in hooks, as that may partially knit on the next pass, creating a knit stitch and disrupting the ladder. Also, rows with loops should be checked to make certain they are in the pairs of needle hooks, not off either or both, before the next row of knitting.
Do not release the loops; when the next set of transfers is reached, treat the loop (where circles occur in the graph) as you would a stitch, moving it over on its own prong.
As with transfer lace, it bears taking the time to knit slowly and prevent errors rather than having to attempt “fixing” errors such as runs due to dropped stitches.
The resulting swatch on the standard KM (2/8 wool)The punchcard:  The related swatch knit on the 260 bulky KM The yarn is an alpaca too thick for the standard.  I liked it at tension 1 for stocking stitch, but I had to increase the tension to  3.. to be able to manage the transfers, especially the ones over by 3 stitches X2.
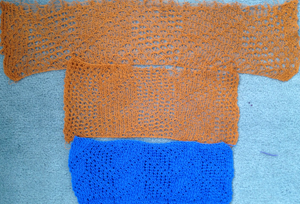
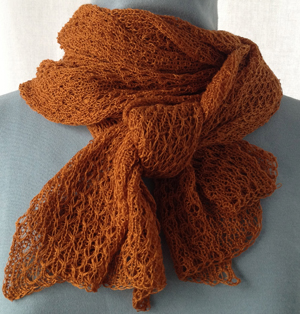
for a sense of the scale difference between the 2 swatches. The punchcard was made from a roll purchased directly from Hong Kong, advertised specifically for Brother. The roll is continuous, with separations as seen in the image below. Numbering, however, is for Studio KM systems, so adjustments need to be made for using them on Brother KMs (ie. the first selection row will be row 3 as marked in the punchcard used in the swatch above).  2022: Sometimes what works well on a small swatch does not in a larger one, or may simply require a different yarn, more attention, and slower knitting speed. The first trial at other yarn content included a yarn perhaps too thin for the effect (green), and one requiring maximum tension making the transfers with loops difficult. Once the initial transfers are made, this loop formation will appear in locations indicated in the chart. A visual check should be made as to whether there is a loop on each needle. If one is skipped, simply lift the yarn onto the hook of the empty needle. As the fabric progresses, the loops will appear on the top of the shafts of the selected needles and are treated as one would handle stitches in multiple-stitch lace transfers Shown again in the white knit  After the transfers are made A yarn split on the machine may be seen in the center of this image.  Yarn splits and dropped loops are quite visible in these tests.  A return to a different 2/8 wool brought better results, again, splits can be identified in the fuzzy spots even if the ladders are formed correctly  This last swatch was knit in wool rayon. The problem of splitting was eliminated, while dropped stitches were easier to miss 


Fair Isle single bed 1: float control

Fair isle is the name given to a pattern knitted with 2 colors in each row.  The motifs are easily identified by looking at the holes in the punchcard, or squares on mylar, pixels in programs. While I will be referring to punch card knitting, the same principles apply. Your knit swatch will look like the card, but the design will be squashed, and these designs are generally knit at least one whole tension number looser than when using the same yarns for stocking stitch.  The length of floats created in knitting these fabrics is sometimes an issue, and following are some of the methods that help with “float control”.

Altering the pattern: random holes may be punched in addition to those in the motif and shorten the very long floats, providing this does not distort the pattern too much. Iris Bishop is a designer with an extensive library of such designs.

Hooking up floats: this method works best when the 2 colors used are similar. If they are strongly contrasting there is a possibility of show through where the float is knitted on the same needle as a contrasting stitch. Use the single transfer tool to hook up the float into a needle hook above while leaving the  needle in the position to which it has been selected. If it is a very long float, it may require “hooking up” several times. Show through can be reduced on machines that preselect the needles, if you can place the float on a needle about to knit in the same color as the float (the needle will be selected to upper working position).
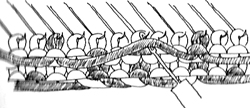
Binding with fine yarn: using a fine yarn, even sewing thread, matching the main color of the design, break off a length for every place that will bind the float down, trying to keep unanchored floats to no more than 5 stitches if possible. Make a slip knot at one end, take it under the first float, and place it onto the needle above, leaving the  needle in the position to which it has been selected . Knit the next row, and lay the fine yarn into the needle hook, fastening down the next float by carrying each length horizontally up your fabric and hooking it over your needles as required. Add more pieces of yarn or change colors as needed.
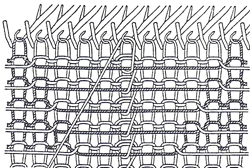
While this method illustrates managing edges of single motif, it also illustrates managing additional threads.

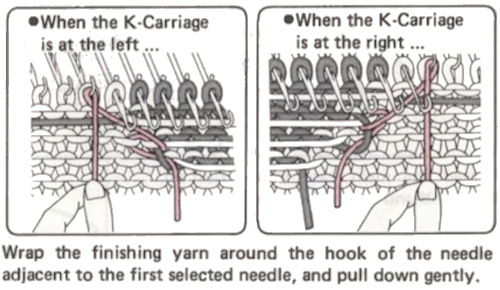
When knitting only a small area in fair isle (single motif), the contrast yarn will pull away from the edge of the patterning. This may result in holes or ladders to either side of the design. The illustration above and the one below from the Brother 940 manual illustrate securing the edges with spare lengths of the main color yarn. The lines of the yarn are in black and pink respectively for the purposes of illustration. Program the machine for single motif, attach each length of spare yarn to a needle adjacent to those pre selected for single motif, in upper working position. Knit one row in pattern to opposite side. Take the extra yarn length between the knitting and the carriage and place it on the adjacent needle in B position (in background color), knit one row to opposite side, repeat wrapping on carriage side throughout the shape.
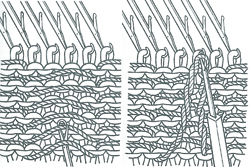
Latching: Using the latch tool, pick up a short float below the first long float. Slip it behind the latch, catch the next long float in the hook, and pull it through the first. Continue in this way, latching up all the long floats, and then place the last float pulled through into the hook of the closest needle above that is knit in the same color latched up. As the next row is knit, the float will be caught. The disadvantage to this method is that the hooked floats will pull across the fabric, making it pucker. This technique may be done off the machine as well, with the last float sewn in by hand.
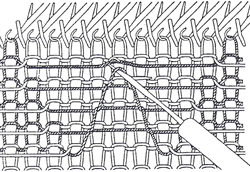
Sewing: sew floats in by hand after completion of knitting by catch stitching the longer floats in on the reverse of the knit. As an alternative a sewing machine and “stitch in the ditch” with matching thread while placing the knitting on the machine and carefully stitching down the valleys between the rows of stitches at desired vertical spacing.
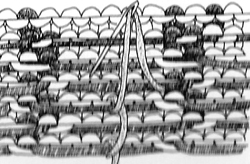
Knit linings: these may be in the form of hems or pieces of knit fabric that you attach as you knit, which could be in finer yarn, large stitches, and not necessarily on every needle. Color matching once again matters.

Bonding with fusibles: suitable for yarns that can take hot, damp ironing. It also stiffens the fabric. Some bonding materials are knit, with stretch in one way and not the other, woven ones have no stretch.

Fringing: long floats may be cut and made into fringes. In this instance, the punchcard may be intentionally masked to cover holes and create intended long floats, which may be later cut. The purl side will now become the “public one”.

Mock weaving: use the reverse side of the fabric for a knit woven effect, one example. The pattern on the knit side may become distorted in a way that could be considered an added design feature.
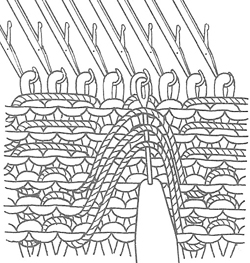
Decorative floats: use the long floats and twist them, or bind, pick up, tuck behind stitches to make decorative fabrics highlighting the purl side.

Ruching in pattern: hooking up stitches as in hems to enclose part or all of the long floats. For this technique, if a lot of ruching is to occur, it may be best to elongate the original pattern to at least X2.

“Stitching in the ditch”: after the piece is finished floats may be anchored by using a straight, medium-sized stitch on the sewing machine. Use thread that matches the main color as much as possible. Place knitting on the machine knit side up. Stitch carefully and slowly in the valleys between rows of knitting in areas with longer spaces between ground and contrast. The same method is sometimes used at standard intervals to secure FI floats when using yarn such as chenille to help avoid “worming” (yarn slipping out in loops) along motif edges as time passes.

Fringing: deliberately planning long floats with the intent of cutting them to create fringed effects. The purl side of the fabric would be used as the “right” side. Specific areas of punchcards could be masked with tape to create wide float areas amid smaller designs, and electronic machine users can control the placement of pixels. Both can vary the designs by exchanging yarn positions in the sinker plate feeder and/or adding additional color striping.

Please note: try any of these techniques on swatches first. There may be changes in the surface of the knit on the knit side such as puckering or bleed through that may require changes. If combining techniques in a garment, each should be tested. If combining FI and “plain knit” one possible solution is to knit the latter in a simple FI pattern using the same color in both feeders, keeping similar texture and weight in both areas. If using several color changes, the card may be marked to help track them.  If self-drawn, repeats lining up in width and height should be knit tested as well.

Combining patterned stripes in stocking stitch: the latter will be single density and different weight than FI. In FI two yarns knit simultaneously, producing a double-thickness fabric. Test on swatches whether doubling the yarn for single color rows works for you. Another option is to knit “plain” bands in a 1X1 fair isle pattern, using the same color yarn in both feeders.