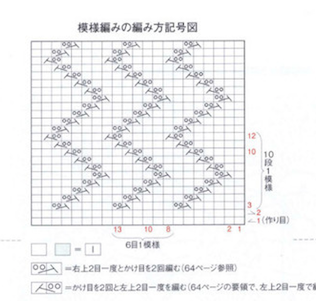
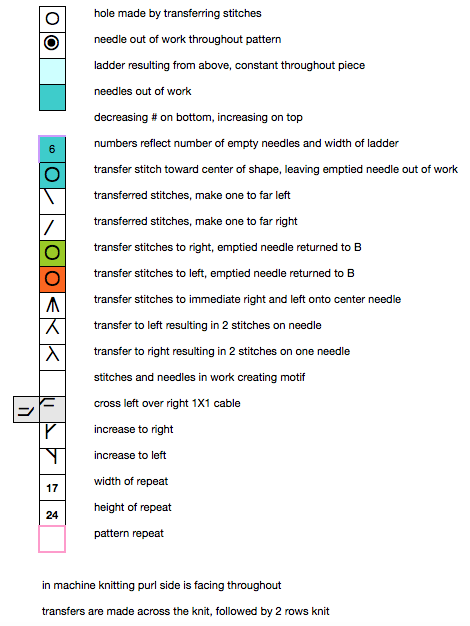
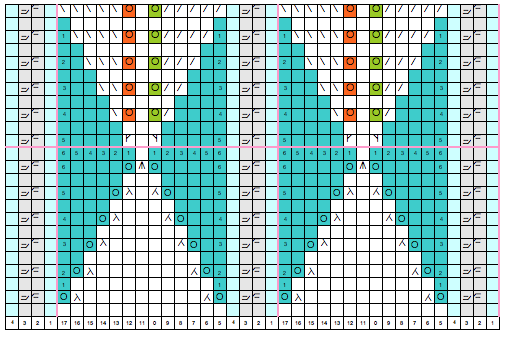
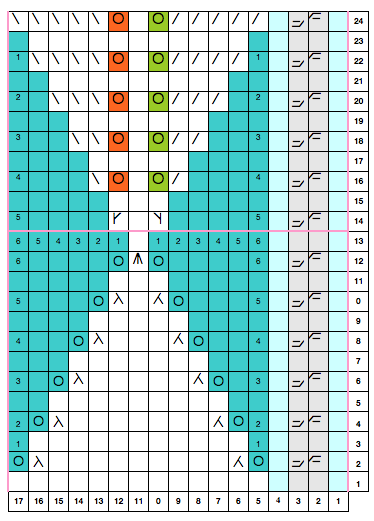
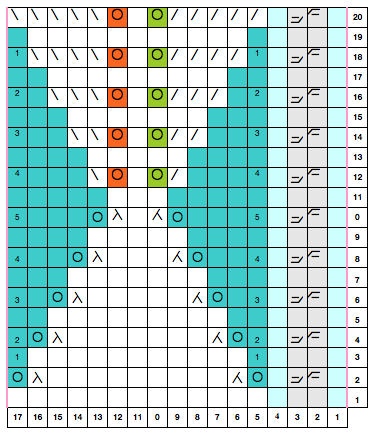
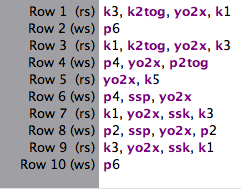
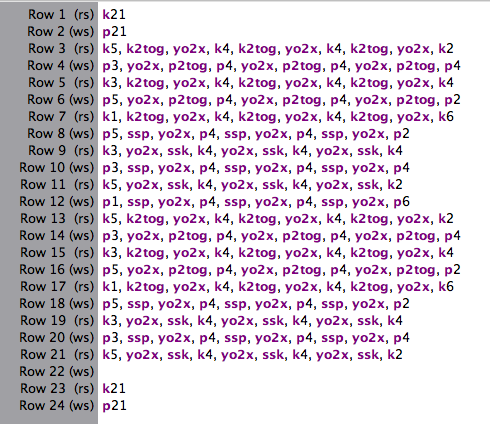
I work primarily on a Mac, Maverick OS. Intwined software has had some issues operating in Mac consistently in the latest OS versions. The chart to text can be a really nice feature. The repeat, drawn here with symbols in the built in stitch library, shows errors in row 2 and 4 of the accompanying text.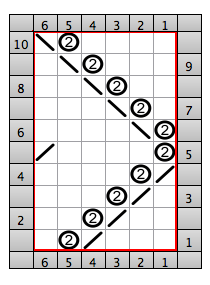
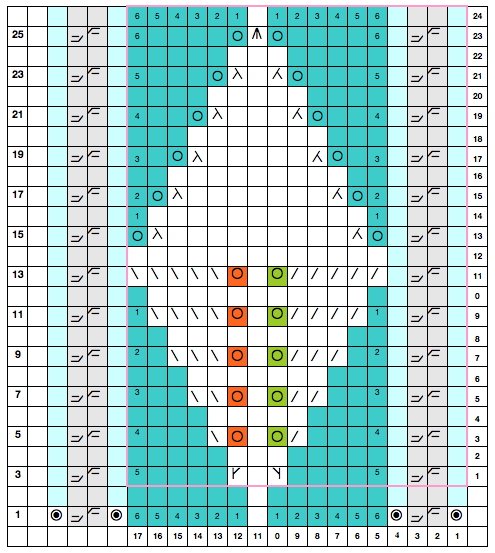
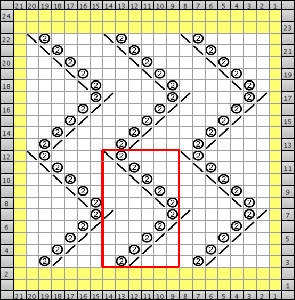
On a larger canvas, the original repeat is outlined below in red. Yellow indicates knit border stitches around ladder lace pattern repeats; row 22 is absent from the text that accompanied the larger chart.
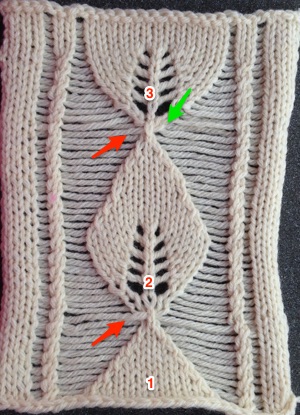
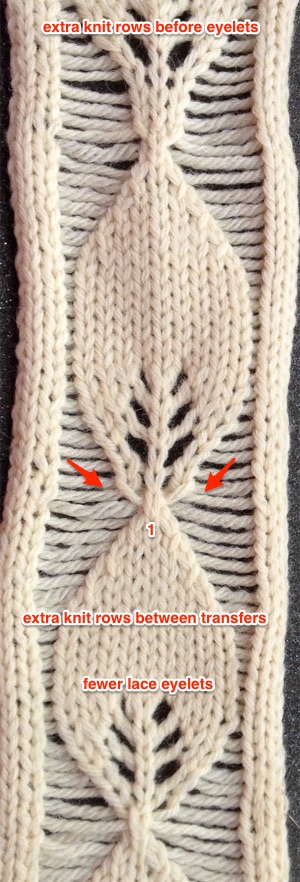
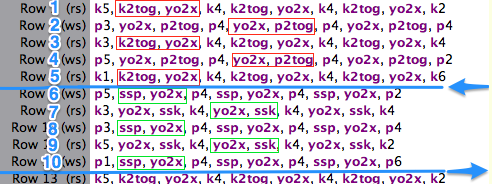
 Skitch is a free program, available for both Mac and Windows, that allows the opportunity for of highlighting or further editing a graphic. Taking the information above, here I added numbers that reflect actual repeat rows, used the arrows as a reminder of change in direction of zig zag, and the red outlines vs green indicate changes in type of knit decrease. It is easy to add as much or as little additional information as one feels helpful. There are controls for line thickness, shadows, etc.
JKnit is another program that may be of interest to anyone who prefers to track their projects, progress, and much more on their iPad or iPhone. The Lite version is free for both devices.
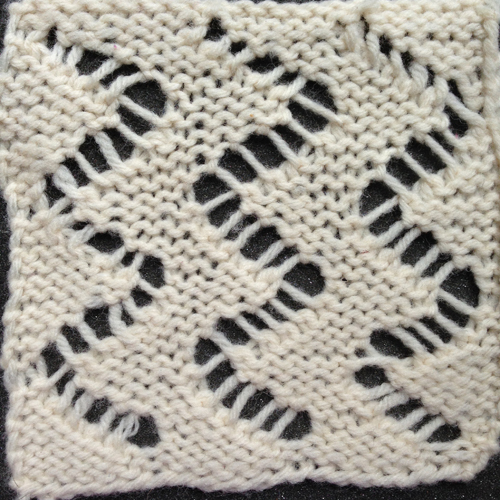
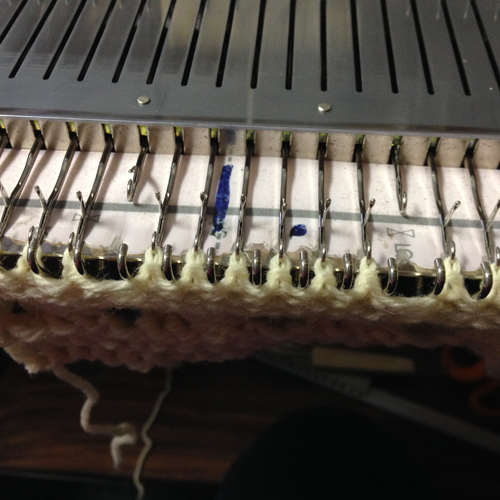
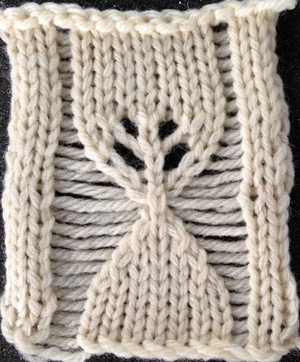
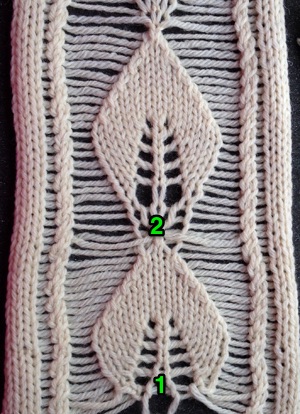
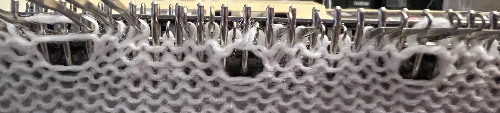
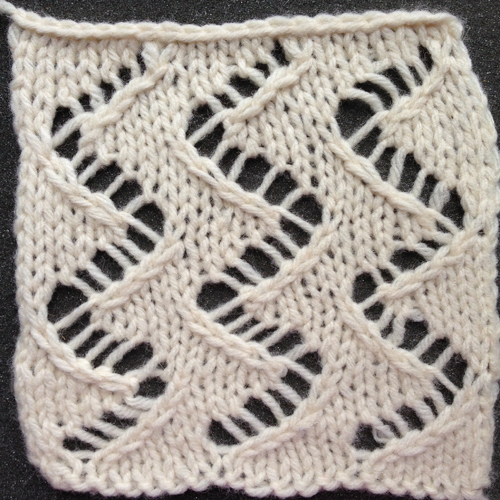
Below is an image of the hand knit swatch, unblocked, which appears three dimensional; transfer lace has traditionally been blocked to lie flat and maximize eyelets. The fabric may be very interesting without blocking. If a slightly thicker yarn with “memory” is used, the piece may be steamed lightly, and the pattern segments will tend to shift in and out from the flat surface, whether the piece is hand or machine knit.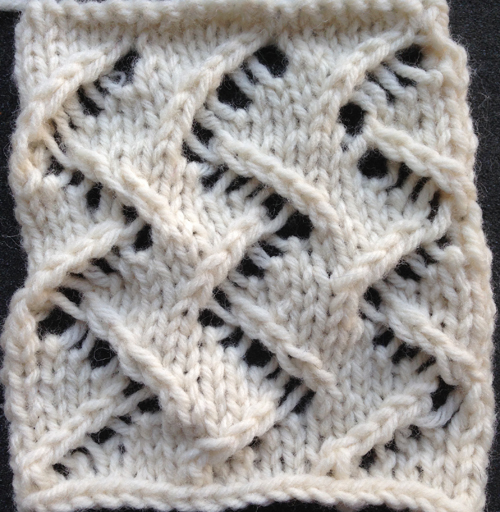
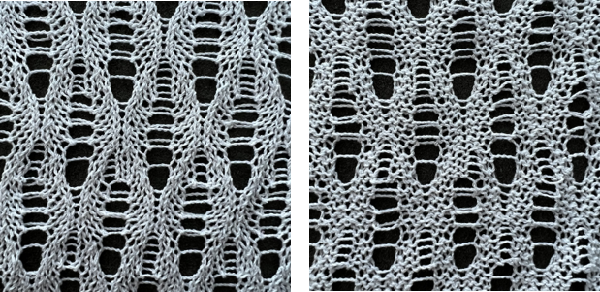
The yarn used was a “throw away” swatch testing acrylic. A very quick, light press and a bit of steam and here it is in the resulting killed, forever flattened version
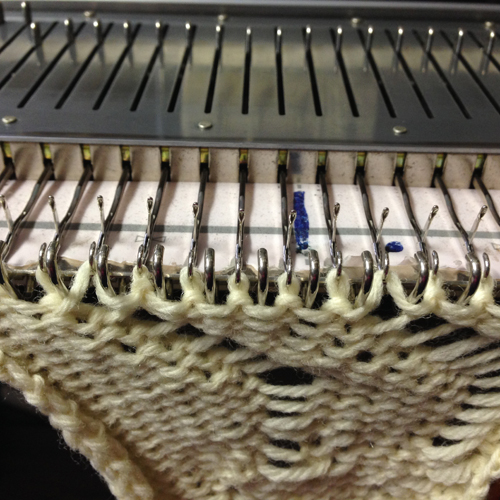
 and it reverse side