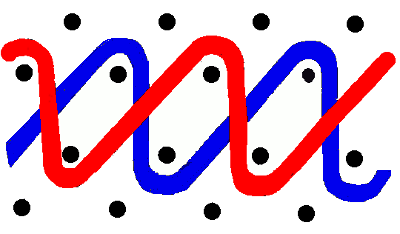
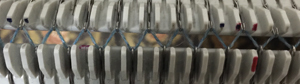
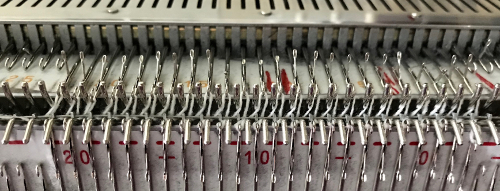
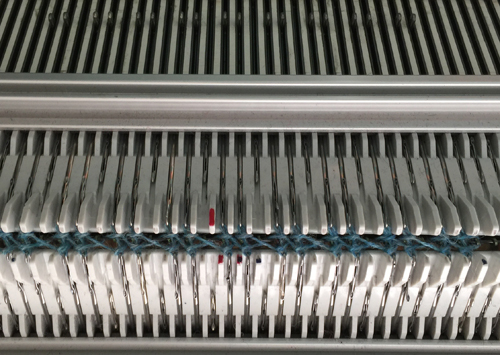
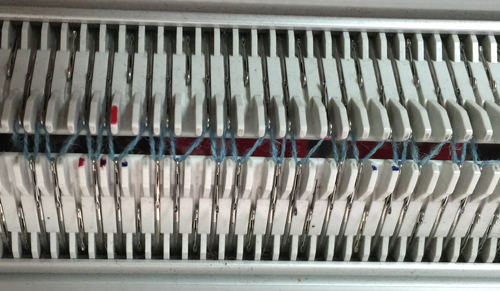
Trial swatches do not necessarily require a permanent edge. The main bed cast on with all open stitches is familiar to knitters accustomed to using a single bed Brother cast on comb. A quick version of the same type of cast-on is also doable when both beds are in use, and the goal is to knit all stitches only on one bed or the other. The broken toe cast on for rib is so-called because if comb and weights are hung in the wrong location on the needle bed when stitches on the opposite bed are dropped, so will the comb be along with weights, heading for your feet. If the ribber is going to be the bed doing the knitting that anchors dropped stitches or pile in Brother kms, please note prongs of ribber comb line up directly in front of main bed needles (blue arrow) and to each side of the loops on ribber bed needles (red arrow). The ribber comb wires will anchor down loops on the needle bed where plain knit rows will be formed. As mentioned above, this method will result in stitches all being open, does not produce a permanent edge, is suitable for quick swatching or for waste yarn at the bottom of the weighted fabric. It is possible to perform this cast on with ribber comb with wire already inserted in both brands, but the broken toe method is potentially less hazardous to needle health. 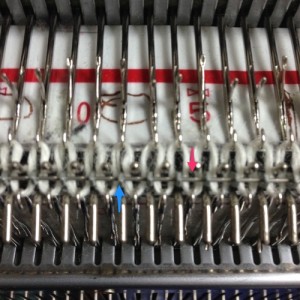 Analyzing what is required to move between km brands with the goal of achieving 2 color or isolated pile motifs: in Passap with the back bed set to FX, one arrow key, EON pusher/ needle selection changes every 2 rows. In Brother, this may be achieved on the main bed by pushing in one tuck button and programming a repeat. The alternate, adjacent cam button, left in its normal position, will knit every stitch when knitting direction is reversed regardless of whether any needle selection is happening. On the ribber, lili buttons may be used for alternate needle selection. Its levers determine whether tucking or slipping, in one direction or both, occur. The number of stitches on the ribber must be even. An easy visual check is to check markings on needle tape, which consists of what I refer to as dashes and blanks. For an even number begin with one, end with the other. Passap will automatically revert to the alternate pusher for patterning on the subsequent 2 rows. In using lilis this is not an automatic function, and some handwork is required to obtain the same effect by changing the first needle selection every third row as seen in this post.
If the ribber is chosen as the loop making the bed, the needle selection on it needs to be manual for any pattern other than across whole rows. In my swatch, to knit across all needles the ribber carriage is set to slip in one direction, knit in the other. The all knit rows in pile knitting need to follow the ones with tuck loops on the opposite bed. Extra needles are on the main bed, which creates fabric backing. The ribber carriage can be disengaged and used to drop stitches after all knit rows on the main bed.
In the actual knitting, if a plain one color pile with plain color backing is the goal, some rules may be broken. The thickest, most stable pile is achieved when the yarn anchoring the loops is as dense as possible. If the goal is to knit every stitch across each row to create loops and in turn drop them, one is, in fact, working an every needle rib. This makes it possible to create tuck loops on either bed creating the backing across the whole row because in fact there are stitches on each side of the tuck loop on the opposing bed anchoring it in place. Normally when 2 or more needles tuck side by side, rather than the stitch formation usually seen in tuck patterning, the loops do not get anchored, drop off, and create a float like those seen in slip stitch patterns.
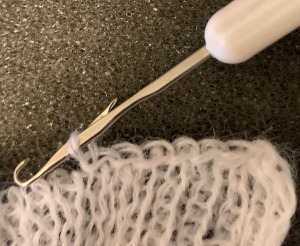
In my first sample, the fabric is cast on the main bed, the loops are formed on the ribber. The carriages are set for the main bed to tuck traveling to the right, knitting to left. The ribber is set to slip to left, knit to right. The ribber is used to drop the stitches, simply by disengaging it from the main bed and running it across from one side to the other. Dropping stitches occurs (on either bed) after all stitches have been slipped there for one row (no needle selection if patterning). The starting side for my swatches was on the left of the machine. It is helpful to have a ruler or tool to help push loops down between the beds after dropping each row of loops and also to occasionally drop the ribber in order to check whether any loops may be caught on gate pegs.
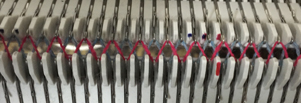
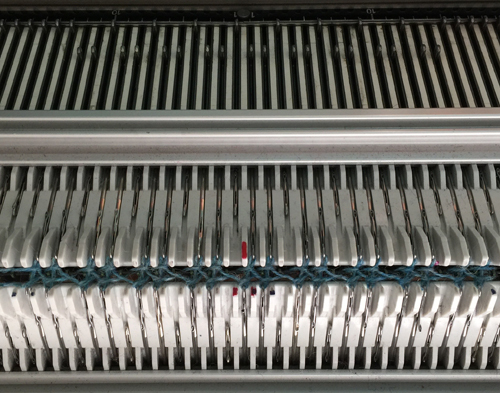
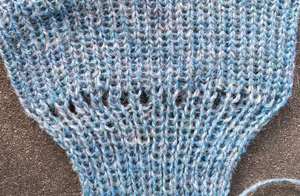
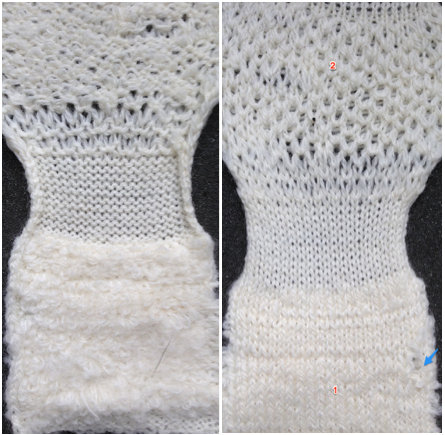
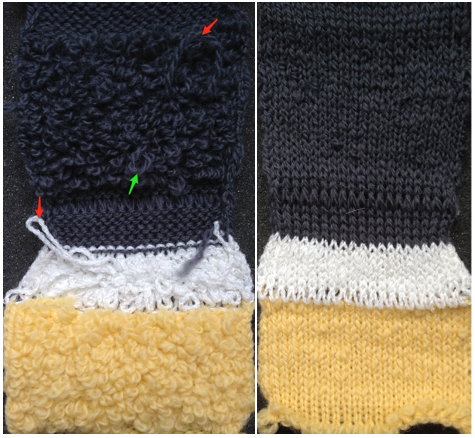
In this swatch, I had some problems (blue arrow) on the right side related to changes in tension while determining what might be the best. Section 1 has every needle tucking on the main bed. Section (2) begins to try to emulate the Passap pusher selection using an EON 2 row tuck repeat on the main bed, resulting in things going awol and loose, even at the tightest tension possible on the main bed. Any time patterning is used on the main bed, end needle selection is canceled (KCII). The tuck repeat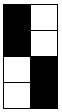
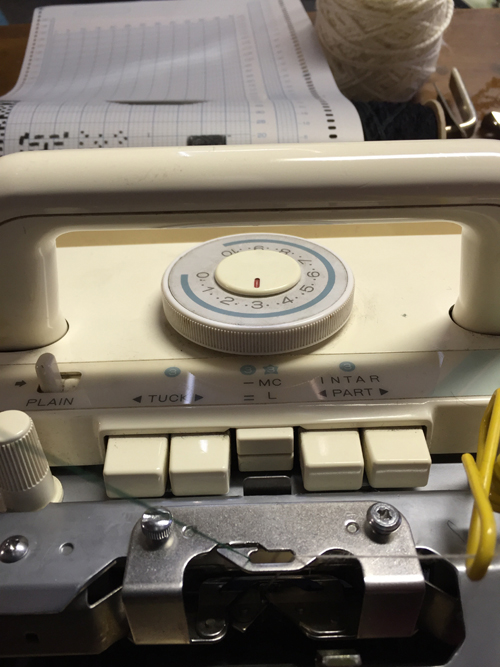
the settings (here lili buttons are not in use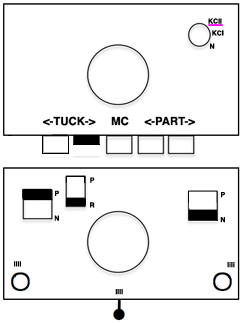
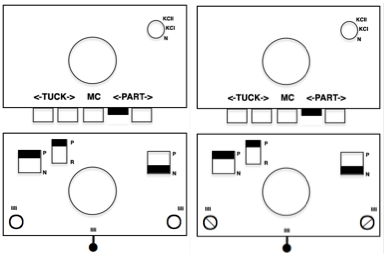
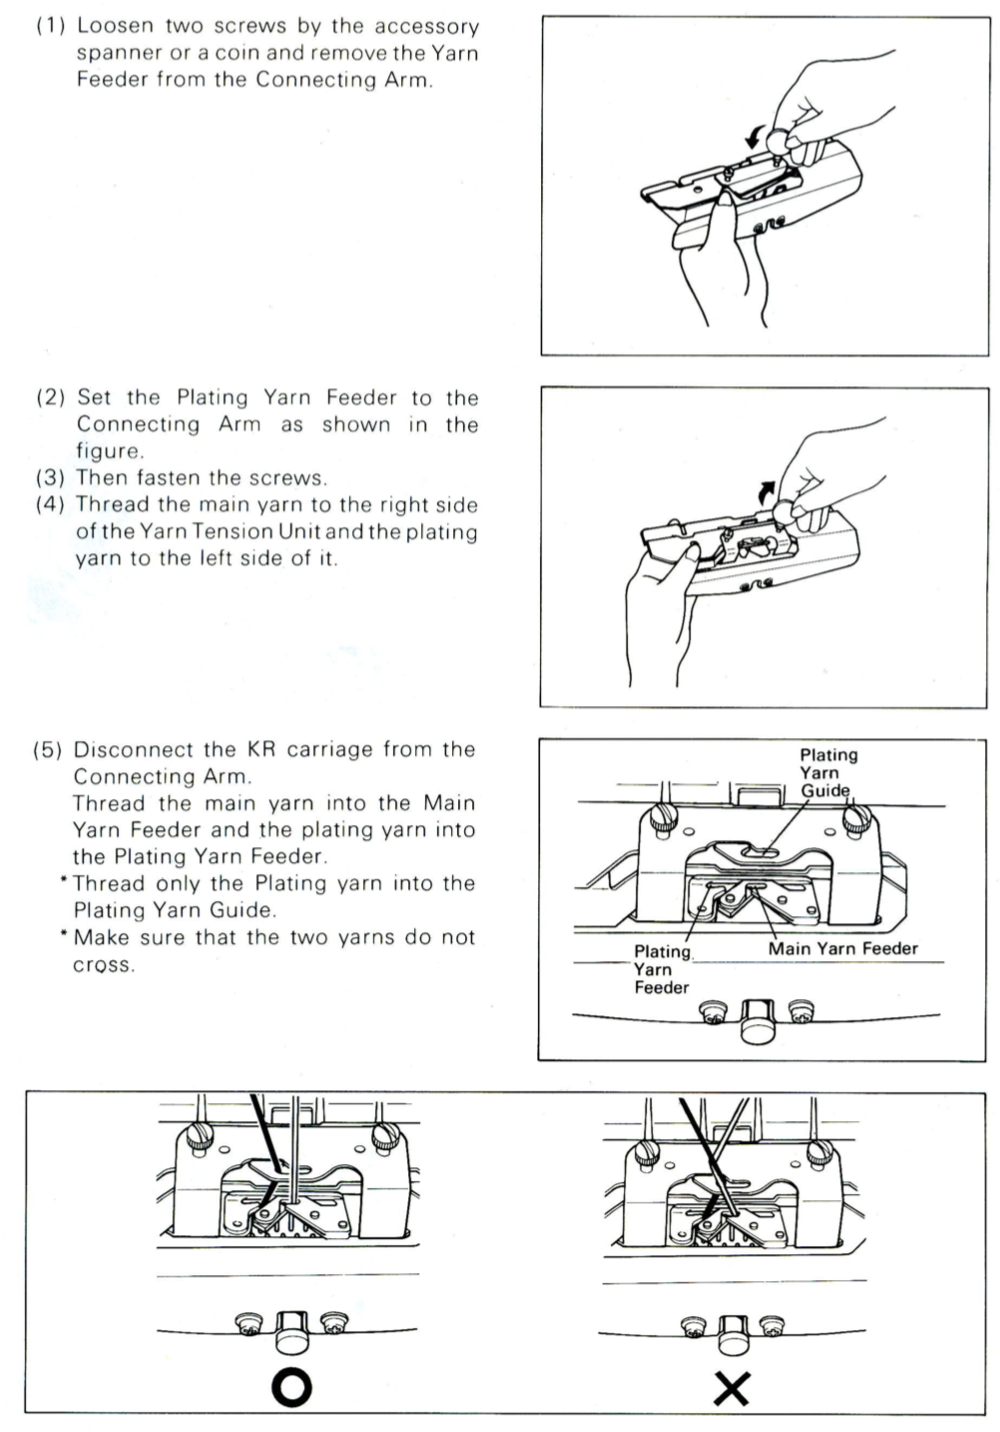
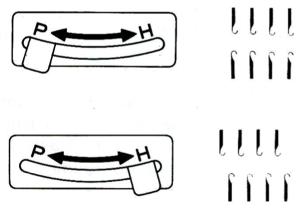
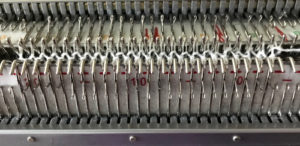
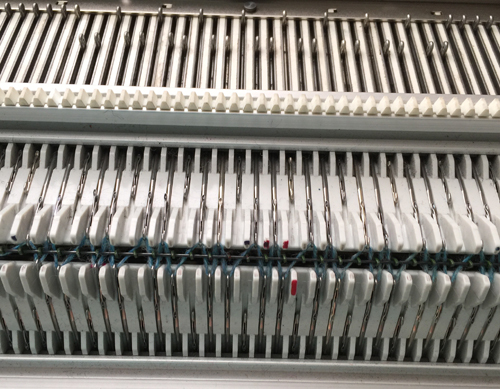
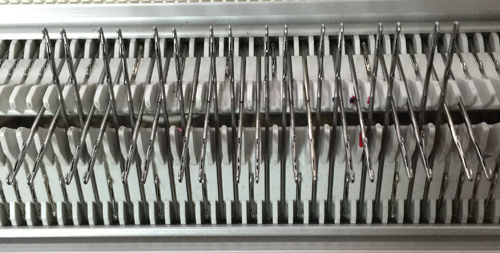
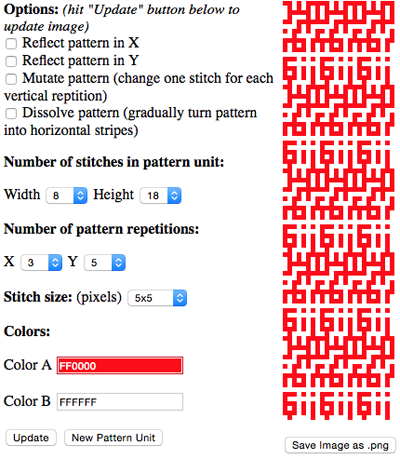
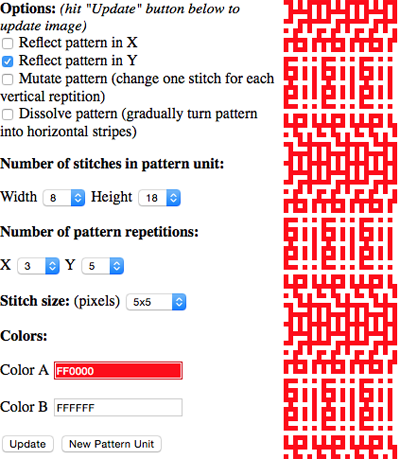
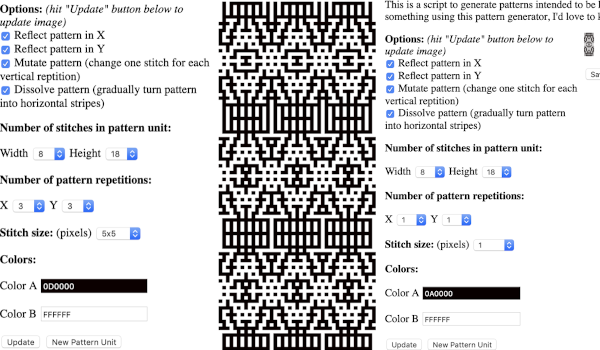
 To create every needle loops for pile on the main bed: CO is on the ribber. With settings on the image below left (no lili buttons in use), the ribber tucks loops on every needle traveling to the right, knit all stitches moving to left. Moving to the right the main bed knits on every needle, slips the whole row moving to the left, giving the opportunity to drop stitches off. With settings on below right, lili buttons are in use, and the ribber now produces an EON needle selection, every row. Left alone the selection is what would be seen using the 1X1 card on the main bed, its repeat
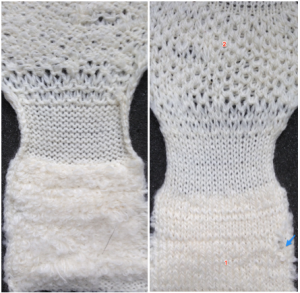
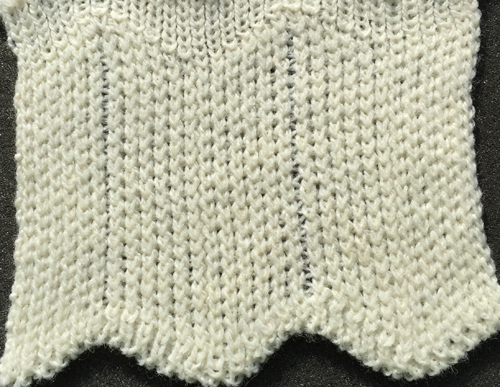
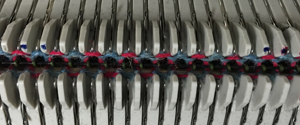
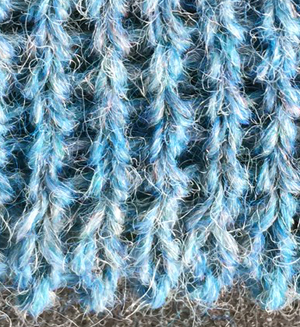
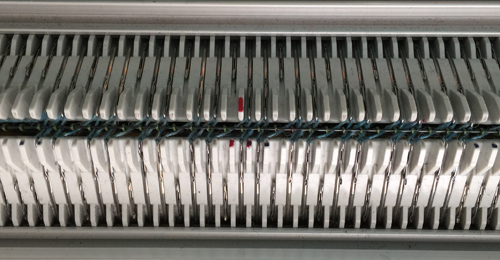
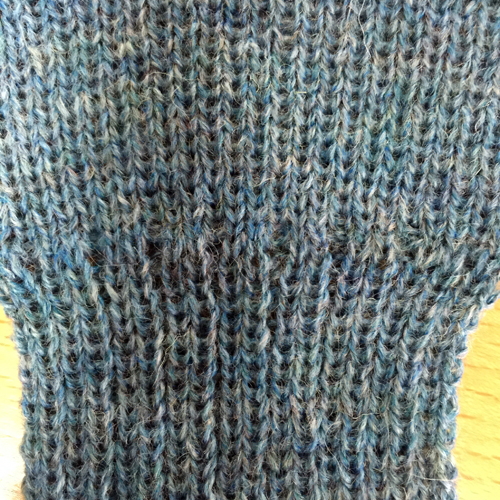
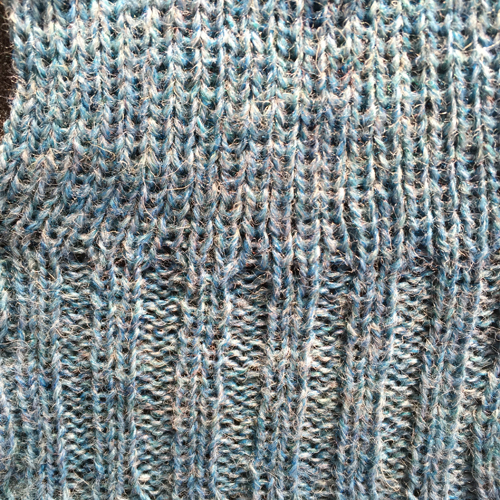
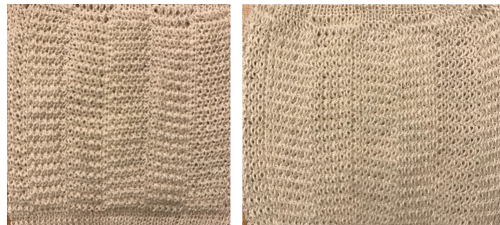
 The yellow yarn is a 2/8 good quality wool knit at 4.2 on the main bed, 3.2 on the ribber. Switching to a rayon twist of similar thickness created instant havoc. The dark grey was a mill end, tighter twist 2/8 wool. Red arrows show what happens when loops are caught up on gate pegs and not immediately noticed. The green arrow indicates longer loops that can happen when knit stitch on either side on the opposite bed do not knit off properly. The result is a dense wool fabric, so the tendency to roll at the top and bottom of each piece toward the “knit” side of the fabric needs to be considered at the top and bottom edges of finished pieces.
knit with no lili buttons in use
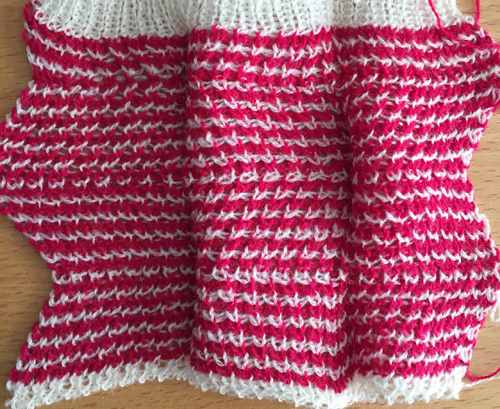
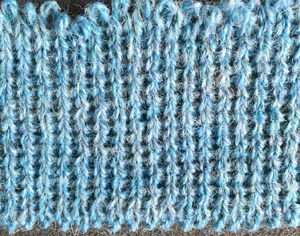
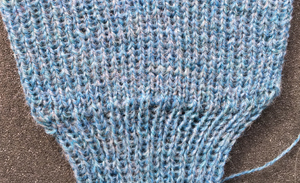
In 2 color knitting, or creating isolated motifs whether on one color or striped ground, anchoring loops by tucking on every needle is no longer possible, making reverting to EON needle selection on ribber a necessity. The results are dramatically different. These swatches were made using lili buttons or hand selection on ribber, loops on the main bed. If things don’t work in one color, they will not in 2, so one color, every needle pile is a place to start evaluating the results
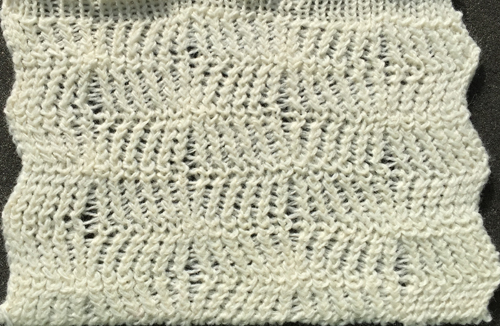
1X1 lili selection left me with “where are the loops?”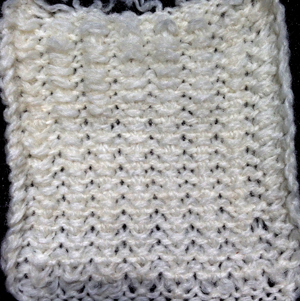
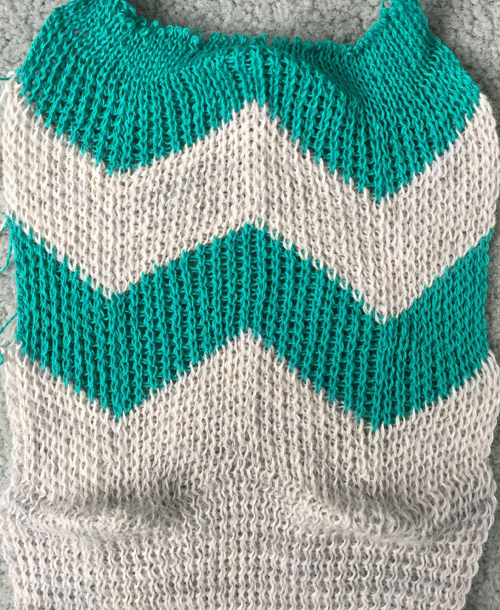
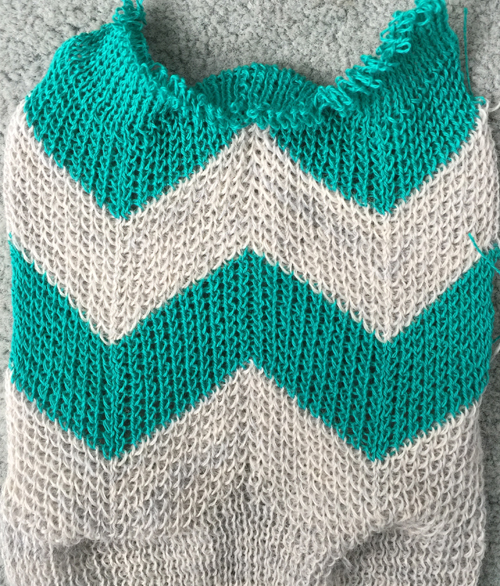
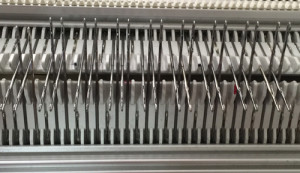
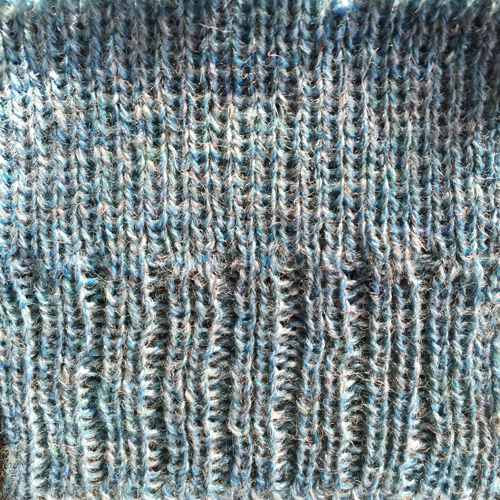
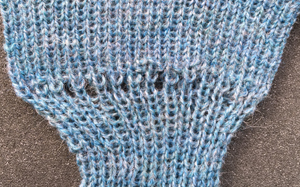
In the bottom section here I tried 1X1 hand selection for 2 consecutive rows, the narrow band in center back was back to 1X1 to separate areas using lilis, at the top I used lili buttons and brought an extra needle into work on ribber before traveling to the right every third row (making needles in work on ribber an odd number), returning it to out of work before knitting back to right. Dropping stitches every 4 rows makes tracking the sequence easier. The resulting pile is far more “subtle” than samples worked with every needle tucking on the bed creating the backing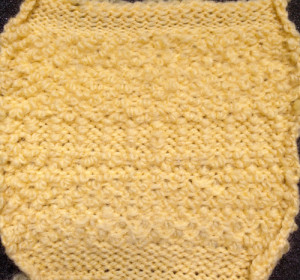
So far I still have had no luck with getting anything that does not look like a variant of drop stitch lace when attempting patterns separated for 2 color knitting, either in embossed one color, or in striped 2 color versions.
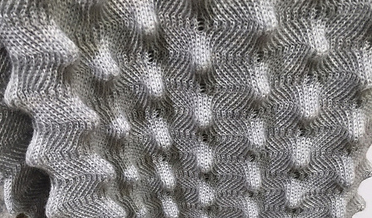
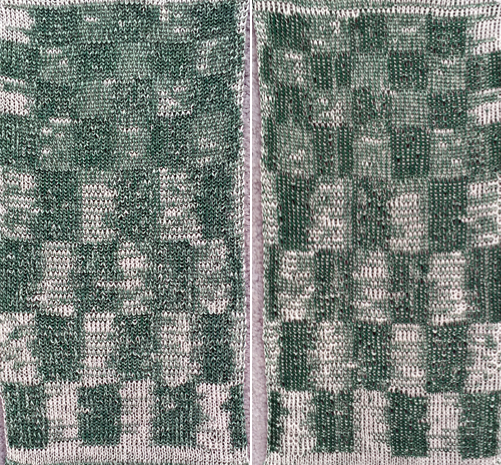
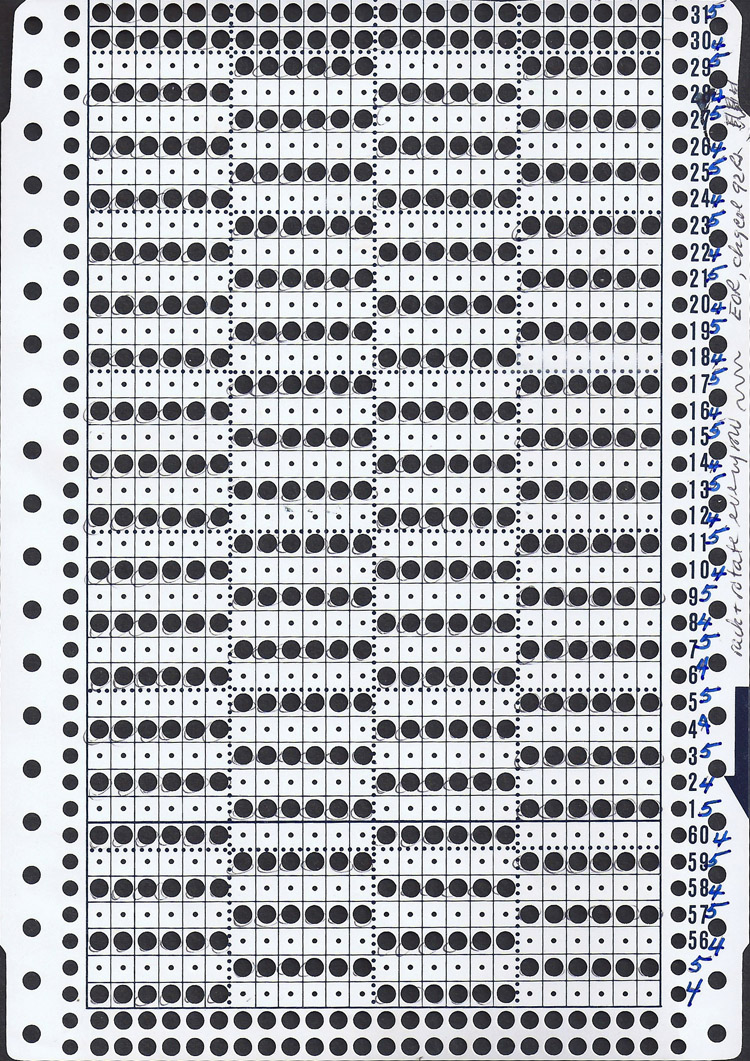
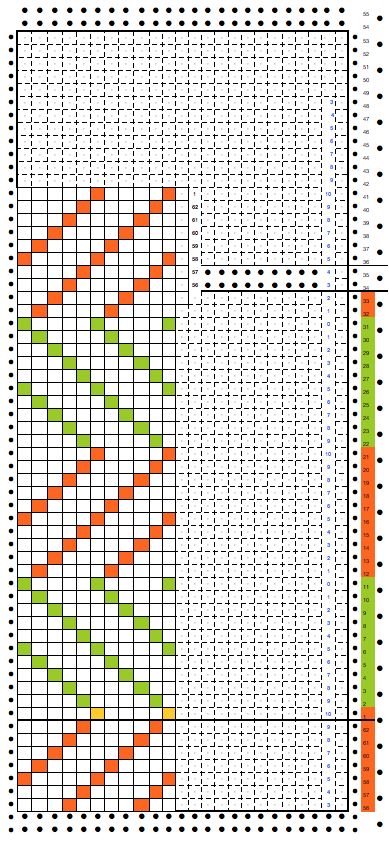
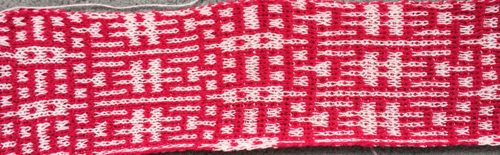
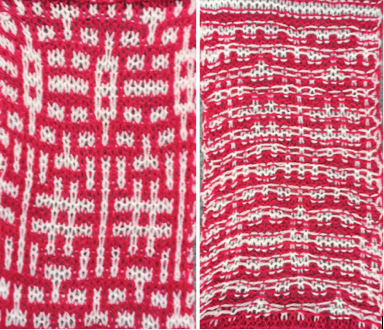
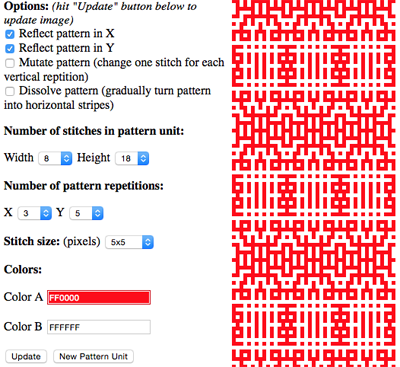
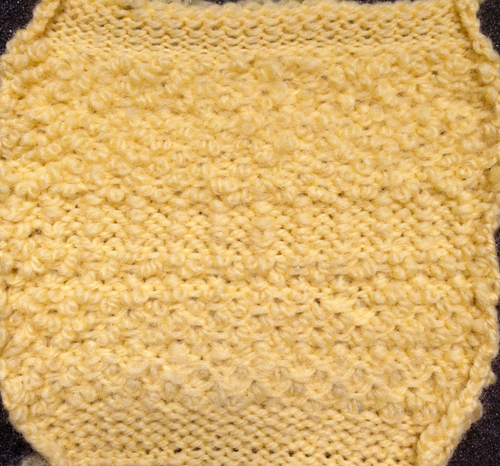
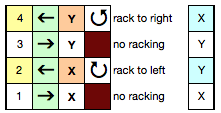 this fabric is produced in conjunction with a pattern repeat using the principle that black squares knit (pushers up, needles preselected), white squares tuck (pushers down, needles not selected), the repeat is 12 stitches wide, 2 rows high; it is possible to have 6 stitches tucking side by side because this is an every needle rib, and there will be a knit stitch on the opposite bed anchoring down each tuck loop
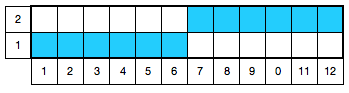

 one color half fisherman side 2
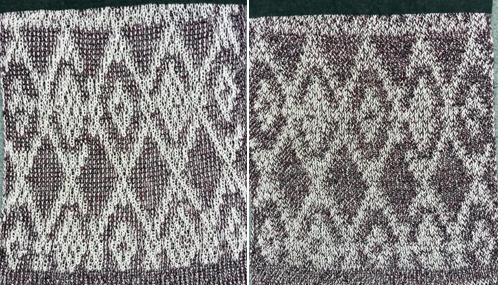
 2 color setting, color changes every 2 rows, side 1, thinner yarn
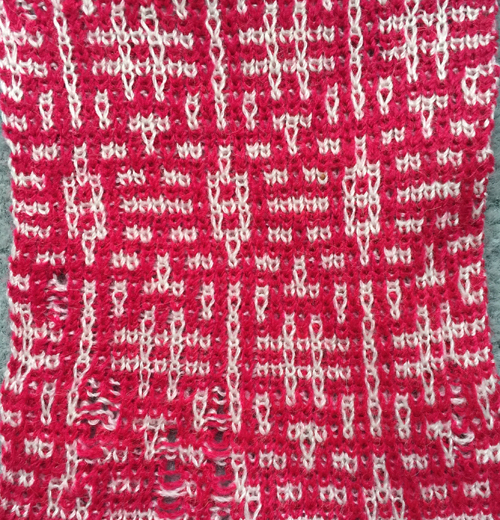
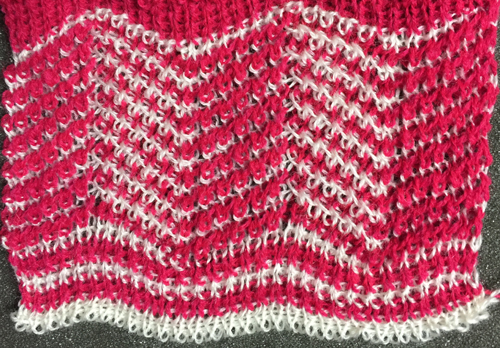 side 2
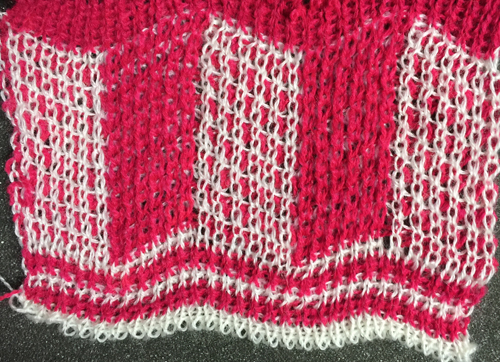
 side two
 side two
 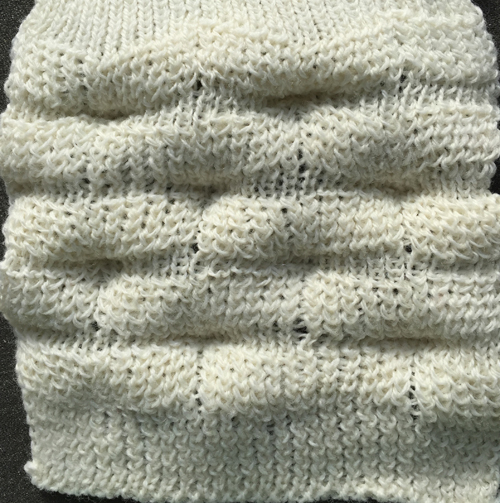 back to vertical: full fisherman with color changes every 2 rows, side one
 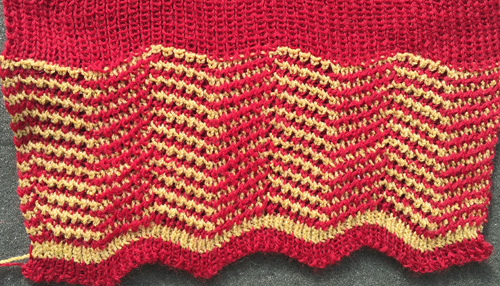 side 2, with a few stitches knit off issues
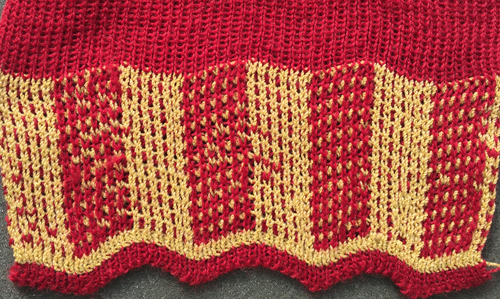

 same fabric with color change every 2 rows
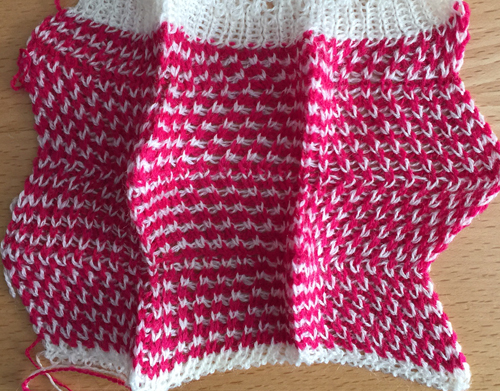
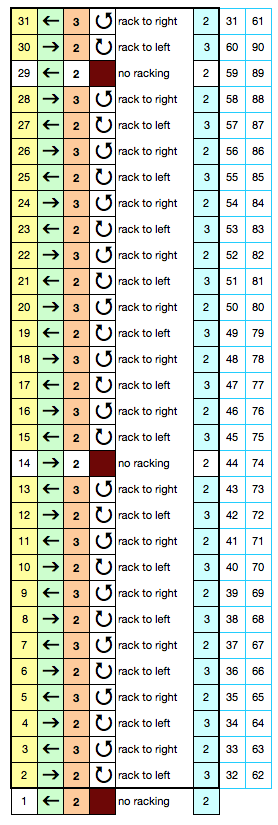


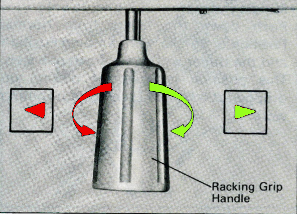
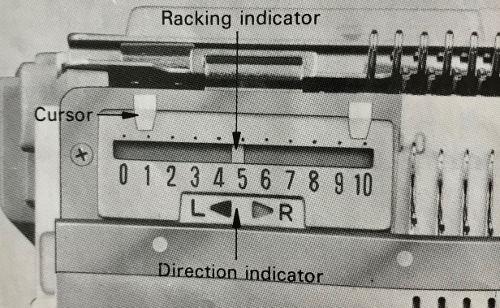
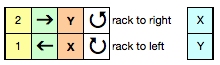
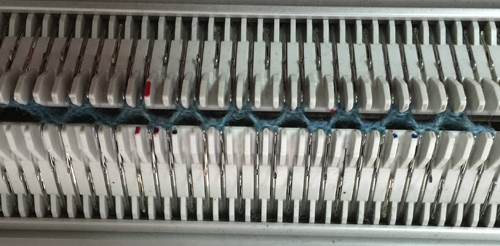
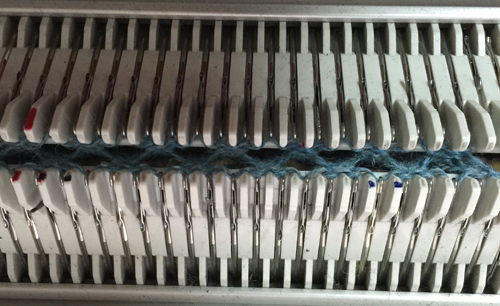
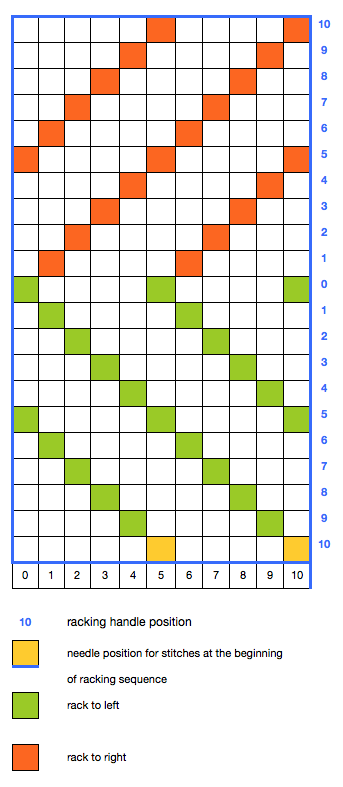
 The ribber is then racked back to its original position (6). The first needle on the left will once again be on the top bed, and the first needle on the ribber to its right
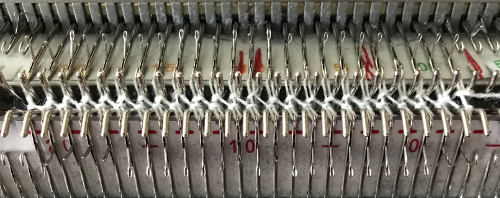
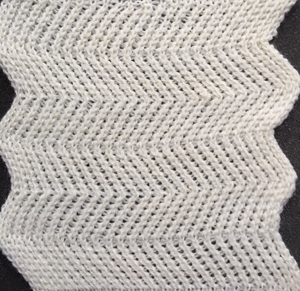
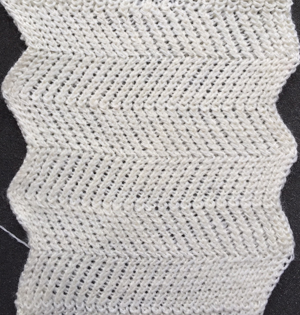
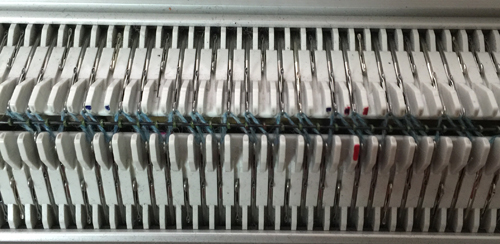
 “zigzag” row, normal needle position: work slowly, make certain all needles have picked up yarn
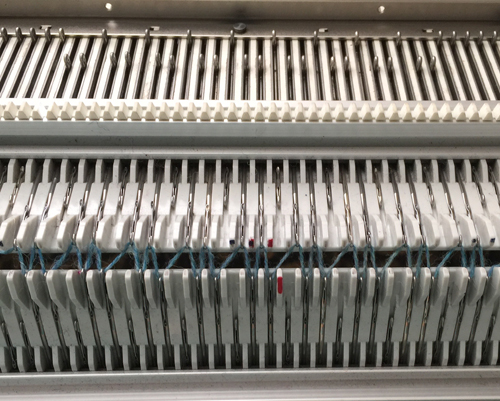


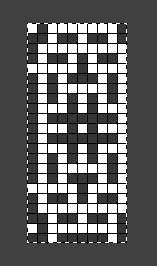
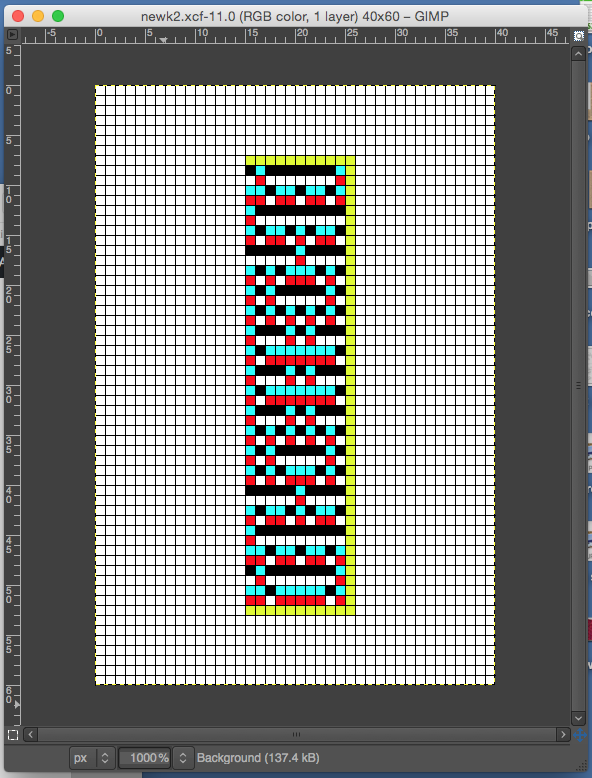
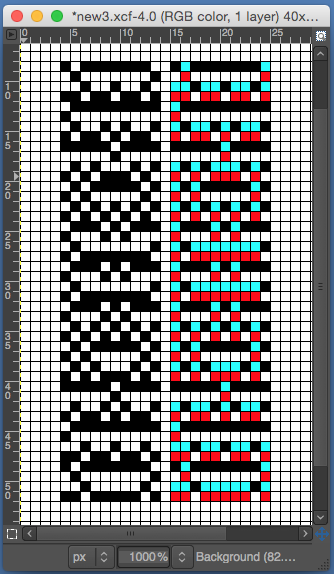
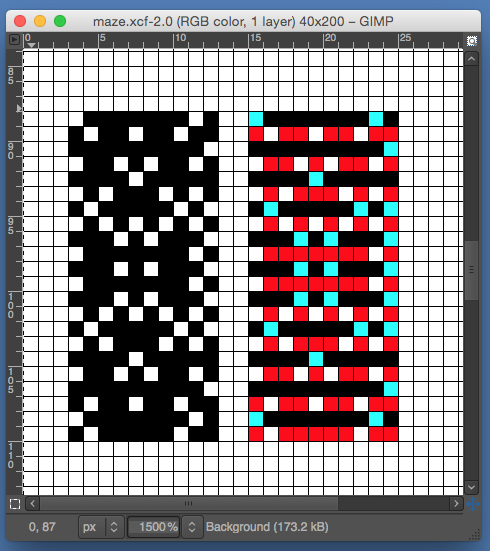
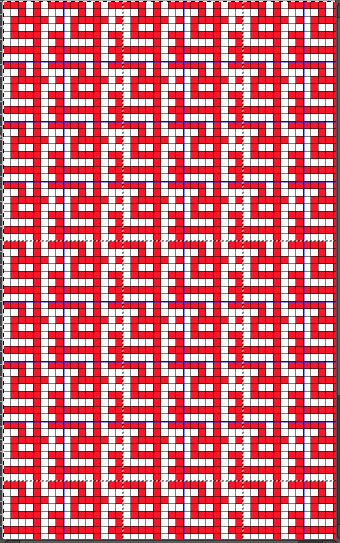
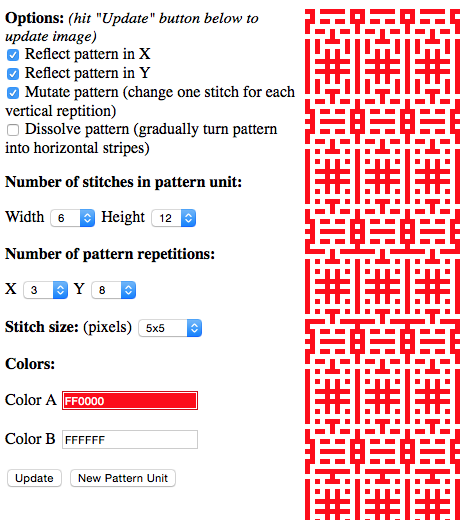
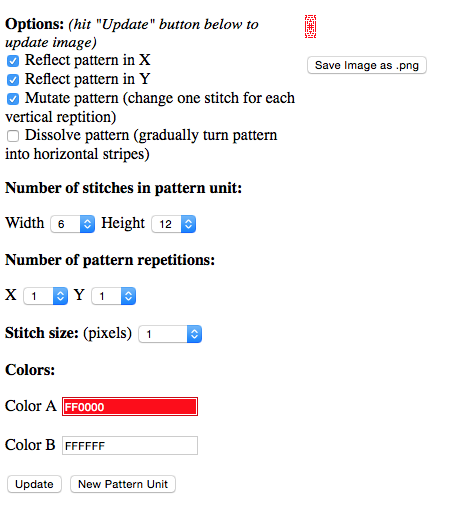
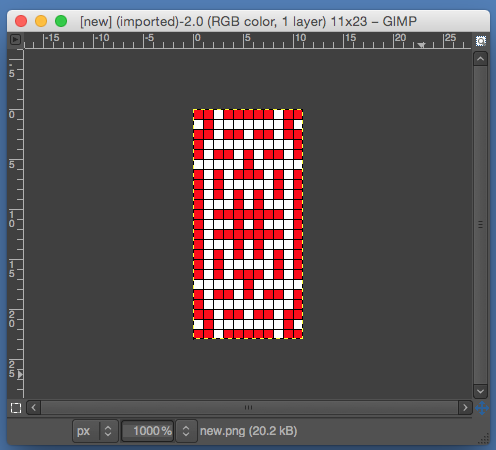
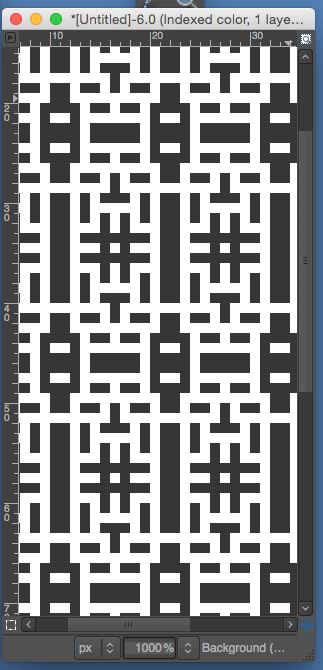
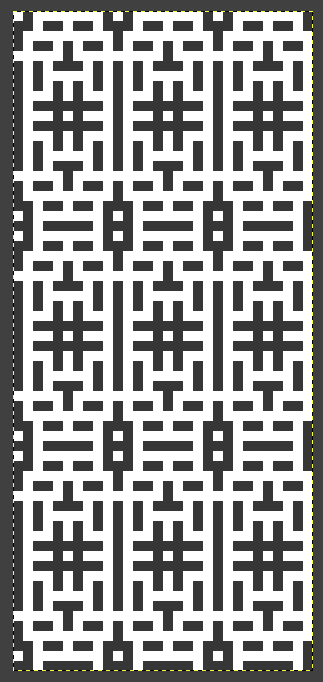
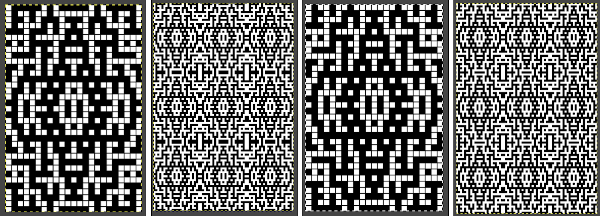
 the BMP in Gimp, explored in two renditions, eliminating double lines
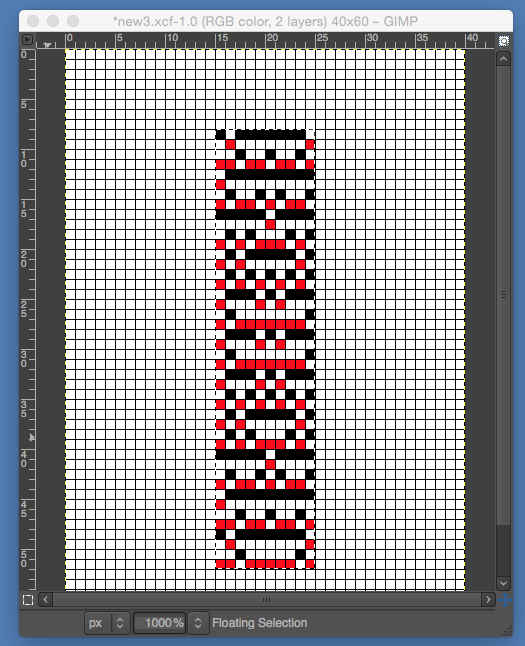
 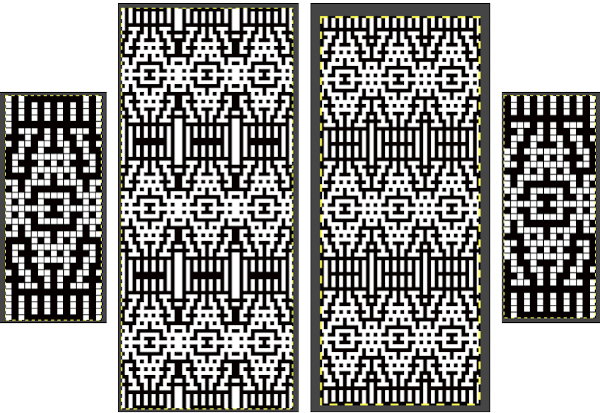 The proof of concept swatch for the version on the right and knit in tuck stitch
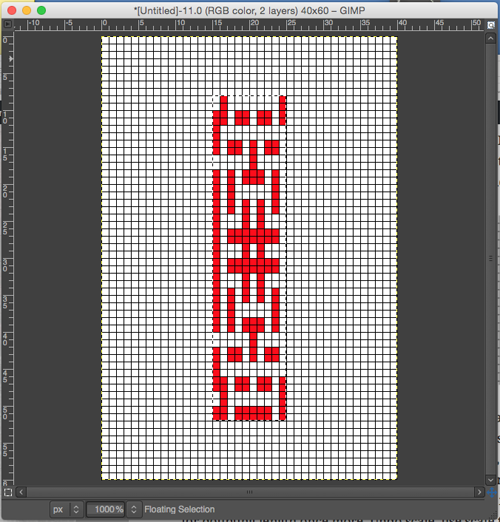
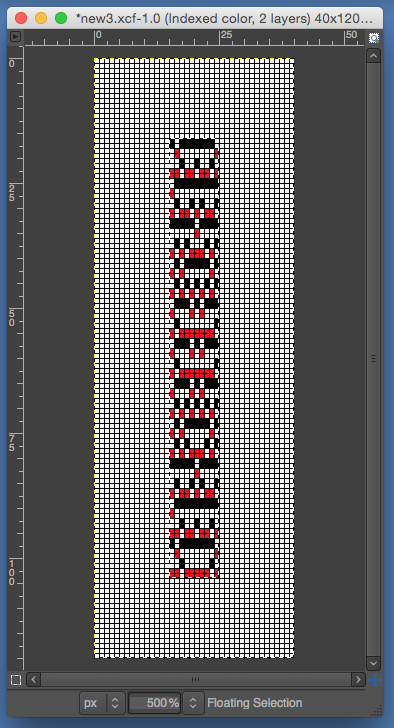
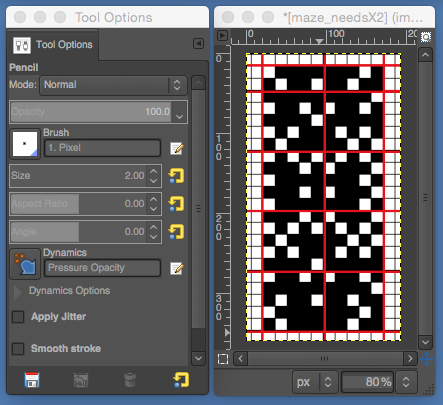
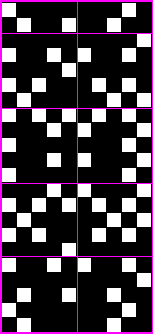
 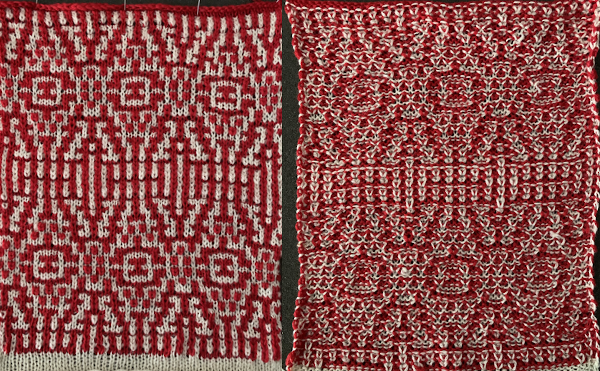 the double-length BMP ready for knitting, 14X68
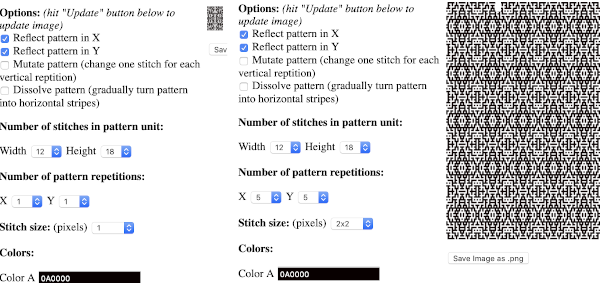