A block lace pattern on the KM 1

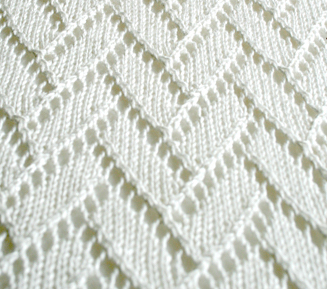
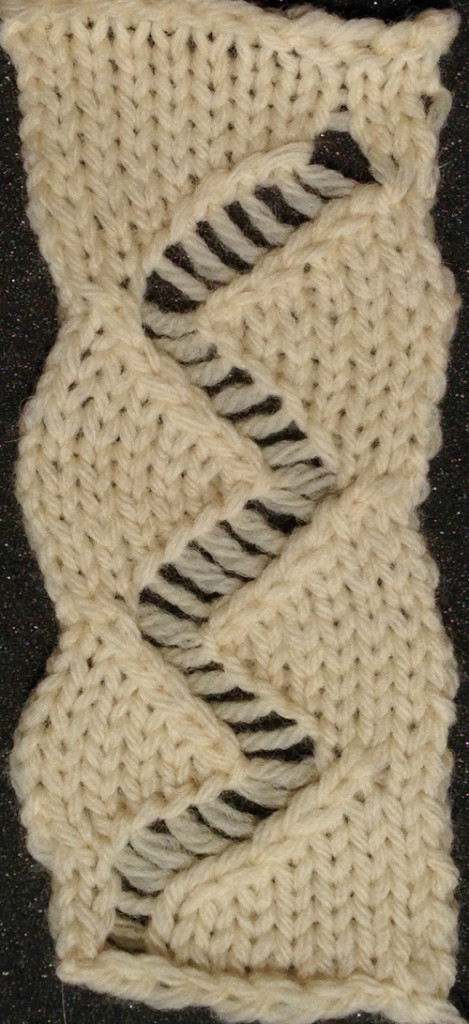
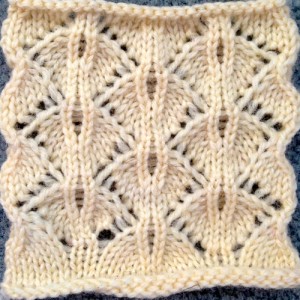
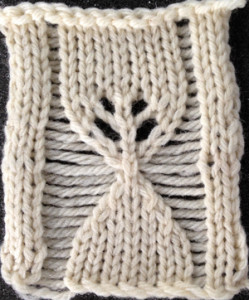
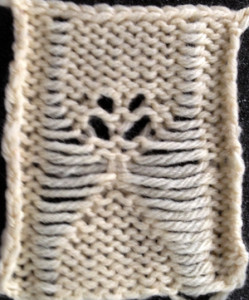
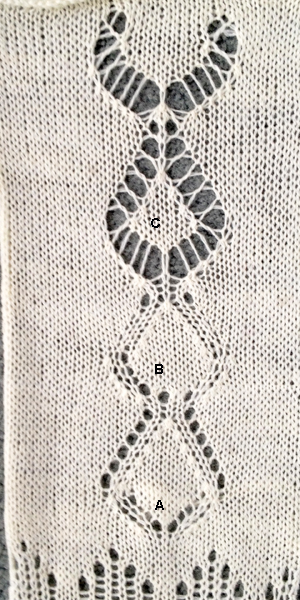
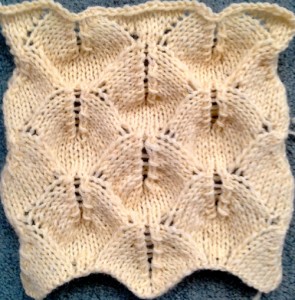
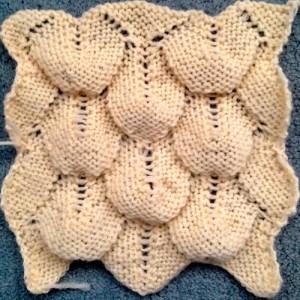
A friend recently posted a forum query on a published pattern that has led to my exploring another hand to machine knit transfer lace. The “flemish block lace” design from the second treasury of knitting patterns by Barbara Walker, p. 270 seemed to be the lace pattern motif used. Here is a partial detail from the fabric that began the discussion

try to copy

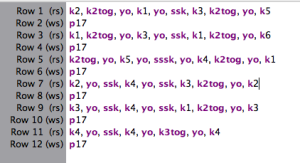
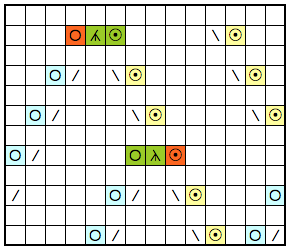
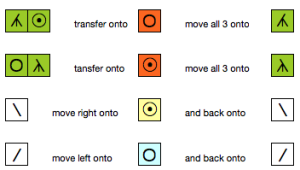
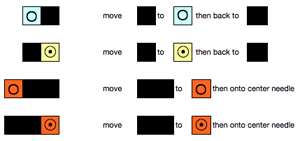
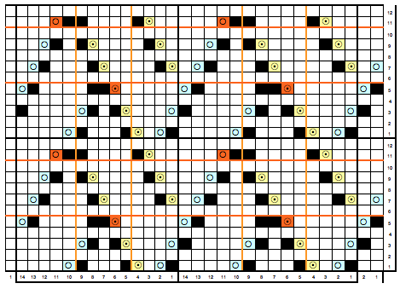
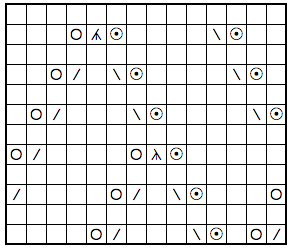
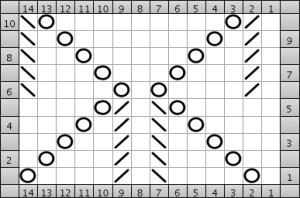
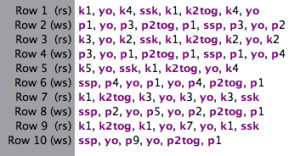
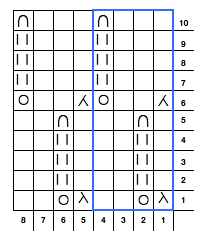
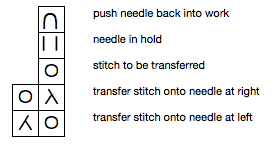
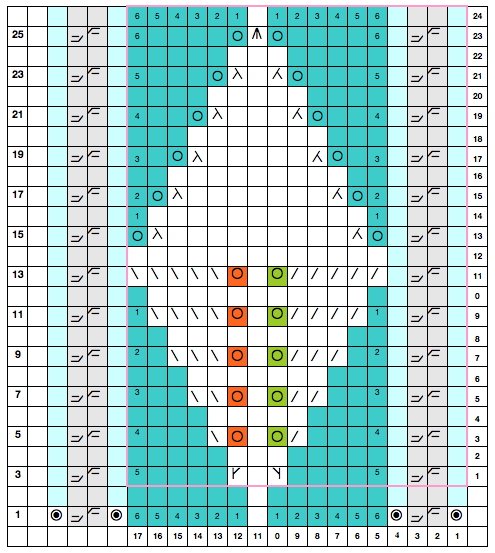
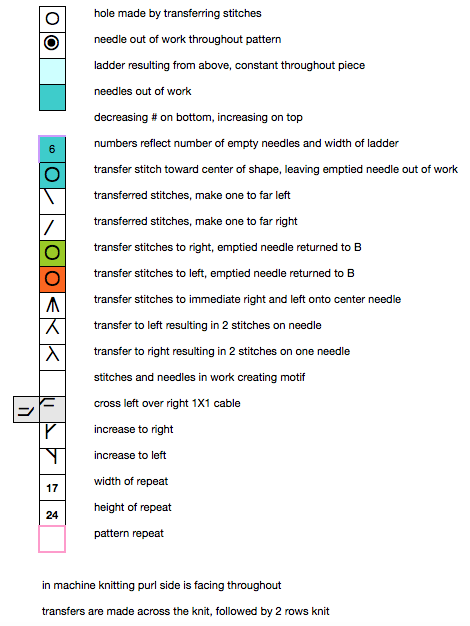
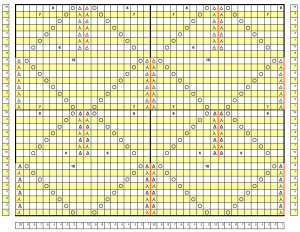
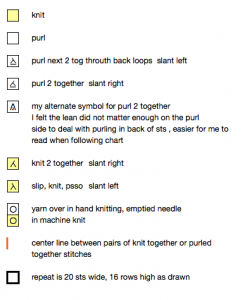
Below is a chart for the Walker repeat produced with Intwined. The repeat is a multiple of 14 + 3 border stitches, the first row is purl, but I could not enter an all purl for row one and not have the remaining symbols altered by the program, which assumes in lace the first row is knitflemish block lacethe program’s generated HK instructions for one repeat plus 3 border stitches screenshot_04In attempting the machine knit version I chose to use the HK chart for my transfers as it stood, the directions of the transfers being mirrored vertically did not matter to me.

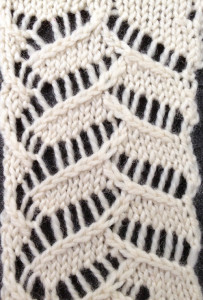
This design has “chains” traveling along some of the edges of the diagonal shapes. A lot of moving stitches in groups of 2 or 3 is required to achieve the look. It may be possible to achieve the fabric knitting with the aid of a lace carriage,  but planning the punchcard or electronic repeat and correcting any dropped stitches pose special challenges. My first samples were knit on the bulky KM, working in width of the 17 sts illustrated above.

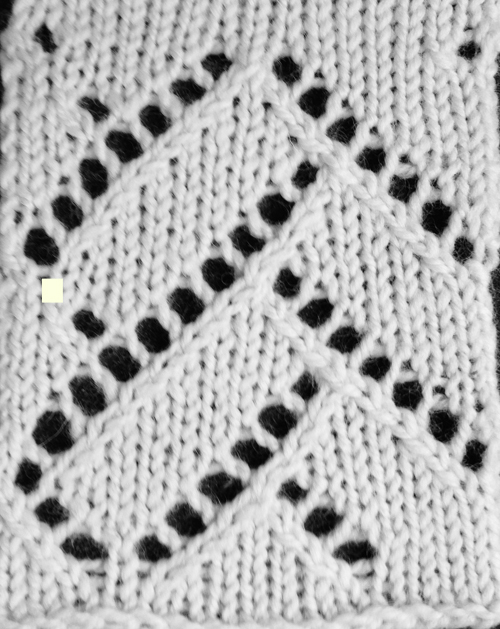
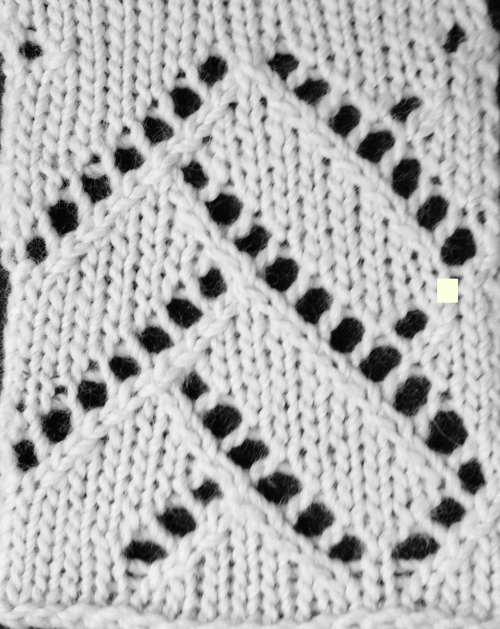
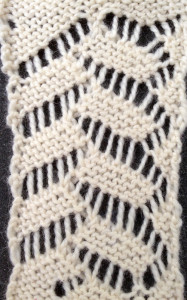
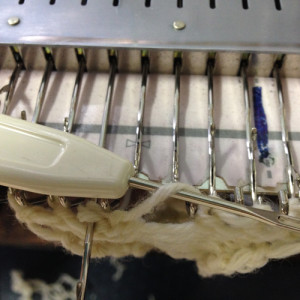
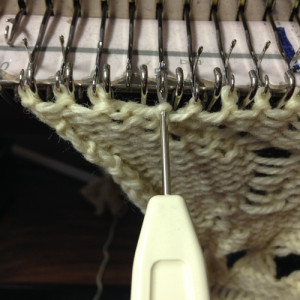
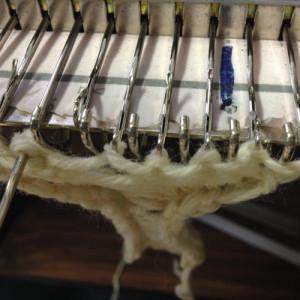
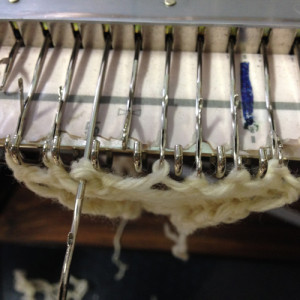
I began to test transfers by moving stitches every row. Interesting things happen when single rows are knit on the machine as opposed to the traditional 2 in multiple transfer lace, as well as the resulting shape being half the number of rows long. The eyelet yarn lies single, without the twist usually seen, and begins to look more like ladders (see previous posts on zig zag ladder lace).

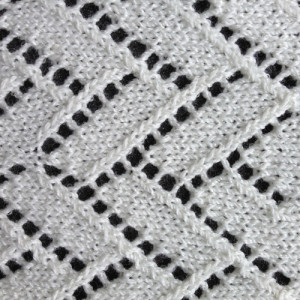
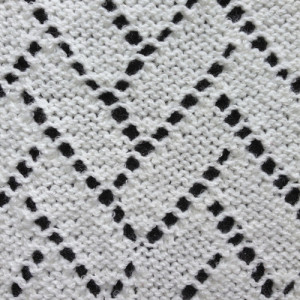
knit sideIMG_1938purl sideIMG_1939

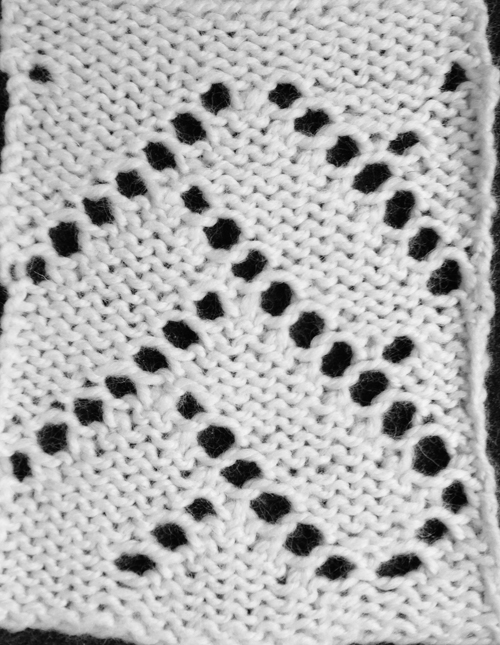
with 2 knit rows between transfers (the missing eyelet in marked spot is due to operator error) the familiar look of multiple transfer lace appears1940

IMG_1941

below the swatch image is flipped horizontally for a different perspective, approaching the original hand-knit inspiration1940looking at charting differently, back to Excel: single repeat

BW repeat_12

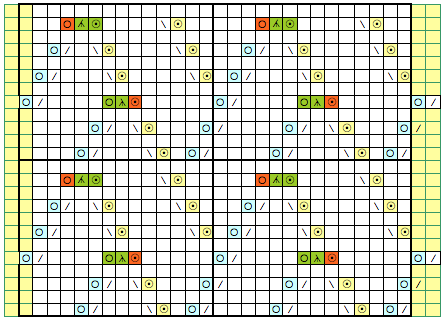
                    checking alignment, adding border stitches4 repeatbw                                                adding colorcolored repeat

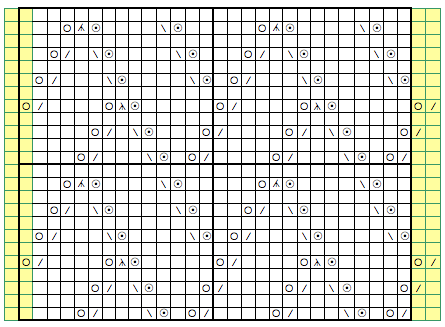
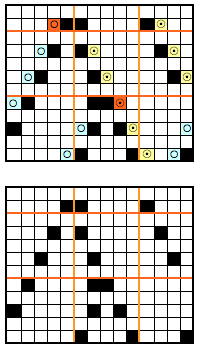
moves                    checking alignment, adding border stitches4 repeat color2The next consideration might be how to make executing the pattern easier on a standard machine. Needle pre-selection may be used to guide hand transfers. Working out the electronic repeat, represented by black squares:isolating mylar rep                                         the transfer directions

transfers                        the chart in repeat , including bordersmylarx4_borderThere is no transfer on row 3 of the repeat next to border on the chart left, it is omitted in the bottom of the chart, shown on the top half. End needle selection is canceled throughout. The resulting test swatch, one operator error transfer missing on mid left:

                                                    knit side 500_1945                                                     purl side500_1944One of the issues I encountered during the initial tests was that of occasional needles “sneaking”/ dropping back on the machine, so ladders rather than eyelets were formed. The needle retainer bar is old, and I like to work lace with the ribber off and a tilted main bed, explaining the possible cause.

Zig Zag ladder lace 1: on knitting machine

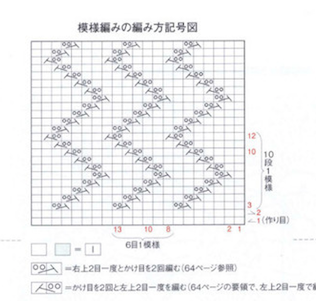
My previous posts on combining ladders and lace: 1, 2 . The chart below, found in a random Japanese publication, started the process of my sorting out a possible “how to” on the knitting machine
bulky zig zag lace

In hand knitting, the 2  empty circles generally indicate a double yarn over. On the machine these can be simulated by working with extra empty needles. For swatching, a few rows of stocking stitch will do as a start. In a final fabric, waste yarn may be followed by ravel cord and a crochet cast on. After the crochet cast on, the chain on the needles for the extra “yarn over” location can be dropped, leaving those needles “empty”, and the pattern may begin immediately.

One of the 2 yarn overs will be created by manipulating an empty needle, the other by transferring stitches by hand as one would in lace.

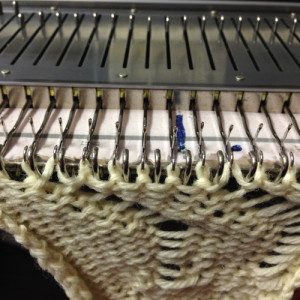
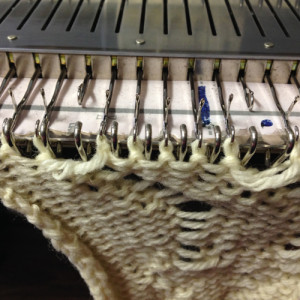
If the empty needle if moved back to A, a ladder is created that is essentially a float in front of the gate pegs up to the next knit stitch. For purposes here, the result did not give me enough yarn to be able to maneuver.

The first step is to decide on the repeat between transfers, and emptying appropriately spaced needles, seen here in A position

IMG_1878

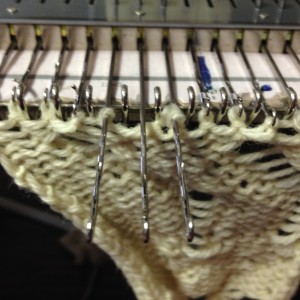
for the longer “float”: before the first row of the pattern, the empty needle is brought out to work, a row is knit, resulting in loops on those needles, that will create extra yarn slack

IMG_1882

the loop is in turn dropped

IMG_1883a tool is inserted through the loopIMG_1893

turned  clockwise for  casting on  in one direction,

IMG_1886

IMG_1895

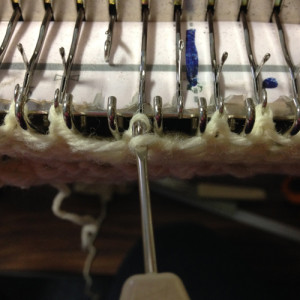
and turned counter clockwise for casting on in the opposite. Note that in one instance the long leg of the e is in back of the knit on the purl side, in the second in front. This makes a difference on the knit side of the fabric as well.

IMG_1894

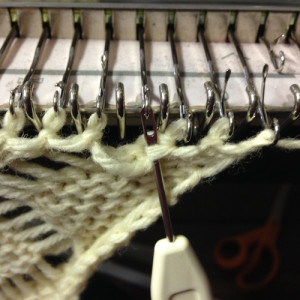
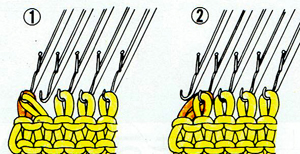
to get the look of ssk and ssp as seen in hand knitting (instead of a simple decrease),  depending on the direction you are traveling, the needle 3 stitch is moved to its right or left onto the center one to create the second “yarn over” . Both stitches are then returned  together to the needle 3 position

IMG_1879

and with the transfer and e wrap completed, one is ready for the next row of knitting. Bringing the 3 needles out to hold gives one the opportunity to check all transfers and wraps, makes the next row easier to knit

IMG_1888

the turn of the zig zag: pick up from row below for increase, instead of e wrapping for a neater turn

IMG_1889

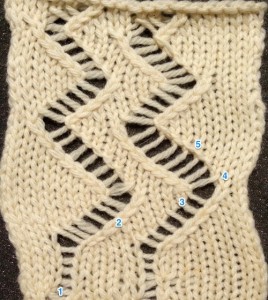
my first swatch: 1/ ladder at start of row; 2/ shows chain moving along the knit side, emulating ssk and ssp decreases seen in hand knitting; all my e wraps were made clockwise, 3 shows the long leg of the wrap moving to front of fabric as opposed to the rear as in 5, each giving a different look to ladder’s edge; 4 indicated the pivot point for reversing the direction of the zig zagnumbered_1892below shows the results of alternating the directions of the e wraps in each section: clockwise when moving to left, counter clockwise when moving toward right. The large eyelet at the top illustrates what happens typically when an empty needle is brought back into work at the top of a ladder.

IMG_1890 (1)

Ladders may be created in any desired width. The look of the vertical knit edges becomes a matter of preference. Good note-keeping helps insure consistent results.


Machine knit “dragon scales” update

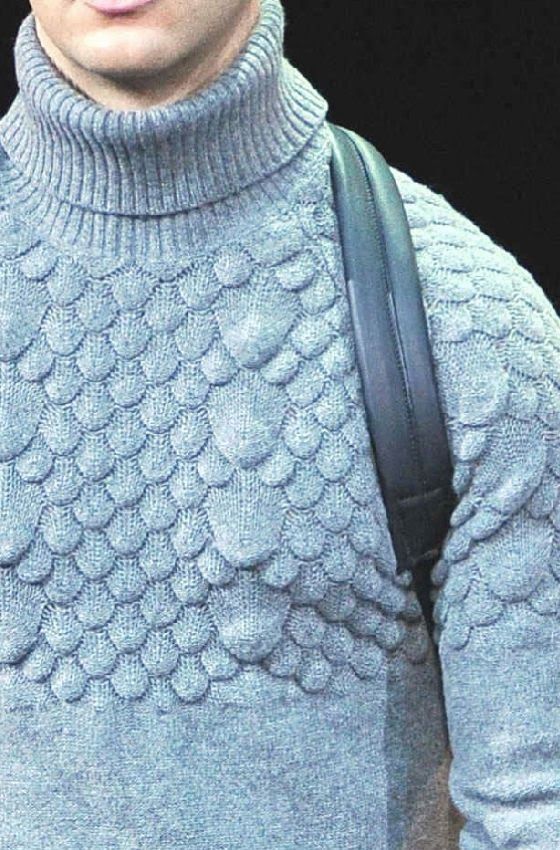
I had previously posted on an Armani-inspired knit scale-like pattern that sometimes was described online as a machine knit “crocodile stitch”. A fellow Raveler just shared on her project page an interesting variation that includes variations in the scale of the scales themselves. All her transfers are made onto a single center point, eliminating the vertical separation that appears at the center of my version.

my previous smaller, machine-knit sample

IMG_1648

a hand-knit lace cousin to try with full repeat and directions, chart, and text generated in Intwined, border stitches not shown

armani hk

armani hk how

Combining tuck stitches with lace 1

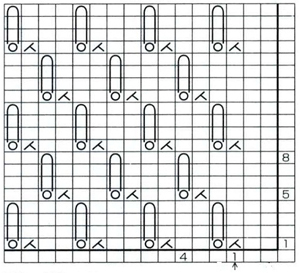
A simple chart, from a random Japanese publication

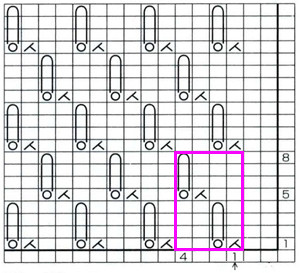
tuck and lacethe isolated repeat outlined

tuck and lace2

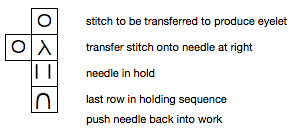
symbols used

symbols1

of note: in the above pattern, all transfers are in the same direction. My test swatches were knit on bulky 260 KM. Held stitches form loops on top of needles brought out to E position. The original stitch formerly in the needle hook grows in length, behind the newly formed loops. When patterning is automated using the tuck cam setting, the non selected needle will not be worked. The original stitch gets longer here as well, while the loops that in the hand technique rest on top of the needles, will now be held in the hook of the needle along with the last knit stitch. The latter fact is the limiting factor determining the number of rows that may actually be tucked, especially on Japanese machines. Yarn used and needle gauge also matter. Tucked fabrics, like lace, need to be weighted evenly for loops formed to knit off properly.

How to for my swatches:

knit base row (s), set up repeat so some stitches knit every row on each side creating a border, set machine to hold stitches

row 1: transfer every 4th stitch to the right. If you are in the habit of pulling needles holding multiples stitches to D before knitting the next row after transferring multiple stitches onto a single needle, this is ruled out when the carriage is set for holding, as those stitches would then not knit as intended on the next pass. To produce an eyelet, emptied needles are returned to B position after each transfer sequence

rows 2, 3, 4 bring alternate every 4th needle as shown in chart into hold, knit 3 rows

row 5: push held needles back into work (D on brother km),  knit one row across all needles. Held stitches will knit off as a group, check that they have done so uniformly

rows 6, 7, 8: transfer alternate every 4th needle out to hold, knit 3 rows

row 9: begin sequence again, repeating rows 1-8

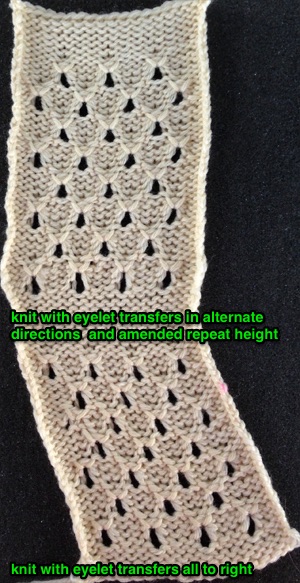
When transfers are made in a single direction, the fabric will bias in the direction of those transfers. In the bottom section of the photo below, the resulting lean to the left is easily seen. If a bias leaning fabric is desired, this is an easy way to get there. However, if the goal is to achieve a balanced fabric, then the transfers need to happen in opposite directions as seen in the top segment of the swatch.

knit swatchthe new working repeat

new_repeat

directions

the number of held/tuck stitch rows has been changed to 4 rather than 3. When the row that knits off the loops occurs, the total number of knit rows for the sequence will be an odd one, resulting in the carriage being at opposite sides of the needle bed at the end of each pattern repeat. Transferring stitches may then be made toward the carriage: COR – transfer to right, COL transfer to left. This makes it easier to track direction when working the fabric as a hand technique.

Next up: automating the pattern for standard gauge machines using the lace carriage, and tuck patterning in the knit carriage as well.

Ladders with lace, “making things work” 2

My preferred, e wrapped  1 to 3 increase

knit side

300_12purl side

300_13

The how: begin with transferring 2 side stitches onto the center one

knit row 1

1knit row 2

2

insert tool as shown

3

turn clockwise, place yarn twist on needle to left of center one

4

insert tool as shown

5

twist counter clockwise, bring twisted stitch behind float on right of center, lift twisted loop and place it onto the empty needle to right of the center

6

pick up a loop from the triple stitch below last 2 knit rows as shown, and lift it onto center stitch

7

knit 2 rows, continue in pattern according to chart

Ladders with lace, “making things work” 1

Just about 2 years ago, I had an obsession with leaf shapes in lace and wrote a series of posts on approaches to both designing them and rendering them in knit on more than one machine.
From a ladder and lace early post.
Recent publications reflect the increasing interest in bulkier knits and combining ladder “lace (created by needles remaining out of work) with shapes floating within the resulting open spaces. I thought I would address some issues in such fabrics while returning to a leaf as the focus “shape”. My samples are knit on a Brother 260, using hand techniques that require only the basic set of transfer tools.

Long verticals in knit may have problems with the edge stitches separating from the rest of the knit, i.e. in FI vertical stripes. In plain knit, the edge stitches may stretch, become distorted, and may encroach on the ladder space. A series of actions taken on the edge stitches of ladders will help prevent that, here I am choosing to use a simple 1 X 1 cable cross every 2 rows to stabilize them. Having the cables coincide with the rows on which transfers are made to create the chosen shape makes tracking them easier.

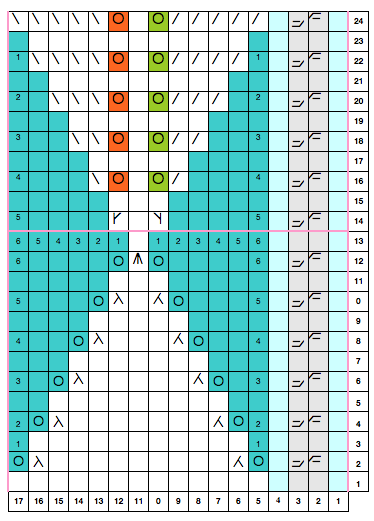
my first schematic (Excel chart)

screenshot_14

symbols used

symbols2

imagining in repeat

in repeat

my first swatch

for decreasing stitches in work on the right or left at the top of the chart I used a simple decrease

edge_decrease

using the “fully fashioned” option to provide a different look along that edge

ff_decrease2

For my test swatch I used a crochet cast on across 17 + 4 for single full pattern repeat, + 4 edge stitches on either side = a total of 29 stitches. To create the transition  from 1 to 3 stitches in the center of the leaf,  I e-wrapped an additional 2  empty needles

e_wrap0-2

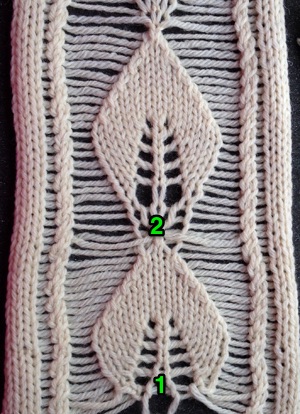
#1 reflects the e-wrapped increase just above the cast-on, and #2 shows the results of the same technique at the top of the established “leaf” pattern

e_wrap1_2

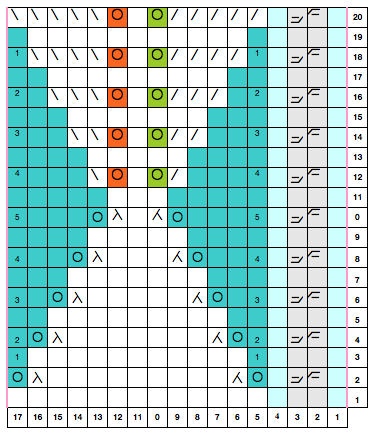
the chart repeat was amended for a different start

screenshot_15for the second swatch, trying a different way of adding stitches

#1 shows a pattern beginning on a group of knit stitches, as opposed to a single center one for leaf

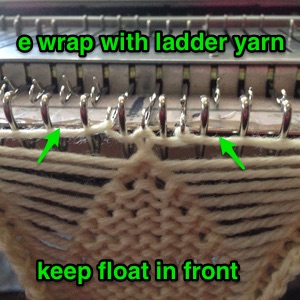
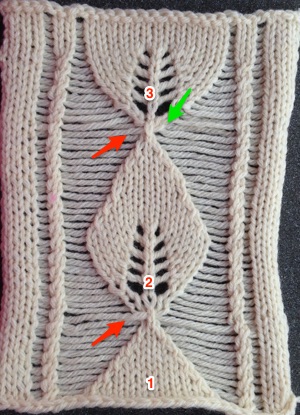
#2 shows a full “leaf” repeat as charted, the red arrow points to e-wrapped yarn traveling in front of the shaping

#3  the red arrow indicates the same is happening with the float, while the green shows my desired twist, with stitch to the front

300_92_2

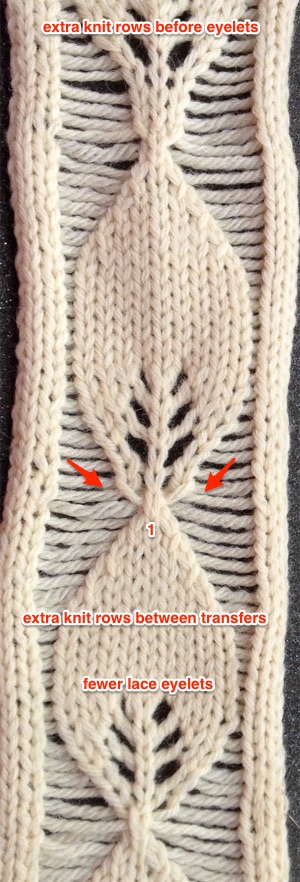
Sorting it out: a third swatch, with an amended way of e-wrapping. To make sampling quicker, I modified the repeat, eliminating cables, and decreasing the number of stitches at the widest part of the leaf, making fewer eyelet transfers.  The results show how much the shape of the “leaf” may be varied with just a few changes. Note the twist and location of floats in relationship to stitches just above #1

e_wrap4_2

I will document the 1X3 increase method I liked best out of several trials in my next post.

If having a single pivot stitch for the repeat is not important, the chart below is amended again to accommodate that

screenshot_16

if eyelets are eliminated to create a geometric pattern and/or for the sake of speed, increases may be created on both sides beginning on row 12 of the above chart by picking up from the row below

make_one

Cables in color

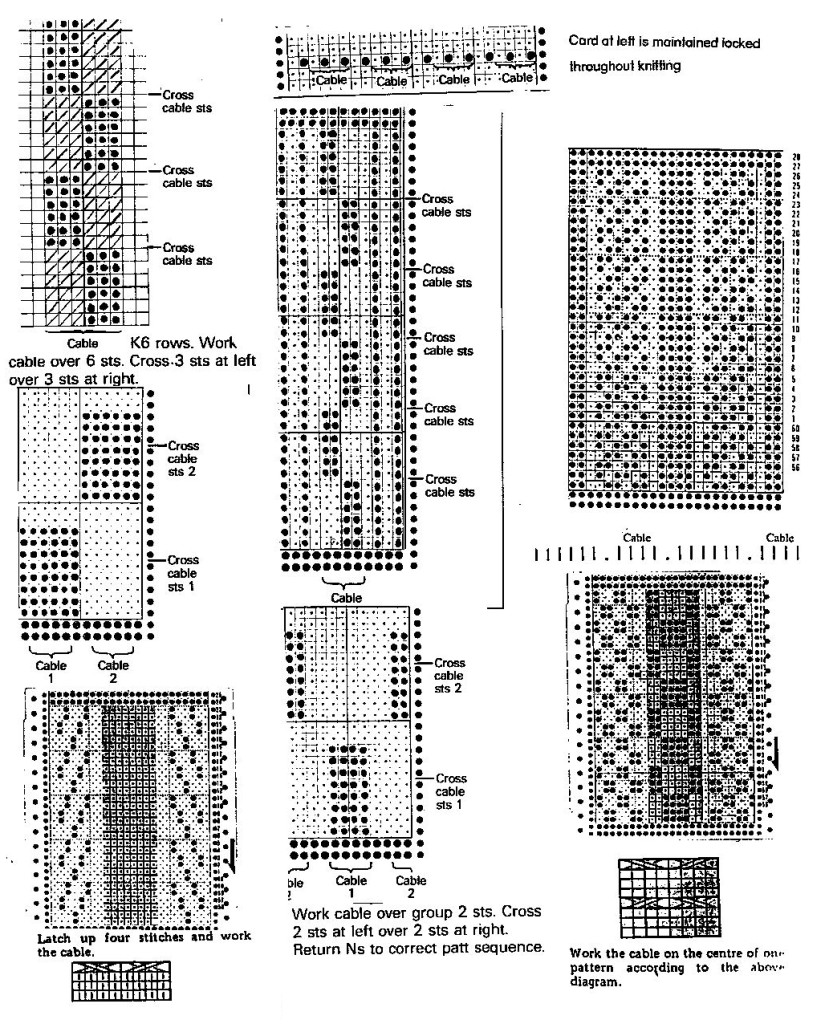
Fair isle, like any slip stitch fabric, is “shorter and skinnier” than any produced using the same yarn colors in plain knitting, single bed. Cables also narrow the fabric considerably. Begin with tension set at least 1-2 numbers looser than usual, and make tension swatches large enough to include all cable variations. After the cable crossings, be sure to return the needles to correct pattern selection before knitting the next row. Do not pull the whole group out to holding (E), as the whole group will then knit the color in the B feeder, and you will have a striped “mistake” on the next row knit. Leaving any needles OOW in the knit will select the needle on each side of the ladder to come forward, knitting the color in the B feeder. This may not work for you in terms of how the motif is affected by the vertical line created. If ladders are required, the vertical line in the B color may be eliminated by canceling end needle selection (KC II), or by dropping those stitches before you cable (which will give you a bit extra yarn for those crossed stitches). Ladders may be also latched up if you like, but watch where those floats are going in the fabric.

Making your own cards: try to control the length of the floats. Pre-punched cards with lots of punched holes can produce areas to be cabled by selectively masking areas with tape (both sides of cards). Conversely, you may punch diamonds, squares, etc. in the center of other shapes that would normally have floats too long for FI, to produce a B feeder color area for cabling.

Like color, most often, needs to land on like color, so stitches need to move further than they would in a one-color knit. Reversible ribbed cables share the principle of like needing to land on like (knit on knit, purl on purl). Starting out with a single row punched card, mylar, or program repeat, with the card locked, provides a quick test for tension, keeping track of patterns, etc. There are many, so at least initially, cabling on a constant number of rows apart may help avoid errors.

beginning to visualize the crosses

FI cables2

another of my “quick reference – some to try” handouts

color_cables

A swatch experiment

A while ago the image of a sweater attributed to Armani caught my attention on Pinterest, and I became obsessed with creating a variant.

13f255bf1c030f6b7f6d5710caf2d860

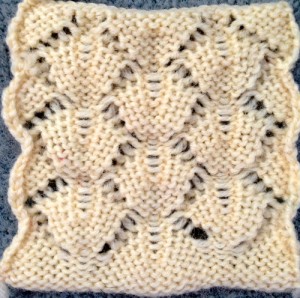
Lace is actually an interesting 3D fabric until it is blocked and made to lie flat. I went the lace route to work out my “scales”. The swatch I created below is hand-knit knit, and could be reproduced as a machine-knit hand technique with the aid of multiple transfer tools. I would recommend a yarn with “memory”, such as wool. The bottom of 3 sets of “shells” were knit on #  7 needles and the remainder on #5. I found I preferred to control the lean of knit-together stitches on the knit side but did not deem it necessary on the purl.

the knit side

IMG_1646

and purl side!

IMG_1645

my working notes  (Excel) showing multiple repeats

scales_in_repeat

symbols used symbolsa printable PDF  scales_all_info

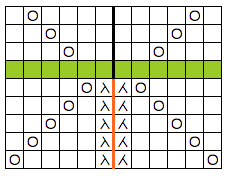
A mini-me version knit on a 4.5 mm. machine, using the same yarn as in the hand-knit sample above, at tension 10+. Repeats are worked out around 2 center needles, on which stitches are doubled as transfers are made. When the pairs of doubled-up stitches are reached with loops on either side of them after the last transfer/knit one row in sequence, and knit one additional row across all stitches before reversing the direction of transfers. That row is represented in green in the chart below. Symbols used are minimal since the same side of the knit is in constant view (incomplete full pattern repeat)

KM_repeat

knit side

IMG_1648

purl side

IMG_1647

see update3/28/2015

Machine knitting cables: single bed, 1

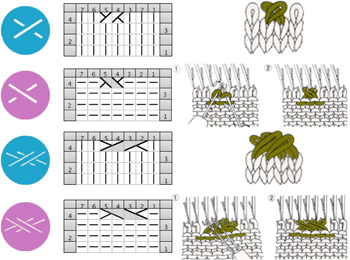
In hand knitting complex cable crossings are often worked on the same, knit side of the fabric, making them a bit easier to visualize and track. Knit and purl combinations in surfaces on either side abound.
In machine knitting, one is always facing the purl side. When attempting to duplicate a hand-knit pattern and the direction of the cables crossings in the machine-knit need to be reversed as seen in an illustration from an earlier post on  machine knit symbols
cable350

Common representations in MK pubs take into consideration that the purl side is always facing the machine knitter for single-bed crossings:
KCcrosses

Crossings of more than 3 over 3 stitches become difficult on home knitting machines unless special techniques are brought into play.
Methods and suggestions vary, depending on the source.
The least satisfactory one is to knit the whole row prior to the cable crossings at a looser tension. If there is plain knitting between crossings, the change in stitch size across that particular work may be quite noticeable. “All over” cabled fabric will be obviously narrower than plain knit, a feature that may be used in garment shaping to gather the resulting fabric in selective areas ie cuffs, or waistlines above peplums.
Generally, a looser tension will be required than when using the same yarn in stocking stitch knitting.

To start testing the best number of rows knit between crosses, it is a good idea, to begin with at least the same number of rows as the total number of stitches involved in the cross ie. 4 rows for a 2 X 2 cable, 6 for a 3 X 3.

Ladders created by leaving needles OOW may be used as markers for vertical rows of cables. They may in turn be left as created or latched up in segments or at the end of knitting to create purl (or other) stitches on both sides of the cables on the fabric’s knit side. An alternative method for latching up illustrated below, produces tuck stitches in ladder spaces
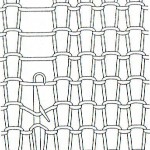
tuck_latch_up

Working the knit on the single bed, extra yarn for a bit more “give” may be created by dropping one stitch on either side of the 2 groups to be crossed. The dropped stitches may be latched up after each cross and will appear as purl stitches on the knit side, or left unraveled for open vertical space on cable sides. Bringing needles with crossed stitches all the way forward out to the hold/ E position helps them knit off more easily and visually check if indeed all stitches have been placed on the alternate group of needles.

A: crossing stitches, B: latching up the ladder
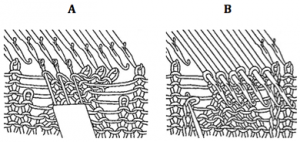
cross and latch 2

Sometimes the cable configuration may be changed for a similar look to render crossings easier ie. using a 5-stitch cable crossing 2 and 3 stitches respectively,  may be substituted for a 6-stitch one. A larger number of crossings may be broken down into smaller groups ie in this 9-stitch cable modification. The chart below is for hand knitting, created in Intwined, with their accompanying directions. Not all publications or software approach HK and symbols and charts in the same manner, requiring varying degrees of study and interpretation in how to either follow or adapt them.
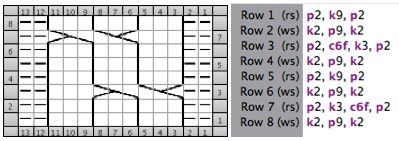
intwined combo

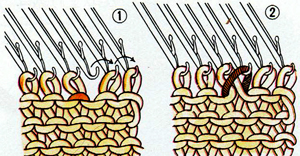
Creating longer stitches to facilitate moving them for cable crosses may be done on any one row by using additional strands of yarn and knitting involved stitches back to the A position, creating elongated stitches. If slightly shorter lengths are needed, cardboard or another spacer may be placed against the rear rail to keep loops even size while pulling yarn back. In the “old” days of MK seminars, a favorite such spacer was made from cutting segments of extra (narrow) strips from window venetian blinds. Bringing needles back into work requires a bit of care and at least a claw weight, to keep long stitches formed from bouncing off the needles. The larger cross can then be executed and made easier if one has adjustable 7-prong tools. After the cross, the larger stitch size may be adjusted slightly by pulling cautiously on the long end of the yarn. The Brother knitting techniques book is available for free download on more than one site, here is one option. It is a very good resource apart from any standard manuals. Creating the longer stitches is described and seen in the illustration below, found on pp 68-69 of the book. Also shown there: how to carry up the yarn rather than cutting it after each cross,  thus avoiding extra ends that later require weaving in

screenshot_13

Larger groups of stitches may be cabled by using holding to shape each section, then removing each of them off the respective needle groups, and crossing them as wanted.

As an experiment: for a single, long crossing strip, I found 7 stitches to be pretty much my maximum manageable width, with tension adjustments. The number was chosen with the intent of using two 7-prong transfer tools to hold and move the stitch groups.

The process: working over a group of 14 stitches for a 7 X 7 crossing.

COR: Set your carriage for holding. I had a needle out of work on either side to make tracking easier.

On the side opposite the carriage bring all beyond the 14 cable sts to hold, and knit one row.

Now pull all the needles out to work except for those involved in the cable. Knit 3 rows across the 14 stitches.

Bring 7  stitches opposite the carriage to hold. Knit an odd number of rows on them (7 in my sample). Yarn will be resting on top of some of the needles that have been on hold, watch that it remains free as you move stitches.

Cross the long strip with the group of 7 stitches towards the front of the fabric, the rest toward its back / the purl side facing you.

Bring the cable group’s 14 stitches and the remaining ones on the side opposite the carriage into work, knit one row, there will still be stitches being held on the carriage side.

All stitches in work: knit desired even number of rows, ending with carriage on the same side as at the start of the process, and repeat the process for crossings to continue in same the same direction.

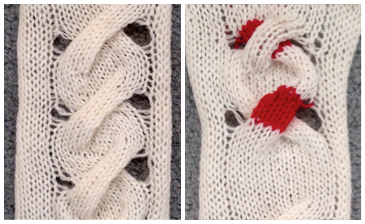
Each cable group may also be knit in individual strip forms and then crossed. At least one of the group pairs needs to be knit with a separate strand of yarn. Some experimentation on the number of rows knit, etc., and attention paid not trapping the yarn in the wrong place when crosses are made is required. Both methods are fiddly, but manageable after repeats are sorted out. My sample is knit in acrylic, which flattens considerably with steaming. On the left are crosses made with a single long strip, on the right, for illustration purposes, the red represents a second strand of yarn that I was able to keep continuous.
combo

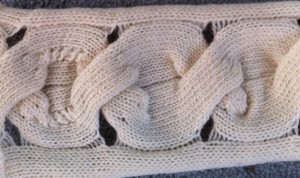
To work cables with 2 separate strands of additional yarn, work each cross segment separately, then remove it on waste yarn, dropping it off the needles. Rehang each strip in the desired location, crossing as required in the pattern. Cut yarn ends may be woven in as plain knit rows between crosses are formed if the piece is one color. The experimental swatch below is from one of my much earlier posts on the topic. Though my examples here align in a straight vertical manner, this method allows for placement anywhere on the knit, in desired spacing, repeat, and cross formation.
br4

Large safety pins, hand-knitting stitch holders, and thin circular needles may be used as alternative tools to remove any strips of knitting and in turn, used to ease those stitches onto their new needle placement.

Using yarns that are not fragile or easily broken when tension is applied, and that have some amount of “give” at all, such as wool as opposed to cotton, also renders the process a bit more friendly. Yarns with “memory” such as wool will also retain dimensional qualities and spring back after any blocking.  There are no single best ways to achieve any specific machine knit fabrics; personal preferences and adjustments evolve with experience.

Please enter “cables” as a search topic on the left to visit my previously published related posts.
Miters and spirals: visualizing, charting (and more) 3

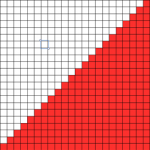
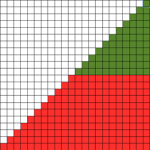
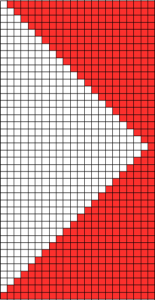
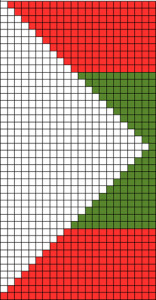
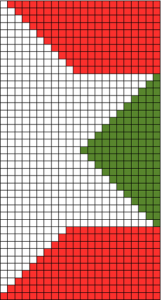
SPLITTING THINGS UP leads to a series of quite different fabrics, sometimes creating interesting secondary solid color shapes when striping is added to any of the forms; repeats will need editing to avoid extra rows to keep the designs balanced, or have them added across their width for extending shapes, such as in creating ruffled effects. I have worked on these charts using Numbers, image capture, and resizing and editing again in photoshop if needed. The images below are not intended as a “sit and knit” tutorial, but rather as a start for creating your own designs, on the desired number of stitches, I randomly picked 22
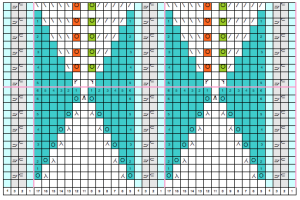
some possibilities on method: SPIRAL original shape

splitting in 2 parts

changing positions and stacking, all knit row edited to bottom of repeat

a mirrored segment

added to first repeat, center line double row edited out for knitting

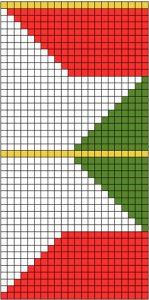
MITER: original repeat

split repeat

moving parts around

areas for adding plain knit rows in desired numbers across the knit (yellow), keeping in mind how this will affect color changing sequences if striping is used to create secondary patterns; repeat usable for machines with color changer on right

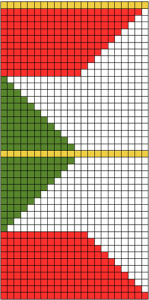
mirroring the whole repeat horizontally for use with color changer on left

Changing colors at regular intervals including every 2 rows will yield secondary, geometric patterns; all knit rows may be added to the right or left of the shapes maintaining color changes, for different effects; if these are planned in extended “white areas”, the holding sequence needs to be maintained every other row; slip stitch setting may be used to automate, with repeats reworked for use on 24 stitch punchcard machines. I find when exploring any of this initially, working repeats as hand techniques helps me understand necessary sequences and editing before committing to punching holes, filling mylar squares, or programming pixels. Swatches and notes, swatches, and notes…