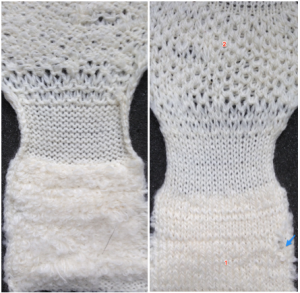
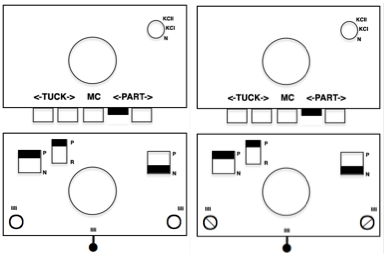
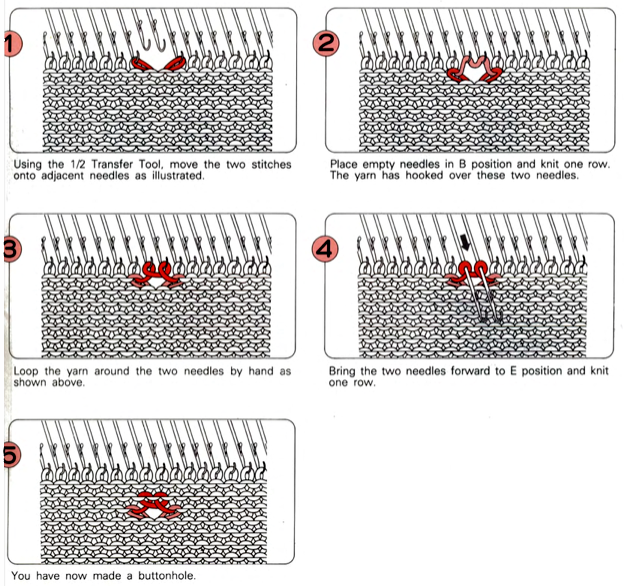
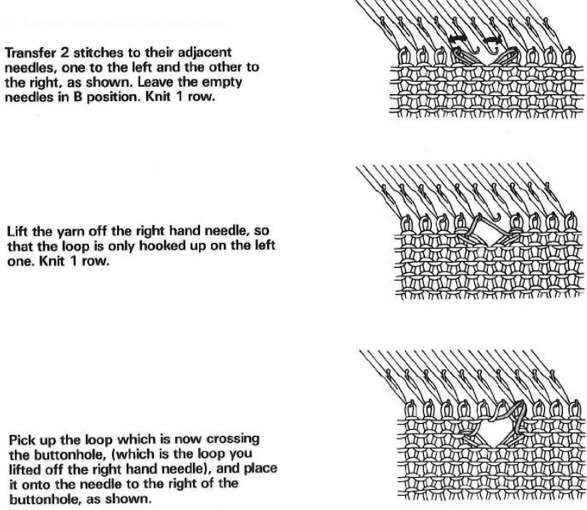
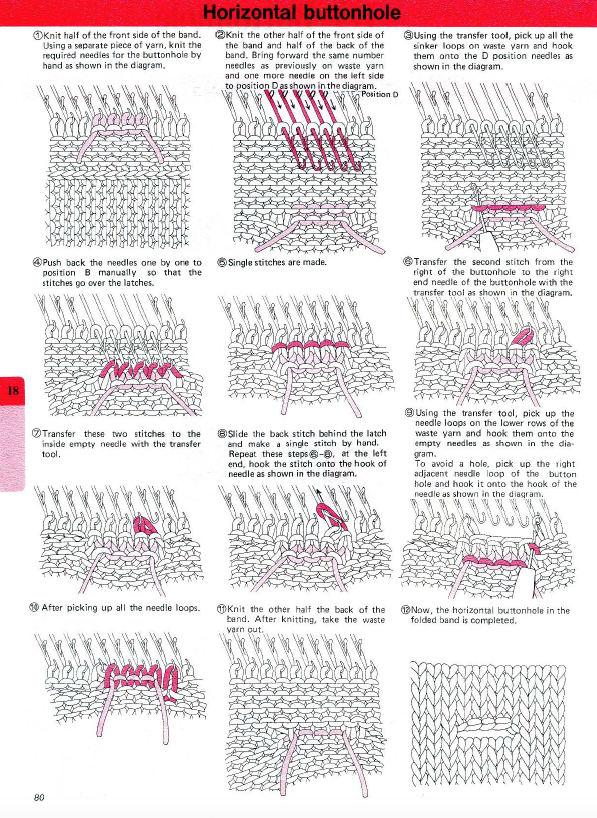
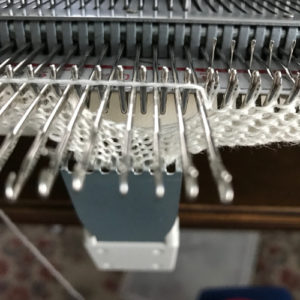
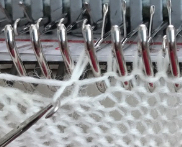
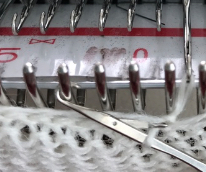
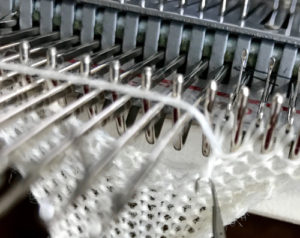
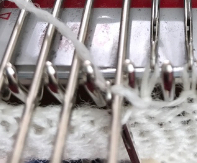
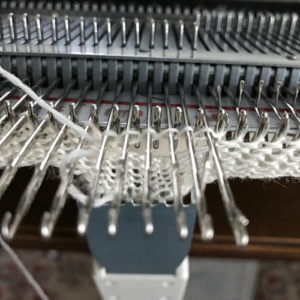
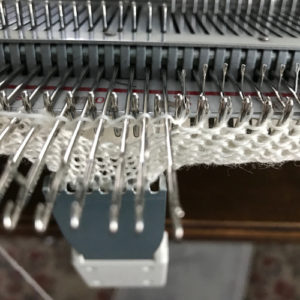
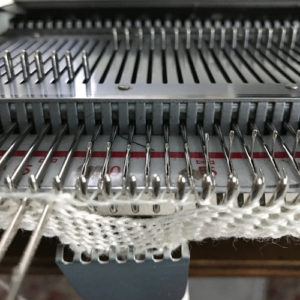
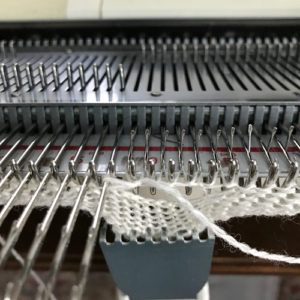
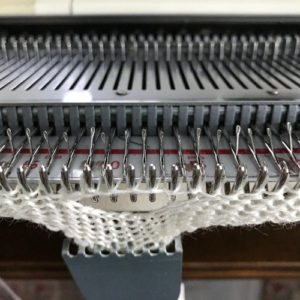
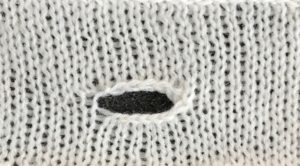
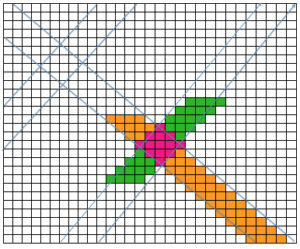
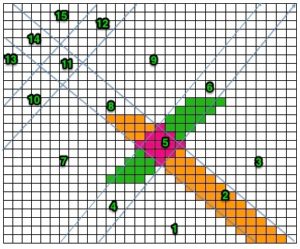
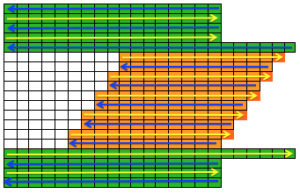
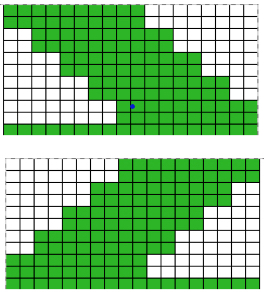
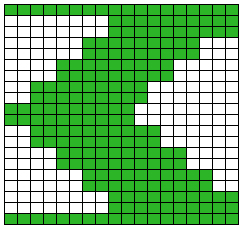
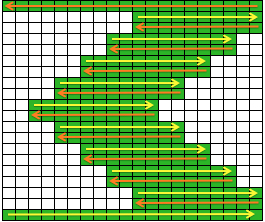
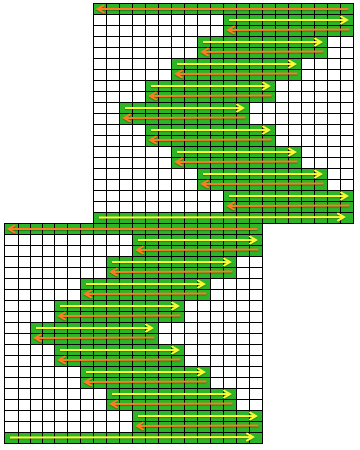
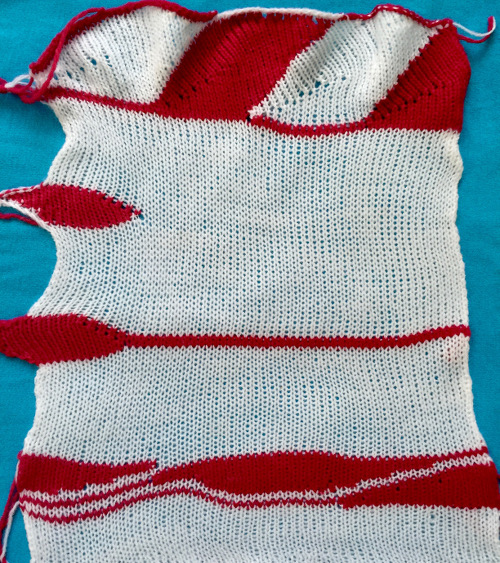
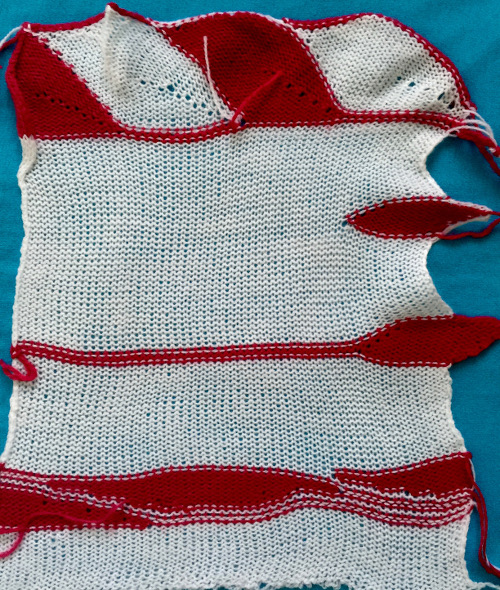
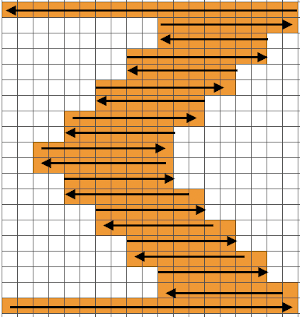
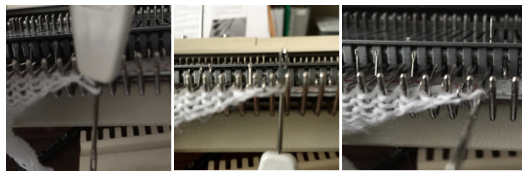
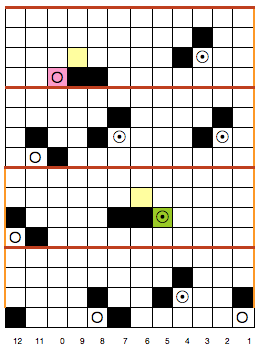
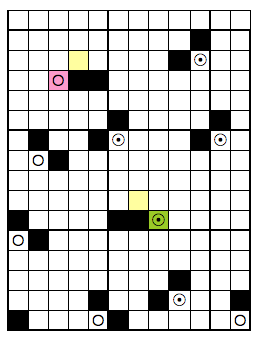
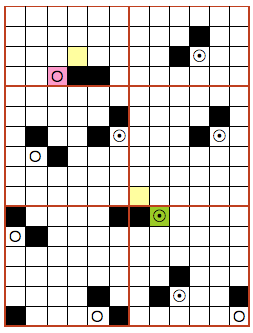
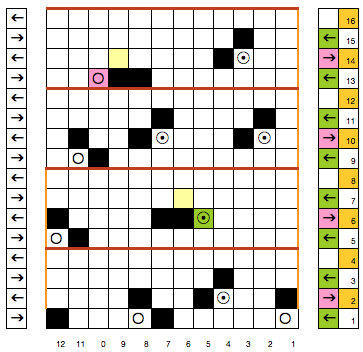
Single bed slits aka horizontal “button holes”

Related blog posts:
2022  More buttonholes and slits with illustrations including ribber variations.
I have previously shared posts exploring assorted meshes including some with large eyelets.
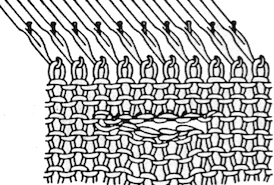
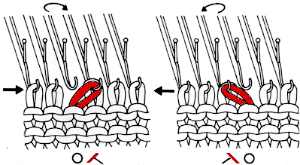
The formation of eyelets is sometimes offered as a buttonhole option in publications, a review of the stitch movements involved and the associated symbols:  The first knit row will form a loop on the empty needle, while the second row knit with the next carriage pass completes the stitch
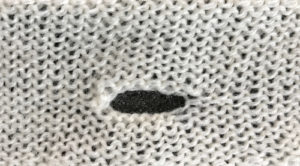
A larger eyelet, with directions found in most manuals, is not really the best option if used as a buttonhole. That said, these 2 methods render round, clean-edge larger eyelets   This version is from the Brother Knitting Techniques Book, begins to address wider openings in knits

screenshot_42Many hand-knitting patterns are published, often in garter stitch, using slits that one may think of as larger “buttonholes” to create a range of interesting fabrics. Trying to produce such slits single bed, without the use of additional strands of yarn and in turn, having yarn ends to weave in, leaves few options.
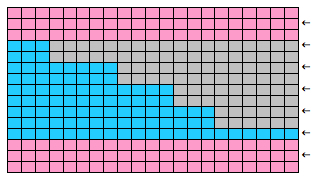
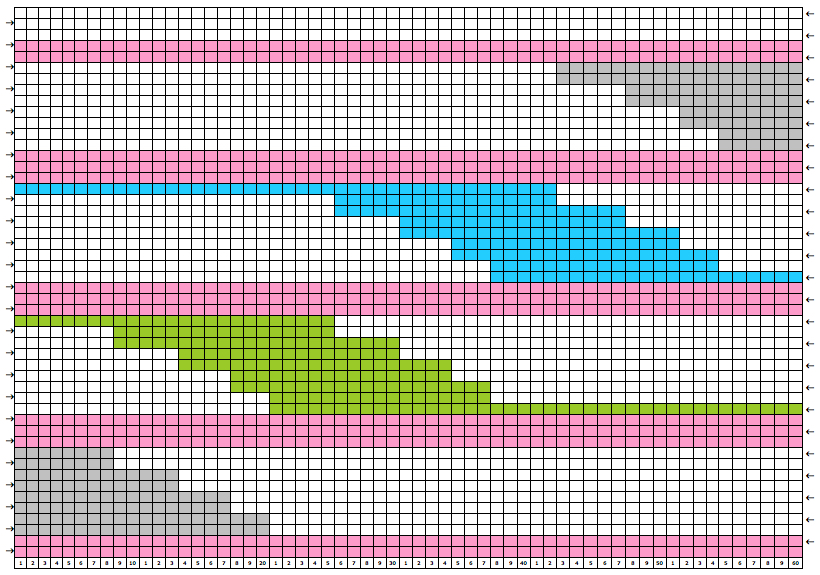
This method may also be used when creating multiple slits across a row. Holding is used to break the knitting into segments. The drawn illustrations show steps are taken, not needle positions.
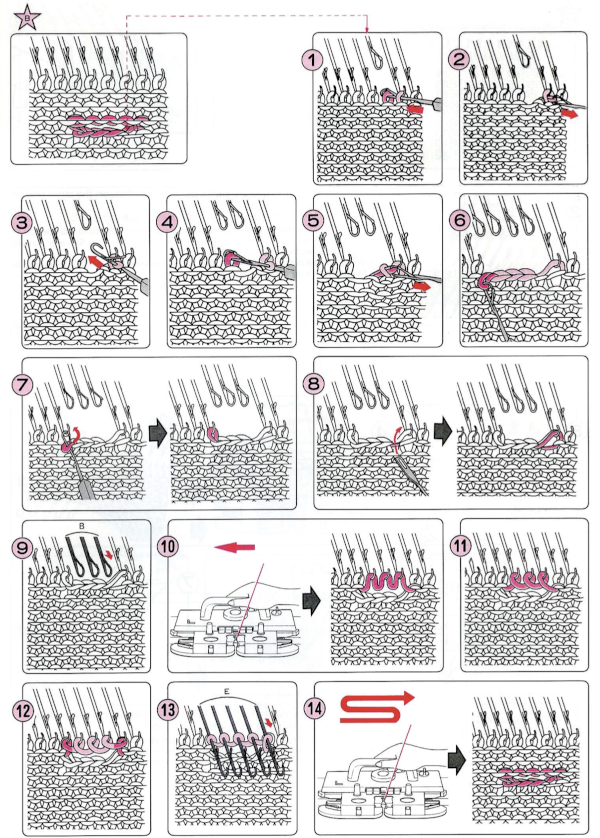
COR, for the bottom of the slit:
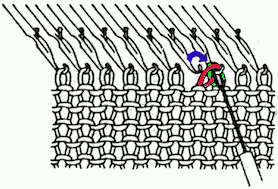
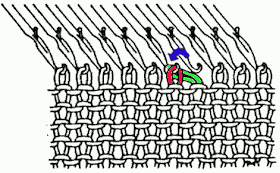
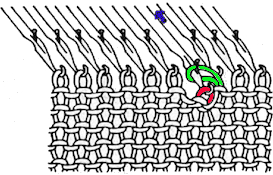
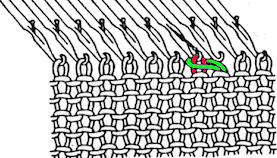
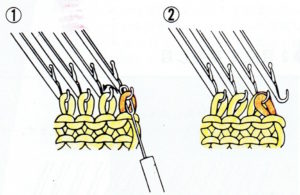
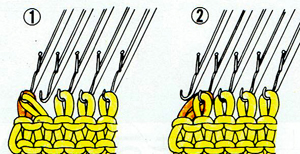
1. transfer the first stitch in the buttonhole group onto the adjacent needle to its right bhole_012. transfer the pair of stitches together onto the now empty needle to their left. The knit carriage, holding the yarn, will be on the rightbhole_023. push the needle forward until the first stitch (green) passes over the needle’s latch bhole_044. push the needle back to the work positionbhole_045. the forward stitch (red) is now knit through the one behind the latch  bhole_05This essentially binds off a stitch.
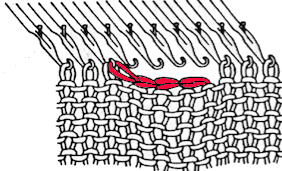
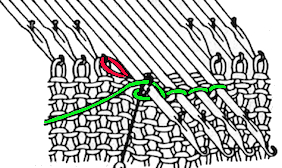
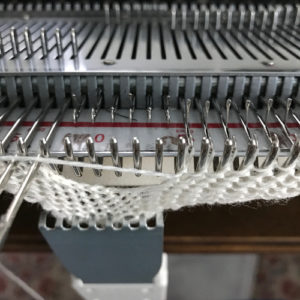
Repeat steps 1-5 until the number of bound-off stitches required is met; the last stitch in the group is then transferred onto the adjacent needle to its left. The bottom edge of the “buttonhole” is now complete. bhole_06aTo make the top edge of the buttonhole/ slit bring its corresponding needles out to hold, and cast on the desired number of stitches with the latch tool from right to left. bhole_07aIn order to best accomplish this with COR set KM for holding, push empty needles back to A position, knit up to now empty “buttonhole” needles img_4069bring empty needles out to hold img_4070insert latch hook from back to front through below the last stitch now knit on the right screenshot_36twist tool clockwise screenshot_37bring empty needles out to hold img_3966come up between the first 2 needles on the group’s right screenshot_38continue with latch tool bind off, the last loop in the chain is hung on needle already holding 2 stitches from the last bind off transfer img_4071tighten up the loop 
img_4072
return “buttonhole”  stitches into needle hooks, back to B position
img_4073COL: set KM to slip in both directions and move to right img_4074COR: cancel holding, adjust tension, knit across remaining stitches to Limg_4075COL: cancel slip <–>, continue knitting screenshot_08img_4077img_4078This version is from an ancient Brother manual, always test techniques on swatches using the yarns intended for the final piece

A hand-knit response to a Pinterest request: variations in rib with holes

A bit of holding 5: intarsia and more 2

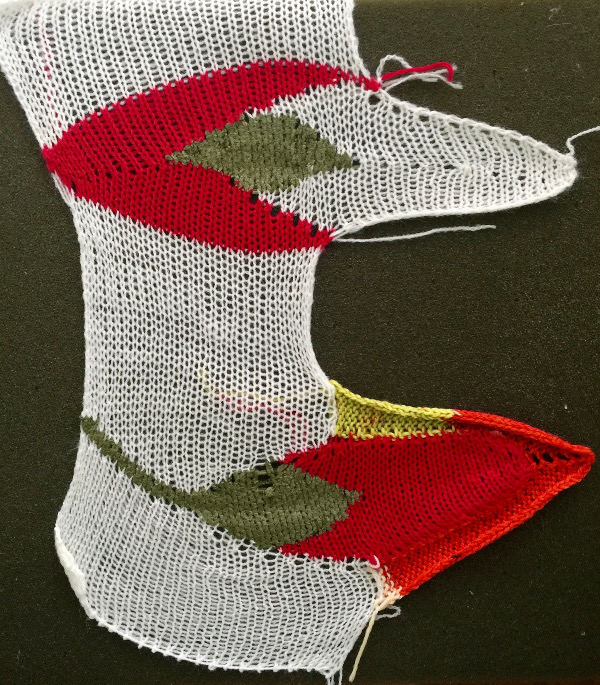
So you have some shapes you love and know: wanting to go large, mixing them up, requires thinking things through. Testing on small swatches will help determine holding sequences and whether the results are predictable or even liked. I no longer have access to Adobe Photoshop or Illustrator, so some of my image editing is now achieved in Gimp. Labeling below is with Skitch, and charting is with Excel.

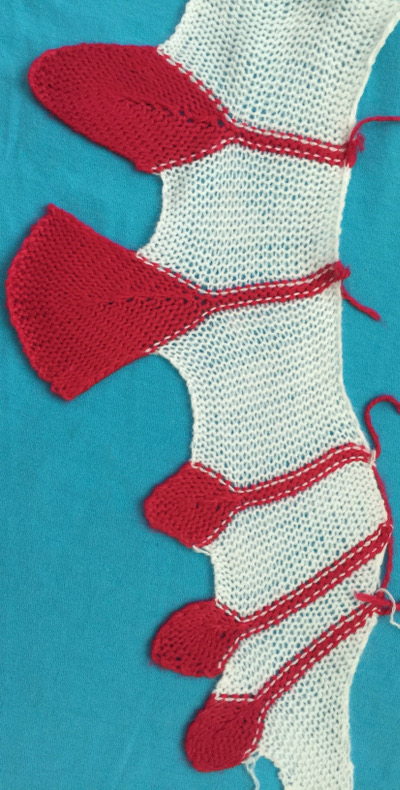
A starting freehand swatch experiment and some observations: shape variations in red areas occur by altering sequence for knitting first and last 2 shapes in the holding position

tulip_knit

tulip_purl

Planning possible sequences out in charting can be confusing. The image direction will be reversed on the knit side. Approaching the technique like intarsia with individual yarns or bobbins eliminates the need for some of the concerns where 2-row sequences or specific starting sides are necessary to keep yarns continuous or for the execution of the desired shape. Trying to imagine the shapes that create the larger one together in a simple 2D drawing can get one started, but then shapes need to be rearranged. I usually began by “playing”, trying to figure out steps needed, and follow that by trying to produce an executable chart. Making the process as easy as possible to track is always a consideration.

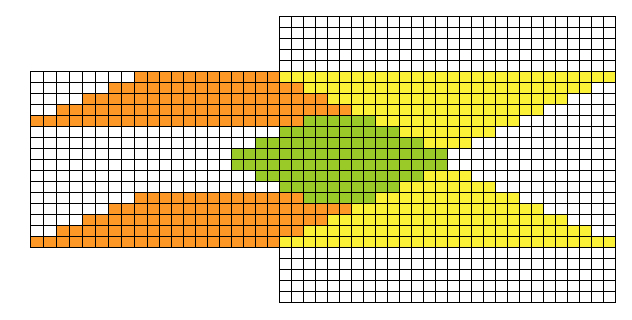
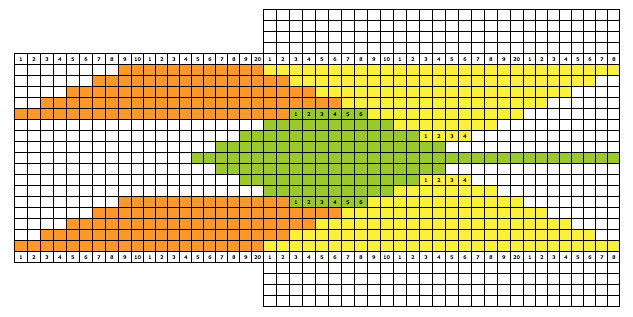
screenshot_09possible stitch counts and adding a center-line “stem”/ stripescreenshot_10its knitting sequence tulip_numbereda resulting swatch, stitch counts not consistent with the chart
labeled_075

600_076

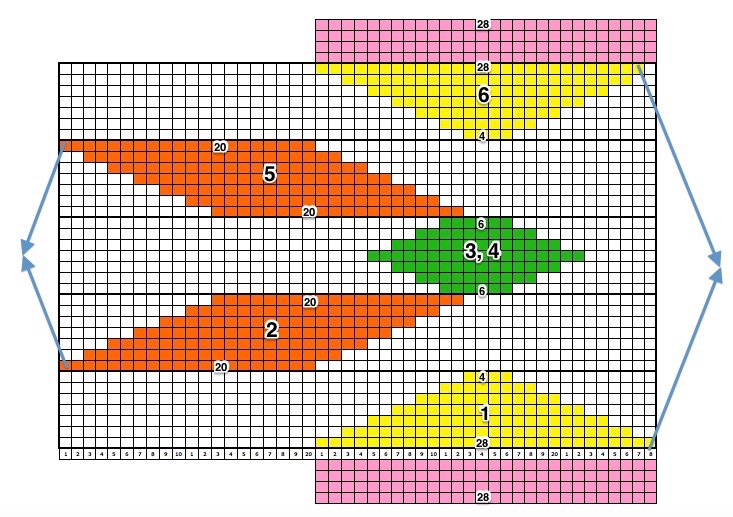
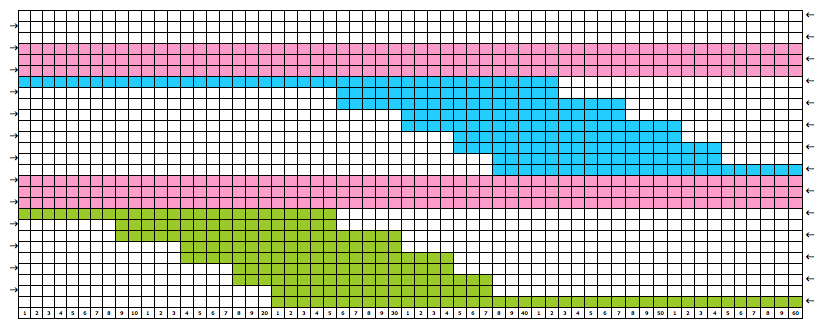
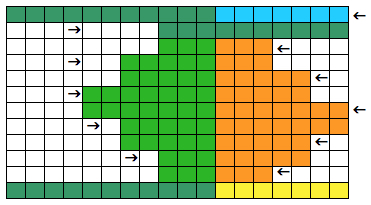
In the chart below the design is worked with 2 needles brought out to work or pushed back into work at any one time, making tracking changing numbers in hold unnecessary. Pink rows indicate starting and ending knit rows, orange “stitches” are cast on and bound off in turn, creating a shape extending out from the edge of the knit. Arrows indicate where shapes meet to create forms.knittable_marked

Holding sequence for each shape may be worked begin with carriage on either side; with experience, this may be planned at times to eliminate some of those cut yarn ends that later must be woven in. Getting back to arrows indicating carriage moves, using the center shape for illustration purposes and beginning with CORdirectionif beginning with COL, simply flip the image horizontally
direction flip

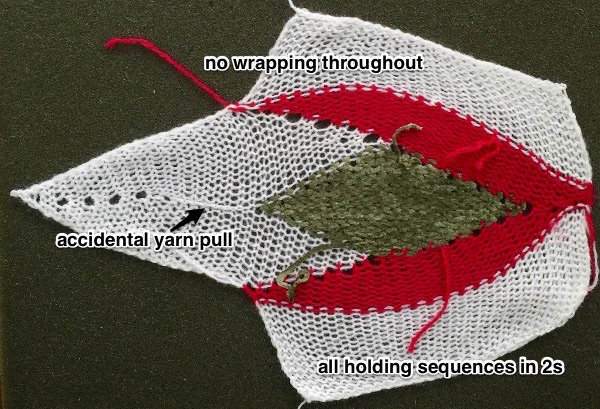
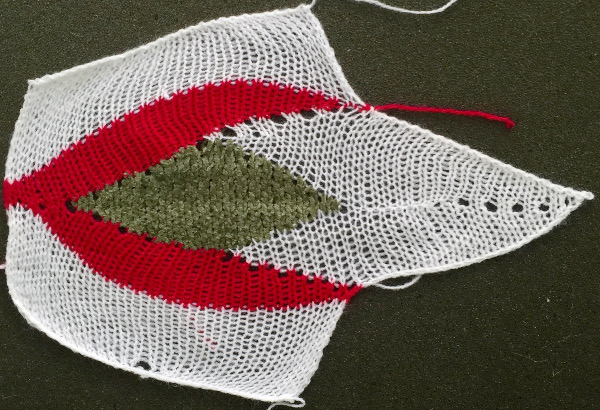
labelled_077600_078The yarns used were “throw away acrylics” in white and red. The green is a rayon chenille, which required a looser tension, resulting in the other colors looser than I would want in a piece of the final fabric.
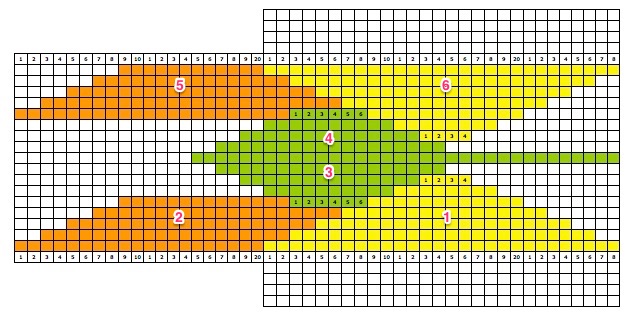
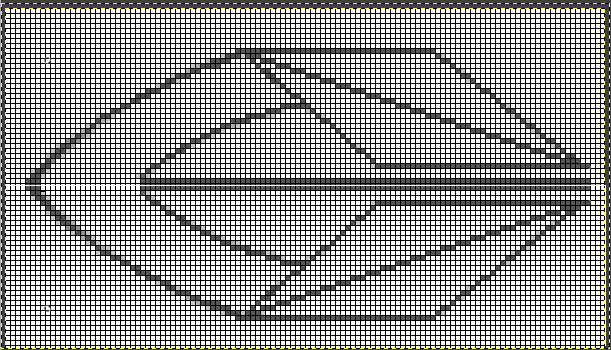
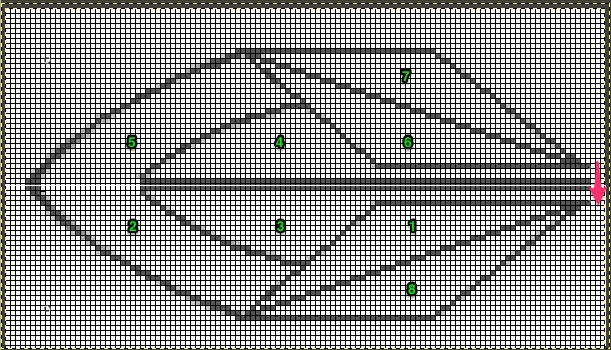
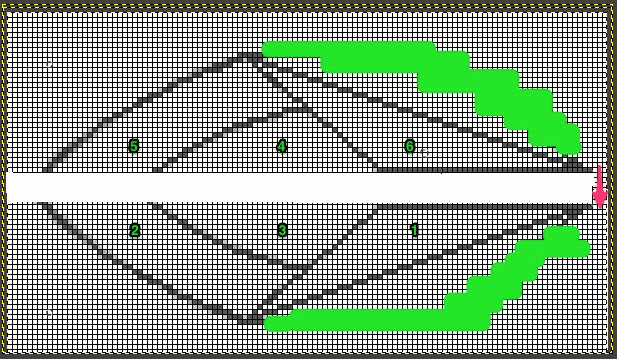
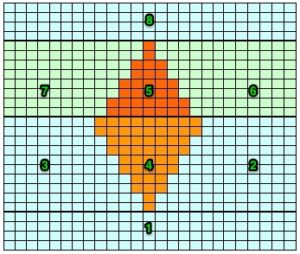
An idea for a larger image in the process of being editedscreenshot_07A possible sequence in knitting if it is to be executed as shown. The arrow marks rows that knit all needles across the width of the piece. The piece segments are numbered to create a starting line for later joining.
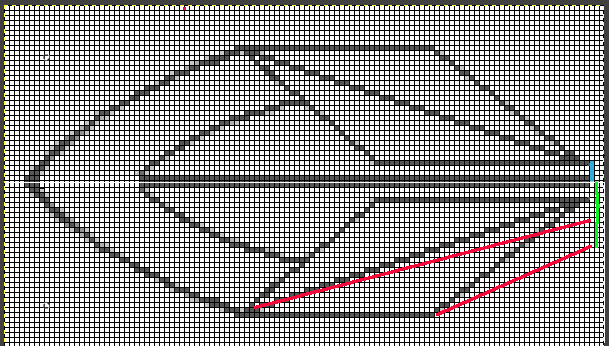
numbered1If the goal is knitting as close to a flat circle as possible, eliminating rows will create a smaller center hole as well after the form is completed and seamed. Knitting segments 1-6 should be adequatecircle2Larger pieces ie shawls, adding knit rows without adding stitches can be done by altering #8, 1, 6, 7. The red line indicates changing angles. Blue and green lines below indicate increasing rows knit at the center of shapes as a result. extededKnitting and cast on sequences flow around left purl edge, straight or diagonal edges on a chart such as above may become foundation rows that are later seamed. Sort out your sequence and preferences on smaller swatches, keeping notes as you go. Additional shaping can happen along the edges of any plain knit rows between shapes by increasing or decreasing on either or both sides to create crescent shapes or triangle variants.

Now a quandary if gauge matters: knit stitches are not square. One option is to generate a grid appropriate graph paper. In holding sequences happen in 2-row sequences. Graph paper cells may be created at twice the height desired. Each rectangle will represent a single stitch, 2-row sequence. To create your own knitting graph paper in excel please see post as a place to start. A common knit ratio is 4W X 6H. An editable workbook in 2W X 6H ratio that takes into account the following outline in 2 row holding sequences: landscape2X6. Links for designing knit graph papers online:
http://www.tata-tatao.to/knit/matrix/e-index.html
http://www.theknittingsite.com/knitting-graph-paper/
http://sweaterscapes.com/lcharts3.htm
http://www.thedietdiary.com/knittingfiend/KnittersGraph.html
http://incompetech.com/graphpaper/asymmetric/

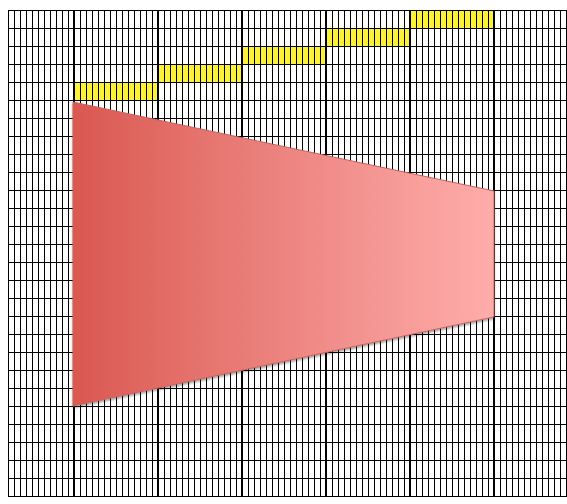
Using the 4X6 model reduced to 2X3 this is a sample generated using excel, with borders in a 2X6 ratio, so in execution, every single cell represents one stitch and 2 rows knit. The shape is one from the shape menu in the program, easily resized. The yellow bars show the gradations in holding. These cells are too small for adding text within the program itself. The math can be double-checked: there are 70 stitches, 34 rows in the rectangle at the center of the shape. Holding happens over 5 chart units (10 rows actual knitting) at the top and bottom of the center shape; 70/5 = 14 X5, matching the drawing shape on gridThe accompanying, editable workbook Excel 2008  landscape2X6

So the goal is a shawl or garment, graph paper is becoming impractical to follow? Time to pull out your knit leader. Draw out each wedge or piece full size, number segments breaking sections into knitting sequences, and let the KL guide you. For consistency, if the same shape is to be repeated many times and accuracy matters, it may be worth “air knitting” it while noting shaping as you go, keeping a row by row flow chart. An editable workbook to help track holding patterns, increases, decreases, etc. as a starting point for your own preferences: tracking knit.

Gauge or shape does not matter? time to scrumble it all and be surprised!


A bit of holding 4: intarsia and more

Picture knitting/intarsia may at times be achieved using holding techniques. As in any such knitting, supplies include extras such as bobbins, clothespins, or weighted clips, but no separate carriage. If the ribber is in use and one is working on a large piece, ribber covers allow the yarns to hang in front of the ribber bed.

Some of the rules for accomplishing this using short rows: it is helpful to work from a chart. Two-row sequences are required, so having the working chart double-length makes the process easier to visualize. “Follow” knitting directions with any tool to determine that the pattern is executable, with no long floats or slits.

The bottom of any diagonal line is always knit first.

Needles are brought out to hold on the carriage side, and pushed back into work opposite the carriage; one exception to this rule is if “automatic wrapping” is used. In the latter one, fewer needles are brought into hold than needed opposite the carriage, the row is knit, then with the carriage on the alternate side the first needle in hold next to stitches just knit is brought out to hold, resulting in a “wrap” and correcting the count to the desired number. Any number of needles may be pushed back into work at any time. More than single stitches brought to hold on the carriage side will produce floats.

When knitting shapes the only needles in work are those being worked to create that shape.

Base rows of knitting, whether in waste yarn or as part of the pattern, are needed prior to working in the holding position.

Remember that you are working on the purl side, so any image will be flipped horizontally on the knit side. Reverse the chart horizontally before working it if direction matters.

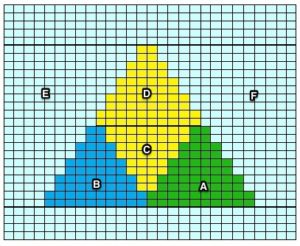
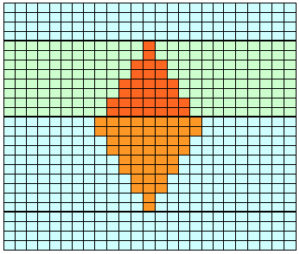
Begin with a simple shape. Letters indicate the knitting sequence for short-rowed sections. Patterning in these charts begins with COR, bold lines separate areas of plain knitting, letters indicate the order for executing short row segments. The fabric produced lies flat, with no noticeable 3D protrusions.

screenshot_08

screenshot_09

screenshot_07marking sequences with numbers is easier for me to follow; color changes help define segments, but do not reflect final colors in the design diamond_29

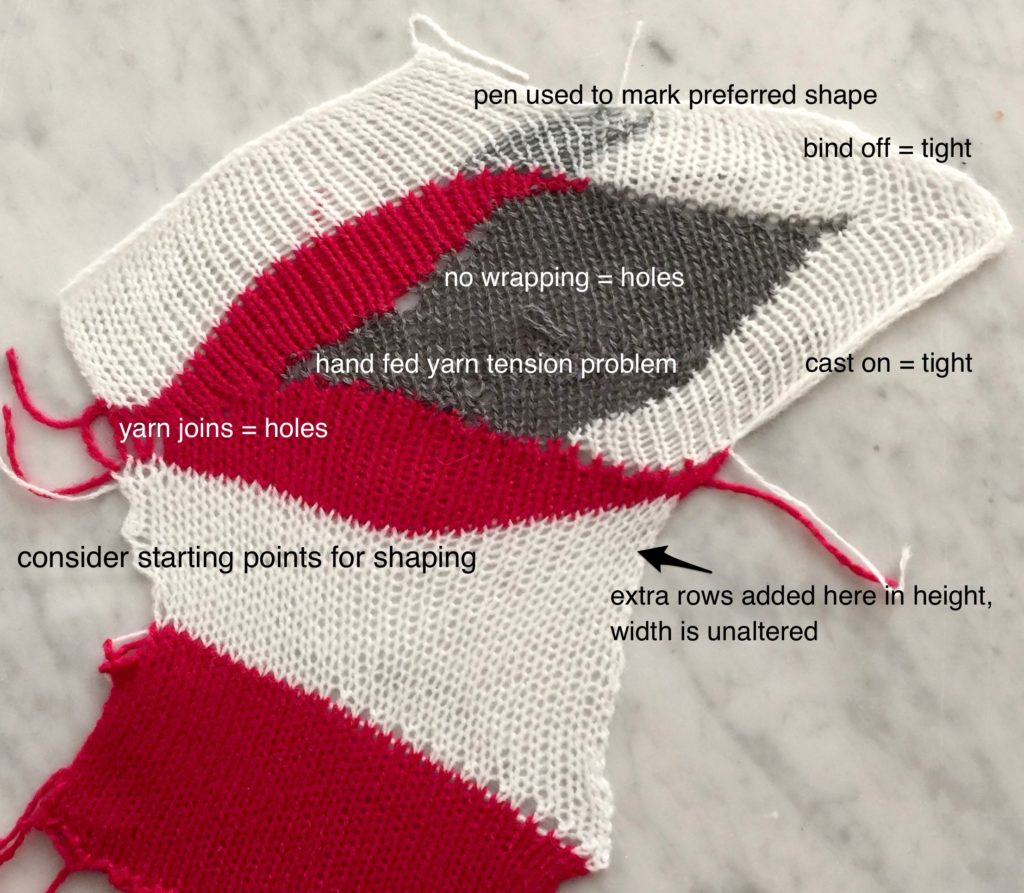
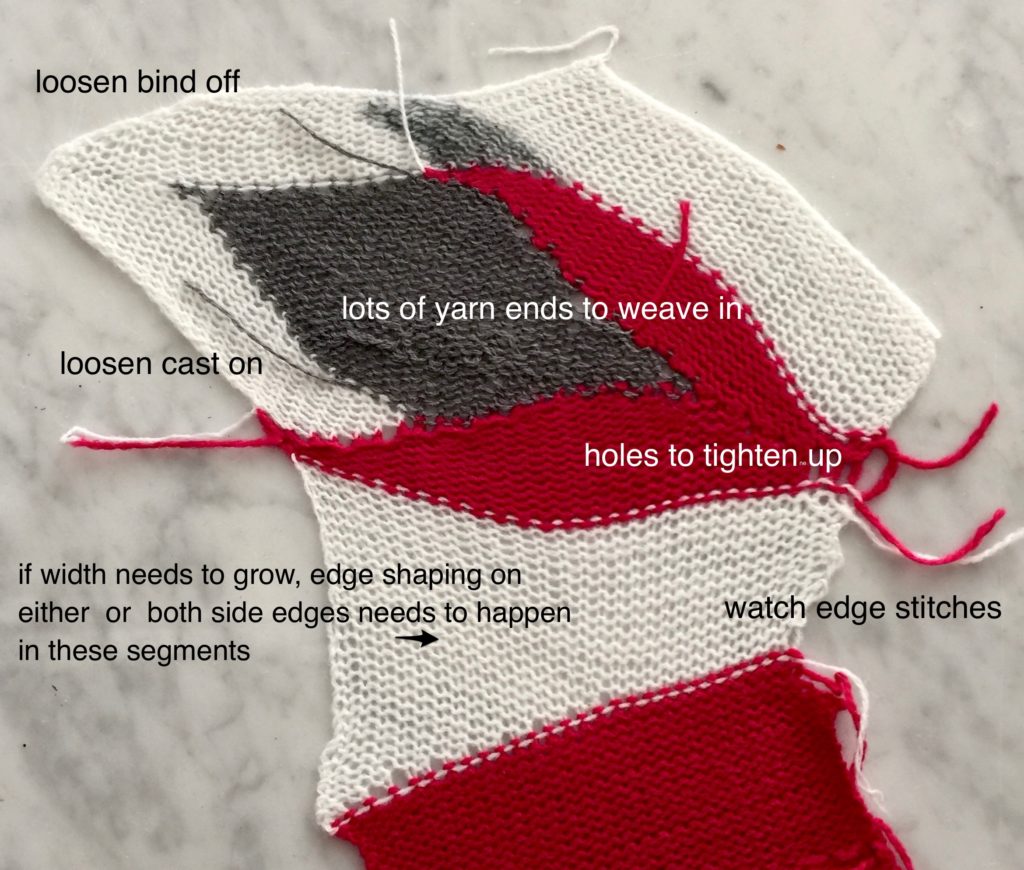
diamond_sequencea supermini swatch: holes are typical both in intarsia and in short rows if no wrapping occurs  IMG_2439be prepared to weave in a lot of yarn ends  IMG_2901going larger, note the wider “steps” created 500_717stripes500_716more complex geometry:  line drawing on “graph paper”complex_30the start of color placement screenshot_01sequence for executing segments at the completion of the design  complex_number_01in actual knitting the pattern must be elongated X2

I find it helpful to use familiar yarn and to work variations of a familiar shape prior to taking on more complex patterns. Below is a cousin of the first shape illustrated in this post, with a pattern worked beginning COL, repeated across the row, increments in the number of stitches worked in short rows but mirrored on both shape sides (shown in the first swatch segment).

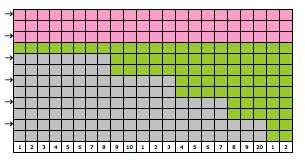
screenshot_01filling in to produce a flat fabric, with straight sides: the bottom segment  screenshot_02the top segment  screenshot_04the amended chartscreenshot_05

Some of the same shapes may be placed on a shaped edge. The repeat will likely need some editing; arrows indicate the direction of knitting for that row. If the background color is used for casting on and binding off, then the isolated shape floats on the ground, and the horizontal line of contrast color is eliminated.

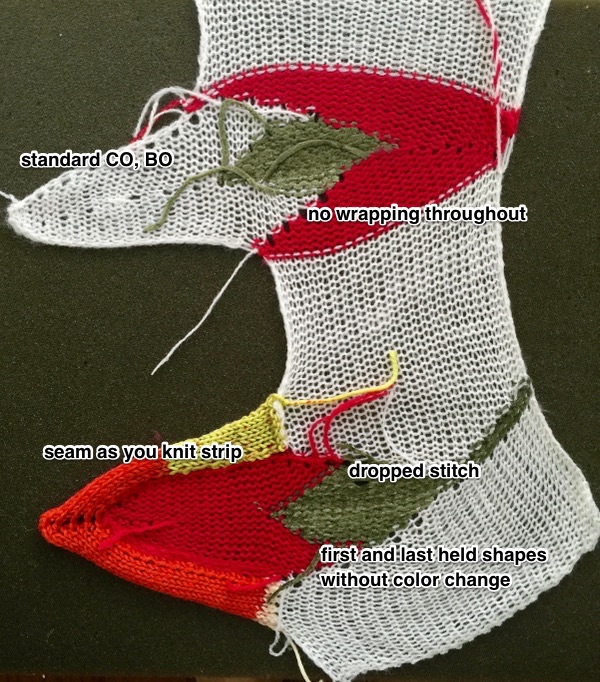
screenshot_18edge 1creating an outline of shape with Color 1screenshot_23edge_21horizontal rotation to achieve “leaf” shape screenshot_05melding shapes no wrap_28don’t like wrapping? for smaller holes offset the return to work position upper half of the shape by one less needle at the start, added at the end.
A first look at  knitting direction leaf_25and at stacking shapes, with bound-off stitchesstacking leaves

combo_2934

combo_2935The start of a smooth shaping sequence for those “leaf shapes” on the machine

The yarn used is acrylic, so pressing helps to make the shapes lie flat. Once again, using wool or any other yarn with “memory” will result in considerable curl at the side and at the top and bottom of the knit piece, so that is a consideration in putting in the effort. The more striping, the more yarn ends to weave in and row counts to watch. Using space-dyed or sock yarns may produce pleasing though unplanned stripe patterns in any of the shapes. My samples are not resolved final fabrics. There are many inspiring patterns available for purchase or at times free on the internet for hand knitting, usually in garter stitch as well as holding, resulting in a nearly square gauge, flat-lying knit.

Taking it to garments: accessories are easiest, since the gauge may not be significant. Shawl shapes in HK are often knit on circular needles, without the constraint of the fixed number of needles on any particular model KM. Sometimes, with adjustments, the same shapes may be rotated sideways on the KM. Segment sizes may differ due to the resulting change in gauge. Sampling techniques and shapes in smaller versions help work out the kinks.

Sources for inspiration: large-scale shapes

http://www.garnstudio.com/pattern.php?id=7365&cid=17
http://www.garnstudio.com/pattern.php?id=7543&cid=17
http://www.garnstudio.com/pattern.php?id=7375&cid=17
http://www.garnstudio.com/pattern.php?id=7099&cid=17
http://www.garnstudio.com/pattern.php?id=6729&cid=17
http://www.garnstudio.com/pattern.php?id=6333&cid=17
http://www.garnstudio.com/pattern.php?id=6001&cid=17

more details, varying concentration, and placement: free pattern
http://www.garnstudio.com/pattern.php?id=7606&cid=17

for purchase on Ravelry
http://www.ravelry.com/patterns/library/endless-rainbow
http://www.ravelry.com/patterns/library/rigoles
http://www.ravelry.com/patterns/library/dreambird-kal
http://www.ravelry.com/patterns/library/scarf-with-flames
http://www.ravelry.com/patterns/library/phoenix-wing—phoenix-flugel
http://www.ravelry.com/patterns/library/spring-plumage
http://www.ravelry.com/patterns/library/hundertwasser-neptunia
http://www.ravelry.com/patterns/library/swingtrelac

A bit of holding 3: shape variations and more

Hand-knit spiraling shawls and shawlettes often involve shaping on every row. Increasing essentially requires casting on one or more stitches. Below are cast on illustrations from varied sources I used in handouts in my intro to knitting classesscreenshot_19 (1)

screenshot_20

A simple decrease occurs when the last stitch on either side is transferred moving away from the carriage, the empty needle is placed out of work, and the row is knit.

edge increaseThis illustration shows a fully fashioned version, which gives an edge that makes seaming easier and more attractive, and eliminates the small bumps usually seen along decrease edges, the process adds to knitting time involved in finishing the piece. Decreases may be made on every row.ff_decrease2

Simple increases: a factor that is often first noticed when approaching seaming is that the carriage side creates loops, while opposite the carriage one gets what looks like a knot, both alternate as starting position of the carriage swaps sides. To speed things up for single increases, one alternative is to bring an empty needle into work on the carriage side. This creates an elongated loop rather than a full stitch. Unless intended as a design feature, the edge is not the best one for seaming. A better-looking increase is created by putting a needle into work opposite the carriage. For a “good edge”  two rows minimum of knitting need to occur prior to the next increase. Continuing on the thread begun in the last 2 posts, I experimented with every row increases and came up with what I consider a reasonable compromise. The method for increases on the right edge:
*COR: bring an empty needle into work on the carriage side, knit a row. Insert transfer tool into the loop created as shown, turn toward carriage (in this case clockwise), essentially creating an e wrap, hang on adjacent empty needle hook.

increase every row

COL knit to right*, repeat *  *
In the previous 2 posts’ samples I did not wrap any needles. Wrapping in both directions can create an interesting line along the center of the “leaf” or “other” shapes, seen in the photo below

experiment smallInterpreting hand knit patterns for use on the machine requires translations of some of the vocabulary and directions are given. If an edge stitch is made in garter or slip stitch variations, disregard and simply add it to the total number of stitches on the segment of the needle bed that is being worked on. Wrap and turn is executed by wrapping the yarn around the adjacent needle in hold prior to knitting back to the opposite side

2: knit <-                  1: wrap COR            1: wrap COL                2: knit -> both

pw2: picking up wraps and knitting them together happens when needles with wrapped loop and stitch behind it are brought back into work.
The terminology may vary in self-published patterns, some are accompanied by very good tutorials. Ravelry HK searches can provide inspiration for many holding technique variations. Other terms to look for in image and pattern searches include swing knitting, and on occasion, tapestry knitting.


A bit of holding 2 / moving shapes around

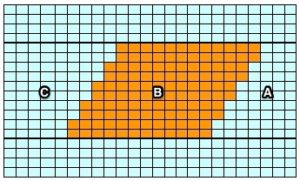
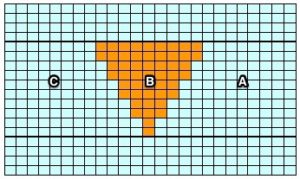
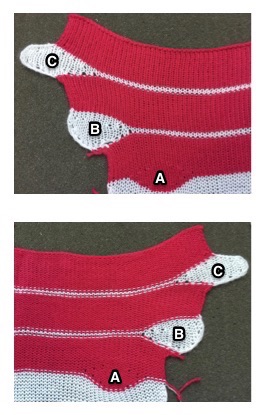
There are many handknit patterns floating around the internet, placing shapes similar to these, with many variations, along with a variety of locations in accessories and sweaters. The same shape discussed in the previous post is shown here placed near and then at the edge of the knit. There are many things to consider in addition to the choice of shape. In hand knitting these patterns are usually knit in garter stitch, a fabric that does a good job of lying flat when completed. Short rows are used in both hand and machine knitting; the Brother G carriage produces it “automatically”, but is not short row friendly. The more practical solution is to try a plain knit version. Edges of the knit are still going to curl toward the purls side. Some of this can be averted by using acrylic or other fiber yarn that responds to being “killed” with ironing/ steaming, and will lie as close to flat as possible after the fact. Section A shows the shape knit with no color change and close to the side of the knit, note the vertical edge remains fairly straight. In section B stitches were cast on, and at the end of the holding sequence all stitches are knit moving from right to left. An increase in the number of stitches cast on is now reflected in the total width of the fabric. The result of multiple repeats would appear as a sort of “ruffle”. In section C the same number of stitches are bound off as cast on. The bind off is critical for shape retention. I prefer a latch tool cast off for most knits, here I used the *transfer over one, knit one* method, note: the turning point sharpness is lost and the bound-off edge is very different from the cast on one. In this instance, because the number of stitches increased and decreased stitches are identical, if repeats were executed and no other increases were made anywhere, the width of the final piece would remain constant. If the goal was to achieve a triangular shape such as in a shawl, increases would have to be made along the edges of the plain knit sections, prior to the color change for section C. In testing repeats I do not wrap any needles. Evaluate whether the extra step is needed when swatching in your final yarn choice.

the swatch 0n_the_edge

planning the shapes, arrows indicate the direction of carriage moves

co_bo

cast on stitches are knit as part of the last row

screenshot_06

cast on stitches are bound off prior to last row

screenshot_07

The last sample was also knit using the same yarn, followed by pressing. Again, I did not do any wrapping, and holes created along the edges of the holding sequences are more visible. The swatch was knit from the bottom edge up. The cast on used was a weaving cast on. Both the bottom and the top edges show some of the distortions in the knit caused by the extra rows of knitting that occur in the shapes. Striping is added to the now-familiar sequence, additional colors could be used, with shapes and stripes varied in the placement along with a wider, longer piece of knitting to create interesting repeats. The top shows the start of a larger shape that could be altered to resemble leaves, etc.

for a larger shape  going large

for a striped surroundstriped surroundknit side                                       purl side variations

A bit of holding 1

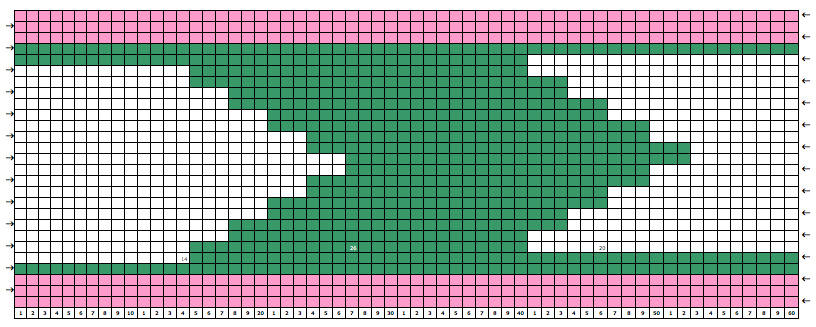
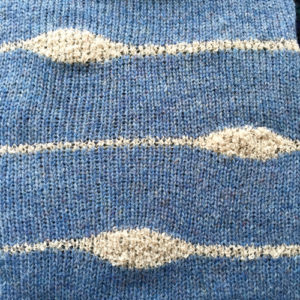
At a seminar during a visit to California in mid-April just prior to the joys of downsizing and moving I showed this swatch and was asked for instructions for duplicating it.

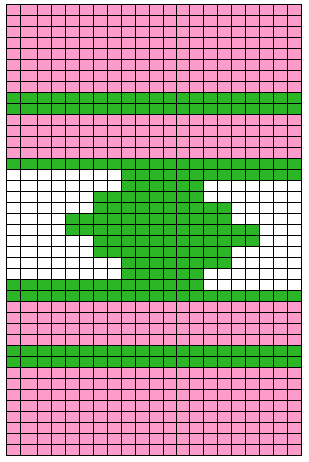
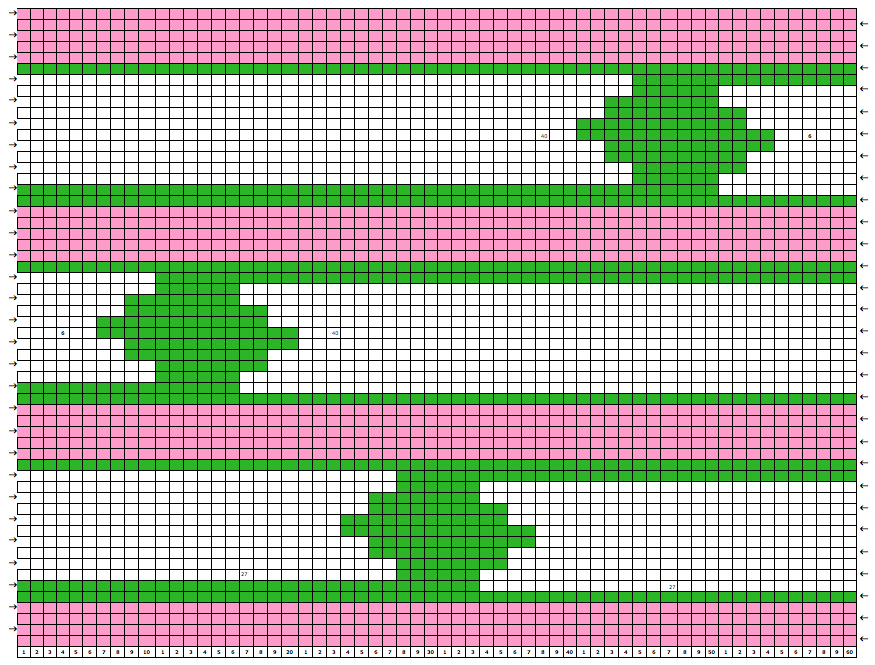
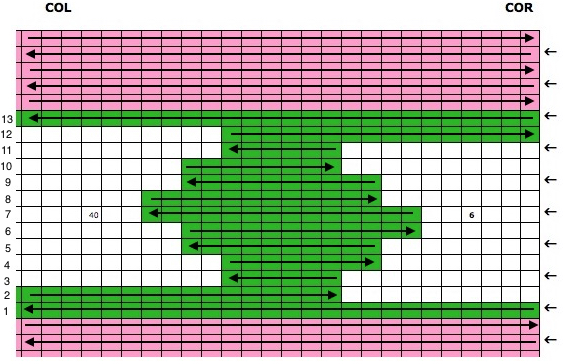
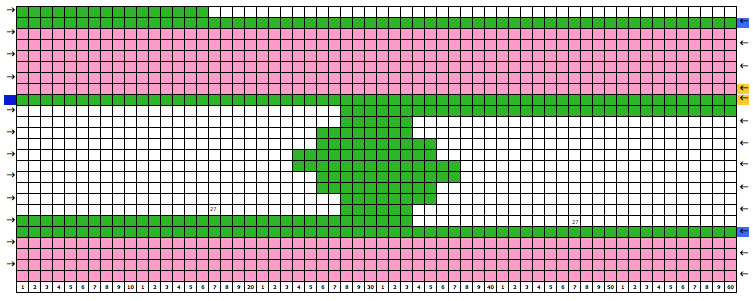
26141860401_aedba24177_oI have moved, and I finally have a machine set up to prove my ideas. The images below show plotting out repeats in excel odd number of rows knit between shapesodd rows between

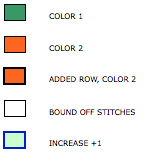
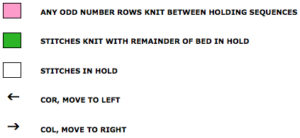
legend

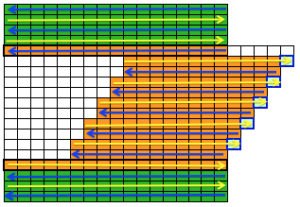
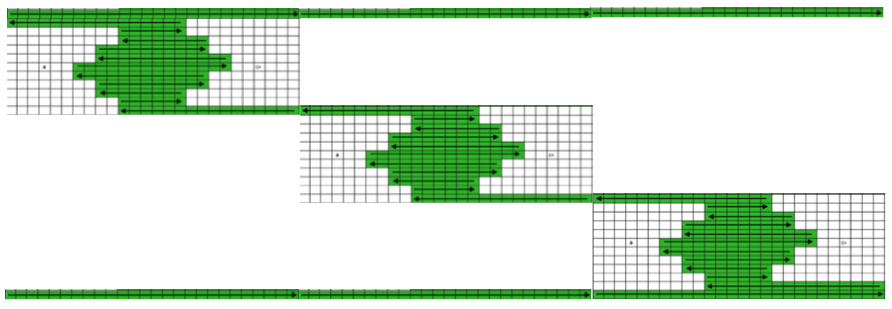
movements of carriage to create each shape pretend knit2If an even number of rows of color 1 is knit between shapes, the yarn is cut at the end of the holding sequence with color 2 (which is made up of an odd number of rows, begins on right, ends on left), a free pass is then made to return carriage to the right, there picking up color 1 for the plain knit sections.even rows betweenSome cut and paste following the direction of the arrows to work out knitting several shapes in any one row: in this instance the first row knit with color 2 is from left to right, as is the last row. Even-numbered rows in color 1 would start and end on the same side, COL. If changes of any 2 colors in any technique are for an even number of rows, yarn ends will occur on the same side.cut and pasteMy original sample was made knitting single shapes with an even number of knit rows between them. A reminder: Studio needle positions are A,B,C,D,  Brother needle positions  are A,B,D,E.  Holding position for Studio = D, for Brother = E. Upper work position for Studio = C, for Brother D. Settings for both are indicated below, for Studio, then (Brother)

color 1 cast on 60 stitches, knit 20 (or X) rows, end COR
first shape:  COR color 2 knit one row, end COL
COL on the right, bring 27 stitches to hold D (E) position. The rule is usually to always wrap taking yarn around the first needle in hold D (E) position, then to knit one row. I found in my samples the holes created were so small they could hardly be seen, so I did not wrap.
COR on the left, bring 27 stitches to hold D (E) position (6 stitches now in work), knit one row
holding sequence for each “shape”
COL at right, push 2 needles to work position C (D), knit one row
COR at left push 2 needles to work position C (D), knit one row
COL at right, push 2 needles to work position C (D), knit one row
COR at left push 2 needles to work position C (D), knit one row
COL at right return 2 needles to hold D (E) position, knit one row
COR at left return 2 needles to hold D (E) position, knit one row
COL at right return 2 needles to hold D (E) position, knit one row
COR at left return 2 needles to hold D (E) position, knit one row
COL return needles to right of shape to work position C (D), knit one row
COR return needles to left of shape to work position C (D), knit one row
COL  cut color 2, make free carriage pass carriage to the right
COR change to color 1, knit the desired number of rows (20) end COR
COR for the second shape with color 2 knit one row, end COL
COL at right bring 40 needles to hold D (E) position, knit one row
COR on the left, bring 14 stitches to hold D (E) position, knit one row
“Always wrap taking yarn around the first needle in D (E) position, knit one row”, repeat shaping as directed above
COR change color 1, knit the desired number of rows (20) end COR
for the third shape
COR with color 2 knit one row, end COL
COL at right bring 14 needles to hold D (E) position, knit one row
COR on the left, bring 40 stitches to hold D (E) position, knit one row
repeat shaping and /or wrapping as directed above
change to color 1, knit the desired number of rows (20), bind off

Tuck and garter stitch: from hand knit to machine knit hand tech pattern

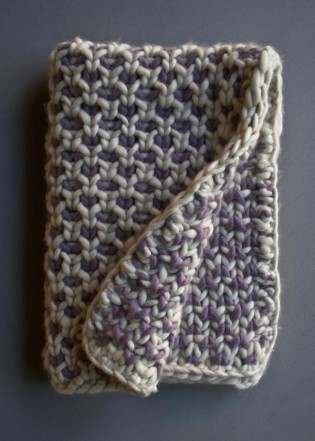
A Ravelry question on the possibility of executing a particular fabric on the machine has led to the experiments in this post. The pattern that led to the discussion is a free hand knit one,  shared and published on the Purl SOHO website and on Ravelry. The gauge for their project is 4.75 stitches = 4 inches in stitch pattern, it includes garter rows. Such rows may be executable on home knitting machines by transferring from ribber (Passap front bed) to main bed, alternating with reversing the process at a predetermined frequency, depending on stitch type. K1b is the hand knit equivalent of tuck for that stitch on that row, adding to the mix.  Not practical for G carriage use, as the latter does not form tuck loops, and hand retooling would be required for all k1b stitches.

Using holding to create tuck stitches in non-auto patterning days was commonly used, and I chose to do so here. As machine knitters, we are conditioned to believe that single color rows are impractical to execute and that the yarn would need to be cut on each side after the one row. Color changers are on one side or the other, making striping with frequent color changes is practical if executed in even multiples of rows. Transfer carriages are available that will help move stitches from one bed to the other, I personally have never had the patience to work with them enough to get good at using them without dropping stitches, so I went back to even lower tech than usual, using the garter bar on the bulky, and beginning pattern row 1 with COR.

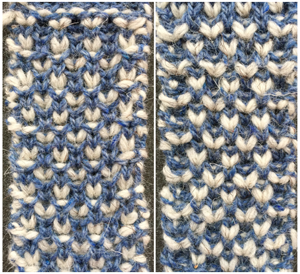
Before attempting nearly every row turns, it is helpful to have some practice with turning work over using a garter bar, develop a sequence of repetitive actions, keeping careful notes as to what works for you, and using contrasting yarns in tests to better understand stitch structure. In my sample the white yarn was thicker than the blue, reversing colors or balancing yarn thickness would change the visual look of the fabric.  Beginning on small samples helps work out issues and the making of the decision to try on a larger project or simply as a border.

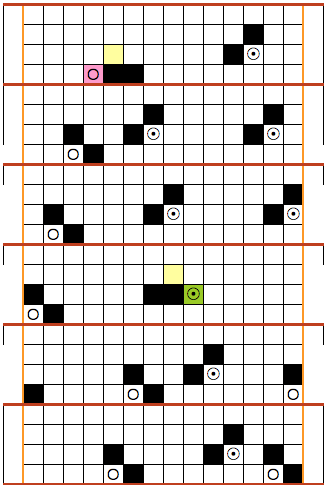
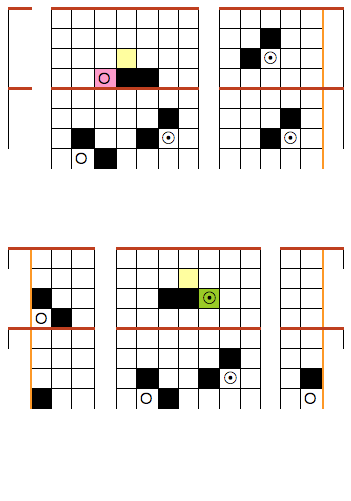
Analyzing the pattern repeat:

screenshot_43tools to help with EON needle selection tools

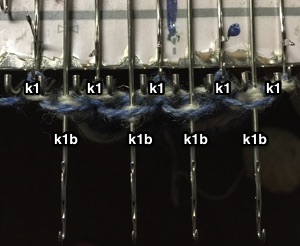
the results of rows beginning with k1 sequence after the row is knit, note the “tuck” loops on top of E position needles, which will be knit off on the next row knit K1_after knit

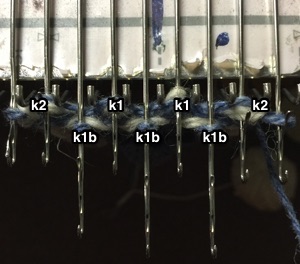
a row that begins with a k2 sequence, before it is knit; the needles holding the single, blue stitch will form the loops on top of the needles as the yarn moves across to the opposite sidek2_before knit

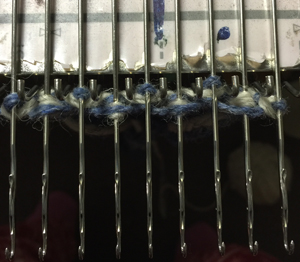
E position prior to transferring stitches onto garter bar, also for a free pass to the opposite side to pick up yarn after stitches are removed on bar free pass473

1            begins and ends with K 1; COR select needles, col A * knit row, COL, bring all needles out to hold, remove on garter bar, free pass carriage to theopposite side, COR, flip garter bar over, replace stitches onto needles push all stitches against gate pegs *

2            begins and ends with k 2; COR select needles for row 2, col A repeat * to* end COR

3            begins and ends with k1; COR select needles for row 3, change to col B, knit one row, do not turn, do not cut yarn; COL bring all needles out to hold, a free pass to the right to pick up col A on next knit row, end COR

4            begins and ends with k 2; col A, COR select needles for row 4, repeat from * to *

5             begins and ends with k 1; COR select needles for row 5, col A, repeat from * to * do not turn

6            begins and ends with k 2; COR select needles for row 6, change to col B, repeat from * to *

publisher’s project photo

beautyberry-blanket-600-12-315x441

my swatch, knit on a whopping 9 stitchesrav blanket 300


Carpet or pile stitch knitting on Passap and Brother KMs 2

Trial swatches do not necessarily require a permanent edge. The main bed cast on with all open stitches is familiar to knitters accustomed to using a single bed Brother cast on comb. A quick version of the same type of cast-on is also doable when both beds are in use, and the goal is to knit all stitches only on one bed or the other. The broken toe cast on for rib is so-called because if comb and weights are hung in the wrong location on the needle bed when stitches on the opposite bed are dropped, so will the comb be along with weights, heading for your feet. If the ribber is going to be the bed doing the knitting that anchors dropped stitches or pile in Brother kms, please note prongs of ribber comb line up directly in front of main bed needles (blue arrow) and to each side of the loops on ribber bed needles (red arrow). The ribber comb wires will anchor down loops on the needle bed where plain knit rows will be formed. As mentioned above, this method will result in stitches all being open, does not produce a permanent edge, is suitable for quick swatching or for waste yarn at the bottom of the weighted fabric. It is possible to perform this cast on with ribber comb with wire already inserted in both brands, but the broken toe method is potentially less hazardous to needle health. brokent_toe_arrowsAnalyzing what is required to move between km brands with the goal of achieving 2 color or isolated pile motifs: in Passap with the back bed set to FX, one arrow key, EON pusher/ needle selection changes every 2 rows. In Brother, this may be achieved on the main bed by pushing in one tuck button and programming a repeat.  The alternate, adjacent cam button, left in its normal position, will knit every stitch when knitting direction is reversed regardless of whether any needle selection is happening. On the ribber, lili buttons may be used for alternate needle selection. Its levers determine whether tucking or slipping, in one direction or both, occur. The number of stitches on the ribber must be even. An easy visual check is to check markings on needle tape, which consists of what I refer to as dashes and blanks. For an even number begin with one, end with the other.  Passap will automatically revert to the alternate pusher for patterning on the subsequent 2 rows. In using lilis this is not an automatic function, and some handwork is required to obtain the same effect by changing the first needle selection every third row as seen in this post.
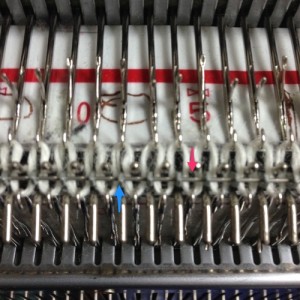
If the ribber is chosen as the loop making the bed, the needle selection on it needs to be manual for any pattern other than across whole rows. In my swatch, to knit across all needles the ribber carriage is set to slip in one direction, knit in the other. The all knit rows in pile knitting need to follow the ones with tuck loops on the opposite bed.  Extra needles are on the main bed, which creates fabric backing. The ribber carriage can be disengaged and used to drop stitches after all knit rows on the main bed.

In the actual knitting, if a plain one color pile with plain color backing is the goal, some rules may be broken. The thickest, most stable pile is achieved when the yarn anchoring the loops is as dense as possible. If the goal is to knit every stitch across each row to create loops and in turn drop them, one is, in fact, working an every needle rib. This makes it possible to create tuck loops on either bed creating the backing across the whole row because in fact there are stitches on each side of the tuck loop on the opposing bed anchoring it in place. Normally when 2 or more needles tuck side by side, rather than the stitch formation usually seen in tuck patterning, the loops do not get anchored, drop off, and create a float like those seen in slip stitch patterns.

In my first sample, the fabric is cast on the main bed, the loops are formed on the ribber. The carriages are set for the main bed to tuck traveling to the right, knitting to left. The ribber is set to slip to left, knit to right. The ribber is used to drop the stitches, simply by disengaging it from the main bed and running it across from one side to the other. Dropping stitches occurs (on either bed) after all stitches have been slipped there for one row (no needle selection if patterning). The starting side for my swatches was on the left of the machine. It is helpful to have a ruler or tool to help push loops down between the beds after dropping each row of loops and also to occasionally drop the ribber in order to check whether any loops may be caught on gate pegs.

In this swatch, I had some problems (blue arrow) on the right side related to changes in tension while determining what might be the best. Section 1 has every needle tucking on the main bed. Section (2) begins to try to emulate the Passap pusher selection using an EON 2 row tuck repeat on the main bed, resulting in things going awol and loose, even at the tightest tension possible on the main bed. Any time patterning is used on the main bed, end needle selection is canceled (KCII). The tuck repeat2 row tuck

the settings (here lili buttons are not in use1X1 card MBno lili2
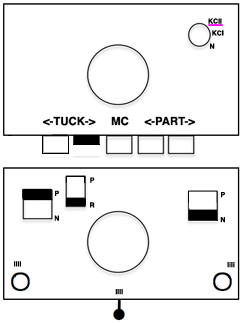
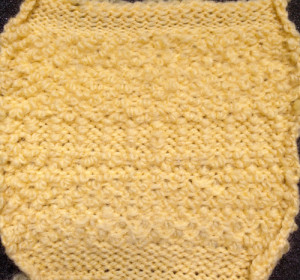
ribber loops2To create every needle loops for pile on the main bed: CO is on the ribber. With settings on the image below left (no lili buttons in use), the ribber tucks loops on every needle traveling to the right, knit all stitches moving to left. Moving to the right the main bed knits on every needle, slips the whole row moving to the left, giving the opportunity to drop stitches off. With settings on below right, lili buttons are in use, and the ribber now produces an EON needle selection, every row. Left alone the selection is what would be seen using the 1X1 card on the main bed, its repeat 1X1tuckloops on MBThe yellow yarn is a 2/8 good quality wool knit at 4.2 on the main bed, 3.2 on the ribber. Switching to a rayon twist of similar thickness created instant havoc. The dark grey was a mill end, tighter twist 2/8 wool. Red arrows show what happens when loops are caught up on gate pegs and not immediately noticed. The green arrow indicates longer loops that can happen when knit stitch on either side on the opposite bed do not knit off properly. The result is a dense wool fabric, so the tendency to roll at the top and bottom of each piece toward the “knit” side of the fabric needs to be considered at the top and bottom edges of finished pieces.

knit with no lili buttons in usemain bed loops2
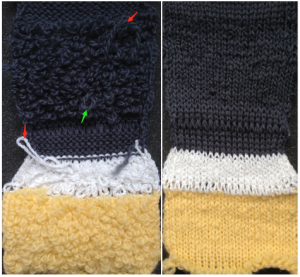
In 2 color knitting, or creating isolated motifs whether on one color or striped ground, anchoring loops by tucking on every needle is no longer possible, making reverting to EON needle selection on ribber a necessity. The results are dramatically different. These swatches were made using lili buttons or hand selection on ribber, loops on the main bed. If things don’t work in one color, they will not in 2, so one color, every needle pile is a place to start evaluating the results

1X1 lili selection left me with “where are the loops?”white_lili
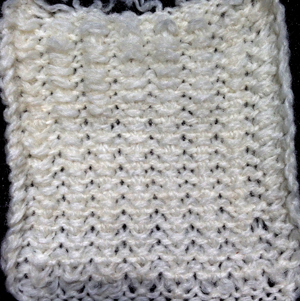
In the bottom section here I tried 1X1 hand selection for 2 consecutive rows,  the narrow band in center back was back to 1X1 to separate areas using lilis, at the top I used lili buttons and brought an extra needle into work on ribber before traveling to the right every third row (making needles in work on ribber an odd number), returning it to out of work before knitting back to right. Dropping stitches every 4 rows makes tracking the sequence easier. The resulting pile is far more “subtle” than samples worked with every needle tucking on the bed creating the backingyelllow-lili_500
So far I still have had no luck with getting anything that does not look like a variant of drop stitch lace when attempting patterns separated for 2 color knitting, either in embossed one color, or in striped 2 color versions.
 

A block lace pattern on KM 3 (punchcard, LC, HT)

This is the original lace working repeat as seen in previous post. It needs to be reduced in repeat width, with segments then moved to accommodate the required changes in height as well

original repeatgetting things down to 12 sts repeat width, eliminating sts and rows: easy task with software and virtual “graph paper”minus rowsthe segments, collaged together; black squares now to become  punched holesrepeat_cardmarking out borders to suit mylar or brand of blank punchcard makes placing the markings for transfers accurately easier ie.

every 5 squares every5                           every 6 squares                           every6

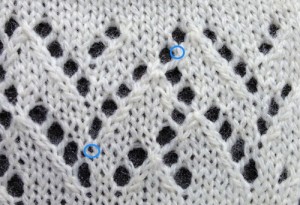
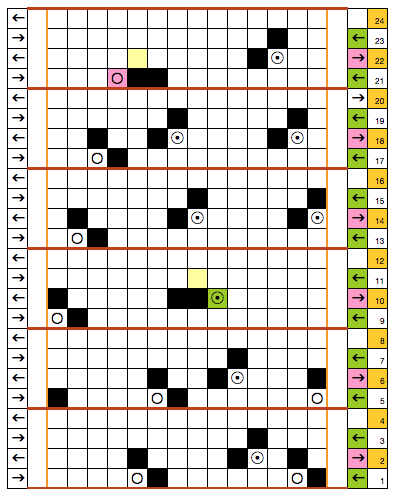
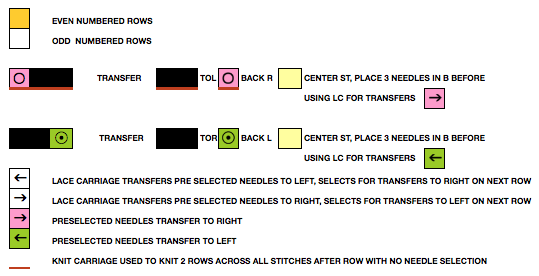
chart with actions of lace carriage included, the 14 stitch by 24 rows electronic repeat now reduced to a 12 stitch by 16 row repeat; see previous post for symbols keyLCactiona brief test of the resulting fabric: blue circles highlight a couple of the intersecting spots where the punchcard produced lace fabric looks different from the electronic version, because of its shortened and narrowed repeats marked

A block lace pattern on KM 2 (electronic LC, HT)

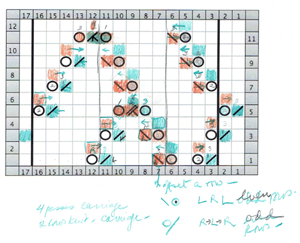
Sometimes I begin by analyzing the moves on large print paper to get a sense of the direction for the required transfer moves. This pattern is fairly straightforward, single moves to the right or to the left. What makes it different is what I have referred to as the knit side “chain” in the previous post. To achieve this, sets of stitches are transferred, doubled up, and moved back to the original position to create the proper eyelet placement.

Tension may have to be adjusted to accommodate the double travel of stitches. If it is just a tad off and occasional stitches sit on a closed latch, that may not be noticed, and runs in lace are no fun. Edge stitches get fussy as the knitting grows, edge weights moved up at regular intervals can help with that problem. Where 2 stitches need to move to their right or left, I have chosen to do so by hand rather than relying on the lace carriage to move them onto the single needle, and in turn back onto the center one of the group of 3.  My initial notes on paper:PAPER SKETCHAssigning colors for transfer, charting in excel: green to left, pink to right, checking where markings need to be for full KM repeat:FULL REPEAT

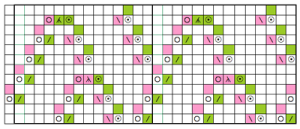
Expanding the repeat, adding 2 blank rows between pairs of transfers with the intent to white out square for “wrong” transfer rows places transfers to right on wrong chart rowwrong

all markings, shifted to proper locationfull mylar

symbols used: black squares = mylar markingschart symbols

The lace carriage begins on left as usual, makes 4 passes before each 2 rows knit. The first sequence hand transfer occurs on row 2 of the 4 LC passes. The second sequence hand transfer on row 1 of 4 passes. After the 3 onto one hand transfer, be certain all 3 needles line up in B position before the lace carriage makes its transfers as well.

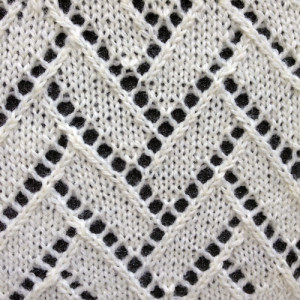
the resulting fabric’s knit side 500_954

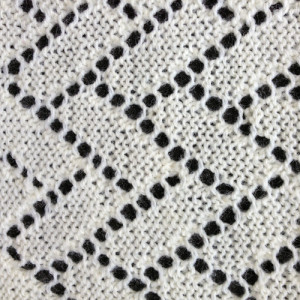
purl side 500_955