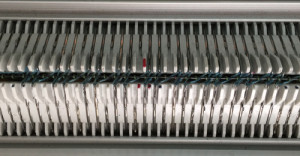
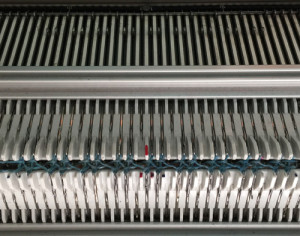
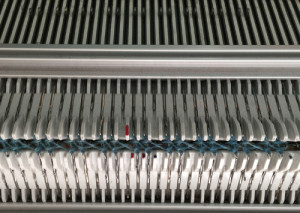
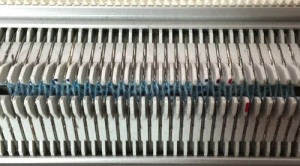
A bit of holding 1

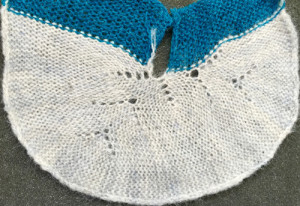
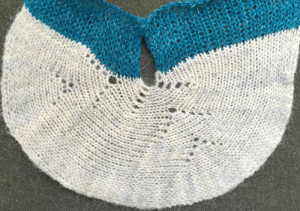
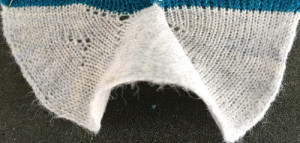
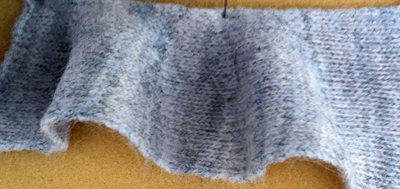
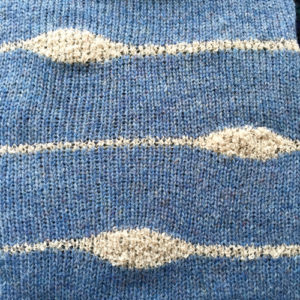
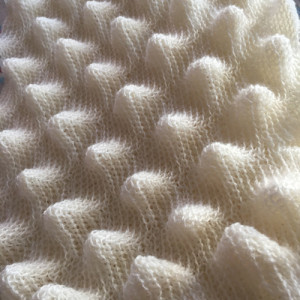
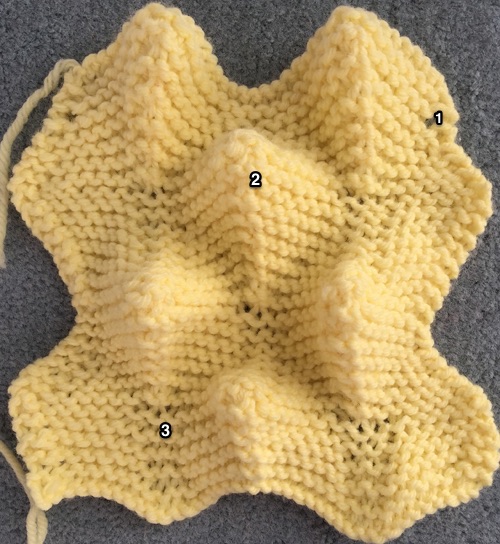
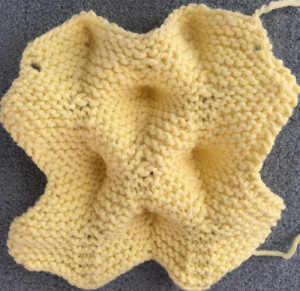
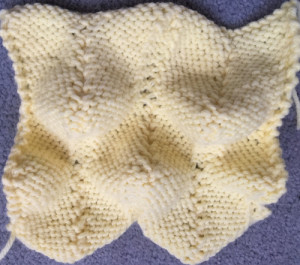
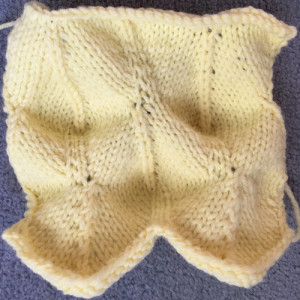
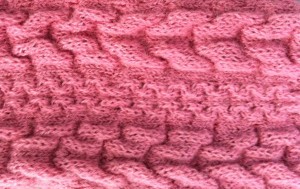
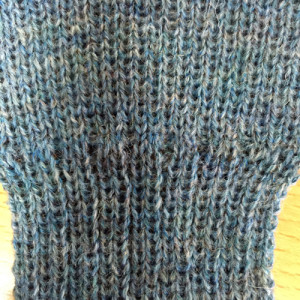
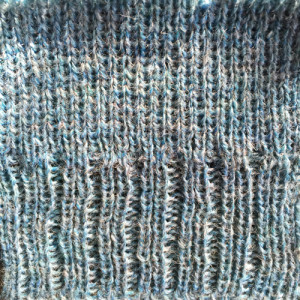
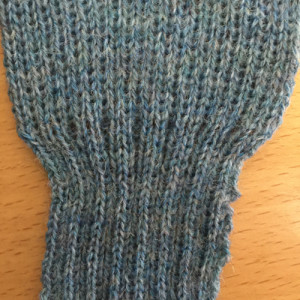
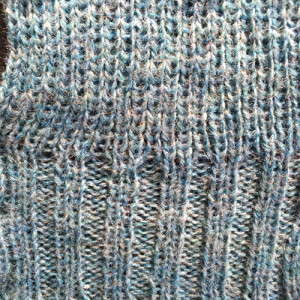
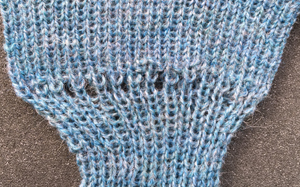
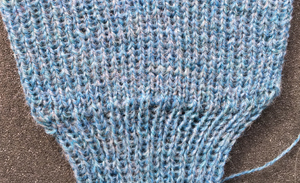
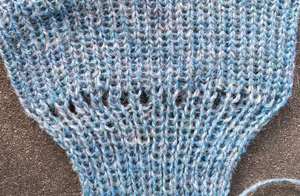
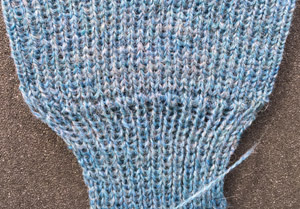
At a seminar during a visit to California in mid-April just prior to the joys of downsizing and moving I showed this swatch and was asked for instructions for duplicating it.

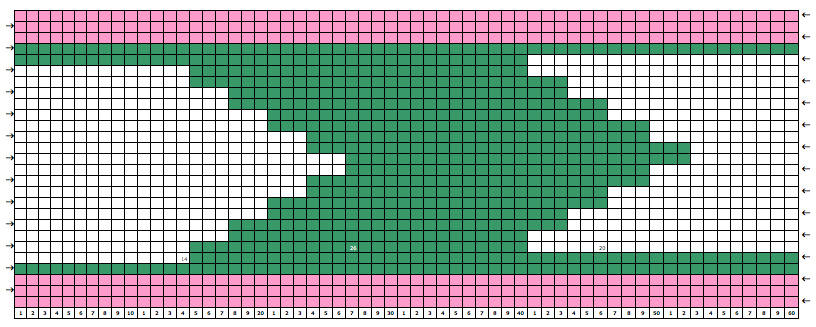
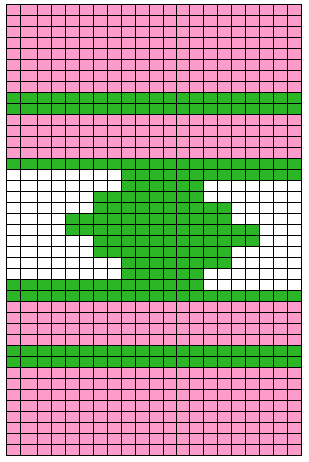
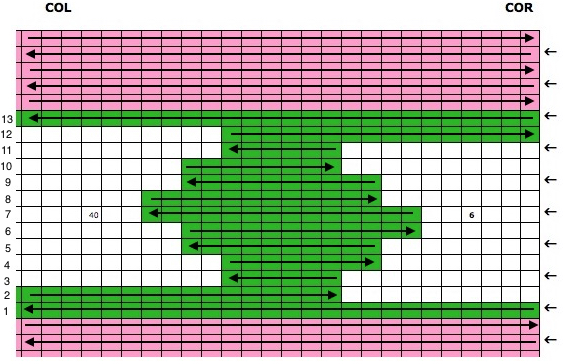
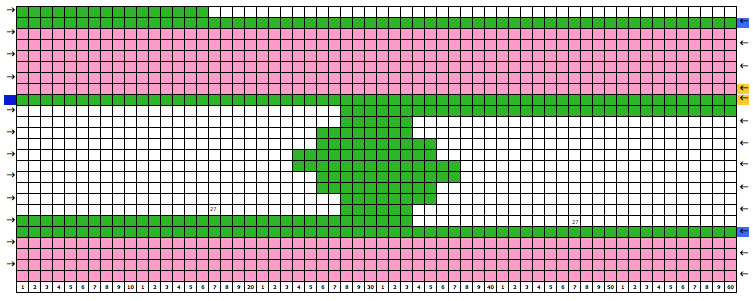
26141860401_aedba24177_oI have moved, and I finally have a machine set up to prove my ideas. The images below show plotting out repeats in excel odd number of rows knit between shapesodd rows between

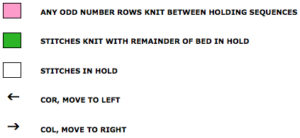
legend

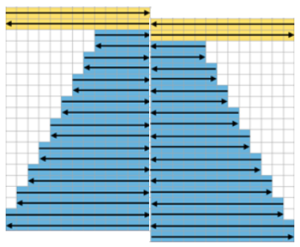
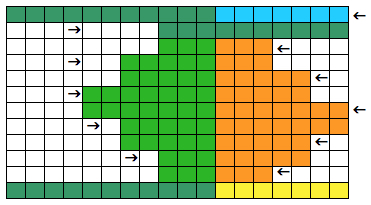
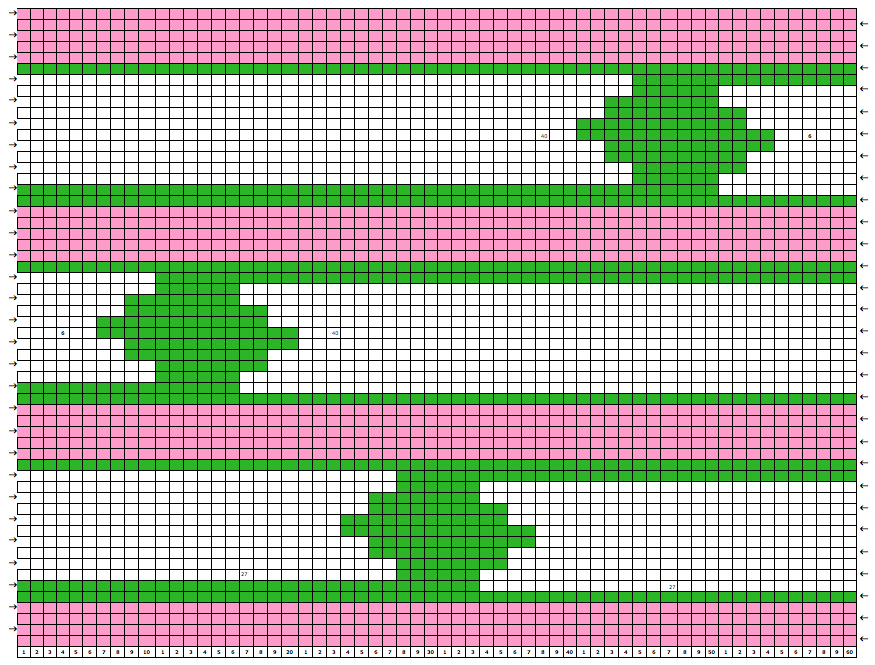
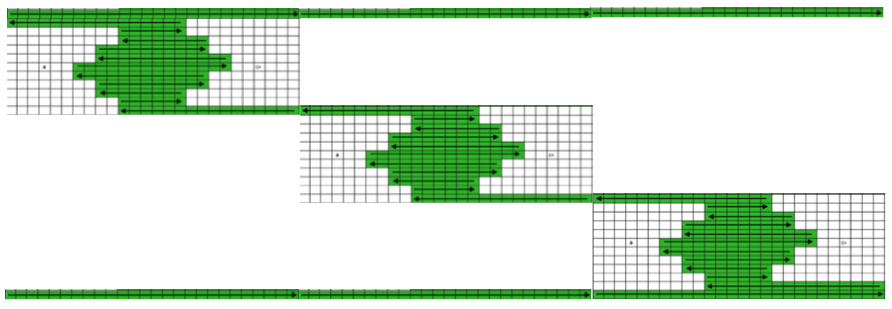
movements of carriage to create each shape pretend knit2If an even number of rows of color 1 is knit between shapes, the yarn is cut at the end of the holding sequence with color 2 (which is made up of an odd number of rows, begins on right, ends on left), a free pass is then made to return carriage to the right, there picking up color 1 for the plain knit sections.even rows betweenSome cut and paste following the direction of the arrows to work out knitting several shapes in any one row: in this instance the first row knit with color 2 is from left to right, as is the last row. Even-numbered rows in color 1 would start and end on the same side, COL. If changes of any 2 colors in any technique are for an even number of rows, yarn ends will occur on the same side.cut and pasteMy original sample was made knitting single shapes with an even number of knit rows between them. A reminder: Studio needle positions are A,B,C,D,  Brother needle positions  are A,B,D,E.  Holding position for Studio = D, for Brother = E. Upper work position for Studio = C, for Brother D. Settings for both are indicated below, for Studio, then (Brother)

color 1 cast on 60 stitches, knit 20 (or X) rows, end COR
first shape:  COR color 2 knit one row, end COL
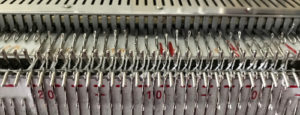
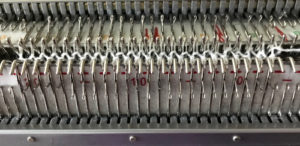
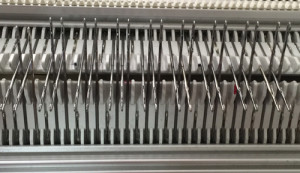
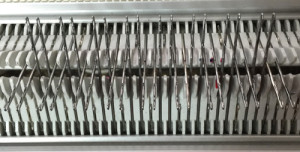
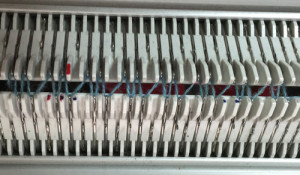
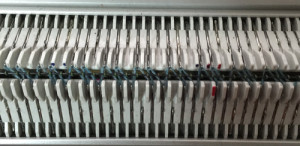
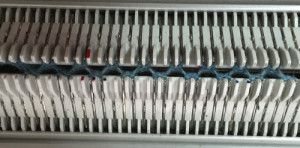
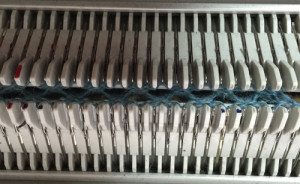
COL on the right, bring 27 stitches to hold D (E) position. The rule is usually to always wrap taking yarn around the first needle in hold D (E) position, then to knit one row. I found in my samples the holes created were so small they could hardly be seen, so I did not wrap.
COR on the left, bring 27 stitches to hold D (E) position (6 stitches now in work), knit one row
holding sequence for each “shape”
COL at right, push 2 needles to work position C (D), knit one row
COR at left push 2 needles to work position C (D), knit one row
COL at right, push 2 needles to work position C (D), knit one row
COR at left push 2 needles to work position C (D), knit one row
COL at right return 2 needles to hold D (E) position, knit one row
COR at left return 2 needles to hold D (E) position, knit one row
COL at right return 2 needles to hold D (E) position, knit one row
COR at left return 2 needles to hold D (E) position, knit one row
COL return needles to right of shape to work position C (D), knit one row
COR return needles to left of shape to work position C (D), knit one row
COL  cut color 2, make free carriage pass carriage to the right
COR change to color 1, knit the desired number of rows (20) end COR
COR for the second shape with color 2 knit one row, end COL
COL at right bring 40 needles to hold D (E) position, knit one row
COR on the left, bring 14 stitches to hold D (E) position, knit one row
“Always wrap taking yarn around the first needle in D (E) position, knit one row”, repeat shaping as directed above
COR change color 1, knit the desired number of rows (20) end COR
for the third shape
COR with color 2 knit one row, end COL
COL at right bring 14 needles to hold D (E) position, knit one row
COR on the left, bring 40 stitches to hold D (E) position, knit one row
repeat shaping and /or wrapping as directed above
change to color 1, knit the desired number of rows (20), bind off

Charting shapes for automating short row knitting and programming

In machine knitting, stitches are usually brought out to hold opposite the carriage. If multiple stitches are brought out to hold on the carriage side, floats are created. Triangles stacked vertically as seen in the previous post will create a spiral curve along the line where stitches are held. The carriage needs to get to the opposite side and back after each ‘decrease’ or ‘increase’, so pairs of rows are used to execute and reverse angles in short row shaping. When multiple rows are knit independently from the rest of the knit, slits are created. In two-row sequences, these are generally similar to holes created in lace, in longer sequences much larger slits are produced. The latter are often used as planned design elements. The small holes being visible may not pose a problem for the knitter. If they do, wrapping the adjacent needles can help eliminate them, but the doubled yarn in the wrapped needle may create small, sometimes visible bumps on the knit side of the finished piece, creating a secondary pattern.

Reducing eyelet size: in traditional wrapping  required needle(s) are brought out to hold, and the yarn is wrapped under and around the last needle in the hold position on the carriage side before knitting the next carriage pass

                        COR                                                              COL                                both

The “automatic method” for wrapping

Decreasing: if COR (COL), 1 stitch to the hold position at a time, set the machine for holding. Bring one needle on the same side as the carriage into the hold position. Pass the carriage to the opposite side. COL (COR) repeat if shaping is 2-sided, or if shaping is only on the starting side, knit back to it, and with COR (COL) repeat process. Increasing single stitch: bring 1 needle always opposite the carriage into the work position.

Decreasing:  more than 1 needle or stitch at a time: if COR (COL), place 1 fewer needle than required into hold on the opposite side as the carriage, knit 1 row to left (right), toward the needle in hold. When COL (COR), bring into hold the last, additional needle. COL (COR) repeat the directions if shaping is 2-sided, or if shaping is only on the starting side, knit back to it, and with COR (COL) continue decreases on the single, opposite side.

Increasing:  to remove stitches from holding, COR (COL) place the desired number of needles into the working position on the side opposite the carriage, knit one row, repeat with COL (COR) if shaping is on both sides, or knit back to starting position COR (COL) and continue increases on the single, opposite side.

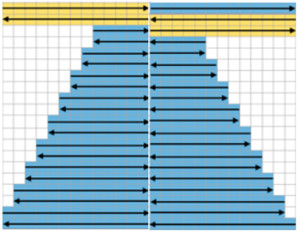
Charting out shapes knitting or programming stacked equal triangles/spirals: the wedge illustrated in the previous post single spiral wedge“Air knitting” is often used to think out fabric issues before swatching using yarn. Drawing lines to follow the carriage movement direction required to keep the knitting continuous, whether on graph paper or within software programs can help sort out shapes that will work in short rowing. Holding needs to happen in 2-row sequences. Below, black lines and arrows indicate the direction of knitting for each row, in this instance beginning with COR. Blue = knit stitches, yellow = all knit rows at the completion of each wedge (2 or multiple of 2, depending on planned design). This repeat is suitable for knitting a continuous strip with ruffling/spiraling at various degrees, not for ‘pie’ shapes.
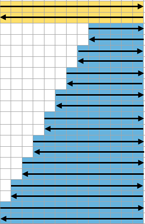
offset

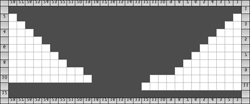
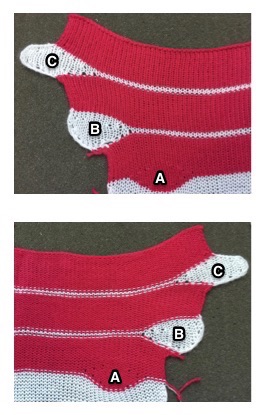
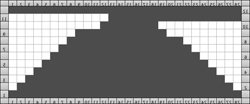
Working out the repeat: the red line represents the starting, selection (KC), knit row, the numbers at the bottom the width of the repeat, the numbers to the side its height. The first repeat A results in the fewest punched holes, drawn squares, or programmed pixels, requiring being knit double length. The remaining repeats (B, C) are drawn double length, standard card rotation is used. Eyelets form at the held edge. C takes automatic wrapping to decrease eyelet size at the held edge into account. When any sequences are programmed for knitting using slip stitch, the end needle selection is always canceled by using KCII or turning non-needle selection cams in punchcard models.

A                                 B                                    C rufflethe start of a miter shape: blue repeat, extra knit rows in yellow, auto hold on the bottom rightscreenshot_45
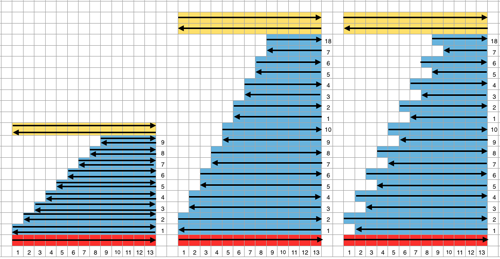
Going 3D: in many designs, the original repeat may simply be mirrored to be executed. If this is done here, one can see there is no longer a continuous knitting line, directional arrows are moving in opposite directions or toward each other from the center point
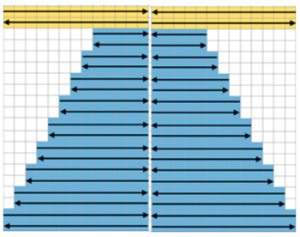
offset1restoring continuity offset 2and shifting rows around to create a workable repeat offset 3one shape knit 3 different ways:  red row = KC II, all knitdouble spiral
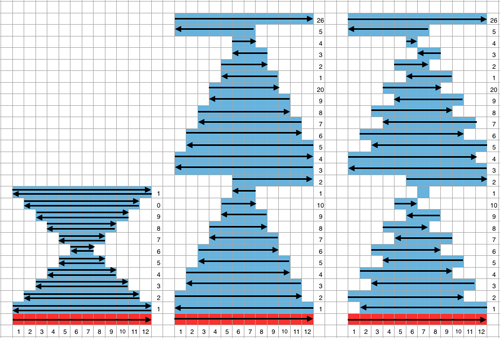
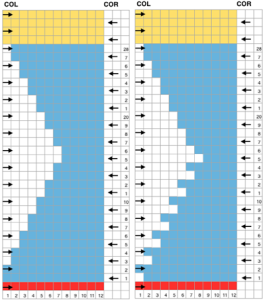
An executable 24 stitch, 26 rows repeat:  black arrows alone indicate movement of carriage on the first row of the repeat, black arrows on red line indicate starting point and direction of movement of carriage for KCII rows. A begins to knit repeat with COR, B with COL. whole repeatsThe triangle’s vertex can be squared off, the height of the repeat shortened, to make 3D shapes much rounder ball1X8ball1X8
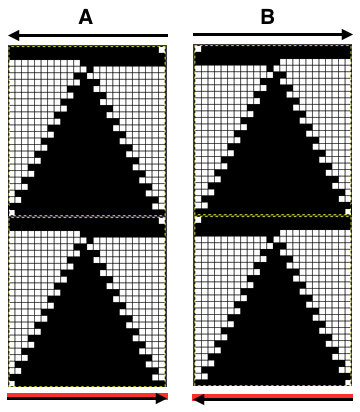
Not just for electronics: some punch card repeats to try (also suitable for any machine). End needle selection is canceled.  Selection rows are always toward the first pair of rows knit in a holding pattern, so for the first 2 cards, they would be from right to left. Single rows are punched but 2-row sequences are needed, so cards must be elongated X 2; miter shaping repeat is shown on the left, spiral on the right. Narrower shapes may be created and knit on the appropriate segment of the 24-stitch repeat needle positions. Use needle tape markings as guides for placement. The preselection row is from right to left, the pattern repeat begins with COL. All punched, extra series of pairs of rows of knitting may be added at the top. Note: just a few rows may not be added with a small segment of an additional card with clips, the whole repeat may have to be split into sections to allow for the extra rows and their smooth passage through the card reader. As an alternative, more rows of all holes could be added to the original card when first punched, tested, and then trimmed if not needed. It is useful to try out the repeat as a hand technique first in any of these instances, to determine personal preference.
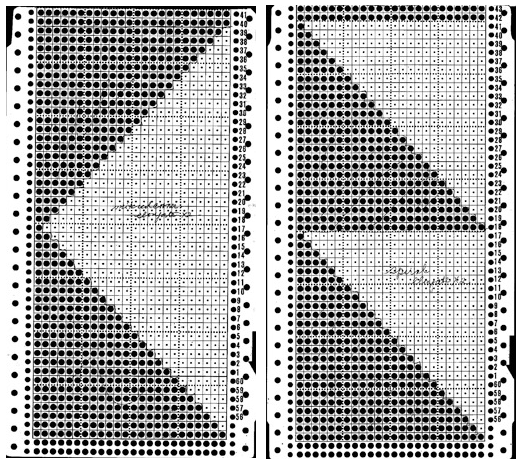
miter_spiral1

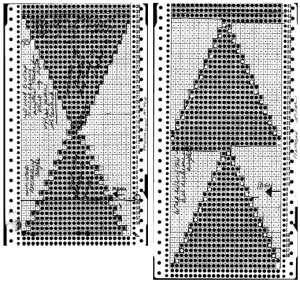
Going 3D: punch only actual holes (black pencil marks were originally used to mark squares that needed to be unpunched for the auto wrap on right, not the best choice for B/W scans). Two-row sequences are punched, so no elongation is needed for either repeat. Miter shaping is shown on the left, spiral on right; mem <– indicates the direction for KC row; decreasing angles are auto-wrapped, increasing angles need not be as seen in the top of miter on left, where needles are returned back to work to create the reverse shape.3Dmiter_spiral corrected
Some ruffle possibilities: all knit rows were added to the card on left with snaps, and are composed of all punched holes. The number of all knit rows between held segments determines the spacing between wedges and the degree of spiraling of the final fabric. KC row needs to be R to L for A, left to right B. Holding sequences are now staggered, changing the angle of the resulting curves. A short float is created where 2 stitches are brought to hold on the carriage side.                                                      

A: elongate X 2                              B: use as is         ruffle-pair-
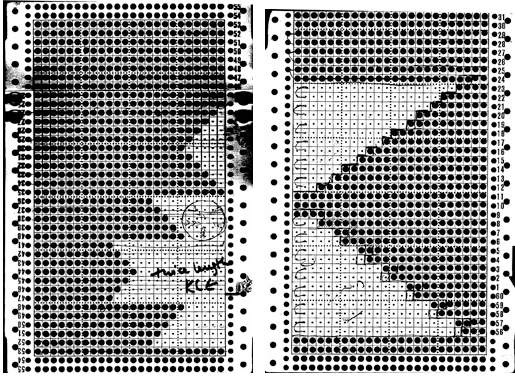
The recommended minimum for punchcard length is generally stipulated to be 36 rows. Card A without the added rows is 28 rows high (the last 2 rows are for card overlap when adding snaps), so the repeat below, with the extra segment removed, would need to be punched twice
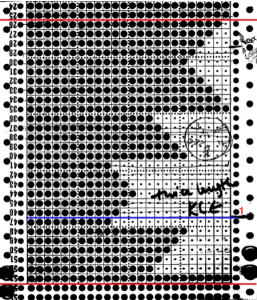
A single_correctedeyelet pattern reflects shaping500668

500_

500_676

B: dotted lines outline segment: yellow dots on the purl side, the 1 needle floats ruffle_floatone possible card revision: red dots indicate punched holes, stitches in hold as the carriage moves from the left to the right ruffle16_CORany difference in the swatch, in this yarn, was almost imperceptible; results would vary depending on yarn thickness and fiber content.
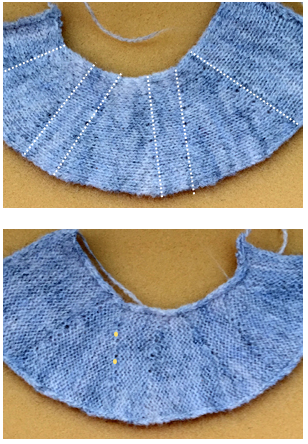
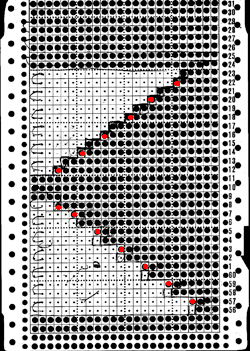
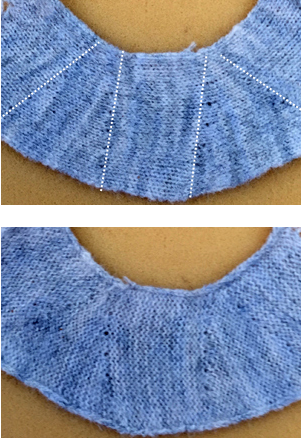
rufle not floatthe swatch as a “ruffle”ruffle_show

Hand knit “dragon scales”

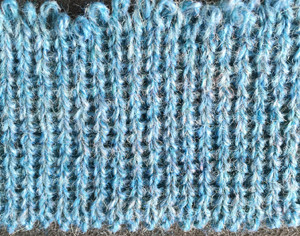
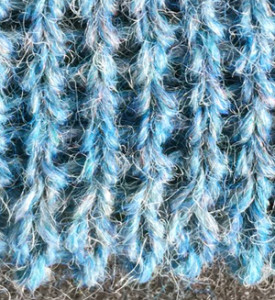
A detail of half fisherman machine knit “dragon scales”  ribber version of the stitch500_606

and its related posts :
https://alessandrina.com/2016/01/09/ribber-pitch-a-bit-on-racking-chevrons-horizontal-herringbone/
https://alessandrina.com/2016/01/13/racking-2-vertical-chevrons-herringbone/
https://alessandrina.com/2016/02/02/vertical-racking-3-automating-half-fisherman-in-pattern-2/

My last experiments led to a search for a possible hand-knit “scale” version. Similar shapes may be achieved through holding, but here the effect is created through the use of increases and decreases.
The test for the repeat was knit in a 4-ply acrylic.
As with the machine knit version, the pockets become more pronounced as the fabric relaxes, without blocking.
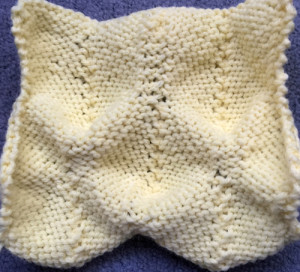
Garter-stitch was used in the first sample for texture and speed.
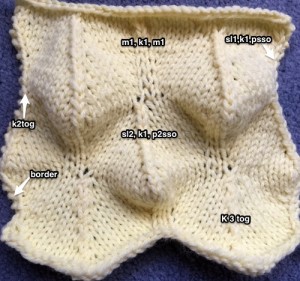
Everyone has preferred methods for increasing (M1) or decreasing/ combining 3 stitches into one. I tried picking up from the row below or casting on single stitches (#1), but found the least noticeable methods to my eye, using this yarn and stitch type, were to knit in front and back of the stitch (#3) where an increase was required, and to knit 3 together (#2) for the decreases.

numbered_636the reverse structure curves in a similar way to the machine-knit 500_637

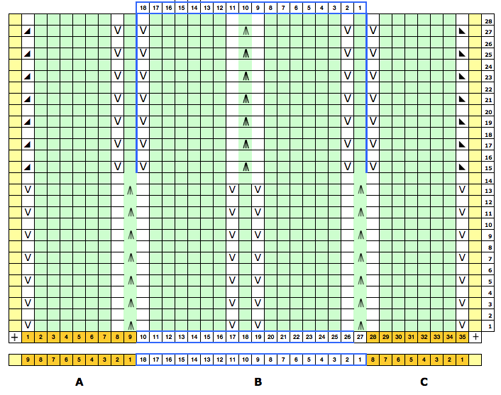
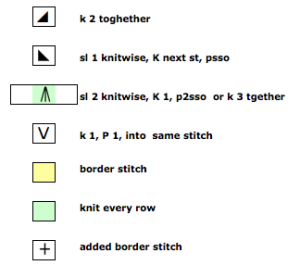
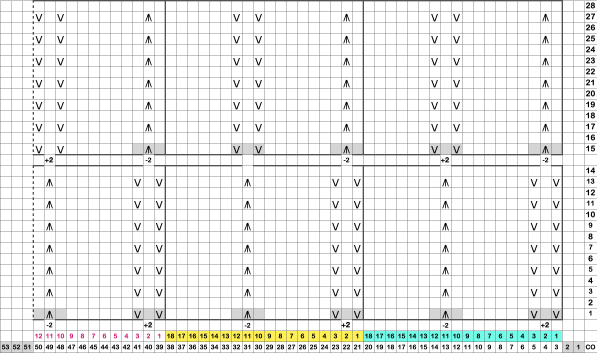
The number of stitches remains constant on each row knit; the chart reflects side panels (A, C). The central 18 stitches (B) may be repeated multiple times to achieve the desired width. Border stitches may be added in any number, and are knit on every row.

screenshot_06scale_symbolsA 2024 chart shifts the repeats and keeps stitch counts constant with M1, K1, M1 increases adding 2 stitches, and Sl 2 knitwise, k1, PSSO or K3 together decreasing 2 stitches in each segment. The original fabric changes dramatically when every other row is purled. This swatch was knit with a single-stitch garter stitch border, and I experimented with increases and decreases.
The M1 sts were created by picking a loop up knitwise from the row below for the increase. The slight shift in the pattern center where decreases and increases meet helps define a point on the “scale” shape.
The same yarn and needle size were used as in the first sample.
A softer, thinner yarn knit using a smaller needle size would benefit either variation. To my eye, the all-garter stitch version was more successful and pleasing.

knit as “outside”, default shapes  knit front reverse  500_643purl as “right side” after poking scales out 500_639its reverse500_646

For a less pronounced, “scaly” relative using lace eyelets in the design, please see
https://alessandrina.com/2015/01/09/a-swatch-experiment/    https://alessandrina.com/2015/03/28/machine-knit-dragon-scales-update/

Thread lace and punchcard knit carriage use on Brother 910_2

A short while ago there was a Ravelry thread discussing reversible, double bed knits. I recalled a demo from eons ago that I saw at a machine knitting seminar and decided to explore my memories and share them. The result approaches a “reversible” fabric, with imperfect results depending on the yarns used and other factors. There is a group of knitters that are presently experimenting with “glitch knits”, where the intent is to purposely create patterns with what some people might consider “mistakes” as purposeful parts of the design. For one example see a video of the technique. The “imperfections” in the fabric below may be seen as a positive by some. It is not the result of any aberrations in the programmed pattern, but rather a result of the way the threads get pulled through each other as the carriage moves across each row knit.

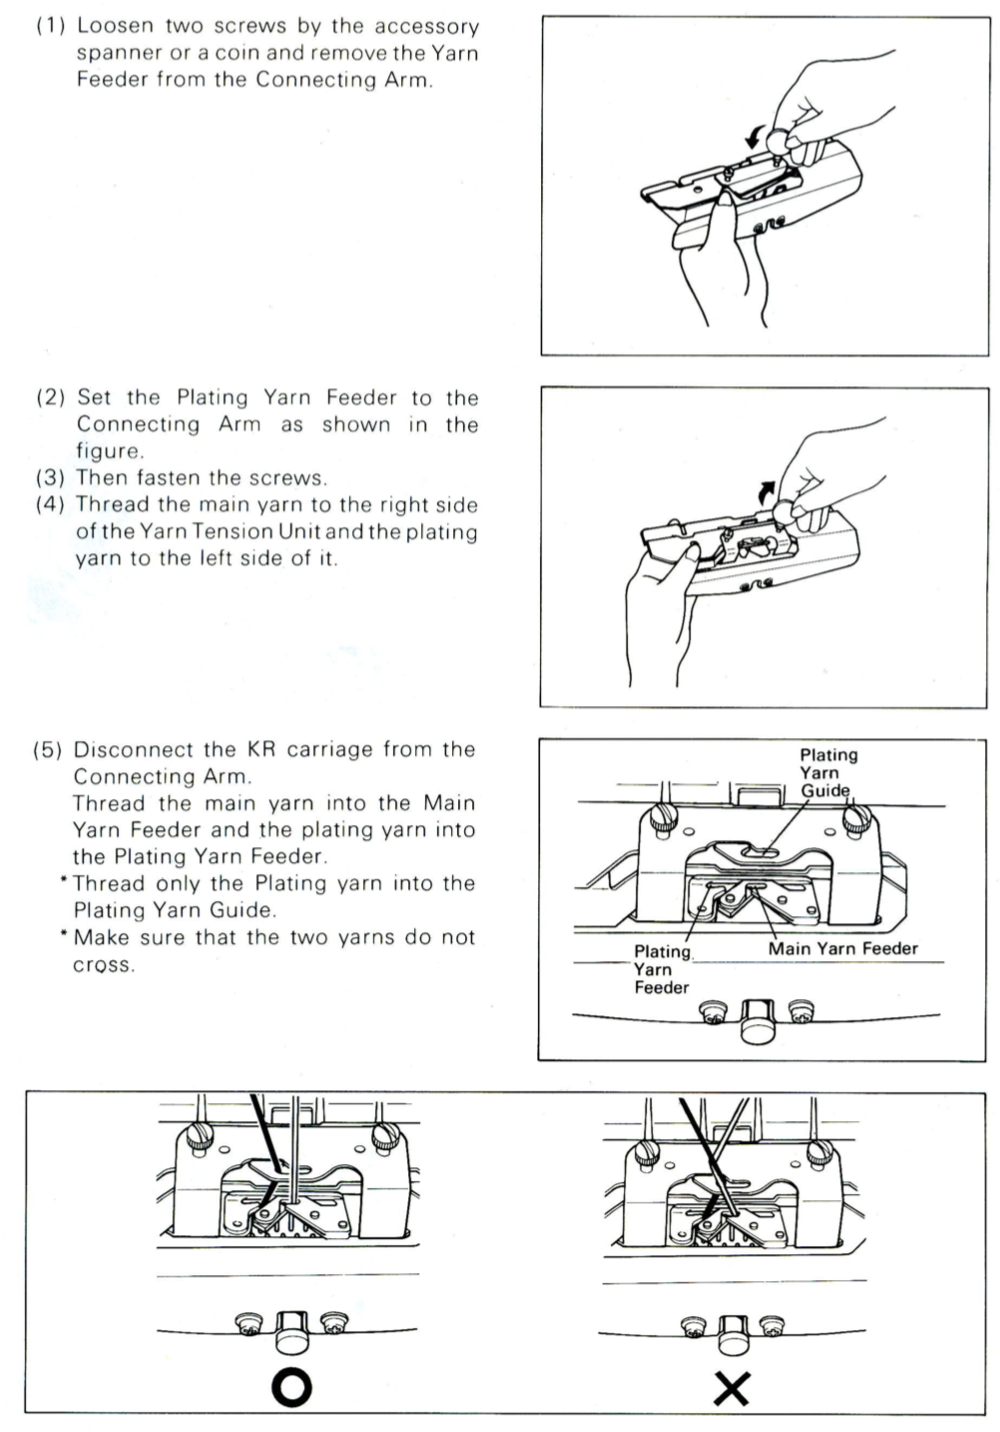
My samples were knit using equal-weight yarns. The fabric may be better served by using different weights, approaching the usual recommendation for plaiting. See the manufacturer’s directions for plaiting feeder use.

Cancel the end needle selection on your knit carriage.
Cast on for full needle rib with both yarns in place.
Hang comb.
Knit 2 circular rows followed by one more all-knit row.
Change to a rib tension that has been tested for yarn combination.
Several rows may be knit for a “solid” color edging.

When the first pattern row is selected, one need not set the KC carriage to slip. N is king in Brother, regardless of pattern/ needle selection as long as no cam buttons or levers are pushed in/ selected, everything knits, whether single or double bed.
After the first row of the pattern is preselected on the main bed, use a tool to push both buttons in as seen below, and proceed in the pattern. Even though end needle selection has been canceled, if the end needles on the main bed are selected, they need to be pushed back to the B position or those stitches will be dropped.
Plenty of weight is required.

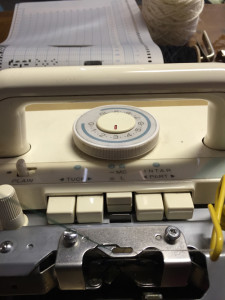
my punchcard carriage with the added magnet set up on one of my 910:
setup_50

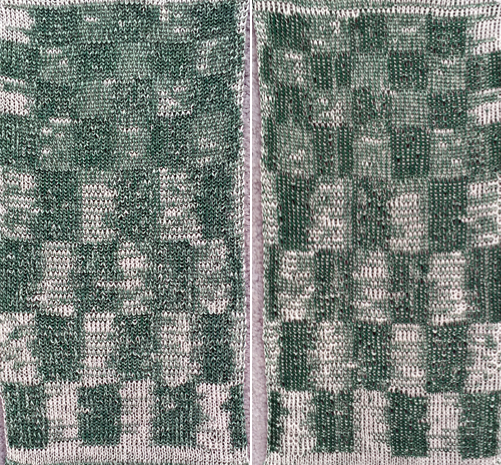
when testing motifs it is always good to begin to do so using a simple pattern, making needle pre-selection easy to view and check. I began with “checkers”. They can be viewed at the bottom of the image below with the machine set for double length, at the top as drawn on the mylar; most such fabrics are well served by double-length on any machine, electronic machines could easily vary the repeat size or color reverse at the flip of a button, using lili buttons on ribber may add to the mix of results as well.
screenshot_22a familiar stock Brother punchcard, knit on my 892, double-length screenshot_23Review of the use of plaiting feeder from Brother ribber manual 


Thread lace and punchcard knit carriage use on Brother 910_1

Yes, the 910 has no thread lace setting. I happen to also own a punchcard machine model # 892E (no idea why Brother chose to add the E to a punchcard model name). I remembered eons ago reading about someone on an Australian list actually getting a punchcard model carriage to work on an electronic machine. It is good to beware that not all carriages may be interchanged between different models, especially if the latter were manufactured several years apart.

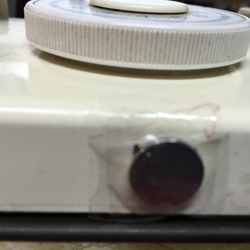
The magnet on the back of the electronic carriage is what trips the reader in the 910. With the 892 and 910 carriages side by side, I marked the approximate spot I wished the magnet to be. It is presently in place with cellophane tape for my tests. I believe it to be a “rare earth magnet”, 12 mm in diameter, part of a jewelry piece from days gone by, with a deep attraction to all KM metal parts.

spot39the first location was too high, the pattern did not read properly place40what turned out to be a much better spot  better placea random mylar repeat mylar45the resulting fabric, on both purl and knit sides both sides

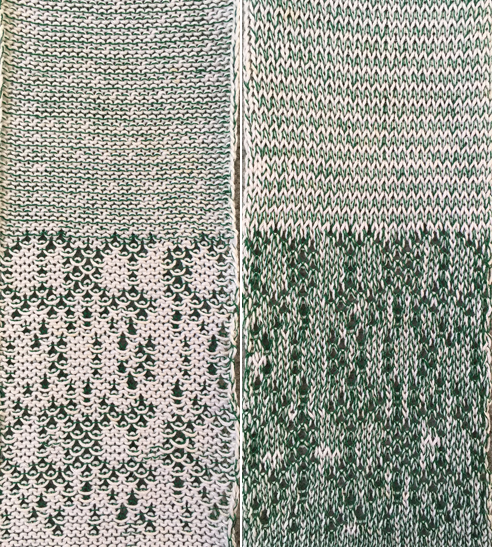
I used two cotton yarns, with a slight difference in weight. With the exception of when knitting transfer lace, the first instinct may be to use the color reverse option when the mylar repeats show lots of “white squares”. However, in this type of fabric blank squares knit both yarns; black squares or punched holes knit only the thinner yarn, while the heavier one floats behind it. The KC tension used needs to accommodate both yarns easily knitting together. When only the thin yarn knits on selected needles, the stitches formed will actually be larger in size than those where both yarns knit together, giving the “illusion” of holes.

This fabric was also at times referred to as punch lace. It is only possible in Brother machines that have 2 cam buttons in the center position, both center buttons under the MC/L mark are depressed. The punched holes/ black squares in mylar select needles that will knit in the fine yarn only. If you are using a very fine yarn for the second yarn, you may have to wrap it twice around the dial on the mast tension unit to control its feeding. Better edges are produced by canceling end needle selection or manually pushing any selected end needles back to B. If KCII is an option on later electronic models, some of the work is done for you. End needle selection may also happen as part of the design repeat, so in those instances, unless you are happy with the thin yarn only knitting on the very edge of the fabric, those needles need pushing back to B by hand as well.

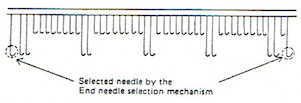
selected needle

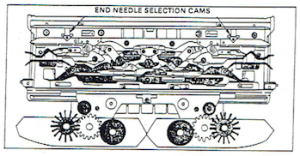
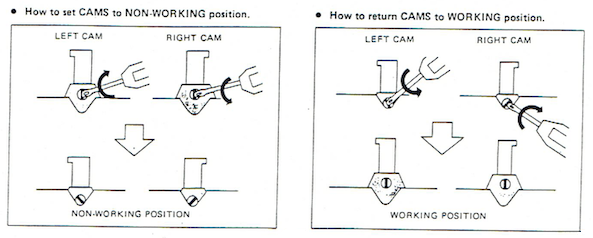
end needle camsset camsBTW: end needle selection must also be canceled whenever patterning with needles out of work is used, or needles on both sides of out of work ones will produce knit stitches regardless of programmed pattern.

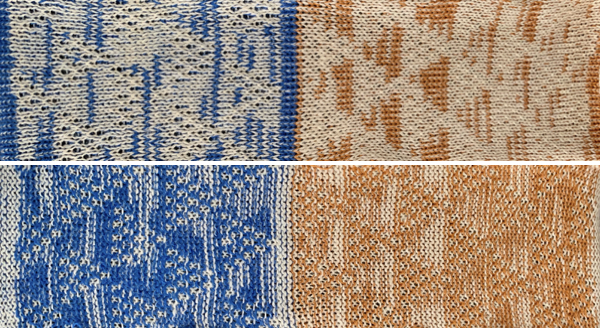
If a contrasting color is used as the thin yarn in the B feeder, the results may be seen below. Note: the colors appear reversed to their position in feeders, so A (thick) color is seen more on the purl side, the B (thin) is more evident on the knit side of the fabric. The top of the swatch shows the result when blank rows are programmed into the reader. Sometimes this setting is used as an alternative to replacing the standard A/B feeder with the machine’s plating feeder (if available for your model km). Reversing yarn position can produce some interesting stripes

combo colornot all A/B yarn feeders are created equal 
sinker plates

I have always found the extra B gate on left more a nuisance than a necessity, particularly if the B yarn needs frequent changing.

Another unconventional use for this setting to produce “pretend cables”

thread_lace

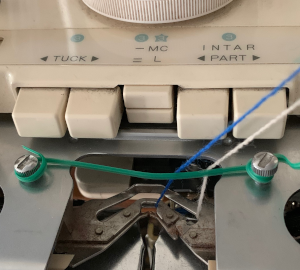
It is possible to knit thread lace with the plaiting feeder in place on the single bed as well. The effect approaches glitched versions of the pattern, Stitchworld #407. This is a quick hack to keep the front yarn from slipping out of the yarn feeder The blue and white yarns are equal in weight, the orange replaced it and  is thinner

Picot cast on for every needle rib

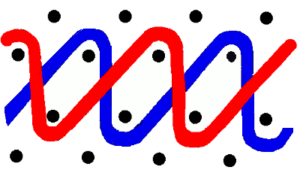
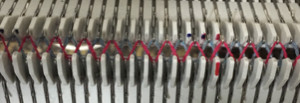
Depending on the sort of rib, the beds need to be aligned in most instances so that the needles on opposing beds line up between each other. For this ribber cast on the beds start at full pitch, as you would for EON knitting. Every other needle is brought in to work. A first “zigzag” row is created at the tightest tension possible. On the second row, the alternative needles need to be worked. On Passap E6000 BX, LX with pushers under new needles only will help do the job. On Japanese machines: bring the new needles out to hold, set both carriages to slip. This will result in only those “new” needles knitting on the next pass. The outcome will be one zigzag crossing over the other (red over blue in the photo). Prior to the third knit row, reset the carriages or locks for circular settings (CX/CX, opposite part buttons). Because all stitches will be knitting on each bed, loosen the tension to about three-quarters of the rib stitch size, knit two rows, change racking handle/lever and needle positions to half pitch at their completion. Adjust tension to desired rib stitch size, knit a closing “zigzag” all knit row at tension used for the remaining knit, and proceed in rib
The method may be used both for every needle and for every other needle rib.
The configurations for each, colors are in reverse order from photos that follow

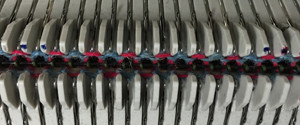
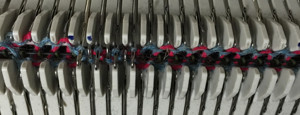
first zigzag rowzig zag onesecond zigzag row (contrast color for illustration purposes)zig zag 2hang comb, knit 2 circular rows circ_combchange racking position and needles alignment rackchange tension, continue in rib, knitting all sts both beds 300_2423detail close up detail

Racked ribber cast on and rib configuration tips

This cast-on (on any ribber) is capable of giving a softer, looser start and is good for fabrics that stretch. It is described in most machine knitting manuals.
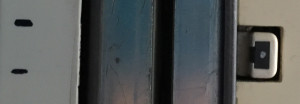
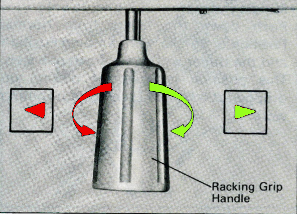
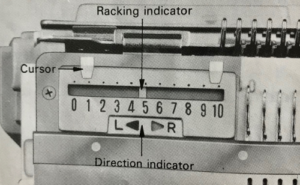
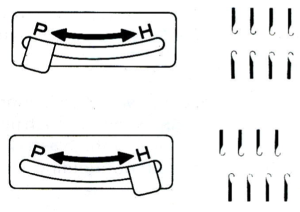
When experimenting, check the alignment of needles physically before proceeding for knitting ribs on all needles. In Brother machines, the racking grip handle is used in creating “racking patterns”. By turning the grip handle the ribber bed is moved to the right or to the left. The racking position is indicated on the racking indicator. Usually casting on is begun with the indicator in the center position, #5. As indicator numbers rise the ribber moves to the left, and as they decrease the ribber moves to the right. The two cursors can be moved and set to use as an index of the racking range. I prefer to track racking positions in other ways ie. with punchcard markings when possible. The arrows L and R indicate the racking movement and will change position after each handle turn reversing direction is completed. The pitch is set to accommodate rib configurations. In the P position needles on each bed “plain and purl” are directly opposite each other and in a collision course. If EON (every other needle) on each bed is in use, then this position is used to center needles on opposite beds between each other. In position H the ribber needles are centered between two main bed needles.
If observing a suggested needle rule, set up needles using it.
Rack one full number to put the needles out of the rule, and knit one row at about 2 numbers tighter than the final setting.
Hang the comb and wights, and rack again to the original position. Add any edge stitches that may be needed for the specific knit fabric. Knit one row across stitches using the final tension setting.
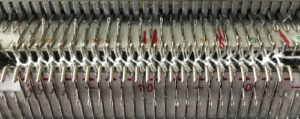
For every needle rib cast on in my sample I began with the racking indicator on 6, COR, knit zigzag row to Left. Note: at the start of the process, on the left side,  the first needle is in work on the top bed.  The ribber is then racked to position 7. The first needle on the left is now in work on the ribber.  A row is knit from left to the right. The ribber is then racked back to its original position (6). The first needle on the left will once again be on the top bed, and the first needle on the ribber to its right Continue in the planned rib.
Often manuals give suggestions as to the “needle rule” for each type of rib. The sequence below is knit on a Passap. It, in theory, would produce a 2X1 “industrial rib that could transition to every needle or main bed knitting without any holes at the transition point. Note here there is a needle in work between each pair of needles on the opposing bed.

IMG_2390“zigzag” row, normal needle position: work slowly, make certain all needles have picked up yarn
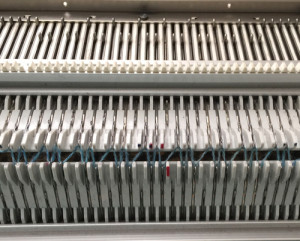
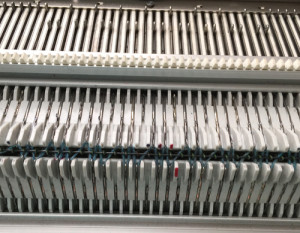
1hang comb: the first needle is in work on the back bed on the far left 2rack one full turn to the right: the first needle in work on the front bed is now on the far leftIMG_2382knit one row  4rack back to the original position, and continue plain rib  5There are sources online including videos that recommend circular rows at this point, they are actually unnecessary. The other recommendation made by many after any ribber cast-on is for 3 circular rows. There is no need for the third circular row. It will actually create a visible line across one side of the rib, that is noticeable, and may not be wanted if it is on the “public” side of the finished garment.
To fill in potential holes produced when empty needles are brought back into work, bring all empty needles into work, and tuck one row across both beds, making certain loops are formed on each needle IMG_2391knit 2 rows circular slowly, some needles hold 3 loops of yarn, switch to ENR rib
the result at rest
rib1rib stretchedfirst rib stretchGoing for a rib with more of a 2X2 look: set up needles for rib pattern, there are still 2 needles in work, one not, on each bed. The empty needle space is now at the center of each pair of needles on the opposite bed

IMG_2392rack one full turn to the right, and knit one row IMG_2393hang comb and weights IMG_2396rack back again to “needle rule” position Knit one row at final setting, proceed for ribIMG_2397at the top of the rib knit 2 rows circular, proceed on EN ribIMG_2399

tension adjustments may make a big difference, my samples have been knit at the same tension throughout, and single-ply throughout

the first rib at rest rib2stretched second rib stretchBoth instances produce a reversible rib
Some experimenting is required to achieve cast-on rows in the rib that is not too loose or too tight. In this instance there has to be enough slack in the loops so that there is room for racking one full turn, too much will leave loops. Loops created by cast-ons with deliberately large stitch sizes may, in turn, be chained off with a latch tool. The stretch factor and weight of the resulting rib also need to be in balance with the remaining knit fabric. If “improvising” it is always advisable to keep good notes. Most publications and how-tos are really guidelines, starting points for investigating what may be the best method to use in any one piece.

A variation: a racking cast on at a large stitch size can be chained with a latch tool after the work is off the machine to make an edge that nearly matches a chained-off bind-off. It is useful, especially in rib tuck fabrics.
Set up needles in the needle rule and rack out of the needle rule.
Knit one row at a large stitch size, moving slowly to the opposite side. Testing will determine the tension the specific machine will tolerate with the yarn being used.
Check that all needles have picked up loops.
Hang the comb and weights and rack back to the needle rule.
When off the machine, use the method described in the post Ribber cast ons: breaking the “rules”

Transitions in ribbing from EON to FNR fabrics

It is always helpful to use a familiar yarn when testing techniques and to have some idea what baseline tensions produce each desired fabric before combining fabric types, structures, and techniques. This will ensure that the knit result will be both manageable to produce, and will match your desired concept.
Any time an empty needle is brought in to work, the first knit pass will create a loop on the empty needle; the second pass will form a full stitch, resulting in a hole. This is seen in lace transfers or when bringing empty needles into work closes single ladder spaces.
Use garment yarn double thickness in the EON needle rib if the aim is to produce DBJ, which will yield a different thickness knit. Test for other fabrics ie patterned English rib, etc. Swatching is worth the effort, avoids producing whole pieces where combined results are disappointing.

EON rib set up for your brand machine
Knit 20+ rows
End and begin the test with COR; trim off one yarn end, to be woven in using your favorite method
Racking handle at half pitch
Bring all needles into work both beds
Observe the needle rule appropriate for your double bed fabric Set both carriages or locks to tuck
Reduce stitch size tensions by one whole number, knit one row, which will produce a “zigzag” across all needles, with a loop on each needle, both beds
Set both carriages to knit circular; this will be a slipstitch, tension may need to be loosened by one number to accommodate the added yarn, knit 2 or 4 rows
Set both carriages to knit, enlarge stitch size one or 2 numbers if needed, knit one row
Proceed as required for pattern

Depending on which direction your first row of “garment” fabric needs to be selected if using a color changer, planning for that may affect which side of the machine needs to be your final location before knitting the first row of pattern.

The swatches below illustrate the transitions, are in their “just off the machine” state. I used the same tension throughout. The EOR rib was knit single strand, the resulting difference in width is easily seen, though the density difference is obviously not observable in a photo.  The yarn used is one of my “throw-away” acrylic/ wool blends.

side 1 “holes”
holes frontside 1 “no holes”no hole frontside 2 “holes”holes_backside 2 “no holes”no hole back

A tale of 2 donuts

Gauge swatches are often the bane of many a machine knitter, as are math calculations. I have recently come across several instructions for hand knit donuts, embellished in a variety of ways, and was curious about turning the knit sideways in order to create a machine knit version. Yes, there are formulas for creating such shapes, but once in a while “winging it” on small projects may provide an easily achieved, workable result.

I began with the formula: 30 stitches in width, divided by 3 = 10; 5 stitches used to create held, narrowed bands at both sides, the 20 remaining stitches knitting throughout the length of the piece, for 20 wedges/ repeats.

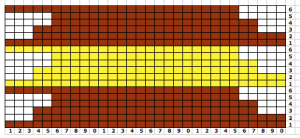
The method: cast on with waste yarn over 30 stitches, knit one row in “donut”  yarn; set the machine for hold; bring 3 needles opposite the carriage into hold, knit to the opposite side, repeat two times: bring 2 needles opposite the carriage into hold, knit to the opposite side, repeat two times; bring 5 needles into work opposite the carriage, knit across to the other side, repeat twice. At this point, all stitches will have been knit, begin sequence over again. This chart reflects 3 repeats, 30 stitches by 6 rows. Knitting begins on the left, and holding stitches begin with carriage on the right:DONUTS

A single repeat may be programmed into an electronic machine, knit with the carriage set to slip throughout, and with end-needle selection canceled (covered in previous posts).

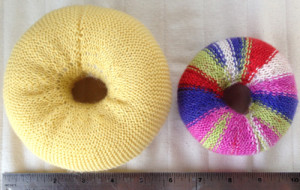
When I taught courses in machine knitting, the first “garment” made after several weeks of swatching and learning the various stitches, was a “baby hat with earflaps”, with the proviso that the same directions had to be used by everyone in the class for stitches and rows, but each student was free to select yarn and stitch type. This often became the first lesson in the importance of gauge, with results varying in size from mini doll size “hats” to gigantic ones. For my donut versions, I used the same directions. The striped one is produced with a random sock yarn that gave my machine fits at tension 8, and produced a very tight fabric; the yellow is from a good quality 2/8 wool at the same tension, resulting in a much looser knit, and a much larger final product. I was casual about seaming the 2 open ends of seaming the knit together on the machine by simply using a latch tool bind off, an invisible seam could be created by grafting with Kitchener stitch. I did a bit of stuffing as I went along in seaming the lengthwise portion of the piece in the second donut, as opposed to leaving a smaller opening in the first, making the process easier, and I paid more attention to seaming of the side “tube” stitches. Once again, it is obvious that changing the material may change the size of the final product significantly, making those tension square calculations important for any predictable results in sizing.

donuts


Carpet or pile stitch knitting on Passap and Brother KMs 2

Trial swatches do not necessarily require a permanent edge. The main bed cast on with all open stitches is familiar to knitters accustomed to using a single bed Brother cast on comb. A quick version of the same type of cast-on is also doable when both beds are in use, and the goal is to knit all stitches only on one bed or the other. The broken toe cast on for rib is so-called because if comb and weights are hung in the wrong location on the needle bed when stitches on the opposite bed are dropped, so will the comb be along with weights, heading for your feet. If the ribber is going to be the bed doing the knitting that anchors dropped stitches or pile in Brother kms, please note prongs of ribber comb line up directly in front of main bed needles (blue arrow) and to each side of the loops on ribber bed needles (red arrow). The ribber comb wires will anchor down loops on the needle bed where plain knit rows will be formed. As mentioned above, this method will result in stitches all being open, does not produce a permanent edge, is suitable for quick swatching or for waste yarn at the bottom of the weighted fabric. It is possible to perform this cast on with ribber comb with wire already inserted in both brands, but the broken toe method is potentially less hazardous to needle health. brokent_toe_arrowsAnalyzing what is required to move between km brands with the goal of achieving 2 color or isolated pile motifs: in Passap with the back bed set to FX, one arrow key, EON pusher/ needle selection changes every 2 rows. In Brother, this may be achieved on the main bed by pushing in one tuck button and programming a repeat.  The alternate, adjacent cam button, left in its normal position, will knit every stitch when knitting direction is reversed regardless of whether any needle selection is happening. On the ribber, lili buttons may be used for alternate needle selection. Its levers determine whether tucking or slipping, in one direction or both, occur. The number of stitches on the ribber must be even. An easy visual check is to check markings on needle tape, which consists of what I refer to as dashes and blanks. For an even number begin with one, end with the other.  Passap will automatically revert to the alternate pusher for patterning on the subsequent 2 rows. In using lilis this is not an automatic function, and some handwork is required to obtain the same effect by changing the first needle selection every third row as seen in this post.

If the ribber is chosen as the loop making the bed, the needle selection on it needs to be manual for any pattern other than across whole rows. In my swatch, to knit across all needles the ribber carriage is set to slip in one direction, knit in the other. The all knit rows in pile knitting need to follow the ones with tuck loops on the opposite bed.  Extra needles are on the main bed, which creates fabric backing. The ribber carriage can be disengaged and used to drop stitches after all knit rows on the main bed.

In the actual knitting, if a plain one color pile with plain color backing is the goal, some rules may be broken. The thickest, most stable pile is achieved when the yarn anchoring the loops is as dense as possible. If the goal is to knit every stitch across each row to create loops and in turn drop them, one is, in fact, working an every needle rib. This makes it possible to create tuck loops on either bed creating the backing across the whole row because in fact there are stitches on each side of the tuck loop on the opposing bed anchoring it in place. Normally when 2 or more needles tuck side by side, rather than the stitch formation usually seen in tuck patterning, the loops do not get anchored, drop off, and create a float like those seen in slip stitch patterns.

In my first sample, the fabric is cast on the main bed, the loops are formed on the ribber. The carriages are set for the main bed to tuck traveling to the right, knitting to left. The ribber is set to slip to left, knit to right. The ribber is used to drop the stitches, simply by disengaging it from the main bed and running it across from one side to the other. Dropping stitches occurs (on either bed) after all stitches have been slipped there for one row (no needle selection if patterning). The starting side for my swatches was on the left of the machine. It is helpful to have a ruler or tool to help push loops down between the beds after dropping each row of loops and also to occasionally drop the ribber in order to check whether any loops may be caught on gate pegs.

In this swatch, I had some problems (blue arrow) on the right side related to changes in tension while determining what might be the best. Section 1 has every needle tucking on the main bed. Section (2) begins to try to emulate the Passap pusher selection using an EON 2 row tuck repeat on the main bed, resulting in things going awol and loose, even at the tightest tension possible on the main bed. Any time patterning is used on the main bed, end needle selection is canceled (KCII). The tuck repeat2 row tuck

the settings (here lili buttons are not in use1X1 card MBno lili2

ribber loops2To create every needle loops for pile on the main bed: CO is on the ribber. With settings on the image below left (no lili buttons in use), the ribber tucks loops on every needle traveling to the right, knit all stitches moving to left. Moving to the right the main bed knits on every needle, slips the whole row moving to the left, giving the opportunity to drop stitches off. With settings on below right, lili buttons are in use, and the ribber now produces an EON needle selection, every row. Left alone the selection is what would be seen using the 1X1 card on the main bed, its repeat 1X1tuckloops on MBThe yellow yarn is a 2/8 good quality wool knit at 4.2 on the main bed, 3.2 on the ribber. Switching to a rayon twist of similar thickness created instant havoc. The dark grey was a mill end, tighter twist 2/8 wool. Red arrows show what happens when loops are caught up on gate pegs and not immediately noticed. The green arrow indicates longer loops that can happen when knit stitch on either side on the opposite bed do not knit off properly. The result is a dense wool fabric, so the tendency to roll at the top and bottom of each piece toward the “knit” side of the fabric needs to be considered at the top and bottom edges of finished pieces.

knit with no lili buttons in usemain bed loops2

In 2 color knitting, or creating isolated motifs whether on one color or striped ground, anchoring loops by tucking on every needle is no longer possible, making reverting to EON needle selection on ribber a necessity. The results are dramatically different. These swatches were made using lili buttons or hand selection on ribber, loops on the main bed. If things don’t work in one color, they will not in 2, so one color, every needle pile is a place to start evaluating the results

1X1 lili selection left me with “where are the loops?”white_lili

In the bottom section here I tried 1X1 hand selection for 2 consecutive rows,  the narrow band in center back was back to 1X1 to separate areas using lilis, at the top I used lili buttons and brought an extra needle into work on ribber before traveling to the right every third row (making needles in work on ribber an odd number), returning it to out of work before knitting back to right. Dropping stitches every 4 rows makes tracking the sequence easier. The resulting pile is far more “subtle” than samples worked with every needle tucking on the bed creating the backingyelllow-lili_500

So far I still have had no luck with getting anything that does not look like a variant of drop stitch lace when attempting patterns separated for 2 color knitting, either in embossed one color, or in striped 2 color versions.