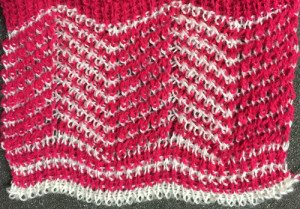
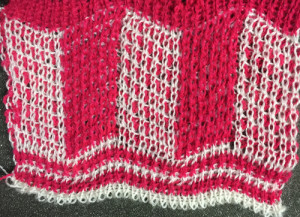
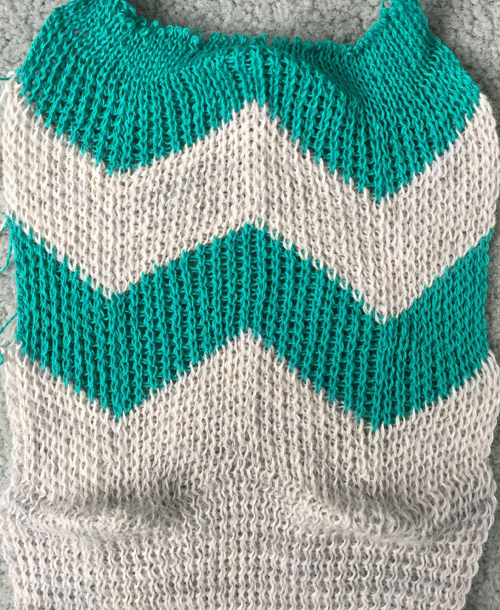
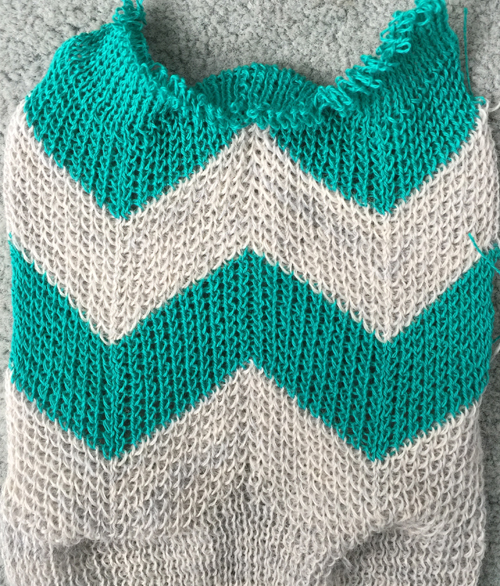
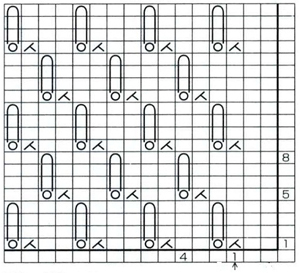
Vertical racking 3: automating half fisherman in pattern (2)

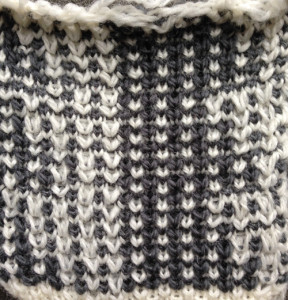
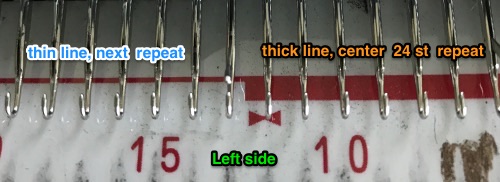
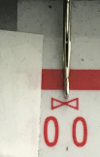
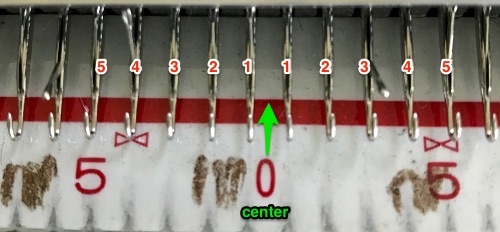
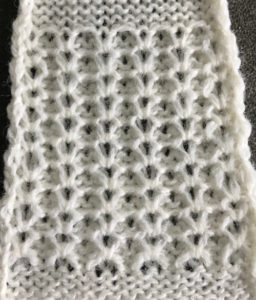
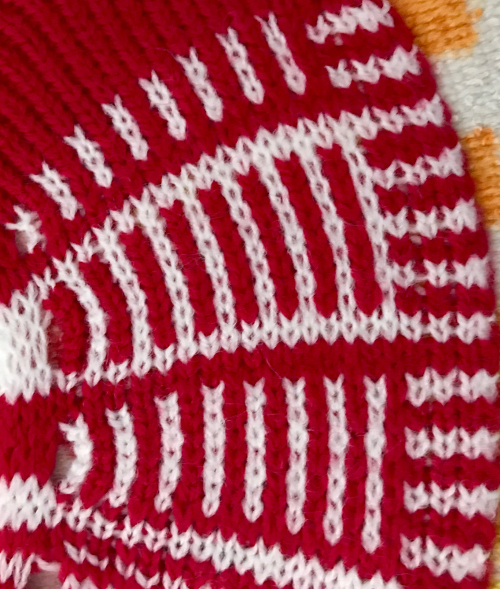
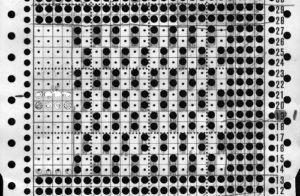
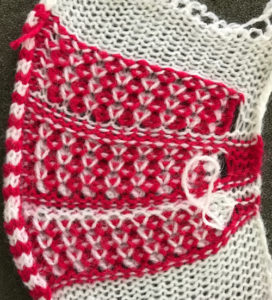
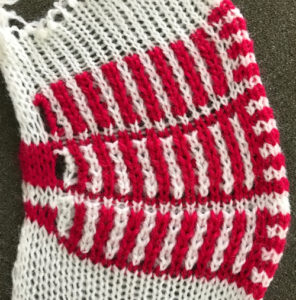
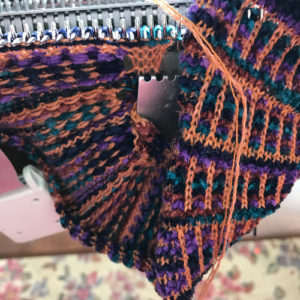
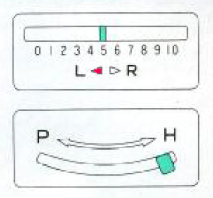
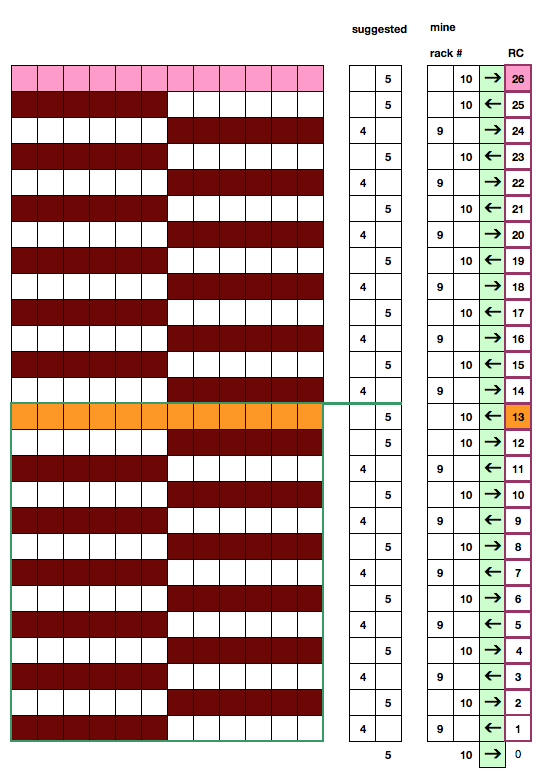
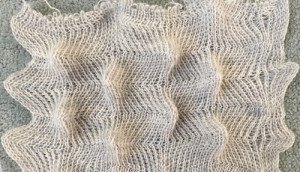
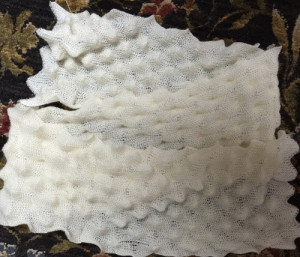
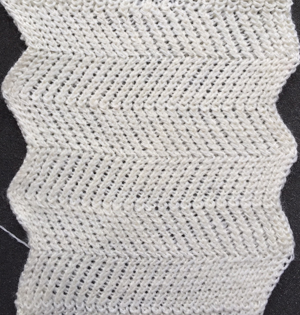
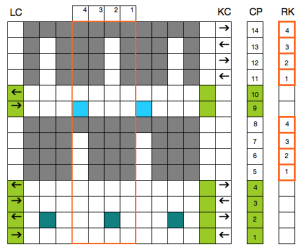
Working with the half fisherman racking discussed in the last post, here is an approach to interpreting the fabric seen below for knitting on a Brother model knitting machine.  500_557For the sample chart, I chose a 12 stitch repeat, making it executable on any knitting machine. The ribber is set to half-pitch. An often-overlooked clue as to what is happening or is about to be found in the arrows just below the racking position indicator. With the latter at 5, the red triangle appears pointing to L. As the bed is racked to position 4, the red arrow now points to the letter R. This is a simple racking pattern involving only the 2 positions, either to R or L

pitch_rack

Once on position 4, the red arrow indicates the direction in which the bed was racked on the last move (R), the “empty” arrow the direction for the next move (L), bringing the position back to 5. More complex patterns require a bit more planning and tracking to avoid errors.

rack2

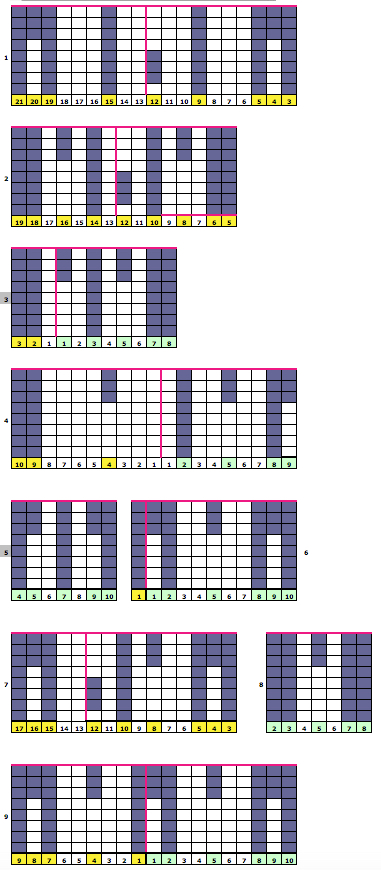
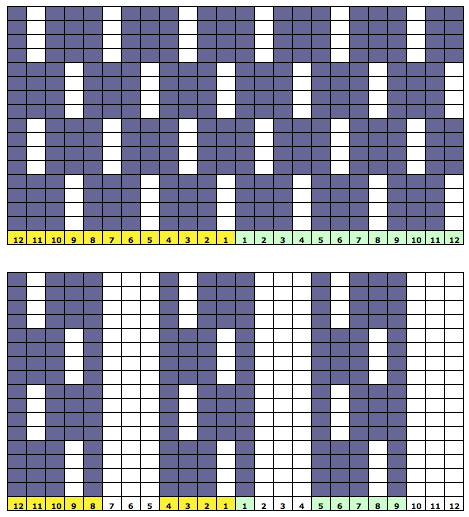
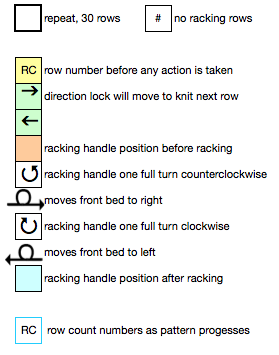
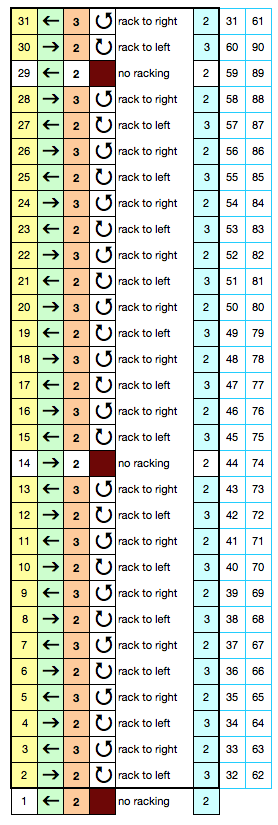
Racking patterns in books often recommend beginning the fabric with the setting on 5, or the center position for the machine in question.  Doing so allows for balanced edges in patterns that swing by multiple positions in both directions. In this instance, for the sake of avoiding mistakes in as many ways as possible, I would start the pattern on racking position 10. Racking cannot go any further to the right, so no chance for example of racking to 6 rather than 4 in the knitting because of inattention. Having a “cheat sheet” with row numbers where no racking occurs, and the position of the carriage to R or L at their start and or after the knitting is also helpful. I had to lower the tension on both beds considerably to avoid forming loops that in turn got hung up on gate pegs. Especially at the start make certain that the comb and weights drop properly. Using KCI will ensure that the first and last stitch on the main bed always knit. In the patterning used on the Passap back bed (previous post), the groups of needles in each half of the repeat will change to the alternate position with each pass of the lock. On the rows where the back lock is changed to N, selection continues in pattern, but no tucking occurs. In this chart, the pattern is maintained continuously throughout, while blank “remaining” squares are filled in on rows where no tucking or racking occurs = N, every needle knits. In Brother machines, both tuck buttons are pushed in. Selected needles knit, non selected tuck across the row. new program 2symbols

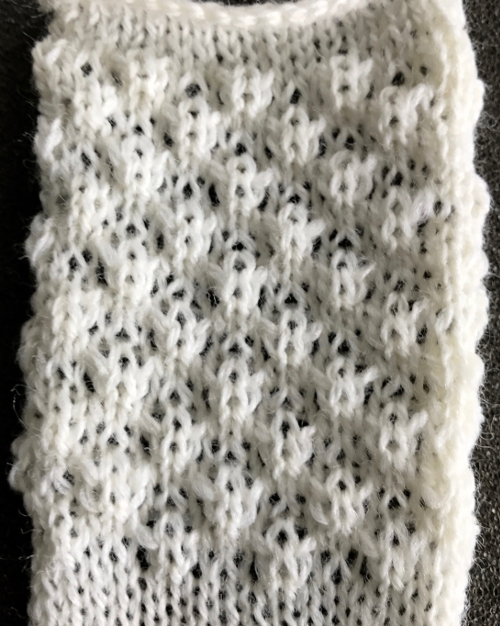
I tested the pattern approach on my 910, with a 38 row, 20 stitch repeat in a random acrylic. I had some issue with some needles not selecting properly, for whatever reason. The repeat was not planned so a full 10 stitches were at each side of the knit, resulting in the difference on the right side of the swatch photo from its left.

larger repeat

half the repeat with color change on a single plain knit row (use of color changer only possible with even row change sequences), the top stripe of the swatch in plain rib

half repeatN1

1rowN1_584

back to scales and knitting them

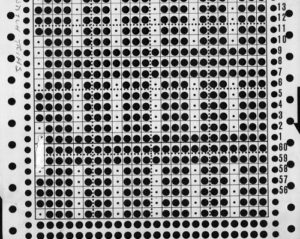
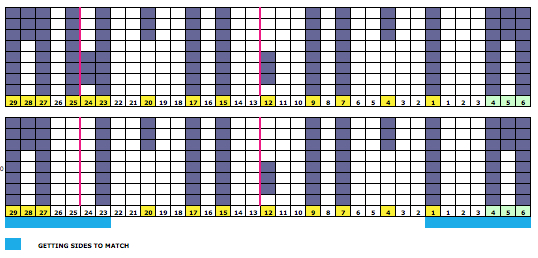
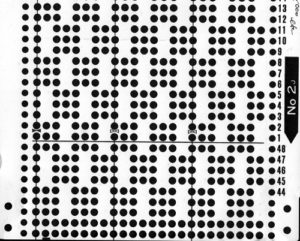
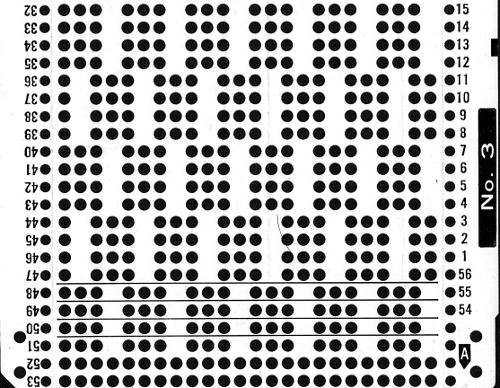
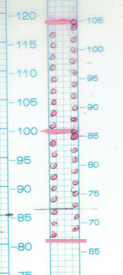
Overall,  wider repeats and thicker yarns gave me harder to knit fabric, with less noticeable pockets and lack of stretch and “bounce”;  ultimately I went back to a 6X6, 12 stitch 2-row sequences illustrated in the chart above. The thinner yarn needs to be with a bit of stretch, and enough strength not to break when ribbed and racked at the tightest possible tension. This is a fabric that requires concentration, having as many clues as possible to help stay on track is useful. If errors are made close enough to the all knit row, it is possible to unravel carefully to that point and continue on. Mylars or punchcards may be marked to reflect racking position. Here the mark on the right = 10, the one on the left = 9. Marks take into consideration that the card reader’ design row and knitter’s eye level row views are not the same.

mylar_marks

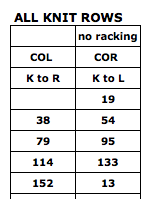
A row cheat sheet can help track carriage location for all knit rows. Pictured below is part of mine. Wording for clues or description of sequences should make sense to the person knitting, not necessarily follow a specific formula.

screenshot_34

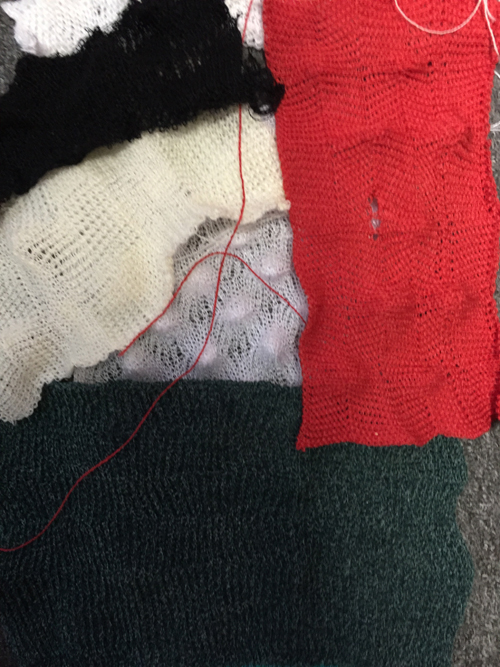
some of what “did not work”, including a very long swatch with a confusing pattern due to creative operator error

500_591a finished piece with yarn ends not yet woven in500_590

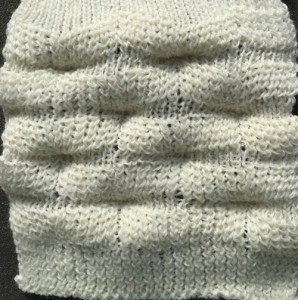
The fabric is tugged lengthwise, left unblocked, and pockets may pop on either side of it, with the majority on one side of the knit as opposed to the other

the start of a series in varied colors and fibers500_604

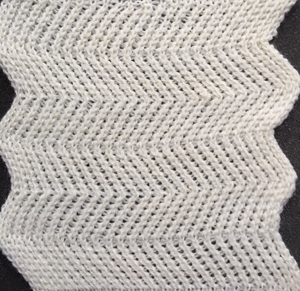
Racking 2: vertical chevrons/ herringbone +

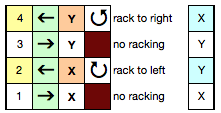
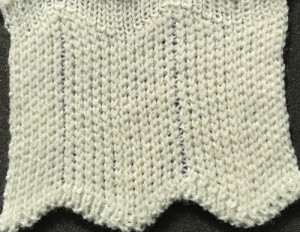
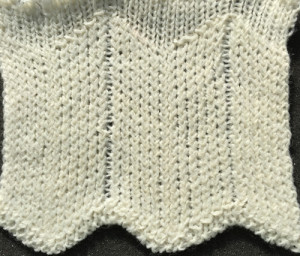
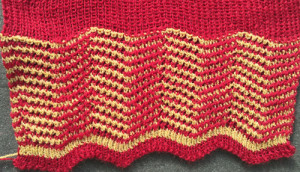
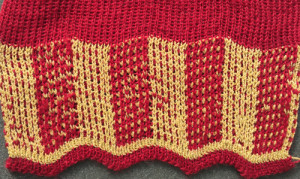
Here again, half fisherman or full fisherman rib is be used. The zig-zag happens at the top and bottom of the fabric. In half fisherman, the setup is once again for full needle rib. If knitting in one color the sequence is: knit one row, rack a space, knit one row, rack back again (X and Y below represent the 2 racking positions involved screenshot_39

for 2 color fisherman, the sequence is knit 2 rows with col 1, rack one space, knit 2 rows with color 2, rack one space back again

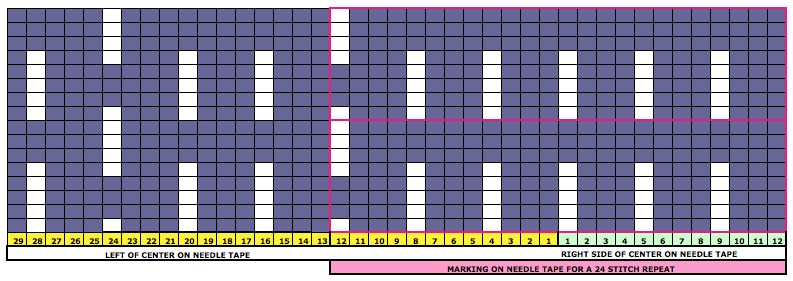
screenshot_41 this fabric is produced in conjunction with a pattern repeat using the principle that black squares knit (pushers up, needles preselected), white squares tuck (pushers down, needles not selected), the repeat is 12 stitches wide, 2 rows high; it is possible to have 6 stitches tucking side by side because this is an every needle rib, and there will be a knit stitch on the opposite bed anchoring down each tuck loop

screenshot_42

screenshot_02

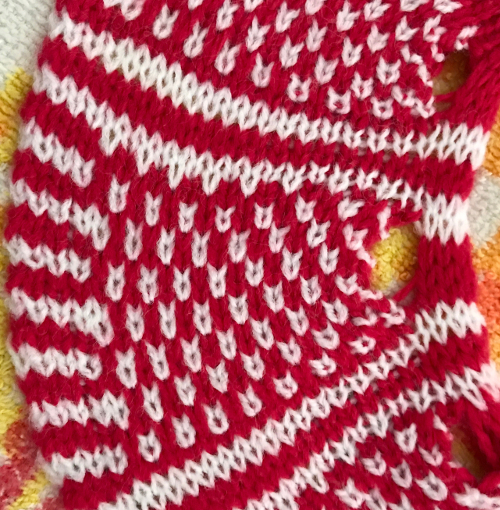
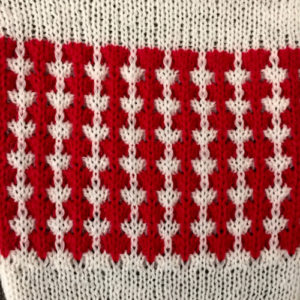
one color half fisherman side one   500_528one color half fisherman side 2500_5292 color setting, color changes every 2 rows, side 1, thinner yarn
500_542
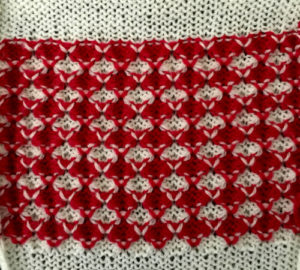
side 2

500_543

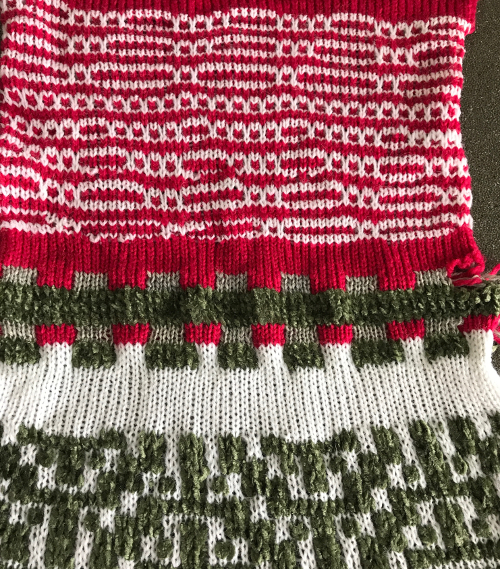
2 color version, changing color every 20 rows; racking interrupted with plain knit rows at top and bottom creating horizontal pockets20rows_plain

20rows_plain1

This type of repeat became popular in Passap clubs for use in their Passap ripple afghan. The racking first to the left and knit a row, knit to the right and knit a row, was interrupted after 36 rows, followed by a color change and a no-racking knit row before resuming the previous racking sequences.
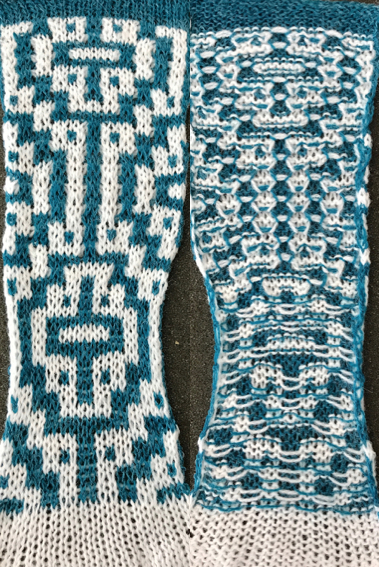
When single or multiple odd # of rows with no racking are introduced at intervals the zigzags once again happen at sides rather than top or bottom, with the knitting after the no racking row(s) reversing direction. The yarn used in these swatches is a random acrylic, presses flat, not the best if aiming for any 3D textures; the color difference is due to photos being taken at different times of day

side one 500_530side two500_541

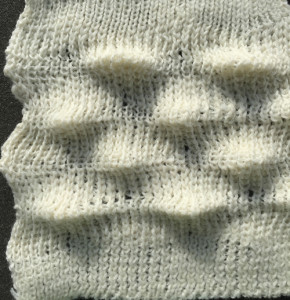
what happens when multiple odd numbers of rows are knit changing back lock set to N (all knit), no tuck stitches. The fabric still swings in opposite directions, and in addition, the all knit rows produce areas that “poke out”, beginning to create scales of sorts

side one 50537side two 500_538back to vertical: full fisherman with color changes every 2 rows, side one 500_539side 2, with a few stitches knit off issues  500_540

it is a matter of personal preference whether the extra effort with full fisherman rib is worth any difference in appearance or result in the final fabrics. Changes in tension, yarn fiber content, and machines used add to the variables. Good notes in trials help one determine predictable results and to choose whether the effort may be worth it or not. Using laborious techniques for borders rather than whole items is always an option.

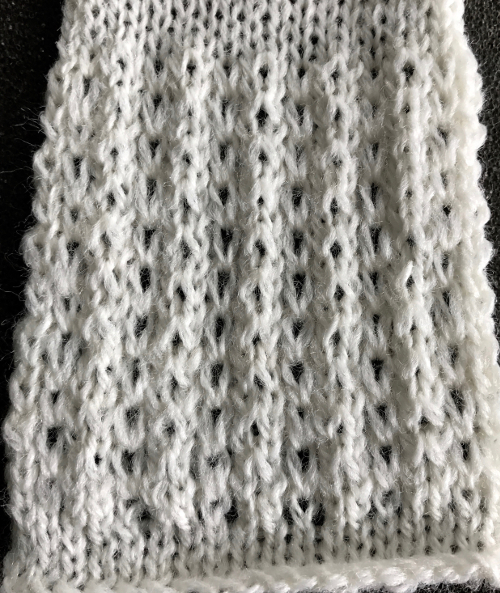
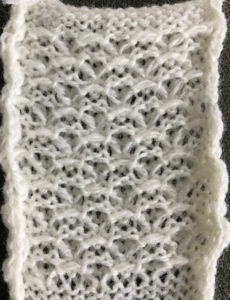
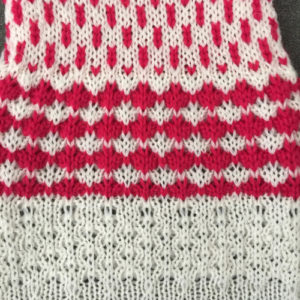
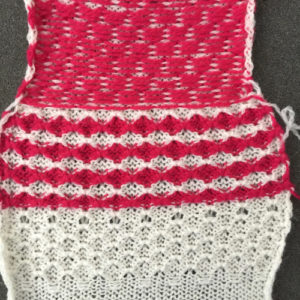
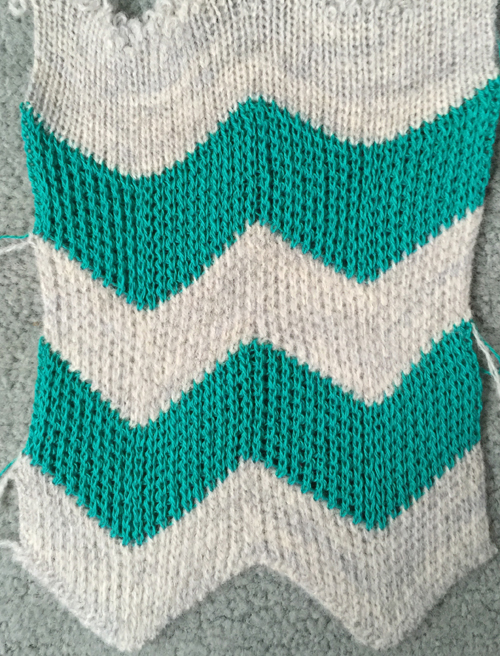
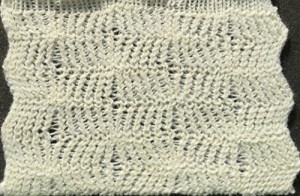
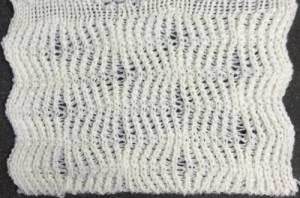
1/22/2016: half fisherman racked rib knit in thinner yarn, wider # of stitches and more rows in pattern group before single N/N row, no blocking

500_557

500_558same fabric with color change every 2 rows 500_561

500_566

Ribber pitch, a bit on racking 1: chevrons/ horizontal herringbone

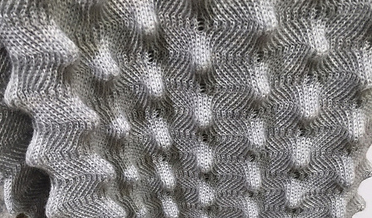
A “how might this be done challenge” of late re this fabric brought to mind racked patterns for chevrons, both vertical and horizontal, and the possibility of producing them on home knitting machines. racked_scarf_mediumTo review some of the principles in racking in both Brother and Passap knitting machines: the pitch is the distance between each needle groove along the needle bed is sometimes also referred to as gauge. The size varies between machine brands and types of machines. For example, the Brother bulky has a 9 mm pitch, the Passap a 5 mm one; the larger the pitch number, the thicker the yarn that may be used.

Full pitch lines up needles and gate pegs (or channels) on both beds directly opposite each other. To knit patterns in full pitch, the rule is that for every needle in the working position on the main bed, the corresponding needle on the opposite bed must be out of work, and vice versa. This setting is never used when groups of all needles are in work on both beds. Stitch patterns using this setting are designed to have opposite needles in work on either bed at any one time, but not both at once. The number of maximum needles in use for ribs on both beds will usually total 200 (4.5 mm machines), and the setting accommodates yarns thicker than when every needle is in use.

In half-pitch both bed needles are now offset by half a position, centering them between each other. The full complement of needles for possible use now is potentially 400 (4.5 mm machines); the setting accommodates thinner yarns than one might use on the single bed.

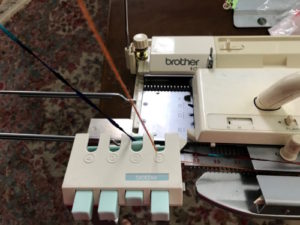
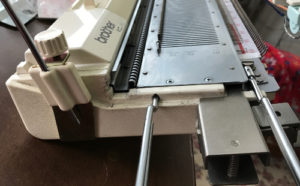
The half pitch lever on Brother may be moved from P to H to change alignments. In Passap the racking handle may be used in an up or down position to do so. The racking or swing lever allows the ribber bed to be swung one full pitch to the right or to the left in a series of stepped moves. The racking handle on Brother machines is located on the left-hand side of the ribber bed. Racking swing indicator positions are numbered 0-10. When the racking indicator has been moved over to the next number, this means the ribber has moved by one full pitch. With the swing indicator at 5, both beds will be centered opposite each other, the usual position. Starting points may vary when racking is used in patterns. Beds cannot be racked with needles in holding, as needles will then crash into each other. It is always a good idea to check ribber alignment before tackling more complex, double bed fabrics. In Passap the racking indicator is situated above the racking handle, and arrows indicate the direction of the last movement. The scale at the top of the front bed shows the possible racking movements from a center point of 0 to 3 to either to right or left of center. I chose to place numbers below the factory ones on the machine from 0 to 7, finding that method easier to follow, since I do not rely on built-in patterns and racking prompts from the console. For the purposes of these swatches, I am reverting to the factory indicators.

In the Passap system, the racking handle has 2 main positions: up, and down. When the racking handle is up needles are directly opposite each other (P pitch in Brother), when it is down the needles are between each other on opposing beds (H on Brother). There are some racking handle positions at different parts of the “clock” that are recommended when using some of the Passap accessories.

Regardless of machine brand needles have 3 basic functions: knit, slip (do not knit), tuck (gather loops). Passap pushers have 3 positions: work, rest, and out of work. When a pusher is in the up position the corresponding needle will knit no matter what the setting on the pattern dial. This is the equivalent of having needle pre-selection on Brother, but forgetting to change cam buttons from the normal knit setting. When a pusher is at rest it will slip or tuck depending on lock setting to AX, DX, or FX (in Brother these would be needles not selected, in B position). If locks are set to C, E, or G, the pushers have no effect on the needles. Pusher positions may be changed manually, automatically by arrow keys (back lock Passap, lili buttons, and lever Brother ribber), automatically by readers whether electronic or punchcard on both brands in the Brother main bed or front bed Passap are in use.  NO pushers are used in N (double or single bed plain knit), CX (tubular), EX (double bed, tuck).

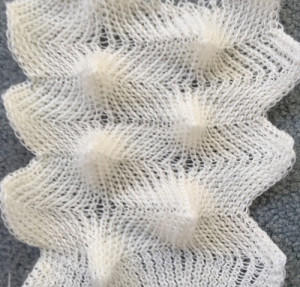
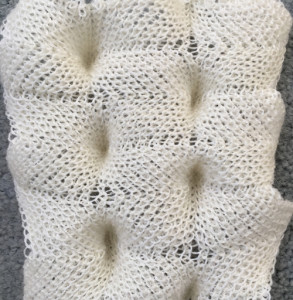
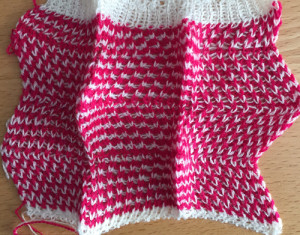
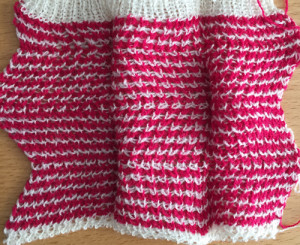
I personally find racking easier in terms of the numbering in Brother brand machines. For these samples, however, I chose to work on my E 6000. Adding tuck to the mix creates more textured surfaces, and a half or full fisherman’s rib where every needle tucks, then knits as the carriage reverses direction on either single or both beds, is a place to start. I have written previously on tracking brother racking sequences using a punchcard numbering system. If no other pattern is used on the main or front beds, needle and pusher selection might be used to track the racking position there as well. These fabrics require concentration. In terms of chevrons, both horizontal and vertical may be produced. Some published sources include a youtube video by Diana Sullivan, knit on a Japanese machine, and a baby blanket in full fisherman rib knit on the Duo 80. The version below is my half fisherman adaptation of the latter. The photos illustrate both sides of the fabric. The racking is done by moving a single of each of only 2 positions to the right or to the left. Single (or multiple, odd-numbered) rows at the end of each sequence place the carriage at its start on the opposite side, rather than altering the numbered sequences as in the Diana video. I began my fabric on Passap racking position 2, to the right of 0, locks set at KX, N, first and last needle in work on the front bed. The back bed tucks every needle right to left, knits them left to right. There is a slight difference in texture between the 2 sides of the fabric.

300_514300_515

activate row counter after CX rows in the cast on, with locks on left, so knitting the racked pattern begins with locks on Right, RC on 1. Below is my working “cheat sheet”

symbols

cheat sheetsettings

For scales and chevrons on Brother machines please see 2018/07/19/more-scales-and-chevrons-in-ribbed-racked-4-fabrics/

Carpet or pile stitch knitting on Passap and Brother KMs 1

Pile, carpet, or loop stitch are terms used for a raised relief fabric made on KMs using both beds, with or without programmed patterning motifs on either bed. Two-color patterns are sometimes also called “punch pile”. Depending on the machine brand and on the thickness of the yarn, loops may be formed every row or every other, varying the pile density. Beds are always at half-pitch, the same setting used for every needle rib. The “needle rule” is disregarded. The first and the last needle are always on the non-patterning bed, to anchor down any loops close to the edge of the fabric. In machines with automatic end needle selection, the function is canceled. Some yarns and designs will even tolerate loops being dropped at the end of knitting. Sometimes dropping them every few rows will work. If any yarn splitting or fussy knitting off because of fiber content occurs, then dropping stitches may be needed after every row of loops formed. If using multiple colors of yarn on either of these 2 brands, having them equal gauge/weight is helpful.

The Passap knitting machines, as well as the Brother, did not have a built-in yarn feeder to facilitate knitting this fabric such as that possible in the Studio brand. Particularly with the advent of the E6000 Passap model, for a while, there was keen interest in how to produce similar fabrics. Susanna Lewis was among the first to describe knitting pile across multiple brands, whether punchcard models or, later, electronics.

The fabric loops are created with one pass of the carriage, the next row of knitting is intended to anchor down those loops, and with no needle or pusher selection, no stitches knit on the patterning bed. This fact gives one the opportunity to drop loops without disturbing pattern selection. Some of my drop stitch lace previous blog posts discuss designing such fabrics. Color separations are required. The E 6000 console performs many of these automatically, one simply has to plug in the appropriate “technique” number. The default DBJ separation made by the console in Brother electronics may not be used because blank rows for no needle selection need to be added in order to attempt the long loop or stitch fabrics. This, in turn, requires the knitter to do the work. Design rows are expanded

  • Graph        Motif        Color
  • Row 1        Row 1       Color 1
  • Row 2        Row 1       Color 2
  • a blank row is inserted  on top of each of the separated rows, so for each 2 color design row, there will now be 4 charted rows

The E 6000 has some built-in technique choice options for knitting and automatically adding blank rows in charts where needed. This allows for the locks, empty of any yarn, to travel from and then back to the color changer achieving stitch dropping. My preference is to work with stitch dropping tools instead of the extra rows “knit” without yarn. Also, if the goal is to work between KM brands, keeping the separations more compact is practical, particularly if one plans to use the end chart with a punchcard or a mylar sheet for programming.

I had tried some pile fabrics on the E 6000 in the past, found the knitting too loose for my liking, but by light felting (wool yarn) result, I had a stable, attractive fabric that could easily be cut and sewn in combination with other knit companion DBJ fabrics. Another option in wearables to add stability may be an iron-on knit interfacing used on areas of pile knit. When I pushed the back bed tension as much as physically possible with the yarn used and was happier with the result. The only problem I encountered was in thinking I could knit a few extra rows on the back bed only before dropping the knit off the machine for inspection. The old adage still applies: if more than a row or 2 are to be knit across all stitches on any single machine bed, each yarn has an optimum tension required for stitches to form properly. Pushing limits will lead to problems. I had a lovely lock jam. For wide ribs, the same principle applies the more stitches on either bed, the closer tension on that bed to what number would apply to stocking stitch on that bed.

CARPET STITCH KNITTING ON PASSAP E-6000 with release stitch tool. Use any 2 color Fairisle pattern from the pattern book that accompanies the machine. Both Passap manuals are now available for free download online. I randomly chose # 1407 for my test.
Start with all stitches on the back bed. If the piece is started with ribbing, transfer all the front bed stitches to the back bed. For test swatches, if open stitches do not matter, it is possible to do a quick single bed cast on the Passap in a couple of ways, the “broken toe” cast on will work across brands. Have an extra needle and pusher on each side of the back bed when setting up work for patterning. Set the back bed tension as tight as possible, with the front bed 1 – 1.5 tension numbers looser than the back bed. As always test a small swatch before committing to a larger one.
Start with all stitches on the back bed, with an extra pusher on each side on the back bed when setting up for patterning

One-color carpet stitch in design:  Technique 256,  handle down, black strippers are recommended. I rarely if ever use black, go for orange first, sometimes combining with one blue or switching to 2 blues if the fabric calls for it. Ignore console instructions. The back bed is set to FX  left arrow key <–, not BX as instructed. Do not use the AX setting by mistake. FX will tuck right to left, knit left to right (toward the color changer, which in Passap sits on the right side rather than on the left as in Brother machines). Knit rows help anchor loops. Back bed pushers are in 1 up, 1 down set up.
Using one arrow key means the same selection is repeated for 2 rows before the switch is made to the adjacent pusher and the corresponding needle.  The front bed is set to LX (slip) throughout. The racking handle is down (setting for every needle rib).  Two rows are knit, then the front bed stitches are dropped (Passap knitting beds are in reverse position to Japanese machines set up with their ribbers). If loops are long they may need to be pushed between the beds before knitting the next row. Passap machines have pushers for this purpose, in Brother rulers or any number of tools may be used for the same purpose.

Two-color carpet stitch:  Technique 185, black (or other) strippers, 184 may also be used, its graphic gives the added reminder for 1X1 pusher set up on the back bed. The back bed tension setting is the same as for the one color pattern, the front bed knits in LX throughout. In theory, stitches may be dropped every 4 rows. Some yarns may split and catch the alternate color requiring dropping after each color is used, others will tolerate much less frequent dropping. It is all an experiment to start with.

Again: the back bed tension must be as tight as possible, the front bed at least 1.5 tension numbers higher until tests determine what is best for the yarn being used. Multiple strands of some thinner yarn may also be worth a shot. Weights are needed on the knitting, no matter what brand machine is in use.

One-color trial: back tension too loose, note change in texture after tightening back lock tension; the loops are formed on the purl side
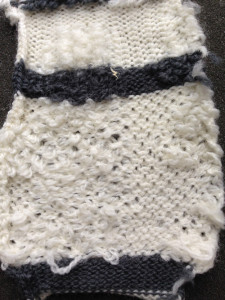
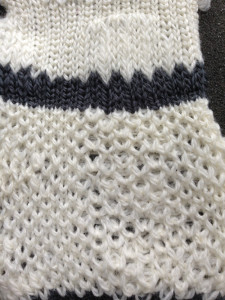
passap front 1col

passap back 1col

the 2 color version, with adjusted tension on the back bed
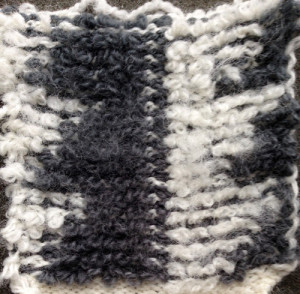
Passap front2col

note vertical stripes in backing
passap back 2col

At the end of knitting the pile, add anchoring rows of knitting on the back bed only (tension may need to be changed after a couple of rows), proceed as preferred.

embossed one color pile (black 2/8 wool)Passap black pile
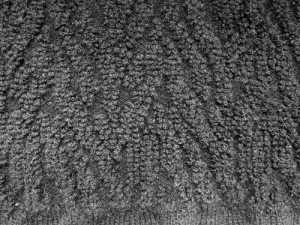
One-color pile, striped background:
Technique 185, black strippers, handle down. Locks set as for above.
Knit two rows with the pile color
Set all front bed pushers down to rest position, change to the second color
Knit 2 rows, the back bed only will knit
Drop the front bed stitches, set all front bed pushers to work position-

Previous posts with info on accessories useful for dropping stitches and loops 1, 2, 3.

This method is a hack intended to emulate pile knitting created on the Studio machine. The ribber features had specific options for such fabrics. These pages are from the Singer SRP-50 ribber manual and one of their punchcard books and share some principles while illustrating setting and card design. Food for thought on any adaptation for use on other brands. Studio settings were reviewed in post-2015/02/20/pile-knitting/.

The comment on this post, clarified in an email, was actually in reference to knitting a solid singlecolor pile on the Passap. Tech 256 is intended to be used with a stitch pattern. This is a fabric that is slow to knit. My Passap had long been unused, and I had issues with yarn splitting and the yarn mast not maintaining even tension, which accounts for the occasionally pulled loops where they did not drop off properly, and the changes in some of the stitch sizes in a few rows on the reverse side. Looking at the Studio information again, I went back to the drawing board for a solution and a proof of concept swatch
1. cast on so that all stitches are on the back bed
2. knit a few rows in stocking stitch sorting the tightest tension at which your yarn will knit, also experiment with the front lock tension in order to produce as large a loop as possible that will also drop off properly, end to  begin your test with locks on the right side: 
3. bring back bed pushers to the up position, set the back lock to EX with the left arrow key. All needles will tuck moving to the left, and knit on their return to the right
3. the front lock is set to CX, it will knit on all needles to the left creating loops on the front bed, while the back lock does the same, slips all needles moving to the right.
When the locks reach the left side there will be loops on every needle on both beds. As they move from left to right, the needles on the back bed will knit, securing the loops there and anchoring the ones on the front bed while the front bed is slipped
4. with locks again on the right side, use stitch ditcher or another tool to drop off loops on the front bed, returning needles to proper work position, follow with a pass using a single eye tool to push loops between the beds, checking that none are left in the needle hooks
*make 2 more passes with locks from and returning to the right, drop off loops**, and continue from * to **
The difference in the size of the long stitches between loop rows in the photo was eliminated by tightening the tension on the back lock,  it is evident that even are anchored even in those segments. As with any fabric, the larger the intended piece, the more likely some further adjustments may have to be made.
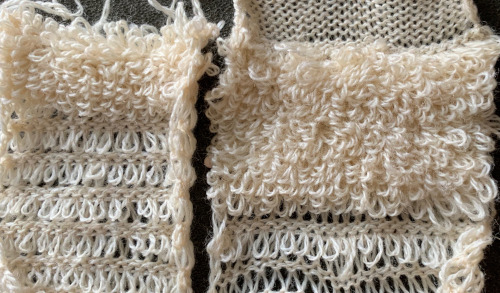
Combining tuck stitches with lace 2 (automating them)

Working with 2 carriages when both are selecting needles brings up some interesting issues. Studio machines are able in most instances to select and knit in the same row. Brother preselects needles for the subsequent row, and on that row, while knitting the preselection, once again, the preselection is made for the next pattern row to be knit.

A couple of my earlier posts on the topic: knitting with 2 carriages and a lace round doily which combines lace with slip stitch selection to emulate holding for creating the needed spiral.

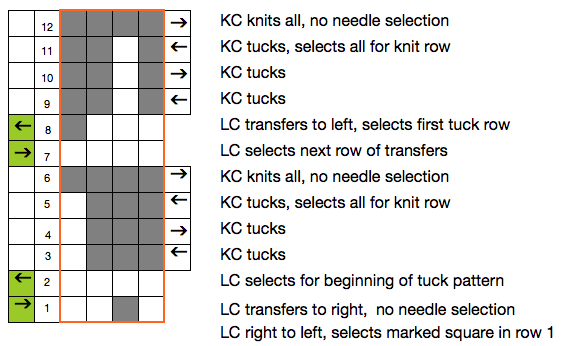
Following up on the previous post, now attempting to automate the stitch, some of the logic in needle selection needs to be explored. The chart as drawn below simply addresses functions that may create the desired fabric. It is incorrect in terms of accuracy in actual knitting it

theory

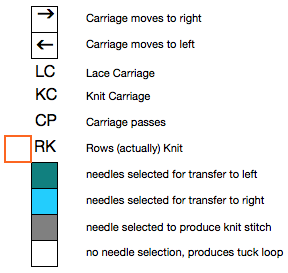
 symbols used

theory symbols

reworking the repeat for use with mylar

mylar selection

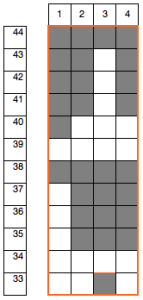
 the drawn mylar repeat, numbers reflect placement on my sheet

mylar repeat

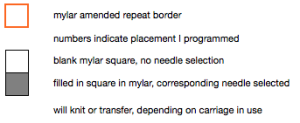
mylar symbols2

When both carriages are in use for pattern selection, they will both engage the belt. While either carriage is in use, the alternate one needs to be off the needle bed, or the belt may actually break as one carriage holds it in a fixed position, while the other tugs at it toward the fixed spot from the opposite side of the machine. Lace extension rails are used on both sides. There were variations over the years, including a pair to fit the bulky 260 KM. They are not always exchangeable between models, need to sit properly on the machine for carriages to be stable while stored to the side, and also for moving them off and onto the machine easily.

Pre-punched standard Brother lace cards usually begin with the lace carriage selecting the first pattern row moving from the left side to the right. As with any lace or tuck fabric, knitting begins with waste yarn that is weighted evenly and any edge treatment of choice. On the 910, because of the preselection factor, and to keep the pattern continuous in proper order, the knit carriage is removed from the right side of the machine, and the lace carriage does a preselection row from right to left. That will be its start and return position for the remainder of the fabric. The knit carriage is returned in turn to its home on the right end of the machine, on the extension rail.

Two types of fabric are being created. The goal is to have the edge stitches knitting throughout. To accomplish this, if the LC is in use, eliminate any end needle selection by pushing needles back to B; when the KC is in use, if the end needle is not selected, to get it to knit, it needs to be pushed out to E. The pattern sequence is an easy one when up and running, with 2 passes of the LC, and 4 of the KC, as seen in the charts above.

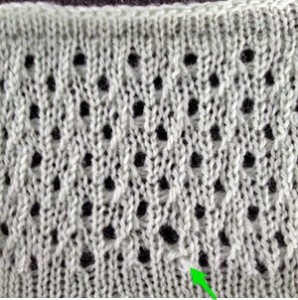
The knit side is shown below, the arrow locating the larger eyelet points to operator error: I had a stitch caught on a gate peg, and was not aware of the problem for several rows. The extra loop of yarn can actually be seen. Tuck fabrics are often far more interesting on the purl than on the knit side

mylar_knit1

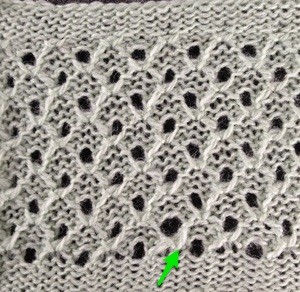
the purl side, with an arrow indicating the same problem spot

mylar_purl1

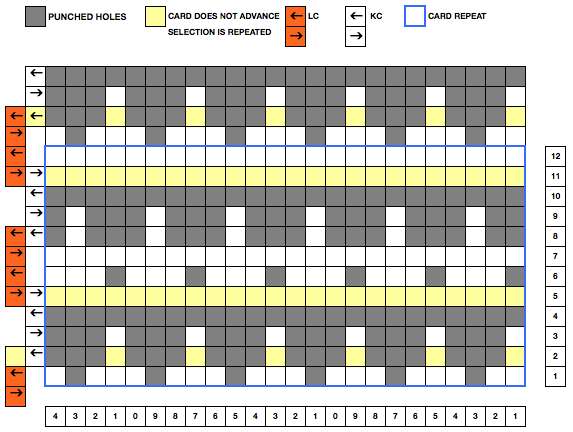
The question that follows is how to program the same design for use with a punchcard machine. Here things get a bit more confusing. The electronic machines advance the program or card a single row for each carriage pass, no matter their direction or sequence. When the punchcard carriage is at rest on either side and the alternate carriage moves toward it, the card does not advance, so the needle selection stays the same, is repeated for a second time. A bit more planning is required and the repeat needs to be shortened to accommodate for this fact.

The chart below shows the amended repeat for punching a card. The first selection row is made with the card locked, and the LC moving from left to right. The card is then released, LC moves to the left, transferring stitches selected from the previous row to the left while selecting those for the first row of tuck. The next row, using the alternate carriage, begins the ongoing sequence

punchcard chartA

the actions of the carriages with each pass

what carriages do

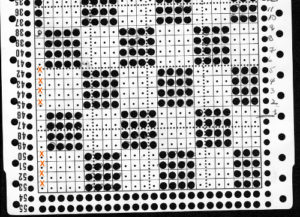
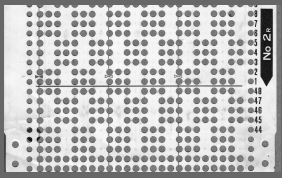
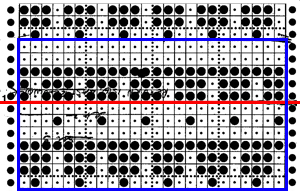
The actual punched holes are shown below. The writing on the card is a ghost from a previous experiment. The red line marks starting row 1 for Brother knitting, blue border outlines a single repeat. A minimum of 3 repeats are needed for continuous reading by the KM

punchcardFabrics with color change every 2 rows such as mazes and mosaics are easily knit on the electronic with 2 carriages. If worked on a punchcard machine, they would have to be executed using a yarn changer and only the knit carriage, unless the design motif is redrawn to factor in the issue discussed above. A previous post, part of a thread on mazes and mosaics, with a punchcard swatch photo.
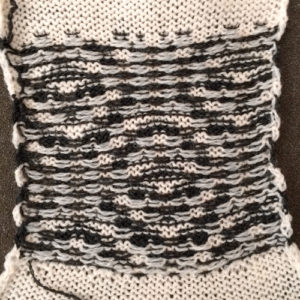
The first preselection row in any patterning that involves color or carriage changes every 2 rows, is usually done toward the side of the machine that holds either the color changer or the carriage next in use. As seen above, there are exceptions to that “rule” as well.

Combining tuck stitches with lace 1

A simple chart, from a random Japanese publication

tuck and lacethe isolated repeat outlined

tuck and lace2

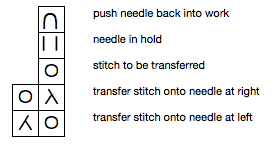
symbols used

symbols1

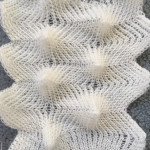
of note: in the above pattern, all transfers are in the same direction. My test swatches were knit on bulky 260 KM. Held stitches form loops on top of needles brought out to E position. The original stitch formerly in the needle hook grows in length, behind the newly formed loops. When patterning is automated using the tuck cam setting, the non selected needle will not be worked. The original stitch gets longer here as well, while the loops that in the hand technique rest on top of the needles, will now be held in the hook of the needle along with the last knit stitch. The latter fact is the limiting factor determining the number of rows that may actually be tucked, especially on Japanese machines. Yarn used and needle gauge also matter. Tucked fabrics, like lace, need to be weighted evenly for loops formed to knit off properly.
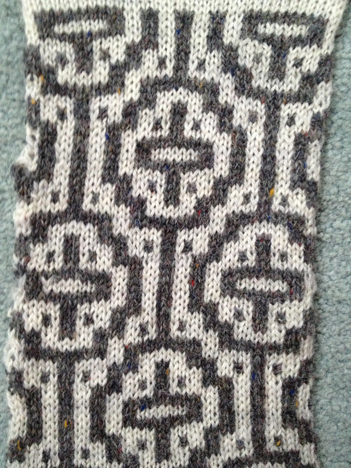
How to for my swatches:

knit base row (s), set up repeat so some stitches knit every row on each side creating a border, set machine to hold stitches

row 1: transfer every 4th stitch to the right. If you are in the habit of pulling needles holding multiples stitches to D before knitting the next row after transferring multiple stitches onto a single needle, this is ruled out when the carriage is set for holding, as those stitches would then not knit as intended on the next pass. To produce an eyelet, emptied needles are returned to B position after each transfer sequence

rows 2, 3, 4 bring alternate every 4th needle as shown in chart into hold, knit 3 rows
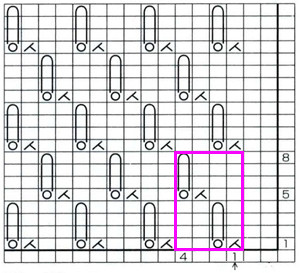
row 5: push held needles back into work (D on brother km),  knit one row across all needles. Held stitches will knit off as a group, check that they have done so uniformly

rows 6, 7, 8: transfer alternate every 4th needle out to hold, knit 3 rows
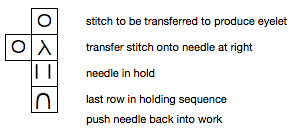
row 9: begin sequence again, repeating rows 1-8
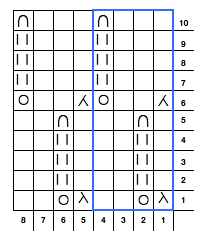
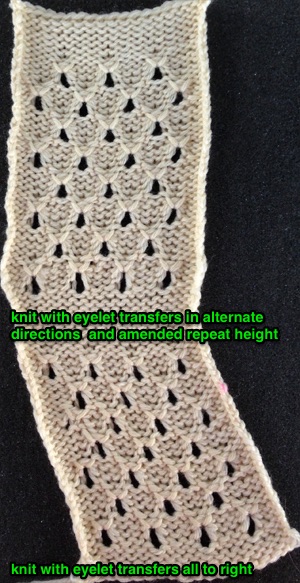
When transfers are made in a single direction, the fabric will bias in the direction of those transfers. In the bottom section of the photo below, the resulting lean to the left is easily seen. If a bias leaning fabric is desired, this is an easy way to get there. However, if the goal is to achieve a balanced fabric, then the transfers need to happen in opposite directions as seen in the top segment of the swatch.
knit swatchthe new working repeat

new_repeat

directions

the number of held/tuck stitch rows has been changed to 4 rather than 3. When the row that knits off the loops occurs, the total number of knit rows for the sequence will be an odd one, resulting in the carriage being at opposite sides of the needle bed at the end of each pattern repeat. Transferring stitches may then be made toward the carriage: COR – transfer to right, COL transfer to left. This makes it easier to track direction when working the fabric as a hand technique.

Next up: automating the pattern for standard gauge machines using the lace carriage, and tuck patterning in the knit carriage as well.

Fall knits in my studio

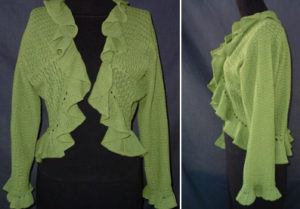
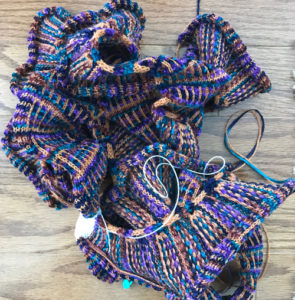
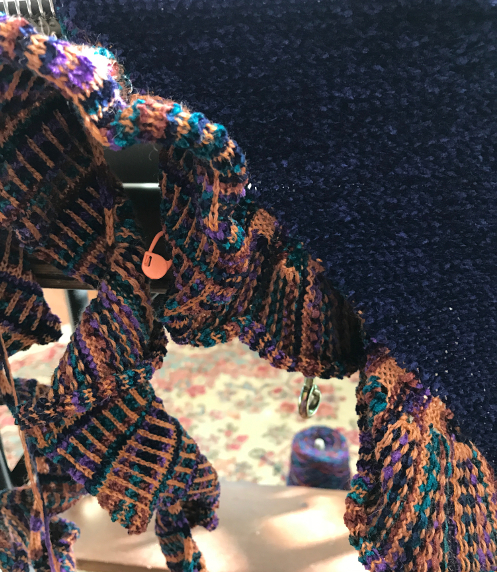
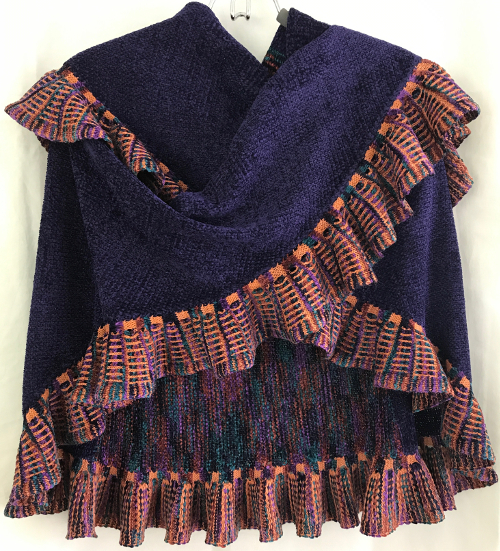
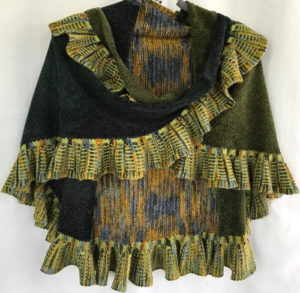
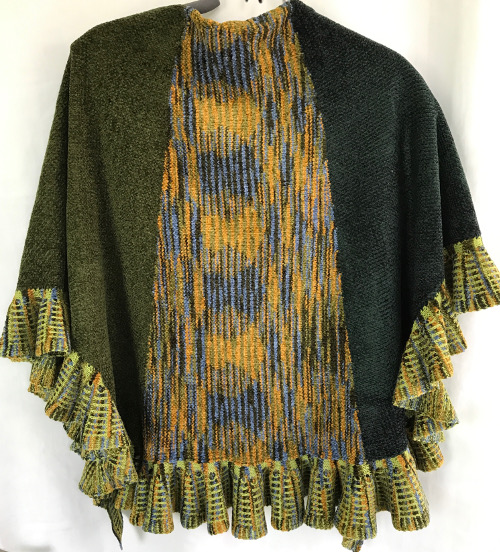
I promise myself every year that I will knit fall inventory during the summer, invariably that seems to not happen, and I find myself scrambling during September and October. I have had a line of ruffled edge shawls for some time. This is my way of interpreting some of the recent shapes in clothing into a shawl/vest format. Below are some shots taken on a dress form, with intent to visualize some of the possible ways of wearing it

a graded, smaller version and different color-way

both are knit using multiple strands of very thin, rayon/cotton blends, pattern is tuck stitch, with variant used in the ruffle, which in turned is knit sideways and seamed onto the piece while it is being knit.

another color way

some of my felt hat inventory in progress

More “circles from squares”

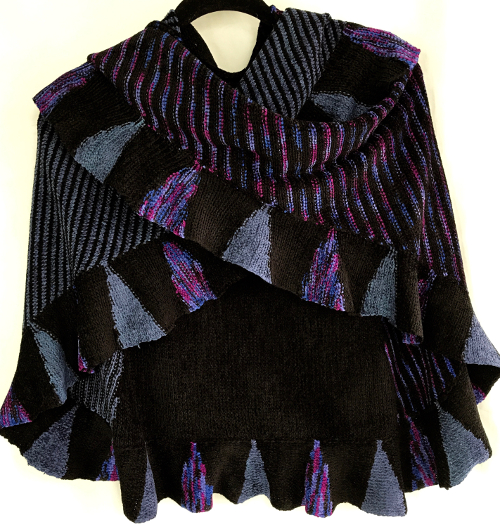
My latest wraps based on this principle are from a variety of fibers, and  knit on the Passap 6000;  the Passap allows for more tucked rows,  which in turn  provide the wider width for the “ruffle” at the top and bottom of the piece

altering the height of the “bottom ruffle” to about half  changes the angles in the drape in the front

my previous posts on the topic of attempting to achieve circular knits on the machine:

2011/06/24/taking-it-to-a-garment/

2011/06/25/taking-it-to-a-garment-2-donuts/

2011/06/30/taking-it-to-a-garment-3a-2/

011/07/03/taking-it-to-a-garment-3b/

2013/07/09/back-to-circles-from-squares/

A bit of fair isle

Fair isle accessories, scarves in particular, can be problematic. I tend to make most of my scarves in the 64-72 inch length after blocking, lining them would result in a very heavy scarf. Knit has a tendency to curl to the purl side in length, and toward the knit top and bottom. Rayon chenille is a customer favorite, knitting it double bed in any DBJ variant is nearly impossible on my E 6000 because of shedding and electronic eye reading errors (I would consider ladder DBJ), and I was left with finding a short float pattern that might look acceptable on its reverse, and lie flat. Weaving draft charts can be a great source for repeats for geometric FI knitting. The pattern used below is an adaptation of one. The first swatch (1) looked fine. The long one followed it. When I ironed it, however, I noticed not only a missing black square or 2 in my mylar repeat (hidden by the fuzz of the chenille in the first swatch) but how lovely for it to have a totally curved, far longer edge (if only that was what I wanted)! On analyzing the possible cause I noticed the repeat had many more stitches knit in the chenille than the wool along that edge. Back to the drawing board: the repeat was sorted out using high contrast, smooth yarns (3 and 4), and the pattern was adjusted to a different location on the needle bed. 

Then, I thought I might introduce a border. The chenille is thicker than the wool, so any hem or stocking stitch edge was too wide. I would have preferred to chain behind the knit to help flatten the bottom and top edges and ran into yarn breakage galore. The final piece was made using 1X1 FI in the chenille “solid” color stripe to keep a balanced width and fabric thickness, and cast on and bound off edges were rehung and “bound off” again, to help cut down on their rolling toward the knit. The finished scarf measures 8″X69″, both knit and purl sides are shown below, side edge lengths now match.Assuming one uses a crochet cast on and binds off around gate pegs at the top, a chain is created at both ends, akin to that created in crochet, and one can identify a front loop, a back loop, and the whole chain. Any of the 3 may be “rehung” onto the KM, and the options are to knit a row and bind off again, or simply bind off again, for different looks that start to emulate single crochet a bit and can help stabilize edges or decorate them. It is helpful to keep notes as to the sequence used and which side is facing with each re-hanging.  Audrey Palmer at one point authored the Empisal book of linked edgings ISBN 0969485905. Intended for use with the Empisal (later = Studio) linker, there are lots of interesting uses for combinations of essentially find off techniques, and some resurfaced when she published her books on knit weaving.

The same pattern knit on Passap, using tech 129 and 138; there is a noticeable difference in width and openness of fabric with yarn weight change, and at the top with tucking for twice as many rows. 
A scarf knit in pattern, using tech 138, double bed on Passap KM; lightweight and drape allow it to be wrapped and worn in multiple ways; knit in 16/2 cotton, measures 11 X 76 inches partially blocked

Tuck and slip color striping

There is a very early Brother “how-to” publication, which can now be found available for free online

The diagrams accompanying some of the tuck and slip patterns illustrating how the color changes combined with the stitch type affect the knit presented the information in an interesting manner. With both tuck and slip the unworked needles’ stitches get longer (unpunched holes, white squares), carrying up the last color knit in them until they are knit off again. If the subsequent color change is in the same color as at the start of the sequence, the in-between color (dark in diagrams) travels behind the longer stitches in slip, or is caught in with interim loops in tuck. The swatch photos show the knit side, the charts the purl side in symbols and  color change sequences

slip stitch

tuck stitch

More stitch types and techniques are represented as well in the publication as well.