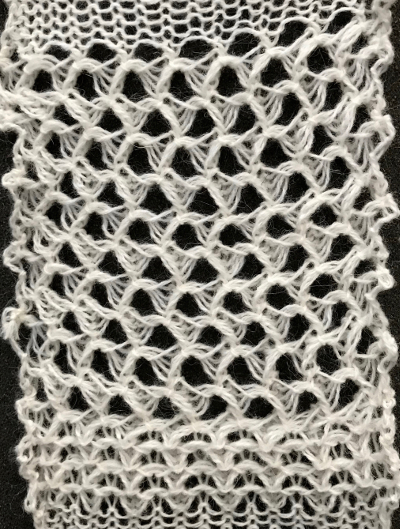
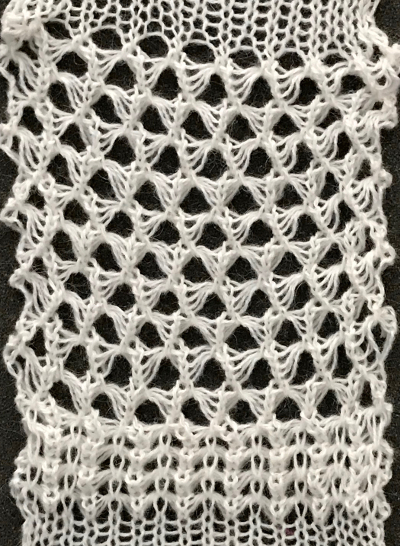
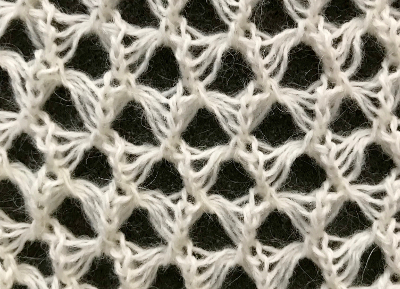
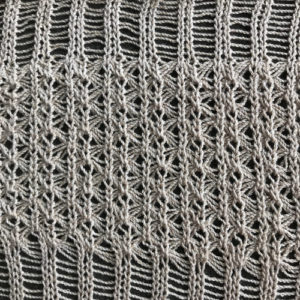
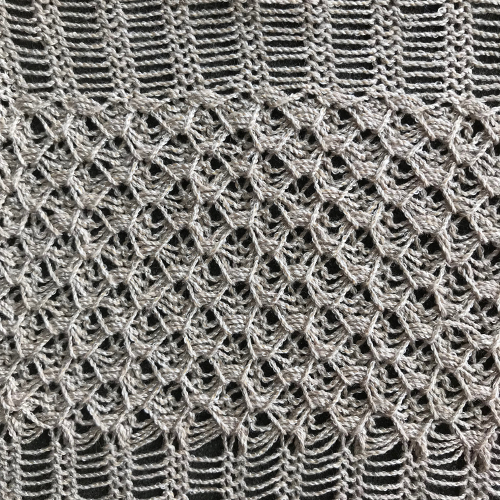
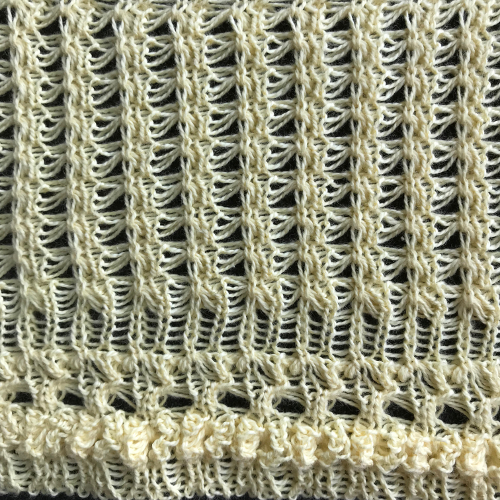
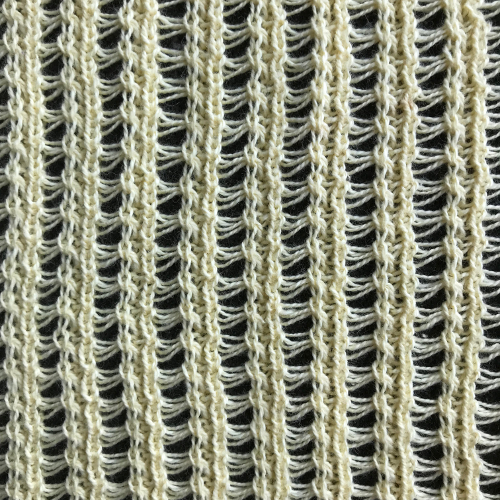
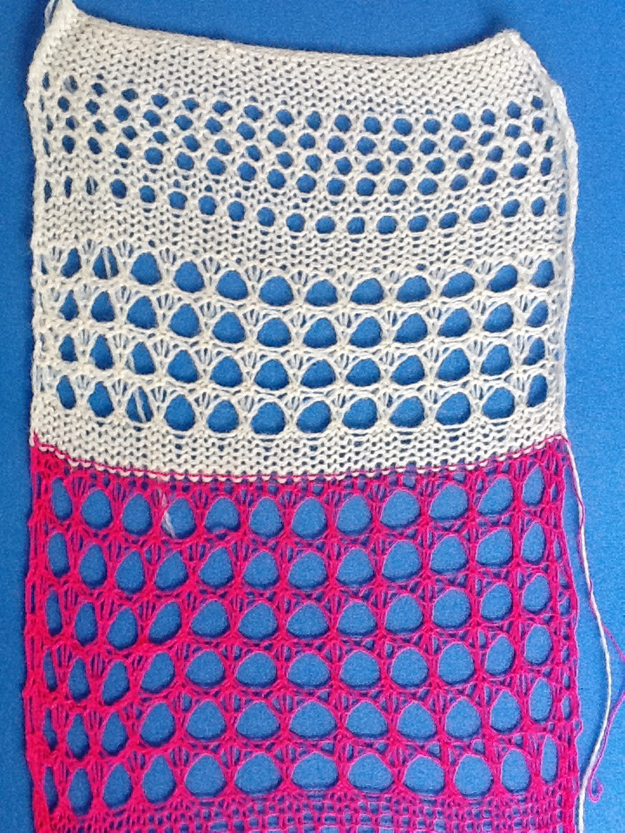
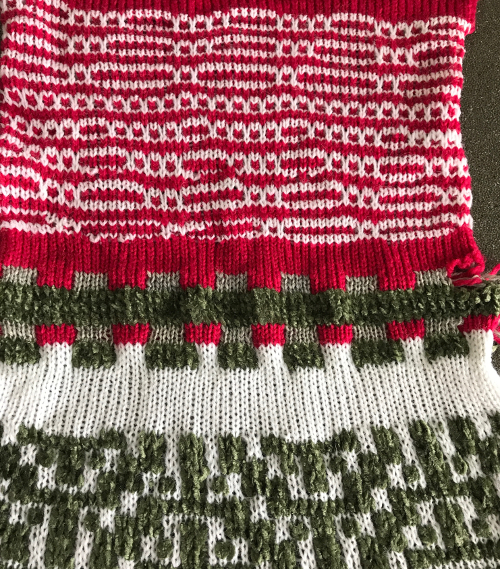
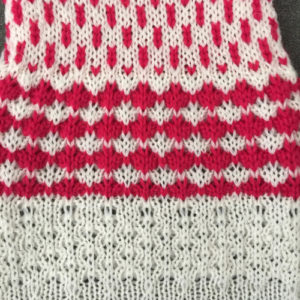
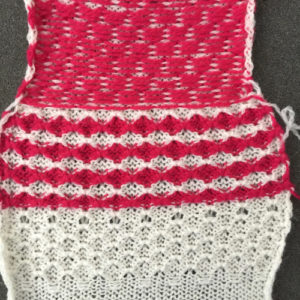
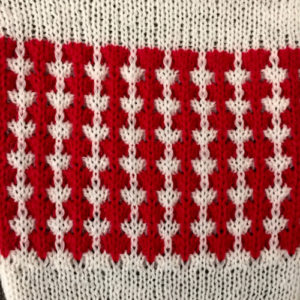
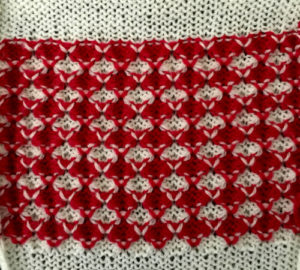
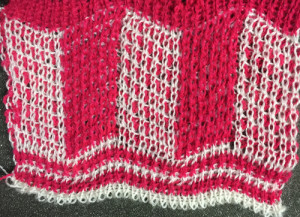
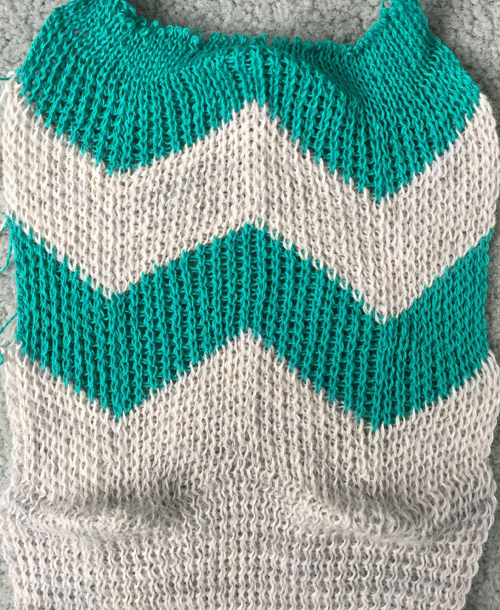
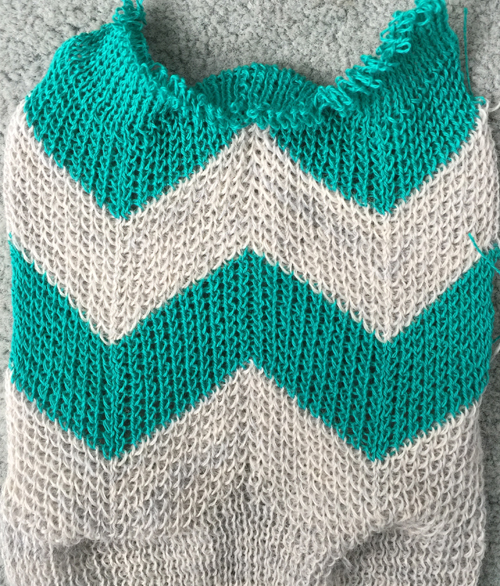
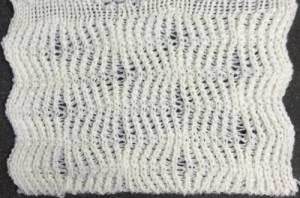
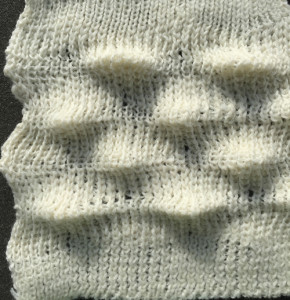
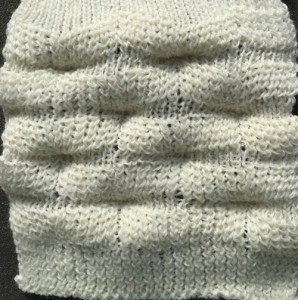
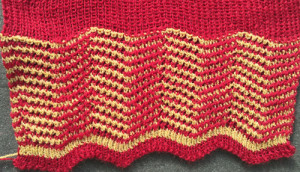
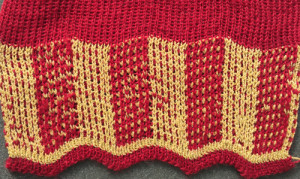
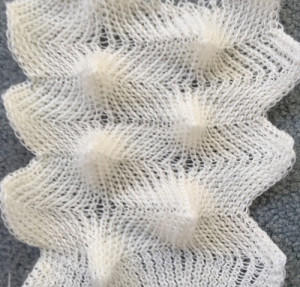
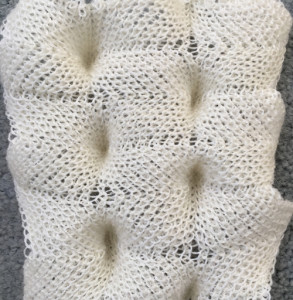
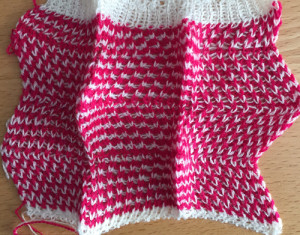
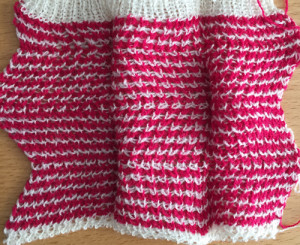
Revisiting pleats on the knitting machine: single bed

A cumulative collection of links to pleat-related blog posts
Single bed
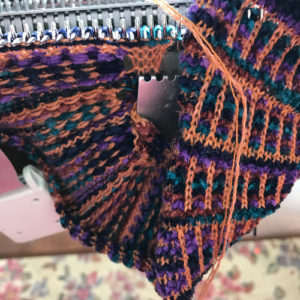
Origami folds inspired pleats 1
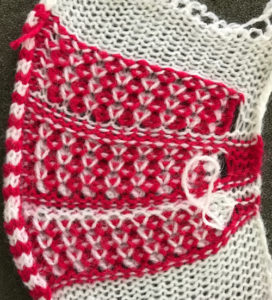
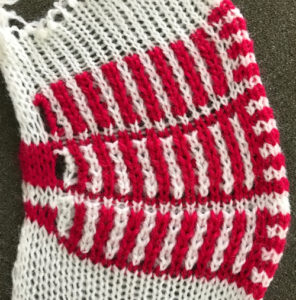
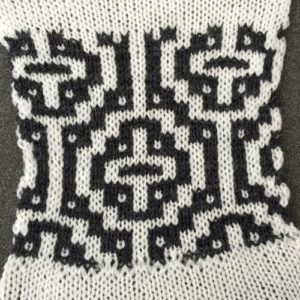
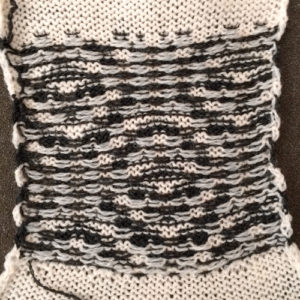
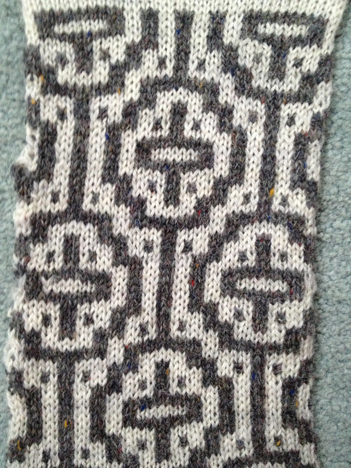
Shadow pleats with added FI patterning
Shadow pleats knitting 
Revisiting pleats on the knitting machine: single bed 
Pleats created with lace transfers
Ruching 2: more working with stitch groups
Ruching 1: fern “pretender” and more 

Pleats: automating “pleating”, single bed
Double bed
Pintucks 2, ripples in knits using the ribber
Pintucks 1 vs shadow pleats, Fair Isle pintucks 
Origami-inspired 2: more pleats and fold using ribber
Slip stitch patterns with hand-transferred stitches, double bed

Knit and purl blocks to create folding fabric_ “pleats”  
Pleats: ribbed, folding fabrics
On two needles  hand-knit and purl folds
Some authors and publications include hems in the category of pleats as “horizontal”. To my mind, they merit their own category.
HEMS
Machine knit hems 2 

Machine knit hems 1
Ruching/hooked-up stitches 
Any techniques may also be used on only parts of finished projects.
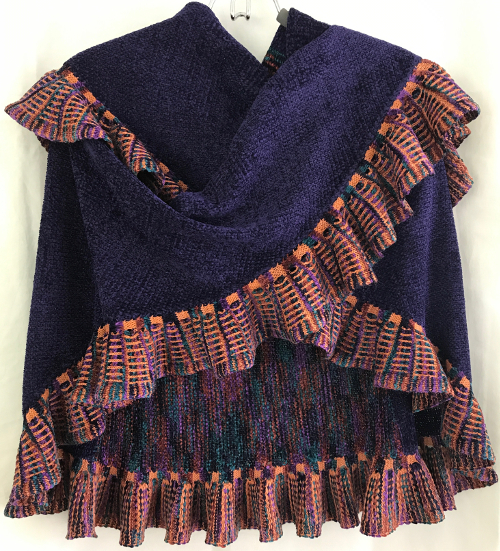
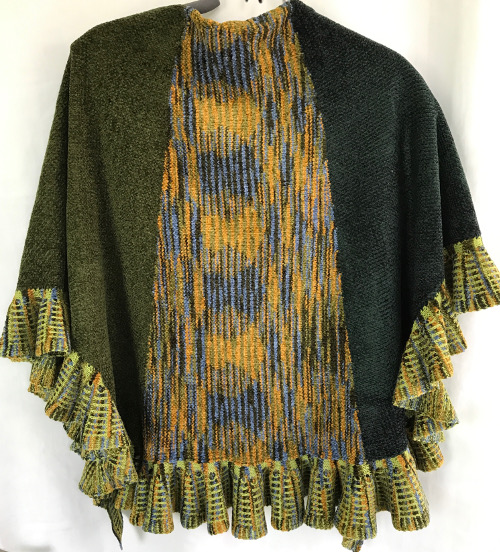
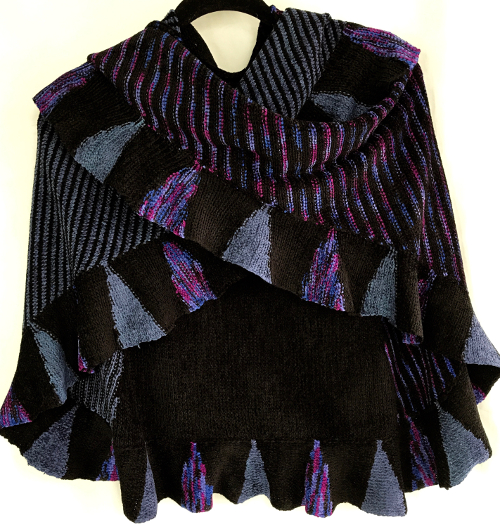
Presently, in fashion and knitwear, skirts and clothing with ruffled or folded fabric variations abound.
In 2013 I shared a post on automating single bed pleats including downloadable files of one of my early handouts and working notes.
This post contains some of the same information, repeated for convenience, along with additional info and images added in 2023.

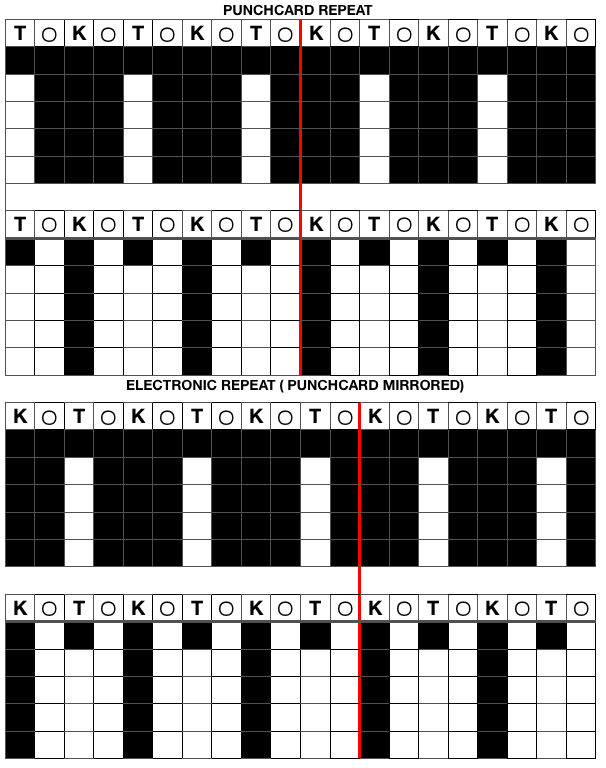
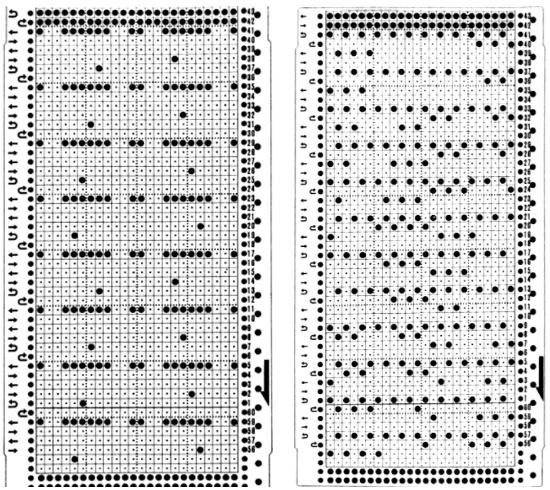
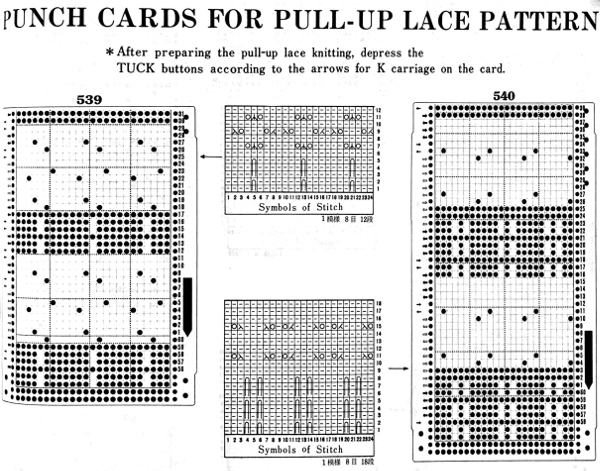
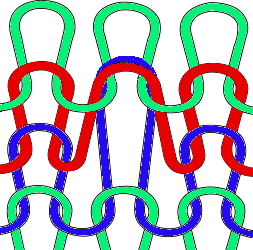
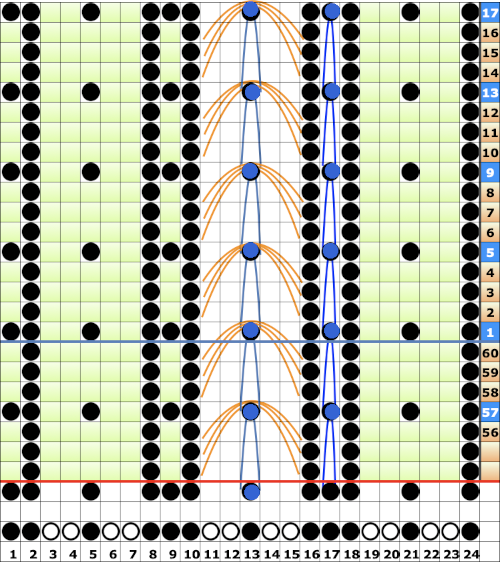
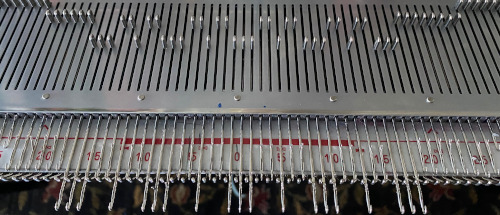
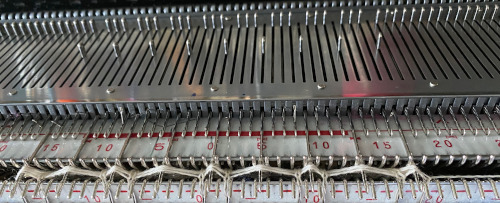
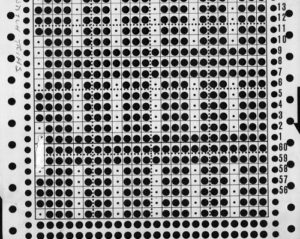
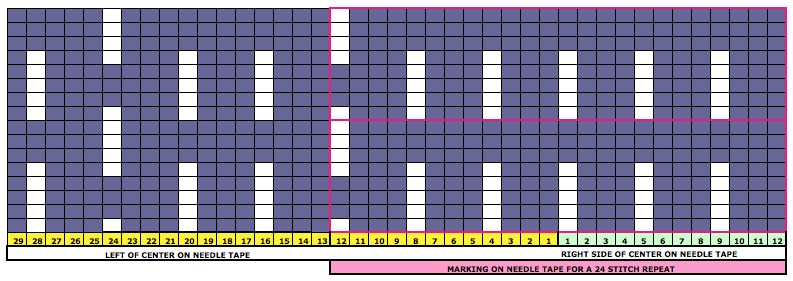
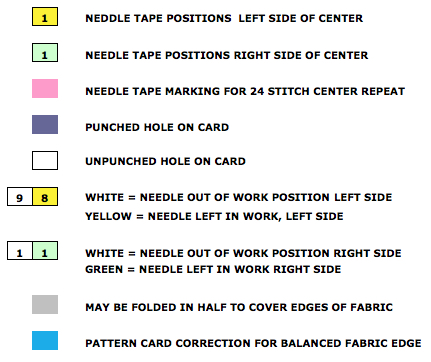
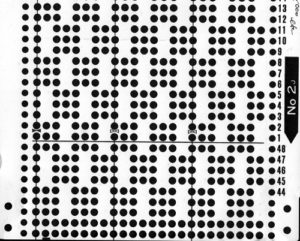
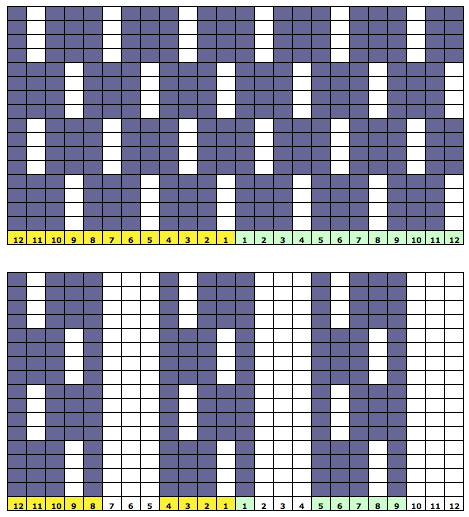
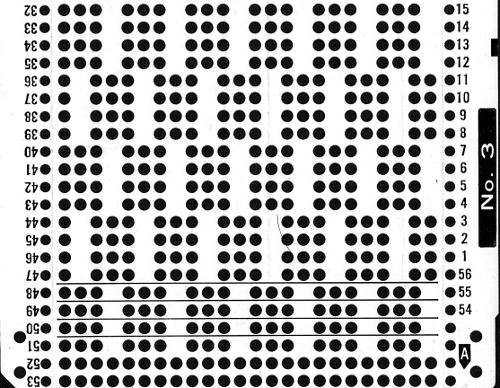
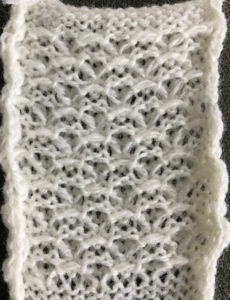
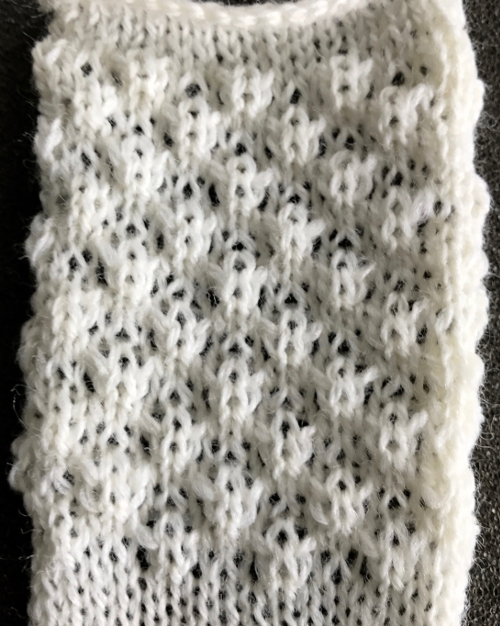
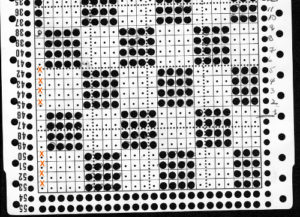
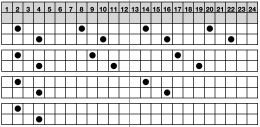
Addition: transfer lace punchcard repeats for Brother machines can vary, from 6 stitch patterns to 8, 12, and 24. Two blank rows (grey cells) would be added above the transfer marks (black dots) below to complete a single transfer repeat. The red line marks the centerline of the 24 stitches.  Proof of concept swatches:
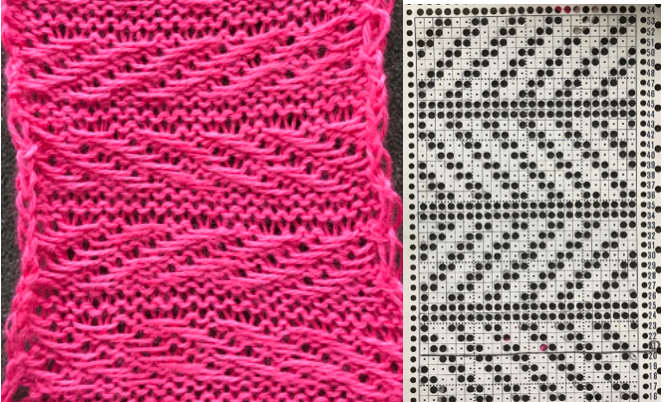
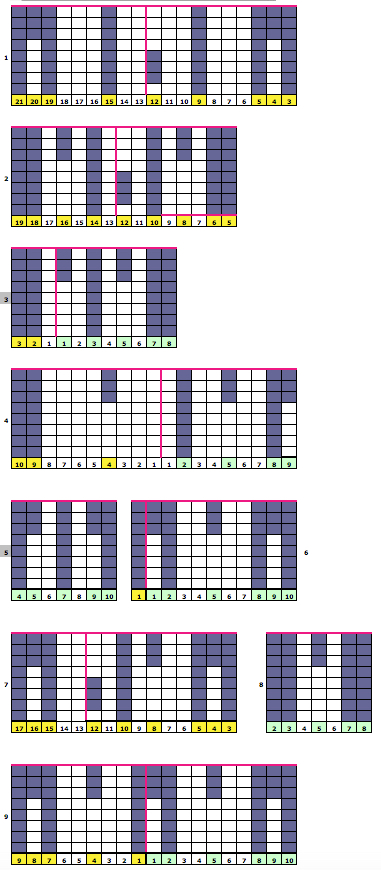
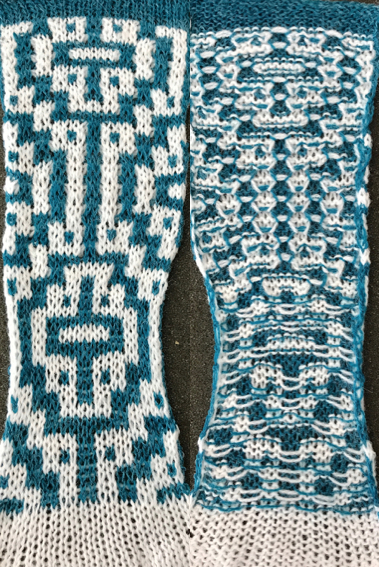
a slip stitch design repeat, punchcard-suitable, is redrawn with black dots representing knit stitches, and blank cells representing slipped/skipped ones. Empty circles along with red numbers mark the locations where stitches are transferred to the right or left, and empty needles are pushed back to A position, out of work/OOW, resulting in ladders. The appearance of the knit side,  and the purl Vertical lace transfers: When working in a stocking stitch, if a soft-looking pleat is desired, the knitted fabric is simply folded to form the pleat and joined to keep the fold. Crisper folds require the added techniques described above. In hand-knitting fold lines are created by slipping stitches on the fold line on the “public side”. Assuming the latter is the knit side of the fabric, this is often indicated by “sl1 with yarn in the back” for the front fold line (and as another slip stitch option, with yarn in front for the back fold line). A purl stitch is more commonly worked on the same side of the knit for the opposing, inner fold. Both the slipped stitch and the purl one are purled on the return purl row pass. It is also possible to work the former purl stitch as a purl, resulting in a garter stitch inner fold.
To review, parts of pleats:

knife pleats may be put next to each other and pointing to the right (S) or the left (Z)

Box pleats are composed of alternating right and left knife pleats, pointing away from each other. Inverted box pleats are composed of one left and one right knife pleat, pointing toward each other.

Accordion pleas are a series of knife pleats in which the back of one pleat forms the face of the next 

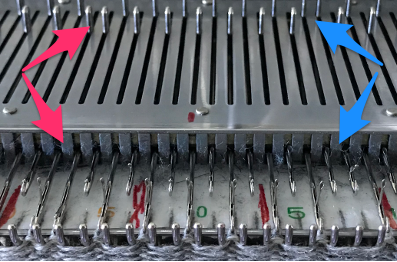
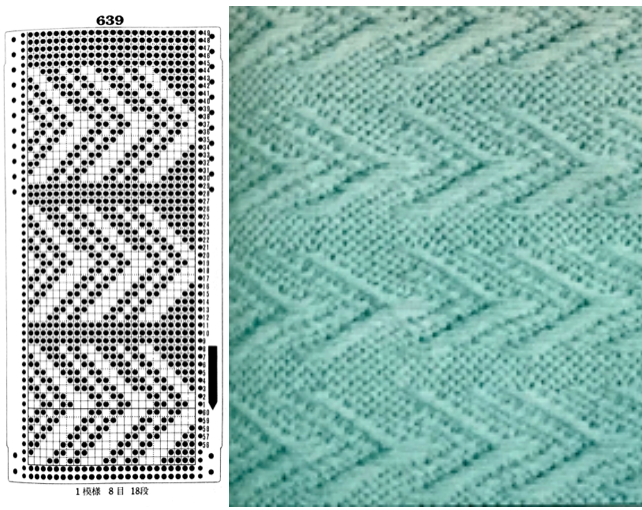
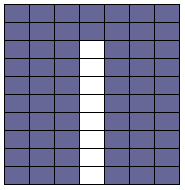
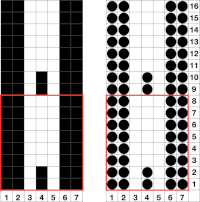
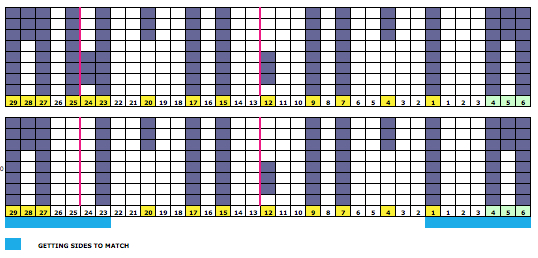
It is possible to knit folding pleats in a knitted stocking stitch with the pleats formed vertically rather than sideways. The two needles (highlighted in red) close together form the top hard outer ridge, and the two empty spaces where needles are out of work (red dots) form the under-fold.  The remaining black dots represent out-of-work needles as well Normally, EON knitting is reserved for tuck lace or heavier yarns on standard machines.  For my test swatch, I used a coarse 2/8 wool on tension 4

The fabric narrows considerably as it is stretched lengthwise to set the stitches. Several panels would be required for a garment such as a skirt. Such an item would need to be pulled into shape, pinned, and hot pressed. Fiber content will determine the crispness of the pleats after blocking, and their retention after cleaning. The swatch below is turned sideways for the sake of space. More variations with folds can be made by varying the “rules” commonly recognized for creases. Working sideways once more: on a punchcard machine, using card # 1 locked, cast on making certain every other needle as well as the first and last are selected.
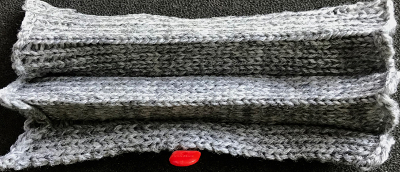
In the swatch varies the number of all knit rows between creasing methods. Overlapping at fixed width at the top of the piece once the fabric is rotated lengthwise, creates a fair amount of bulk as pleats are fixed.
The all-knit sections could be combined with holding techniques to vary the width of pleats from one end to a different width than at the other.
The change knob remains set to KC throughout.
With no cam buttons selected, all stitches will knit.
After the desired number of rows, cam buttons are set to slip in both directions for at least 4 rows (commonly this is done for 2). Cancel the slip setting, complete the next knit section, and transfer every other needle to the adjacent one on either the right or left. The needles holding 2 stitches may be brought out to the hold position as each transfer is made, or pushed out to hold after the fact to insure the stitches have been transferred and will knit off properly. The number of needles in work remains constant.  Change the cam buttons to tuck in both directions. On the first carriage pass, the empty needles will pick up a loop, on the second pass a second loop will be formed on those same needles.  Cancel the tuck setting, and leave the needle selection on to form knit stitches once again, continue with the determined number of rows.
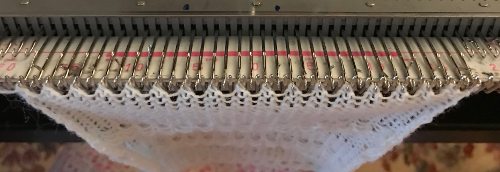
Repeat the process beginning with the slip stitch setting once more.
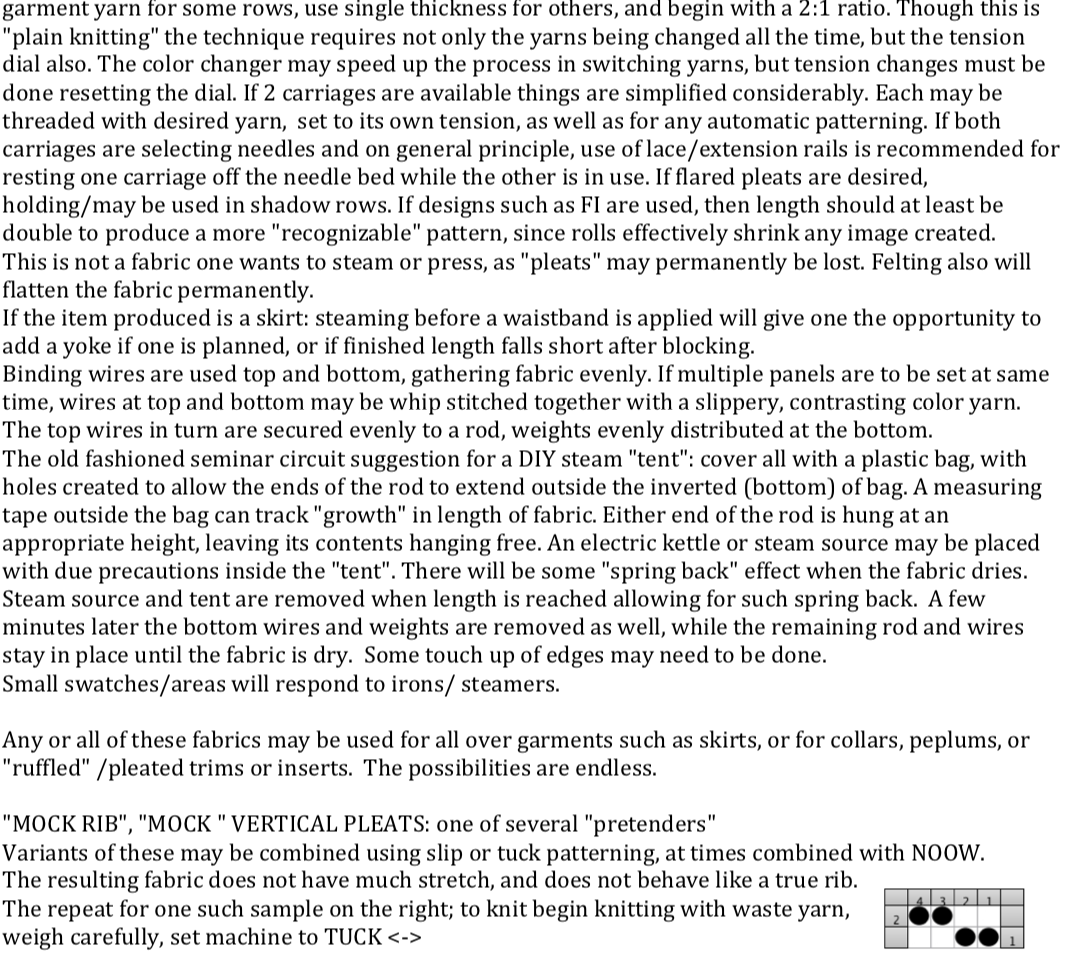
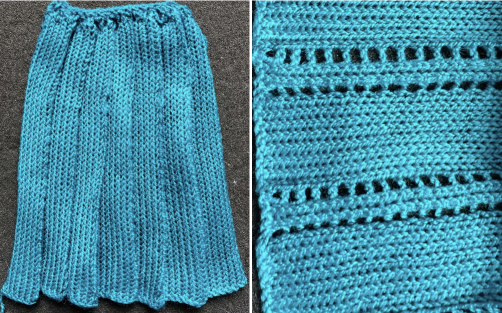
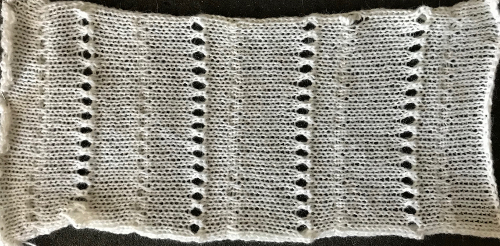
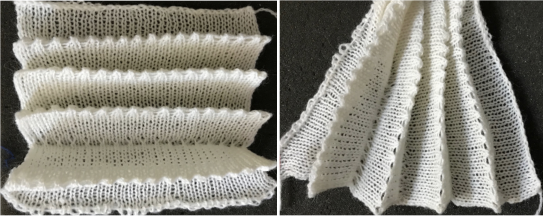
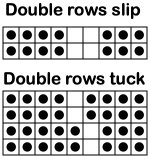
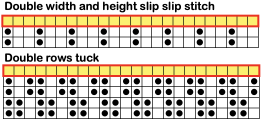
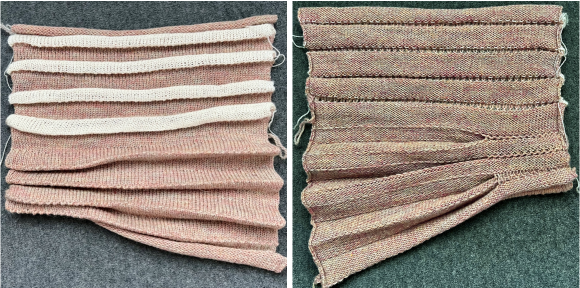
The yarn used is a 2/24 acrylic, seen here stretched flat.  The slipped stitches form the inside folds in the pressed swatch, while eyelets and tuck stitches fold a picot edge to the outside.  The placement of the holding sequences may be varied, with the eyelets allowed to form and considered a potential design feature.  The number of slip floats or tucked stitches may also be altered by widening the slip repeat or lengthening it, and tucking on alternate pairs of stitches for usually no more than two rows.  Extending the repeat to a punch card with slipped or tucked stitches flanked by a single knit stitch on either side. The outlined blocks of colored cells represent subsequent knit rows.
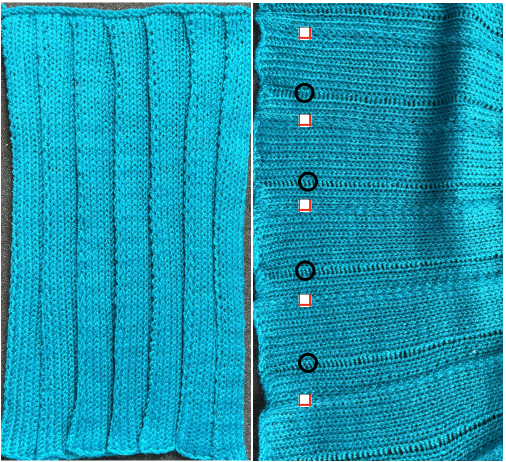
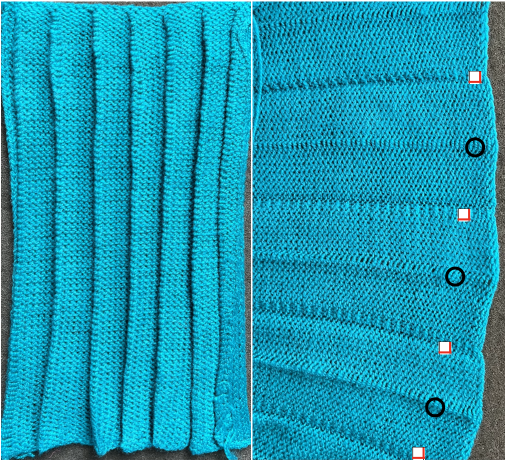
The folds to the purl side may also be created by simply doubling up the yarn for a single row. Both yarns in this case are 2/8 wool. The second color is used for illustration purposes but might be a design feature in some pieces, and is not clearly visible on the knit side.   Hand selection aided by some of the standard multiple-selection tools is easy enough to use for tests on small swatches to determine resulting effects and preferences prior to any programming.
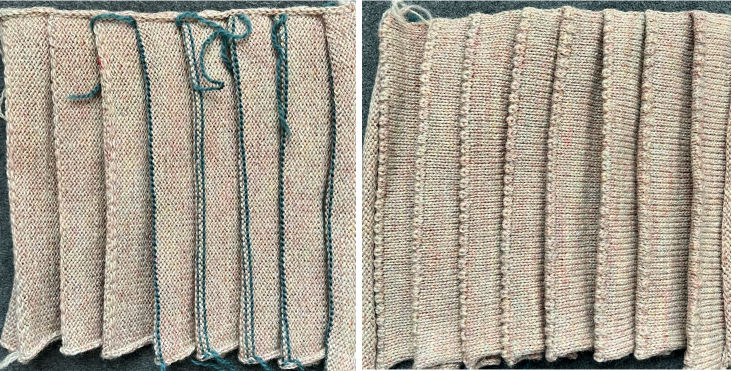
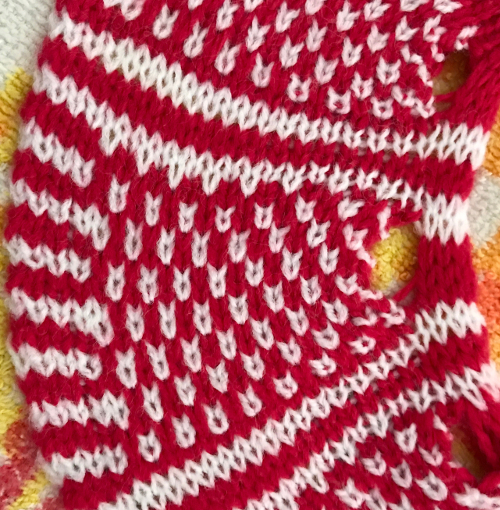
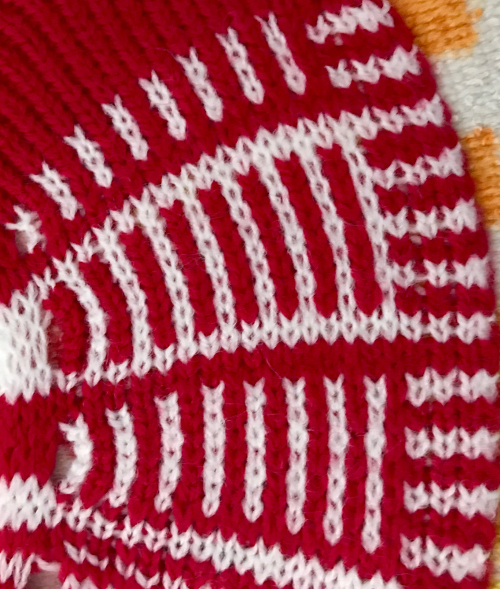
In this swatch, such increases are combined with holding techniques for what might become anything from an extended ruffle to a full skirt.
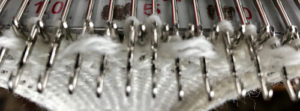
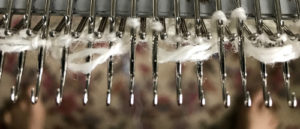
The issue with sideways knits is that the number of needles available and the knit gauge may limit the possible length of any garment produced in a single piece.  Single bed pintucks may be made by knitting any number of rows on the top bed, followed by the use of every other needle selection to create slip-stitch floats on the machine to serve as markers. The short floats are picked up and hooked onto the corresponding needles in work after more knit rows.
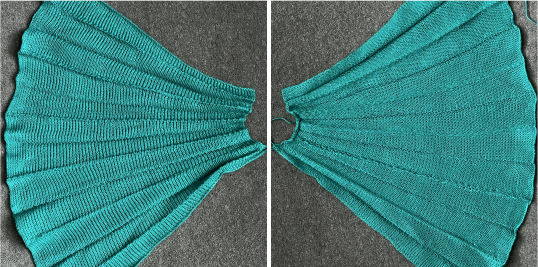
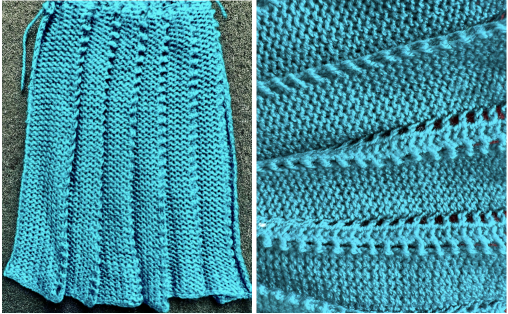
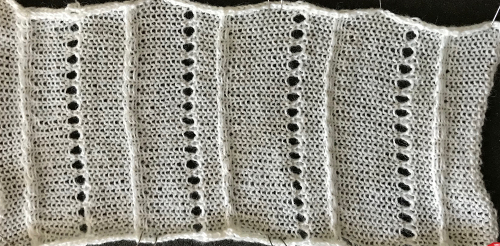
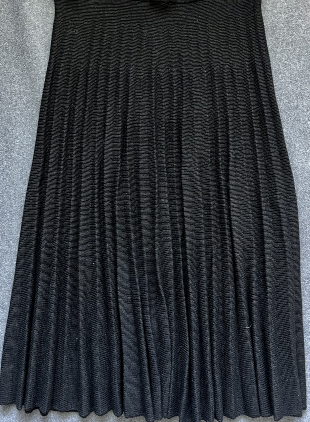
Short-row shaping may be automated to include needle wrapping to diminish the size of the resulting eyelets.  This photo is of a multiple-decades-old skirt that has been stored folded for years, as taken out of the storage box.  It measures 26 inches in length, with a 97.5-inch bottom circumference. Single tuck and slipped stitches were used along with short rows to create intentionally soft folds.
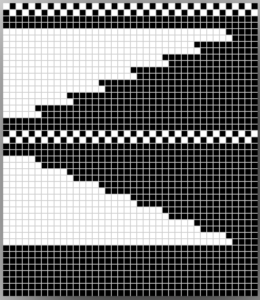
Useful math calculators for planning wedges
A look at miters, spirals, and angles to create shapes 
Some notes on circular shawls 
Round yokes and more
Hems created using this technique are faster than those where every needle is rehung and may be stuffed or threaded with other materials ie suitable size plastic tubing, or upholstery cords for sculptural effects.
Planning is required for the best method as to how to join panels in items such as skirts.
Markers at regular counts added while the work is on the machine in areas that are to be folded or gathered into a waistband, yoke, or to other shaped pieces are useful.
“Crochet” meets machine knitting techniques: tuck lace trims or fabrics 2

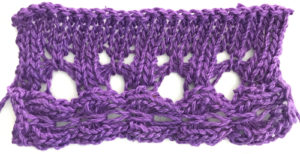
There have been several previous posts on “crochet” like stitches and “tuck lace”, this is another variant. The needles need to be arranged as in the diagrams below. After the first preselection row, the carriage is set to tuck

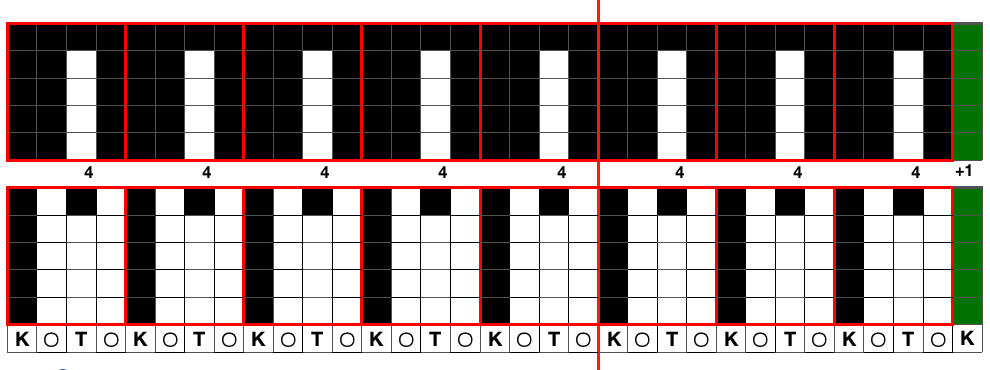
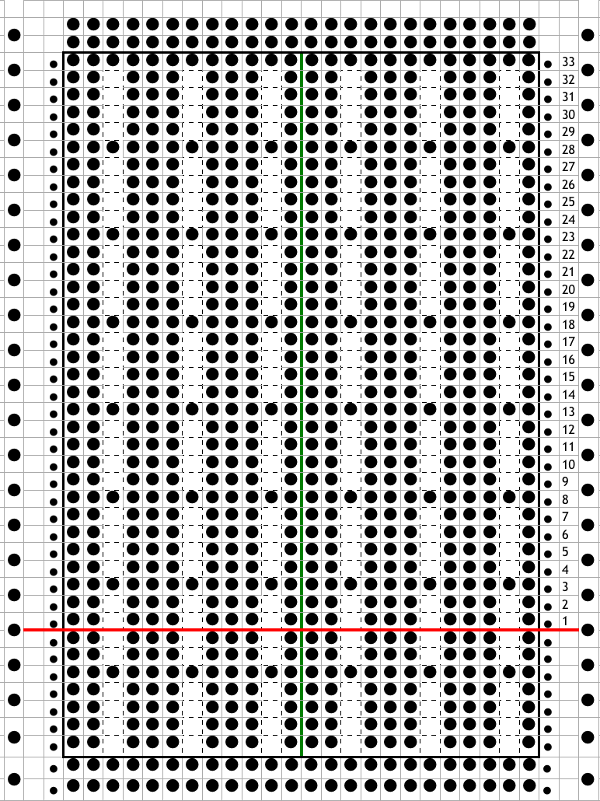
the full punchcard T= areas where tuck loops will occur, K = knit columns, o = NOOW, the red line the 0 mark on the needle tape

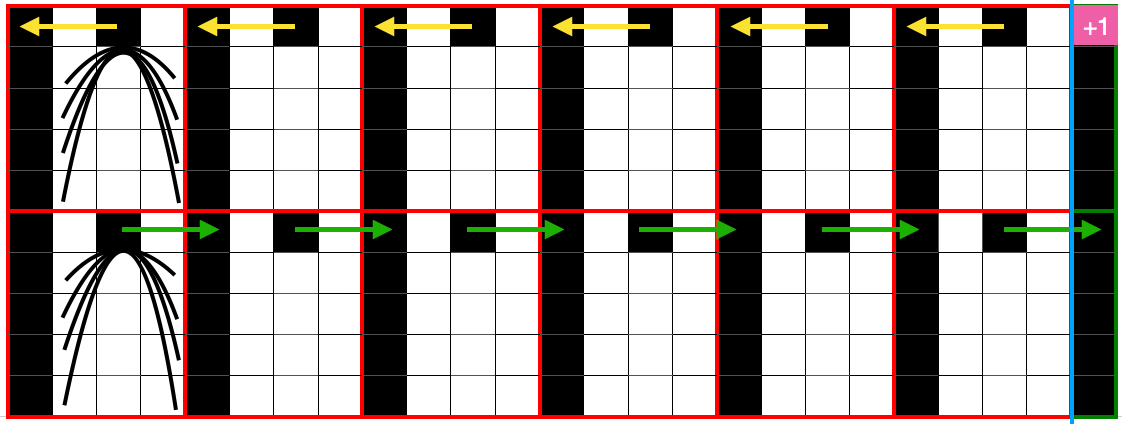
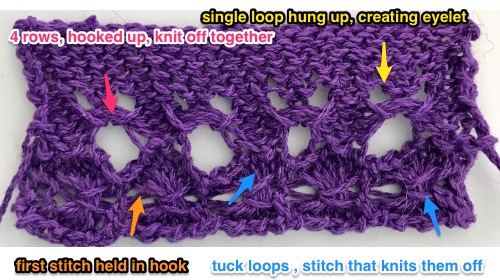
Every 5 rows, after the tuck loops are knit together (illustrated in repeats on far left), the formed stitch (single black square) is transferred in turn to the right and then to left; this works out happily so that transfers may always be made toward the knit carriage.
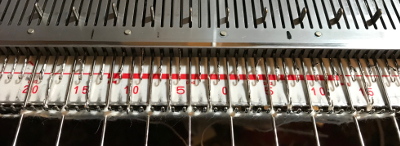
The sole repeat (all that would be required on a mylar) is 4 stitches wide, 5 rows high. The number of needles used needs to be planned so that there is a knit stitch on either end of the piece. This is accomplished by using a repeated multiple of 4 + 1, so one side of the 0 mark has an even number of stitches, the other an odd (4+1=5). Ayab software requires that the repeat is programmed across the width of the fabric, so the final design would be a variant of this, my sample was worked on 20 left, 17 right. Non selected needles form tuck loops until they are knit together every 5th row

If you prefer to work with the top repeat programmed, then transfers will need to be made on each side of the non-selected needles to get the proper configuration. If programmed with the bottom repeat, then and every other needle cast on is fine. I generally stay away from combs and weights if I can, but this is a fabric that benefits by evenly distributed weight, a cast-on comb with weights added to it is a good idea. In the absence of any, start with waste yarn and ravel cord, thread a thin knitting needle or wire through the knit, and hang evenly spaced weights on that. Follow with your preferred cast on, and knitting in pattern. 

The swatch as it appears on the purl side (traditional “public side” for tuck stitch). The bottom 4 repeats show what the fabric looks like before one intervenes with the hand technique

its knit side and a bit closer a few more

in early publications combinations of lace and tuck, creating a large scale mesh were also referred to as mock crochet

Punch cards to electronics: book symbols and samples

A number of variables need to be considered when adapting punchcard patterns for use on electronic knitting machines. These images pertain to Brother use, but the principles are shared between KM brands. I will add more information as time goes on. Online free downloads for magazines, manuals, etc. may be found at
http://knittsings.com/knitting-machine-manuals/
http://toyotaknitting.blogspot.com/
machineknittingetc.com
https://www.knititnow.com/ManualAndDocuments/
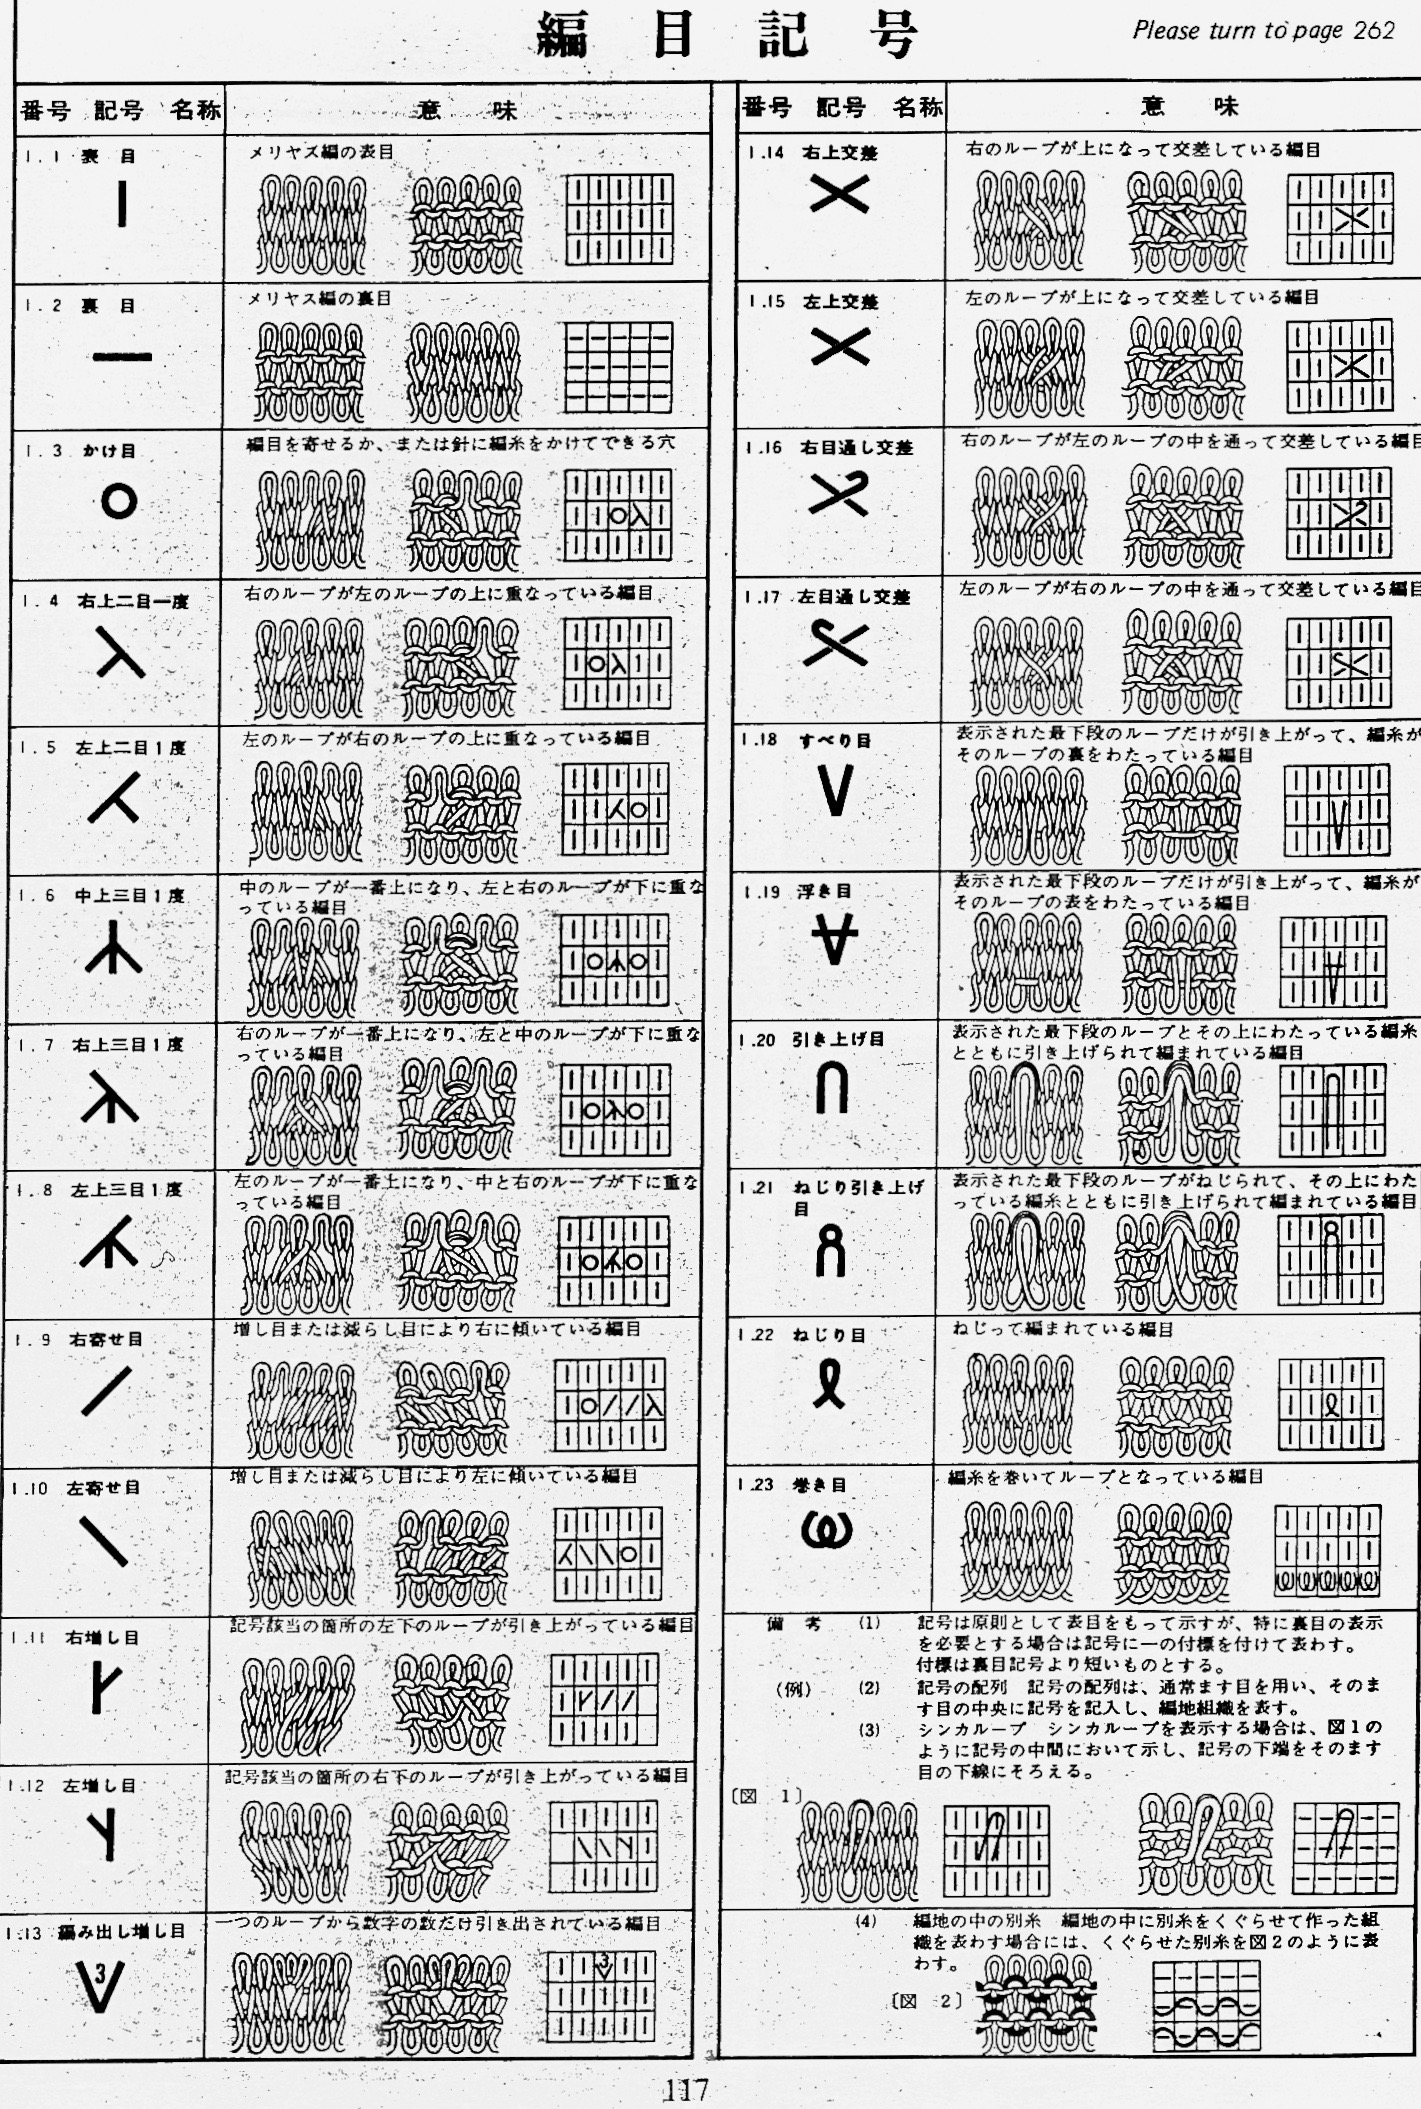
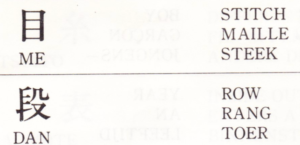
some additions of late include designs in 12, 18, and 30 stitch repeats in addition to the familiar 24 and 40 ones, and to help with interpretations of symbols:  Japanese symbols for machine knitters 

Punchcard collections for all brands @ needles of steel 

For a later post including information on scanning and editing published designs electronically see https://alessandrina.com/2018/07/02/numbers-to-gimp-to-create-images-for-electronic-download/
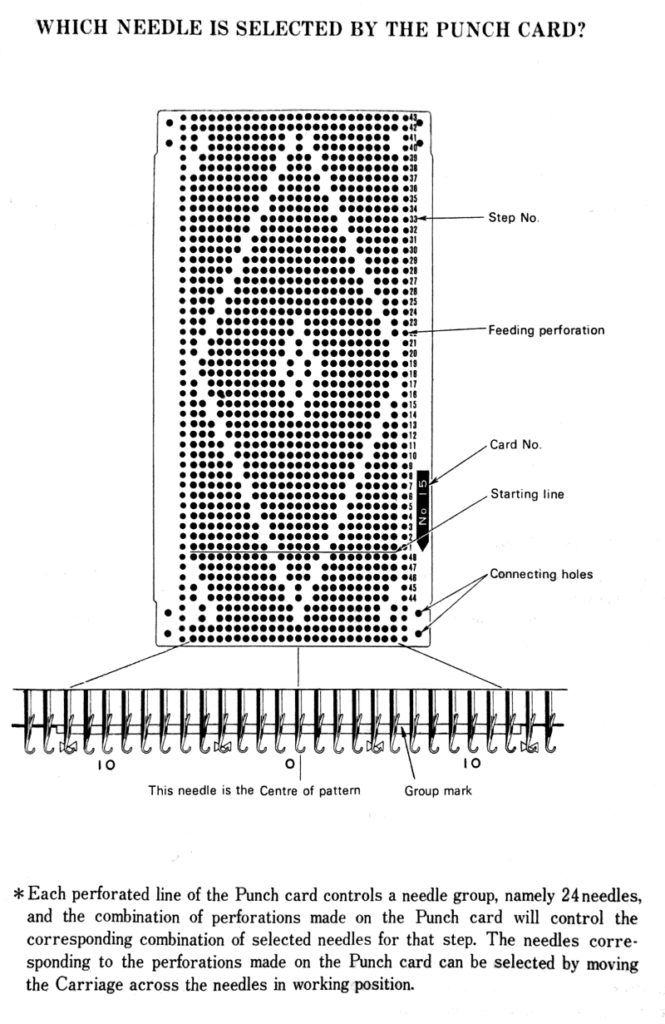
As the transition was made from manual machines to push-button, and then to punchcard selection systems, the early collections included diagrams of symbols familiar to hand knitters, and interestingly worded text that disappeared or was reduced in later punchcard books. I am presenting information in the order in which it appeared in this particular collection’s paper version, I have not found this volume in the above-mentioned sources for free download. Images are gathered from more than one source, so there is some repetition of information


LACE KNITTING

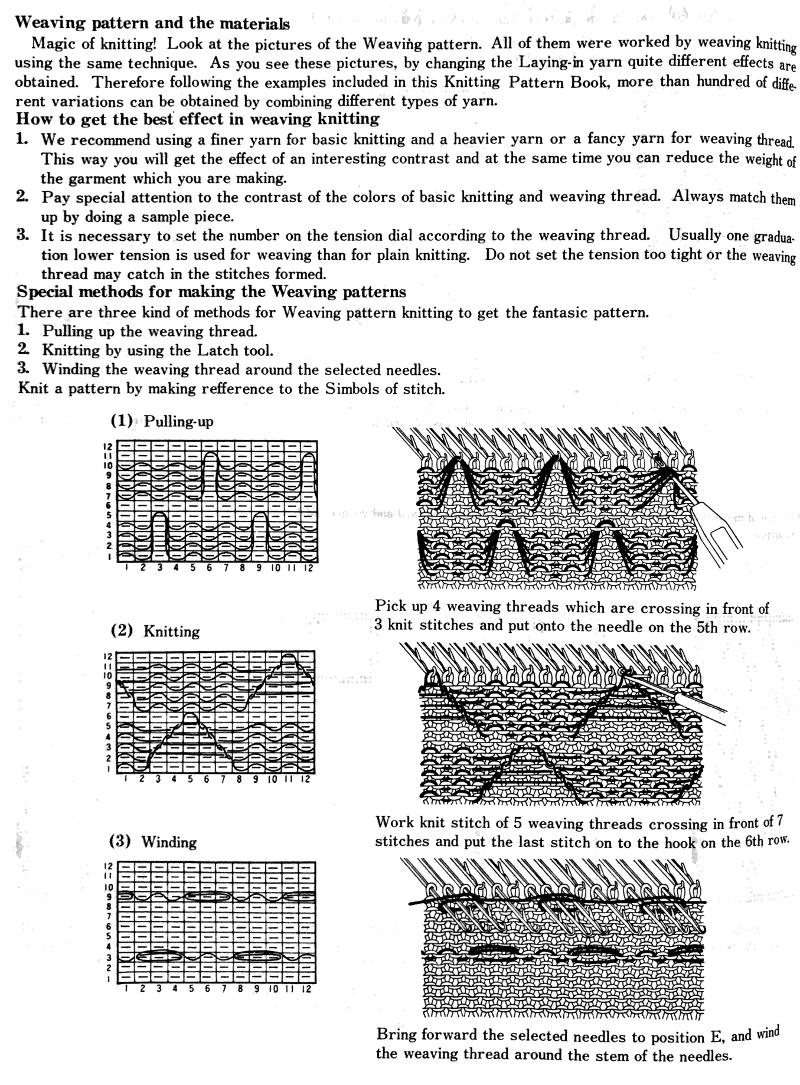
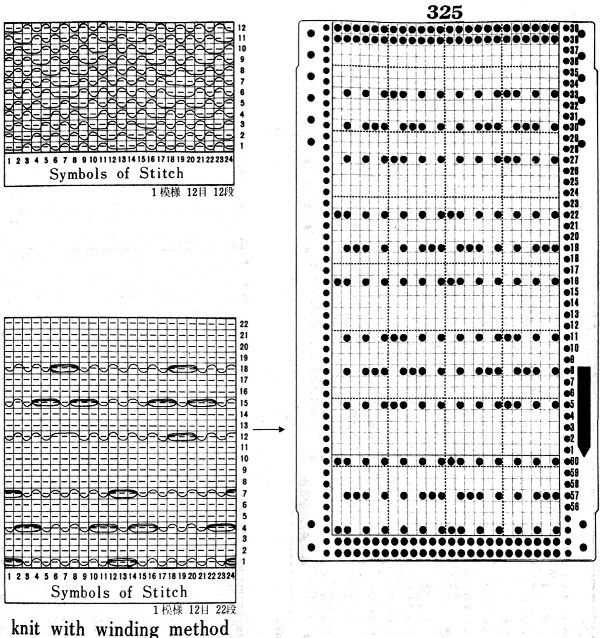
Punchcards may be used to guide one for hand techniques, here a version of e-wrap is used on selected needles for weaving effect, and the diagram on the upper left is for a different fabric. Punchcards may also be used to help track twisted stitches, cables, and racking This is a 2 carriages patterning operation, lace extension rails must be used, with each carriage disengaged from the belt while the other is moving across the knitting and back to its resting place. 

SYMBOLS IN PATTERN KNITTING

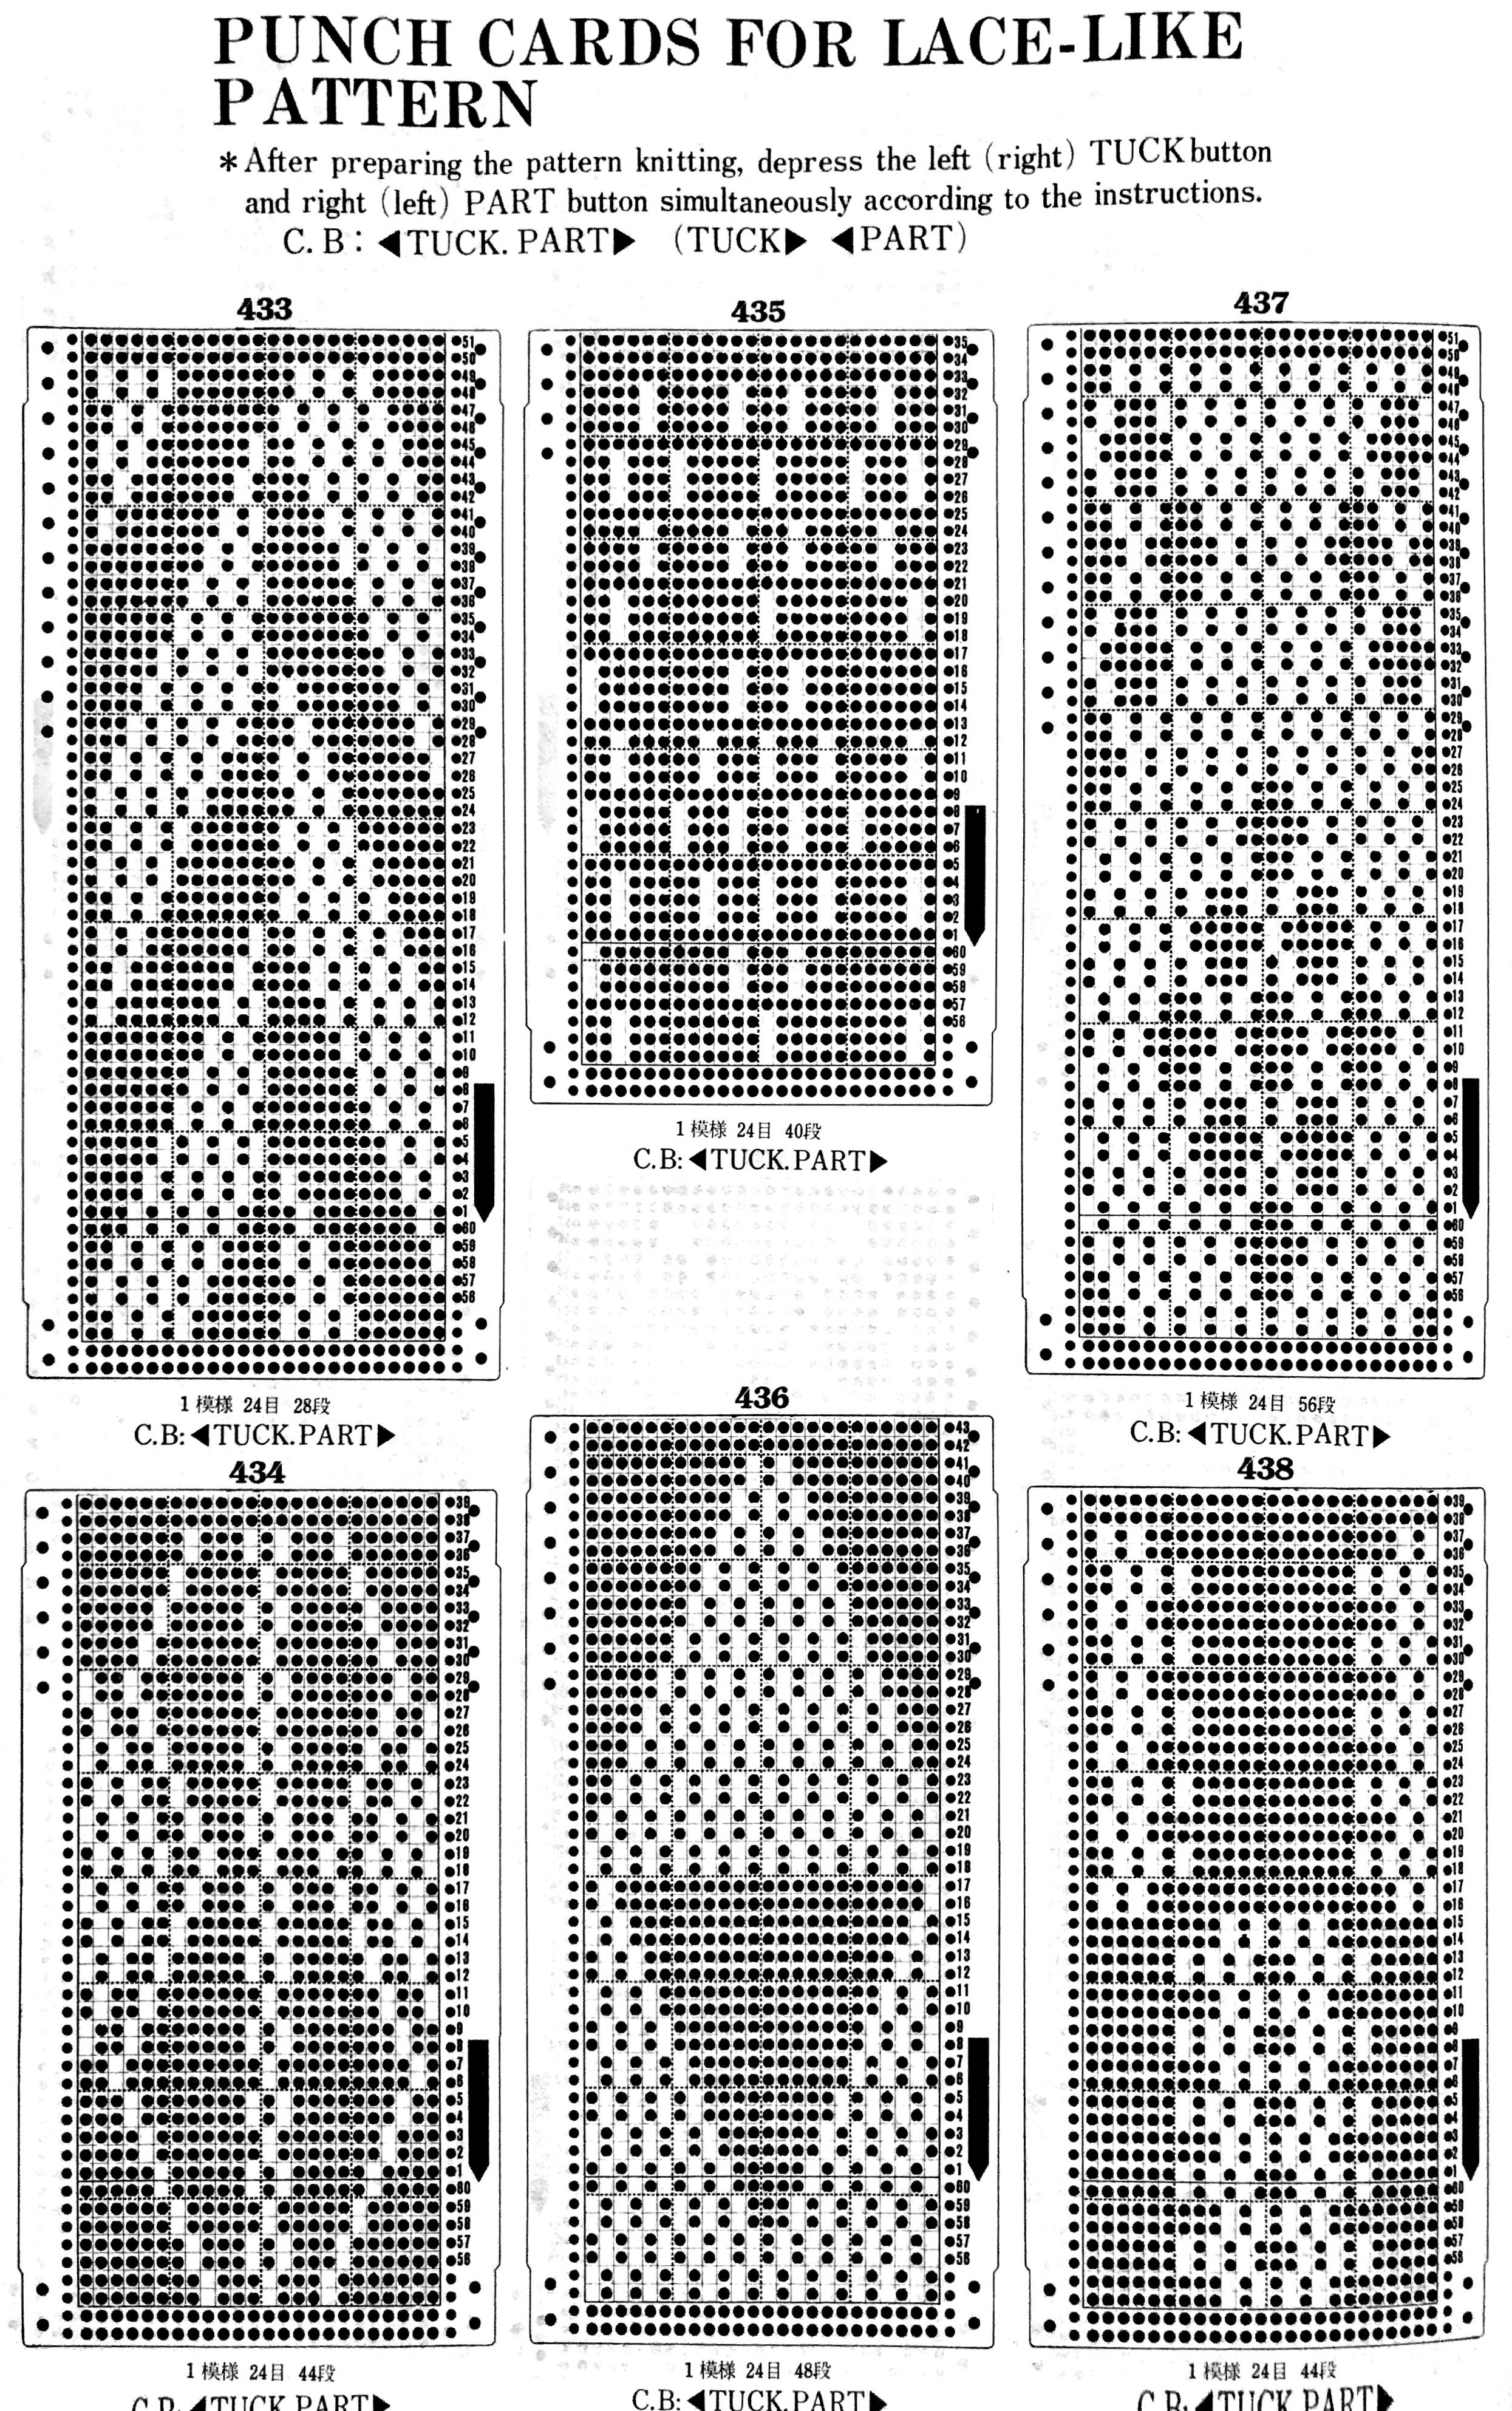
Below each punchcard, the repeat is identified in numbers for stitches and rows. The cards presented are the minimum length required for the card to roll smoothly within the reader when joined for continuous knitting (at least 36 rows). Electronic knitters may isolate the individual, smallest repeat, draw only the squares that appear as white in the cards, enter them via mylar or download, and use color reverse.

Skip is aka slip or part. These cards would work for tuck stitch as well, may even tolerate elongation, depending on yarn thickness.

Opposite cam buttons are in use, the fabric changes appearance depending on which of the 2 stitch types is forward, so if instructions with cards are to be followed, then the starting side for the attern in this instance should be COR. Both tuck buttons (or slip) may be used as well, for a different fabric. If the tuck or slip texture is created over an even number of rows (2, 4), changing colors for each paired row sequence can create some interesting color patterns with very short floats akin to planned mosaics and mazes. 

The fair isle patterns below are actually poor choices in terms of float control, pushing its limits. It is usually recommended that floats be no wider than 5 stitches, and even then, they may have to be controlled to make the finished garment easier to wear. 

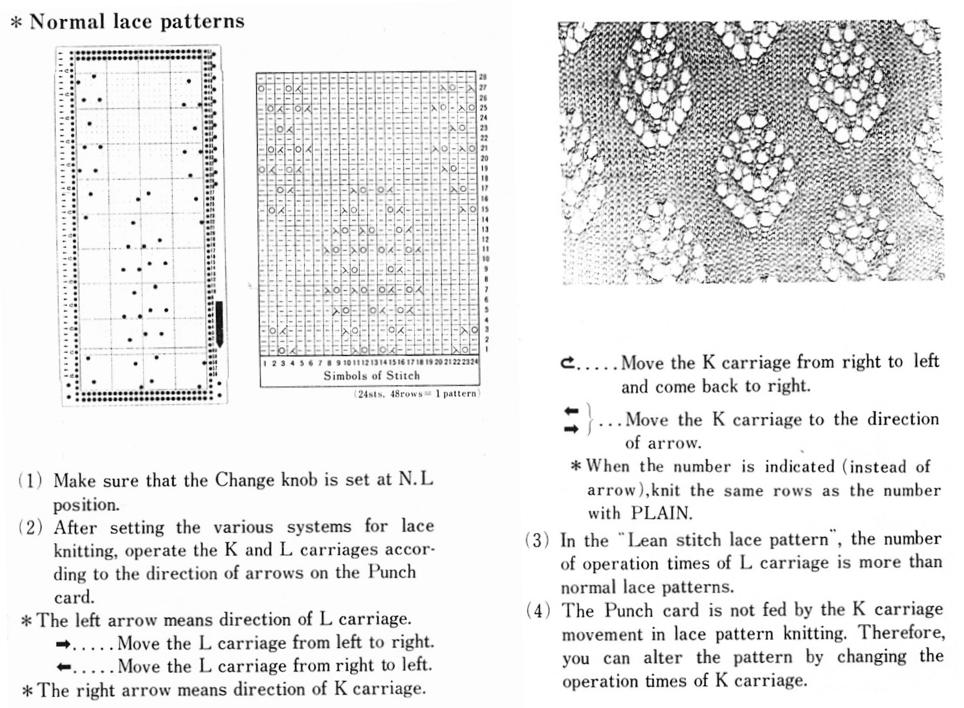
Brother only produces a transfer lace (as opposed to studio simple lace, where the carriage transfers and knits with each pass of the carriage). The lace carriage is the one advancing the punch card. The knit carriage does not select needles, but rather, knits 2 (or more) plain knit rows

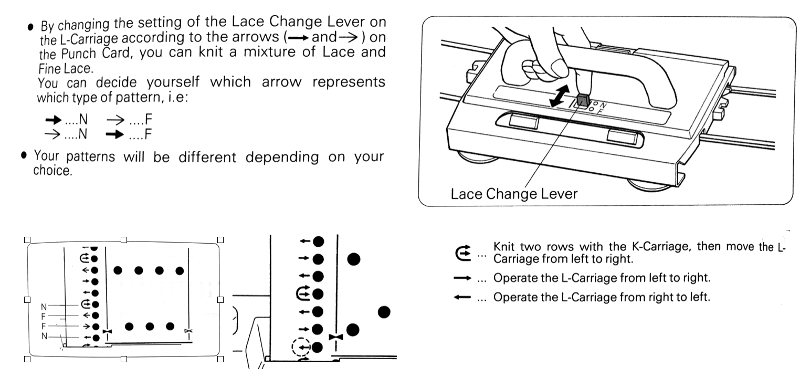
Lace card markings, including those for fine lace: in the latter, stitches are transferred and shared between pairs of needles, best knit in a light color, with smooth yarn so the surface texture becomes more noticeable.

Lace point cams may be used on the punchcard machine to create vertical bands of lace. This is also achievable on the electronic by programming for knit stitches between vertical (or horizontal bands).

Tuck (left) and weaving (right) may be combined with lace. In these fabrics both carriages are selecting needles, so extension rails must be used. The two-column on the left of the cards indicate movements for the lace carriage on left and the knit carriage on right. Straight arrows indicate single carriage passes, curved ones 2.

Yet another fabric using 2 carriages selecting needles for patterning

Here the “openness” is created by having the appropriate needles out of work, creating ladders in those spaces. Some interesting results can be obtained by transferring the recommended out of work needles’ stitches to the ribber. “air knitting” can help with verifying proper needle placement is in use

to match the location of the out of work needles to markings for punchcards, which are often given with lines delineating 0 needle position, the image will need to be mirrored horizontally

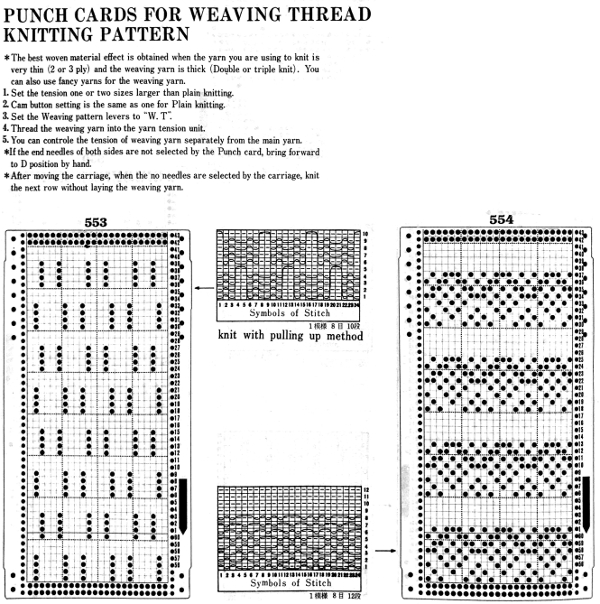
THREAD OR PUNCH LACE is possible only on machine models that have 2 buttons in mc position The thicker yarn knits along with the thinner one where there are unpunched areas or white squares, the thinner yarn knits alone where the punched holes or black squares occur, with the thicker yarn floating behind it more information on this fabric 

Suitable for tuck and possibly tolerant of elongation as well:

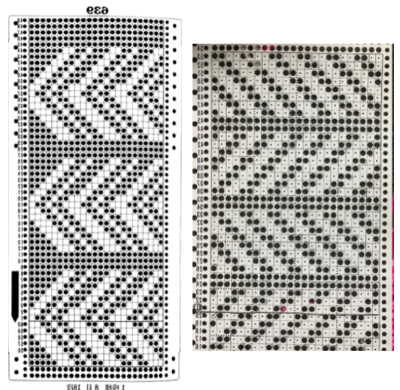
Punchcard machines mirror motifs when knit. This may not be noticed when copying small repeats, but it becomes more evident in larger ones. For knitting on the 910, the supplied motif would need to be mirrored when programmed to retain the intended direction. With other machine models, one needs to know whether the “image” on the card will appear on the purl side, matching punchcard pattern and needle selection, or the knit side, thus reversing it. 

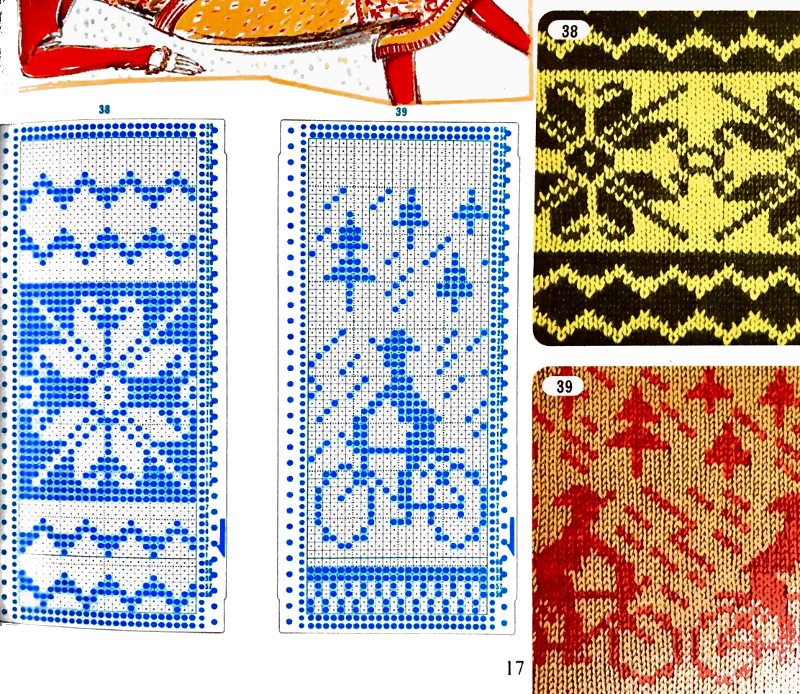
Here are 2 FI samples: the one on the left is fairly evenly distributed, so little if any difference is noticed, the one on the right sends the biker to a different forest

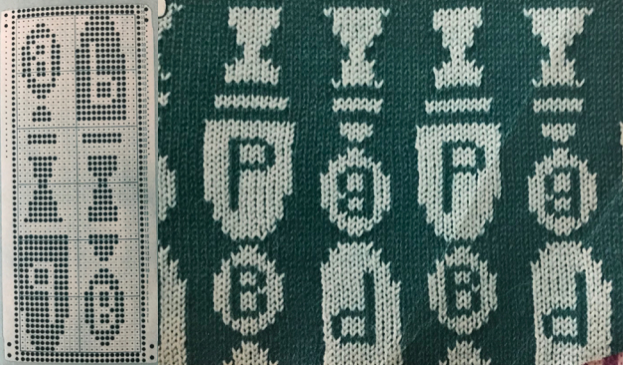
reversal of lettering


When you think that that is all sorted out in your head, there are these in slip stitch, the direction of stitches matches, because the purl side is used, images are reversed on the knit side.  

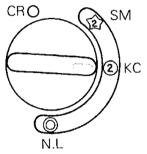
the mirrored punchcards the punchcard change knob has selections for single motif and pattern knitting (KC)

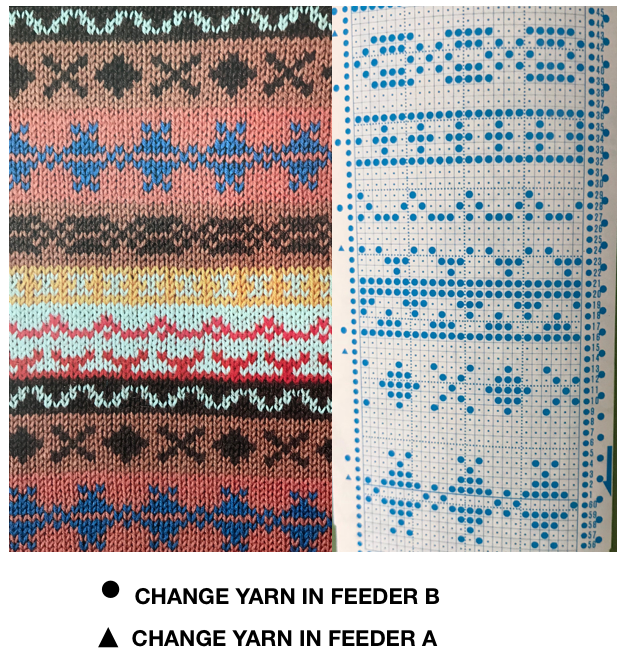
the 910 has settings KC I and II, KC II cancels end needle selection, while in punchcard machines this has to be done manually if the pattern stitch requires it. One such example is when any patterns are made with needles out of work. End needle selection would make the needles on each side of the empty space select forward and create a knit stitch. In tuck or slip, that would be an out-of-pattern knit stitch, in FI, a vertical line of the color in the B feeder would appear along on each side of the OOW needles.

Ribber settings and symbols for Brother machines 

Tuck lace trims and fabrics 2

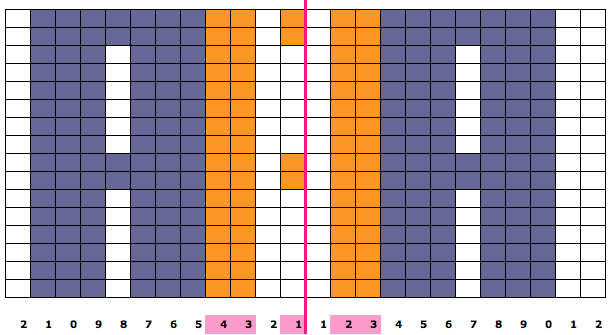
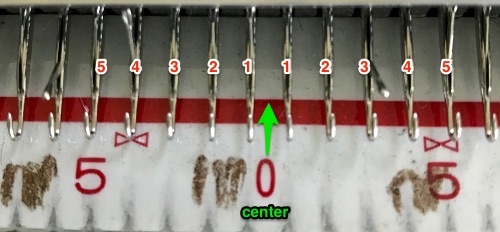
Working between electronic and punchcard machines needs to take into account that repeats on a punchcard KM must be a factor of 24 (2, 3, 4, 6, 8, 12). An electronic tuck stitch repeat may be any width.  Since the above is seven stitches wide, if punched accordingly it would occupy 21 out of 24 stitch units on a punchcard. As is unless those extra needles on the far right or left are left out of work for ladders or transferred down to the ribber, it would not be suitable for an all-over fabric. It can, however, be used for a trim. If the latter is the intent, only one series of vertical repeats as seen in the chart needs to be punched. The numbers below the image indicate Brother needle tape markings. The Brother needled tape has a center O position marking, with numbers beginning count with one and radiating out marked in groups of 5 in both directions. This is a 6-row tuck fabric, thinner yarns should be used if the pattern is automated, as tuck loops build up in needle hooks. If you wish to experiment with slightly thicker yarns, decrease the unpunched areas to 4 rows, or execute the repeat using holding. Held stitches sit on top of the needle shank, tolerance is determined by how many rows it either takes for knit stitches on sides of the loops jump off needles or accumulated loops in hooks or any stitches become unable to knit off consistently on the next all knit pass.
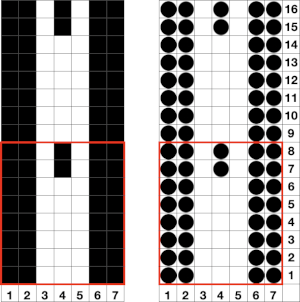
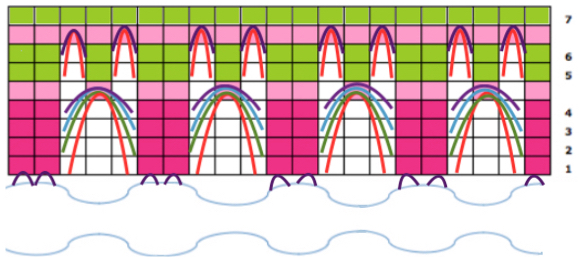
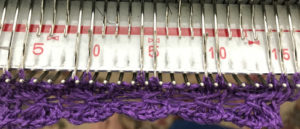
To test the yarn and repeat out, try the technique by using holding, then punch your card. Automating makes the process less prone to error and faster if great lengths of trim are needed. It is also possible to punch or program only the part of the card that is planned for the repeat. The single-width repeat may be programmed as pixels, on left, or punched holes on right. In electronics a single 8-row repeat is adequate, punchcard knitters repeat 5 times to 40 pattern rows punched. I prefer starting such designs on a knit row. To do that, the design repeat start may be shifted Using the trim as the cast on edge for a garment: determine the length required after a technique test. Knit a bit extra and remove on waste yarn, so more may be added or some be unraveled if needed or you wish to change the configuration using it as your cast on. Rehang and cast on later when it is completed. The flared-out portions of the trim will be used to “cast on” the edge of the piece, continuing with some needles out of work. An attempt at a line drawing of the “trim” sideways Using the curved out edge of the trim, hang half stitches if possible, or one full stitch away from its edge as illustrated below. Knit 4 rows. With a tool pick up all ladder loops created by NOOW (RC 1-4) and hang them on the center empty needle. Knit rows (RC 5, 6), hang ladder loops on still empty needles, knit across all needles, continue with garment

needle arrangement picking up loops 

The yarn used is cotton and appears to have a tendency toward biasing on knit rows as seen in the tendency to lean in one direction in the above photos. It has no stretch, so stitches that knit off several tuck loops remain elongated. A look at the structure on the purl side: For more trims in this family, please see later post Tuck trims 4 and other edgings

In Brother knitting when needles are out of work, the automatic end needle selection may interfere with the pattern, and this is a consideration in many stitch types.
All over fabrics, analyzing a published Brother tuck lace punchcard repeat:
Single bed
: to test the pattern, arrange the needles as shown below the full pattern repeat.
Cast on and knit a few rows, set the change knob to KCII, knit one row. Push in both tuck buttons, and knit the desired number of rows. If using the pattern on electronic machines, the needle selection needs to match on the top bed. Depending on the model electronic, the pattern may have to be reversed for accurate needle selection.
I prefer to start on a row where all needles in work are selected, providing an added visual check that indeed the proper needles are in use.
Begin with waste yarn and ravel cord, followed by a permanent cast on.
I like to use a crochet cast on and bind off, with extra chains where needles are out of work. The fabric will stretch sideways depending on the number of rows tucked as well as needle set up, so casting on and binding off needs to accommodate that stretch in finished pieces.
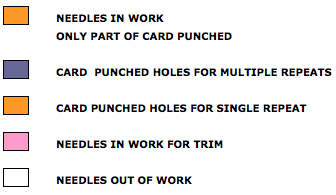
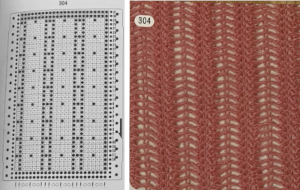
Punched holes or black pixels represent knit stitches, as always unpunched areas of the card, or white squares represent tucked rows.  The knit stitch (blue) above which tuck loops (red) are formed becomes elongated for as many rows as unpunched cells or white pixels in the pattern until that same stitch is selected forward to be knit When using card 304, tucking happens for 3 rows forming loops that span across needles out of work, then all stitches on needles on rows with numbered markings on blue cells knit for one row. Orange gradient-filled cells represent rows on which tuck loops are being formed on the held single stitches, which in turn grow in length. The full 24 stitch repeat, shifted for my preference, with the smallest electronic 8 stitch repeats outlined with red border In electronic knitting, repeats may be planned across the number of needles in work based on personal preference. Here the repeat is adjusted to produce knit stitches on both sides of the swatch, 35 stitches X 16 rows. On the 930: the odd number of needles are automatically placed on the left, with the pattern used in the isolated design setting.
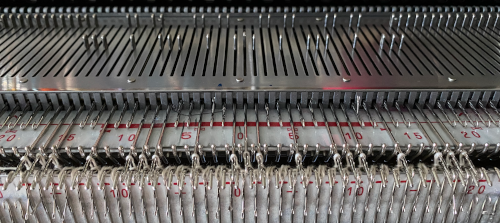
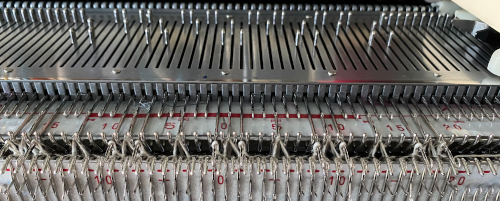
Air knitting the selection for the first row will bring proper needles to forward position, odd number on left, even number on right.
Unselected needles on the right and left must be taken out of work, knitting will continue on the remaining selections.  Double bed: there are a couple of options for varying the fabrics. In one, to retain the laciness of the knit transfer only stitches creating those long vertical columns on the top bed down to the ribber. In the other, any or all out-of-work needles on the main bed will be transferred down to the ribber. Hybrid combinations of both modes of transfer could explore the knit further in yet more ways.
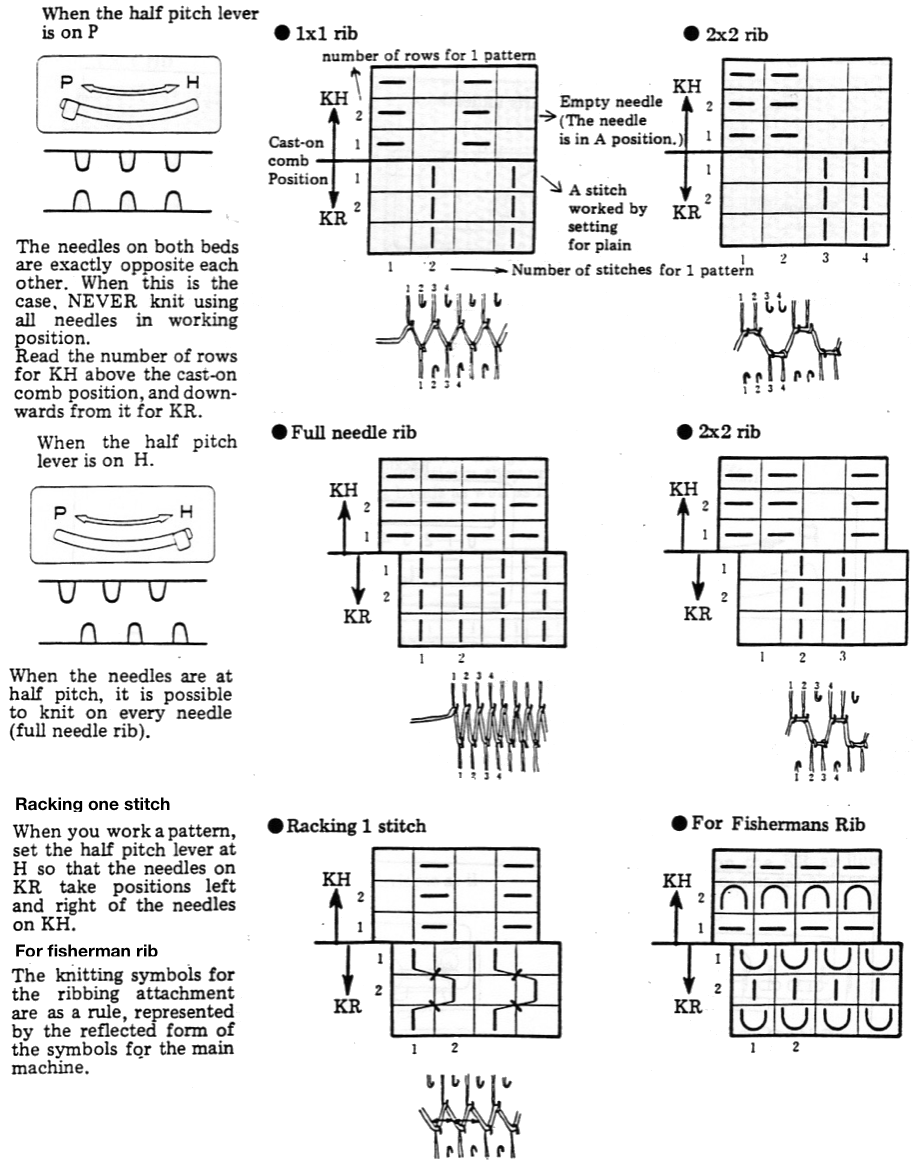
If casting on in rib, set half pitch lever on H, racking indicator on 5. Cast on the desired number of stitches and knit base rows.
Set half pitch lever on P, transfer stitches between beds arranging them as shown with NOOW on both beds. Set change knob to KCII, knit one row. Push in both tuck buttons on the main bed, knit in pattern for the desired number of rows.
Lately, I have been experimenting with chain or crochet cast ons and bind offs with extra chains between needles in work, and actually began my single bed swatch in pattern immediately after the cast-on row on the needles preselected in air knitting for row 1. Some weight, distributed evenly across all stitches is necessary. The main bed remains set to tuck in both directions throughout, the ribber when used is set to knit in both.
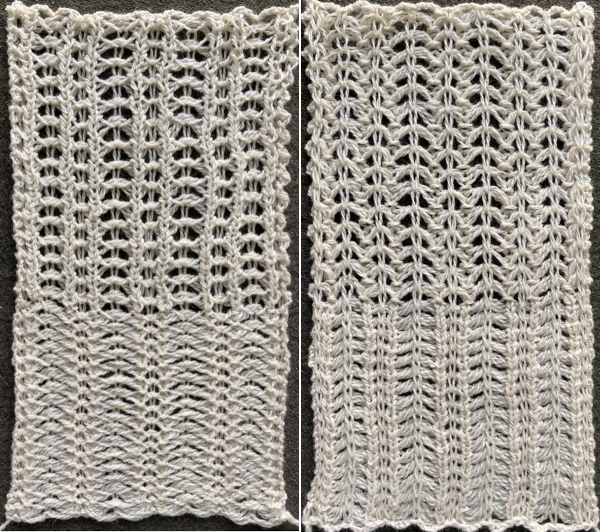
The bottom of the swatch shows the single bed fabric, the top a double bed version.
When knitting on the double bed, in this instance, the stitches where those all knit vertical columns occur on the main bed, marked with red dots, were transferred down to the ribber. Here the main bed needles, continuing in pattern, are selected forward for knitting on the next carriage pass, here the elongated stitches and tuck loops are shown after they have been knit together on the main bed. Transferring all non-selected needles down to the ribber: the tuck loops still form on the main bed, the ribber is set to knit every needle in both directions. The resulting knit, very different in appearance and in width than the previous sample, using the same tensions
For how-tos, illustrations, and swatches showing fabrics knit with all needles in work on both beds, please see post: Ribber fabrics with main bed tuck patterning 1/ pick rib 

“Crochet” meets machine knitting techniques: tuck lace trims and fabrics 1

Any discussion of crochet like fabrics on home knitting machines, whether single or double bed, invariably lead to looking at gathered loops, whether created as a hand technique using holding or automated by using the tuck setting. The function of the card remains the same when cam buttons are engaged, regardless of whether knitting single or double bed. In Brother machines punched holes result in needles being selected to D position (brother has no C), those needles will knit (second color in FI, thin yarn in thread lace / B feeder). Unpunched areas remain in B position, and will tuck or slip, (color 1/A feeder FI, both yarns together in thread lace) based on cam settings. Another Brother feature is that the needle tape to help with markings for stitch counts, pattern repeats, etc. centers between 2 # 1 needle positions. This can cause some confusion when translating patterns from other makers that rely on needle position numbers only for their directions.

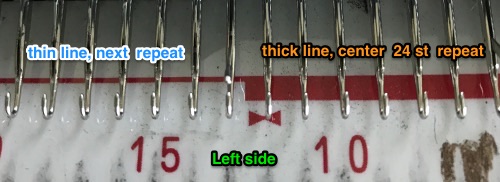
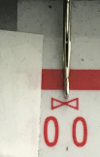
I often use punchcard designs on my electronic machines after isolating the repeat, most often for the sake of speed and convenience. Swapping out the needle tape for the electronic with one for a punchcard machine makes identifying and placing repeats easier. In Brother punchcard machines tapes the heavy solid line, followed by a thin line on alternate sides, reflects each 24 stitch repeat. Repeats on these KMs are fixed, there is no option for altering the starting position. When using electronics in some patterns, aside from the added convenience of color-reverse for minimal “drawing”, it is helpful to know that the punchcard design reflects what happens on the purl side, so letters, etc are reversed on the knit side. As a result, when translating for electronics, some patterns may also require being flipped horizontally. Using the markings on needle tape is pointless if the tape is not properly centered. Check needle “bow” mark at 100 on the left side, the last needle on that side should rest directly in its center. As the retainer bar begins to loosen a bit from wear, the tape may start shifting position, and cello tape may be needed to anchor it in place

Marking colors have varied over the years

“Trims” can be any width, from narrow to wider bands. Punching cards is enough work so that it is worthwhile to get as many functions or fabrics out of each card as possible. Various software makes it easy to check repeat tiling, or simply scan/copy the card with black paper behind it, cut it up, and cello segments together to sort out needle placement. I chart mostly in Excel, old fashioned colored pencils, and graph paperwork just fine

self-drawn punchcard for Brotherside by side repeats in this instance, left side needs some adjustment

got a pre-punched card? tucks occurring for 3 rows for an all-over pattern,  or trim choosing a section of repeat Studio card (use appropriate starting row for the machine)same needle arrangement, tucks will now occur for 4 rows

Love your ribber? use any tuck lace appropriate card. Transfer any or all of the needles to be left in A position (OOW) on the main bed onto the ribber, and you will have a pattern combining knit and purl stitches. Use waste yarn, ravel cord, and ribber comb with weights through waste yarn. Cast ons and bind-offs may require planning and choice depending on yarn used and the number of rows tucking. These in turn result in a stretch in width and diminished length proportionately in the body of the finished fabric. After casting on and setting up both beds, set ribber on P (so needles on both beds are directly opposite each other) to center ribber created vertical columns between those on the opposite bed.

When more than one stitch tucks

A quick post to address another question:

Two cards that meet limitations on fabrics with side by side tuck stitches  when using Japanese machines

Side by side tuck loops create floats similar to those created by slip stitch; the yarn is held in the needles however, so they are longer than those in slip stitch, which are simply not worked and travel in front of gate pegs. In Brother KM, the non selected needles tuck

In the card above left, after tucking for 2 rows, the needles are all selected forward in order to knit across the next whole row (every square punched). This is the result as needles come forward, illustrating some of the potential problems and limitations with wider or longer “tucks”

fabric 1fabric 2

Knitting in pattern with 2 carriages vs color changer, Brother punchcard KMs 2

After my recent attempt to resurrect my single bed color changer and frustration with my 910 behaving “flaky” when reading mylar sheets drawn using template marking pencils (perhaps, because over time of some of the marks flaking off the surface of the mylar, with changes their density as a result), I went back to the idea of using my punchcard machine. I pulled out an old friend, illustrated in my post 2012/10/15/mosaics-and-mazes-from-design-to-pattern/ , had forgotten about my other post 2016/08/25/knitting-in-pattern-with-2-carriages-brother-punchcard-kms/ and actually came up with a second alternative for starting to knit with 2 carriages. Here is a bit more description: I began with a card punched with repeats that are single rows in height, and would normally have to be elongated for use with a color changer. Since 2 carriages are used, the starting side does not necessarily matter. With COR, color 1, carriage set to KC, card set on row 1 but not locked, but rather, set to advance normally. The first carriage then is moved to the opposite side of the bed (in this case the left). The second carriage is now placed on the extension rail on the right, cam settings set for the choice stitch to be worked (in this first case tuck or slip). It is threaded with the second color, is used to knit 2 rows of col 2, returns to right. The carriage on the left now comes off the rail on that side and onto the needle bed, with cam buttons set for appropriate stitch type, it travels to the right,  and then back to its starting point. Yarn weight alters the appearance of any fabric considerably. As always, slip is short and thin, tuck short and wide.

The same method may be used with any punchcard requiring color changes every X even number of rows. FI can be knit with 2 separate sets of colors in each carriage, or with one carriage set to select but with no cam buttons engaged for solid color stripes between motif repeats (it will plain knit, with color in A feeder, the card keeps advancing). Cam settings may be combined for different or opposing textures or stitch types without any manual changes to cam buttons. Of course, also helps if your punchcard is punched correctly to start with ;-). Problems in the slip stitch red and white segment were due to tension adjustments being needed for stitches to knit off properly. 

Lastly, there has never been a single bed 2 color changer for the 260 bulky. Extension rails for the bulky machine were manufactured at one point. If a second carriage for the bulky is available as well as the rails, working this way opens up a range of complex fabrics for execution more easily.

And then, buyer beware! I am still experimenting with a patterned ruffle. So I tried the card first with 2 carriages, but the design was different than one of my aged swatches using the same card.

I went back to the color changer, assuming this yarn pair might work in it, and it did, but here is the resulting fabric, so it would appear the above is technically twice as long. Frankly, when the color changer works, when only one carriage cam setting is used or very few changes are needed, and if you don’t do things like pushing the wrong button, have your yarns happily mating or causing loops in all your brushes as they travel from the yarn changer side, it may even be quicker than using 2 carriages. What is possible may not produce what you originally intended, but sometimes the surprise can be a very pleasant one. If not, then it’s back to the drawing board to accommodate the techniques and yarns involved. Pictured below is part of the working repeat, whited out areas are not punched for these swatches, they are covered with cellophane. Denise Musk’s book on the technique of slipstitch provided the source/ inspiration for the experiments. For the second swatch, the card was flipped over vertically. 

Areas of the knit placement on THE needle bed may be changed to suit. I like working within the 24 stitch marking on the needle tape for this sort of work. Flipping the card vertically when using the color changer in this instance will allow that, and begins each row with knit stitches (every hole punched on right in the image above), and patterned knitting and needle selection stops shy of the “slipped” stitches (unpunched areas on left). In using the slipstitch setting this may not make a significant difference since the yarn threads stay in front of the gate pegs. This repeat is also suitable for the tuck setting. The yarn gets laid in hooks as the non punched area of the repeat is cleared. While not knitting or necessarily affecting the pattern, this can cause added issues with loops and yarn tangles on that side (one may be noted in photo of purl side of swatch below). Seam-as-you-knit can also now occur on the opposite side, away from yarn ends and color changer.

Purl side showing loop at non-knitting (or punched) side and edge curl on the left may actually be used as a “design feature”. The density of the tuck stitch helps keep it in place.

the knit side 

an “oldie” of mine, using the technique in a single color 

4/6/17 I am getting along better with the color changer by making different yarn choices, so I now have a WIP, and am going about a shawl design backward: ruffle first, body later. Reasoning: seam-as-you-knit should be easier if not taking place during ruffle knitting. If the latter is not bound off it may be continued with body knitting taken off on scrap yarn if needed to facilitate doing so. BTW, as with all knitting that uses patterning on only part of the knitting on the machine, end needle selection must be canceled on the knitting undercarriage. Any reverse movement of the carriage will advance the card for a pattern row, so that is an added possibility for errors as the knit grows in length. The pattern has 18-row segments, 36 for the full repeat. For 36 passes of the carriage, only 8 full rows of knitting take place. Every individual has their own design process. I tend not to sketch, but rather to make decisions as each piece grows. As for some math? 800 rows would actually take 3600 passes of the carriage, the shawl requirements TBD. (3276 on completion).

A previous post with notes on color changers: https://alessandrina.com/2014/01/26/some-notes-on-machine-knitting-color-changers/

Older model machines had no provision for a second yarn mast, and an accessory was available for mounting on their left side. Having the yarn in that position brings it closer to the changer and seems to help with undesired looping and sliding within the changer’s wheels. This shows the carriage traveling toward the extension rail, with the auxiliary mast in place

If the ribber setting plate needs to be moved forward in order to balance your ribber when in use, setting it as close to the needle bed as possible or even removing it may be needed if it starts to catch and hold the yarn

 the “finished” ruffle; HK markers every 20 repeats to help track rows knit and being joined on with “seam as you knit” technique
the finished shawl after a successful truce with  my color changer 

going green the series grows 

Knitting in pattern with 2 carriages, Brother punchcard KMs 1

I touched on knitting with 2 carriages in some previous posts:
2011/03/30/knitting-with-2-carriages/
2011/03/29/lace-meets-hold-and-goes-round/
2015/03/31/combining-tuck-stitches-with-lace-2-automating-them/

If 2 carriages are in use for patterning extension rails are a must. For this discussion we are excluding the lace carriage as the #2, the intent is to use 2 knit carriages with each set to desired cam functions. As one carriage is put to rest and the other one is set to move from the opposite side, the card does not advance, so the last row selected is repeated one more time. In one of those lightbulb moments today (any excuse not to do laundry) it occurred to me that starting out with an odd number repeat pre-punched card, coming from the opposite direction at the end of each odd row repeat, an even-numbered repeat would actually be knit. The card below is a Brother issue with all standard knitting machines. Card number (2 in this instance) may vary, depending on the year of purchase. Color changes here as well would have to be planned for every even number of rows, so respective carriages can travel to and from each side.

punchcard

The swatch below begins with locked selection row on punchcard row marked #1 (standard location); tuck setting is used in first 2 segments, FI on third; pattern produced is “OK”, but not actually tucking for 4 consecutive rows; note how much narrower FI is than tuck. Tuck tends to be short and fat, slip and fair isle short and skinny when compared to plain knit in same yarns 500_326

500_327

Since Brother preselects for the next row of knitting, setting the first selection row one locked below the usual spot on in this case #48 got me what I wanted, each color now tucking for 4 rows

500_325

500_324

Then something a bit more exciting occurred to me; one is an odd number, so any card where single rows are punched could be executed in theory, changing color every 2 rows (remembering to start with first selection row one row below # 1-row mark on the card). This sample was knit with 2 carriages, using a maze card, illustrated in a previous post, in which each row had been punched only one time, requiring for the repeat to be elongated X2 500_319500_320

the image from the previous postgrey_slip

Using 2 carriages allows for combining yarns using different tensions, cam settings, fiber content, or sometimes using materials that the single bed color changer is not “friendly” with. Also, there is no pushing the wrong button, causing errors in sequence, or dropped knitting if no yarn is picked up.

A punchcard carriage may be used on electronic machines. I work on a KH892, and a 910. The 910 is from a much earlier model year than the punchcard machine. The back rail for the KH to travel on, is a different shape, with slits as opposed to smooth, and a bit more raised. The electronic carriage set on KC locks on the belt and advances the card appropriately, but the fit is quite snug, making it hard to push, while the 892 behaved well on the 910. If borrowing carriages and sinker plates from different model years or one type of machine to use on another, proceed with caution and listen to your machine. Sometimes the span of time between model issues is irrelevant, even if model years are only a year apart, and the swap is not the best for successful knitting, may “work” in one direction, but not as well in the other.

sample back rails: 910 910892rail2

 Dec 7, 2018 Knitting studio simple lace with 2 lace carriages transferring stitches 


Vertical racking 3: automating half fisherman in pattern (2)

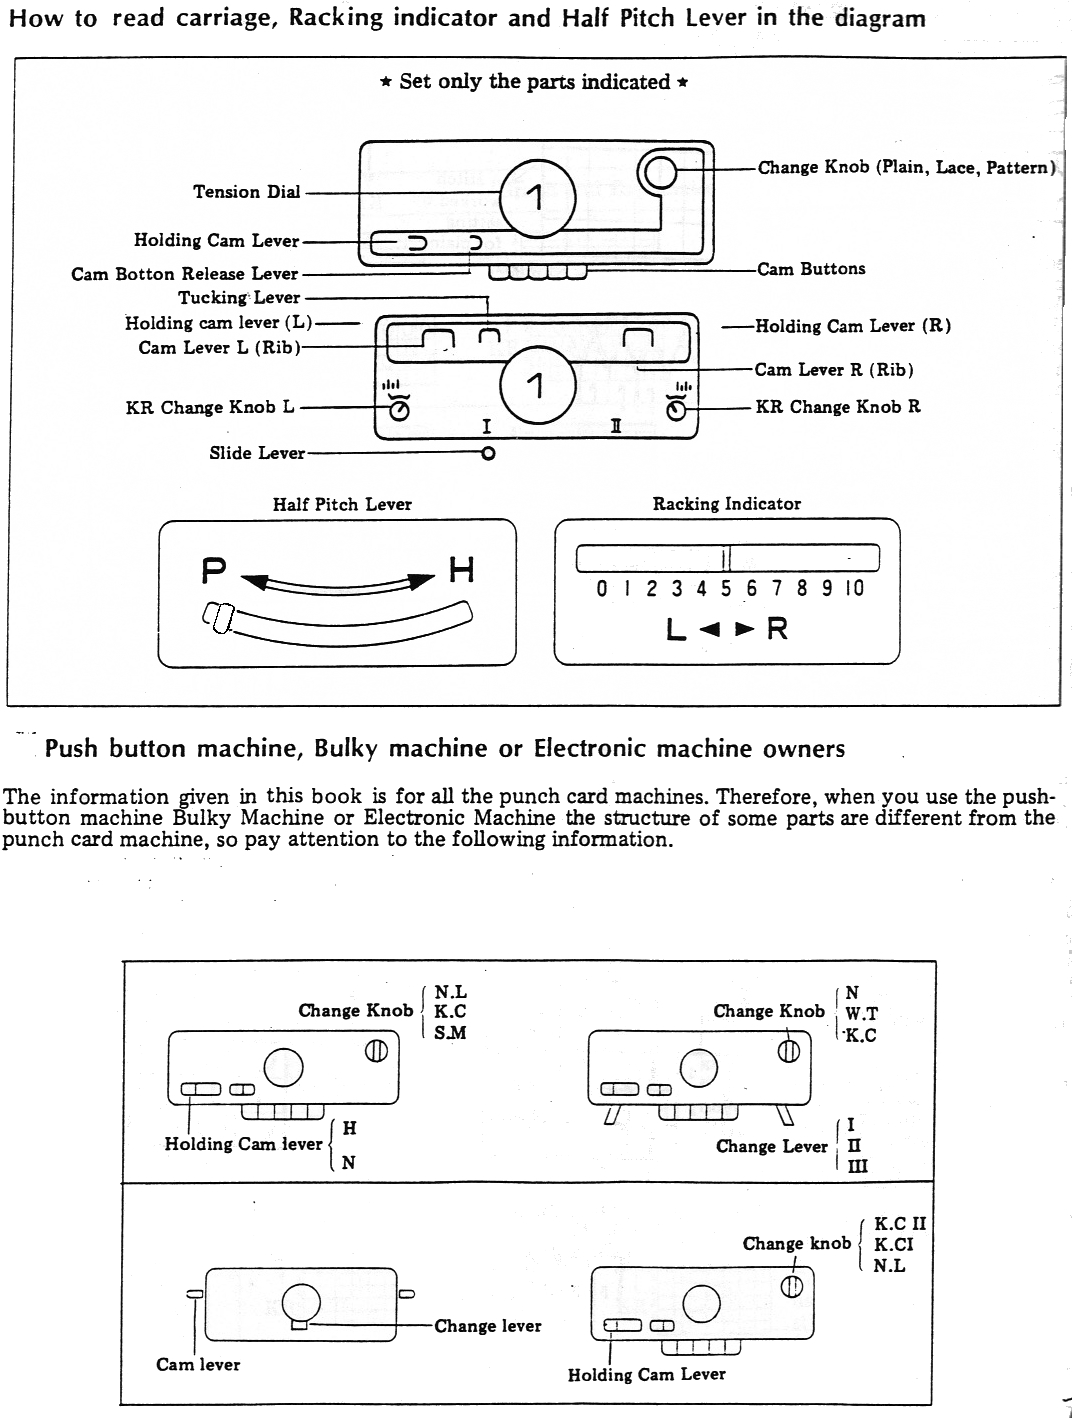
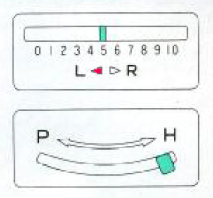
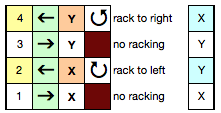
Working with the half fisherman racking discussed in the last post, here is an approach to interpreting the fabric seen below for knitting on a Brother model knitting machine.  500_557For the sample chart, I chose a 12 stitch repeat, making it executable on any knitting machine. The ribber is set to half-pitch. An often-overlooked clue as to what is happening or is about to be found in the arrows just below the racking position indicator. With the latter at 5, the red triangle appears pointing to L. As the bed is racked to position 4, the red arrow now points to the letter R. This is a simple racking pattern involving only the 2 positions, either to R or L

pitch_rack

Once on position 4, the red arrow indicates the direction in which the bed was racked on the last move (R), the “empty” arrow the direction for the next move (L), bringing the position back to 5. More complex patterns require a bit more planning and tracking to avoid errors.

rack2

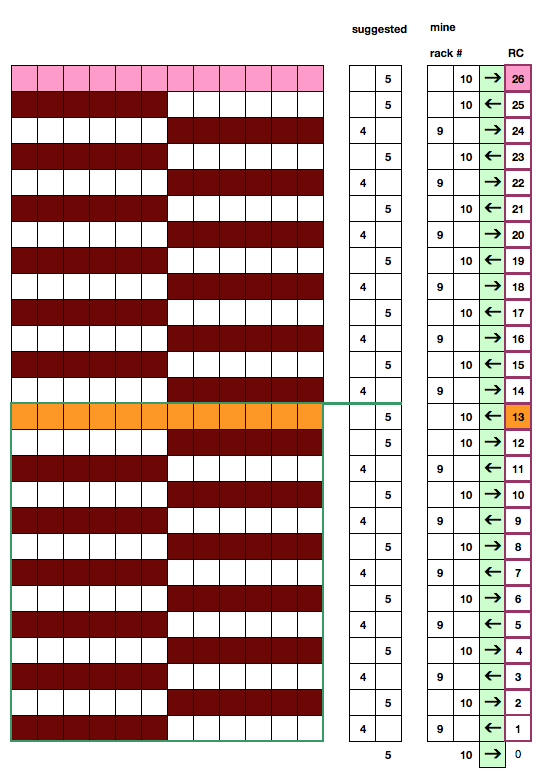
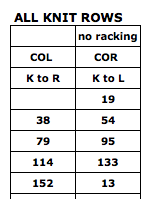
Racking patterns in books often recommend beginning the fabric with the setting on 5, or the center position for the machine in question.  Doing so allows for balanced edges in patterns that swing by multiple positions in both directions. In this instance, for the sake of avoiding mistakes in as many ways as possible, I would start the pattern on racking position 10. Racking cannot go any further to the right, so no chance for example of racking to 6 rather than 4 in the knitting because of inattention. Having a “cheat sheet” with row numbers where no racking occurs, and the position of the carriage to R or L at their start and or after the knitting is also helpful. I had to lower the tension on both beds considerably to avoid forming loops that in turn got hung up on gate pegs. Especially at the start make certain that the comb and weights drop properly. Using KCI will ensure that the first and last stitch on the main bed always knit. In the patterning used on the Passap back bed (previous post), the groups of needles in each half of the repeat will change to the alternate position with each pass of the lock. On the rows where the back lock is changed to N, selection continues in pattern, but no tucking occurs. In this chart, the pattern is maintained continuously throughout, while blank “remaining” squares are filled in on rows where no tucking or racking occurs = N, every needle knits. In Brother machines, both tuck buttons are pushed in. Selected needles knit, non selected tuck across the row. new program 2symbols

I tested the pattern approach on my 910, with a 38 row, 20 stitch repeat in a random acrylic. I had some issue with some needles not selecting properly, for whatever reason. The repeat was not planned so a full 10 stitches were at each side of the knit, resulting in the difference on the right side of the swatch photo from its left.

larger repeat

half the repeat with color change on a single plain knit row (use of color changer only possible with even row change sequences), the top stripe of the swatch in plain rib

half repeatN1

1rowN1_584

back to scales and knitting them

Overall,  wider repeats and thicker yarns gave me harder to knit fabric, with less noticeable pockets and lack of stretch and “bounce”;  ultimately I went back to a 6X6, 12 stitch 2-row sequences illustrated in the chart above. The thinner yarn needs to be with a bit of stretch, and enough strength not to break when ribbed and racked at the tightest possible tension. This is a fabric that requires concentration, having as many clues as possible to help stay on track is useful. If errors are made close enough to the all knit row, it is possible to unravel carefully to that point and continue on. Mylars or punchcards may be marked to reflect racking position. Here the mark on the right = 10, the one on the left = 9. Marks take into consideration that the card reader’ design row and knitter’s eye level row views are not the same.
mylar_marks

A row cheat sheet can help track carriage location for all knit rows. Pictured below is part of mine. Wording for clues or description of sequences should make sense to the person knitting, not necessarily follow a specific formula.

screenshot_34

some of what “did not work”, including a very long swatch with a confusing pattern due to creative operator error

500_591a finished piece with yarn ends not yet woven in500_590

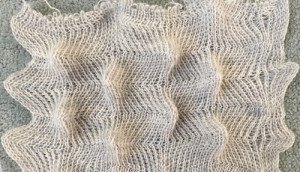
The fabric is tugged lengthwise, left unblocked, and pockets may pop on either side of it, with the majority on one side of the knit as opposed to the other

the start of a series in varied colors and fibers500_604

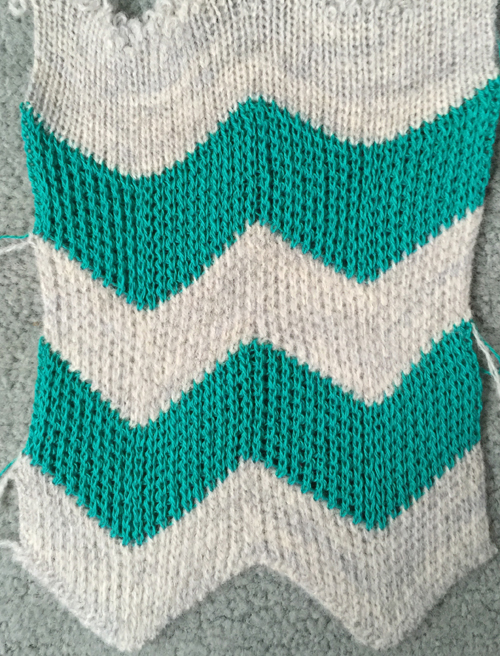
Racking 2: vertical chevrons/ herringbone +

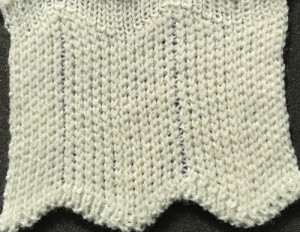
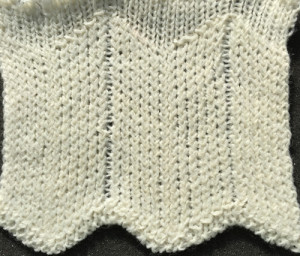
Here again, half fisherman or full fisherman rib is be used. The zig-zag happens at the top and bottom of the fabric. In half fisherman, the setup is once again for full needle rib. If knitting in one color the sequence is: knit one row, rack a space, knit one row, rack back again (X and Y below represent the 2 racking positions involved screenshot_39
for 2 color fisherman, the sequence is knit 2 rows with col 1, rack one space, knit 2 rows with color 2, rack one space back again

screenshot_41 this fabric is produced in conjunction with a pattern repeat using the principle that black squares knit (pushers up, needles preselected), white squares tuck (pushers down, needles not selected), the repeat is 12 stitches wide, 2 rows high; it is possible to have 6 stitches tucking side by side because this is an every needle rib, and there will be a knit stitch on the opposite bed anchoring down each tuck loop

screenshot_42

screenshot_02

one color half fisherman side one   500_528one color half fisherman side 2500_5292 color setting, color changes every 2 rows, side 1, thinner yarn
500_542
side 2

500_543

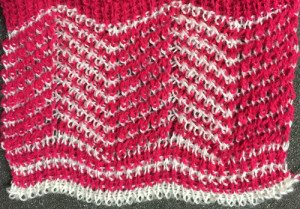
2 color version, changing color every 20 rows; racking interrupted with plain knit rows at top and bottom creating horizontal pockets20rows_plain

20rows_plain1

This type of repeat became popular in Passap clubs for use in their Passap ripple afghan. The racking first to the left and knit a row, knit to the right and knit a row, was interrupted after 36 rows, followed by a color change and a no-racking knit row before resuming the previous racking sequences.
When single or multiple odd # of rows with no racking are introduced at intervals the zigzags once again happen at sides rather than top or bottom, with the knitting after the no racking row(s) reversing direction. The yarn used in these swatches is a random acrylic, presses flat, not the best if aiming for any 3D textures; the color difference is due to photos being taken at different times of day

side one 500_530side two500_541

what happens when multiple odd numbers of rows are knit changing back lock set to N (all knit), no tuck stitches. The fabric still swings in opposite directions, and in addition, the all knit rows produce areas that “poke out”, beginning to create scales of sorts
side one 50537side two 500_538back to vertical: full fisherman with color changes every 2 rows, side one 500_539side 2, with a few stitches knit off issues  500_540

it is a matter of personal preference whether the extra effort with full fisherman rib is worth any difference in appearance or result in the final fabrics. Changes in tension, yarn fiber content, and machines used add to the variables. Good notes in trials help one determine predictable results and to choose whether the effort may be worth it or not. Using laborious techniques for borders rather than whole items is always an option.

1/22/2016: half fisherman racked rib knit in thinner yarn, wider # of stitches and more rows in pattern group before single N/N row, no blocking

500_557

500_558same fabric with color change every 2 rows 500_561

500_566