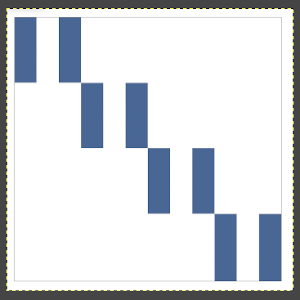
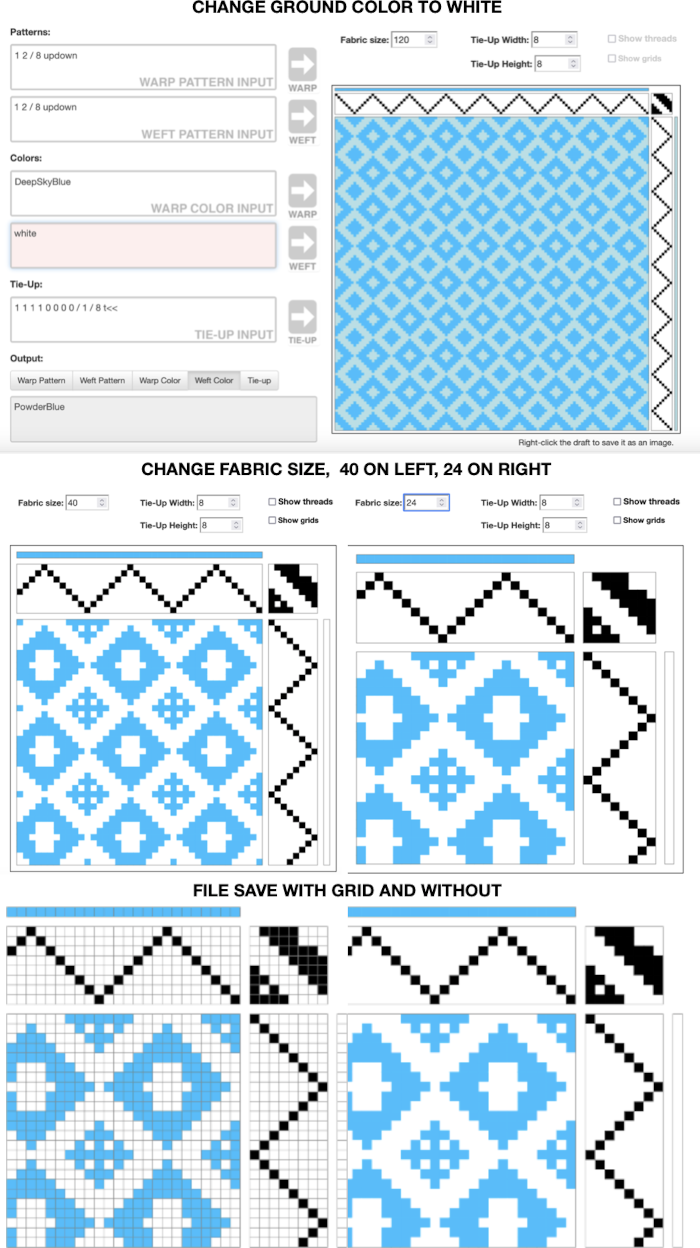
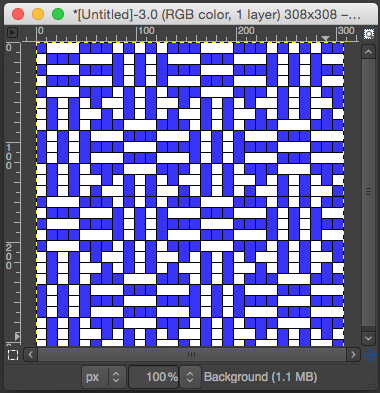
My first attempt to use a 3 color automatic separation was with img2track. There are 2 oddities for me using the program. One is that the default selector setting is for a single motif, perhaps on the assumption that the main use would primarily be for large-scale, nonrepetitive images. The other is that even if working with 2-row color changes with each color in each design row knitting for 2 rows, the first preselection row must be made from the color changer side. This is a necessity in Japanese color separations for 2 color work where the first color knits for only one row on moving from the right side to the left, but if 2 colors with the same selection are required at the start, one row of the 2 appears to be technically eliminated as a result. I had expected to use 3 shades of grey, a pleasant surprise: the program can actually import 3 colors other than grays. The test was using the 11 stitch repeat 
 A pleasant surprise: the program can actually import a 3 color other than greys image. Using Gimp, images worked in RGB can be reduced to indexed 3 colors for this purpose. If there are rows where there is no color represented, then as explained later in the post, the indexing should be to 4 colors, not 3 for the planned for import to work properly.
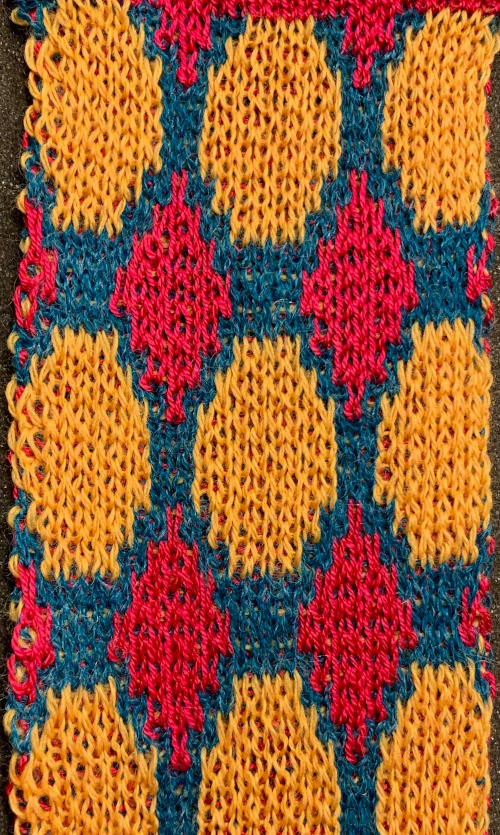
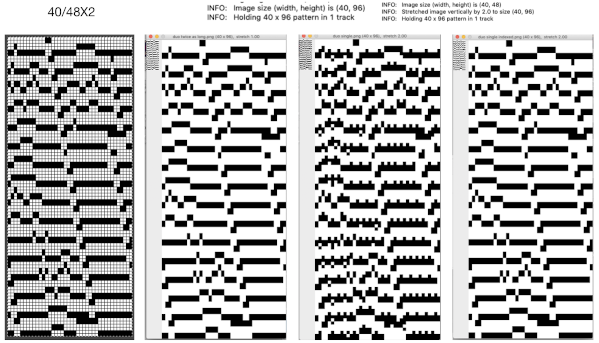
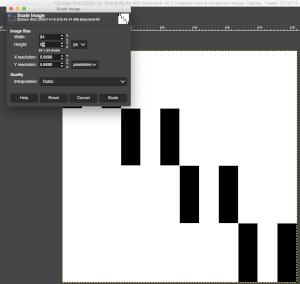
 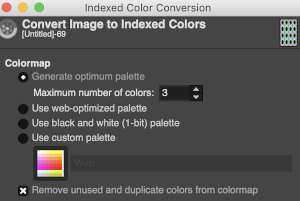 The design is automatically flipped vertically, so it will appear as intended on the knit side of the fabric. Yarn colors may be placed in the color changer matching the order in the assigned color numbers to match the placements in the original image. The program automatically adjusts for the vertical stretch, which changes the aspect ratio of the shapes. On my 930 I received prompts on which color to change to prior to doing so, eliminating any confusion. With no such prompts generally one can tell which color was knit last because it will appear on top of the previously used one on the left of the knit. With a stretch factor of 1 selected in img2track, the image height was reduced by half.
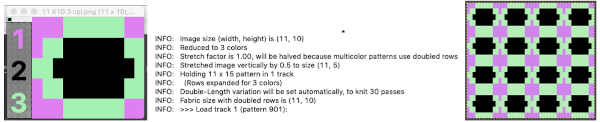
 To achieve a look closer to the intended shape, the repeat needs to be rendered twice as long, or the stretch factor can be adjusted in the program itself to 2.0
 In the past, I have preferred to elongate the design prior to importing with plans for download rather than to rely on memory for changing settings either in the download program or in the machine itself in future uses of the same design.
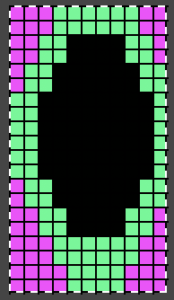
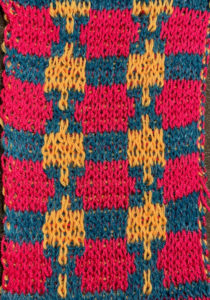
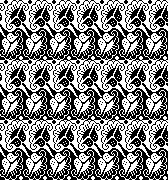
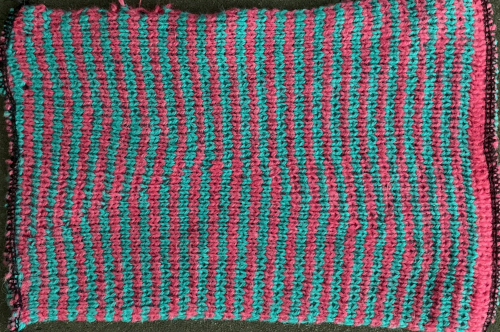
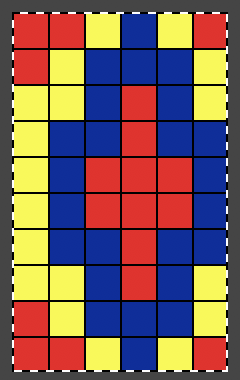
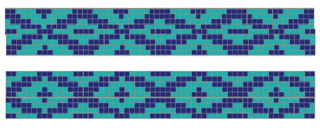
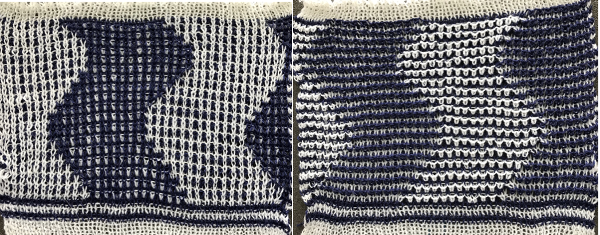
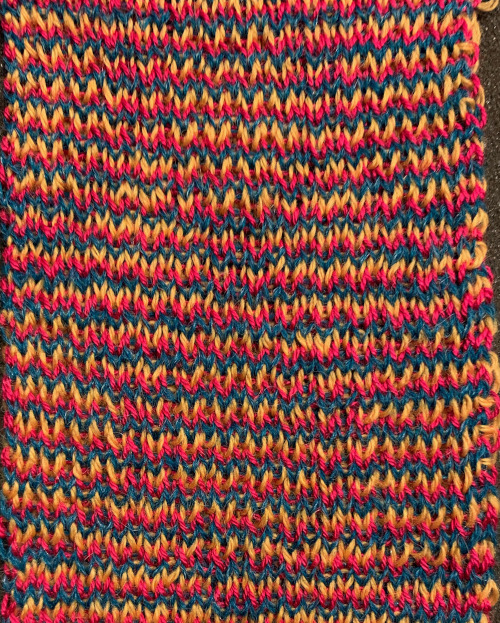 The same yarns, tension, the total number of carriage passes, and settings were used showing the difference in aspect ratio between single color per row knitting and the img2track built-in color separation.
 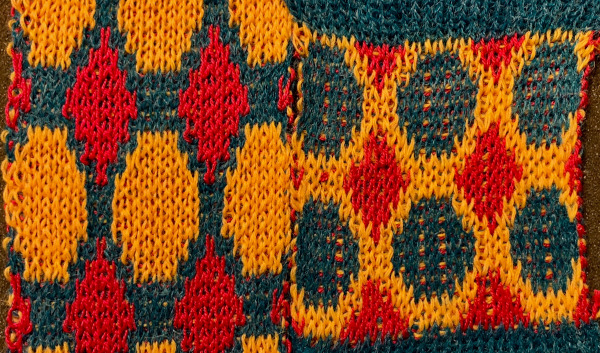 The width of both swatches is essentially identical.
Images may be loaded into the program without the cable being connected to the machine. Error messages do appear with download attempts if the cable is not properly in place. The machine also needs to be powered on before the program is launched if a download is planned. I am working in Mac OS Mojave 10.14.6, have no present desire to upgrade to Catalina.
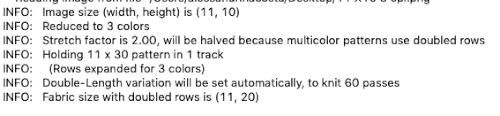
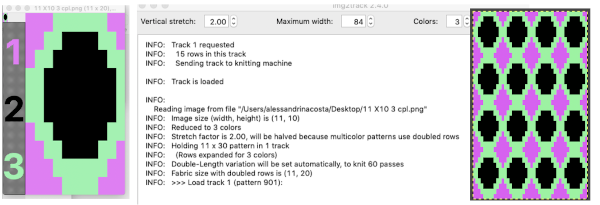
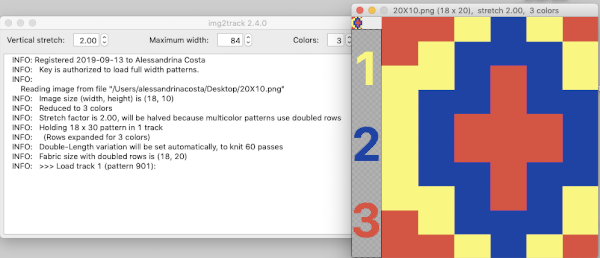
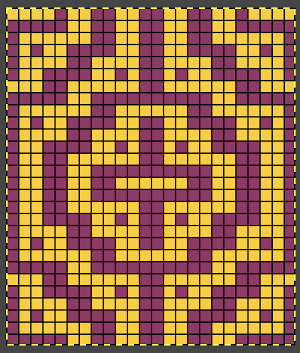
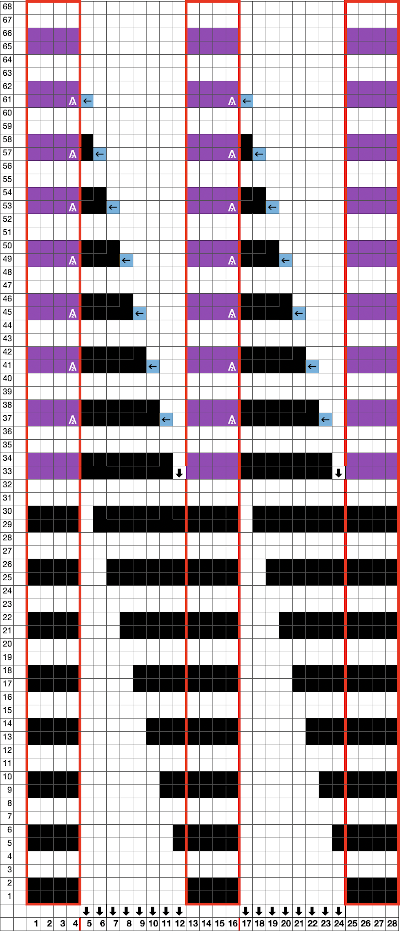
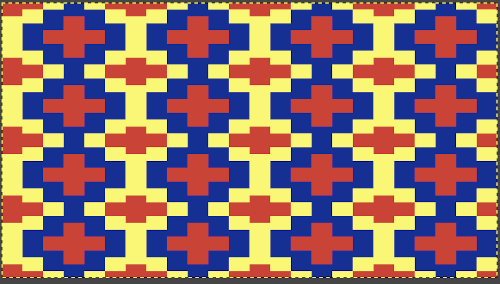
Executing fabrics that will knit each color in each row only once for every 2 passes on the main bed: back to that original repeat 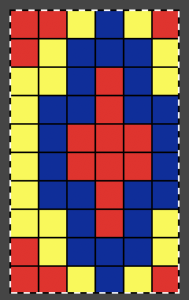 Here it is used as drawn, note vertical stretch set at 2, will be cut in half by the software, getting the image back to the original height l0 X 3 = 30 rows required for all colors to knit in turn; there will be 60 carriage passes to complete one single repeat.
 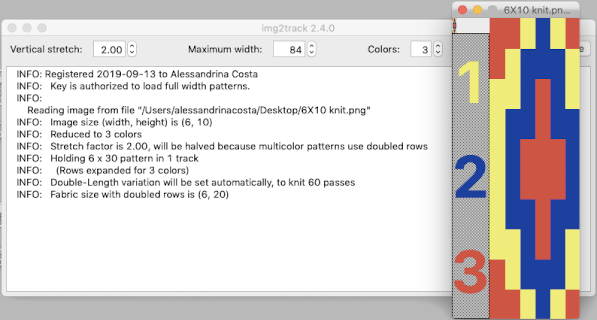 The 930 will provide prompts for the next color to be selected by pushing the matching number button on the color changer, avoiding any confusion in terms of what should be picked up next. img2track will also flip the design horizontally automatically so the image will appear as originally drawn on the knit side. Images are loaded as single motifs, so the change in the selector needs to be made manually for an all-over pattern.
In order to have each color in each row knit only once: cast on with preferred method and color. Set up the machine so that the yarn colors are placed in the color shown in the image presented by the program to match your design. End with the machine on the left-hand side for the first preselection row.
COL: set both carriages to slip in both directions and all its needles in B position, set lili buttons if not already in use, pick up color 1
knit one row to the right
COR: knit to left, color 1 will knit for a single row
**COL: change color, STOP! Push back any needles on the top bed back to B position, as you knit to the right the ribber only will be knitting, knit one row to the right
COR: preselected needles will knit in the color last picked up on the way back to the color changer, knitting only one row in that color on the main bed as you return to the left**
repeat the last ** 2 steps throughout. One can get into a rhythm. A cast-on comb, part of a garter bar, or any tool of adequate width can make it a quick process of pushing needles back to B when needed to
trust the software, not the selection expected by your eyes.
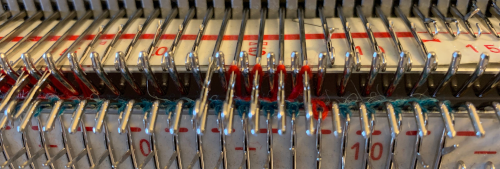
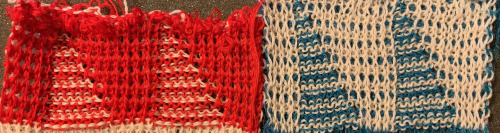
My swatch seemed to be growing in length at a faster rate than I remembered in the last exercise, here the results are shown side by side with the fabric executed previously 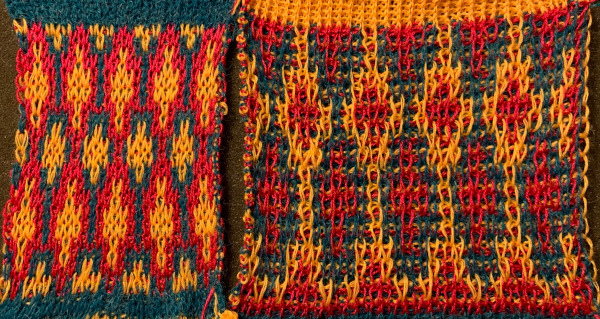
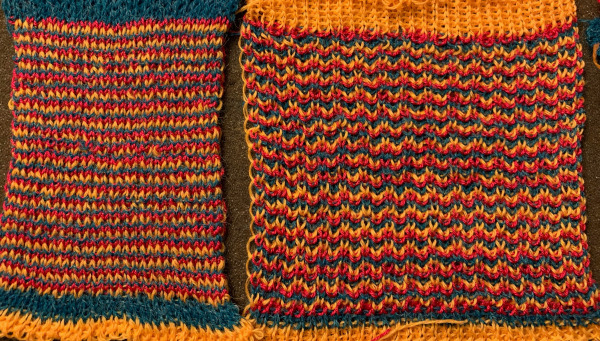 Obviously a success in terms of the single row for each color reducing elongation of the design shape. While knitting occurs using the same yarns, at the same tensions, there is a clear difference in the length of each stitch on the main bed and their appearance. The reverse. Checking the ribber carriage I noticed on the left side it was set to knit only, not to slip: OOPS!
 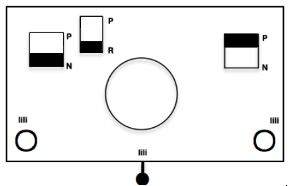 N is king, so the ribber set as shown is knitting every other needle when moving to the right, but even with lili buttons in use, it knits on every needle when moving back to the left. Every other needle on the ribber will then be knitting for 2 rows as a result. The more knitting on the ribber for each pair of rows, the longer the stitches on the opposite bed. The backing is an interesting variation (half) birdseye. The elongated stitches on the main bed show more of the backing in between their shapes, it is referred to as bleedthrough. In some instances, the result can make the knit surface resemble weaving and its appearance far less familiar in a surprising, pleasant way. Beauty is in the eye of the beholder.
Remember always to double-check all settings at the start of any process in case something was missed or magically moved, and keep notes.
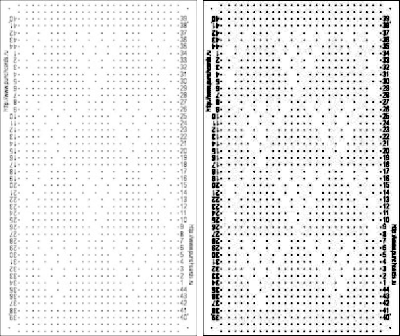
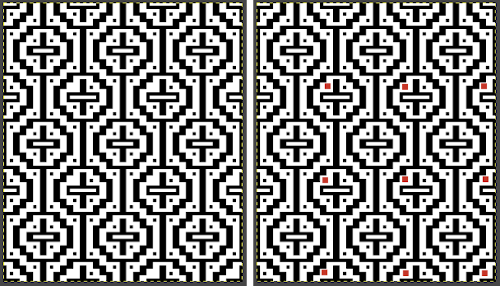
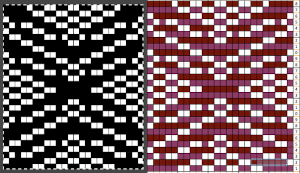
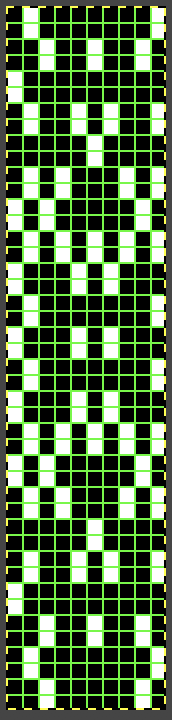
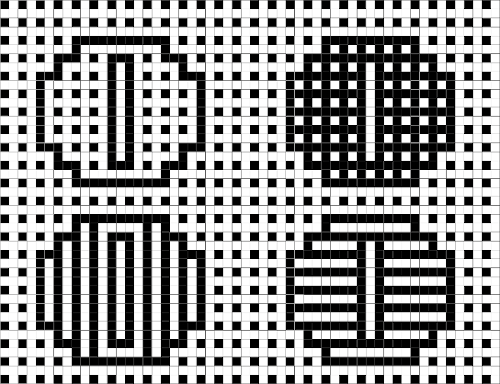
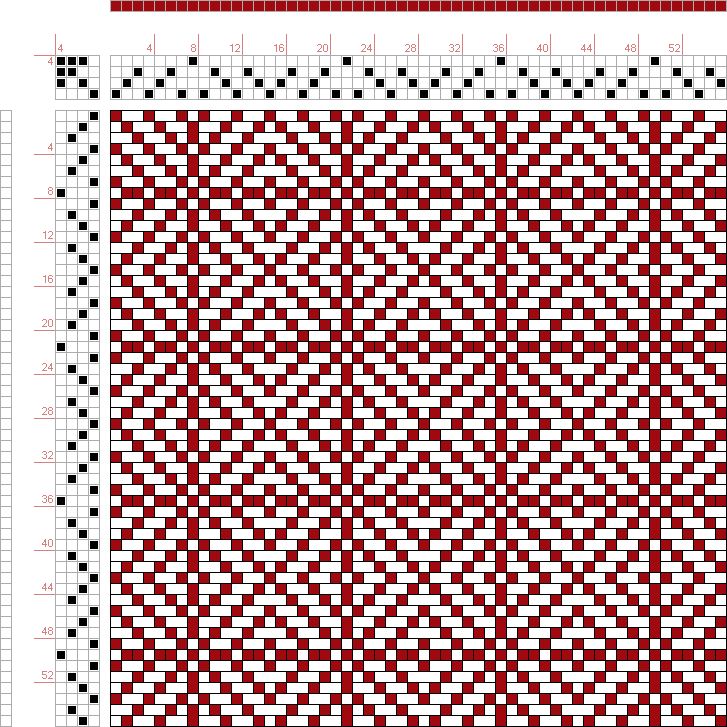
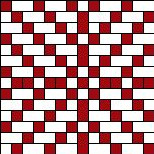
I was asked on Facebook whether the technique shown here is the same as the 3 color slip (skip) stitch patterns in the Stitchworld pattern book, my response: some of the stitch world patterns for 3 color slip are designed for or may be used on the double bed (often single bed as well). For instance, patterns 392 and 394. The original designs are rendered color separated. Numbers on the left suggest the order for color changes to achieve a look similar to that in the swatch photos. Assuming the pattern is not easily accessible because of its being built in your machine’s memory, it would have to be entered into a paint program manually to make it available for import and in turn for download. Note that the color-changing sequence may change over the course of knitting the image, so prompts or notes of some sort would be needed to keep it correct. Each color in each row knits twice after each color change. My goals in my blog posts so far have been to keep a constant color-changing sequence with each color in each row of any personal design knitting only once. I did it first with my own color separation, then, in turn, used the 3 color separation feature in img2track to achieve my desired result. Here are 2 images from the Stitchworld section in question 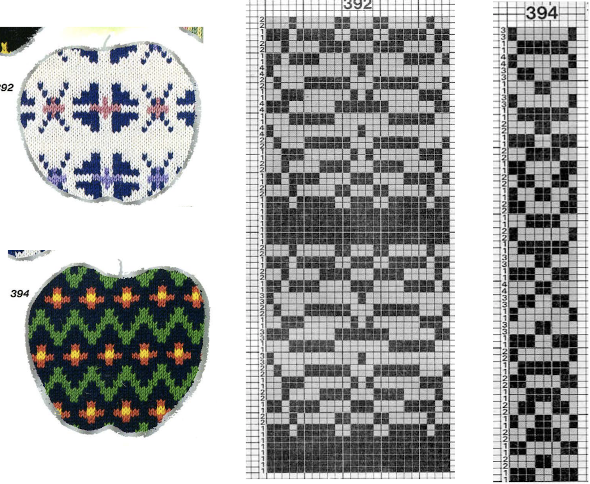 The images could be replicated as given in a paint program, using only one color for the squares, but “should be reduced to black and white”. Attempting to import an indexed 2 color image drawn in a color other than BW may result in strange results.
 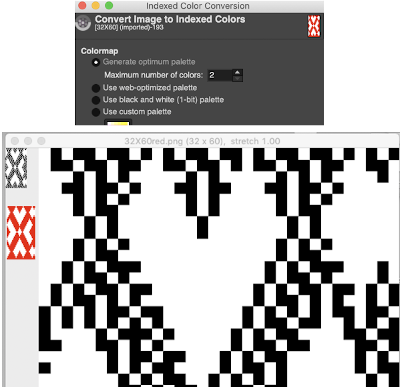 That said, if glitched knits are the goal, the above could work just fine. Curiously, here is the same process, using a different color, and a successful import. Checking again, I had forgotten to save the image after indexing it from RGB mode to 2 colors.
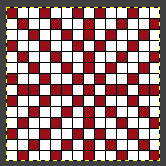
 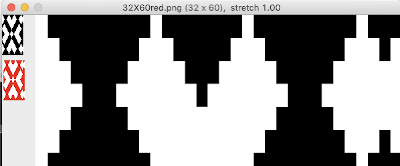 and a test with another color
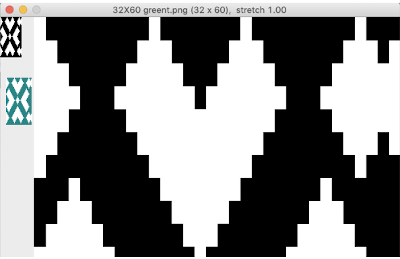
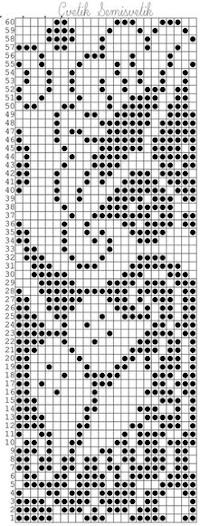
Drop stitch lace periodically comes up, I have written several posts on the technique, now considered the possibility of producing it in 3 colors. The resulting fabric tends to be long, thin, and in need of blocking. There is no way to avoid the striped ground. Passap knitters often refer to this type of knitting as “summer fair isle”. I adjusted the repeat width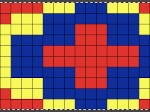
 Note to self: if you are determined to use a punchcard carriage on your electronic machine remember there is no KCII to cancel end needle selection!
In order to knit this fabric, stitches must be cast on in whatever method you prefer, but prior to any patterning all stitches must be transferred down to the ribber, and the main bed needles are placed in the work position but are empty. Because of the single row knit for the first 2 design rows of color one, the start is a bit finicky. Alternative start follows lower in post
COL: KC II, main bed set to slip <– –>, ribber stays on N throughout, no lili buttons. Knit one row with color 1 (ribber only)
COR: as you knit to return to the left, the color 1 preselected needles will knit, while the ones corresponding to color 2 will preselect
COL: carefully drop any stitches on needles with color 1 on them without disturbing the new needle selection for color 2
**COL: change color, knit to right
COR: drop the stitches knit in the new color, make certain all needles are empty and in B position, knit back to left and needles will be preselected for the next color**
Repeat the ** to**
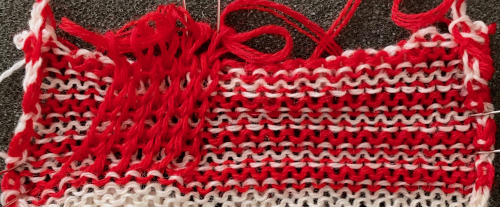
Again, the resulting fabric is narrow and long, it may take a bit of squinting to recognize the design.
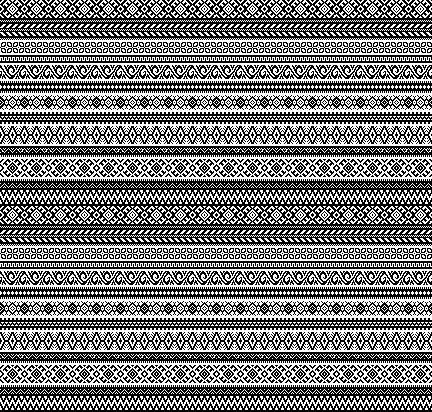
If each color is not represented in each design row, the ribber only will knit with no selection on the top bed corresponding to those no pixel rows.  A single repeat results in about 3.5 by 9 inches of knitting, a far cry from what might have resulted in a single row per color design row dbj virtually shown here in a tiled format
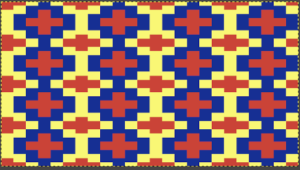
The question then comes up re dropping only one of the 3 colors. Using the manual selection described above, the knitting on the top bed would need to be canceled on every color, every row except for the single row in the chosen drop stitch color. To my mind, that is too much to keep track of for any length of time. It would be easier achieved with specific self-drawn color separations.
There is a lot of testing that can go into developing any fabric in unfamiliar techniques that may or may not meet our expectations or our “like”, it all contributes to learning regardless of whether the tests evolve into projects.
My last post on drop stitch lace in from single color to two: revisiting the techniques on brother machines
2022: returning to the topic, exploring drop stitch lace in multiple colors
Reviewing what happens within the program one more time, highlighting significant items to verify before beginning to knit 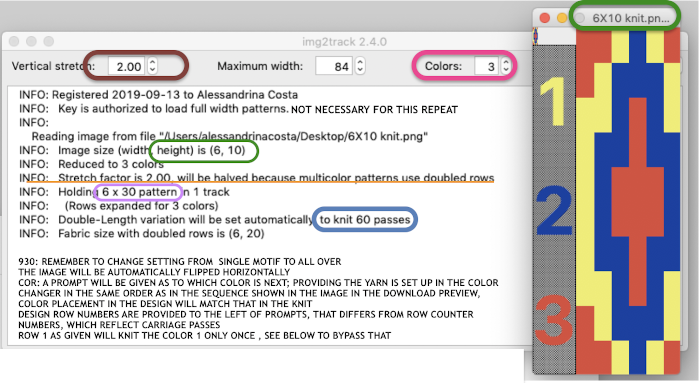 Getting that first row to knit twice instead of a single time if that matters in your technique or is your preference:
advance design row to last one in the sequence, in this case, 30
in the 930 when the pattern is loaded, using the down arrow key gets to the last row in the downloaded pattern more quickly
COL: set machine to preselect pattern, the next 2 passes would need to not knit, so both carriages are set to slip in both directions
knit one row to the right
COR: number 30 design row flashes
knit one more free pass to the left, row 1 of color 1 will preselect as you knit
COL: number 1 design row flashes
check all settings, main bed set to slip <– –>, ribber set to slip <– –> with lili buttons, and with an even number of needles in work for standard dbj 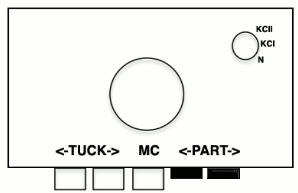
 pick up color 1 in yarn changer
the resulting knit design will be elongated
COL: knit one row to the right.
As you knit the first row of color 1 design row 1 will knit, row 2 of color one design row 1 will preselect
COR: knit back to the left
as you knit back to left row 2 of color 1 design row 1 will knit, row 1 of color 2 design row 1 will preselect
COL: pick up color 2,
continue in pattern changing colors every 2 rows
In designing your own, small repeats can easily be rendered even in a simple paint program. Larger, more complex ones, may best be worked using layers and masking in a variety of programs ie. Photoshop or Gimp. It is possible to combine 2 color dbj and 3 color dbj in the same piece simply by using different color separations for each segment, but the look of the fabric in terms of the length of each stitch on the knit side may be quite different when moving from one segment to the next. Of course, the backing will change as well. Though the aspect ratio of the design changes in terms of height when one knits 2 rows for each color in each design row, it remains the easiest separation method. Adding the hand selection as described above so that the main bed knits in one direction only helps reduce some of the extra height, making the original image more recognizable. There is no option within img2track to perform the action automatically in terms of adding the necessary blank rows to replace some of the colored ones in the separation.
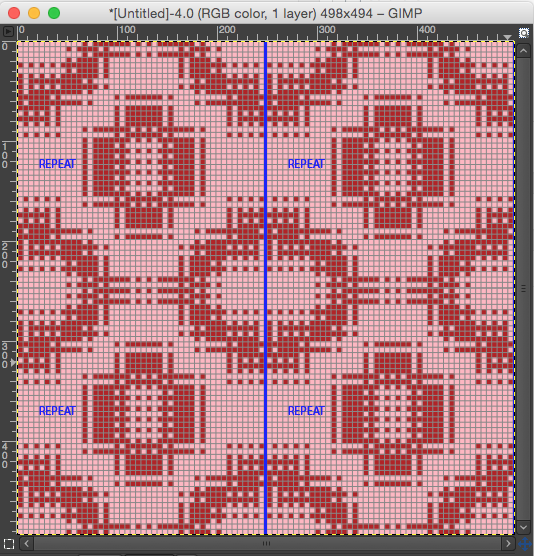
Passap knitters are not left out of this idea. Passap preselects pushers. On the E 6000 Tech 179 emulates the built-in KRC option in Japanese model machines. My guess was that technique 180 for 2 colors, perhaps 197 with both arrow keys on the back may work for 3 colors. TBD in my next spurt of knitting activity on it. That said, the console’s built-in designs may be used cross-brand. It is possible in Passap to layer repeats in order to add the third color to the mix. Here is one sample reworked for use on Brother and downloaded into img2track.  If black and white repeats are already in your library, one may easily recycle them adding a third color. Here I did so with a repeat intended for a very different topic in future posts. The image was altered and tiled in Gimp for a repeat alignment test and is also shown imported into img2track for possible knitting.
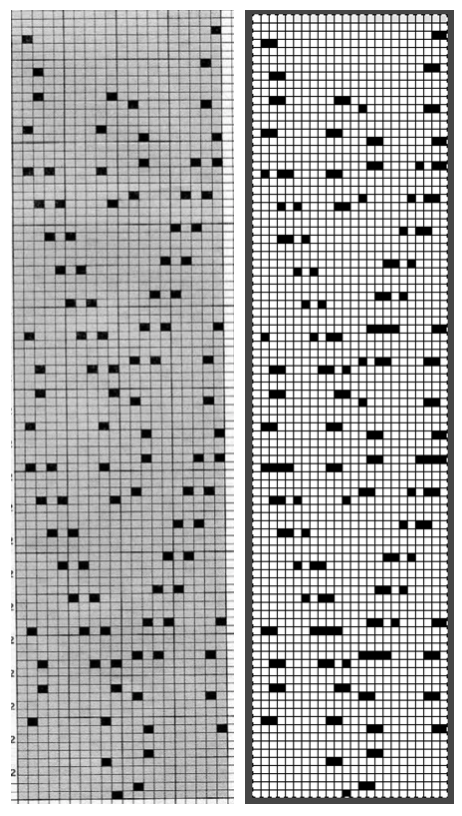
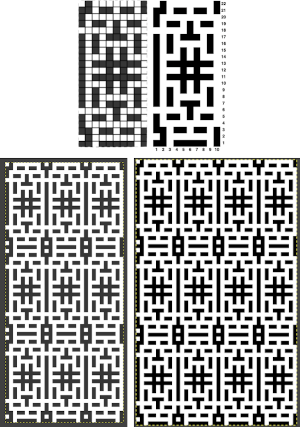
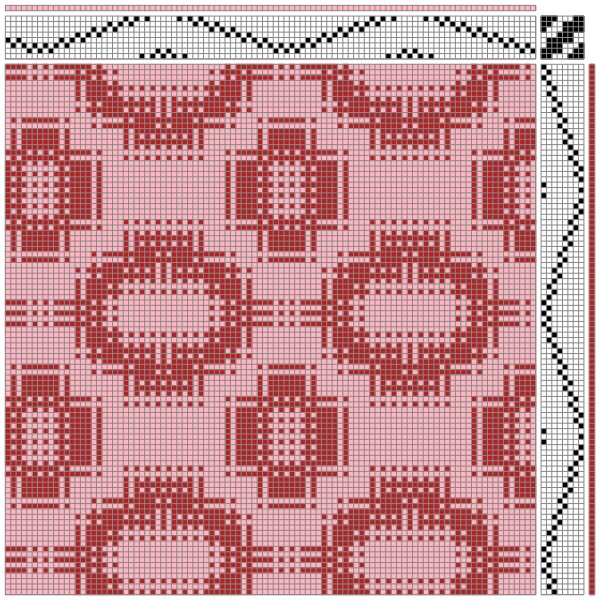
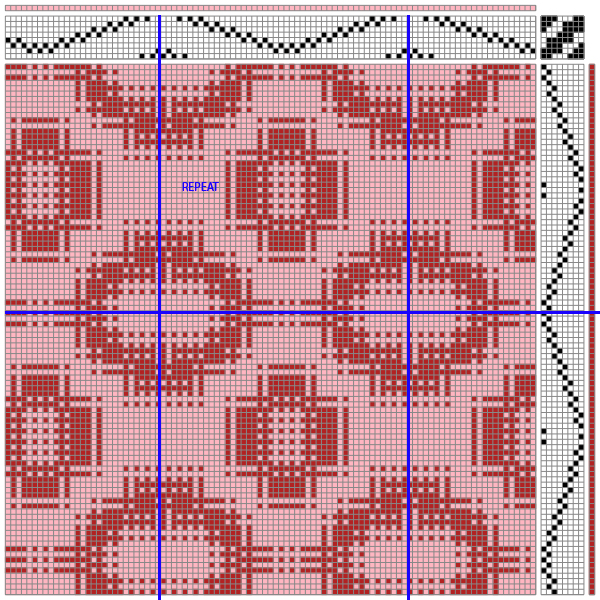
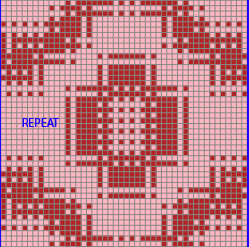
  What about using images published in punchcard machine references? It is probably best to start with smaller repeats. That said, this is from a Deco pattern book. Deco punchcards were 40 stitches wide, could be joined together in length as can those for the Japanese models
 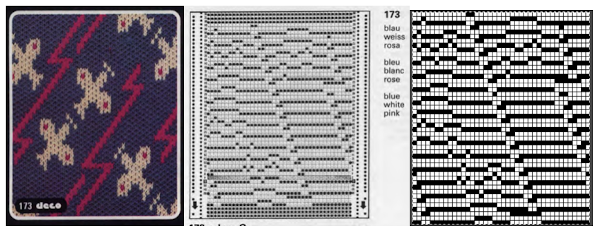 The image of the separation on the above right has not been proofed for accuracy. If it were, the next step would be to elongate it X 2 for color changes every 2 rows. One method is to elongate the original in a paint or photo processing program. The width is fixed (40), the height is scaled X 2. The resulting BW indexed image may be imported, using a 1.0 stretch factor, it remains unchanged. When I tried to elongate the unstretched image in img2track by 2.0 my first try failed. It turned out the reason was I had saved the import without first indexing it to 2 colors. With that corrected, the result matched the one from scaling X 2 in height in the paint program
 For years now I have been doing color separations which at first could be extremely slow, one pixel at a time. With increasing familiarity with Gimp and Mac Numbers over time, I have been able to decrease the speed to achieve them immensely. So here, with img2track I now have a program that can work with and separate multiple colors at a time (up to 6 in its pull-down menu option). Here I returned to my first separation in 3 colors for the now-familiar repeat A, elongated it in the paint program B and imported A into img2track choosing 2.0 stretch and 3 colors C. I can totally live with the fact the colors are not the same. The color changer can be set up with my chosen colors in any order I choose
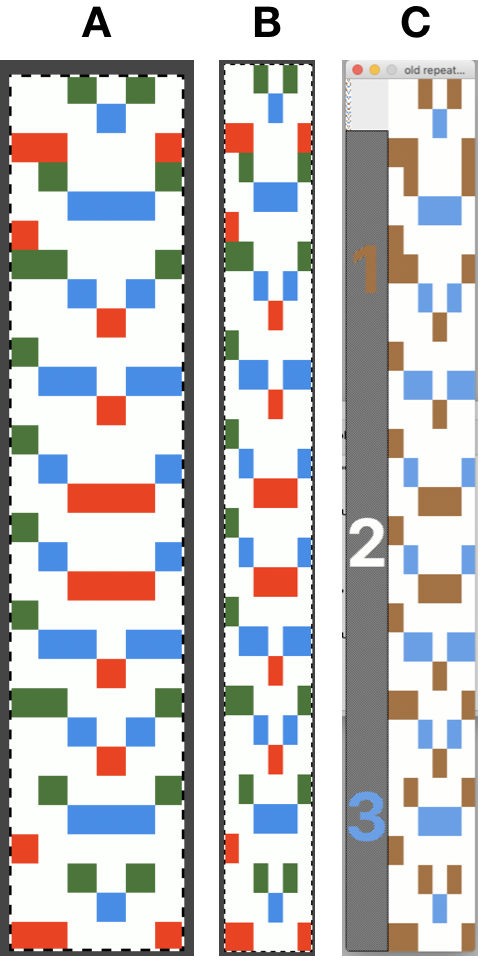
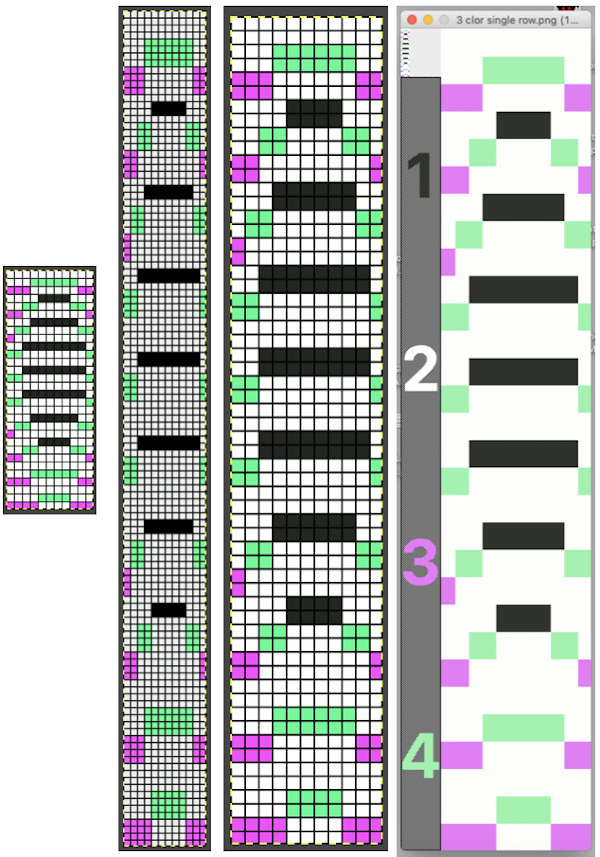
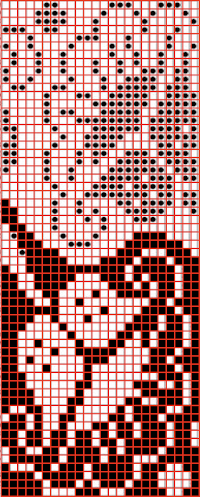
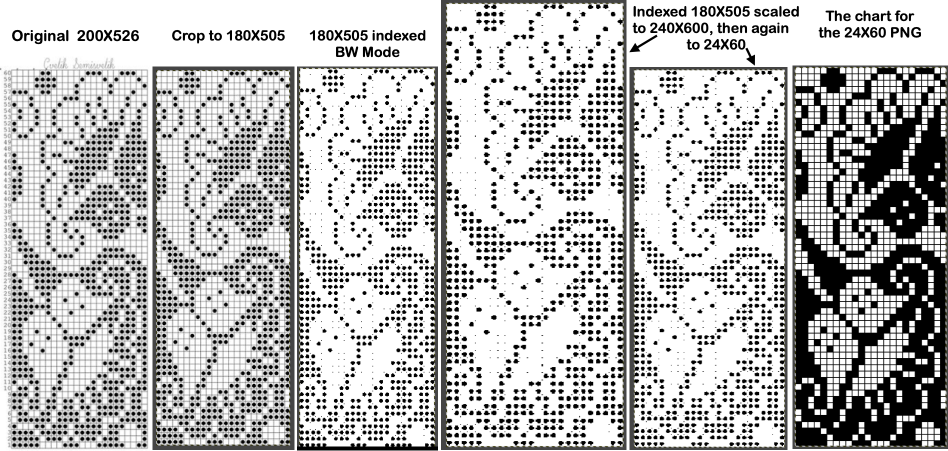
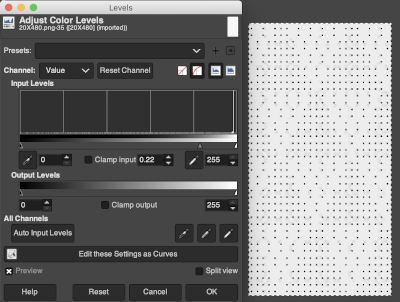
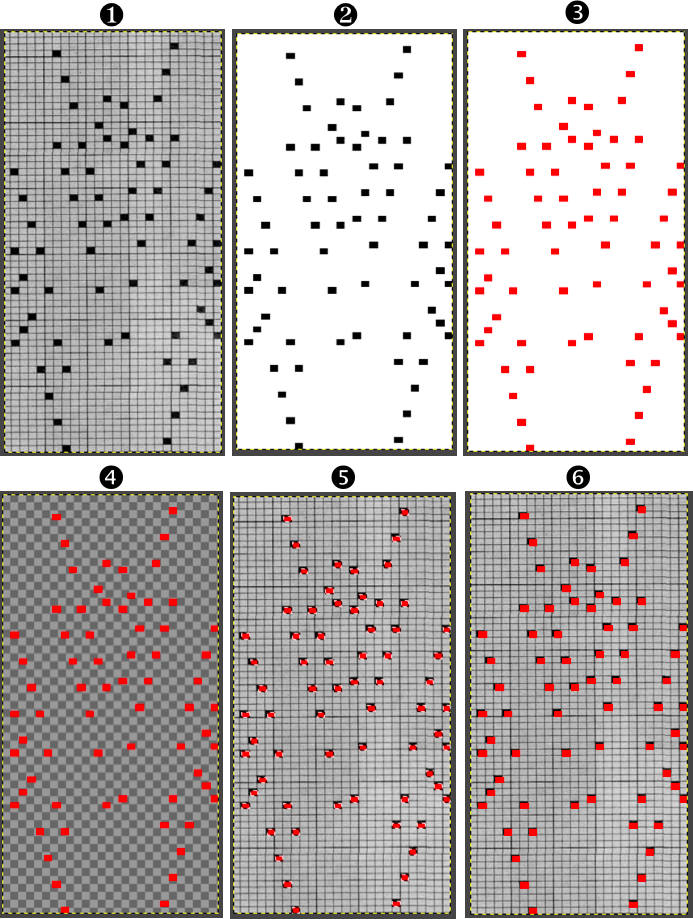
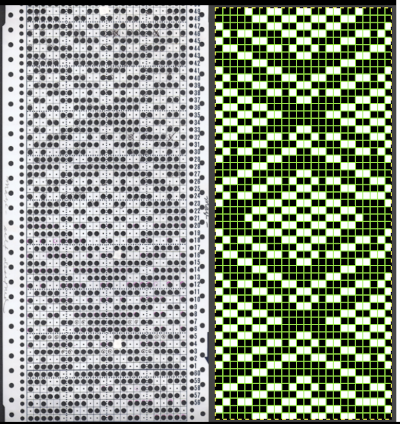
In my first tests with charting a repeat missing any color in some rows, I had scaled the original image taken from a spreadsheet to the wrong size in Gimp, so operator error resulted in crazy results in img2track. 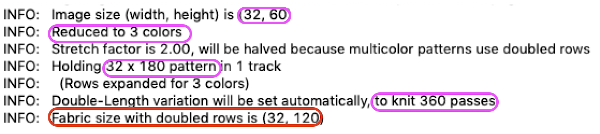 Here the image is scaled properly for each color represented for a single row in height, and also scaled again for double-height for possible knitting in Gimp. The Gimp scaling failed to be accurate for me (second image from left) until I indexed the original to 4 colors as well instead of 3. The no color rows as we view them actually serve as a fourth color in the separations. Importing the proper size png into img2track for separation of 4 colors per row now gives results that make sense: note the daunting estimate for the total number of carriage passes for a single repeat height
 If the ribber has knit on every needle by its return to the color changer and the machine is set to slip both ways with no needle selection on the main bed, the “no color” can be executed as an empty yarn holder in the color changer combined with no yarn in the feeder. The rows involved should simply not knit on the top bed, with no dropping of any of its stitches since no needles will have been selected thus coming forward with the yarn in the hooks and traveling behind the latches and in turn, slipping off the needles as a carriage with no yarn pushes the needles with now empty hooks back to B position.
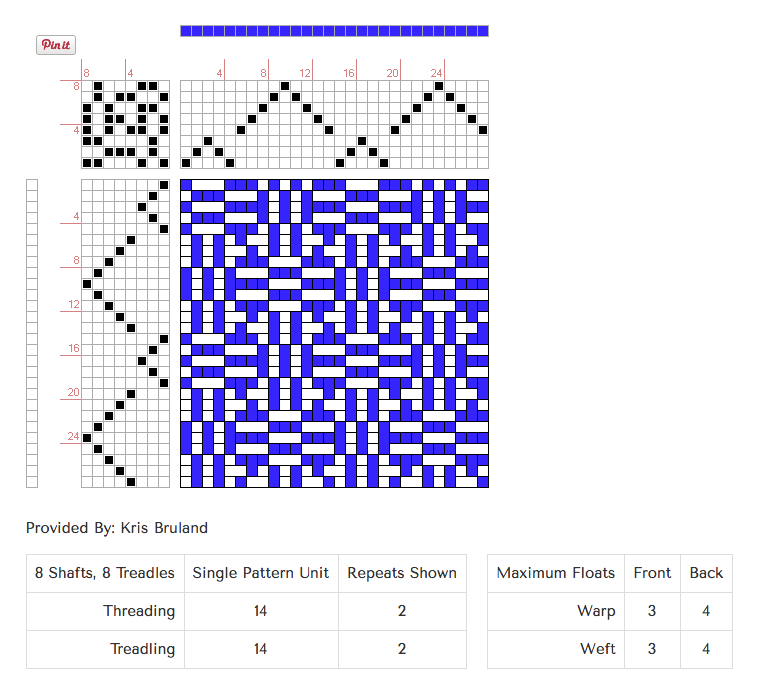
In testing concepts, I prefer to work initially with small repeats. Punchcard books can be an excellent source, but the Stitchworld books have the advantage of actually showing a single repeat for each design, so an 8 stitch repeat, for example, would be shown as such and it would not be up to the person using it shown in a 24 stitch card one to isolate it. I randomly chose pattern 394. I realize that if used from a built-in library of patterns in any machine model the prompts may be provided by the machine, but here I am looking at simply duplicating the pattern for import into img2track.
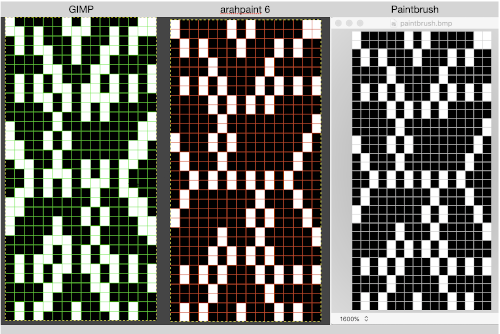
 After duplicating the repeat and associated numbering using Numbers, these were some of my results. A pleasing surprise was that colors in the 2 color import need not be only black and white. That said, the pale green failed, the red did not, and the results from importing both the red/white and the black/white were identical. Another future time saver for me to keep in mind.
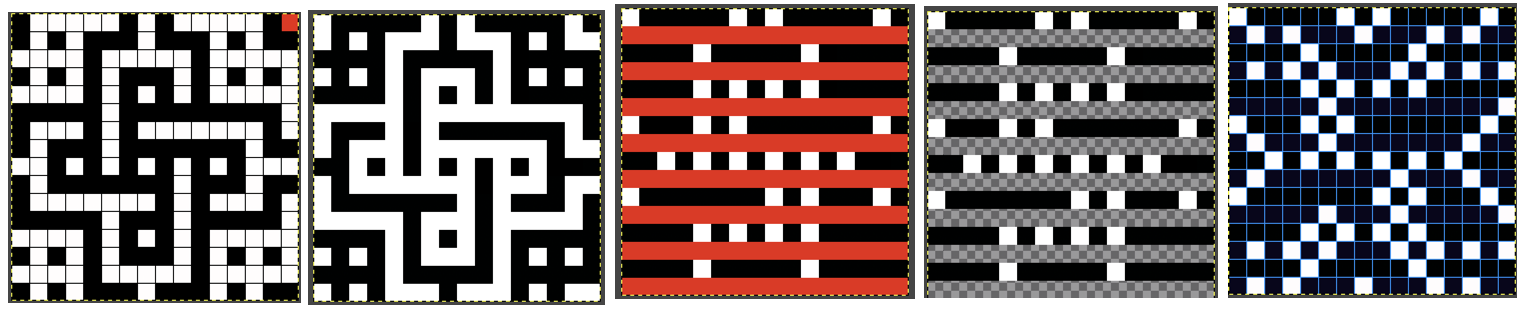
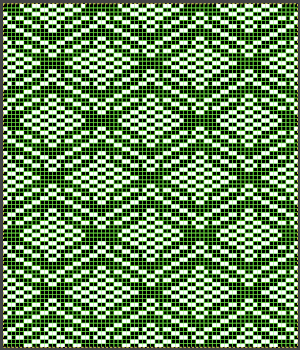
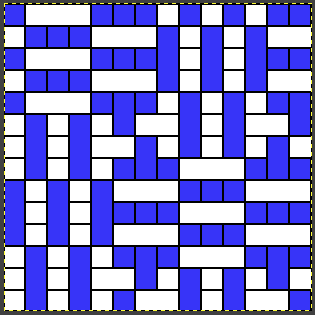
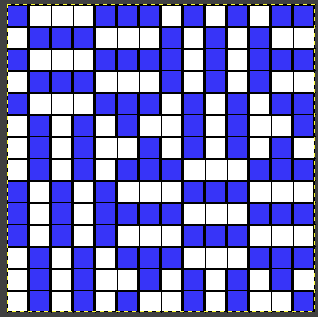
If colors were assigned to each pair rows representing each color used, the white squares were read as an added color on import, and the only way to have those few blocks for the 4th color to show up in the visual representation in an imported repeat was to assign a 5 color separation, resulting in a scrambled pattern. Removing the few squares in color 4 will produce inaccurate separations for actual knitting of the given pattern whether imported to be rendered for 3 colors or 4. The black and white on the right is the “correct” match, leaving any prompts for use of shifting color changers to be tracked somehow by the knitter. 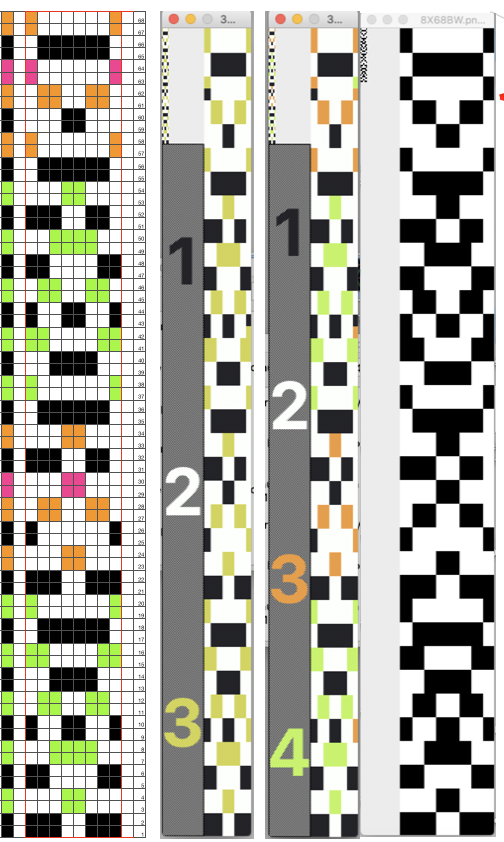 Punchcard knitters may have the easiest knitting variable color sequences since cards may be visually marked up with colored pencils matching needed change locations and taking into account your eyes are a number of rows above the row being read by the card reader. This number depends on the machine’s brand and model.
Some spreadsheets that may help with tracking row color changes or other regular actions on paper: 2018/04/tracking-rows-1.pdf
I have been asked about the position of the slide lever being fixed in my dbj illustrations. I have found the alternate positions can be wild cards, would rather make adjustments in carriage settings if needed rather than let the factory settings do some of the work for me. If the settings are accidentally in the wrong place as multiple pieces are knit, or in knitting ribber bands for garment pieces, the gauge is changed if the alternate setting is not adjusted and kept constant, and that may not be noticed until the piece of knitting in question is completed, needing a restart. With 15-20 machines active in each studio class and lab session, out of habit, I tried to reduce as many variables as possible.
A video resource on using img2knit for 3 colors per row knitting with blank color rows in the design by Tanya Cunningham, and a Ravelry thread on the topic
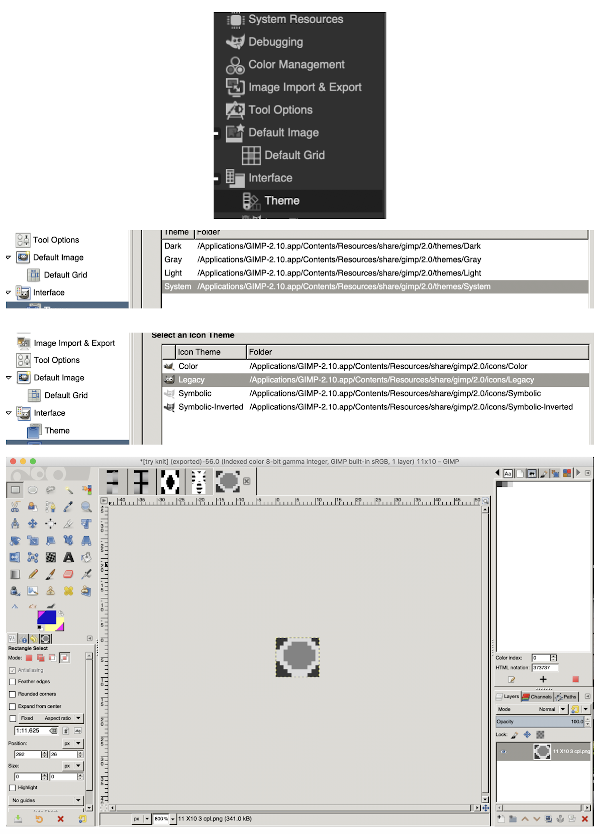
 Getting a bit more methodical,
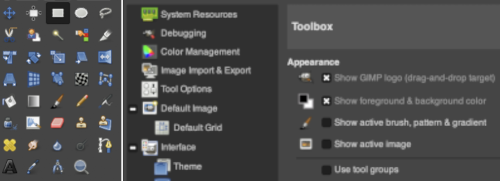
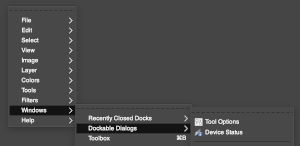
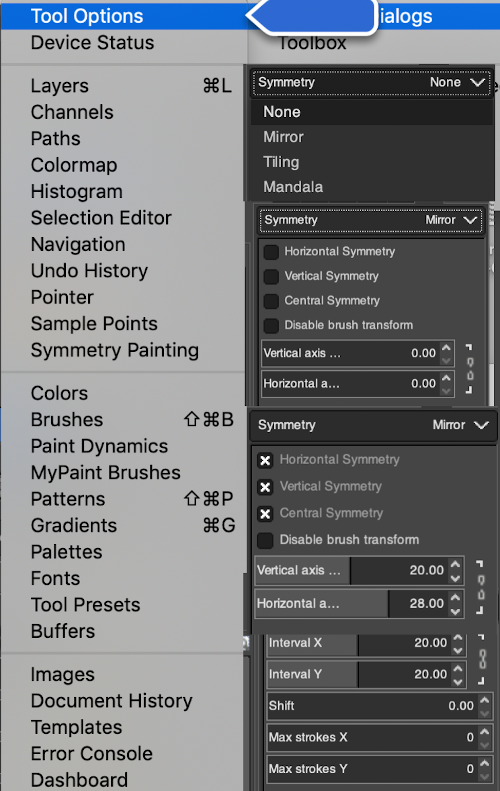
 a partial illustration of changes in the grey and light themes
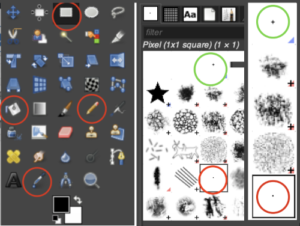
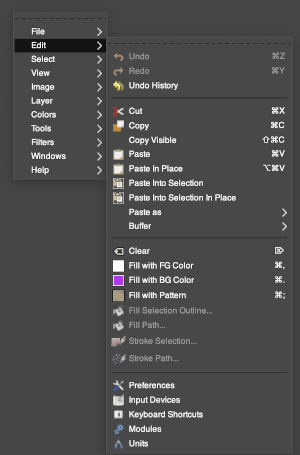
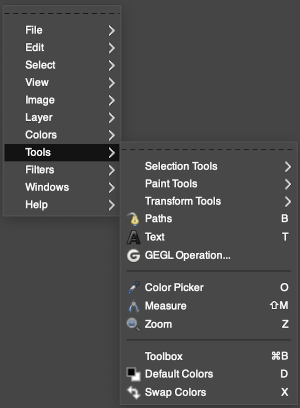
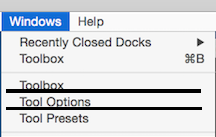
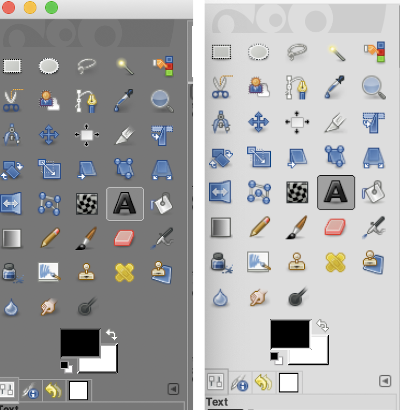 Text may be activated by choosing text in the image/ tools menu
 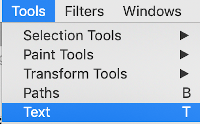 by clicking on the tool icon A in the toolbox
 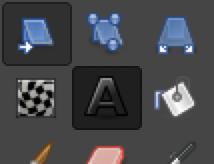 or by using t as the keyboard shortcut, then clicking anywhere on the canvas.
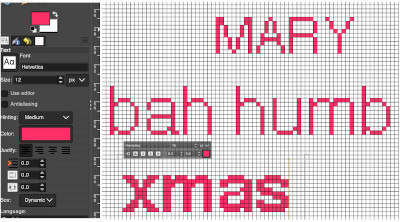
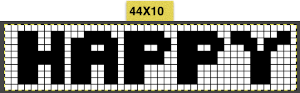
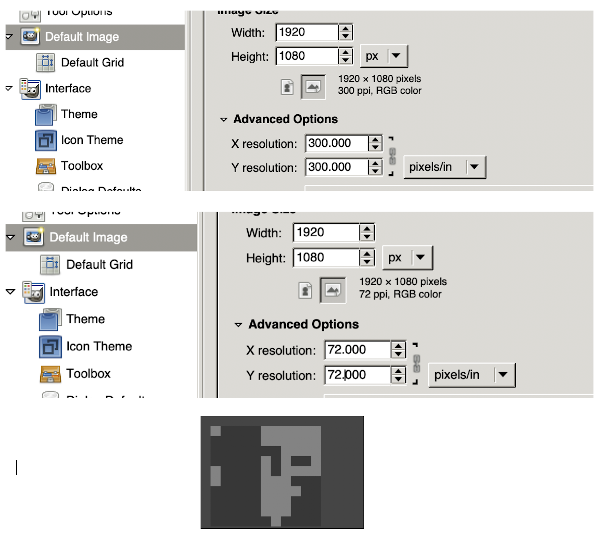
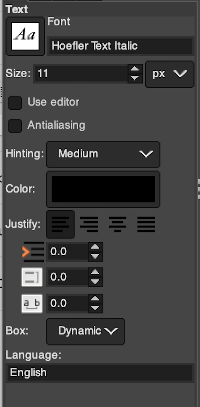 At the top of the Text tool dialog, the current Text Size, 11 in above, is shown in either pixels or points. A pixel is the smallest component in a bitmap image, and all measures in pixels depend on the screen resolution. A point is a fixed value, one inch is the same as 72 points. Standard screen resolution is often 72 pixels per inch, in which case text in pixels will be the same size as text measured in points.
 choosing from installed fonts. Text editing can happen by selecting buttons here or with direct on-canvas editing by making the changes within the semi-transparent floating toolbox on the canvas itself.
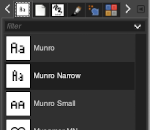 As long as a text box is active, making another selection from the fonts menu will instantly change the box content, creating a preview each time.
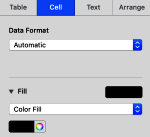
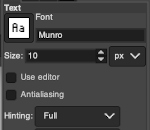 Color default is black, click in the box beside Color selection and a dialogue selection box appears for changing it
 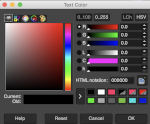 The choices listed at Gimp.org for text directions include the standard right to left, left to right as in most languages, and the following for vertical text
 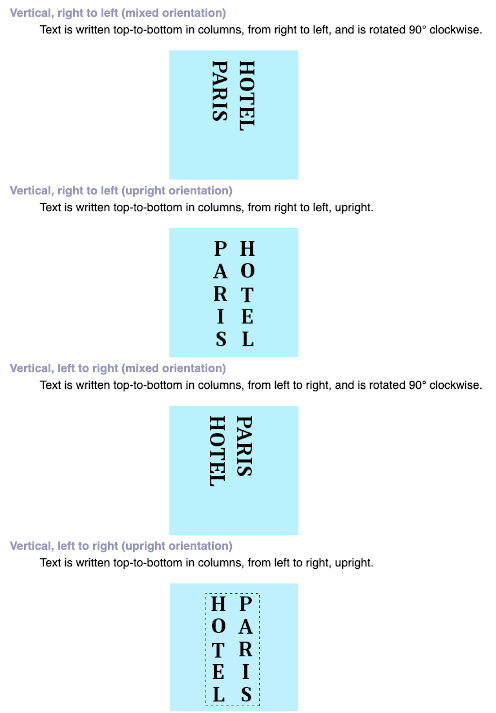 After the text is entered on the canvas, right-click on the inside of the text box to change text direction
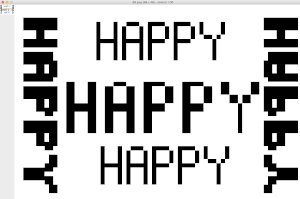
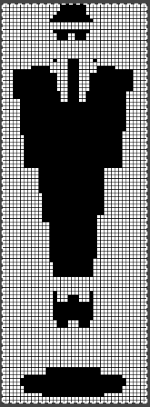
 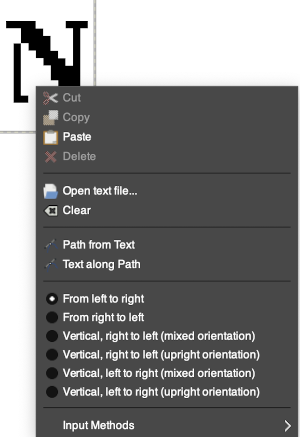 It is not necessary to work with the layers menu to start with. It is possible to “wing it” to get a starting sense of the process. Scaling and transformations are available, starting on a canvas size less than 200X200 based on needle counts on a standard km providing an ample field on which to play. If the intent is to change the direction of all the entered text, Image/transform may be used. Entering the same text in the same font size in an altered direction can change the overall pixel counts
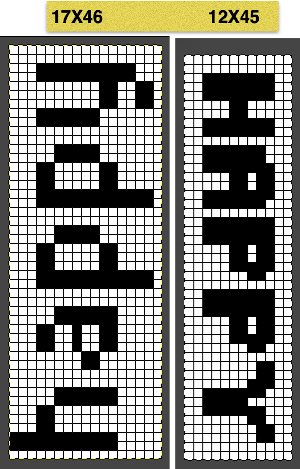
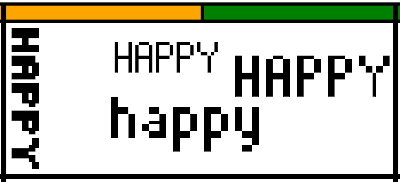
 After the chosen text is placed change its mode from RGB to B/W indexed, then crop the image to your chosen size. Export.bmp, the result loaded into img2track and Ayab
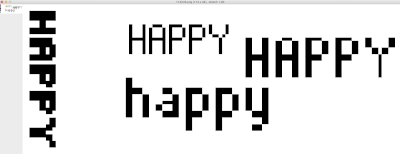
 For a different way to edit, choose Image/Flatten and individual components may be reconfigured on a new canvas to a very different size. This file is now 68 stitches wide, rather than 144
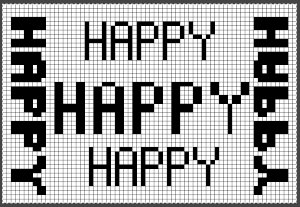
 The usual text alignment rules apply in text boxes as well, left to right
  using the return key, double-clicking in the box will highlight each letter and activate view grid should you wish to count pixels in each
 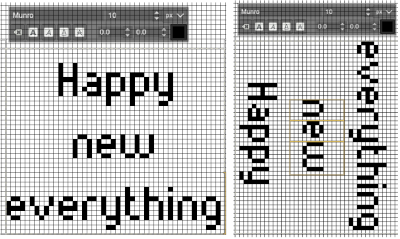 Getting more control of the process: after the text tool is highlighted and clicking anywhere on your canvas two things appear automatically. The four little boxes represent the text box, which is dynamic by default and grows in size to accommodate typed text. Anytime you click on the canvas a new text box is created.
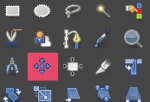 then click on any letter within the text box and drag and place. Random placement in the text box will move the whole layer
 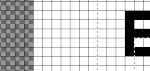 The spacing between the lines and between the letters may be adjusted as well. Clicking on the arrows to change the values here is one option, negative or positive numbers may be used
 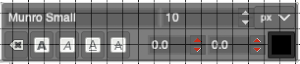 or what appeared easier to me, the same may be done here
  A sample of adjustments in line spacing
 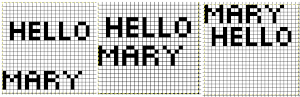 Very small fonts are likely not to have any room for decreased spacing in the between letters in strings of text.
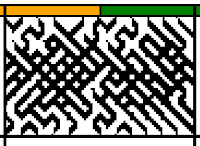

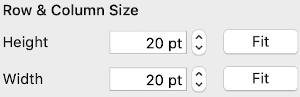
 The units in many such illustrations are not square, and the goal is to end up with a PNG where each square unit represents one stitch, one row.
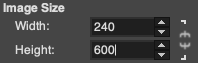
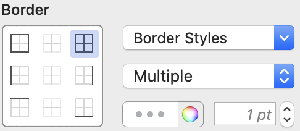
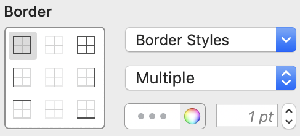
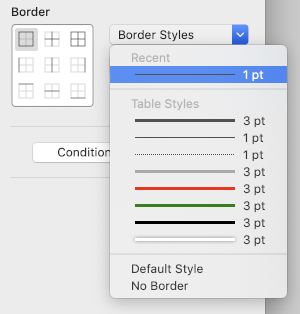
 and alter the cell borders to a bright, contrasting color. I chose red, 3-point thickness.
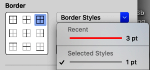
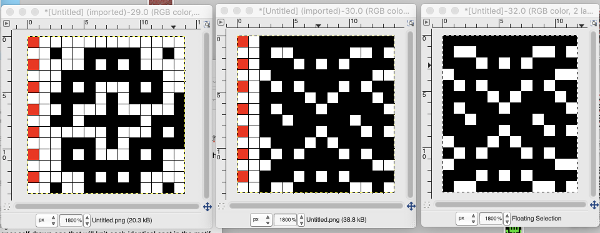
 Copy and paste the completed table. Make certain there is a different color cell in any white squares at the far corners of the image, in this case, upper right and upper left (yellow), remove cell borders
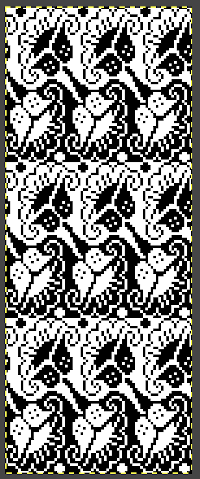
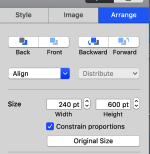
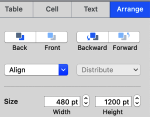
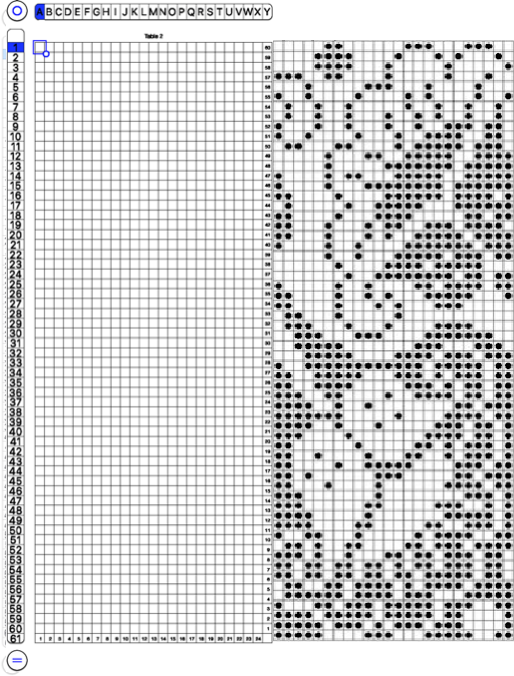
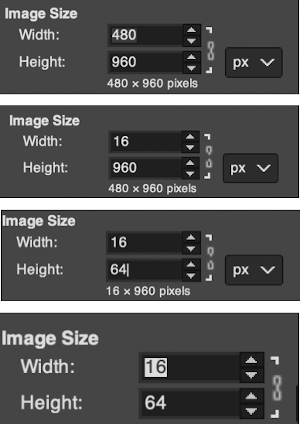
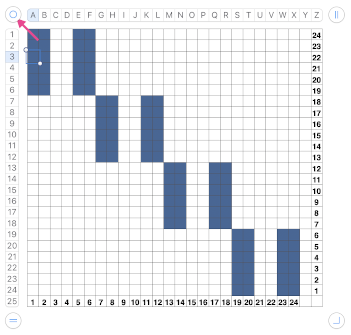
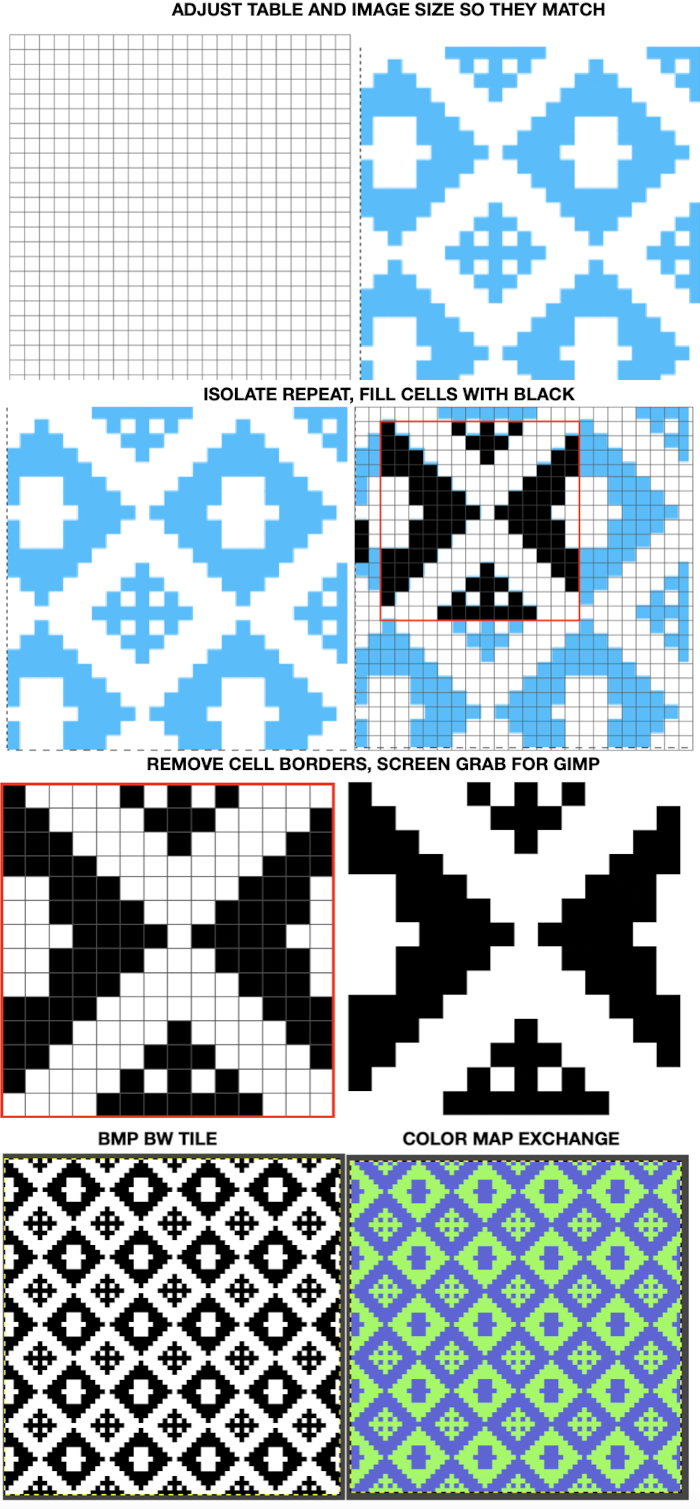
 Proceed as for the first image, being mindful of an unnecessary row at the bottom. The saved image can be tweaked in size by turning off Constrain Proportions and adjusting values for width and height for proper placement under the table grid. It soon becomes evident that the card is composed of smaller repeat segments, which in turn can be copied and pasted making for quicker work in filling in the whole punchcard row requirement.
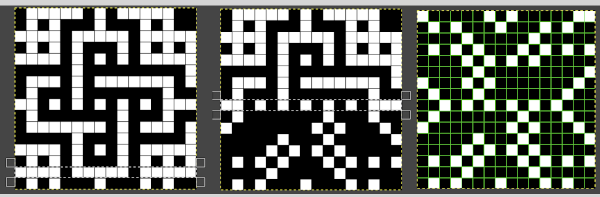
 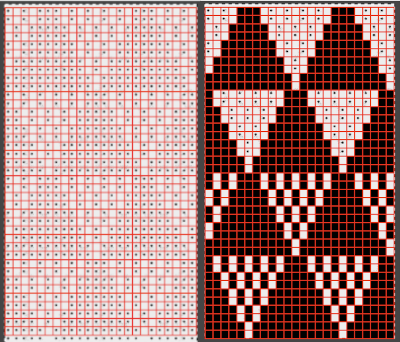 Check the repeat alignment by tiling it.
 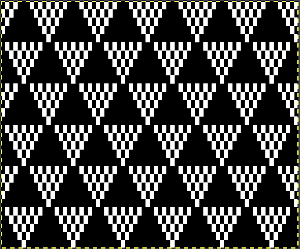 The smallest adjusted electronic repeat, 12X20 pixels.
  The converted, partial punchcard repeat
 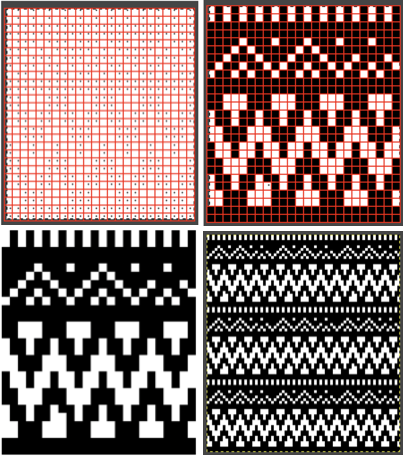 2023: ArahPaint‘s weave from grid tool makes working with the full repeat possible. The final repeat was cropped by 2 rows at the top to 24X206 to avoid a 4-row solid color line produced when the original was tiled vertically.
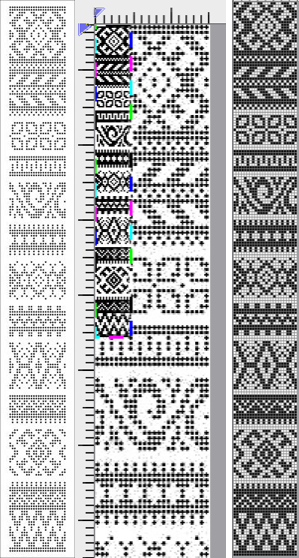
 if used, will change the numbering on the side of the card, but not the design content
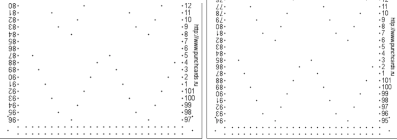
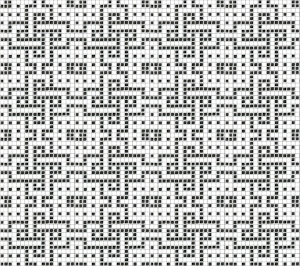
 In the past I have found lace repeats, in particular, to be particularly cranky when scaled down in Gimp due to the paucity of black cells. After the above steps, I decided to try color invert, resize, and color invert again, which in this instance, produced what appears to be an accurate repeat. Of course, the final png is likely to need mirroring for use in some electronic models
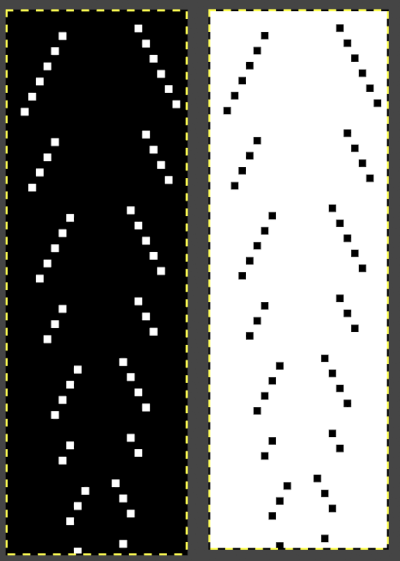
 2023: a different approach:
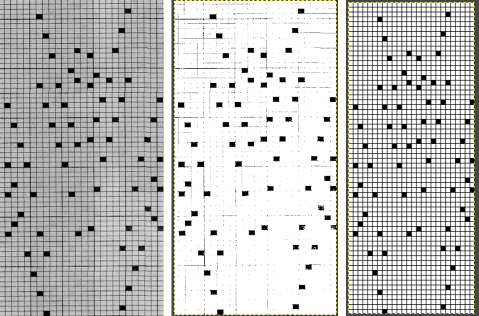


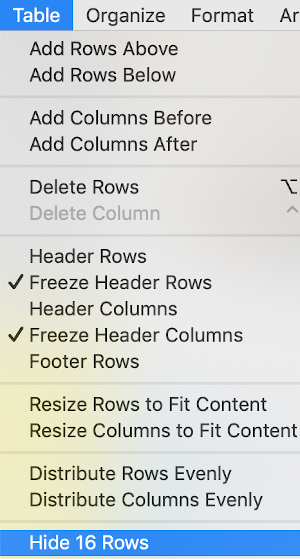
 The working design repeat is 16X16. Create a new table that is 16 cells wide, twice its height, 32. While holding down the command key, select all the odd-numbered rows planned for the final chart repeat, any errors can be corrected by clicking again on the same spot, still holding the key down. The process may be done in steps, releasing the key in between selecting groups
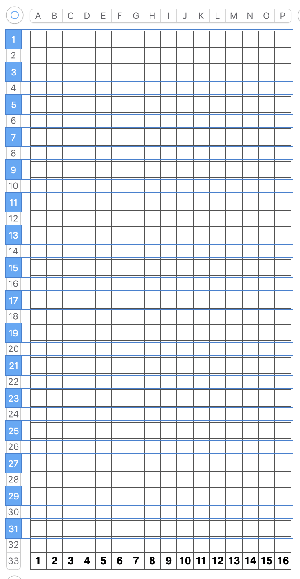

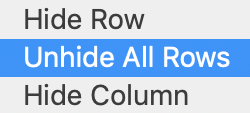

 will swap black and white cells in that row. Continue the process on every other row. It is not necessary to select the tool each time, as you advance and select the next row, the one just left remains briefly outlined in white dashes, making it easier to advance correctly in the design.
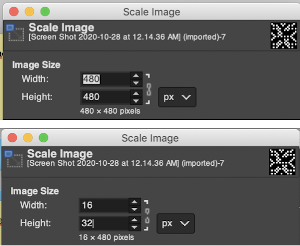
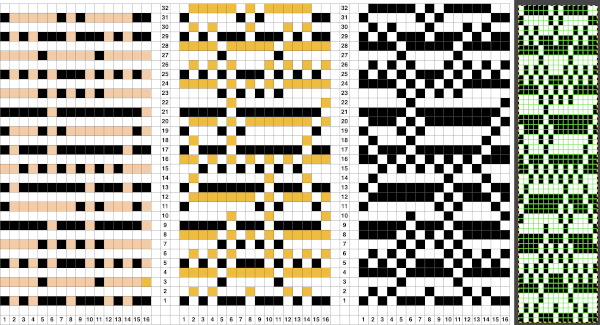
 This repeat posed by a quandary. The file may be used as-is and doubled in length after download. For doubling the height in Numbers, prior to importing the final screengrab into gimp, please see post:
 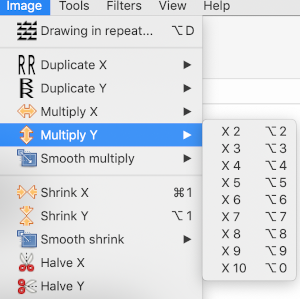 and
and 


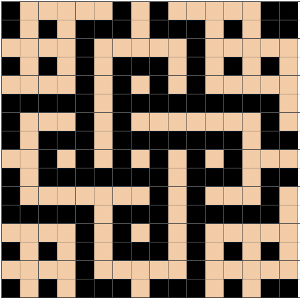
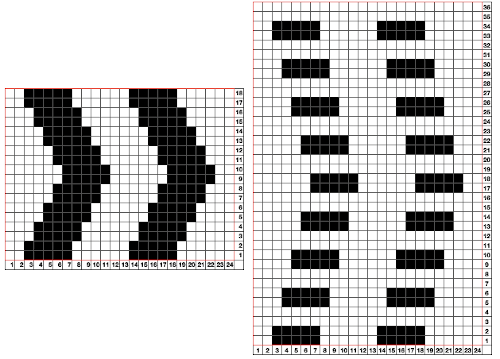
 adapted for maze knitting, eliminating long floats, to be lengthened to double-height
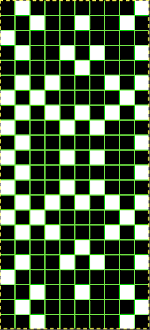
 Using the maze generator by
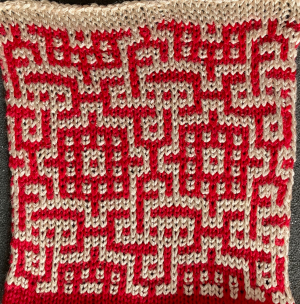
 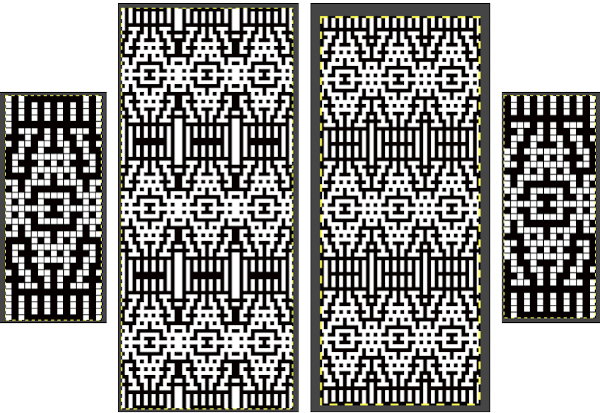 The proof of concept swatch for the version on the right, knit in tuck stitch
 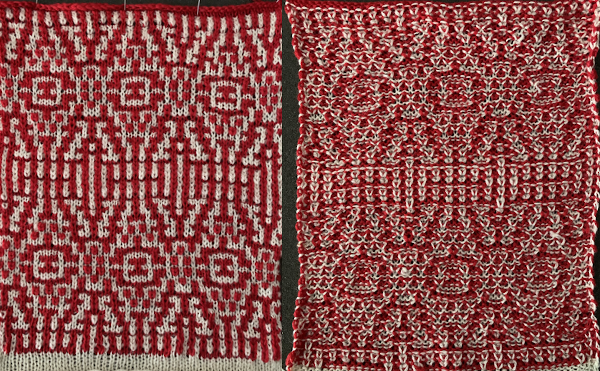 the double-length BMP ready for knitting, 14X68
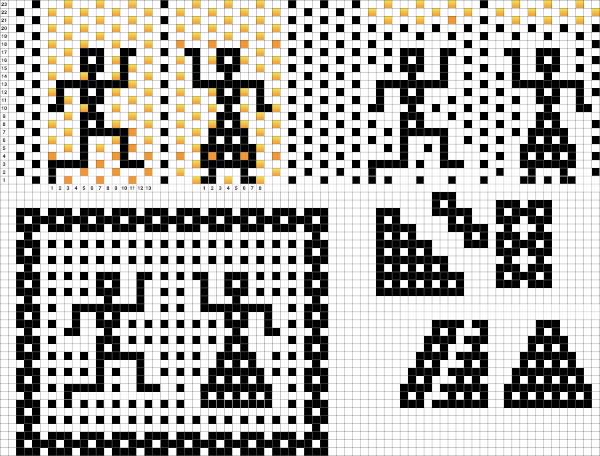
 The suitable dbj separation is the one where each color in each row knits for 2 rows, whether performed by hand, using the 3 colors per row separation in img2track or the default separation in Passap. The Ayab HOP separation is awesome, works for any 3 color design with as little elongation as possible, but is not suited for this purpose. How-tos for DIY separations and their automated versions by programs for knitting more than 2 colors per row have been discussed in other posts.
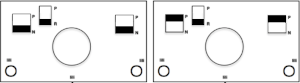
 A similar process on the Passap allows for playing easily with both racked colors because of the possible arrow and pusher settings on the back bed, but on Brother, this would require hand selection on the ribber on every row or a specific color separation for needle selection on the top bed
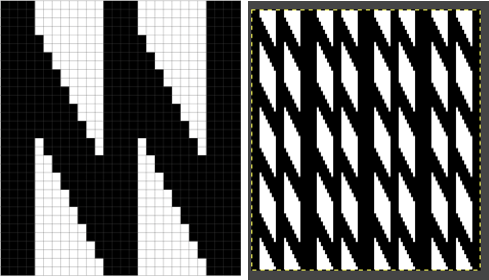
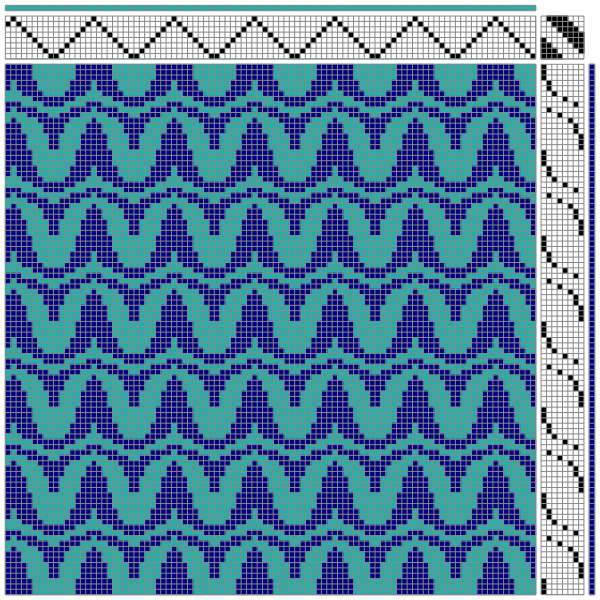
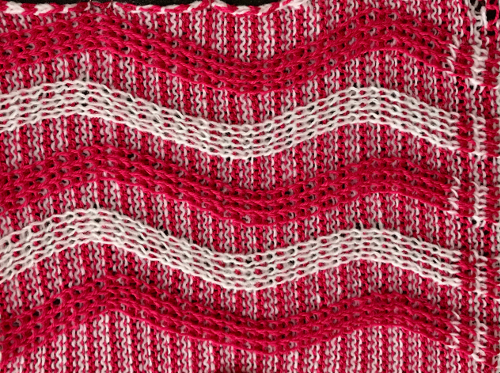 Seeking automation, keeping things simple, here is a basic zigzag pattern in a repeat also executable on punchcard machines. The ribber is now set to knit throughout (N/N), the main bed to slip in both directions. End needle selection must be canceled when using the slip setting selectively or when working patterning with needles completely out of work
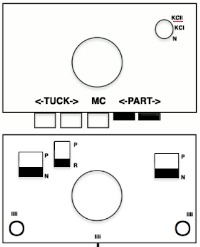
 The process using 3 colors: the patterning color will be knit on needles preselected on the top bed. As shaping is about to begin, in this pattern, one needle preselected out indicates the location for an “increase”, one preselected back to B position a decrease
 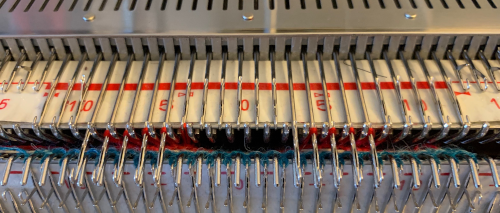 To perform the decrease, using a double eye tool to transfer the B position stitch down onto the ribber needle adjacent to the first needle in D position on the top bed
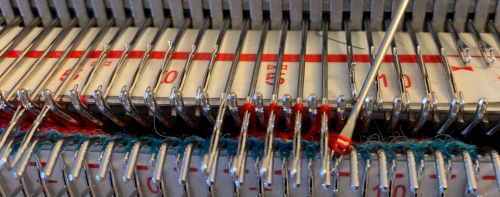


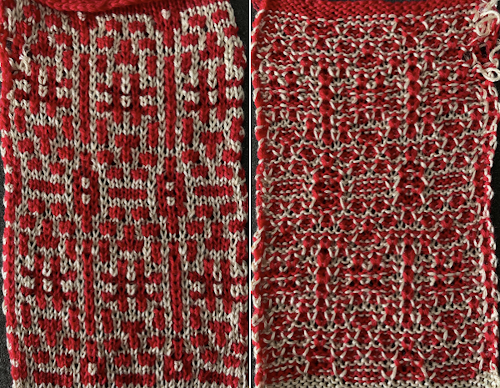
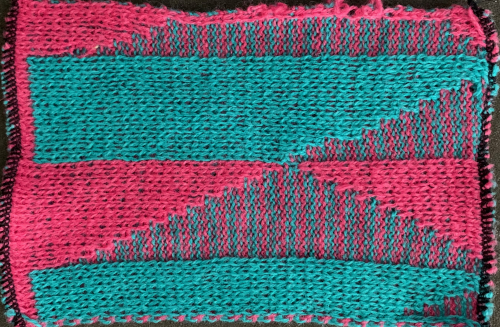
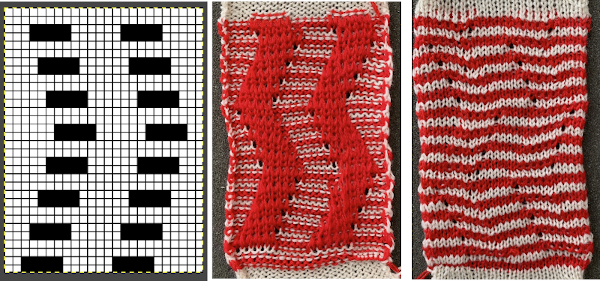
 The repeat and the knit shown on both sides:
 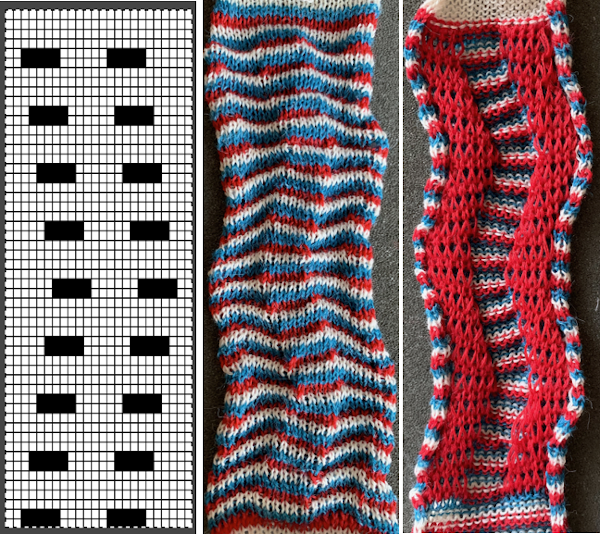 Comparing the 2 color and 3 color versions: aside from the obvious increase in length, note that the slipped segments in red on the 3 color swatch are now composed of longer stitches since they are held for 2 additional rows, and the overall fabric is more puckered than the 2 color version. The curling at the sides is the nature of edge stitches, especially if the yarn used is wool. At times that may be used intentionally, as a decorative edge.
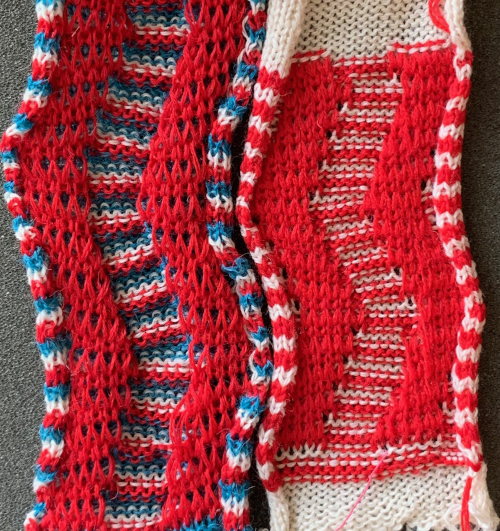
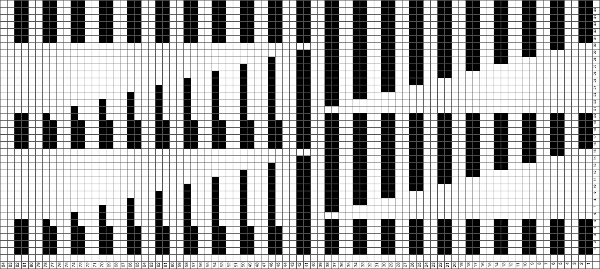
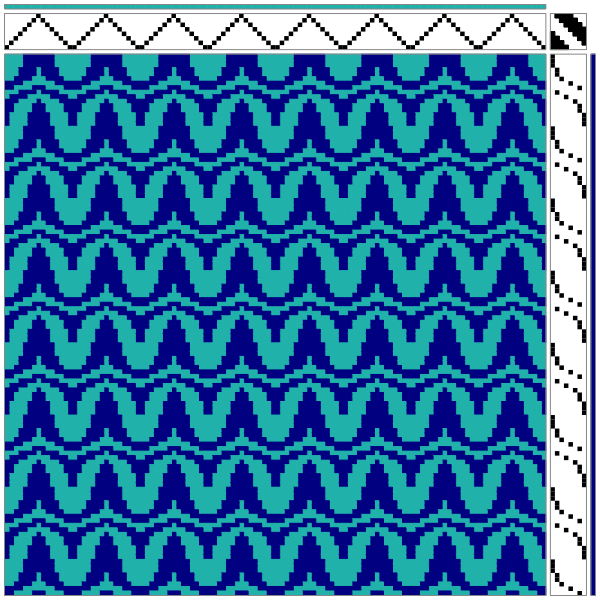
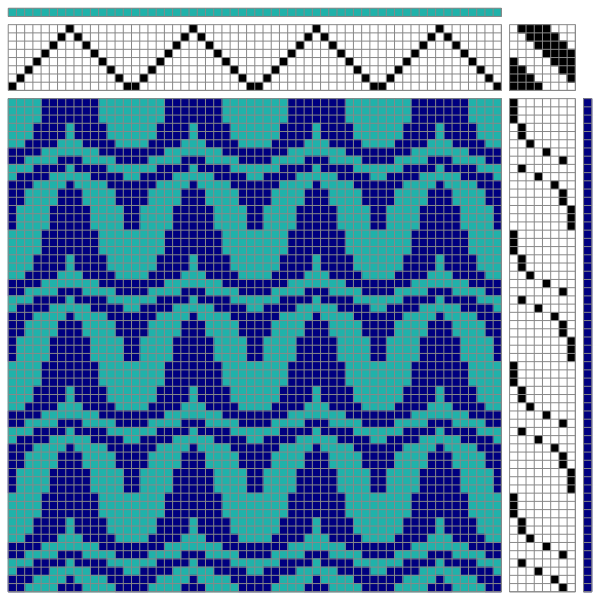
 Using the same color separation as for the simple zig-zag shape, the design is expanded to include knit bed rows that will be skipped completely, resulting in the ribber alone knitting in the second color for those rows. It is now twice as long as the original, 24X64
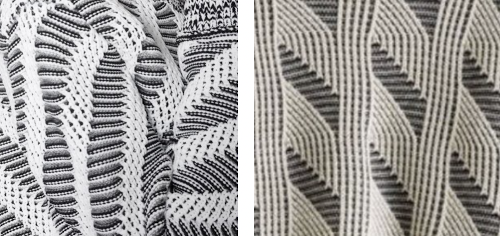
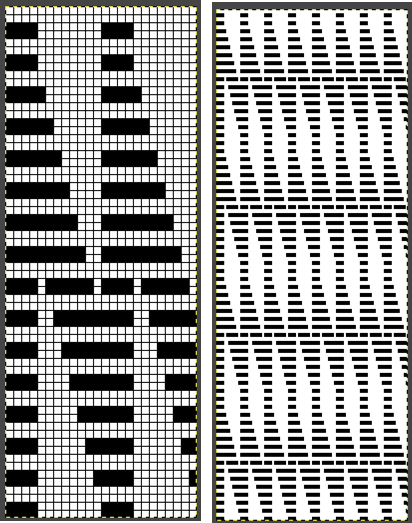 The planned proof of concept added a 4 stitch border on the right for a 28 stitch swatch centered with 14 stitches either side of 0. Tiling the repeat X2 again in height made it easier for me to plan how to manage transfers to expose the varying stripes in the ground. Visual comparison to the movement in the inspiration knit:
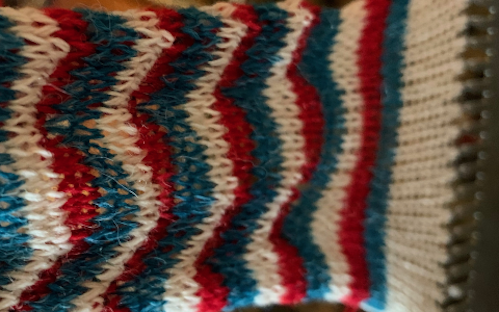
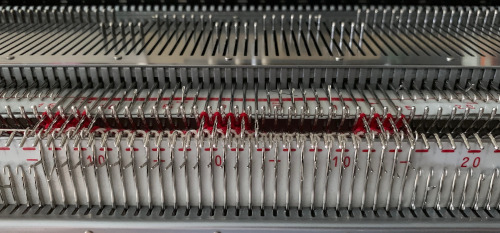
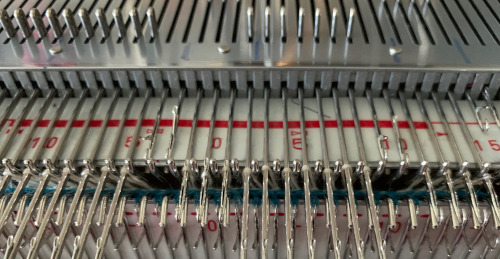
 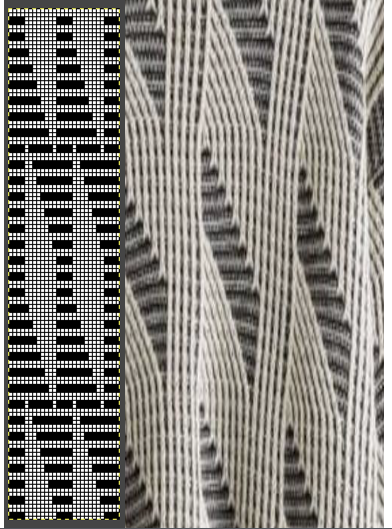 As the number of needles in work on either of the 2 beds is increased, it is likely tension or yarn changes may be required. The first preselection row is from the right, toward the color changer. The stitches on the non selected needles are transferred to the bottom bed
 with the color change, only preselected needles will knit on both the top and bottom beds moving to the right
  and will do so again on the return to the left while preselecting an all blank row
  on the next pass to the right only the ribber knits in the ground color;
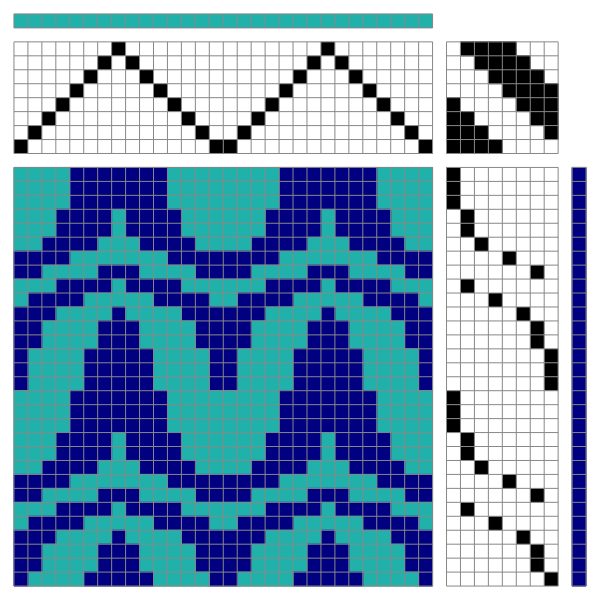
 Back to the drawing board in order to reduce the number of hand manipulations involved, with a shift in the center transition, the repeat in my spreadsheet is now 24 stitches wide, plus an additional 4 stitch border, and gets marked up with colors. I prefer to program the width of my knitting as opposed to a single repeat for all over patterning
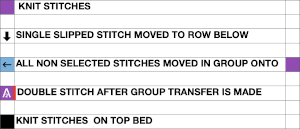
 The choice can be made based upon the preference of moving stitch groups to the right or to the left with the horizontal direction of the repeat adjusted for your KM model or software used.
 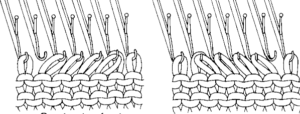 I planned the transfers in this swatch toward the color changer after picking up the proper color, white, and before knitting the next row using it. The 930 png:
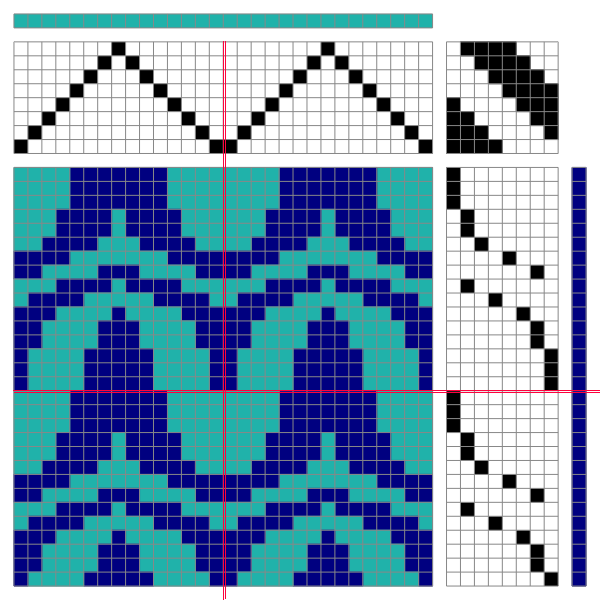
 When the top of the repeat is reached, row 68, the only needles selected will be those of the 4 stitch vertical columns and the design repeat will return to its start
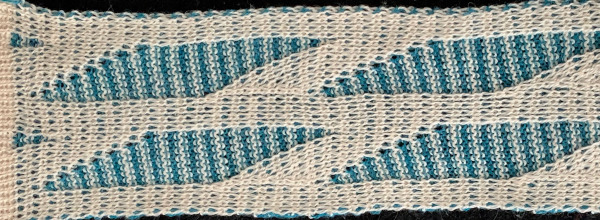
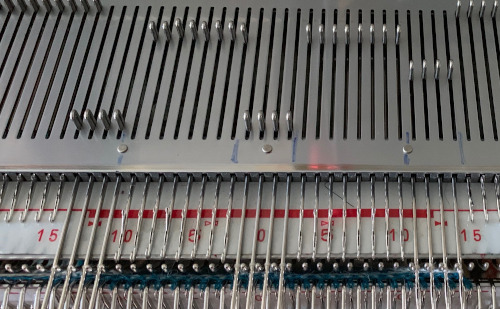 My proof of concept swatch is 3.75 inches wide
 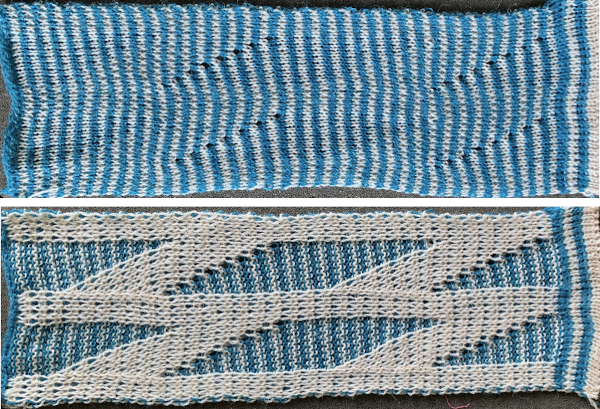 The inspiration sweater was knit using a wider repeat and significantly thicker yarn, reflected here in the small number of repeats composing the sweater body front
 The off white yarn used here was the same thickness but not fiber content as in the previous swatch, 2/18 wool-silk vs Australian wool in the former. It is not as smoothly spun. The result shows an interesting similarity in length, though there are 16 additional rows in the pattern repeat. This time I programmed my repeat for stitch transfers on the knit bed to move away from the color changer.
 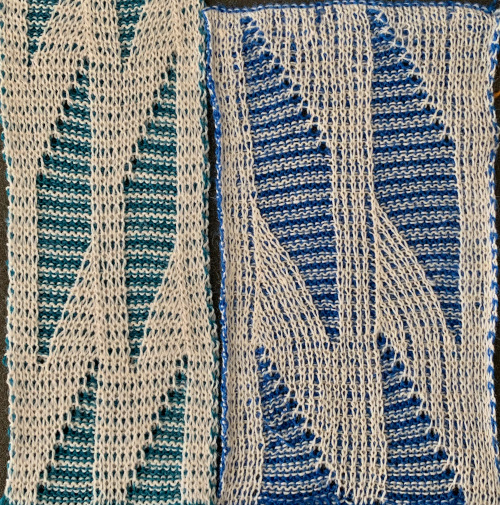 Eliminating the border on one side, a double repeat (30 stitches) measure 4 inches in width. To put the difference in scale to the sweater in perspective, an oversize garment with 40 inches in chest diameter would require 20 inches in width for the front piece. Ten single repeats, as opposed to the inspiration’s sweater 4, bring the total required the number of stitches to 150. With the added border of 5 stitches for matching side edges, the fabric is in the realm of possibility for producing a garment on the home knitting machine. My tension was set at 3/3 for all the swatches, with some teasing required on occasion to encourage stitches on the main bed to knit off properly. Ribber height adjustment can also have an effect on those numbers. I tend to do all my knitting with the slide lever in the center position. The double 30X84 repeat with no added border


 The symmetry tool is greatly improved and more user-friendly, allowing the distribution of patterns in varied repeats across canvases ie garment pieces.
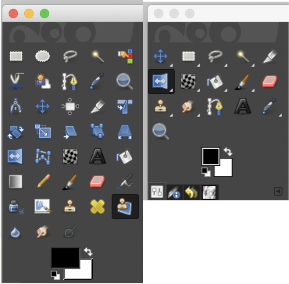 Right-click on the tool icon to reveal other choices
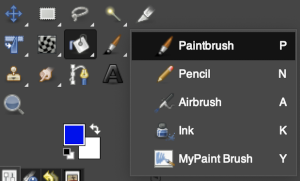
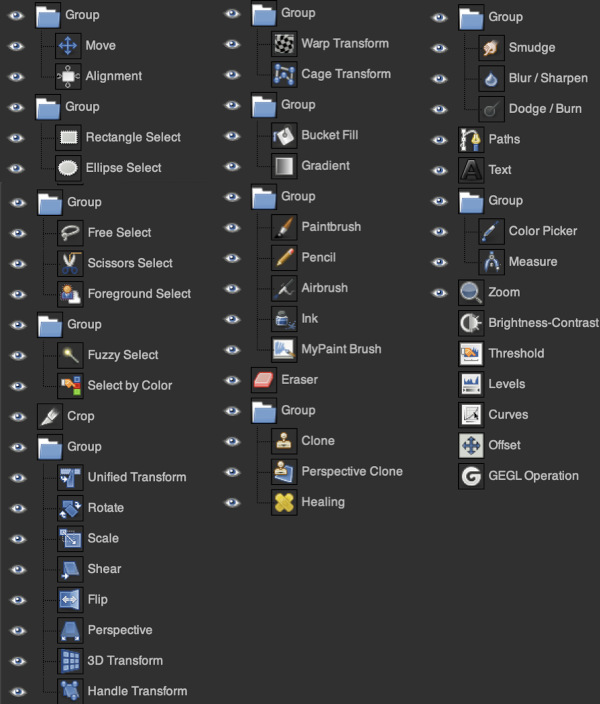
 An option for selecting specific tools that include keyboard shortcuts to do so
 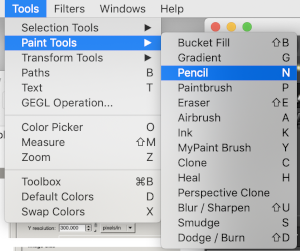 or right-click on the chosen tool
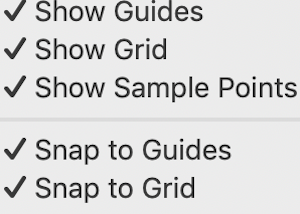
 The jury is out as to whether changing the snapping preference value solves the problem long term
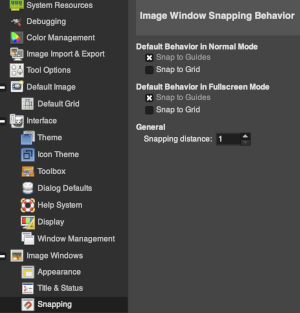 A FB friend with a lot of experience with the program offered this as a possible cause “sometimes I accidentally activate commands with key combinations. It happens if you use the keyboard a lot (I have not used the mouse, for years). I work on a large Mac desktop and prefer the mouse to any keyboard commands.
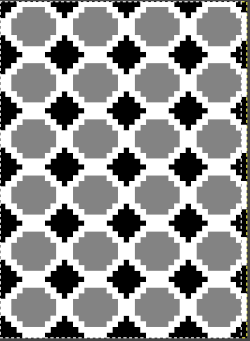 and here with a portrait size image
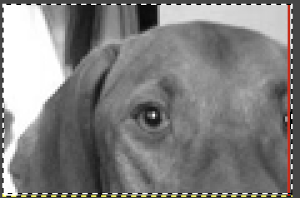
 A new
A new 
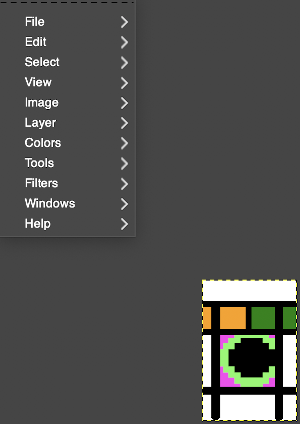
 Previously clicking on the red X dot would ask if the image was to be discarded, and on the acknowledgment of the fact, the program would continue to stay open,
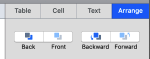
  now that same action will quit the program completely. Clicking on the X beside the image will bring up the discard option, quitting the image and working on it as opposed to quitting the program. It is possible to work on multiple images at the same time. Drag and drop superimpose the new image fixed onto the center of first.
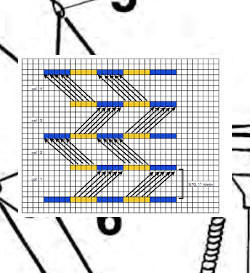
 Working on 2 images again, copy the smaller image on its own screen,
  return to the screen with the larger image intended to be in the background, paste the smaller image for a floating selection that can be anchored anywhere on the ground, edit/ undo may be used repeatedly if need be, and done
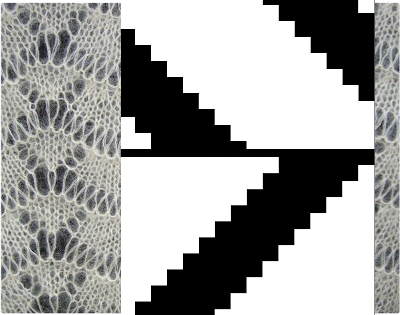
 click on the gimp icon again to restore the view.
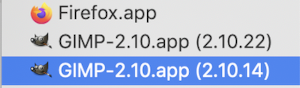
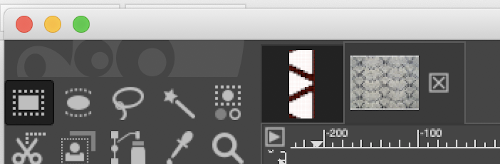
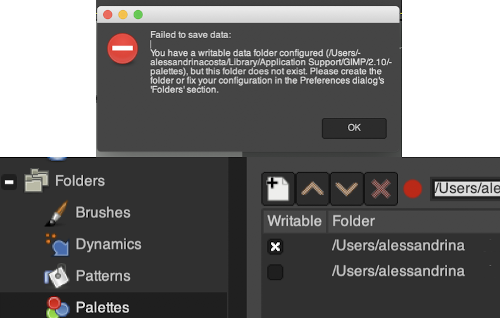
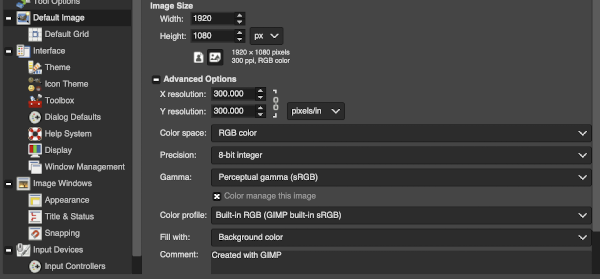 A word of caution: after choosing the 8-bit option and not liking the quality of my imported images, I tried restoring the original 32-bit floating one without success even after saving, quitting the program, and restarting it several times. I then chose to reinstall the program and continue working in the default settings for now. The download turned out to be for version 2.10.14, this is the new default appearance after launch on my computer
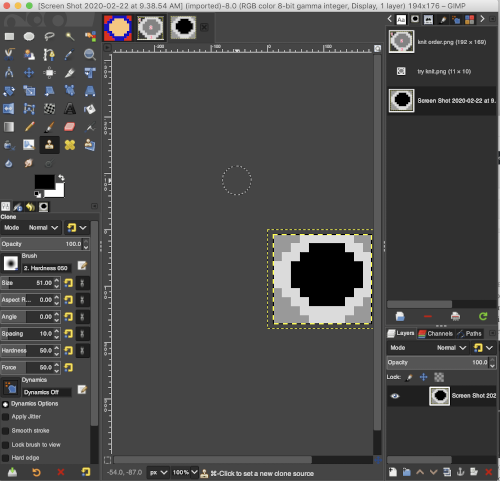

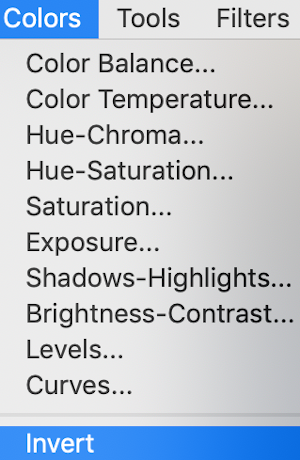
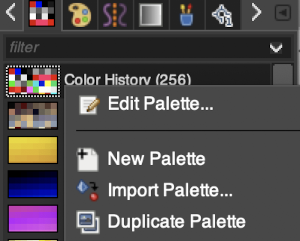
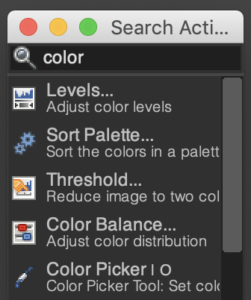
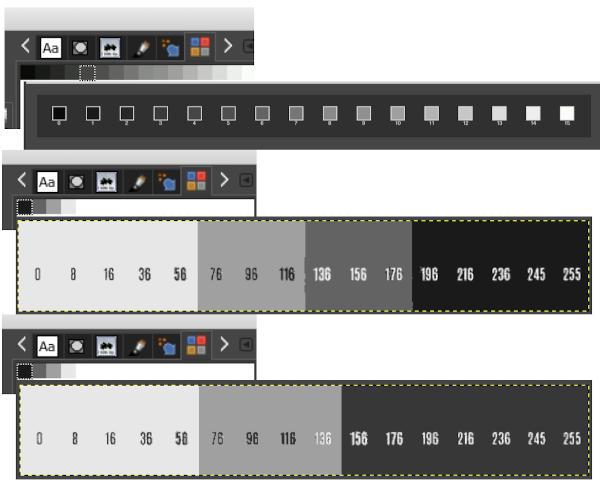 What about saving the color information as easy access palettes? Doing so in this release is fairly intuitive.
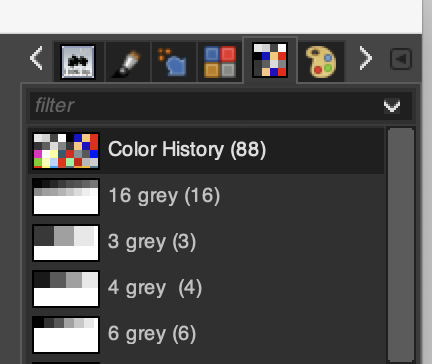

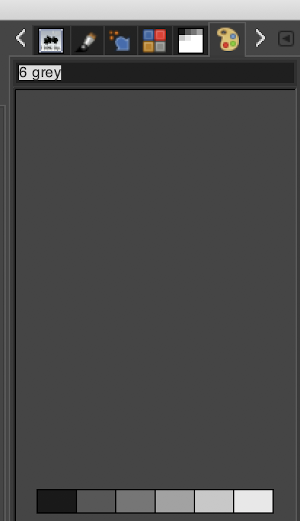 Selecting any one of the colors will automatically change the foreground color for working on the image ie choosing color 3 of the 6
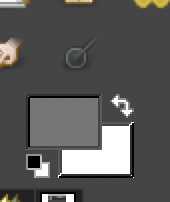
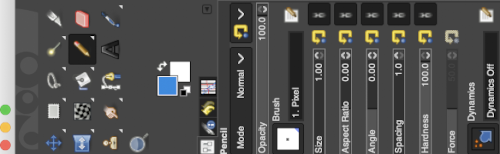
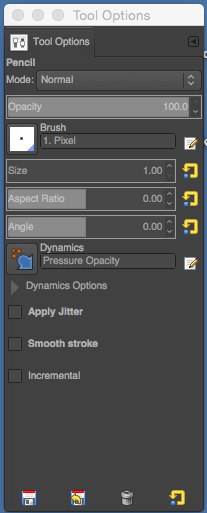
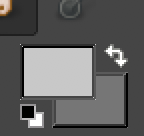 Using this feature with palettes containing multiple colors makes far quicker work when designing in RGB. Set pencil to desired pixel size, click on the desired color in any sequence to choose it, and then click again to place it on the working canvas
 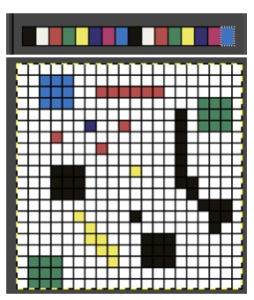 Right-click on any of the palette icons, for this dialogue menu
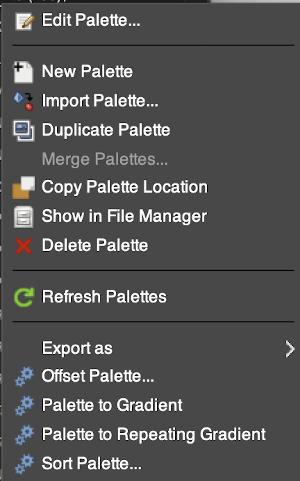
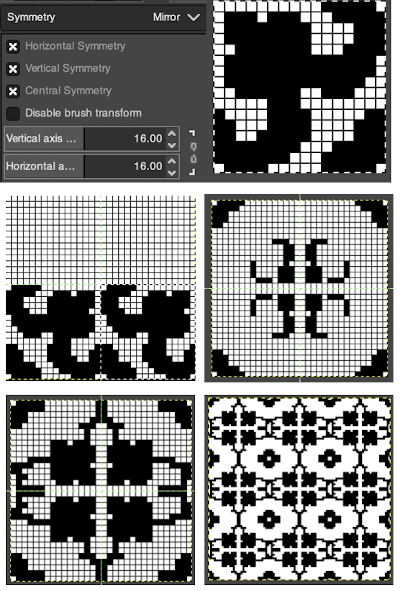
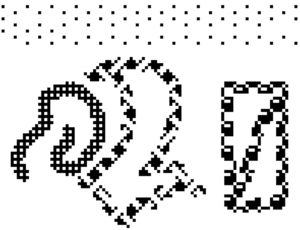
 Some quick doodles using a single-pixel brush note the lags in some of the mirroring
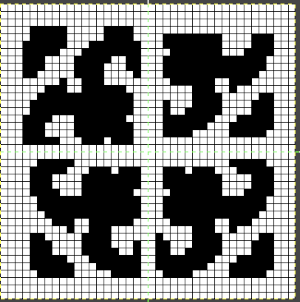
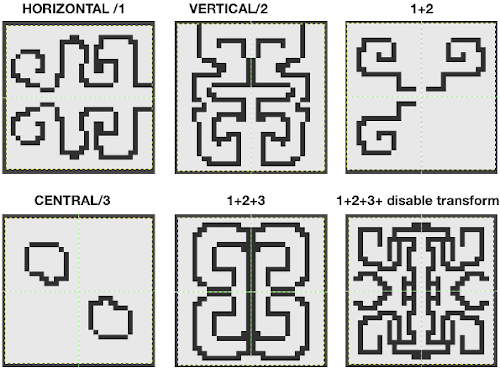 Other than drawing freehand I have had no luck working predictably with larger designs, even if saved as brushes or patterns. One problem is that the pivot point is 2 pixels in each direction, not one, so repeats with single stitches/rows along their center axis would still need editing. In a previous attempt to explain mirroring in a forum post, I used Passap 1273 as my sample pattern. Copying and pasting the image on a larger canvas leaves one unable to change the direction of the newly pasted image alone, the whole potential repeat is affected by the command. The image in question here was 16 pixels wide by 16 high, the goal to mirror it to a 32 by 32 repeat.
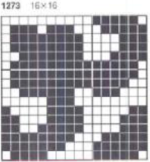 There was no problem with transforming the original and pasting each in place, here it is also scaled twice as high and wide
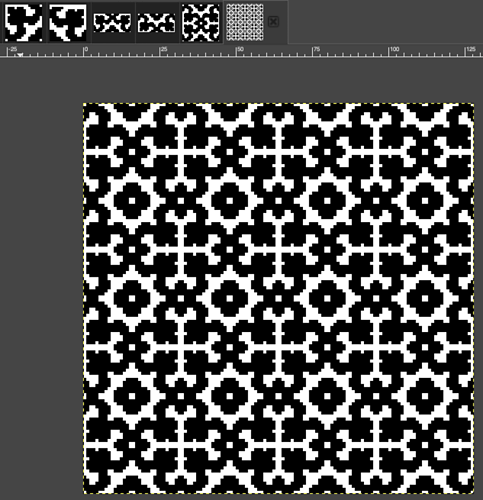 tiling is compared for both the original repeat and the same scaled X2, with both the final tiled images 128 pixels in width and height
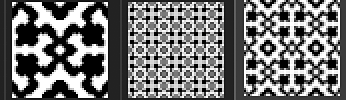
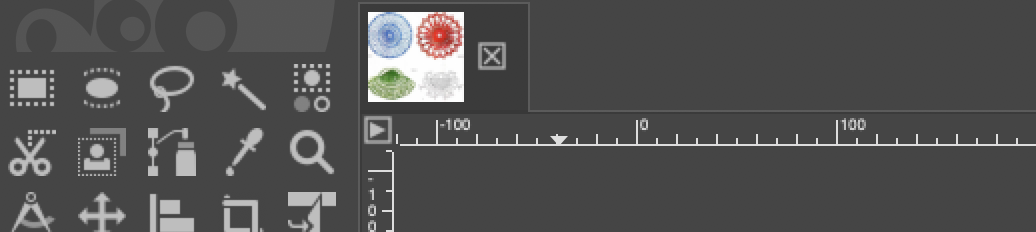
 The mandala option reminds me of spirograph drawings, the number of points can easily be changed
 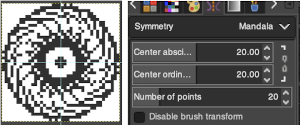 Tiling may be useful in brick or offset repeats, but my limited experiments did not produce anything worth saving or sharing.
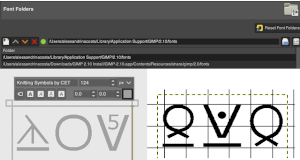
 and the 8-bit precision option
 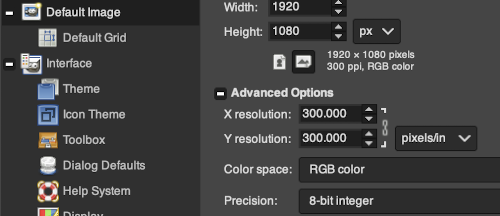 I have previously written on using Numbers (similarly done in Excel) to create charts, then importing them into Gimp to create .bmps for download. This is a review of a method that seems to work well with smaller repeats: the working chart. Make certain the table is formatted so that all cells are the same size, with equal height and width
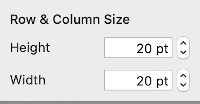
 Use the border option to eliminate the interior cell borders, selecting no border,
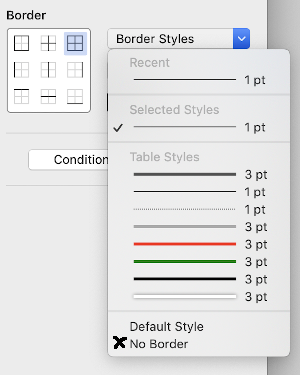
 Use the bucket fill tool to make each color segment black, change the mode to indexed,
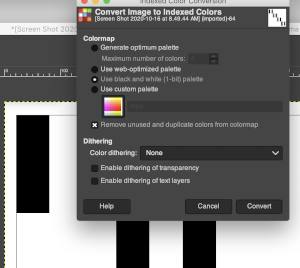

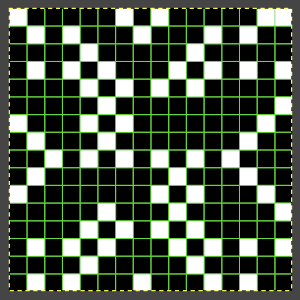
 magnify to at least 800X, show grid, check that no clean up is needed,
 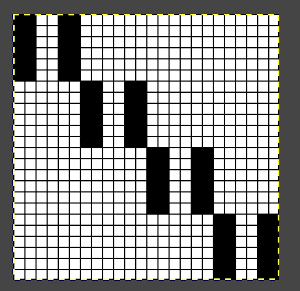 the image needs to be color reversed in order to be used for slip-stitch knitting,


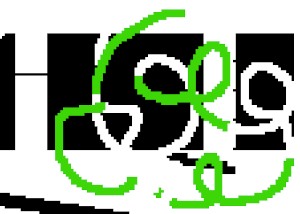
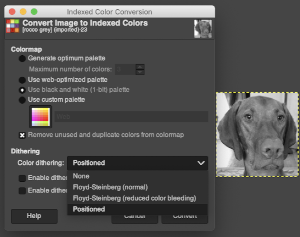
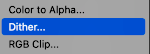
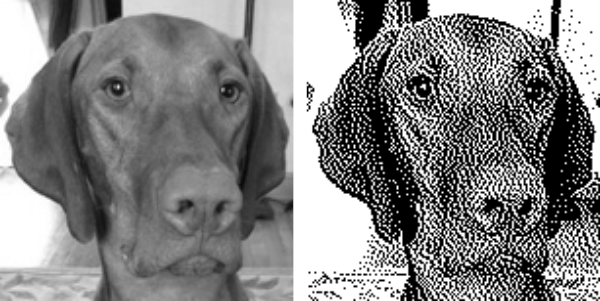
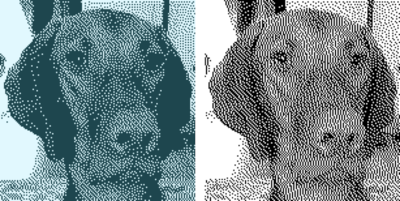
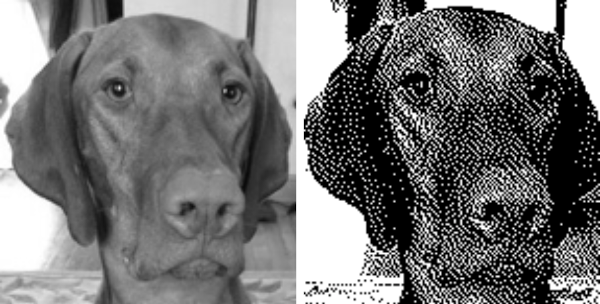
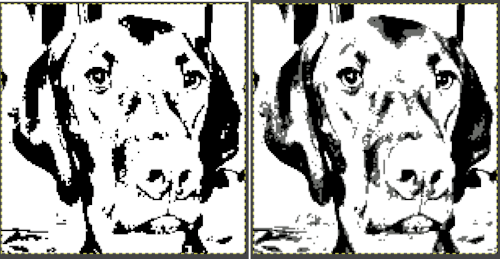
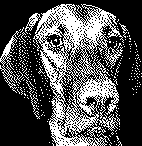
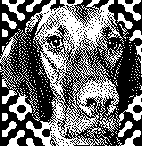
 The image is used with the kind permission of Rocco’s owner. I have used this image before, when I posted previously on some ways to reduce colored images to B/W for possible knitting using a Mac computer, please see post on 013/03/14/ color-reduction- conversions-mac-os/. Gimp offers some alternatives to the familiar dithers and is available, free, for both PC and Mac platforms. Tutorial links on Gimp edge detection available online as of May 2019 are listed at bottom of the post.


 Difference of Gaussians


 adjusting B/W with Threshold
 after a bit of “tweaking”
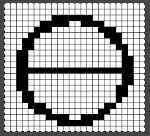
  Image_Mode_Indexed, rendering it “knittable in 2 colors”

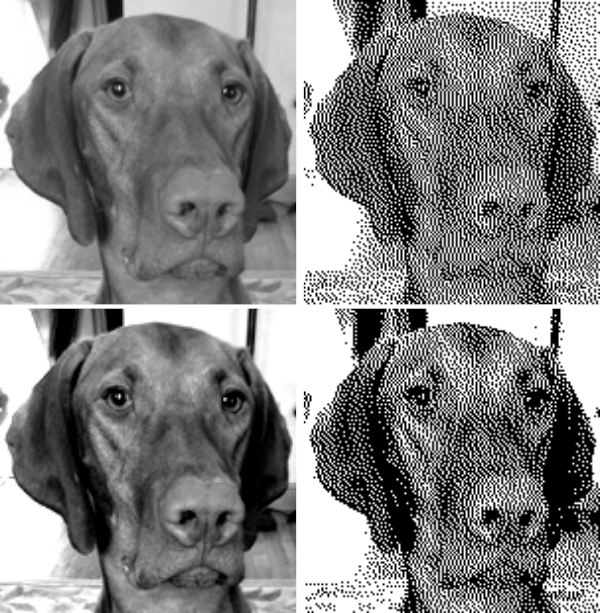
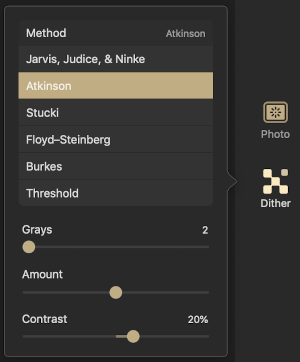
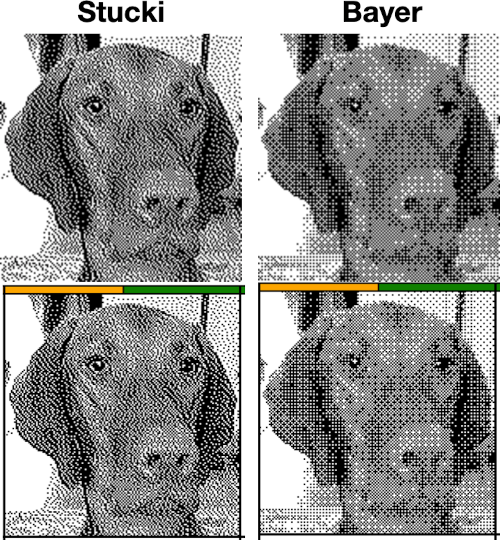
 default Stucki
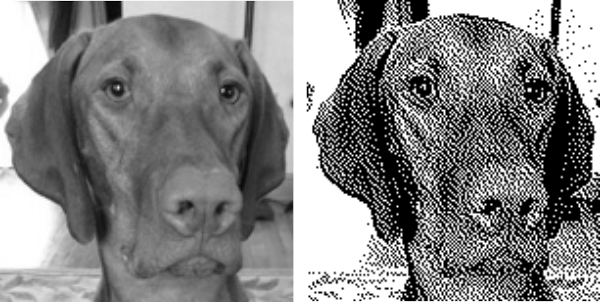
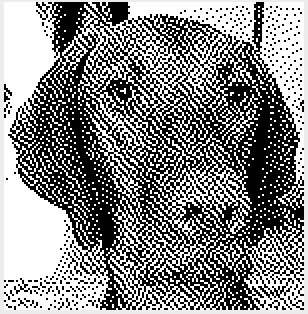
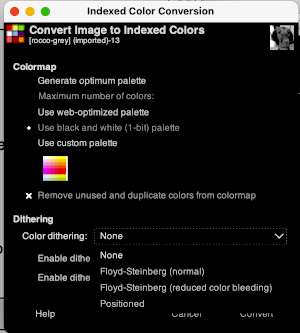
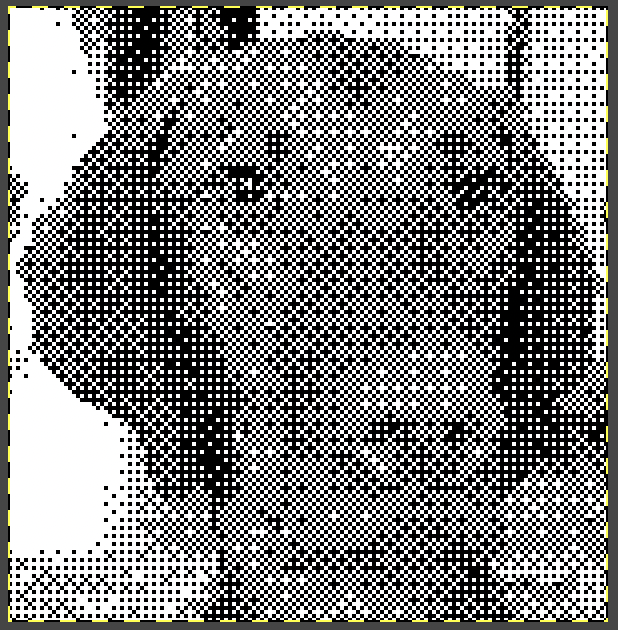
 Check dithered results, downloaded images may be in RGB Mode. Prior to any knitting, they will need to be converted to B/W indexed.
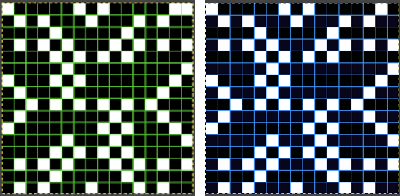
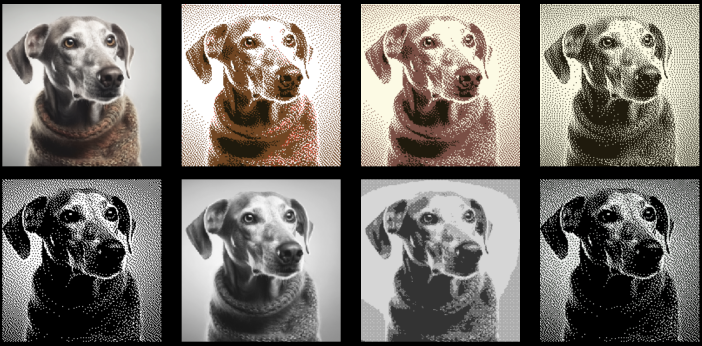
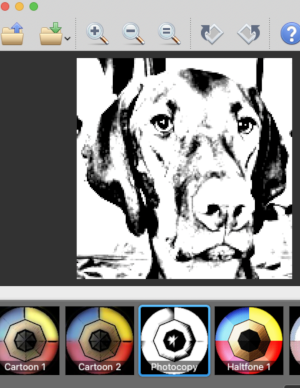 imported the result into Gimp and saved it in indexed 2 color BW and in turn, 3 color indexed mode, no color adjustments, finding the result pleasantly simple
 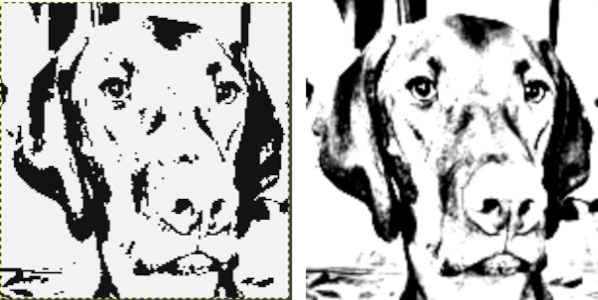 beginning with the greyscale generated image followed by Mode changes in Gimp, indexed 2 color BW, then indexed 3 color, there appear to be very subtle differences with a bit more detail:
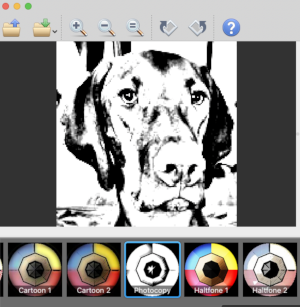
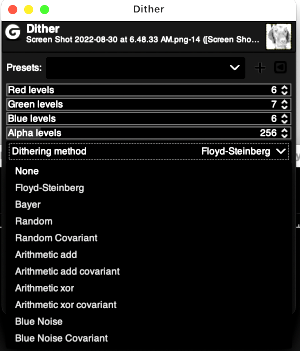
 It is possible to reduce images to 4 or 3 colors using the program as well: a slider for color count is used to choose the final number of colors in the reduction. Again, these instances have no added manipulation
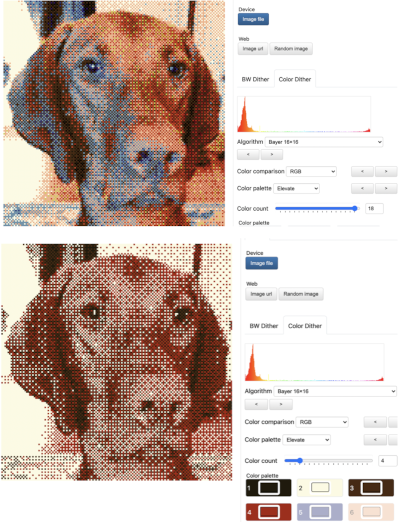
 To retain the quality and size of the dithered image, download it, rather than using a screen grab. The software used to separate the chosen dither may alter the result somewhat. I am writing my posts using an iMac M1 with OS 12.0.1. At this point Ayab is not operable, img2track does open images, but in this case, with interesting distortions, and it does not download any files at all.
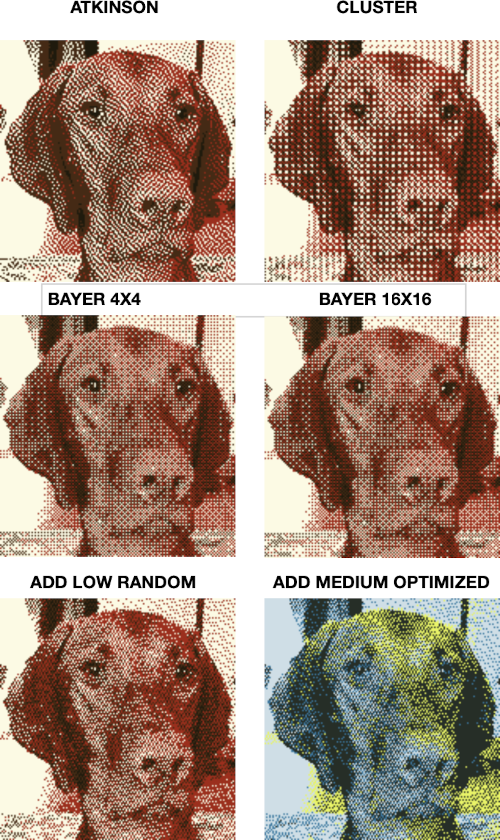
 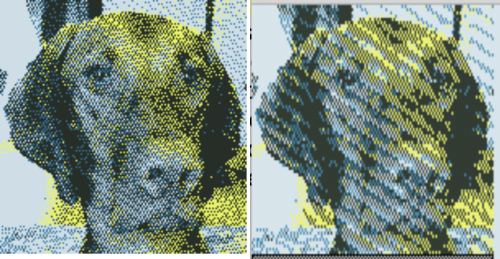 Yet another dithering
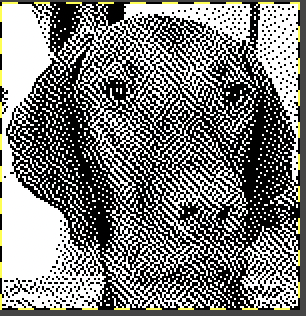
 On odd-numbered rows beginning with row 1, mark all empty squares in the even-numbered light-colored row immediately above it with purl symbols.
  All unmarked stitches throughout the design are knit, whether, on the “wrong/right” sides, all dashes are purled, patterning occurs on the second row of each color. To visualize the full pattern one may use the add row below feature to expand the graph (the chart below is missing the very first row).
  Now add the second row of each color and grounding stripe (s) at bottom of the repeat. Most patterns will start the illusion immediately after casting on with dark color, row 1 above. I was interested in my sample having a border of sorts on its top and bottom.
  The resulting knit swatch

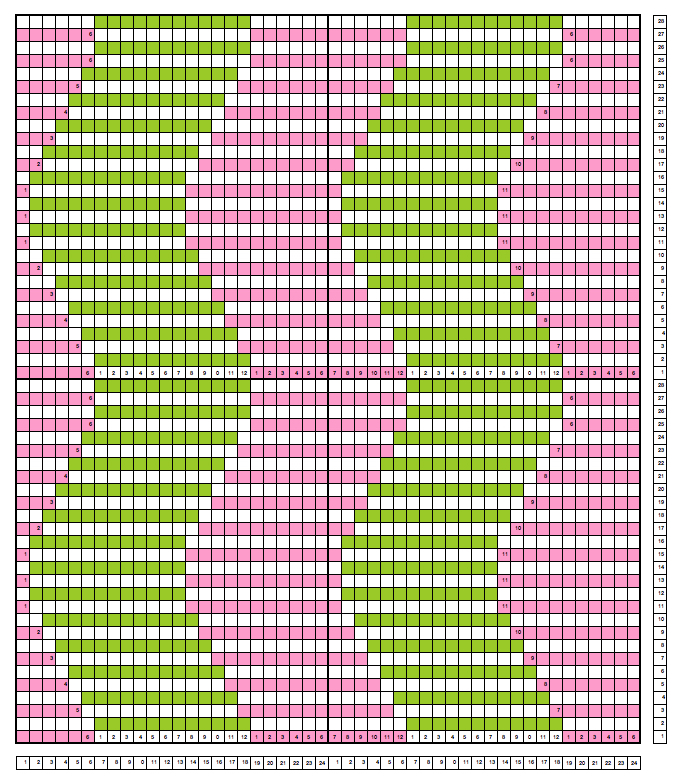
 the actual repeat
  color inversion begins on row 1 and follows every other row (if numbered these would be odd rows)
  testing the repeat through filter/ map/ tile
  a working chart that can be printed to suit with dark/light row markings and blank squares for tracking knitting rows in the execution of the pattern
  A larger version with stitch and row counts marked. The chart represents half the rows in the actual knit. The cast on row counts as knit row 1, color 1, and following the chart beginning with row 2 knit the black squares and purl the white squares. *Change color, knit one row (odd#), on the next row follow the chart, knitting the black squares and purling the white (even#).** Repeat from * to **.
 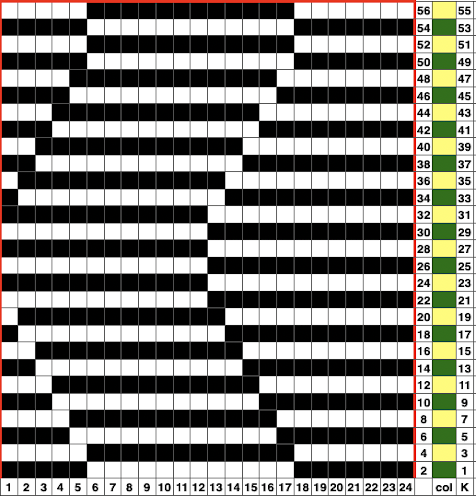 the knit swatch: “shadow side”

 Follow up:


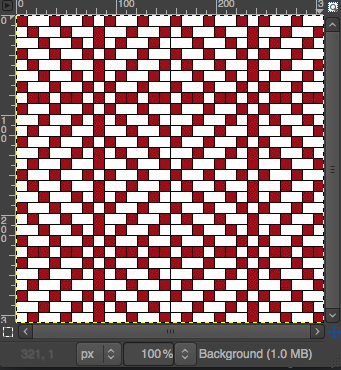
 a 24X24 repeat