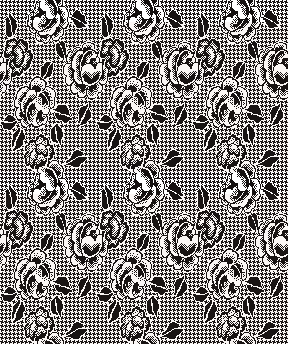
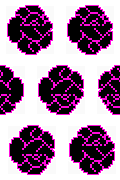
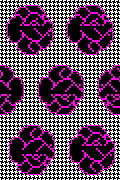
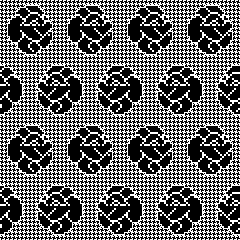
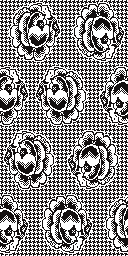
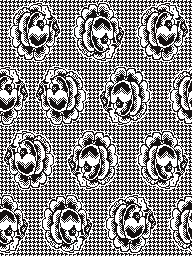
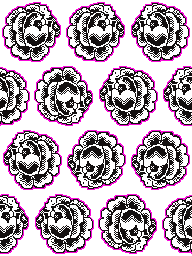
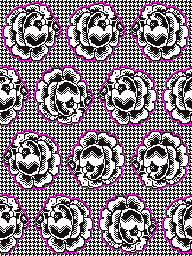
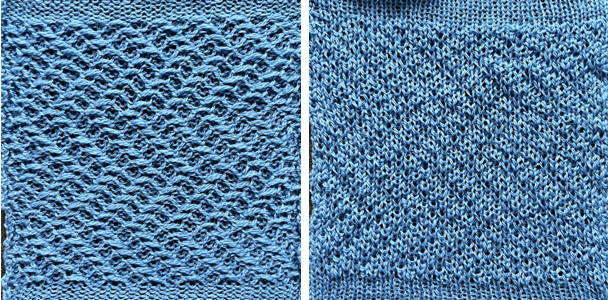
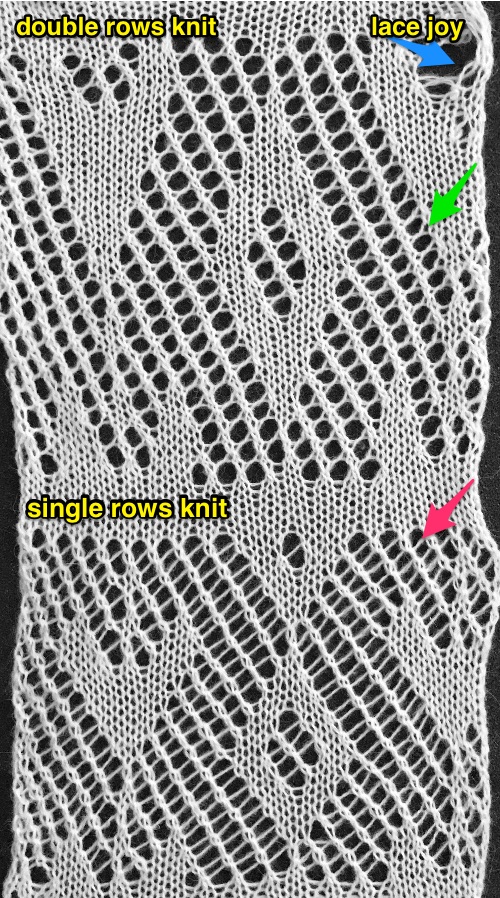
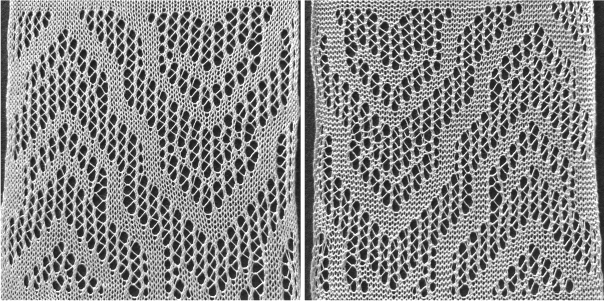
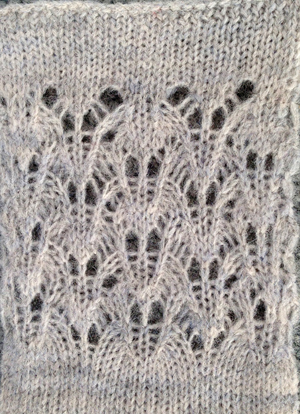
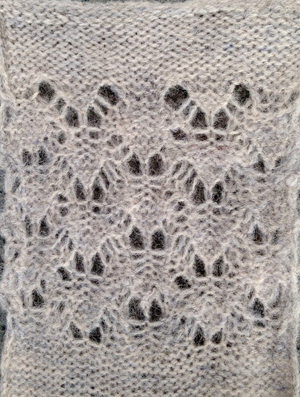
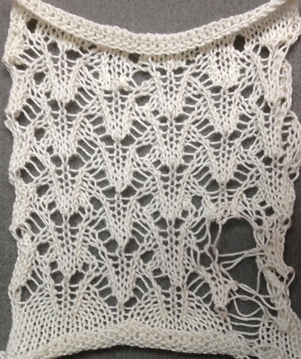
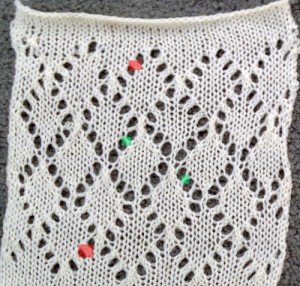
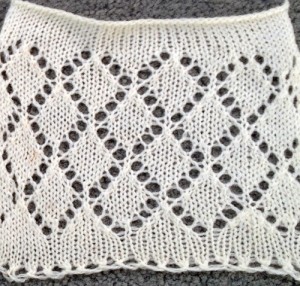
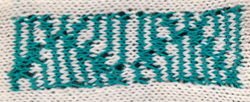
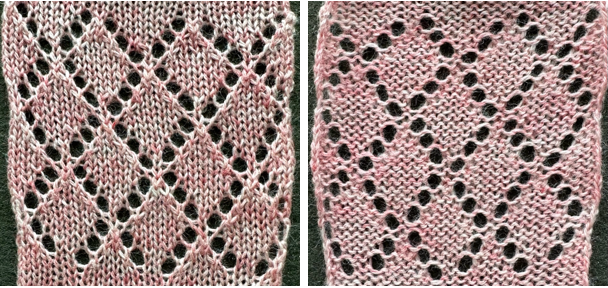
Swatches based on adapting random online published repeats

I still surf Pinterest daily and often encounter published punchcard repeats that catch my eye.
Many need some interpretation and editing for use in specific machine models.
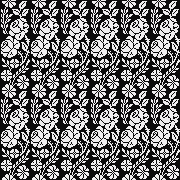
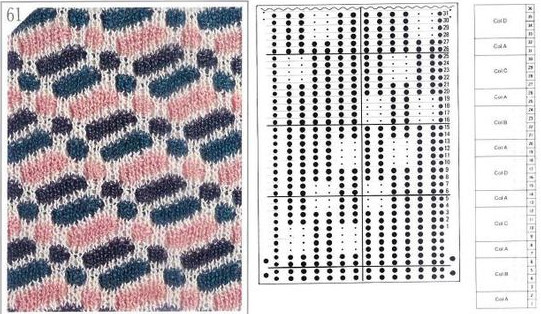
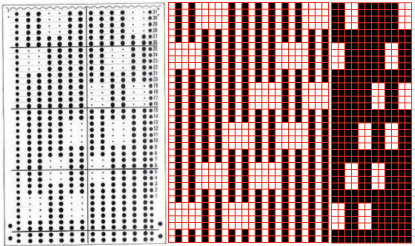
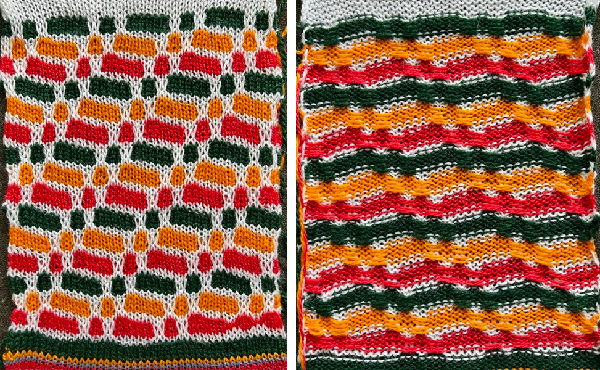
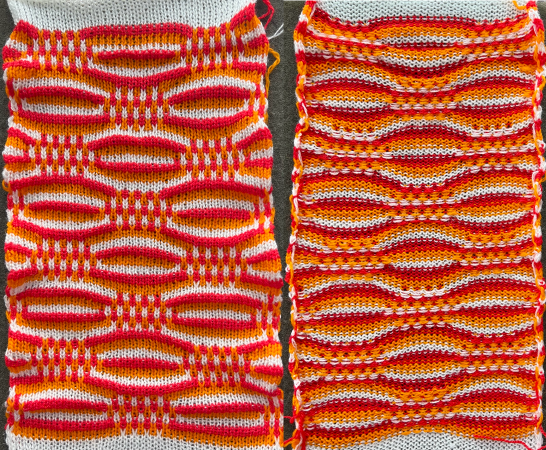
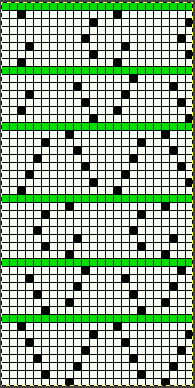
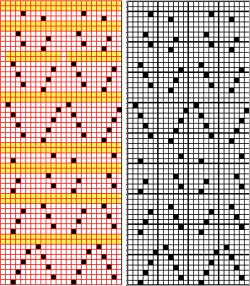
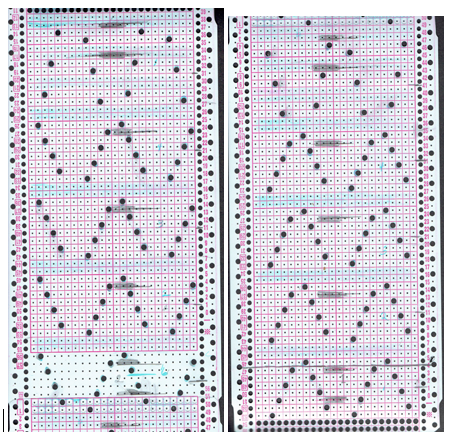
The first inspiration: is knit using 4 colors, alternating 2 rows of a base color, then rotating color changes for 4 rows for each of 3 contrasting ones.
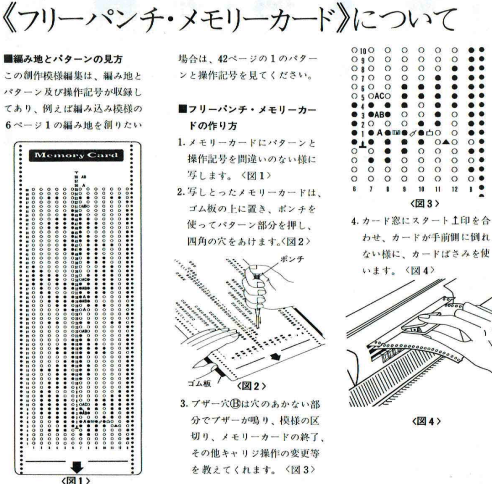
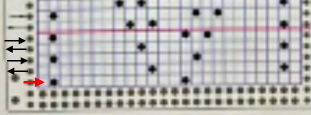
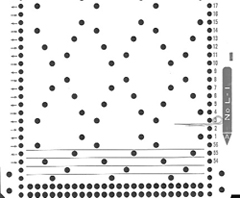
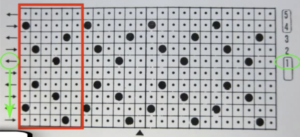
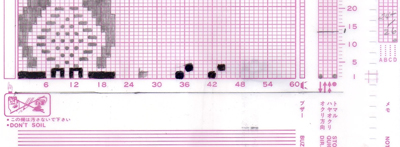
Counting up from the bottom of the illustration after the marks for the typical two all-punched rows, it would appear this is a Studio punchcard, but starting row 1 as visible outside the card reader can simply be changed for any other brand knitting machine.
The every other stitch configuration is for an every other needle repeat used in early machines such as the Juki.
A full reference volume   An illustration of the card use  If using thicker yarns on a standard machine that grinds at the loosest tension, this configuration can retain the full design while knitting every other needle/EON.
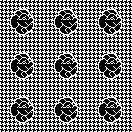
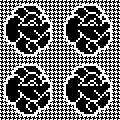
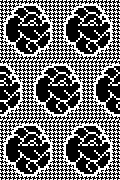
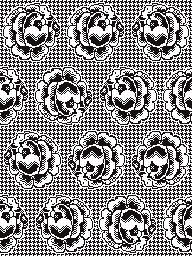
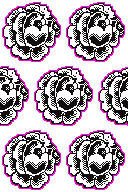
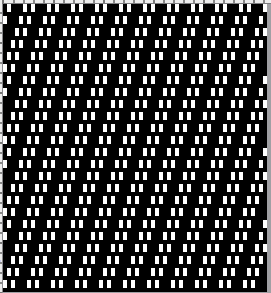
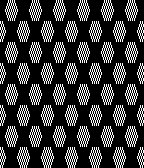
The adaptation began using Mac Numbers, the repeat was isolated and traced, and the 12 blank columns were then hidden producing a result scaled in indexed B/W mode to 12X36 pixels. The tiled design, checking alignments.  The proof of concept Periodically tuck stitch designs that appear to break the usual rules for the stitch are discussed.
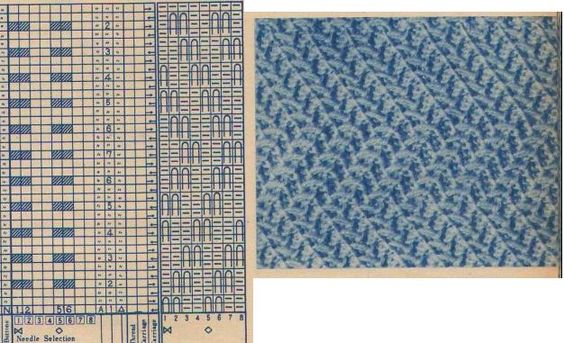
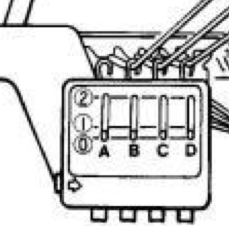
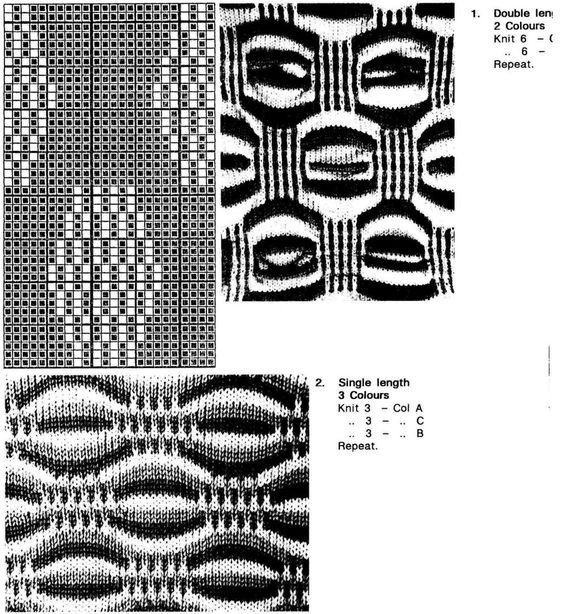
This design is intended for a push-button machine capable of 24 stitch repeats, uses symbols in the associated chart interpreted to mean tuck loops form for 2 rows and knit along with all other stitches every third row.  The working repeat is made up of 8 pixels in width, and 36 pixels in height.    This next design is likely published for use with the Studio color changer, which is marked with letters for each color,   rather than with numbers as in Brother models.
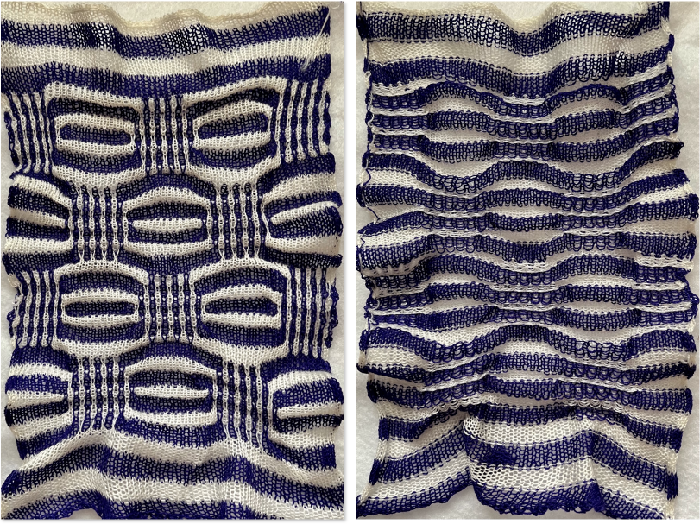
It is intended as a slip-stitch. The bottom swatch relies on color changes every 3 rows, which would need to be performed manually.
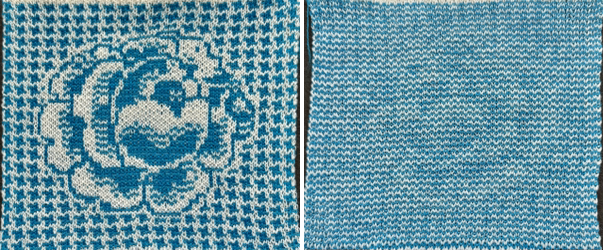
In the elongated version, colors are changed using the color changer, every 6 rows.  The design was first tested in thin yarns using the electronic 24X84 elongated PNG  tested for alignment   and displays interesting 3D variations, the purl side is remindful of shadow pleating  Changing colors every odd number of rows is a tad fiddly.
The use of the color changer is not an option.
With the three yarns fed through the yarn masts, it became hard to keep them from twisting around each other. Ultimately, that problem was solved by hand-feeding one of the three colors with the cone on the floor, in front of the machine, as one would place yarns for weaving.
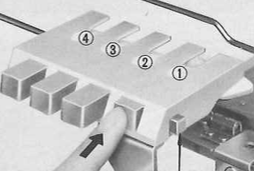
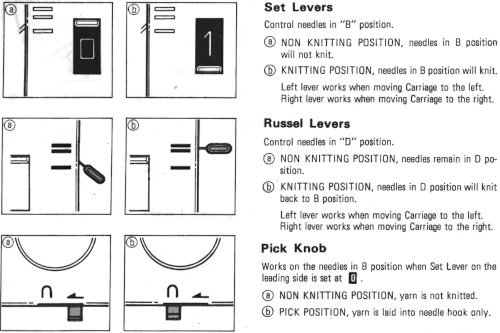
Brother knitters are familiar with yarn placements in the sinker plate.
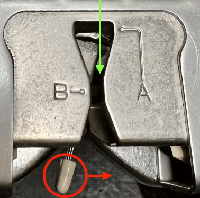
Position A is for knitting when using only one color or for the ground color in fair isle patterning.  There is a “gate”, which is closed, and the B color/contrast motif color is placed in that front position, knitting the yarn in needles preselected to needle position D on the next carriage pass.
It is tempting to leave the gate open when switching colors by hand frequently, and that may work for a while, providing tension is placed on the yarn manually to keep the yarn back. If at any point the yarn shifts forward (green arrow), with no needles in position D, stitches will be dropped.
Textured stitches can make for more complicated correction of errors or dropped stitches.
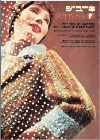
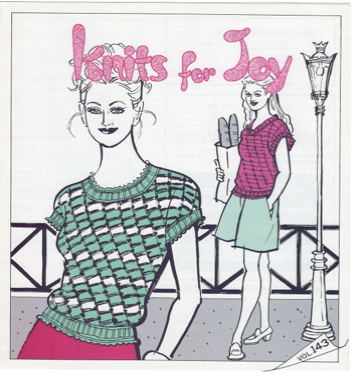
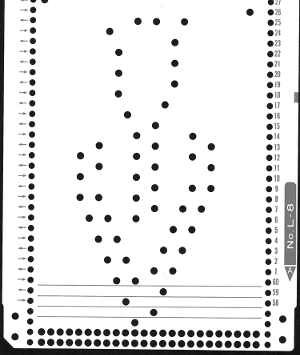
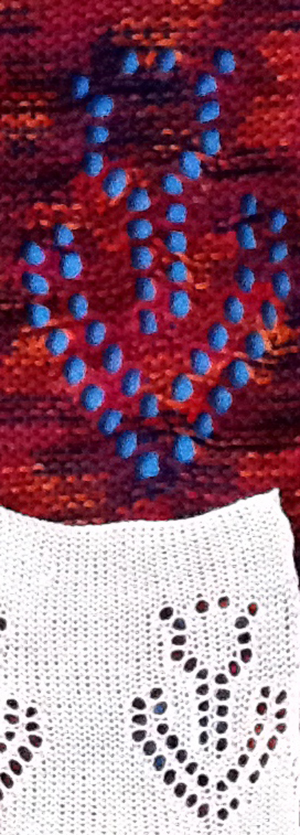
Taking the extra seconds to close the gate (red markings) after each color change avoids what became fondly known as “dropitis” in my classes.   The proof of concept: two of the yarns used were acrylic, so steaming to reduce the curling of the swatch flattened the texture.  At one point Studio published a newsletter  with cover art composed of simple drawings, such as this, for #143, which spiked my curiosity, and led to these explorations:
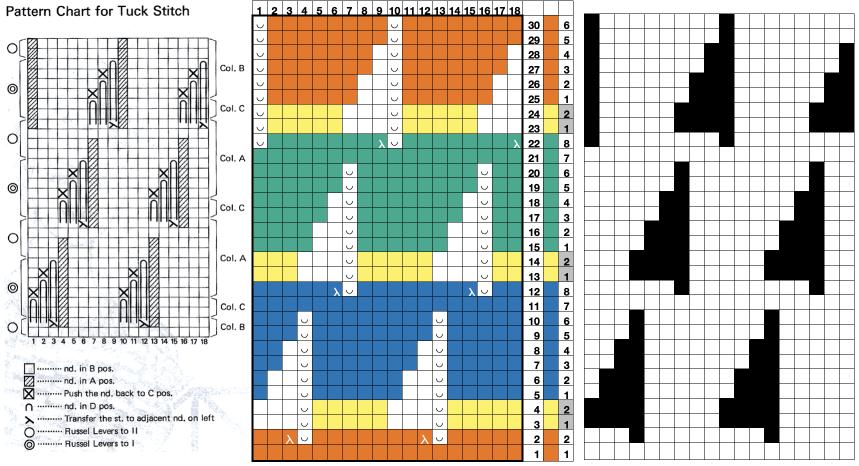
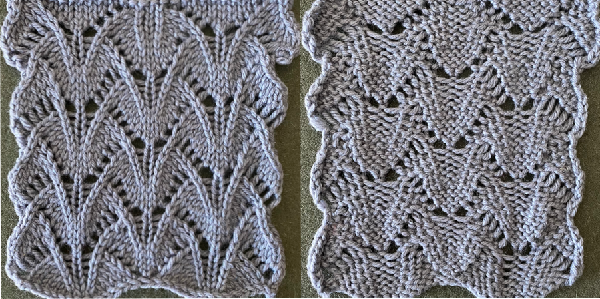
the pattern and symbols refer to tuck stitch, but technically the design is executed using short rows and transfer techniques.
The programmed repeat selects needles, making tracking actions easier.
End needle selection is canceled.
No cam buttons are in use.
The knit carriage is set to hold.
Stitches on the single needles selected on rows, 2, 12, 22, etc, are transferred onto the needle on their left. The empty needle is then pushed back to A position, out of work, creating a ladder.
The groups of 3 preselected needles are pushed out to hold, the D position, before continuing.
After every 2 rows knit, a stitch on the left is pushed back into work, until lastly, the empty needle is returned to the B position.
All needles will then knit for one row filling in the empty needle with a loop and a full knit stitch on the next pass where transfers begin again. A brief summary of stitch manipulations  Images of the work in progress, a small claw weight single claw hung on edge stitch helps keep side edges equal in length:
preselected needles initially manually brought to hold position after the first carriage pass to the right
after the second carriage pass to the left, with the first needle on the left in each group pushed back into work  the second needle on the left in each group is returned to work
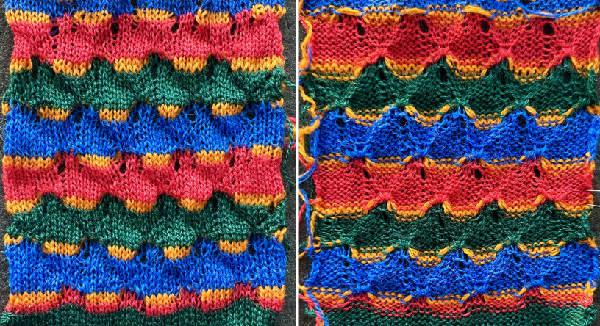
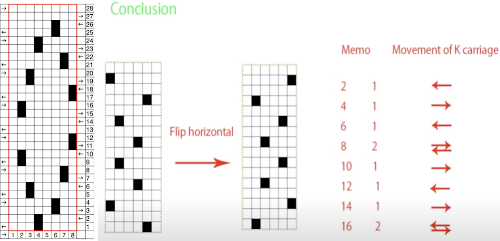
one needle in each group remaining in hold pushed back into work  at this point the empty needles have been brought to the B position, single preselected needles have been transferred to the left,  and a pass is made forming loops on the empty needles/ eyelets  The original 18X30 repeat, some machine models and download software may require that it be mirrored horizontally,   repeated to 44X30 with a planned distribution of plain stitches at sides, knit in 2/18 wool blends: Converting random transfer lace designs poses different challenges, and since the time at which the reference post was published, there have been several Gimp updates.
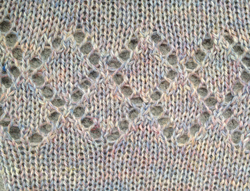
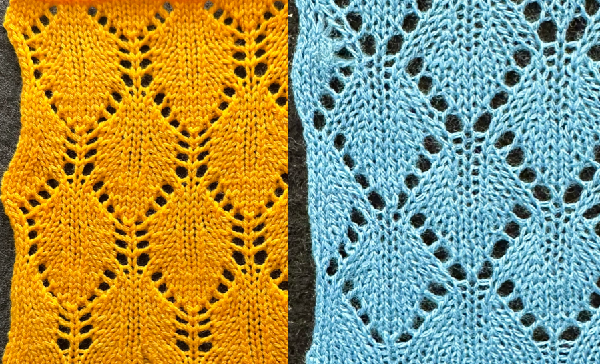
Lace designs contain few black and white pixels and, at times are brand-specific. Multiple transfer lace in Studio models begins with 2 blank rows, while Brother begins with a design row, and ends with 2 blank rows. As given, the inspiration repeat is designed for Studio/Silver Reed.
When using any program, ie Gimp, ArahPaint, or even Dak, the original scanned or screengrabbed design needs to be aligned horizontally and vertically to window borders for accurate conversions.
Gimp:
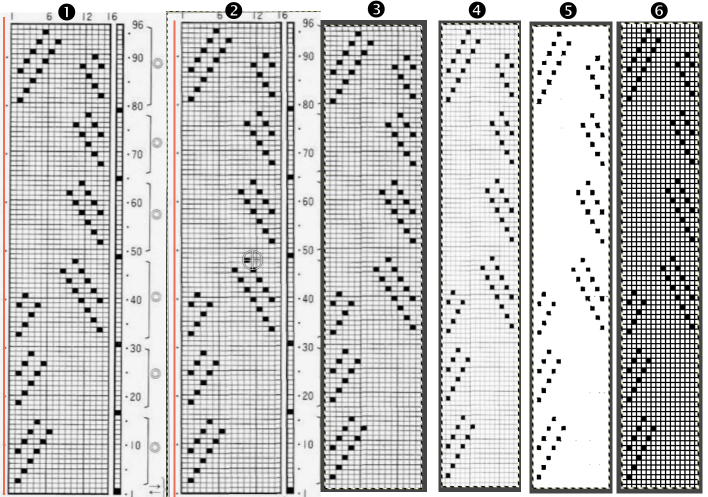
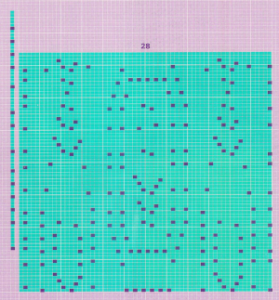
Before any scaling of images, establish stitch and row counts. In this case, they are published as being 16 stitches X 96 rows.
The process for converting the same lace design using Gimp 2.10.34 on the Mac, beginning work in RGB mode:
1. drawing a straight line to the side of the cropped image reveals a slight lean to the right
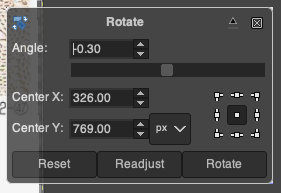
2. using Image, Transform, and Arbitrary Rotation -0.30 improves the alignment  3. using the rectangle tool, crop to the borders of the published image.
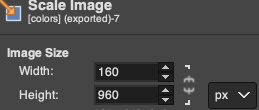
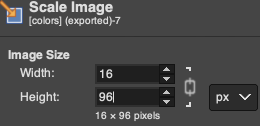
In this instance, the cropped image measuring 199X938 pixels is at first scaled to multiples of 10 for both width and height, note the broken chain link
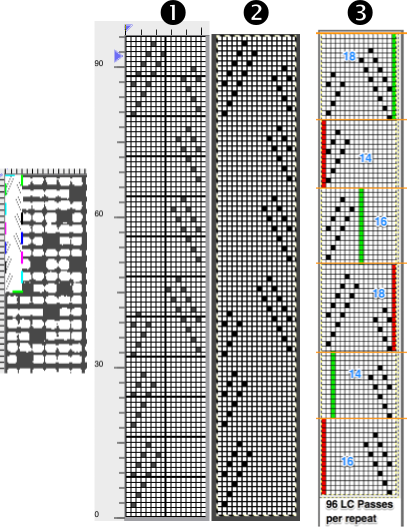
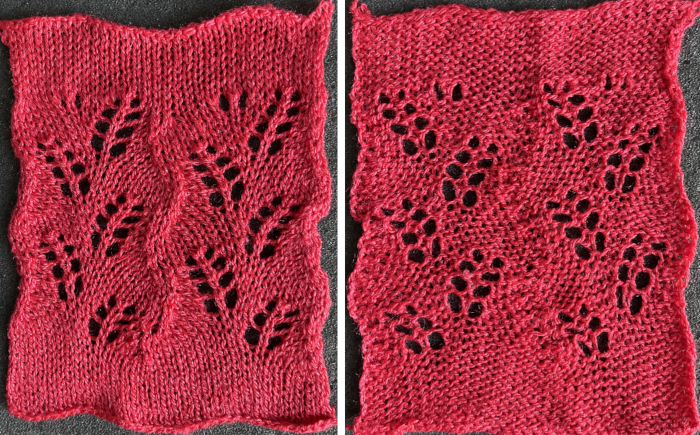
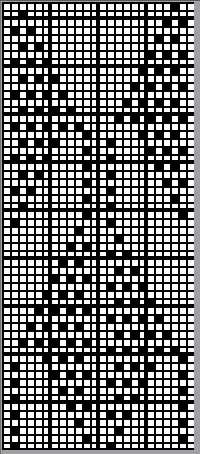
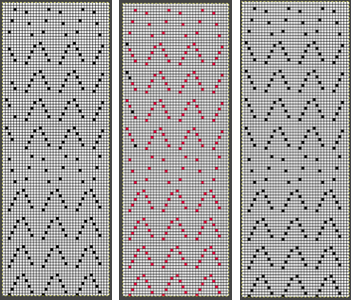
4. 160X960 pixels. 5. Image mode is changed to B/W indexed, and the image is scaled once more to 16X96, the size of the expected repeat, note the intact chain link  6. the final repeat, when studied, matches that from the results in the previous post  1: the result using ArahPaints tools, including its guess weave from grid, compared to
2: the Gimp final image and
3. borrowed from the previous post illustrating other considerations before actual knitting,  
which include:
if using the repeat on Brother machines, the first 2 blank rows of the design are shifted to the top.
The 16-stitch design width makes it suitable only for electronic models.
The final PNG is actually downloaded as a fair isle pattern while maintaining the required needle selection for lace, and the knit carriage remains set to knit throughout while the lace carriage selects and transfers.
The machine, depending on the model, may by default mirror the result vertically, so the final PNG can be mirrored and saved as here, prior to knitting on the 930, or the mirror function in the machine may be used after programming.
I prefer to save my files in the orientation required for the actual knitting as a means to avoid confusion or errors.
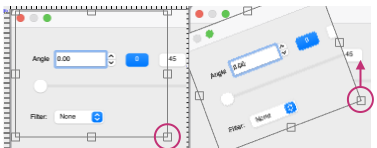
Working in Arahpaint, rotating an image turns it on its center point. To rotate a layer, selection, or image, from the Image menu, choose Rotate.  Selections can be made at offered angles, or specified degrees can be entered in the degree field, or select an area, move the pointer outside the bounding border, and then drag on any one of the small boxes at each corner while pressing the left mouse button.  To align the image,
1. load the lace inspiration
2. choose Image, select Rotate Image, and draw a line that follows the orientation of the image. The color will be based automatically on the palette being used, and altering the pencil pixel size or color has no effect.
The program then rotates the image and will inform you of the rotation angle, and the drawn line becomes straight.
To confirm alignment, click the OK or Close button in the Rotate Image window.
3. use the rectangle tool to select the content for the full design repeat, and crop the aligned image to the selection. 4.-9. continue with the steps using the tool Guess Weave from Grid, producing the same final PNG. In summary, they are:
4. crop the selected image to size
5. change the color palette to 8-bit, adjust background and foreground colors
6. reduce the number of colors to B/W, adjust the threshold, and set the number of colors to 2
7. the resulting image
8
. use the guess weave from the grid tool, crop the bounded image to the selection, magnify the results to visually check the repeat, and save the PNG if satisfied
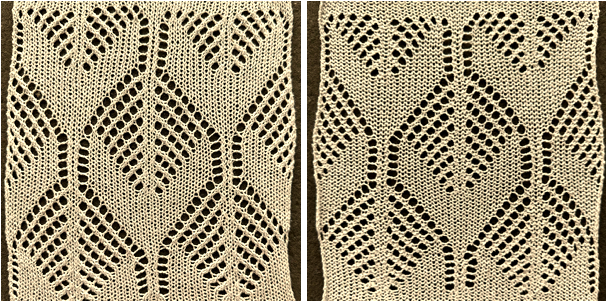
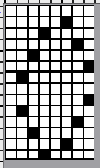
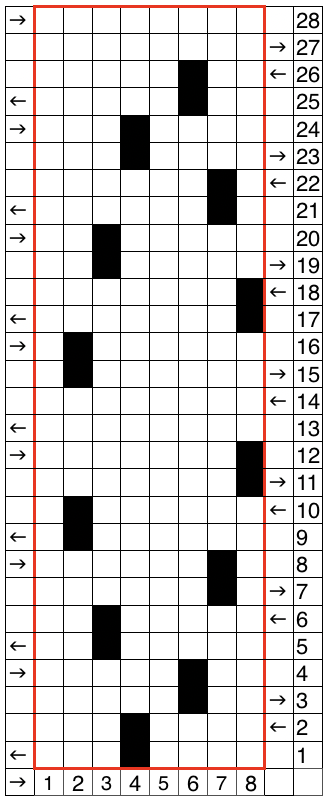
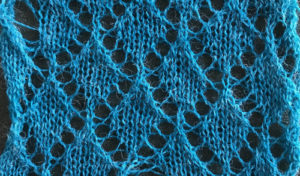
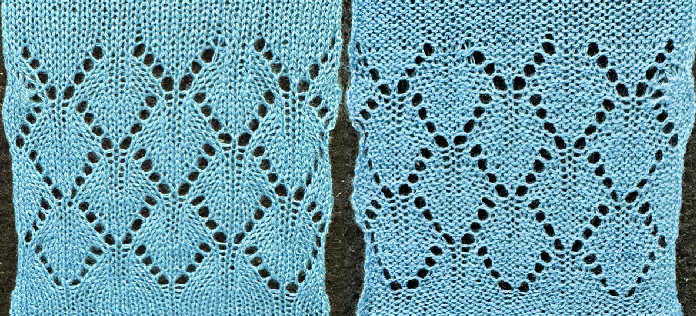
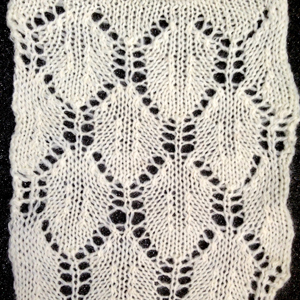
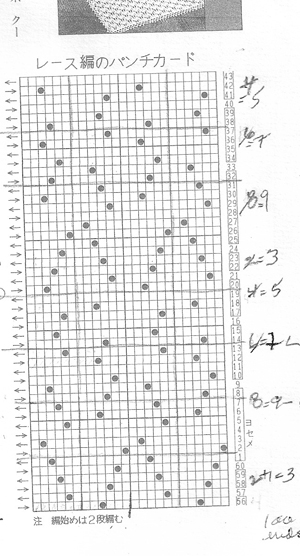
9. the final 16X96 pattern design repeat, matching the Gimp result. The associated swatch  This Pinterest find is credited to Tatiana Demina, and is intended for use on Studio punchcard machine models.  Studio machines are capable of transferring and knitting in single carriage passes. Studying the image of the card, it can be seen that there are no blank rows anywhere, and punched holes on alternate rows indicate transfers alternating first to the left, and then to the right.
The swatch was knit using the same technique described  recently in the post Unconventional uses for punchcards 2: thread lace cards for “filet” mesh
The original 24X56 design was lengthened X2 to, shown here also doubled in width to 48X112   to match the direction of the transfers, the hint offered in the inspiration source can be followed down to indicate the first row of transfers need to be made to the right,    hence the knitting begins with the knit carriage on the left, the lace carriage on the right. As the LC moves to the left it preselects needles, and as it returns to the right it transfers them to the right.
The LC is removed from the knit bed.
The KC knits a single pass to the right and remains there.
The LC is returned to the knit bed on the left, preselects needles on its pass to the right, and transfers them to the left as it returns to that side, and is removed from the bed.
The KC knits one row to the left and stays there.
The LC is returned to the bed on the right and the process is repeated.
Preselection of needles is made by the LC toward the knit carriage, transfers are made away from it.
Whether the repeat needs to be mirrored again may depend on the machine model or the software used to download the file to it.
The direction of the first row of transfers provides the necessary clue, they need to be to the right. If to the left, mirror the pattern horizontally and begin again.
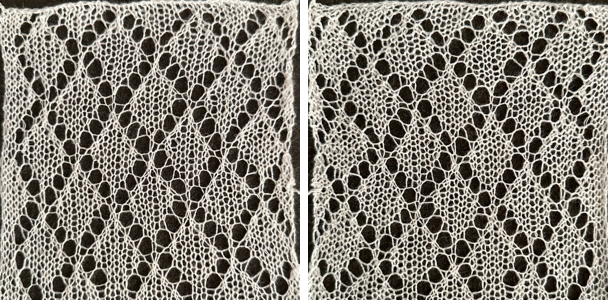
The swatch was knit in a wool-rayon blend, the results point to the difference in appearance and gauge with a change in color and type of yarn used when compared to the inspiration image The context for this can be found in To mesh or not to mesh 8: more Numbers meet Gimp
the 60X74 png  and the proof of concept

Cables and software for electronic download to knitting machines

A Ravelry post discussing cable connections to knitting machines for downloading patterns and associated software has led to my accumulating the information below. I am primarily a Brother and a sometimes Passap knitter and can speak to only part of the content below from direct experience.
The information on electronic downloads cannot be separated from a history of hacking, which began with Brother machines when mylar sheets became less available and folks began to have an interest in bypassing them. A review of such efforts was also shared in a previous post:
a hacking history https://www.beautifulseams.com/2014/10/29/tricodeur-writeup/
only the intro is in German: a nearly hour-long presentation by Fabienne<https://www.youtube.com/watch?v=n1CRNjzOuto>
Brother 930: http://learn.adafruit.com/electroknit
Brother 970: http://glitchknit.tumblr.com
930 knitting: http://andrewsalomone.com
910: Claire Williams  Wordpress site is no longer available
Fabienne http://fabienne.us/tag/knittingmachine/
keypad: http://travisgoodspeed.blogspot.com/2010/12/hacking-knitt…
FB100 Emulator software, disc utility program, cable
another approach for Brother models KH”‘930, 940, 950i, and 970: http://daviworks.com/knitting/ and the associated group on Ravelry 
970 how to hack instructable 
for additional cumulative information, software compatibility, and hardware specs see Claire Williams’ website
Superba hacking and open source software https://www.hackerspace-bamberg.de/Singer_Superba
E6000 https://www.hackerspace-bamberg.de/Passap_pfaff_e6000
hack and 3D printed accessories, PassapKnitterstream

Present interfaces available for downloading patterns to Brother knitting machines: so far, both programs do not appear to run natively in the new iMac with M1 chip and Monterey OS.
That said, https://ayab-knitting.com , supported devices: https://ayab-knitting.com/supported-devices/. My experience using it has been with the 910. Pre-assembled kits used to be sold, over time they were offered by 2 different providers and were taken off the market by each of them. In many cases, there appear to be some issues with the program in DIY units as well resulting in mispatterning especially in long pieces of knitting.
Ayab operates as a true knit-from-screen, so the computer needs to be awake through the whole knitting process. In the case of the 910, the hack replaces the reader completely, the left side of the machine is left exposed, and the interface replaces the traditional patterning and power source, with its own cord connecting it to the power supply.
The last update to the program was in 2019. It performs color separations for dbj in multiple colors per row, including the only one of its kind, the Heart of Pluto one that eliminates jacquard color separation patterning errors and knits single passes for each color in each design row on the main bed.
Since the built-in patterning control buttons are rendered inoperable, Actions such as color invert, setting the number of repeats, vertical flip, mirror, rotate left, and rotate right are available within the program. Patterns may load both in color and shades of gray, palette color choices make a difference in achieving successful color separations.
Ribber settings include classic, middle color twice, HOP, and circular for tubular fair isle or other fabrics.
https://xxxclairewilliamsxxx.wordpress.com/hack-ta-machin… is an early post on the hack, showing steps involved. Kits with parts for DIY may be found online including at https://ko-fi.com/redpinkgreen/shop.
The program is free, any incurred expenses depend on how and from where the interface components are purchased.
The related Ravelry group has been quiet for a very long time, for more information on what is being developed and what users are knitting, the FB group has frequent shares. I would urge anyone interested in the program to join the group before making final decisions, to observe issues reported, and the finished projects if any using it https://www.facebook.com/groups/1384431355220966.
A recently added video KH 900+ KH 965 Brother knitting machine – How to install the AYAB Shield/alternative pattern control|
On my blog when I actively used the program, I shared my experiences using it and explored a variety of fabrics using its settings.

img2 track: works with Brother models KH 930, 940, 950i, 965i, and 970. https://daviworks.com/knitting/index.html. The program is also free to use on swatches limited to 60 stitches in width, to use the full width of the needle bed a the purchase of a registration key is required, the cost is around $100. The download cable can be ordered directly from Davi and directions are available for those with the ability to build their own. The program downloads the pattern into machine memory, so the computer does not need to be awake other than during download. The size of the download is limited by the machine model brain, with the 930 being the smallest.
When large files are planned, the program will reduce the pattern into tracks, and each has to be entered as a new program after the previous track is completed. The KH-930 takes just a few seconds to load the track because the memory holds only 2 KB of data (about 13000 stitches). Later models have a much larger memory (32 KB). The KH-940 and KH-950i require 42 seconds to load a track. The KH-965i and KH-970 load only the requested pattern, so the loading time depends on the size of the pattern. With Brother models KH-965i and 970, you can load a pattern from img2track without erasing the previous ones in the KM, as long as they fit in the memory. So you can have 901, 902, etc. loaded and choose between them.
Color separations are available for multiple color dbj, but not as a single pass for each color in each row as in Ayab Heart of Pluto. Images open in shades of grey. Each color in each design row is knit twice. It is possible to knit each design row color only once by adding a hand technique.
Adjustments may be made for vertical stretch, maximum width, and the number of colors used. Any remaining changes can be made by using knitting machine button selections.
Out of habit, I have used both programs to open bmps and pngs saved in indexed mode though both are said to open common file formats ie. jpg, gif, png, bmp, tiff, …Neither program exports files in other formats or allows for editing specific pixels in the designs in any way after they have been opened.
I have found img2track to be completely reliable, errors encountered during knitting or programming have usually been operator ones. I develop my patterns outside either program in paint programs, I prefer to use Gimp or ArahPaint6.
The AYAB GitHub offers a huge library of ready for download images from various sources,  most in png format.

I do not have any direct experience with Studio Electronic machines post-EC1 Studio’s approach to machine brains was to develop an exterior box that could be purchased separately from the knitting beds, EC1 on the left, their PC1 on the right From the manual on its use The following information is gleaned from online searches: Studio or Silver Reed’s efforts to move away from mylar sheets as seen in the EC1, headed in a different direction than seen in Brother knitting. There are two options still available are the SilverKnit and SilverLink systems:
SilverKnit, with more info at https://silverknit.nl/dk/silverknit-en.htm “provides the knitting functionality of the EC1/PE1 for electronic Silver Reed machines. The site lists all pertinent information on system requirements and compatible models. One can knit patterns without the need for additional software, which may be created with a graphics package of your choice.” The pieces involved include a controller unit, a coil cable connector curly cord, and the box, which may be secured on its side to the knitting machine case using velcro strips, usually true for other switch boxes and control units as well. There is a SilverKnit software user interface. For Superba machines, there are the Superbaknit packages available: type A for pressure pad, 624, 9000 models, and type B for light scanner/pegboard models. They allow patterning across the entire bed, accept multiple file formats, and seem to use the same platform as the Silverlink program. 
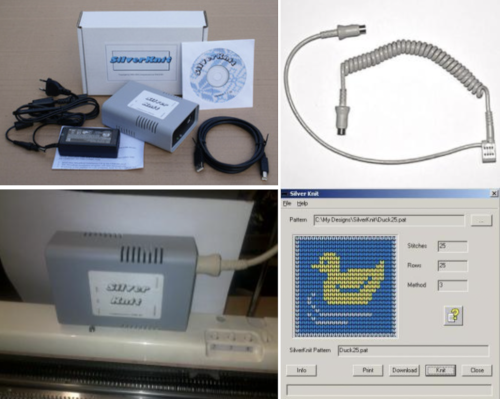
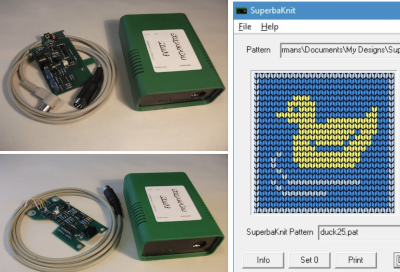
The Silverlink, now in Series 5 is for use with DAK. Manuals for softbyte cables include information on series 3, 4, and 5. There are distributors in each country listed on the Softbyte site. There are also individual dealers selling related DAK products in other states and locations. Prices are not necessarily fixed, and relationships with local dealers may foster easier-to-reach individual support.
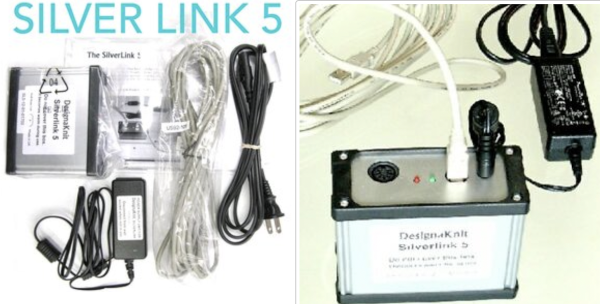
A 2020 review of the Five Pattern Control Methods for a Silver Reed Knitting Machine.

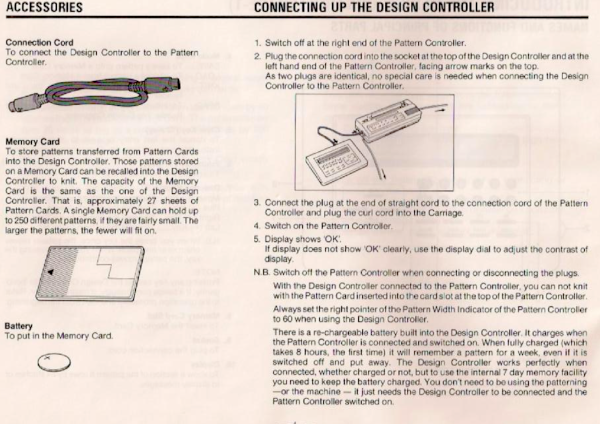
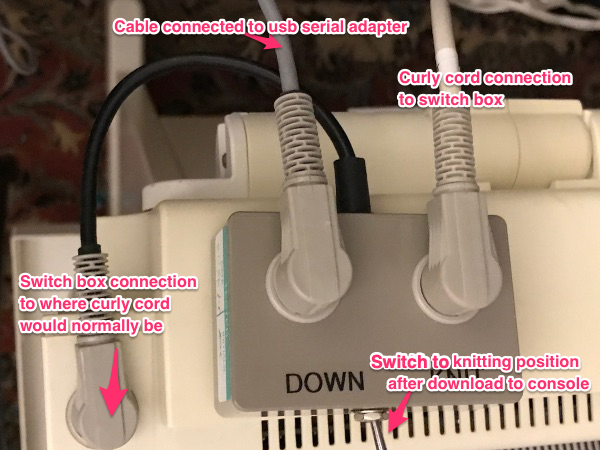
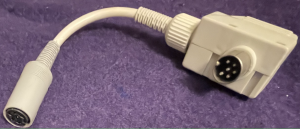
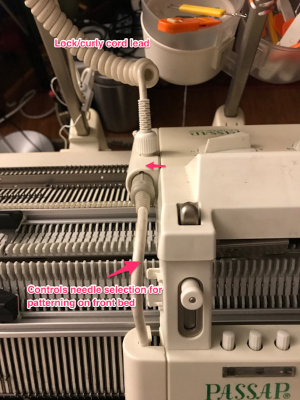
Passap knitters were first introduced to Creation 6 as the proprietary Madag E6000 software, usable with a short dongle on computers available at the time, making it necessary to remove the card reader from the machine in order to get it close enough to the computer for download. The dongle was plugged into where the curly cord connects on top of the console. Cochenille developed a download, knit from screen cable, and my early Passap pieces were made using Suzan Lazear’s BitKnitter on a reader with 8K memory. With true knit-from-screen, console memory is bypassed. The system was also available for Studio machines, both became abandoned.
As is true for the present DAK system, there was also a proprietary Passap file format used, CUT, aka Dr. Halo. Eventually, I  purchased a switch box and download cable from Richard Croucher in England, and up to the present-day that has been my go-to for downloading patterns using and an ancient laptop. Personally, where I go now that I have a new PC available, is TBD. I failed to get the system to work using VMware on my old iMac.
One of the caveats with downloading to the Passap is that the cable connection for both the curly cord and the download cable share a single entry point to the console. This connector was temporarily available and spared some of the wear and tear on the console The addition of a switch box, secured with velcro on the console, allows for the possibility of downloading and knitting patterns without having to make any multiple other connections. Aside from connections to the machine, there was the issue of available software for drawing repeats and downloading in the proper format.
In the heyday of machine knitting aside from textbooks and articles beginning to appear from authors such as Lewis in the US, Kinder in the UK, and Carmen Router in Australia, lots of practical accessories and other info grew out of a very active knitting community in Australia as well. Accessories included a plaiting feeder and a stitch ditcher, and homegrown freeware was shared for printing reader cards. To this day Wincrea is still available for downloading to the E6000 machines. Others have followed ie Journal 6, which is now available as freeware, the repository may be found here. Wincrea remains the easiest to use. Supported formats are CUT/ Dr. Halo, BMP, and WMF (Windows metafile). At the present time, downloads of patterns are only possible in machines that allow PC downloads with later manufacturer chips and larger, 32K memory.
CUT files have a separate palette, the program reads the palette if it is found in the same folder as the CUT file. If the program palette is not the same as when the pattern was saved previously, the colors may not be as expected.
Some scaling may be done within the program. Files may be saved in both CUT and BMP formats.
If one chooses to, saving palettes is done by using specified names in the 256 color PAL (Dr. Halo) format.
When a design is uploaded to Wincrea step one is to have it read the correct number of needles and the number of colors used. If it does not recognize a com port, it will give an error message, and com-ports can be reassigned using the E6000 settings option menu. Once it recognizes the port, then it will come up with the download to E6000 option, and will also give an estimated time for the download to take place. It walks the user through how to prepare the machine for download. Two things are required: the console’s correct buttons need to be pushed to get to a “PC start” programming position, which verifies the machine itself is capable of accepting the download,  and the switch must be in the download position. If things work, a beep follows once the download option is selected and the LED screen on the passap actually shows a progress bar for downloads that take longer than a few seconds.  If the pattern has indeed downloaded successfully, the console beeps again and then follows up with questions on whether you want to alter the design in any way from its built-in additional options, what knitting “technique” you want to use, how many needles you want in work on either side of 0, and if you want to place the design in any particular place on the bed. It is possible to continue programming, either segments or different patterns altogether. At that point, cables are swapped out or if using a switch box, providing the operator remember to flip the switch to the knitting position, things should go smoothly. If one has forgotten to change to the knit position, the machine will beep and give you a totally different error message and beep. The Passap console has a whole series of lovely beeps, for all sorts of prompts and reasons that may be at times downright infuriating to people using the machine.
Passap color changers were available as add ons for automatic sequential color changing for up to 4 colors, are placed on the right rather than on the left as in Japanese machines, so programming downloads and first preselection rows must take that into consideration.
As CUT files proliferated, shared by Madag and individual designers, or as knitters wished to create their own, interest grew in creating, reading, and converting formats. Programs like Dr. Cutter for doing have long since become unavailable. Stitchpainter’s early versions were able to save CUT files, I have not been able to verify online whether the present version still does.
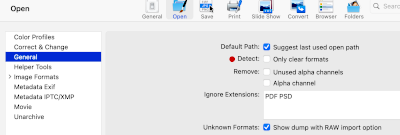
Present-day options for opening and converting CUT files include for purchase Graphic converter. On my new M1 iMac, I had issues with CUT files not opening. The software developer was responsive to questions and troubleshooting, a nod of thanks to Thorsten Lemke. The advice: please download the latest version http://www.lemkesoft.org/beta.html, and make certain that in preferences, the box aside Detect Only clear formats is uncheckedand for solving the same issue in XnviewMP, a nod of thanks to Pierre-e Goulet for the solution:  in Settings, General, make certain that  Show all graphic formats is checkedXn Convert allows for easy batch conversions.  I did not encounter any issues on Mac.
As these programs have grown in complexity, some of the CUT files open in strange colorways, need adjustments and editing, possible within the above programs, for increased or any visibility while some are viewed clearly. Batch conversions to other formats are possible, performed easily and quickly.  A Windows-only image conversion program for exploration: Konvertor
DAK proprietary formats ie STP and PAT to my knowledge are not readable by any program outside the DAK universe.
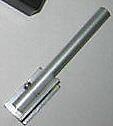
Softbyte now offers a similar setup with a switch box allowing for download to a console capable of accepting PC downloads, the E6000 Link 2. “This link has a switch that enables the selection of either downloading or Interactive Knitting. It means that the cable can be kept permanently attached to both the E6000 console and bed. This avoids the need for repeated connection and disconnection of the link, and therefore also avoids wear and tear on the E6000’s sockets. The other links do not have the switch and need to be disconnected after downloading, so even if Interactive Knitting is not required, we recommend using the Serial E6000Link 2.”The Softbyte links for Brother machines include versions for downloading and uploading with a Brother PPD or to machines that take a pattern cartridge. The magnet arm for interactive knitting is not included with all, may be purchased separately. “The USB Brother Link 5 enables patterns to be downloaded from DesignaKnit, and any 900 series patterns to be uploaded to DesignaKnit. The 900 series pattern numbers are those loaded from another source into your knitting machine or PPD (e.g. from the PPD, Brother FB100 Disk Drive, or DesignaKnit). This link supports downloading and uploading with the KH930, KH940, KH950i, KH965i, KH970, and with the PPD using Cartridge III in KH900 mode, or with the PPD using the CK35 cartridge. This link is identical to the USB BrotherLink 1 except that it includes a magnet arm that attaches to the carriage and thereby enables Interactive Knitting with any knitting machine, including non-electronic ones.”
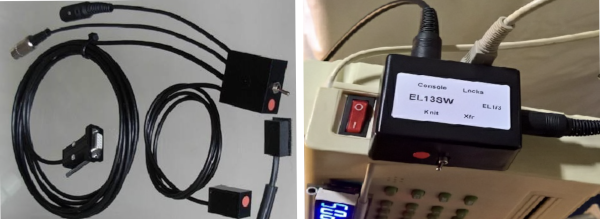
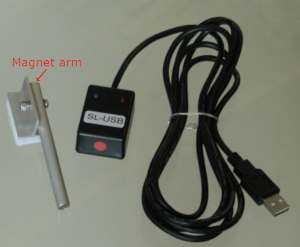
The ScreenLinks provide row by row instructions and audible memo alerts for non-electronic machines or anyone using mylars, built-in patterns, or other software for the pattern downloads. They are not able to download patterns. The Universal Link for DesignaKnit allows one to connect any knitting machine, including plastic beds, to the DesignaKnit interactive knitting as opposed to knit from screen function. The USB cable is attached to your personal computer. The other end of the cable is attached to the mainframe of your knitting machine, the magnet to the carriage or lock of your knitting machine. The cable senses the magnet as it moves past it, and as it does DesignaKnit will advance the pattern one row. From the manual: And shown applied to a plastic bed machine @ https://www.allbrands.com/
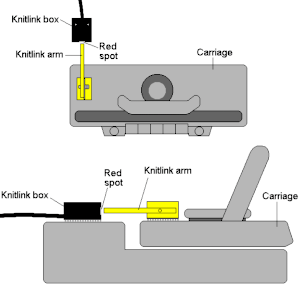
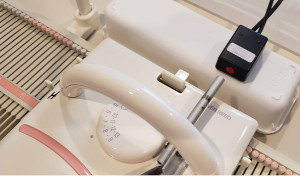
Garment shapes filled with patterns may be developed in DAK, the cable allows one to use DesignaKnit as a knitleader or knit radar device increasing the capabilities of the knitting machine when shapes are created illustrating pixel-based increases and decreases, akin to what could be drawn on graph paper with each cell representing both a single row and a single stitch, and connecting dots placed on the basis of gauge calculations.
Having a small supply of self-stick velcro tape to put on each of your machines, allows for the cable and magnet to be moved as required.
A second knitlink arm appears to be required for the use of the lace carriage. I would guess it might be attached to a second knit carriage as well if one is choosing to knit with 2 knit carriages selecting needles.DAK cable manuals published by Softbyte. Full Dak software manuals are not available until the program is purchased. There are 5 program modules. Some of the user experiences, answers to questions, and related knits may be found in the FB associated group.
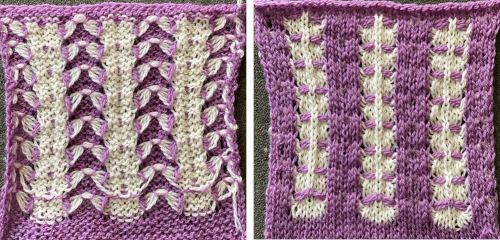
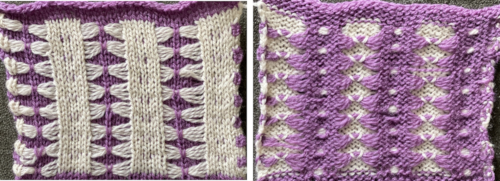
Bowknot aka butterfly or dragonfly stitch in more than one color

There has been a resurgence of interest in this stitch in the FB machine knitting group and discussion exploring a variety of methods for creating it. The inspiration, taken from a commercial sweater-knit:   For some single-color variations see Bowknot/ Butterfly stitch on the machine and No longer a mystery pattern.
I program repeats whenever possible, and find it useful in eliminating errors, particularly in longer pieces. My first experiments for this fabric were conducted using the fair isle setting, which is essentially a slip stitch automatically working 2 colors with each pass of the knit carriage single bed.
Slip stitch patterns with hand-transferred stitches, single bed explores some of the methods for bringing slip stitch floats to the knit side of these fabrics, which is part of the hand techniques necessary to achieve the colored versions. As with any knit fabric yarn qualities, color contrasts, and tolerance for proper stitch formation are all variables.
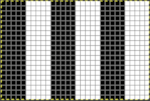
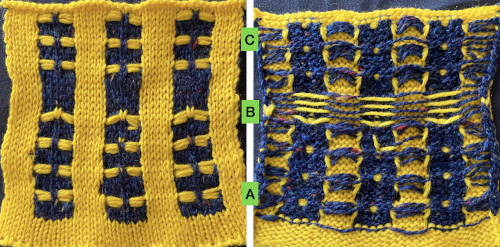
For vertical columns in 2 colors, it is only necessary to program a single, fixed row with a punchcard or electronic, or choose any pixel-based repeat akin to this with full pairs of alternating stripes. I like to plan with selected needles at each end of the sample With the machine set to FI, needles not selected will knit a ground color, while selected needles will knit the color in the B feeder. It is easier to manipulate the slip stitch floats from purl to knit side if working in the non-selected groups of needles. Having the columns in odd numbers of stitches makes it easier to handle steps that require finding the center needle in each group if one is wanting to maintain symmetry. In my first test, I manipulated only the selected groups of needles to work the float movements, leaving the floats from the other color undisturbed, which makes the process far more convoluted than it needs to be. In this and the subsequent sample, I manipulated the left and right-hand pairs of floats moving them to the front of the knit, leaving the choice of what to do with the remaining center floats. In A they were brought up on top of the center needle in E position before knitting the next row. In B they are lifted into the hook of the needle and brought out to the B position so that the stitch is knit in color 1, while in C the remaining single stitch floats are simply left alone. In a couple of spots the yarn split, getting hooked up creating bleed-through, and what would result in an issue if that happened on the group of floats that were to be moved. As stated, the process is easier and quicker working on non-selected groups. Above, the yellow yarn was thicker than the blue. To maintain proper color selection in the non-selected column, the center needle needs to remain in the B position, with the slipped stitch forming floats below it before the next row knits. If the needle is brought out to E, it will knit in the contrast color, forming floats in that color on the purl side, and a knit stitch in what was planned as an all-solid column on the knit. The results are seen at the top of the first sequence in the swatch. I chose to limit my number of floats to 4 to keep the process manageable, moved stitches on the left of the center needle to the front of the knit, and then followed with those to its right. One of the many things to explore in hand technique fabrics is finding a way to handle tools that may be more comfortable than others, practicing on single blocks of color first can help establish that. Below both yarns are equal in weight and thinner. The floats formed by the color in the B feeder are also hooked up on the center needle in each vertical group in that color, forming a pattern on the purl side as well. The needle position for selection for B feeder yarn also needs to be maintained. Bringing the needle out to E ensures it will knit on the next pass. In both of my tests, the slip stitch floats on the knit side lie more horizontally than the lifted-up floats on the purl.   Other ways of working the fabric, along with a history of the FB thread offered by Claudia Scarpa including a single bed slip stitch version with an English downloadable PDF http://ratatatata.it/dragonfly/.
Her youtube video illustrates a different way of managing floats than mine.
JuliKnit offers 2 videos knit on Silver Reed 1, and 2. Both are knit using the ribber, the first method uses holding to gather loops on each of the beds, and the second begins to address automation for needle selection on the top bed using DAK, with the selection on the ribber remaining manual. The stitch illustrations generated in DK offer knit stitch simulations such as these Executing her versions on a Brother machine requires some interpretation. The fabric is constructed using the ribber in conjunction with the main bed. The vertical columns are 5 stitches wide.
Colors are worked one at a time. If a color changer is to be used, an even number of rows would be required for each pattern segment. For 4 floats followed by an all-knit row, the repeat would be 5 rows high, so one consideration would be operating with the second color from the right, requiring free passes. Studio machines release the top of the knit carriage at an angle from the bottom, so that explains the move seen in the video for the carriage to be moved to the right. Brother machines use the slip stitch setting in either or both directions, to achieve that. Using both buttons avoids any confusion. All needles in use must be in the B position for the “free pass” to avoid dropped stitches. The number of rows gets adjusted in the videos eventually to 6.
When working on the top bed, the ribber is set to slip both ways.
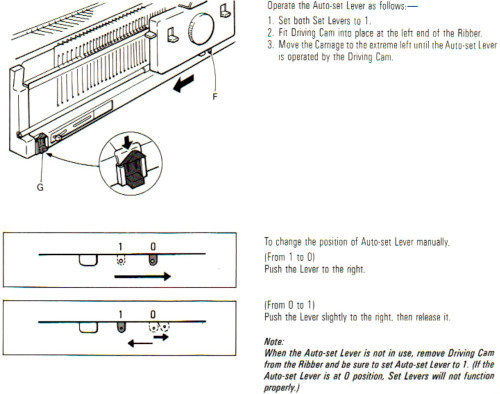
For those unfamiliar with Studio settings a brief review: the Studio SRP60N ribber introduced the option for knitting emulating the lili selection in Brother. The grey plastic piece on the left of the studio ribber, the autoset lever, when cleared would essentially duplicate setting Brother levers to slip manually in both directions, clearing it again would return it to knit. Cast on either EON or EN rib. Transfer needles in a 5X5 rib beginning and ending with a single needle in work on the ribber on the far left and right,  setting up the initial needle arrangement for the fabric. Black dots represent needles in work on both beds, and the red ones the initial needles that will be worked in the holding position on the top bed. The video knits each color for an even number of rows. Bring the first and last needle into work on the ribber before knitting each row. The remaining stitches are knit only on the main bed. The knit carriage is set to knit, the ribber to slip in both directions. Pick up the chosen color on the left, and knit for an odd number of rows, when the carriages are on the right, push held needles back to work position so they will knit on the pass back to the color changer. The ribber knits the next color. A review of the Brother ribber carriage for those not familiar with it COL: the main bed will now slip in both directions, set it accordingly. The ribber only knits. The center needle on the top bed that held the butterflies is transferred down to the ribber, illustrated in the red dots over black ones. The center needles in the blank areas on the ribber, blue dots, are brought up to hold, the ribber levers are set to knit in both directions, holding levers are set to hold in both directions as well,   knit for an odd number of rows, with carriages on the right, push held needles back to work position so they will knit on the pass back to the color changer. COL: the knit carriage changes back to knit settings, and the ribber slip setting in both directions is restored. The center stitches that formed ribber butterflies are transferred up to the top bed, and needles at the center of the blank areas on the top bed are brought out to hold. The color is changed, and the process begins again. My first efforts were met with dropped stitches after a few rows and expletives. My second effort fared no better, I simply could not avoid dropped stitches on either bed, perhaps because of my yarn choice and the small tension it required. Working on the single bed once more, using the slip stitch setting and knitting one color at a time, I achieved a fabric more similar to the original photograph. The chart reflects the number of needles in my test swatch, with a 2 knit stitch border added on each side Each color knits for 4 rows. At the end of each 4-row sequence, the non-selected needles allow for manipulation of the floats. The transfers in the piece begin on row 5. Before the next row is knit in the alternate color, the slip stitch floats are reconfigured, bringing stitches 1 and 2, 4 and 5 in each group to the knit side of the fabric, leaving the center floats undisturbed. Bring the whole group out to the E position so they will form knit stitches with the first row of contrast as the carriage moves to the right. Knit 4 rows. The carriage will once again be on the left unless 2 carriages are in use from opposite sides. The center needle in each group of 5 will be left unselected. Lift floats up onto that center needle, and bring it out to E position so that it will form a knit stitch in the next color to be used. The final result is closer to the original


Revisiting use of lace patterns Studio vs Brother machines

2011: There are several brand KMs still around and in use, most are no longer being manufactured. Questions often come up on how to use one KM brand pattern card on another. Card readers inside the machine are below eye level, so exterior number/other markings on cards or mylars reflect that, providing the knitter with a visual cue as to where they are in the repeat. If machines pre-select, the needle selection may not bear any relationship to the actual design row on the punched card or mylar as opposed to what one sees. In addition to this variable in lace one often has 2 carriages in use. It is possible to develop cards etc. from lace hand knitting graphs, but there is enough going on so a good place where to start experimenting is with pre-drawn ones. Lace preselection on any single row may have no obvious relationship to where the lace hole will ultimately end up.
Here are some random facts gathered from both sources and experience, they are applicable only if the knit carriage is set for plain knitting and no other function ie. slip or tuck is involved; plain knit rows do not advance the card reading mechanisms. In mixed structure fabrics, the rules change.
The Brother and Toyota lace cards can be used on studio punchcard machines as long as they are patterns which have 2 blank rows after each transfer sequence
Brother and Toyota have u shaped arrows to identify when to knit with the knit carriage, both brands read cards 7 rows down
The first row on Brother is transferred from right to left, while on Toyota it is transferred from left to right; Brother and Toyota cards are interchangeable provided the card is mirrored vertically (or a simple cheat: use carriages on opposite sides of usual)
For Studio knitting find the row number of the U shaped arrow and circle the 2nd and 3d row below that row that number to identify rows in which carriage is changed/set to knit
Brother knitting ends with 2 blank rows
Studio starts with 2 blank rows
on Studio begin brother card by locking card 4 rows before row 1, on row 3
Brother/Knitking lace carriage does not carry yarn, does not knit or trip the row counter; the stitches get transferred in the direction that the lace carriage is being pushed
Studio/Singer has a lace carriage available that transfers as it knits; on more complex laces one is sometimes instructed to set the carriage not to knit for a specified number of rows, the yarn may be removed, other adjustments are often required
though Studio and Brother lace cards are not directly interchangeable; aside from the numbering issue the transfer method is different, so a studio lace card working on a Brother or vice versa is a happy accident and likely to result in different fabric
Brother information is applicable to its new clone, Taitexma
A few references :
Machine Knitting: the Technique of Lace by Kathleen Kinder
Knitting Lace and A Machine Knitter’s guide to Creating Fabrics by Susanna Lewis
Machine Knitting: the Technique of Pattern Card Design by Denise Musk
John Allen’s Treasury of Machine Knitting Stitches
The Harmony Guide to Machine Knitting Stitches (their Colorful Guide to Machine Knitting Stitches does not include lace)
322 Machine Knitting Stitches (Sterling Publishing,1988)

2013 In this instance I am exploring the use of punchcards that are designed for transferring and knitting at the same time as seen in Studio simple lace in machines such as Brother, where the operation is the result of using 2 different carriages.

The studio card used the resulting fabric The method: both carriages are used to select needles, use lace extension rails on both sides of the machine. Cancel end needle selection on knit carriage underside if possible, or push end needles back manually if needed to avoid their corresponding stitches being transferred throughout the piece. Set up for knitting the pattern as usual, punchcard row 3 (marked in pencil) becomes row 1 of the design when the above card is used in the Brother machine. The arrows always indicate the direction the lace carriage will move across the knit to make transfers in the direction of that same arrow.

  1. 1. begin pattern knitting with COR, card locked, change knob on KC, no cam buttons in use. This will result in needle selection, but the fabric produced is in stocking stitch. The lace carriage is engaged on the opposite side, and moves toward the knit carriage to make the transfers, as it travels across the bed the now empty needles will once again be in the B position.
    2. (lace carriage) travels back to the right and is released off the machine (same needle selection appears, but those needles are now emptied of yarn)
    3. COL: KC moves left to right, knitting the single row, all needle hooks are now full, and new needle selection occurs
    4. LCOL: makes transfers toward the knit carriage, and then makes a second pass to return to the opposite side and is released.
    These 4 steps are repeated throughout the knitting, with the knit carriage knitting and selecting, the lace carriage following its selection to make the required transfers. Not every transfer row will match the direction of the arrows as marked on the studio punchcard.
    If there is no pattern needle selection with the KC pass on any row(s), continue to knit until there is needle selection, and begin the process using lace carriage to transfer toward the knit carriage from the opposite side and once again releasing it after its second pass.
    A caution: hesitation and reversal in the movement of carriages in Brother machines advances the card in the reader, and results in mistakes in patterning; if errors are to be corrected or such movements need to be made for any reason, it is worth locking the card, checking row numbers, remembering to release the card before continuing, and visually checking pattern after the next knit row.

2013: While working out yet another HK to MK lace pattern, I sorted out the following method for using Studio simple lace on the electronic KM. It is a method that does not work on the Brother punchcard to produce the same fabric, however; on punchcard machines, as either carriage is moved to select from the opposite side of the bed, the card will not advance on the first pass, interrupting selection. I tried a swatch and got a very different lace design; depending on the starting pattern the results may be interesting (do not use elongation), but not the ones intended to match any original.
The knitting samples shown below were knit on a Brother 910. On electronic machines, as seen in previous posts on knitting with 2 carriages, the mylar (or otherwise programmed) repeat advances a row with each pass of the carriage, no matter on which side of the bed the pass originates. Dropped stitches are harder to repair in these fabrics than in patterns for multiple transfer lace (there knitting can be unraveled to the start of a sequence where 2 or more knit rows usually occur), so checking transfers, gate pegs, and adjusting stitch size and weights matter even more. There is no need to mirror the image horizontally if using a mylar; draw repeat as it is on punchcard, all variation buttons down
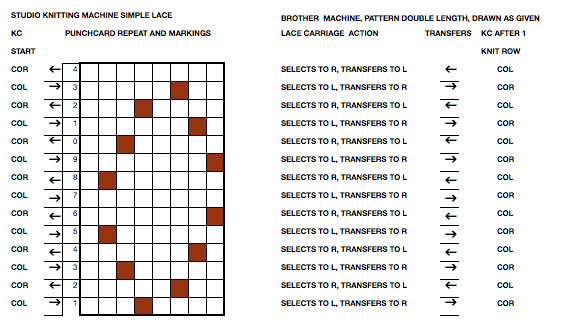
start knitting with KC (knit carriage) on left, Lace Carriage (LC) on Right program pattern double length on the first row the LC selects, the next row it will transfer; LC always makes 2 passes first toward the KC, then away from it, even if those 2 rows in repeat have no needle selection. It is then removed from the bed to be returned to the bed on the opposite side after the knit row with KC that follows. In summary:
KC knits a single row to the opposite side
*LC is placed back onto machine opposite the KC to make 2 passes, is removed.
KC follows with a single knit row to the opposite side*.  * to* steps are repeated
3 total carriage passes complete one row of knitting.
The preselection is repeated on the empty needles where stitches were just transferred.
The chart below shows actions and placement of carriages  This sample was knit beginning with lace carriage on left, as can be seen in marked areas, the alternating repeats have a different quality in the sets of transfers marked red vs green 
The successful swatch knit beginning with KC on the left, and LC on the right in the method described above April 2019 I attempted the same repeat on the 930 with img2track. I mirrored the repeat horizontally and elongated it X 2 prior to knitting it. The arrows in the chart indicate the movement of the lace carriage, beginning with the first preselection row from the left I had issues with the proper needles being selected (proofed also in fair isle), but with random stitches not being transferred. A switch in lace carriages, needle retainer bar, yarn, did not eliminate the problem. I finally had to perform some of the transfers by hand. This swatch also shows the joy of missed dropped stitches in lace knitting, the yarn used is a thin acrylic.    Different year (2023), even thinner yarn, with the image mirrored horizontally on the 930 using the method described above, the new knit proof of concept:  

An interesting method using 2  electronic lace carriages found on youtube. The repeat used in the video is a variation of the one used in my sample above, programmed using img2track. The repeat is mirrored prior to knitting, there are extra knit rows to allow LCs to continue the pattern from alternate sides. The machine being used appears to be a 930. The requirement for mirroring of any pattern may depend on the model of electronic KM used to knit the lace and whether the download appears as drawn on the purl or the knit side of the piece  A comparison of my repeat using a single LC and the Knitlabo pattern expansion  including memo options for use with 2 lace carriages

Studio transfer lace on Brother bulky and standard machines
Studio multi transfer lace punchcard use on Brother punchcard machines
112, 113  113 has single rows between repeat segments, requiring added manipulation of the knit carriage
the 24X48 png
On a 930 with img2track use the # 1 variation key with the pattern repeat as shown, or flip horizontally before downloading.
Ayab knitters before the latest software release: mirror repeat, tile repeat width across the number of stitches to match the number of needles to be used in your final piece. There will be no needle selection at the end of each sequence, signaling the need to release the LC, knit one row, and continue with LC brought to the opposite side. This is a very fussy knit. At several points, it is loops formed on previously empty needles that get transferred rather than full stitches. They love to get hung up on gate pegs. It took a significant amount of time to produce a proof of concept swatch. It is a lovely lace. Knitting it on a punchcard would give one the luxury of frequent pauses and markings to make for additional clues
LCOL  9 passes, release
KCOR knit one row to the left
LCOR 7 passes, release
KCOL knit one row to the right
LCOL 5 passes, release
KCOR one row to left
LCOR 3 passes, release
KCOL knit one row to the right
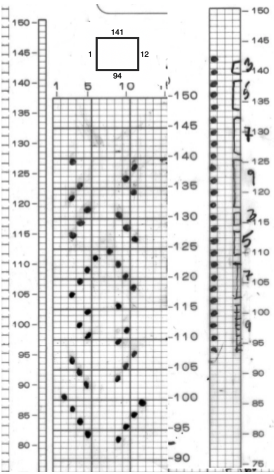
In # 112 there are the standard pairs of rows between transfer segments. The punchcard pattern is composed of two 12-stitch matching vertical repeats, here 1 of the two halves is shown rotated counterclockwise. The additional extra knit rows in the Studio design have been eliminated. If knit as given this overall appearance will be different than that in the swatch pictured in the source. Brother machine knitters would need to track the midpoint location in the design, after the first 50 carriage passes, to place those extra knit rows, making six passes with the knit carriage rather than the standard 2. The 12X104 png, on a 930 with img2track remember to use the # 1 variation key  If one makes a choice or is required to repeat the width of the design to the number of needles used on the needle bed, it is easy to accidentally use the pencil in a paint program when working between windows. This test swatch clearly shows selection errors on a side edge only.   One way to check the repeat, handy when repeats are much larger or visually confusing: open the faulty one in Gimp, working in RGB mode, select by color and change black pixels to red, and make the white background color transparent by using Layer/Transparency/Color to Alpha. Open a new image, and carefully draw the design in repeat once more in the same location as in the first work window. Copy and paste the red pixels onto the black, revealing the missing pixels and the associated transfers on that edge.  Fill red pixels with black, return the image to BW indexed mode, and save the new PNG to knit the piece.  Redesigned for use on Brother machines with the LC operating from the left and the standard 2 knit rows between each design segment the 24X56 png knit mirrored horizontally on the 930, using a 2/18 wool comparing both versions a cousin version executed as a bulky knit

Yet another method, illustrated in Swatches based on adapting random online published repeats
Mesh experiments using thread lace punchcards. This image also illustrates the yarn lines created in the eyelet spaces: a single thread when single rows are knit between repeats and twisted double threads when 2 rows are knit between transfers.  A later experiment Using StitchWorld #545    

Studio multi transfer lace punchcard use on Brother punchcard machines

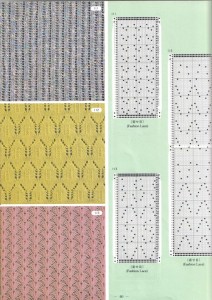
Some Studio punchcard patterns

studio cards

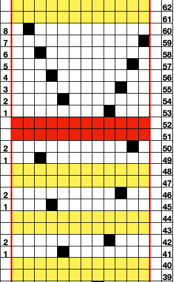
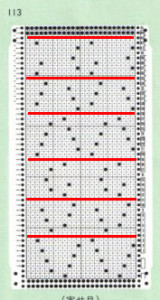
Pattern 113 (bottom left) has a single blank row between groups of multiple transfers (indicated by punched holes). These correspond with single rows knit at the completion of each set of transfers. They are highlighted with red lines in the related punchcard image below.

studio113crop

Essentially the same repeat, found in a different publication source, was interpreted for use in the 910 electronic in my previous post, nearly a year ago. Pattern 112 (middle left on the first image) has some noticeable differences. To start with, at the end of each set of transfers, there are 2 blank rows (red), as opposed to one in #113, making it suitable for use on Brother KMs almost “as is”. Studio punchcards for this type of lace generally begin with 2 blank rows (blue highlight). Brother cards generally begin with the first row of punched holes for row 1 of the pattern. The Studio first 2 blank rows would normally be moved up to the top of the punchcard if punching your own, or simply if the card is pre-punched, a different row # selection may be chosen for the first selected row.

studio112A

In the middle of the repeat, where the first set of transfers is completed, there are several (six) unpunched rows,

studio112b

and at the punchcard top, there are 4 blank rows. These last rows, added to the first 2 rows (blue) will total another set of 6 unpunched rows at the top of the alternating pattern repeat. These multiple blank punchcard rows result in knit-only rows when using Studio KM. In Brother, the knit carriage does not advance the card unless cam buttons are in use ie for tuck or slip settings. Generally, if multiple plain rows are desired, this is indicated in Brother appropriate row markings on the card, and need to be tracked by the knitter.

Lace cards generally require few punched holes but can be considerably longer. To insure 2 rows between each set of transfers I highlighted them on my card in light blue pencil, helping me place repeats properly. Following the highlighted markings above, the first 2 blank rows (blue) are dropped, a set of 6 is reduced to 2, and the top 4 (Brother lace usually ends with 2 blank rows) are reduced to 2 as well. My resulting punchcard is shown here in 2 segments that were to be joined with snaps for continuous use. I found in knitting the samples, that I was having a problem with the single row near the join being read correctly when using only snaps, the problem was solved when I taped the 2 cards together across their width. This particular punchcard roll was sold as for “Brother”, but markings are for Studio. Brother selection row 1 is marked on right. Thick pencil markings indicate the viewable point where rows are knit at the completion of each transfer sequence. These make it easier to know where to roll back the card to knit rows, as opposed to relying only on any of the row number markings. I prefer to unravel down to knit rows when correcting dropped stitches or other “mistakes”.

whole_card

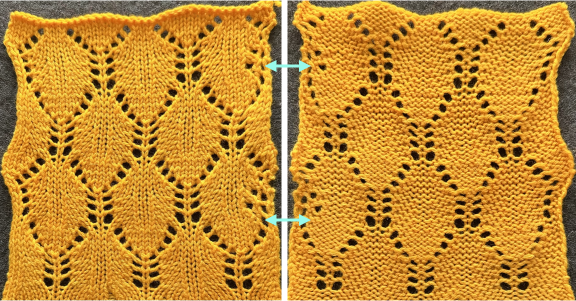
I omitted the extra knit rows (4 out of a series of 6) in my own sample (shown lightly pressed). This eliminates the visible break between eyelets in the knitting reference swatch jpg.

studio09

A WIP using the card showing the differences between “blocked” and not may be seen in the later post.


Studio transfer lace knit on Brother 910

Eons ago I had “saved” a random copy of a japanese punchcard pattern in the someday I will figure it out pile. I was attracted by its opennes and what appeared to look like ladders as well as holes in the small B/W photograph. I have more experience in knitting and understanding of lace now, and in the process of studio clean up and paper possible recycling I found my “future project” and thought I would “tackle” it

the card

As can be noted in numbered markings, the card is a studio lace card. In addition, between series of transfers there is a single blank row = a single row of knit as opposed to the 2 rows commonly seen in brother’s kms’ lace

my mylar repeat, with notes on R sidebar as to # of LC passes, rows knit

the method: with no repeat adjustments or conversions

I began with lace (LC) carriage on left (OL), knit  (KC) carriage on right (OR). Because a selection row is required for the first transfers row to occur, I added one row to each of the suggested lace pass sequences marked on the punchcard. The LC as a result travels an odd number of rows. It will begin on the side opposite from, and move toward the KC. At the end of each of the odd numbered row sequences it will reach the same side as the KC. At that point there will not be any needle selection. The LC is released from the needle bed, and the KC knits only one row to the opposite side and remains there. The LC returns to the bed opposite to the KC, and the sequence is below is repeated:

LCOL  9 passes, release 
KCOR knit one row to left 
LCOR 7 passes, release
KCOL knit one row to right
LCOL 5 passes, release 
KCOR one row to left 
LCOR 3 passes. release
KCOL knit one row to right 

I used a waste yarn acrylic for my swatch, which became scratchy, flat and stiff, losing any texture when pressed, and shrinking a bit so as to almost looking felted, yet another reminder  test small swatches fefore committing to larger pieces.  Here is the result

knit side

purl side

a new day, a different fiber, the joy of not noticing dropped stitches

“unblocked”, rayon yarna bit closer, after light pressing

for sample knit on 930 with img2 track please see later post 

Studio simple lace on Brother electronics

this method works for studio simple lace patterns, wherein a single pass the stitches are both transferred and knit. There has been information published on using Studio punchcards on Brother punchcard machines using the KC to select, followed the LC, each making single passes. My two previous posts on the topic: 2011/05/18/lace-cards-use-on-the-brother-260-bulky/ and  2013/03/17/studio-simple-lace-punchcards-used-on-brother/.
While working out yet another HK to MK lace pattern, I sorted out the following method for using Studio simple lace on the electronic KM. It is a method that does not work on the Brother punchcard to produce the same fabric, however; on punchcard machines, as either carriage is moved to select from the opposite side of the bed, the card will not advance on the first pass, interrupting selection. I tried a swatch and got a very different lace design; depending on the starting pattern the results may be interesting (do not use elongation), but not the ones intended to match any original.

The knitting samples shown below were knit on a Brother 910. On electronic machines, as seen in previous posts on knitting with 2 carriages, the mylar (or otherwise programmed) repeat advances a row with each pass of the carriage, no matter on which side of the bed the pass originates. Dropped stitches are harder to repair in these fabrics than in patterns for multiple transfer lace (there knitting can be unraveled to the start of a sequence where 2 or more knit rows usually occur), so checking transfers, gate pegs, and adjusting stitch size and weights matter even more. There is no need to mirror the image horizontally; draw repeat as is on punchcard onto mylar

start knitting with KC (knit carriage) on left, Lace Carriage (LC) on Right

program pattern double length
on the first row the LC selects, the next row it will transfer; LC always makes 2 passes toward the KC, even if those 2 rows in repeat have no needle selection, and is removed from bed to be returned to the bed on the opposite side after the knit row with KC that follows
KC knits a single row to the opposite side
LC is placed back onto the machine opposite the KC to make 2 passes
KC follows with a single knit row, and the last 2 steps are repeated
3 total carriage passes complete one row of knit
the chart below shows the actions and placement of carriages

this sample was knit beginning with lace carriage on left, as can be seen in marked areas, the alternating repeats have a different quality in the sets of transfers marked red vs green

the “successful” swatch knit beginning with KC on left, LC on right in the method described above

December 7, 2018: an interesting method using 2 lace carriages found on youtube


Studio mylar use on brother machines 2

In a previous post I addressed some of the issues involved in using the studio mylars in Brother KMs. I have an enormous store of them from back in the day when it was only possible to have single patterns occupy a fixed number of rows, while the remaining surface for those rows was unusable. This fact changed when the company produced the EC1. I revisited this topic after a forum question on the subject. It would be convenient to produce consistent results with the Studio brand, and be able to use my stash of them as well.
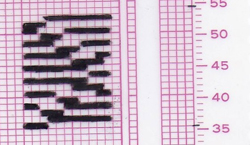
It is interesting when one is trying to figure something out how sometimes the obvious may be missed. Instinctively this time, I simply lined up the bottom design row of both mylars before drawing the set line, disregarding the difference in length between the 2 mylars below it. This bypasses the 3-row difference in programming rows suggested in my previous post completely, while the shorter distance below the set line to the reader did not prove to be a problem I had tested template markers on Brother mylars when ink pens were discontinued and I had no luck with permanent markers, found they shed a bit and pencils tips broke easily, while I could not be as neat in rendering small markings as simply by going the route of using a number 2 pencil on the mylar’s back ( I prefer the Mirado Warrior HB 2). Drawing with enough density “within the lines” on mylars is rendered far easier with one of these templates, at one point made available from Brother. Similar ones may sometimes be found in stationary or art/ drafting supply stores. The images below show my first “new” tests: on the left, I drew with the template marker over previous pencil markings, the squares repeat over # 36 was made with multiple layers of a sharpie (which smeared even after what would seem like adequate drying time), the ones over #42 are made with the template marker. The sharpie did not get scanned properly by the reader, all other marks did. There is a guiding pencil line placed where the set line familiar to Brother users would be. In the first narrow column to the right, the pencil marking corresponds to the first visible row (design row 1 in reader). The column on the far right (absent from Brother) could be used for additional cues in knitting ie. color changes, knit rows between lace transfers, etc.

the template markers are easily available here in the US, for a little over $ 4 now; frequently they are found in quilting departments of fabric stores. I am not certain which specific brand mine is, but this is what it looks like

the “pencil” that appeared to work when used on the back of both mylars is the Pentech rubberwriter, which seems to no longer be available (rubber coating is on pencil exterior; results  were random on Studio mylar)

When used on the respective brand machines, the Brother reader scans 13 rows below eye level outside the machine, while Studio scans 10 rows below This explains why the columns intended for memos extend up and beyond the last row which can have cells marked for pattern in each brand.

2021_ some FB knitters have mentioned having success with using whiteboard markers to make readable and removable if needed marks on Brother mylars

I had some erratic results as seen in the last post. Here a small success led to a bigger trial (template marker over motif previously drawn with studio electronic pencil) and I ran into a different problem: bands of rows on the mylar did not select; this may be seen in the image below (testing repeats for any stitch in FI makes drawing or punching errors easier to visualize), and recurred in a different area of the card, while at its very top nothing got read ->needles selected

———-

a couple of times over the decades of my knitting with Brother mylars I ran into this specific problem for no apparent reason, so I tested a different Studio mylar sheet, toward the top, and both the template marker and the rubber writer got to read/knit correctly

“going bigger” again, the pencil did not get read, while the template marker did

playing with a slip stitch on another part of the sheet (marker)

the “patterning errors ” in the image above (extra brown stitches third white stripe from the bottom of the swatch) were actually due to a bit of eraser left after its use on the mylar in the blank area of the card.

——-

In summary: there have been good results in my trials in using the template marker both on top of already rendered electronic pencil drawings or on previously blank sections of Studio mylars and subsequently having them read by my Brother 910, with limited results in having small repeats read when drawn on the back of the mylar in pencil, but not with larger motifs. There have also been some problems that are not immediately explainable.

Studio simple lace punchcards used on Brother

My previous post and a few others addressed some of the issues in knitting lace and the differences between machines. In this instance, I am exploring the use of cards that are designed for transferring and knitting at the same time.
Brother transfer lace is the result of using 2 different carriages.
The studio card used  the resulting fabric

To knit using LC for transfers:
cancel end needle selection on knit carriage underside if possible or push end needles back manually if needed to avoid their corresponding stitches being transferred throughout the piece; set up for knitting the pattern as usual, punchcard row 3 (marked in pencil) becomes row 1 of the design when the above card is used in brother machine; the arrows always indicate the direction the lace carriage will move across the knit to make transfers in the direction of that same arrow
begin pattern knitting with COR, card locked, change knob on KC, needles will be selected  for transfers moving to the left
release punchcard
LCOR moves to left transferring and is released off the machine (same needle selection appears, but those needles are now emptied of yarn)
COL: KC moves left to right, knitting the single row, all needle hooks are full, and new needle selection occurs
LCOL: makes transfers in the direction of the arrow, and is released
These steps are repeated throughout the knit, with the knit carriage knitting and selecting, the lace carriage following its selection to make the required transfers
If there is no pattern needle selection with the KC pass on any row(s), continue to knit until there is needle selection, and begin the process using lace carriage to transfer in the direction of the arrow now in view above the card reader, and once again releasing it after a single pass
A caution: hesitation and reversal in the movement of carriages in Brother machines advance the card in the reader, and result in mistakes in patterning; if errors are to be corrected or such movements need to be made for any reason, it is worth locking the card, checking row numbers, remembering to release the card before continuing, and visually checking pattern after the next knit row.

Another option is hand transfers:
KCOL: lock the card on the appropriate row, row 3 if using a Studio brand one
The KC is set to knit, with no cam buttons pushed in. As a result, there will be needle selection, but no patterning.
KCOL: make the first selection row left to right, release the card, and set it to advance normally, disregarding arrow markings on the card
KCOR: transfer stitches on preselected needles onto adjacent needles to the left, away from the KC, and knit back to the left 
KCOL: transfer preselected stitches to the right and follow with a knit row to the right.
After each selection row hand transfers continue to be made away from the knit carriage, with transfers on odd-numbered design rows toward the left and on even-numbered rows toward the right.
Blank rows on the original design repeat will have no needle selection or hand transfers, the KC continues to advance the card and knit, producing stocking stitch for the necessary number of rows.
Before any knit rows when using tools for hand transfers, check that needles have not been accidentally returned to the A position to avoid ladder formation instead of eyelets or proper patterning.

Using Studio mylar sheets on brother KMs 1

Factory “drawn” Studio mylar sheets ie for 560 model KMs will work on the Brother 910 with some adjustments. Just as when using punchcards, the card reader drum as well as the mylar scanner “see” a different row as row 1 than the alternate brand KM.
The image below is a quick scan of positions of black/white squares on Studio mylar with a superimposed, unmarked one for Brother. The holes for movement of the mylar occur in just about nearly the same location. The first issue at hand is to draw a set line in the proper position for Brother pattern reading (traces of pencil line on the red studio mylar may be seen underneath the blue brother markings). Some machines are fussier than others with the set position, and I found drawing the line by placing the denser studio card over the brother one on a light_box surface made that very easy.
The second issue is that as can be seen above, the first design row on Brother is actually 3 rows below that on Studio, so when programming the repeat 3 rows should be added to the first row of studio repeat, and 3 also added to its top. For example in the studio mylar #1 segment below#4 pattern in Studio programming would begin on row 11, ending on row 14, to program same in Brother beginning row is 14, ending row is 17; stitch locations remain unchanged, but a reminder: Brother sheet is marked in 5X5 blocks of squares, Studio in 6X5.
Hand drawn studio mylars when using the pencil appropriate for them will not read, so sheets need to be marked with any tools you have used for doing so in brother markings in the past. One oddity I encountered is that with the drawn repeat below I had no needle selection until I programmed rows beginning above row 5, using rows # 9-12 as top and bottom of the repeat, not an issue with the factory mylar. I used a sharpie to draw the first pair of squares (has never worked for me), number 2 pencil on the reverse of the sheet for the second (my preferred method), and template marking pencil on the mylar front for the third. Drawing with the latter over hand-drawn studio mylars enabled those markings, in turn, to be read by my 910. One problem with the template pencils is that small pieces of the coating they produce may shed with use. The issue with bottom rows not reading did not repeat when I used a different blank mylar sheet and drew the identical repeat, nor did it occur with factory drawn. Sometimes there are no explanations…