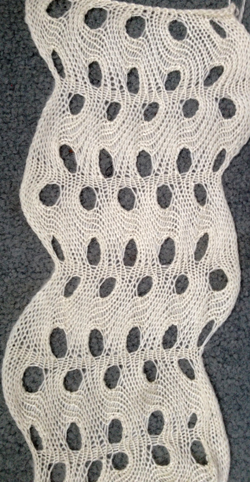
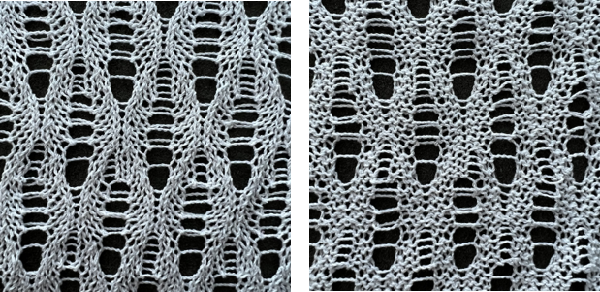
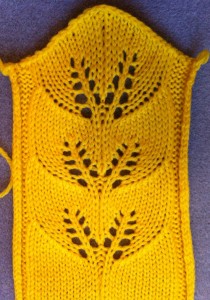
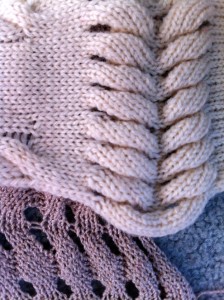
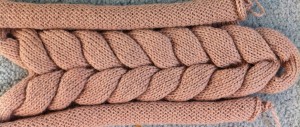
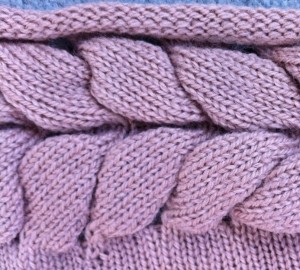
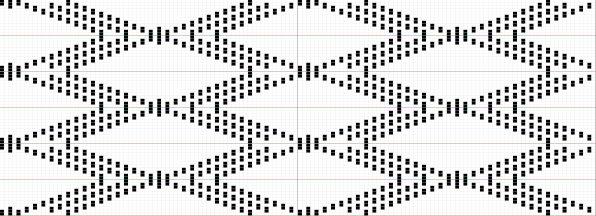
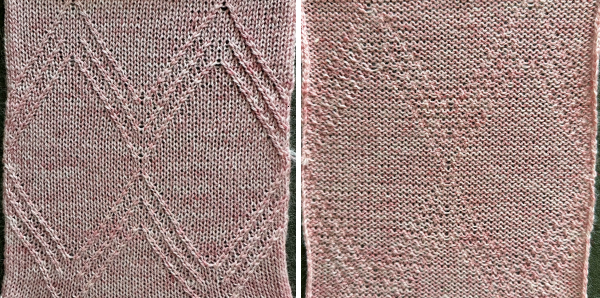
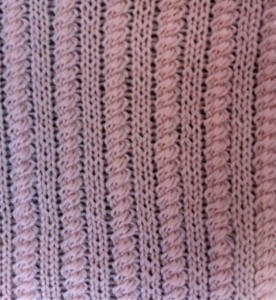
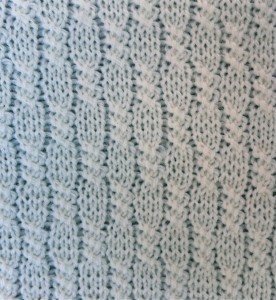
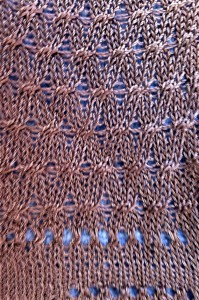
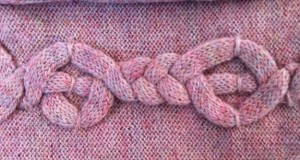
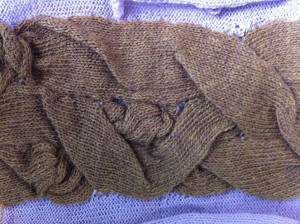
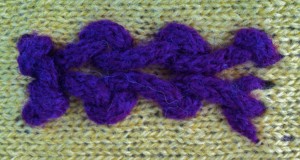
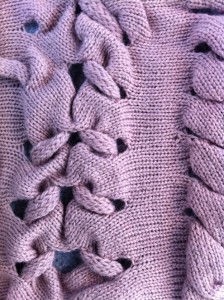
Wisteria cousin 2, also called fern leaf, hand technique

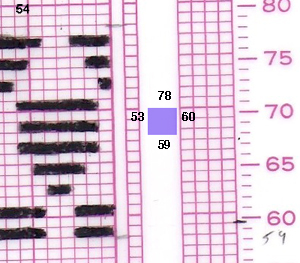
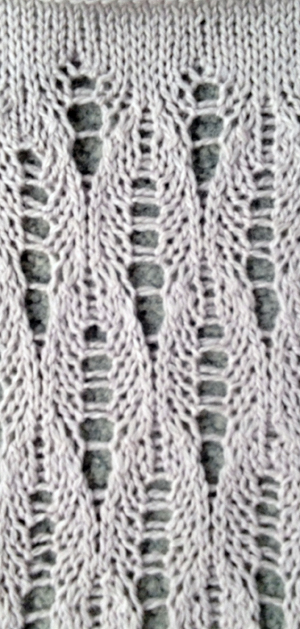
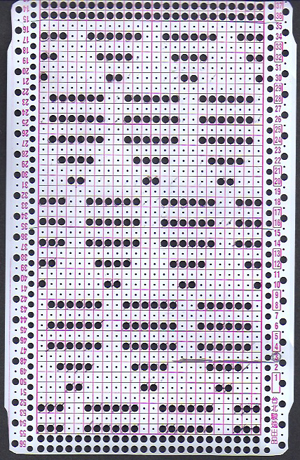
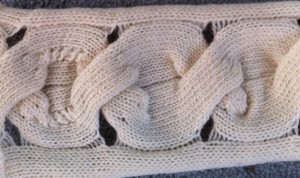
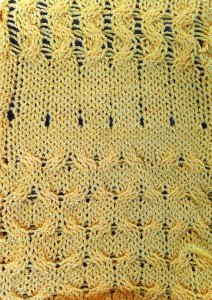
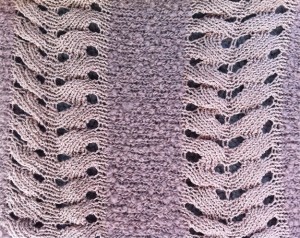
In seminar days this was referred to as a “fern leaf” pattern. Holding groups in these sequences givea a bit more swing to the side of the finished piece. Directions for this fabric may be found in  the post 

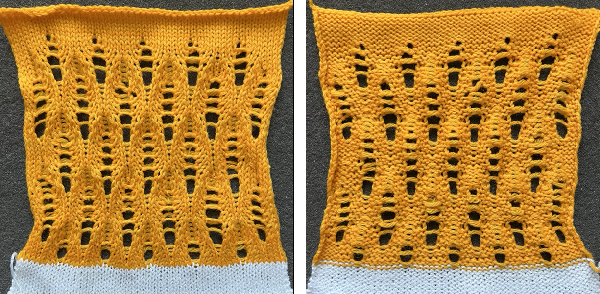
The difference between the fabrics below and the ones that look like this swatch is that when the row of held sequences is completed from one side to the other, at least 2 rows are knit across all stitches before reversing the holding direction and moving toward the starting side to complete the repeat.
In addition, there is often a tension change between the groups that pull the fabric inward and enhance the texture. In my sample, the held segments were knit at tension 6, and the tight rows at tension 3.
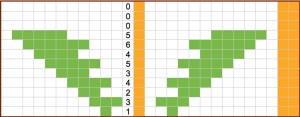
The pattern in this swatch is executed on a multiple of 8 stitches 
To knit: cast on the required number of stitches, the first four rows are tight, so waste yarn and ravel cord followed by the cast-on and tight rows are recommended.
At T3 knit 4 rows, COR. Set the machine to hold stitches.
T6: bring all but the first 8 needles closest to the carriage into hold.
Knit 12 rows.
COR: on the side opposite to the carriage but closest to the needles in the working position, bring a group of 4 more needles into work. Knit one row.
COL: on the side opposite the carriage bring 4 needles into hold.
You will now again be working on a group of 8 needles. * Knit 11 rows.
COR: on the side opposite carriage bring 4 needles into work, knit one row.
COL: on the side opposite carriage bring 4 needles back into hold.*
Repeat *to* until the last set of 8 needles are in work on the left-hand side, knit 12 rows, ending COL.
T3 knit 4 rows.
Reverse the process, moving in the opposite direction, beginning with knitting 12 rows on the first group of 8 stitches on the left.
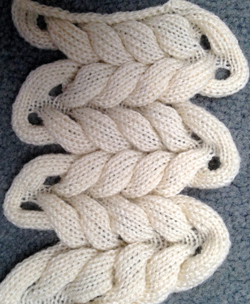
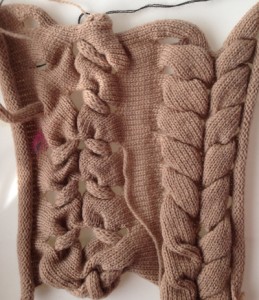
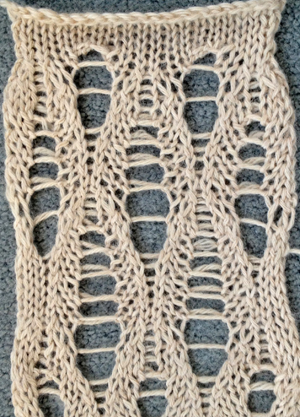
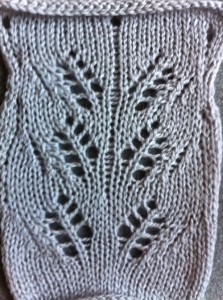
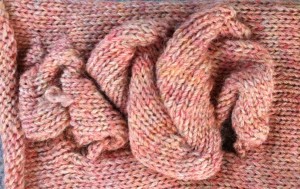
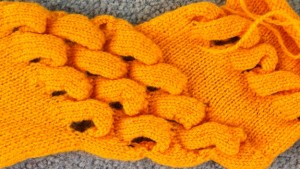
If the goal is to retain the texture, a yarn with “memory” ie wool is recommended; if a yarn such as acrylic, which has the capacity of being “killed” when pressed (sometimes the desired effect) is used,  the result may be seen below

lacing up a sample with knit i-cord

I had previously shared other images of this type of fabric, they may be found in my previous post, described as “horizontal cables“. The sequences there illustrate the use of other results from varying the number of stitches and rows in each held group, as to the biasing that results when all rows of groups move in a single direction. A bit on the possibility of automating such fabrics using slip stitch. 
Holding/short rows: hand tech to chart to automating with slip stitch 1

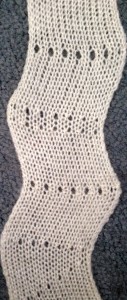
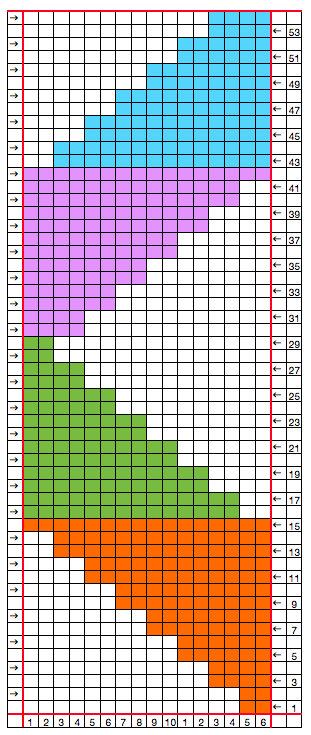
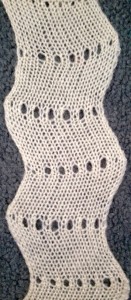
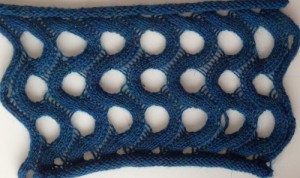
These directions apply to Brother Machines; designs could be used as they are and programmed into Passaps, other brands would require some adjustments. In these samples, the holes resulting from holding for 2-row sequences are considered part of the design. Vertical strips in different colors could be knit and later joined. The final result is a “zig-zag” pattern. Written directions may read: to begin, cast on, and knit 2 rows. **COR: set the machine for holding. Place in hold all except the first 2 needles on the right (carriage side). Knit 2 rows. Return to work the next group of 2 needles on the left to work, knit 2 rows. Repeat until only 2 needles on the far left are in  hold, return them to work, knit one row (color 1 in the chart below). COL: pull the first 2 needles at far right to hold, knit 2 rows, repeat until last 2 are left in hold, knit 2 rows (color 2). COL: bring next 2 needles into work, knit 2 rows, continue until the last 2 stitches are returned to work on the right, knit one row (color 3). COR: pull first 2 needles on left into hold, knit 2 rows; repeat until last 4 stitches at right are put back into work, knit 2 rows**, and repeat from **. Knit 2 rows at end of the desired number of repeats bind off.
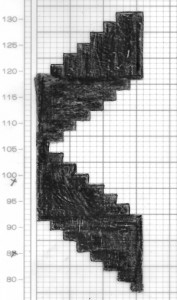
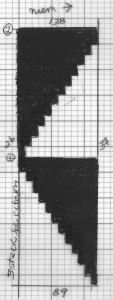
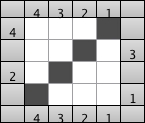
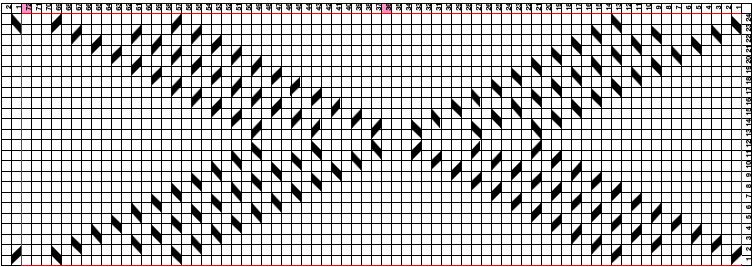
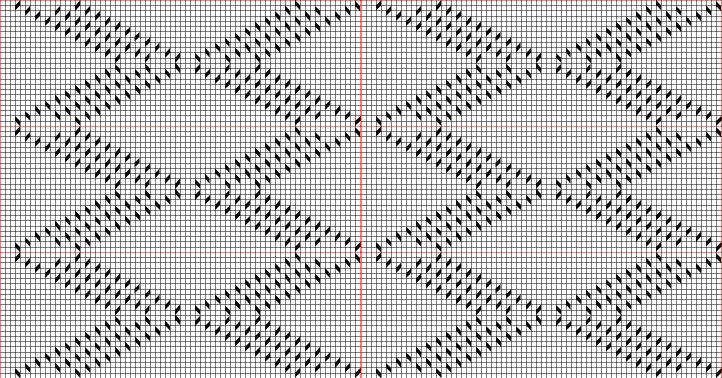
The sorting out hand tech sequences to achieve the desired shapes sample: When producing my charts for using slip stitch to automate holding I like to draw what I would actually be knitting for each row, each stitch and row being a filled square, so the colored areas below represent knit stitches/rows on each row, the blank squares the stitches in holding. I test the repeat as a hand technique first, before in my case marking the mylar, then essentially fill in the knit stitches with color, keeping in mind the location of the knit carriage and the direction of the knitting. The colored squares are then programmed as punched holes, black squares, or pixels, and the pattern may be knit using slip stitch <—>. Needle selection needs to be canceled, otherwise, the yarn will be knit on the side of non-selected needles on that last stitch, creating a long float. The selection row needs to be toward the first 2 knit rows sequence. Here they are knit beginning on the right for 2 rows, so the selection row is made from left to right.  Odd rows move, knitting, from right to left, even rows from left to right. At this point, I prefer mac numbers for charting.

the final repeat, working chart the mylarthe swatch

The  above repeat could be considered composed of 2 pairs of stacked, mirrored triangles, here is an instance of playing single “triangles”

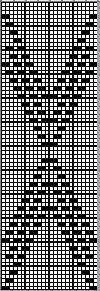
the mylar repeat its accompanying swatch

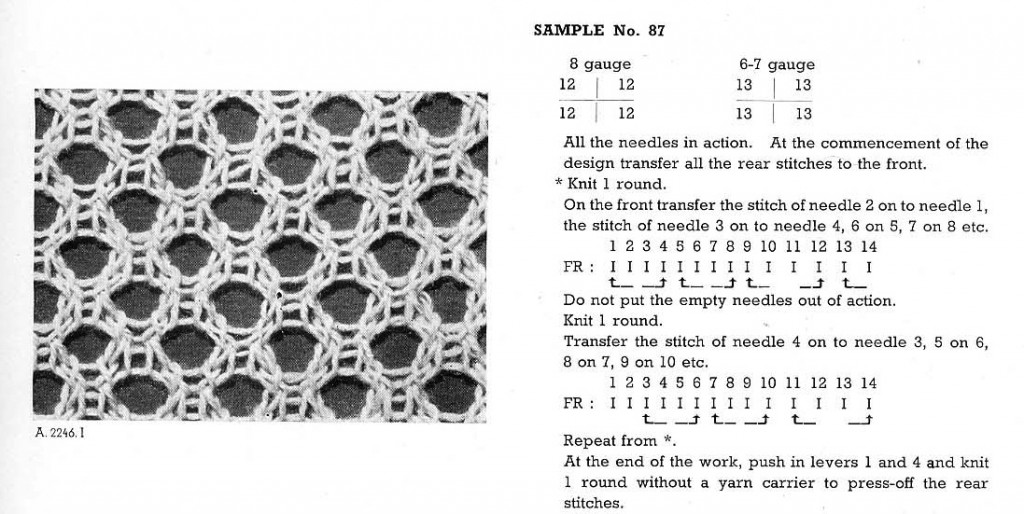
Large eyelet lace, hand transferred (or not)

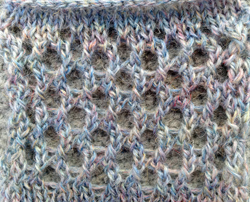
This is a lace sample created on a dubied industrial knitting machine

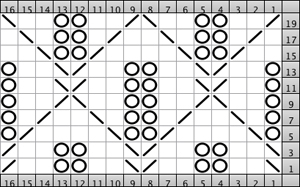
I became curious as to how to duplicate it and decided to use needle selection to help track the transfers rather than counting needles by hand. The repeat is a small one, suitable for both electronics and punchcards. Below is its configuration on my 910, punchcard knitters may want to flip the repeat to match the directions for knitting as written.

the sample’s knit side

its purl side

yarn: 2/8wool

end needle selection (KCII here) must be used any time there are needles out of work in the pattern

transfers are always made toward the carriage

single empty needled are put OOW after transfers across row

pairs of empty needles after they are created are returned to work before the next row of knitting to create side-by-side loops

in  my case, odd rows transfers were —>, even <—

single rows are knit after each set of transfers

1.KCII <—, transfer selected needles <—, move empty needles OOW

2. select row 2 as carriage knits —>, transfer selected needles —>, there will be two empty needles, side by side; bring all needles in work across the row

3. knit <—here there will be 2 loops side by side on adjoining emptied needles; check that no loops have dropped off, rehang and adjust tension if needed; transfer selected needles toward the carriage _ move single now emptied needles OOW

as this row and the next row are knit and transferred, side-by-side loops will become stitches, and another 2-loop set will be created

4. knit —>, transfer selected needles —> onto the adjoining loop, there will be 2 empty needles side by side, bring all/pairs needles in work across the row

repeat steps 3 and 4 for the remainder of the fabric

my previous posts on large eyelet lace were created using the lace carriage
large eyelets, and diagonal large eyelets

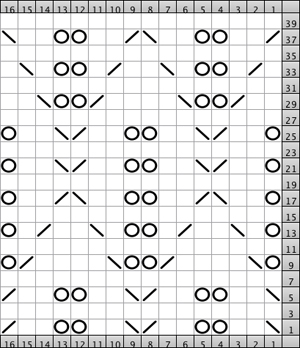
a cousin of sorts may be achieved by using the following punchcard lace repeat; the lace carriage selects and transfers for 4 passes, the knit carriage follows with 2 rows of knitting throughout; stitches are transferred, doubled up, and transferred again, so yarn choice, weight, and tension may need a lot of editing.

the resulting fabric

There is an added post on automating such large meshes published in July 2020 

Ladder lace

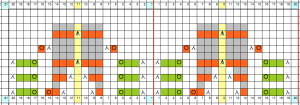
The inspiration: part of a magazine photo  A slightly different approach than in the last post. The tale begins with a hand-knit graph:  expanded to include alternate rows the “graph” paper version   If a punch card is to be used, all colored squares represent punched holes. I used my 910, Studio mylar for my swatch. The mylar repeat and programmed numbers: A png for a single repeat used in the later postThe approach in the execution is a bit different from the previous samples. In this instance, colored squares represent the number of stitches to be moved/the number of prongs on the transfer tool to be used.
The pairs of transfers in the chart are made away from each other, orange to the right, and green to the left.
The transfers produce 2 empty needles side by side, they are left in work, as the next row is knit they will produce loops on each needle.
Side-by-side loops do not make stitches, so subsequent rows will continue the ladder.
It is helpful to use yarn that does not split and get caught in hooks, as that may partially knit on the next pass, creating a knit stitch and disrupting the ladder. Also, rows with loops should be checked to make certain they are in the pairs of needle hooks, not off either or both, before the next row of knitting.
Do not release the loops; when the next set of transfers is reached, treat the loop (where circles occur in the graph) as you would a stitch, moving it over on its own prong.
As with transfer lace, it bears taking the time to knit slowly and prevent errors rather than having to attempt “fixing” errors such as runs due to dropped stitches.
The resulting swatch on the standard KM (2/8 wool)The punchcard:  The related swatch knit on the 260 bulky KM The yarn is an alpaca too thick for the standard.  I liked it at tension 1 for stocking stitch, but I had to increase the tension to  3.. to be able to manage the transfers, especially the ones over by 3 stitches X2.
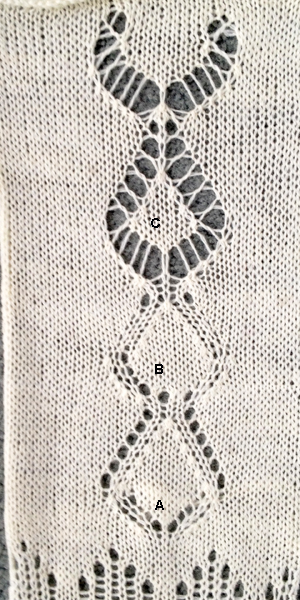
for a sense of the scale difference between the 2 swatches. The punchcard was made from a roll purchased directly from Hong Kong, advertised specifically for Brother. The roll is continuous, with separations as seen in the image below. Numbering, however, is for Studio KM systems, so adjustments need to be made for using them on Brother KMs (ie. the first selection row will be row 3 as marked in the punchcard used in the swatch above).  2022: Sometimes what works well on a small swatch does not in a larger one, or may simply require a different yarn, more attention, and slower knitting speed. The first trial at other yarn content included a yarn perhaps too thin for the effect (green), and one requiring maximum tension making the transfers with loops difficult. Once the initial transfers are made, this loop formation will appear in locations indicated in the chart. A visual check should be made as to whether there is a loop on each needle. If one is skipped, simply lift the yarn onto the hook of the empty needle. As the fabric progresses, the loops will appear on the top of the shafts of the selected needles and are treated as one would handle stitches in multiple-stitch lace transfers Shown again in the white knit  After the transfers are made A yarn split on the machine may be seen in the center of this image.  Yarn splits and dropped loops are quite visible in these tests.  A return to a different 2/8 wool brought better results, again, splits can be identified in the fuzzy spots even if the ladders are formed correctly  This last swatch was knit in wool rayon. The problem of splitting was eliminated, while dropped stitches were easier to miss 


Ladders and Lace

The patterning resulting from creating and manipulating ladders with needles out of work can create interesting openwork fabrics. I like to use punchcards or mylars for “automatic” patterning in selecting needles, with carriage set to plain knit,  to help keep track of where to introduce transfers when possible. Microsoft Excel or Mac Numbers remain my favorite “graph papers” for working out repeats at various stages of developing the trial swatches.

A work in progress sketch: 2 side by side repeats, my first “drawing”. Empty circles indicate where I think I want to produce holes, green transfers and orange ones are toward each other, colored squares (orange and green) indicate the number of prongs on the tool used for transfers: orange transfers are made with a single eye tool, green with a triple eye one. Needles in the greyed-out area are left out of work after each transfer to create ladders. Where a lace hole is desired the empty needle is returned to work after its stitch is transferred. The yellow line is the knit of every row’s center stitch of the pattern. The chart does not match the card, which was further edited

the punchcard repeat for the edited final version, including markings showing directions of transfers and ” row 1″

the resulting swatch
I have a brick repeat sorted out, not certain about its end-use

another card, 2 prong tool was used for transfers, arrows on the right indicate the direction of those transfers, and color change indicates its reversal

the resulting fabric: A_ empty needles left in work throughout, B_ as the direction of transfers is reversed, the empty needle on top portion is “filled” in by lifting purl bar from the row below onto its adjacent side, C_ 2 adjacent needles are constantly left empty to create ladders, with one needle brought in to work for every one taken completely out of work as needed. There are more possibilities. When experimenting it is helpful to keep good notes to ensure the ability to reproduce the desired effects.

previous post on leaf-shaped lace


Back to leaf lace, add rib, and take it to the Passap

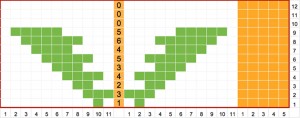
The chart below represents the working repeat for a twin leaf that incorporates ribs in fabric. Golden color represents needles in work on ribber or Passap back bed, the numbers in the center of the graph the number of needles moved away from the center column, toward the wider rib on each side of the repeat. All colored areas within the red border represent black squares on mylar, or single palette color in SP, wincrea, or your means of downloading. The addition of electronics allows for a wider repeat. Air knitting on any machine will help make the selection needed for transfers to the opposing bed. On the Passap use Tech 129 and color reverse. This results in pushers corresponding to each colored square being selected to their up position: they then in turn may be pushed up slightly to help track the needles that need to be moved. The wider ribs on the sides make it easier to identify repeat center: again, transfers are made away from the single needle, toward the larger group. The front lock stays on N throughout. Pushers corresponding to needles on the back bed, not in the twin leaf pattern areas, need to be completely out of work. The back lock also knits throughout.

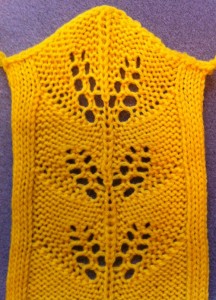
the resulting repeat: knit side

the repeat’s purl side

Having only 3 needles at each end of the chosen number of repeats knitting on the ribber or back bed will create a small rolled edge on each side of the knit, using the irritating property stocking stitch has of curling to purl side to create an “edging”. I have multiple stitch transfer tools for Passap but found I did much better avoiding dropped stitches doing larger transfers in two moves of fewer needles.

The graph may be modified for use in other electronics. Here the gold represents needles out of work that create ladders. The two stitch ladder helps with definition and with tracking direction of transfers. With ribbers in use cursed dropped stitches and holes may not be noticed until it’s too late for “repairs”. Again the center numbers reflect the number of stitches requiring movement on that particular row. All colored squares are used for “drawing” the repeat in the design program or on the mylar.

There are many designs available for machine knit leaves that align in a regular, vertical manner. The more varied shapes require a large number of transfer rows for each row knit. One such variant is this:

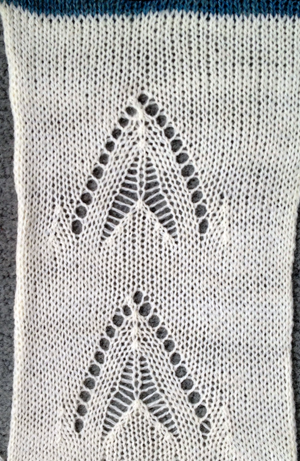
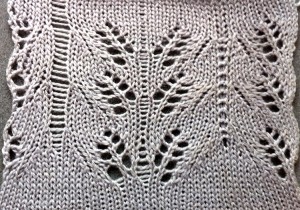
a second effort with more ladder experimentation

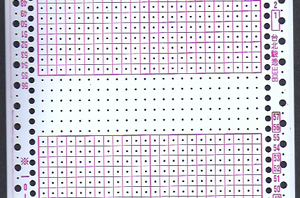
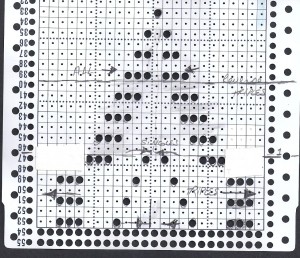
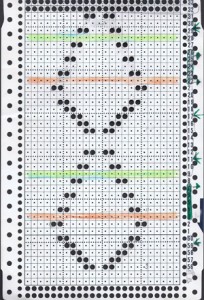
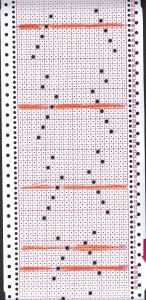
The result is definitely not a twin, but rather a distant relative of the twin leaves, more akin to wheat or fern lace. The design works within the punchcard 24 stitch repeat limit. A central ladder again helps definition. Latching up the ladder on the purl side made it disappear. Playing with ladder spaces between full repeats can vary the fabric considerably. This is the self-drawn card used for the swatch, the horizontal heavy lines indicate where the 2 rows of knitting occur. The card uses up the whole 60 rows, all punched holes are identifiable with corresponding row numbers, the card was a touch too long for my scanner.

Patience is a requirement, and yarn color that allows one to see what is actually happening to stitches is a recommendation.

Horizontal “cable”

I live in the East Coast of the United States.

In the 80s there used to be a yearly machine knitting seminar that was fairly well attended. There were droves of machine knitting publications. Susan Lazear, the founder of Cochenille, was just beginning to develop her knit design software ideas on the Amiga Computers, and a fellow Californian, who happened to be Japanese, used to travel here with the Pandora box of foreign knit magazines. At the time translating knits from one language to another amounted to guesswork and some leaflets. Subsequently, there were fliers, then articles, and even books on translating from Japanese to English and multiple language translations for knits and crochet.

One year there was a “Guess how this was done and you get a prize contest” for a technique appearing on a sweater with only Japanese instructions. The design was dubbed wisteria by some, has been reincarnated as a trim, insertion, bandings on sleeves and cardigans, and is beginning to reappear in magazines now again.

Here is one method for this “horizontal cable” created by short rowing across the width of the fabric.  Brother machine needle positions are A, B, D, and E, and a lever sets KH for holding in both directions Studio needle positions follow the alphabet, and Russel levers on each side must be set for holding.  The directions below are for Brother.

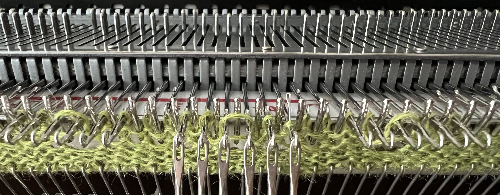
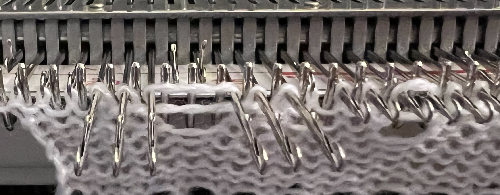
Reminder: when the machine is set for holding the needles in B or D position knit, needles pushed out to E will not knit. Weight is used as needed, watch for dropped stitches particularly along the edges of the sections as the rows of knitting are built up.

1.cast on the desired number of stitches knit several rows at garment tension, end COR (Carriage on Right)

2.COR, set the carriage not to knit needles in HP (hold position)

3.leave 6 needles at the right of knitting in WP (work position), push the remaining needles out to HP (hold position)

4.knit  10 rows over the 6 stitches, ending COR

5.push back 3 needles to D position at the LEFT of the 6 needles now in WP

6.knit one row from right to left (9 needles in WP) end COL (carriage on left). Push the needles now in WP on the far right to HP; 6 needles will remain in WP

7.knit 9 rows on these 6 needles,  end COR

8.repeat steps 5 through 7 across the fabric row until the last 6 needles remain. Knit 10 rows over  these last 6 needles, end COL

9.set the machine to knit needles in hold (holding lever to N), knit 2  or the desired number of rows across all the needles

10.holding lever on H. Repeat the procedure from left to right, reversing the sequence.

If the sequence is not reversed a bias fabric will be created. For maximum texture use a yarn with memory ie. wool. Anything that can be “killed” by pressure or ironing will flatten considerably and yield a very different fabric.

My demo samples were made out of colors that would make them easy to find, and unlikely to get “permanently borrowed”, so none of these were studies for actual finished garments

this swatch combines a boucle and a rayon; the latter has become flattened over time
this is a wool rayon, knitting is not reversed, resulting in biasing

these samples show the same technique, applied to much larger groups of stitches

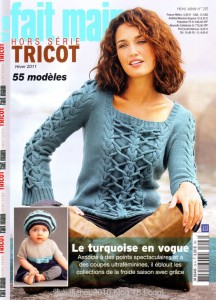
a segment of a magazine recent garment photo, no origin given as to source, appears to use the above technique

online source for patterns using this technique

more cable like/structures/textures

Using punchcards to track small cables in pattern (1)

Symbols in knitting have evolved considerably through the years since the day when all instructions were longhand and it was abbreviations used that would need de-coding. This is true of cables as well.
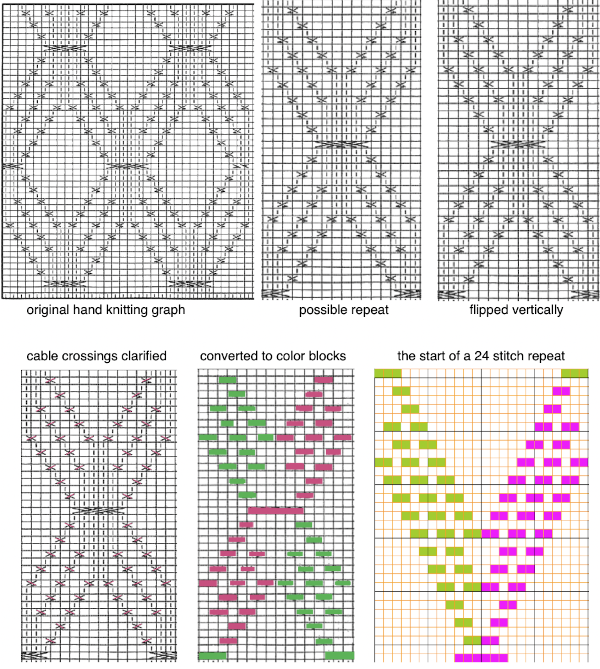
I came across a magazine graph that led me to explore its conversions from hand to machine.
In the BW original graph cable stitches are represented by solid lines and dashed lines, and stitches are moved in the direction of the upward slant.
The “needles” with the solid lines will be moved first, and the dashed lines will follow to replace/fill the empty needles.
The repeat below is 64 rows high, so if a card is used it would need to be created in two pieces, the last row on the graph is not part of the repeat itself.
As is seen in knit alphabets, however, punchcard patterns are mirrored vertically when the design is executed.
That needs to be kept in mind if punched holes are used to track the cable repeats, particularly in complex arans.
Assuming mirroring is required to match movements in the hand-knit original graph, colored cells representing punched holes in the first colored card repeat are also mirrored. Using the card
green color blocks :
the left half of the crossed stitches are moved first, taken off on the tool, held to the side
the right half of the crossed stitches follow and are placed on the empty needles on the left
the first held stitches in turn are then placed on needles now empty needles on the right
magenta color blocks :
the right half of the crossed stitches are moved first, taken off on the tool, held to the side
the left half of the crossed stitches follow and are placed on the empty needles on the right
the first-held stitches in turn are then placed on needles now empty on the left
The markings on the punchcard machine’s needle tape correspond to needle selection for 24 stitch repeat, and that can be used as a guide, needles selected are intended to move toward the center at the bottom of each half repeat, and away from it in the top half, creating the diamonds.
If electronics are used and the repeats are other than 24 stitches wide, the needle tape may be marked with a water-soluble pen or removable color tape strips may be placed between the needles that are first and last in each repeat.
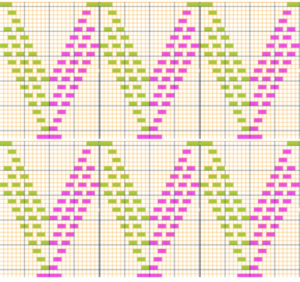
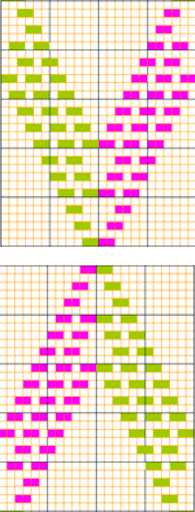
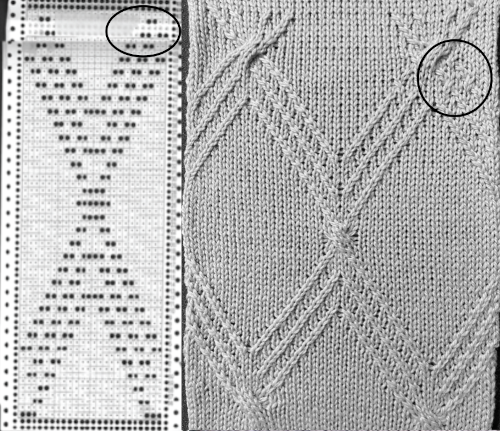
The initial imagined diamond shape is tiled in width.   The start of a possible chevron shape  Those 3X3 cables are likely not easy to knit, especially after only one all-knit row. One alternative would be removing the crossing, disregarding the 6-needle preselection, thus adding another knit row between any 2X2 crossings.  In writing a 2022 post on using Numbers and Gimp for charting cables and revisiting this post I realized there was an alignment error at the top of the punchcard repeat used to knit the earlier associated swatch. The image below now has the problem area in the card marked.
A circle also marks the spot where operator error occurred with some twists made in the wrong direction,  The amended, now rendered 72 rows tall card: 2024: The result of further editing, a table representing the direction of the stitch brought forward in each crossing, while the magenta numbered cells indicate spots where the crossings begin to reverse direction. All crossings are now planned 1X1. The top 2 rows from the above chart have been shifted down to the bottom to create a point at the start of the diamond shapes, and the resulting repeat is tiled to check alignment and possibly ready for printing a guide.  The associated 24X72 PNG and markings in 6 stitch blocks for punchcard users The proof of concept swatch:
Such techniques may be used in isolated portions of garments instead of all over.
A “simplified” interpretation of a similar knit pattern is seen below. Related posts:
Using punchcards to track cables and twists in pattern 2 
Using punchcards (3) or electronics to track small cables in pattern


Some “real” cables on KM

2/8 wool

slippery rayon: fabric flattens with pressing and remains that way

a couple of twist samples: wool/rayon blend

Fair Isle, any punchcard locked on a single row of every other stitch selection: there were whole books of HK patterns based on this idea, sequence of moving stitches can create a variety of secondary patterns. On the KM fair isle is essentially a slip stitch, short and skinny, tension needs to be loosened considerably to try this, stitches in cables cannot be brought out to “hold” position to ease knitting off on the next row, as this will affect the color pattern. Larger crossings are possible, but more difficult

another FI and cable variant: mistakes are probably from needles that were out just a bit too far and knit in the alternate color

a blast from the past: knit on my metal no punchcard bulky (first KM) and ribber more than 2 decades ago. Ribs at waist and armholes are hand knit twisted rib

Pretend/ mock cables 1: i-cords, holding

I have literally hundreds of machine-knit swatches from the days I taught in a design school program. I periodically revisit them and since cables and their look-alike relatives have recently caught my attention I thought I would share photos of some of the samples in the next few posts.
They are not necessarily resolved fabrics, some of them are the result of random demo efforts/ stitch play.
In any discipline over decades, one cannot help but become aware of how materials and styles cycle, and this is oh so true in fashion and certainly in knitting. For a while more than a decade ago knit i_cord yardage/ tubular yarn was marketed by several manufacturers, and it is now making its reappearance.
One way to create pretend cables in varied color combinations is to apply purchased yarn, or machine knit cording/ tubular knit to the purl facing the knitter side as the piece progresses. The application may be done in an organized manner, using a punch card to select needles on which the yarn will be hung, or more random, even with wide knit strips in contrasting colors.With tubular knit cord in addition to hooking up, anchoring may require some stitching, “seaming as you knit” at planned intervals would make the joins “invisible ” Strips using holding techniques or stitches hooked onto the knit to create texture, in turn, joined in the “seam as you knit method”Cording may also be inserted into single stitch lace “holes”or larger holes created through holding techniquesKnit i-cords, ribbon, twisted cording, etc. may also be threaded/woven through holes created at cable crossing as a way to add color and dimension to standard cables, mimicking their movement on the fabric. A recent foreign magazine cover including a variant of the above technique