I reviewed and edited this post in mid March 2019, with plans to add a part 2 post on use of llili buttons when I am able. The content here explores one of the possible lili settings, where slip stitch is used in both directions for every other needle pattern selection on the ribber.
If one chooses to hand manipulate needle selection on either bed, bringing needles to be knit out to hold with the carriage in use set to slip, one can make knit stitches happen wherever one chooses. Automating any part of the process speeds things up, but comes with built in KM limitations. lili buttons enable every other needle selection on the Brother ribber carriage, behave in the same manner as when using the following card single bed.

Another way to look at it, showing the isolated smallest repeat bordered in red on the right side, and action on needles in work on the ribber, K for knit, S for slip. Movement of the carriages shown is from left to right and back to left, the color changer side 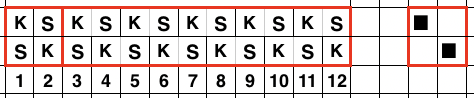
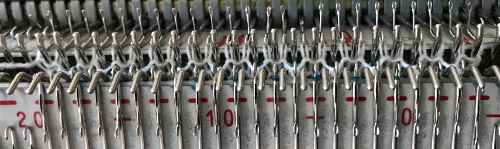
The usual rule when working with lili buttons and slip <– –> setting is to have an even number of needles in work on the ribber bed. The markings on the corresponding needle tape consist of dashes with spaces between them. For an even number of needles, if the first needle is positioned over a dash, then the last must be positioned over a blank space.
The charts below take into consideration duplicate rows, knit first away from, and then back to the color changer resulting in striping every 2 rows. Patterning is fixed, beginning with the second needle from the left when traveling from left to right, and the second needle from the right when traveling from right to left. The second needle in each instance knits. This is true whether one starts on a “blank” or “dash” needle tape position. With an even number of needles in use, needles in work begin and end on opposing symbols in pairs ie dash and blank, or blank and dash
Dashes and spaces on the needle tape are shown in the yellow row in the chart with the first needle on a “dash”. Needles (colored squares in repeat) are numbered reflecting the sequence in which they are knit as the ribber carriage moves in the direction of arrows. 
If an odd number of needles is in use, the same needles will slip/knit respectively. Grey squares represent the needle location for which the ribber carriage thinks it is selecting, including the missing needle location to keep the number of stitches even. Unless settings are changed patterning is fixed on the same stitches.
To create vertical stripes using slipstitch, this would need to be the repeat, not “automatically” possible on the ribber

The card that is being imitated is card one elongated X2, here shown in the studio version 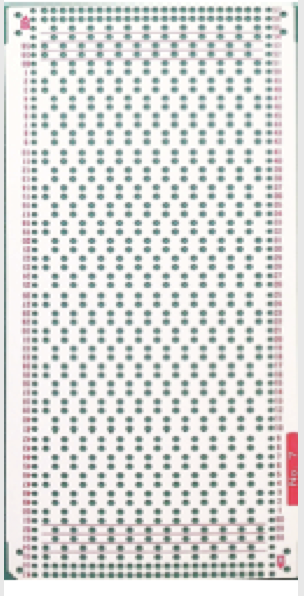 “Fooling the machine” into thinking a continued number of odd needles are in work is achieved by bringing an extra needle in work on the ribber carriage side on left, and then right in turn on the carriage side, or one empty needle on each side at the same time. The knitting happens on the needles represented by yellow squares, but the carriage thinks it is knitting the pink repeat
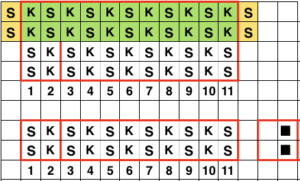
 Odd needle setups begin and end on the same symbol ie. Dash or blank on the needle tape, in this case, the “dash”
 If knitting begins with an even number of needles in work, extra needles are brought into work with a starting even number of knit stitches, each 2 passes produce a single row of knit with alternating slipped stitches, resulting in a narrow stripe alternating with small checks, or plain stripes in each color on the fabric backing. Again, the movement here is away from and back to the left side
 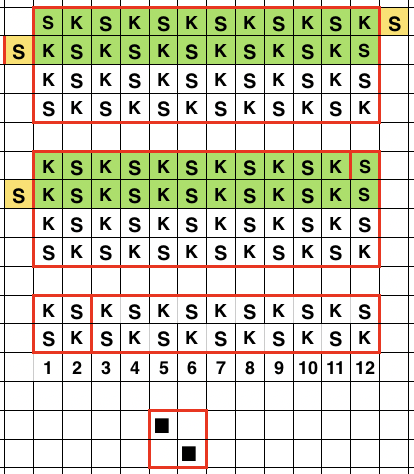 The overall design is interrupted by knit stripes, depending on whether one or 2 extra needles are brought into work, here is one sample.
 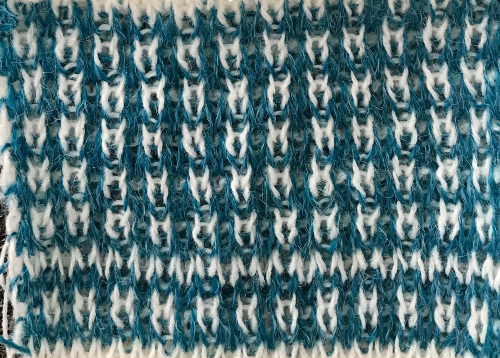 Working with an odd number of needles on the ribber
 2023 :
Repeat steps between * and **.
To test the technique choose easily identified contrasting colors.
The main bed will be set to simply knit every needle, resulting in stripes in 2 rows of each color.
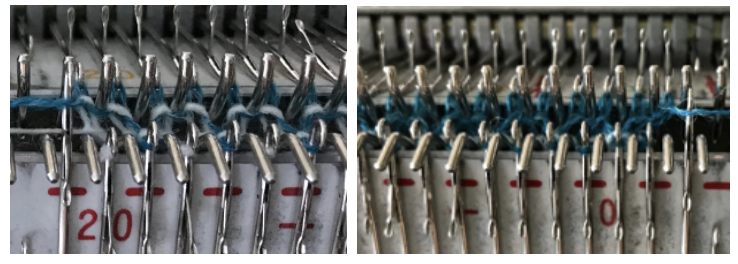
Cast on using the light yarn on an uneven number of needles on the ribber, with the first and last needle in work on the top bed. Set the ribber to slip with the lili buttons set for both directions.
COL, dark color: the second needle will be knit in it. Do nothing, knit 2 rows
*COL, light color: the goal is to fool the machine into thinking the light color will knit on the second needle. Bring an empty needle into work on the ribber on each side, shown here on the right. Knit to right. 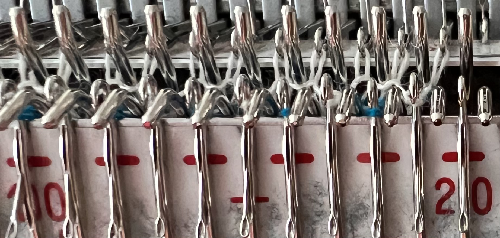 COR: do nothing, knit to left.
COL: there is now a pair of empty needles, they need to be taken out of work so as not to add new stitches. Change to the dark color and knit 2 rows** 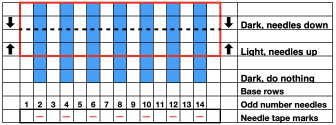 A sort of tune: light yarn cast on, follow with dark yarn, knit 2 rows
*light yarn: empty needles up, knit 2 rows
dark yarn: empty needles down, knit 2 rows**
For wider stripes, release the lili buttons.
Set the ribber to slip in both directions on an even number of needles.
Pairs of needles will need to be hand selected on every row on the ribber and brought up to E so they will be knit. The remaining needles will be skipped. Beginning from the same side, I chose the left,
*COL: bring up the first needle pair, #1 and 2, for color 1, continue across the row,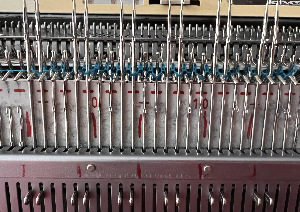 knit to the right
COR: repeat the same selection, knit to left
COL: change color. Begin selecting pairs with needles #2 and 4 from the same side, 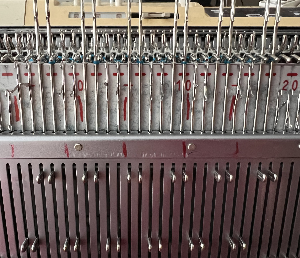 and continue across the row. Knit to the right.
COR: repeat the same selection, knit to the left. **
The yarn used is thin, thicker yarns will fill in. Because alternate colors are slipped for 2 rows, the stitches that are skipped are elongated compared to those that are not. These methods may cause distortions on the knit side if used in patterned DBJ, seen slightly in the horizontal stripes.  2013 To knit:
*COL (carriage on left): color 1 knits to set up the base in pattern for 2 rows, ending on the color changer side.
Before knitting with color 2 COL, bring an extra needle into work before moving from left to right. Knit one row.
COR: drop the extra empty needle on the left OOW, and bring an extra needle on right into work. Knit to the left, return to the color changer, drop the extra needle on the right OOW, and change colors*
Repeat the * *process throughout. Check regularly to make certain that the extra needle does not become an unintended increase.
Having an extra needle in work on both sides of those on the ribber on the main bed will insure end stitches knit off and side edges are cleaner, with less noticeable elongated stitches on each side.
If loops are formed on needles brought into work, they need to be released before knitting the next row. This did not occur in the samples knit using the method described in 2023.
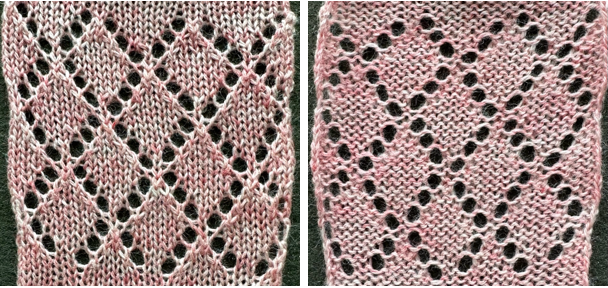
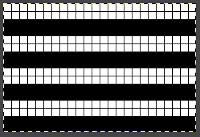
 The fabric swatch from the original post illustrates the vertical striping. The thin yarn clearly shows the lengthening of slipped stitches, and why some DBJ fabrics are referred to as “long stitch” ones, with color bleed or grin through from colors traveling behind them.
The plain rib at the bottom is significantly wider than areas where slipstitch is used, an issue if plain rib is to be combined with DBJ created with slipped stitches. On the knit side in this instance, the fabric is knit stripes.
When using the color changer starting with waste yarn and testing yarns, gives one the opportunity to make any adjustments necessary including on occasion doing a bit of metal bending where needed.
 A subsequent proof of concept for inclusion in the later post
  It is also possible to work with the same approach, using tuck settings. A first experimental test
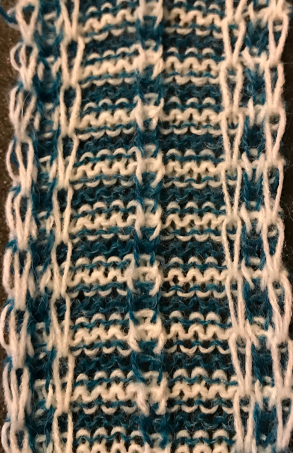
  lili buttons may be used with needles out of work when using thicker yarns, or for the resulting effect on that side of the fabric. A vertical stripe in that instance produced with hand needle selection on the ribber bed.
 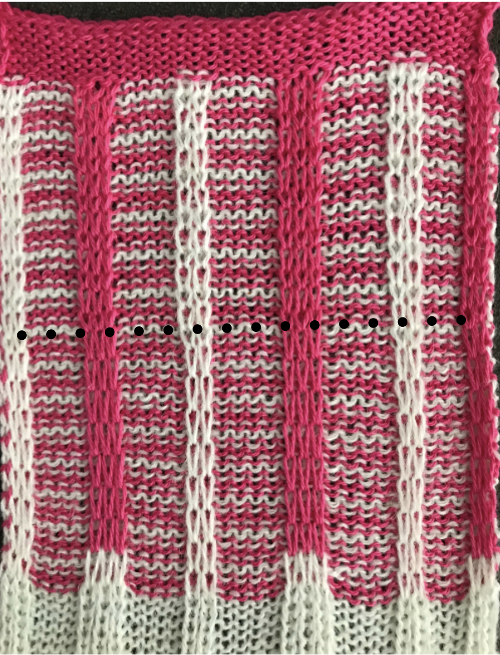 Lastly, here is a tiny swatch in an arrangement beginning to explore the odd number of needles in work on the ribber in conjunction with the use of lili buttons, and adding needles to “fool the machine” as described above


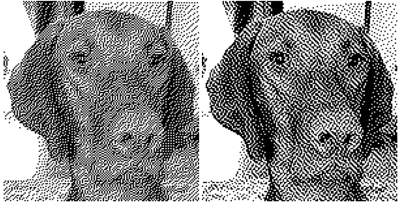
 May 24, 2019 a greyscale mode scaled image processed in ditherlicious online produced a sharper, far more defined image than my previous effort 142X146 pixels


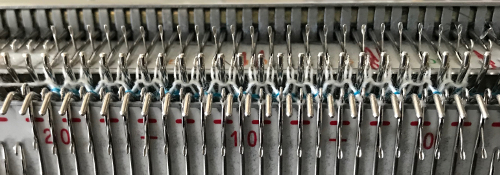
 rear view


 When all main bed needles are preselected, the ribber is set to slip for 2 rows, only the main bed will knit. When there is no preselection on the main bed, the ribber is set to knit, no stitches will be formed on the main bed, so each surface remains separate. The knit carriage is set to KC1 to ensure the sides of the tube will be sealed. If two knit carriages are used to select needles, then it is possible to easily adjust tension for the alternate color if that is deemed needed.


 marking the knit stitches in odd rows
  marking the knit stitches in even rows
  markings for all knit stitches
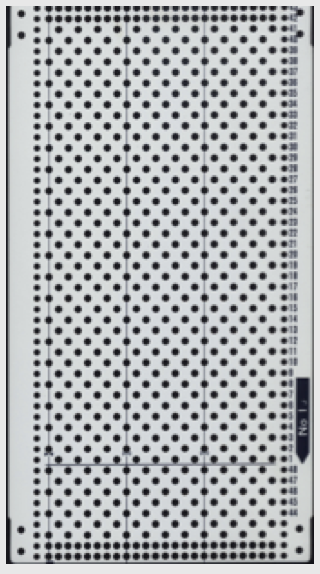
 Shared in an earlier post: using point grids,
  the pattern may be drawn over them;
  staggered units may require some cleanup and “erasing”, as represented by pink squares


 The resulting fabric using slip setting, rows 4 and 5 make motif problematic for tuck setting
 The 2 fabrics side by side, showing in this instance a slight difference in the overall repeat in the last swatch; in the left sample green is color one, in the right one white is color l
  the same motif knit in the tuck setting is wider, both sides are shown below
  If the yarn used is capable of being blocked fairly flat, because of the short floats, finished items in these fabrics may not need to be folded over or lined as traditional FI items often do.
 As each set of repeats for each card is completed the punchcards are exchanged. KC direction is marked on them, with knitting beginning on the opposite side. I found the fabric more manageable when I completed and began each design sequence and color change by beginning and ending with an all-knit row in that color. The bottom of the swatch shows the difference in the side edges if half repeats are not planned for. If this were a production item it would actually be possible to work out the repeat on enough cards so they could be used as a continuous roll rather than having to so frequently reinsert and rejoin them. This sample was knit in Jaggerspun wool, and since wool has memory, the resulting 3D texture remains after steaming, resulting in a noticeable difference from the previously knit acrylic swatches.
 and the knit side