Two color dbj, non repetitive images, electronic kms.

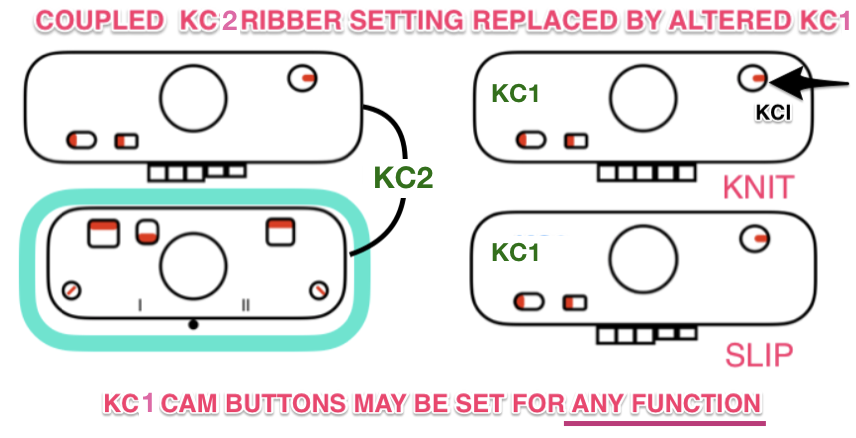
Additional information may be found in previous posts on ribber adjustments and color changers

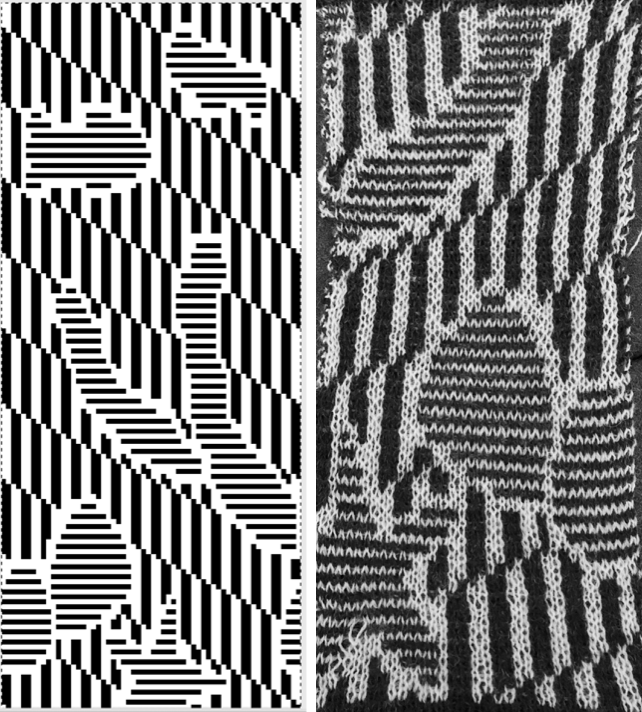
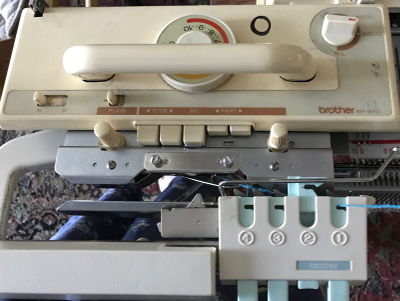
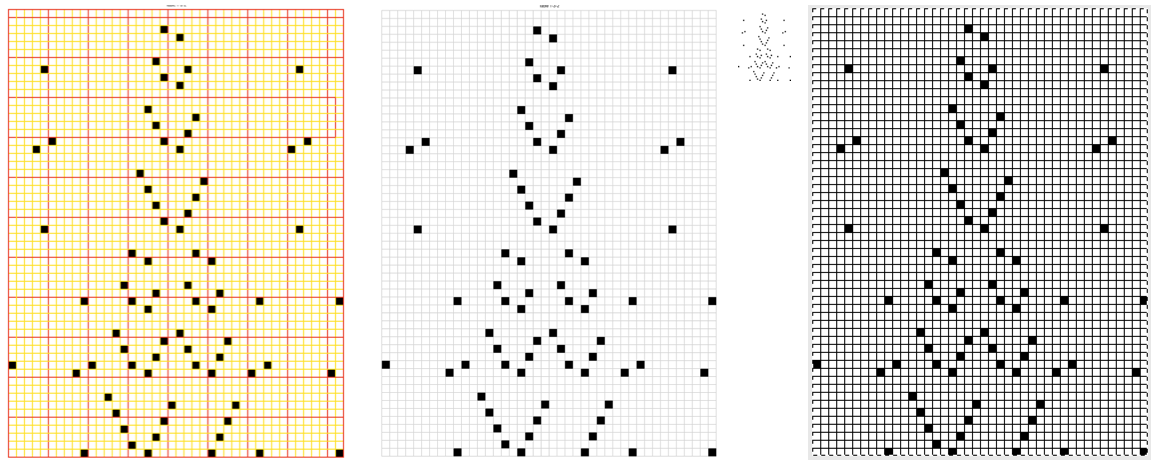
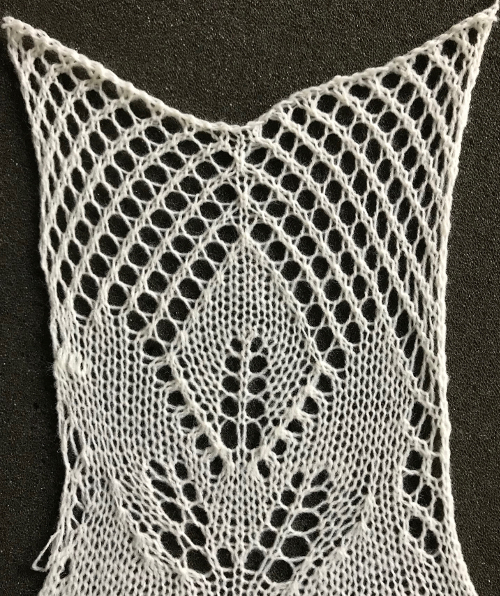
Recently I began to be curious as to how long, non-repetitive images might be handled when knitting on both Brother and Passap. The subject is not out of reach for punchcard knitters. In the early art-to-wear days when the options were for 24 or 40-stitch repeats, many artists joined punchcards in length to the desired height, and knit them in width + seam allowances, joining long panels together to form the large images, or hanging them as panels in tapestry format. One such artist was Nicky Hitz Edson. I have avoided working with such images since my bit knitter knit from screen days eons ago. Also, I always preferred DBJ variations on the Passap. I used the KRC function only in my very early Studio Electronic days, prior to acquiring the Passap or any of my Brother machines. Tools and machines available to me at present: 910 with EMS kit and Ayab software, old fashioned mylars also for the 910, an unknown capacity for accurate knitting “rehabilitated” 930 accompanied by img2track consultations for the moment with Tanya Cunningham, and Passap E6000 using technique 179.

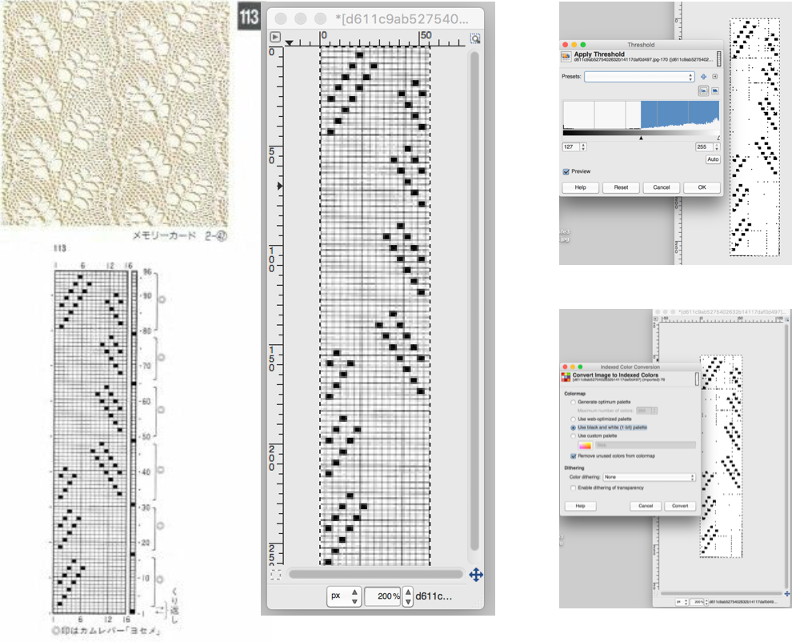
Reviewing some basics: the KRC function built into the 910 performs this separation automatically. It is the default dbj separation in Ayab and uses the built-in KRC button with img2track on the 930. Repeats must be an even number of rows in height.
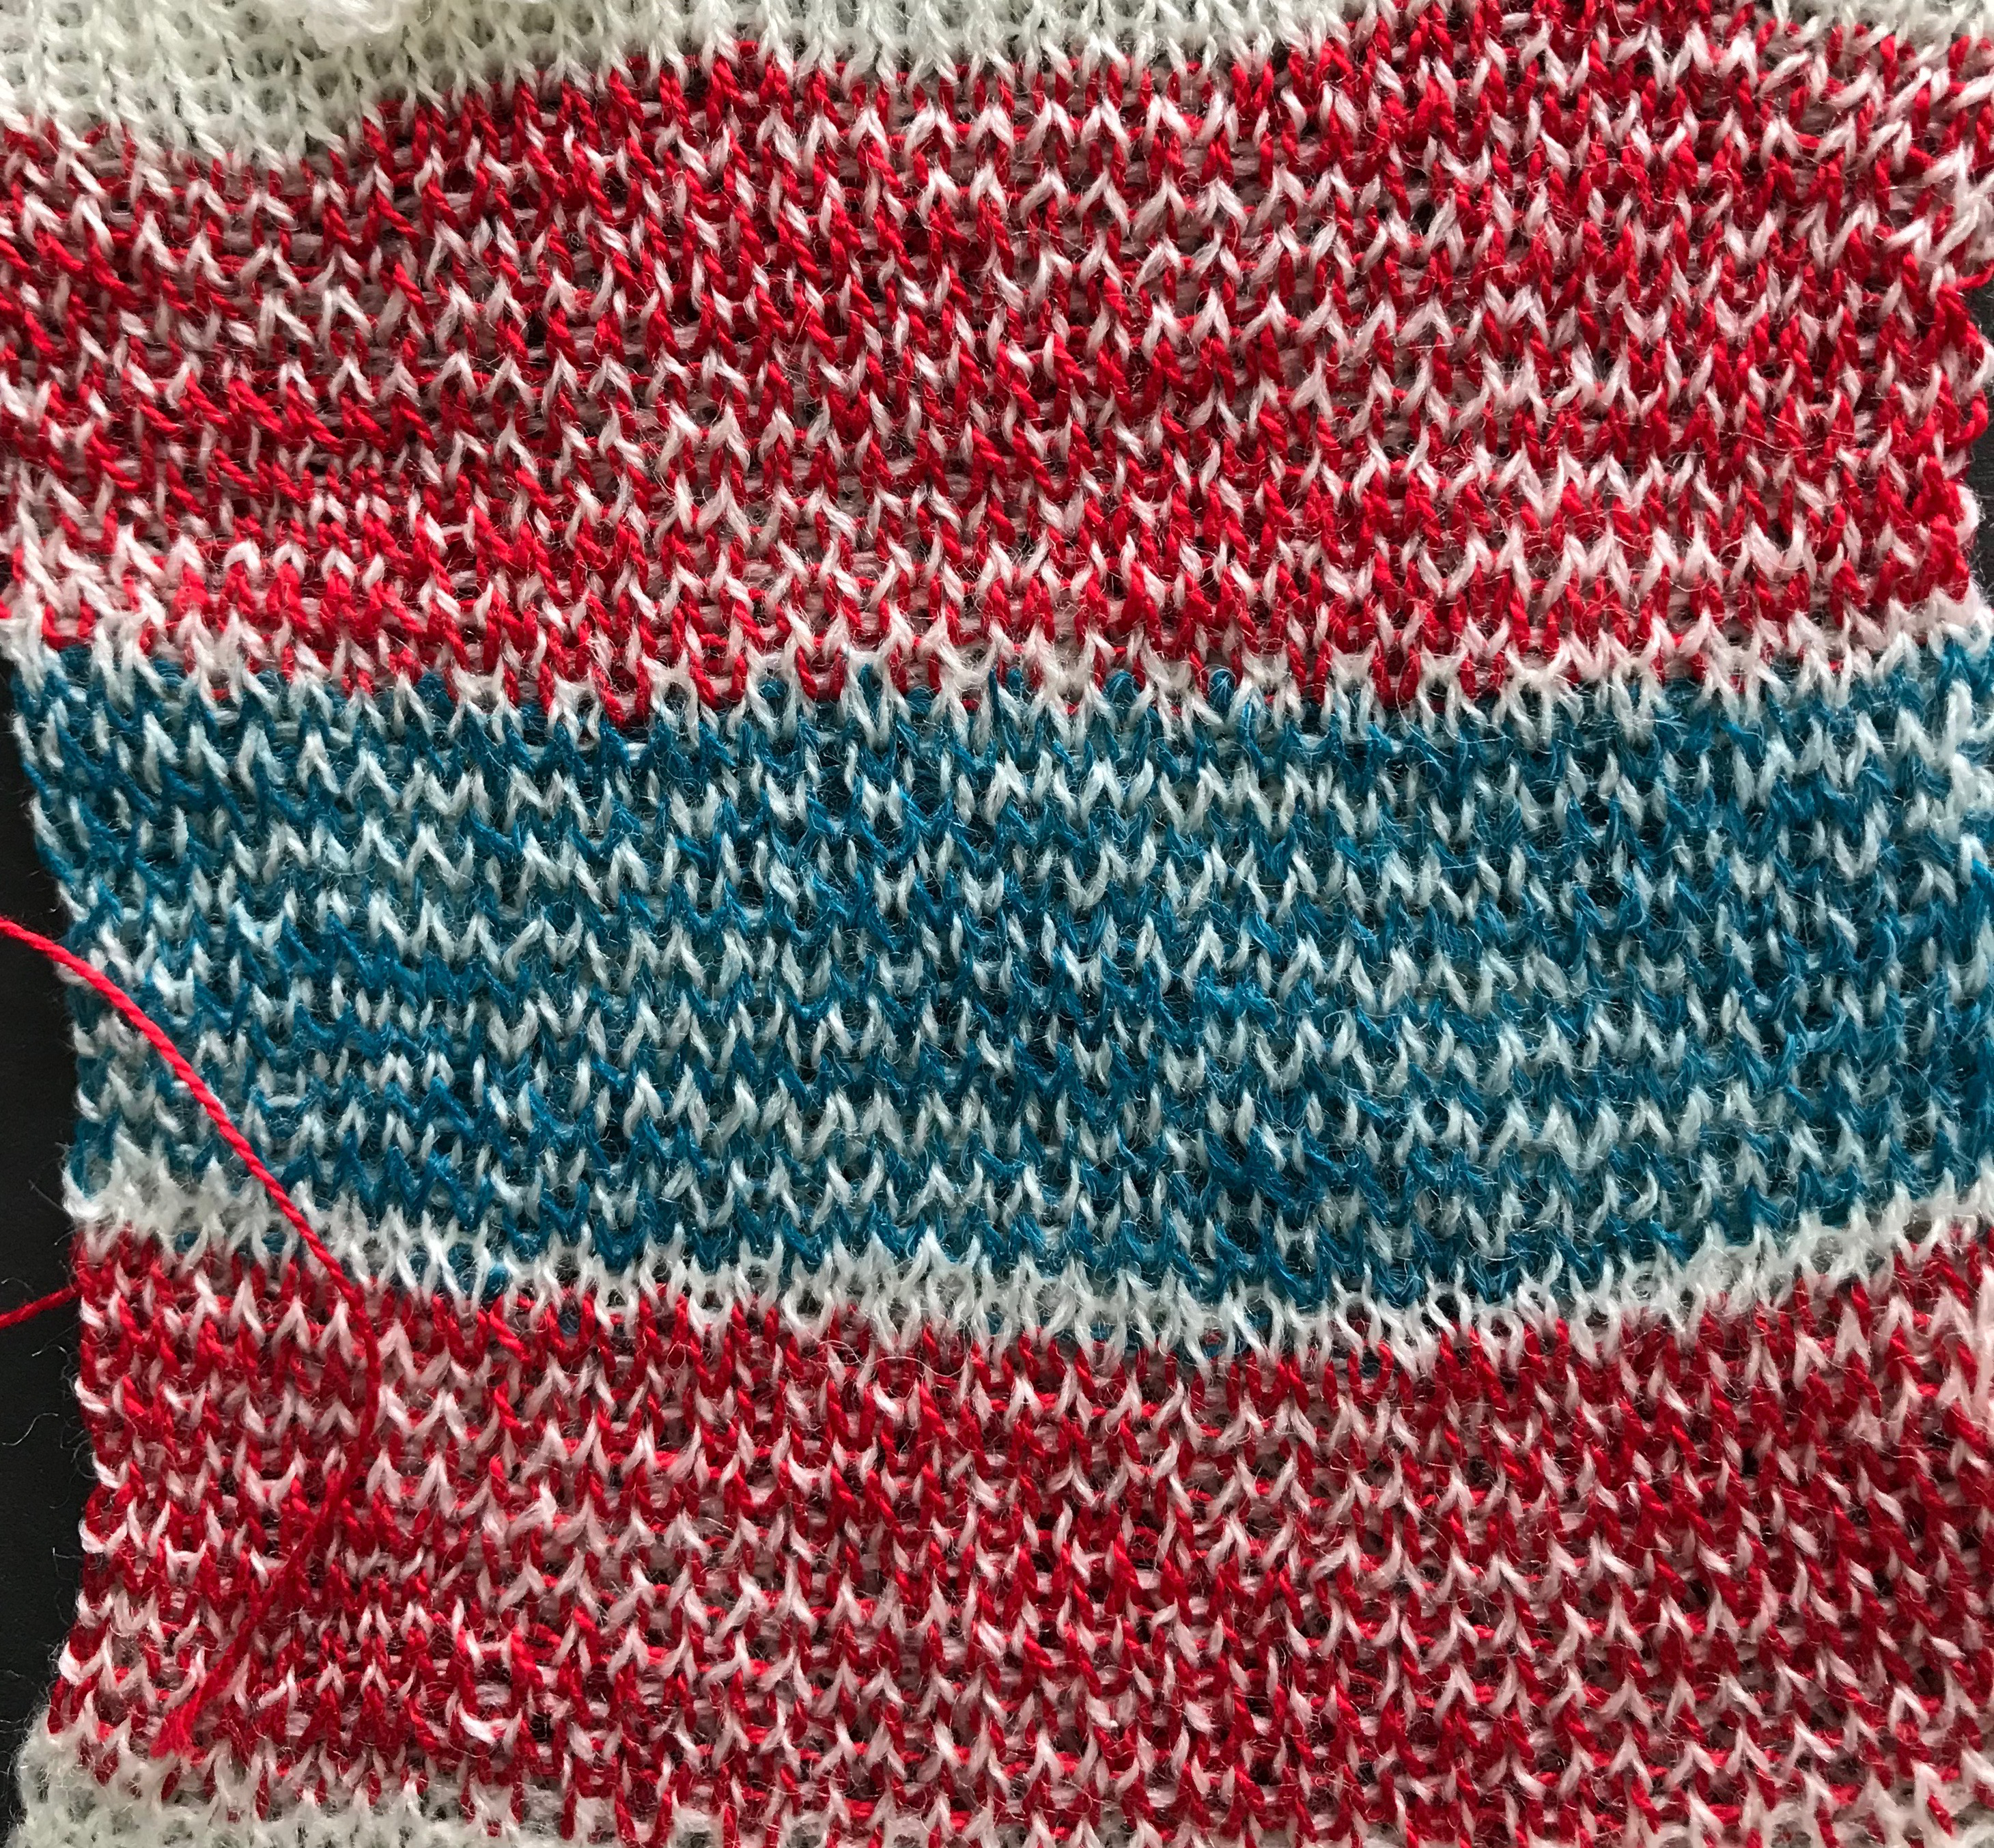
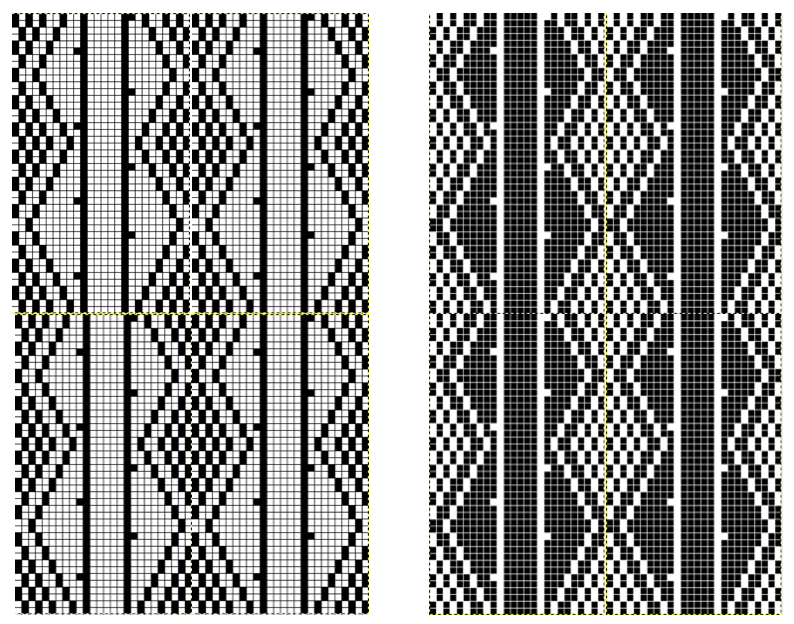
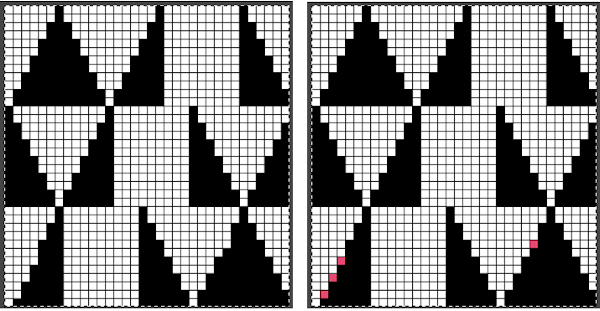
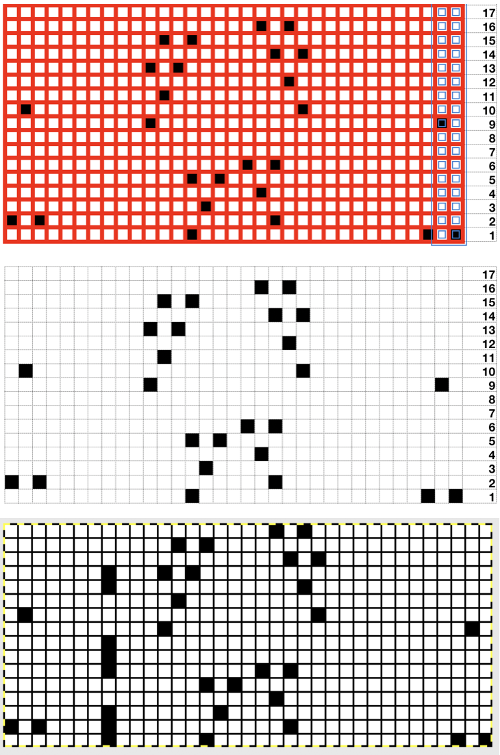
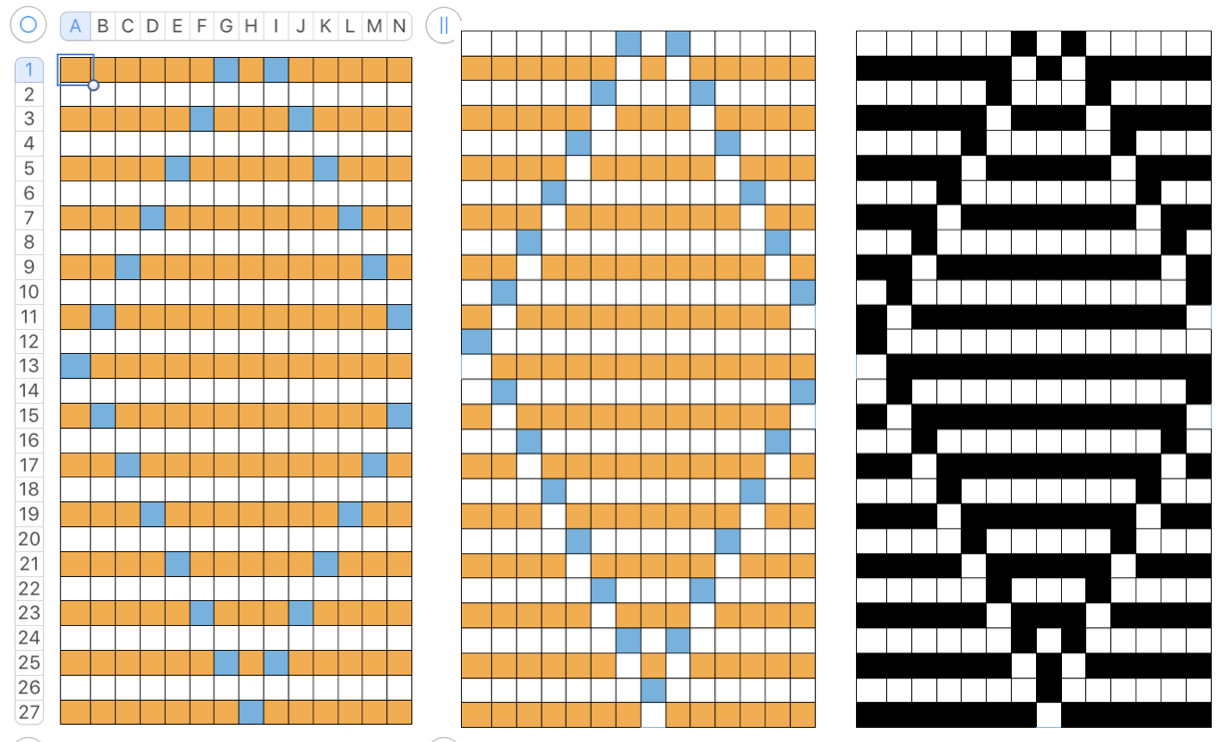
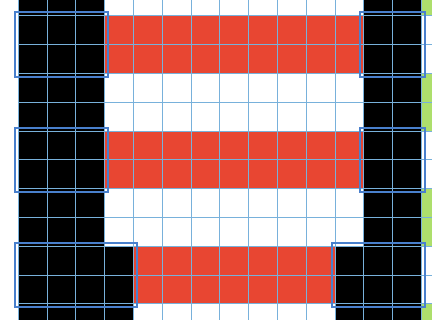
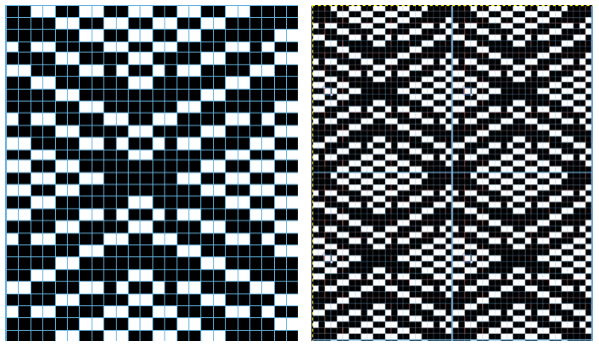
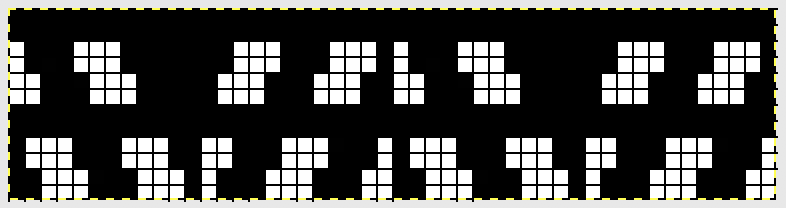
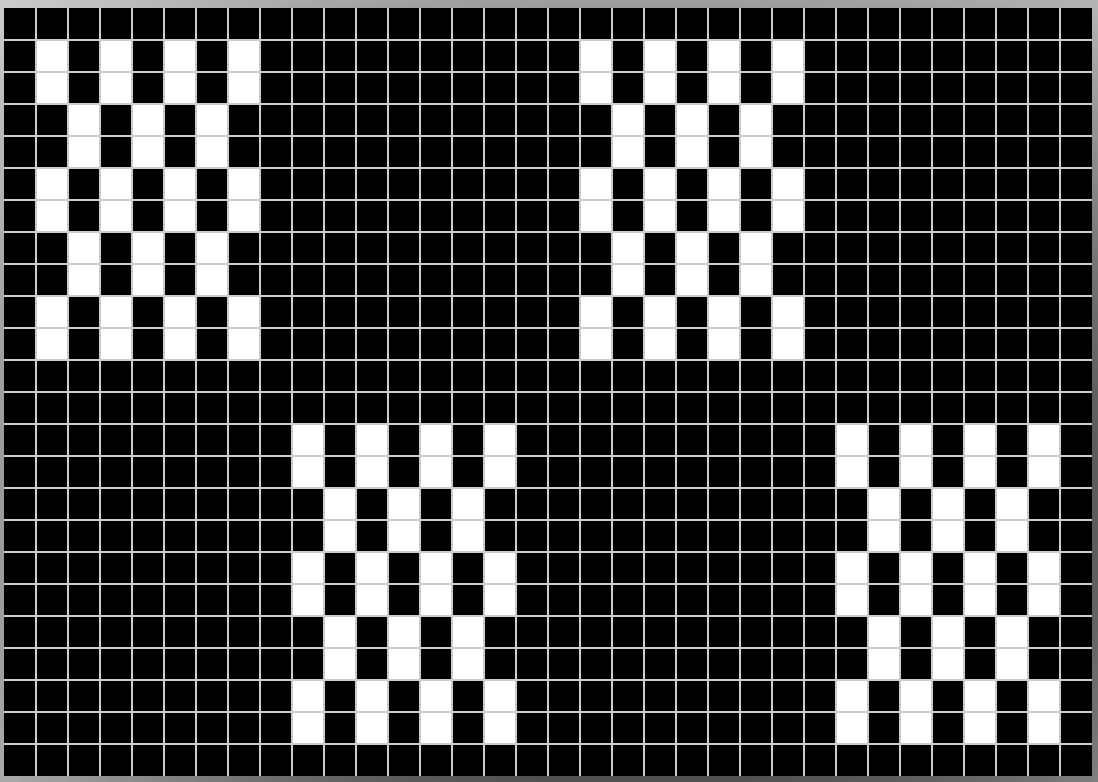
Here the simple shape illustrated in some of my previous is shown in color and repeating twice vertically. Note: the first color used knits only once, toward the color changer  This means the first preselection row needs to happen from left to right, with color knitting beginning from right to left, and subsequently every 2 rows. Pertinent reminders from the 910 manual: in any pattern knitting

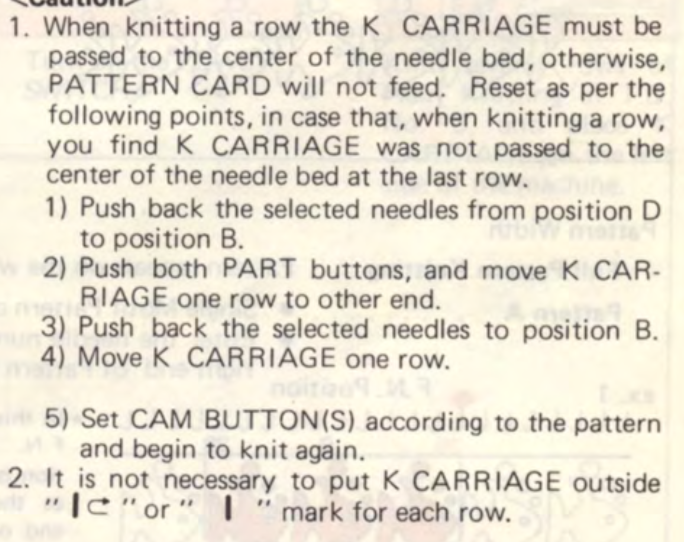
and when knitting DBJ with factory mylar (or self-drawn patterns)White pixels knit first when images are drawn in black and white squares 

KC I or II may be used, needle arrangements can vary depending on the look one prefers on the edges. The 930_940 directions get a bit more elaborate, and show usage of an accessory “latch opening tool” (I have never used it on my 910, may have to give it a test in the future); img2track downloads to the machine’s built-in brain, the equivalent of downloading to the Passap console, which will hold the pattern program in memory until altered or erased. In re-reading manuals, I noted I have had a chronic habit since I began knitting of referring to the ribber “connecting arm” as its “sinker plate”.

I have several sinker plates. In reference to the above, this photo illustrates the location of #2 when present vs. not

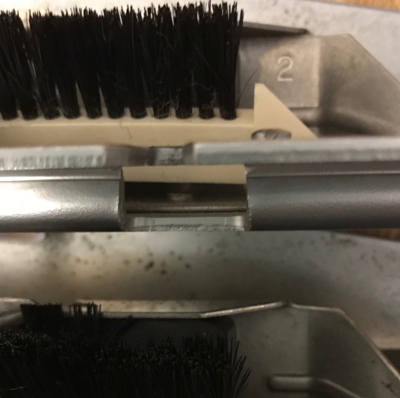
here the latch opening plate has been secured into place in the connecting arm without the #2 marking, where it makes a noticeable change, bringing the unit closer to needles when on the machine during knitting

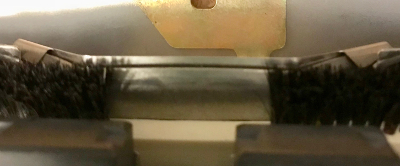
A reminder: if the needle presser bar on the ribber (all plastic) is to be removed, it is reinserted back in with ridges facing, and flat side down
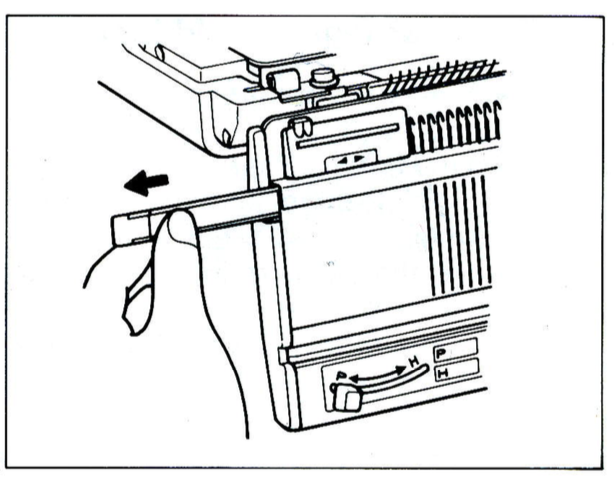
When the pattern selector is down, the pattern is centered on green #1 (right of  0). If a pattern is an odd number of stitches and the pattern limits are yellow 12 and green 13, the center is green #1. AYAB color sequence is reversed from the Brother convention of white pixels being color #1, and black pixels being color #2. It chooses black as color #1, and white as color #2. The first pass to the right is set up with the “black” yarn. The first pass to the right preselects for the first row of black squares, which will be knit on the first pass from right to left. With an odd number of needles, Ayab places the larger number of needles on the left, its orange (yellow) side.

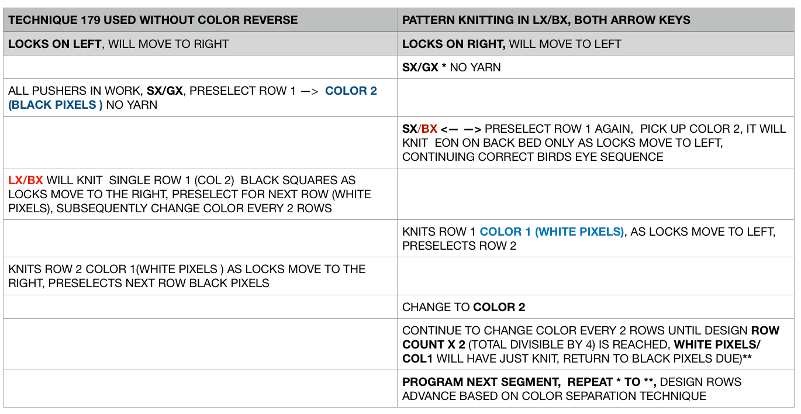
The closest relative to the KRC button in the PassapE6000 is Technique 179, intended for emulating single bed 2 color FI on Japanese machines, but it may be used with every needle rib and varied back lock settings to produce far less elongated DBJ than its standard built-in DBJ color separations. In single bed knitting GX/LX is used, for DBJ use every needle rib, and set back bed settings and pushers for desired backing (GX is the Passap equivalent of a free pass, with the bed in that setting not knitting any stitches, whether or not any needles are in use or holding yarn). The repeat must be an even number of rows in height. The instructions in the company publications are that color reverse must be used, swapping the background and motif colors. The color-changing sequence is the usual one. Both KRC and 179/ col rev knit white pixels first. When knitting a row in Brother machines the K carriage must pass the center of the needle bed, or the pattern will not advance properly. In Passap, programmed end needles for the pattern on each side must be cleared or error messages will be received, and a pattern “correction” will be required before continuing.

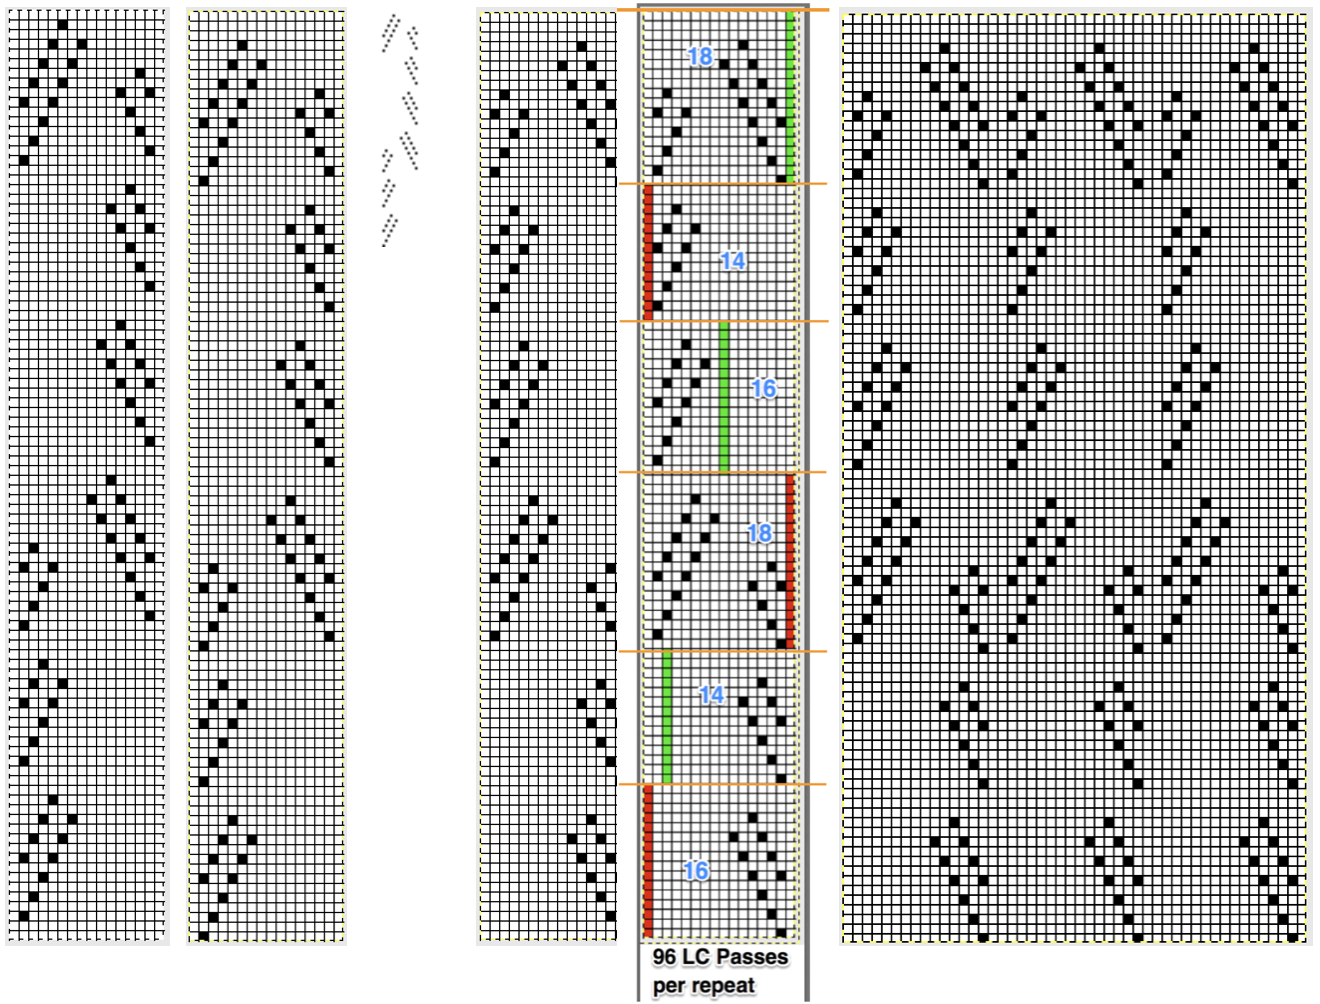
I am planning to begin by using a 2 color, large repeat factory mylar scanned and reduced to a downloadable image, details on how to in a previous post. The goal is to knit segments that are part of a continuous, “longer” image. My ultimate goal: is to knit scarves that are 70-84 stitches wide, with nonrepeating patterns for 12-1400 rows. My understanding is that such an image in img2track would be broken into tracks by the software, with each track programmed in turn as separate segments, and the software warning one when the last row for each track is reached. In Passap the segments will be entered as patterns A, B, and C, with no warnings at repeat ends, they are calculated based on math. Segments will be 30 pixels in height as  “pretend” longer file components, for the sake of knitting speed.

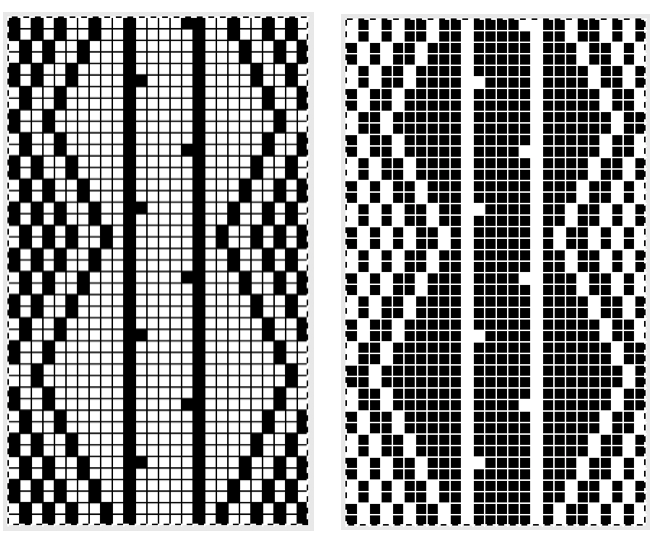
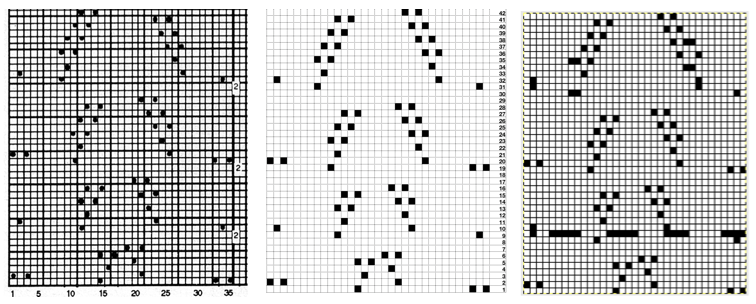
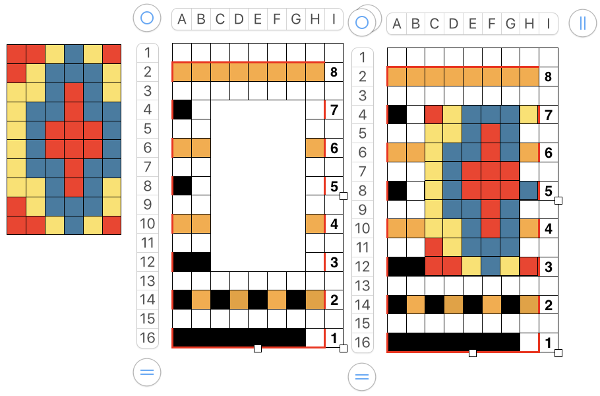
That row back to the color changer knitting row one again would show up as an error/ extra row below row 1 color 1 of the subsequent pattern. Looking at it in terms of black and white squares, what happens the same repeats when stacked continuously above each other

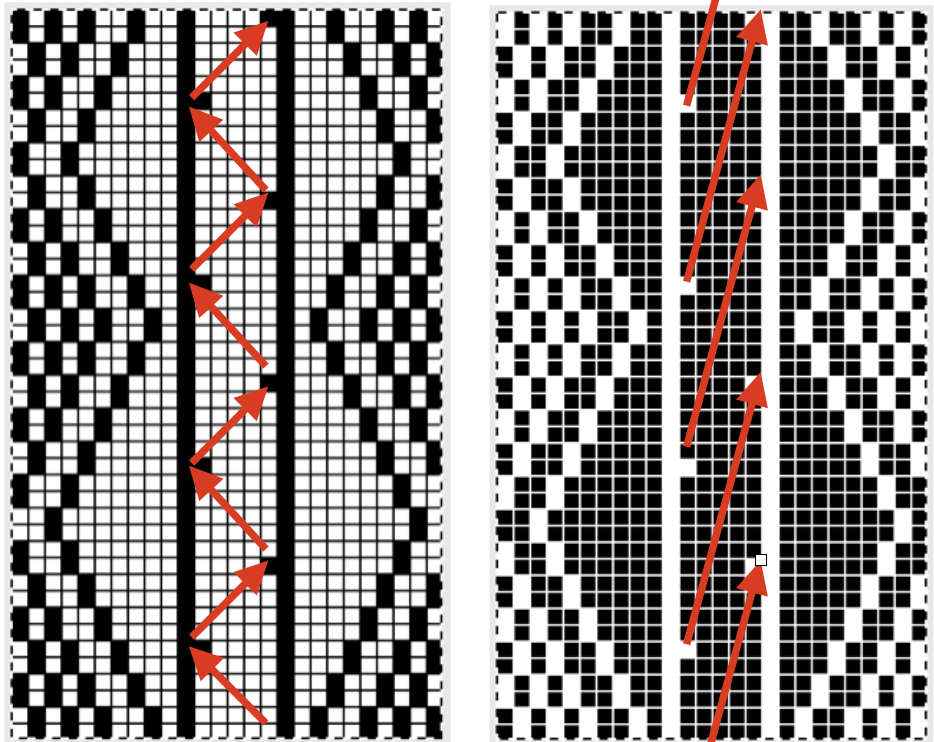
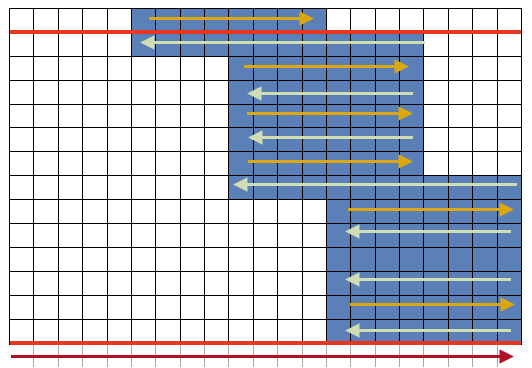
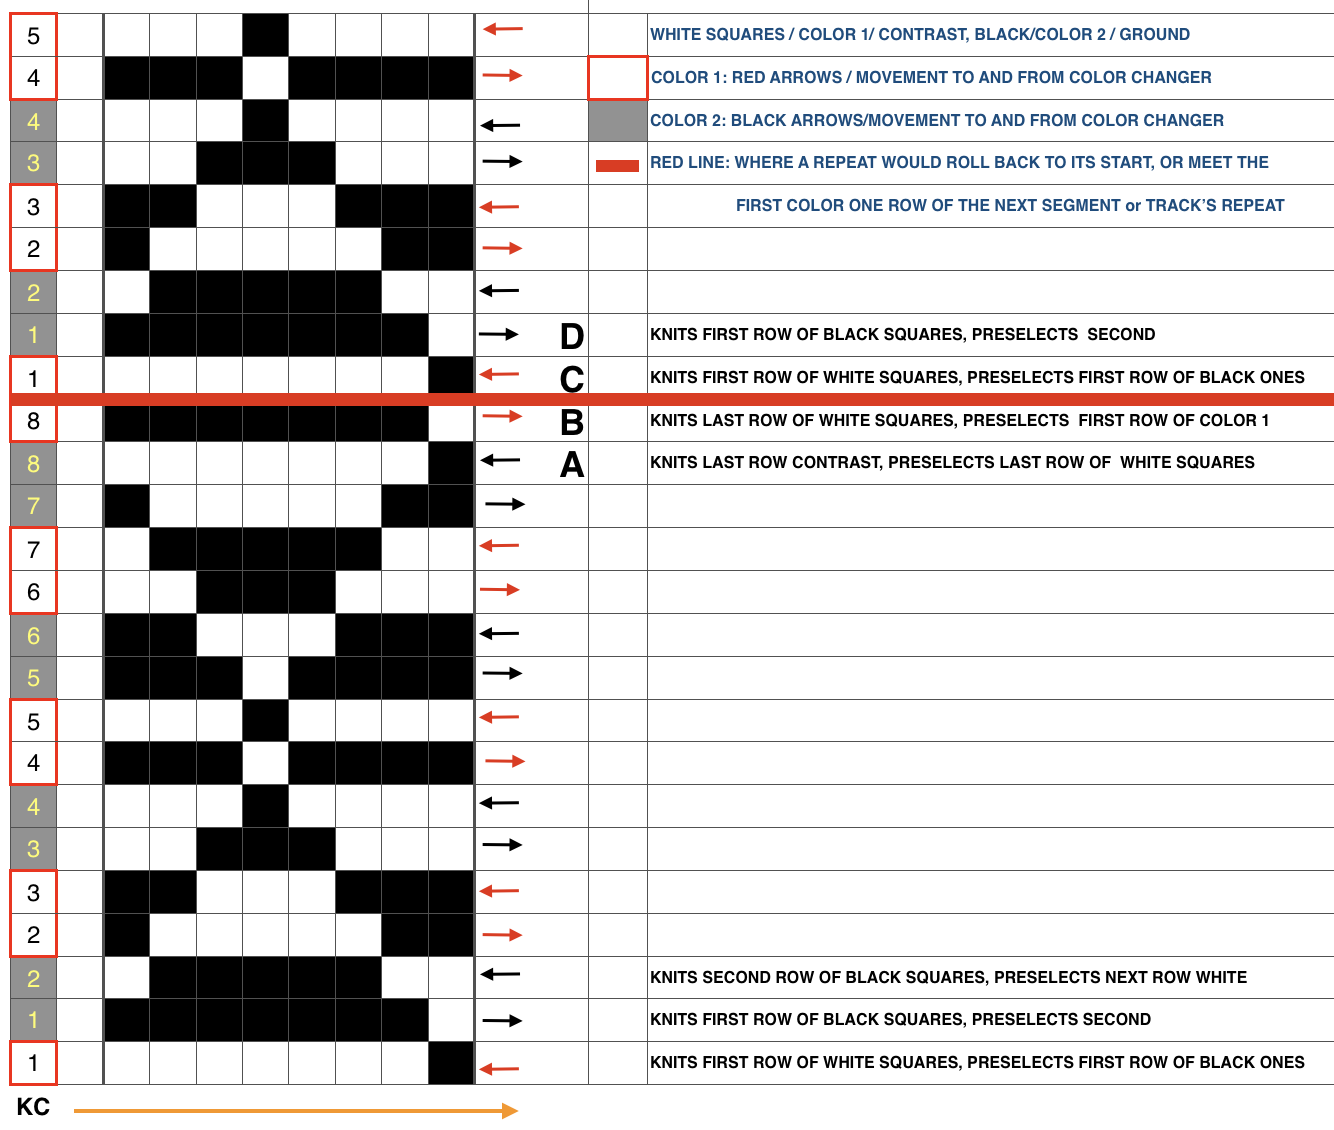
The problem comes at the intersection of the 2 different patterns; the assumption with the KRC separation is that you start with one row of color 1 opposite the color changer and if you are knitting a continuous, “looping/repeating” pattern,  knit the last row of color 1 away from the color changer (B), and will start with row 1 color one again toward the color changer on the left in Brother (C). One approach is to stop knitting in pattern opposite the color changer, (red line), program the second piece of the “longer” design, and start to knit the first row of color 1 again for that pattern segment, going from right to left/ toward the color changer(C). Color changing then follows every 2 rows until the top of the second pattern piece is reached, repeating as needed.

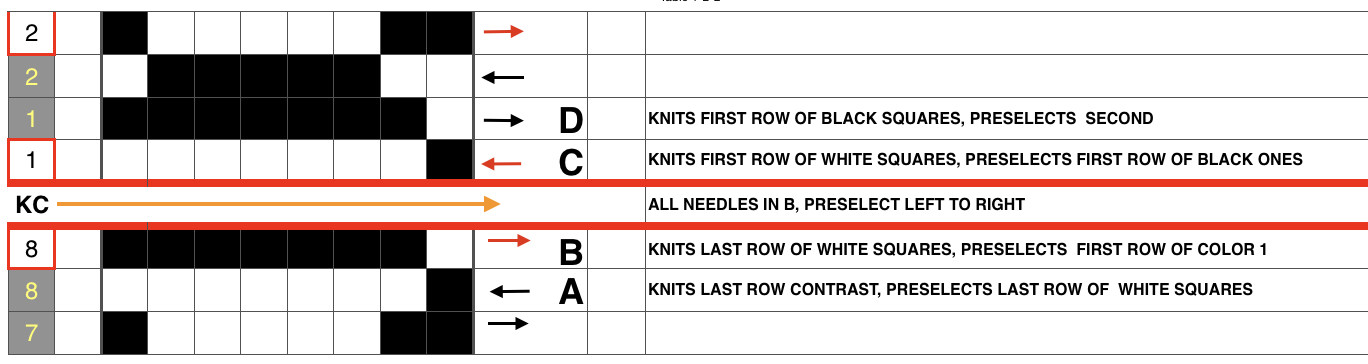
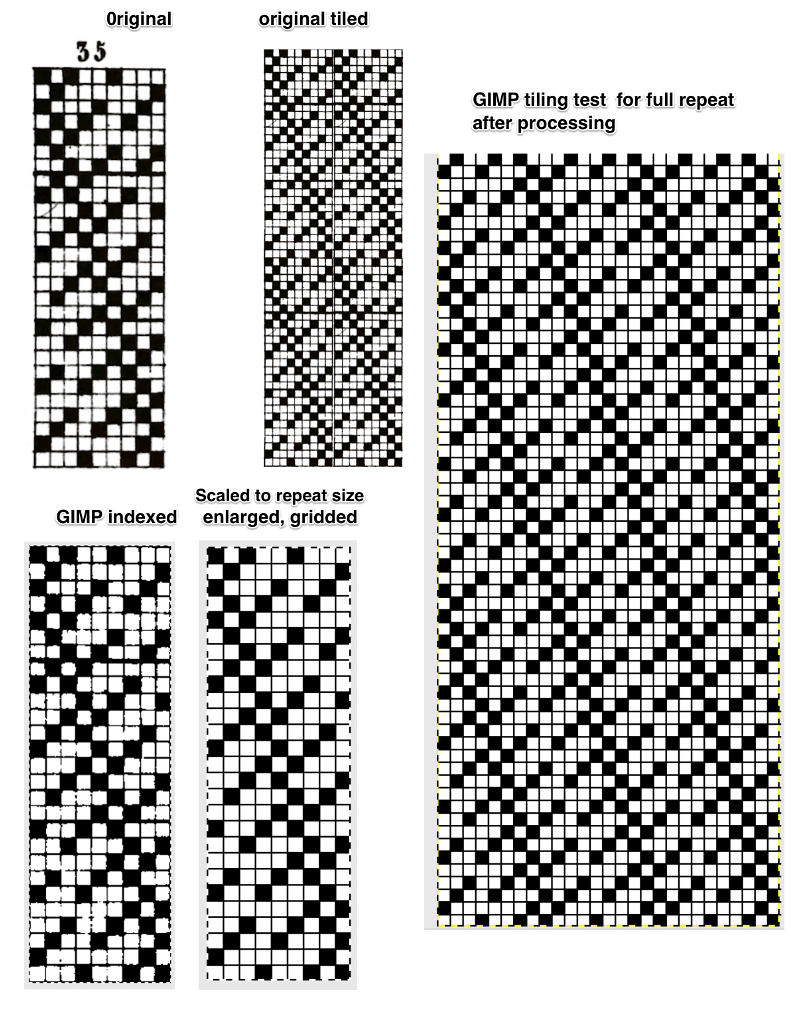
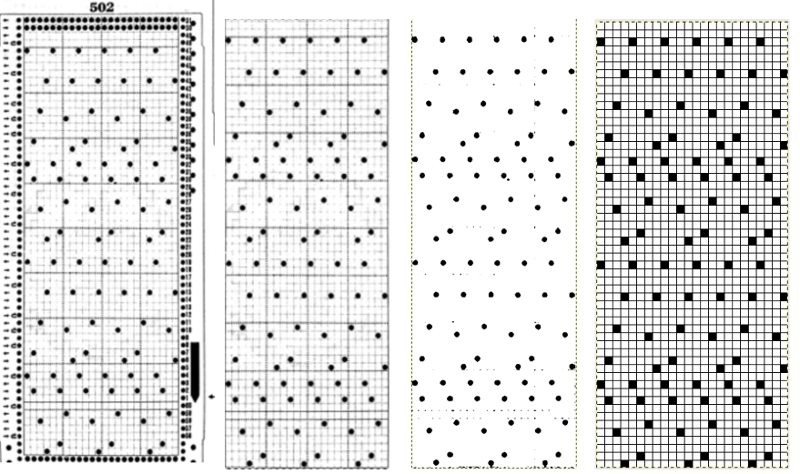
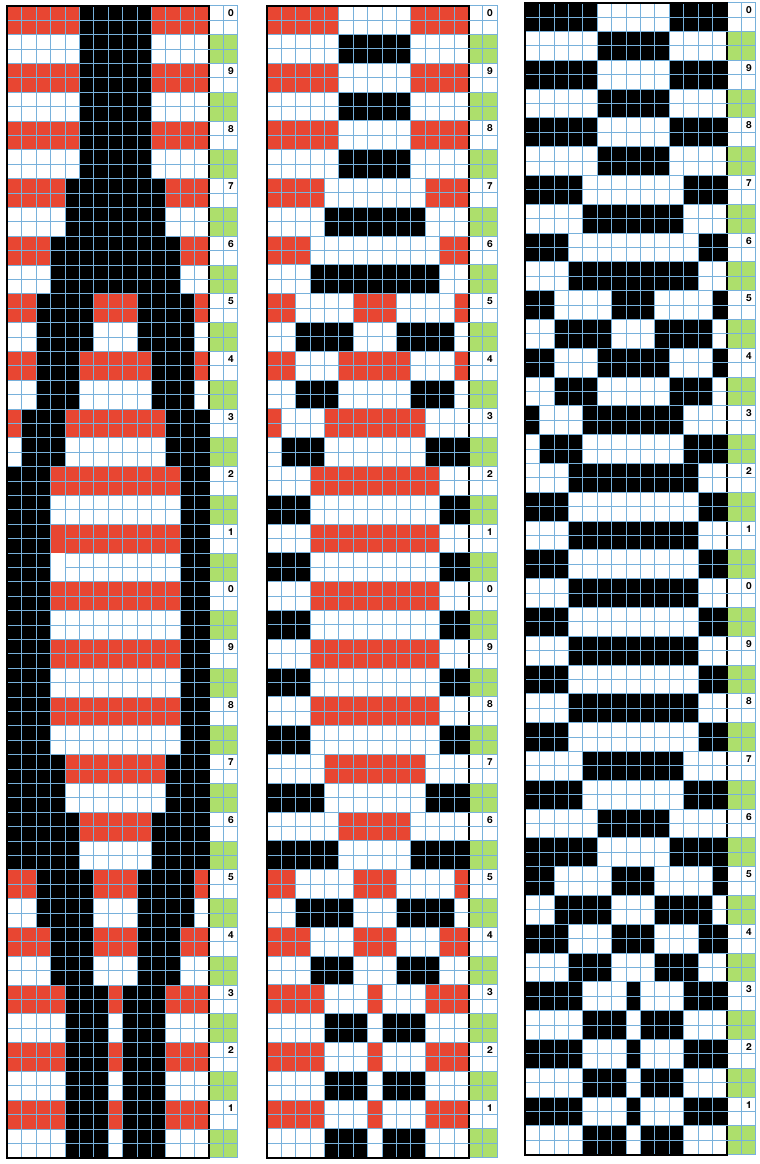
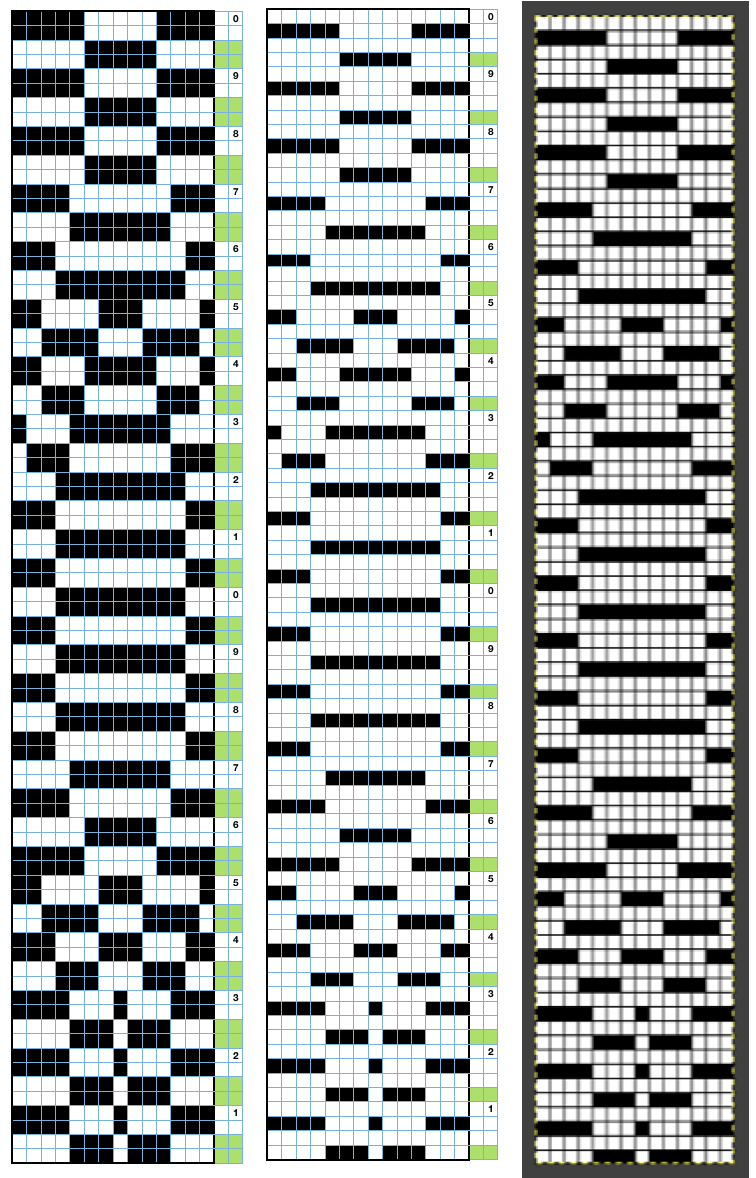
The full mylar repeat scanned and processed for use as images to be eventually downloaded via cable is shown in the top image. Below it segments 1-40 stitches, rows 1-30, 41-60, and 61-90 are shown as selected, cropped in turn, with corresponding .bmps saved for cable download. AYAB users can work with image software like Paint, Gimp, etc. to process and save them as b/w bitmap, png, etc. Img2track accepts common image formats (jpg, gif, png, .bmp, tiff). Both software programs may be used on PCs and Macs. Wincrea Win_Crea can open files in .cut (Passap), .bmp, or .wmf formats, and can be saved in .cut and .bmp. Passap and the 930s hold the segments in their own memory, while ayab knits from the screen. Stitch Painter (2.0) prior to the latest release used to have limited import and export formats, including .cut. There now is a new website for the program, and a new release, and I could not find info on exports beyond “There are now numerous export file formats including PDF, JPG, TIF, PNG, and other popular formats.”

The full mylar 
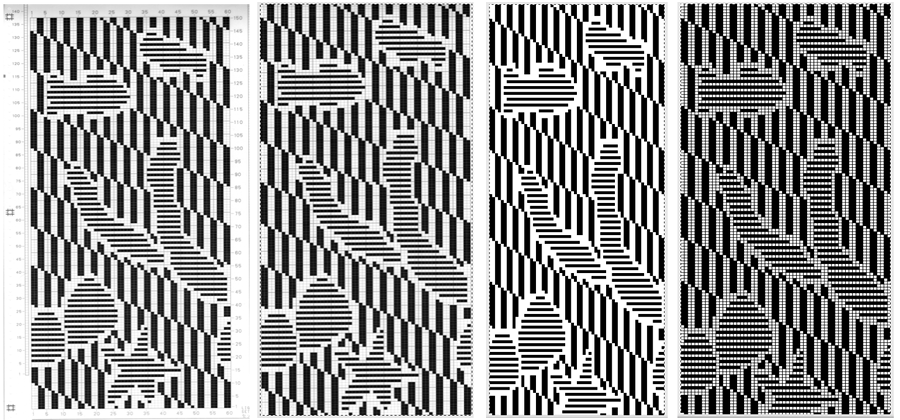
three segments, selected from its bottom left 

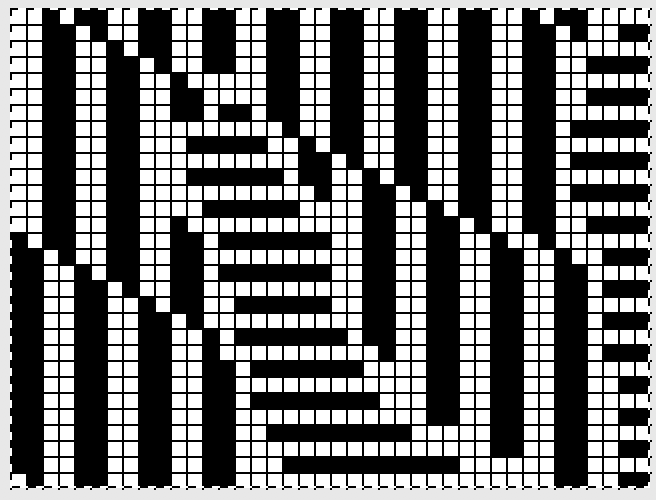
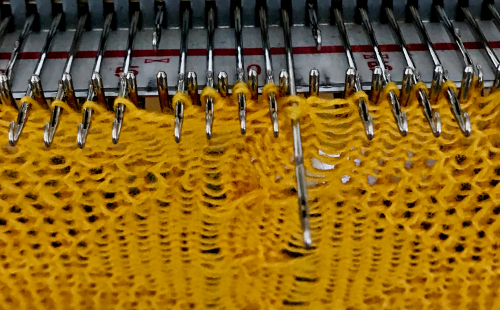
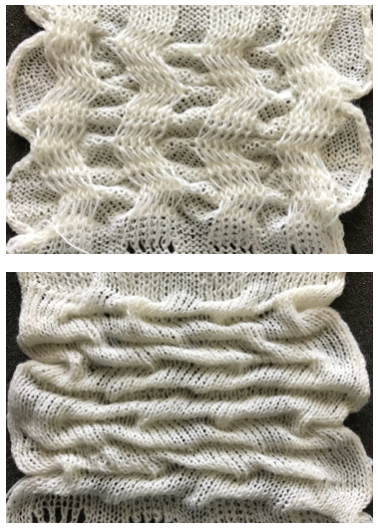
Proof of concept swatch on 910 using the mylar, programmed consistently in width on needles 1-40, with height for each segment 1-30, 31-60, 61-90. I was knit in a throw-away yarn, in unfamiliar DBJ tension settings, so I had some dropped stitches seen in the left, the bottom of the swatch image that were resolved with adjustments in settings. Note the image is reversed vertically by the program automatically with all variation levers down with the exception of the KRC one

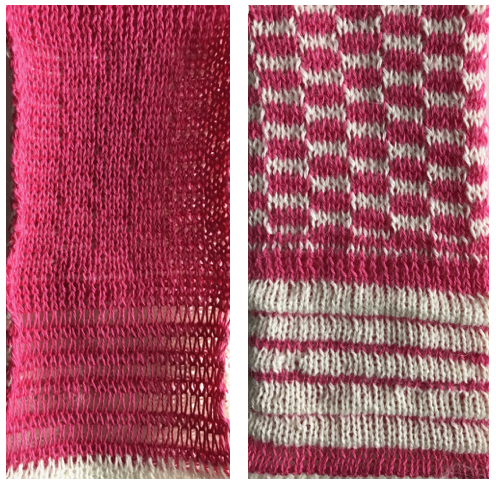
One develops preferred ways of handling images as their knitting experience increases and varies. I have always done my own scaling prior to any actual knitting. Software programs at times offer to adjust the height based on knitting technique and either real or estimated gauge. Passap has a smooth edge feature to decrease stepped effects if the image is enlarged in multiples by the console. In double bed work, sample swatches are often much larger than when working on a single bed, at least 100 stitches by 100 rows. Because DBJ lengthens the image by default (every single row of design now requires 2 passes of the carriage), a separation for a 30-row design would require 60 rows of knitting on the machine to complete the repeat. Ribber settings can help reduce elongation in addition to any scaling of the motif. One alternative would have the ribber knitting in one direction, slipping in the other. This means that every other row the main bed will create floats for the non-knitting color, get caught between beds on the next pass.

In my test design, such floats are quite long in sections of the motif, resulting in problems, so that left me with choosing the lili setting. 

Lili buttons on Brother machines behave like a 1X1 punchcard does on the main bed. There is no free pass with ribber set to slip in both directions if lili buttons are engaged. It is the equivalent of making such a pass on the main bed with every other needle selected, where any stitches on selected needles would be dropped if there is no yarn in use. Also, one may not slip on the same needles continually, so needles in use on the ribber must total an even number, in pairs of what I refer to as dash and blank or blank and dash markings on the needle tape. The pusher selection on the Passap selections operates differently, so an even vs. odd total # rule doesn’t apply.

These photos illustrate needle selection on ribber, first beginning with a dash on the left, ending with a blank on the right, the second beginning with a blank on the left, and ending with a dash on the right. It is the second needle on the carriage side that gets selected in each direction, regardless of the starting mark for needle pairs. Here the blank knits to the right, the dash knits to the left,  
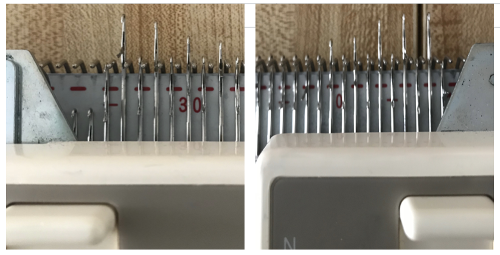
and its reverse, with dash knitting to the right, and blank knitting to the left. There is no way without operator intervention to get that first needle to be the one knitting (such adjustments are made to achieve striper backing as opposed to birdseye, a different topic altogether

I programmed my first repeat segment after casting on, ending with dark color, both carriages on the left side. The white squares (in this case knit in white yarn) need to be knit on the first row from right to left. Either remove the ribber carriage and move it to the opposite side or tilt it forward and move it to the right, being careful not to engage any needles. After it is in place, set it for birds-eye backing

The knit carriage is now brought to the left, set to slip in both directions, KCI or II, in proper placement outside the turn mark for the first preselection row to the right. Make a free pass to the right, needles will be selected in pattern for the first single row of white squares (needles on the main bed after cast on are already only in B position). Place the yarn properly in the feeder, couple the carriages, knit right to left, and change color every 2 rows.

At the row before the last row of the pattern (top row, color 1), the card is automatically returned to the starting position of the pattern. When the machine buzzer alerts with its sound that the end of the repeat is being reached, the contrast color 2 (black squares) will be on the right side. In my initial attempts, I used the approach: knit to left, change to white (color 1), knit a single color 1 row left to right, and stop. Do not cut the yarn. The next pass to the left needs to knit the first white squares row in the next segment. The ribber carriage remains on the right, the bird’s eye pattern on the back will not be interrupted. I took the knit carriage off on the right, moved it back to the left side, it will not be holding any yarn. Prepare for knitting the second segment. There will still be needles selected (they would have knit the first white row when moving from right to left if the repeat were a continuing one). They need to be manually pushed back to B or those stitches will be dropped on the free pass to the right. Program the new repeat segment, and as usual, pre-select to right, place white yarn back in the proper position in the feeder, engage both carriages, and knit repeating the process until once again, a first, single row of the white is knit at the top of the second segment. The machine sounds serve as reminders when you have reached the point where things require attention. The process is repeated until all necessary pieces have been knit, composing the much longer image. As I worked further, I believe the same method may be used as seen below with the mylar in place. Knit the last row with the ground color to the left, preselection for the white squares is made on the way. Do not disturb needle selection on the bed or settings on either carriage. COL. Program the next segment, begin on the far left outside the turn mark, and change color to color 1 (white squares). As the carriages move to the right, the last row of segment one knits, and the first row of segment 2 is preselected. As the carriages return to the left to begin color-changing sequence every 2 rows, row 1 color 1 segment next will knit, while the first row of the ground (black squares) will preselect. 

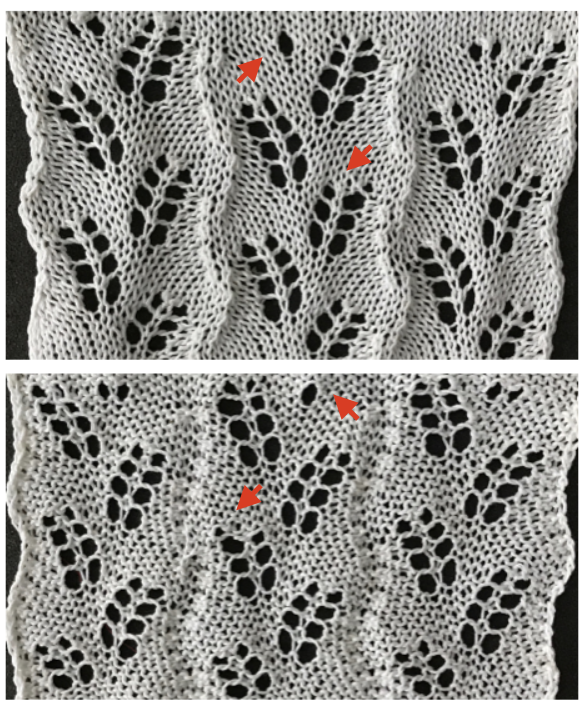
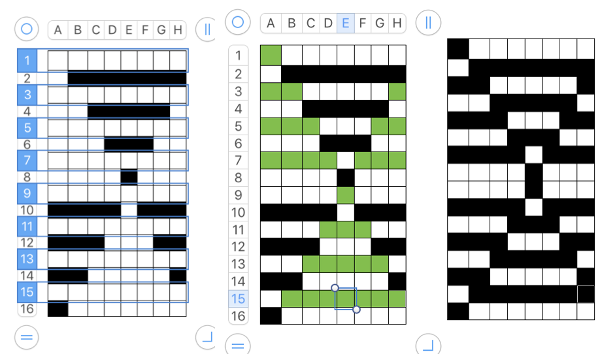
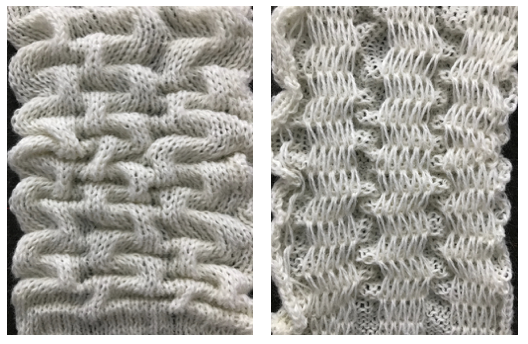
I recently received a second EMS Ayab kit I am just now beginning to use. Here the same image, bottom segment only, is tested. Knowing Ayab selects black squares first in its ribber setting I used the action invert available in the program itself to color reverse (middle image) so white would knit first. The process remains essentially the same in terms of ribber and other settings prior to knitting color 1 design row 1. The difference here as compared to the sample knit with the built-in KRC, all other buttons down, is that the native 910 KRC image is reversed on the knit side, it is knit as it would appear on the purl side. The Ayab version automatically mirrors the motif to have the original appear on the knit side as drawn. 
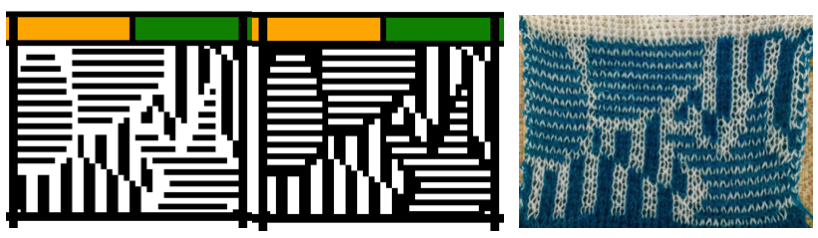
I did attempt to load the 3 segments into the program, and knit them using the single setting (left), and the infinite one (right). The single setting gives one alert when the top of the repeat is reached akin to the native buzzer, the infinite relies on the operator to know to stop. I had problems with the yarn I was using and dropping stitches after out of curiosity I decided to add the latch opening plate to my ribber carriage. They went away when I removed it in subsequent swatches. I was not successful again using the single setting. The arrows mark what appears to be needle selection errors in both series.  9/18/18 Because of space restrictions at the moment my ayab and 910 are in “storage”. As I kept working, it occurred to me this method might be the way to go when using Ayab as well, at present it is untested

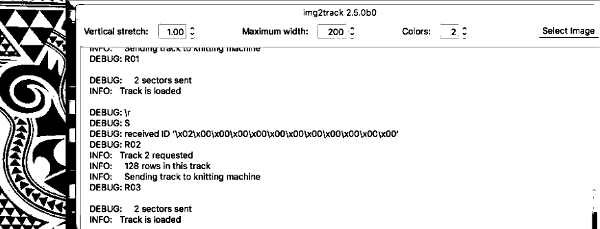
Here I attempted proof of concept with img2track on my 930 which is nice enough to track rows knit. As the top of the first segment was reached and the carriage began to reverse direction from the right, the machine made a warning sound, alerting me to the fact that the second row for row 30 of color 2 was about to be knit as the carriage moved back toward the color changer selection was made for the last row of color 1making certain I did not disturb the needle selection in that row, I took the carriages to the far left, programmed the second segment in the repeat, with no other changes to carriage settings, changed to color 1. The above row is knit on the first pass to the right with color 1, while the preselecting row 1 for color 1 in the new segment and knitting it on the return to the color changer. The idea appeared sound, but then I ran into this: random dropped stitches. At first, I thought it might be a yarn issue (different fiber content and weight). After a break, I took the time to check all ribber adjustments, since this deconstruction was not part of the plan. 
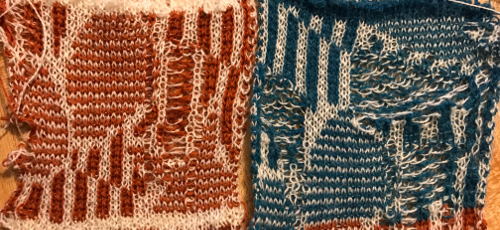
Adjustments in ribber height (dropped a bit on each side) appeared to solve the problem. I began the swatch intentionally with plain knit stripes as an initial check, and switched color 2 to the other yarn to test any different behavior there as well. I had actually moved my ribber from my 910 to the 930 without checking alignment and spacing after doing so, lesson learned.

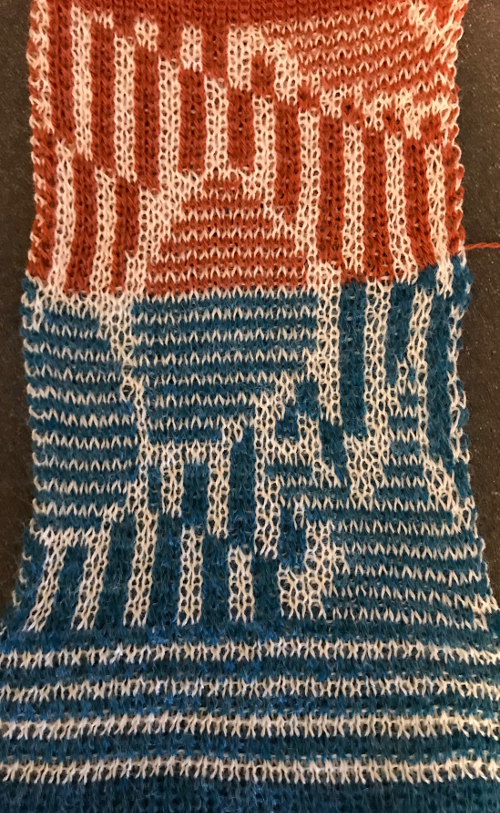
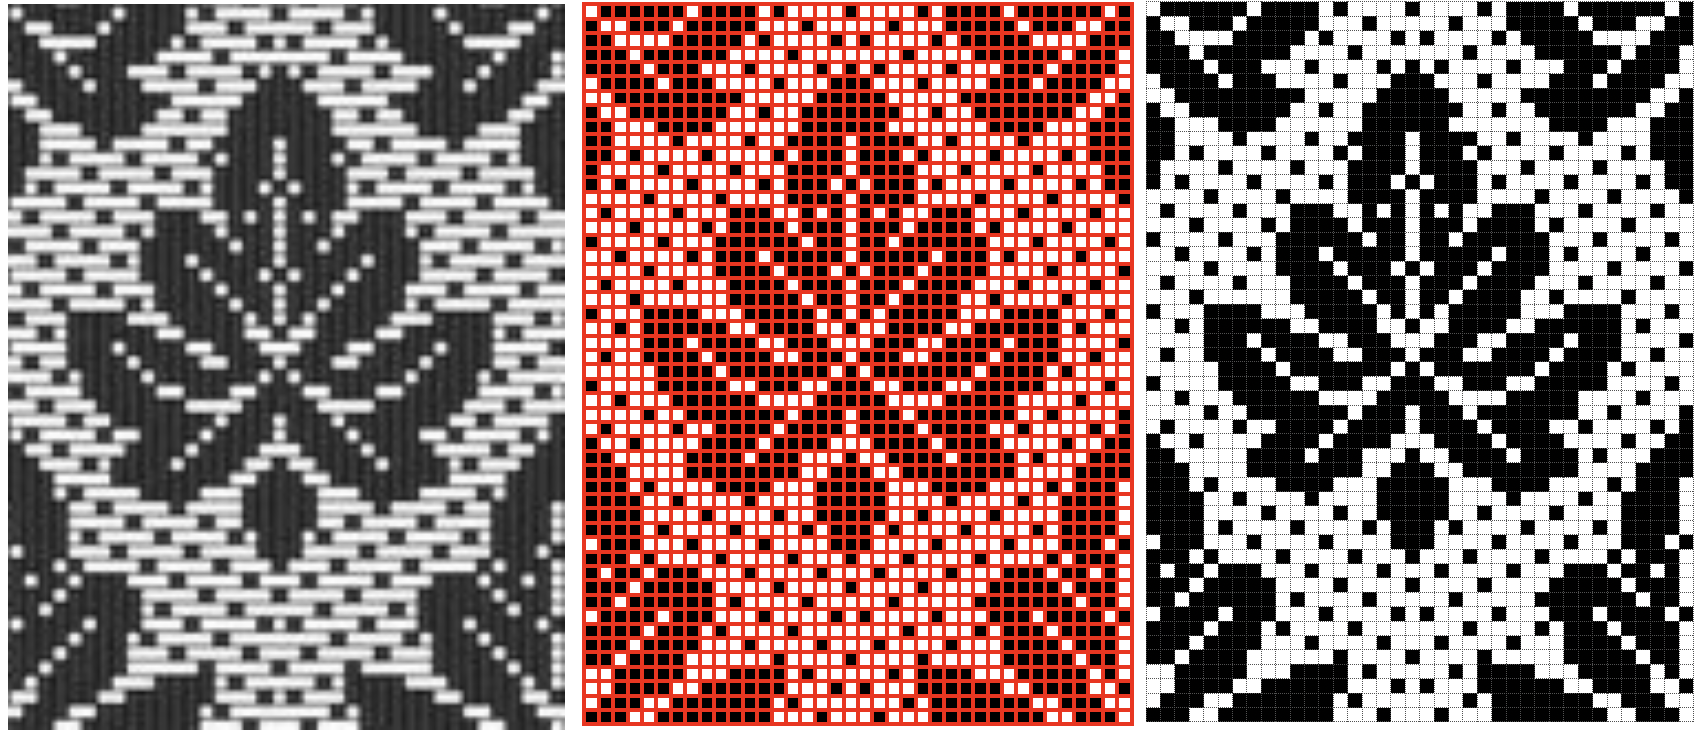
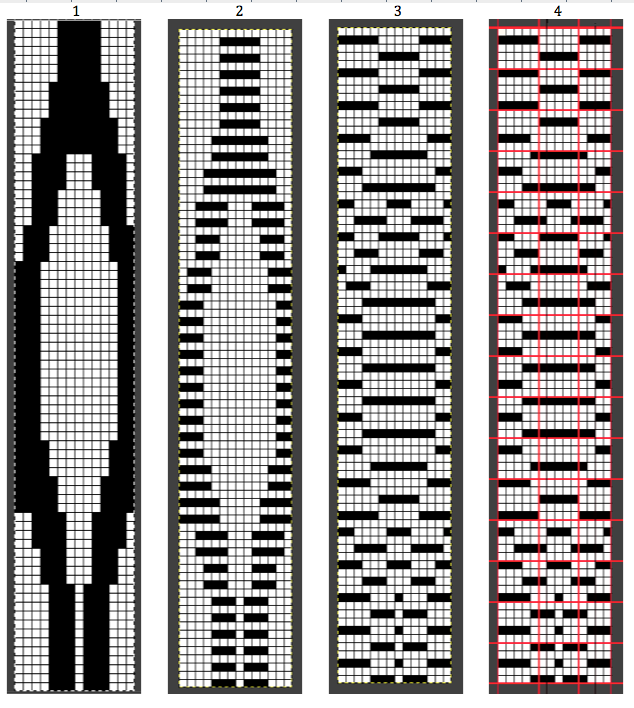
A theoretical design as a starting point for more discussion in Facebook 

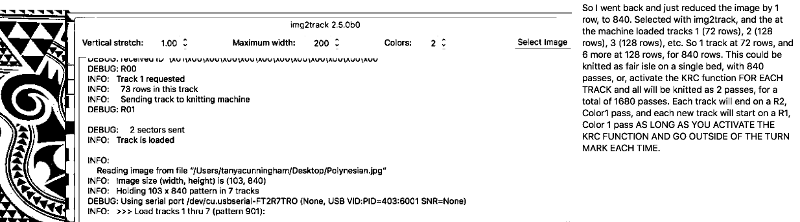
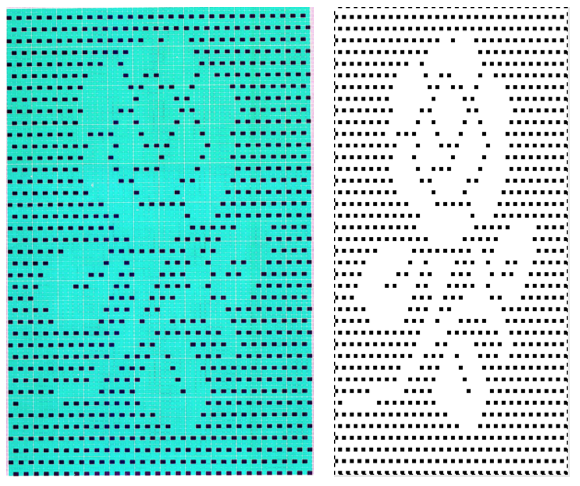
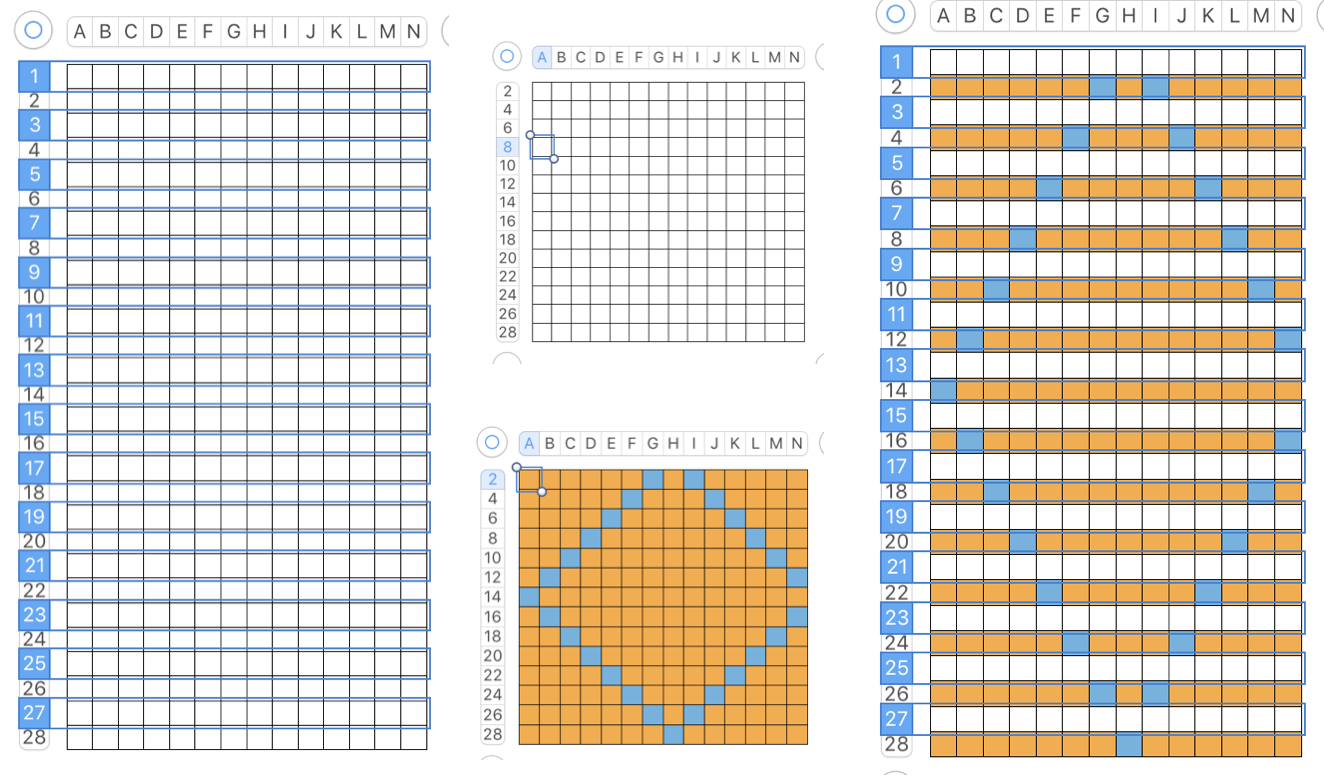
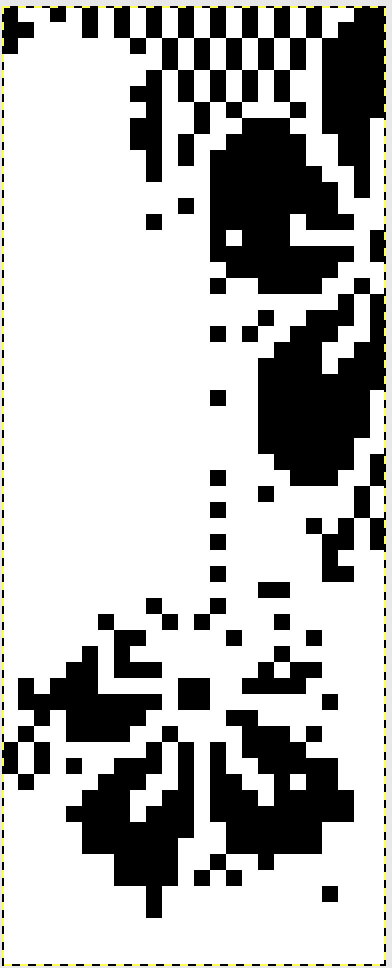
I cannot speak for img2track from personal experience. When I posed the question to the FB group as to how the program might handle a long, non-repetitive image, I supplied the image above. It is not knittable as is, 103X841(odd#) rows, from a random illustration, found online that would need a lot of “clean up”. Assuming it was knit ready, an even number of rows and other DBJ setup requirements are met does the 2 color separation work for the whole image length or must the image be divided into segments that are in turn knit and color separated separately? Tanya Cunningham, the creator of the group, was kind enough to respond in the forum, and I have her permission to share her response here. “Img2track creates a B&W pattern of the full length of the image. THAT file is useable in other applications. Many people create an image file with img2track, then load that image file into DAK to knit. Img2track does NOT create separate image files for the various tracks into which it breaks larger images. That happens when you request the pattern from the machine console. When img2track receives the request from the KM, it offers all tracks, and you select which one you wish to load. This image is already in a format such that it will not be altered by img2track (.bmp) (unless you restrict the width.) I selected it with img2track, and the resulting “pattern” was basically the identical image, just converted to a png.
The image was at first loaded in an uneven number of rows, and the software gave the warning “It will not end well!”

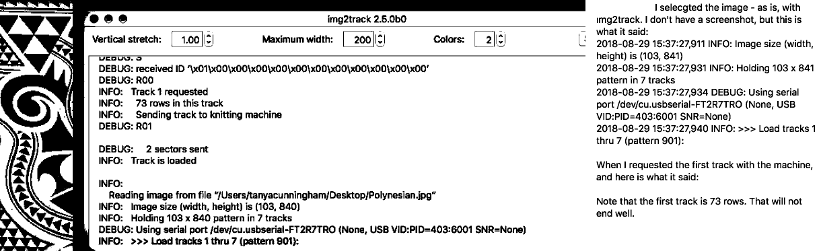
“As you knit the last row of each track (left to right) you will be selecting the needles for the first row of the next track. Thus, when you arrive at COR with color 1, you will be all set up for knitting the first row of the new track. Insofar as dividing up the pattern goes, that is done completely automatically by the software. You still have to load the successive tracks (and go outside the turn mark and select KRC). You just have to keep track of which tracks you’ve knitted. I write it down on a piece of paper each time I load a track, and how many rows it is. You can scroll back in the img2track window to see what was the last track knitted, unless img2track gets closed, and restarted, then it won’t show your previous activity unless you go to the img2track log..”

I put the same query to participants in the Facebook Ayab group. Ayab knits from the screen, so providing there is no interruption in power it appears some users are able to knit long, non-repetitive images without any subdivisions of the original pattern. Adrienne Hunter, an expert user, and great resource offered the following information: “there is effectively no length limitation in AYAB; the Arduino requests the next row as soon as it has finished selecting the current row, and the computer keeps sending the next row (color-separated as needed) until it reaches the top of the file. The pattern is in your computer’s memory which can be considered to be infinite; unlike a download to a 1980s self-contained knitting machine with very limited on-board memory. As you say, the computer must be set to stay awake, and as always you need to consciously wait for the beep on the right; the time it takes to do the color change is generally enough to cover the delay on the left.
I see occasional patterning errors in long narrow fair isle pieces too, but not in DBJ. That is because the errors can be prevented by crossing a turn mark every now and again, and with DBJ you cross a turn mark every two rows when you enter the color changer.
You will see the annoying UI bug where the display jumps back to the beginning of a long item so it isn’t showing you the section where it’s actually working. The knitting is doing the right thing, just not scrolling the display correctly to show it to you.” If accurate for the full image, this appears to be the ideal method to me.

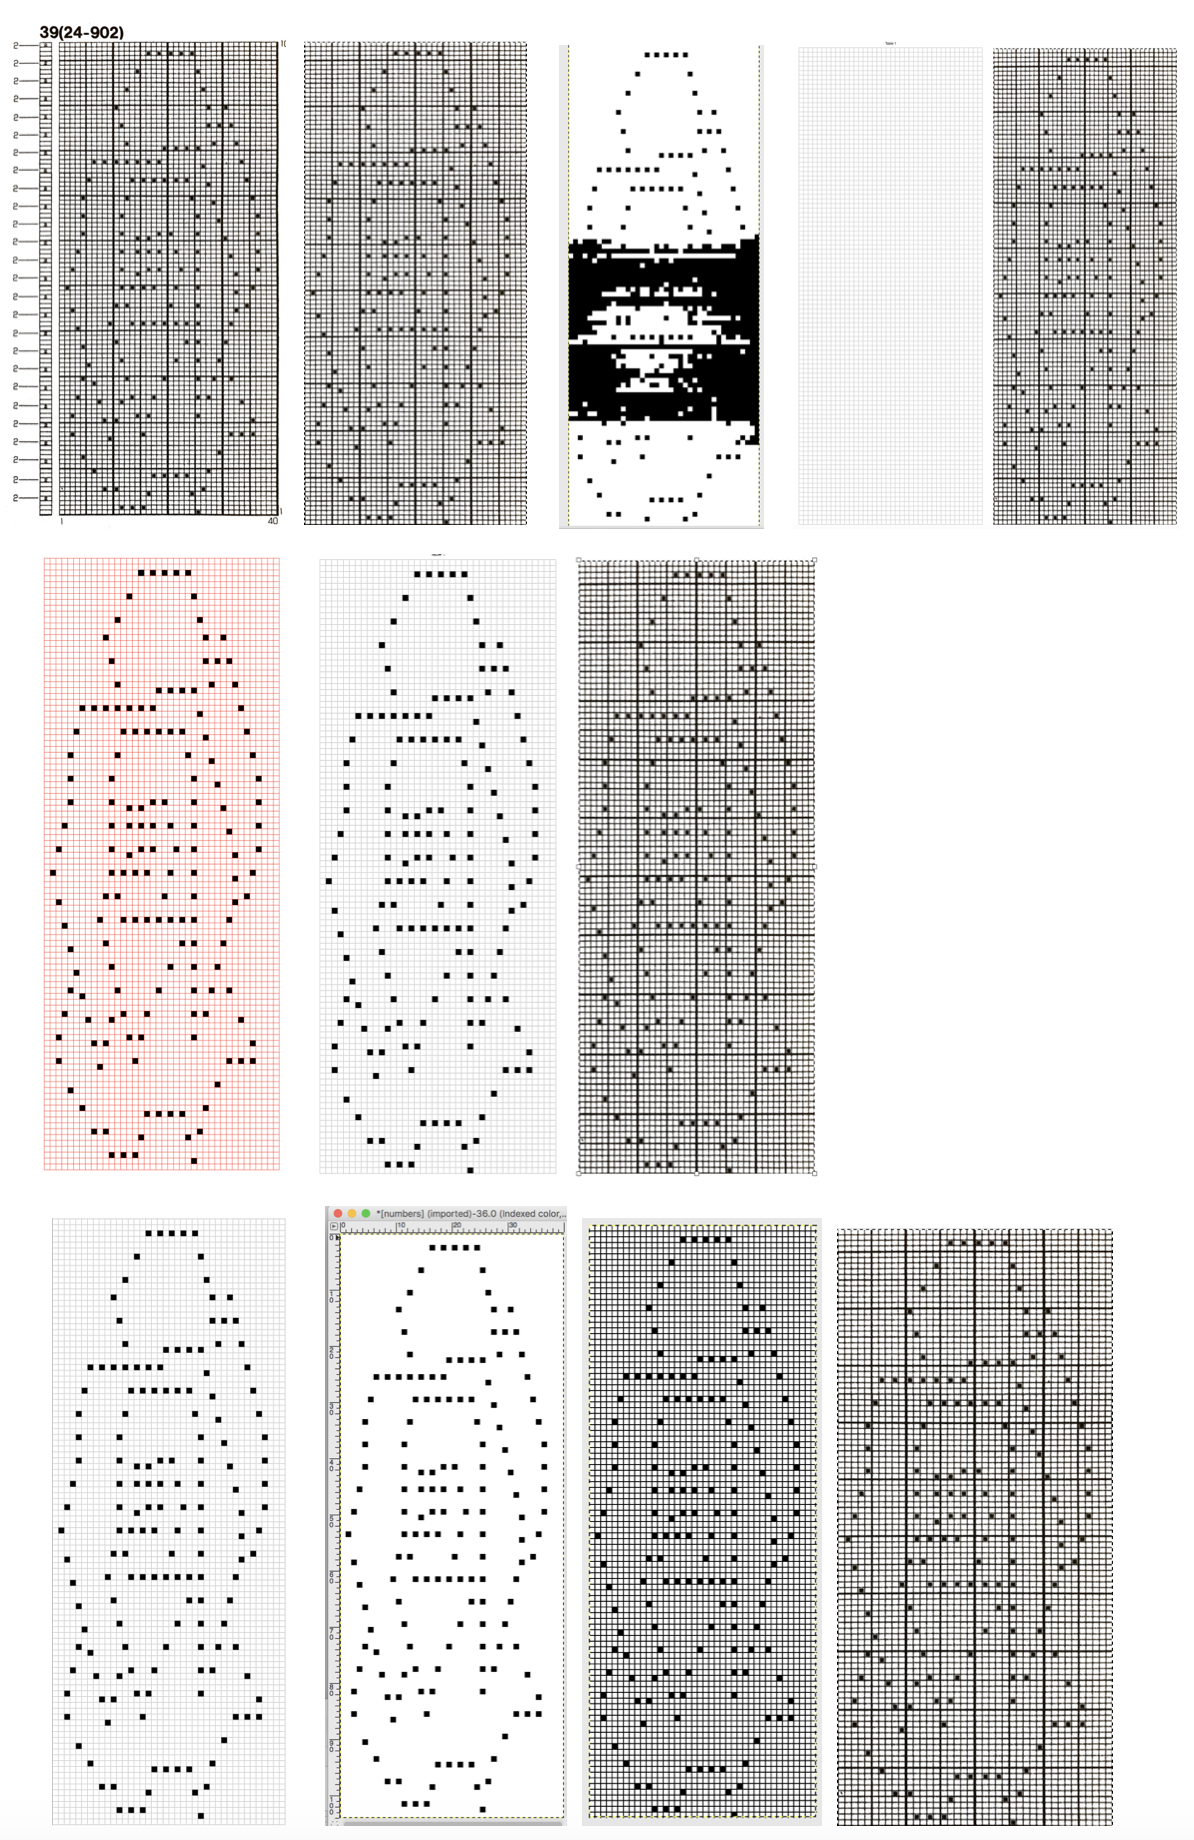
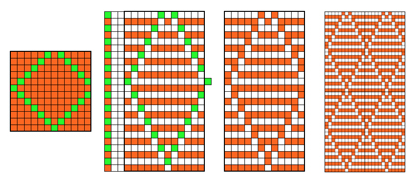
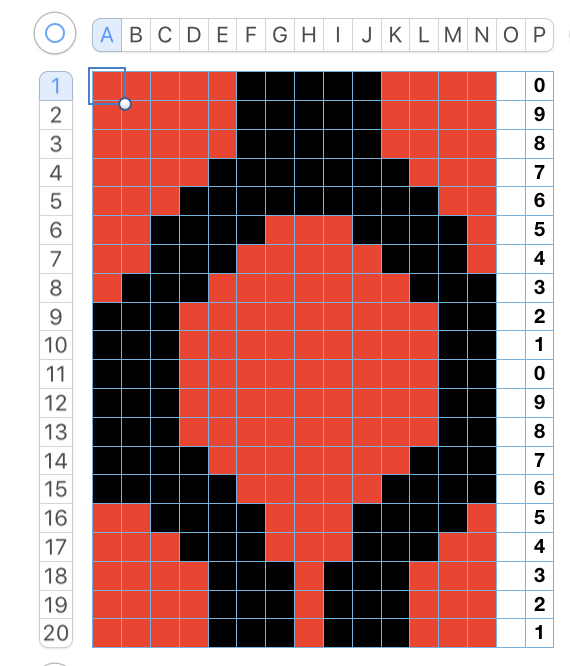
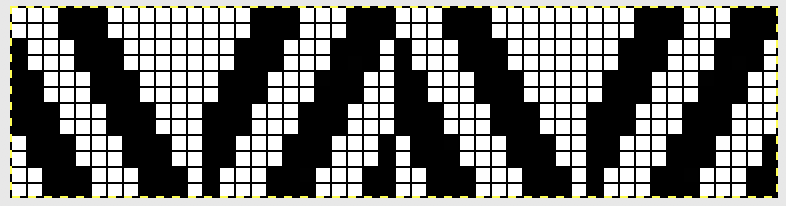
Paint programs allow for easy manipulation of images that make it a bit easier to imagine the finished product. With the assumption I wish to knit a scarf no longer than 1200 rows using the above design, the first task is to reduce the repeat to a workable, even number of rows in height, no more than 600 rows. So I cropped the image to 94X536. It is well worth studying how the image might appear if the color reverse is used, as well as what effect mirroring it may have (especially if direction matters in your design). Pairs of mirrored images may produce interesting, far wider pattern variations. Know whether the program works first with black or white squares, and you can simply choose that color when color 1-row one begins to knit from the right. The color reverse option is built into most software and electronics. I prefer to save images as I want to knit them. Notes to self-using ayab with images such as above: black squares knit first, so if I want the white to knit first, matching any Japanese pattern knit using KRC style separation use color reverse. If direction matters, remember that the image will be flipped vertically by the program so that it will appear on the knit side as drawn. Though technically I have no plan to knit the whole piece, I decided to test a portion of it with my new ayab board. I programmed the image on the left, wishing to get the effect noted on the right. Began on the right with color 1 = white for design row 1. I am not used to working in this scale. That said, the pattern was accurate up to the point I decided to stop because of time factors. Though the design is 94 wide, I knit only on its center 80 stitches

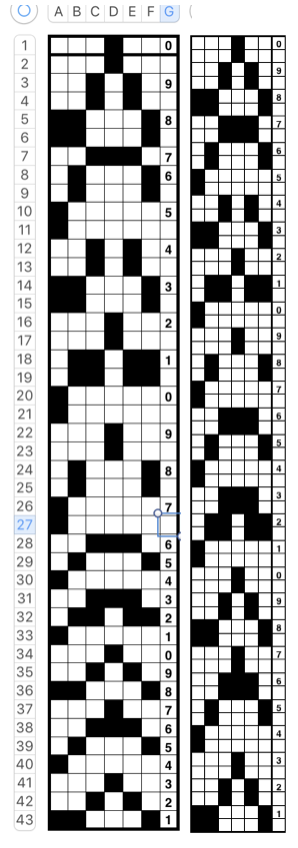
9/16/18 I received an orphan 930 which when first arrived had no movable parts related to patterning. The belt was frozen in place, and when that got liberated after cleaning and lubricating as much as I dared take apart at the time, after some initial errors the built-in patterns from several groups including lace knit perfectly, with only a slight squeak. After being stored again for a while, I tried built-in FI patterns again, and they displayed errors. I heard a new noise coming from the needle selector, exposed that, cleaned, and lubricated it, and it lost the added noise during operation. Tried built-in FI with resulting patterning errors once more. That said, test patterns in the service manual 881, 882, 884 knit perfectly. After another break for both of us, I got some built-in patterns to work again on both single and double beds and put working with them to rest. I began to work with img2track. I have not yet purchased a key. These were my first self-drawn single bed and dbj tests, none intended for any final piece. 

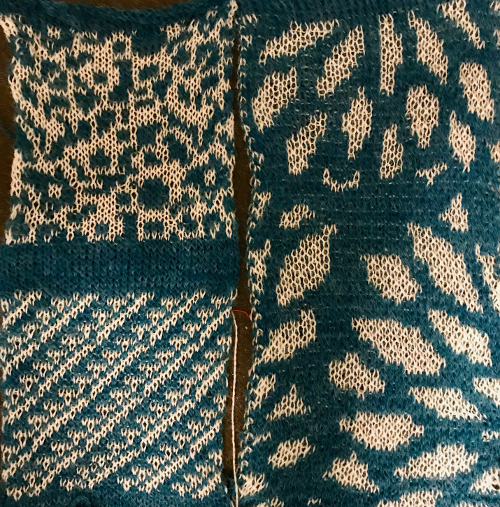
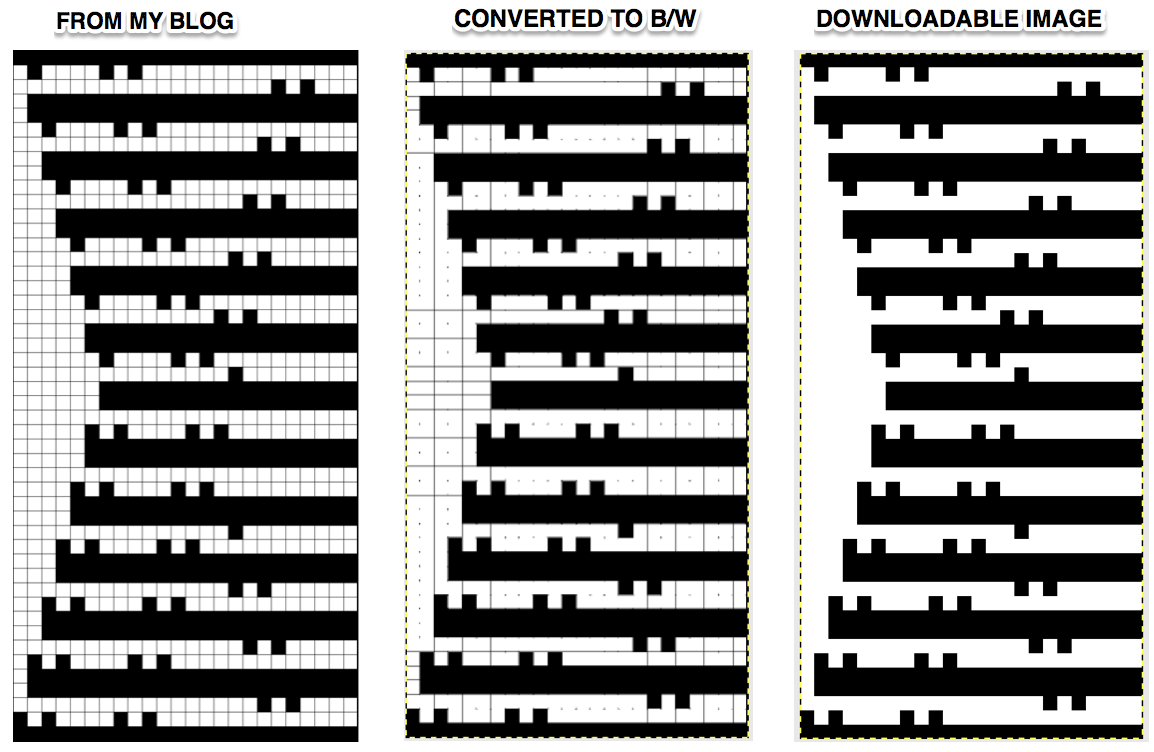
Here a quickly drafted long, narrow test design is shown with the first track self-repeating on the bottom, then with the second track programmed, and continuing on after the first (thanks to help and feedback in the FB group; long stitch striper backing and dropped stitches = extra “design features”. The program makes a sound when the last row of ground (black squares) is reached. The carriage is then moved to the left, knitting that last row of ground while selecting the last row of color 1 for that specific track. When on left, begin outside the turn mark, program the next track, change to color one, remember to set for KRC, knit to right (Cam button will already be set for KCI orII). As you do so, the last row of color 1 is knit, the first row of the next track for color 1 will be selected. The latter will knit on the way back to the color changer. Continue in pattern, changing colors every 2 rows. Knitting is uninterrupted by having to change carriage settings on either bed, the backing pattern is also uninterrupted. 

as described in the user guide: to download, launch program and select

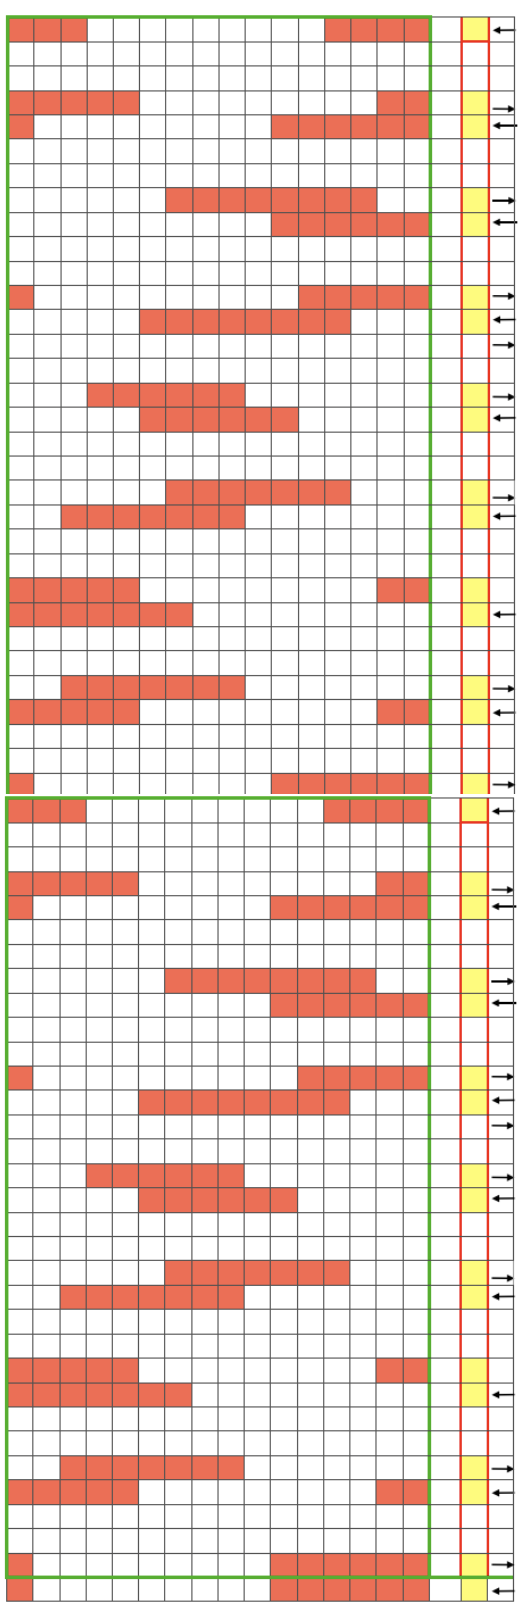
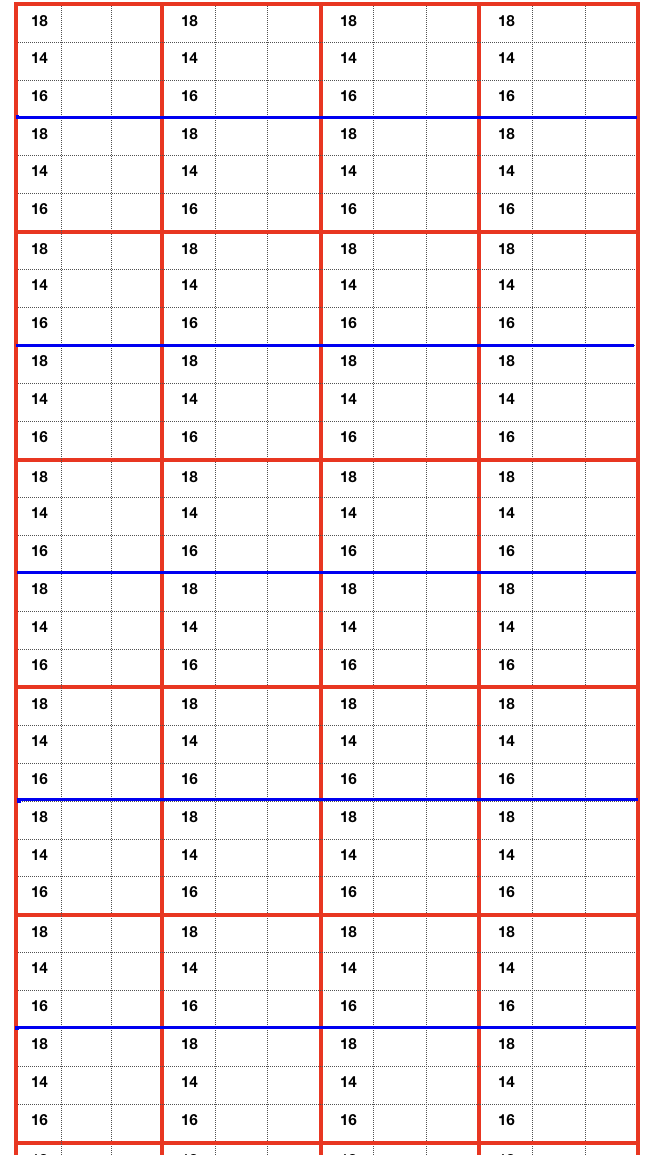
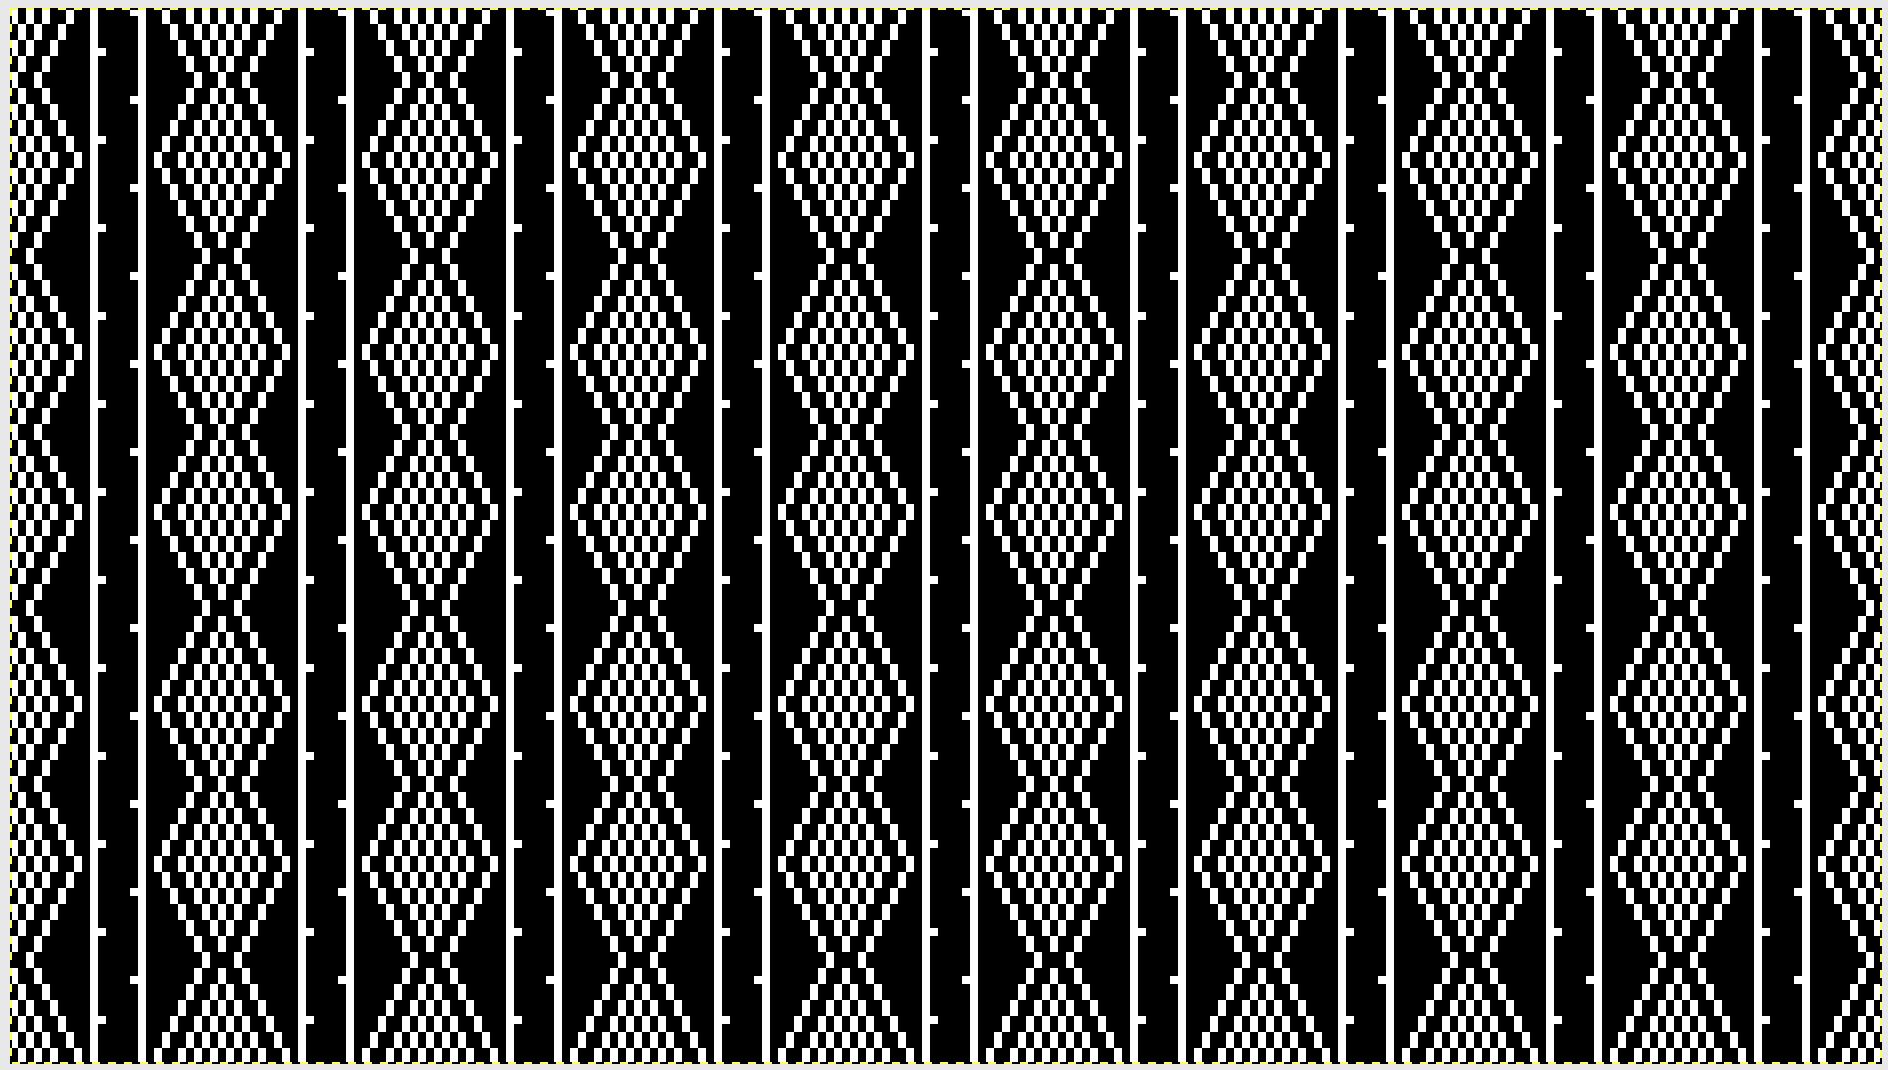
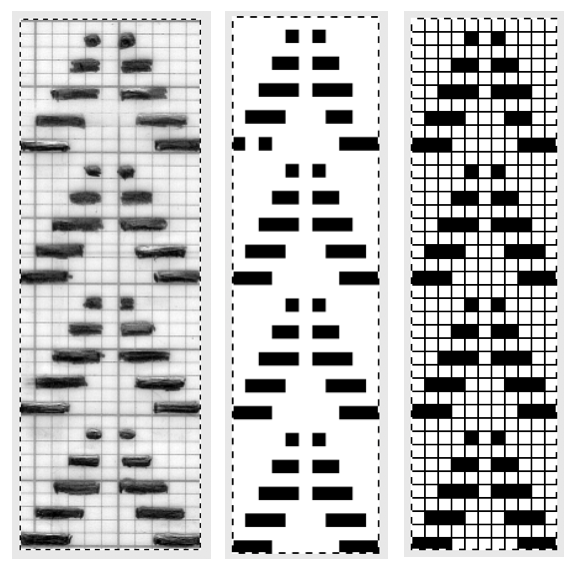
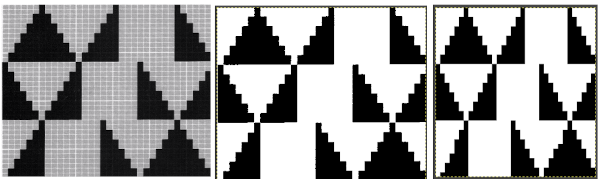
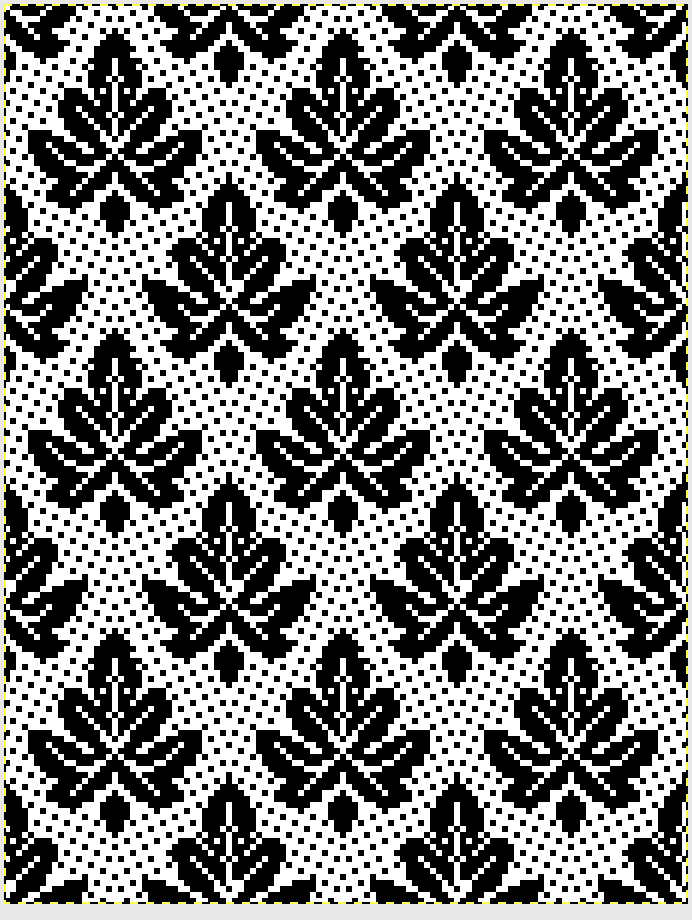
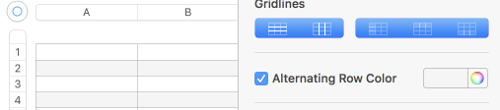
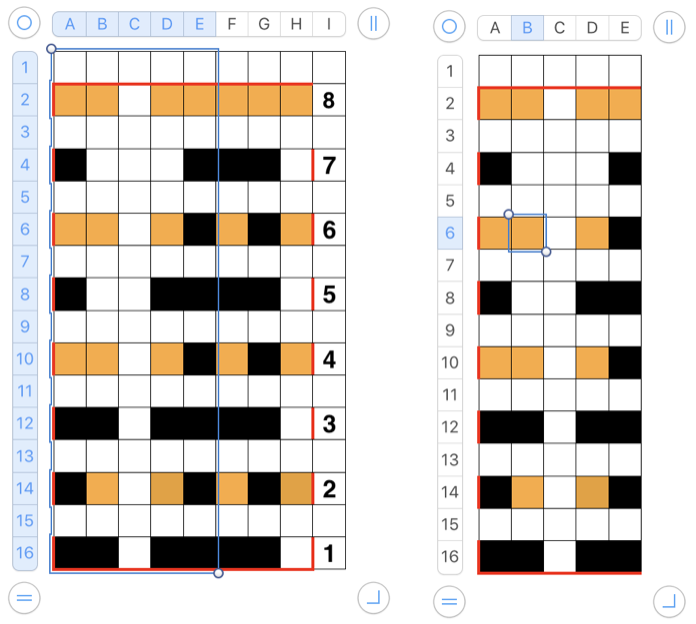
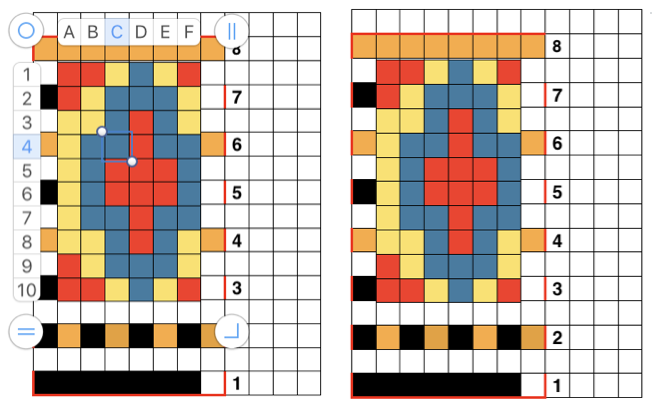
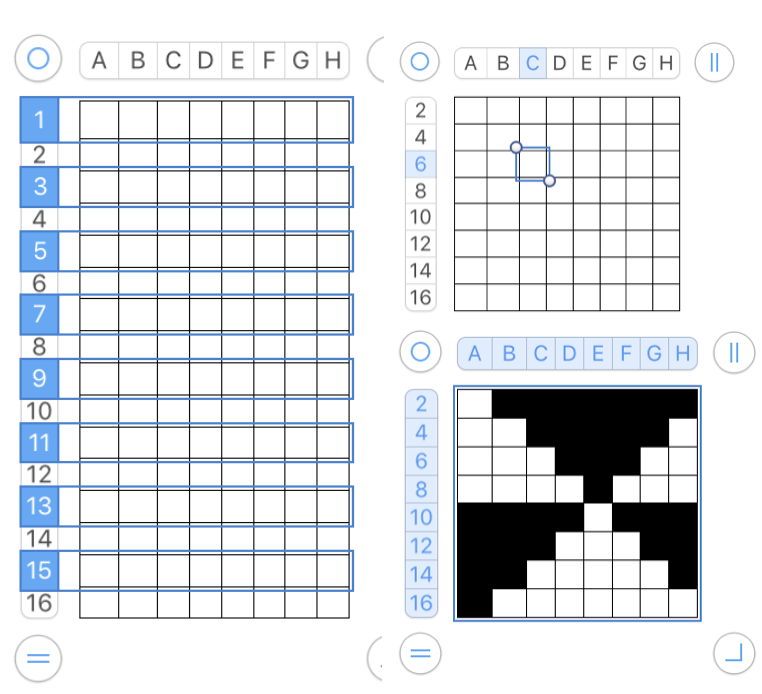
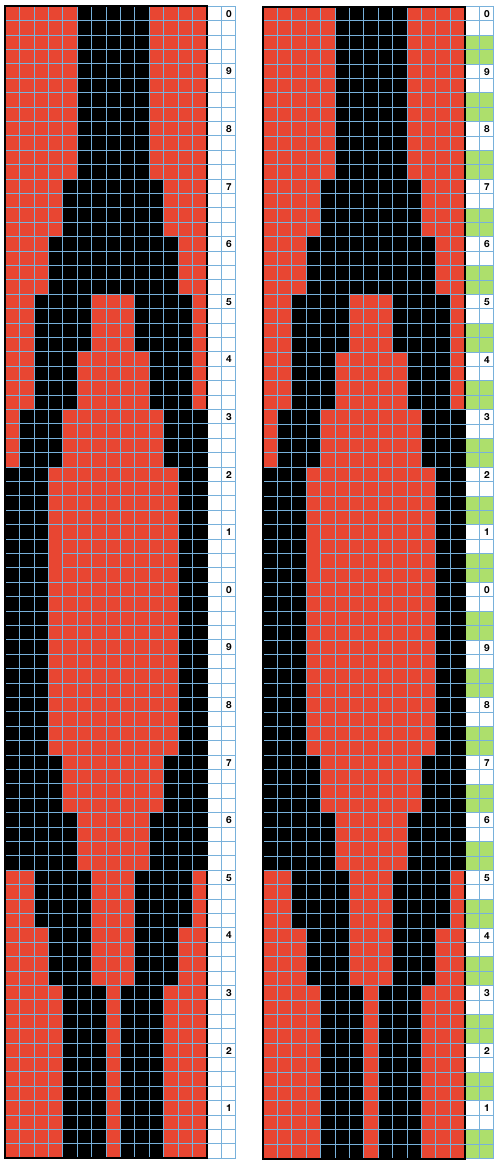
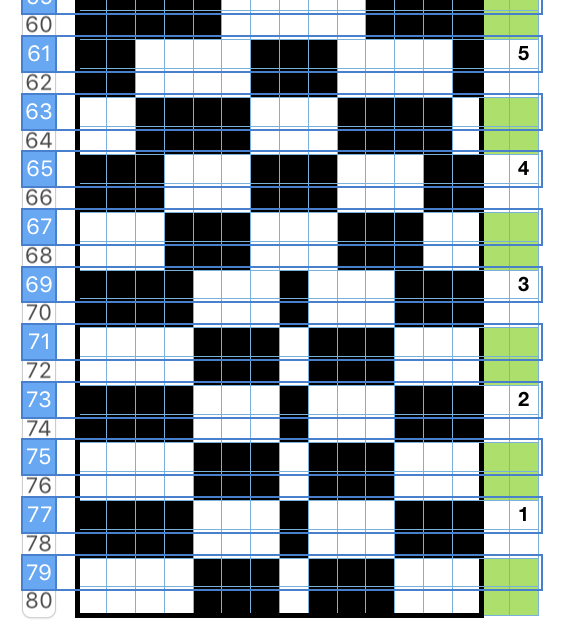
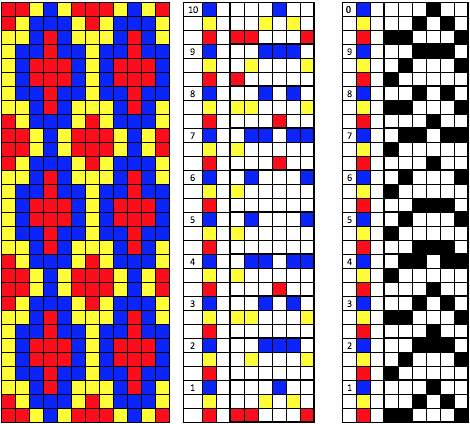
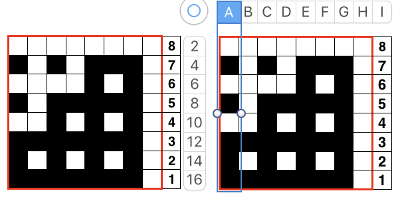
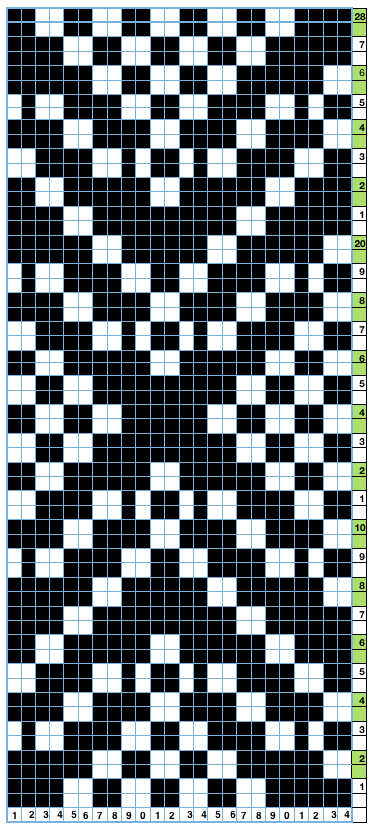
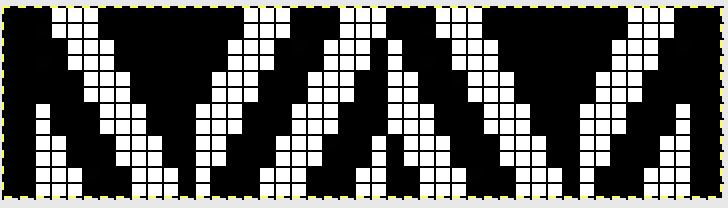
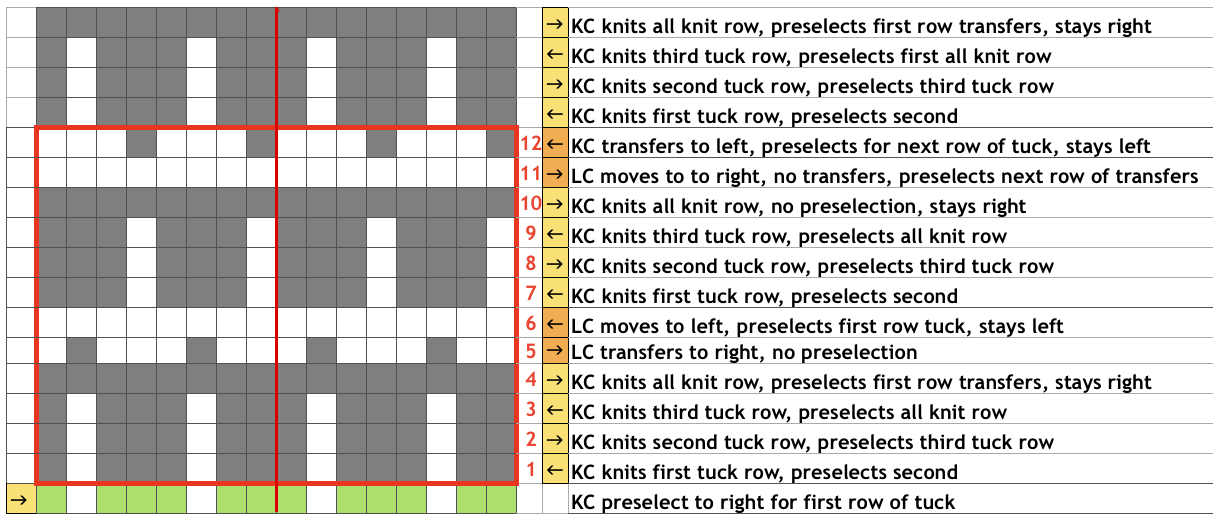
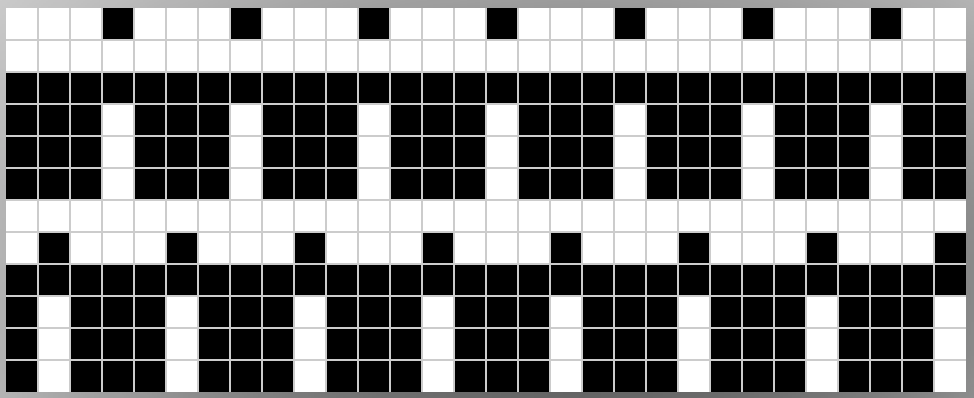
“The KH-930 takes just a few seconds to load the track because the memory holds only 2 KB of data (about 13000 stitches). Later models have a much larger memory (32 KB). The KH- 940 and KH-950i require 42 seconds to load a track.” “If your pattern was divided into more than one track, you will have to load successive tracks when completing the previous track. Listen for the beep from the knitting machine, indicating that the carriage is about to knit the next to the last row of the track, selecting needles for the last row of the track. Knit this second to the last row, and then STOP. (If you simply continue knitting at this point, the knitting machine will knit the last row of the track and select needles for the first row of the same track). To load the second track of the pattern, enter CE 551 STEP, and then 2 STEP prior to knitting the last row of the current track. (If your computer goes to sleep while you are knitting, you will be unable to load additional tracks. Be sure to check that your computer is not asleep before attempting to load successive tracks.) Before you begin to knit the last row and select needles for the first row of the next track, be sure that the carriage passes outside of the turn mark. The knitting machine will retain the loaded track in its memory until you alter it. You can turn it off, and later turn it on and resume where you left off.”
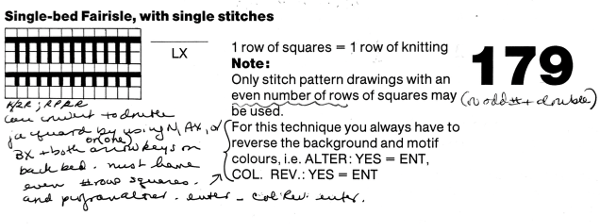
So what about Passap and using it for emulating the KRC 2 color DBJ? The Passap color changer to start with is on the right side rather than the left. All preselection of pushers (they will, in turn, drive the needles to move into work or not) always starts from the left. The first pass to the left after casting on and the pattern is programmed brings them all in to work in a flat line, the first preselection row is left to right, with color changes following every 2 rows. Settings for those 2 rows can vary, the console guides you through supposed 2 free passes with settings at SX/GX, the equivalent of Brother slip in both directions/ slip in both directions. Technique 179 is intended for simulating single-bed FI in Japanese machines, the manual recommends color reverse. In DBJ that would line up with KRC selecting white squares first. I like thinking of my black squares as my pattern ones, so I tend not to use the color reverse, and choose my contrast color accordingly. I decided to program the same built-in pattern twice, as A and B, each using tech 179, a repeat in which I thought it might see easily what happens when the “2 separate segments” intersect. Below is the pattern is seen charted in B/W, tiled, and knit. Notice in the knit swatch that the first row in each sequence repeats twice. What appears to be happening, is that only that very first row is repeated twice for one time in the color separation at the very beginning of the knit. The arrows on the right indicate movements of the locks to and from the color changer, knitting my black squares. If row one is knit in that color twice only once, and the pattern subsequently is kept continuous, rolling back to row one for only a single pass, the 2-row color rotation can be maintained. The bold, green border outlines the single, full repeat. The separation is only for illustration of placement for the one color.

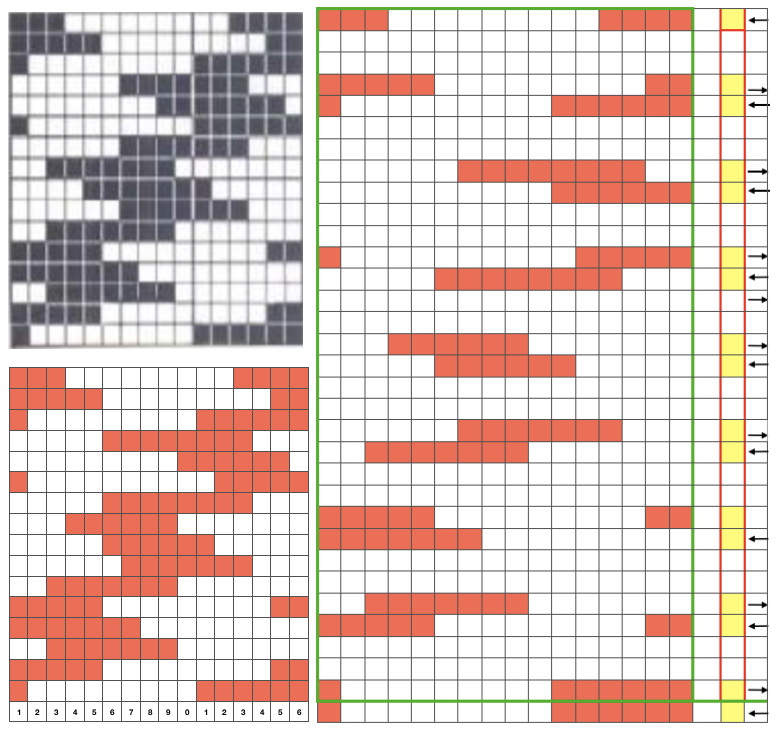
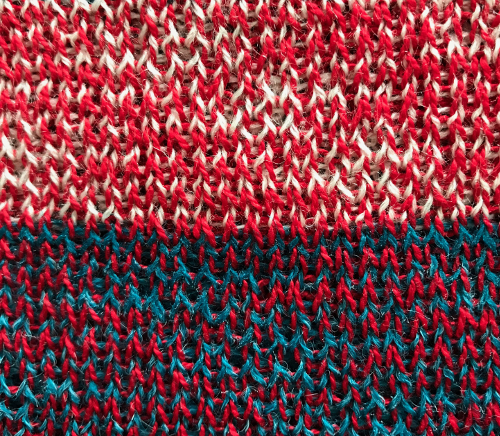
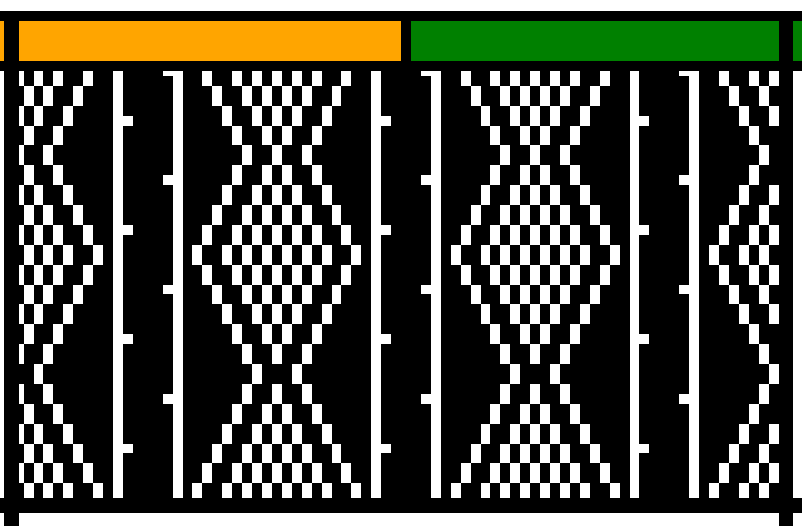
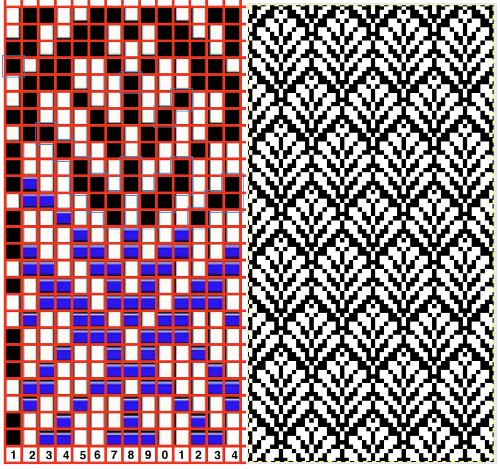
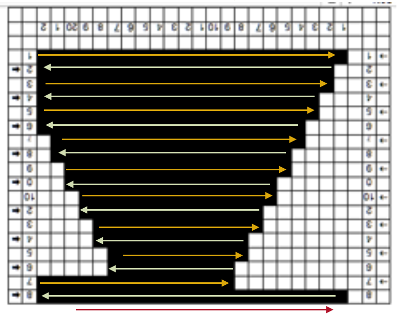
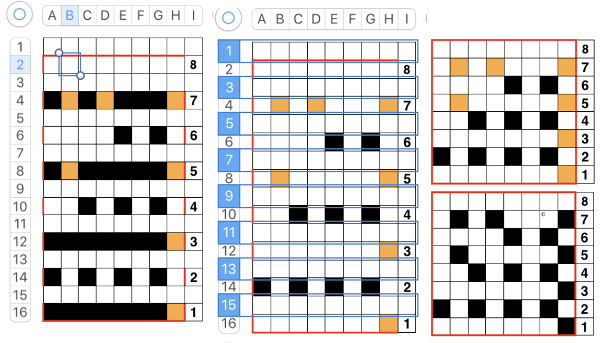
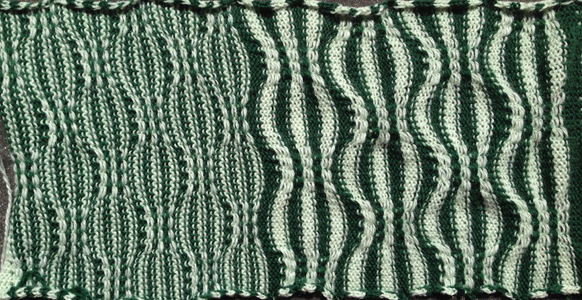
Swatching again with an attempt to produce it as 2 separate but continuous segments: I do not use color reverse, choose my color to match black squares, and that would be color 2 on the console prompt. In my first attempt, I followed other usual console prompts but used SX/GX settings for three rows rather than 2. The first pass will lift all pushers into work. The second pass preselects pushers for the first row of the pattern to the right. The third pass would normally knit the first row of the pattern, preselect for the second row to be knit from left to right, and so on. After the third SX/GX pass the locks are on the left side(LOL), I changed the settings for pattern knitting (LX/BX). On the right, make certain the empty yarn holder is up for the next color. On the left place the yarn into an eyelet, making certain it was positioned so it would not be crossing other color yarn on travel back to the color changer. Knit single row to the right, changed color, continued knitting in pattern unit the top of the segment was reached (row countX2, in this instance = 32). The design color knit its last pass, locks are on the right (LOR) Programmed second segment, repeated 3 rows of SX/GX. On the left, yarn in the feeder, proceed as above. This gave me correct continuous segments on the knit side of the fabric, but the bird’s eye backing was disrupted. On the bottom because of operator error in the lock setting, and the top because birds-eye normally knits EON for 2 rows, creating a bit jaggy, a single line of color after knitting on all needles when the second pass is knit, while here it EON for one row only, missing that second pass. Note yarn ends, the yarn would need to be cut to position it for those single-row passes from left.

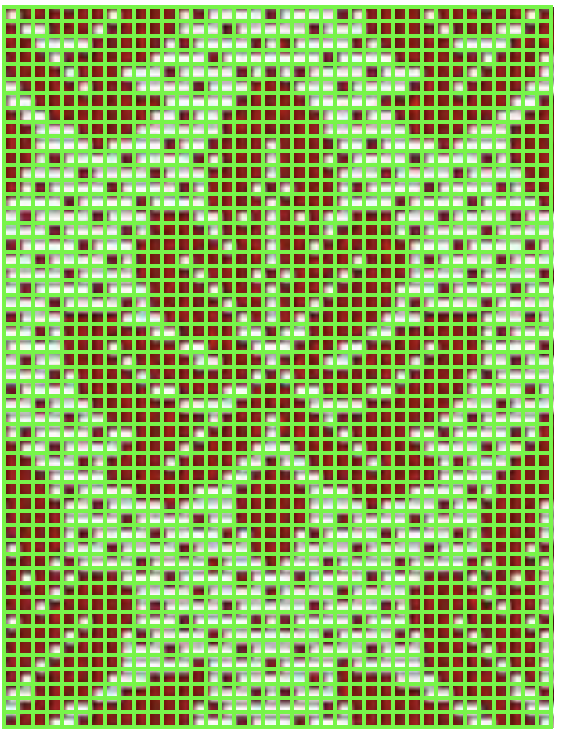
It is really helpful to use colors that are in high contrast when testing patterns. Here color positions are reversed, the red is now my ground (white squares with no color reverse), and the blue at the segment change muddies things considerably to my eye. Maintaining the Birdseye selection is now sorted out and actually makes for easier knitting

A complex published transfer lace to electronic repeat for download/ GIMP editing


Lace on the machine can render beautiful fabrics that closely resemble hand knitting, but programming very long repeats is a challenge both in placing every hole in the correct square in a punchcard and in programming individual pixels on a mylar or as pixels for download correctly. I found the “leaf lace” repeat below shared frequently on Pinterest and thought I would test the approach discussed in the post on using numbers and gimp to create images for electronic downloads. Because it is 16 stitches wide, it is not suitable for punchcard knitting, which requires a factor of (4, 6, 8, 12) and up to a 24 stitch maximum width.

The published pattern on the left is shown as shared on Pinterest. In turn, in was captured, opened in Gimp, and magnified. After a threshold adjustment, it was converted to a BW indexed, scaled to its 16X96 original stitch and row count, and then saved in 100% magnification result for the possible electronic download.

The published repeat is intended for use on Silver Reed knitting machines, for using it on Brother machines, the initial 2 blank rows are shifted to the top of the pattern design.
On the far left below is the first BW processed single repeat isolated from its source. To its right, it has been adjusted so the first row is a preselection row for the lace pattern, and the full repeat ends with blank rows (Brother KM characteristic). The latter in turn was saved as an image for download.
Since the leaves change direction in the way they lean, the spacing between each pattern swing in the repeat is actually 3 all blank rows, not the “standard” 2, including at the top.
The bottom half begins with the first row resulting in transfers to the left, while after the first 3 knit rows the transfers will begin to the right.  The plan was for me to use Ayab for knitting a proof of concept swatch.  In order to achieve that, the full repeat is first flipped horizontally (ayab will auto mirror it,  so starting with it this way it will be in the correct orientation when knitting). The mirrored repeat may be used in unaltered machines as is with LC operating from the right, with KC operating from the left (not possible in ayab without adjustments). The full repeat consists of 16+14+18+16+14+18= 96 passes of the lace carriage, for every 12 rows knit. My sample was programmed horizontally for 3 full repeats, the width of my planned swatch. I added one additional needle in work on each side, with the LC end needle selection canceled, allowing for the full pattern as programmed with a single stitch all knit border on either side A tightly twisted cotton yarn did best in terms of handling the multiple transfers and not resulting in split stitches or breaking. I had occasional selection errors, seen in the center panel at the top of each repeat (my common experience with the interface), but the repeat itself appears to be sound. Lace repeats that have even numbers of rows for both and LC transfer and knit ones are easy to follow. Punchcards are also easily annotated and if knitting is interrupted needle selection is easy to return to or restore if necessary. In electronics, there may not be any memo to indicate row #  location for each carriage pass in the pattern, or when to switch carriages. Because in this instance there are so many transfers (some of the multiple stitches) between knit rows and dropped stitches are best corrected as noticed during knitting if possible, I created a “cheat sheet” of sorts to help keep track of actions. Each block outlined in red here represents one full repeat, read from the bottom-up, with blue borders at the center and red at the end of each half sequence. A visual check at the end of each segment’s # of rows in the series is well worth it to prevent unnoticed runaway dropped stitches and large holes. A check-in box next to # could indicate the completion of transfers. and a number added manually in that same row for that sequence, record the row on which knitting was interrupted ie. stopping on row 8 out of 16 to fix dropped stitches would be a reminder that 8 more LC passes are required before the next visual check. 

9/23/18 In now have been experimenting on a 930, where each pass of the LC is actually tracked, akin to following numbers on a punchcard.  Built-in patterns also offer a memo window, which will alert the knitter as to when knit rows are due In testing the pattern with img2track I found the LC passes are still counted, but the memo window is absent upon download. I generated a chart in Mac Numbers, reads from the top-down, expanding on the one above. It illustrates the number of LC passes (left column) required to produce any significant length of fabric.  Patterns such as these are not for the faint of heart and require a friendly yarn. 2168 passes of the LC (33 full repeats, outlined in green; red line separates half repeats) are accompanied by 396 rows of “actual” knitting. In actual knitting, the pattern advances from row 1 to 96, and back to 1 again. A check-off list can be much simpler if one is desired. The numbers on left appear in the LC window in a 930, when reached 2 rows are knit with the KC. The numbers at the top reflect completed repeats. Boxes can be checked moving to the right as those rows are completed Another option is to download the pattern in img2track, and then enter memo information prior to knitting it. Two youtube videos that show how to enter memos in machine models that allow it, 930 included  https://www.youtube.com/watch?v=S0tXNT76v10    and  https://www.youtube.com/watch?v=nR8MheT5Bao. The number 2 may be entered after numbers on the left appear in the LC passes count window, and provide an easy guideline to follow. And this is what testing lace patterns can look like. In this instance, a tighter stitch tension, a bit of change in weight, and visually checking after each row of transfers brought me some success. This is not a stitch pattern that lends itself to easy “repairs”. A more successful sample knit also on the 930 using the shared repeat as given, knit in wool-silk 2/18

Pretend/ mock cables 3

A Facebook group query brought up the possibility of creating cables in an “easier, quicker” way than by crossing stitches by hand. Over the years different authors have suggested a “sewn” method for pulling stocking stitch columns together in order to achieve the cabled effect. The illustrations are usually of the work done on a ribbed fabric, but it also may be achieved in simple stocking stitch, with ladders marking the edges of the mock cable, and providing a visual line to follow and count spaces when smocking the fabric up. The width of each column, the yarn fiber content, and personal preferences will determine the success” of the results.

I was reminded of “magic cables”, a technique made popular years ago in a copyrighted pattern series by Ricky Mundstock, ie this one from 1969 (illustrated online). The concept originated in a Japanese publication years before, relies on hooking up tuck loops to create the cable-like effects. I tend not to knit from published patterns, set out to understand what makes the fabric work in theory, and then sort out whether I have other preferences of my own for creating it. I began to experiment with a totally random tuck card. Tuck is chosen for the background because it is short and fat, giving the taller all knit rows for the “cables” the possibility of an additional gather, adding to their depth. I chose a purely random repeat, which is a good way to start for DIY if hesitant about the process. White squares will not be selected, will tuck for 2 rows, have a knit stitch (black dot in card) on each side of them. Max on Brother, unless using very thing yarn would be white bars single square in width, 4 rows in height (yes, there can be exceptions on rare occasions)
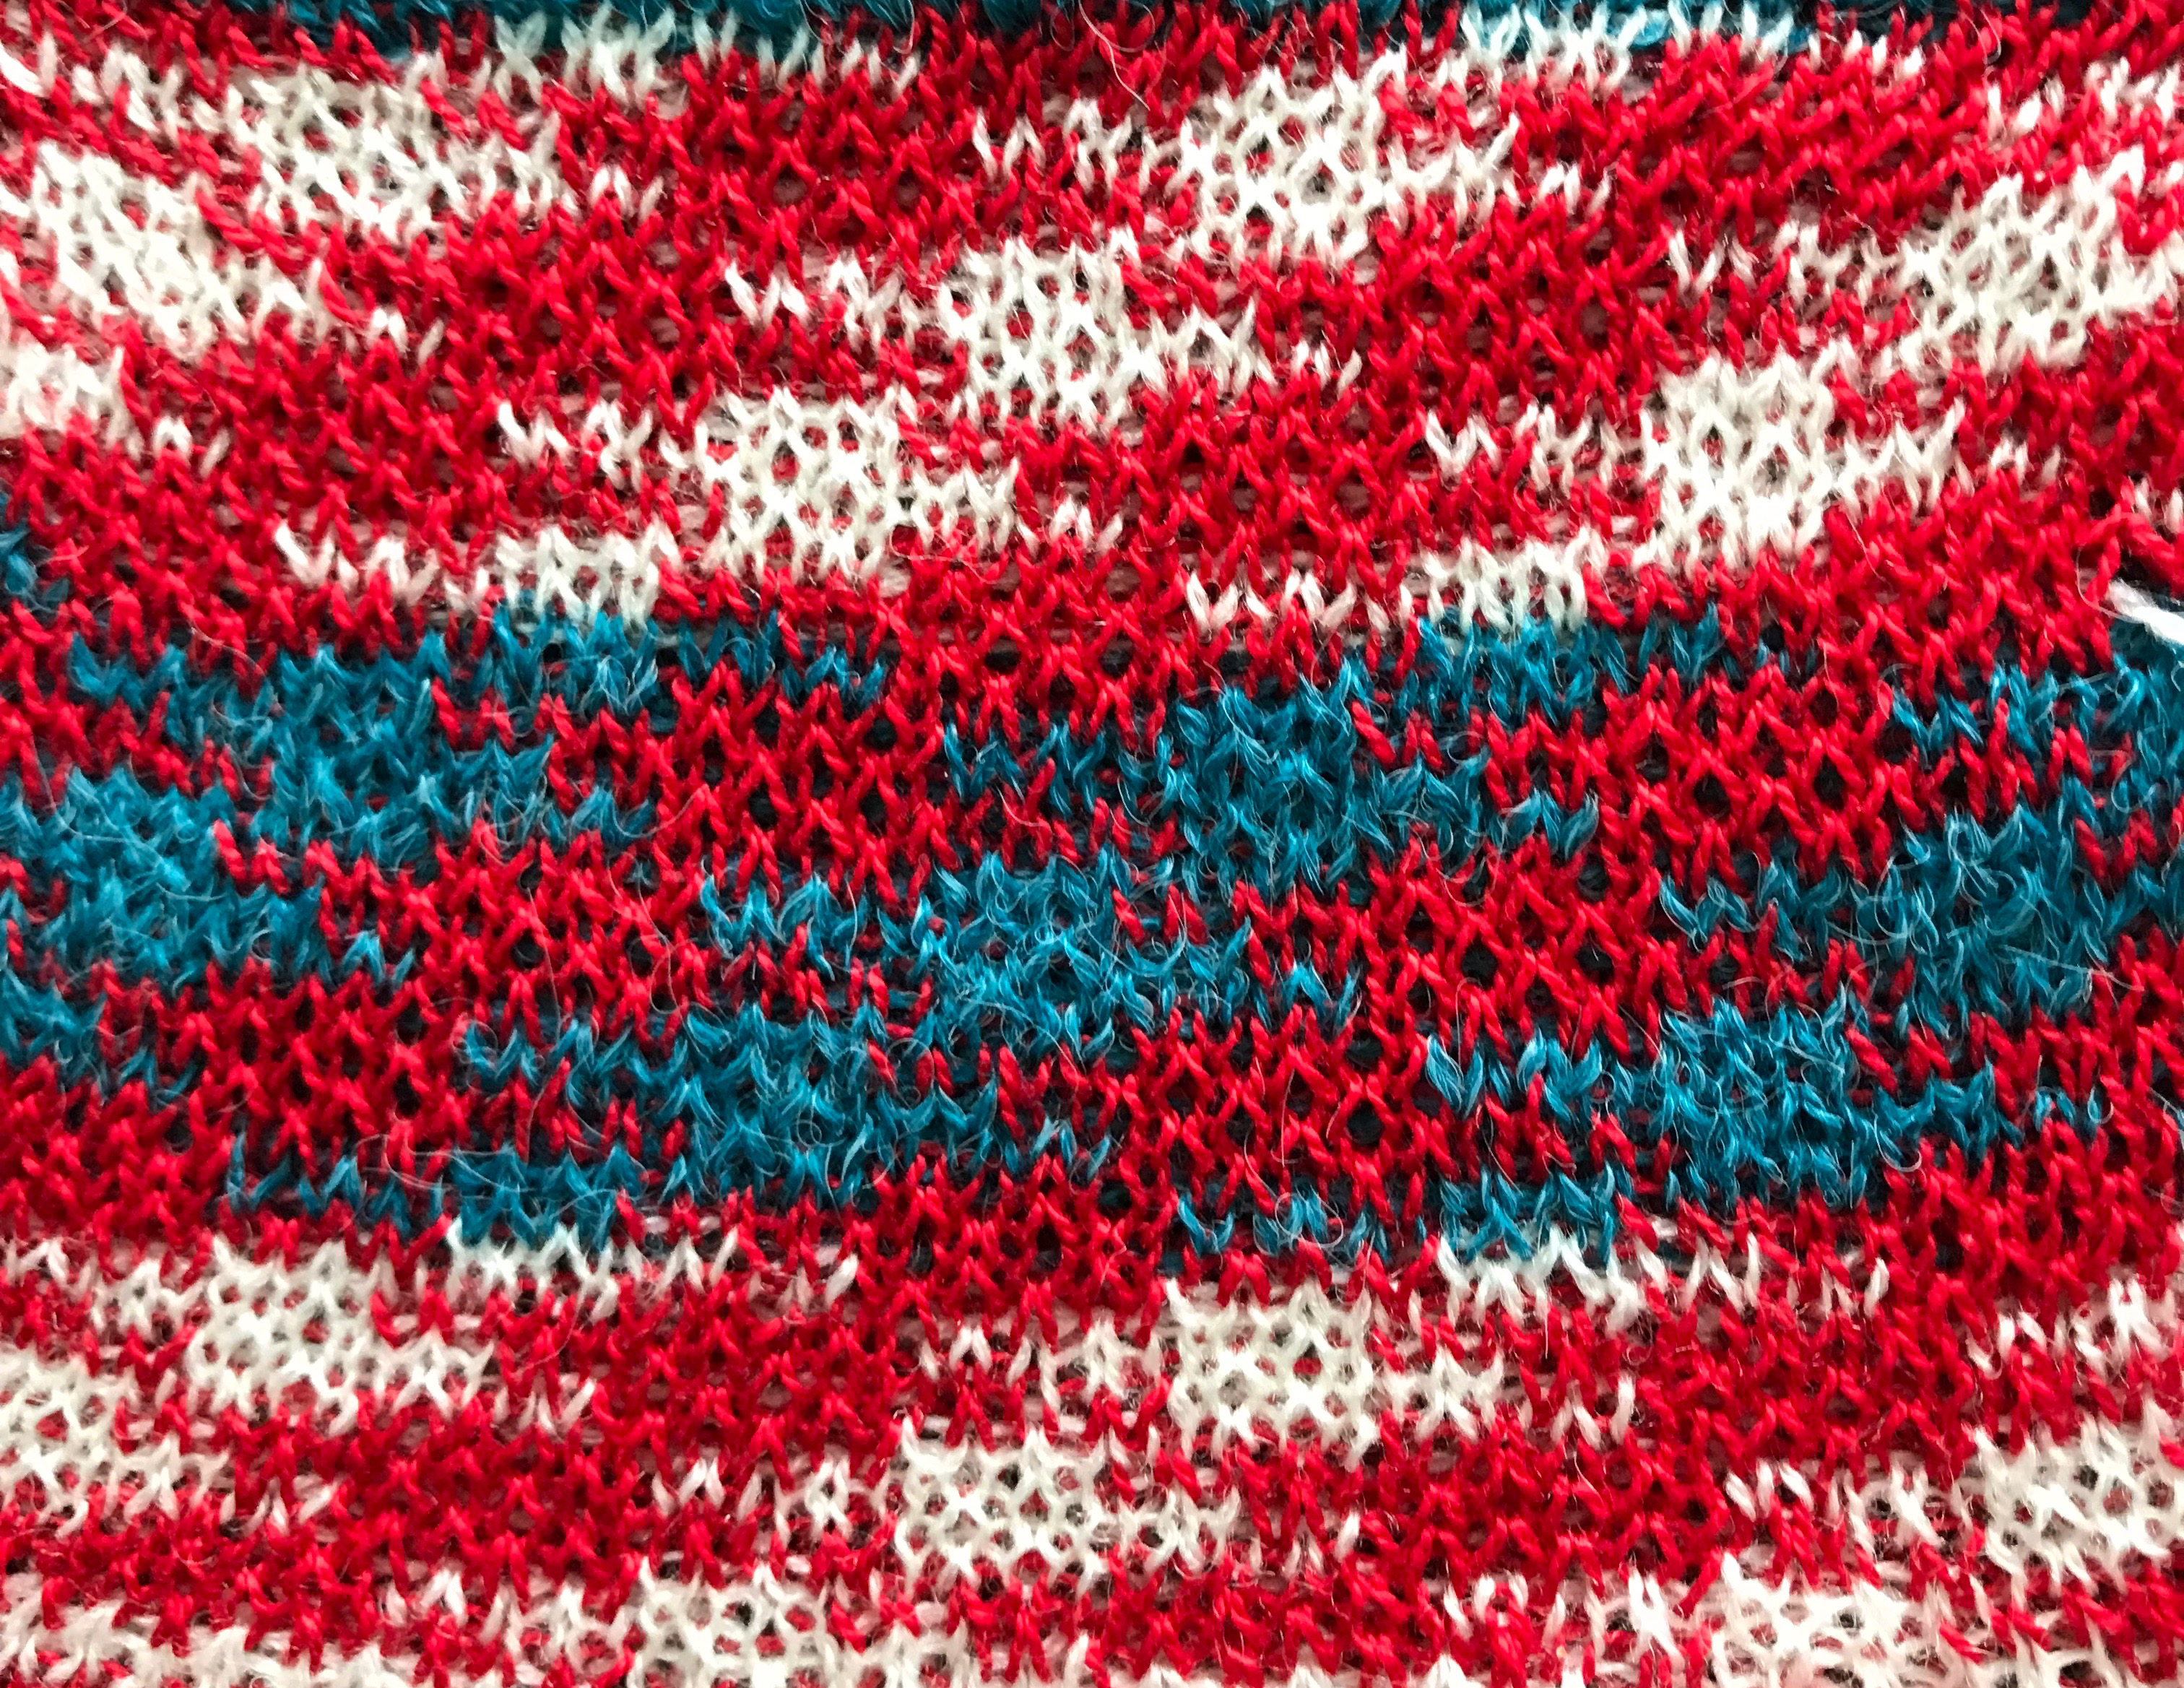
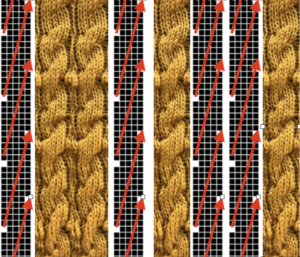
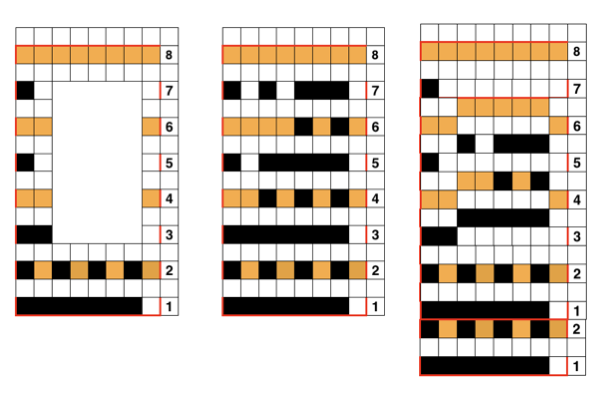
The card is cropped to the 24 X 44 stitch in width and height for the repeat to be worked in electronics. The area colored blue on the far right indicates possible all knit rows for hooking up “cables” during knitting, mustard color indicates ladders created by an out of work needle on each side of the central, all knit column. The ladders make it easier to identify each all knit column. The tape over holes idea does not work for masking a punchcard since that blue area would need to be all punched holes. The tape over would result in “unpunched” ones.

This takes the revised card single repeat and indicates some quick possibilities for altering it I added 2 more stitches to establish a slightly different pattern. The grab form my work in Numbers was then opened in gimp and scaled to 26X44 for the possible knitting pattern. If working with black and white squares, the image will need to be colored reverse for knitting. I abandoned this repeat for my final swatches in favor of keeping markers for hooking stitches up along the all knit column inside the ladders as opposed to the knit body of the remaining shapes. Here the non-selected needles are placed along the knit column itself, on alternating sides. The final repeat after correcting a pixel error I discovered while knitting: Ayab does not repeat across the horizontal row, each stitch in the width you are planning to knit needs to be programmed. For a test swatch, I decided to work with programmed 72 stitches (knit on fewer). This would be the downloadable file

magnified and gridded to visually check again prior to knitting it This is what is seen by the knitter when the image is loaded, but any image loaded is automatically flipped/ mirrored horizontally by the software. Direction may not matter in the overall pattern, but here we have needles out of work, which if selected on the basis of what is seen as opposed to what is knit, would be in the wrong location. The first preselection row is also only possible from left to right. The easiest way to empty the proper needles is to do transfers after that row, to either side, restoring needle selection prior to continuing to knit. Also, since there are needles out of work, end needle selection is canceled (KCII).

In my first swatch, I tried the idea of hooking up stitches in opposite directions, but was not pleased with the result, wanted to reduce the amount of hand manipulation involved. In the later swatch, I hooked up every other selection onto the same side. Arrows here indicate the direction, not the proper needle position.

Alternating side hooking up with some yarn and needle change issues. Hooking up to one side only was quicker to execute and appeared more pleasing to me. Both swatches had blips from an errant pixel. Steps in knitting the above fabric. The actual knitting will happen with what is shown as the repeat with white pixels on the dark ground, seen looking at the center vertical all knit column of the repeat when knitting the fabric. Allow the non-selected needle on the left side of the column to tuck, providing a marking row for picking up stitches, knit until the needle on the right side of the column is not selected. Prior to knitting across that row pick up the tucked loop and stitch on the left side
Lift both loops up onto the non selected needle on the right side of the column, bring that needle all the way out to hold (three yarn loops in the hook) 

Continue knitting until the next non-selected needle in the column appears once again on the right, pick up from below the left marking spot, and repeat. For DIY insert all knit columns on your chosen repeat and proceed as above.
Visualizing possibilities: chart for side by side columns actions on the purl side is shown. The black columns with arrows coupled with photos show the direction of the hook-ups in the back, purl side of the fabric, and potential “cables” as seen on the knit side using the column repeat illustrated above. This is a garter stitch version found on Pinterest

Numbers to GIMP to create images for electronic download

I am a member of a few Facebook groups, recently joined the img2track one out of curiosity, and wanting to explore the possibilities of an interface other than an Ayab/910 from a kit, which has proven to be of limited use to me. I have been charting original patterns and color separations for years, first in Excel and occasionally and now exclusively using Mac Numbers. Up to last December, entering designs for knitting on my 910 was limited to filling in squares carefully one at a time or small blocks and lines on mylar sheets in order to knit the repeats designed in charts in either program. Working with small, individual repeats and filling cells one at a time or in limited groups in GIMP to create duplicate pattern downloads was an easy transition out of sheer habit. A FB group member, Julie Haveland Beer shared a file on how to Convert Mosaic Knitting Chart to KM Skip Stitch Diagram (shared with her permission) that sparked a light bulb moment. I began to explore using the method in her share on files available in other printed materials and punchcard collections, wondering about those lace cards with so few holes that can go awry when building from scratch in order to download. Often I use Scanner pro on my phone (rather than a full-size scanner), save images in black and white, share them via photos, and open them up on my Mac for further editing. The full-size scanner saves of 60X150 patterns may be found at the bottom of the post.

The first repeat was from

I happen to own a hard copy. The book offers endless repeats that might be adapted for knitting 2 color fabrics (or more with experimentation in some instances). They are categorized by height and width, so even punchcard owners can find whole pages of workable repeats. Another group member shared the link to the Compendium for online browsing https://archive.org/details/dictionaryofweav00poss

I have written several previous posts on using GIMP, including the use of the tiling option to visualize how groups of repeats line up prior to any actual knitting. The enlarged, “original” gridded image below would be the final repeat, reduced in size, grid gone, made ready for download in required image format.
A chart from my blog: the image is converted to B/W, then scaled to stitch and row proportions with just a few keystrokes 

From self-drawn mylar, with a subsequent one-pixel correction 
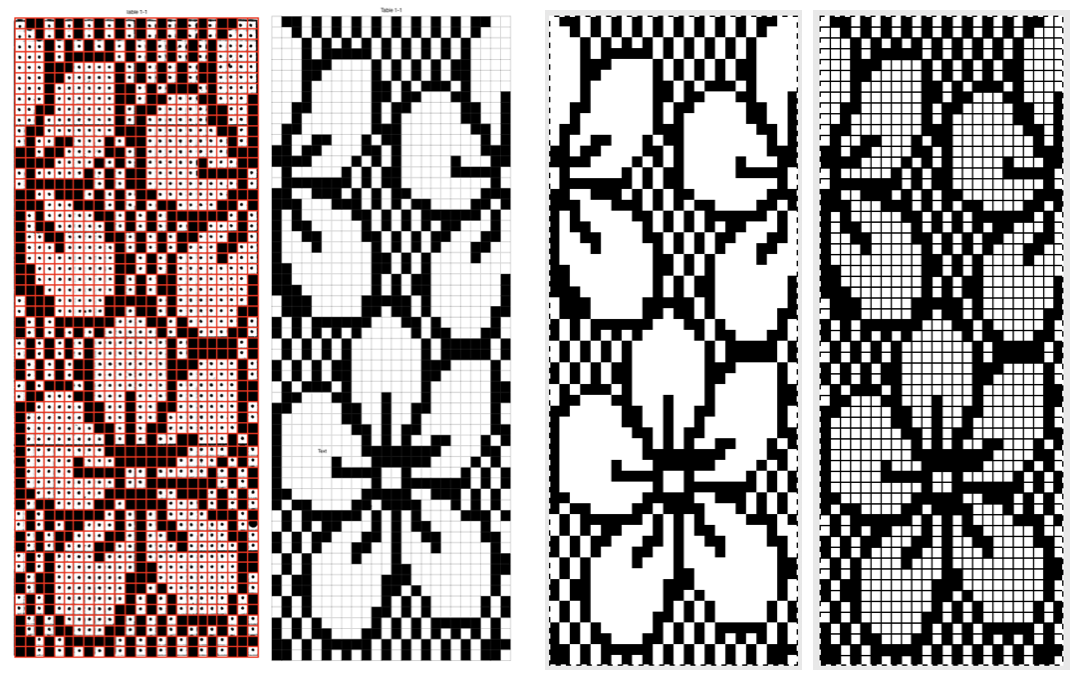
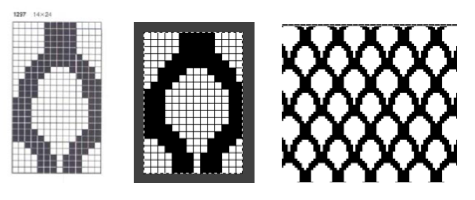
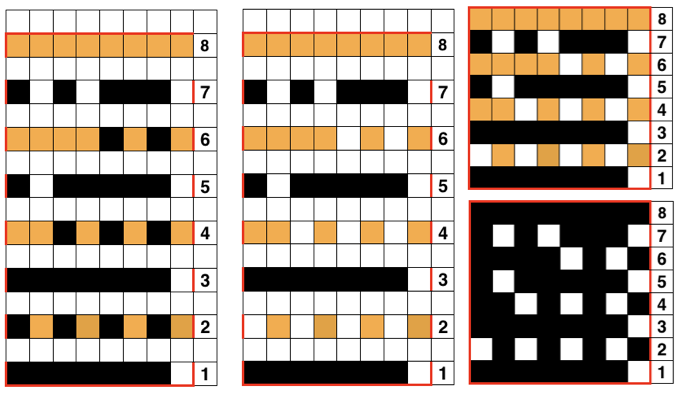
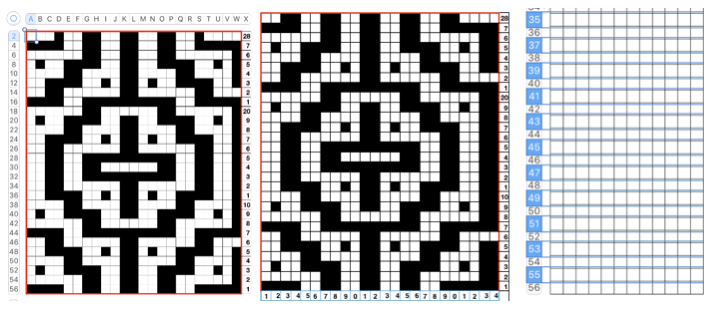
From colored repeats in Brother electronic collections: with some color adjustment after a first attempt that required some clean up of pixels, the conversion and scaling are easily achieved. The originals were designed on a rectangular grid, within blocks defined 6 wide by 10 tall the repeat tiled, for an added visual check Another Brother published in color repeat, scanned in B/W, imported directly into Gimp, mode converted to indexed, then the image was scaled to the size of the original illustrated repeat 34X36Check the scaled repeat on a grid for any missing pixels against the original

From a Brother electronic lace publication a simple BW bitmap conversion followed by scaling (60X120 repeat). The appearance of difference in width is due to the fact that the published image is on a rectangular grid, the bitmapped on a square one

If the electronic published repeat appears to have the core of the cells outlined clearly in white something to try: reduce to indexed BW, use bucketful to remove as many gridlines as possible, scale to appropriate repeat (24X48), edit the results A “straightforward” conversion for a repeat from a scanned punchcard with its darkest black line removed

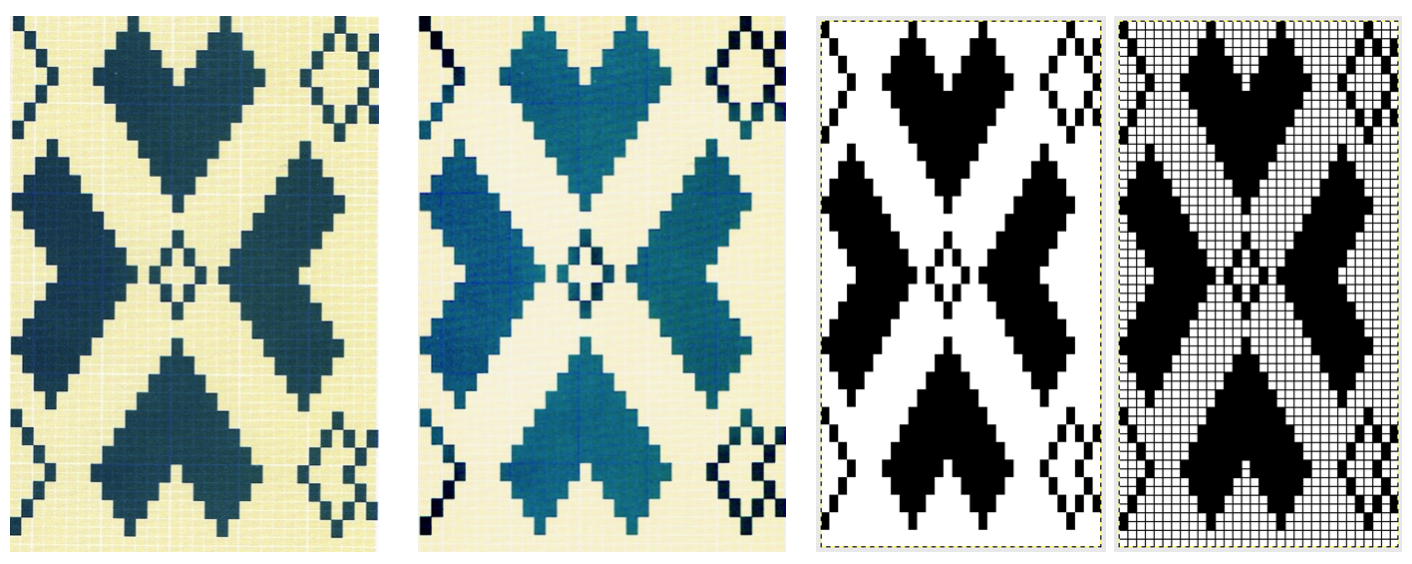
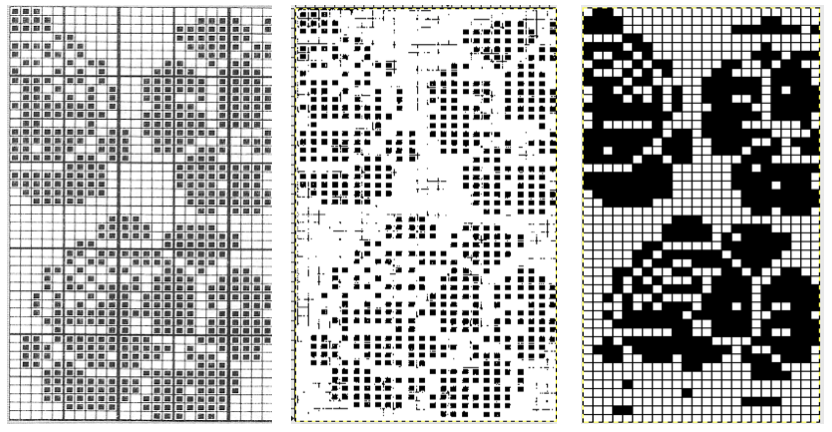
and one from a BW punchcard reference pub

My last post on working with numbers to create knit charts includes info on creating tables, working with cells, keyboard commands, and more

using the combined programs: Things got more complicated again when I tried to work with a lace repeat from an electronic pattern book. The straightforward method resulted in an unworkable image. Part of the problem may result from varied densities of lines in the original, its cells not being fully filled in (ie dots in squares or rectangles), and illustration with units in a rectangular rather than square format, so they do not scale properly in a ratio of 1 pixel per row and stitch. After isolating the repeat, I for this repeat I entered it in numbers with the plan to superimpose a table grid over the repeat and fill in squares/cells where needed. Cell borders may be created in varied thicknesses and colors, and are easily changed or removed altogether. Having a red cell border to superimpose on the image made the process significantly easier for me. In the middle section the red border is switched to a significantly lighter one, and lining up the repeat beside the images helps one visually check for any errors. In the bottom row, the image is shown magnified after scaling, gridded in the magnified version again to check the repeat against the original.

Another lace image with table cell margins adjusted, and a reminder that borders may be in any configuration or color that makes it visually easier for you to proceed with filling in cells that correspond to black squares in the original image

The steps in progress, with the processed image ready to knit, shown in magnified, gridded final GIMP scaled repeat on far right. With a bit of familiarity with both programs, this process is far faster than any counting and filling in of pixels one at a time

This lace card was not cautiously cropped at the top and bottom edges, the final repeat when scaled is shown first, with obvious errors, but workable when done “the long way” from the same image or hand-edited

Taking the time for a more careful crop for another card and easy peasy: crop, open in GIMP, convert to bitmapped BW image, scale to stitch and row count of the original repeat (in this instance 24X56), verify gridded by GIMP in magnified image version, then save for download in reduced size

GIMP magnified and gridded final repeat above on left, one obtained working the “long way” between programs to its right Conversions issues may happen also when there are large areas of black squares or working with color adjustments or with the option to “photocopy” in GIMP in images that do not translate cleanly Working with repeats that do not convert easily using both programs: the greater the number of squares or dots, the slower the process, but ultimately faster than counting then and entering them one at a time. In Numbers, create a table that will be superimposed onto the desired repeat. I like to work in cells that are 24 X 24 points. Columns are marked in letters, so 24 is 2 letters short of the full # of letters in the alphabet (X), and row counts are numbered top down on left and easily adjusted. Lace repeats would be the easiest to translate, as they are likely to have the lowest number of cells that will require to be filled in. The cell borders may be created in any color. To my eye, the red grid made it easier for me to view its lines when superimposed on the black image. The BW center image was then dragged/dropped into the numbers sheet. Checking via the table format arrange option, the table was shown to be 553 X 1440. The image arrange option showed my black and white image to be adjusted visually by me using the corner handles to 496 to 1440. On the far right, the BW image is in turn adjusted to match point values for the table. Check your typing, adjust accordingly. Here my width on right is actually 3 points off.

Drag and position table onto a BW image. Use image format arrange to move the image to the back of the table (box to left below “Style”). Magnify screen to easier working view by adjusting the zoom. It may be helpful to alter some row heights or column widths to get a cleaner view and matching cells to be filled into dots (center). Click on any row or column, adjust by in turn clicking on up or down arrows that correspond to their respective size. Using command-click and color fill options, cell fill on top of the black dots. When done, or to check periodically, the table may be slid off the image and back on if needed. With the table completed, if any columns or rows have been altered in with or height, choose from the menu to distribute rows and columns evenly, restoring all square units.

Change border selection to light, thinner color, capture image and save as png. Load image in GIMP, convert to BW bitmap, scale to 24 by 60, save in downloadable format. Results are magnified in GIMP final images on the right. Showing grid allows an added visual check if preferred, against the original repeat. The final repeat tiled, as opposed to punchcard repeat tiled helped me see one missing square I found bothersome, an easy edit the culprit marked in red

The easiest conversion of all? a full-page factory mylar sheet. Here is one for lace with a simple adjustment of sharpness and contrast, magnified, and with superimposed rectangular grid after converting to BW bitmap for saving, to then discover that the blue grid disappears in a quick mode change to indexed in this factory mylar. The images on the far right are again the magnified scaled image and shown with a superimposed rectangular grid to check match against the original crop

Rethinking those dark cards: this is a partial repeat grabbed from Pinterest, the image was loaded into GIMP, color inverted, the threshold was adjusted while in RGB mode. The adjoining 2 images show the magnified, scaled, indexed image and its color reverse. When working in RGB mode choose color invert, and when working in indexed mode, choose value invert for color reversal of the image and its ground. Other image adjustments may require toggling between the 2 modes. The bottom pair of images indicate menu location for adjusting grid size and color, and the magnified, scaled image now with a GIMP single-pixel grid is also shown
This method, however, did not work for the flower? thread lace motif (partial repeat) or the FI repeat. That said in the days of glitched knits, perhaps executed in DBJ accidents such as this could make for interesting experiments or transitions. Here we have the original not planned result, followed by some flipping horizontally and vertically, then resized. There usually is no right or wrong, and it is important to find one’s own voice and the tools required to express it.

my favorite glitch textile artist: Phillip Stearns

for more on gimp editing see post

4/15/19 I have always been curious about weaving drafts and patterns being translated to knitting ones. I wrote a post on some of the basic possibilities in 2015, in my Excel days. Lately, I have come across many tempting charts shared on Pinterest from many sources. Some are more difficult than others to translate cleanly. Having a periodic leaf obsession, I came across this chart, which also will show some of the issues found in mesh grounds, thread lace, and other fabrics when there are regularly spotted grounds. 

I found the easiest way to work with the repeat was to overlay the table over the image using a much thicker cell border. The repeat was isolated, its colors reduced to black and white out of habit. Adjustments were made to the image eliminating aspect constraints, and it was laid under the grid to the closest visual match for stitch and row units cell size. Command select makes quick work of filling in pattern cells. When done, the table border was selected and rendered in a much lighter outline, the captured final image was saved, opened in GIMP (insured it was indexed), scaled to 38X50 pixels, and produced something in theory now knittable. Tiling is as always a good test to see if the final repeat meets your expectations prior to knitting and offers the opportunity for any other adjustments with the use of the grid and magnification even easier approach: use the same grid method on the original, in the original color isolated repeat. The table may be shifted slightly in its front position as one advances through the repeat, filling in cell content. another in progress repeat and its tiled BW counterpart using this method Luminescence is an online weaving program developed by Andrew Glassner. There are ample instructions and help files on site with regards to weaving. A related post, updated with information on processing images using a combination of Mac Numbers and Gimp, beginning with this draft Back in 2011, I had quite a lace obsession. One of the shawls I produced is shown below in one color on a blocking board, and in a completed other
The knitting took place in my mylar on 910 days and I still recall the tenacity it took to reproduce the lace pattern accurately from a small image in a publication, to a repeat 150 rows in height and 35 wide on the mylar. The original lace pattern was part of a series of motifs used in a lace shawl published by Susanna Lewis in issue # 5 p 43of Macknit, a short-lived machine knitting magazine. I now used the method illustrated with the woven leaf above. A thick cell border table was laid in front of a scaled scanned image of the original repeat, filling in cells, and then using the image grabbed from numbers in gimp to produce the final BW .bmps for download via img2track to my 930. Once I realized that the original image grabbed from numbers needed to be large enough to produce a clean scaled .bmp in gimp and broke the pattern into 3 segments 50 high each to accommodate the screen size of the Mac and an easy to count grab, within minutes I had my lace pattern for download subsequent proof of concept swatch was easier and quicker to produce as well now that I have a much better understanding of how lace transfers work, it was not quite centered, but appears to be correct

A bit on method:
Cell size minimum 24X24, at this size I was able to grab 50 rows at one time
Colored Border 6- 8points when filling in individual cells
Zoom 75%
Fill in cells with black
Change the cell border to 1 point dotted
Screengrab desired repeat as cleanly as possible, this makes a difference with straggler dots
Open screen grab in gimp, trim if necessary, convert to mode indexed 1-bit palette
Image scale to grabbed a repeat cell count. On occasion one of the 2 numbers may be off by one or 2 pixels, can be rounded off by breaking the chain symbol used for keeping aspect ratio constraints
If there are stragglers they can easily be edited with side by side comparison. There may be fewer with larger grabs. The method worked seamlessly for me yesterday, today I am getting extra black cells. Comparing with the screengrab and editing at 800 to 1000 X with grid, snap to grid preferences will make for a quick edit, still ever so much faster than drawing on mylar.

“straggler” illustrations for clean up in GIMP prior to saving for download


Ayab: short rows automated with slipstitch

I have recently been reviewing some of my ideas for using slip-stitch to achieve fabrics normally created by hand-pulling needles for short rows. The samples for most charts below are found in previous posts on the topic. My hacked machine is presently being put to bed for a while as I work on some production pieces on KMs that allow me to produce predictable lengths of knitting. I will not be providing proof of concept swatches for every chart.

A bit on defining short row 2013/12/18/holding-stitches-short-rows/

2014/02/20/wisteria-cousin-revisited-holding-using-slip-stitch/

The carriage movements are partially illustrated below, beginning with the first-row pre-selection from left to right (red line/ arrow), which happens to be the only option when using ayab. Ayab also mirrors automatically, so either mirroring the rendered repeat or using the action mirror in software is required for the holding sequence to be correct. The lines indicate the direction of the carriage movement on each design row. Blocks need to be even numbers in height and may be adjusted in width. The full swing of the fabric in each direction needs to be programmed.

https://alessandrina.com/2013/12/28/short-rows_-balls-tams-3d-rounds/
here the holding sequence works toward the center 
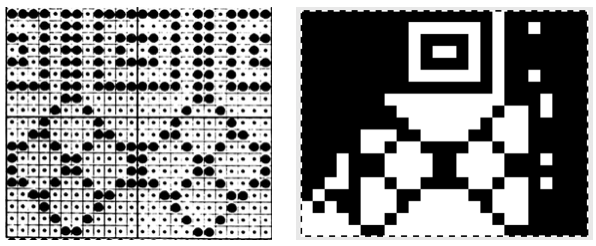
Ayab will mirror it if drawn as is, which will place carriages in position for first preselection row to start from left, decreasing stitches in work 

For increasing stitches in work rather than decreasing them, this illustrates the direction in which the carriages need to be moving. In this instance, the image needs to be mirrored to erase the software’s automatic doing so 

Single bed pleats https://alessandrina.com/2013/01/21/automating-pleating/. This repeat is planned for each square representing both a single stitch and a single row. Since the width of the knit piece needs to be programmed when using Ayab, this approach may be used for anything from ruffles to sideways skirts. Additional information on designing is offered in the previous post, used as is  

With a bit more planning and even using a garter bar, this is executable as well
https://alessandrina.com/2013/02/28/garter-bar-short-row-trim/
For a possible all-knit surface variant the repeat on the left is drawn, due to the auto mirror, no mirroring is required to obtain the knit rows in the directions illustrated on the right. Knit as is, the resulting eyelets including the larger one at the center can serve as “design features”. The motif on the left is mirrored as it would be by Ayab on the right. With narrow pieces of knitting, pay extra attention to beeps and flashes. Clearing the end marks on the needle bed may also be necessary to keep needle selection accurate, watch for yarn loop formation on either side as the result of  having to travel that far from the end of the needles in work. “just for fun” 2017/06/11/crochet-meets-machine-knitting-techniques-working-with-short-rows/

Category search:  
machine-knitting/short-rowing


Charting knits using Mac Numbers 2

From 2012, Numbers 3.2.2: printing graph paper to desired cell dimensions: I chose to change preference for rulers to point units (options are for centimeters, inches, and points). Online conversion between units of measurement and PostScript points may be calculated (if needed) using calculators ie.
http://www.unitconversion.org/unit_converter/typography.html

default cell size in cm and points

Click on the table icon at top of your document screen, to right of function icon; select first choice on left, second row

a place to start

Uncheck alternating rows on the sidebar at right

Click anywhere on the screen, use command all to select all table cells. Choose row and column size, typing in your desired values or using arrows provided, hit return.

Click anywhere on the table to get additional markings to appear again. With your mouse, grab and drag the Add or remove rows and columns button symbol on the bottom right and all units on the sheet will be resized to displayed measurements

as you do so you will also have the benefit of viewing the number of rows and columns in your document.

For thicker, darker, or even differed colored and types of lines changes are easily made working with borders menus

Clicking on any cell leaves only your graph; selecting print from your file menu prints exactly what appears as the sheet number chosen, and /or have saved; additional adjustment options are offered on right

Click on the white part of your sheet, only your chart will be viewable and ready for printing. If a PDF is desired, choose Export to -> PDF from the file menu.

The last online manual for numbers 09 is available here. The program has changed significantly in appearance and in some of its functions since then.

I have been exploring numbers out of necessity since upgrading my Mac to the latest OS, thus losing availability to Office, and therefore to Excel. I recently published a post using Numbers for color separations in knits and decided to attempt to explore the program further. Here I am reviewing and sharing some of the process and information I now use in creating my blog’s knit charts. There is no recent, full manual for the program.

The format bar that may be familiar to users of older versions 


the Graphic inspector 

Tips immediately below are extracted from Online apple support  Numbers 5.0.   

A list of keyboard shortcuts edited by me for use with colored cells

“Undo” restores the previous state, may be used multiple times to reverse several steps. Redo will cancel it. The program autosaves. The option “revert changes” when closing the program erases all changes since its previous launch session. “Revert to” under file menu offers an opportunity to browse previous saves and restore them, similar to using the time machine in older versions of the program and Mac OS.

Frequently there are more options for achieving any desired result.

Building a knit chart: choose a default table from

Use format table in

  1. In the Format page1image1768000 
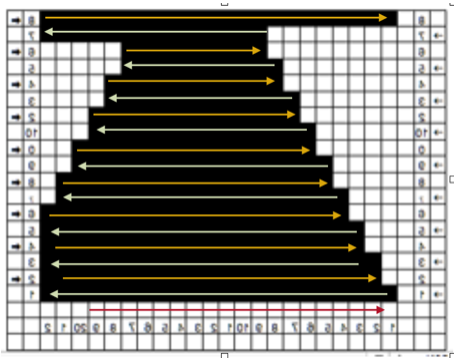
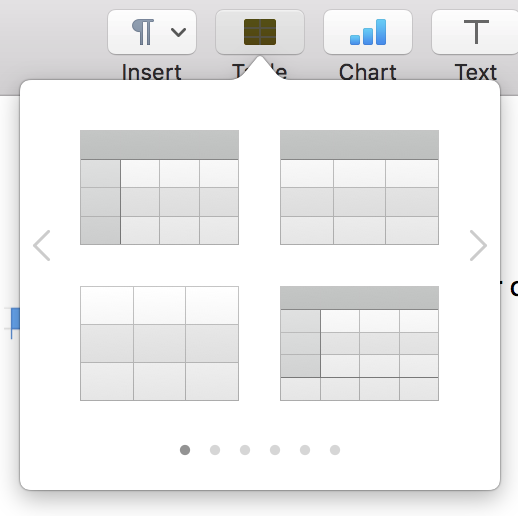
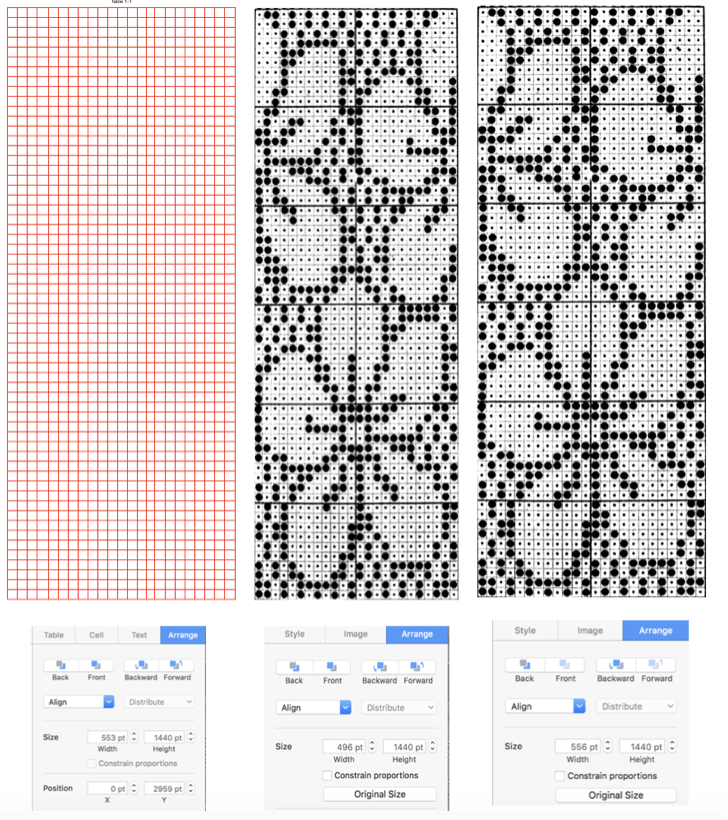
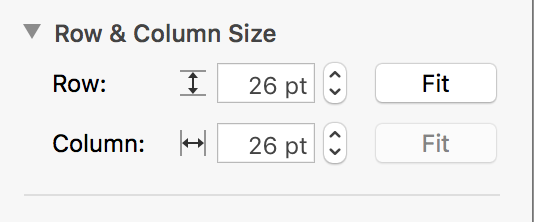
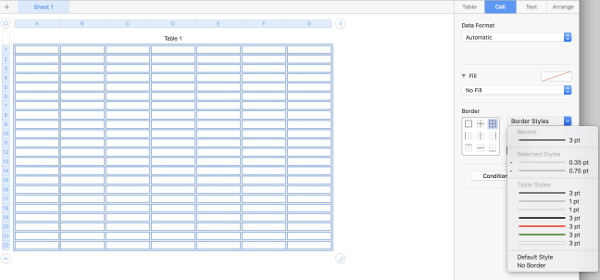
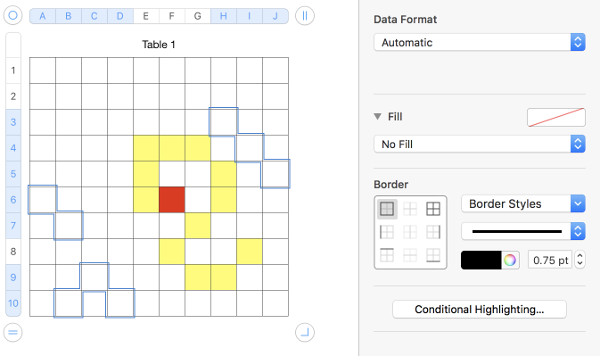
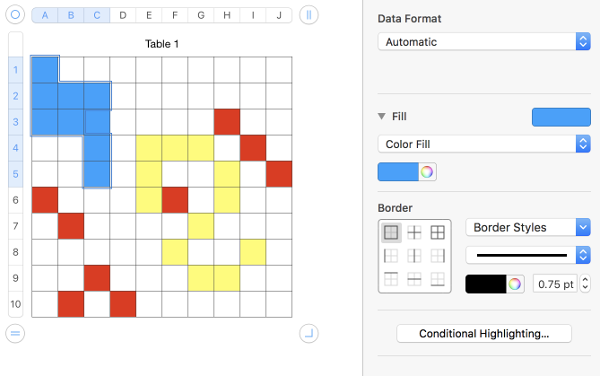
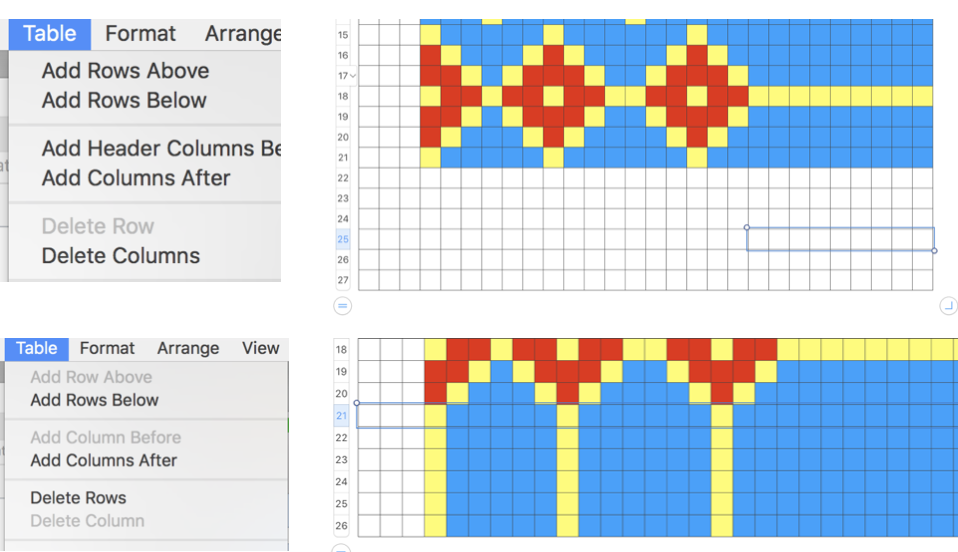
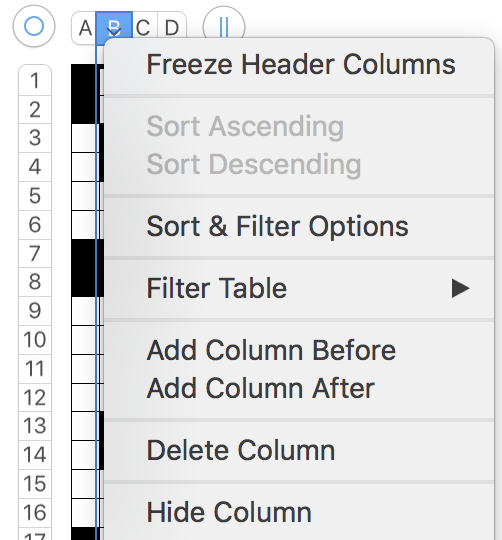
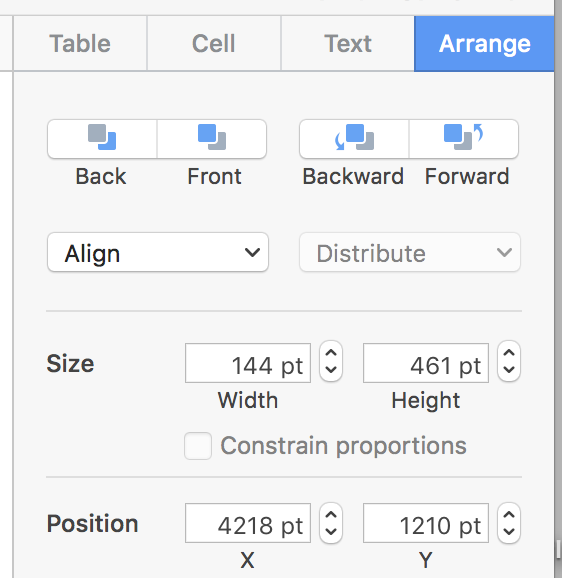
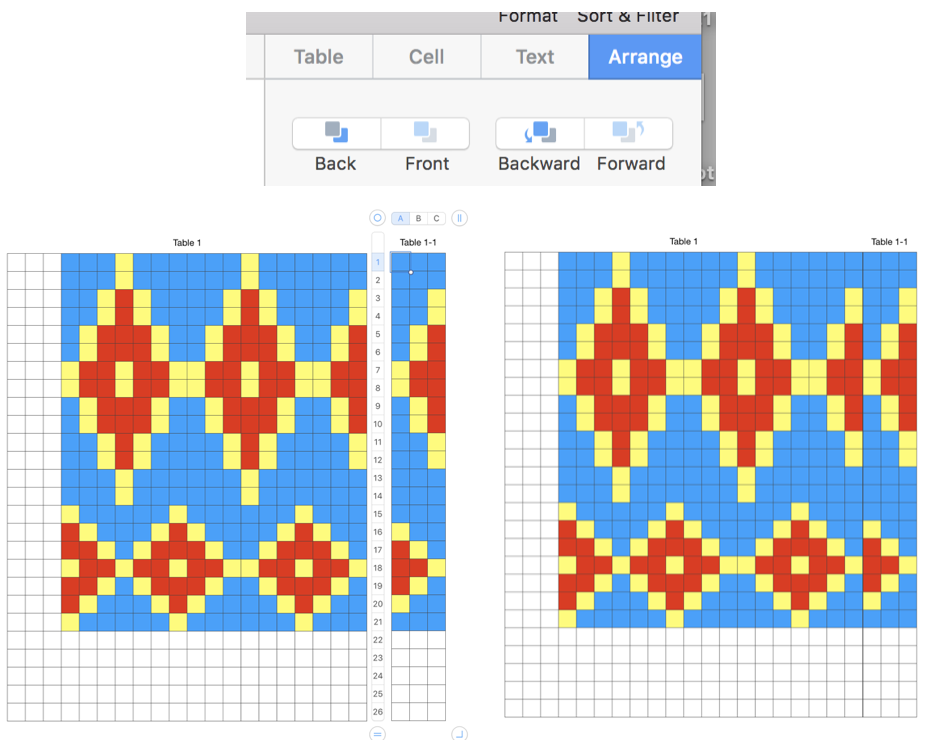
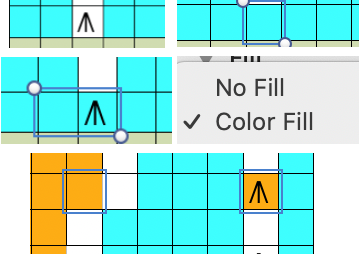
sidebar to the right of the document to change features such as table name, headers, footers, as well as colors, and row and column size,

or click anywhere in table and select all  (Command A), choose no fill option on right to remove any default colors
Choose a border color and line weight. If accustomed to working with black as a color in your chart building, starting off with a colored border will make the black cells easier to count. The change may be made at any stage of the design

Determine column and row size using format cell menu on the sidebar at right. I tend to work in cell size 24-29 pt square shapes. These values may be easily adapted if one chooses to draw in knit proportioned cells for more closely approaching gauge or estimating elongation in fabrics such as DBJ. Border colors may be also be adjusted or changed at any point, globally,  for single lines, or to outline blocks of cells. Clicking on a column tab “letter” and dragging its border on one side or the other will change its width, and the new point value is visible on a shape with a black ground while doing so.  Top or bottom drag a “number” in the tab for rows at left for column height changes and viewing the changing value display. Undo will revert the change.

Review for basics for enlarging the table with cells with no fills: reference tab numbers on left may be used to refer to rows. Reference tab letters at the top may be used to refer to columns. Drag the table handle the Table handle to move the table. Click the column handle the Add Column button to add one column, drag it to add multiple columns. Click the row handle the Add Row button to add one row, drag it to add multiple rows. It is not necessary to press shift while dragging either symbol for multiple adds. Drag the column and row handle the Add or remove rows and columns button to the right to add columns, down for rows, and diagonally to add columns and rows at the same time. Reference tabs are active while the chart is being worked on. They disappear if any area outside the table is clicked on. Creating a chart initially larger than the planned design offers a larger field to “draw on” to start with. 

To draw shapes in color: click on a cell, choose your color 1 from the menu on right by clicking on the rectangle to the right of “fill”

To copy cells within a table, or to another table, drag the selected cells while holding down the option key. You can also copy cells by selecting them, choosing Edit > Copy (Command C), selecting destination cells, and then choosing Edit > Paste (Command V). You can also paste a cell€™s content into multiple cells, which don€™t have to be adjacent to the copied cell or to each other. After copying a cell, select the destination cells and choose Edit > Paste. The cell€™s contents are copied to all the destination cells, in the same or another table, replacing any existing content. An alternative way to draw motifs in different colors: holding down command key select cells that will compose the desired shape

choose the current fill color again to fill the outlined areas

adding a second color: click on a cell, choose the second fill color

hold down command, select cells for a new shape

color fill

repeat with color 3, and continue on

Not enough columns or rows for your motif?  Click on the Add Column buttontop right or on the the Add Row buttonbottom left will copy and add the previous column or row including content to clear unwanted filled cells in the added field, select column or row from tab reference letters (columns) or numbers (rows), choose “fill” as no fill

To insert multiple rows or columns at once: Anywhere in the table, select a number of rows or columns equal to the number of rows or columns you want to insert, “click the arrow” next to one of the selected row numbers or column letters, then choose Add Rows Above or Add Rows Below (or Add Columns Before or Add Columns After). The arrows are visible as you hover or click in either tab, seen more easily when working in larger magnification, and often clicked on while unaware of doing so in lower magnifications 

Alternately, click on table and in turn click and drag the Add or remove rows and columns buttonat the bottom right up, down, left or right for further adjustments to the total number of available cells,or simply repeat the fill in the selected column or row along with creating the added cells, and select areas to remove any unwanted color. In some instances, the added colored cells could serve as a deliberate design feature

Adding columns and rows above or below and columns before or after using the table menu. Options are greyed out until a row or column is selected. 

options also appear when you click on the arrow in the row or column reference tabs

Adding specific rows above or below can help scale coordinated designs. To add rows after a particular row, make sure the bottom row selected is the one after which you want the new rows added; to add rows before a particular row, make sure the top row selected is the one before which you want the new rows added. Then choose Table > Add Rows Above or Table > Add Rows Below,

or use keyboard shortcuts to add a row above a selected cell, press Option-Up Arrow. To add a row below a selected cell, press Option-Down Arrow. To add a row at the end of the table, press Return while the last cell is selected. To add a column after a selected cell, press Option-Right Arrow. To add a column before a selected cell, press Option-Left Arrow. To add columns after a particular column, make sure the rightmost column selected is the one after which you want the new columns added; to add columns before a particular column, make sure the leftmost column selected is the one before which you want the new columns added. Then choose one of the commands above. You can also use the Tab key to add a column to the right side of the table.

To delete a single row or column, hold the pointer over the row or column reference tab to see the menu arrow, and then choose Delete Row or Delete Column from the pop-up menu.
To delete several adjacent rows or columns, select the rows or columns and then choose Delete Selected Rows or Delete Selected Columns from the pop-up menu of a selected row€™s or column€™s reference tab.
To delete empty rows, drag the lower-left Row handle  the Add Row button up or drag the lower-right Column handle the Add or remove rows and columns buttonup.
To remove rows with content, hold down the Option key while dragging.
To delete empty columns, drag the upper-right Column handle on the Add Column buttoninward.
To remove columns with content, hold down the Option key while dragging.
Moving a cell or groups of cells: select and choose group by using cell handles or commands, immediately click on the same selection again, and drag it to a new position within the same table. Moving the selection outside the table, onto a blank portion of the sheet creates a new table.

Having a large table area to work on allows for copying and pasting repeats in different configurations. 

Added ways of working with cell groups: to select adjacent table cells, select a single cell, and then hold down the Shift key as you select adjacent cells. You can also click a cell, press, and then drag its handles through a range of cells. As seen above, to select nonadjacent table cells, hold down the Command key as you select cells. Continue to hold the key, and use Command-click to deselect any cell in the group.

Adding, copying, and pasting tables or portions of them. Clicking on the + beside sheet # will create a new default table, on a new sheet, a new sheet of “graph paper”.

Tables and their data may be copied and pasted from one sheet onto another, or on the same sheet. To add a new table in the same sheet from available templates click the Table button in the toolbar, then click a table or drag one to the sheet. Reviewing process once more: Move the table: Click the table, then drag the Table handle in its top-left corner. Add or remove rows: Click the table, then drag the Add Row button in its bottom-left corner down or up. Resize the table: Click the table, click the Table handle in its top-left corner, then shift-drag the white square in its bottom-right corner to resize the table proportionally. Change the alternating row color setting: Click the table; in the Format  sidebar, click the Table tab; then deselect or select Alternating Row Color. (To choose a different color, click the color well.). Change the look of the new table: Click the table, then use the controls in the Table tab of the sidebar to make changes, such as adding a table outline or changing the table font size. To delete the table click the table, click the table handle in its top-left corner, then press Delete on your keyboard. An alternative way to create a new table matching presets is to copy a blank segment of one of your existing tables and paste them, adding and subtracting more blank squares, or even to copy a full table with color designs, and simply remove color fill after pasting.

Selecting a portion of a table that contains graphics and choosing copy and paste will reproduce the selected portion as a new table, usually at the upper left of the sheet, sometimes on top of a preexisting table.  When working on large charts, the pasted table may be “hard to find”. Reducing magnification to 25% sometimes makes that easier, since larger sheet area then comes into view. Clicking on any tables and dragging on the the table handle at their upper left allows one to move the contents to its desired location.

Fine-tuning table size and positions may also be achieved by changing values in the size and position sidebar format options. Click on arrows for default size moves, or click in respective value boxes and type in the desired number, hit return 

Some of my tables have table 1 above the graphics, some not. That can be changed by clicking on the table name box in the format table menu 

or click the table, Control-click the row number for row 1, then choose Hide Table Name or Show Table NameTriple-click the name at the top of the table, then type a new name to rename it. Keeping a “name” helps track versions such as when working in color separations, where a whole table is repeated and altered in a series of steps while preserving the previous one. Below a table segment is selected, copied and pasted as a new table. The new table is moved into a position next to the original. To combine the tables in order to create a new design, choose arrange from the format menu. In this instance, I chose to position the new table by clicking on it and selecting the back paste option. Once you click on a blank part of the sheet, the table tabs will disappear. The tables are visually merged, but in fact remain separate tables, each of which can be moved, resized, added to, and otherwise altered. 

It is also possible when working on 2 tables to select and cut out a segment or more. Below, the table with the cut-out window is moved onto its unaltered table twin and shifted up (note numbers on right, and red border segments) 

A different “table” with the same cell dimensions, may also be dragged and placed under (or over) the “cut” portion of the first. My placement here is slightly off intentionally to show table placements for under/ in back  

and placement over/ in front  

To screen grab tables with row, column tabs, and corner bullet markings click on any individual table cell (note the outlined cell with handle markings upper left and lower right), and use shift-command-4 to select area for saving.  For a multiple-table grouping, hold the shift key while clicking anywhere in any single cell contents of multiple tables, and while still holding shift, add command-4 commands, select and save. Clicking anywhere outside the tables on the “sheet” results in tabs and bullets disappearing. Click on any cell in any table again, to move it, or make any other adjustments needed.

A helpful yellow dot: for sequential numbering in any row or column, fill in a minimum of 2 with number values ie 1, 2, 3, select all the numbered cells, a yellow dot will appear on the right 
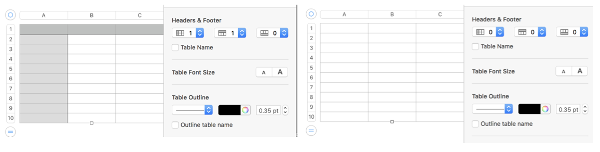
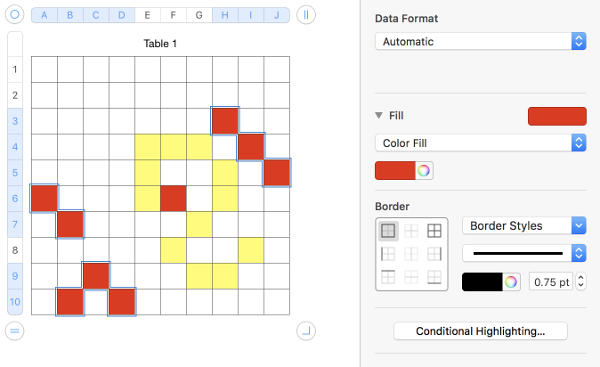
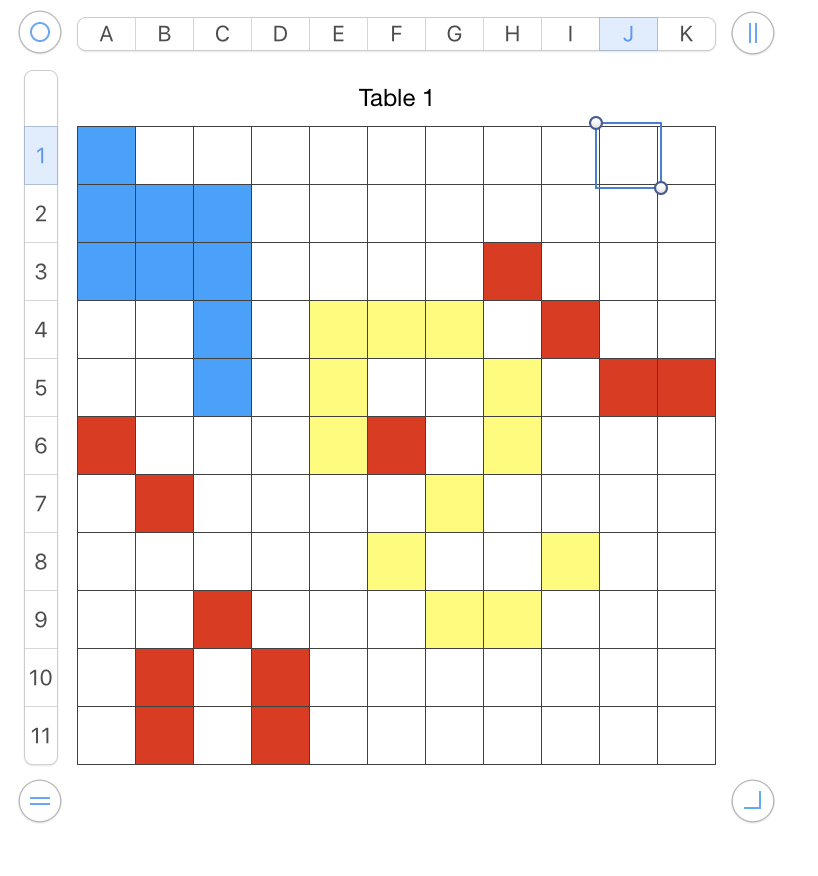
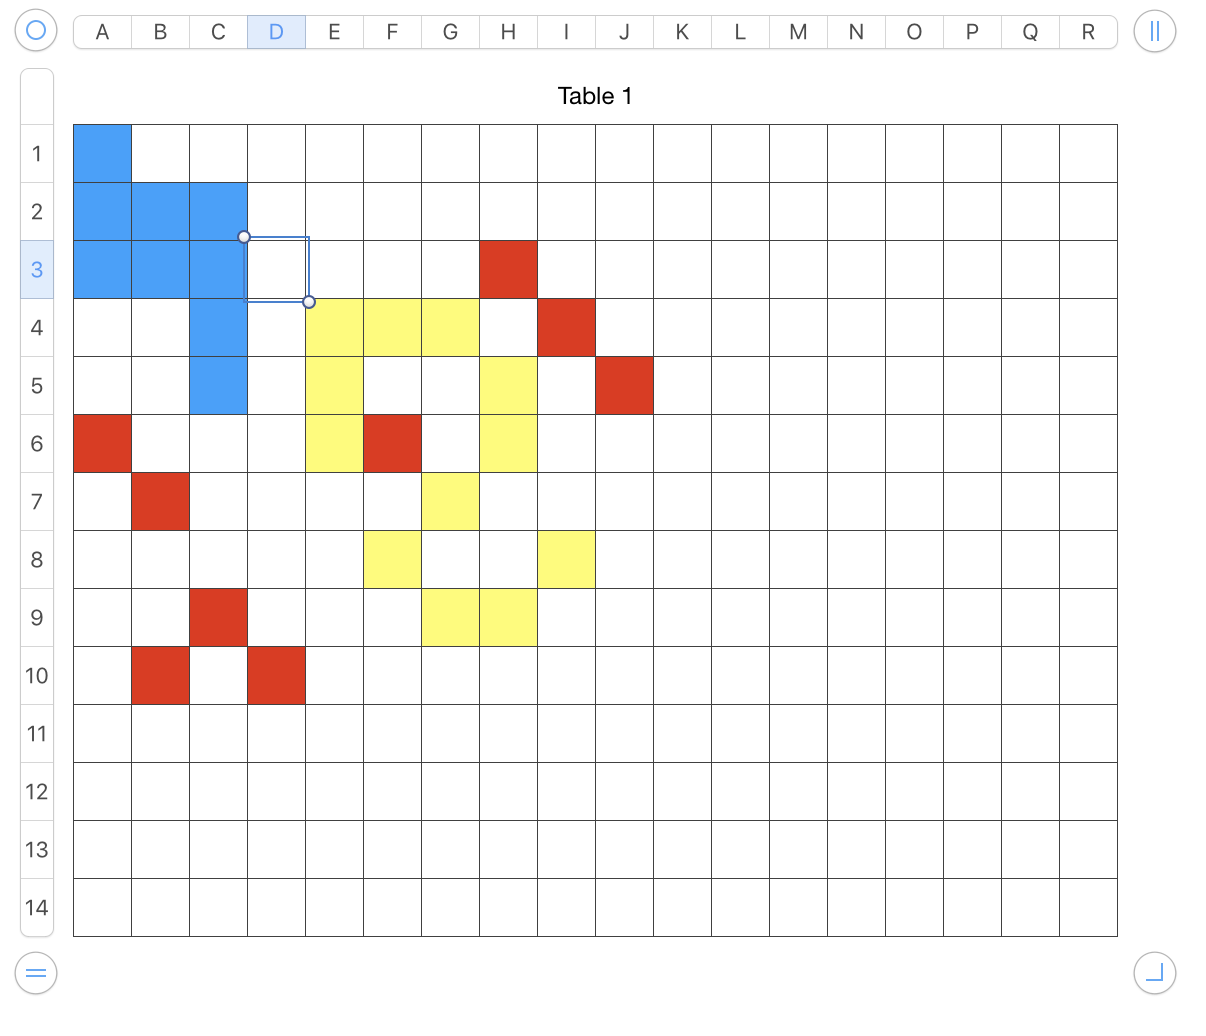
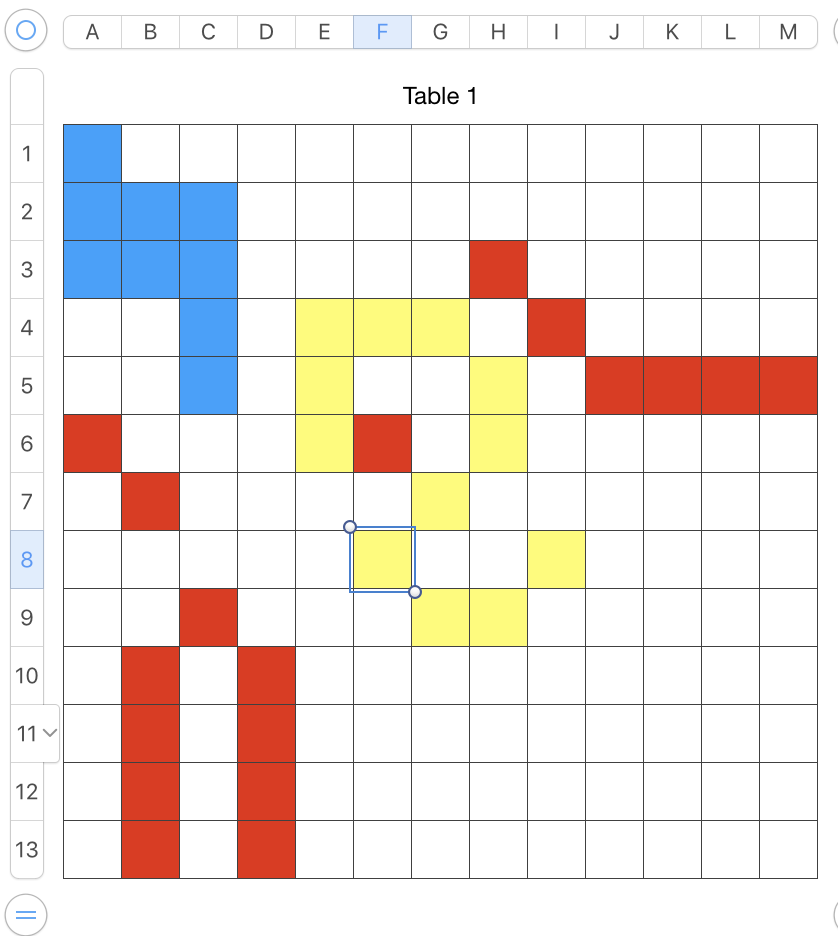
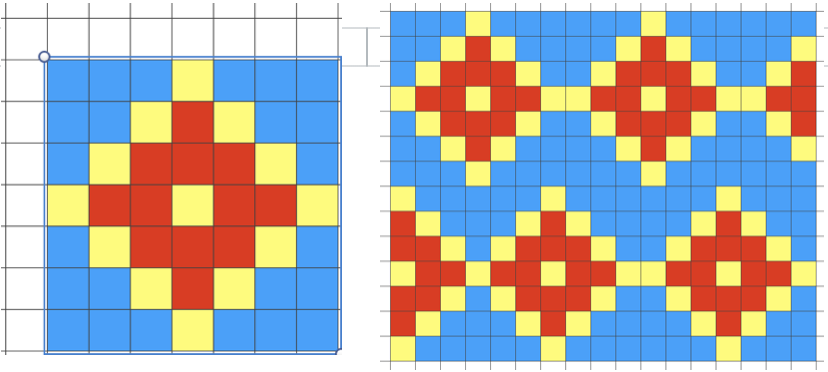
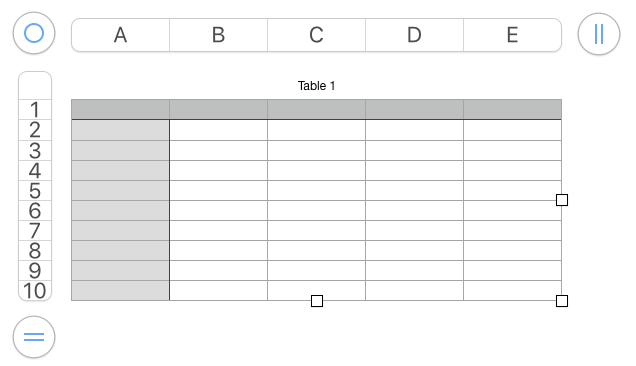
click on it and drag across the row of cells you wish to number and  doneFor numbering in the opposite direction, simply begin numbering on the right in reverse order for at least 2 cells, and use the same technique. For vertical numbering, once again, use the same principle at the top or bottom of the column you wish to number.
Multiple numbers, symbols, or letters in repeat (wish I knew of this feature or its possible availability in my earlier charting)
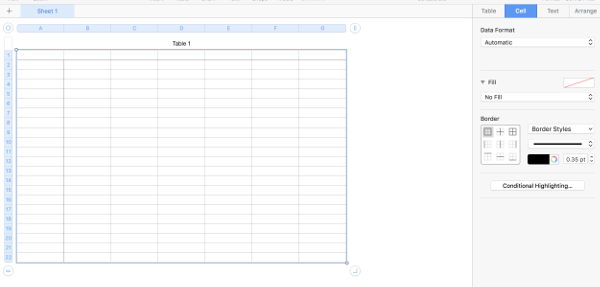
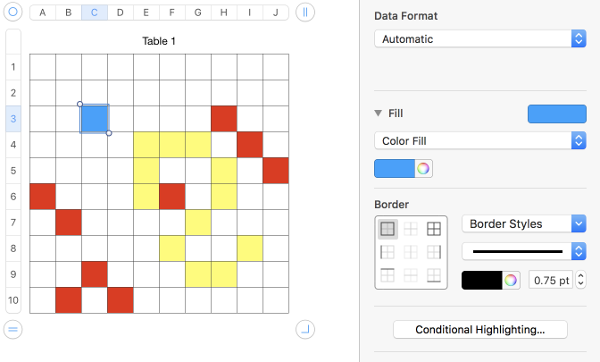
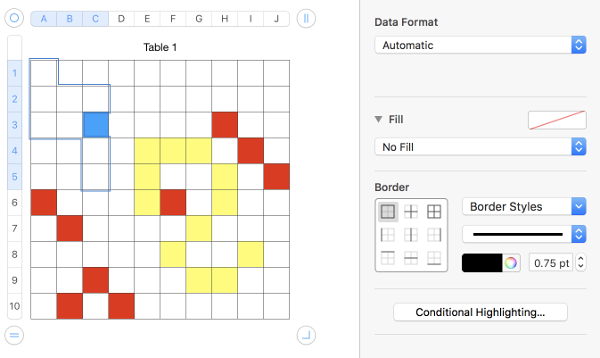
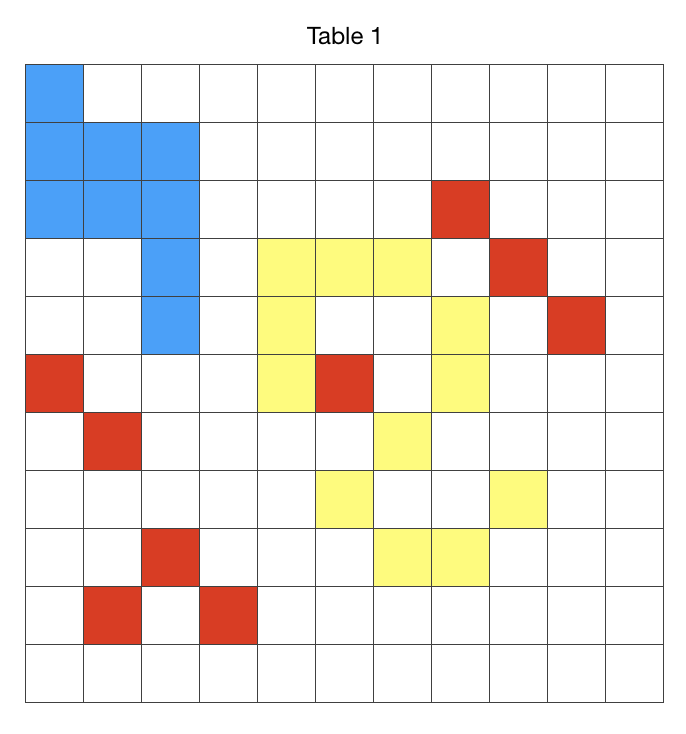
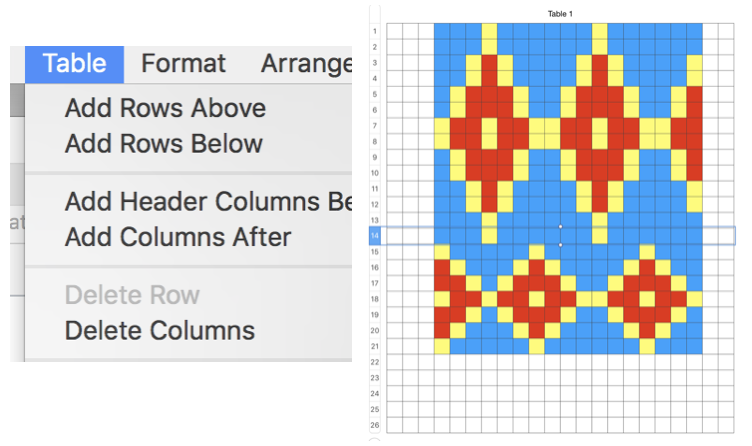
Any table may be adjusted to accommodate adding text, shapes, or to expand on instructions.  Working with shapes merits its own, separate discussion.

My favorite font, used in most of my charts that begin to address specific fabrics such as lace by adding symbols,  is no longer available for distribution. For more on symbols and fonts see post

If colored cells are in use and text or symbols are added to any such cell, the ground color may be lost. If a color is added to that cell after the text/symbol entry ie by copy and paste of a colored cell, the text is lost. Arrange behind from the format menu does not work in this instance. The quickest method is to use the command key, click on any cell containing only the chosen color you wish to use behind the text, drag and drop selected content onto text, and the color will appear behind it.
Another method is to use command key, click on the chosen colored cell,  use format menu to choose color fill, click on the original cell and the one you now wish to color, finally choose color fill from the format menu again

Online published shortcuts for using the program with downloadable as PDF 


Charting knits using Mac Numbers: color separations 2

This is not intended as a full tutorial, it presumes there is some familiarity with concepts for charting knits or proportioned graph paper using spreadsheets. I am sharing some of my recent explorations using the latest version of Numbers version 5.01 in Mac High Sierra 10.13+ OS. To my knowledge, there are no other specific directions for using the program for this purpose. As I progressed through the separations below, I “found” new ways to deal with cell selections and table properties. At some point, I will work on expanding the original post on drawing motifs (Numbers 3.2.2).

The command key has become my new friend. In my past experience using excel, I found limited ways to work with designing motifs and working with color in cell groups. When working on the design for 3 colors per row slip stitch for a segment of this post, I found holding down the command key while drawing makes clicking on cells and selecting them sequentially, to be akin to using a pencil/ paint bucket option in paint programs. The process is significantly faster than the other steps I have tried. This image is the intended, final one Working on the table: the areas selected holding down the command key and in turn clicking on chosen cells sequentially are outlined. They were color filled with blue for my chart. The one extra square “error” in the center of the motif was dealt with individually and changed in the subsequent color selection. For a screen grab with table markings, a cell must still be highlighted. If it is not, only the selected cell contents are captured. 

In a post I wrote in 2012, I referenced the features of splitting cells that disappeared in a later version of the software. These options for working with rows and columns are available. The highlighted row will be duplicated, one row at a time, a slower process than simply splitting cells. A positive feature is that an individual table may be changed while still within view of other tables on a single sheet, without globally affecting the document. It is possible to create blank rows between design ones. Though the results from such charting are not capable of being downloaded directly into knitting software, they are a good way to sort out repeats and begin to understand and create any necessary color separations. By holding the command key, rows on the table can be highlighted and hidden as a group. I chose all the even-numbered rows. The repeat then is drawn. When it is complete, rows originally targeted for hiding are “unhidden”, leaving the design motif with a blank row between each design row, at twice its length. Hiding could take place at irregular intervals as well.

Putting theories into practiceDOUBLE BED 

QUILTING: in terms of applying the technique, the first charts are based on a quilting post that created this example using other software

I had a 14-row motif in mind, so I created a table 28 rows in height, twice that of the motif. While holding down the command key I clicked on all odd-numbered rows and hid the 14 highlighted rows. I then drew the motif on the collapsed chart in the reduced number of rows. When it was completely filled in 2 colors, I used the option to unhide rows, having the expanded graph now 28 rows in height

On the left is the 2 colors “basic” chart. You will notice it is missing a blank row at its top. Check to be sure that the expanded image has that space, it is needed for that last row of color 2 (blue) to move up. In the center, by clicking on each blue square and then clicking on it again and “dragging”, I moved each square immediately above its spot, on the matching location in the blank row. I like to work with black and white squares before drawing bitmaps or other formats for download, so the image on the far right have all colored squares reduced to black and white ones. I filled them in Gimp using the paint bucket on a screengrab of the color separation, but it may also be done in Numbers (see below)

DOUBLE JACQUARD COLOR SEPARATION: this table was part of the review of color separation methods reviewed in a previous post For the first method: testing using a simple shape, 8 stitches by 8 rows, create table 16 rows in height by 8 columns (stitches) in width. Hold command key, click on odd number rows, choose to hide 8 rows from the table menu, resulting in reduced 8-row height. After the motif is drawn on the reduced table size, the odd-numbered rows are then unhidden. Next, fill in any squares in the restored rows that are empty in the row below, where markings already exist. This may be done all in one color, but I used green for the purpose of illustration. The image on the far right may then be entered into an imaging program ie GIMP for download, drawn as is. The choice follows as to whether to double the file in height prior to programming the machine or choosing software options for double-height after loading it if that is a function of your knitting software  This image is from a previous post on DBJ separations for punchcard machines using the same size repeat and mirrored (punchcards reverse the image), offered as proof of concept The second method is for the color separation that knits each color for each row only once: the motif can be drawn in black and white. The sequence is different than for above. Rows are hidden in pairs above row 1 (16 in table left), then the repeat is drawn in black squares only. Adding a column with numbers for each row in the original provides added cues, and follow with the changes in tables. The rows are “unhidden”, resulting in the completed separation for color 1. Color 2 (in different colors in the center chart for purposes of illustration): on the first blank row, (odd row numbers for color 2) fill in squares empty in the row below, on the second blank row, fill in all squares empty in the row above (even-numbered rows for color 2). On the right is the repeat ready to be drawn for download. 

Drop stitch lace, one color, partial repeat inspired from post, 10 rows in height vs 9:  beginning with table 20 rows in height, repeat is drawn with hidden rows (markings on left), in addition, design row numbers are added in a column on right expanded design revealing hidden rows, black squares ready to be programmed 

ONE REPEAT, 2 FABRICS once again, beginning with a repeat from a previous post DBJ with each design row knitting twice, no elongation: each design row needs to be expanded into 4 rows of knitting. The first table is drawn with table rows and design rows matching 

Starting at the top, using the option key and the down arrow, the chart is expanded by using the down arrow three times before moving onto the next row and repeating the command. Any errors in single rows are easily edited. I have added the green cells on the right to represent the alternate 2 rows of color 1, making it easier to keep an eye on rows as chart is edited further

holding down the command key, it is possible to perform the same action in multiple rows 

I began by eliminating the red on rows marked with green cells, leaving only the black in those rows. Copying and pasting the chart with each step provides a continuing visual check and may avoid restarts. In the middle chart, black has been eliminated from rows (with no color cells on the far right) containing red. Lastly, red cells are changed to black for the final pattern repeat.

DROP STITCH LACE IN 2 COLORS: my original separation

Today’s much quicker method, using the all-black chart from the DBJ separation for the repeat on the far right and the command key again, I selected odd-numbered rows from the bottom up and removed the fill. The results match the ones from the previous method 

Three colors per row slip stitch: the method is the same as for 3 colors per row DBJ. The separation from my previous post

the repeat and its companion table:

6 rows are required to complete a single row of the design. These charts get very long. I chose to work first with each design row repeated twice, and then followed the same process as for the 2 colors per row separation, including reducing the cells to all black. As one advances up the table, color markings on the far right indicate the single color that is to remain in that row. Hold down the command key, and select for removing fill in as many areas as comfortable. The magnified images with tables lining up side by side provide a visual check. For screen grabs such as these, the individual tables may be moved to the front or back of others by using the arrange feature in the format menus. The black and white squares would be converted to punched holes in a card (as is) or pixels. On either machine, they require elongation X2 for use with the color changer. Again, the increase in length may be achieved prior to download in your paint program, or automatically in software or KM that has the feature built-in. To elongate the image on the right use option and down arrow if starting from the top. I added design row numbers on the right of the table to help track the process. Clicking on those numbers performs the same action as doing so on row numbers generated by the software when creating the tables. At left is the repeat in process, on the right the final one. Note: the numbers 6 and 7 are sequential on the left, an error, with no empty cell vertically between them. It is easy to see which row is not elongated and to make the correction seen in the image to the right. 

SINGLE BED

It helps to have some understanding of rules for creating fabrics such as mazes and mosaics prior to designing your own. The color separation can be a tedious one. I have previously worked out the repeats in paint programs. This method is far quicker, but there are still lots of pixels that need to be entered in software for download or squares that need to be punched. There are very interesting results that can happen by using pre-punched factory-supplied punchcards. Any of the same designs may be worked on both single and double bed, but the topic here is for a DIY approach to the separation for suitable designs

MOSAICS 2 WAYS: I previously posted on drawing motifs, and moving from design to pattern. Here again, I am starting with an 8 stitch repeat. The first method results in a repeat suitable for use with electronics. The repeat then in turn needs to have its colors inverted and is programmed to knit double length. Color changes will occur every 2 rows. The original motif is on the left, shown with hidden rows on the right. The expanded table is 16 rows in height, double the row height of the original repeat (8). Hide odd-numbered rows, and fill in your motif. (Note table row markings as opposed to the design repeat row markings)
On the expanded graph, with unhidden rows, on odd-numbered design repeat marked rows, fill in empty squares with another color. Follow that by in turn removing any black squares in that same row. Hide rows to collapse the shape, resulting in the top image on the far right. The bottom right chart repeat illustrates pixels that would need to be programmed. The setting is slip stitch on the main bed <– –>. With color reverse, the now white squares will knit, the now black squares will slip.

Punchcard knitters need to punch the majority of squares. They are manually accomplishing the task automated by color reversing the repeat in electronics. This fabric is knit at double length, with color changes every 2 rows. The alternate color now fills in empty squares on even-numbered design repeat marked rows in the expanded table. Black squares are removed from those same rows. Hide blank rows. The bottom right chart shows stitches that will be knitting, white squares will be slipping. 

EXPERIMENTING WITH LARGER DESIGNS I began with an image used in one of my earlier posts on the topic, worked through the whole process, and realized at the end of it that my repeat was technically 23, not 24 stitches wide, so it was back to the drawing board for the separation once again with the now counted and marked 24 stitch repeat. Tiling is a quick and easy process using gimp, and these repeats should be checked as those for any other type of fabric.

The newly corrected repeat (center) was then drawn onto a table twice its original height, as described above. The added rows that will be hidden and in turn unhidden are partially shown in incomplete width and highlighted on the right. A second color may be added to the repeat at this stage, but I find the results too much to deal with visually for further editing The rows are hidden prior to drawing the repeat and unhidden to create the expanded graphs. The command key is held down while clicking on selected rows along with the design height for both actions. I find the expanded rows easier to follow for editing, with the blank rows between giving my eyes a rest. If black is one of the colors, the borders may be drawn in any shade other than black to make counts in black areas easier. Some of the early programs actually assigned black as the value for the €œtransparent€ grid, automatically changing palette colors to other values, or resulting in error messages if black was part of the design palette.  Since the repeat eventually will need to be reduced to pixels or holes in cards, one can attempt to skip a step by using a darker color for color 2 in the separation and count squares and draw pixels from there. I personally find it easier if I am dealing with only black squares when plotting out pixels for download. Adding color to numbered table cells on the right is another clue to follow. Within the spreadsheet, the whole document allows for easy travel between magnifications for easier editing or prepping for any screen grabs. 

Here the repeat is drawn, rows are unhidden, on even-numbered design rows (highlighted on the right in green), the empty squares in that row are filled in with a different color (red). The black squares in those same rows are then in turn emptied of color (no fill). Again, holding down the command key while selecting across a row allows the same change to be applied to all those cells, making the process faster

a partial repeat for the squares altered in colors for respective color changes the completed results for each step If rows are hidden at this stage, the center image will result, and all red squares may be changed to black if preferred

As mentioned, I prefer to work on expanded graphs. When ready to hide rows, select empty squares (no numbers) on right, again holding down the command key while doing so to make a global change as opposed to row by row 

The BW image tiled. Most electronics (ayab is an exception) require a single repeat in width and height. If color reversal is an option, one may program white squares and use the machine or software to color reverse. Punchcard knitters use the 24 stitch width repeat in width, twice in length, punching all black squares. Slip stitch <€” €”> is the default setting.

After all that, let us not forget that for color changes every 2 rows the new repeat needs to be programmed to knit at twice the height. Again, most electronics (ayab is an exception) have a double-length option. I began at the top of the repeat, working my way down. The pull-down table menu may be used, or the shortcut: option key, down arrow for an exercise in “add row below”. One can verify that no rows have been skipped by checking on design row numbers on right. Punchcard knitters punch black squares. Electronic knitters have the option of drawing and programming the white squares as well but followed by the use of the color reverse option prior to knitting the fabric. 

In a later post, on using numbers and gimp to produce files downloadable for knitting on electronic machines, the method is explained for taking the numbers generated image above, opening it in gimp,  where stitch and row markings are cropped. The mode is then altered to a BW indexed one,

which scaled to 24X28 is ready for download (shown magnified here) 
and the repeat is shown in a tiled configuration test 

Revisiting knit graph papers, charting, row tracking, and more

DIY proportioned charts may be created using spreadsheet programs. I began to use Excel for charting in 2009 and continued to in nearly all the colored charts in my color separations for knits posts up to my latest computer upgrade. I now no longer have access to Office and work primarily in native Mac OS programs. I reviewed links for working with Excel for this post, and these are still live in 2024
http://marniemaclean.com/blog/tutorials.html#.Um_-wpFQY7I
http://www.chemknits.com/2010/01/how-to-make-knitting-chart-in-excel_9394.html
http://fleeglesblog.blogspot.com/search?q=charting+with+excel
http://anniebeeknits.wordpress.com/2011/06/06/charting-in-excel/
http://www.youtube.com/watch?v=T9dwuarghqE
https://colornotesyarn.com/create-knitted-design-chart-with-excel-spreadsheet/

one for google sheets:
http://fibercraftmama.blogspot.com/2014/10/making-knitting-charts-in-google-sheets.html

my early posts on working with numbers with some edits
https://alessandrina.com/2013/10/28/color-separations-using-mac-numbers-for-knitting/
https://alessandrina.com/2013/10/29/charting-knits-in-mac-numbers-program-2/
https://alessandrina.com/2014/09/03/creating-knit-graph-paper-on-mac-using-excel-and-numbers/

Punchcard design planning, new: these are not to scale but can serve as a base for planning repeats on paper, may print to size with some tweaking by splitting on more than one page. The first sheet is marked as a Brother factory blank single card, the second has the same markings as the roll I purchased as a “Brother one”, which has row # 1 markings for Studio kms, so Brother knitters need to begin knitting on row # 3 punchcards.

I have revised the nearly-to-scale template from a previous post; the first is not for a full card but is designed to fit on one sheet. There are 36 rows/ 180 mm high, by 108 mm wide, of prints to scale on my printer. It is bordered in blocks of 6, with no row numbers: scale no numbers.  A second document includes an added 6 rows, brother numbers row markings on the right, and a column for notes such as lace arrow marks, etc, prints to scale on my printer scale card extra2

It is sometimes helpful to have help in tracking information for actions to be taken on specific rows ie for increases or decreases during knitting on specific rows, or for lock/carriage setting changes in more complex double jacquard (DBJ). Going the printed paper route, this PDF  tracks single rows, every 2, every 4, every 6, and every 8 for tracking such instructions on individual pages. They have enough blank area left to write in pattern name, stitch, cam settings, stitch size, yarn, etc. It may be helpful to include short clippings of the fiber used. Each page may be printed separately, with printer adjustments made if required with your software: tracking rows

Some rib setup with room for notes, in both P and H settings

Ribber fabrics produced with 2 knit carriages selecting needles

There are a number of ribber fabrics that are produced by altering the settings on the ribber’s carriage to slip for an even number of rows in both directions. This requires manually changing the ribber setting from slip to knit and back for the length of the piece. In electronic machines, where the pattern advances with every pass of the carriage, there is another option. For example, to produce DBJ with the backing in one color, settings would be changed manually every 2 rows, using the color changer on the left

Some things to remember: when 2 carriages are selecting, each carriage needs to move far enough at the end of the needle bed so as not to be locked onto the belt. Extension rails are required. On the Brother ribber bed, there are stops that keep the combined carriages from going off the beds. There is one on each side (magenta arrow on left, the blue arrow on right), and to remove the ribber carriage off its bed, it, in turn, needs to be tilted forward prior to reaching the stops in order to clear them on either side.

Altering the KC sinker plates and arm: remove 6 small screws from the sinker plates, leaving only their arm

The carriage with the altered sinker plate in place, in turn, will then be used to replace rows that were to be knit with the ribber set to slip in both directions <– –>. In my sample, it operated from the right, with the combined carriages (KC2), from the left. 

For consistency, I am editing the original post and will continue to refer to the coupled carriages= KC2, the altered single bed one= KC1KC is the abbreviation commonly used in publications for Knit Carriage. The change knob, which affects end needle selection, is marked on the KC as for I (end needle selection, indicated by black arrow) and II (cancel end needle selection). Initials KR in publications are often used to refer to ribber carriage in setting discussions. My beginning swatches were knit using ayab software’s ribber setting, which matches the KRC (2-color double jacquard separation) function in the unaltered 910. With my first try, I made no effort to consider which color gets chosen first in the color separation (ayab = black, 910 = white). There is a limit as to how far the single carriage from the right (KC1) can travel on the needle bed to the left because the combined carriages on the left (KC2) are held in place by the pin.

It would be possible if needed to separate KC2 and push further out on the extension rail, but perhaps not practical, so there are some constraints on the fabric width able to be produced.

My first swatch has some manually created pintucks on the knit side (white only knitting extra rows, joined together by all knit rows with pink). The reverse, purl side, is knit by the ribber set to N/N, all in one color. The stitches held on the ribber while the white only knits on the top bed are visibly elongated (left swatch bottom). There is some color confusion on the knit side on the first couple of rows of DBJ, solved in the second swatch. My repeat for the planned width using Ayab:

Knitting on 910 a single repeat may be programmed, start knitting with color intended for white squares, which will also serve as the solid backing color. For more similarities and differences between the original and the altered 910 see ayab diary post.

To knit using Ayab: begin the knitting with the color intended to be used for areas marked in black squares, which will also serve as the solid backing color. Preselect the first row from left to right with ribber set to knit (N/N), it will remain set that way for the remainder of the process. When on right, set coupled carriages (KC2) to slip <– –>, knit one row to left, both carriages stay on left. Knit the next 2 rows for DBJ using KC1 with altered sinker plate operating from the right, using color intended for areas marked with white squares. The main bed only will knit. Set change knob to end needle select (KC I) to ensure first and last needles in use knit. Return the KC1 to the right, on the extension rail, and knit the next two rows with KC2 operating from left. Repeat, changing carriages and consequently colors every 2 rows.

Blisters or pintucks are created when one bed knits more rows than the other, whether as simple knitting or in the pattern. Periodically the knitting is sealed by at least one-row knitting across all stitches on both beds. In this version, sealing rows must occur in pairs to allow for color change. The first chart shows a tentative repeat, planning for black squares to create the blister shapes, drawn in 2-row blocks to allow for color changes every X even number of rowsThe image color inverted, so white areas will create the blisters in slip stitch (col 2) while black squares will knit (col 1)Most published patterns for these fabrics will also include an all knit rows to seal the shapes knit on the main bed only

By using 2 carriages to select needles, one (KC1) may be set to slip <– –>in order to knit X number of rows on the top bed only, while the pairs of carriages (KC2) are set to normal knit on both beds, its cam button set to select needles, KCI. Selection will continue, but no patterning occurs as a result. A proof of concept swatch knit on only 24 stitches, the pink knits for 4 rows, the white for 2; the pink yarn is a cotton, the white an acrylic/wool blend:

An expanded pattern repeat is planned for a larger test swatch. Here there are 2 black squares added at each end of the repeat to ensure that those stitches on the top bed are knit on all slip stitch rows. The new color is wool, this time knit for 6 rows in slip stitch prior to sealing with 2 passes of the combined carriages with the contrasting color.

Single bed slip stitch rows appear on the knit side in color 2, the reverse, purl side is in a single color (1), and formed by the all knit rows. Its stitches are in turn elongated, since they are held and not knit while the opposite bed knits for multiple rows. In the sample, the first and last stitch on each side were on the ribber, creating a single white slip stitch edging. One can adjust such details to suit. The first preselection row was made after cast on with both carriages(KC 2)set to knit, moving from left to right with color 1, where they stay. KC 1 with altered sinker plate was threaded with color 2, and begins from and returns to the left-hand side.

A detailed shot of the edge: note the white, single, elongated stitch uppermost, and the pairs of contrast color ones in the “border” Designs with the deliberate placement of white blocks representing each blister can be created. It is a good idea to test tolerance for each of the yarns involved as a hand tech or repeat such above before planning significantly longer repeats. All black rows are required at intervals if the fabric is to be knit changing ribber settings for all knit rows. The same rows could be left blank if using carriages in the above manner, and lack of needle selection would be an indicator for switching to the double carriages for the 2 sealing rows, while not having to track the count for the slipped ones.

I am always interested in automating stitches to facilitate as many details as possible in creating fabrics that imitate hand techniques, without relying on row counts and a lot (in this instance) of “hooking” stitches up manually. The swatches below were part of a series of posts on ruching as a hand technique

The hand tech chart mirrored, as the springboard for my automated fabric Both led to my exploring the possibility of a cousin, working on the double bed, and using the 2 carriages. The process began with a proof of concept swatch. Two colors were used to highlight what the stitches knit with each of the 2 carriages are doing. Both KC1 and 2 were set to knit in both directions. I began with KC2 knitting the needle set up for the fabric in a dark color, on a small number of stitches

KC2 operated from left, KC1 from the right. With KC2 returned to left, KC1 knit 8 rows. It is best to work out the limit for how many rows will knit on the top bed without stitch problems prior to any automation of functions. *Two rows were knit with KC2 in the dark color, 8 rows with KC1, ribber racked to proper position**, * to** were repeated. The elongation of the stitches on the purl side results from the fact the ribber knits far fewer rows than the main bed, and in addition, the stitches on the row knit on its second pass in the pattern are pulled on across the bed at distances matching the racking positions. 
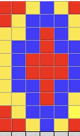
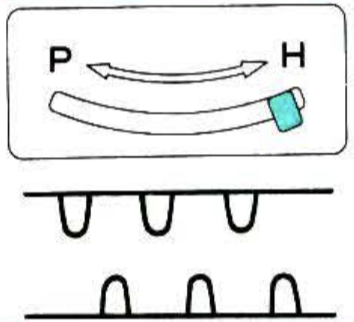
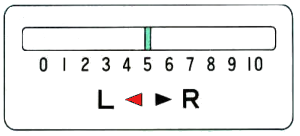
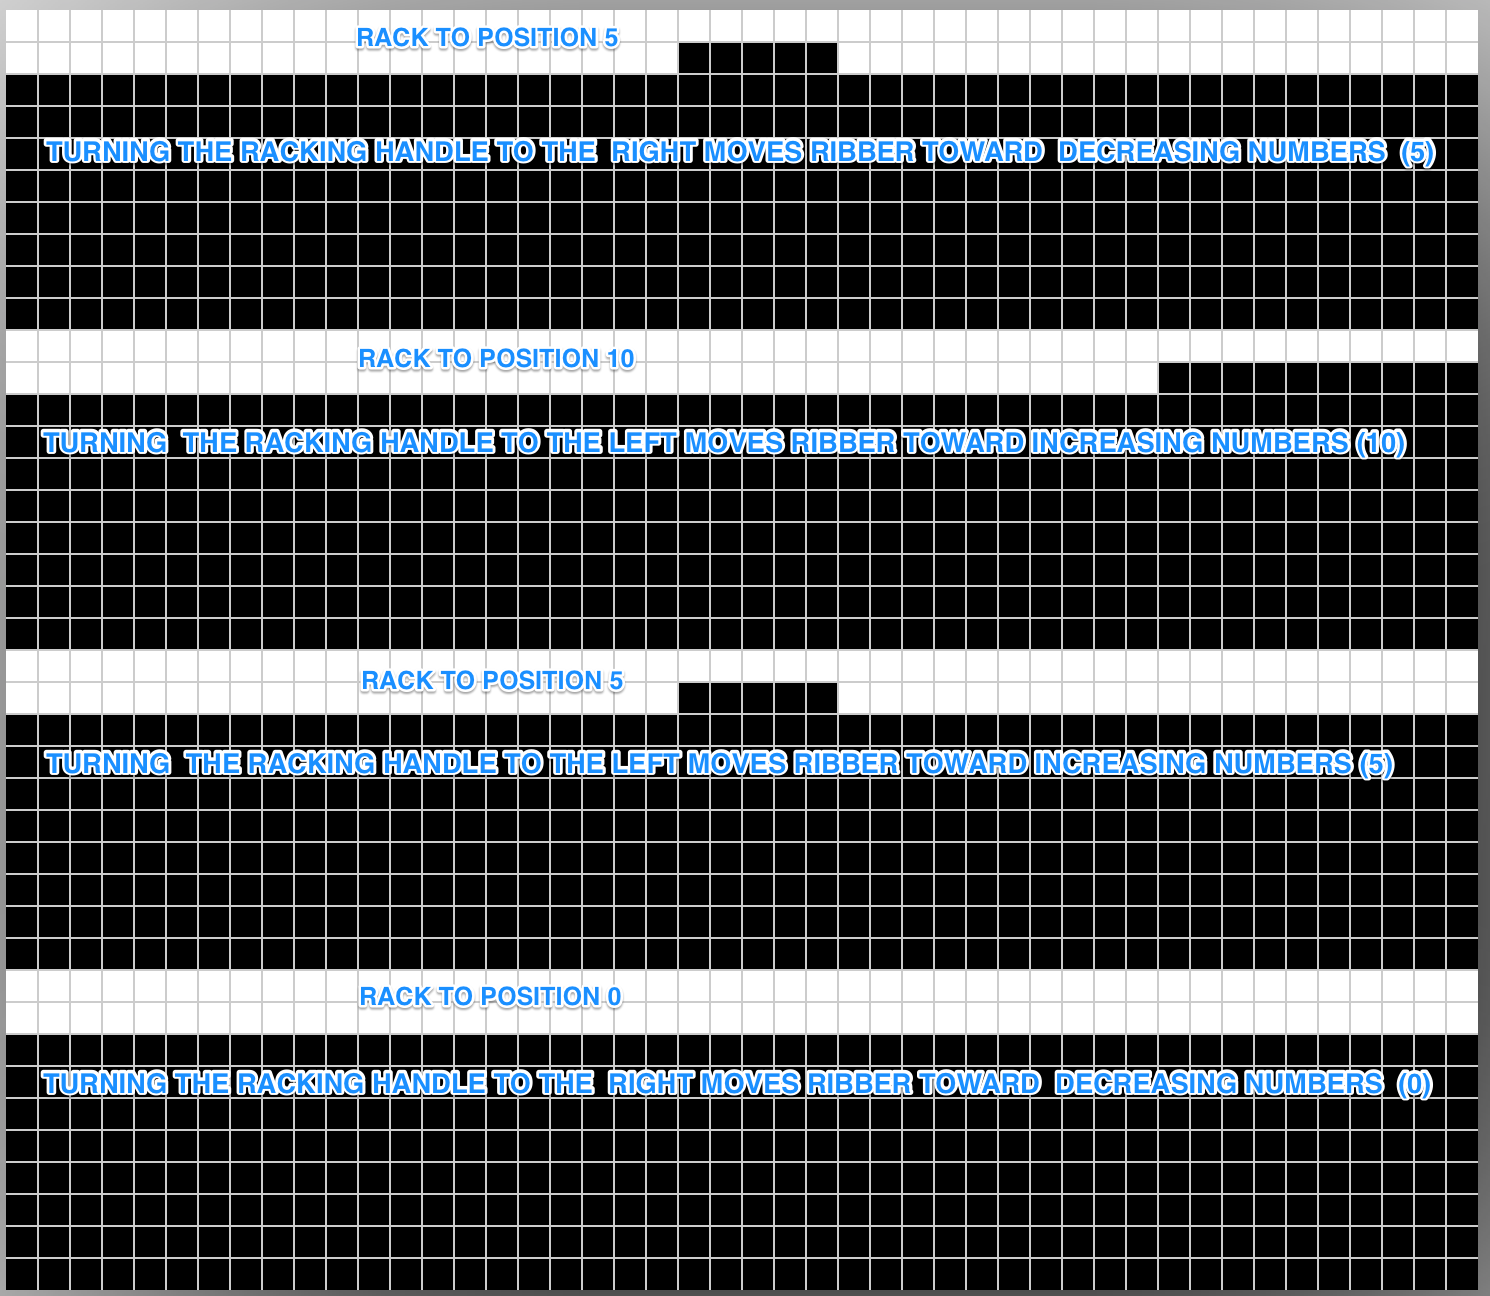
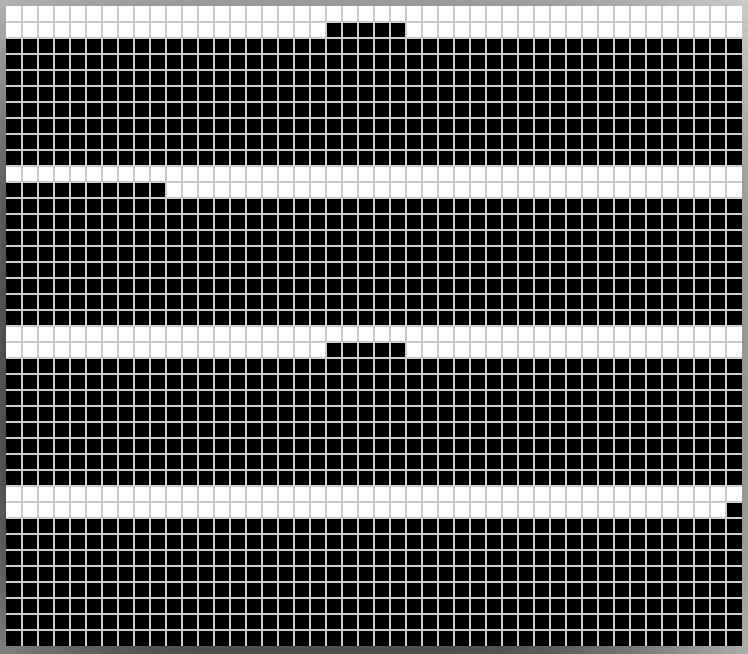
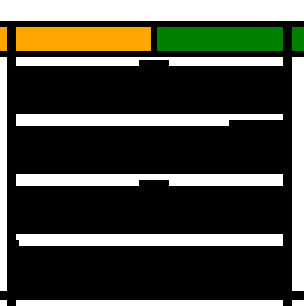
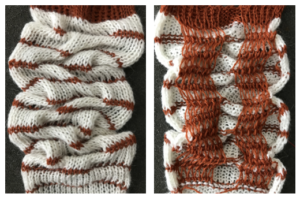
The plan is to automate the texture, knit it in one color, and find a way to track correct racking positions: cast on may be in any preferred method. With the pitch set to P, it is easier to transfer stitches between beds to the desired configuration. Every needle is in work on the top bed, for a multiple of 10+6
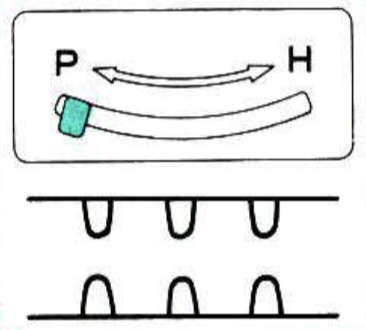
ribber needles with stitches that will be moved with racking

placement of stitches on respective beds
change pitch after transfers, ribber moves slightly to right final configuration prior to patterning and racking sequence begins

The starting racking position is 5. Racking handle markings for Brother begin with 0 on left, 5 at the center, 10 on right. The ribber is set to half pitch since part of the needle bed will be knitting every needle rib. An often-overlooked clue as to what is happening or is about to is found in the arrows just below the racking position indicator. The red arrow indicates the direction in which the bed was racked on the last move. Since racking for my experiment will only be to 3 different positions, I began by choosing to use 5 pixels center, left, center, right for the full repeat sequence, but later amended the repeat to numbers of pixels equal to specific racking indicator number. The needles will be selected prior to the next row knit, a reminder of racking selection. Sequence will actually be 5, *0, 5, 10, 5,** 0, 5, etc. The racking indicator

My first Ayab repeat was planned for use with 2 carriages: KC1 (single carriage) is set to knit but to not select end needles (KCII), and will be producing the multiple rows gathered to create the blisters/ hems. KC2 (coupled carriages) are also set to select needles, both KC (knit carriage, cam button also on KCII) and KR (ribber carriage) are set for normal knit. They will create the sealed stitches joining up the blisters/ hems. The same color yarn is threaded in both. Blank squares will knit because a carriage set to knit overrides needle selection or lack of it in stitches on needles in the work position. My repeat is 46 stitches wide. Because the knitting is started with the ribber already in racking position 5, the first move in the pattern is turning the handle to the right, toward 0. The concept illustrated

set up and ready to go, racking position 5

4/19/18 As is true in any knitting, things can go quirky. I began to have a single needle on the main bed not knitting on rows knit with the combined carriages, then ran into dropped stitches in racked groups. The problem was initially not with the software but appeared to be a ribber issue, which after checking and balancing was resolved.

4/22/18 And today’s problem is the software, with persistent, intermittent selection errors. I did achieve a sample by manually pushing wrongly selected needles out to D by hand on problem rows, which tended to be 5 and 7 in all black areas. Some reminders and observations: ayab auto mirrors all images. If this repeat is entered (I added a single square as a marker for racking position 0), the software will actually be knitting this, the “image as it would appear on the knit side of the fabric”. What to program? anticipating the above getting mirrored by the software I entered this resulting in this

That said, remember that turning the racking handle to the left is toward increasing numbers on the indicator, to the right is toward decreasing numbers. For me that is counterintuitive. Mirroring the image again, and working with the repeat below can help with tracking racking movement even more. With the single dot on right, turn the handle toward it, to the right, and the movement will be towards 0. With the movement of marking row to left, turn racking handle to left, toward 5, and so on.

Next on the drawing board: a fabric using the same technique, but that I might like more. This image was a portion of a greyscale pin of a pattern book from a Russian pinI tested a concept for recreating it as a hand technique, trying to sort out how many rows I could knit before racking and the racking sequence. The best result was with a single sealing row, which in turn required changing the ribber slip setting for one row only,

so it’s back to the drawing board. I think any automation is best done using the ribber to do the all knit rows, the main bed to needle select racking positions. Results will be added to the post on combining KC patterning with racking

The present set up with 2 carriages may be used for solid color backed quilting. Using the altered KC1 operating from the right with no yarn in feeder should work to drop stitches in drop stitch lace where the repeat is altered to allow for the knit carriage with no yarn to do the stitch ditching while selecting needles as well. Related color separation and swatch may be found in the last segment of the post: revisiting-drop-release-stitch-lace/


Revisiting knitting with 2 carriages single bed, 910 vs Ayab so far

The question has often been asked as to why knit with 2 carriages. For me, it became a personal favorite for knitting fabrics requiring color changes every even number of rows. I tend to push the limit with materials and found the Brother single bed color changer to be quirky. When using 2 KCs there is no pushing the wrong button for the proper color in the sequence, or accidental choosing of an empty slot and dropping the knitting. Some of the loops at the color changer side edge or yarn getting caught in wheels or hooks are also eliminated. Each carriage can be set for a completely different function from the other with no manual cam button changes ie single color knitting vs FI, its own tension depending on desired effect or fiber (ie striped shadow pleats), etc. Floats along the vertical edges of the knit as a result of the striping happen on both sides rather than all on the color changer side. The principles apply when using the lace carriage and combining it with tuck, slip, or FI settings in the KC. If one is following a published punchcard pattern for such fabrics, frequently there are guidelines as to when to change colors, but no explanation as to why the cards are punched the way they are, so understanding what happens enables one to interpret directions for electronics. When going from published 2 carriage punchcard machine repeats to electronic, the repeat needs to be adjusted to compensate for the change to row by row selection. In punchcard machines, the needle selection does not advance when you switch to operating the carriages from the opposite sides, so the pattern for those rows knits twice.

Many of the stitch world books seemed more concerned with larger repeats than with some of the more labor-intensive, specialty fabrics. The punchcard books, now downloadable for free are worth having and studying no matter what your machine. They do need to be brand specific. Studio and Toyota ones may be used, but adjustments may have to be made in terms of starting rows or even flipping the card over vertically.  Download links for punchcard patterns, with symbols used and pattern samples, can be found in my previous post

I have added a new category to my sidebar to make this topic search easier: Patterning with 2 knit carriages.  Included are color separations for some fabrics suitable for this method of knitting.

I am presently knitting my samples on an altered 910, using an EMS kit purchased last December. I have had selection problems related to my hardware, but some of the 2 carriage operation or lack thereof has been evaluated and duplicated by others. My successful experiments with 2 single bed carriages selecting so far:

Lace and slip stitch: both carriages selecting in their usual positions 
2018/03/05/lace-edgings-on-brother-machines/
Start with 2 knit rows in a programmed pattern 
with KC on left, preselect to right, set to slip <€” €”>, knit first 2 all knit rows, ending with KC on right, proceed with selection with LC on left
Will not work if the pattern is adjusted so KC knits the first 2 rows and parks on left, with attempted use of LC from the right. LC will not select. 
Operating LC with KC plain knitting (no pattern selection) may be done with LC selecting from either side, with repeat adjustment 2018/03/05/lace-edgings-on-brother-machines/

Lace and weaving: 
2018/01/02/lace-punchcards-meet-ayab/
both carriages selecting in their usual positions 

Lace and tuck stitch: the fabric worked out for use with mylar sheet

Ayab actions for carriages, use LC on left, KC / tuck <– –> on right
a charted ayab repeat for my swatch 

I came across this image on a pinboard, and imagining the possibility of knitting it led me back to a previous post illustrating a similar stitch structure, knit on an unaltered 910. The pin:


working out the first repeat in the blog post

The swatch (sideways view) shows the repeat as illustrated in the upper segment of the above chart, and then lengthened X 2, with color changes every 4 rows (the length X2 is not presently an available action in Ayab)

In the past, when I tried to knit with 2 KCs, one on the left and one on the right, both selecting needles, I was unsuccessful, but in light of the above experiments, I decided to test the idea with the RKC (the one that would operate from the right) selecting and then knitting the first 2 rows of color, in turn resting on the right side. I then operated the second KC from the left, alternating carriages every 2 rows. Knitting at a slower speed and moving each carriage perilously far out on the extension rails did the trick.

To use the repeat in Ayab, in order to keep the proper color sequence, the last design row is shifted down to row 1 position. There is an error in the repeat, marked by arrows I did not notice until I had completed the swatch. The repeat may be used as is, and color reversed via action inverse in Ayab, or color reversed prior to loading the image, which I chose to do personally. 

This is grabbed from the ayab screen: the knitting is actually mirrored automatically by the software, so what is shown onscreen is what appears on the knit side of the finished piece. Something to keep in mind in situations where placement and direction might have some importance. 

Things to notice in swatch: as already mentioned, there is an error in the repeat in terms of my intention. Placement for the slip stitch blocks could certainly be planned for an asymmetrical effect, varied in size, and more. Slip stitch produces a significantly narrower knit than the stocking stitch. That would need to be allowed for were the stitch to be used in a garment or gauge dependent knit. 

Examining the purl side of the knit, which is facing as one machine knits: the intentionally dropped stitches at the start on both sides are there because I had cast on extra stitches that were outside the parameters of the programmed repeat width. The left side edge, next to LKC (left knit carriage) is visibly shorter than the right. The two yarns used were of different thicknesses but knit at the same tension. The LKC would have merited from a looser tension, and an edge weight on the very last stitch on that side would help with adjusting the length the white edge €œfloats€ from one color change to the other as stripes are created. The handling of side floats in striped knitting is dependent on the row height of such stripes.  
There are a great number of interesting ribber fabrics that can only be knit by manually changing the ribber settings to slip in both directions, so that the main bed only knits for X # of rows, with the ribber carriage periodically set to knit again. If the function happens for an even number of rows at a time and in both directions, the sinker plate for the KC may be altered for use with the ribber in the up position, to knit the main bed stitches only. Its change knob should be set to KC I to ensure that the first and last stitch is knit. I knit this sample using the altered KC selecting from the right, the KC engaged with the ribber sinker plate selecting from the left. I will address the altering process and steps involved in the knitting in a separate post.