Over the years I have written on an assortment of methods for color separation in knits including DBJ, a summary post with links to previous shares: dbj-and-color-separations-some-previous-posts-links/
and in the-start-of-a-blog-index/
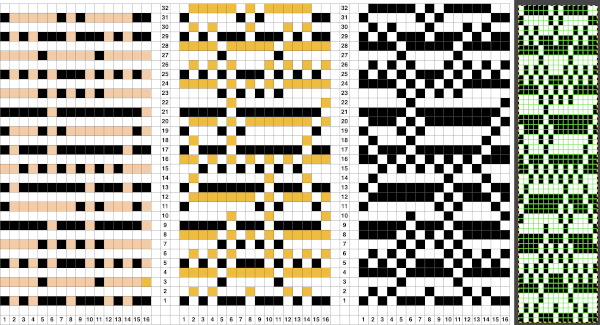
A variety of textures and patterns may be used to achieve fabrics that are very different in appearance, using a very simple pattern along with cam button or lock setting changes. The first chart was generated at that time using Intwined Pattern Studio, a program that for a time appeared to be very promising and then moved on to lack of updates for Mac making it useless in 2013, followed by none for Windows as well, with no successful use of it reported in forums in years, but one may still purchase it 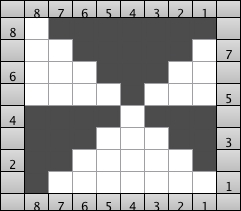 The manual color separation method for punchcard machines.
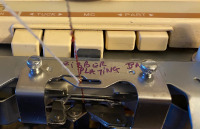
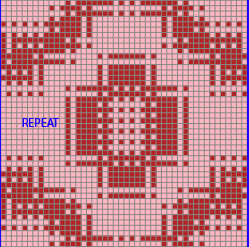
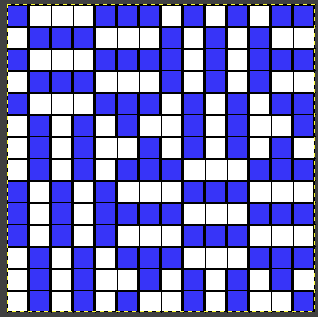
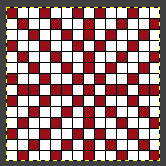
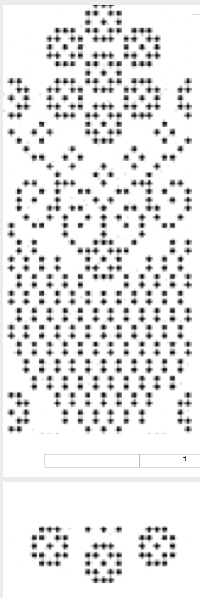
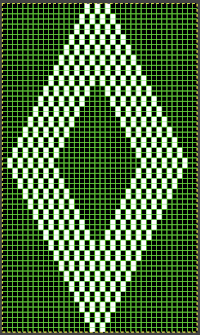
The elongated X2 repeat version of the triangle drawn in Gimp 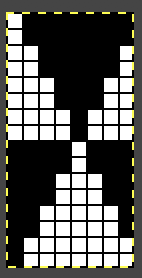
 As for more than 2 colors per row, performing the color separations may be achieved manually, various software is now available for performing the work in instants.
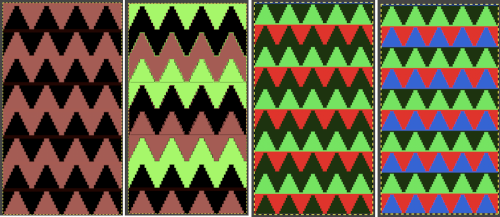
Ayab offers an elegant color separation solution, heart-of-Pluto, that will knit single passes for each color per row on the front of the knit, resulting in 3 color patterns with limited design stretch, and no worries about the placement of one color over any stitches preceding it in the same color on the previous pass.
The difference in the same design being knit with the standard, elongated version, allowing for two passes with the same color before each color change and the Pluto version.  knit using img2track, the vertical stretch is manually set to X2,
 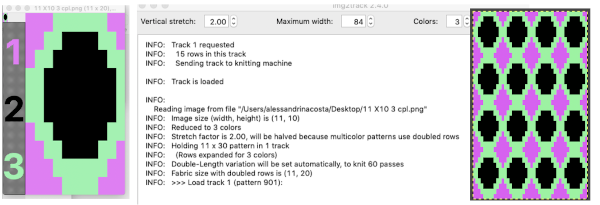 A “hack” 2021/01/24/img2track_multiple-colors-per-row-dbj-each-color-knitting-only-once/
For more information on the various DAK separation charts and related swatches including limitations encountered, see post: DBJ, more than 2 colors per row 4
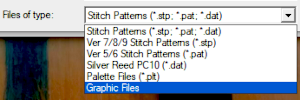
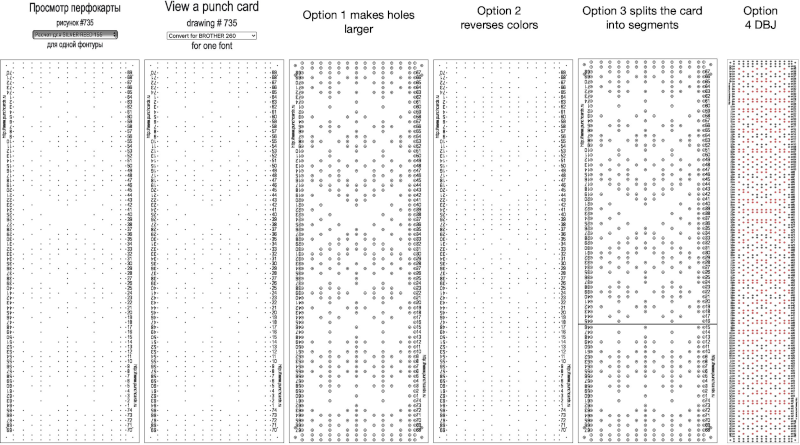
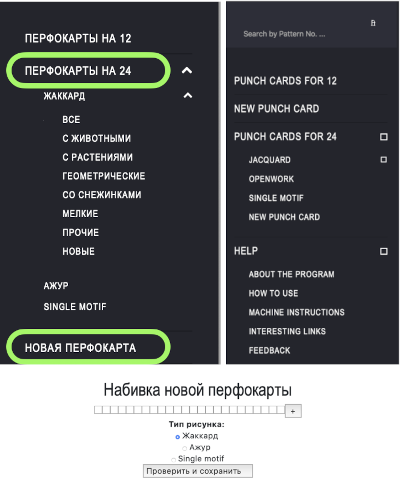
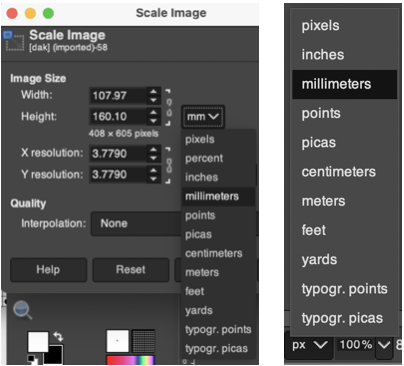
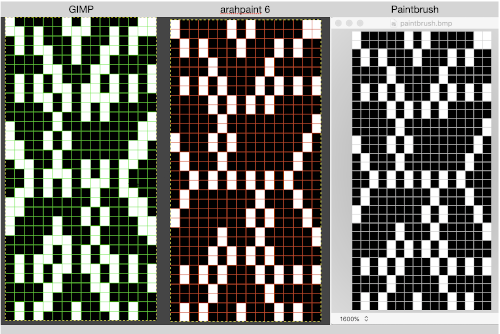
There is a Russian punchcard site that will allow entering personal repeats or selecting one from their extensive library, where it is possible to obtain related 2-color dbj separations as well. The punchcard color separation may be created manually, a slow process, while the punchcard templates in Dak are achieved with a few, quick clicks of a mouse. The repeat may be created as a graphic file, in my case a png created with Gimp, the elongation in Arah because Gimp fails to scale small repeats cleanly. The image may then be opened as a graphic file,
 stitch and row counts should match, and save the stp
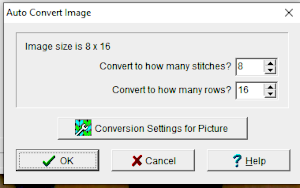
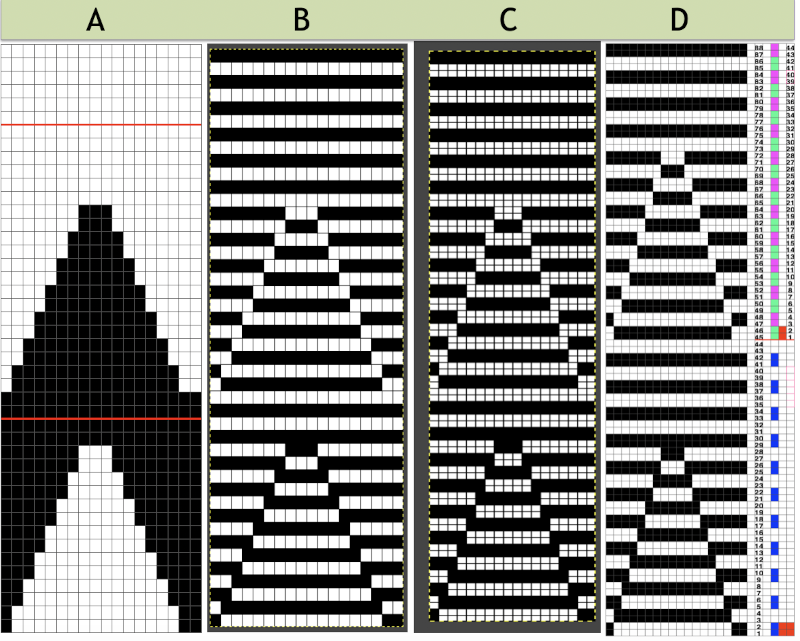
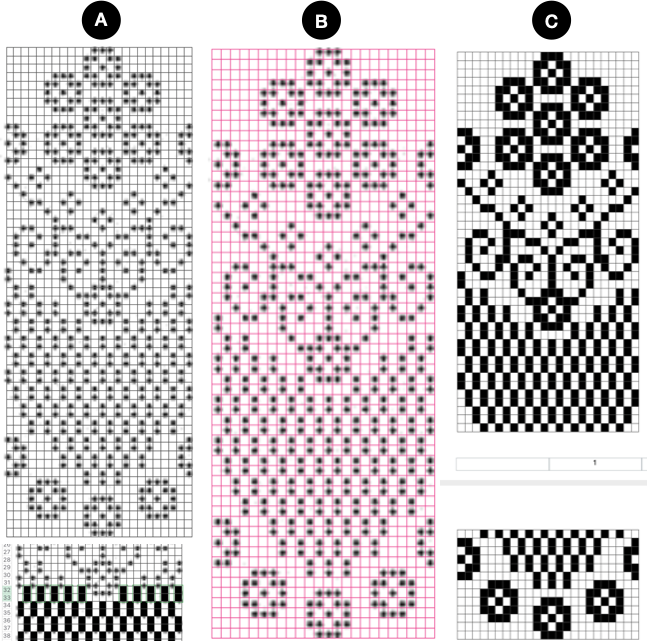
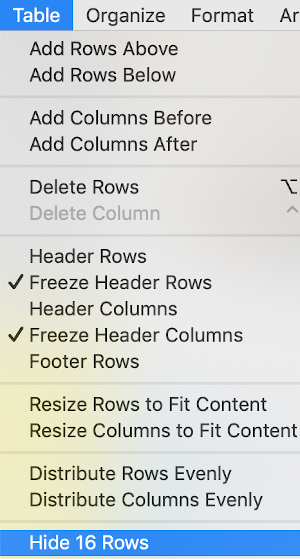
if experimenting with changing selections and this window appears it is OK to click on No 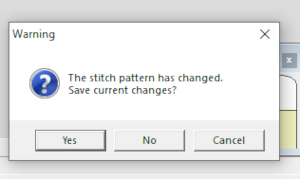 The separation methods in DAK:
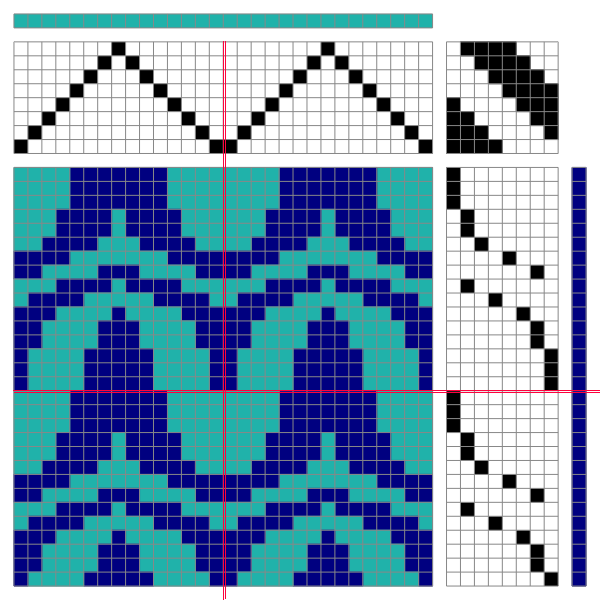
Method C separates each color row into separate rows of knitting, rows do not have to be repeated in pairs, and the double-length switch will need to be used in Japanese knitting machines 
![]() The elongated triangles repeat template is different from what would be produced with the above set at double length, may be used as is to produce a variety of fabrics including quilting
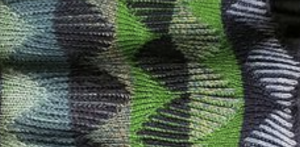
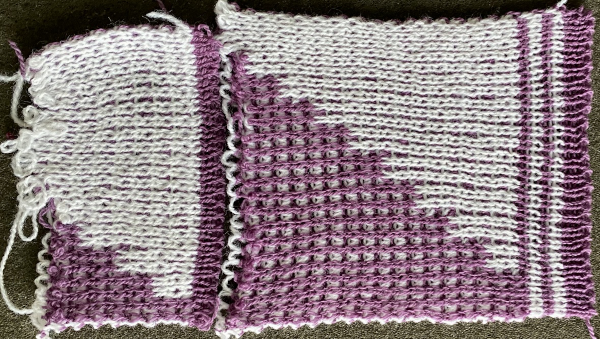
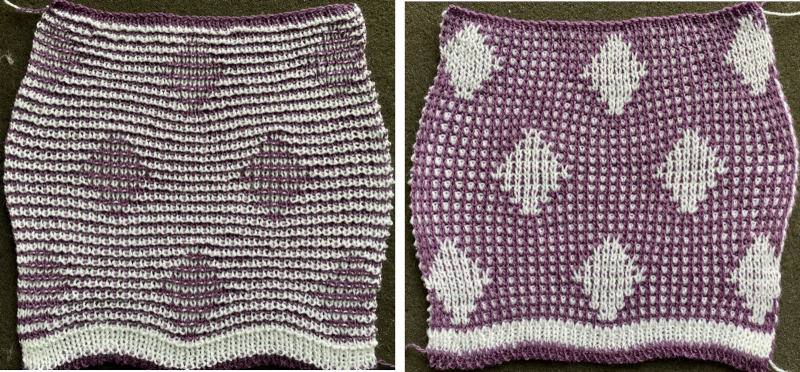
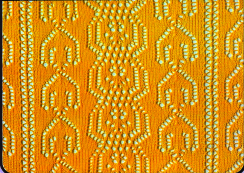
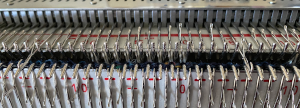
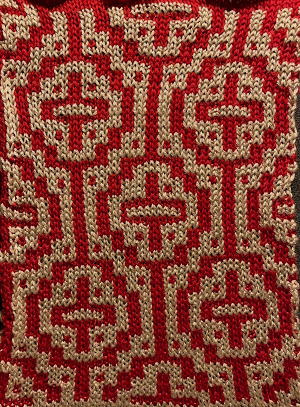
The elongated triangles repeat template is different from what would be produced with the above set at double length, may be used as is to produce a variety of fabrics including quilting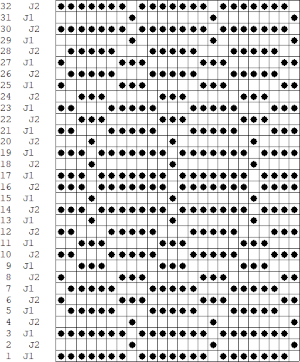 Yarn choice and design make a big difference. Here the yarn is far too thin, and the repeat too narrow in width, but the possible result is illustrated. The main bed is set to slip in both directions throughout. The ribber setting needs to slip in both directions for every other pair of rows. When the ribber slips, the main bed will knit the color that will create the pockets, where there are many single stitches selected here, the KC was set to KC1. When the color is changed and the ribber is set to knit again, stitches in that color will knit on both beds, sealing the fabric in those areas and forming a solid color background on the reverse side. Here the white forms the pockets, and the floats after a pair of passes are seen in this photo.
 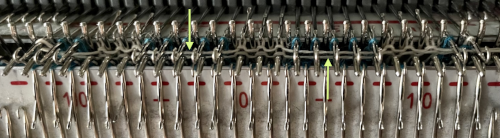 Because the yarn is so thin there is a considerable grin through on both sides, the areas marked with arrows indicate where the white pockets were lightly stuffed with yarn ends
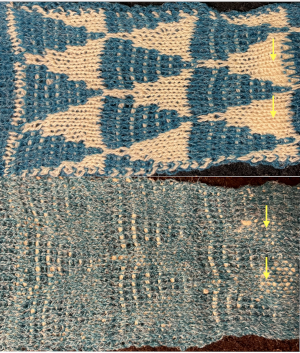
![]() For a review of quilting on machines including Passap see 2018/02/15/revisiting-machine-knit-quilting/, and using a second knit carriage with a modified sinker plate for knitting stitches on main bed only, making ribber settings fixed throughout, and allowing for tension adjustments for each color yarn.
For a review of quilting on machines including Passap see 2018/02/15/revisiting-machine-knit-quilting/, and using a second knit carriage with a modified sinker plate for knitting stitches on main bed only, making ribber settings fixed throughout, and allowing for tension adjustments for each color yarn.
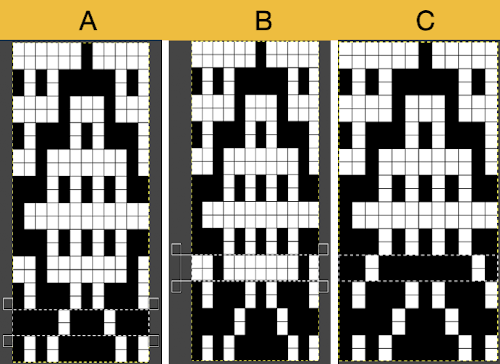
Methods A and B are both used in Japanese machines when each color is intended to be knit for 2 rows with color changes on the left.
Method A works on pairs of rows. If the pattern does not consist of identical pairs of rows there are likely to be yarn error messages that resolve when the design is lengthened in height X2.
The original triangle elongated to 8X16 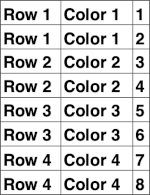
 If pngs are created outside the program, they may be doubled in length unless the repeat is designed that way.
 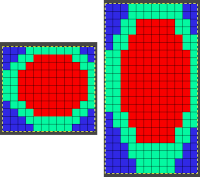 The associated menu options in Dak when the plan is to work in double jacquard
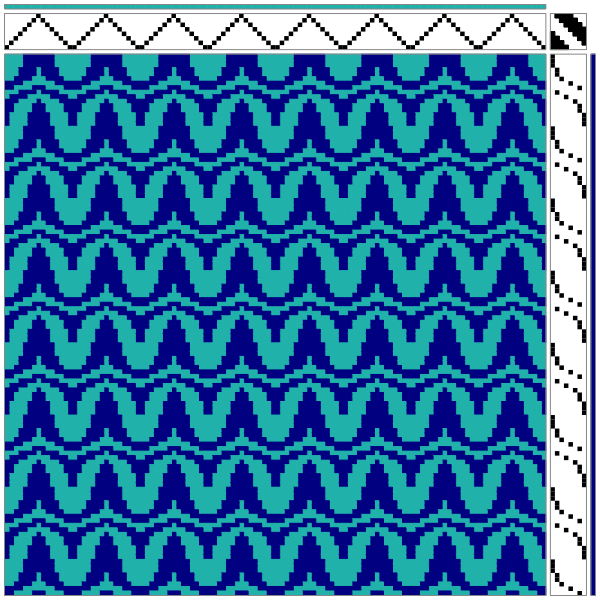
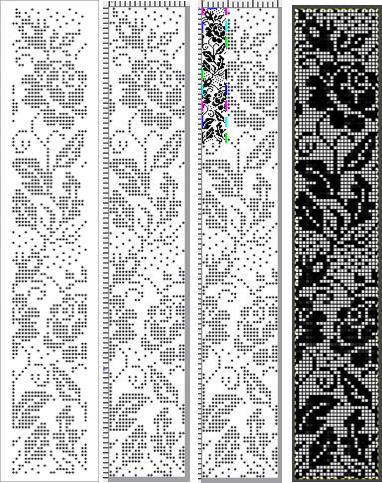
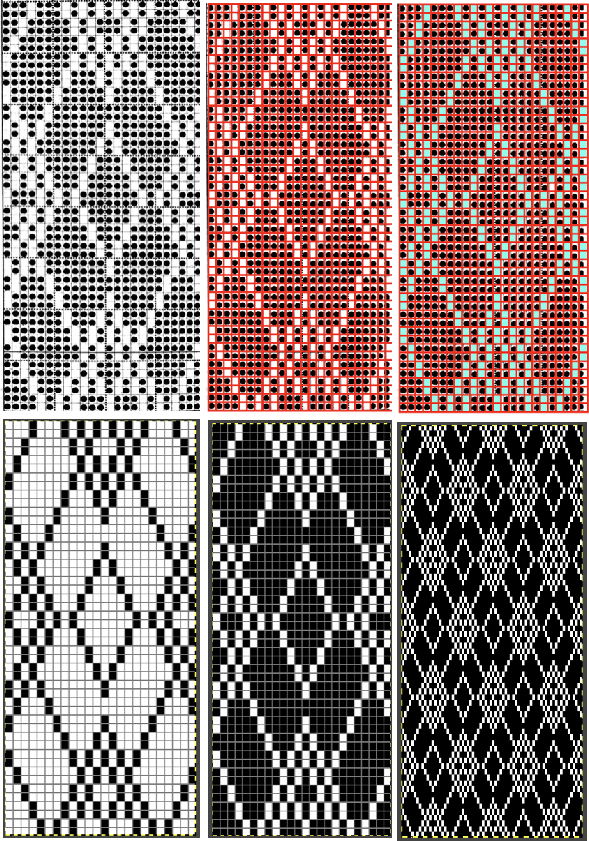
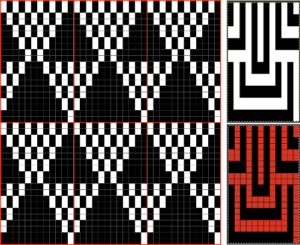
 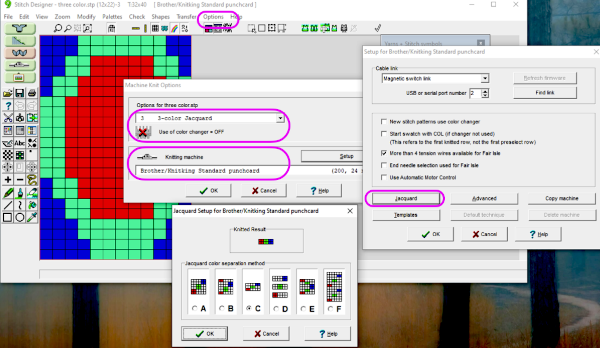 How the different jacquard setups process the specific repeats:
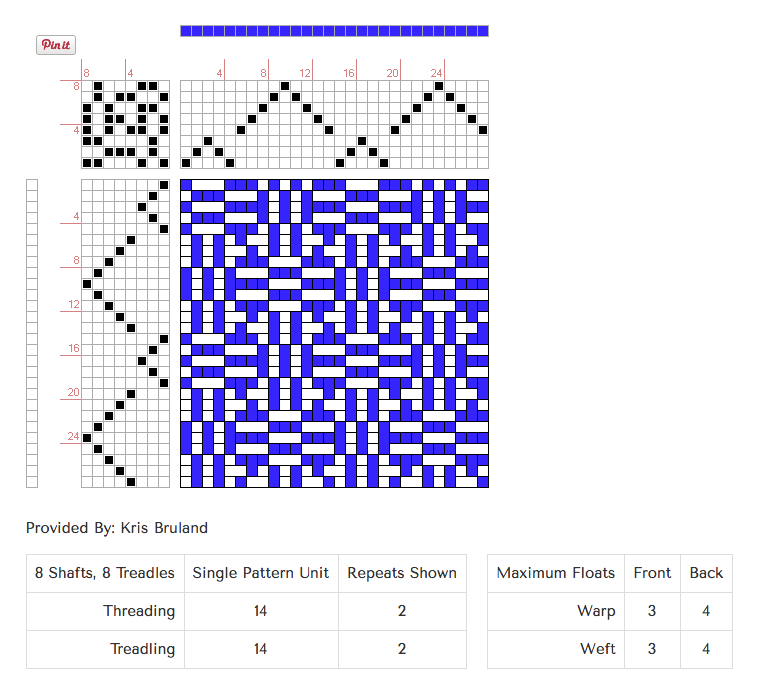
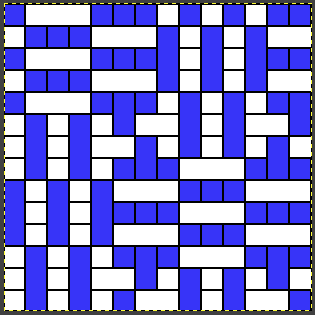
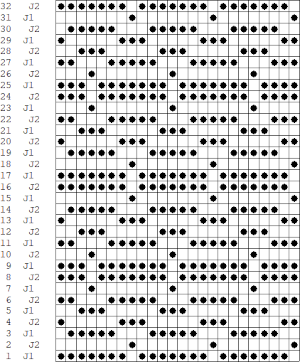
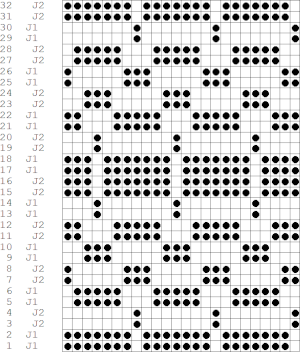
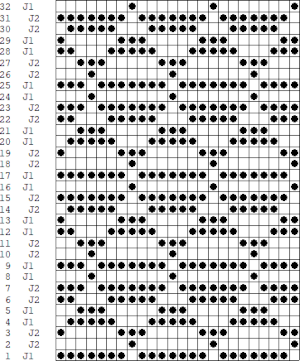
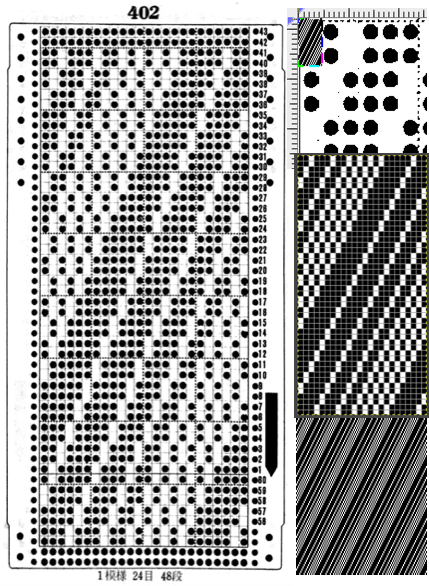
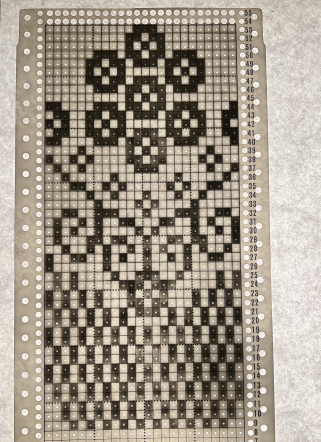
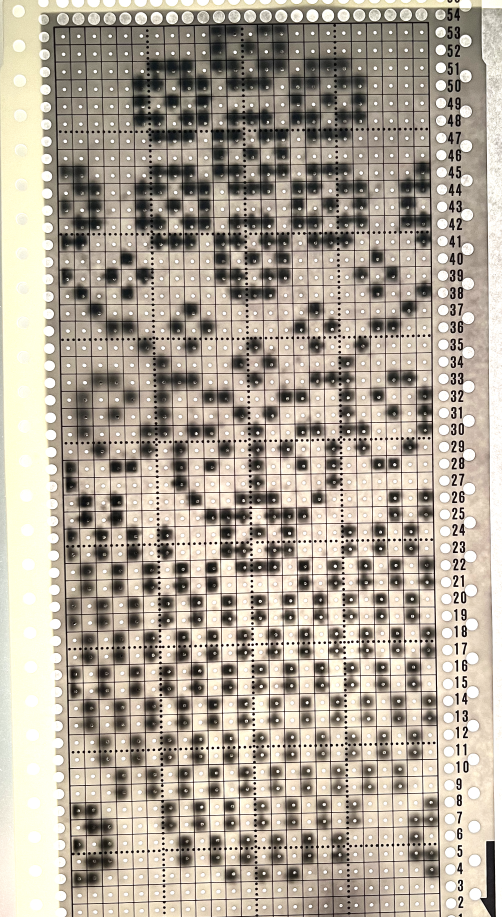
Method B creates the same separation as the default built-in KRC one in Japanese electronics. If knitting DBJ it may be used with DAK if the pattern is downloaded as fair isle but the machine will then need to be set for dbj. If additional colors are used, pairs of rows will follow a single pass for color1. The print preview templates, if generated within the stitch count restriction for use on punchcards, may be used as guides for punching the required holes, this would be the card for that 8X8 triangle repeat, a tad shy of the recommended 36 rows, 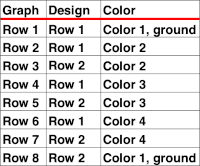
 Passap card reader techniques saved from long ago experiments.
 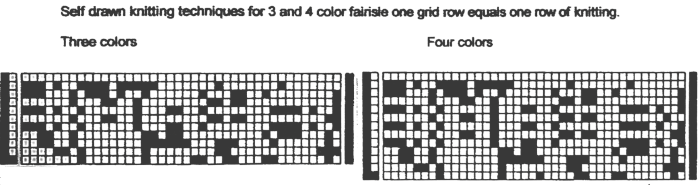 Other separation methods in the Passap are handled by the console with the entry of specific knitting technique numbers.
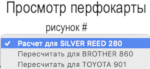
That said, the DAK color separation is applicable for printing reader templates if still using Passap E6 reader cards or punching for the Duo with Deco.
Method C see the top of the post
Method D separates each color into a separate reader card and is used to download to the Silver Reed PEI or the Passap E6, appears to use superimposing of layers, and matches method 4 in my post.
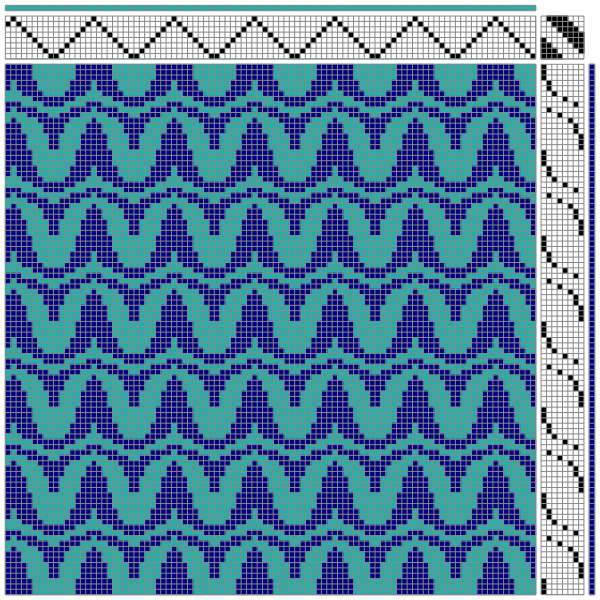
Method E is suitable for machines with a color changer on each side, like the Brother CK 35. It works on pairs of rows and separates each row into a pass with each color. A 3-color jacquard would have six passes with colors separated as follows: 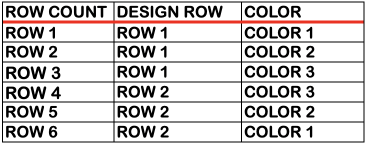 Method F is a Half-Milano separation. Each pattern row is separated into a pair of passes for each color, but the second row for each color has no patterning, so the ribber stitches only knit as the carriage returns to the left side, a possible way of creating repeats for drop stitch lace on Brother machines.
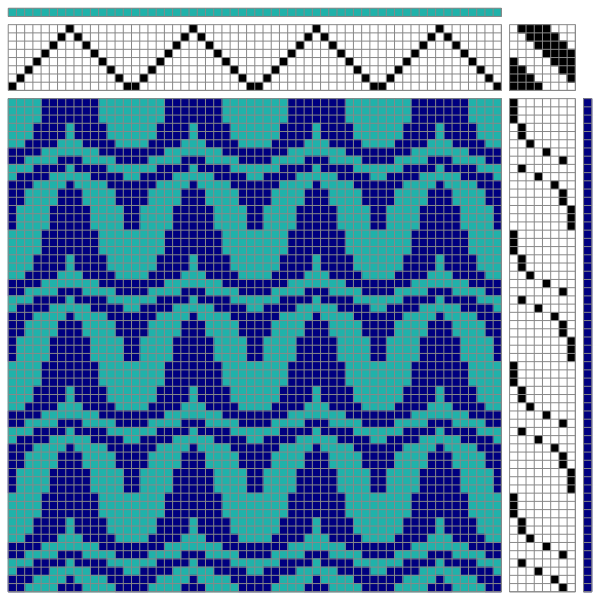
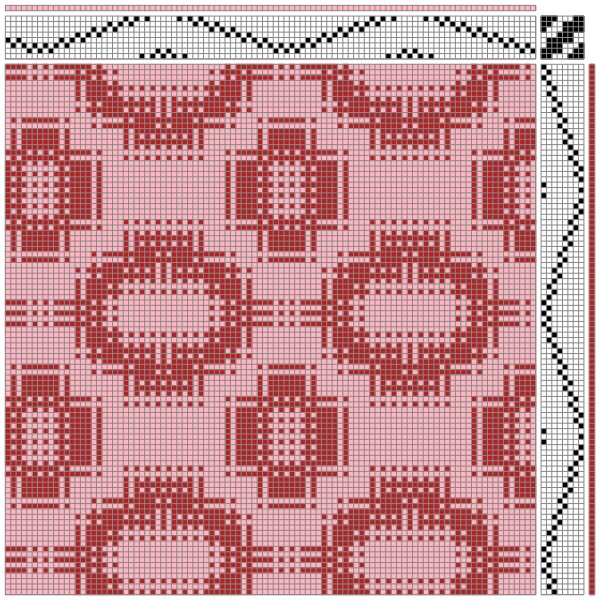
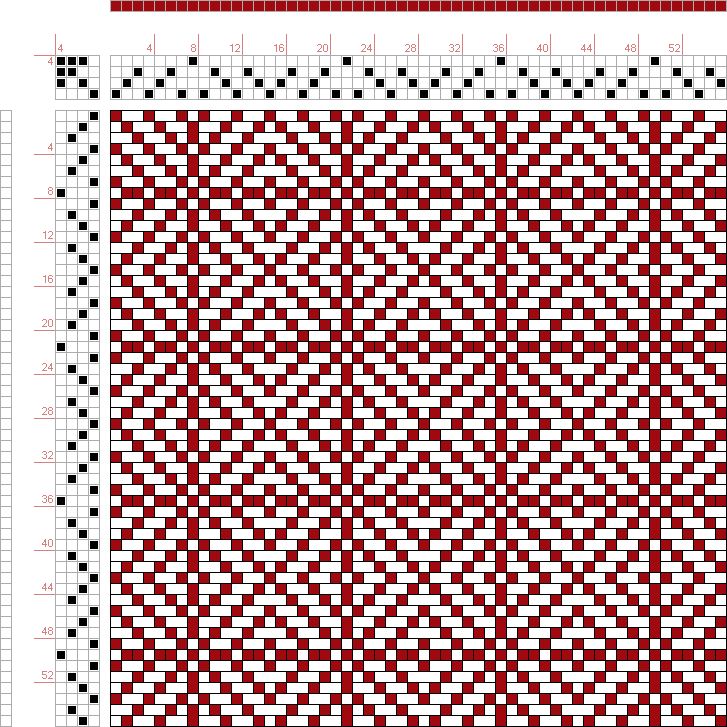
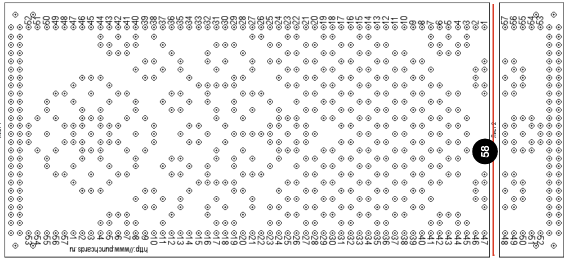
 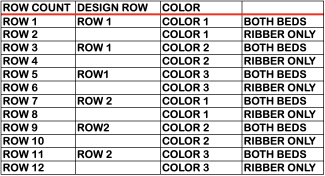 The elongated triangle template was split into 2 pages for viewing, they are combined in this image
 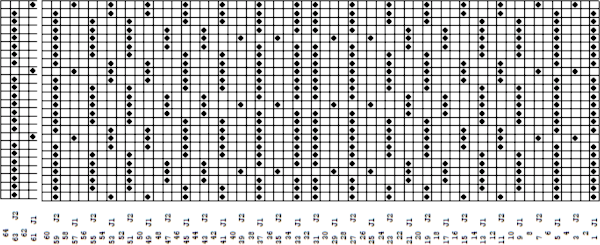 This may be the associated Passap Reader technique, but I have no way to test it
 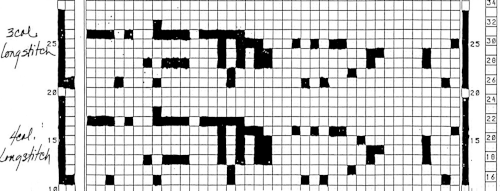 Processing the template using numbers: a table is created twice the length of the 8X16 triangle repeat, followed by hiding the 32 odd-numbered rows, positioned in front of the scaled punchcard template, stitch markings are traced
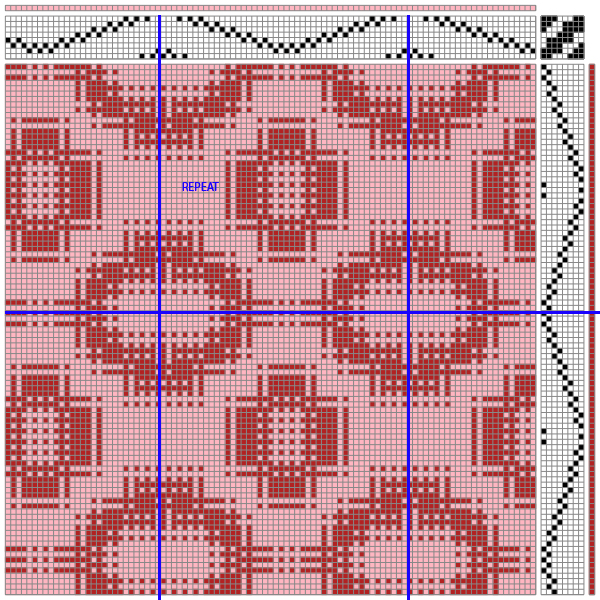
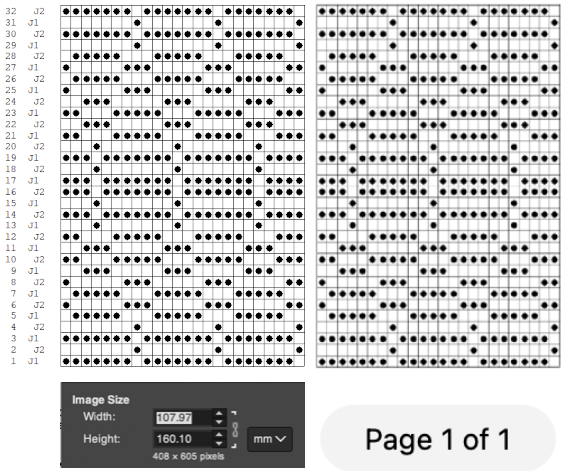
 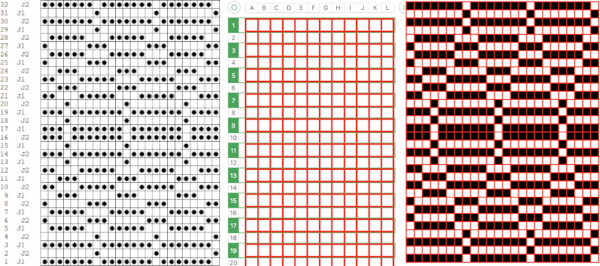 the rows are then unhidden, the repeat is checked, matched here to the F jacquard separation in Dak
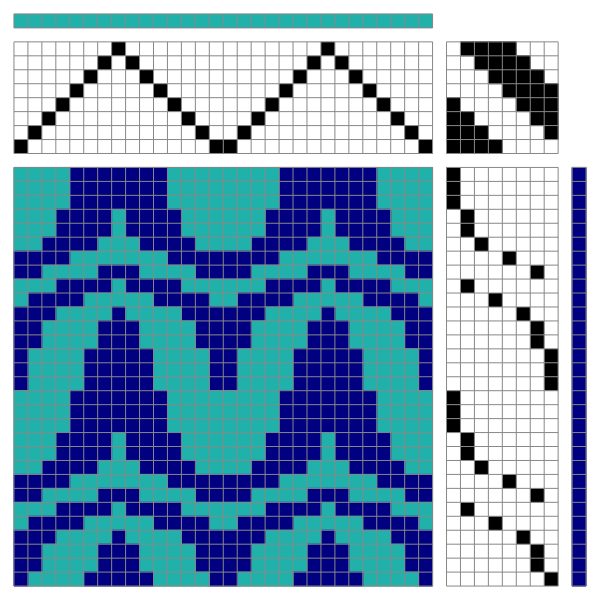
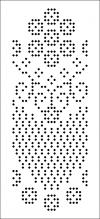
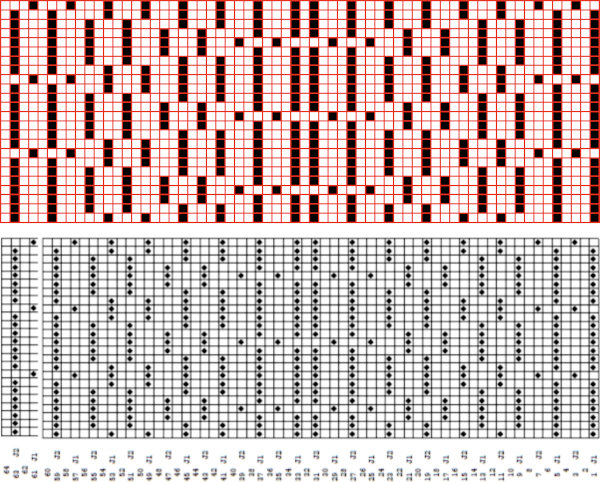 The numbers table is processed in Gimp to obtain the png for knitting the now 24X64 pattern
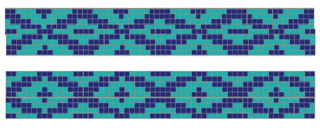
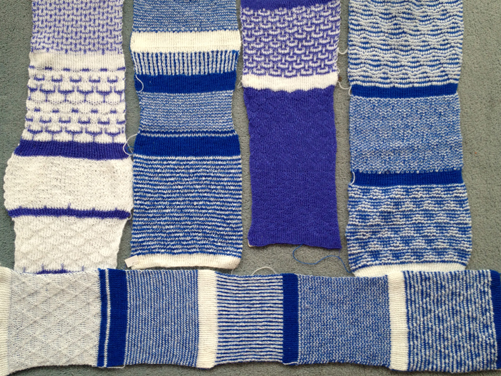
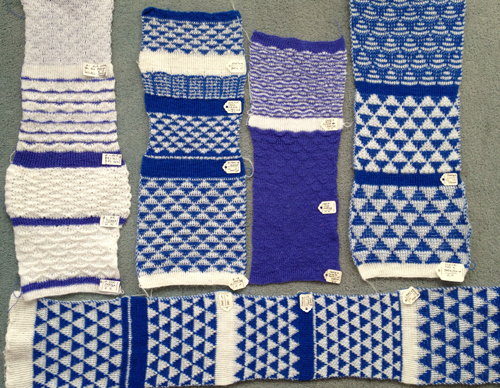
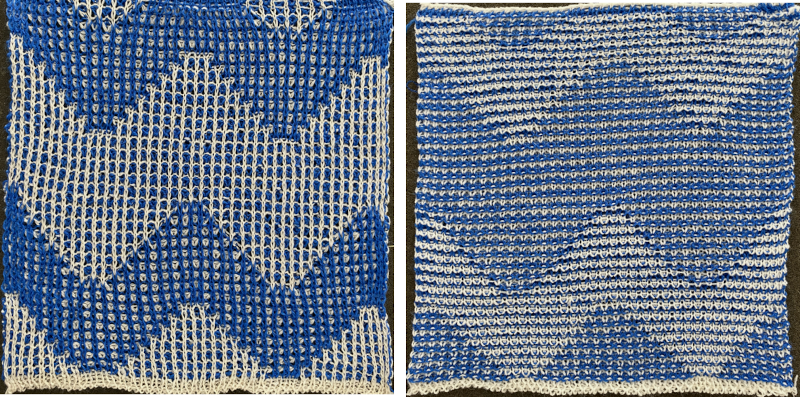
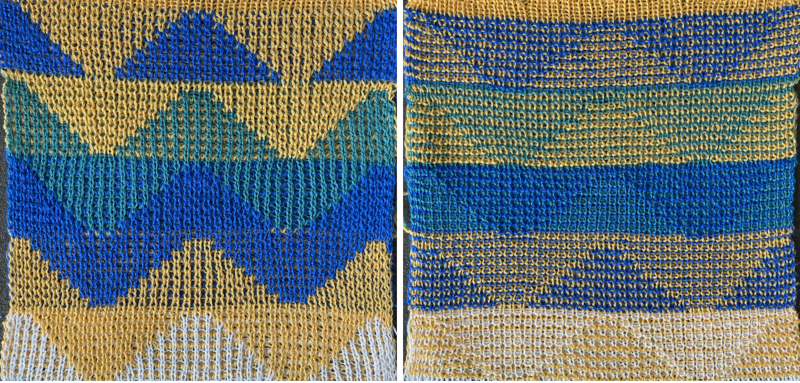
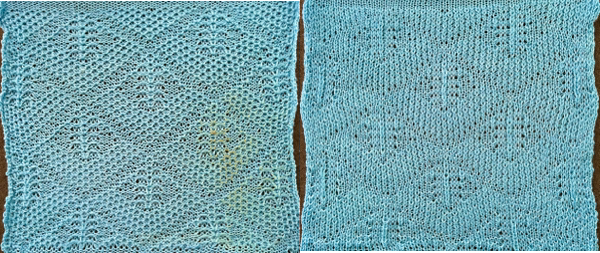
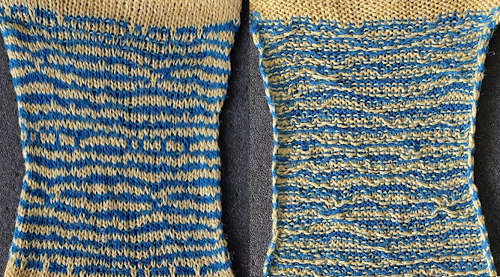
 ![]() Proof of concept swatches: the long stitch in 2 colors,
Proof of concept swatches: the long stitch in 2 colors, 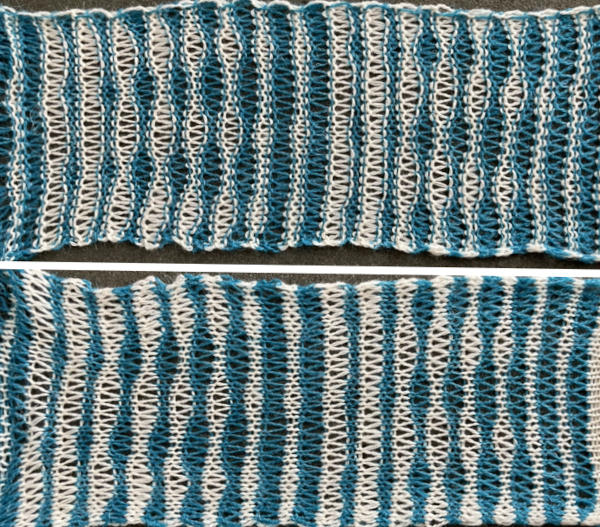 and the pattern executed as a tubular FI knit: I had yarn issues, hence the dropped stitches. Both swatches were knit to approximately the same point in the pattern repeats, there are obvious quality differences in width and length. In tubular knits, there are differences in the width and height of the knit on each side. The front is a slip stitch with floats, drawing the fabric in, while the ribber knits every stitch every other row. With a good choice of yarn and pattern, loosening the tension on the top bed may ease this problem. As often happens, casting on and binding off need special considerations ie to allow for any fabric stretch when off the machine or to leave a tubular knit open at either or both ends if that is the goal. More info on tubular knits including on Passap
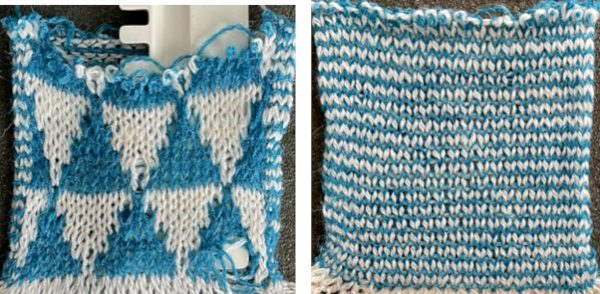 DAK has been a purchase made out of curiosity, and my use of it has been very limited since my designing needs are met by using other programs that are free to users and generate and accept files in multiple formats, while the Brother Knitleader or even simple use of the magic formula solves knitting any desired shape in any gauge.
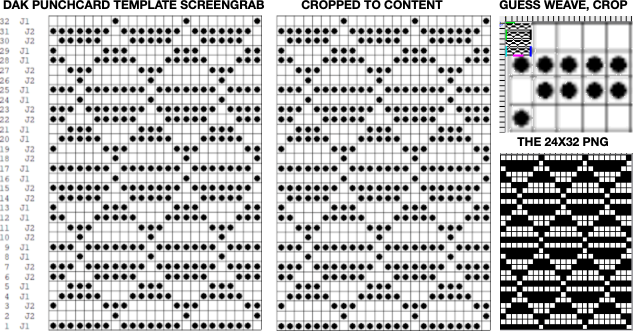
That said, if one can generate the templates produced in DAK, the screengrab of the result may be used to generate a PNG with ArahPaint using the weave-from-grid feature that is then knit-ready on any electronic machine able to accept downloads. The method is far quicker than using Numbers and Gimp. 
![]()
![]()
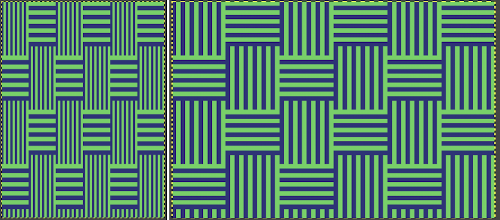
 The plan is to create a repeat which may be knit using color changes every 2 rows. Each design row knits each color twice, so the standard built-in KRC separation is not a consideration, though the same cam settings may be used in those fabrics as well.
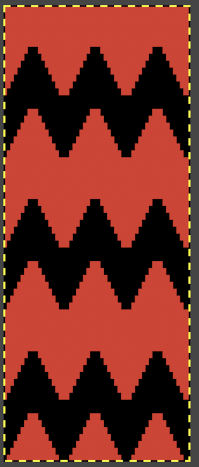
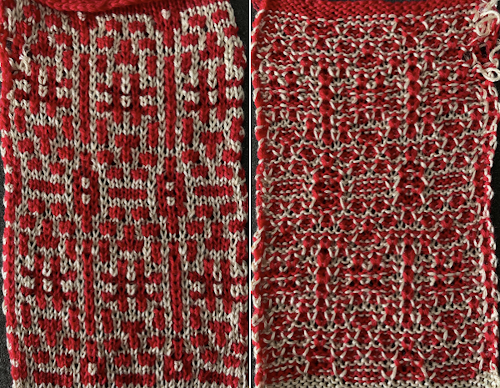
 Lock settings are easier to achieve on the Passap than switching out cam buttons in Brother machines. This was knit using 4 carriages. Color one knits with the main bed set to tuck both ways, color two knits with the main bed set to slip both ways. The slip stitch reduces the width of the fabric considerably
 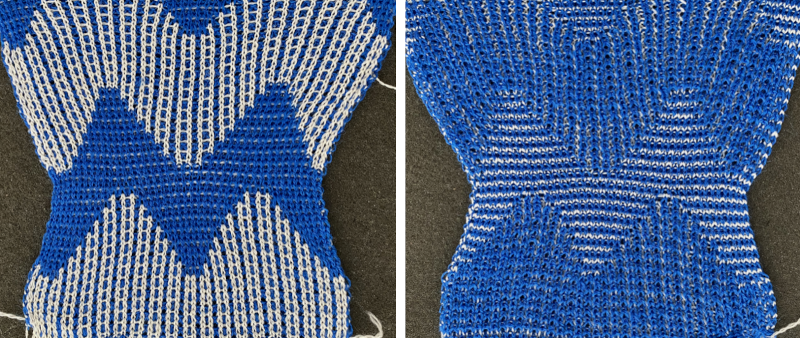 Here each color alternately tucks and slips. The choice of cam buttons matters, tucking first from left to right, slipping from right to left, with cam buttons set COL after the first preselection row
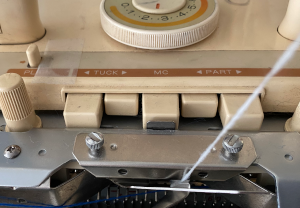
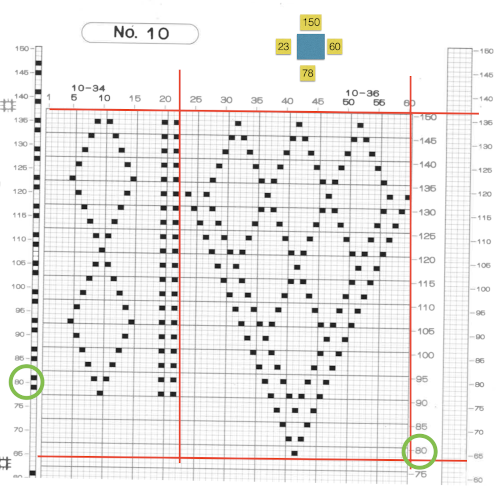
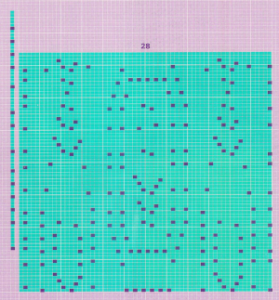
 This last cam setting appears to my eye to produce a texture “close enough” to the inspiration fabric. Attempting to add more colors: the repeat, D, is still 18 X 88 but is now shifted slightly.
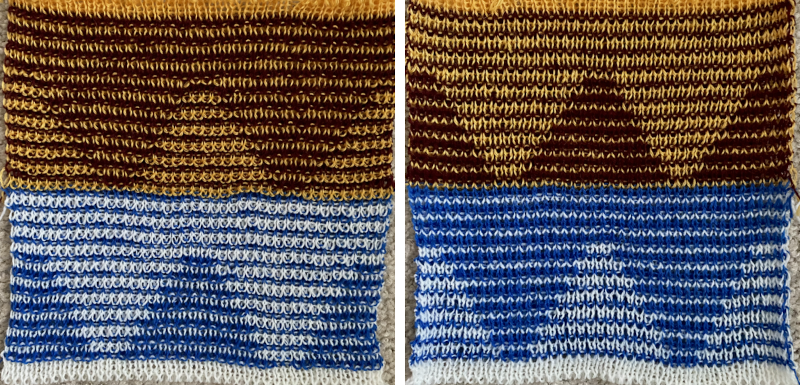
 The existing repeat may be reduced further to 18 X 64, eliminating some of those extra rows in the center of the chevron shape
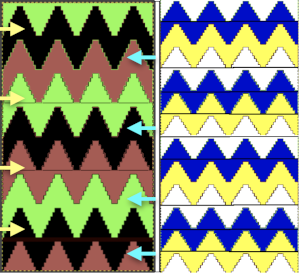
 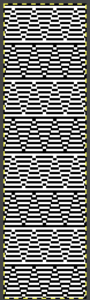 Whether or not the design is intended to retain chevron shapes in alternating textures, actions may be plotted pre knitting in any way that visually makes sense to the person designing the pattern and tools available to them.
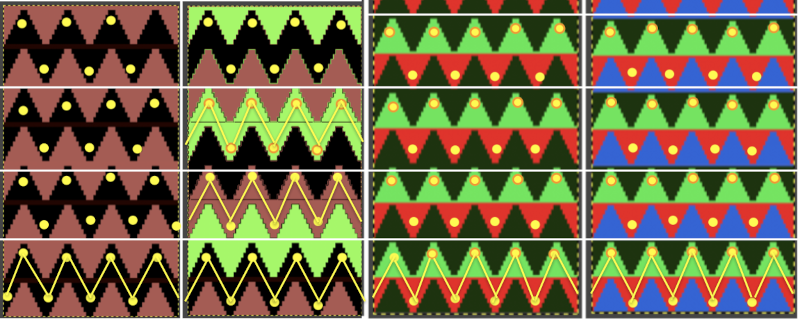
 Reversing the png so that the more textured stitches will begin with the color in yarn position 1
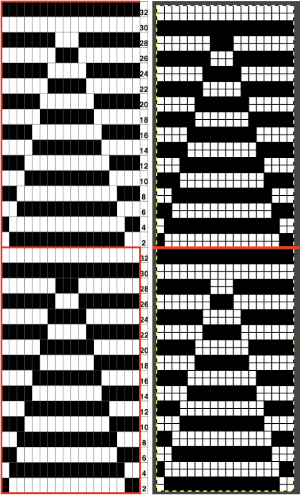 Adding colors can be planned cautiously or allowed to happen randomly depending on the preferences of the designer and end-use. Ribber fabric designs are not visible until several inches have been knit, too late to catch color sequence errors. Some machines allow for memo placements or sounds to help track color changes, but only within the initially programmed repeats. A quick spreadsheet can provide customizable checkboxes or added information. For an attempt to retain chevron shapes in different textures:
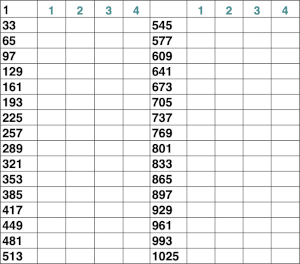

 A PDF including row numbers and space for notations
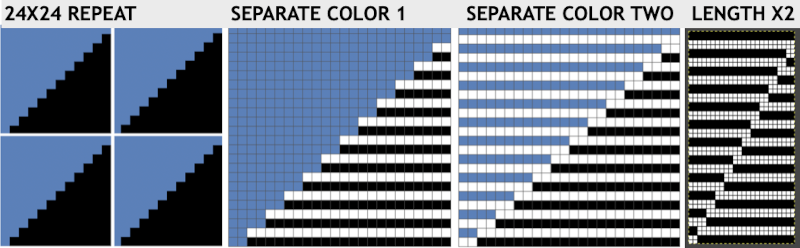
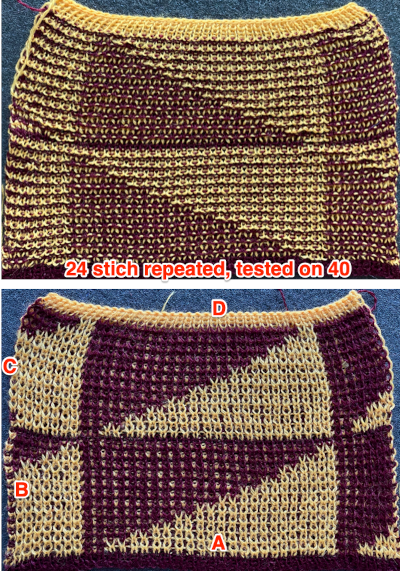
 Continuing on a 24 stitch repeat, the original design may be rendered at double height and separated once more, doubling the separation height to 96 rows
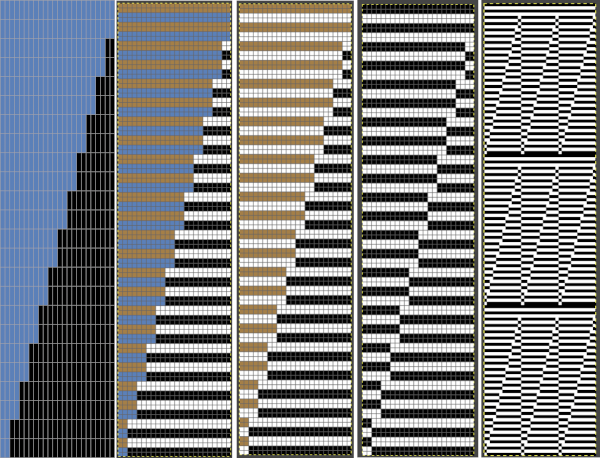
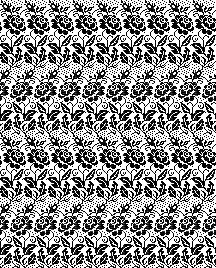
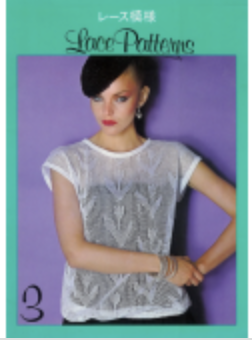
 Another even more complex inspiration from a sweater attributed to Falke, Spring 20 collection, using similar stitch structures, but in addition, also transferring stitches between beds exposing a purl striped ground.


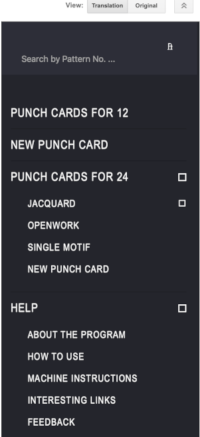
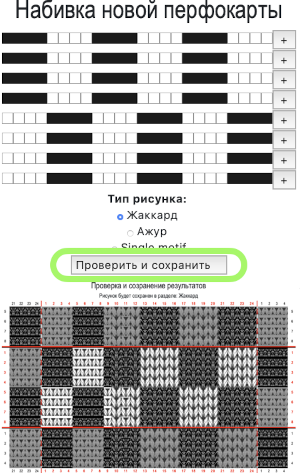
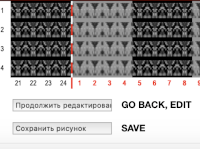
 For some reason, I found the commands erratic when working on the translated version of the site, and fared much better in the original language publication.
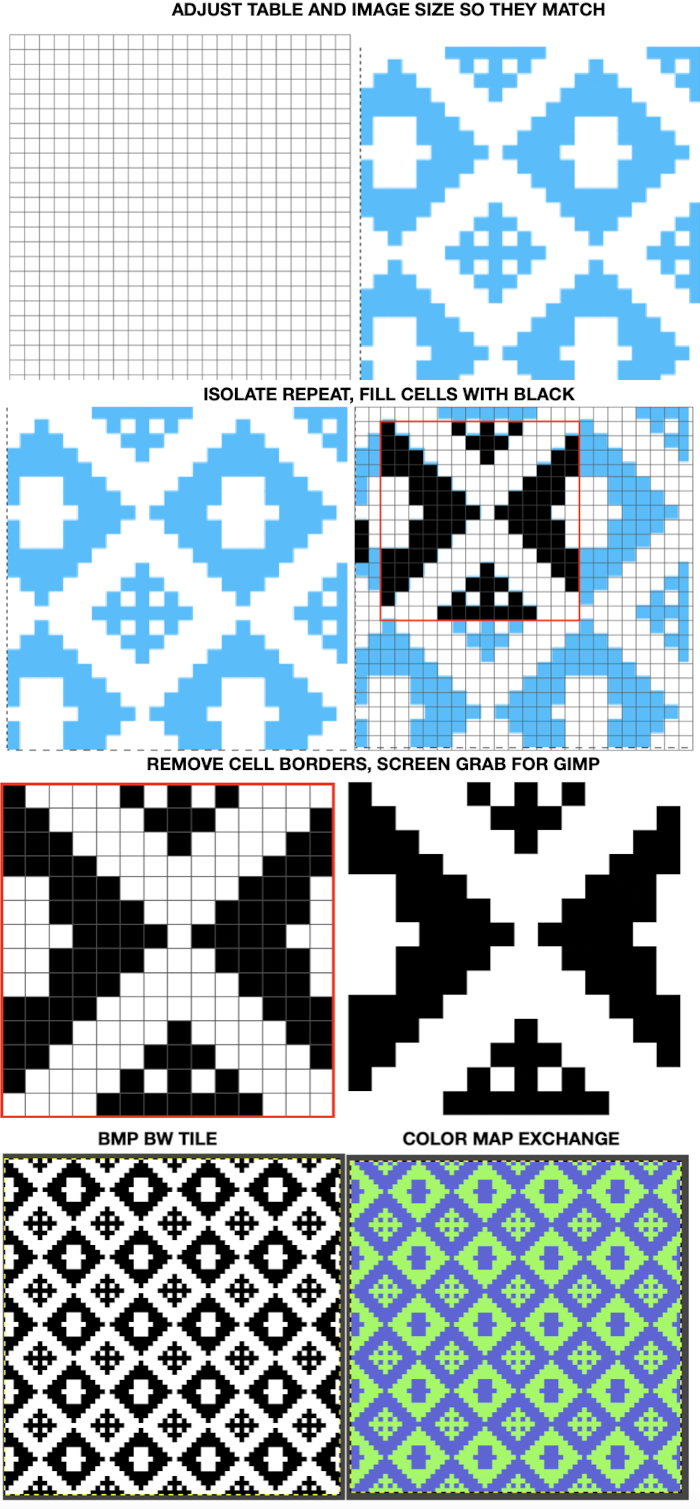
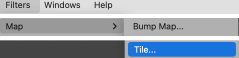
 Screengrab the final image surrounded by extra white cells, and open it in GIMP.
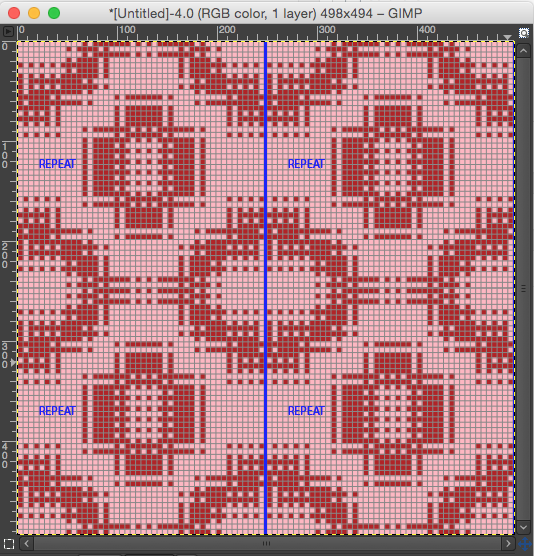
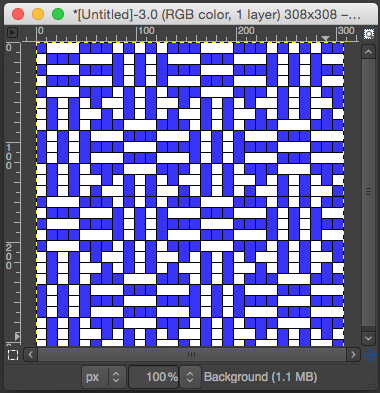
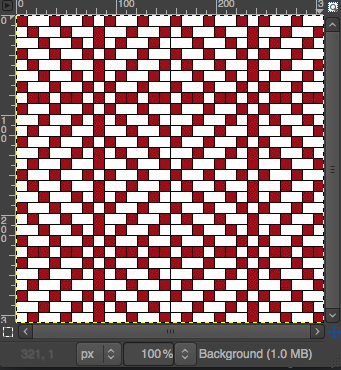
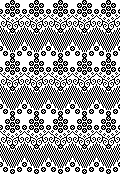
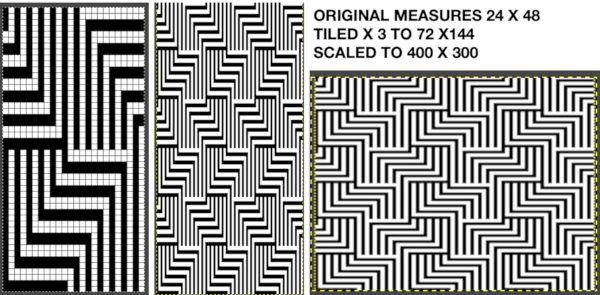
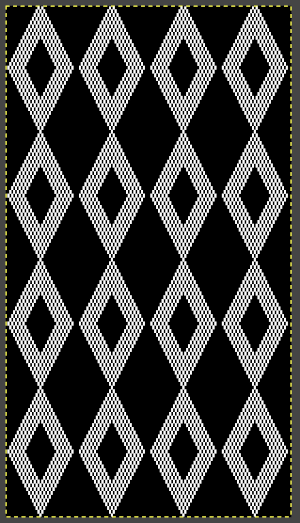
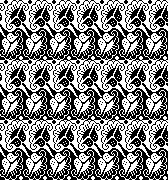
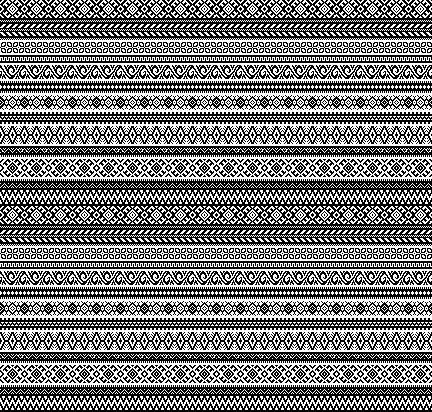
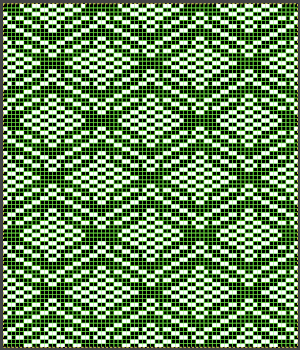
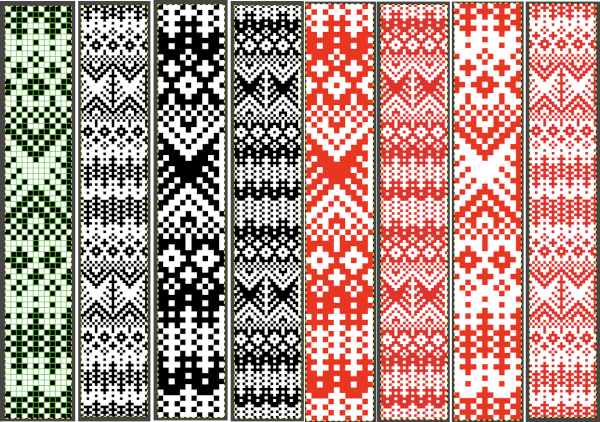 Getting a preview of how a finished garment might appear, here the tiled version is 192 pixels in width and one may glean some idea as to whether that repeat should ever really be used in a sweater or even a blanket. Further image scaling or cropping can happen based on the knit gauge.
 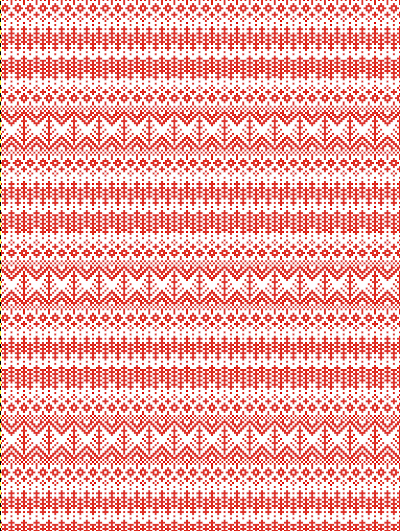 A very quick rendering imagining pattern and color placements using a simple sweater outline
 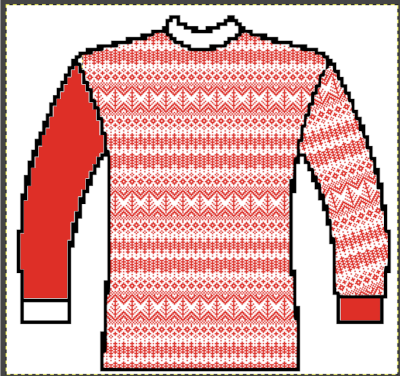 Collections of every other needle repeats for processing with a similar approach may be found in these volumes, available for free download
 Both volumes include accompanying swatch illustrations.
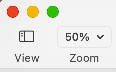
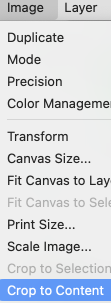
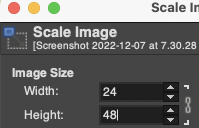
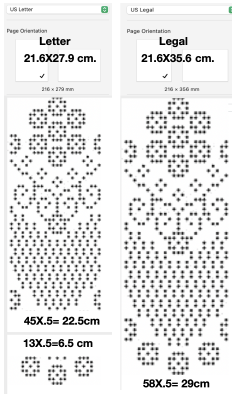
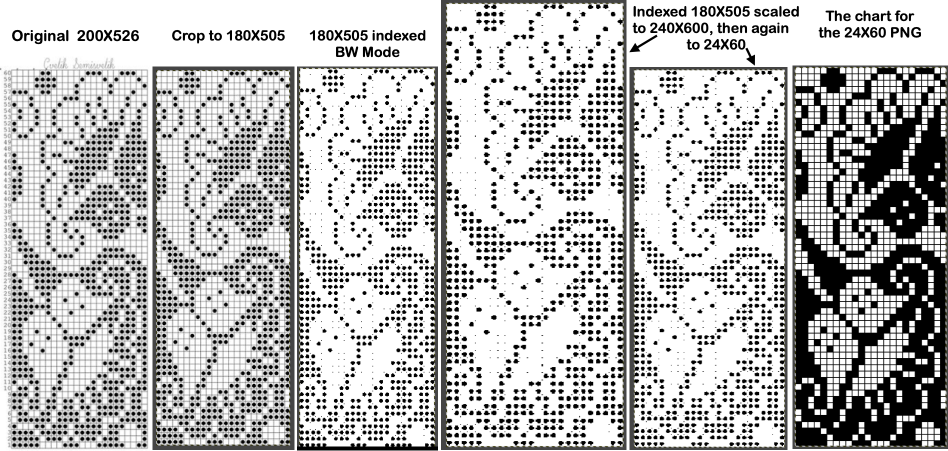
 For a better, printed match size, after capturing the image from the PDF for a single page outside image edges, opening it in Gimp, and cropping it to content, it is then possible to scale the results to measurements of a factory punchcard equal in width and adjusted for the number of rows in the image. My card required print measurements were 14.1cm by 26.1. Scaling executed with an aspect ratio that is too long.
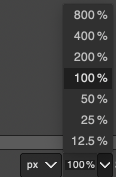
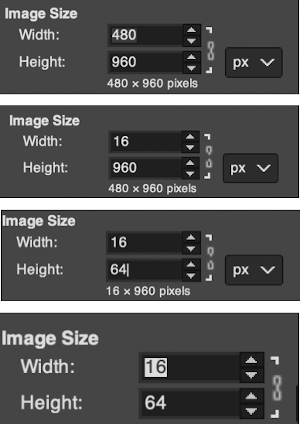
 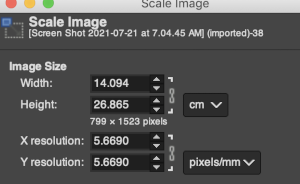 breaking the chain-link, removing size constraints
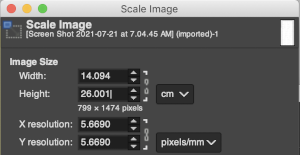

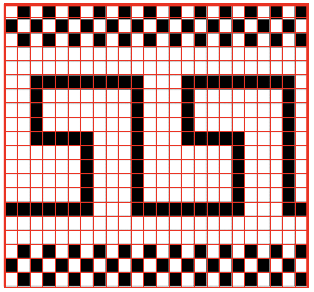


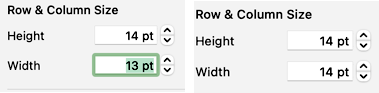


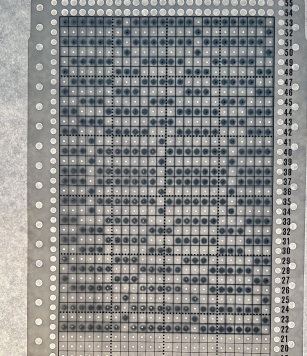

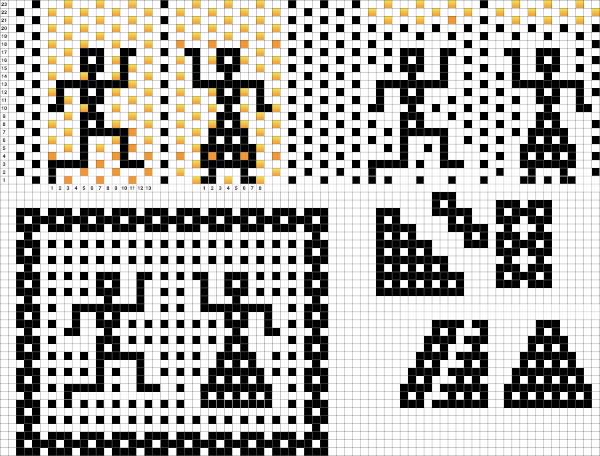
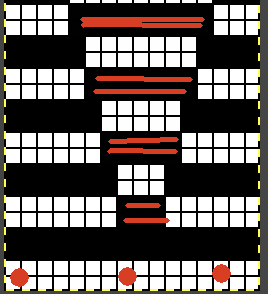
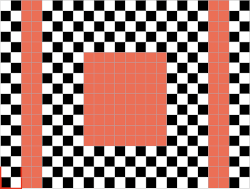
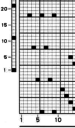
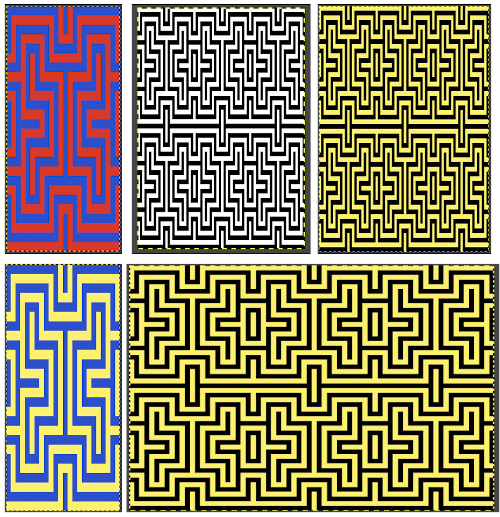
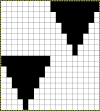
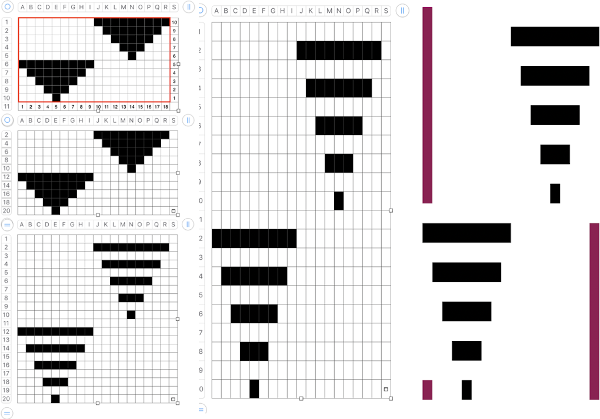
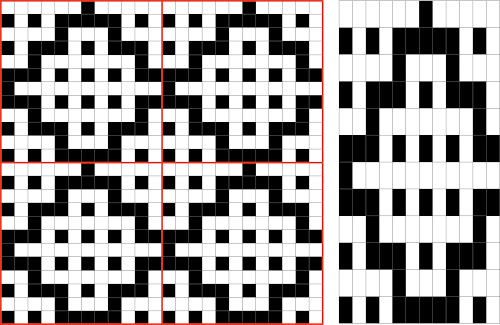
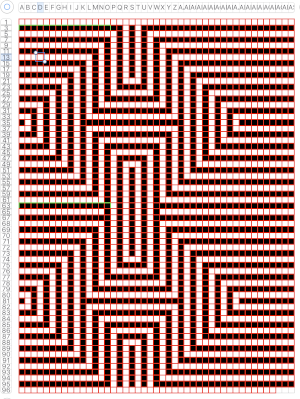
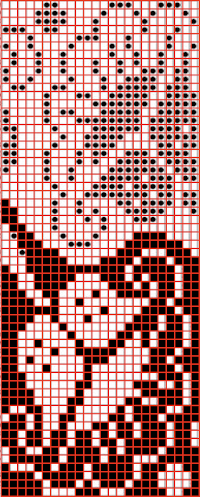
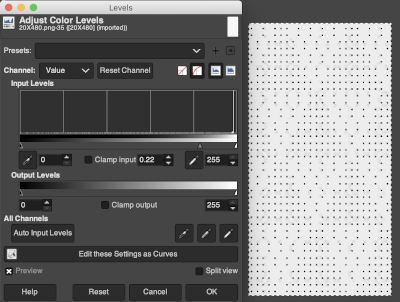
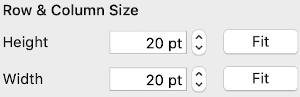
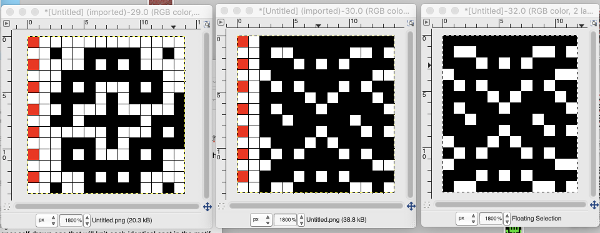
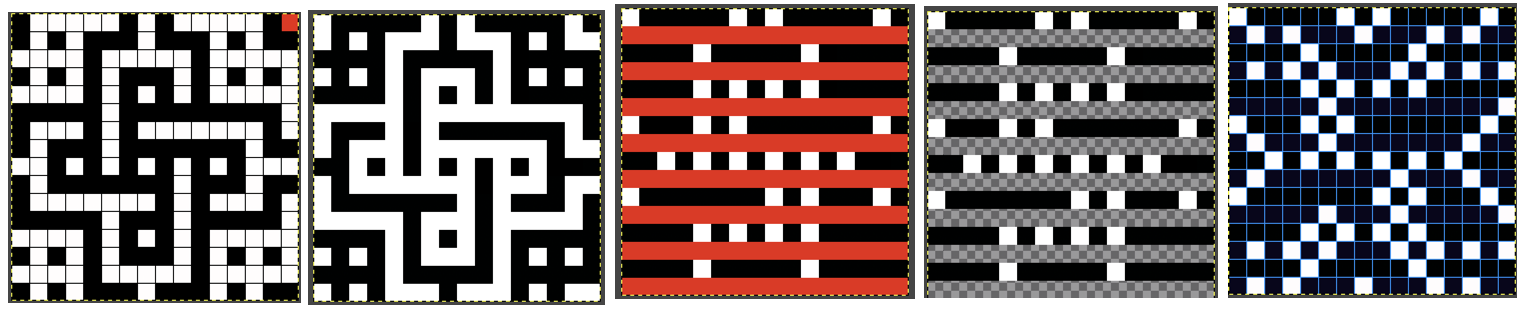
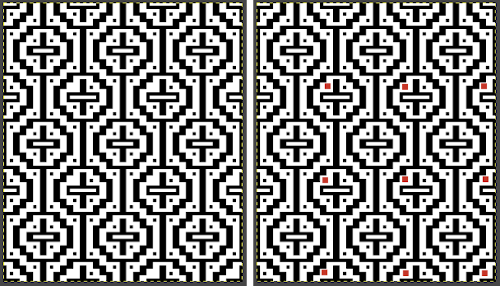
 Depending on the electronic model or the software used to download patterns designed for lace, the final image may need to be flipped horizontally. This is true for use on my 930. Creating a template for mesh using numbers: begin with a table with square cells in numbers larger than you might need, ie 24 by 54. The method for doing so has been explained in previous posts. I happen to prefer cell units that measure 20 points by 20. The smallest repeat unit for use on any machine is isolated, shown bordered in red, is 4 stitches wide by 6 rows high, and drawn onto the template. The group of cells in the repeat are selected. If one hovers over any side or top and bottom borders of it, a yellow dot appears. Clicking and dragging on the yellow dot will repeat the full selection to the right, left, up, or down. Here the move is to the right
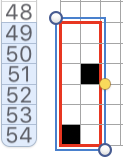
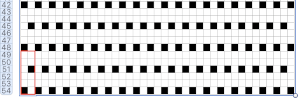
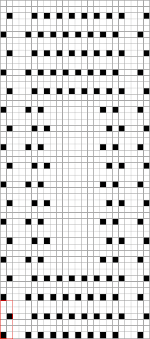
 The whole group is selected,
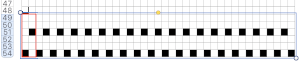
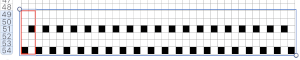
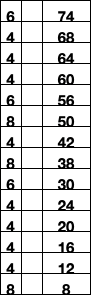
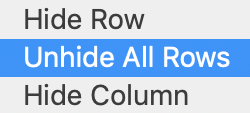
 Beginning at the top or bottom of the table, hide all blank rows. Using the command key during the selection process will allow this to be done on the whole table at once or in groups of rows at one time; 36 of the 54 rows are hidden.
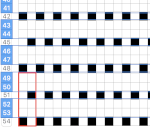
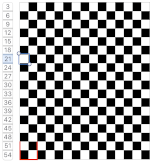
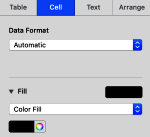
 the color may be replaced with white in the spreadsheet,
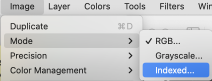
 The last image is in RGB mode once more, converted to BW indexed, scaled to 24 by 54, and exported as BMP or choose any other format ie png, etc. to suit your needs.
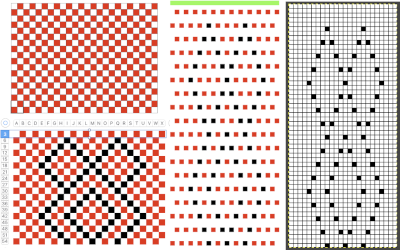
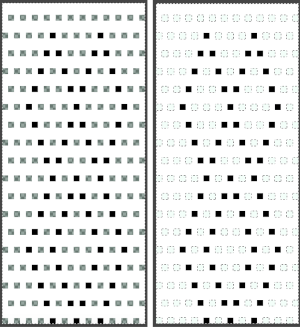
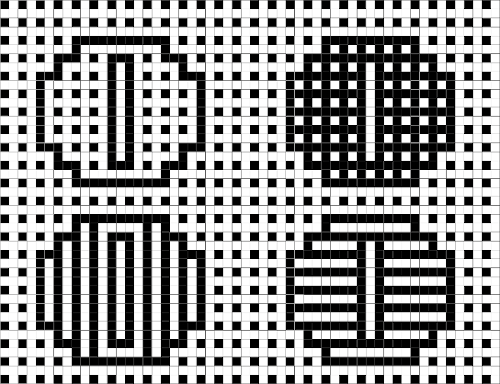
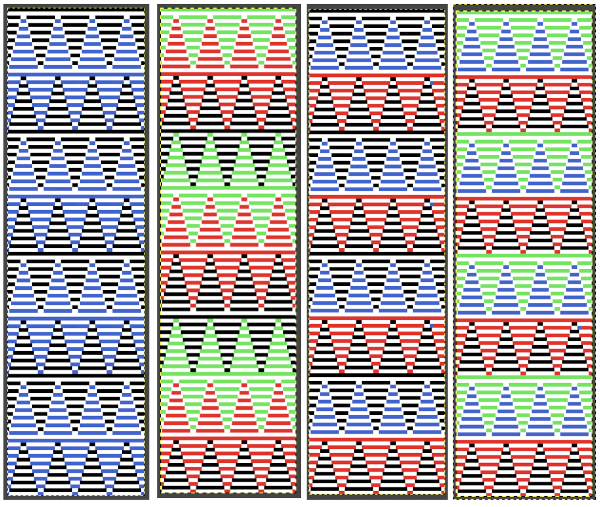
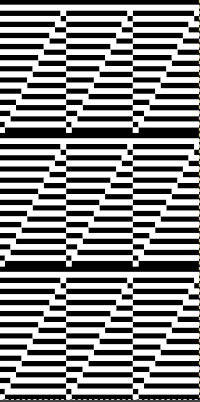
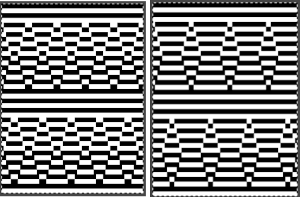
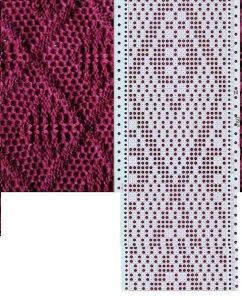
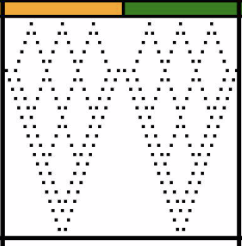
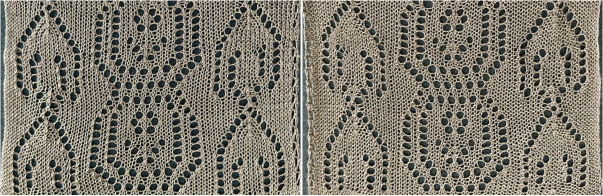
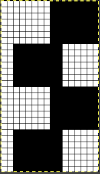
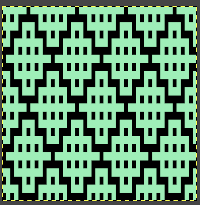
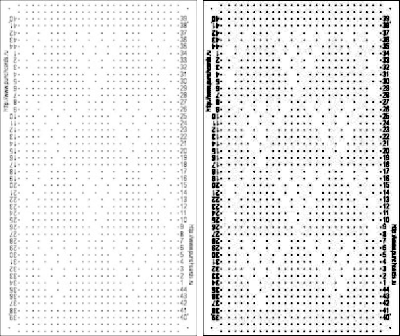
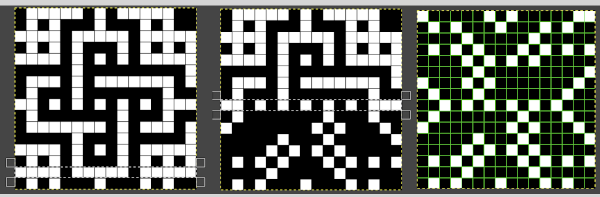
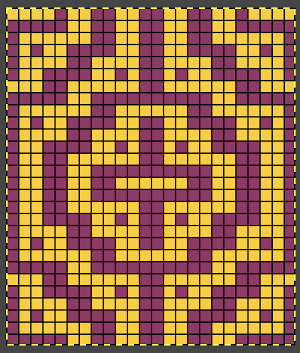
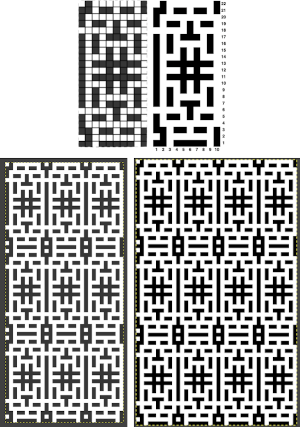
 The design was not planned as continuous, but is easily amended to be so. Here an alternate version is shown, with 2 linear repeats on the left, and a single expanded repeat to its right
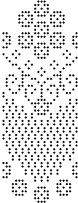
 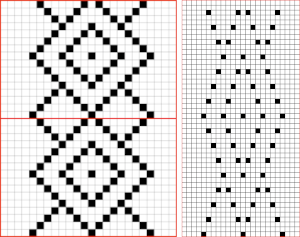 As for that mylar repeat, this is an image of the shapes with the chart collapsed, eliminating blank rows between black pixels.
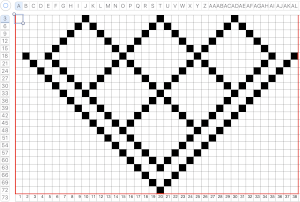
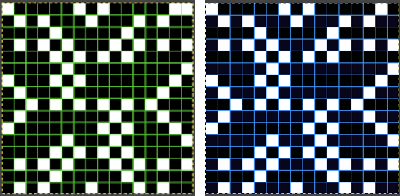
 In fabrics designed this way, using the image as drawn (left), or mirroring it horizontally, does not visually change the result. This does not hold true in more complex transfer lace.
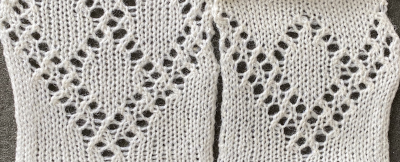
 2024:
2024: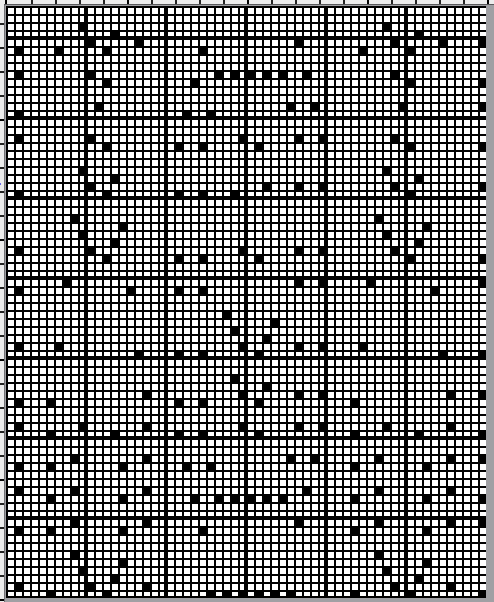


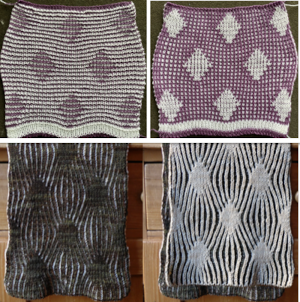
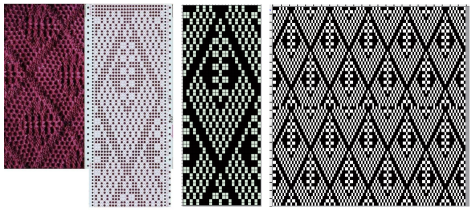
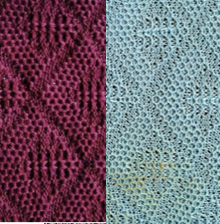
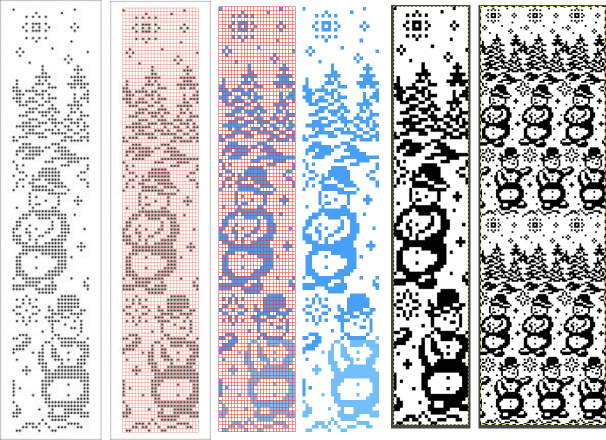
 The colored versions before and after scaling, compared with the slip-stitch swatch.
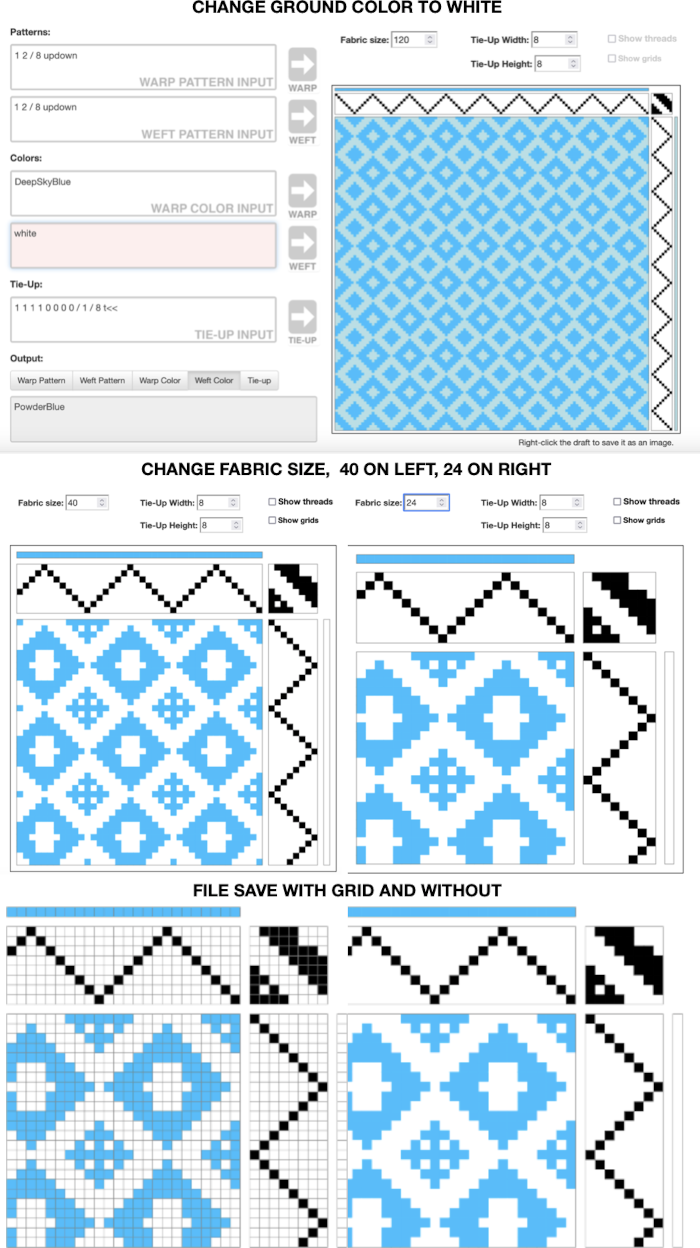
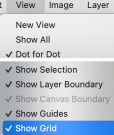
  It is possible to produce a rectangular grid to start with on which to draw in Gimp, but the larger canvas size occupies a significantly larger space on the screen, complicating the process. For small designs, however, that may be an option to give one the sense of aspect ratio for the design in the final knit ie in representational FI. To resize the grid in uneven proportions, the chain-link below the spacing values needs to be broken
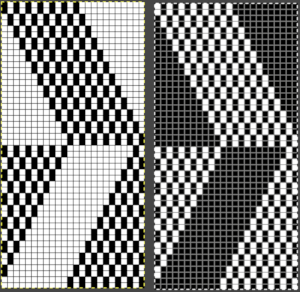
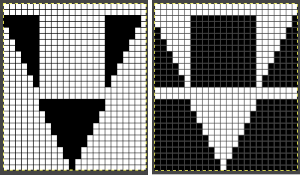
 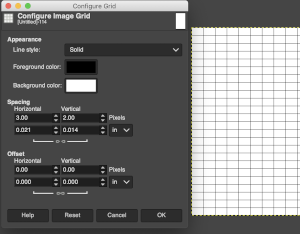 This repeat is designed for an electronic, and requires color-reverse.
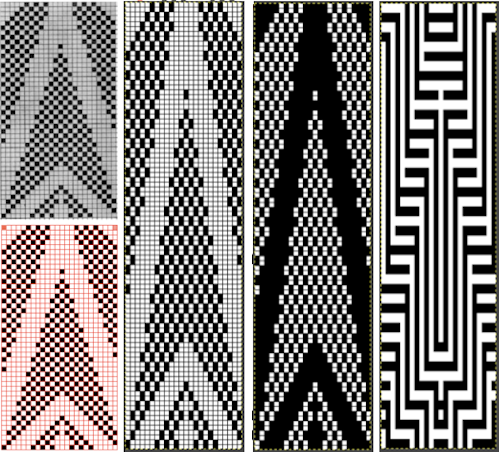 Once again, the possible change in scale is estimated. The repeat though only 24 stitches wide, is 92 rows high. On the left the repeat is shown as it appears on a square grid, to its right is the scaled 4:3 version, in a pixel count approximating the size of the swatch. It takes a bit of squinting to see the pattern more recognizable in the longer repeat in the larger tile

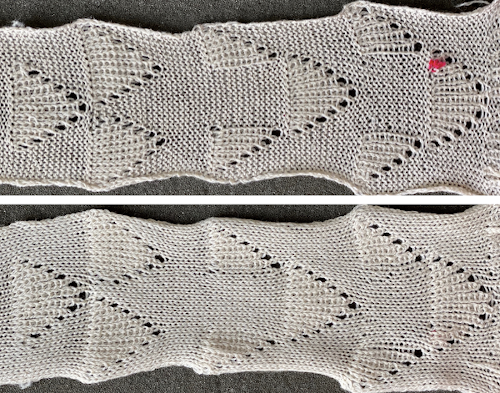
 The proof of concept swatch, knit in tuck stitch, begins to show the distortion by the stitch formations, textures vs plain knit, easily seen at the top edge. The bind-off is around 2 gate pegs in order to allow enough stretch.
 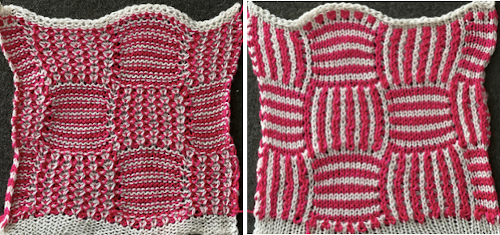 Anyone familiar with either or both programs may find this a very quick way to visualize the scaling and moving of motifs within DIY designs and their possible outcomes prior to test knitting
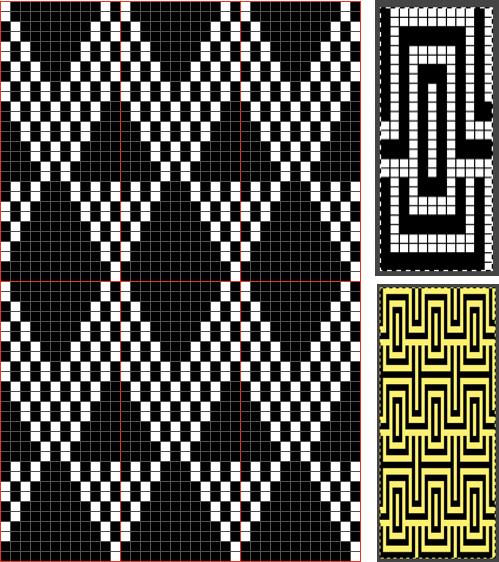
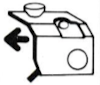
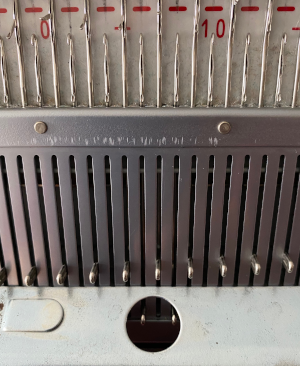
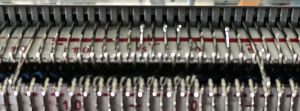
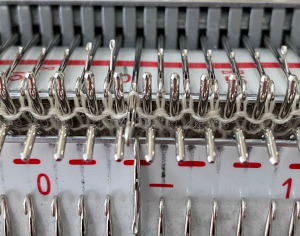 In terms of positioning the carriage, a wire that is akin to that found on Passap strippers is on its underneath. In positioning the carriage on the beds, check visually that it is indeed lying between the gate pegs of both beds prior to attempting to travel with it to the opposite side
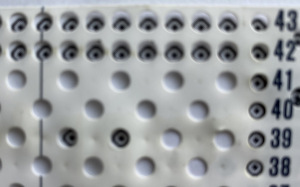
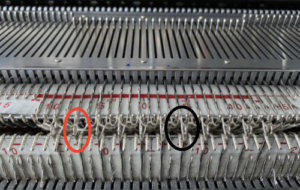 For my test I used EON needles on the ribber, planned alternating selection for each new transfer. This could be done by selecting dashes and blank spots on needle tape ie. dash in the above photo, blank spaces below
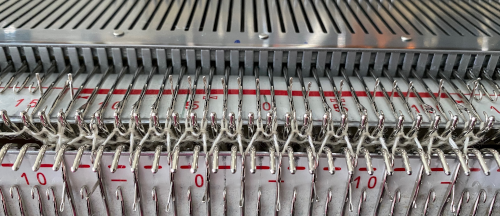
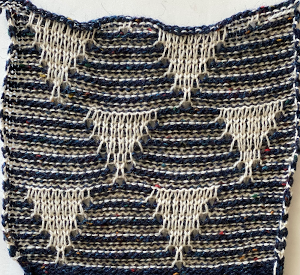
 My first attempt at creating shapes includes a band at the bottom where the EON transfers as above were made, but every row. Simply bringing needles into work on the opposite bed creates an eyelet. They can be eliminated by sharing stitch “bumps” on the opposite bed, but for the moment they are a design feature. The texture created appears in the areas involved on both sides of the knit
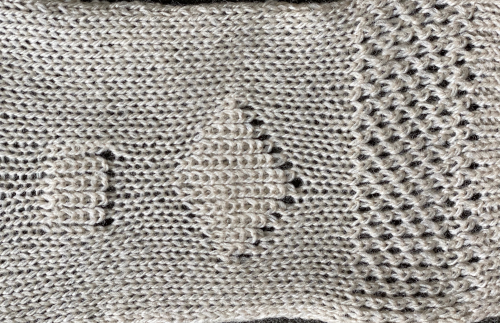
 It is possible to transfer single needles at sides of shapes ie
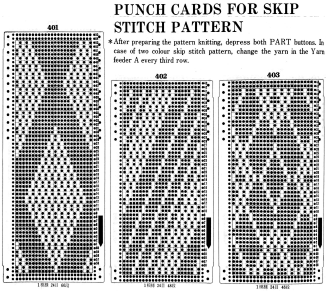
 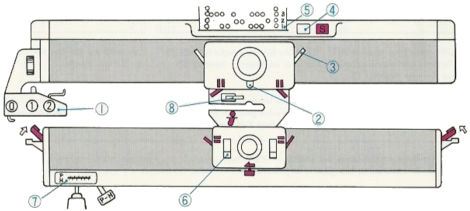 The enclosed punchcards:
 Transfers of stitch groups, whether by hand or using the accessories are made on rows where no needle preselection occurs on the main bed
 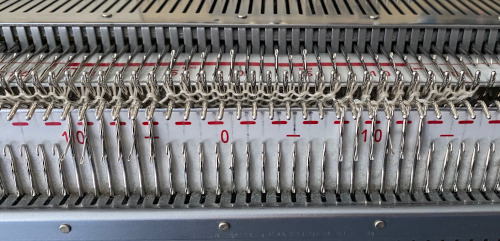 This series is a proof of concept for my approach to developing electronic cues
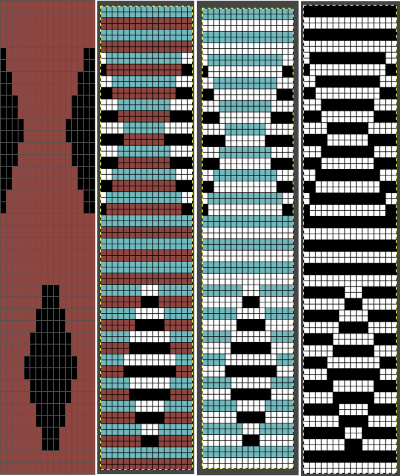
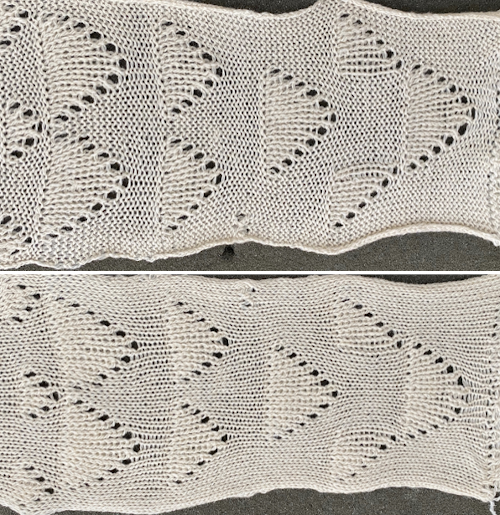 The original repeats were modified to include 2 blank rows between segments that allow for transfers between beds not hampered by needle preselection on the top bed. The motifs are color reversed, but not the blank rows between them.
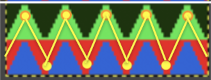
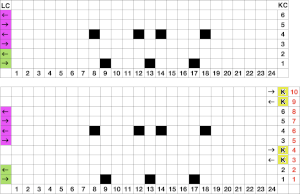
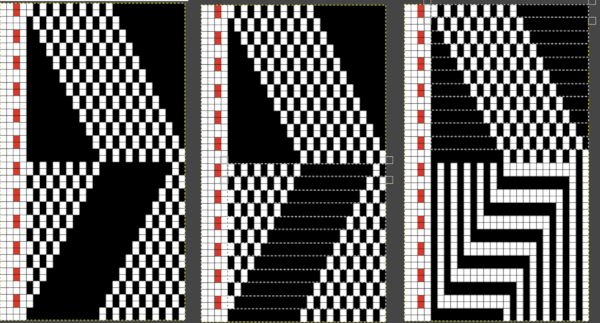
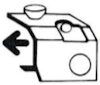
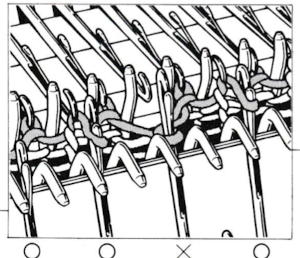
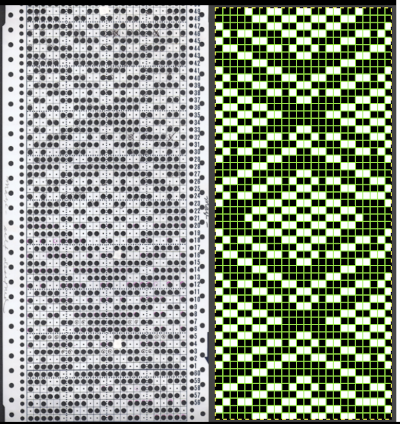
 The knit carriage is set to select needles KC I or II, end needle selection does not matter. All needles on the top bed knit every stitch, every row, whether or not those design rows contain black pixels. No cam buttons are pushed in. Blank areas between black ones indicate the number of needles that actually need to pick up loops on the ribber to create shapes, filling in spaces between selected needles until an all-blank row is reached for making transfers. The chart on the far right illustrates a shape where the easiest method becomes one where stitches on the ribber are manually transferred to the top bed in order to reverse the shape and maintain every row preselection. The selected needle corresponding to the black square marked with the top of the red arrows is pushed back, the ribber stitch below is transferred onto it, the needle with the couples stitches is brought to E position, moving across the bed in proper locations prior to knitting the next row.
 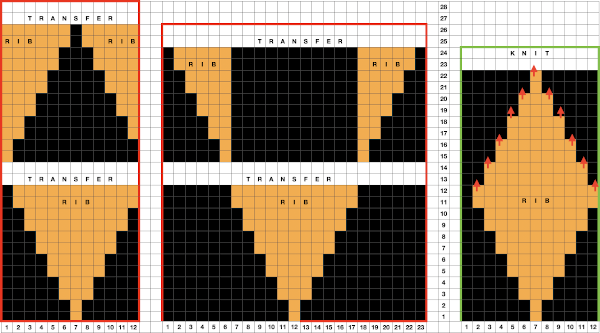 In this repeat, the side vertical panels of ribbed stitches are added. The knit stitches on each side of them roll nicely to the purl side, creating what in some fabrics can actually be planned as an edging.
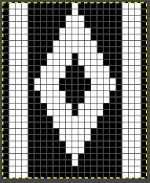
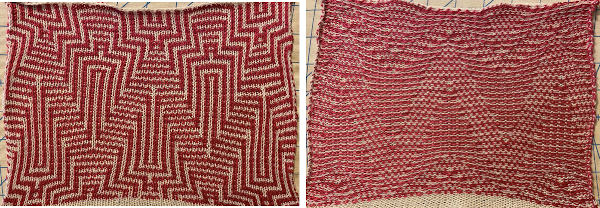
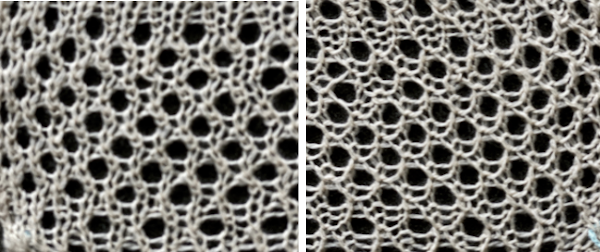
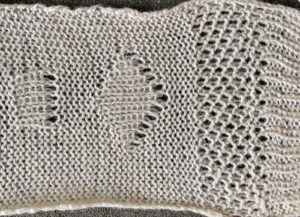
 In the first sample, equal thickness yarns were used, the colored yarn was a rayon slub with no stretch and slippery nature.
 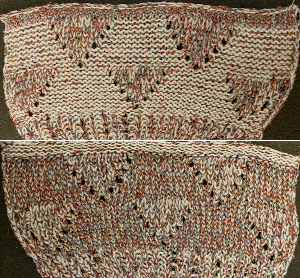 The bottom of this test used a wool yarn of equal weight to the light color, which proved hard to knit. The red is a 2/48 cash-wooll
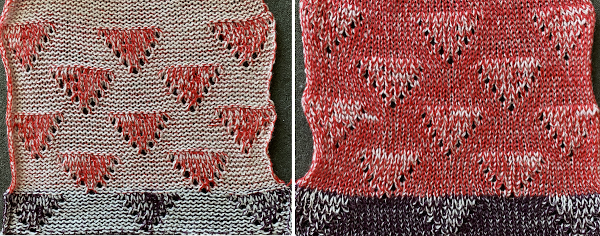
 If any stitches are pushed all the way back or in mixed alignment during transfers,
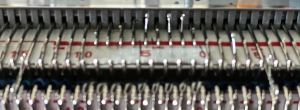
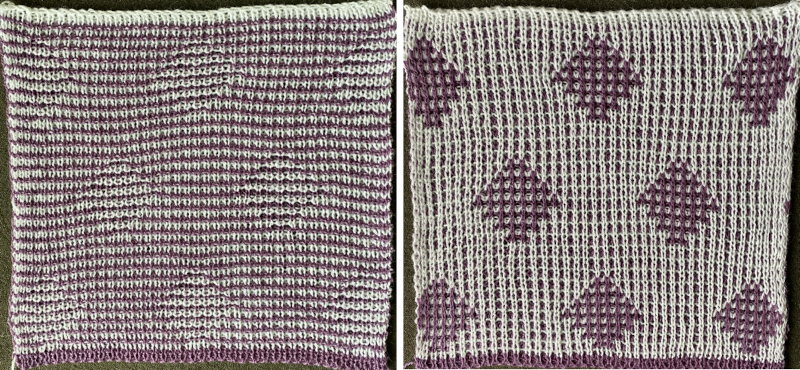
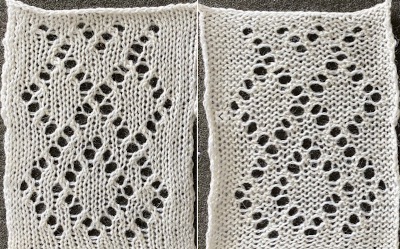
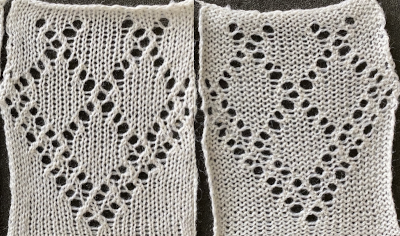
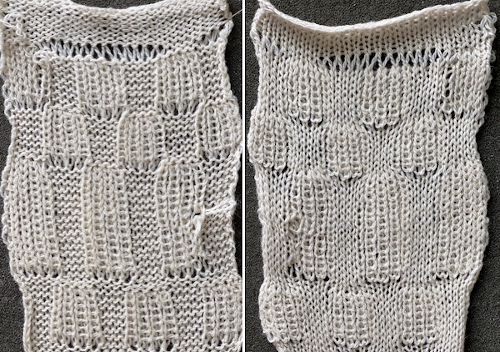
 Proof of concept: the bottom half is knit using the slip stitch setting, the top half in the tuck setting. The added texture on the tuck stitch purl side makes the fabric a more interesting, reversible one, and wider than its companion.
 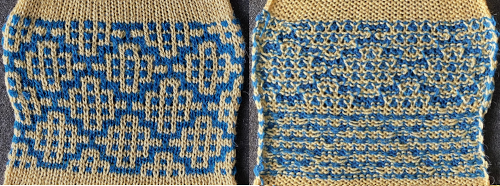 For a different way of working with two-color initial images using only Gimp, see tips in
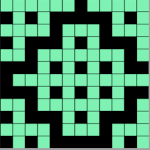

 Numbers processing to ready the repeat for final gimp editing:
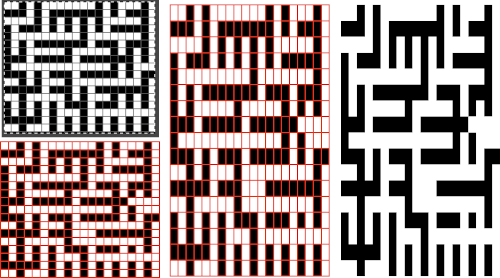
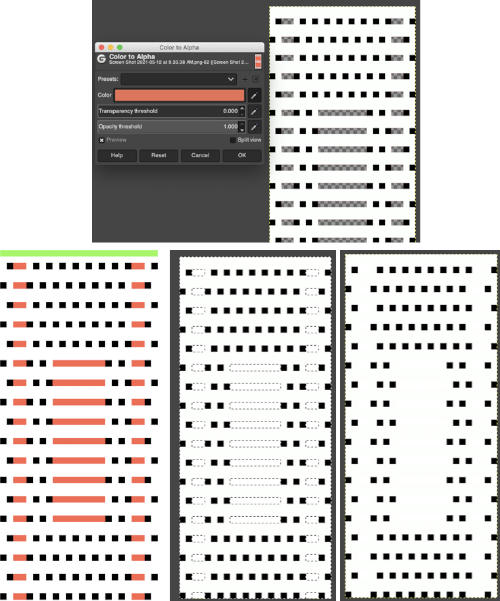
 Getting back to clearer pattern results: when using electronics, it is possible to create far wider and taller repeats for download. The technique to achieve them uses the same process. That said, there are quicker ways to attain the final repeat illustrated in the 2024 posts on using Gimp color to alpha through the Layer> Transparency option or Colors> Color to Alpha.
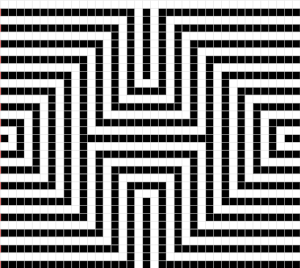
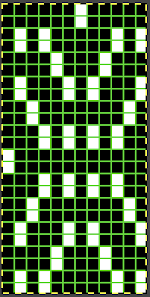
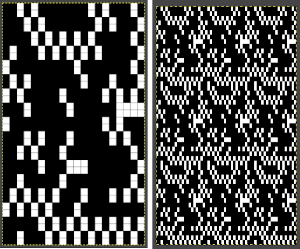
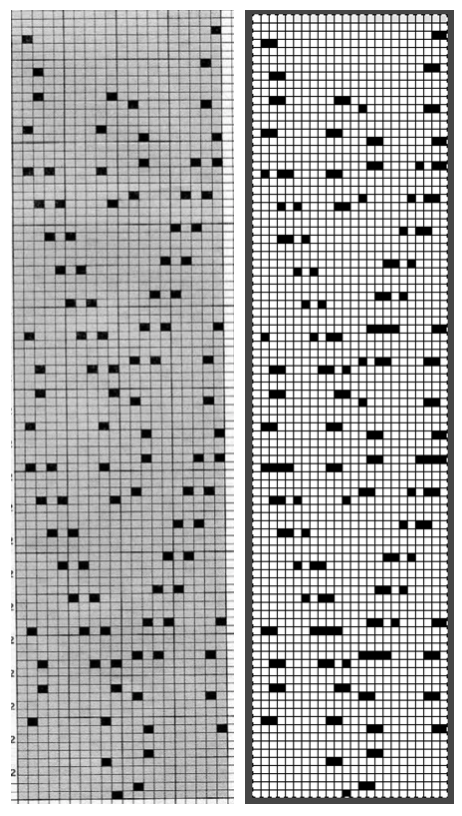
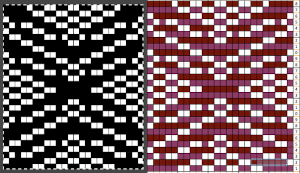
 the isolated repeat, double-length
 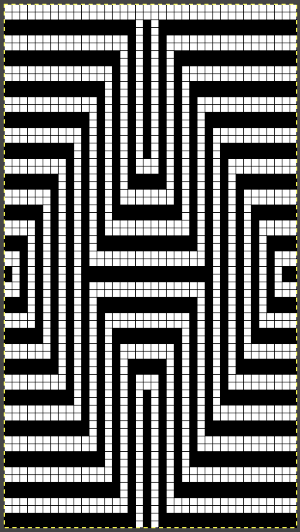 the color separation in progress
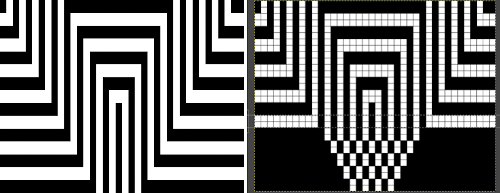 When knit, that white cell pair of rows break up the overall shapes and shifts the pattern in the top and bottom half
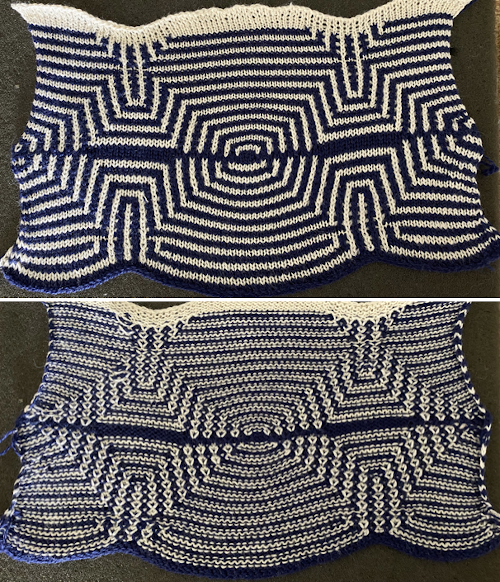
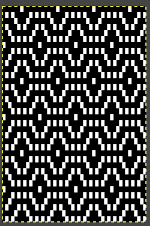
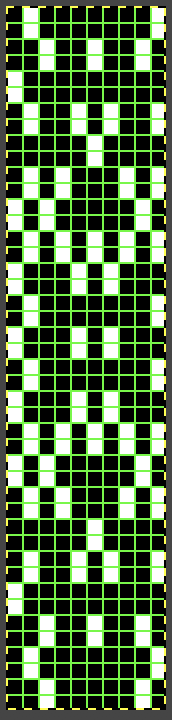
 The final adjusted repeat
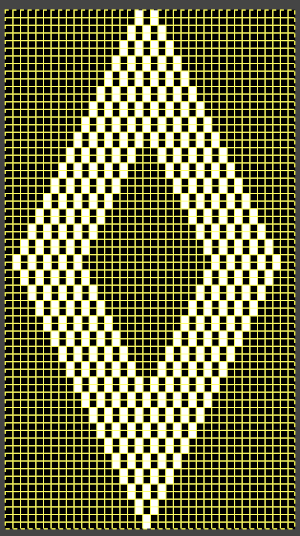
 knit using the tuck stitch setting in both directions, KCI, first row left to right, leading with the dark color
 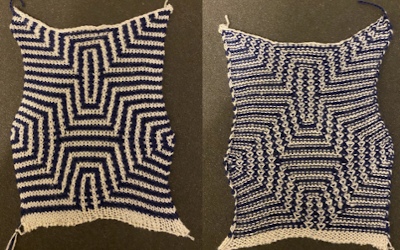 and here with the lighter color
 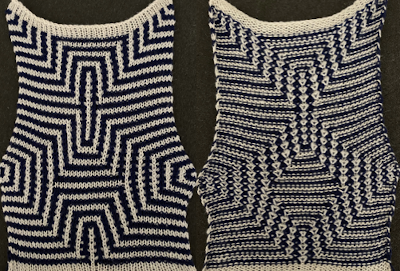 In progress, on the km
 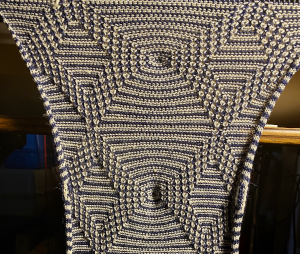 the relaxed, 3D-ish view on the reverse
 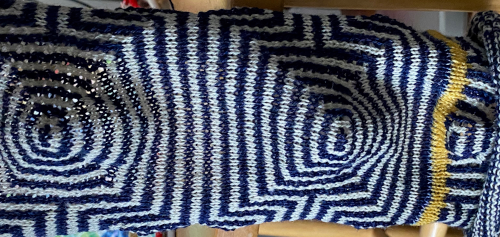 why projects can take longer than planned
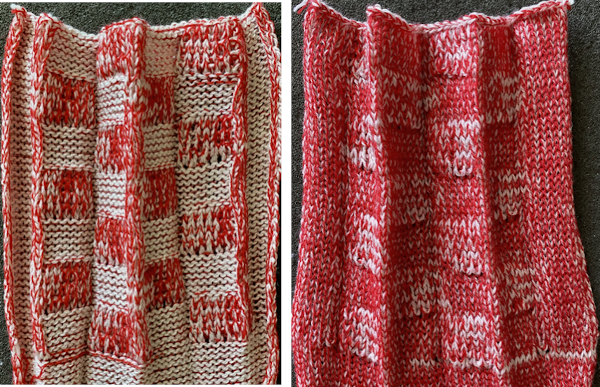
 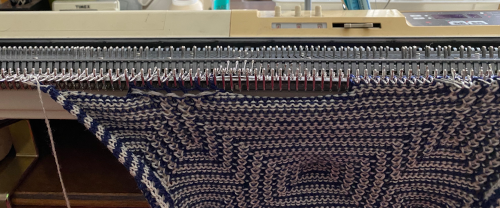 The finished, relaxed scarf with pressed edges only, retaining the conical striped forms
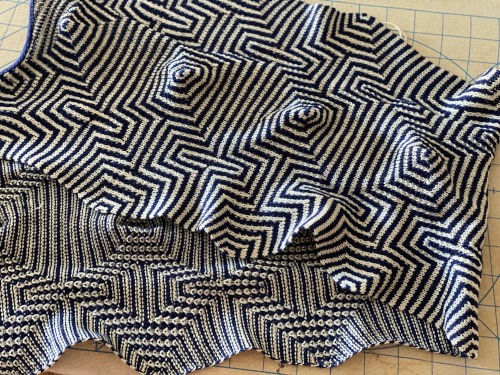 The repeat knit double length, changing colors every 2 rows, becomes something quite different, with a sharp curl to the purl side
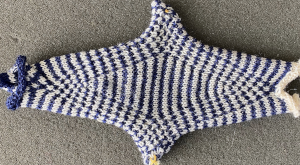

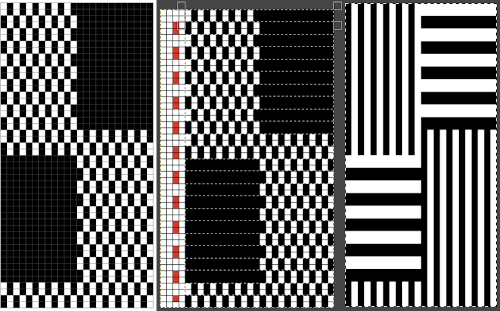
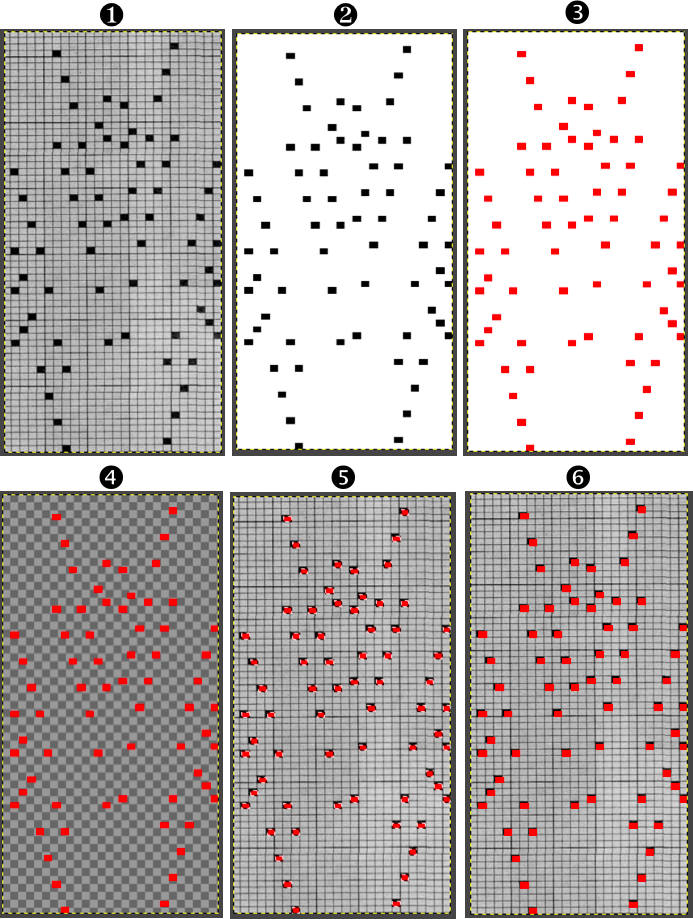
 The units in many such illustrations are not square, and the goal is to end up with a PNG where each square unit represents one stitch, one row.
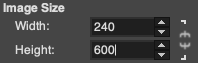
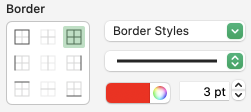
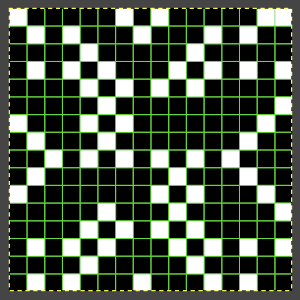
 and alter the cell borders to a bright, contrasting color. I chose red, 3-point thickness.
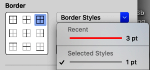
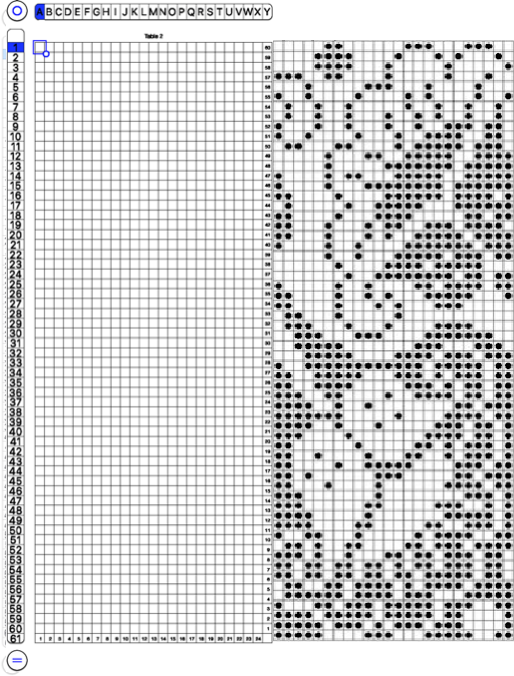
 Copy and paste the completed table. Make certain there is a different color cell in any white squares at the far corners of the image, in this case, upper right and upper left (yellow), remove cell borders
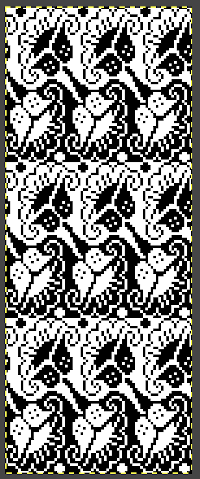
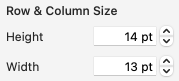
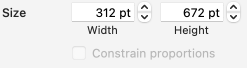
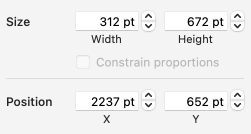
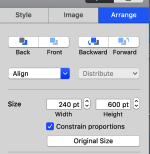
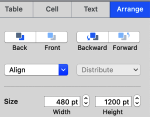
 Proceed as for the first image, being mindful of an unnecessary row at the bottom. The saved image can be tweaked in size by turning off Constrain Proportions and adjusting values for width and height for proper placement under the table grid. It soon becomes evident that the card is composed of smaller repeat segments, which in turn can be copied and pasted making for quicker work in filling in the whole punchcard row requirement.
 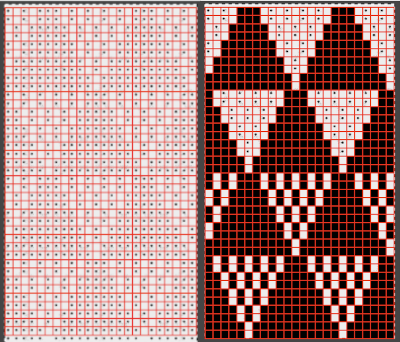 Check the repeat alignment by tiling it.
 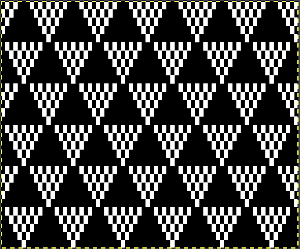 The smallest adjusted electronic repeat, 12X20 pixels.
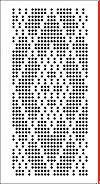
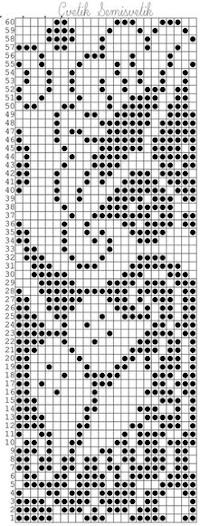
  The converted, partial punchcard repeat
 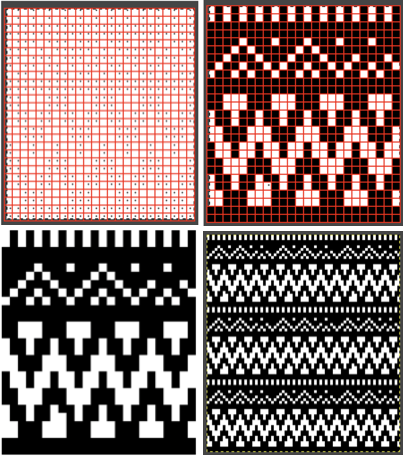 2023: ArahPaint‘s weave from grid tool makes working with the full repeat possible. The final repeat was cropped by 2 rows at the top to 24X206 to avoid a 4-row solid color line produced when the original was tiled vertically.
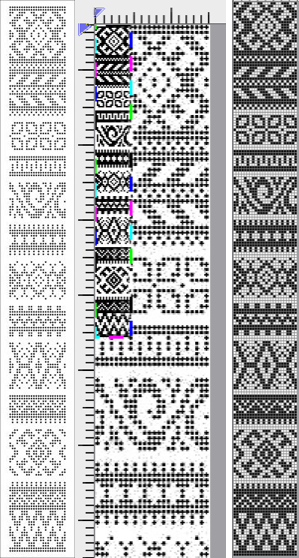
 if used, will change the numbering on the side of the card, but not the design content
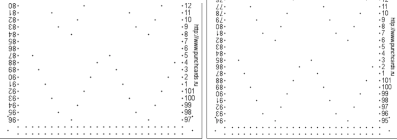
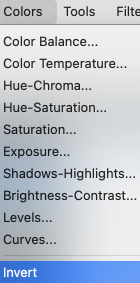
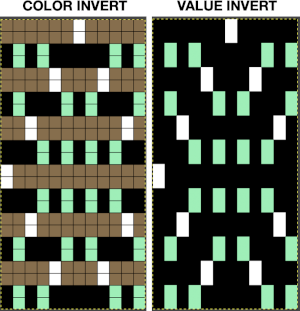
 In the past I have found lace repeats, in particular, to be particularly cranky when scaled down in Gimp due to the paucity of black cells. After the above steps, I decided to try color invert, resize, and color invert again, which in this instance, produced what appears to be an accurate repeat. Of course, the final png is likely to need mirroring for use in some electronic models
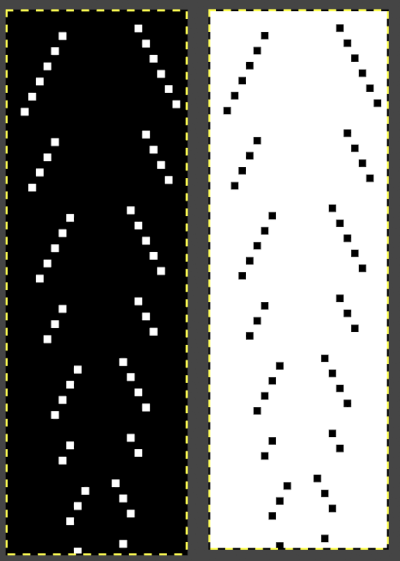
 2023: a different approach:
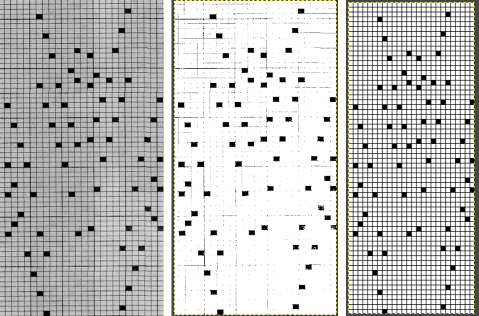


 The working design repeat is 16X16. Create a new table that is 16 cells wide, twice its height, 32. While holding down the command key, select all the odd-numbered rows planned for the final chart repeat, any errors can be corrected by clicking again on the same spot, still holding the key down. The process may be done in steps, releasing the key in between selecting groups
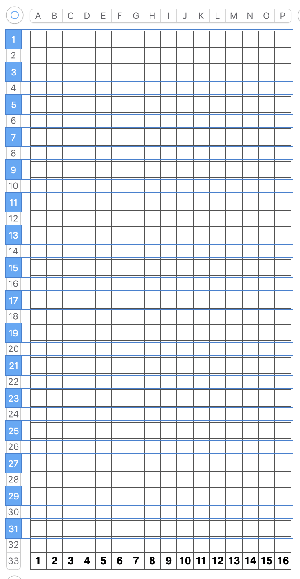

 will swap black and white cells in that row. Continue the process on every other row. It is not necessary to select the tool each time, as you advance and select the next row, the one just left remains briefly outlined in white dashes, making it easier to advance correctly in the design.
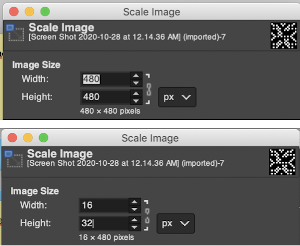
 This repeat posed by a quandary. The file may be used as-is and doubled in length after download. For doubling the height in Numbers, prior to importing the final screengrab into gimp, please see post:
 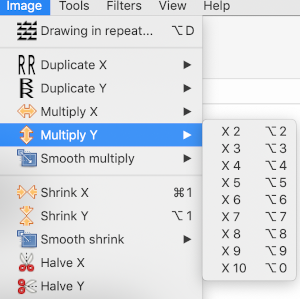 and
and 


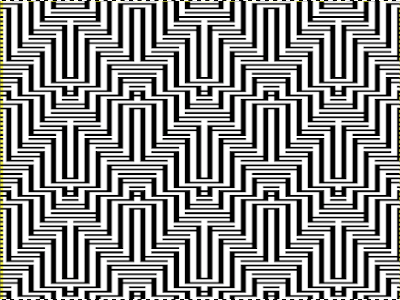
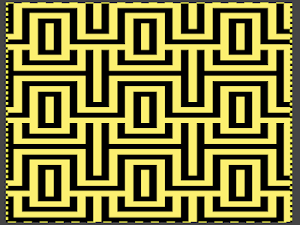
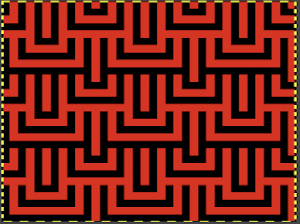
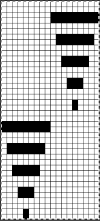
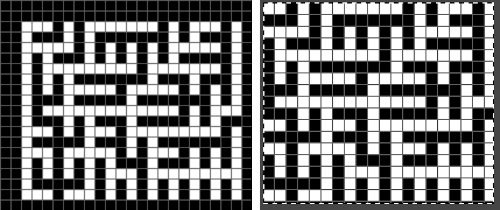
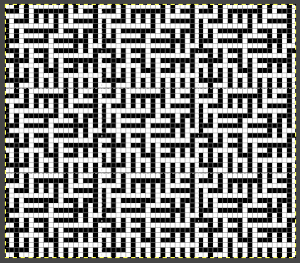
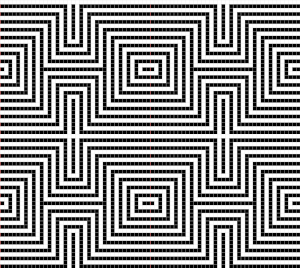
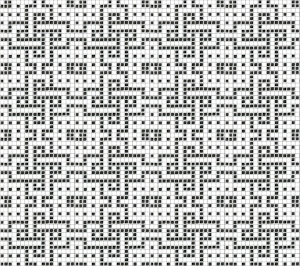
 adapted for maze knitting, eliminating long floats, to be lengthened to double-height
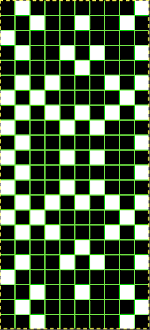
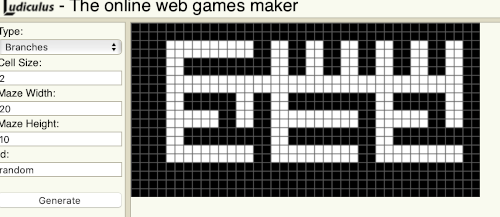
 Using the maze generator by
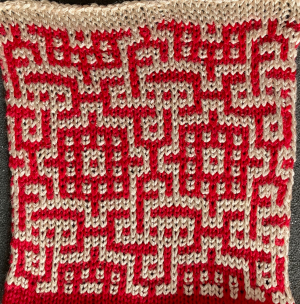
 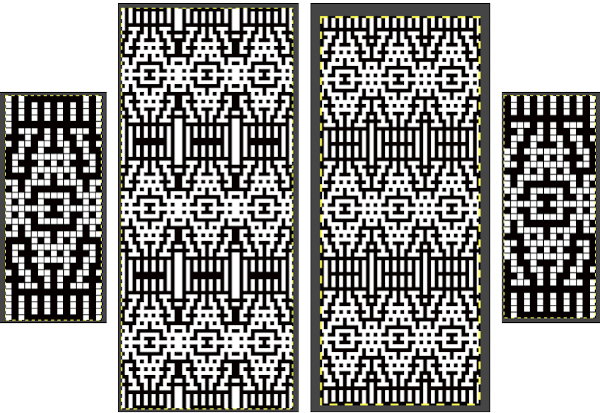 The proof of concept swatch for the version on the right, knit in tuck stitch
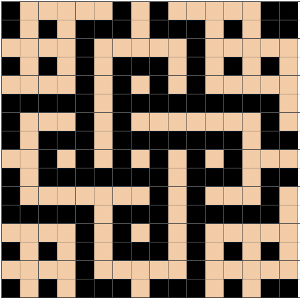
 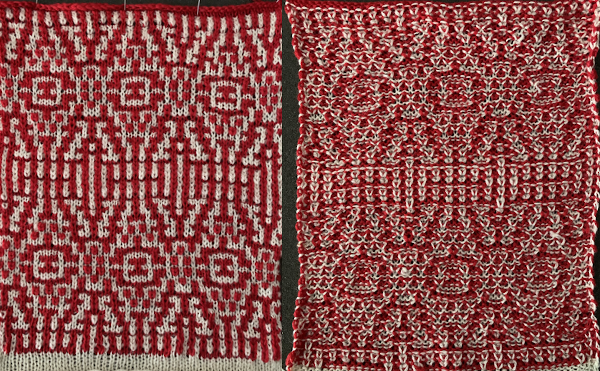 the double-length BMP ready for knitting, 14X68