Ladders with lace, “making things work” 1

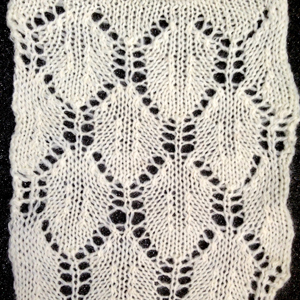
Just about 2 years ago, I had an obsession with leaf shapes in lace and wrote a series of posts on approaches to both designing them and rendering them in knit on more than one machine.
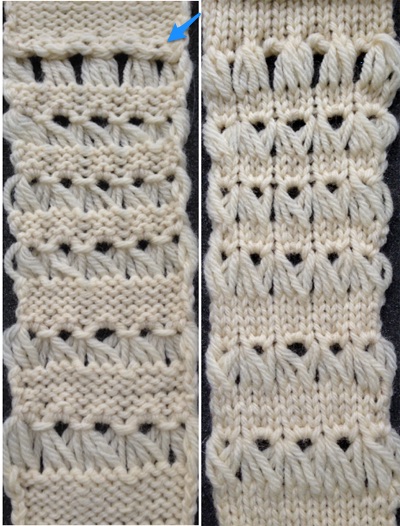
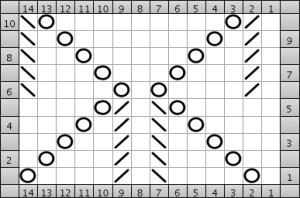
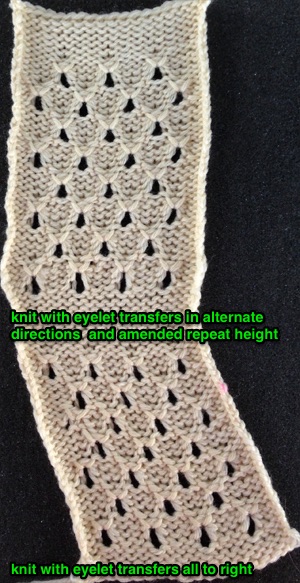
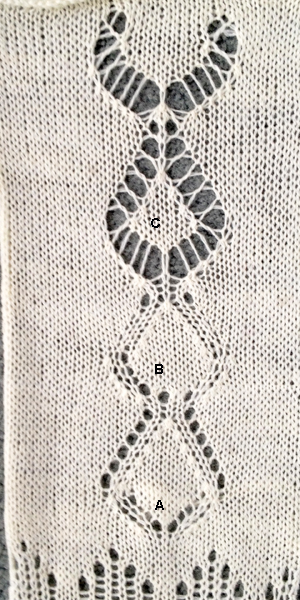
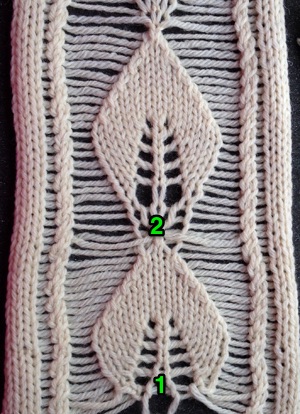
From a ladder and lace early post.
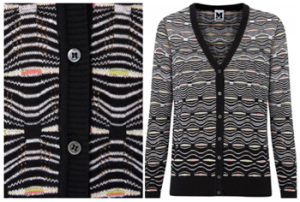
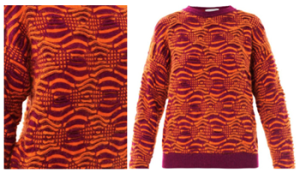
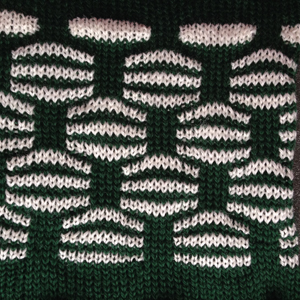
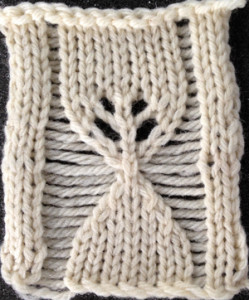
Recent publications reflect the increasing interest in bulkier knits and combining ladder “lace (created by needles remaining out of work) with shapes floating within the resulting open spaces. I thought I would address some issues in such fabrics while returning to a leaf as the focus “shape”. My samples are knit on a Brother 260, using hand techniques that require only the basic set of transfer tools.
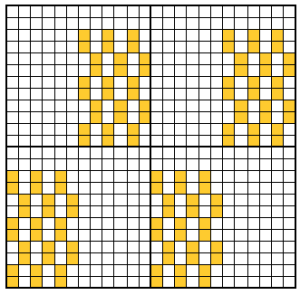
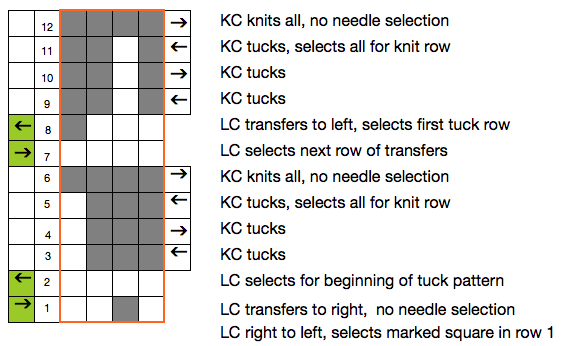
Long verticals in knit may have problems with the edge stitches separating from the rest of the knit, i.e. in FI vertical stripes. In plain knit, the edge stitches may stretch, become distorted, and may encroach on the ladder space. A series of actions taken on the edge stitches of ladders will help prevent that, here I am choosing to use a simple 1 X 1 cable cross every 2 rows to stabilize them. Having the cables coincide with the rows on which transfers are made to create the chosen shape makes tracking them easier.
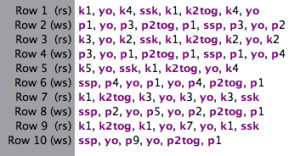
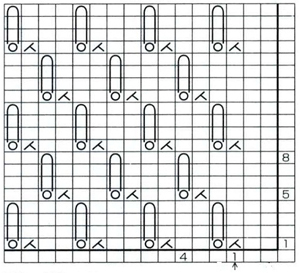
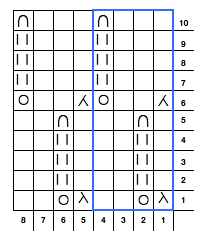
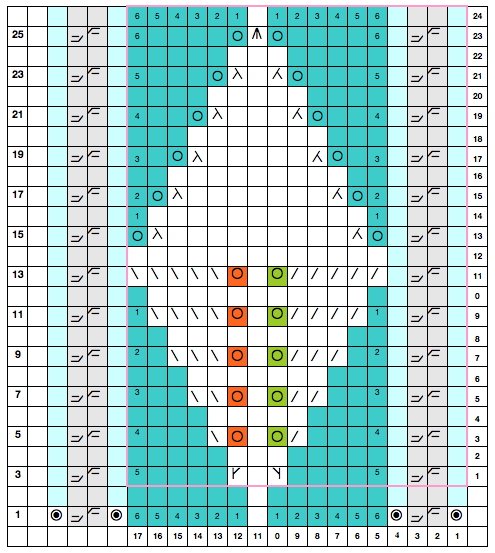
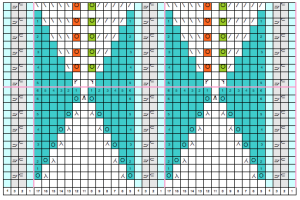
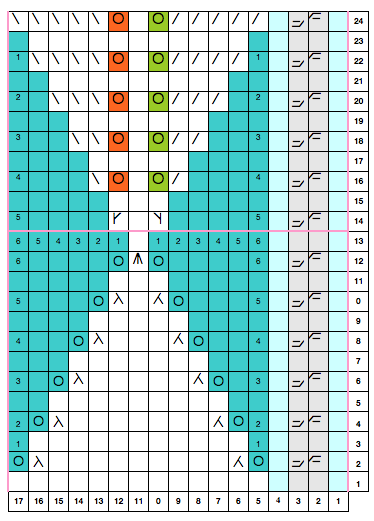
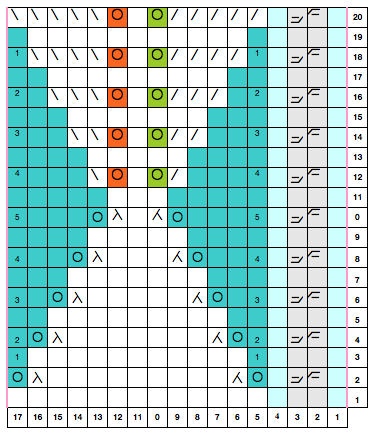
my first schematic (Excel chart)

screenshot_14

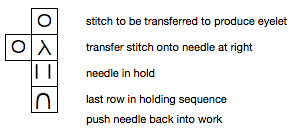
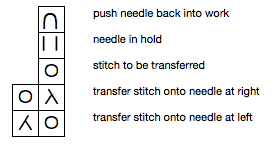
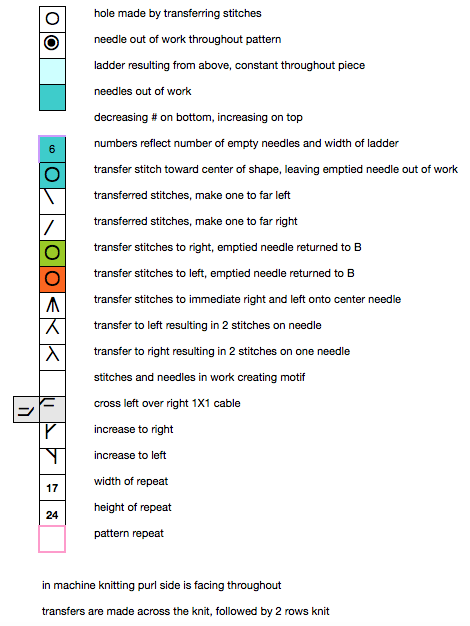
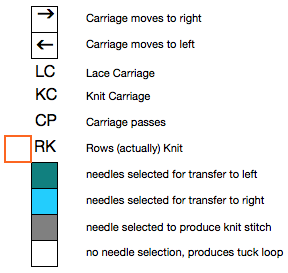
symbols used

symbols2

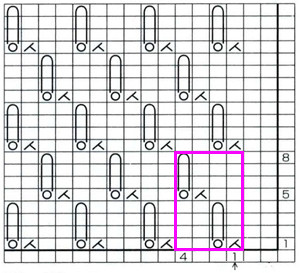
imagining in repeat

in repeat

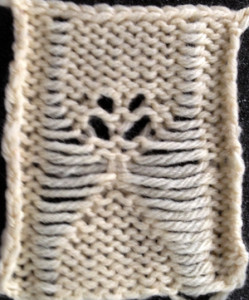
my first swatch

for decreasing stitches in work on the right or left at the top of the chart I used a simple decrease

edge_decrease

using the “fully fashioned” option to provide a different look along that edge

ff_decrease2

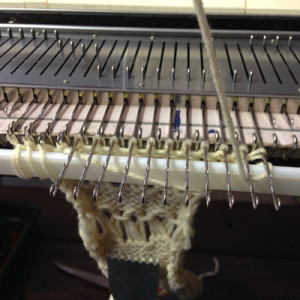
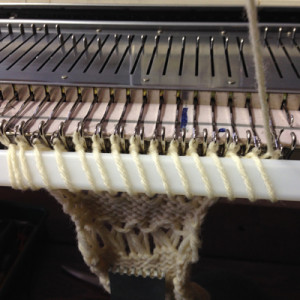
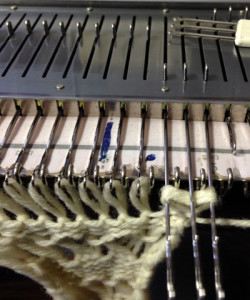
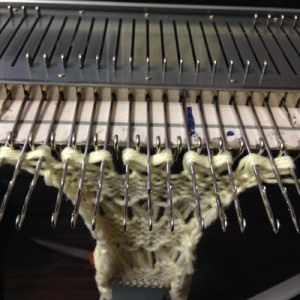
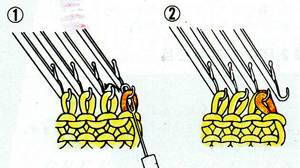
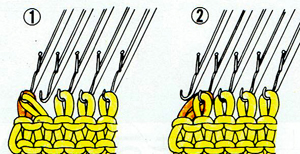
For my test swatch I used a crochet cast on across 17 + 4 for single full pattern repeat, + 4 edge stitches on either side = a total of 29 stitches. To create the transition  from 1 to 3 stitches in the center of the leaf,  I e-wrapped an additional 2  empty needles

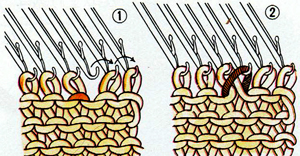
e_wrap0-2

#1 reflects the e-wrapped increase just above the cast-on, and #2 shows the results of the same technique at the top of the established “leaf” pattern

e_wrap1_2

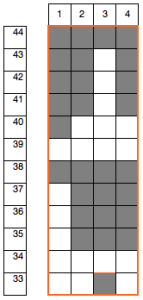
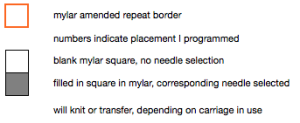
the chart repeat was amended for a different start

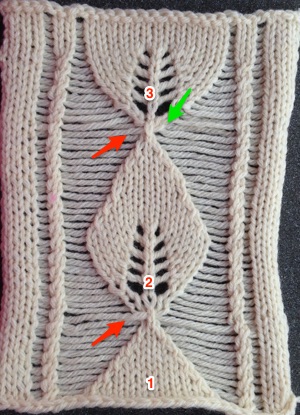
screenshot_15for the second swatch, trying a different way of adding stitches

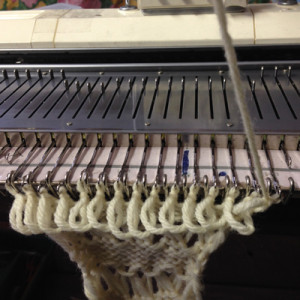
#1 shows a pattern beginning on a group of knit stitches, as opposed to a single center one for leaf

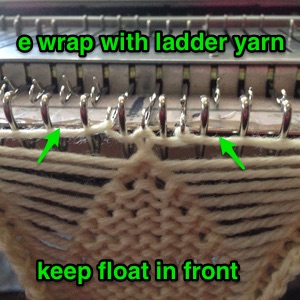
#2 shows a full “leaf” repeat as charted, the red arrow points to e-wrapped yarn traveling in front of the shaping

#3  the red arrow indicates the same is happening with the float, while the green shows my desired twist, with stitch to the front

300_92_2

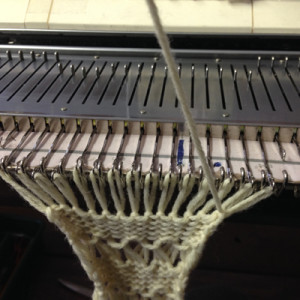
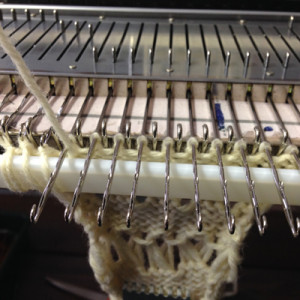
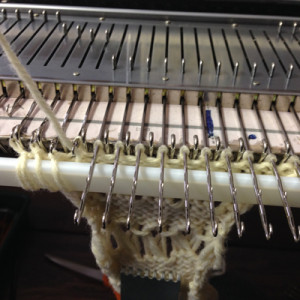
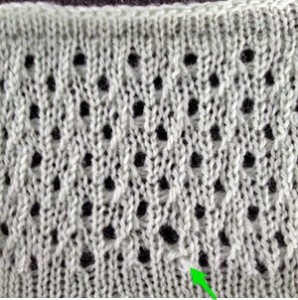
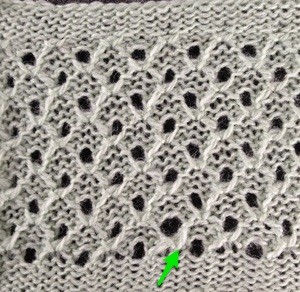
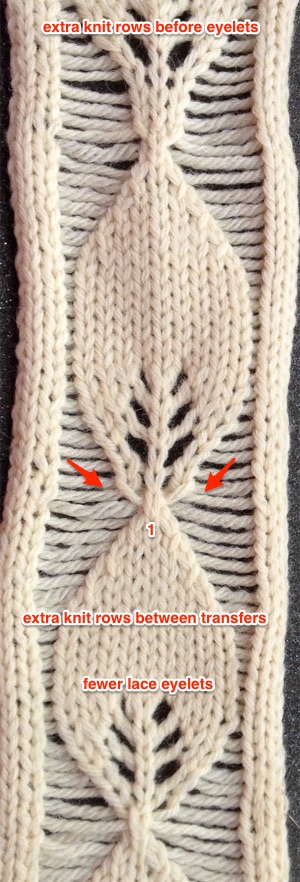
Sorting it out: a third swatch, with an amended way of e-wrapping. To make sampling quicker, I modified the repeat, eliminating cables, and decreasing the number of stitches at the widest part of the leaf, making fewer eyelet transfers.  The results show how much the shape of the “leaf” may be varied with just a few changes. Note the twist and location of floats in relationship to stitches just above #1

e_wrap4_2

I will document the 1X3 increase method I liked best out of several trials in my next post.

If having a single pivot stitch for the repeat is not important, the chart below is amended again to accommodate that

screenshot_16

if eyelets are eliminated to create a geometric pattern and/or for the sake of speed, increases may be created on both sides beginning on row 12 of the above chart by picking up from the row below

make_one

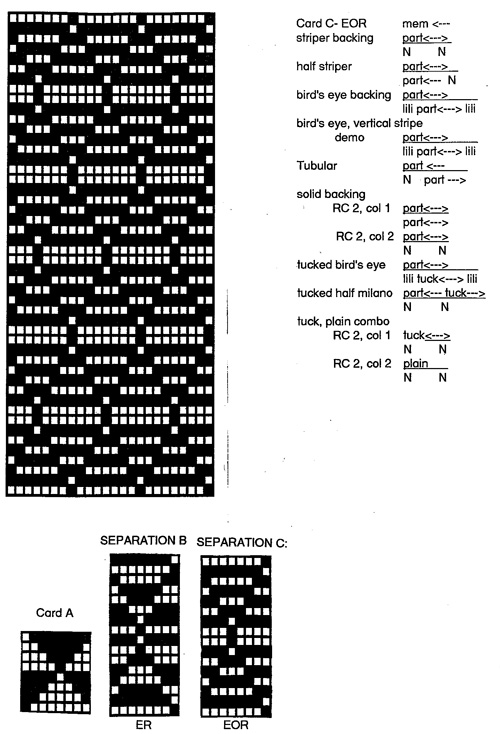
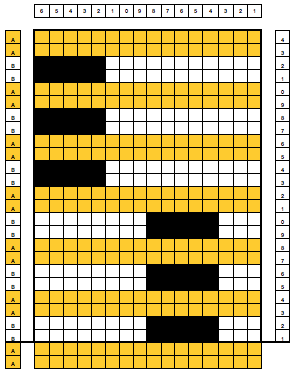
Studio multi transfer lace punchcard use on Brother punchcard machines

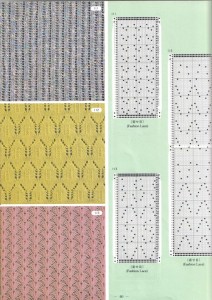
Some Studio punchcard patterns

studio cards

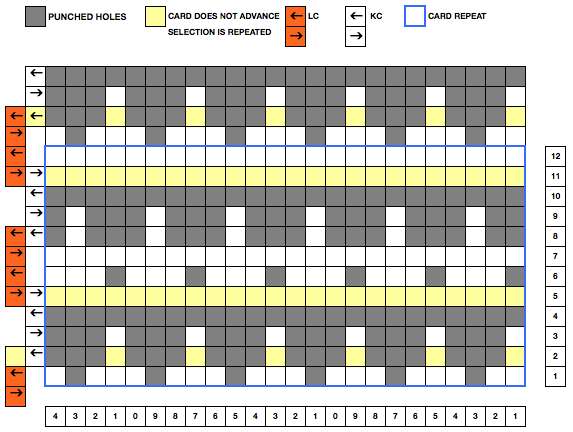
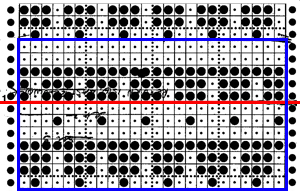
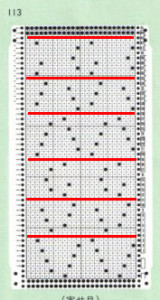
Pattern 113 (bottom left) has a single blank row between groups of multiple transfers (indicated by punched holes). These correspond with single rows knit at the completion of each set of transfers. They are highlighted with red lines in the related punchcard image below.

studio113crop

Essentially the same repeat, found in a different publication source, was interpreted for use in the 910 electronic in my previous post, nearly a year ago. Pattern 112 (middle left on the first image) has some noticeable differences. To start with, at the end of each set of transfers, there are 2 blank rows (red), as opposed to one in #113, making it suitable for use on Brother KMs almost “as is”. Studio punchcards for this type of lace generally begin with 2 blank rows (blue highlight). Brother cards generally begin with the first row of punched holes for row 1 of the pattern. The Studio first 2 blank rows would normally be moved up to the top of the punchcard if punching your own, or simply if the card is pre-punched, a different row # selection may be chosen for the first selected row.

studio112A

In the middle of the repeat, where the first set of transfers is completed, there are several (six) unpunched rows,

studio112b

and at the punchcard top, there are 4 blank rows. These last rows, added to the first 2 rows (blue) will total another set of 6 unpunched rows at the top of the alternating pattern repeat. These multiple blank punchcard rows result in knit-only rows when using Studio KM. In Brother, the knit carriage does not advance the card unless cam buttons are in use ie for tuck or slip settings. Generally, if multiple plain rows are desired, this is indicated in Brother appropriate row markings on the card, and need to be tracked by the knitter.

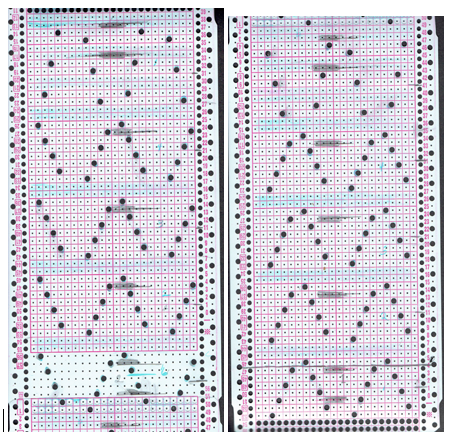
Lace cards generally require few punched holes but can be considerably longer. To insure 2 rows between each set of transfers I highlighted them on my card in light blue pencil, helping me place repeats properly. Following the highlighted markings above, the first 2 blank rows (blue) are dropped, a set of 6 is reduced to 2, and the top 4 (Brother lace usually ends with 2 blank rows) are reduced to 2 as well. My resulting punchcard is shown here in 2 segments that were to be joined with snaps for continuous use. I found in knitting the samples, that I was having a problem with the single row near the join being read correctly when using only snaps, the problem was solved when I taped the 2 cards together across their width. This particular punchcard roll was sold as for “Brother”, but markings are for Studio. Brother selection row 1 is marked on right. Thick pencil markings indicate the viewable point where rows are knit at the completion of each transfer sequence. These make it easier to know where to roll back the card to knit rows, as opposed to relying only on any of the row number markings. I prefer to unravel down to knit rows when correcting dropped stitches or other “mistakes”.

whole_card

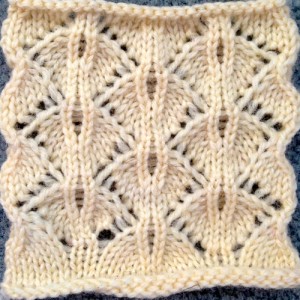
I omitted the extra knit rows (4 out of a series of 6) in my own sample (shown lightly pressed). This eliminates the visible break between eyelets in the knitting reference swatch jpg.

studio09

A WIP using the card showing the differences between “blocked” and not may be seen in the later post.


Machine knit cables: using patterning as a guide to transfers

If you have a machine that selects needles to the forward position, you may use a punchcard, mylar sheet, or program to select needles for indicating cable placements. On the single bed, the selected needles act as the signal to actually create the cable crosses. When working on the double bed, the needle selection on the row before the cables are crossed may serve to remind you to put extra needles in work on the ribber, thus providing some extra yarn for the crossings. Previous posts on topic

https://alessandrina.com/2011/12/19/aran-knits-a-new-thread/

https://alessandrina.com/2012/01/07/a-simple-braided-cable-and-card/

Keeping crossings all in the same direction and having ladders to mark vertical placements makes the process far easier. The stitches on either side of the cable may be knit, dropped every X# of rows, and latched up to create a purl ridge on either side of the cable, at times there is enough slack in the ladder created to achieve the same. End needle selection needs to be canceled (KCII) in any pattern with needles out of work. In simple patterns using selection to keep track, ladders are not needed to stay in a clear vertical.

An alternative repeat for combining 2X2 cables and 2 twisted stitches is illustrated below. The repeat is suitable for punchcard use, must be drawn in multiples to meet machine requirements (at least 36 rows in length). Spacing between twists and crossings may be far more varied in machines that use mylars or programs

punchcard repeatfor an all-over pattern

twists and crosses

for a 22 stitch repeat or vertical panel, with ladders added

ladder

22 st repeat

If using the ribber, stitches marked for “ladders” may actually be transferred to the ribber to create the purl ridges on either side of the cables and twists.

Pile knitting using Studio machines

I live in the northeast US, and the past few weeks have been taken up by a whole lot of time moving snow and not knitting or even thinking about knitting. A Raveler, however, recently asked about pile knitting which got me contemplating knit fabrics again. I thought I would start a thread here on some of the techniques and possibilities involved, editing, and adding further information as I can.

Pile knitting may be done on any machine. The quality of the fabric varies, depending on the method and yarns used. Loops are often created every other row, and “normally do not pull out”. They may be made either on the main bed or on the ribber. Some of the techniques result in a much looser fabric than others. In those instances, using a ground yarn that will felt, and slightly felting the finished knit will make the fabric much more stable. If it is to be used in garments, by default, it is best to make those pieces larger than required, and to plan to use them in cut and sew projects.

Beginning with the machine manuals and suggestions: in Studio/Singer knitting machines the ribber features specific options for such fabrics. These pages are from the Singer SRP-50 ribber manual and one of their punchcard books and share some principles while illustrating setting and card design. Food for thought on any adaptation for use on other brands

Two weights of yarn are used: a lightweight yarn for the pile, and a fine yarn for the background. The usual set up is for every needle rib, half-pitch. The finer yarn is threaded into the auxiliary feeder.

Studio machines use the P Carriage with the P pressor attached to drop the loops. If using a punchcard or mylar, the punched holes create the design, the unpunched holed knit the ground. The Singer P carriage information (from SRP60N ribber manual) singer_PCarriage

knit sample

500_481

500_482

Studio punchcard sets and Volume collections offer many designs and inspiration for DIY. A page from one of their collections

Toyota had a small accessory offered for knitting pile using the ribber and the simulknit setting. Both yarns knit on the main bed, the ribber only catches loops in the “S” yarn. Manual available for Toyota pile knitter 

Kathleen Kinder was credited with first using FI designs for pile knitting, resulting in loops being created in every row rather than every other. In the method, loops are still required to be dropped after every row. Cards with bold areas of each color are most suitable. Since the fabric has a tendency to spread horizontally, doubling the length may become necessary if the goal is to retain more of the motif shape.

A natural follow up is to use double jacquard cards and color separations to achieve multiple color pile. A color changer is a must when using multiple colors. Loops will be formed every row here as well, may be dropped every row, or just before each time the color is changed.

Pre-selection of needles in Brother poses an interesting problem: patterning needs to be retained, dropping stitches disrupts it, and there is no accessory such as the P Carriage to make the process quicker.

Cables in color

Fair isle, like any slip stitch fabric, is “shorter and skinnier” than any produced using the same yarn colors in plain knitting, single bed. Cables also narrow the fabric considerably. Begin with tension set at least 1-2 numbers looser than usual, and make tension swatches large enough to include all cable variations. After the cable crossings, be sure to return the needles to correct pattern selection before knitting the next row. Do not pull the whole group out to holding (E), as the whole group will then knit the color in the B feeder, and you will have a striped “mistake” on the next row knit. Leaving any needles OOW in the knit will select the needle on each side of the ladder to come forward, knitting the color in the B feeder. This may not work for you in terms of how the motif is affected by the vertical line created. If ladders are required, the vertical line in the B color may be eliminated by canceling end needle selection (KC II), or by dropping those stitches before you cable (which will give you a bit extra yarn for those crossed stitches). Ladders may be also latched up if you like, but watch where those floats are going in the fabric.

Making your own cards: try to control the length of the floats. Pre-punched cards with lots of punched holes can produce areas to be cabled by selectively masking areas with tape (both sides of cards). Conversely, you may punch diamonds, squares, etc. in the center of other shapes that would normally have floats too long for FI, to produce a B feeder color area for cabling.

Like color, most often, needs to land on like color, so stitches need to move further than they would in a one-color knit. Reversible ribbed cables share the principle of like needing to land on like (knit on knit, purl on purl). Starting out with a single row punched card, mylar, or program repeat, with the card locked, provides a quick test for tension, keeping track of patterns, etc. There are many, so at least initially, cabling on a constant number of rows apart may help avoid errors.

beginning to visualize the crosses

FI cables2

another of my “quick reference – some to try” handouts

color_cables

Machine knitting cables: single bed, introducing the ribber

Using two beds is the obvious means of creating a purl ground in combination with your cables, it will be addressed in later posts. If you are trying to cable more than 4 stitches on the main bed, using the ribber to provide extra yarn for the cross over may solve problems in accomplishing the cross. The ribber needs to be set at half-pitch the row before the cables. Needles on the ribber are kept out of work until that row, pushed up to work position, and the row is knit. The loops formed on those needles are then dropped off, the ribber needles are put out of work, and the cables are crossed. The main bed knits until the next row before the cable crossings are once again due. I have recently begun to use water-soluble markers to mark needles positions on metal beds clearly for help in keeping track of locations for specific manipulations.

An illustration of 2 (or more) possible places to pick up extra yarn for a 6 stitch cable crossxtra_yarn

Below is a revision of a punchcard used in a previous post to track crossings for 3X3 cables, with punched holes added, taking into consideration locations for picking up extra yarn on the ribber. After 2 needles are selected on the main bed, one needle on the ribber on either side of them is brought into work. As the carriages knit across, the ribber needles pick up loops, while 6 needles are selected indicating the location of the cable cross on the next row. Ribber loops are dropped, and the needles creating them are returned to out of work position. The cable stitches are then crossed, and knitting resumes, continuing until needle selection once again indicates that an action is required.

IMG_1681

An alternative solution: reverse the beds, with the ribber doing the knitting. A card may then be drawn to select needles for picking up those extra loops, now on the main bed. The knit carriage is set to slip throughout. Punched holes (or programmed pixels in downloads, black squares in mylars) will preselect in Brother KMs, not only keeping the needle selection error-free but also tracking rows knit between cable crosses being made. Brother ribbers tend to knit more tightly than main beds, so tensions will require adjustment as well. With a bit of planning ahead and doing some “air” knitting, all needles not involved in picking up the extra yarn may be noted and placed out of work. Only the needles for selection will remain in work, thus making it easier to drop the loops formed on them during knitting.

This method allows for creating the cables while retaining a somewhat tighter tension. Since the ribber carriage has no wheels or brushes to help hold the knit in place, weight must be used. Too much of it will lead to more frequently dropped stitches. It is always good to bring cable group stitches out to holding (E) in order to visually check that transfers have occurred properly,  and that there are no dropped stitches before continuing to knit.


Some cables to try, hand knit

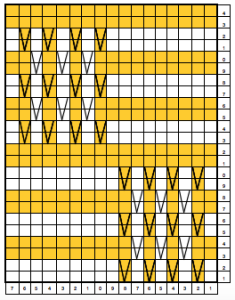
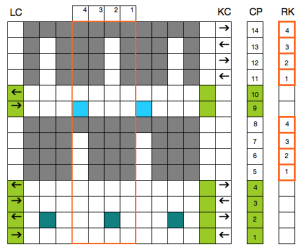
The first repeat below is for a vertical cable panel 24 stitches wide, 12 rows high (2 repeats shown); within the repeat, odd rows are all knit, even rows are all purl. Colors are indicative of cable crossings.

Borders in the swatch, or area in between multiple vertical panels, may be worked as 1. purl on even-numbered rows, knit on odd-numbered rows to create a purl ground behind the cables on the “right side”, or 2. knit every row for garter stitch in same areas.

Abbreviations : RS: right side, WS: wrong side. CF and CB indicate where the cable needle (CN) is held during the process.

CF: CN to front | LC: Left Cross, cable leans toward left

CB: CN to back | RC: Right Cross, cable leans toward the right

Dotted borders in chart outline columns 3 stitches wide; all cables in the sample are 3X3 crosses.

An alternative way to picture things: numbers on the left of the chart below indicate row numbers; on the right, they indicate the number of stitches knit before crossing cable stitches begins on that row

the hand knit swatch

IMG_1656Adding a purl stitch ground: a shortened chart using Aire River Design font, odd rows only shown

screenshot_02

screenshot_03

using color in Excel, showing every row

screenshot_04A

screenshot_03Avisualizing multiple repeats

in repeat

a very quick, hand-knit test swatch, knit with needles a bit too large for yarn used

300_1658

another possible charted in Excel, multiple repeats shown

screenshot_13

If patterns are for publication in specific venues, conventions in symbols may, or should have to be observed. To keep track of personal projects we often differ in what format or shorthand makes the most sense to us. If the like of the above result appeals to you, I am sharing a workbook with pertaining puzzle pieces. I find working at 200% magnification is the easiest for me, which may be easily changed to suit.

cable_purl_share

PS: My working palette in the original document was as seen in the images above. You may find some of the colors will be different in your download, depending on your computer. I have read on other sites in the past that the color change can be an issue in excel knit charting downloads. The image below reflects such a change. It is a quick capture of part of the chart when I tested the download myself. The large color blocks are the ones affected and may be easily changed to match the cable crossing colors.

color change