Questions regularly turn up asking what software we use as individuals to design repeats for our knitting. Up to this point, I have worked exclusively on a Mac unless downloading to my Passap with Wincrea, an ancient laptop, and as old a version of Windows.
I have been a Gimp user for eons, it is my go-to along with Numbers to create the charts in my blog and to graph my designs and ready them for download.
ArahPaint is a free paint program, part of a far larger weaving one. I have used it intermittently for features not achievable in Gimp at all, especially prior to its latest Mac updates. My Gimp working notes may be found in blog posts including the latest 2021/07/18/gimp-update-for-mac-2/.
The scope of AhrahPaint is smaller than that of a full photo editor, but its functions are well worth exploring from simple designs for use in any craft including hand knitting, cross-stitch, etc for scaling images to size, drawing in repeat, configuring those repeats in many arrangements easily, for color reductions, and much more for end-use in machine knitting.
There is a very good downloadable manual, but not generous in providing small details applicable when working in a low-res bitmap such as that found in knit design.
My goal here is to provide some starting ideas on using the program for new users and a few comparisons to Gimp features for those who have worked with that program in the past.
Links for anyone wishing to try Arahpaint on a Mac (or Windows), including video tutorials
Sept 20, 2021: a new version of the software is now available for download, it is larger in file size https://www.arahne.si/learn-support/software-demo/
A “fast pattern” supplement http://www.arahne.eu/pdf/fastpattern-EN.pdf, black and white images are used on pages 20-24,
The user manual appears unchanged
The drawing in the repeat window now offers new Preview, and Browse options. If Paint is part of the complete weaving program, there is a library of patterns for the user to browse through. If it is used as a stand-alone, the choice provides the opportunity for the user to browse through their library of images before continuing. 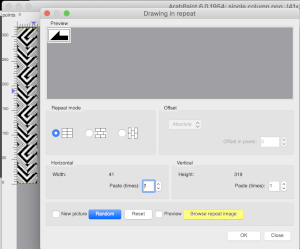 The information available to me as I began this post:
the download button is at the top left of the webpage
https://www.arahne.si/…/softwar…/arahpaint-for-mac-os-x/
https://www.arahne.si/learn-support/
https://www.arahne.si/…/user…/detailed-users-manuals/
http://www.arahne.eu/pdf/apaint4-shortcuts-EN.pdf
https://www.youtube.com/c/arahpaint4/search?query=arahpaint
https://www.arahne.si/public/news/ with more info and videos on version 6
https://www.youtube.com/watch?v=daOsTulCKbk for anyone inspired by weaving drafts as a source of knitting pattern repeat
Arah menu options provide a quick view of menu differences between it and Gimp 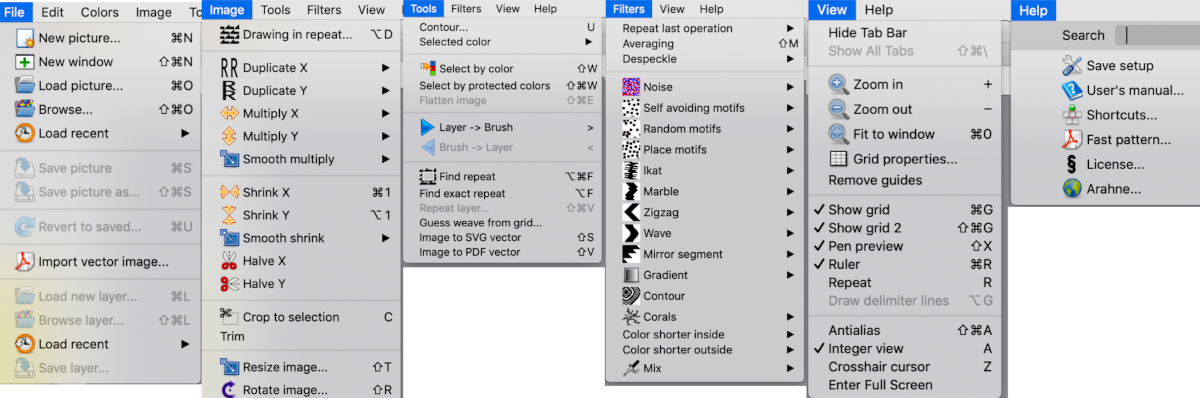 Tools as listed in the shortcuts pdf, the order is slightly different than in the program view
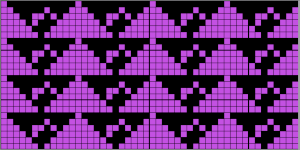
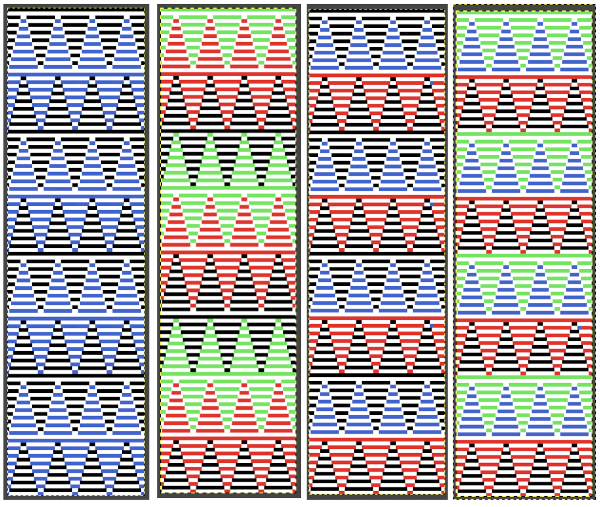
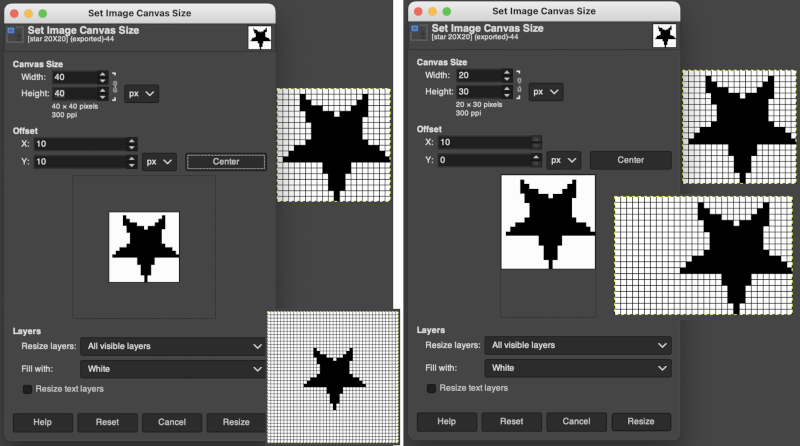
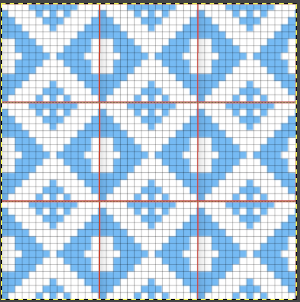
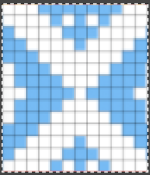
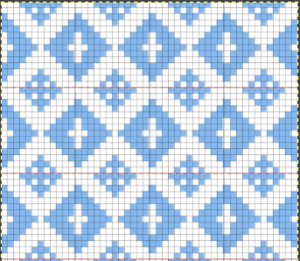
 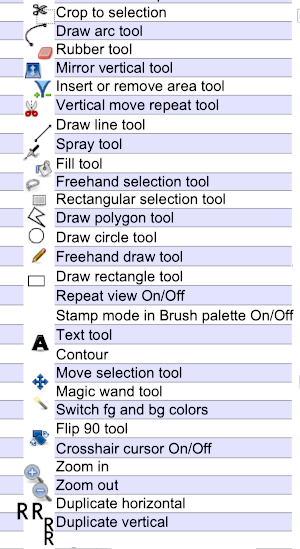 When exploring design potential in any paint program, it is best, to begin with, to use a small repeat that can be clearly identified when tiled in various configurations, resized, and pixel edited. If drawing is with the goal to produce a BW bitmapped image for download of 2-color patterns, drawings can happen in those colors to start with. If color separations are planned in the development of the design, then 2 color images including black may be preferable.
The Arah default dot size for pixel drawing is 1X1. The 8-bit palette mode both for colors and greyscale uses up to 256 shades, greyscale values may also be measured in percentages of black ink coverage. Images may be converted from one color mode to another as in Gimp.
Begin with a small image size 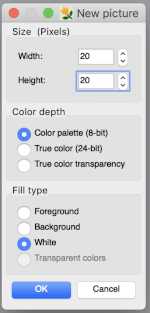 To work on the image, magnification will be required. This may be achieved several on the Mac, one is to click repeatedly on the magnifying lens icon in the toolbox, and the other is to press any number from 0 to 9 on the keyboard, and the zoom will instantly change for 1 at 100%, to 6 for 600%, to 0 for 1000. The latter is minimal for building repeats on a viewable grid, the magnifying lens may be used to reach a comfortable starting view. The zoom level for both increases and decreases may be changed during drawing operations as well.
In addition, the image may also be magnified to fill the window or by entering the full-screen selection on your monitor 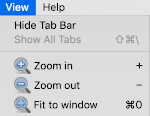 and the program may be used in full-screen mode on your device by making the very last selection in the View menu.
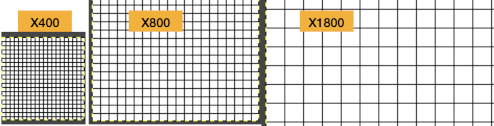
 ![]() At zoom levels higher than 300%, the program shows a grid between pixels, if the grid view is enabled.
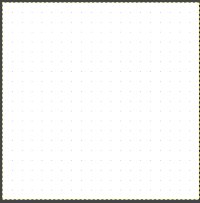
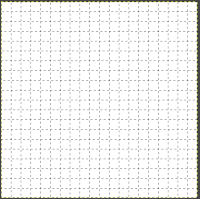
At zoom levels higher than 300%, the program shows a grid between pixels, if the grid view is enabled.
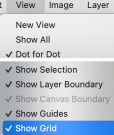
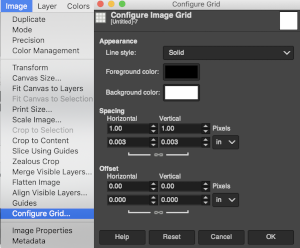
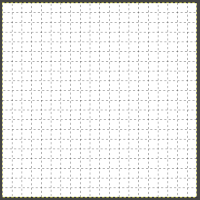
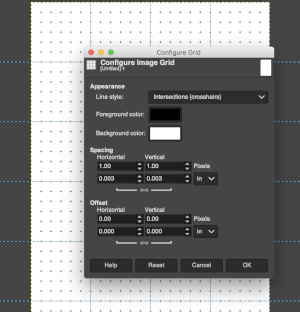
To show or hide the grid, choose View, Show Grid
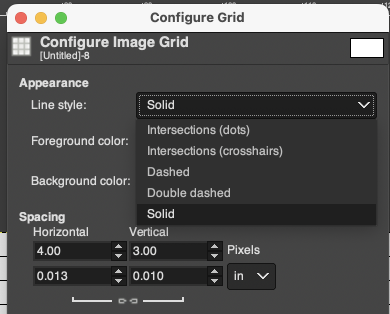
To change the grid properties, choose View, Grid Properties
The grid color can be black, gray, or white.
The second level grid determines how many thin lines a thicker one will be drawn
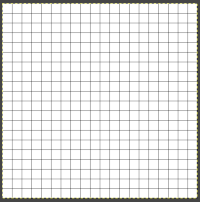
Setting the grid: the default grid is subdivided, and grid color and spacing may be custom set through selections in the View menu 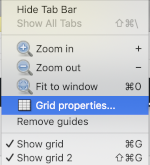
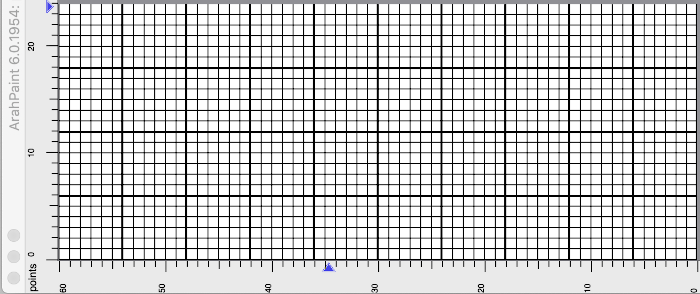
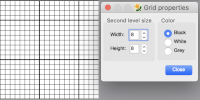 Altering the thicker line placement to suit personal preferences or to match electronic or punchcard published repeats more easily, simply type in new values and close
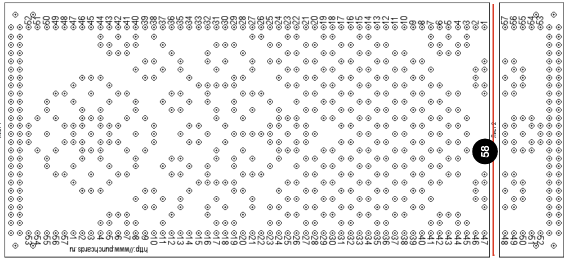
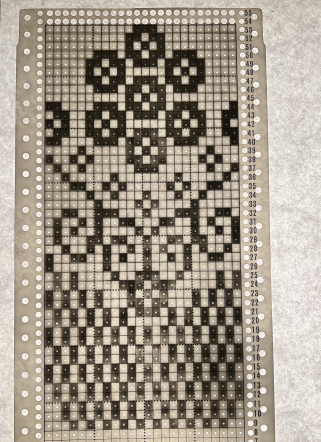
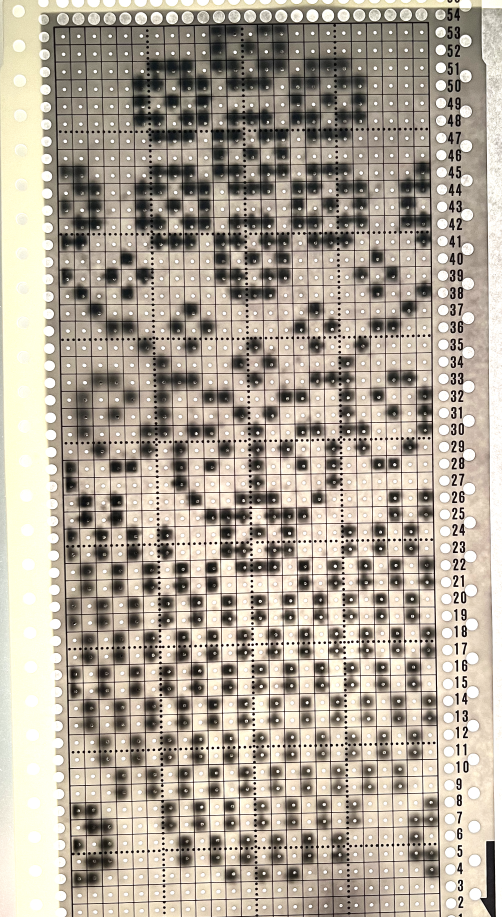
 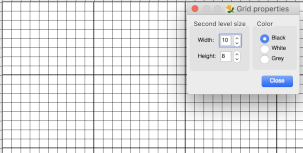 Punchcard knitters may use this feature to create a template on which draw. Factory-supplied Brother punchcards are by default 24 stitches wide, the maximum repeat width, and 60 rows high with the minimum design height of 36 rows for the card to advance continuously in the card reader. The grid spacing is 6X6. With values changed to 6, the template is created
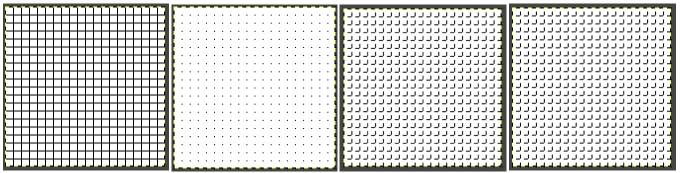
 The default cell shape appears to be square, without the option to create rectangular cells. Changing the grid option to lose subdivisions: deselect show grid 2.
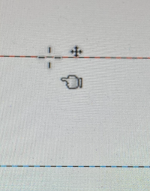
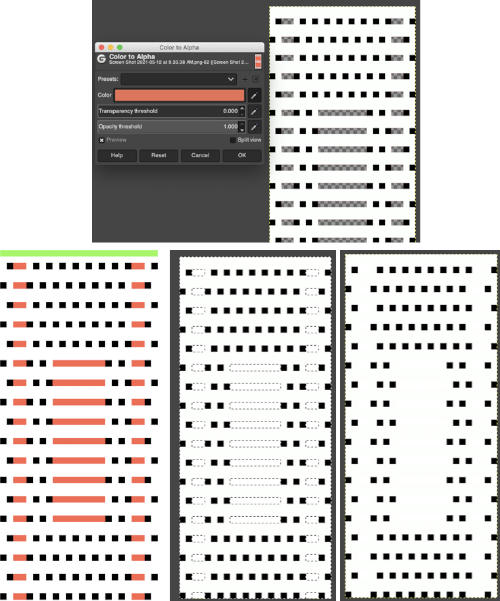
 In addition to the image grid, like Gimp, ArahPaint 6 also allows for positioning aids: guides. They are horizontal or vertical lines that are temporarily displayed on an image. To create a guide, double-click on the dark blue arrow displayed on one of the rulers in the main window. The guide is then displayed as a dashed line following the pointer. To move a guide after it has been created, hover a mouse pointer over the blue arrow and click and drag it to remove the guide to a new location. To delete a guide, double-click on the arrow. After a guide is created, another triangle in a different shade of blue appears below it. Use that to create the next guide, repeat as often as wanted both horizontally and vertically. To remove all guides choose View, Remove Guides.
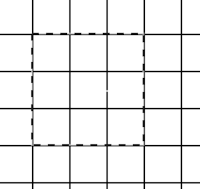
 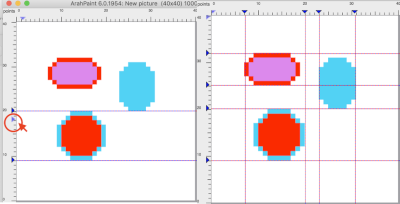 One use for the lines can be to mark plain knit rows between transfer markings in lace punchcards as illustrated in this Gimp image
To test the program, draw a basic shape whose changes may be easily recognized. Color palette tools are in the palette areas.  The foreground (upper square) and background color (lower square) are used in drawing operations. They are numbered 1 and 0, not to be confused with the same numbers assigned to colors in the working palette. The starting palette may be altered to include black. Double-click on the foreground color at the top, the #1, not in the space below the palette icon. A color selection window will appear, choose, and click OK. This change is lost if one quits the program.
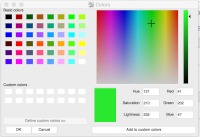
 If satisfied with the drawn repeat, use the selection tool to isolate the final motif.
![]() The new working image after cropping to selection:
The new working image after cropping to selection: 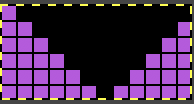
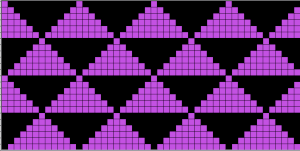
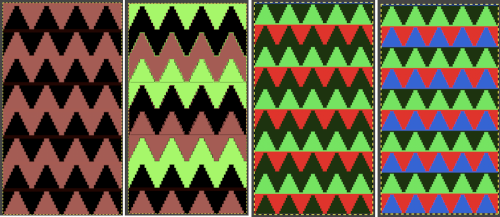
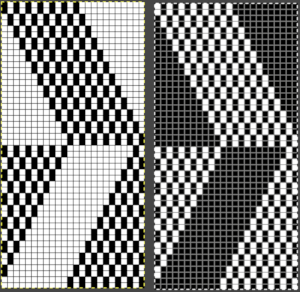
Drawing in repeat instructions reproduced from the manual  Starting with the single triangle: block alignment
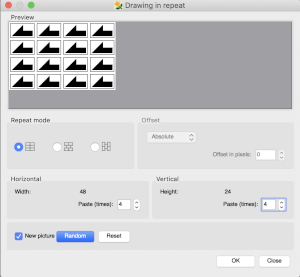
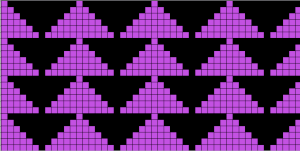 Standard brick alignment using offset in pixels
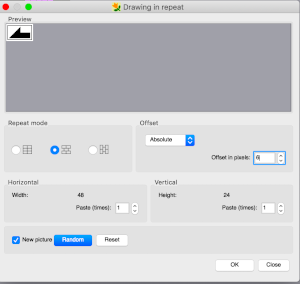
 Pillar repeat also using offset in pixels
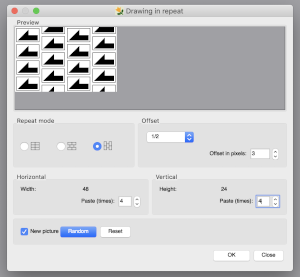
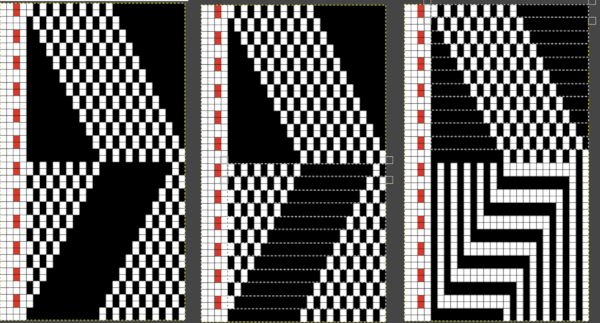
 Other offset options through the use of fractions
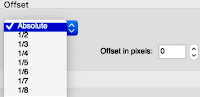 Playing with mirroring positions, producing a minimum 2 by 2 repeat,
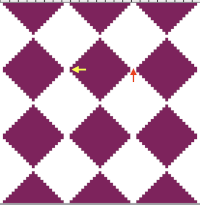
 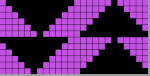 the result looks akin to the pillar repeat drawing above, but tiling again to check for alignment may yield surprises that can be viewed as design features or errors,
 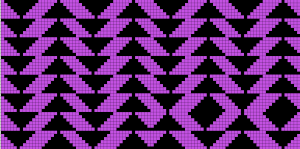 Changes to mirroring arrows may be made when drawing in repeat on the top left of the window as well
  Once an image is drawn in the repeat of your choice, if only the Random option is used, with new picture left unchecked, the pencil may be used to draw on pixel cells, and changes will be made across all repeat segments. Each step may be undone individually.
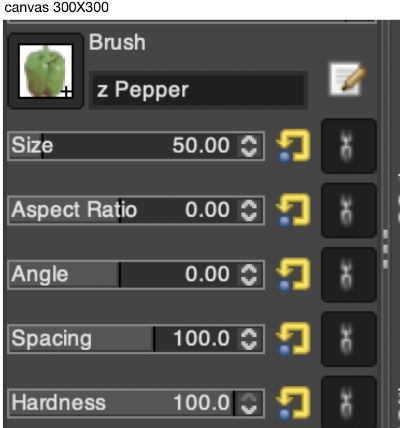
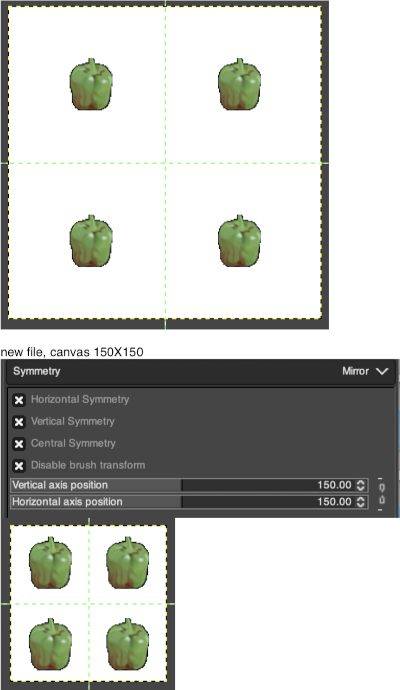
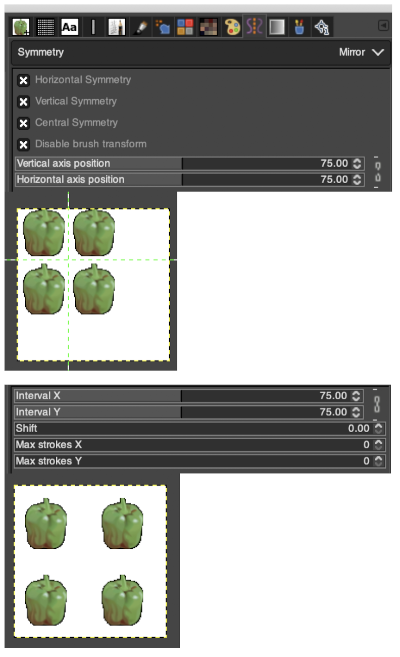
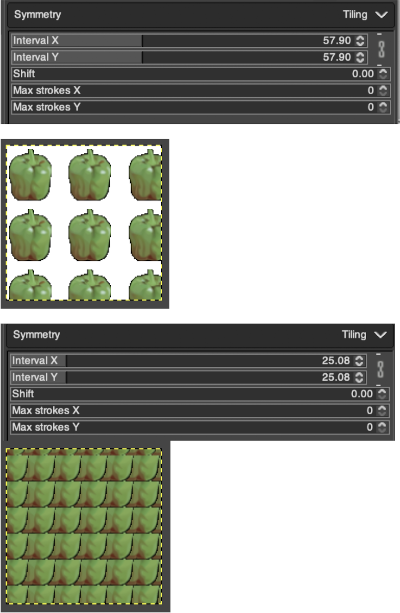
 Many of these functions are paralleled in Gimp symmetry drawing.
The possibilities are endless. As always, good note-taking helps in being able to reproduce your chosen process with new images.
If you begin drawing a repeat using a single color on a white ground, then decide you would rather work in only black and white, simply double click on the foreground color, the palette window will appear, choose the new color, and all pixels in your repeat will then change to the selected one 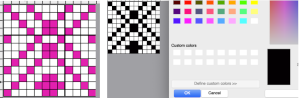 Repeats may be built in a more controlled manner using the image/duplicate X menu,
  its symbols immediately reminded me of the Passap Alter Direction options:
 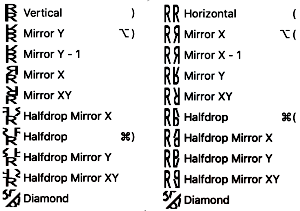 Choose a simple repeat to start with. Here a diagonal line was drawn along the center of a square, the bottom half bucket filled
  a half drop was added
 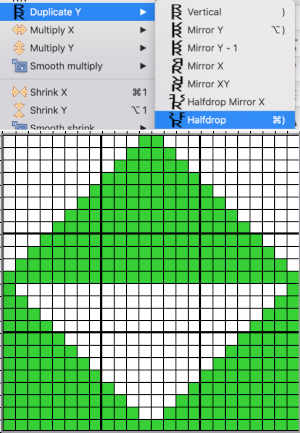 and the repeat was tiled to test alignment
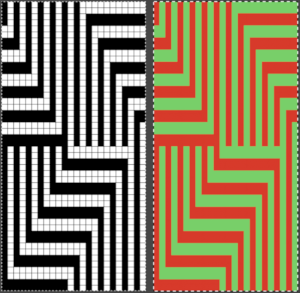
 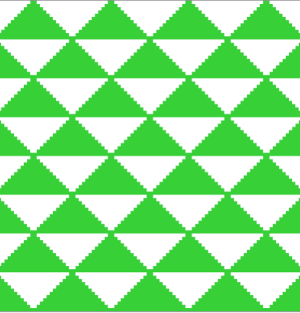 The duplicate tool enables the repeat of an image or part of an image in a fast way. All duplicate tools with the exception of Mirror X-1 and Diamond work similarly to the drawing in repeat tool if the new picture option is enabled. The mirror X-1 works the same as the normal mirror, except the last pixel of the image is omitted from the image
  there is also the option for Y-1, here both mirroring options are in use, note the areas in both that retain double pixels,
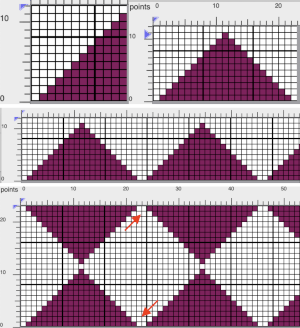
 Eliminating those double pixels can be achieved by cropping. The first mirror is for Y-1, the cropped image is tested for tiling by drawing in repeat
  Drawing lines: use the straight-line icon button to activate the tool, select the line thickness by selecting a number of pixels to be used then move the mouse pointer to a line starting point on the canvas and press the left side of the mouse, dragging it until the line is of the desired length and angle. When the line is at that desired length release the mouse.
A=1 pixel, B=2, C=4 with line dragged and released randomly, D= the line was moved and the mouse was not released until the steps were all the same size.  The thick lines option works only at line width 1, which will keep the single pixels connected
  If you double-click on the line icon, the Straight-line icon is activated. Now you can draw horizontal, vertical, or diagonal lines. If you move a mouse horizontally—it doesn’t need to be perfectly straight, the drawn line is horizontal. If the angle between a line and the horizontal axis exceeds the angle of 23 degrees, the drawn line will be diagonal at 45 degrees. If you move the mouse toward the vertical axis, the line will be drawn as a vertical line.
 The straight-line tool may be used to draw clean diagonals. If the paint tool is then used to fill spaces between some of the drawn lines, the line tool reverts back to the original and will have to be reactivated if you wish to continue using it.
The polygon is a series of straight lines whose ends are connected so that the end of one line is the beginning of the next. Move the mouse pointer to the starting point and left-click.
Move (not drag) the mouse to the next point and left-click again, repeat this step until the desired polygon is drawn.
Press the right button to stop the polygon drawing or the middle mouse button if available to erase the last polygon point.
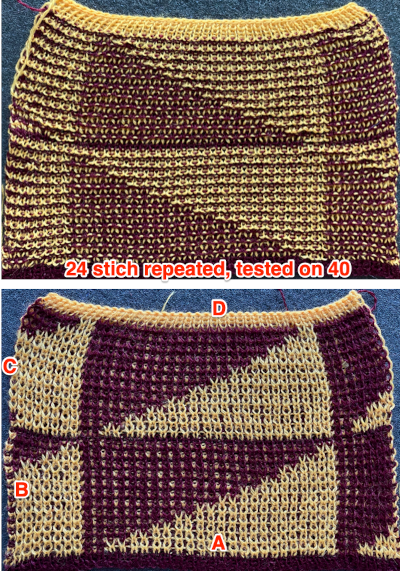
Returning to patterns with repeat constrained
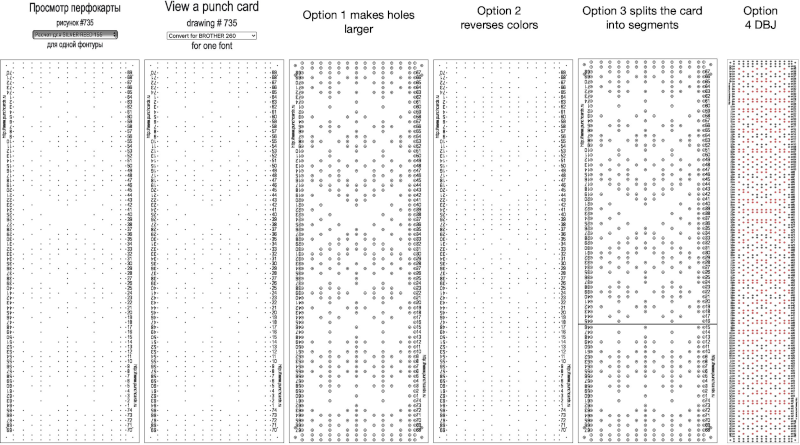
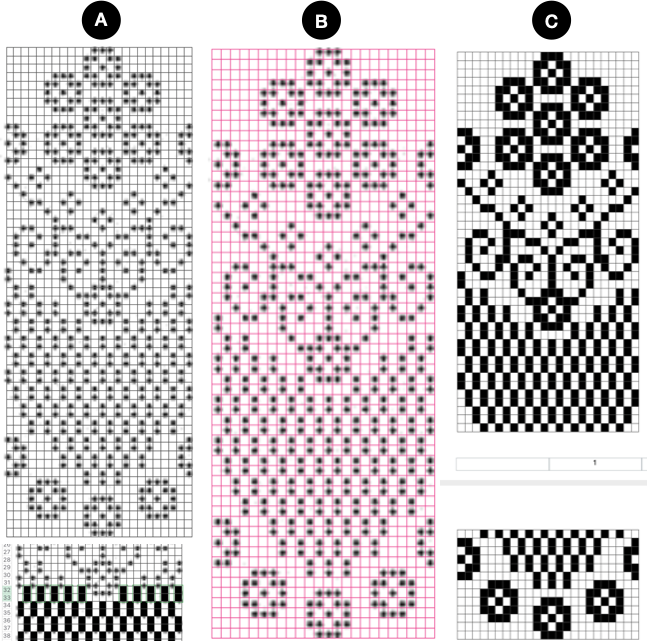
A: a new file is created for drawing a punchcard repeat 6 stitches wide by 60 rows high
B: a freehand-drawn pattern
C: the motif is drawn in repeat, X4 in width to match the 24-stitch repeat, and X2 in height to get a sense of vertical alignment  D: as long as the new picture option is not checked, the image allows for live pencil drawing, E, with additions which may be edited and undone if needed. Work until satisfied, screengrab the enlarged image if the goal is to use it as a guide to punch cards, and scale print it to an easy-to-follow size. Electronic machine knitters use the Tools, Find the repeat option to isolate the minimum programmable final repeat, and exchange colors if needed
  The same process, using an 8X8 repeat drawn in repeat X3 in width to 24 stitches and X5 to 40 rows in height meeting the punchcard minimum height
 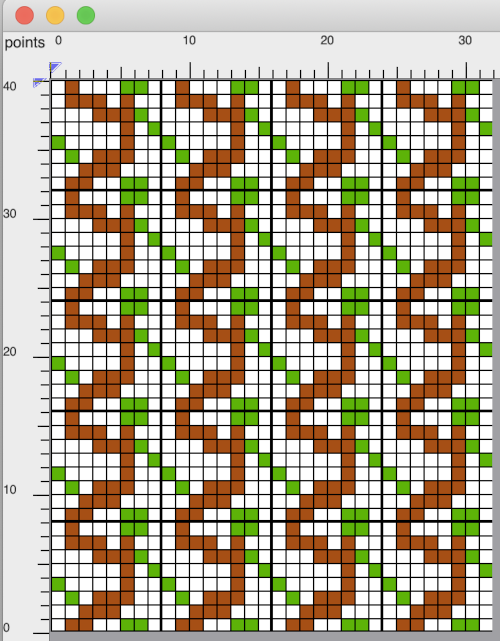 Again, electronic machine knitters use the Tools, Find repeat option to isolate the minimum programmable final repeat, exchange colors if needed
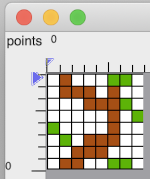
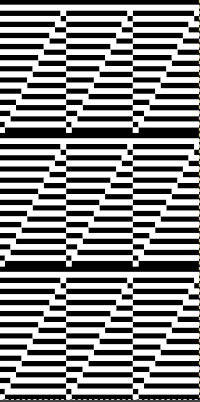
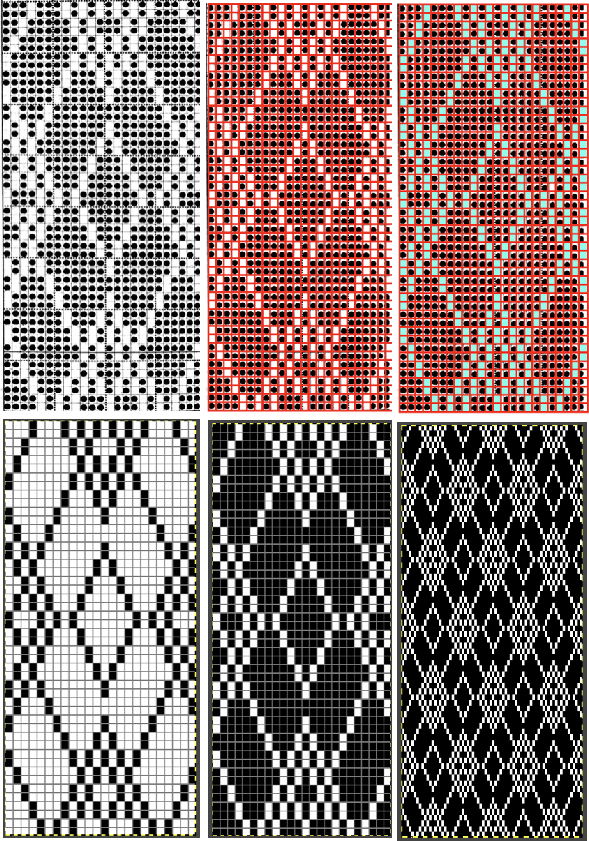
Many knitters find inspiration for knit designs in weaving drafts. The Arah Youtube video on developing drawings for such repeats shows an option for preview in the draw in repeat window not available in my present version of only ArahPaint. The resulting working repeats are likely to be large. Reset allows for changing repeat mirroring arrangements. Using find the repeat may help develop a sequential series of repeat segments in different sizes, producing different tiling effects, and the option of hand selection of even smaller areas followed by cropping and processing is always possible.
A sample effort producing a tenfold repeat of the original: 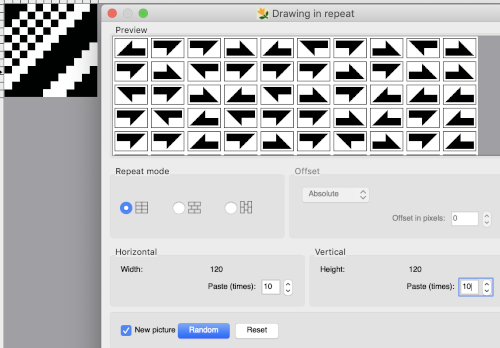 Finding the repeat first on the complete resulting new image on left and testing its tiling, followed by finding the repeat again, cropping to the selection, and tiling that as well on the right
  If the goal is to knit a scarf, 72 stitches wide, crop either repeat to a chosen 72 stitches in width, tile in length in either program to visually check alignment. If knitting in DBJ for approximately 1200 rows is the goal, one may obtain a visualization of the results ie for 1296 consecutive rows.
  A black pixel border could be added to the 72 stitches by copying and pasting the image on a larger canvas that will accommodate that border, or the border may be added by filling in pixels vertically to the edges of the original. Some repeats to play with: the 120 X 96 png
  Its shorter, top half
 ![]() The bottom half, 120 X 48, isolated in Gimp,
The bottom half, 120 X 48, isolated in Gimp, ![]() tiled in length X4 to get a sense of some of the possible differences I c
tiled in length X4 to get a sense of some of the possible differences I c I can see the process becoming addictive once a single personally pleasing starting repeat is developed, and its, in turn, becoming a possible source for collections of designs.
 ![]()
 October 2021: I have recently purchased both a PC and DAK software. At the moment I am not planning the purchase of any cables, the initial patterns developed using the lace module are adapted for use on Brother electronics for proof of concept swatches. Arah is an easy, accurate, quick way to develop accurate brick repeats for lace patterns, which can be complicated to produce accurately in other ways. One such repeat
  December 2021: in reviewing my post including lace mesh repeats, using the draw in repeat figure in Arah provides a quick way of filling in punchcard repeats from small electronic repeats for any fabric ie this lace repeat, 4 stitches wide by 8 rows high.
 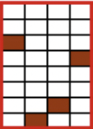 Create a new picture in the same dimensions, fill in the proper cells
deselect the pencil tool by randomly clicking on any other tool
draw the repeat as given, 6 times in width, 5 times in height for a card 24 stitches by 40 rows in height, making certain the pencil tool is no longer engaged or cells will be filled with any contact with the new image, adding cells in repeat and changing the original file
grid properties may be changed to match markings on factory-supplied blank cards, for Brother every 6 cells 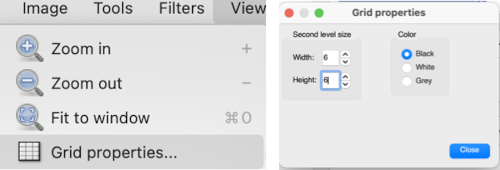 The resulting punchcard image
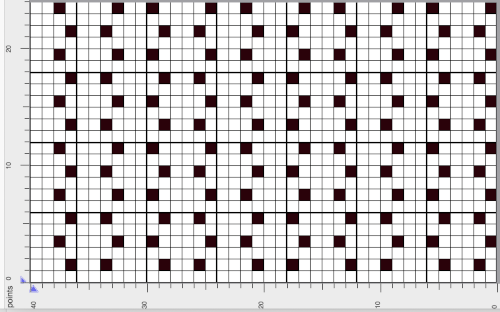
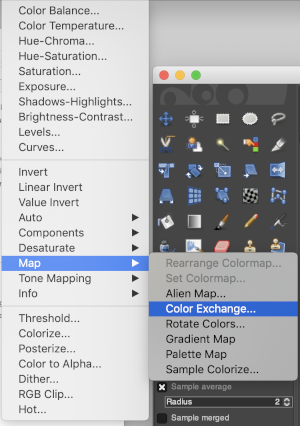
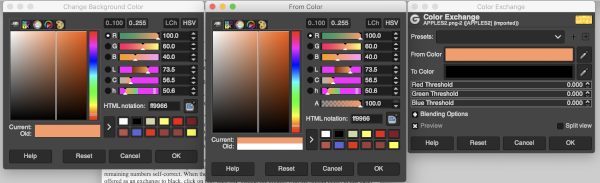
COLOR EXCHANGE
In the process of reviewing old Passap files in cut format, the conversion for some of them to .pngs using Graphic Converter on the Mac was successful but left me with oddly colored images that would, in turn, need conversion to black and white for 2 color knitting downloads to other machine models. I have had limited continued success with the color exchange in Gimp. Also, pixel-based images drawn in color in spreadsheet programs such as Excel or Numbers might need far less and quicker editing using the Arah option including reducing “clean up” with pencil tools.
Reviewing the palette tool, from the manual 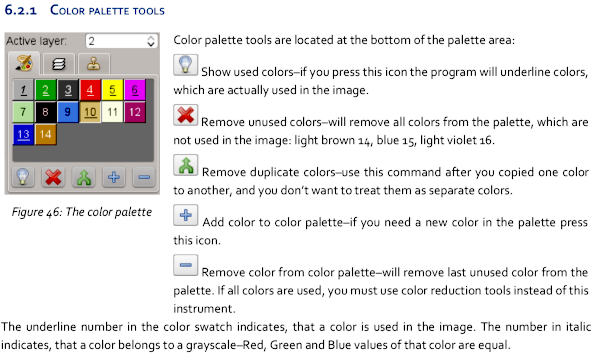 Double-clicking on colors in the palette area will lock them, if this is unintentional, simply double-click on the same color again to undo it.
  The color exchange was easy and straightforward with self-drawn images in the opening palette when creating new documents in Gimp. It failed when working on a segment of published patterns. The Arah manual helped me find the solution. Converting the images from true color mode to color palette mode: the original image and its palette, this is not a “correct” working repeat,
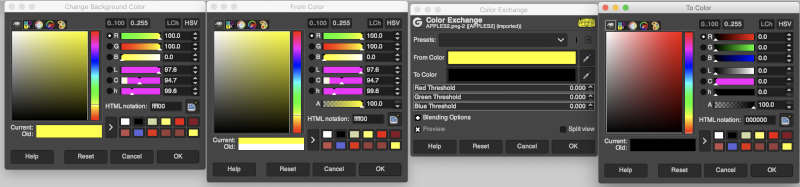
  Converting for use with an expanded palette
 To change the color of the foreground, double click on it, choose black from the upper left corner of the colors window, the image and its foreground color will change accordingly.
  Repeat the process with the background color changing it to white,
  saving the file yields a quickly created png for use in downloads to programs such as img2track
  Testing with a repeat segment from another image
![]() The successful exchanges
The successful exchanges  Spreadsheets such as Excel and Numbers are familiar to many as design tools for developing knit repeats. If colors are used, one is faced again with the necessary reduction to black and white pixels if the intent is to work in only 2 colors. The maximum of 3 and 4 colors per row in machine knitting are handled differently depending on the program used for download. Color exchange reduction with 2 images drawn in Numbers using more than 2 colors:

 This repeat would work fine with a reduction to 3 colors, but the proof of concept uses a reduction to 4 colors for both repeats. The two shades of green will need to be exchanged separately, each shade is processed using the sliders on the far right, also note the crosshair.
 A spreadsheet pattern for different end-use.
  To exchange the red the cross-hair was moved to the bottom right, and the slider up to the top
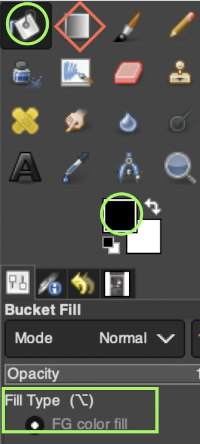
 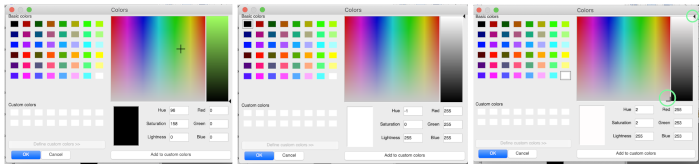 2022 Gimp update offers a selective way to exchange colors using the fuzzy-select or select-by-color tool. The bucket fill color works differently in some ways from previous Gimp versions.
 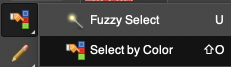 Fuzzy-select will change any contained segment of an image in RGB Mode. Make the selection of the area to be changed, it will become surrounded by a dotted line. Choose bucket fill, change the foreground color to the new one and click on the outlined area, to the new color. Click on the rectangle tool and then anywhere in the work window to set the image and save it.
 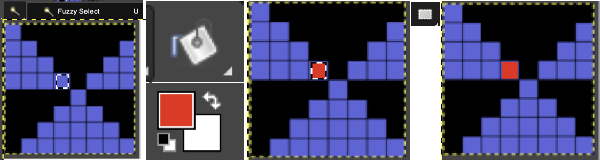 Multiple color exchanges in the same image.
  Edit, and undo can be used to trace steps backward at any point.
Using select by color will select all areas containing that color, making global edits, 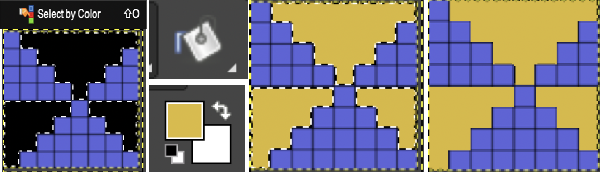 the process may be repeated within bordered segments, retaining their outlines.
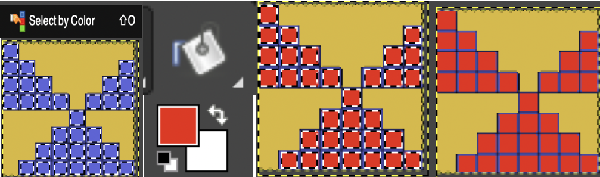
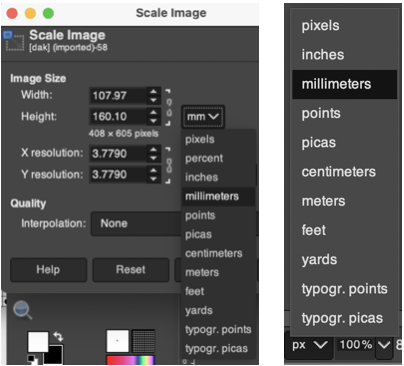
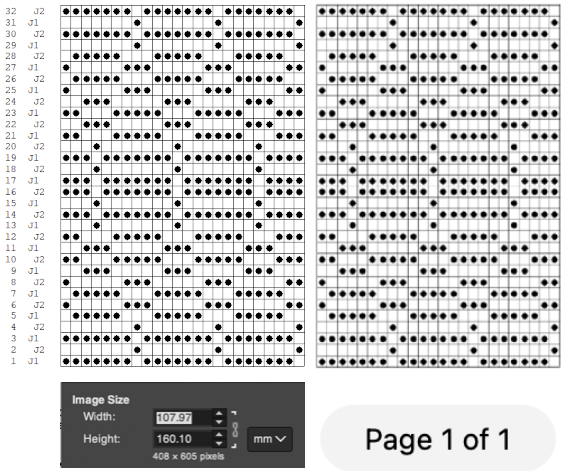
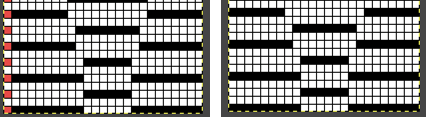
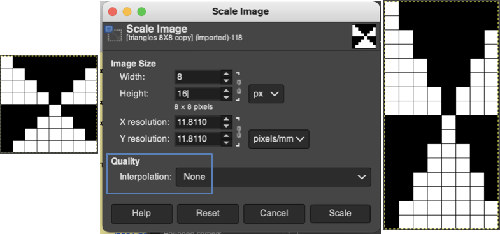
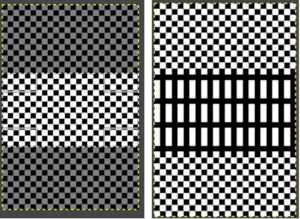
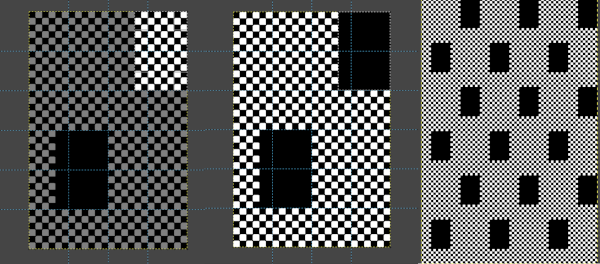
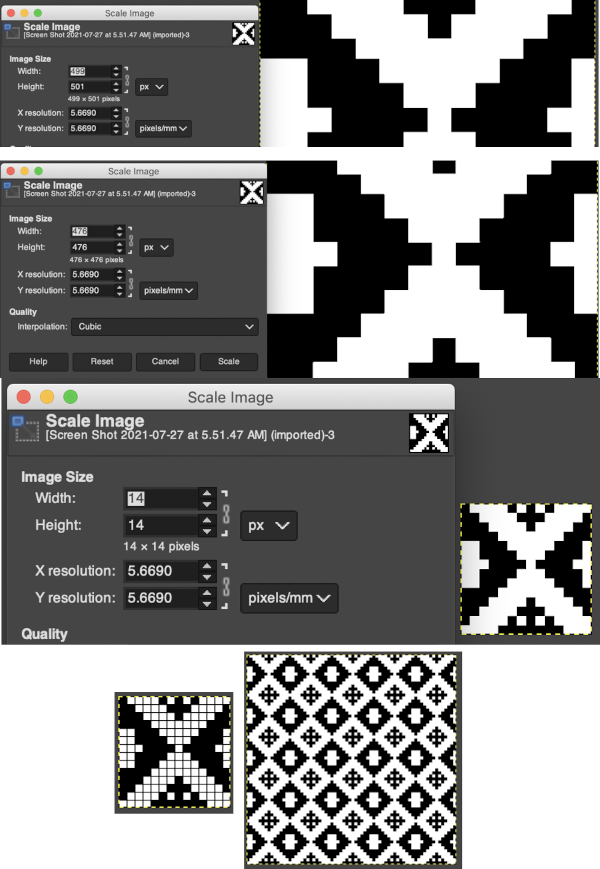
When scaling small repeats in Gimp in height only I found the results to have errors, as seen in these images, 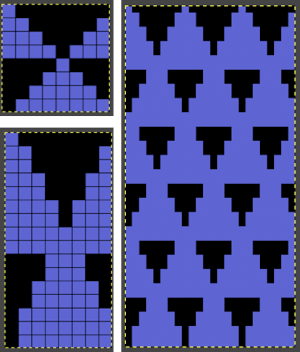 With added experience, I discovered part of the problem is that after restarts or working on multiple images, the interpolation setting changes randomly to cubic, and issue are resolved if the setting is changed to none again.
 ![]()
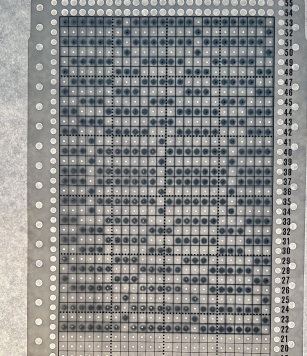
 ArahPaint will multiply the motif cleanly only in height when needed, as seen here with the original multiplied both X 2 and X4
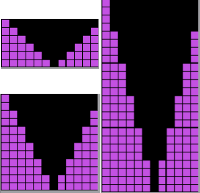 The Arah scaling appears to be quicker and far more accurate also when used on some published images that would require a lot of clean-up after resizing in Gimp. That said, when working with very large images Gimp offers the opportunity for controlled scaling to any size, keeping the image aspect ratio or not. This reference is described in translation as a pattern design course for Silver Reed knitting machines.
  The publication offers many large-scale repeats that are suitable for punch lace, but also for what translates to “braided patterns” which when studied may be intended for fair-isle with enormous floats or for DBJ. No stitch and row counts are given, the goal is to match the manual 54X56 stitch and row count.
The published swatch photo is obviously not a thread lace pattern 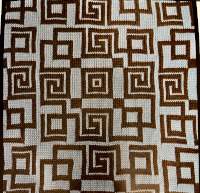 The initial scanned page segment on the left is 2160 stitches in width, and 1588 rows in height. The isolated, cropped, repeat is shown to its right
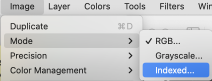
 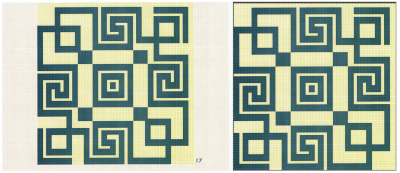 In Gimp, reducing colors: A
 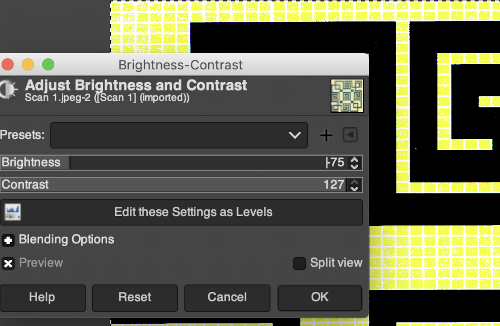 converting to indexed: B
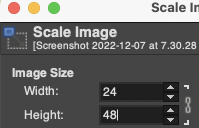
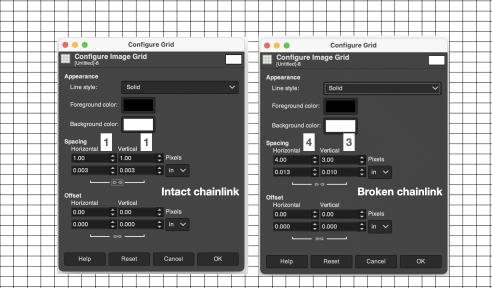
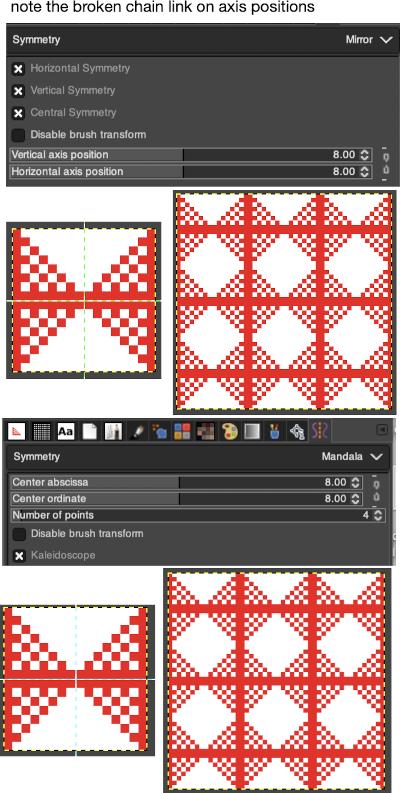
 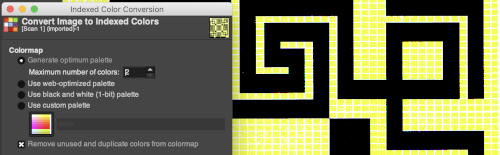 Use scale image to desired dimensions, checking first that values are a full multiple of the expected final repeat pixel count. If not, scale first to a full multiple of each value with aspect ratio off (broken chain link), then scale again with aspect ratio on (intact chain link), edit with a superimposed grid, cleaning up the repeat: C.
  Save the final image, C, open in Arah, check set the number of colors, there should be only 2 colors in use,
 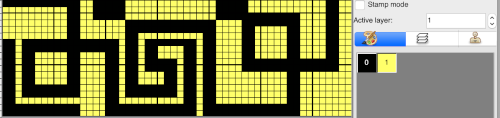 Add a third color, white, to the palette, click on the + symbol, use sliders to convert the magenta to white, click OK
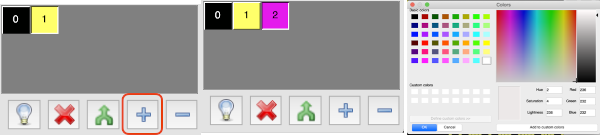
 single click on the yellow above to place it in this selection, double click on it
 ![]() use sliders again to achieve the white, click OK
use sliders again to achieve the white, click OK The final window prior to saving the BW image
 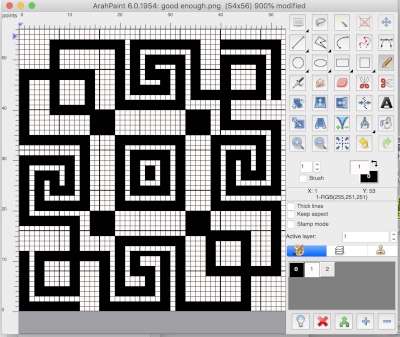 ArahPaint will also scale larger images in pixel units. Resizing may be achieved through the use of the image menu Resize option,
  or simply clicking on the appropriate tool, also copied here in the window that will appear. The chain link, circled in the bottom right, left whole retains proportion, broken by clicking on it will allow for scaling differently in height and width as in this instance
 ![]() I found the final Arah scaling to be less accurate and requiring more cleanup than the repeat obtained using both programs
I found the final Arah scaling to be less accurate and requiring more cleanup than the repeat obtained using both programs 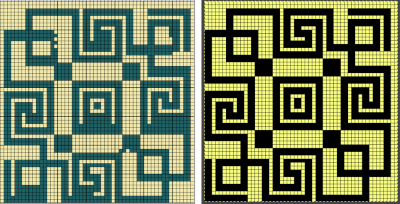 The results differed when scaling a large black and white indexed image, neither result has been altered in any way, the Arah one would require less cleanup.
 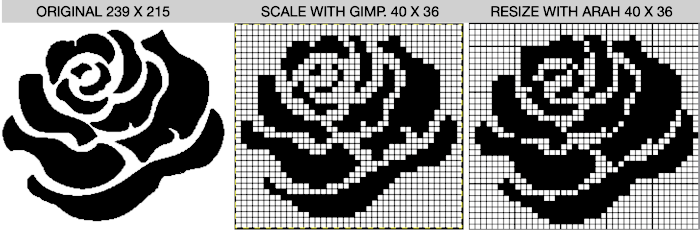 When scaling in Gimp it is helpful to check whether the interpolation is automatically set when opening the image ie. here, to Cubic or other
 change it to None for better results
 ![]() Resetting tool options preference, saving it, then quitting and restarting the program appeared to make no difference in the behavior of the program when attempting to scale new images
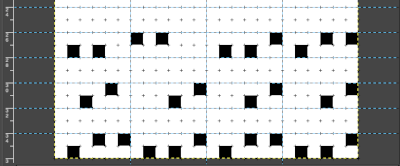
Resetting tool options preference, saving it, then quitting and restarting the program appeared to make no difference in the behavior of the program when attempting to scale new images 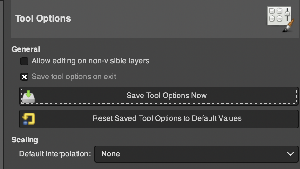 Explored and used frequently in later posts, beginning with designs in color or BW, the ArahPaint tool Guess Weave from Grid makes very quick work of converting charts to PNGs, such with this random screengrab from the Stitchworld III book
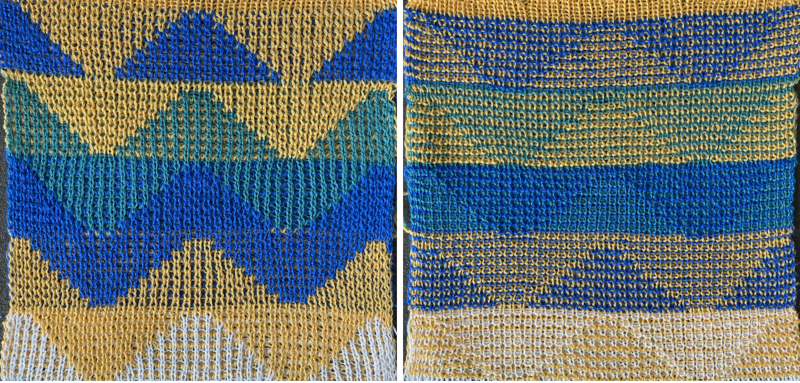
 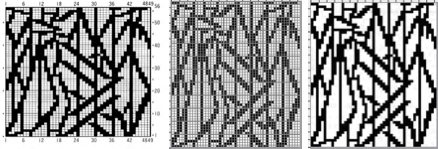 My first attempt at developing a pretend repeat to later be used for chevron 24-stitch tuck stitch :
A: using straight lines, draw several after determining the spacing to be left blank between them, here they are not all intended to match. Bucket fill the stripes intended to be knit stitches, reactivating the straight line tool after each fill
B: when satisfied with stripes and shaping, crop the original to 12 stitches in width
C: using drawing in repeat, mirror to create a 24-stitch shape. Save images along the way in case any “wrong” selections are made, draw in repeat (not shown) at least X 2 in both width and height, looking for errors in alignments D: correction is needed a the top of the repeat E: after your best shot, draw in repeat once more, leaving the setting at random, edit any wrong pixels using a white pencil, the edits will happen across the repeat
F: the new repeat
G: drawing F in repeat makes it appear correct
H: make the repeat as small as possible for use on electronic machines; the find repeat tool does not work on every repeat, particularly very small ones, and it works seamlessly at other times or will require only small adjustments. It is worth testing on images and keeping their use in mind. Here it makes a selection, the image is cropped to the selection, saved, and drawn in a larger series of repeats to check the alignment. 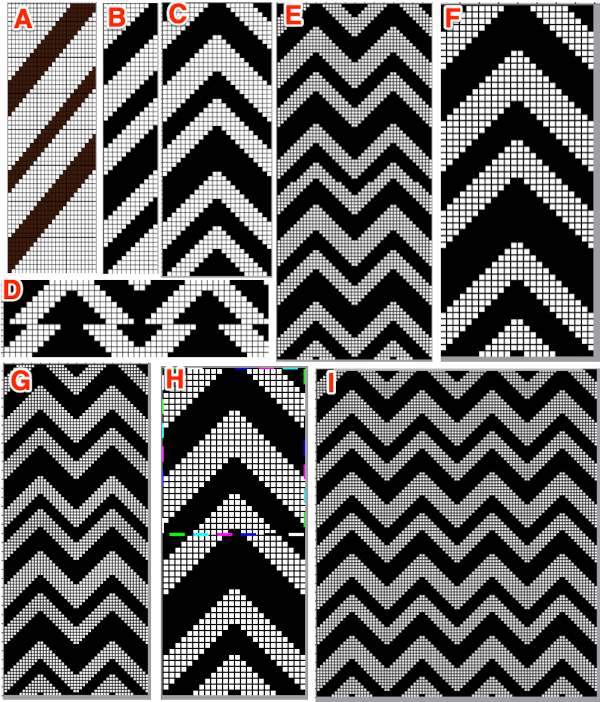 Planning a repeat suitable for a punchcard, the uncropped repeat F is opened in Gimp, and pattern fill is used in white areas to ready the file for tuck knitting. The image is then map tiled to check alignment once more, and if satisfactory, it can be saved, ready to be knit
 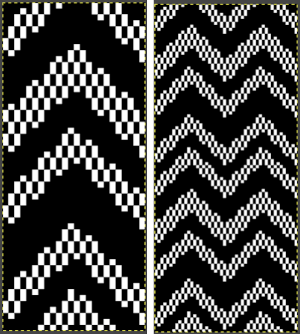 The process can be so quick that it can be easily repeated to make new adjustments to meet our needs.
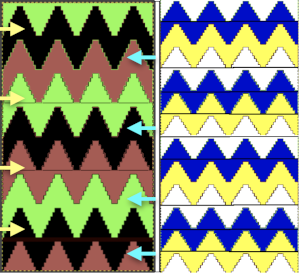
Making things work to get a “cleaner repeat”: the pattern fill is 2 rows wide by 2 rows high, so having both black and white areas of the design a multiple of 4 is a place to start. In the above, the shape outlines are in single row steps, so it is inevitable that the 4-row fill is episodically cropped by single pixels. Doubling the height of the initial single step repeat in Arah begins to solve the problem. In keeping the 24 stitch width restraint, the result, a now 56-row repeat, will now have variations in the width of the black pixel areas which will produce knit stitches on a tuck ground  With experience, one can quickly imagine ways to clear errors and alter images. Electronic machines free us from repeat width constraints. Widening the zag repeat to 48 stitches, working in Arah, check vertical alignments first,
 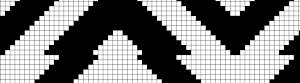 edit intersections whether in a tiled image or the original, ultimately the 48-stitch by 80-row repeat is opened in Gimp, filled with the tuck pattern, and saved for knitting
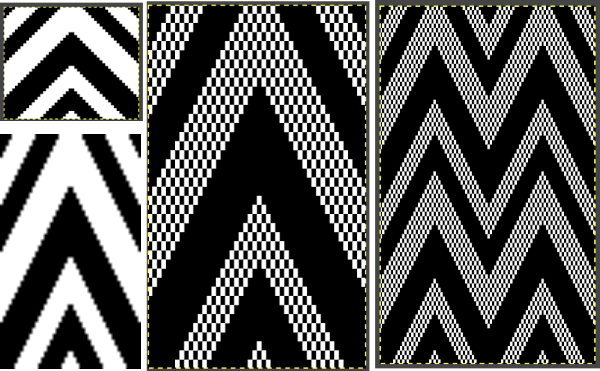
![]() Pattern fill may be accomplished in ArahPaint using brushes made from selection and then enabling those brushes with bucket fill. This functionality using multiple brushes to replace colors in the original is shown in this video: https://www.youtube.com/watch?v=3uacuqK5SjA
Pattern fill may be accomplished in ArahPaint using brushes made from selection and then enabling those brushes with bucket fill. This functionality using multiple brushes to replace colors in the original is shown in this video: https://www.youtube.com/watch?v=3uacuqK5SjA
The technique illustrated here with a screengrab from the video offers a very interesting alternative option for those who enjoy working with dithered color-reduced black and white images.  Working on a possible tuck repeat using only Arah Paint: draw and save the image you wish to superimpose on the ground. I chose to use the color red for visibility. Draw a new image, keeping magnification constant, ie using 0 for 1000 X. Draw a repeat unit for the brush you wish to use, choose repeat from the View menu, click on the stamp icon shown outlined in red, and the available brush will appear immediately below it.
  Use load recent to retrieve the shape that is to be superimposed, say no to saving changes. Make certain the superimposed color is in the background-position, and that the brush box is checked. Use bucket fill to place predetermined patterning behind the shape
 To prepare the pattern for download, use Find Repeat, Crop to Selection, change the red to black for knit stitches on a tuck ground, and save the image for a knittable 2 color result
 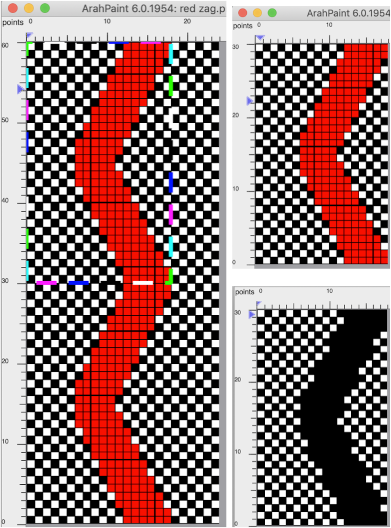 The same process may be used to develop a design placed over a lace mesh ground. The final superimposed shape, however, needs to be white rather than black to produce knit stitches,
 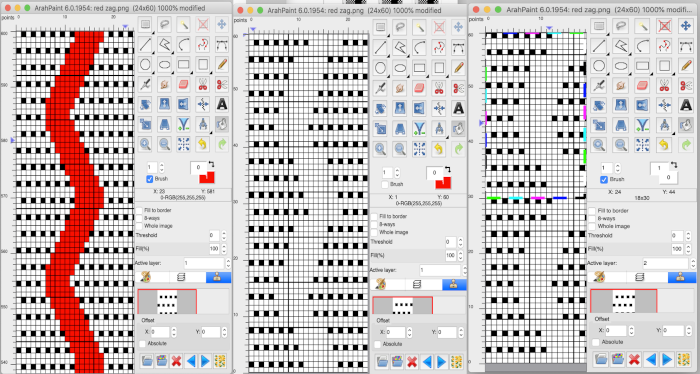 and the final repeat may need to be shifted along its vertical axis to suit the brand machine on which the knit will be manufactured. Brother lace designs begin with a row containing black pixels and end with two blank rows. In Studio lace knitting, the reverse is true
  Lots of knitters appear to be interested in large, nonrepetitive images. Depending on the machine used and its memory, the repeat may need to be split horizontally or vertically. Before electronic machines, many art-to-wear pieces were created by knitting repeats broken down horizontally into the punchcard widths, completing the height of each panel and then joining the strips together. Nowadays there are online tools for many tasks including dividing large images. For DIY, in the first instance, Arahpaint is used to split the “large” file in half horizontally, the resulting image saved. The action happens from left to right, so to achieve the split for the second half, the full-size original is flipped horizontally, split, and flipped again. Followers of my blog have seen the images of my friend Rocco recurring intermittently over the years. Dividing the image horizontally
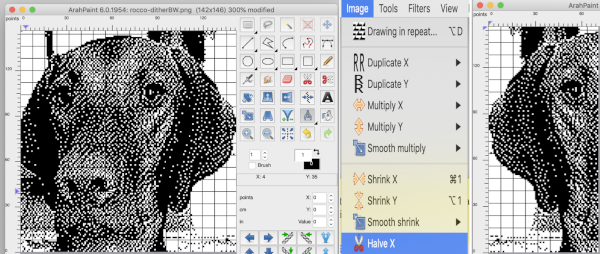
 The same may be done vertically in a matter of seconds beginning with Image, Halve Y, and then using the mirroring tool
  to flip the image as needed
  Color separations: the critical difference in the use of the Arah rectangle tool from that in Gimp is that it cannot be used for sequential selections of pairs of rows in color separations such as those for DBJ or mosaics. In those instances, the Arah image, scaled to the appropriate height may be saved, then opened, and processed in Gimp. For DBJ with each color in each design row knitting twice, design the shape and scale in length in Arah, save and open in Gimp for the separation, see post on working with Gimp update for Mac
  Mosaics: draw the desired repeat in Arah, double it in height, save the image, open in Gimp and proceed with mosaic color separation
 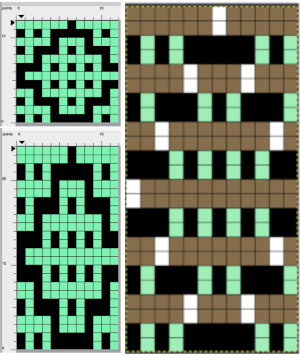 The color separation, in turn, is very easily and quickly changed to all black and white using color exchange in Arah,
  2022: Using layers in Gimp for color separations in the latest Gimp update offers a quicker, easier method to achieve them for a variety of fabrics than that used in some of my previous blog posts.
 The plan is to create a repeat which may be knit using color changes every 2 rows. Each design row knits each color twice, so the standard built-in KRC separation is not a consideration, though the same cam settings may be used in those fabrics as well.
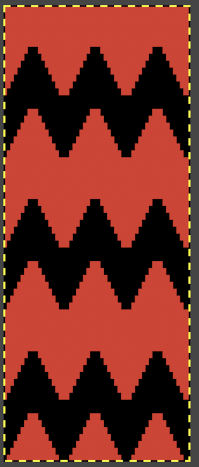
 Lock settings are easier to achieve on the Passap than switching out cam buttons in Brother machines. This was knit using 4 carriages. Color one knits with the main bed set to tuck both ways, color two knits with the main bed set to slip both ways. The slip stitch reduces the width of the fabric considerably
  Here each color alternately tucks and slips. The choice of cam buttons matters, tucking first from left to right, slipping from right to left, with cam buttons set COL after the first preselection row
 This last cam setting appears to my eye to produce a texture “close enough” to the inspiration fabric. Attempting to add more colors: the repeat, D, is still 18 X 88 but is now shifted slightly.
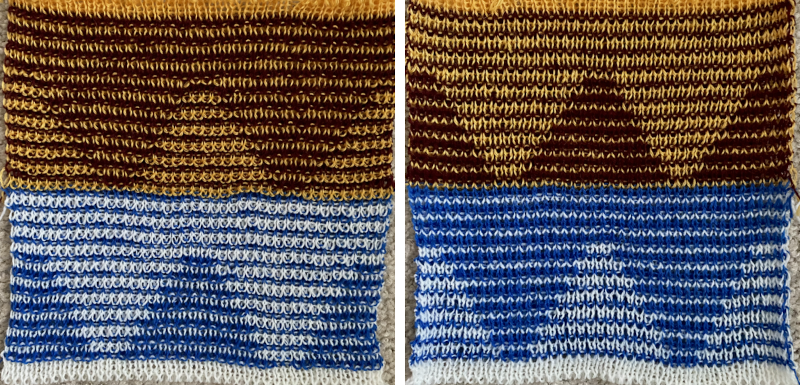
 The existing repeat may be reduced further to 18 X 64, eliminating some of those extra rows in the center of the chevron shape
  Whether or not the design is intended to retain chevron shapes in alternating textures, actions may be plotted pre knitting in any way that visually makes sense to the person designing the pattern and tools available to them.
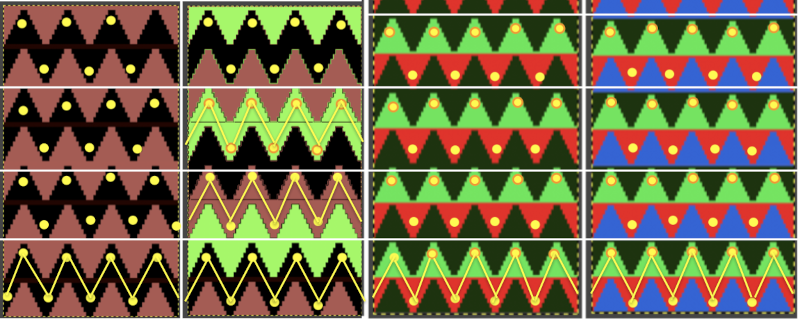
 Reversing the png so that the more textured stitches will begin with the color in yarn position 1
 Adding colors can be planned cautiously or allowed to happen randomly depending on the preferences of the designer and end-use. Ribber fabric designs are not visible until several inches have been knit, too late to catch color sequence errors. Some machines allow for memo placements or sounds to help track color changes, but only within the initially programmed repeats. A quick spreadsheet can provide customizable checkboxes or added information. For an attempt to retain chevron shapes in different textures:

 A PDF including row numbers and space for notations
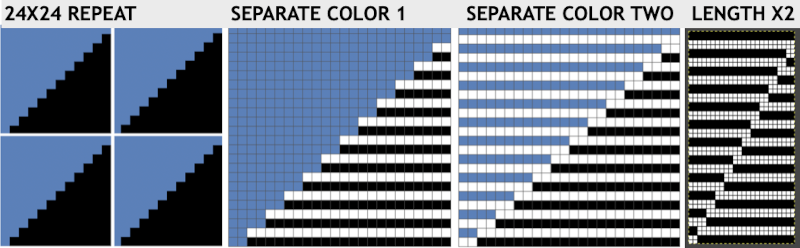
 Continuing on a 24 stitch repeat, the original design may be rendered at double height and separated once more, doubling the separation height to 96 rows
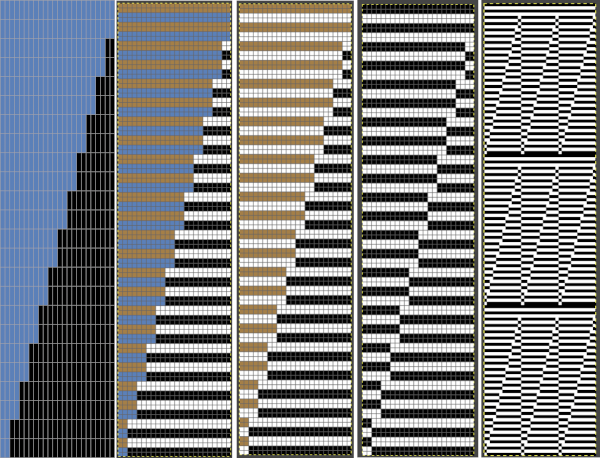
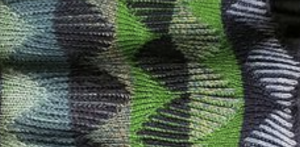
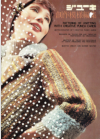
 Another even more complex inspiration from a sweater attributed to Falke, Spring 20 collection, using similar stitch structures, but in addition, also transferring stitches between beds exposing a purl striped ground.


 For some reason, I found the commands erratic when working on the translated version of the site, and fared much better in the original language publication.
 Screengrab the final image surrounded by extra white cells, and open it in GIMP.
 Getting a preview of how a finished garment might appear, here the tiled version is 192 pixels in width and one may glean some idea as to whether that repeat should ever really be used in a sweater or even a blanket. Further image scaling or cropping can happen based on the knit gauge.
  A very quick rendering imagining pattern and color placements using a simple sweater outline
 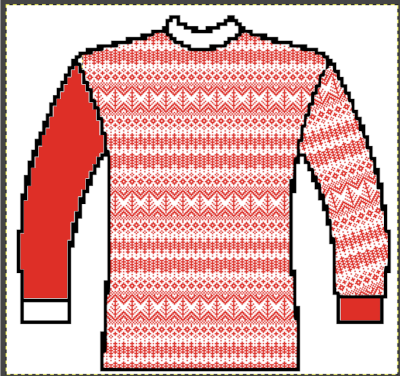 Collections of every other needle repeats for processing with a similar approach may be found in these volumes, available for free download
 Both volumes include accompanying swatch illustrations.
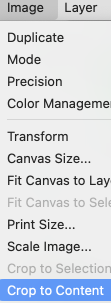
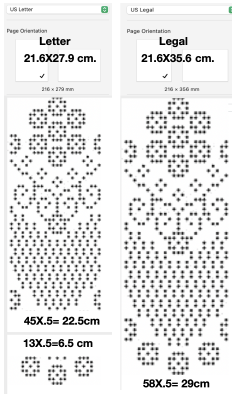
 For a better, printed match size, after capturing the image from the PDF for a single page outside image edges, opening it in Gimp, and cropping it to content, it is then possible to scale the results to measurements of a factory punchcard equal in width and adjusted for the number of rows in the image. My card required print measurements were 14.1cm by 26.1. Scaling executed with an aspect ratio that is too long.
 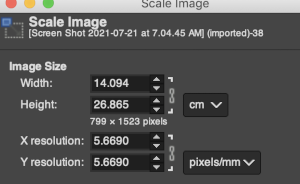 breaking the chain-link, removing size constraints
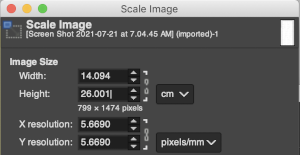


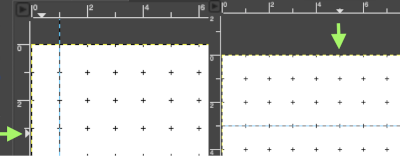
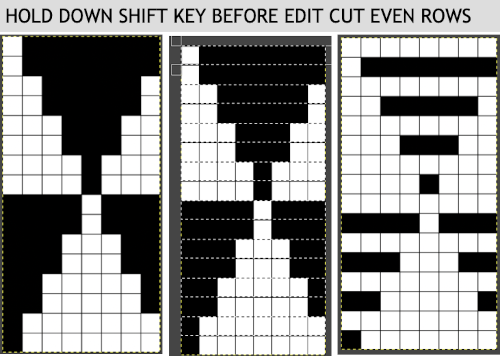 The results with the selection of even rows simply shift the result up a row
 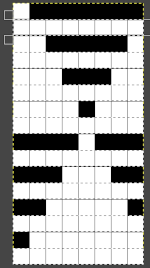 Test in your version of the program to see whether releasing the shift key prior to making edits changes them. Either way, being consistent in the choice makes for less confusing results. Experimentation takes a matter of seconds.
 using the rectangle tool, either odd or even rows may be chosen, remaining consistent for the height of the repeat in a scale to suit the end fabric goal. Here the original file is lengthened X2
 working with the original file lengthened x4. The selections can happen on every row or every other, whether singly or in pairs. Note the difference between making the first selection on the first pair of rows or the second.
  2021:
2021: 
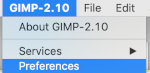

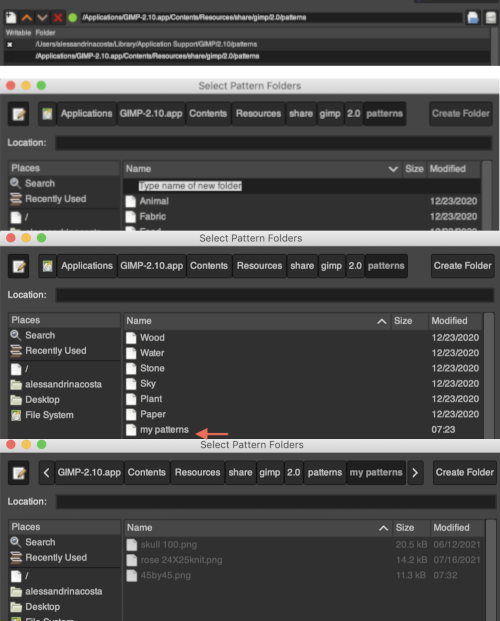
 single click on the filing cabinet icon on the right,
 double click on the patterns folder, and its own window will appear,
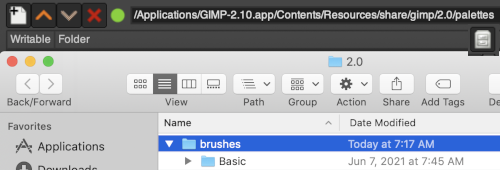

 For future use, any saved brush may be dragged and dropped into the named personal pattern folder icon, or into the folder after it has been expanded or opened in its own window. My opened brush folder
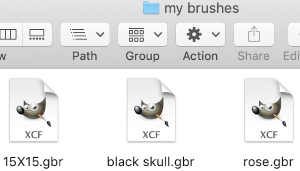

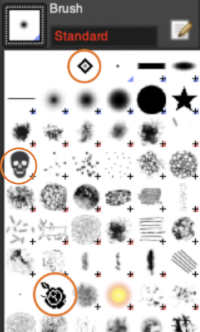
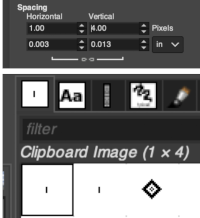
 When exporting self-drawn brushes, the option is offered for adding spacing surrounding the shape, here a 10% addition was chosen
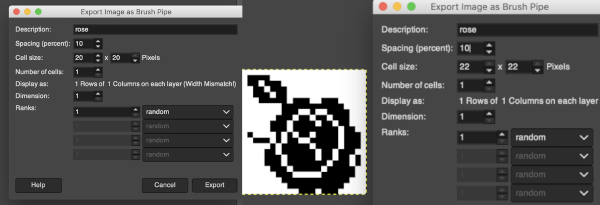
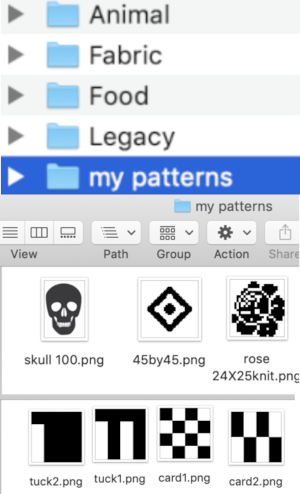 To save personal patterns, instead of choosing the file cabinet icon in preferences, one may choose the folder icon, following a similar series of steps to those above, including verifying the contents of the newly created folder
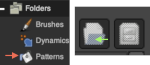
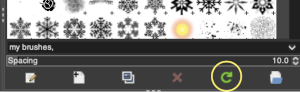
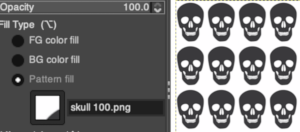
 Use Windows, Dockable Dialogues, choose Pattern. The patterns will show on the right
 Click on the paint bucket, then on the pattern you wish to use on right, hover over the canvas with the paint tool, click on it and the image will fill in the chosen pattern.


 Foreground and Background colors: in RGB Mode, click on the foreground color to select a new color for the grid, click OK
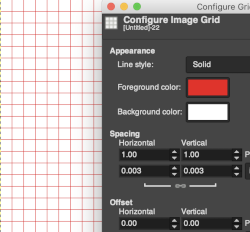
 This command is found in the image menubar through
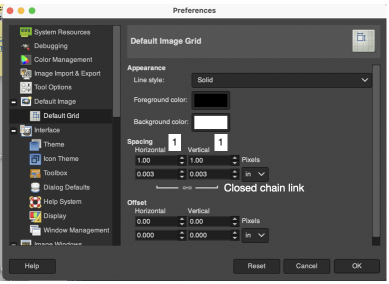
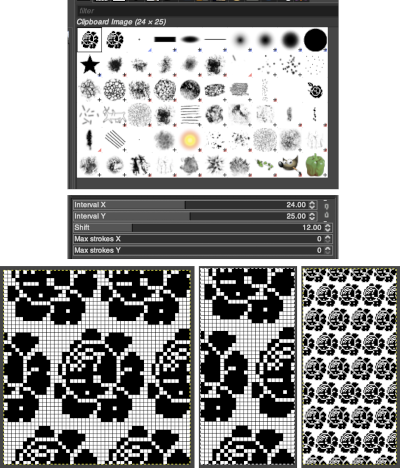
 Built-in or custom brushes may be superimposed on a bucket-filled ground. Create an image in the desired width and height, here 24 X 24, and magnify at least X 800 for a grid view.
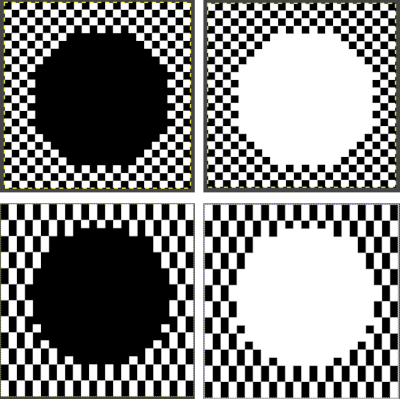

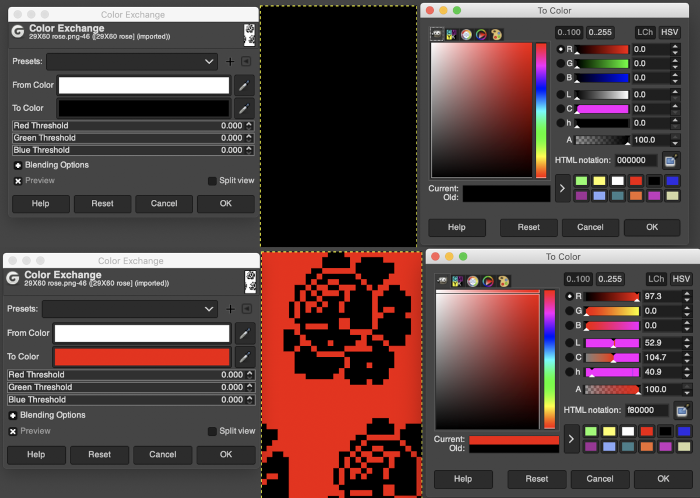
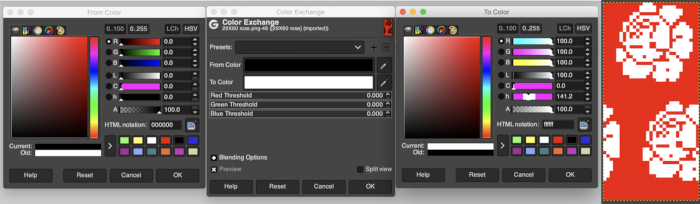
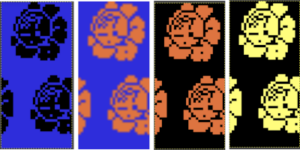
 The color exchange window will appear. Here the white “from color” is left undisturbed. Select the dropper next to the “to color”, then click on the image on the color you wish to change, a palette window will appear. Make your choice, the color exchange window will now have substituted the chosen color for black, click OK, and white design areas are now changed to the chosen blue globally.
 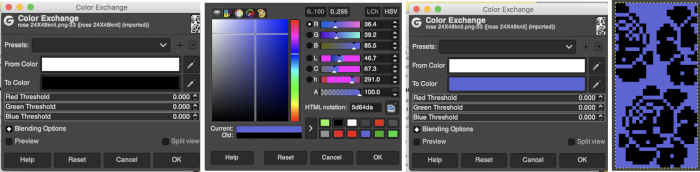 The process may then be repeated with the second color if desired. The color exchange window will show white as the default “from color”. Click on the white bar, choose black from the palette window or use the dropper to select black from the image. The from color will then appear as black. Repeat selection with the dropper from the right of the “to color” bar on any black pixels in the image, choose the color from the palette window to replace it, and the color exchange window will display the new “to color”. Click OK, and job done.
 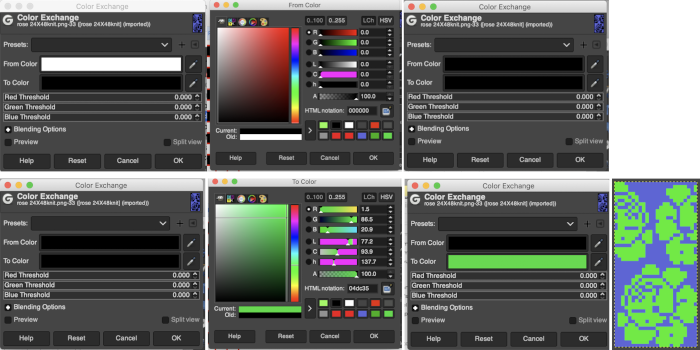 The process may be repeated multiple times on the same design or used on large-scale ones, giving one some idea as to whether or not to really commit to the estimated colors.
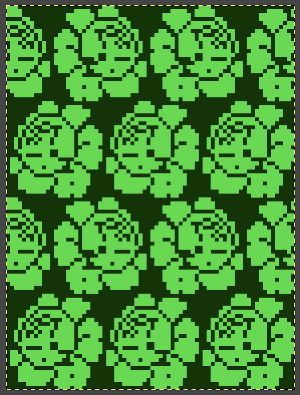
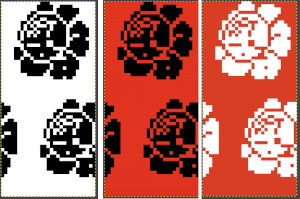
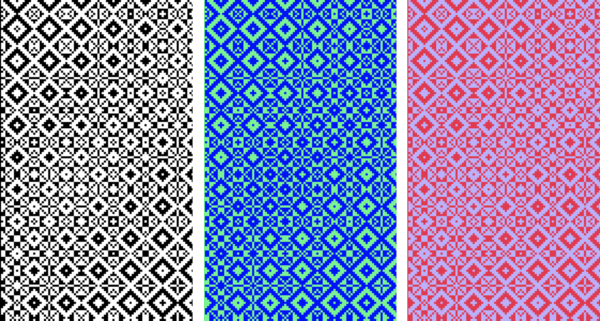 I recently had reason to review old PC files from my Passap knitting days and came across several cut files that when converted to png format appeared in colors rather than black and white, leading me to experiment with color exchange again. The image for the first experiment is part of a crib blanket by Cheryl Giles


 It is possible to colorize images originally drawn in black and white. The color exchange options will remain fixed throughout the process. The image may be worked on continuously and exported when color exchanges are completed, or saved and imported again after each step. The color exchange here happens consistently on the chosen background color, changing that quickly becomes familiar and easy. There are times that the repeat being processed will turn black onscreen, trust in the process and continue.
 Developing custom palettes in order to visualize different colorways while using the same repeat:
 this window will open with selections for possible palette choices
  click on your choice, then click on the palette icon, and your color choices will appear, click on the white, to create a new background color.

 My success with series of other images in using color exchange has been spotty. Online forums reveal this is a recurrent issue with no clear solutions. Suggestions include stipulating that the cause may be the version of Mac OS in use. Color reductions using
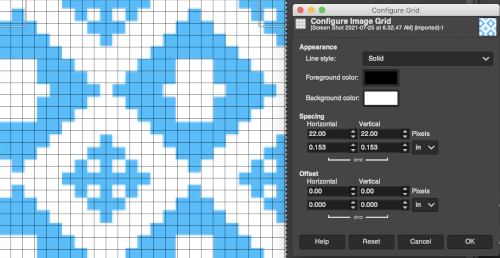
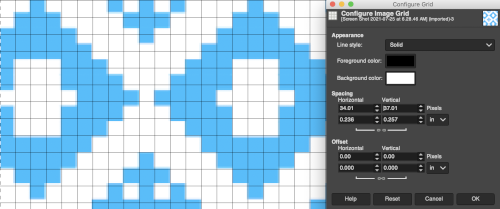 The image itself may be scaled concurrently to tweak grid border alignments. The final grid size below is 18X18, the image size is shown after scaling from a width of 277 pixels (with a broken link at that time) to a final 270 pixels in width
 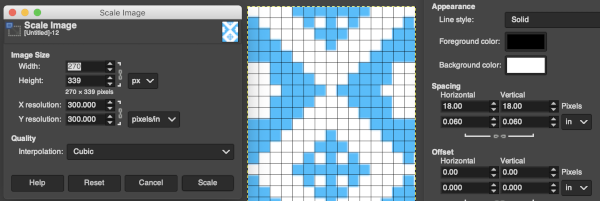 The screengrab of the above center, with a superimposed new grid; note the image, in this case, was also offset for better placement, a 3-pixel pencil was used to isolate the border of the possible smallest repeat
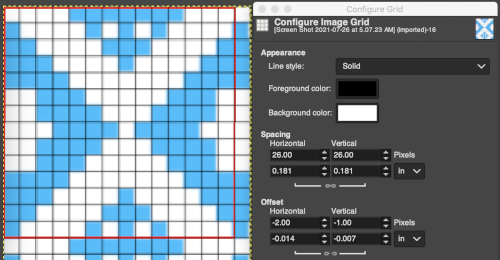
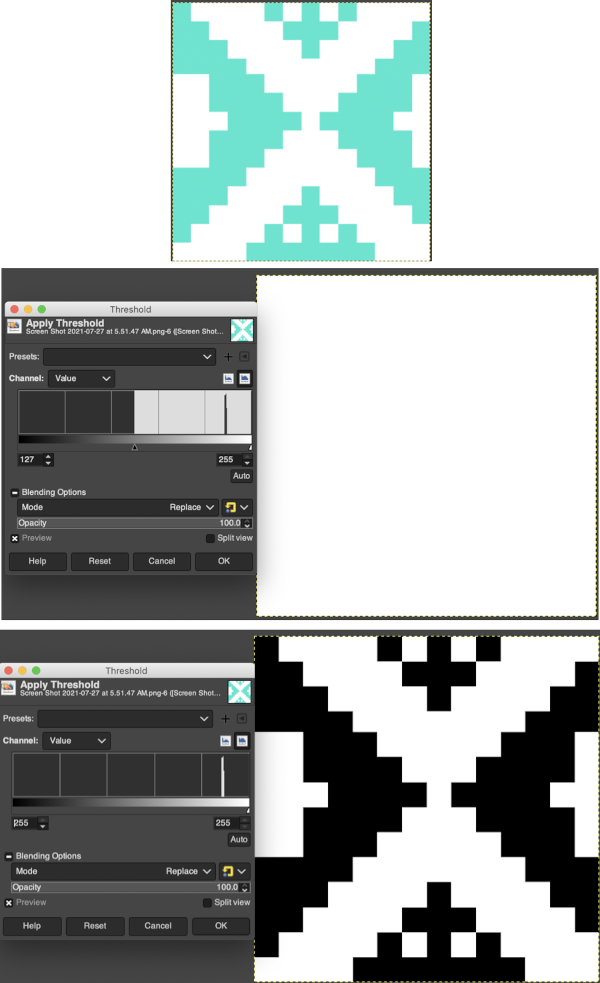
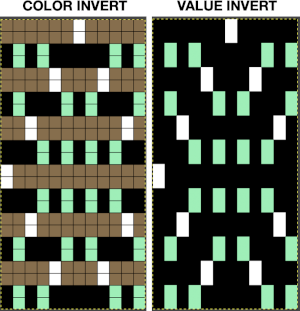
 Translating the colored image to BW indexed may take several steps and some clean-up if only Gimp is used to process it. With the colored large-scale isolated repeat, the image is opened in Gimp. The Threshold tool transforms the current layer or the selection into a black-and-white image, where white pixels represent the pixels of the image whose Value is in the threshold range, and black pixels represent pixels with Value out of the threshold range. It may be activated from the pull-down colors menu or from the toolbox.
 The appearance of the final repeat when color is reversed
 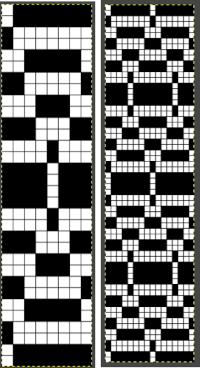 Another comparison of the 2 options for altering every other pair of rows in the specific color separation for a mosaic repeat. There is less filling in of cells with a different color, but in large files especially, I feel the result would become far more visually confusing to track.
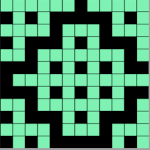
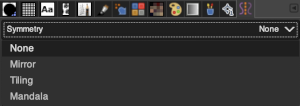
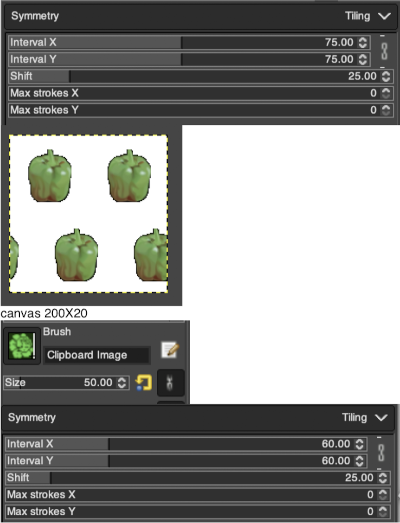
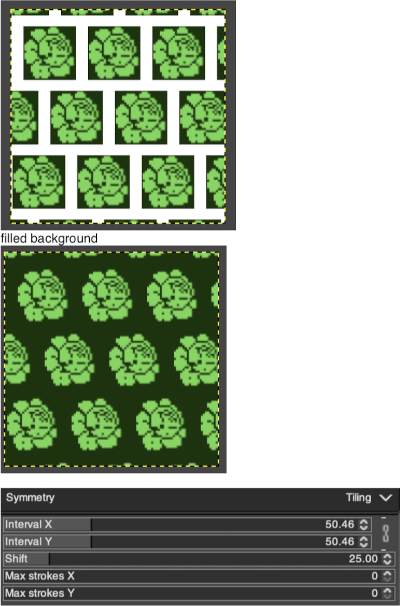
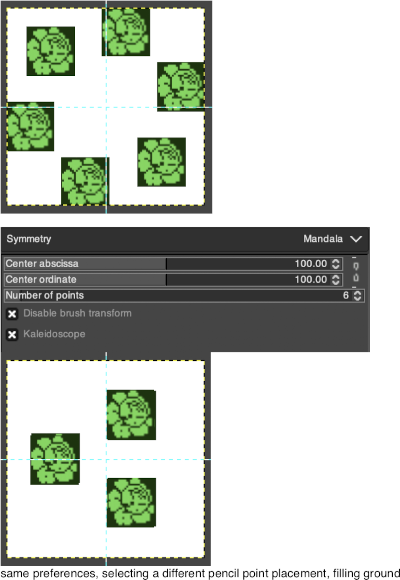
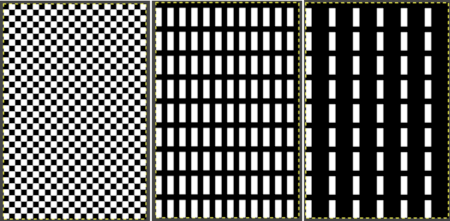
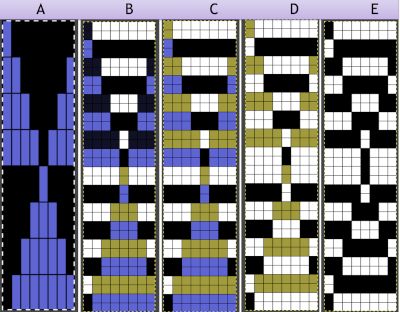
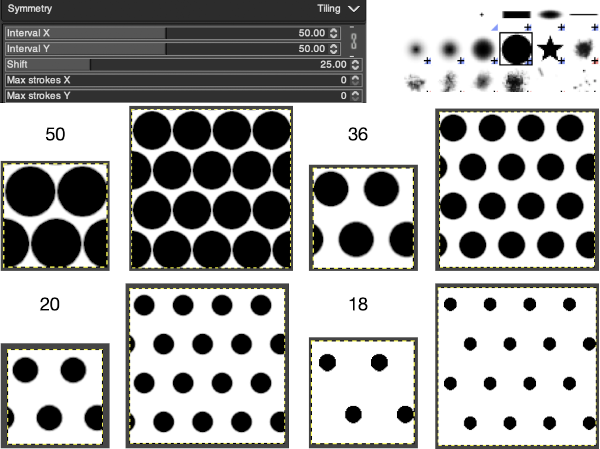
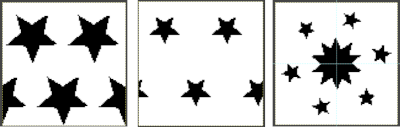
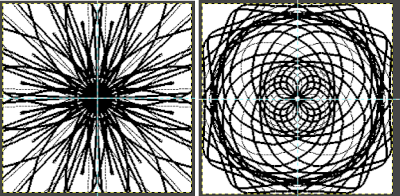
 Working with potential knit repeats the scale is reduced further. Magnification is useful for the evaluation of repeats. The smallest repeat segments for use on electronic machines may be isolated. The filter, map, and tile option easily verify how the repeats line up overall. Cropping a 24-stitch width and tiling that also visualizes the suitability of the repeat for use on punchcards with the 24-stitch limitation. Grid view helps identify any need for “clean up”.
 and a type of symmetry and accompanying settings, click on pencil tool, the motif will appear as on the above right, paste the image on the new canvas, undo and repeat setting adjustments until satisfied with the distribution of motifs.
 The 24X50 repeat:
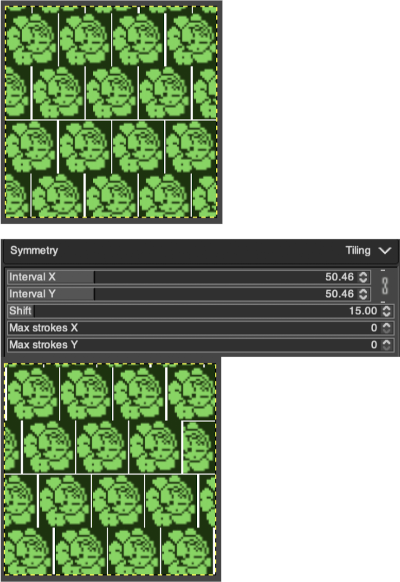
 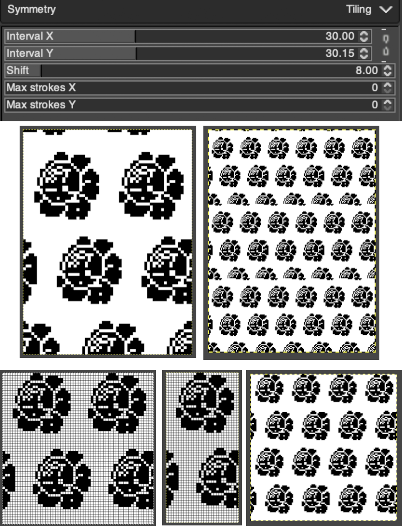 Being more deliberate with the math leads to a full, successful repeat
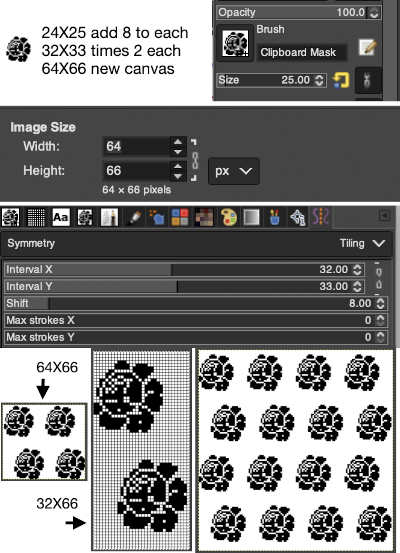
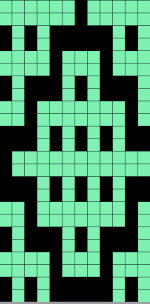
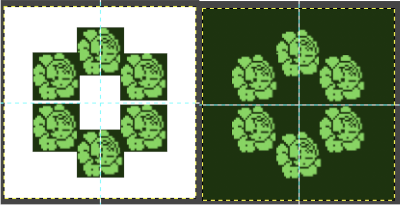
 Using that small triangular 8X8 repeat
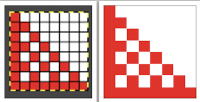
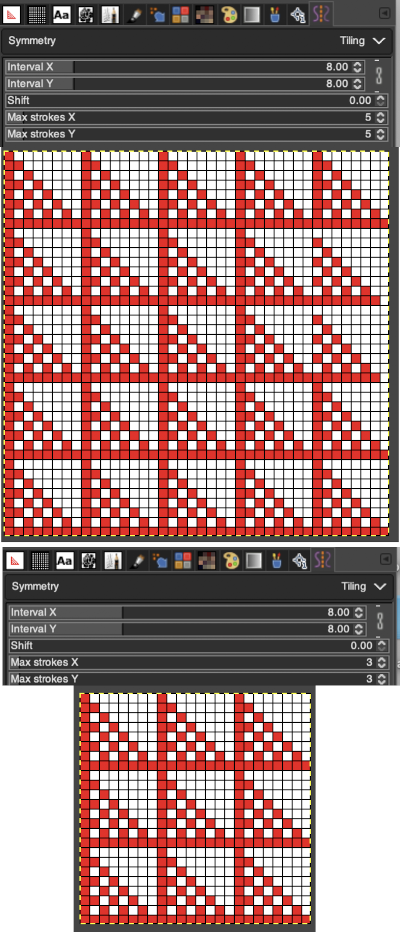
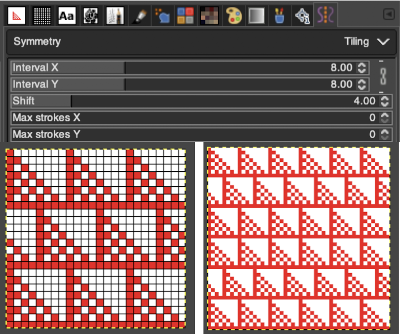 Again, preemptive math will yield images that avoid further processing. It is up to the user to recognize any problems, the repeat here needs to and can be isolated correctly from the file on the left, it is actually only 16 rows high. Here the adjusted repeat is created on a 24X16 canvas with the same symmetry settings, and filter/mapped/tiled
 The above repeat was cropped and adjusted to 16 stitch width and 8 row height, the file saved, and the process repeated
  Using symmetry once more, remember to adjust the pencil size.
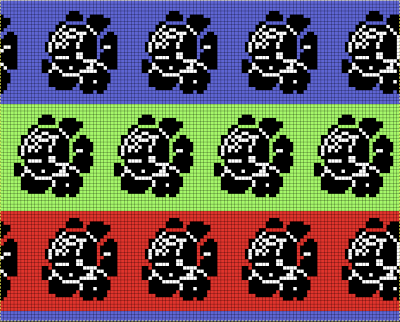
 I was unable to use color exchange successfully on the above images, but with the saved 2 colors indexed red and white repeat both img2track and ayab appeared to load the repeat successfully.
  The map color exchange was successful using the steps described at the top of the post when beginning with the repeat drawn in a black and white version.
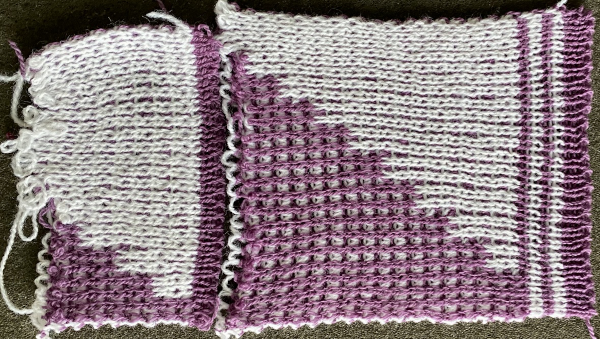
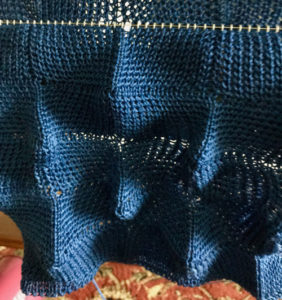 Nearly all my previous dbj pieces have been knit on a Passap E6000. The 930 experience for such repeats is new to me. With some help from Tanya Cunnigham in reviewing the steps required when using img2track, I returned to cellular automata repeat saved years ago.
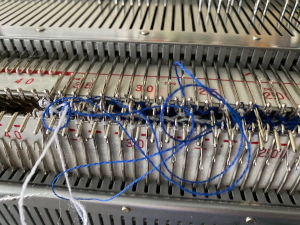 That provided an opportunity to decide I preferred the reverse color placement as well as wanting a thicker ply for the white, resulting in twice the fun with 2 colors, and another scrapped sample
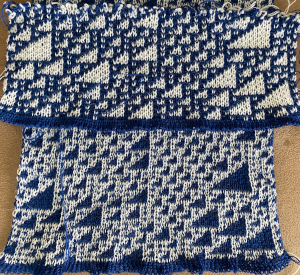
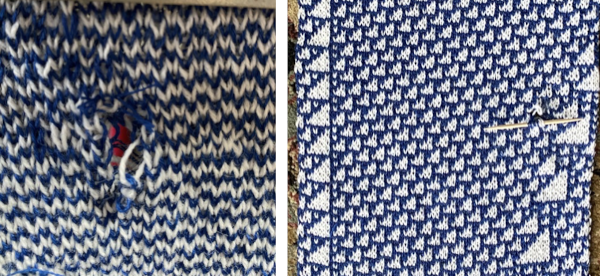 I was able to achieve a reasonable repair on the knit side, but the birdseye pattern on the reverse is a bit scrambled.
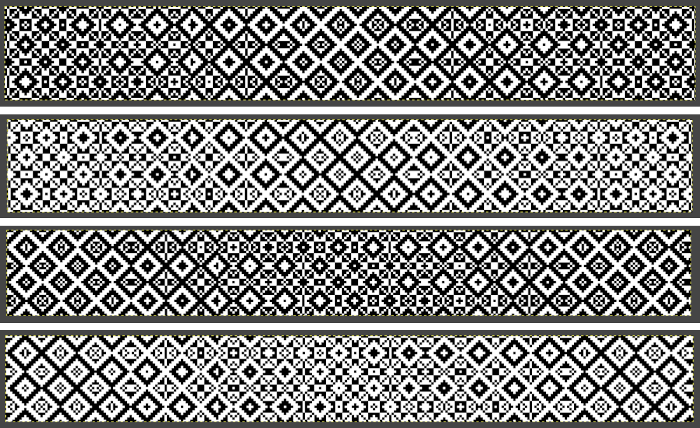 There is also potential for exchanging colors to get a sense of how the pattern might appear in different colorways
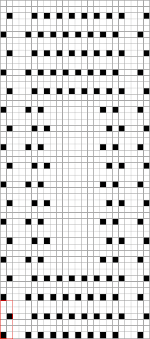
 Depending on the electronic model or the software used to download patterns designed for lace, the final image may need to be flipped horizontally. This is true for use on my 930. Creating a template for mesh using numbers: begin with a table with square cells in numbers larger than you might need, ie 24 by 54. The method for doing so has been explained in previous posts. I happen to prefer cell units that measure 20 points by 20. The smallest repeat unit for use on any machine is isolated, shown bordered in red, is 4 stitches wide by 6 rows high, and drawn onto the template. The group of cells in the repeat are selected. If one hovers over any side or top and bottom borders of it, a yellow dot appears. Clicking and dragging on the yellow dot will repeat the full selection to the right, left, up, or down. Here the move is to the right
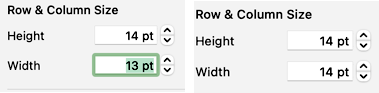
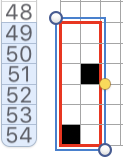
 The whole group is selected,
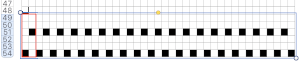
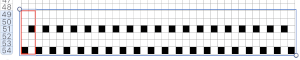
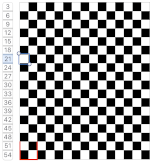
 Beginning at the top or bottom of the table, hide all blank rows. Using the command key during the selection process will allow this to be done on the whole table at once or in groups of rows at one time; 36 of the 54 rows are hidden.
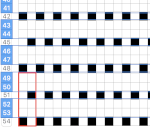
 the color may be replaced with white in the spreadsheet,
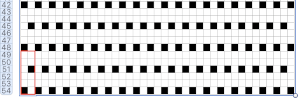
 The last image is in RGB mode once more, converted to BW indexed, scaled to 24 by 54, and exported as BMP or choose any other format ie png, etc. to suit your needs.
 The design was not planned as continuous, but is easily amended to be so. Here an alternate version is shown, with 2 linear repeats on the left, and a single expanded repeat to its right
  As for that mylar repeat, this is an image of the shapes with the chart collapsed, eliminating blank rows between black pixels.
 In fabrics designed this way, using the image as drawn (left), or mirroring it horizontally, does not visually change the result. This does not hold true in more complex transfer lace.
 2024:
2024:


 Tiling the repeats to imagine the final knit presents the problem that results from working on a square grid and comparing the results to a knit, which usually produces a rectangular one. The representation for the linear patterns produced on the knit side of the piece cannot factor in some of the added distortions created by the stitch type used. I process my images in Pages or Numbers, depending on which document contains my most recent work and happens to be open. It is also possible to perform the final rescale in Gimp. Most knits approach a 4:3 ratio, with gauge variants in highly textured fabrics. To preserve a clean design, tile and save the original, screengrab the resulting image, load it in Gimp, and rescale. Repeat the motif for the same number in both height and width when tiling it.
 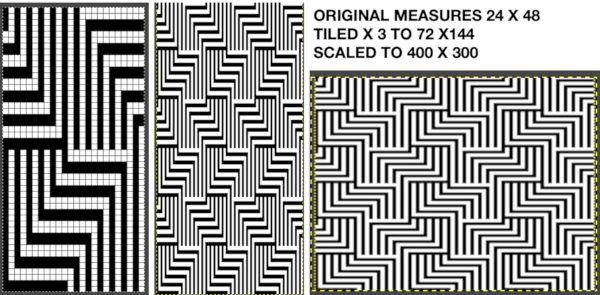 The colored versions before and after scaling, compared with the slip stitch swatch.
  It is possible to produce a rectangular grid to start with on which to draw in Gimp, but the larger canvas size occupies a significantly larger space on the screen, complicating the process. For small designs, however, that may be an option to give one the sense of aspect ratio for the design in the final knit ie in representational FI. To resize the grid in uneven proportions, the chain-link below the spacing values needs to be broken
 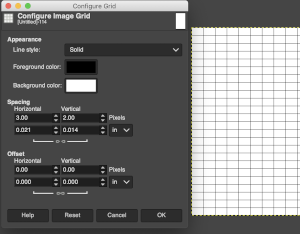 This repeat is designed for an electronic, requires color-reverse. Since it is 24 stitches wide and it may also be modified and used on a card. In this instance, the original marks for rows and stitches are single height. The image is processed, matching the original, rendered double-height, color reversed, and then alternate pairs of rows were color inverted to render the repeat used in the test swatch
 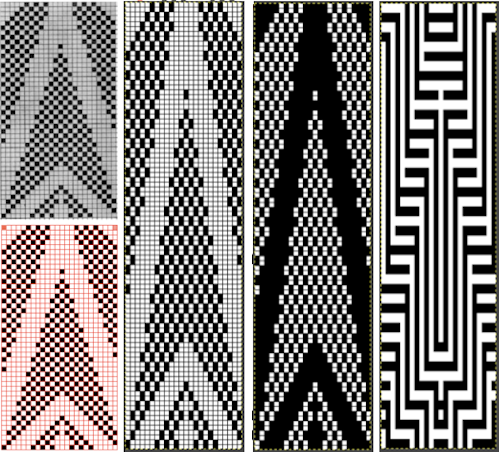 Once again, the possible change in scale is estimated. The repeat though only 24 stitches wide, is 92 rows high. On the left the repeat is shown as it appears on a square grid, to its right is the scaled 4:3 version, in a pixel count approximating the size of the swatch. It takes a bit of squinting to see the pattern more recognizable in the longer repeat in the larger tile
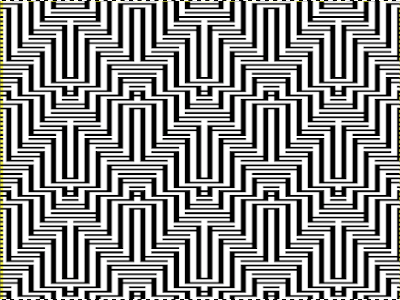
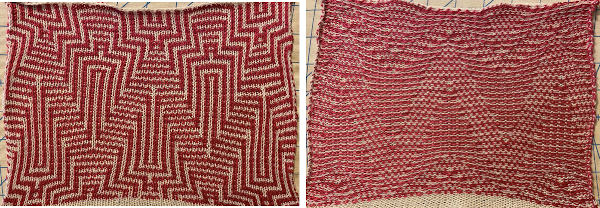

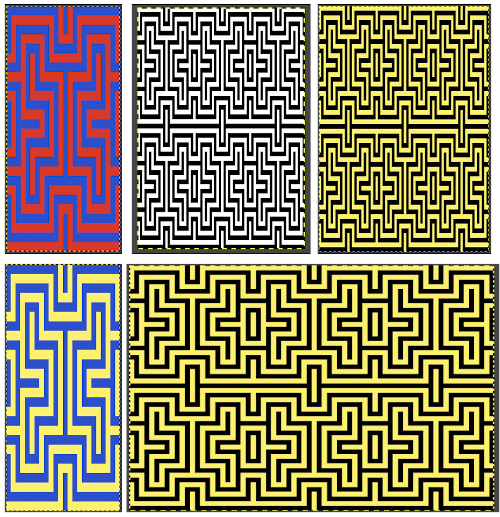
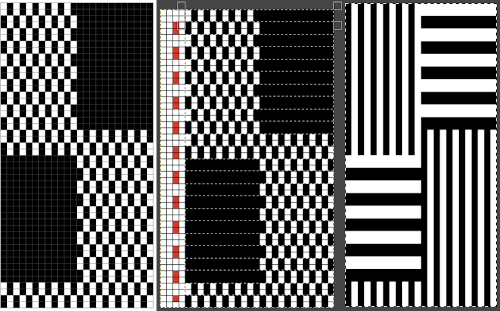
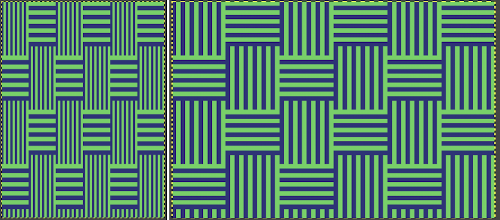 The proof of concept swatch, knit in tuck stitch, begins to show the distortion by the stitch formations, textures vs plain knit, easily seen at the top edge. The bind-off is around 2 gate pegs in order to allow enough stretch.
 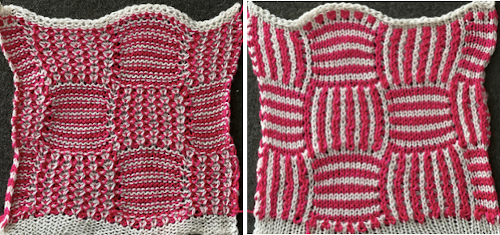 Anyone familiar with either or both programs may find this a very quick way to visualize the scaling and moving of motifs within DIY designs and their possible outcomes prior to test knitting
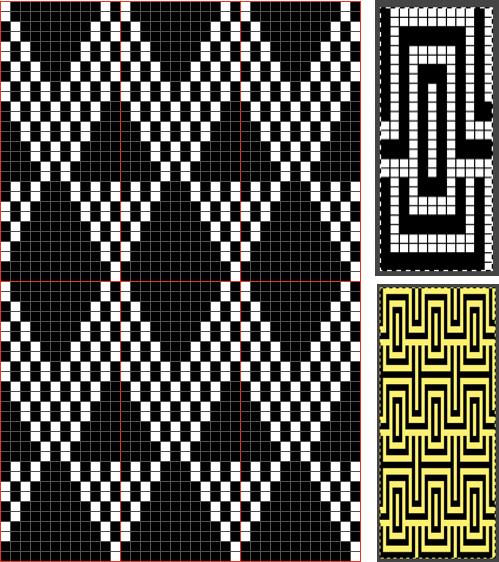
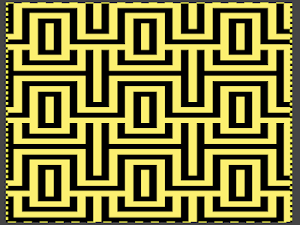
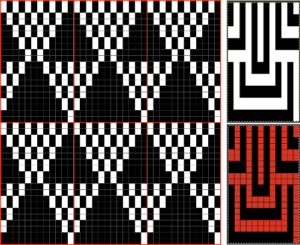
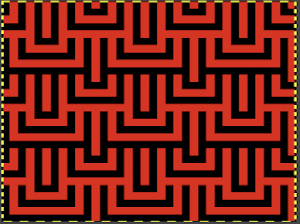
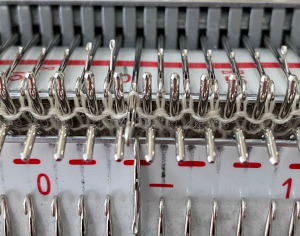 In terms of positioning the carriage, a wire that is akin to that found on Passap strippers is on its underneath. In positioning the carriage on the beds, check visually that it is indeed lying between the gate pegs of both beds prior to attempting to travel with it to the opposite side
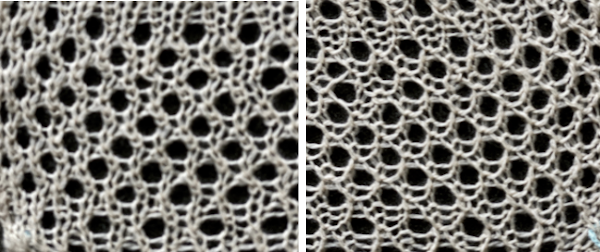
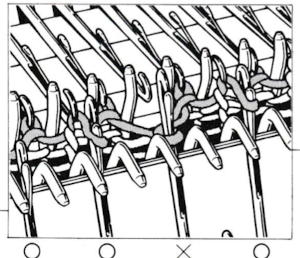
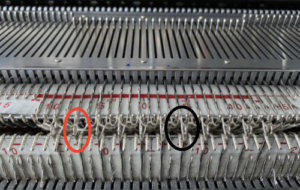 For my test I used EON needles on the ribber, planned alternating selection for each new transfer. This could be done by selecting dashes and blank spots on needle tape ie. dash in the above photo, blank spaces below
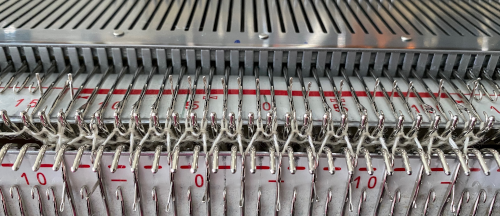
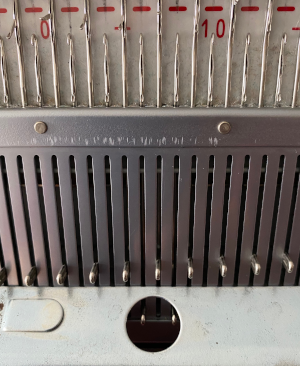 My first attempt at creating shapes includes a band at the bottom where the EON transfers as above were made, but every row. Simply bringing needles into work on the opposite bed creates an eyelet. They can be eliminated by sharing stitch “bumps” on the opposite bed, but for the moment they are a design feature. The texture created appears in the areas involved on both sides of the knit
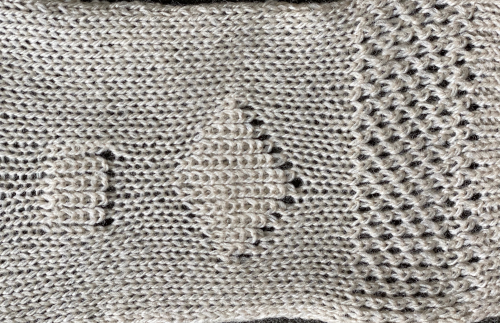
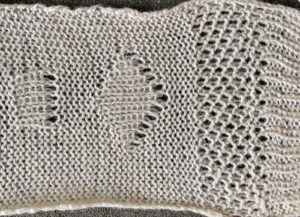 It is possible to transfer single needles at sides of shapes ie
 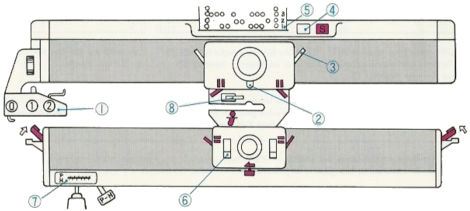 The enclosed punchcards:
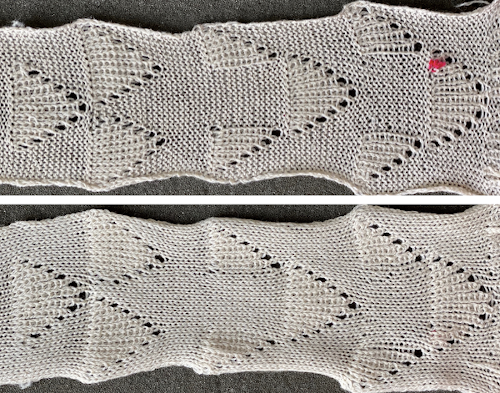
 Transfers of stitch groups, whether by hand or using the accessories are made on rows where no needle preselection occurs on the main bed
  This series is a proof of concept for my approach to developing electronic cues
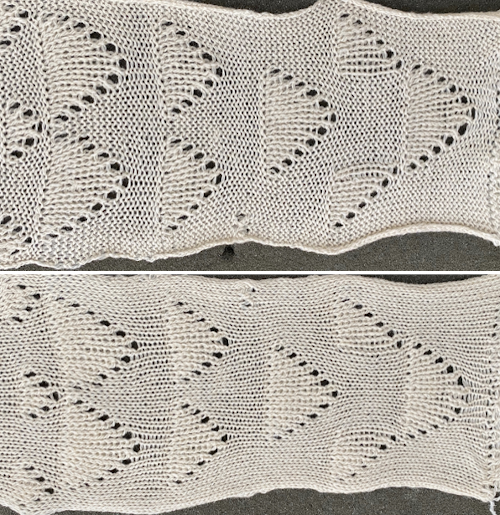 The original repeats were modified to include 2 blank rows between segments that allow for transfers between beds not hampered by needle preselection on the top bed. The motifs are color reversed, but not the blank rows between them.
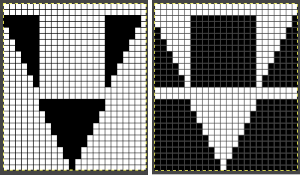 The knit carriage is set to select needles KC I or II, end needle selection does not matter. All needles on the top bed knit every stitch, every row, whether or not those design rows contain black pixels. No cam buttons are pushed in. Blank areas between black ones indicate the number of needles that actually need to pick up loops on the ribber to create shapes, filling in spaces between selected needles until an all-blank row is reached for making transfers. The chart on the far right illustrates a shape where the easiest method becomes one where stitches on the ribber are manually transferred to the top bed in order to reverse the shape and maintain every row preselection. The selected needle corresponding to the black square marked with the top of the red arrows is pushed back, the ribber stitch below is transferred onto it, the needle with the couples stitches is brought to E position, moving across the bed in proper locations prior to knitting the next row.
 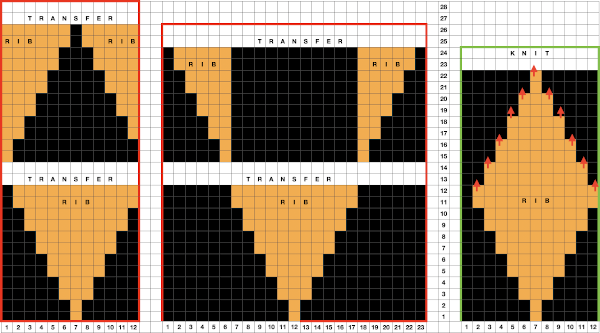 In this repeat, the side vertical panels of ribbed stitches are added. The knit stitches on each side of them roll nicely to the purl side, creating what in some fabrics can actually be planned as an edging.
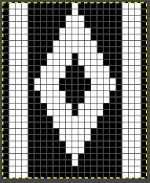
 In the first sample, equal thickness yarns were used, the colored yarn was a rayon slub with no stretch and slippery nature.
 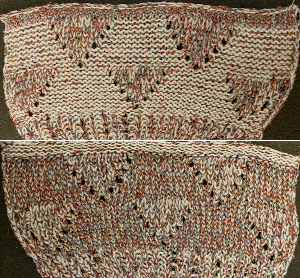 The bottom of this test used a wool yarn of equal weight to the light color, which proved hard to knit. The red is a 2/48 cash-wooll
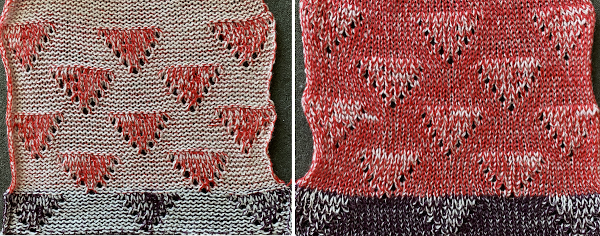
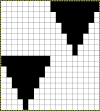
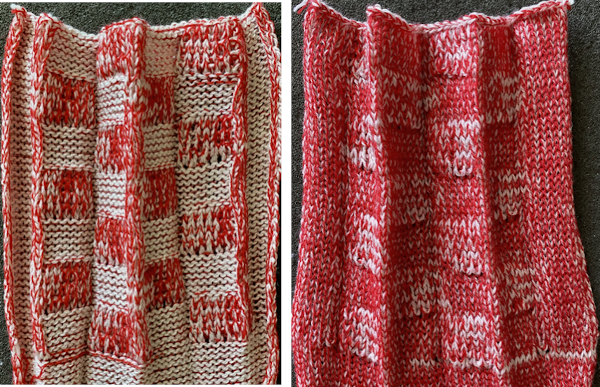
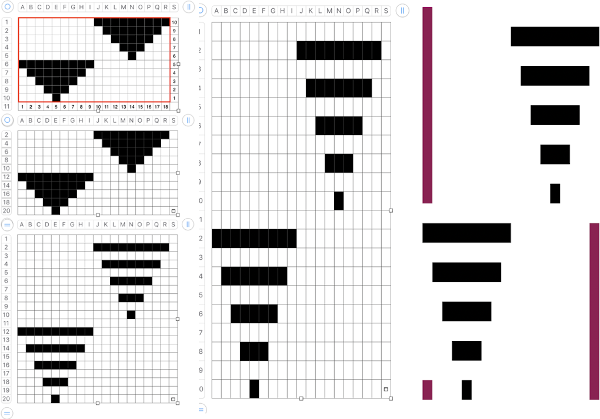
 If any stitches are pushed all the way back or in mixed alignment during transfers,
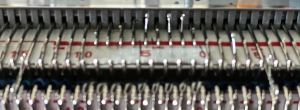
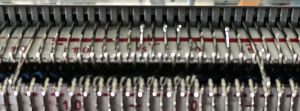
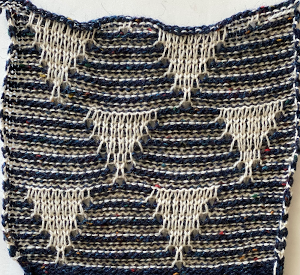
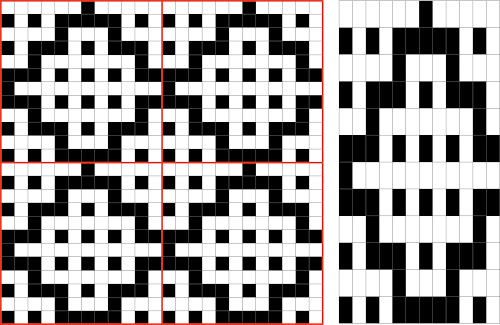
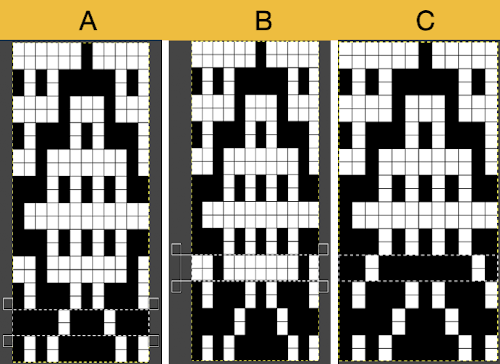
 Proof of concept: the bottom half is knit using the slip stitch setting, the top half in the tuck setting. The added texture on the tuck stitch purl side makes the fabric a more interesting, reversible one, and wider than its companion.
 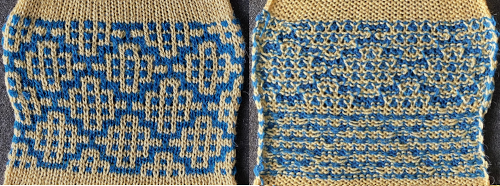 For a different way of working with two-color initial images using only Gimp, see tips in
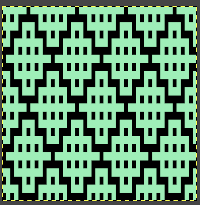

 Numbers processing to ready the repeat for final gimp editing:
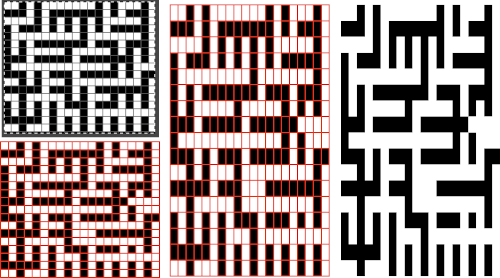
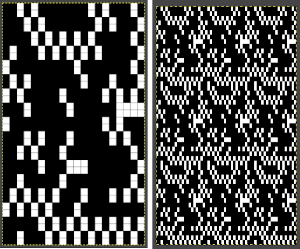
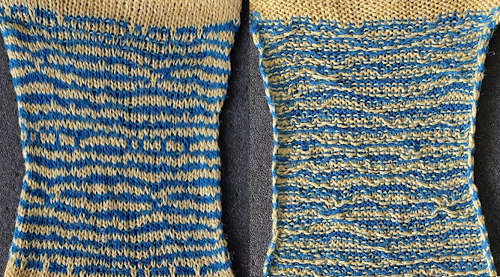 Getting back to clearer pattern results: when using electronics, it is possible to create far wider and taller repeats for download. The technique to achieve them uses the same process. That said, there are quicker ways to attain the final repeat illustrated in the 2024 posts on using Gimp color to alpha through the Layer> Transparency option or Colors> Color to Alpha.
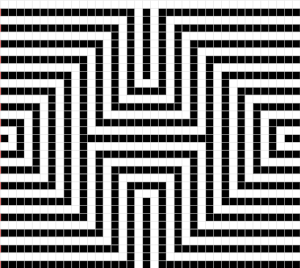
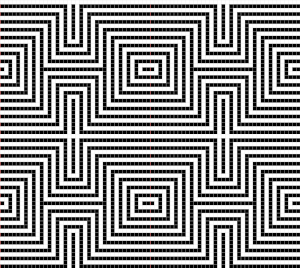
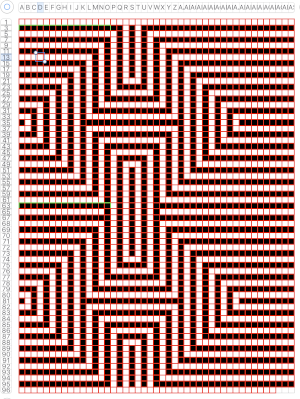 the isolated repeat, double-length
 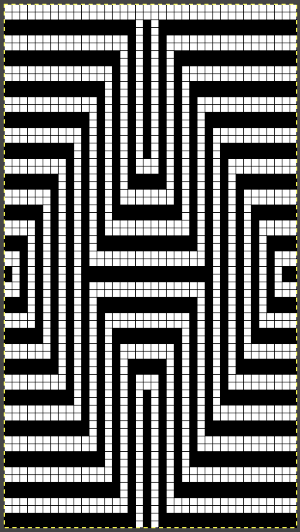 the color separation in progress
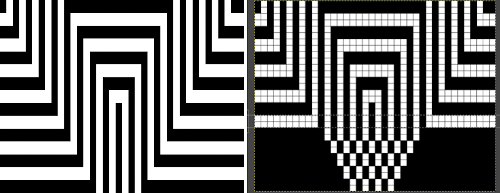 When knit, that white cell pair of rows break up the overall shapes and shifts the pattern in the top and bottom half
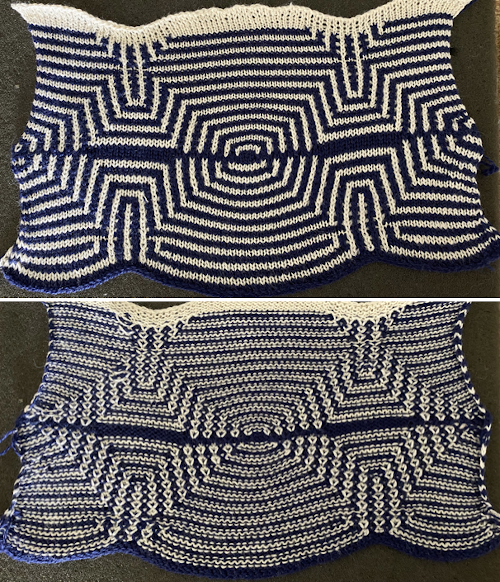
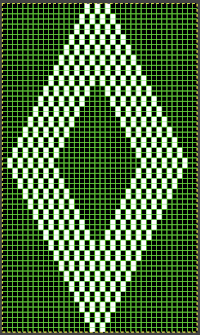
 The final adjusted repeat
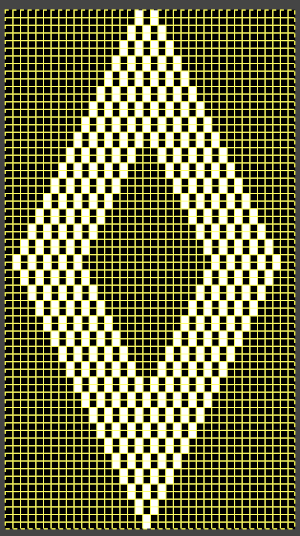
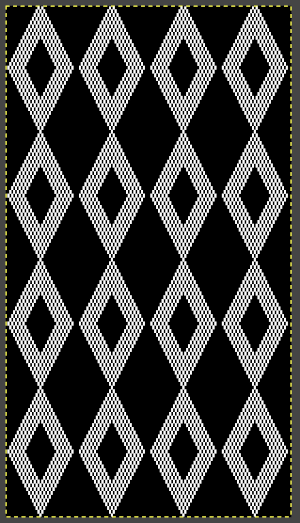 knit using the tuck stitch setting in both directions, KCI, first row left to right, leading with the dark color
 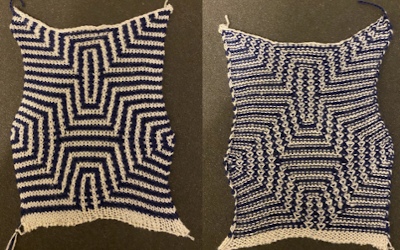 and here with the lighter color
 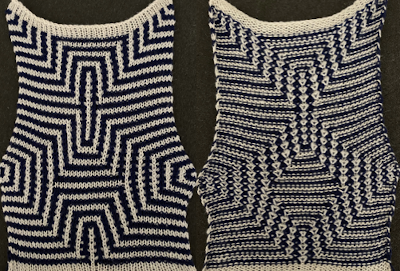 In progress, on the km
 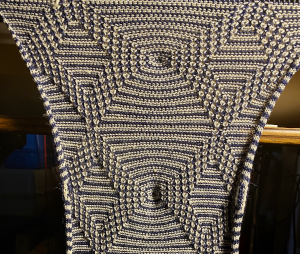 the relaxed, 3D-ish view on the reverse
 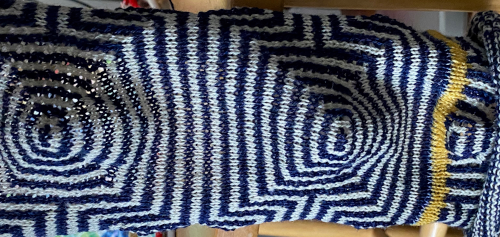 why projects can take longer than planned
 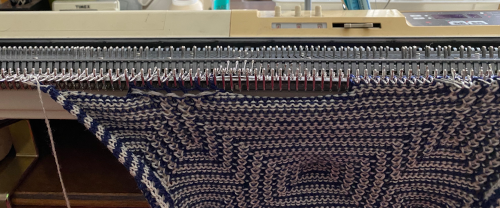 The finished, relaxed scarf with pressed edges only, retaining the conical striped forms
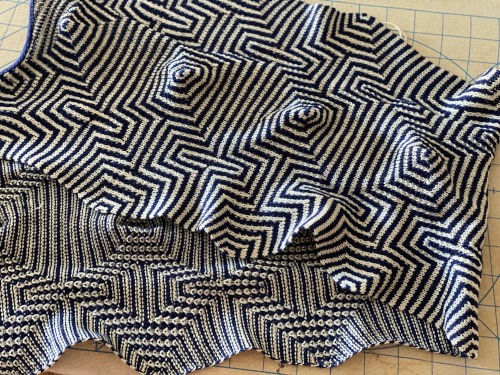 The repeat knit double length, changing colors every 2 rows, becomes something quite different, with a sharp curl to the purl side
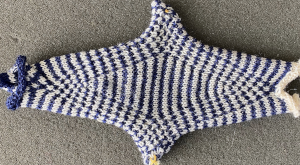
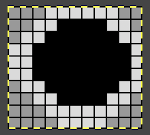 with my color changer in this threading sequence throughout
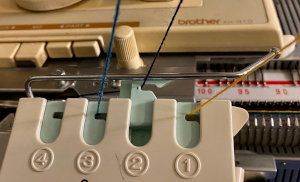
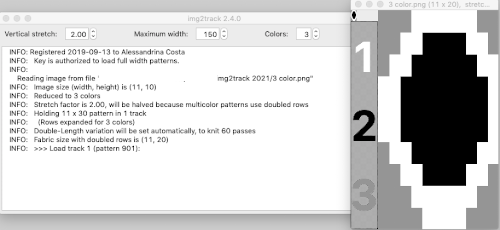 where normally each color in each design row knits twice. Because selection occurs for pairs of rows, the first preselection row is from right to left. To decrease the backing rows, the ribber is set for birdseye. I prefer to have an end needle on each end on the ribber, keeping in mind that the total number of needles in use there needs to be even. The machine provides reminders as to which color should be knitting. My samples are knit using KCI on the top bed. Because the preselection happens twice, it is easy enough to knit in pattern from left to right,
 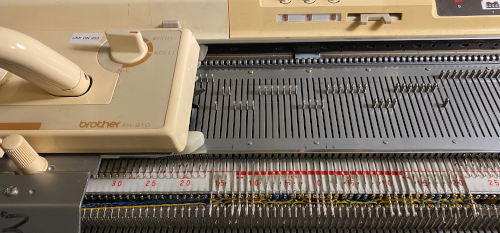 when the carriages have reached the right side, simply use a ribber comb to push all needles back to B.
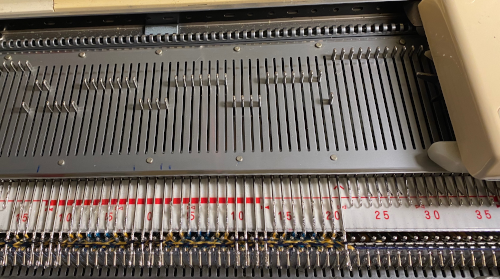
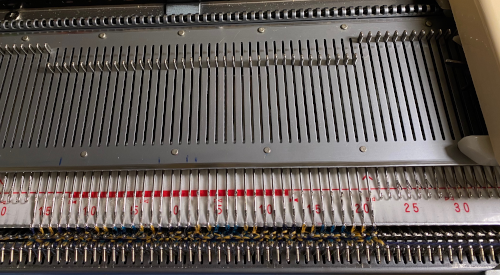

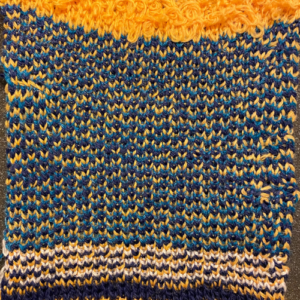 Speeding things up with color separation, beginning with the method that will have each color, each design row knitting twice. The repeat is 10 rows high, so it is expanded X6 to 10 by 60 rows. In the final result, the second row for each color in the separation is in turn erased. The red was added to make all 3 colors visible while working the separation, avoiding confusion with the white ground. The knittable result as usual is in a black and white png
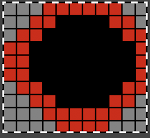
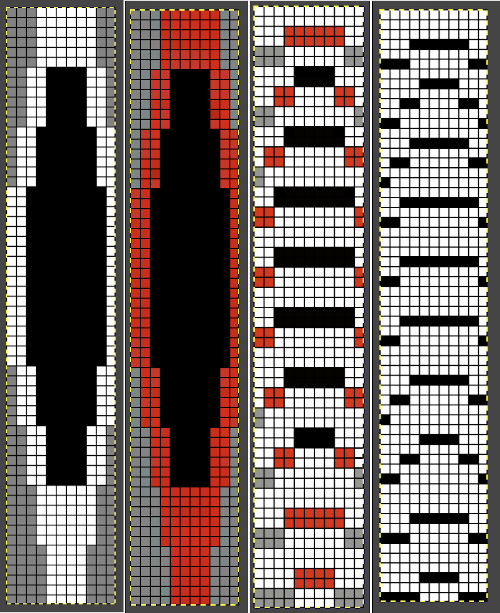
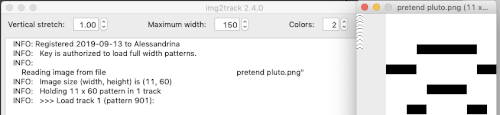
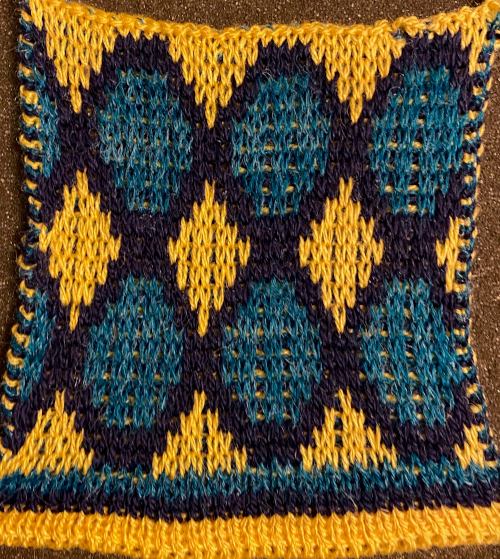
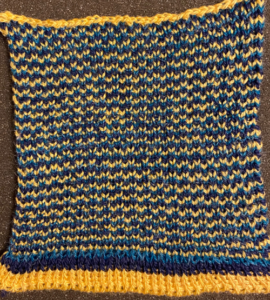 The ribber can also be set to knit every row, resulting in elongation on the knit side, while creating an interesting striper backing
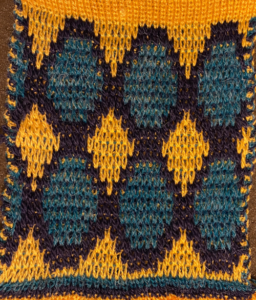
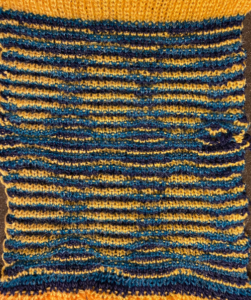 Comparing this version to the birdseye backed one for repeat height
 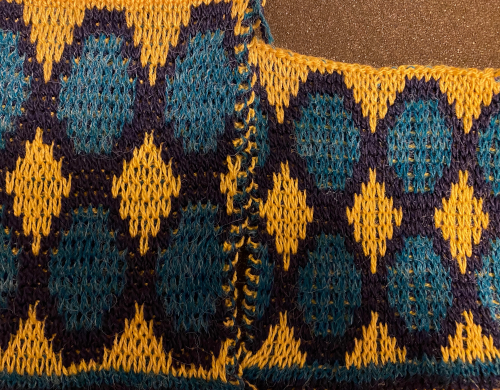 Comparisons: HoP, pushing back needles to B, and color separation results. In the latter, the design is likely elongated in part due to a change in the distribution of thinner yarns to larger design areas with no tension adjustments