Update releases after this post was published
ArahPaint April 23, 2025
Gimp March 16, 2025 has many menu and command changes, perhaps making some reinterpretation necessary when following previously published blog posts. A quick tutorial, and a video.
I have found the March and the later May release update both problematic, would recommend staying with or installing the last previous stable version instead.
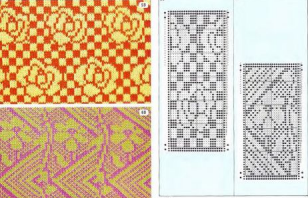
I remember graph paper, colored pencil, acetate transparency days, and the achingly slow first experiments using Excel to attempt to fill in motifs cell by cell, row by row. A better understanding of knit structures evolved along with tools to make them possible, and the process has become quick and satisfying when those black squares or punched holes make the planned knit fabric possible.
More separations for various knits using Gimp, color to alpha included this method for knitting each color in each design row twice. 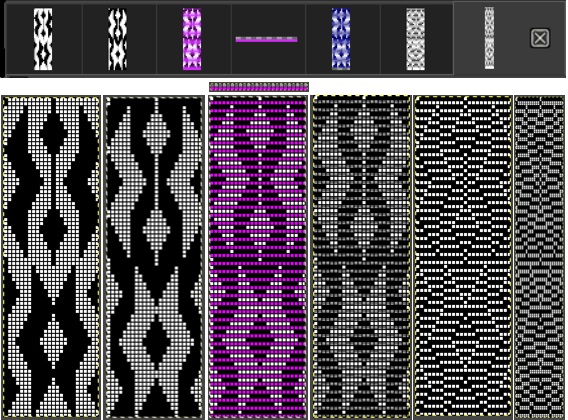 I have not duplicated the process using ArahPaint in the past. The previous failed attempts appear to have resulted from rendering a color transparent before copying and pasting the chosen file onto another in a new window.
Using a matching size file filled with the brush and enough magnification ensures that the layers will be superimposed on each other correctly, with no missed rows or columns.
The experiments that follow use the same repeats explored in the Gimp posts, which included the knit swatch proofs of concepts following their use.
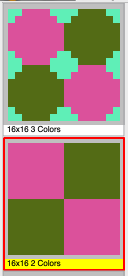
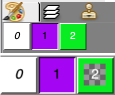
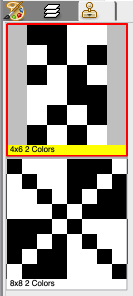
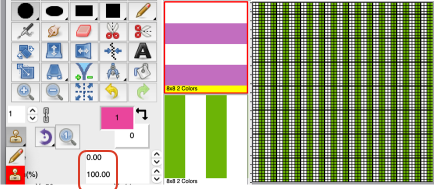
At the bottom of ArahPaint in knit design 5 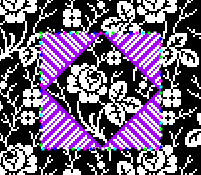 exploring rendering colors transparent began with creating and saving one or more brushes in 2 colors and involved steps in multiple open windows.
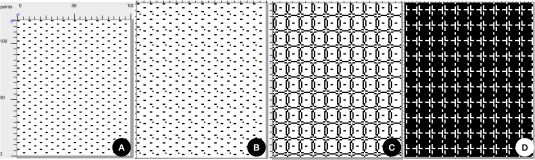
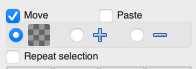
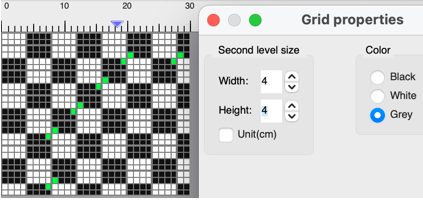
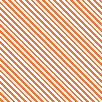
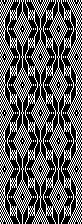
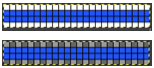
The brushes need not match the design in width, plan its magnification and size for easy visibility ie this 12X2 ![]() A reminder: magnification used appears at the top of each window, selecting 0 on the keyboard will enlarge the starting image X1000, use select + or – for custom values
A reminder: magnification used appears at the top of each window, selecting 0 on the keyboard will enlarge the starting image X1000, use select + or – for custom values ![]()
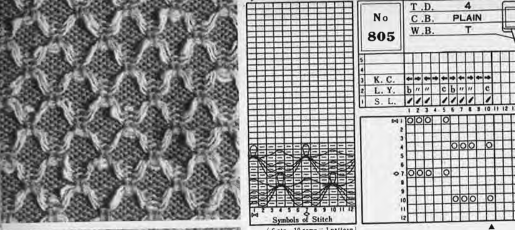
![]() From the Kinder book
From the Kinder book
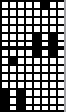
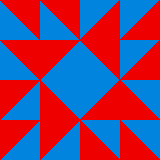
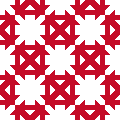
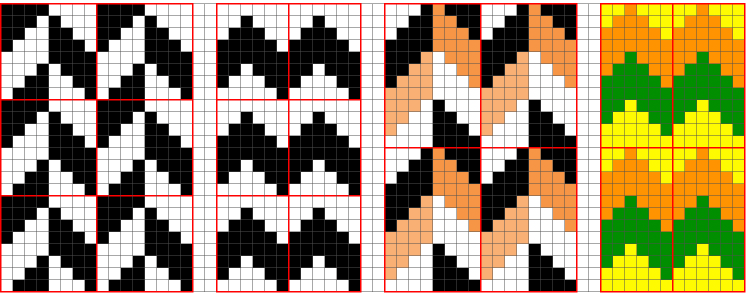
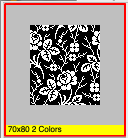
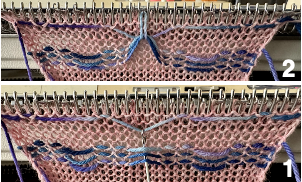
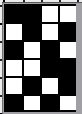
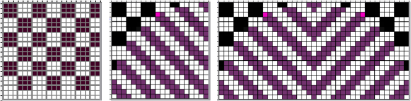
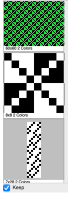
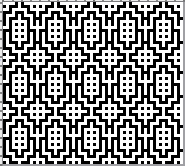
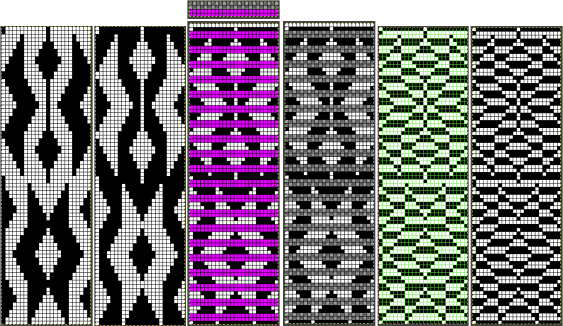
1. a 12X18 repeat
2. the published separation for knitting as a mosaic
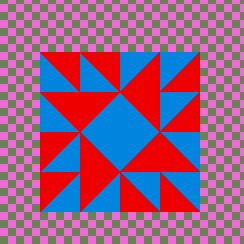
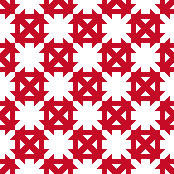
3. #2, color inverted for knitting using the tuck or slip setting
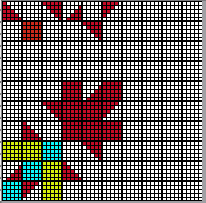
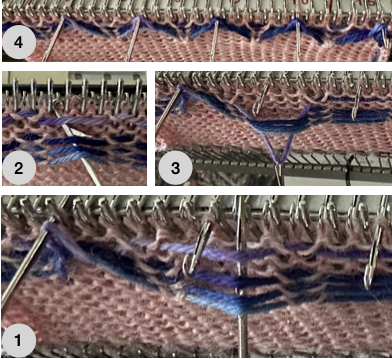
4. the brush used to bucket fill a 12X18 picture, and the palette window illustrates each of the 2 colors alternately rendered transparent 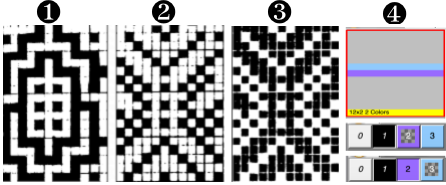 1. in the first window, open the 12X18 PNG
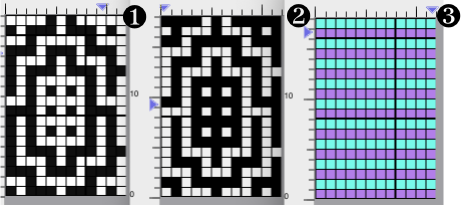
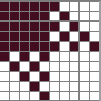
![]() 2. in the second window, Colors >Invert all
2. in the second window, Colors >Invert all ![]() 3. in the third window, 12X18 filled with the brush pattern
3. in the third window, 12X18 filled with the brush pattern ![]()
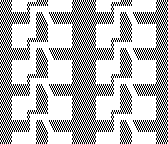
 A. copy # 3, as you move to paste #2 before moving it permanently in place, shadows of both brush colors will be slightly visible, select the color for row 2 and even rows in the palette window repeatedly until it is shown as rendered transparent (color to alpha)
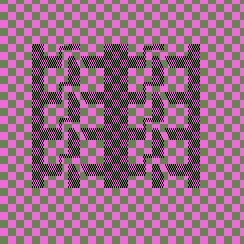
B. paste the result in place and select the merge down/drop selection tool by clicking on its icon in the toolbox,  pressing the Command+d on the Mac Keyboard, or right-clicking outside the selection somewhere in the background image to merge the selection into the image in its current location. The dotted lines, sometimes referred to as walking ants, will disappear.
C. copy B, repeat the process positioning it on A, rendering the purple transparent to complete the color separation. 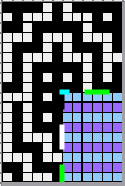
![]() For knitting as a tuck or slip-stitch mosaic, the 12X18 file
For knitting as a tuck or slip-stitch mosaic, the 12X18 file ![]() must be doubled in height to 12X36. The approach for developing separations for large-scale mosaics is the same, taking care that when images are pasted from one window to another, they are not placed a row or a column off.
must be doubled in height to 12X36. The approach for developing separations for large-scale mosaics is the same, taking care that when images are pasted from one window to another, they are not placed a row or a column off.
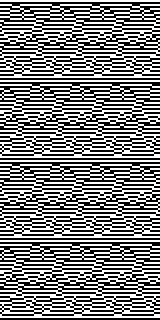
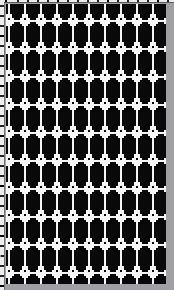
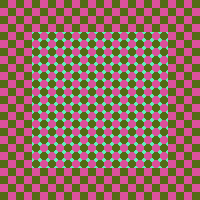
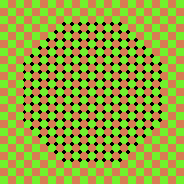
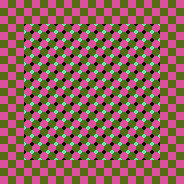
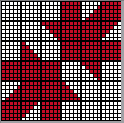
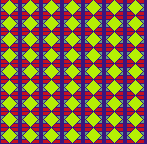
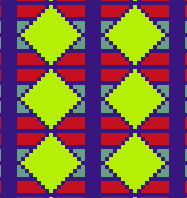
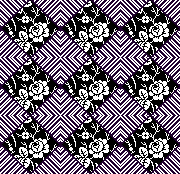
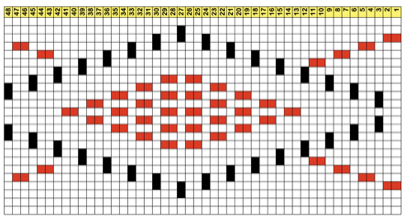
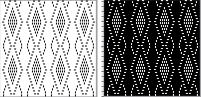
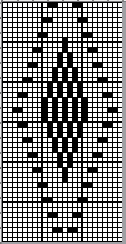
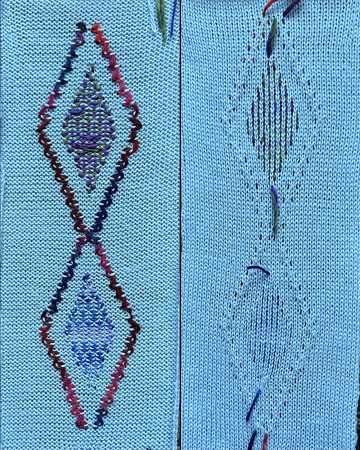
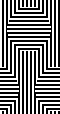
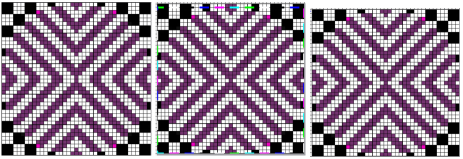
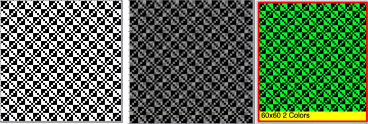
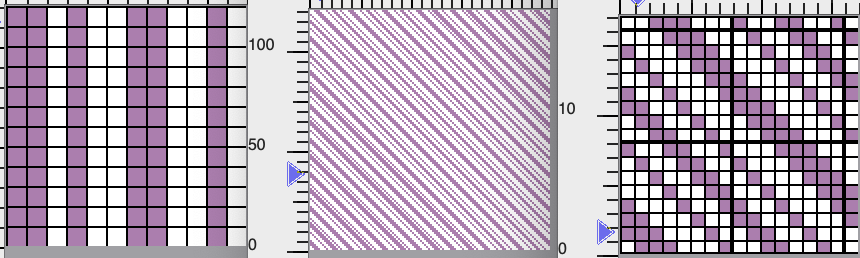
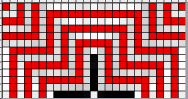
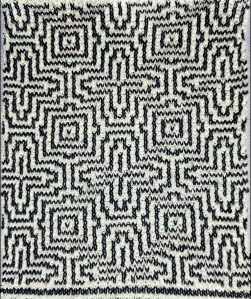
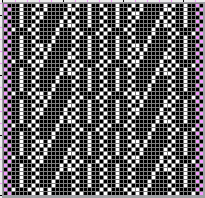
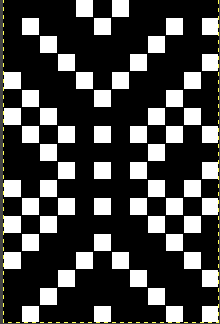
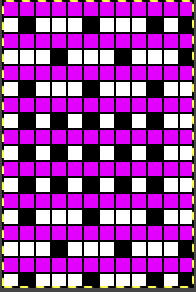
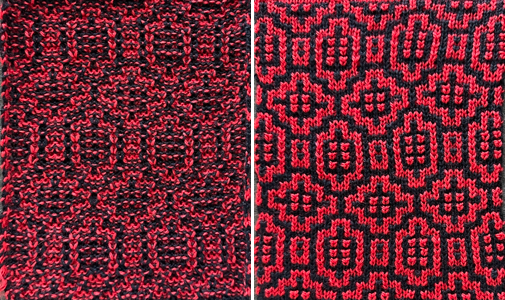
From a free online pattern, the adapted repeat: 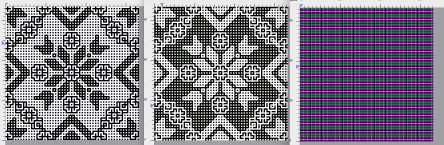 the repeat, 100X100
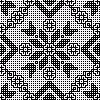
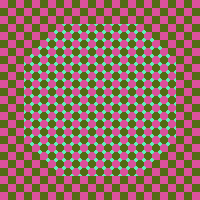
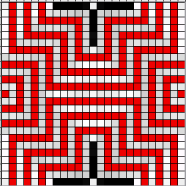
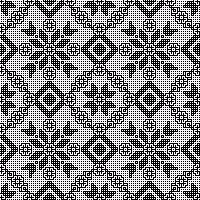 color inverted
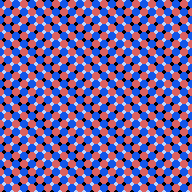
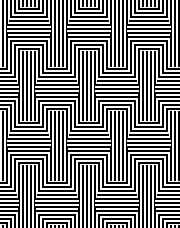
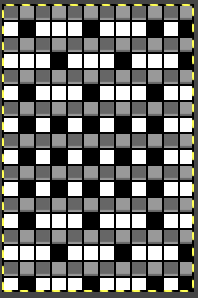
  same size image brush filled
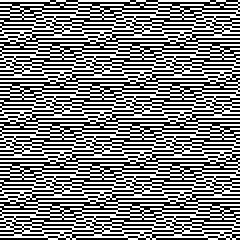
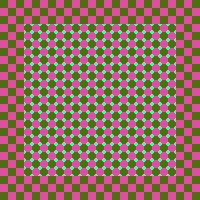
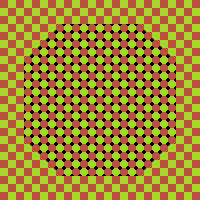
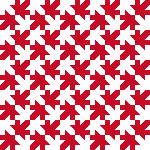
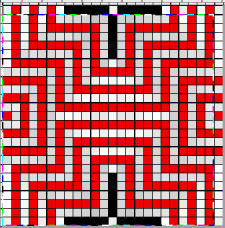
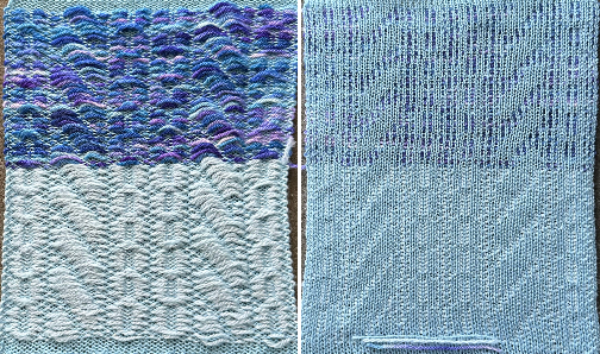
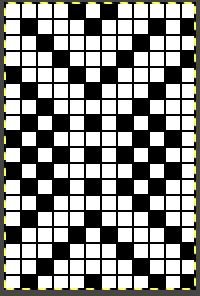
 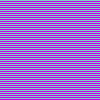 copied and pasted on color inverted file, after light blue color to alpha
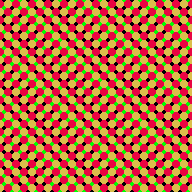
 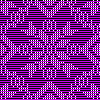 copied and pasted on the original, after purple color to alpha
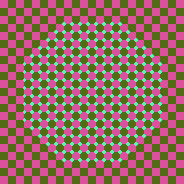
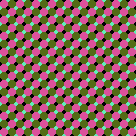
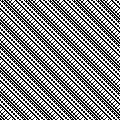
 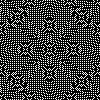 rendered double length (or set the double length button in the machine)
  Proof of concept swatch is found in Color separations for larger scale mosaics and mazes along with added experiments ie with this starting image
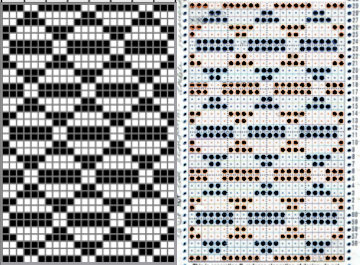
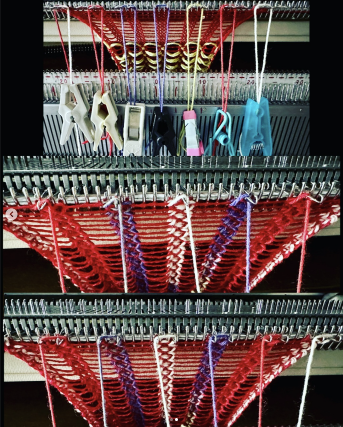
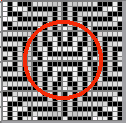
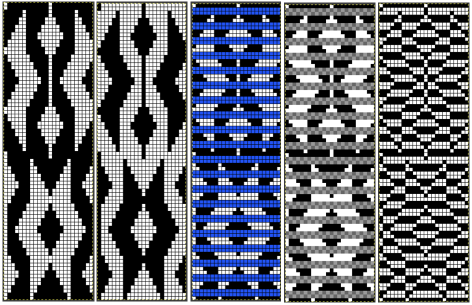
![]() DBJ work: using StitchWorld # 548 is a 24X40 design
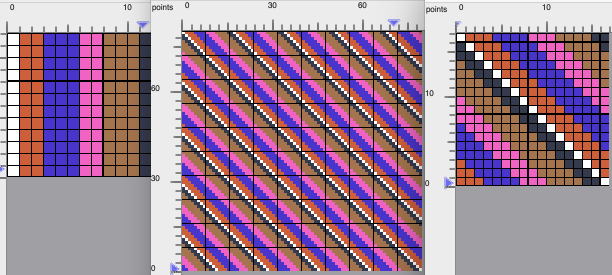
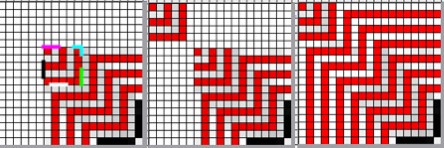
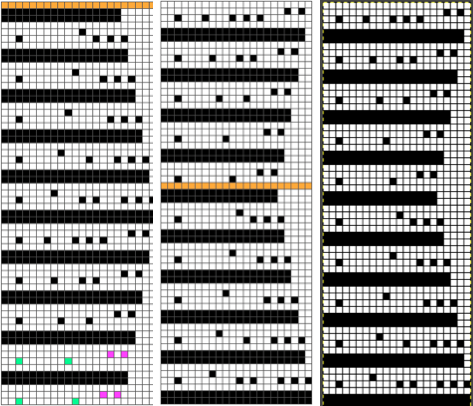
DBJ work: using StitchWorld # 548 is a 24X40 design ![]() The three ArahPaint windows.
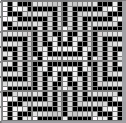
The three ArahPaint windows. 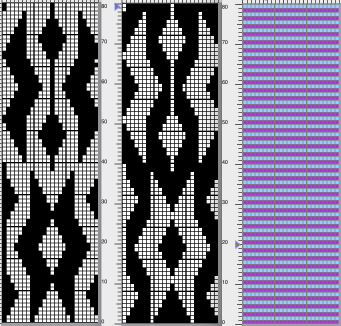 To be separated for use in DBJ with each color in each row knitting twice, begin with # 548 doubled in height to 24X80
 ![]() invert colors
invert colors ![]() copy the 20X80 brush-filled image,
copy the 20X80 brush-filled image, ![]() and move it in place over the color inverted file, blue to alpha, merge layers
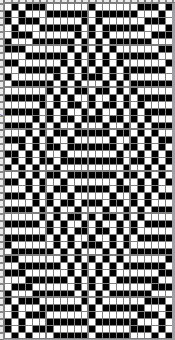
and move it in place over the color inverted file, blue to alpha, merge layers ![]() copy and paste it on the original rendered double height>20X80, first changing purple to alpha, merge colors, set the number of colors to 2> BW,
copy and paste it on the original rendered double height>20X80, first changing purple to alpha, merge colors, set the number of colors to 2> BW, ![]() the 24X80 file doubled in height (Multiply YX2) to 24X160, matching the Gimp results.
the 24X80 file doubled in height (Multiply YX2) to 24X160, matching the Gimp results. ![]() Duplicating the punchcard design separation for knitting each color in each design row only once,
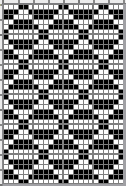
Duplicating the punchcard design separation for knitting each color in each design row only once, 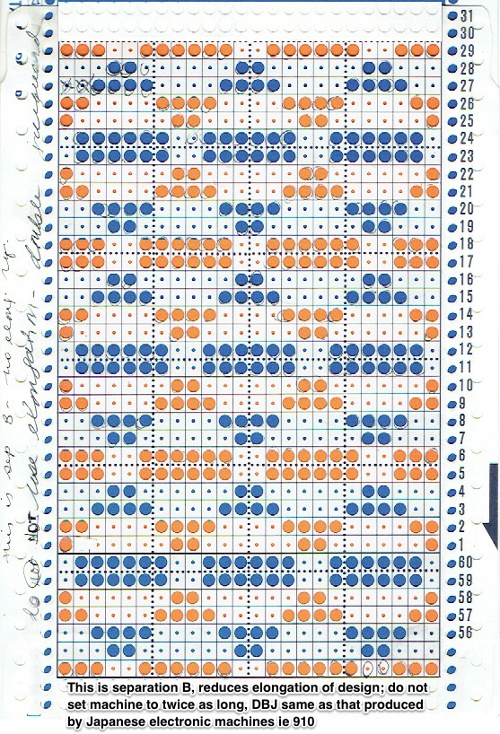 the original methods followed using a shifting template, as follows:
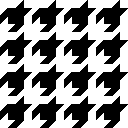
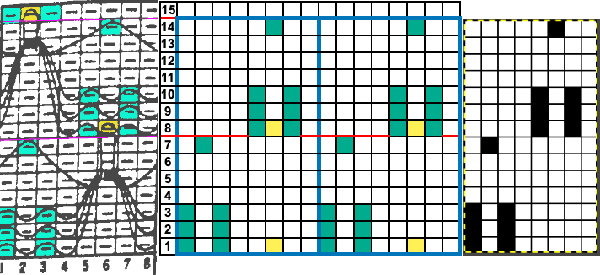
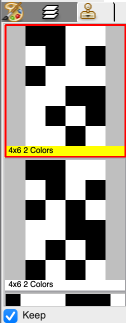
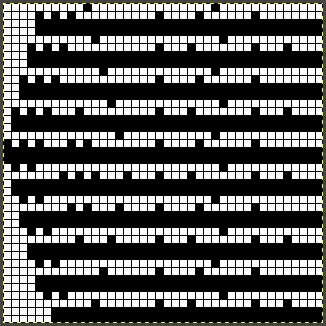
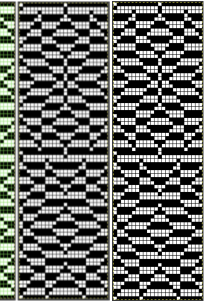
the original 24X6 complete row of repeat is doubled in height to 24X12 ![]() and in turn, is repeated to an adequate height for the punchcard to roll smoothly in the reader, 24X36.
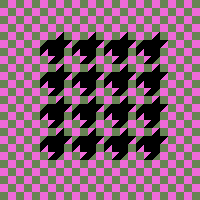
and in turn, is repeated to an adequate height for the punchcard to roll smoothly in the reader, 24X36. ![]() Begin the color separation by creating a 4-row brush in 2 colors ie
Begin the color separation by creating a 4-row brush in 2 colors ie ![]()
![]() May 2025 edit is the result of a lightbulb moment when attempting to answer a FB question shortens the process:
May 2025 edit is the result of a lightbulb moment when attempting to answer a FB question shortens the process:
the new brush ![]()
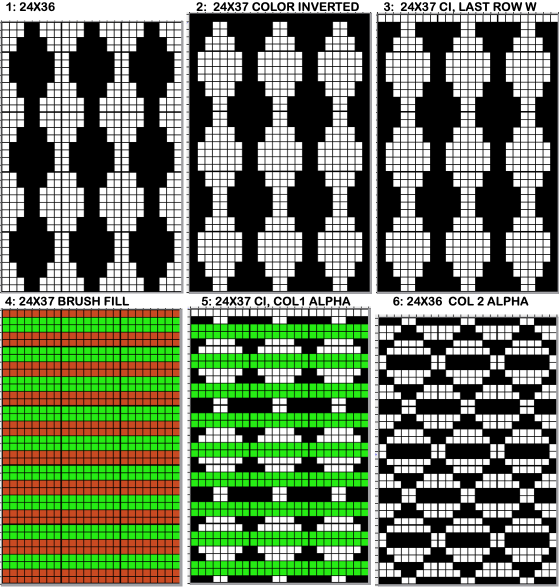
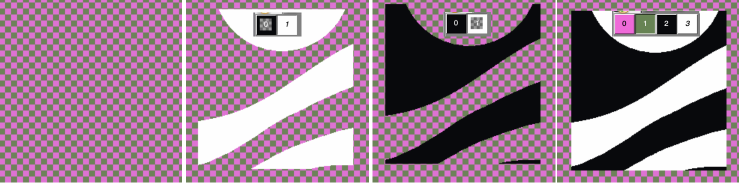
![]() 1: first window, 24X36
1: first window, 24X36 ![]() 2-3: in the second window, open another 24X36 file, color invert all content
2-3: in the second window, open another 24X36 file, color invert all content ![]() 4: in the third window, open a new file, 24X36, fill with the custom brush, and select all
4: in the third window, open a new file, 24X36, fill with the custom brush, and select all![]() 5: copy and paste the brush-filled image on the color inverted one after rendering the cyan color transparent using color to alpha, merge to new content
5: copy and paste the brush-filled image on the color inverted one after rendering the cyan color transparent using color to alpha, merge to new content ![]() 6: copy and paste it on the first image after rendering the magenta color transparent, merge the content for the end-result.
6: copy and paste it on the first image after rendering the magenta color transparent, merge the content for the end-result. ![]() To knit on electronic models, change mode to indexed, BW, and save.
To knit on electronic models, change mode to indexed, BW, and save.
If preferred, save a scaled result to print and aid in tracing and marking a card for punching.
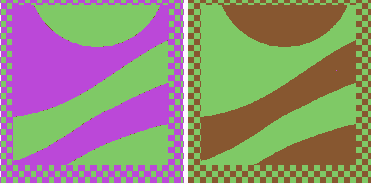
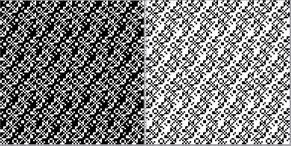
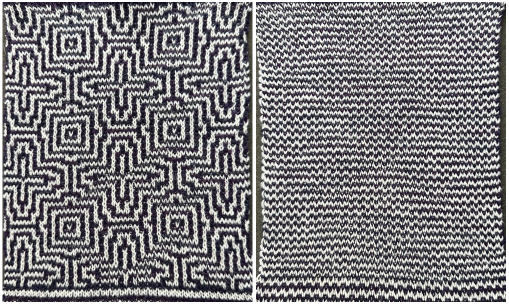
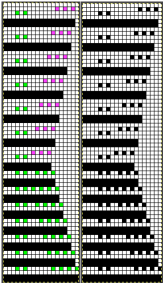
The “old” method,
 and the “new”, resulting in a matching result with fewer steps,
 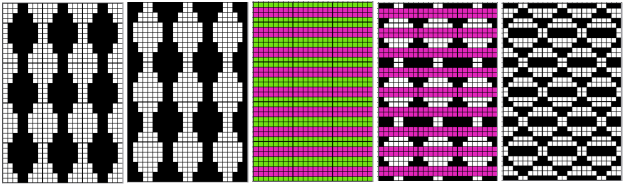 with both matching the punchcard separated the low-tech way. The approach used to emulate pile knit designs using large-scale repeats as seen in Geometric shapes on ribber fabrics formed with tuck stitches 4, where proof of concept swatches are also found.
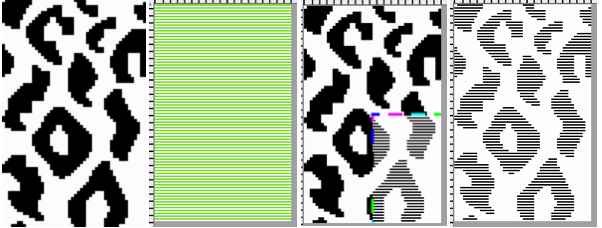
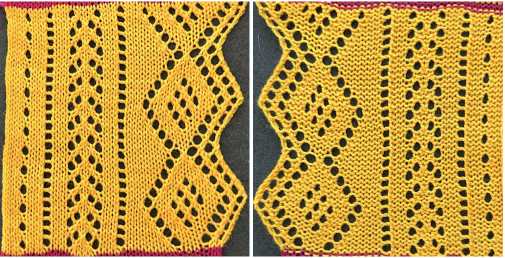
 Using the same design for embossed fisherman rib
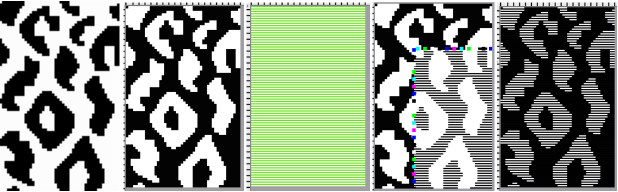
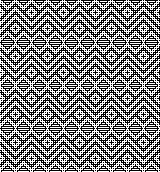
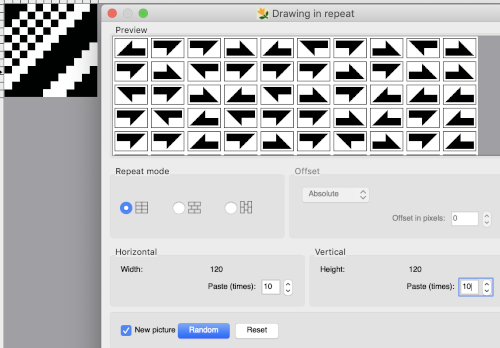
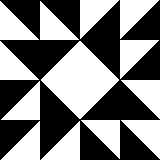
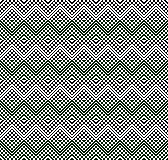
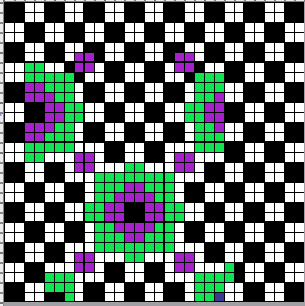
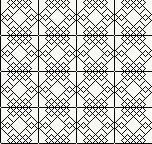
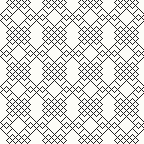
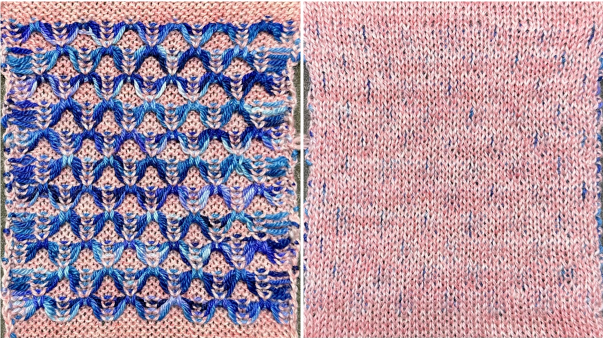
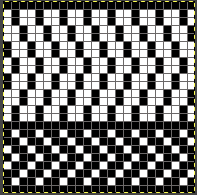
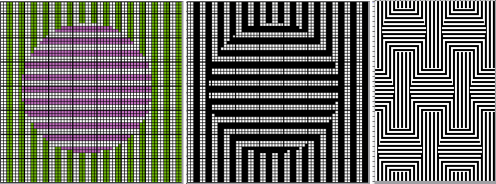
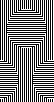
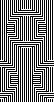
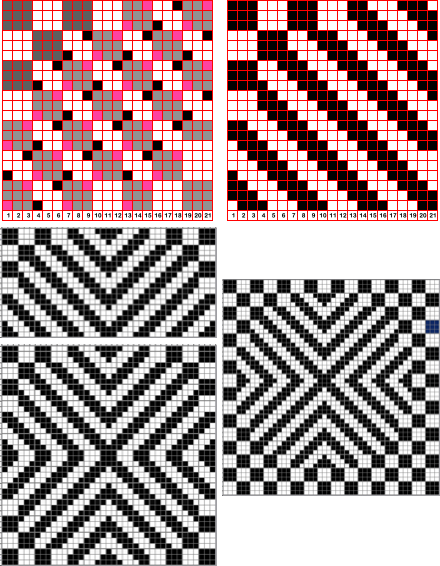
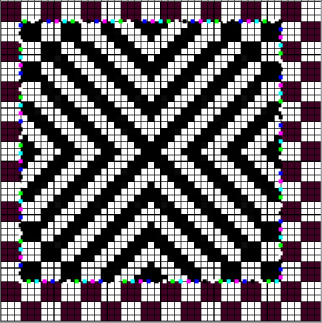
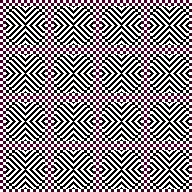
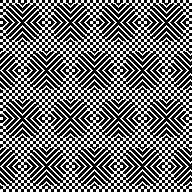
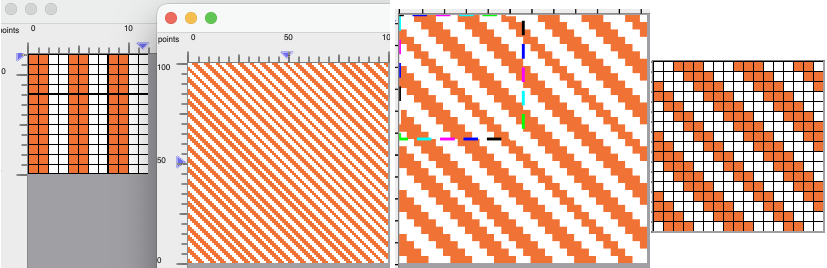
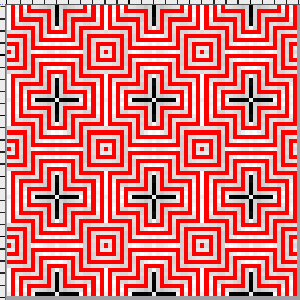
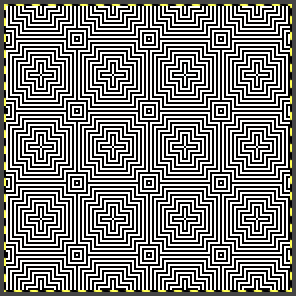
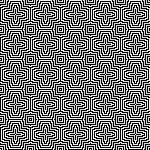
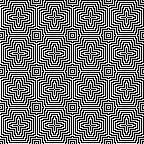
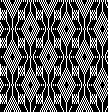
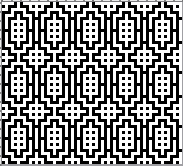
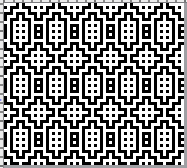
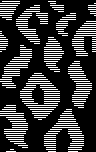 A 25X25 pixel file based on Truchet tiles was
 ![]() drawn in repeat using the random >preview option until a final version was chosen
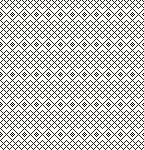
drawn in repeat using the random >preview option until a final version was chosen 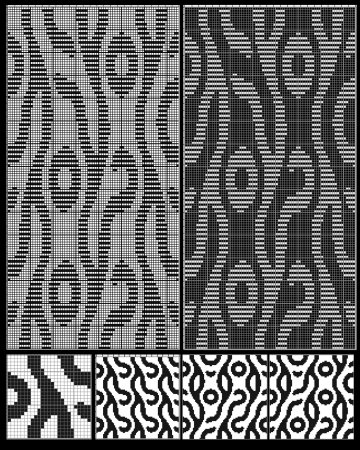 and rendered double height. A 2-row brush fill was used to expose every other row, the resulting 75X150 file.
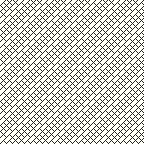
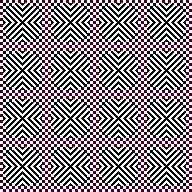
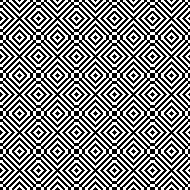
 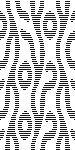 was color-inverted for use with the tuck setting.
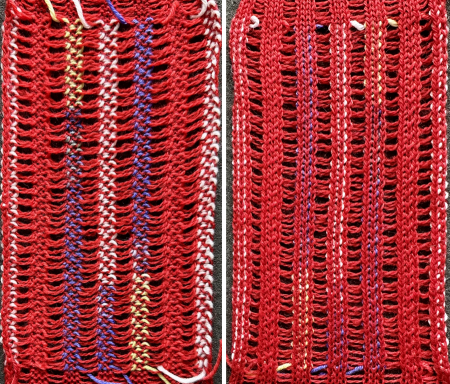
 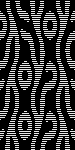 Before being color inverted, the above design could be used in single-color drop-stitch lace or punch pile in machines with that capacity.
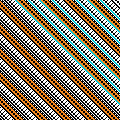
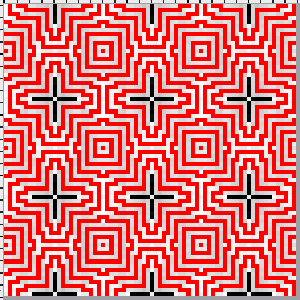
The spacing between lines of pixels can be varied for custom designs ie in the hand-formed loop version of a 24X48 file, ![]() adjusted in height and width by multiplying YX3
adjusted in height and width by multiplying YX3 ![]() and multiplying X X2
and multiplying X X2 ![]() the saved brush
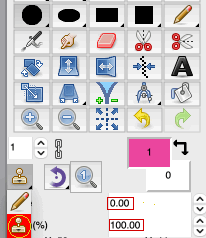
the saved brush ![]() set the number of colors to 3 to include the added one used in the brush
set the number of colors to 3 to include the added one used in the brush
in a new window open a new picture 48X144, fill it with the brush, ![]() and copy and paste it onto the first image, after rendering the third color transparent.
and copy and paste it onto the first image, after rendering the third color transparent. 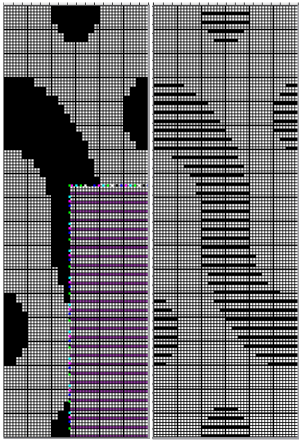 Set the number of colors to 2>BW, and the final 48X144 file will be ready for knitting.
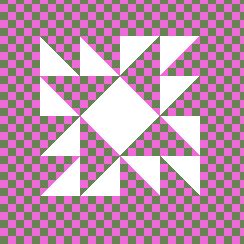
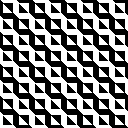
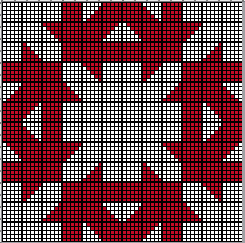
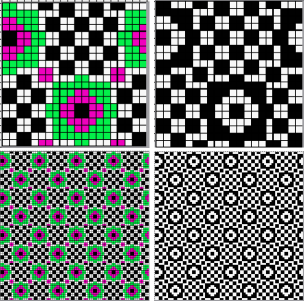
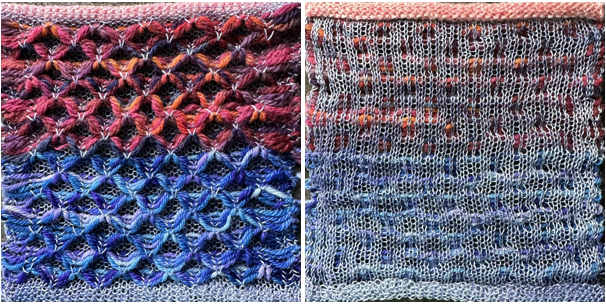
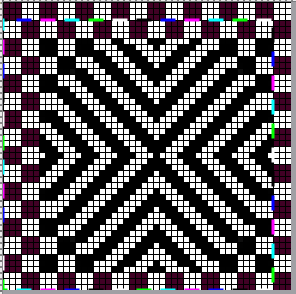
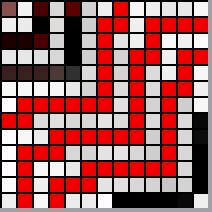
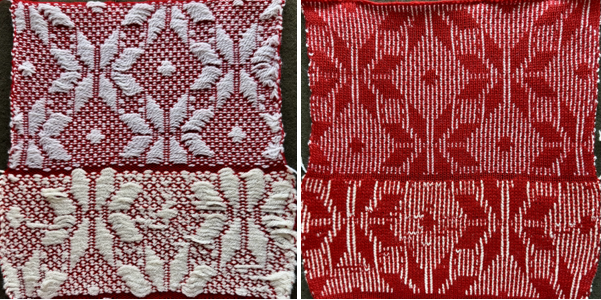
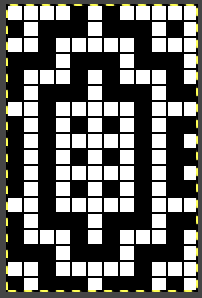
 ![]() A new large-scale mosaic using the same approach, 32X86 PNG
A new large-scale mosaic using the same approach, 32X86 PNG ![]()
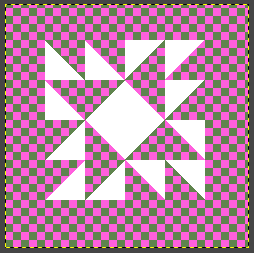
 color inverted 32X86
![]() 32X86 brush fill
32X86 brush fill ![]() copied and pasted on color inverted file, white color to alpha
copied and pasted on color inverted file, white color to alpha ![]() copied and pasted on the original file, purple color to alpha
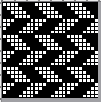
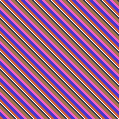
copied and pasted on the original file, purple color to alpha ![]() double length for knitting using tuck stitch setting single bed, 32X172
double length for knitting using tuck stitch setting single bed, 32X172![]()
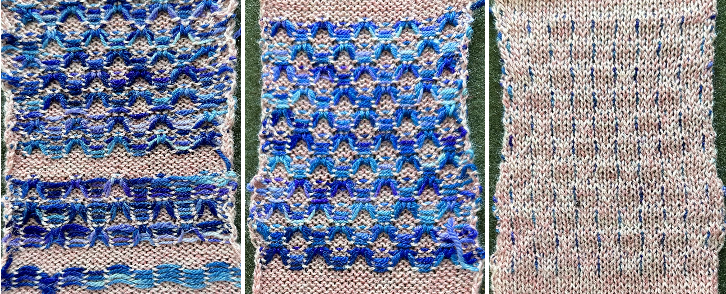
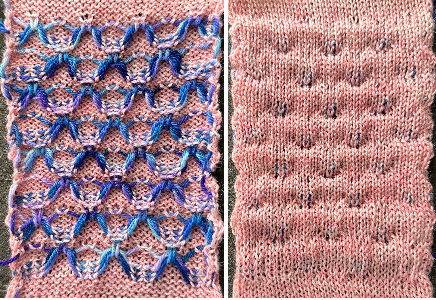
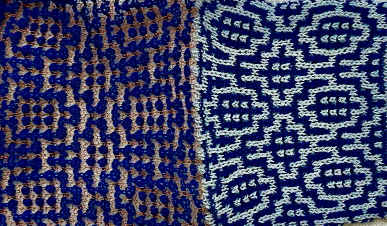
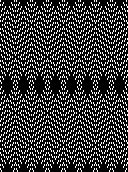 The swatch was knit on 60 stitches and for 182 rows, measured 9X11.25 inches. Multiple color drop stitch lace using img2track and more includes a cumulative list of links to previous posts investigating the technique including when using only one color. In Passapese the knit was often referred to as summer fair isle.
Shorthand for ArahPaint steps for attaining the same results as with the Gimp color separation: ![]()
![]()
![]()
![]()
![]()
 Other effects can be obtained using DBJ color separations, which knit each color in each row twice. An easy variation is seen in the post on Long stitch Passap and Brother DBJ design using thick and thin yarns.
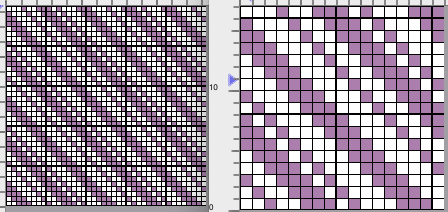
ArahPaint drawing in repeat facilitates half-drop and brick variations of designs. Color separation often requires long images.
If a source separation is already available, ie this 40X80![]() using offset it is possible to develop a brick repeat, 40X160
using offset it is possible to develop a brick repeat, 40X160![]()
 half drop repeat, 80X80
 A proof of concept swatch has been added to the post on Long stitch Passap and Brother DBJ design using thick and thin yarns
 and
and 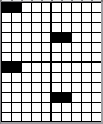


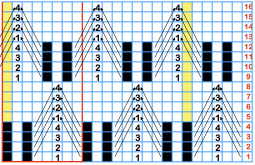


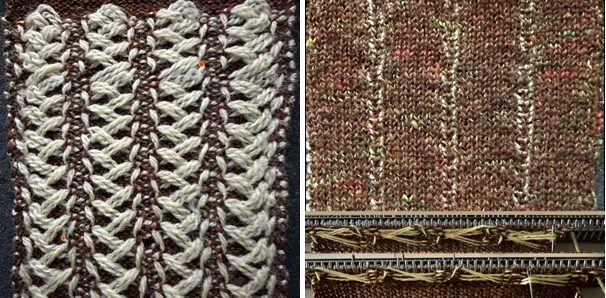

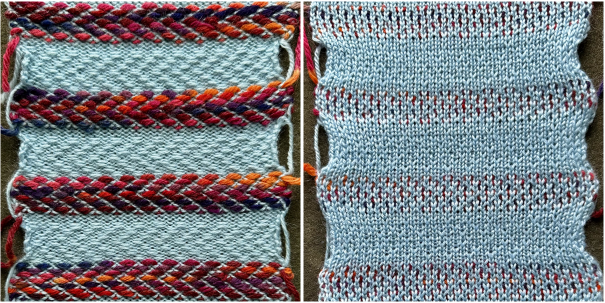
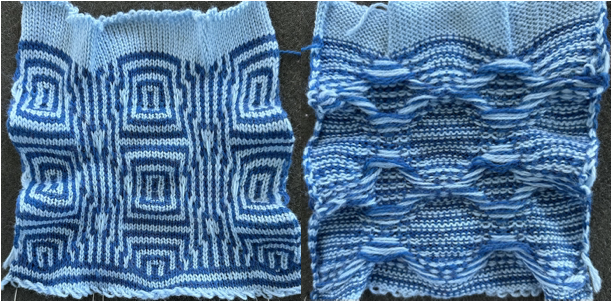
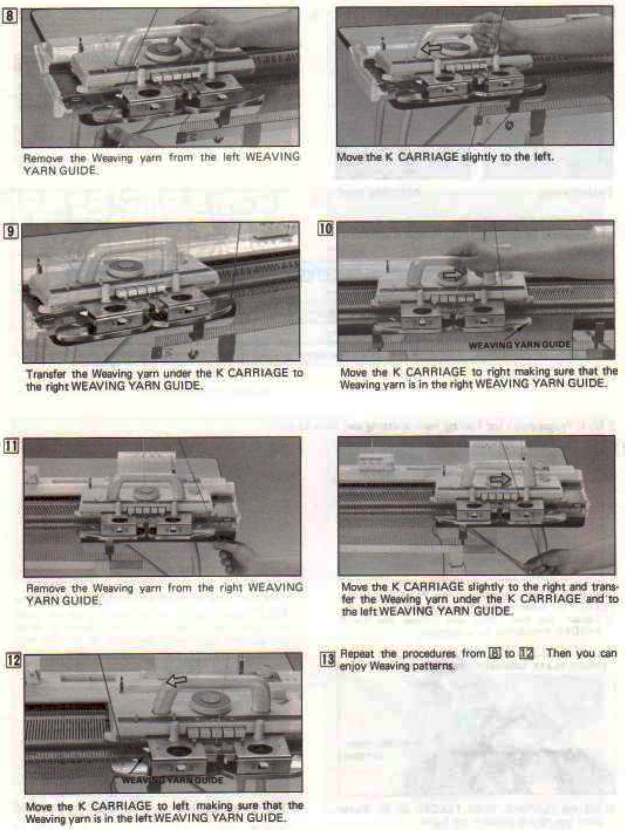
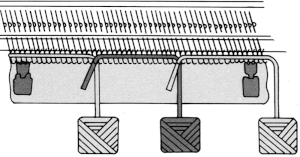
 Altering the repeat while planning on cam settings to be changed every even number of rows also brings the possibility of using 2 carriages in electronic models, with one set to tuck in both directions, the other to normal knit (no cam buttons) but with needle selection for weaving rows, KCII
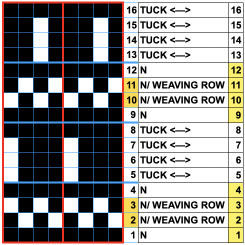
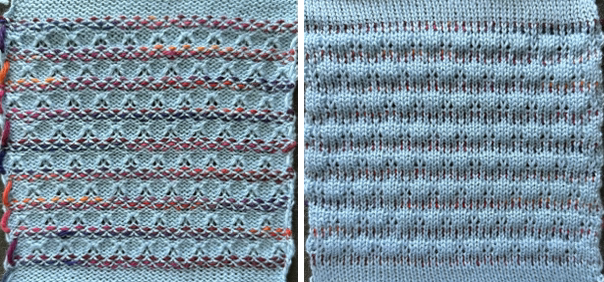
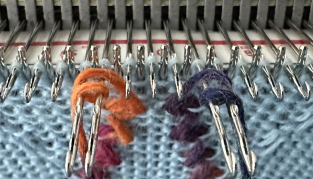
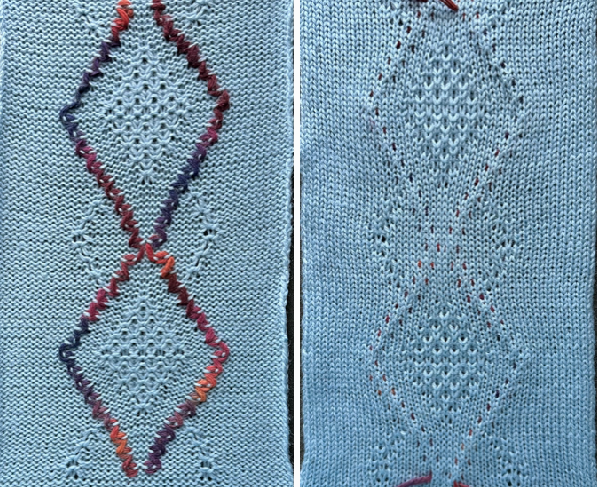
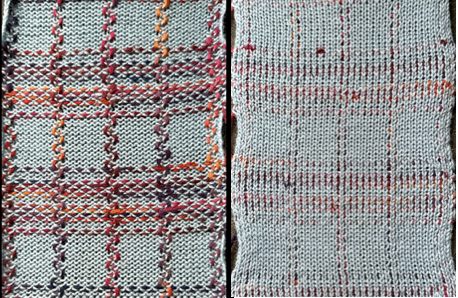
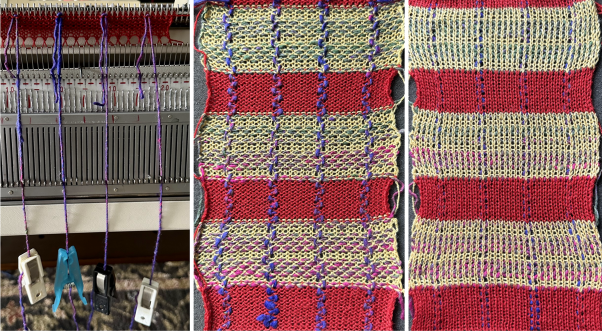
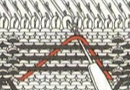
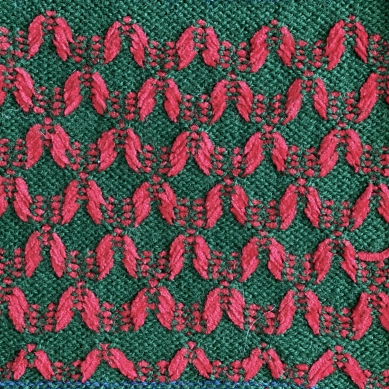
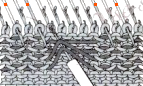
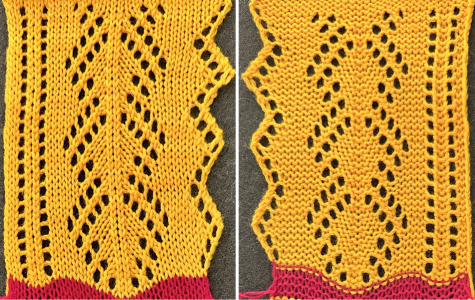
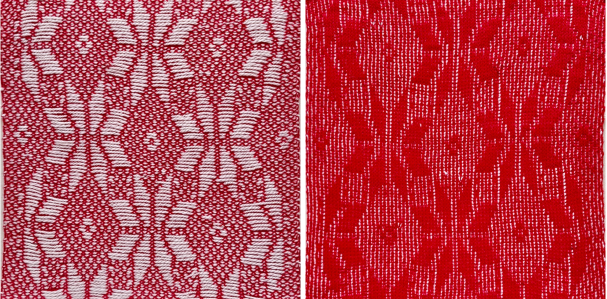
 In this sample with horizontally woven rows, the ground yarn is a 2/20 wool, the weaving yarn a space dyed sock yarn resulting in random color blocking. Relaxed the knit resembled shadow pleating, here it is shown after pressing and steaming
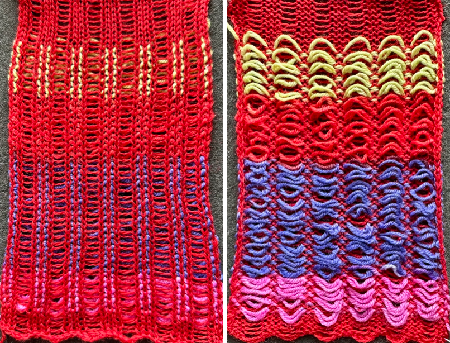


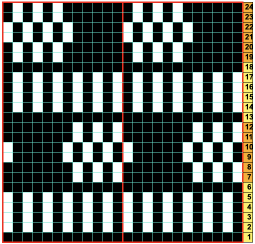
 to expand the design, draw it in repeat, offset 28 pixels
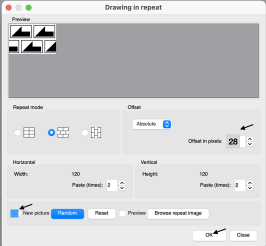


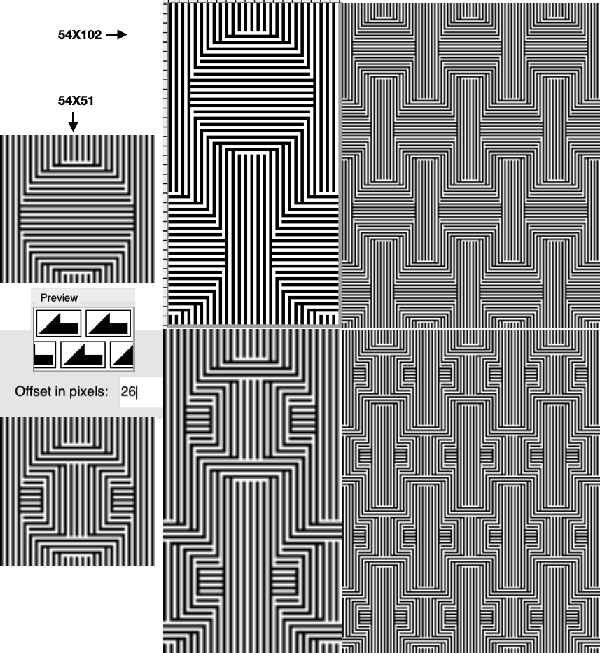
 with blocks added for proper alignment to 64X64
  its brick 64X128 companion
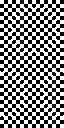

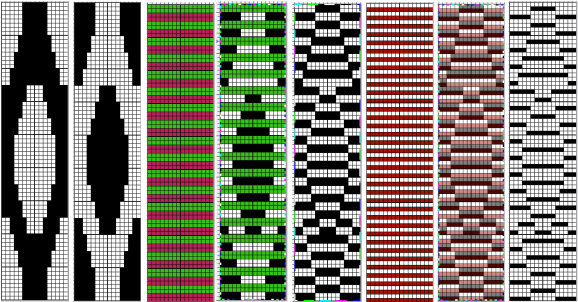
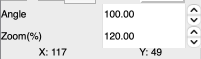
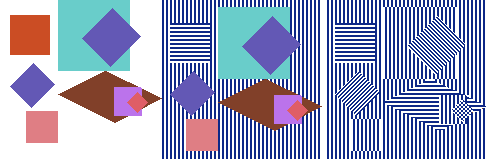
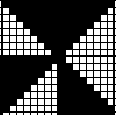
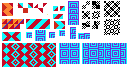
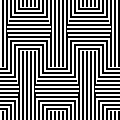
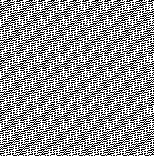
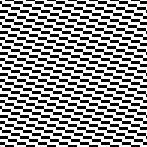
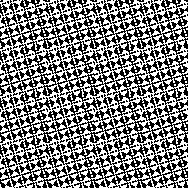
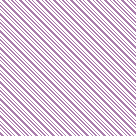
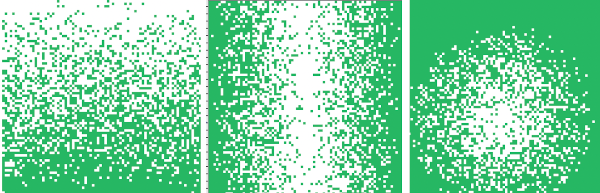
 Similarities, and differences in density of markings by the addition of single pixel lines, playing with what ifs:
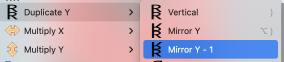
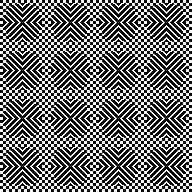


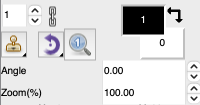
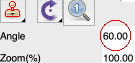


 use the command key on Mac, Angle 60, Zoom 200


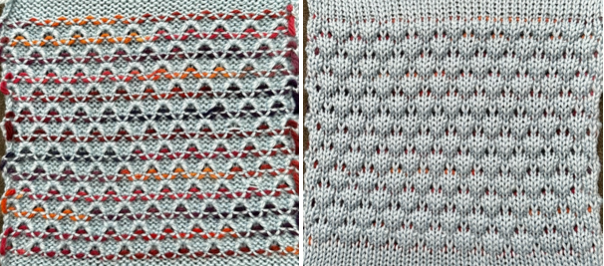
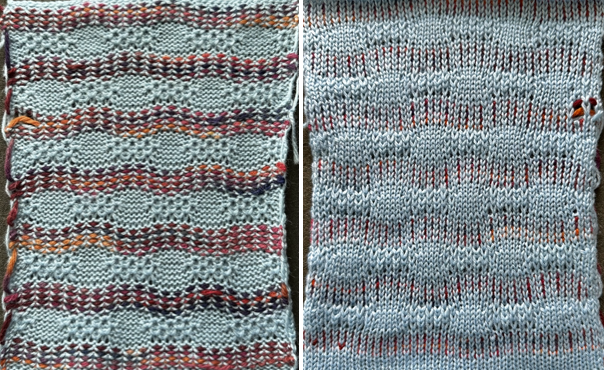
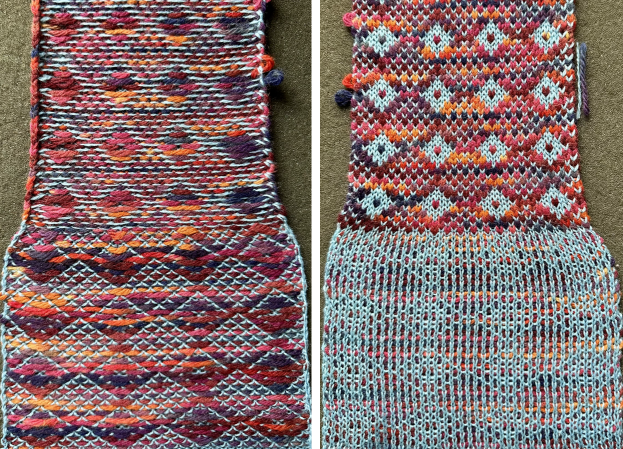
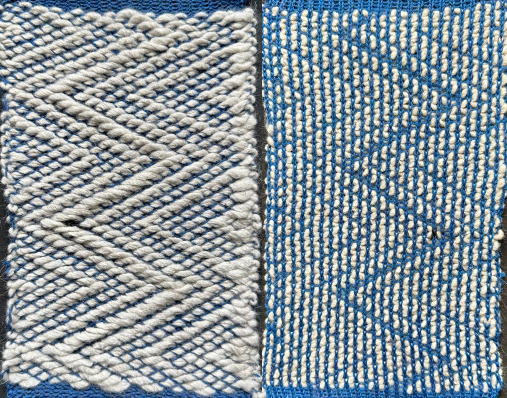
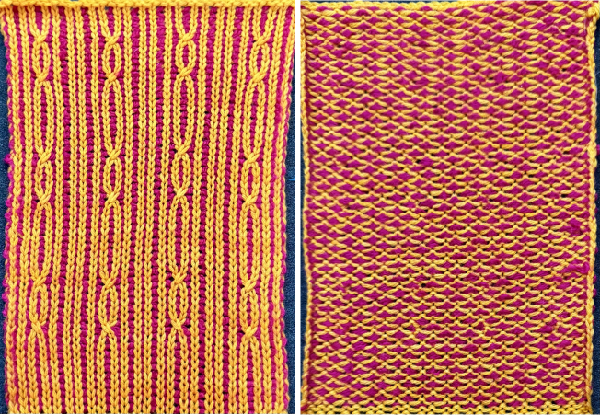
 The proof of concept swatch
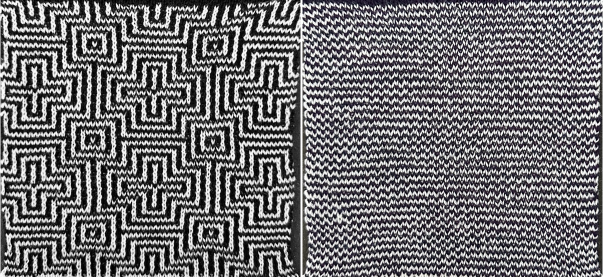
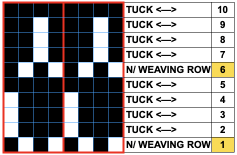
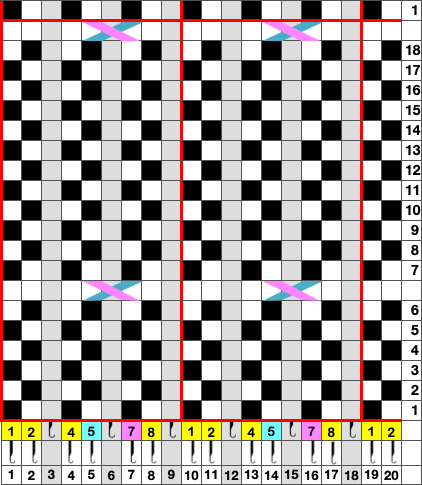
 While the DDJ separation is used as is, this separation must be rendered double length in order for it to be executed single bed with the knit carriage set to slip in both directions, and color changes every 2 rows.
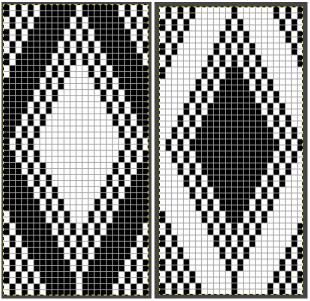

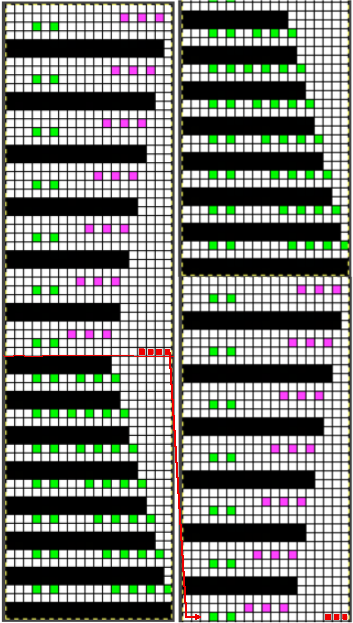
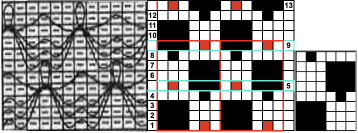
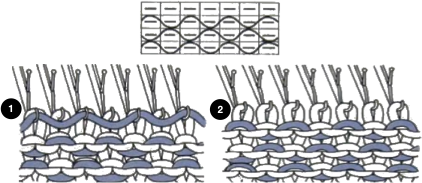
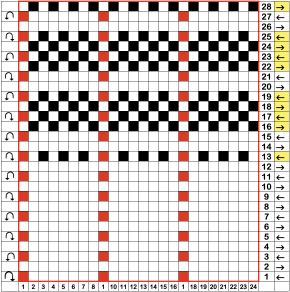
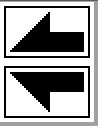
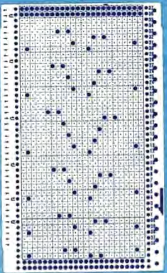
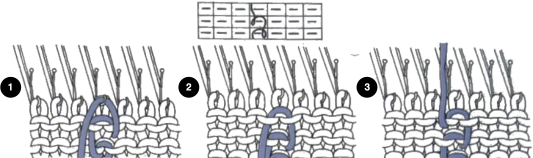
 When charting in spreadsheets, in addition to assigning a color to the direction of transfers made by the LC, arrows may be added to indicate the direction of the respective carriage movements.


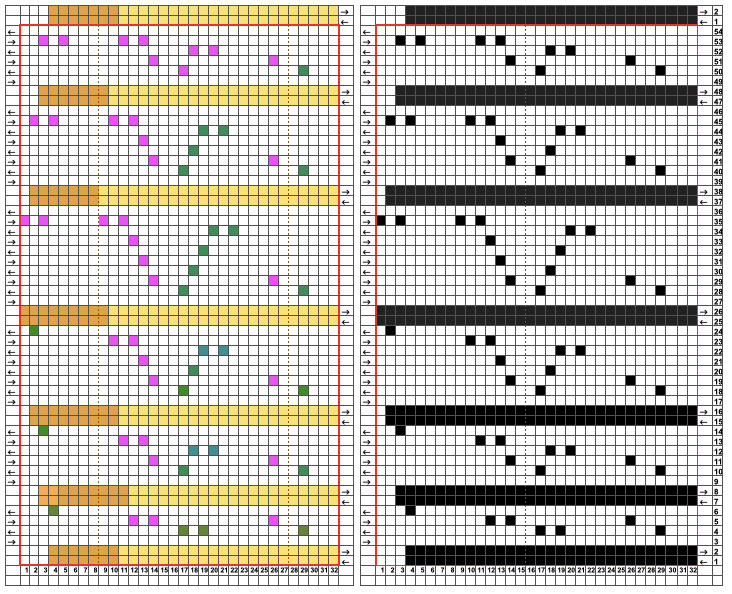


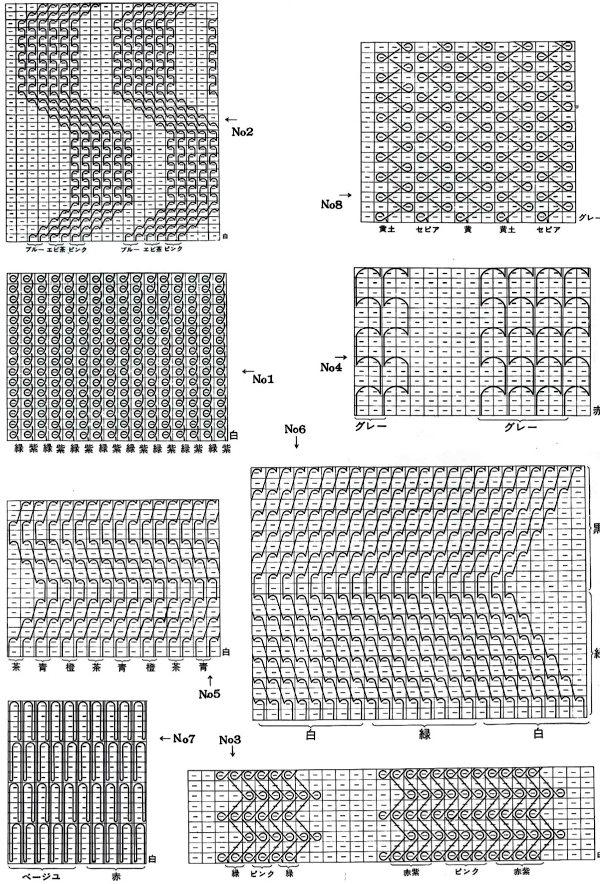


 file 2: its color reverse
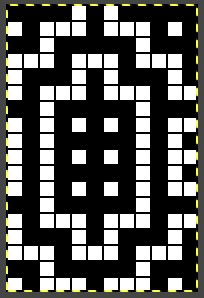
 file 7: file 6 color-reversed for knitting with the tuck or slip setting,
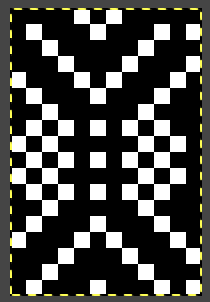
 The proof of concept
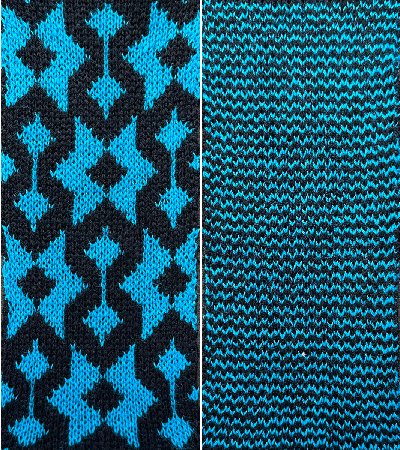
 Please see edit published in
  Working in RGB Mode the 24X6 starting repeat