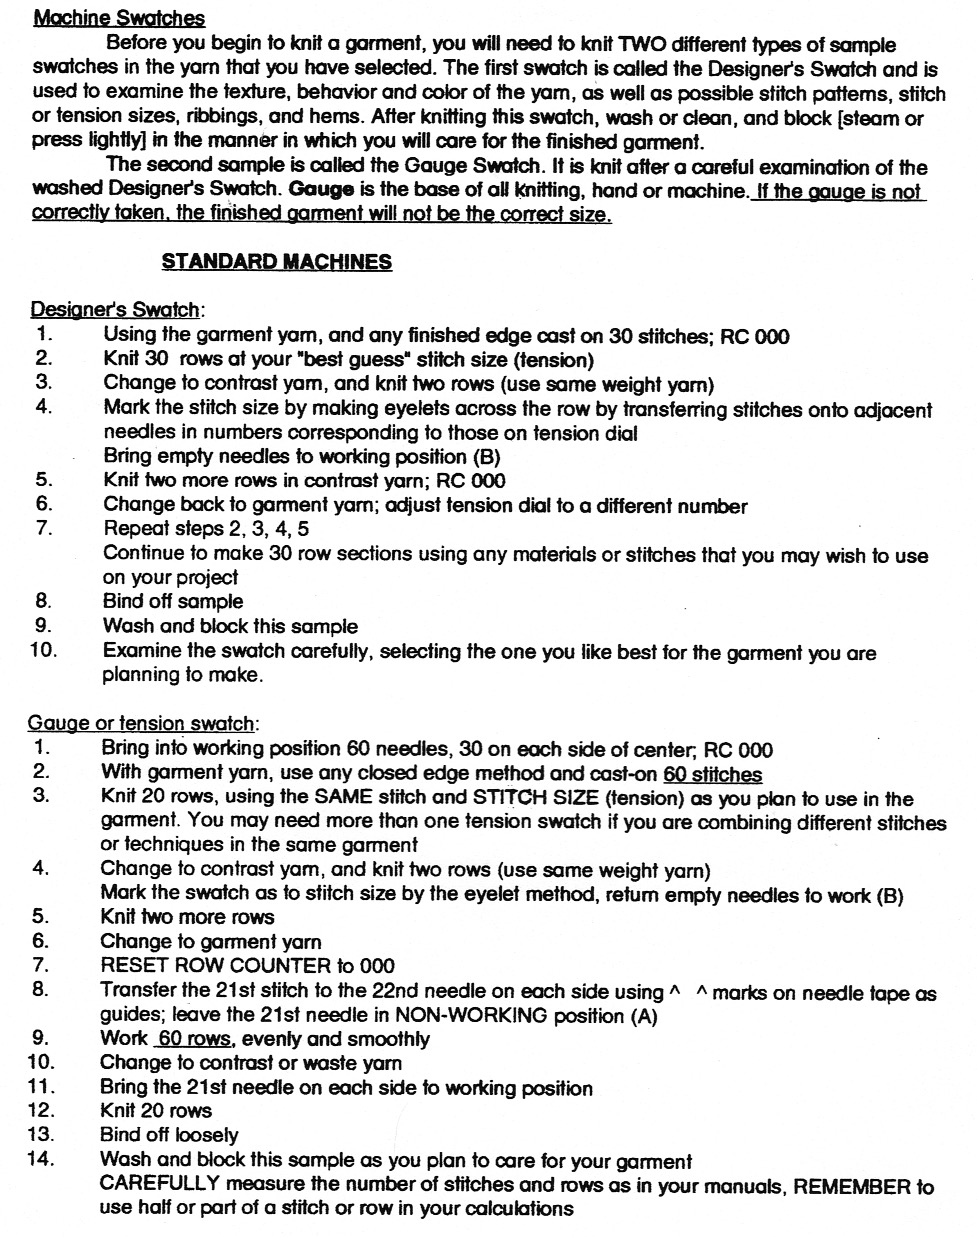
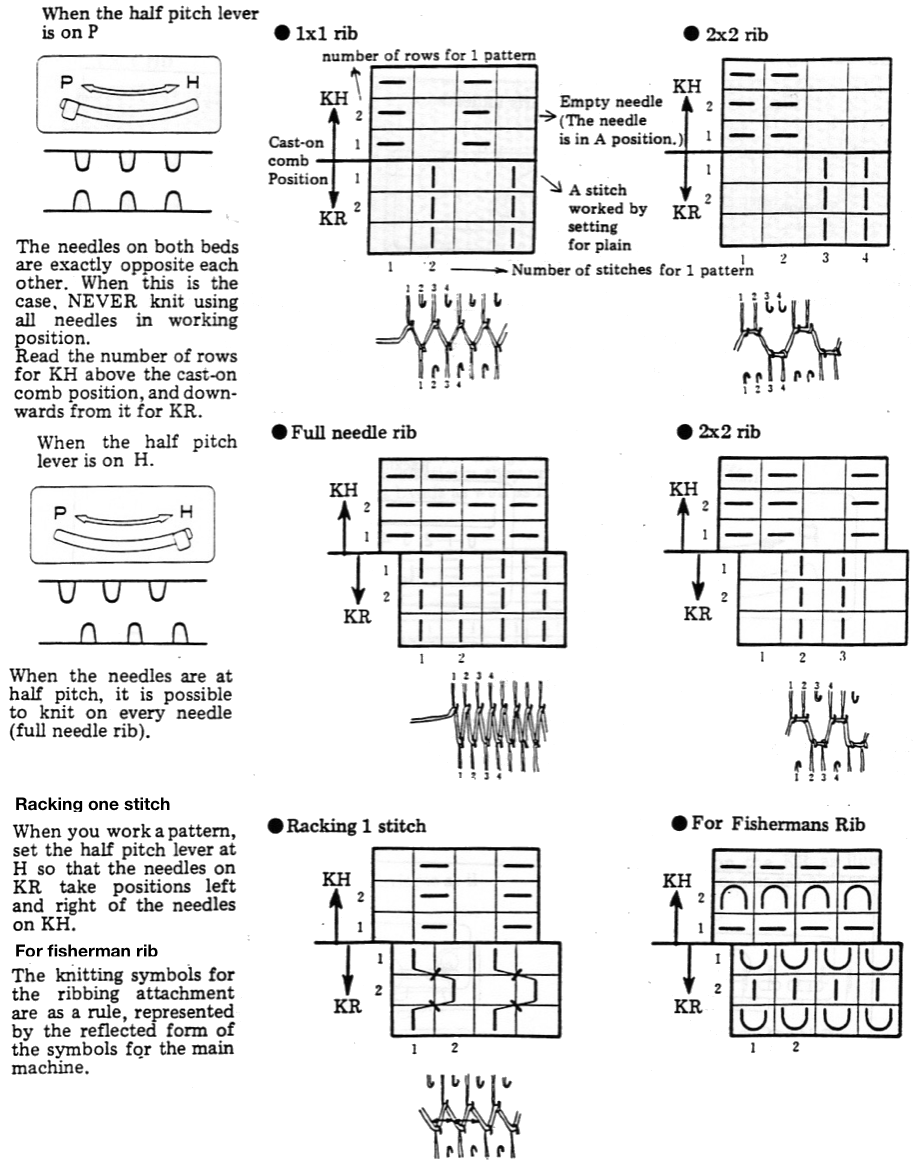
Some notes on how tubular software color separations such as the one automated in the ayab circular setting may be found in the previous post
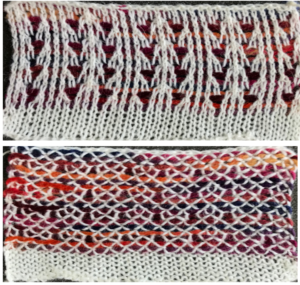
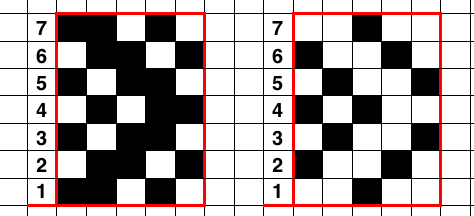
In an effort to respond to a request I have had via my blog, I am sharing information on this topic as I have time to explore it. My first attempt when up and running with the Ayab software, was to reproduce an earlier sample I had created as a color separation originally intended for a hand-knit shadow knit experiment.
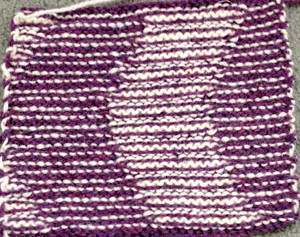
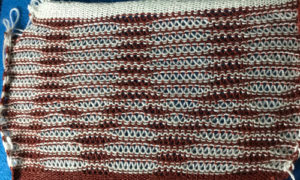
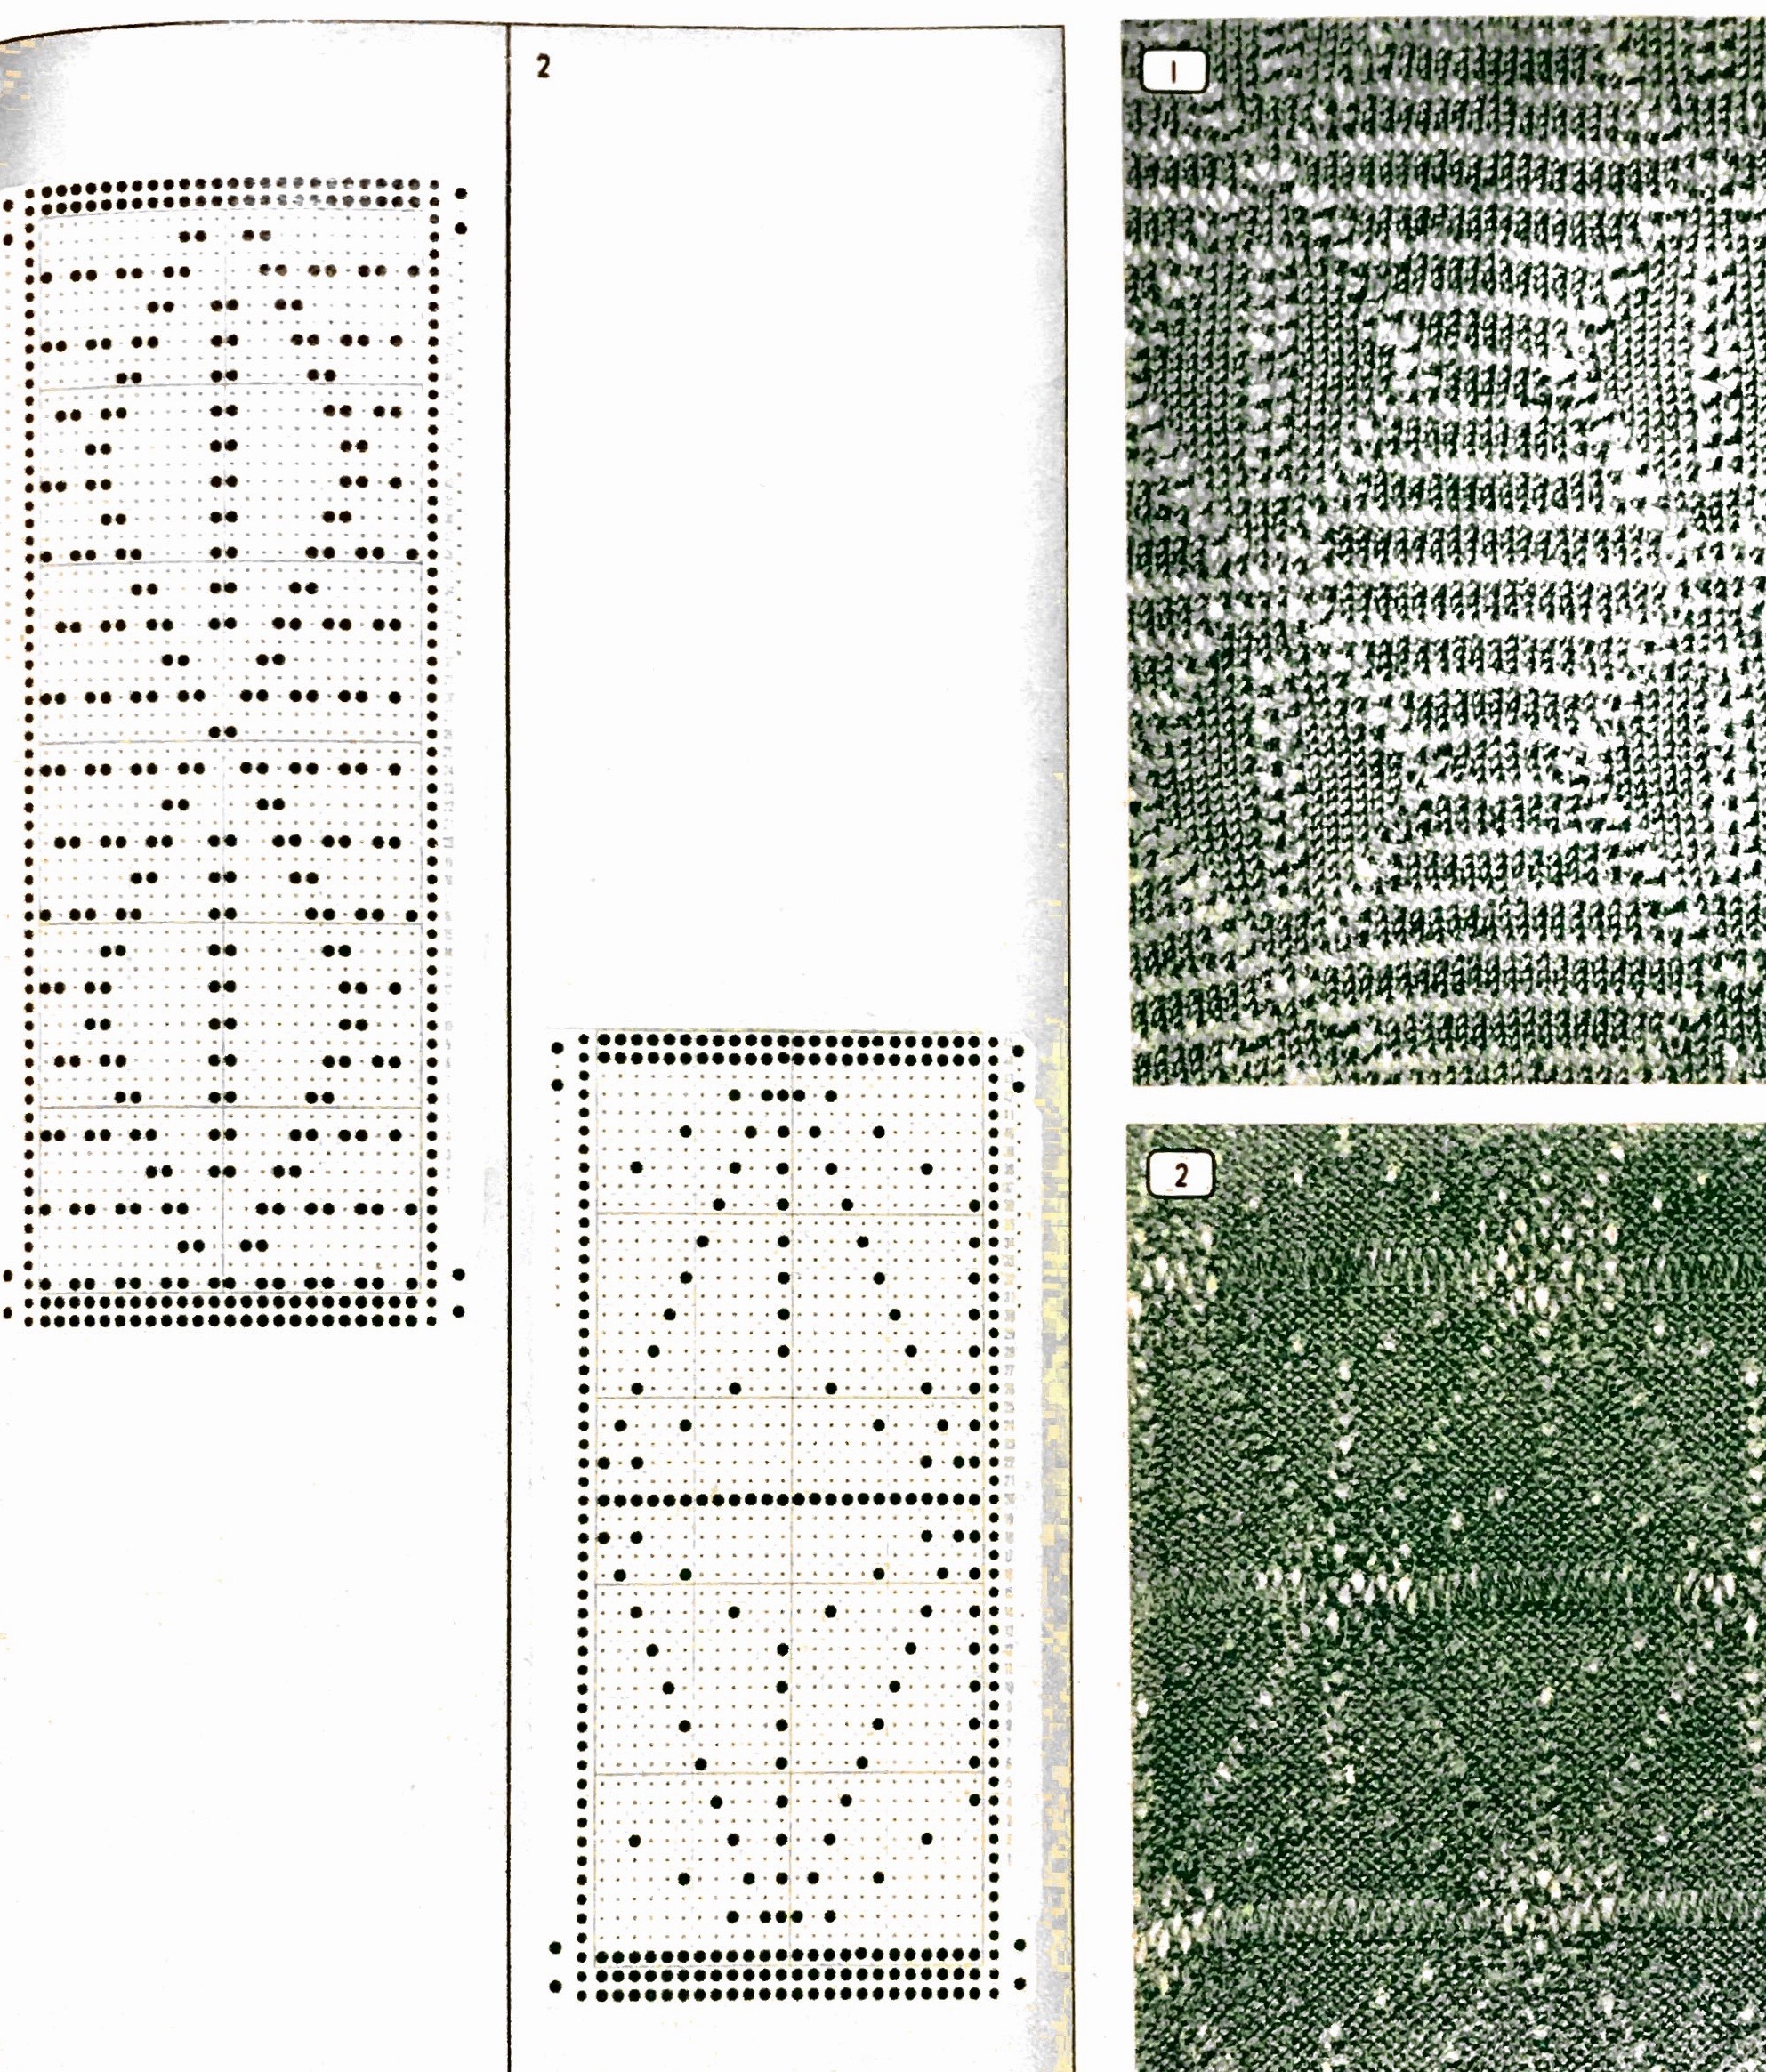
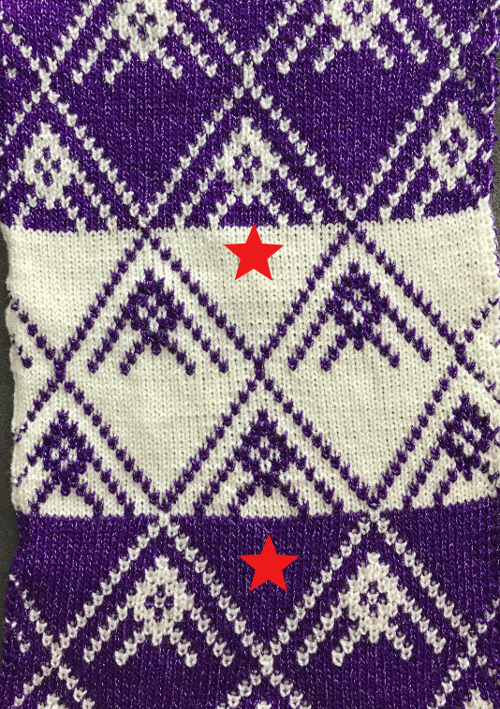
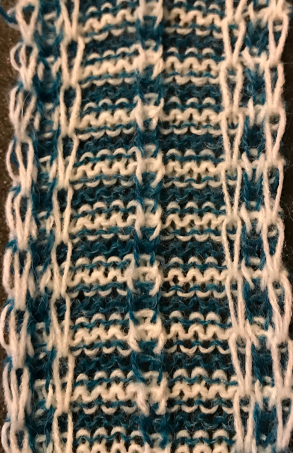
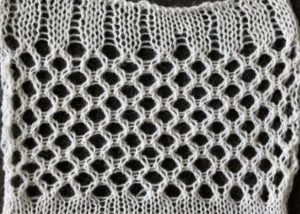
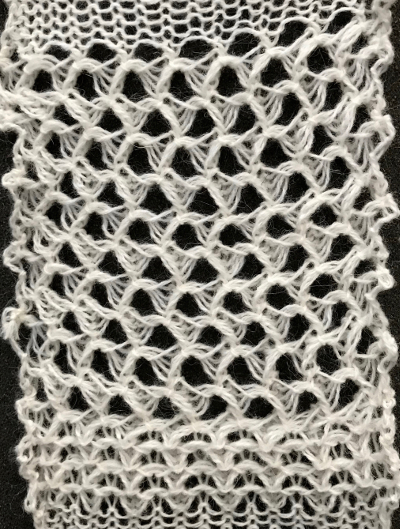
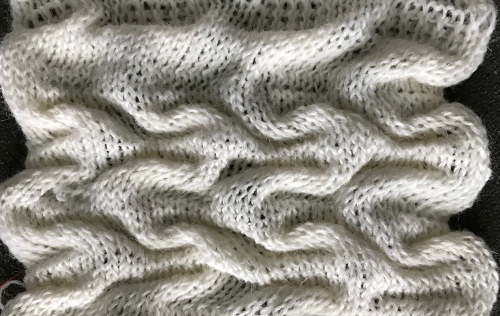
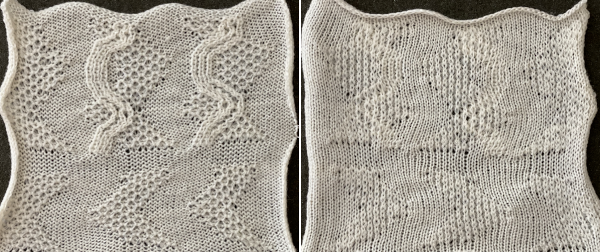
a chart from that blog post 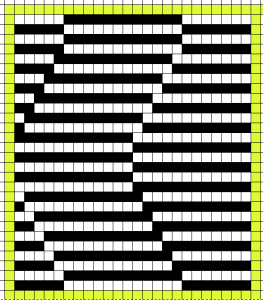 the resulting hand knit, on the purl side
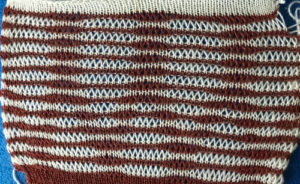
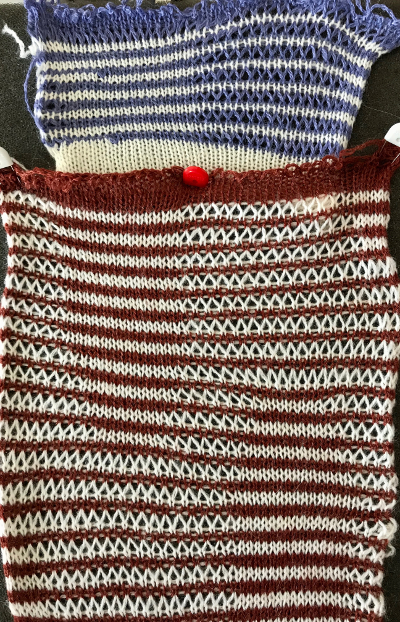
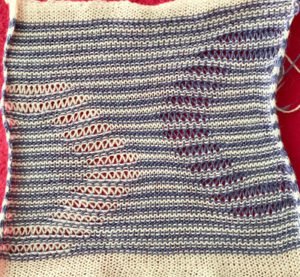
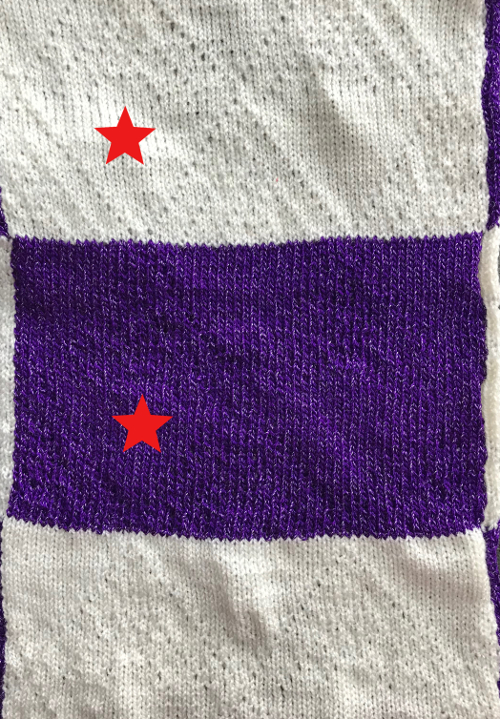
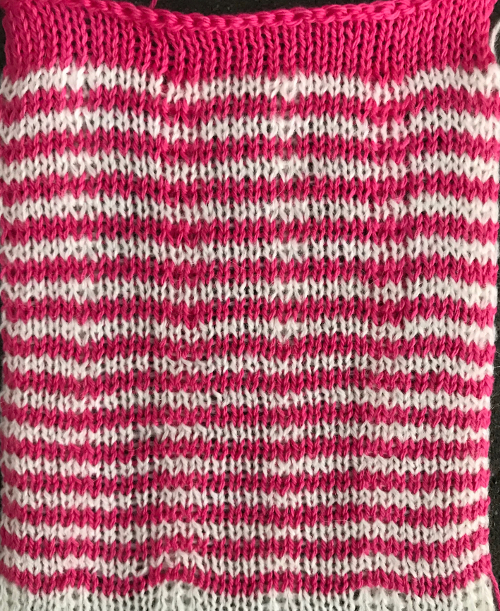
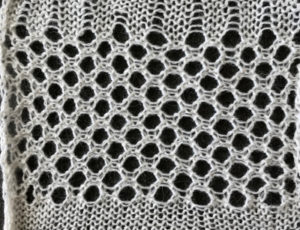
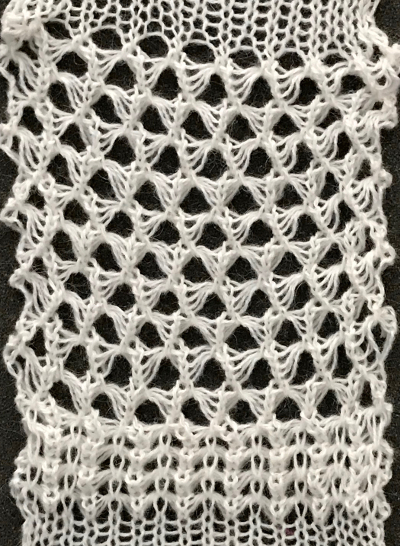
 the color-separated sample knit pre ayab
 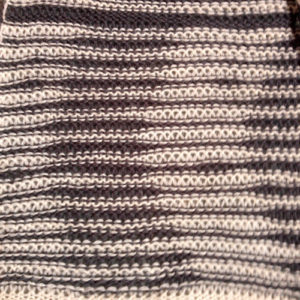 the sample knit using the Ayab circular setting

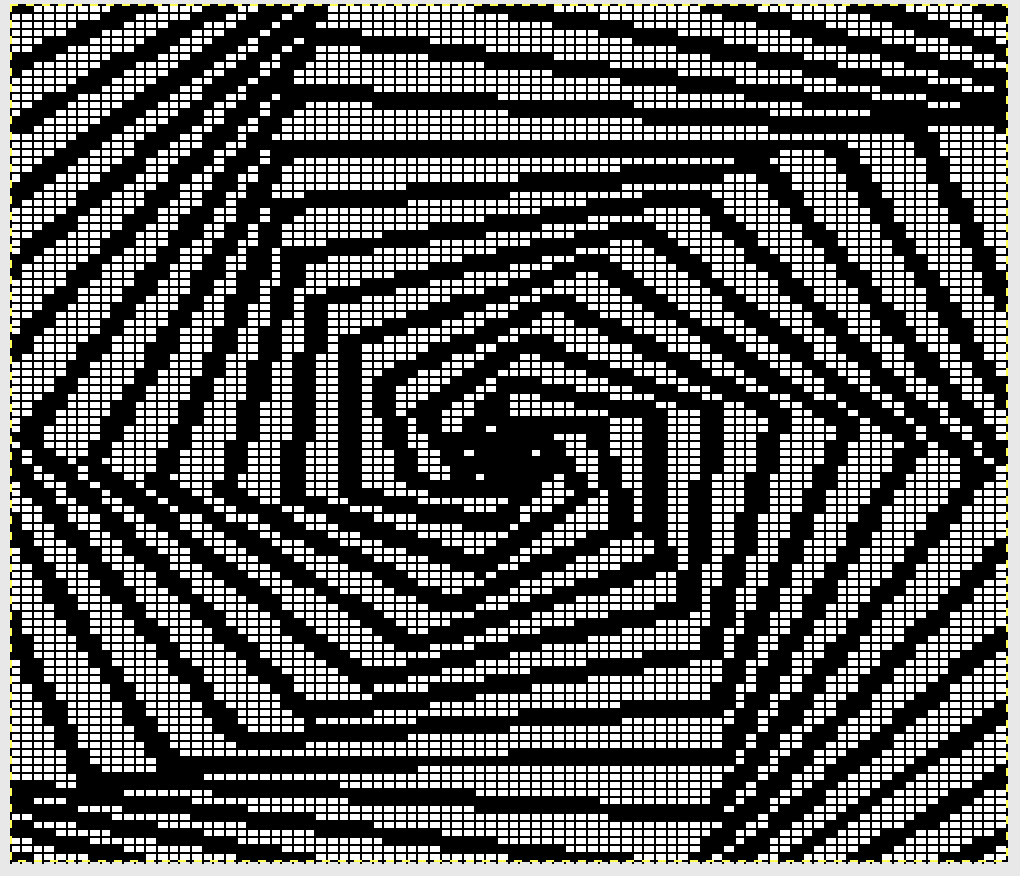
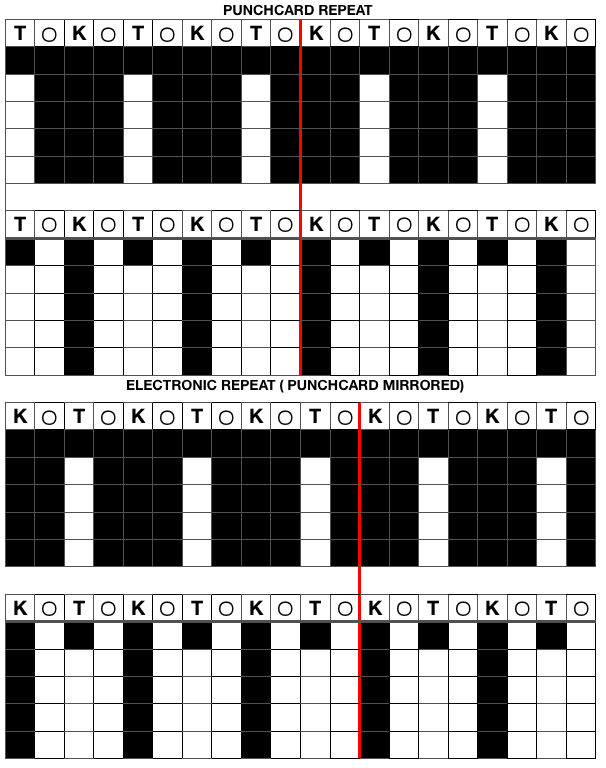
Patterns predawn for shadow knitting, appear to be one published source for interesting 2 color drop stitch variations. What about geometric shapes or developing your own designs? Designs created using this technique lengthen considerably when off the machine. Both color sets of stitches become elongated as they are dropped, and that should be a consideration in planning your design. If your goal is a circle, the actual shape programmed may have to be closer to an egg laid horizontally rather than that of a “true” circle. The fabric also widens considerably when blocked and off the machine, making the cast on and bind off methods considerations another necessity. Design repeats may be drawn in Paintbrush or GIMP (both freeware), or Photoshop. I have been a long time GIMP user, and prefer to use it in tiling repeats as opposed to the copy and paste features in Paintbrush to accommodate the Ayab requirement of programming the repeats horizontally in the width of your piece.
In my previous, how-to posts on designing your own 2 color drop stitch lace, part of the color separation required elongating the design X 2. The starting side in Ayab for needle selection always needs to be from left to right, and elongation of the motif is not required when using the Ayab circular option.
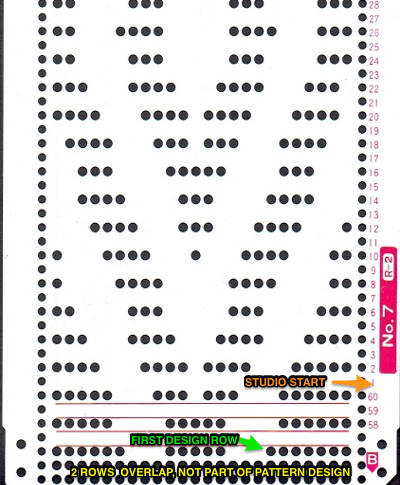
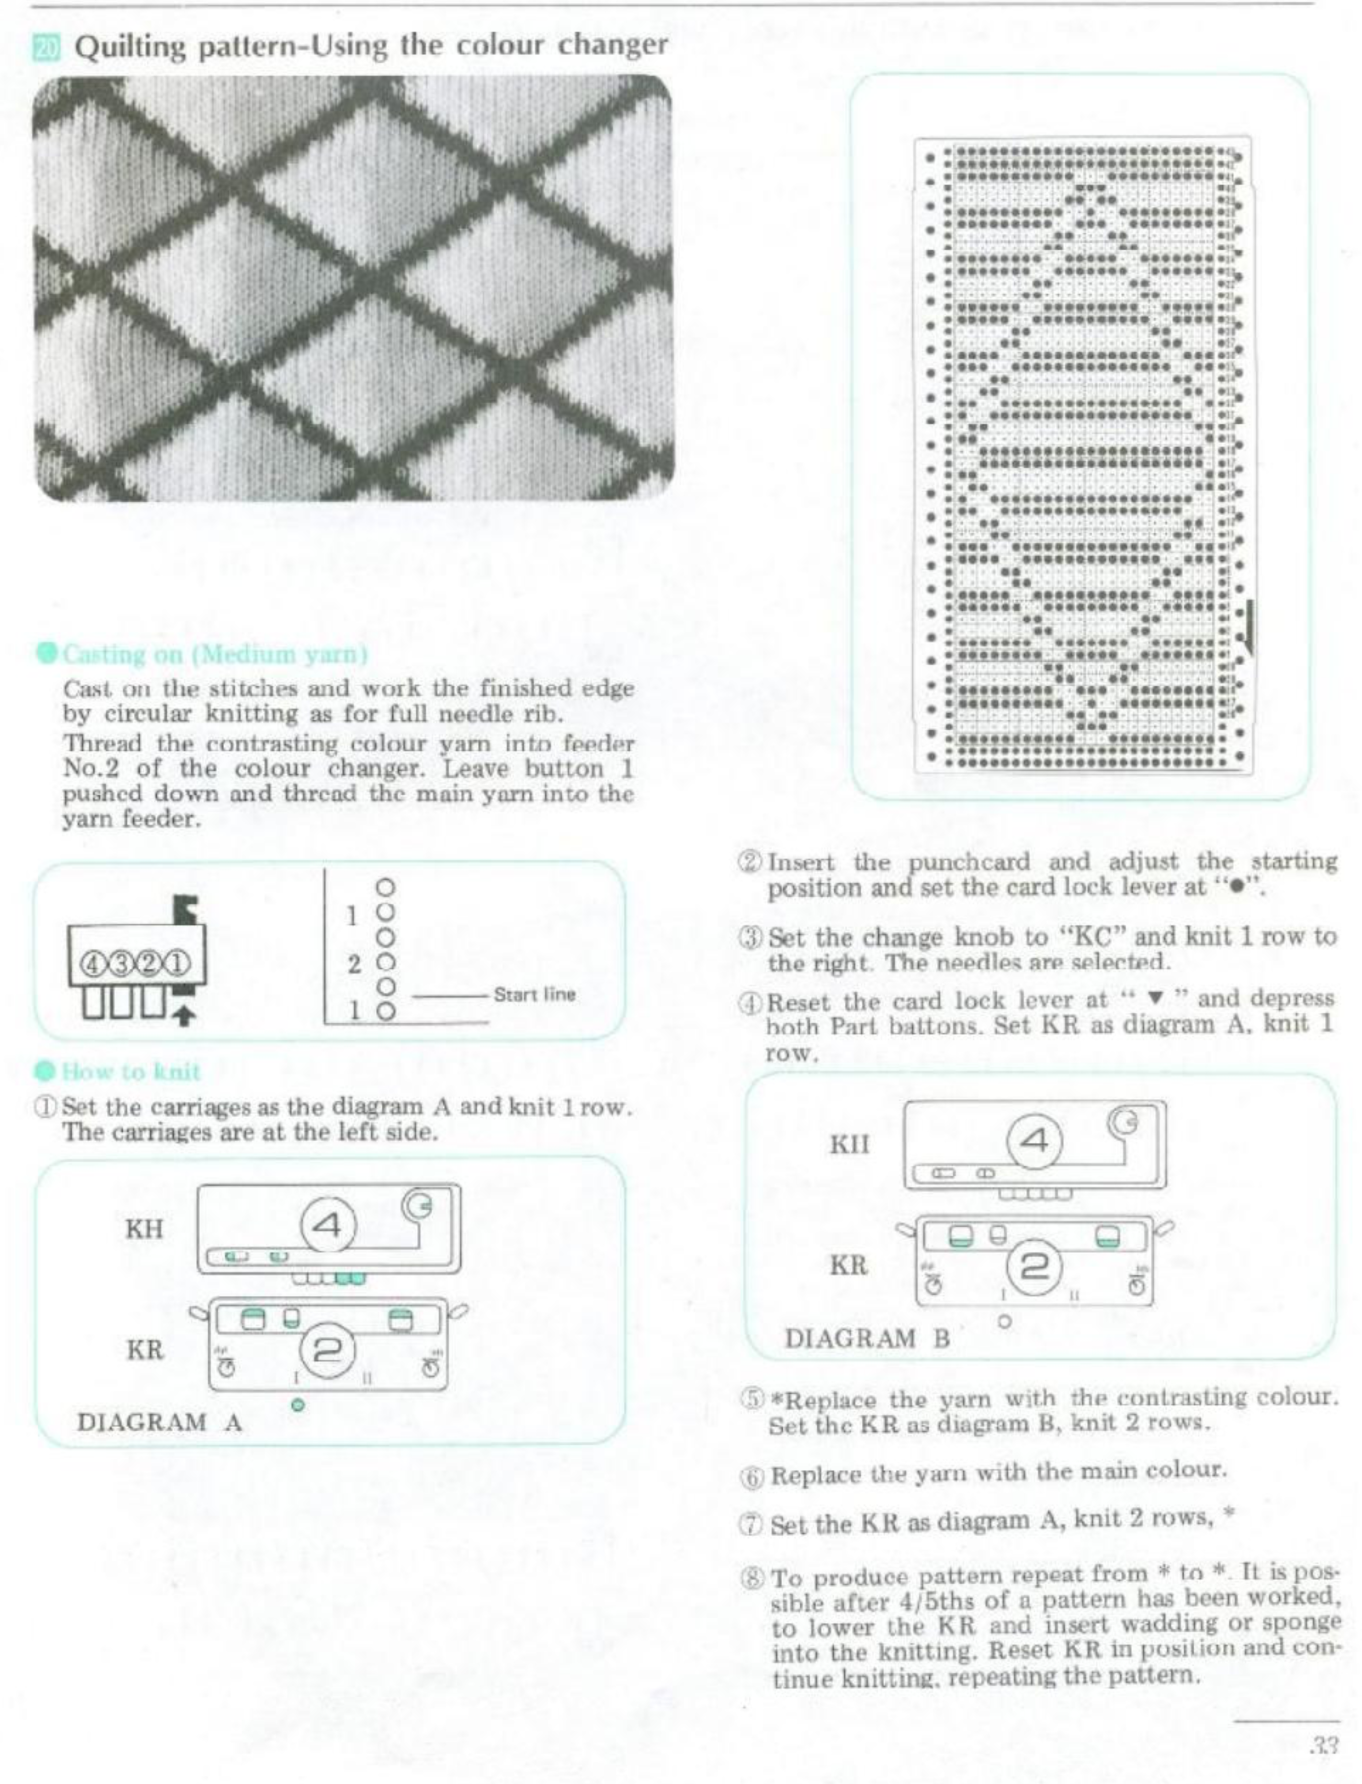
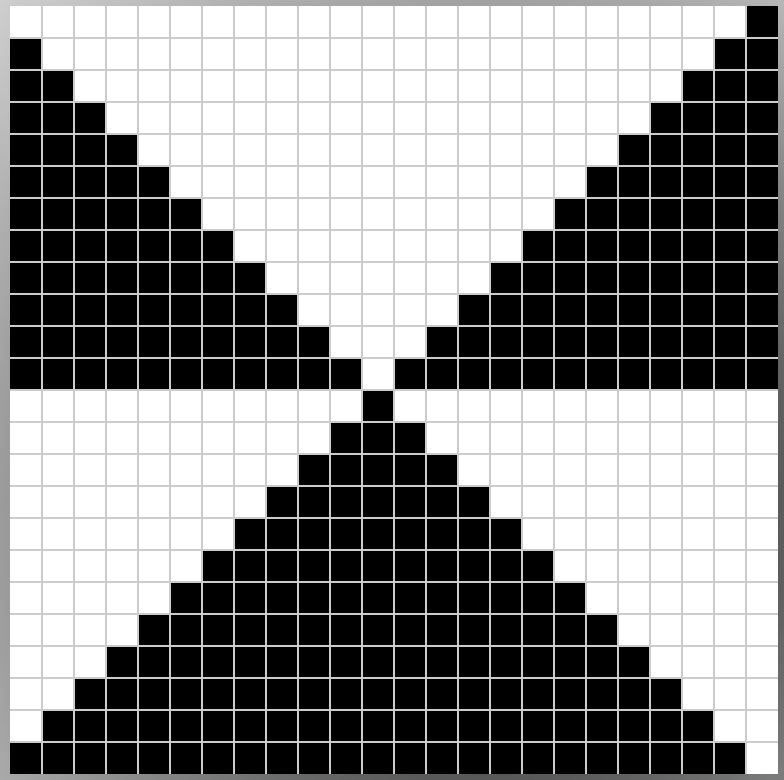
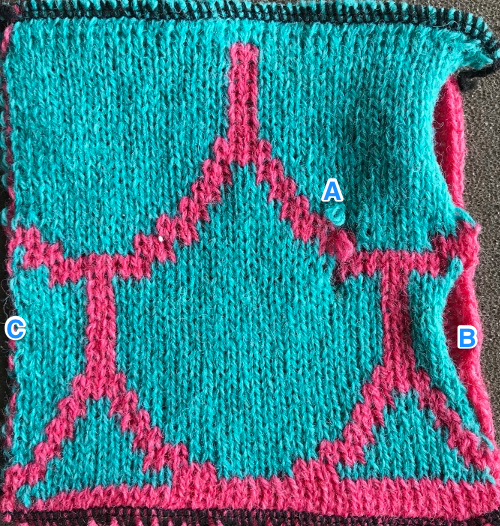
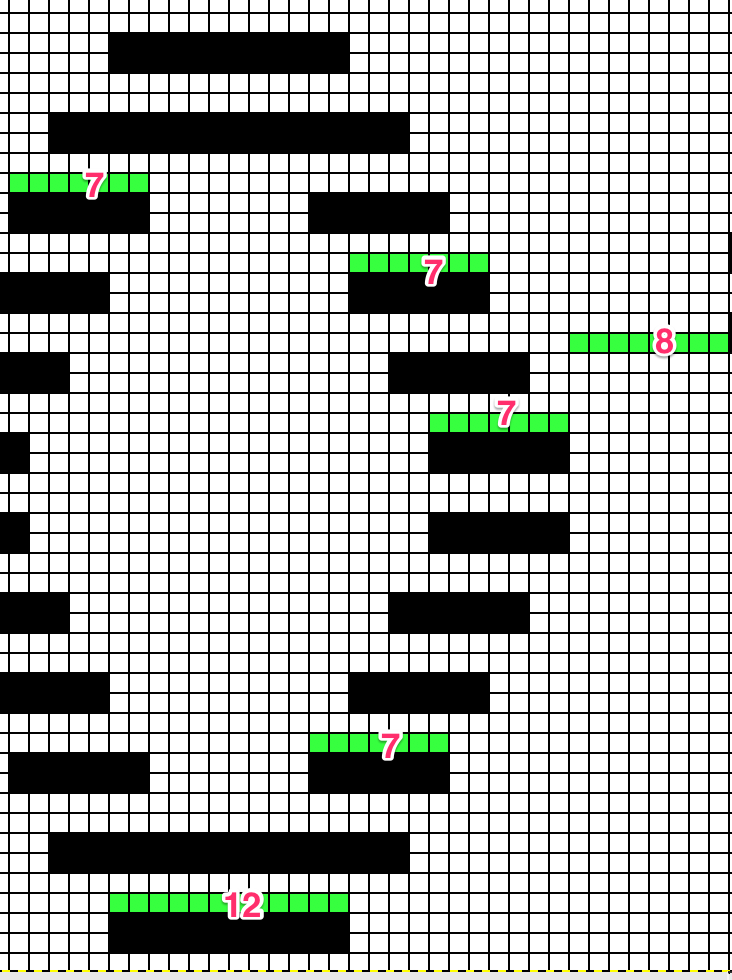
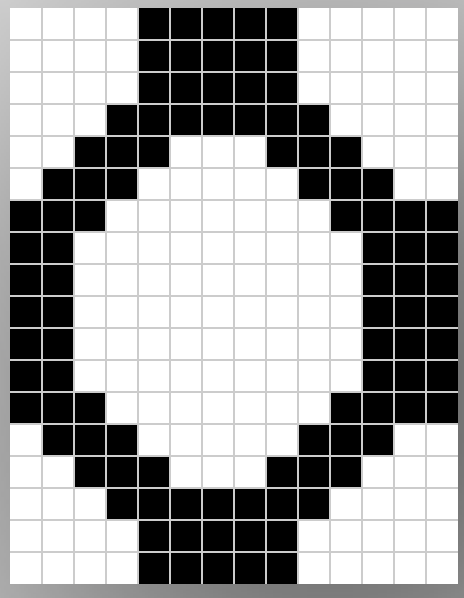
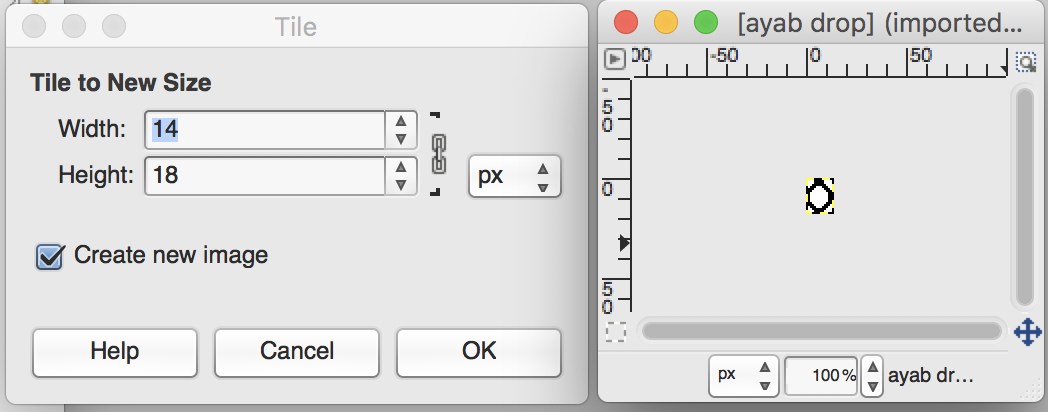
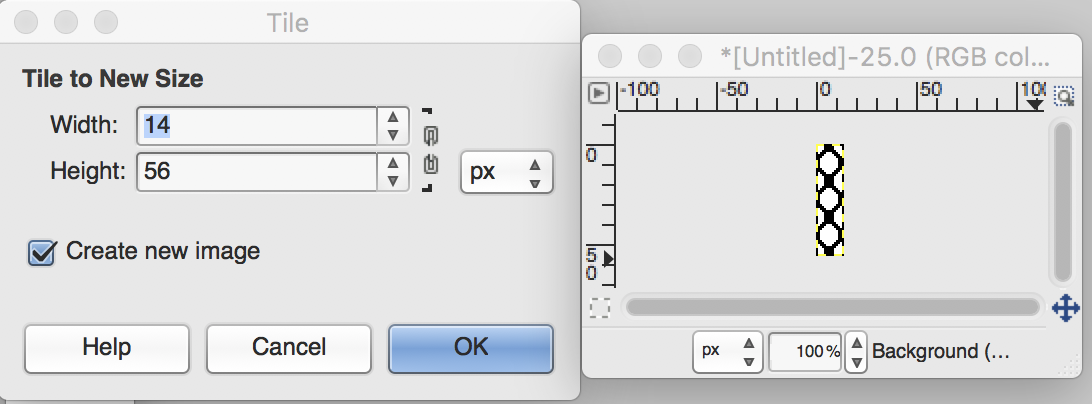
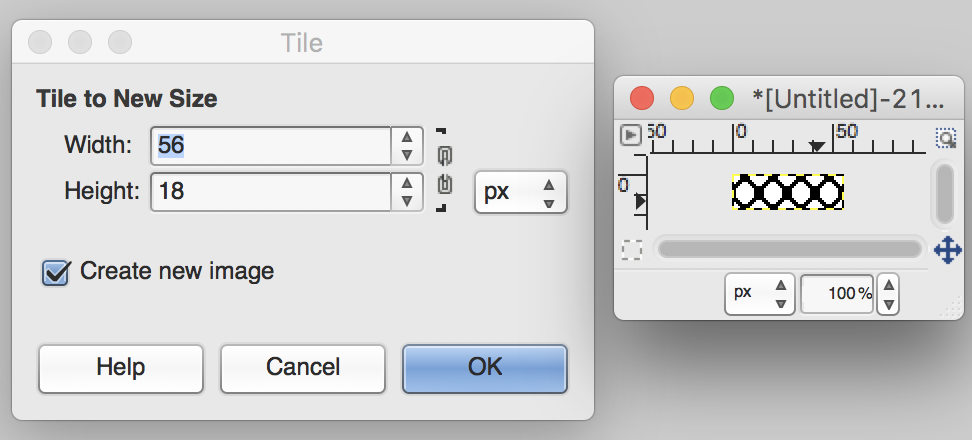
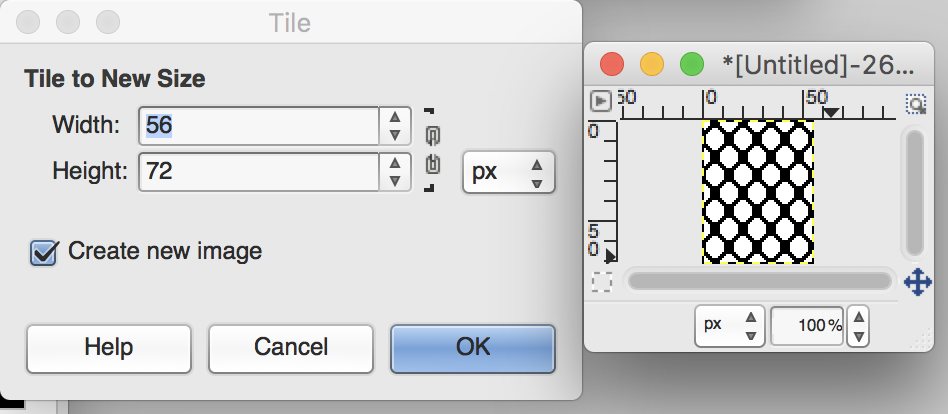
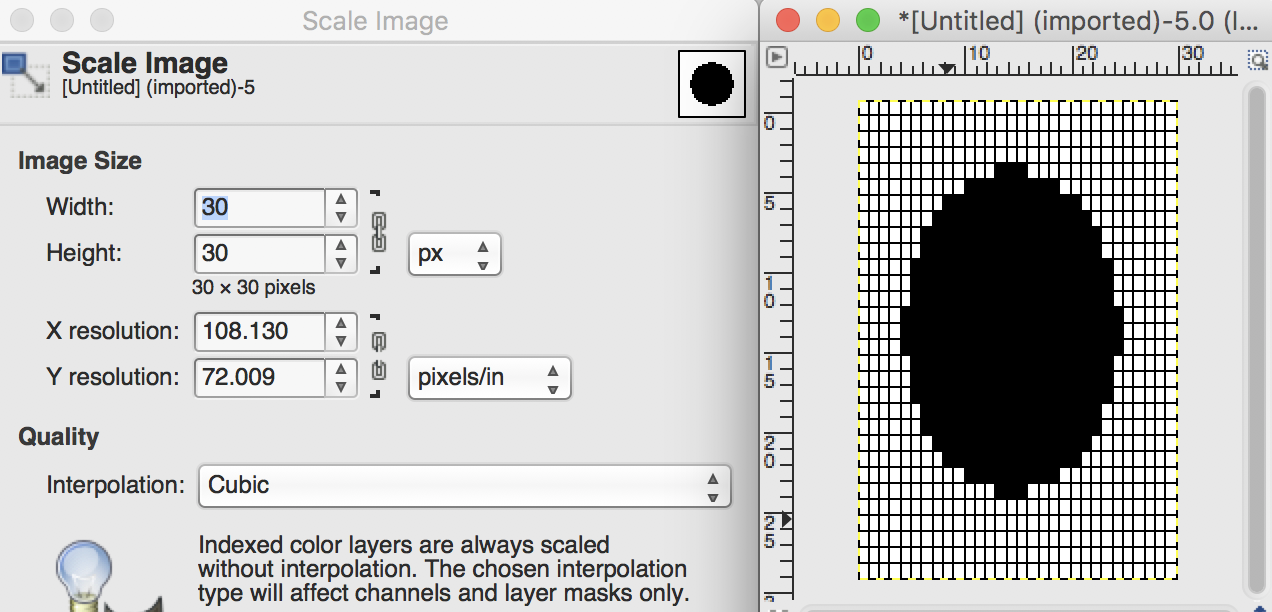
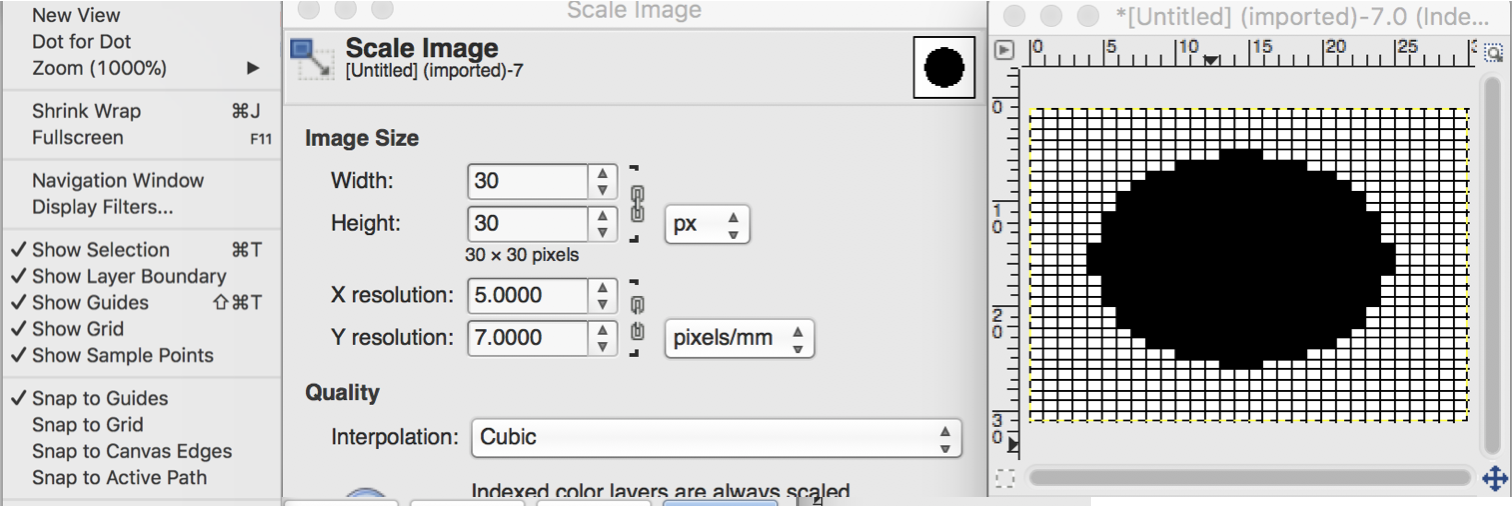
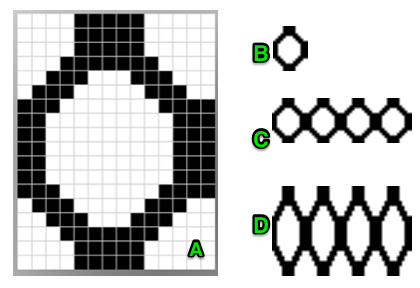
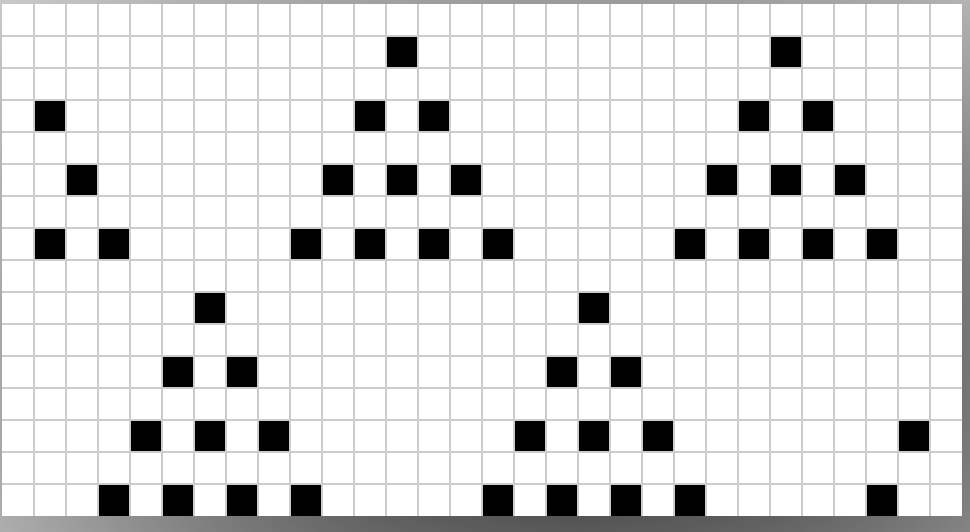
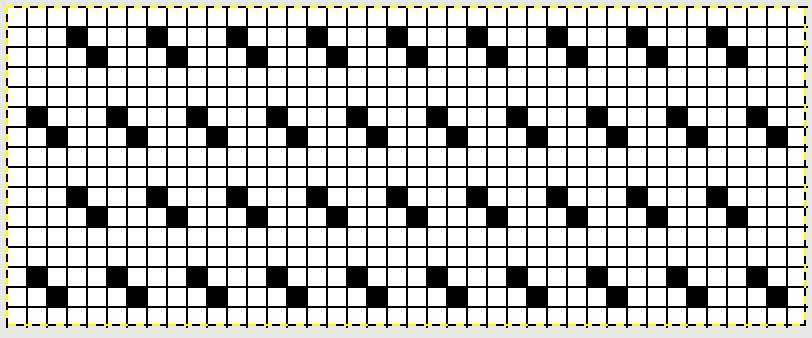
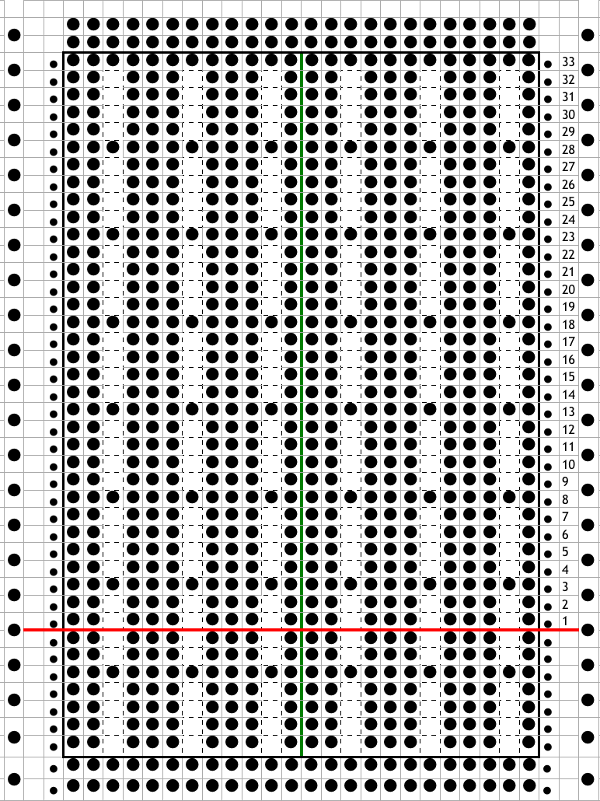
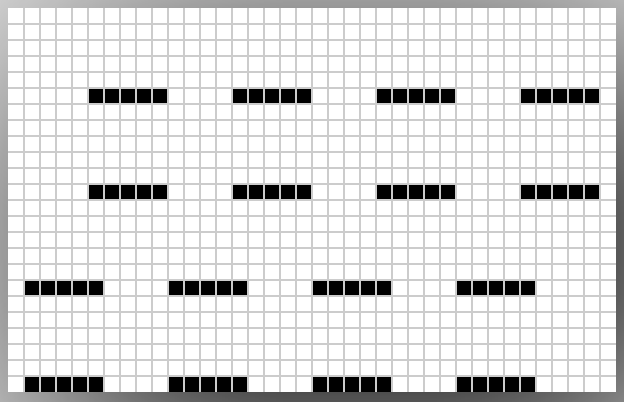
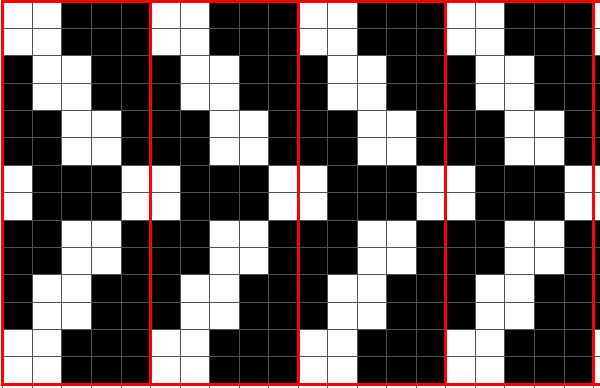
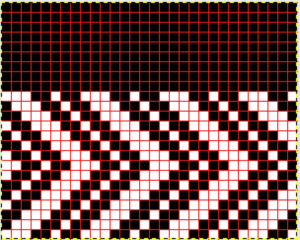
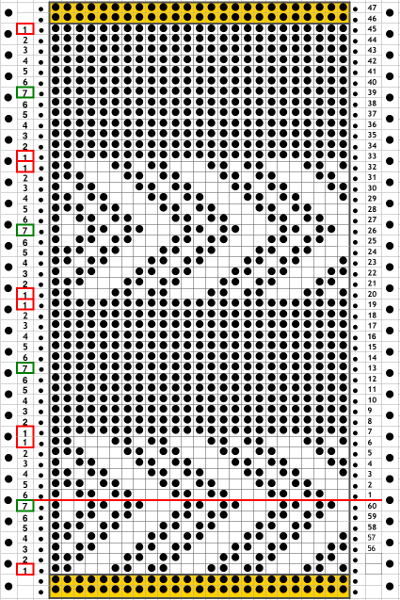
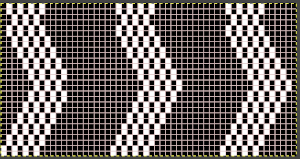
This was my first working repeat, A = repeat charted out. B = the working bitmap or png, etc. (which would be the only requirement for the mylar). C = the image tiled for the chosen number of stitches (again, Ayab requires the repeat to be programmed for the width of your knit piece). D = the image elongated, not usable for this fabric, it results in too much elongation. If you would like a knit border on either side, that can be achieved by having extra stitch(es) in work on the ribber. 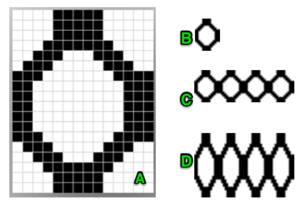 a possible ayab repeat, 56 stitches wide by 36 rows high
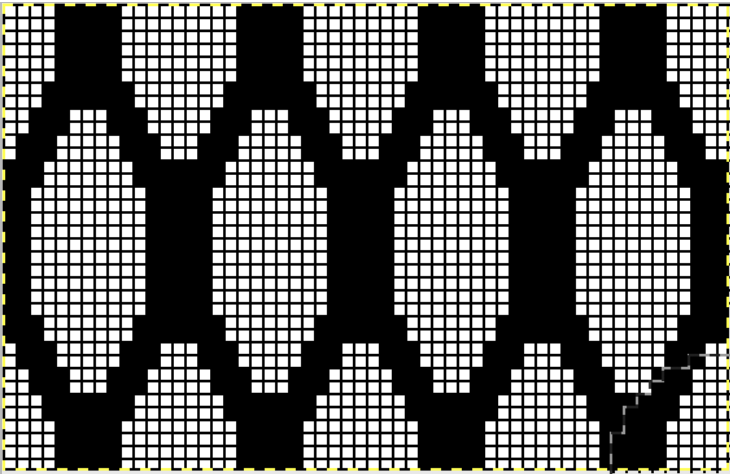
The results up to the point in which I had a yarn caught in brushes and stitches dropping on the left of the needle bed:
Drop stitch lace has been referred to over the years in other terms as well, such as release stitch, drive lace, and summer fair isle in Passapese. Passap knitters will recognize the results from this first method are akin to those produced using Technique 185.
Getting started: stitches intended to be dropped may be created on either bed. If the ribber is used to create loops, then the technique is a manual one. Using the main bed in Japanese machines to program dropped stitches increases accuracy and ease.
If you are swatching and testing, a permanent cast on is not necessary. The broken toe cast on is one of the two quickest on the Japanese machines, usable on either bed. It is fondly called that because if ribber cast on comb and weights are in the wrong place so that the wrong loops are dropped, everything falls to the floor, and likely on your toes. There is an online video by Diana Sullivan that shows its use for a tighter cast on row in 1X1 rib, but the use here is for a different purpose.
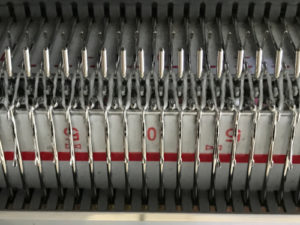
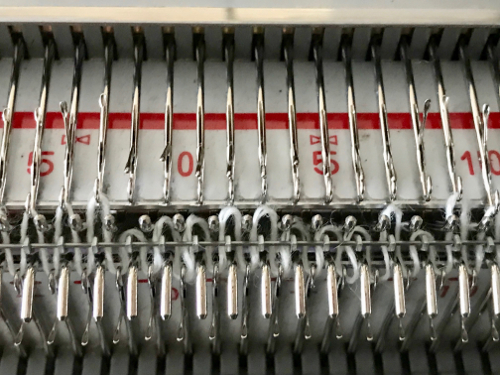
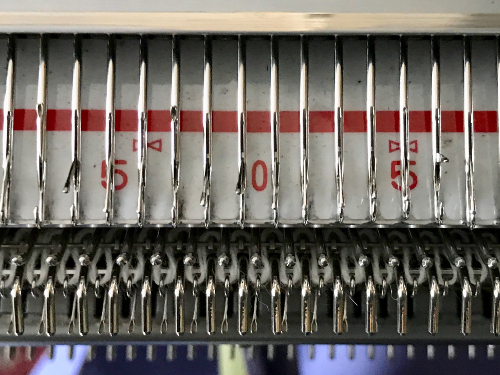
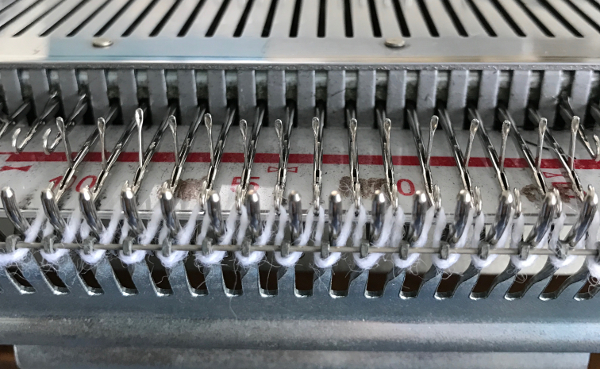
In producing this fabric you are technically knitting every needle rib.  Cast on a fairly tight zig-zag row. The ribber comb wire needs to be placed so that it holds down the stitches on the bed on which you need to keep them. The principle and results are akin to the first row knit when you use a single bed cast on comb, and the second pass, with the first knit row anchors open loops before you continue to knit. Any loops not secured by the comb will result in dropped stitches. Any fabric, any time, when 2 stitches are empty side by side, stitches are not formed and the yarn is dropped off them creating a float or ladder. The red line indicates the ribber wire on top of the ribber loops in the zigzag row, placed so released knitting will be left on the ribber. Black lines your zig-zag yarn loops, blue dots the teeth of your ribber cast on comb. You can check placement by dropping just a few loops on the main bed before hanging your weights on the comb.
zigzag row showing the placement of cast on comb teeth, on each side of main bed needles
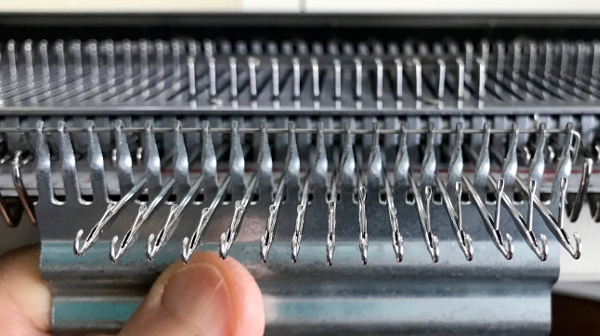
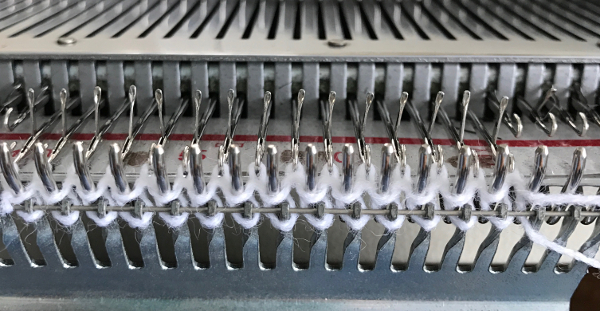
 with wire in place, anchoring ribber stitches
 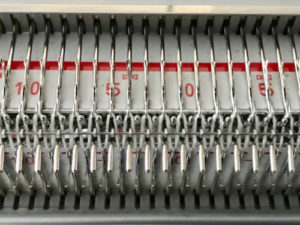 testing out dropping a few stitches
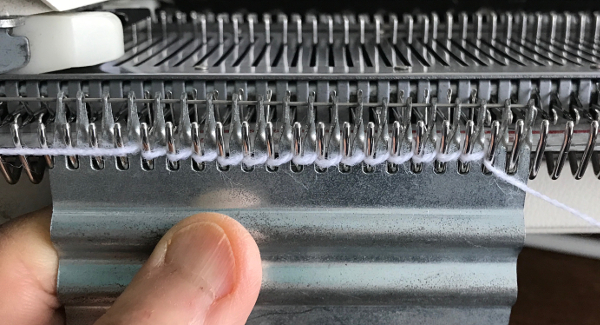
 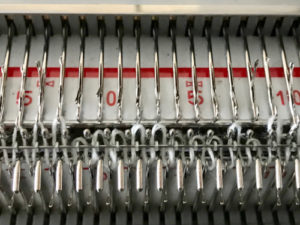 all stitches now on the ribber in preparation for dropping stitches created on main bed
It is possible to also use a wired cast-on comb for an open stitch cast on the top bed only. Remove the wire from the comb. Bring the comb up and between needles to be used, and re-insert wire. Needles and latches will need to travel easily under the wire when the first knit row takes place. 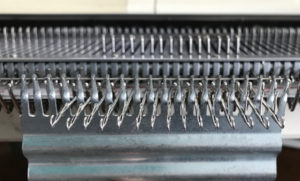
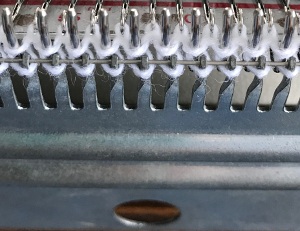
The knit carriage will not clear the comb properly because of the location of its brushes, etc. For the “cast on” row, exchange the sinker plate on your knit carriage for the one normally used with the ribber. The first photo below shows the approximate location for the comb during the first row knit. Needles are centered between the teeth, the teeth themselves line up with gate pegs. The comb needs to be manually held in place since there is no opposing bed in use to help balance it. Working with the ribber up would ease the process in wider pieces of knitting. The ribber sinker plate has no brushes or wheels to anchor knitting on the knitting bed. Any rows knit single bed using it, will need to have needles brought out to hold position prior to knitting each row for all stitches to be formed properly
the comb in position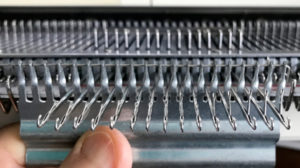 pass is made slowly with the ribber sinker plate in place
 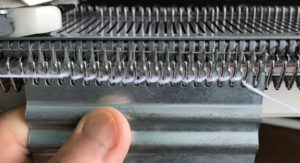 the comb is dropped
  bring all needles out to hold position
 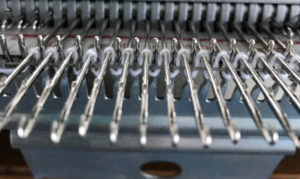 knit one more row, returning to starting position
 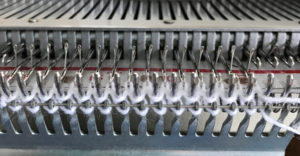 change sinker plate on knit carriage if needed, proceed with knitting
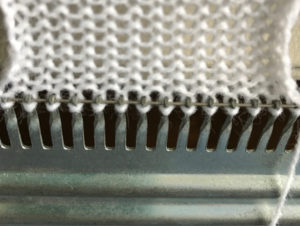
To use the same method with ribber in place: hold the appropriate ribber comb with the bump(s) up facing you, so that the teeth line up with gate pegs as shown above, and so the needles can come through the gaps. Leave the wire in, hold the bump(s) against the ribber, and tilt the comb against the knit bed. Hold the comb high enough to take the carriages across to the opposite side. Move carriages to the other side, drop the comb and weigh it. If continuing on the top bed only drop the ribber, switch sinker plates, and continue to knit.
“bumps”: Brother comb 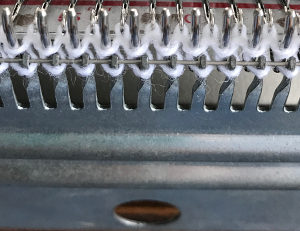
For other purposes and an edge similar to a weaving cast-on executed on Japanese machines use EON for the cast-on row, then bring into work and add the rest of the needles prior to knitting the second row.
Use a cast-on comb appropriate for your knitting machine’s gauge ie 4.5mm, 5mm, etc., the brand is not relevant, only tooth spacing is. It is possible to cut ribber cast on combs into different widths for use when knitting is planned on fewer stitches than those accommodated by their available commercial widths.
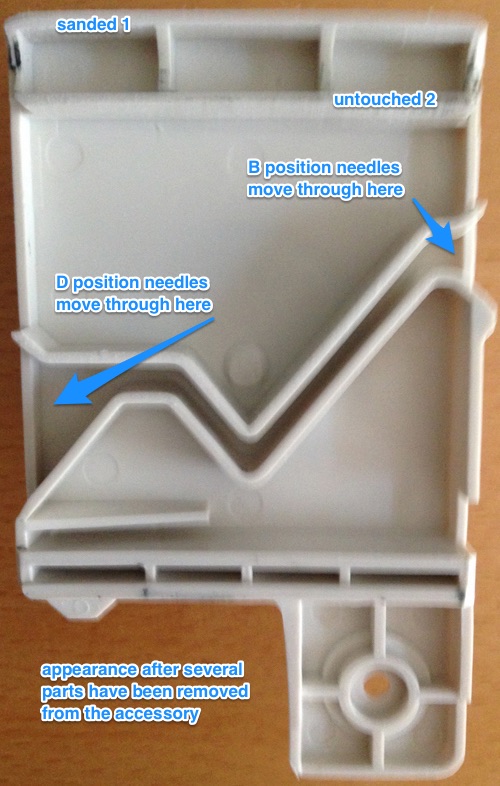
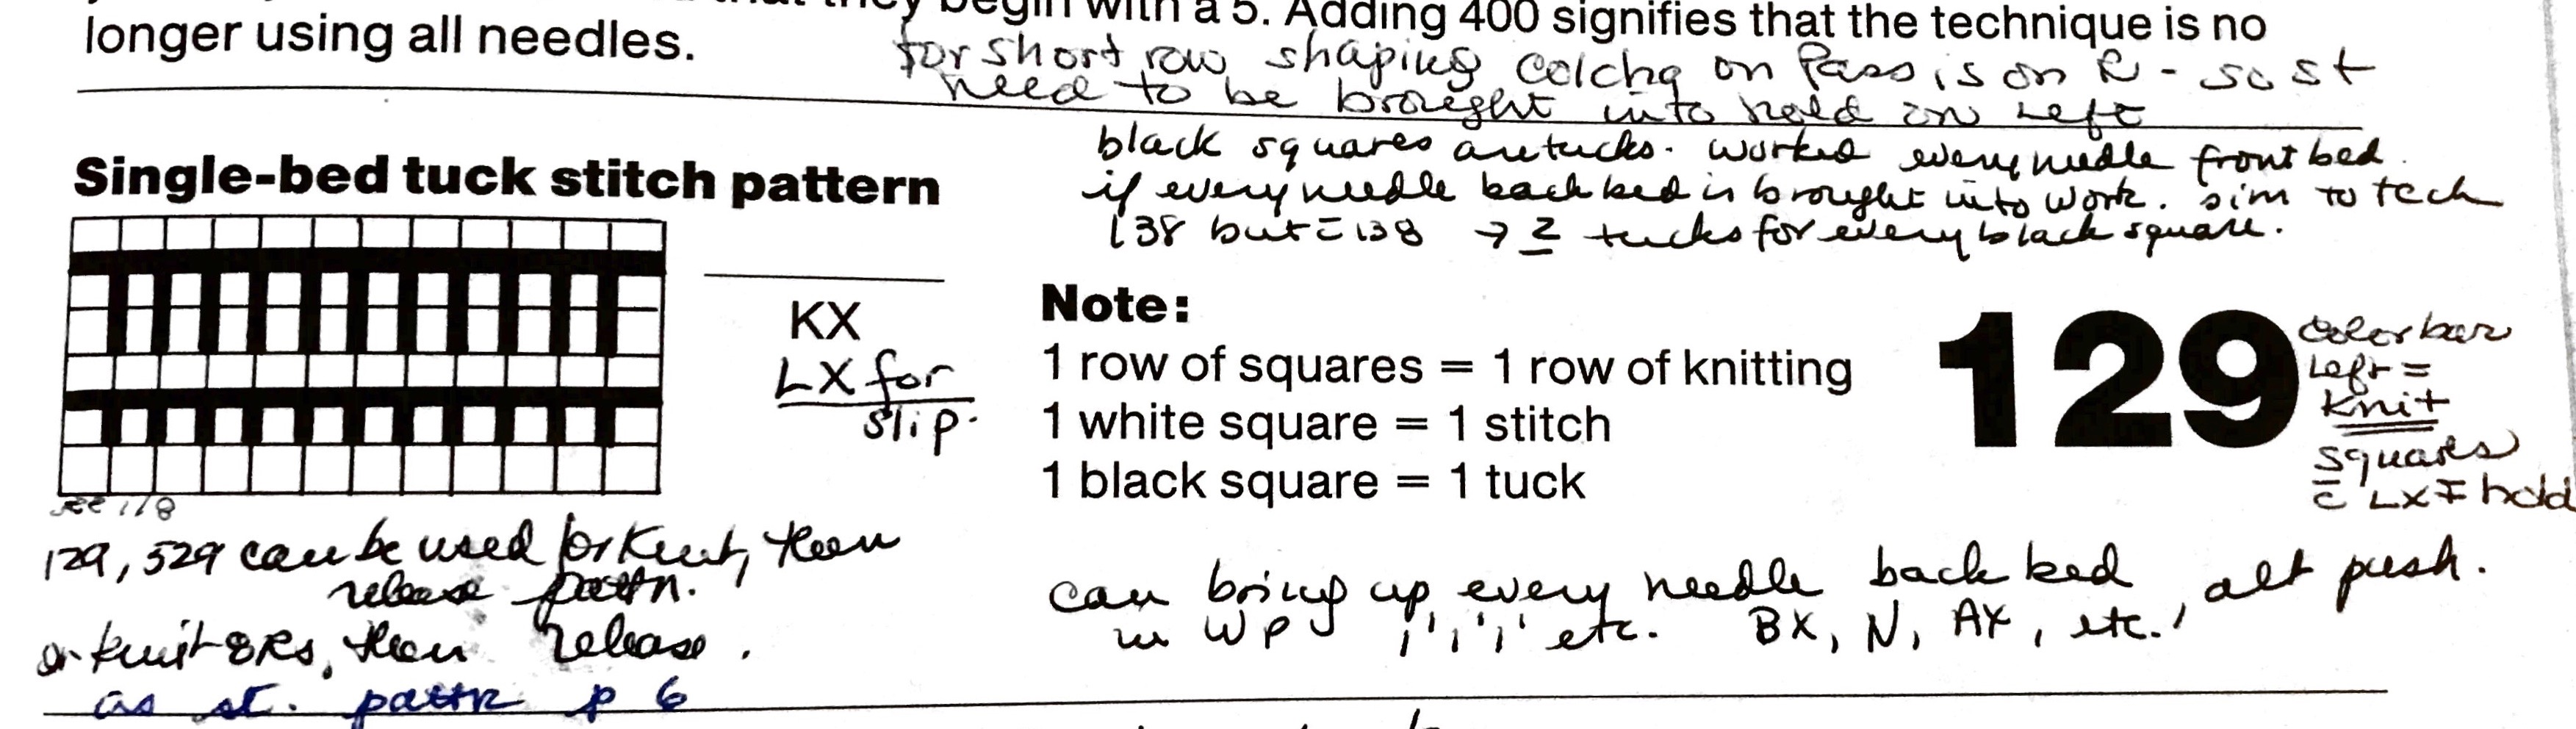
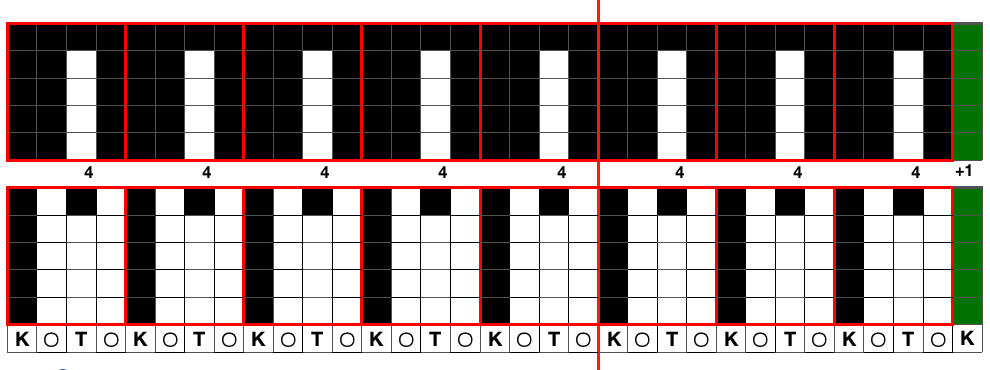
As for dropping those loops that will form the long stitches, one can do so manually with improvised tools. For more automatic dropping of stitches using knit carriage in Brother patterning, one may punch a card or draw a mylar with a method akin to color separation. A pass of the KH carriage across the knit is made with no yarn in the feeder, color 2 is actually no yarn/empty from left to right while establishing the proper needle selection on its return. The ribber would need to be reset to slip, or the ribber carriage separated from the knit one for the 2 passes to and from the color changer. This is the “scariest” option by far, more error-prone. It is not applicable when using the circular Ayab setting in creating the fabric. Without a specific tool, all stitches can be brought to E and back to B with a ruler, piece of garter bar, ribber cast on comb, or other handy ‘toy’. Dropping stitches is done while carriages are on the left, after the return to the color changer side. It is possible to modify the Studio accessory used to drop stitches
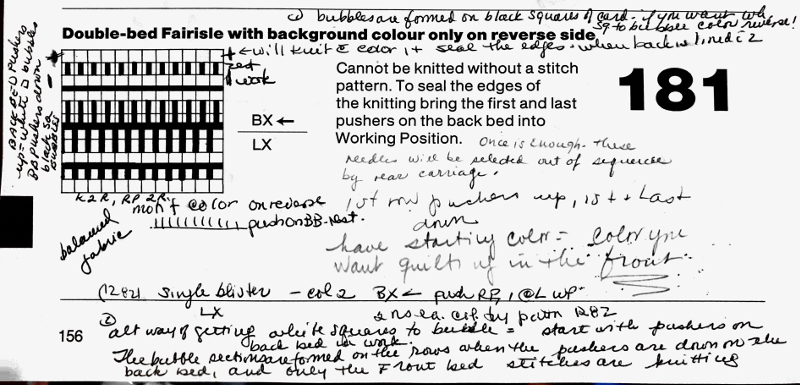
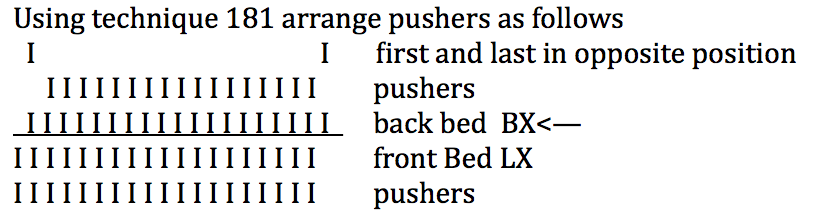
For 2 color drop stitch, the main bed is set to slip in both directions. Because not all needles on the main bed are used for patterning on every row, the KC II setting on the change knob is used, eliminating end needle selection on the 910. The ribber is set to knit every row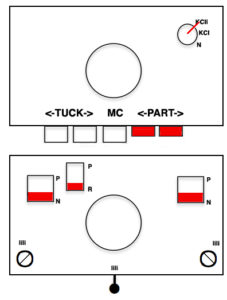
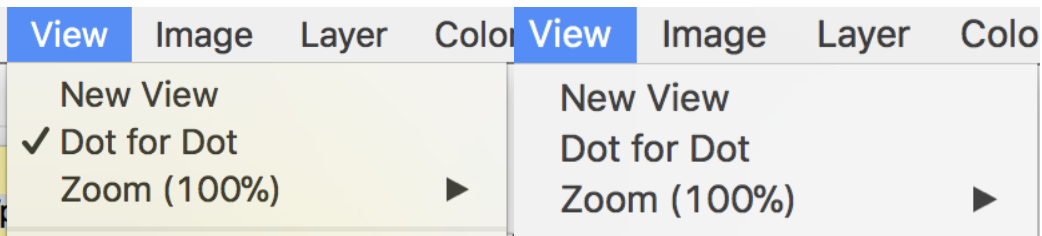
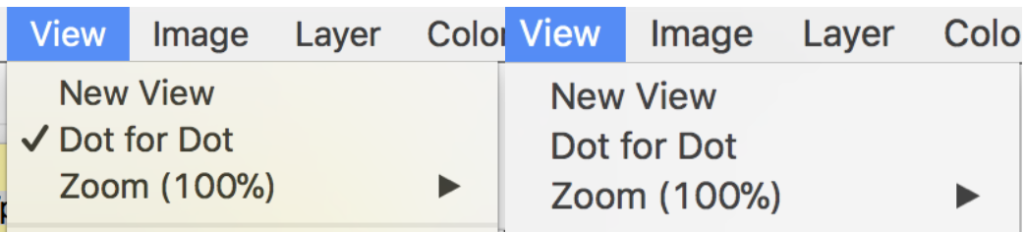
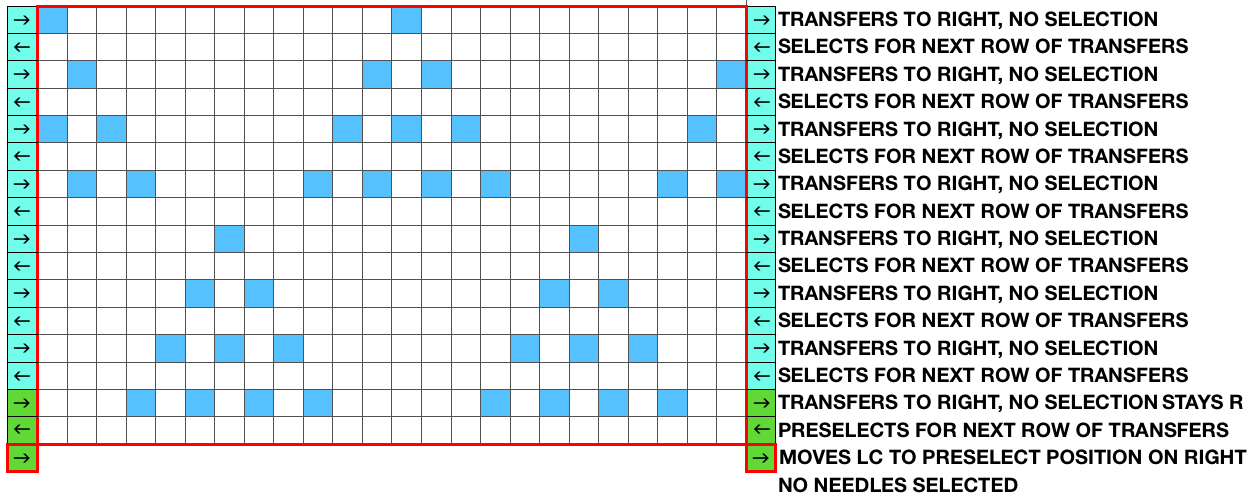
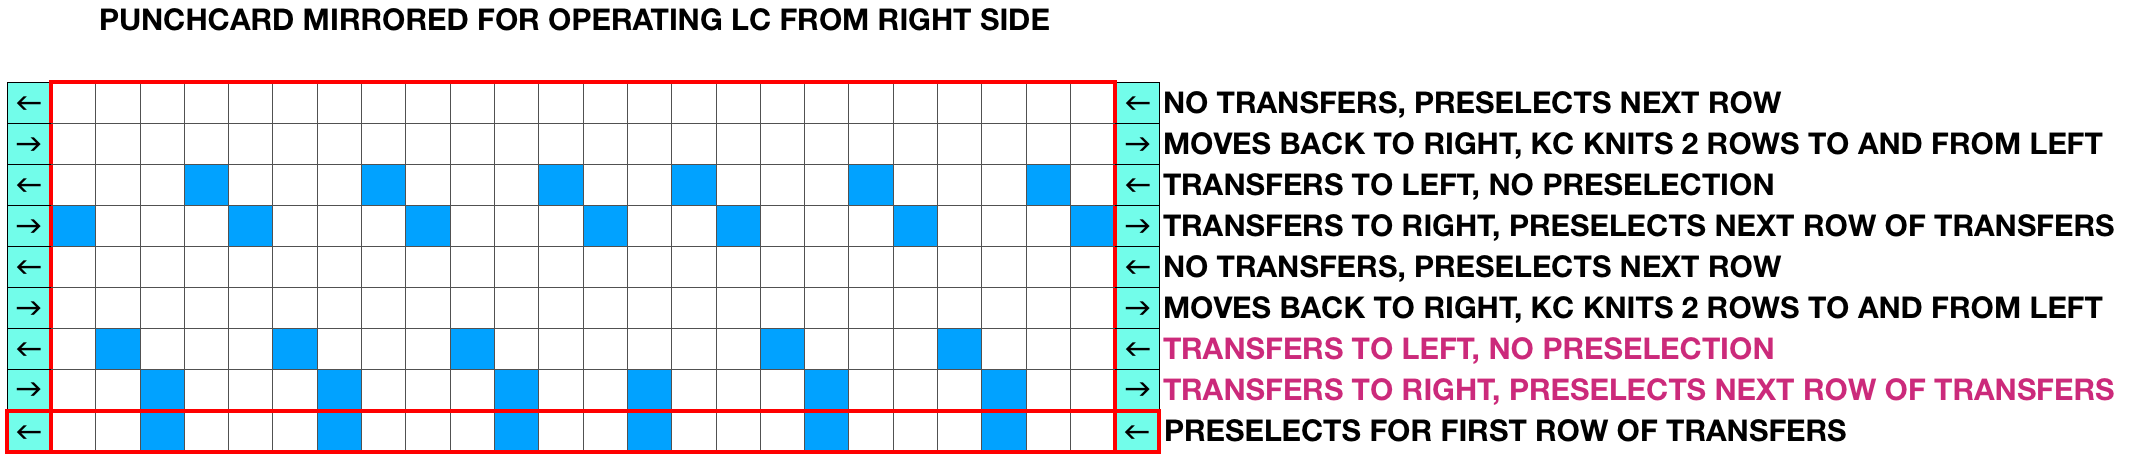
Ayab: begin your design repeat on your first row, choose its circular setting in machine type pull-down menu on the right
The first design row is preselected left to right
The main bed is set to slip <– –>, change knob on KC II (end needle selection is canceled)
Ribber is set to knit <– –> for the duration
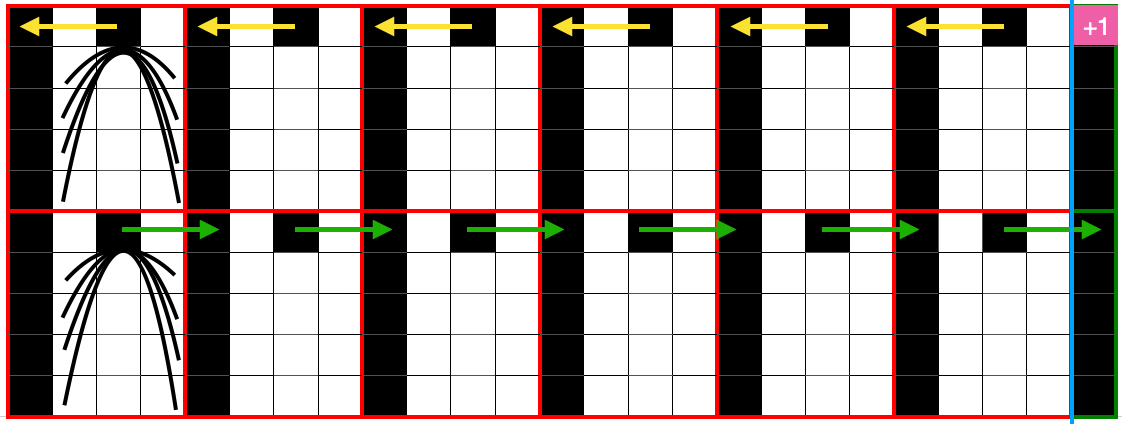
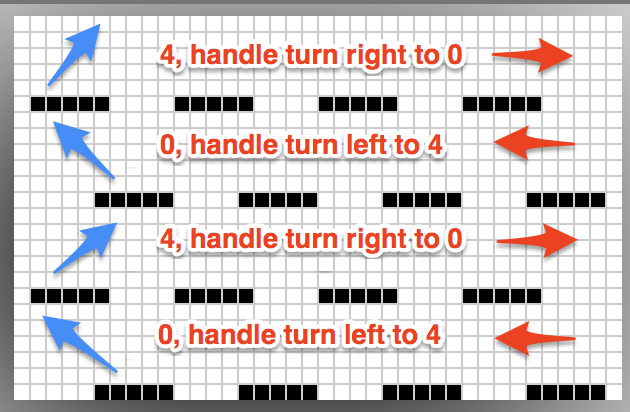
COL: as you go from the left to right, needles are preselected on the top bed, they will knit, picking up loops that you will in turn drop on the subsequent passes of the knit carriage from right to left.
COR, the KC knits on preselected needles as it moves to the left.
Clear the color changer, set up your next color. Drop the stitches knit on that last pass
It may be necessary to push those loops down between the beds before you next pass, remember to pull down on your knitting periodically, visually check needle alignment on the main bed (all needles in B in the work area)
*With the new color move to the right, preselecting the next row of loops
Knit right to left, picking up loops on preselected needles, change colors, drop stitches,** and repeat * to ** steps in 2-row rotations
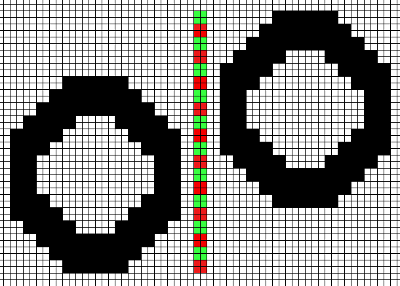
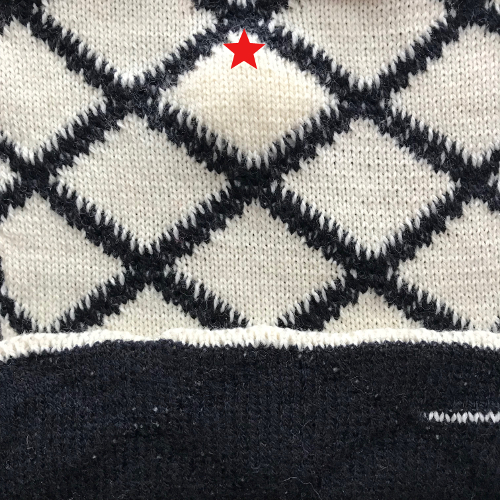
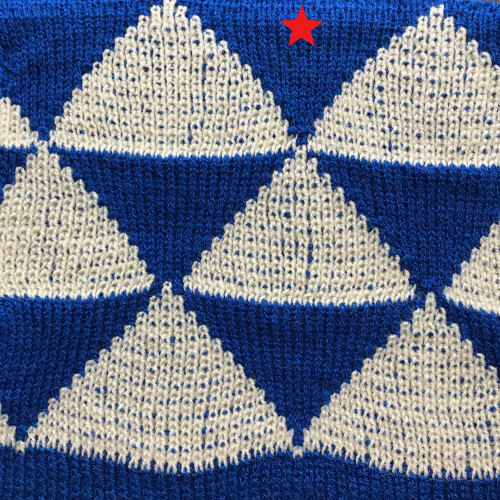
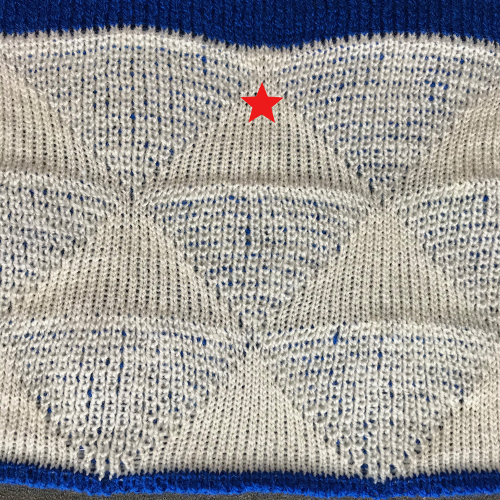
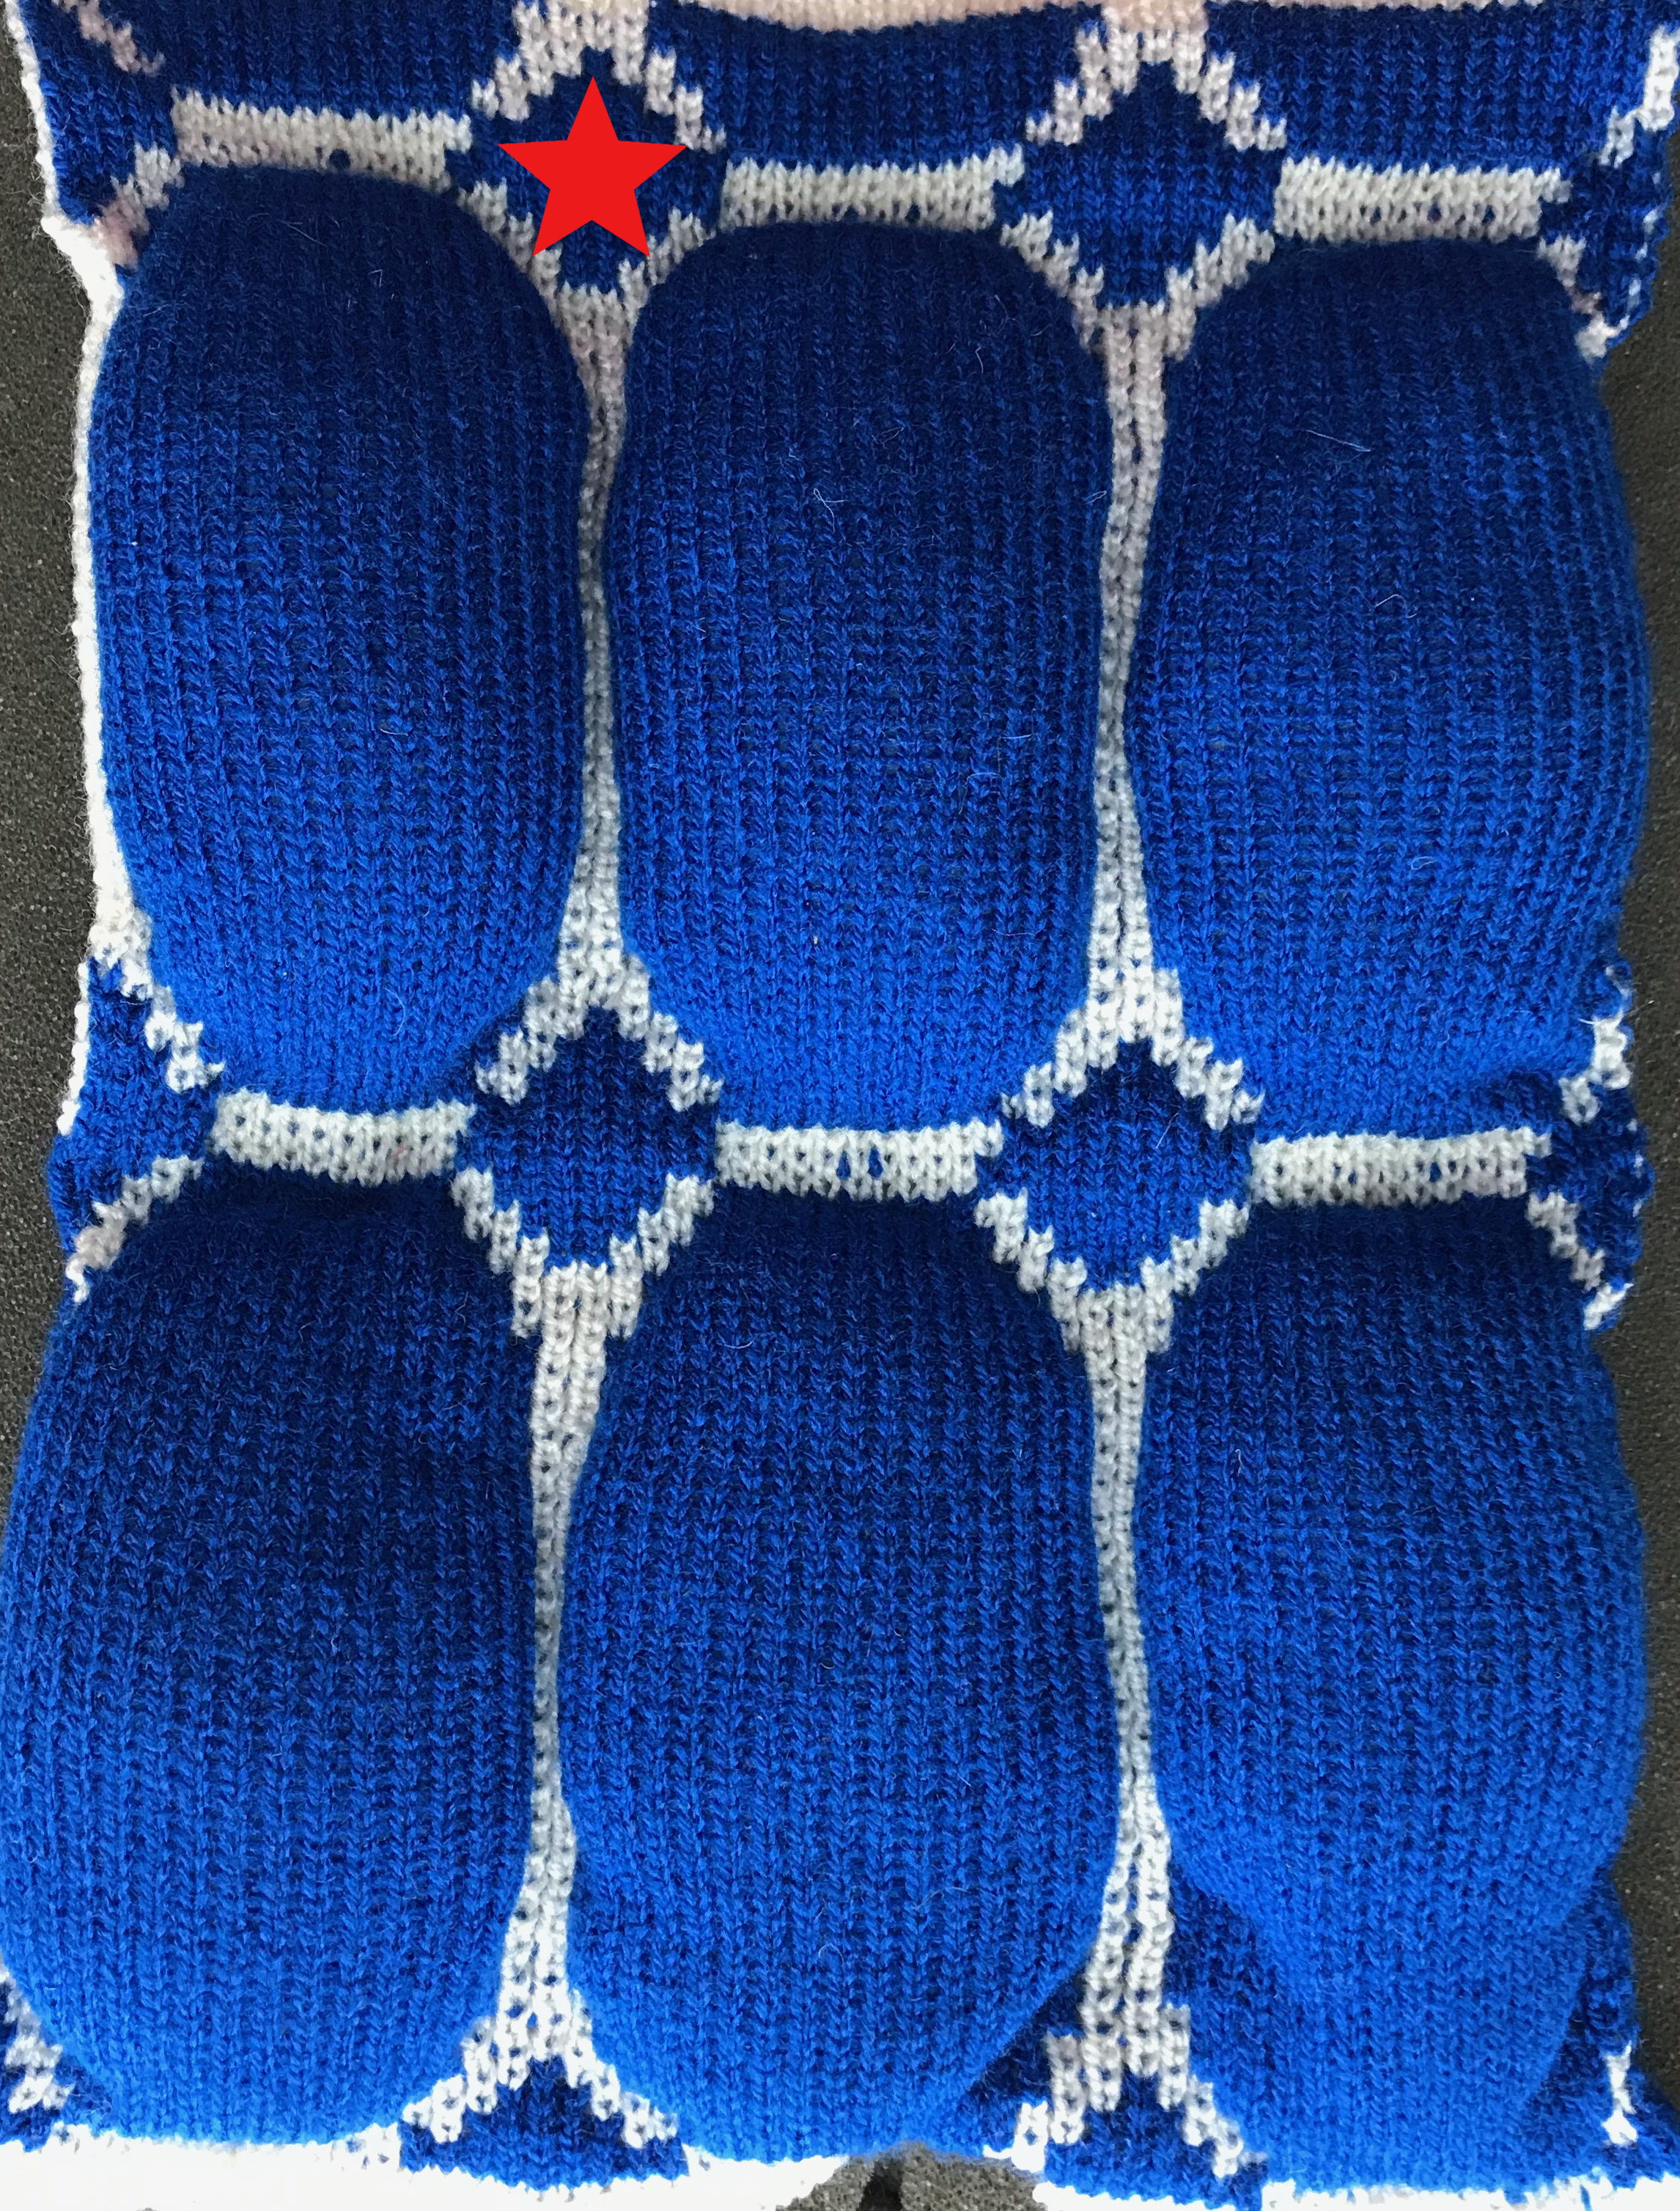
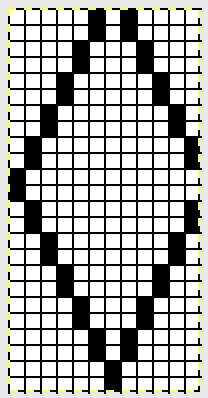
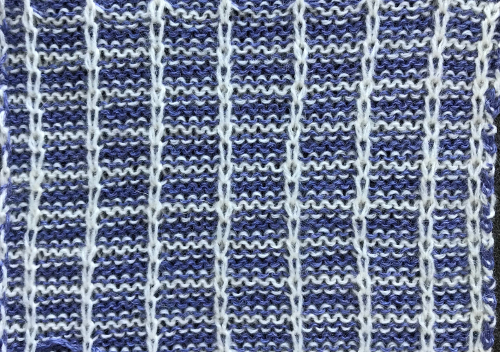
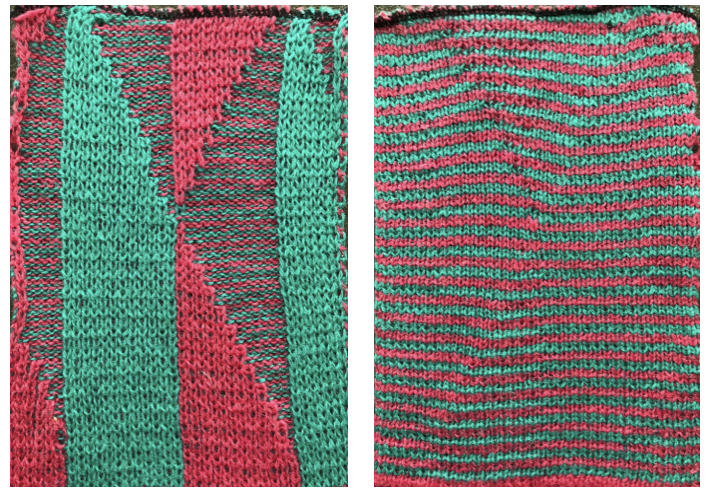
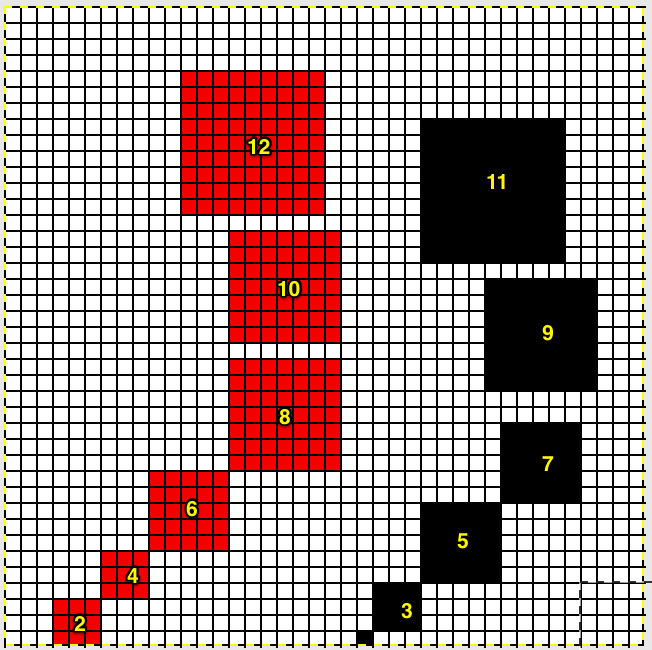
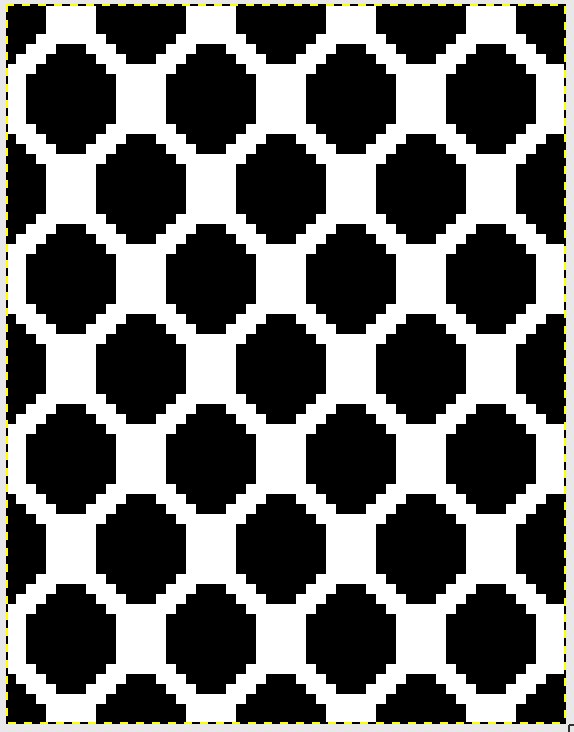
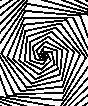
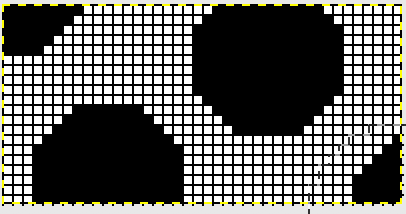
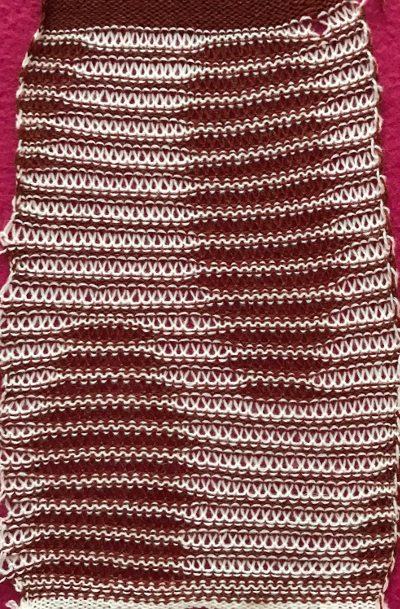
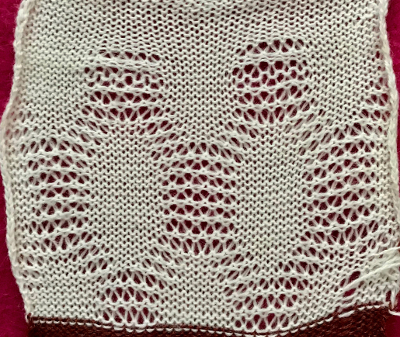
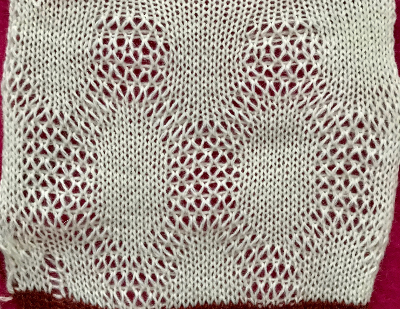
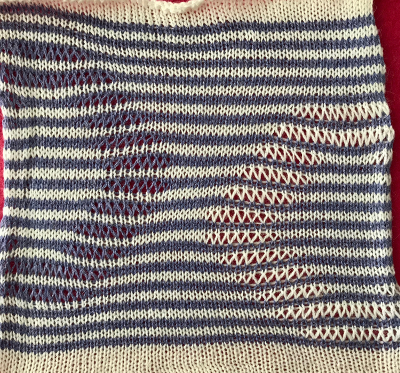
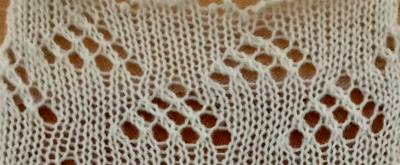
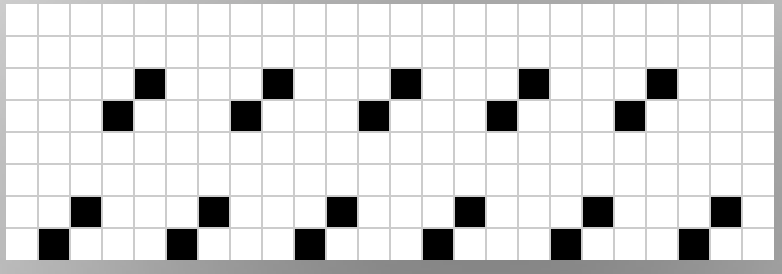
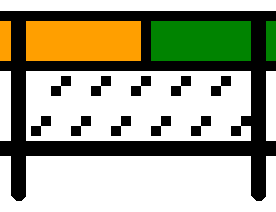
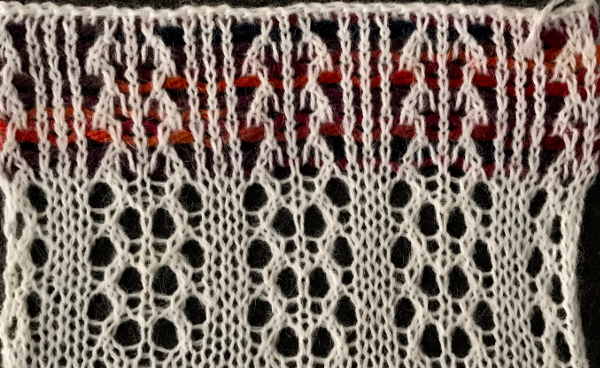
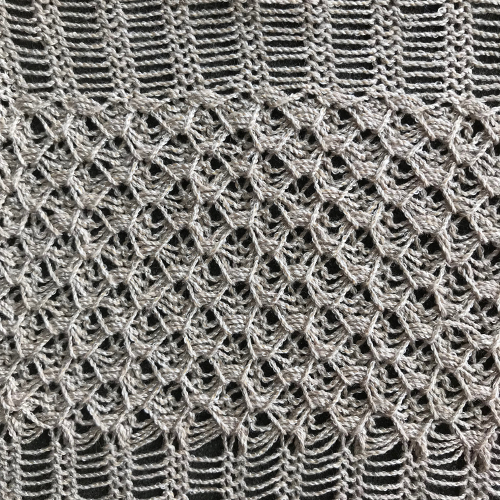
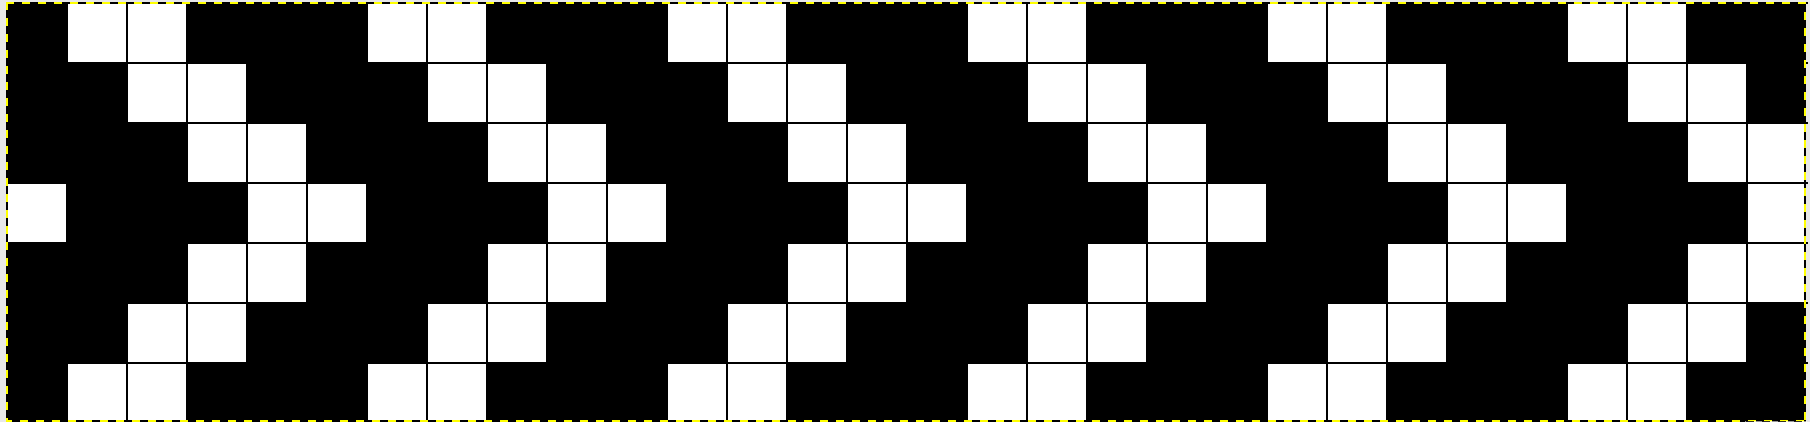
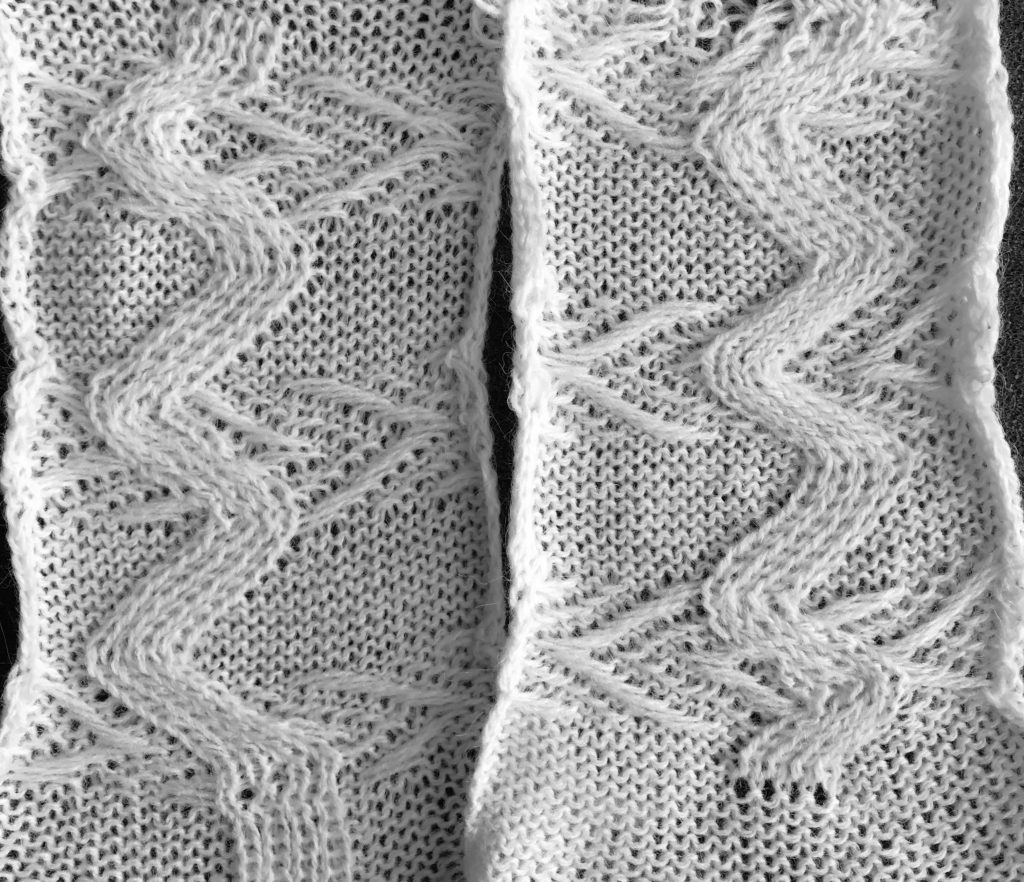
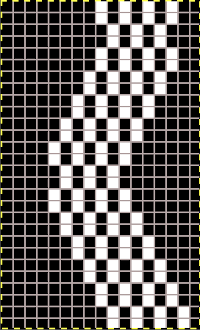
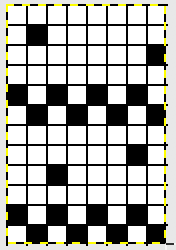
so I want circles, here is my test pattern 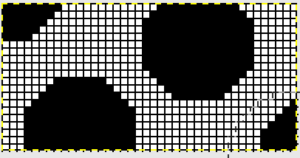 more like eggs, the black squares in shape appear as drawn on the purl side
 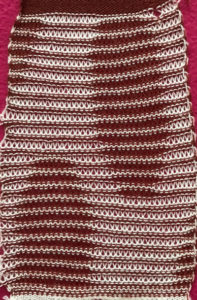 shapes are reversed as drawn on the knit side
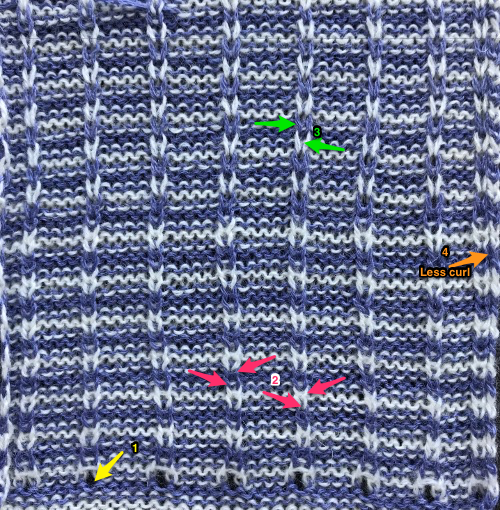
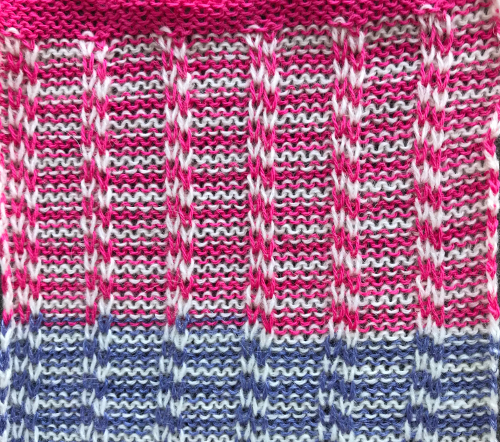
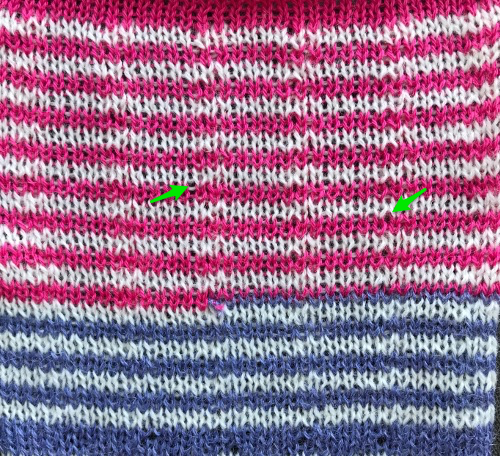
It is possible using the circular setting to drop only one of the 2 colors, whether background or shape. I began by dropping the white ground. I used to encourage students to develop a tune/ repeat in their heads when regular actions needed to be taken. For me, in terms of yarn color, it was “white, knit, drop”, “brown = erase (push back to B), go back”. 1: white travels to the right, needles are pre-selected; 2: white travels to left, picking up loops 3: on left, change color, drop stitches. For brown: 1. travel to the right, needles are preselected 2: on the right, before traveling back to left push all selected needles back to B. Only the ribber knits on the way back to left, so brown will have knit 2 rows with no dropped stitches. I ran out of brown yarn, started over with the blue and white, planning on having the shape drop the stitches. There is a difference in the fabric width with the change in the distribution of stitches. I stopped knitting, not due to any mispatterning, but because I encountered another Ayab behavior that may be well known to punchcard knitters. Due to a yarn mast issue, I moved the knit carriage back to disentangle the yarn, and lo and behold the pattern advanced a row. Punchcard machines will advance a row with any movement of the carriage outside the edges of the knit. This was never an issue in the unaltered 910. At that point, I stopped knitting. 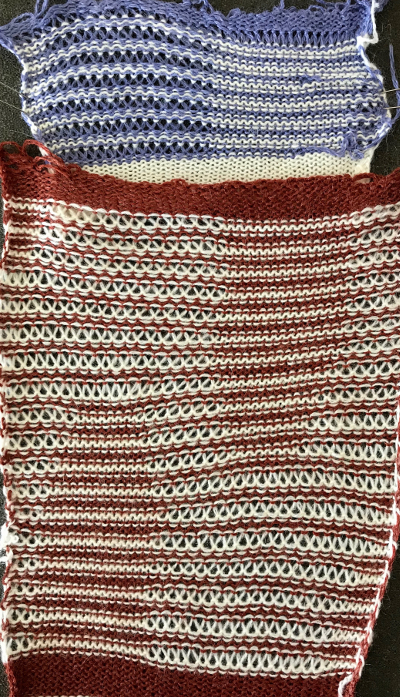
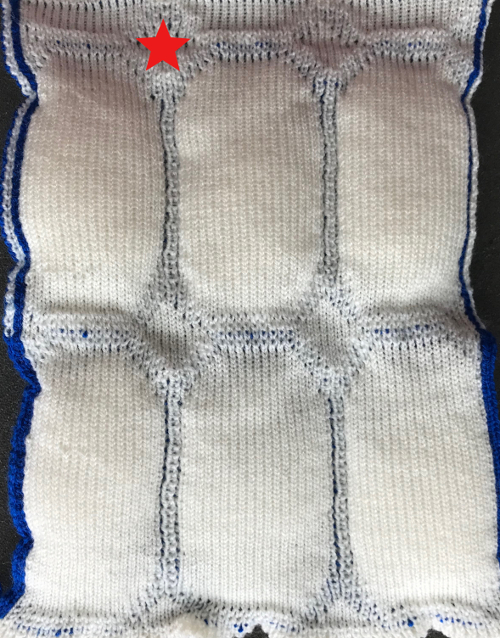
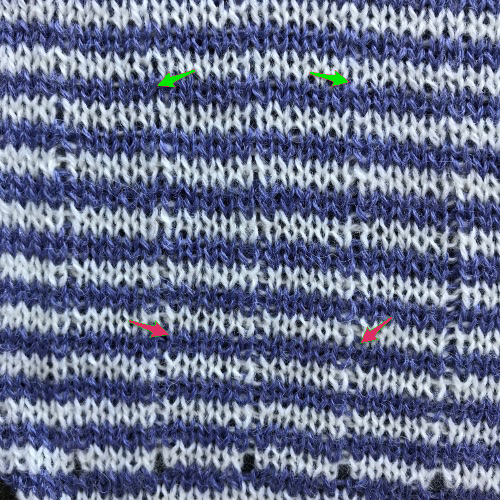
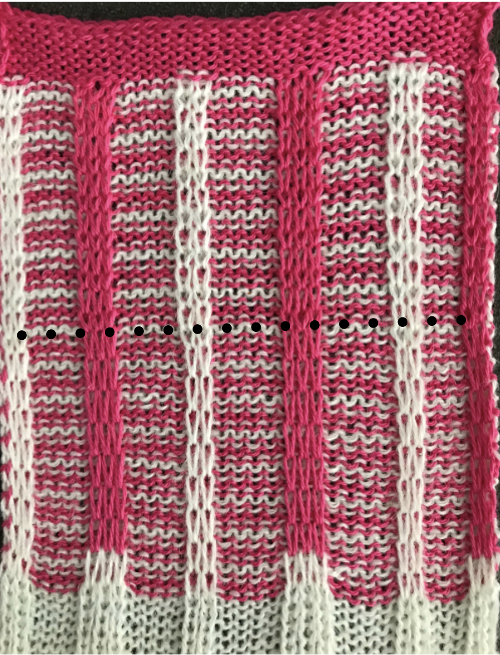
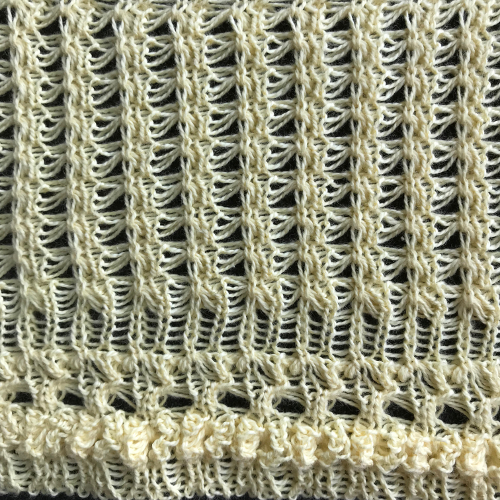
Not fond of stripes? prefer one color? the sample below was worked on 40 stitches in width, using the repeat charted for 56 stitches. Here decisions are made at the design phase of your repeat. For single color, drop stitch use an image double length, and single setting in the Ayab software. The process is the same: *preselect stitches left to right, knit on selected needles right to left, drop loops just picked up traveling to left**, repeat from * to **. Settings are the same as for the 2 color drop stitch, but the elongation depending on the number of stitches dropped is not as noticeable. The texture in my swatch is diminished after a quick press, the yarn is an acrylic blend. The charted repeat illustrated is wider, but I worked it on only the center 40 stitches. As always in slip stitch, the black squares knit and they represent the stitches that are dropped. If you wish to create the long stitches on the ground (white squares), reverse use Ayab Action Invert prior to knitting
the chart as viewed and explained at the top of the post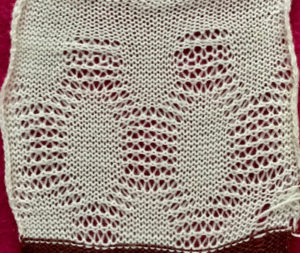
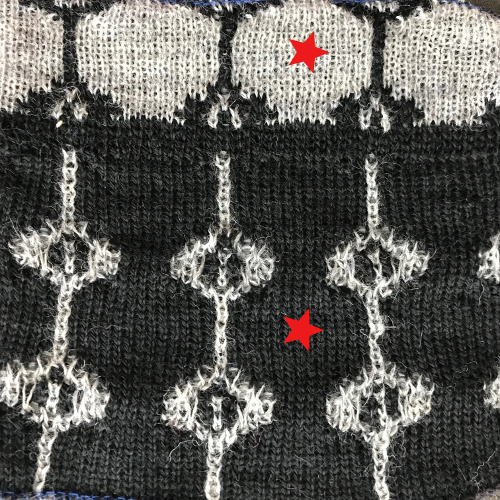
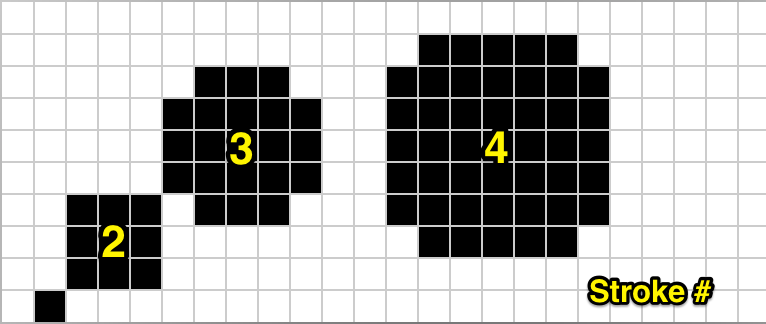
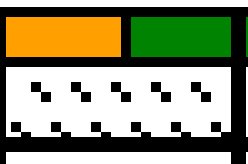
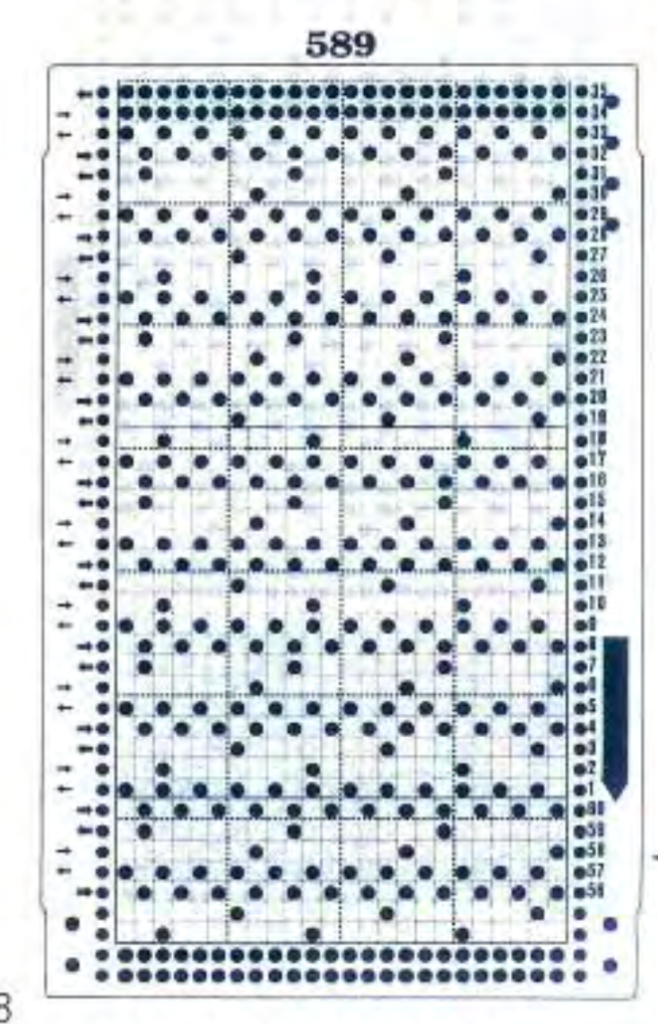
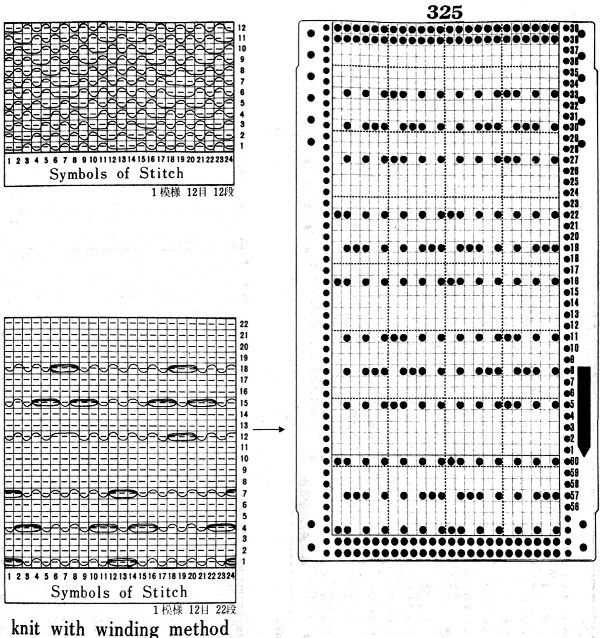
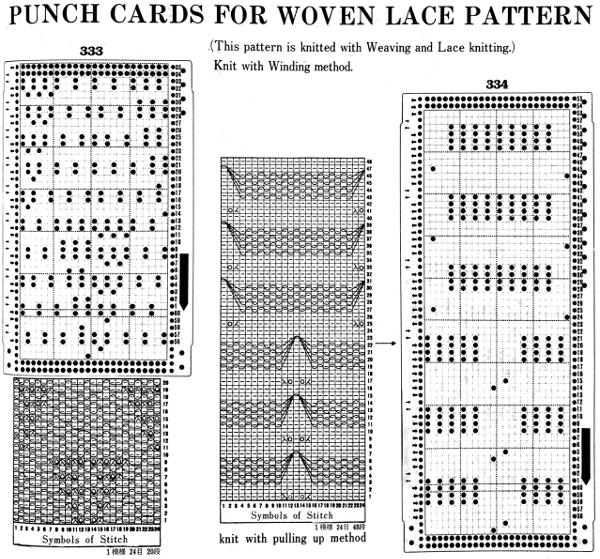
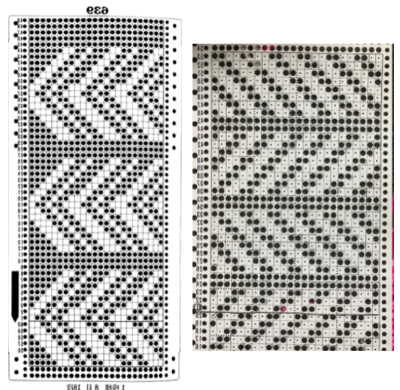
Sources of inspiration from studio publications vary, patterns designed for pile knitting make for suitable one color drop stitch. A partial punchcard repeat
from an electronic collection
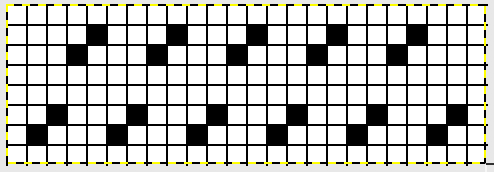
and a punchcard pattern book, where markings emulate eyelets, usable only for single color knitting
Note that in #2 card directly above, there is a solid row at the very start that is a design row (third all punched). In Ayab again, first-row preselection is left to right, you will be picking up loops on preselected needles going from right to left and then dropping them. That first design row needs to have punched holes or black squares/pixels in it. The color separation is essentially done for you in the source image. Do not use circular in Ayab, but rather, use “single” setting and follow instructions for creating the fabric as described above, with no color changes. The blank punchcard rows match the no selection rows in self-drawn color separations,
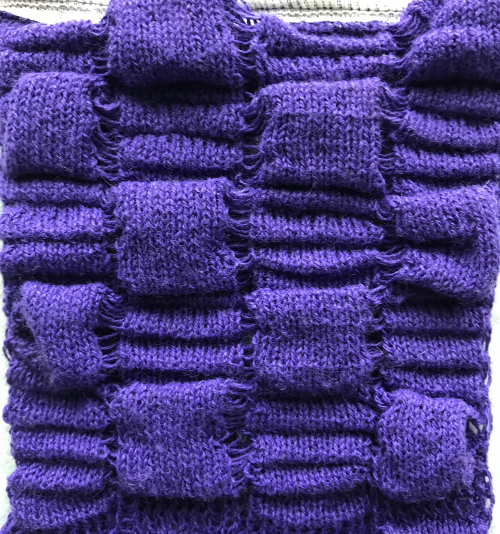
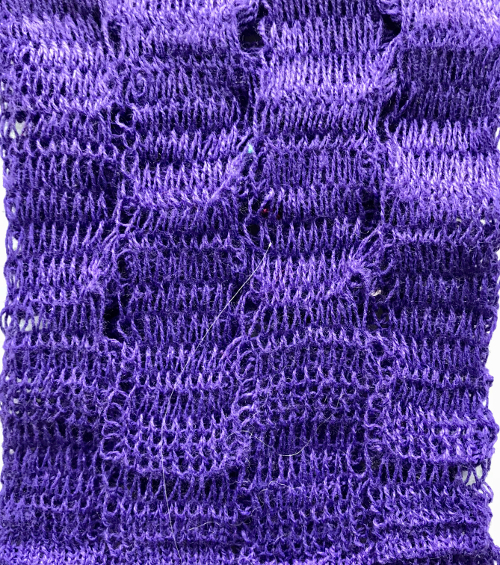
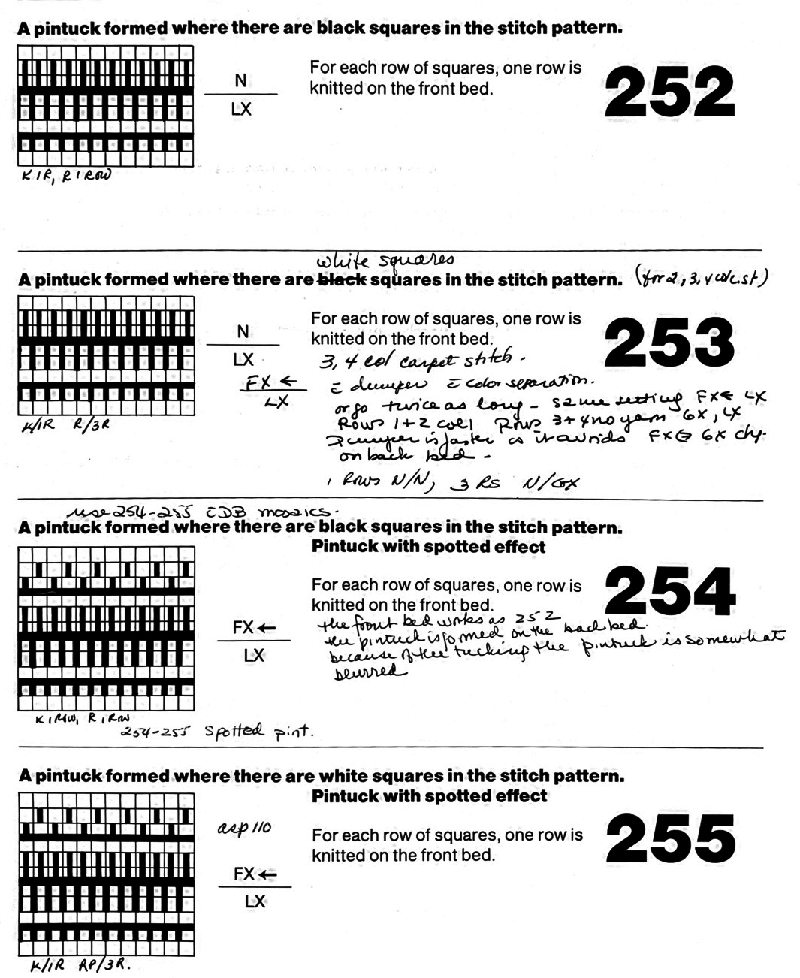
If double bed work is daunting, for a different stitch, worked single bed, that may cause interesting distortions in all knit, single bed fabrics see block stitch post.


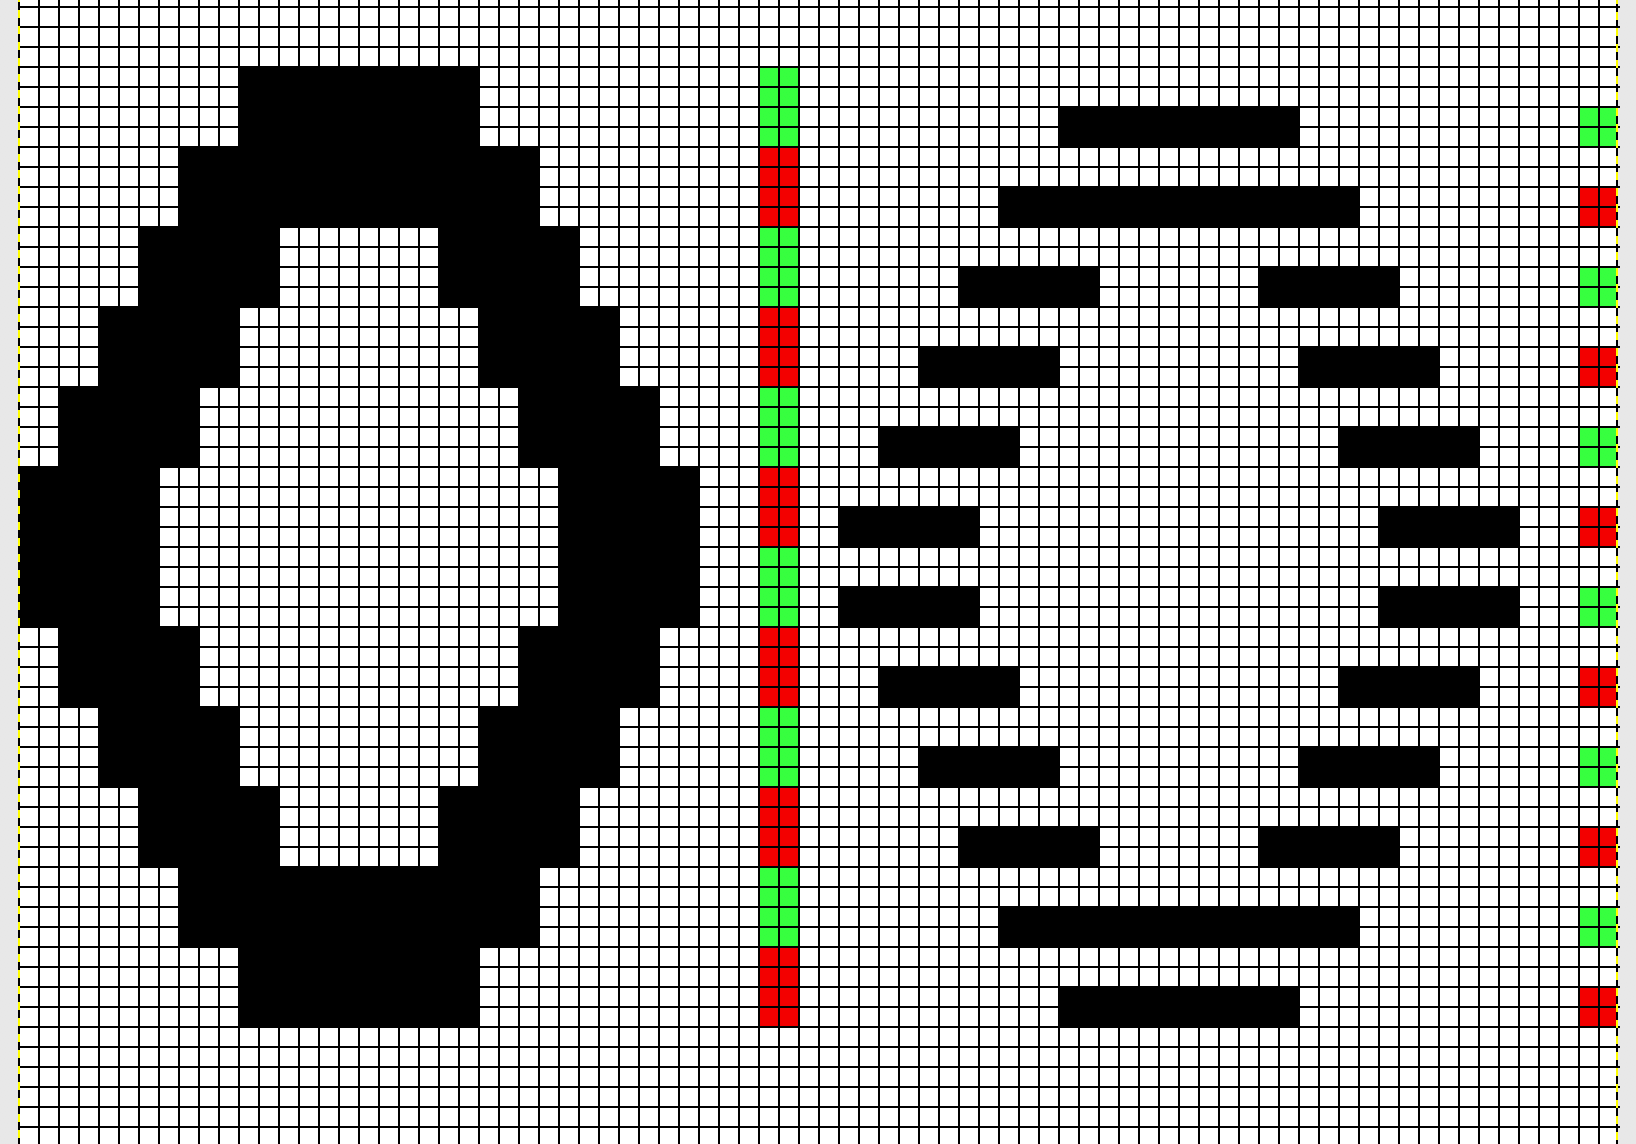
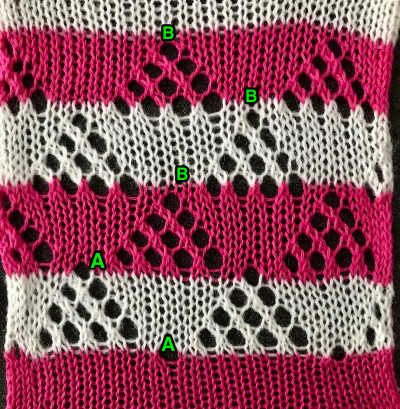
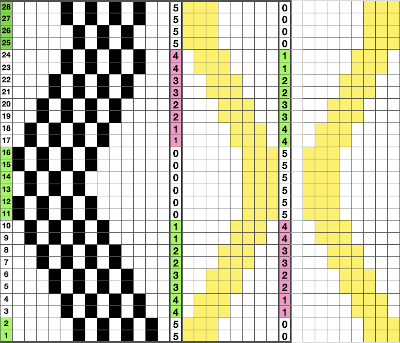
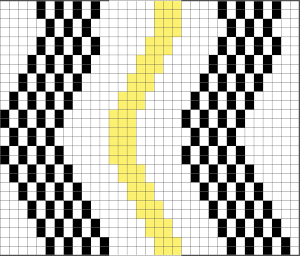
The self-drawn design repeats for 2 color drop stitch may be offset as well, resulting in colors being dropped alternately. The design shape needs to be created in 4-row blocks in order for the yarn to make it back and forth to the color changer with both colors to complete one design row. The second pairs of rows in each 4-row block is erased. In this instance as well, rows marked with black squares will pick up loops on the main bed, which are in turn dropped to create the long stitches. The second design repeat is offset to try to get sections of it to create loops to be dropped as well. The final motif must be a multiple of 8 rows in height if it is to be used as Ayab’s infinite repeat in length.
Color changes are indicated in the vertical strip in the center of the design. This was my starting idea
Elongation to 4 rows per block, erasing the second pair of rows for each color on right. The repeat on the right may be used if only one color is to be dropped; the 2 blank rows in the design field represent stitches that will knit only on the ribber for 2 rows. No stitches are dropped in color(s) used in sequential rows of blank squares in all “white” areas of the chart, including multiple rows above and below the design shape. Color changes every 2 rows continue, creating continuous stripes. 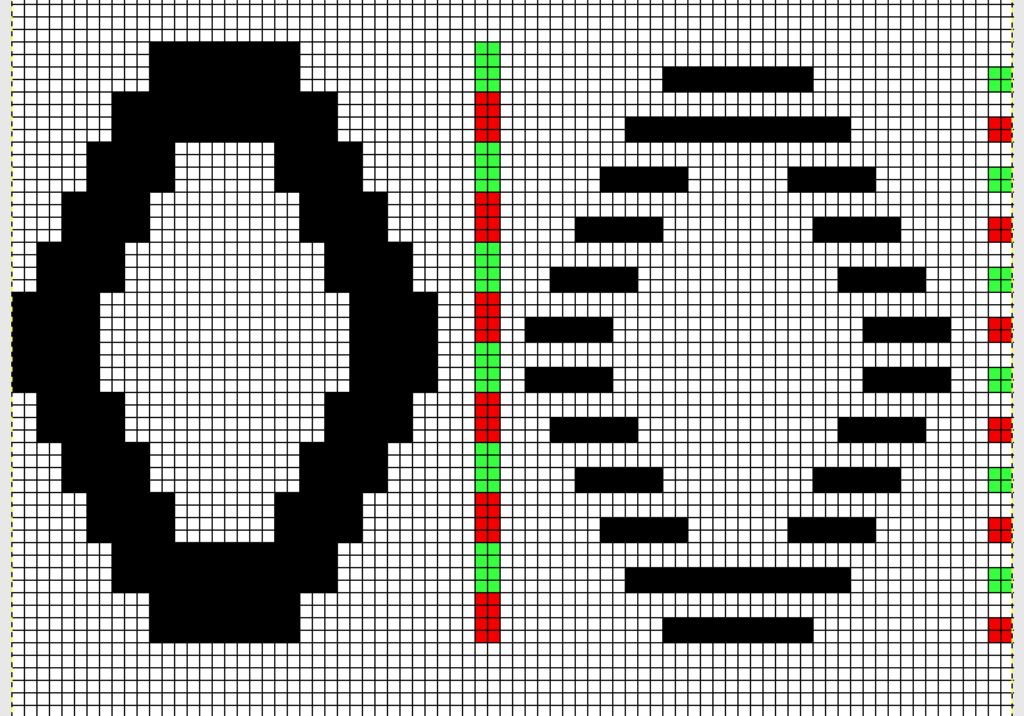 shapes staggered, visually checking for placement of alternately dropped stitches
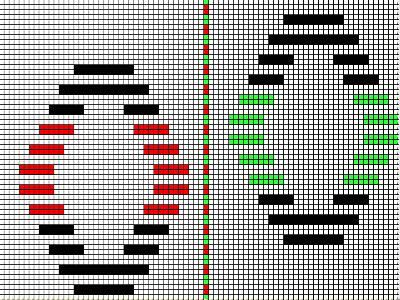
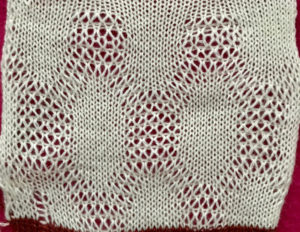
To accommodate the Ayab preselection for the first row to be knit from left to right, move the last blank row in the design to the first-row position. As the carriages travel from left to right and back to the color changer, the stitches will knit 2 rows only on the ribber. Continue knitting in steps as described earlier in the post, changing colors every 2 rows. On a larger knit ground such shapes may be arranged to suit. This was my working repeat, but I used a third fewer stitches in the swatch than in the chart. 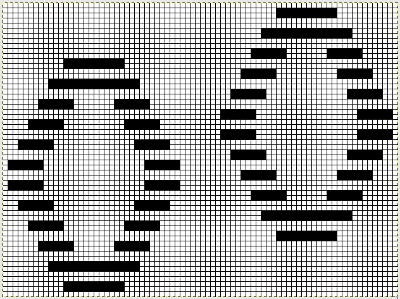 Note that the images will be reversed on the knit side, so if preferred, use Action Mirror to flip the image horizontally prior to knitting it
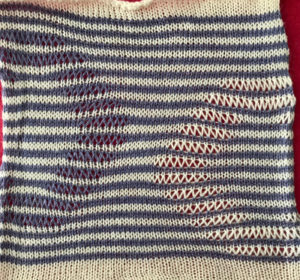
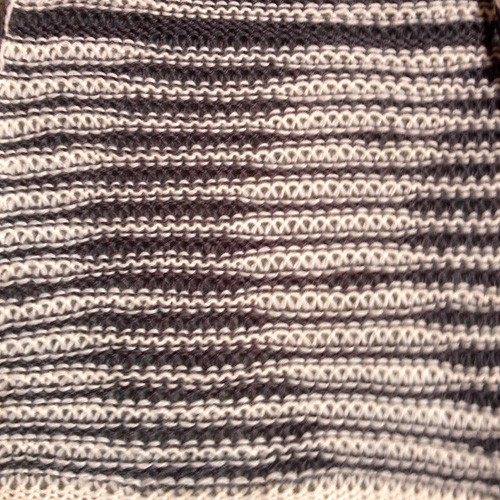
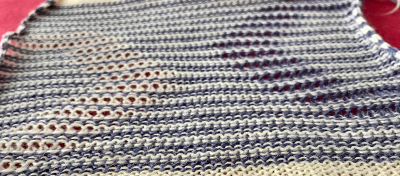
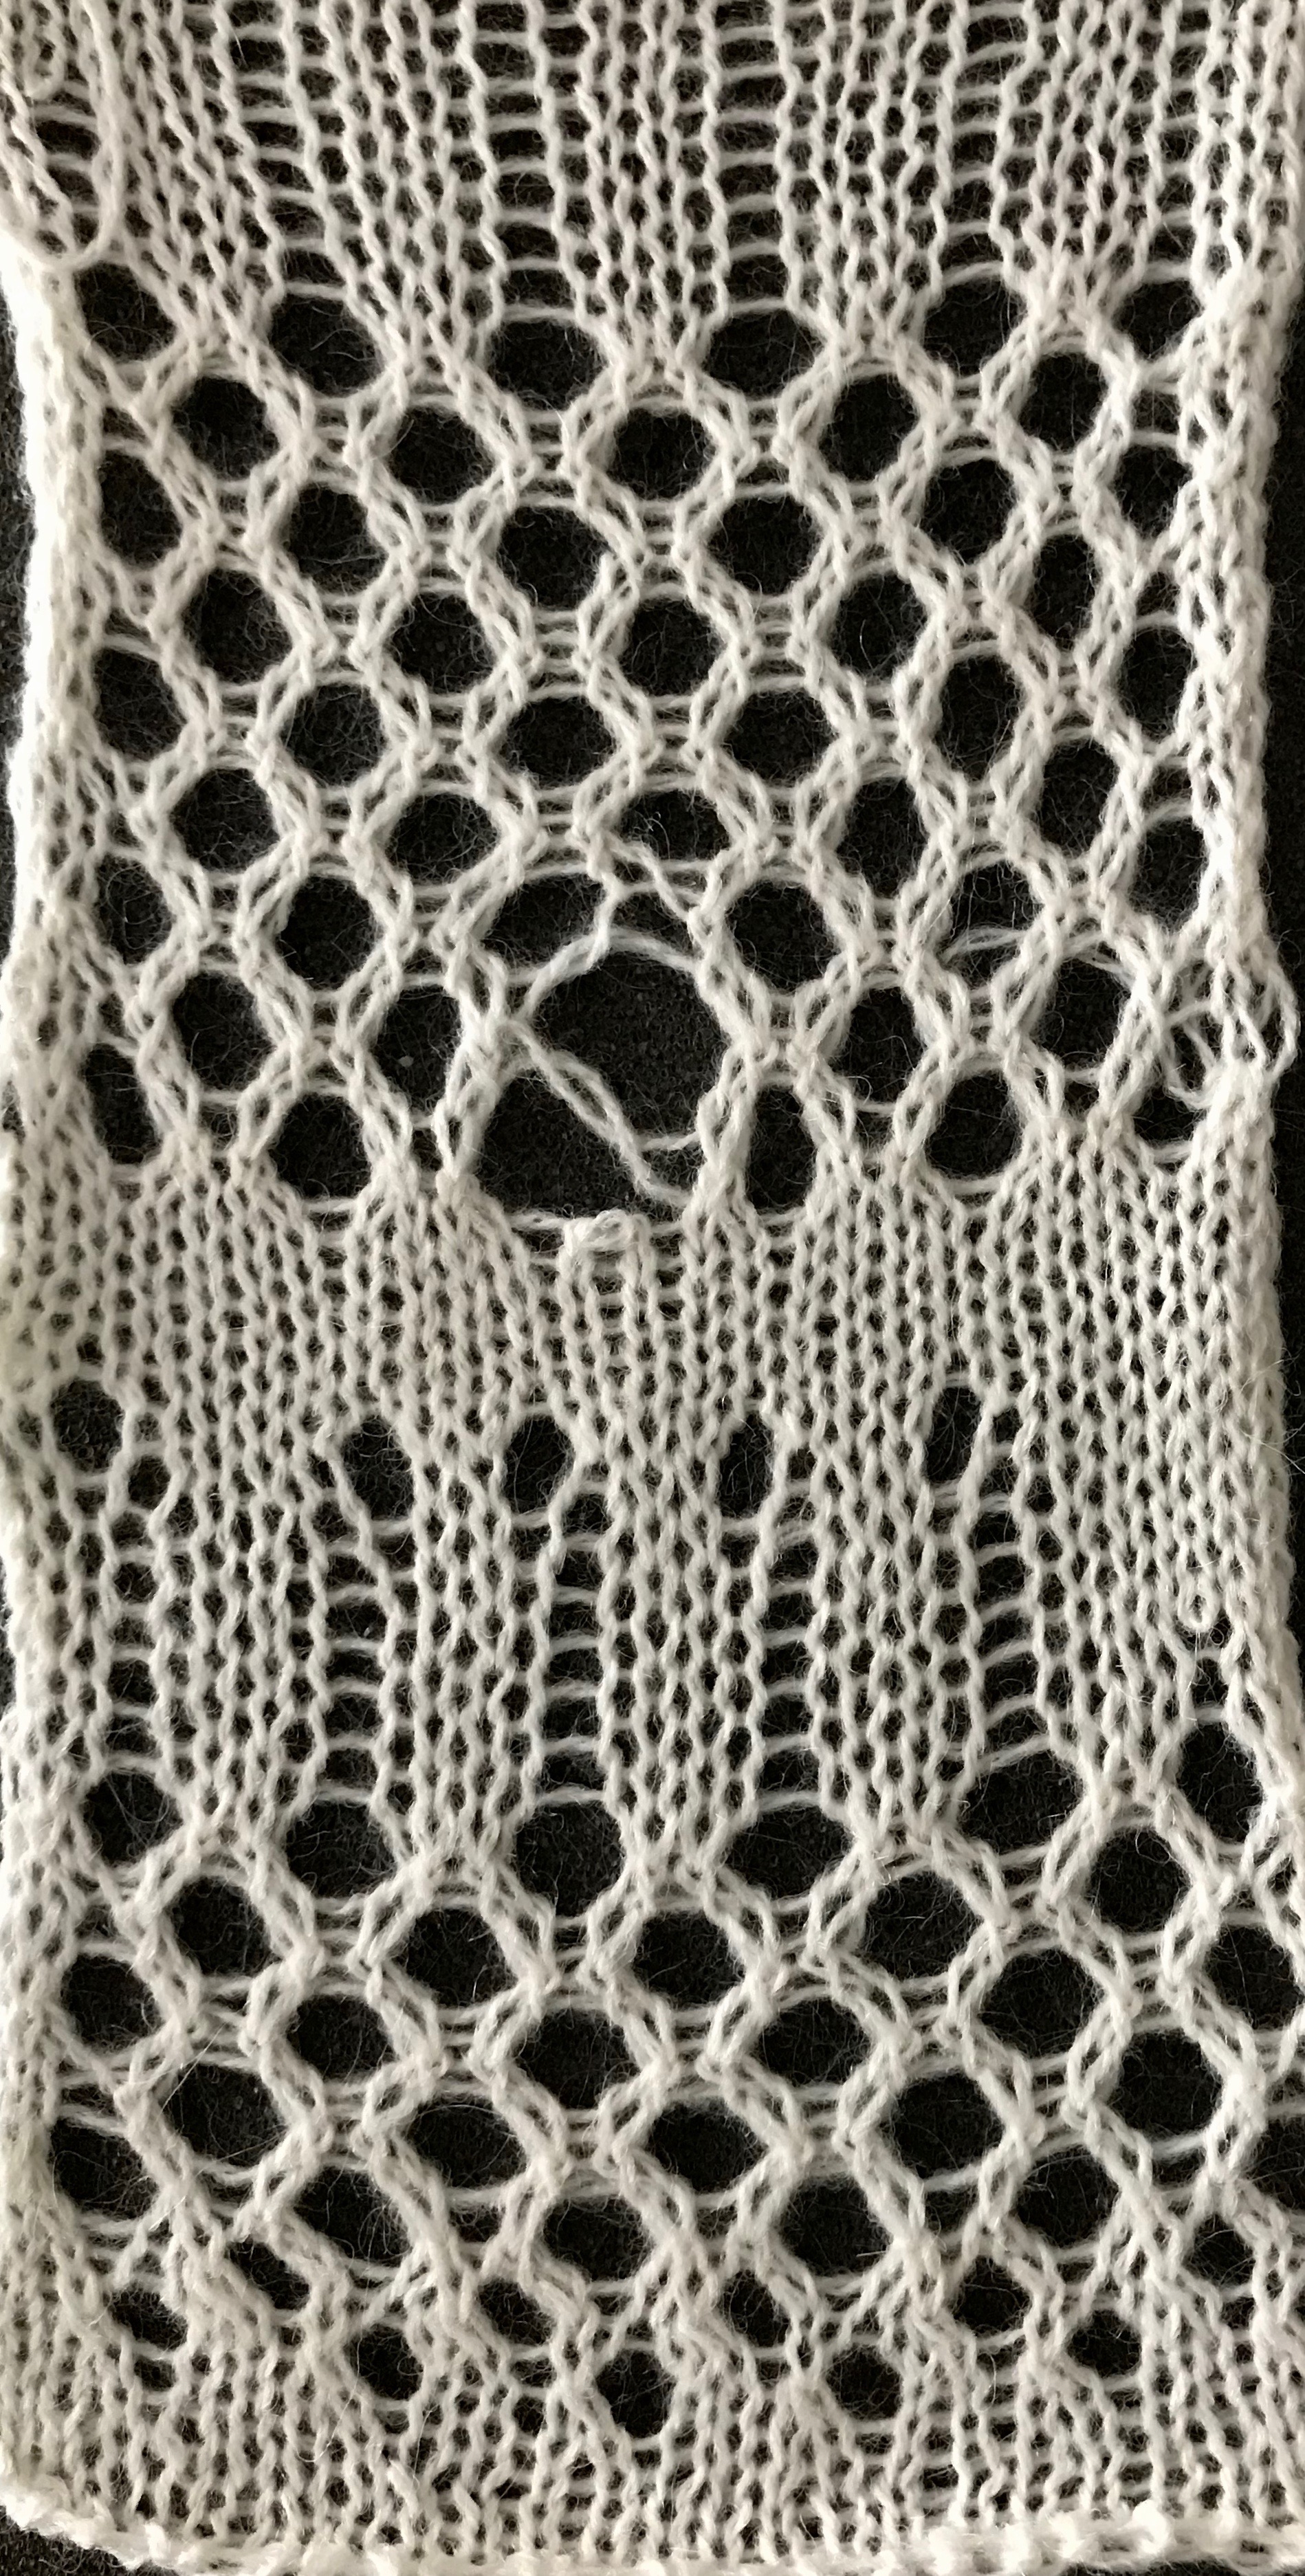
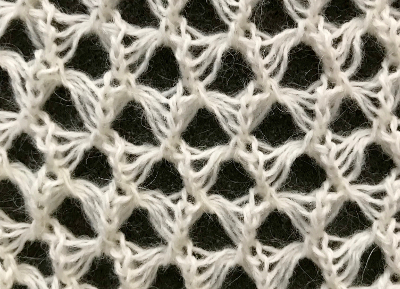
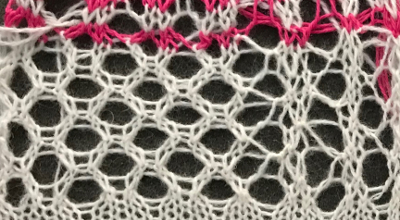
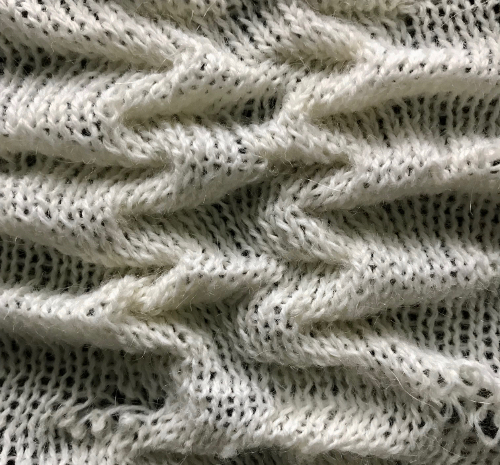
The swatch has been quickly pressed, so the texture is flattened out, but I am reminded of a few shadow knits when viewing its purl side. 
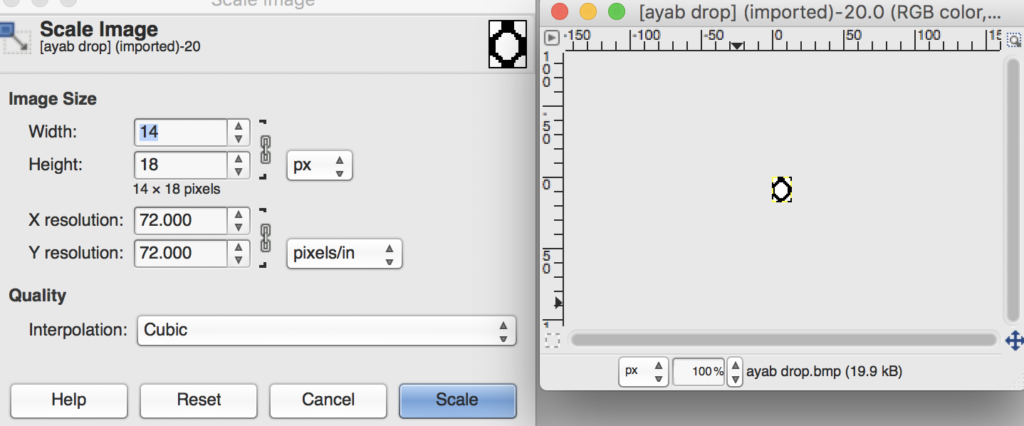
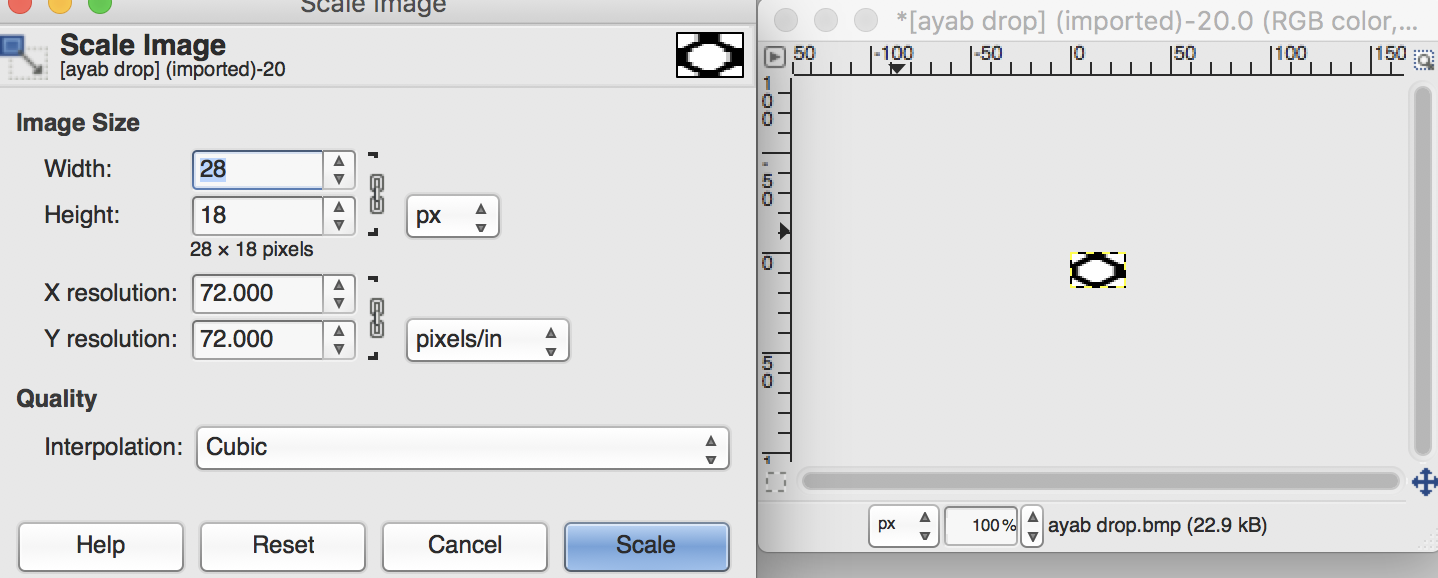
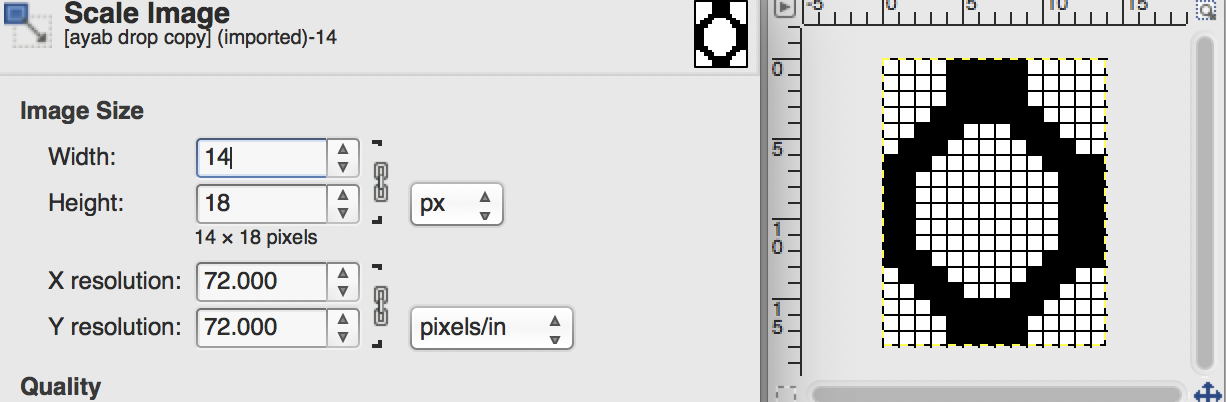
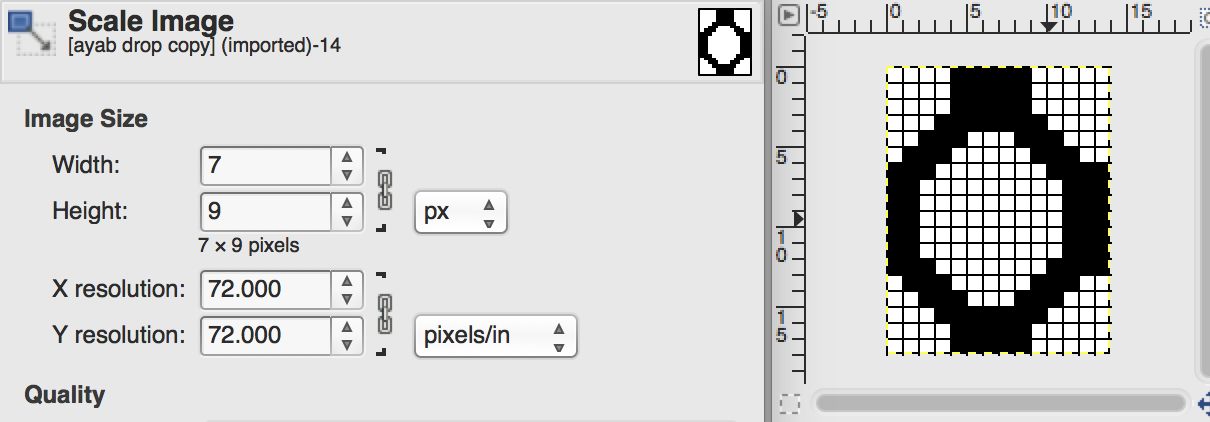
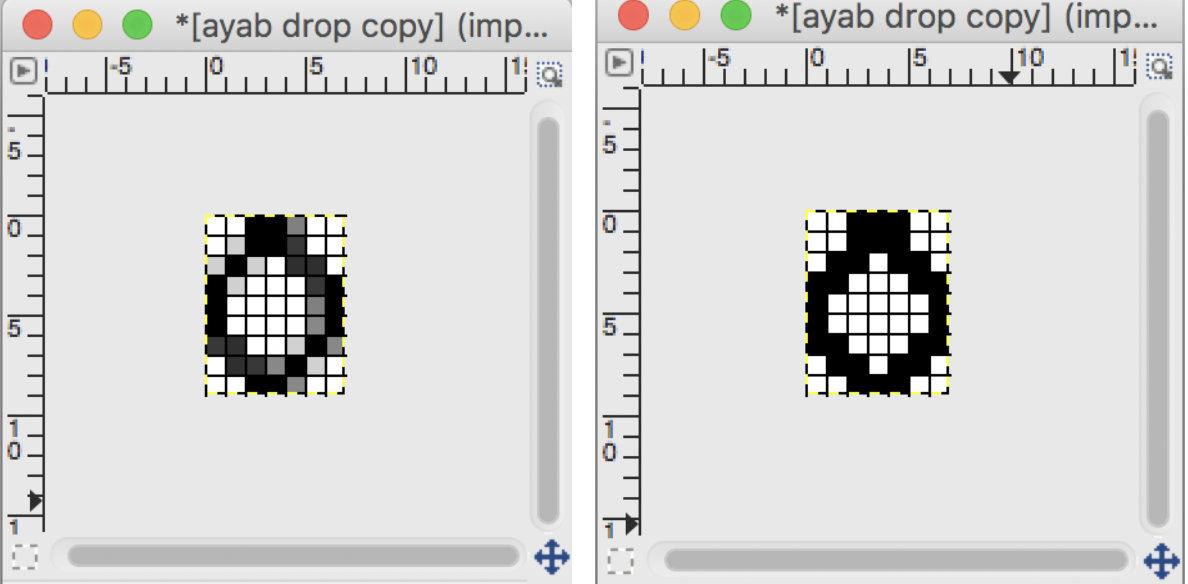
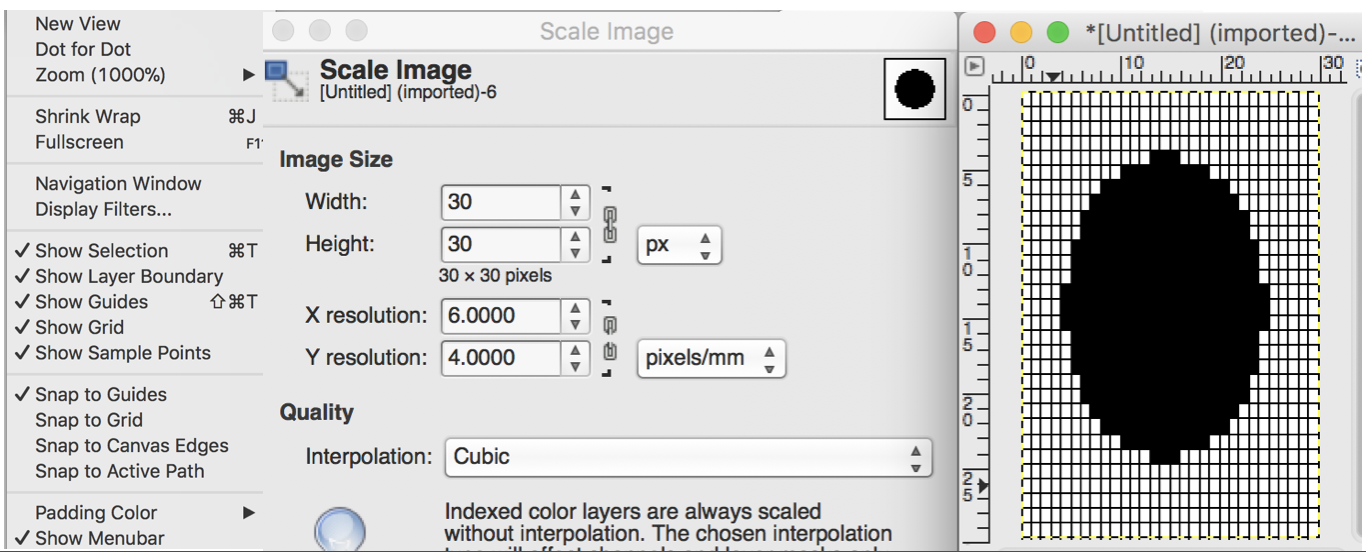
In an unaltered 910 with the ability to double the width of the programmed repeat, mylar users are not excluded from exploring a similar fabric. The repeat above may be rescaled to half the width, drawn that way, and then use the twice as wide built-in feature. Gimp does an “interesting” thing when scaling this design to half-width, note the right side of each repeat is an odd number of squares, the left side an even. The repeat may be used as-is or redrawn, adding or eliminating black squares if symmetry in each shape matters. Paintbrush produces the same image, mirrored.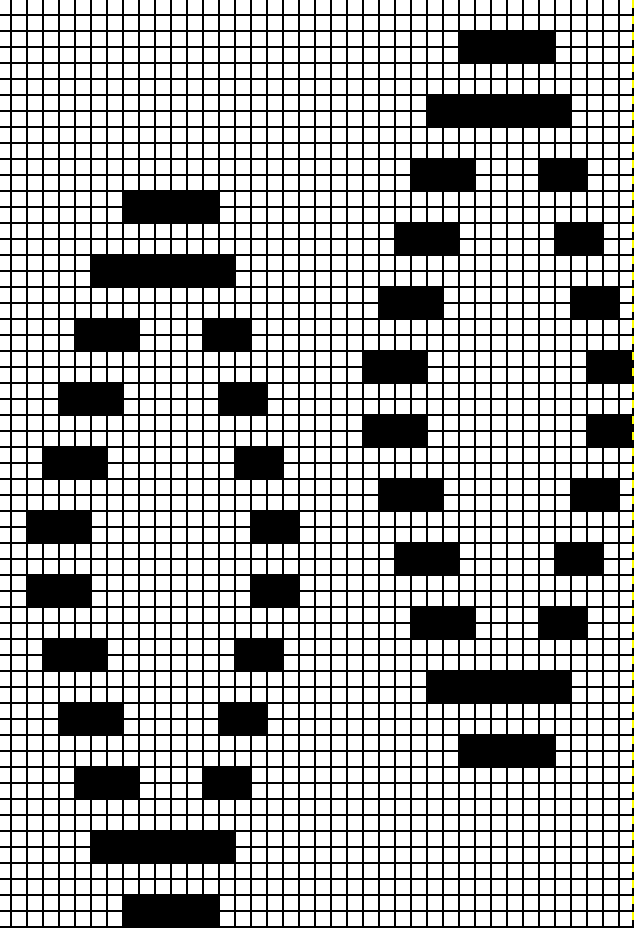
The explanation: further analysis of the original design reveals the fact that some of the pixel numbers in the design black square blocks are uneven in width. In this instance, 3.5 is half of 7, and half pixels cannot be rendered, so the software assigns the split to 4 and 3. 
 These illustrations are from the Brother Knitting Techniques Book, now available for free download online
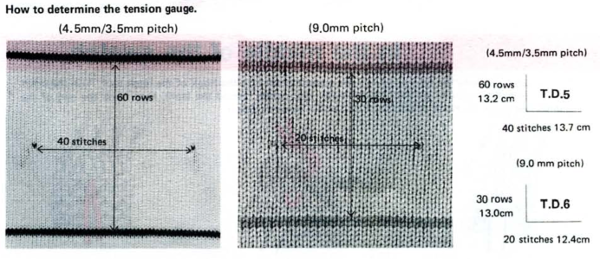 adding yarn markers in the body of the knit
 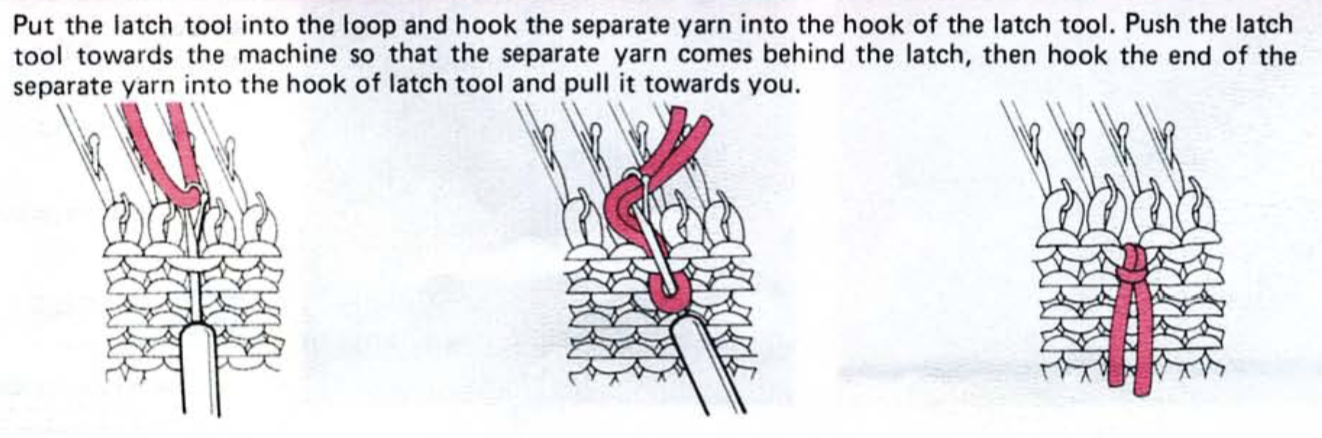 I prefer to measure on the purl side, find the top and bottom of stitches easier to identify
  Using the ribber? from the Brother Ribber Techniques Book:
 There are some additional ways to handle measuring swatches. For very textured fabrics or DBJ, the standard becomes a 100X100 swatch. As always, treat the test as you would the finished piece ie by steaming, pressing, washing, etc., and allow it to rest. It is easier to work in mm than inches to start with. There is a ruler supplied by Brother for that purpose, but any good quality ruler with such markings will do. Measure the full width of the swatch in several places. The stitch measurement suggested by the machine manuals is necessary to find the proper ruler to insert into the knitleader. Obtain that number through proportional math. Using the suggested ruler, position it from 0 to 60, or your chosen full-width stitch count on your swatch, on more than one place from side to side, turning it over, or choosing another tape as needed to match the stitch indicators.


 double height
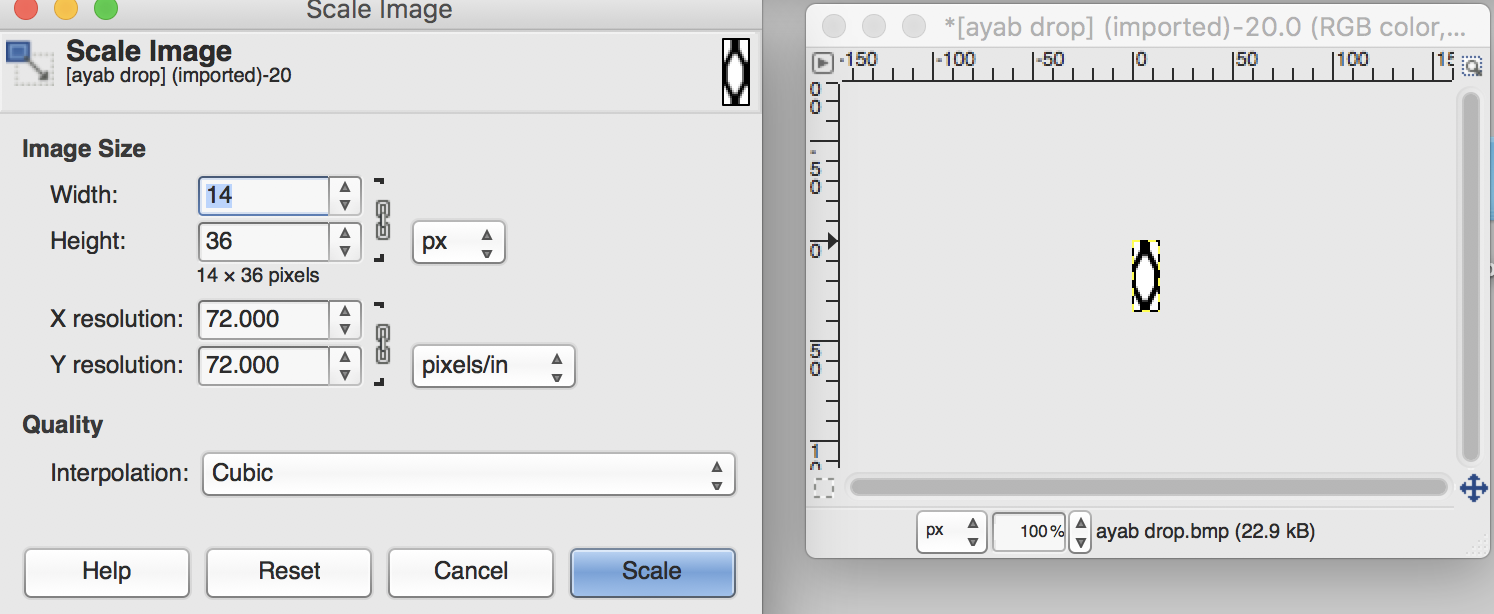


 The image tiled for the width of my knit, in this case, 32 stitches, a multiple of 8
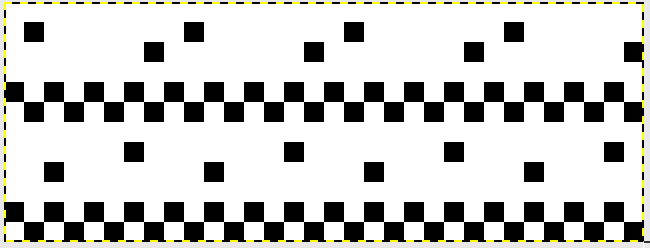
 With the pattern flipped horizontally / mirrored, we now have the same results as in using the 589 punchcard
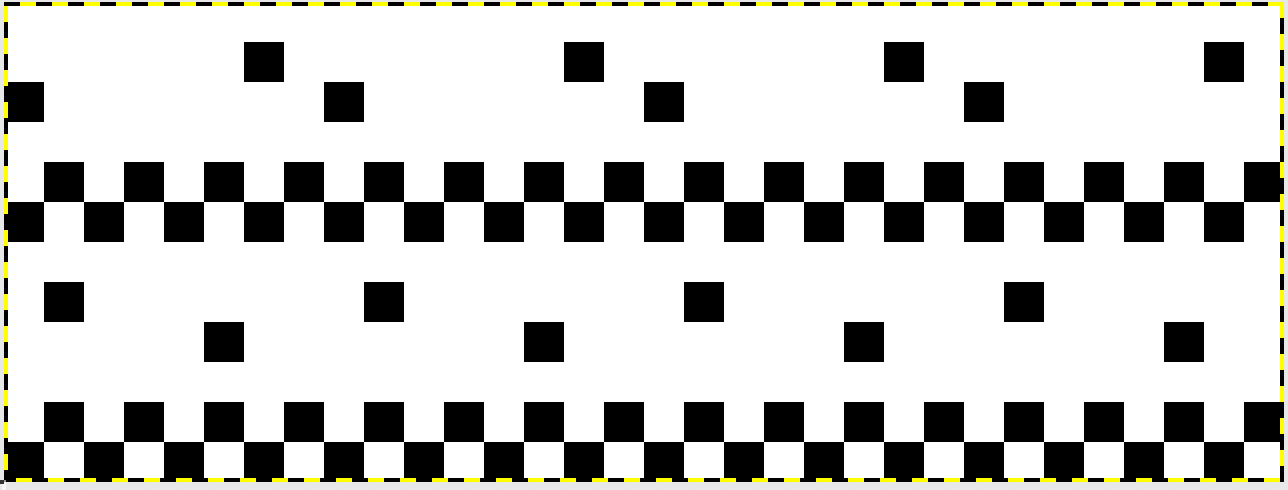

 no mirroring, software patterning errors in one of the test swatches
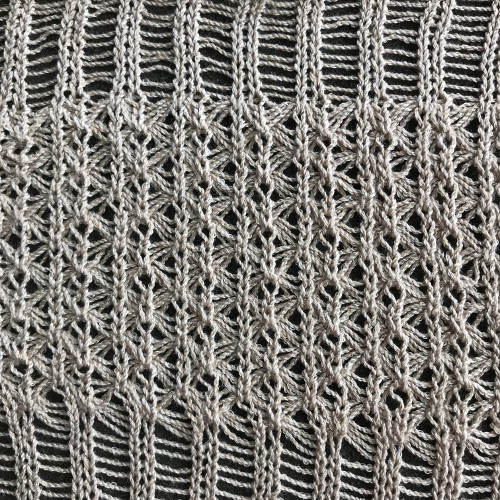


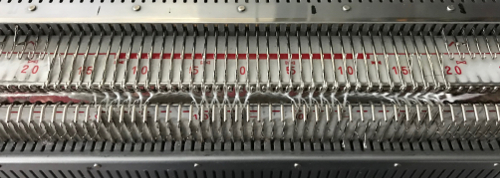


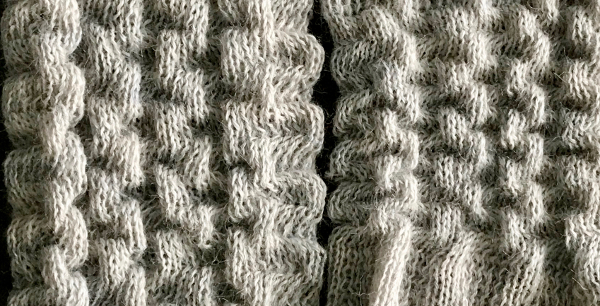


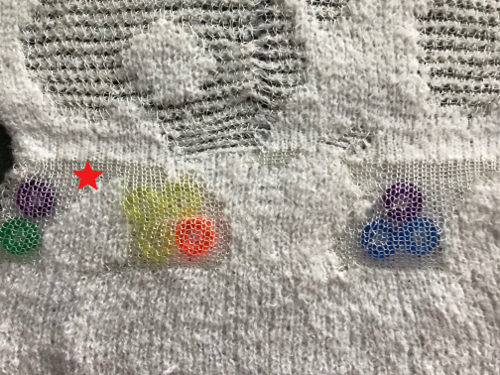
 The repeat required mirroring for use in my electronic 930. Experimenting with racking intersecting tuck stitch on multiple repeat png, stitches were picked up on the ribber aside from the first tuck stitch on the right, A, on the center, B, and on the left, C, of the knit stitch groups.
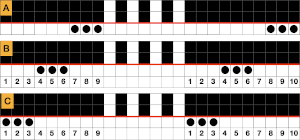
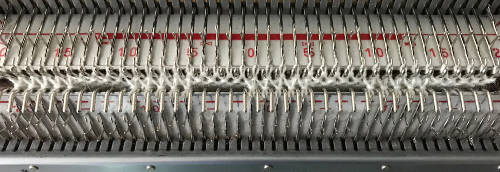
 changing ribber needle positions
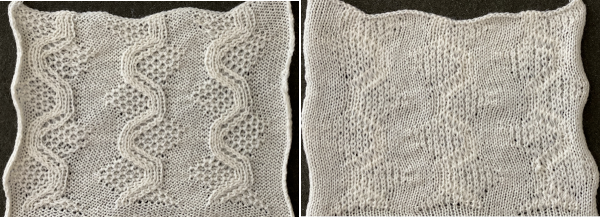 moving toward positioning the racked pattern further into the knit columns.
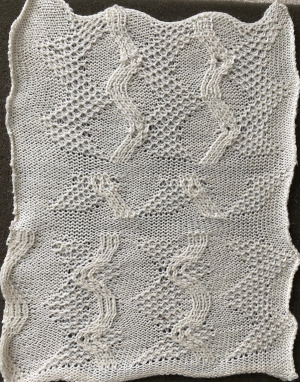
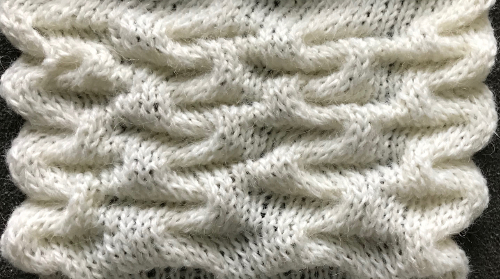
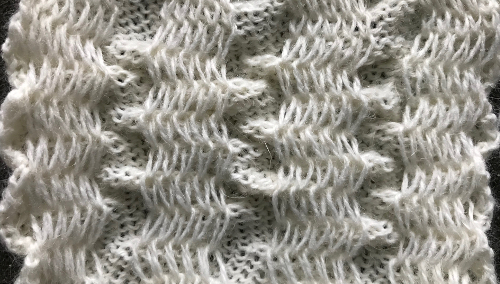
 Good notes and documentation of the final needle arrangement will make the technique easily reproducible. The needles involved on the top bed always need to be returned to the patterning position after any shares.
  At any point in the knitting, it is easy enough to transfer stitches on the ribber up to the main bed, drop the ribber down, and check on the placement of the racked pattern. If the place is satisfactory, the moved stitches can be returned to the ribber and the work is continued. If not, transferred stitches can be left on the main bed, other stitches can be shared with the ribber and patterning can continue with racking in the new location. One such adjustment is seen toward the bottom of this swatch.
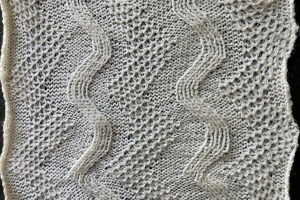


 the punchcard change knob has selections for single motif and pattern knitting (KC)


