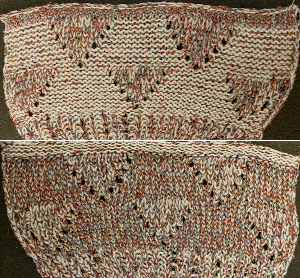
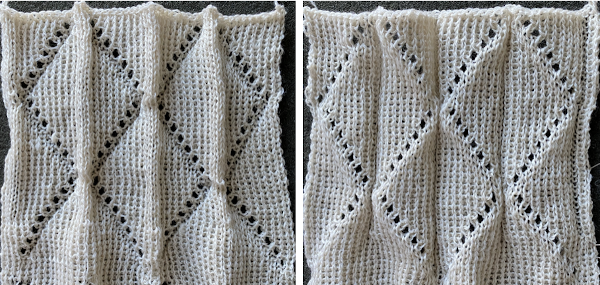
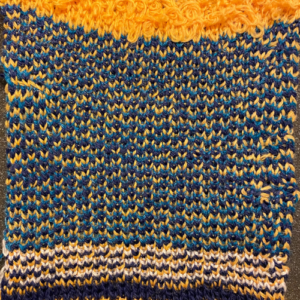
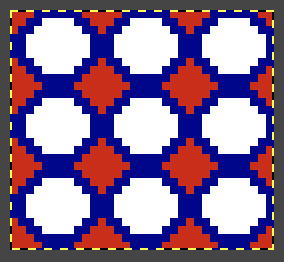
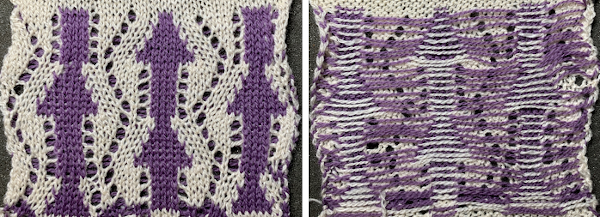
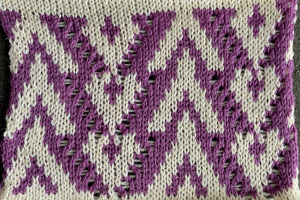
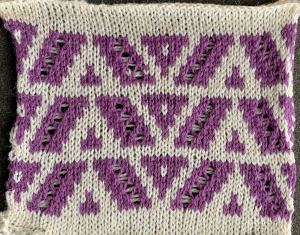
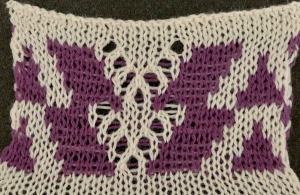
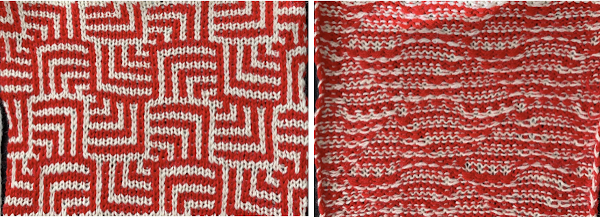
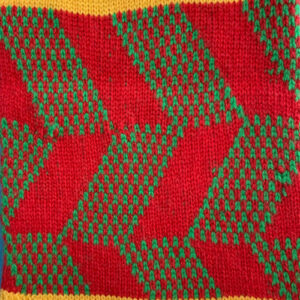
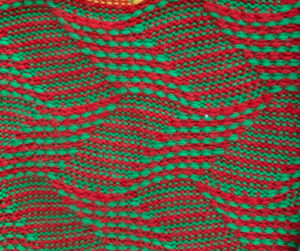
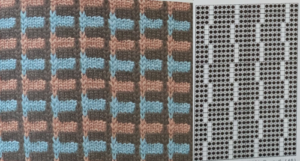
There has been a resurgence of interest in this stitch in the FB machine knitting group and discussion exploring a variety of methods for creating it. The inspiration, taken from a commercial sweater-knit: 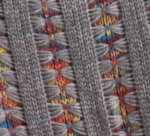 For some single-color variations see Bowknot/ Butterfly stitch on the machine and No longer a mystery pattern.
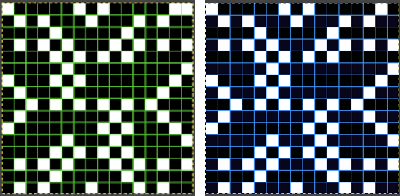
I program repeats whenever possible, and find it useful in eliminating errors, particularly in longer pieces. My first experiments for this fabric were conducted using the fair isle setting, which is essentially a slip stitch automatically working 2 colors with each pass of the knit carriage single bed.
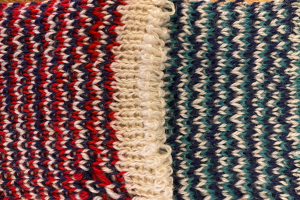
Slip stitch patterns with hand-transferred stitches, single bed explores some of the methods for bringing slip stitch floats to the knit side of these fabrics, which is part of the hand techniques necessary to achieve the colored versions. As with any knit fabric yarn qualities, color contrasts, and tolerance for proper stitch formation are all variables.
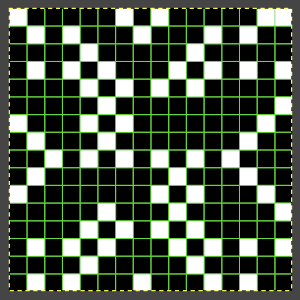
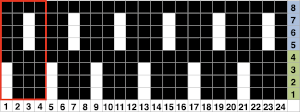
For vertical columns in 2 colors, it is only necessary to program a single, fixed row with a punchcard or electronic, or choose any pixel-based repeat akin to this with full pairs of alternating stripes. I like to plan with selected needles at each end of the sample 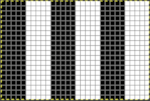
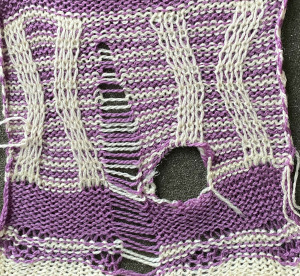
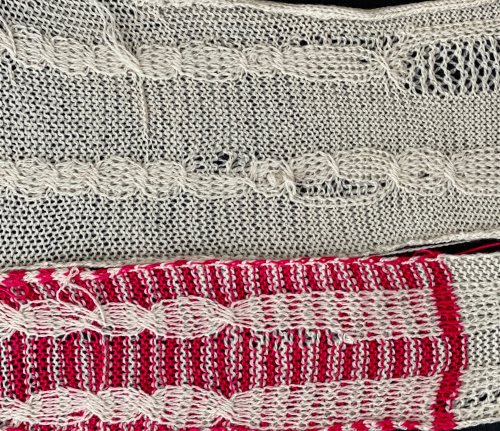
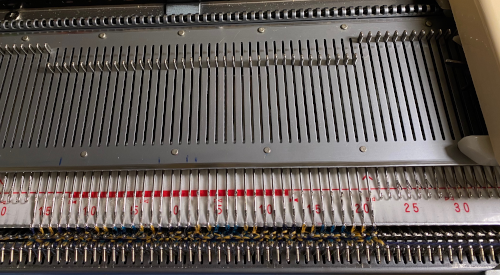
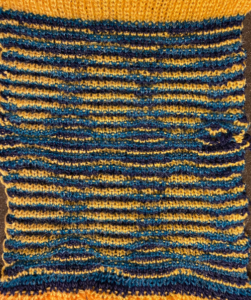
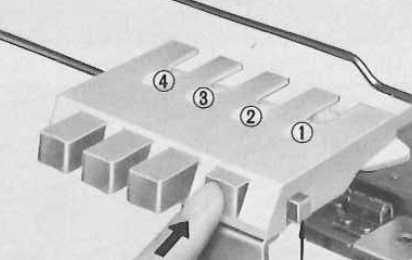
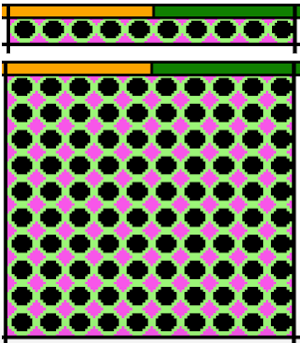
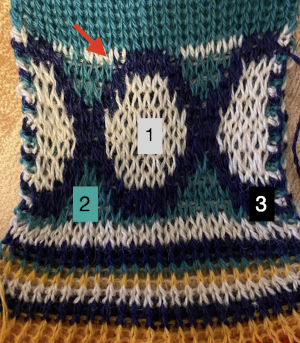
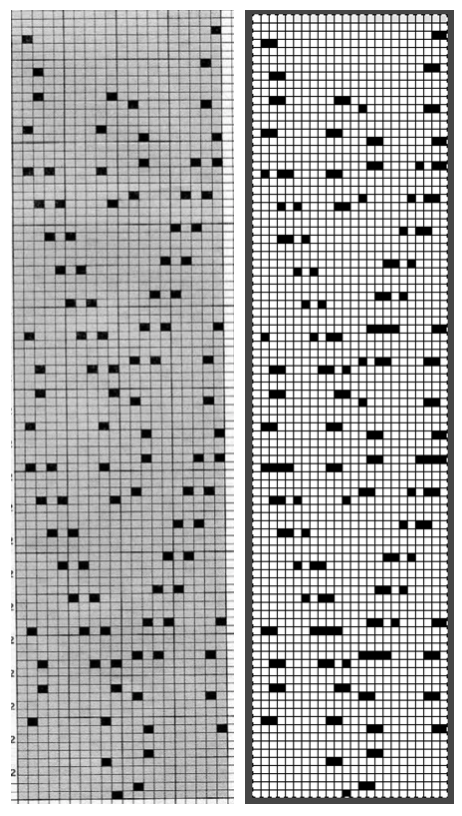
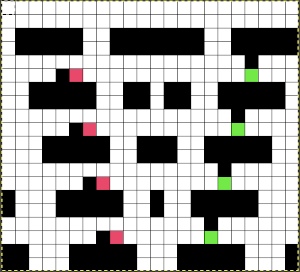
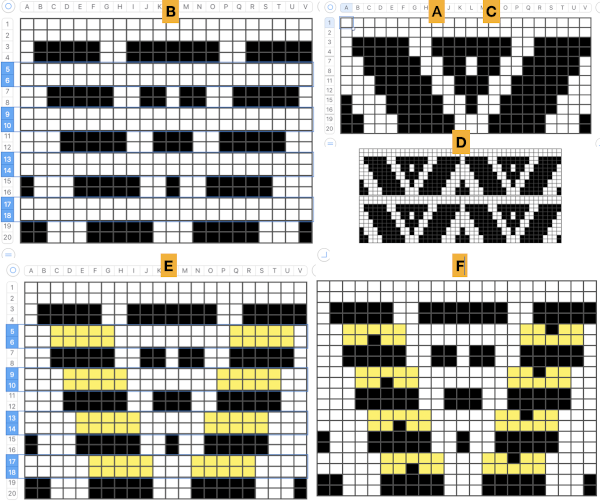
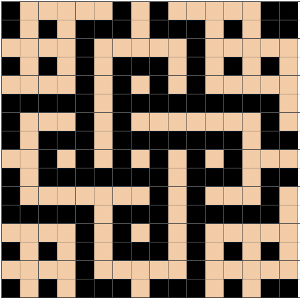
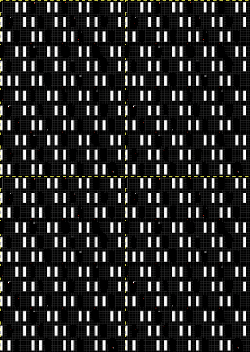
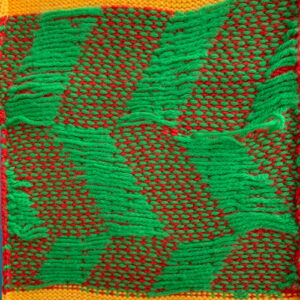
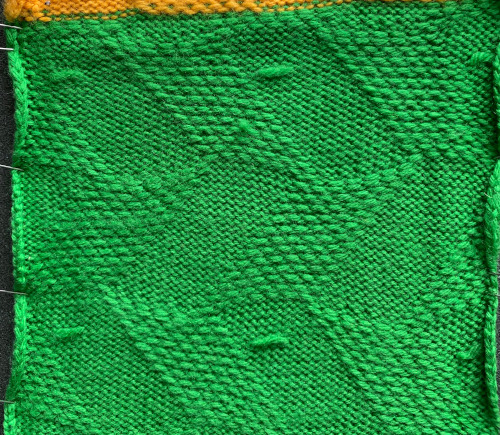
![]() With the machine set to FI, needles not selected will knit a ground color, while selected needles will knit the color in the B feeder. It is easier to manipulate the slip stitch floats from purl to knit side if working in the non-selected groups of needles. Having the columns in odd numbers of stitches makes it easier to handle steps that require finding the center needle in each group if one is wanting to maintain symmetry. In my first test, I manipulated only the selected groups of needles to work the float movements, leaving the floats from the other color undisturbed, which makes the process far more convoluted than it needs to be. In this and the subsequent sample, I manipulated the left and right-hand pairs of floats moving them to the front of the knit, leaving the choice of what to do with the remaining center floats. In A they were brought up on top of the center needle in E position before knitting the next row. In B they are lifted into the hook of the needle and brought out to the B position so that the stitch is knit in color 1, while in C the remaining single stitch floats are simply left alone. In a couple of spots the yarn split, getting hooked up creating bleed-through, and what would result in an issue if that happened on the group of floats that were to be moved.
With the machine set to FI, needles not selected will knit a ground color, while selected needles will knit the color in the B feeder. It is easier to manipulate the slip stitch floats from purl to knit side if working in the non-selected groups of needles. Having the columns in odd numbers of stitches makes it easier to handle steps that require finding the center needle in each group if one is wanting to maintain symmetry. In my first test, I manipulated only the selected groups of needles to work the float movements, leaving the floats from the other color undisturbed, which makes the process far more convoluted than it needs to be. In this and the subsequent sample, I manipulated the left and right-hand pairs of floats moving them to the front of the knit, leaving the choice of what to do with the remaining center floats. In A they were brought up on top of the center needle in E position before knitting the next row. In B they are lifted into the hook of the needle and brought out to the B position so that the stitch is knit in color 1, while in C the remaining single stitch floats are simply left alone. In a couple of spots the yarn split, getting hooked up creating bleed-through, and what would result in an issue if that happened on the group of floats that were to be moved. 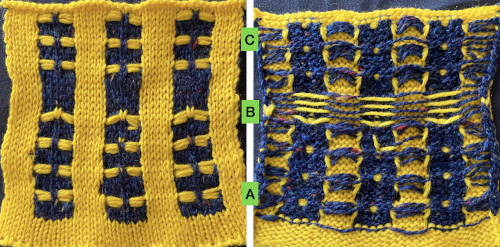 As stated, the process is easier and quicker working on non-selected groups. Above, the yellow yarn was thicker than the blue. To maintain proper color selection in the non-selected column, the center needle needs to remain in the B position, with the slipped stitch forming floats below it before the next row knits. If the needle is brought out to E, it will knit in the contrast color, forming floats in that color on the purl side, and a knit stitch in what was planned as an all-solid column on the knit. The results are seen at the top of the first sequence in the swatch. I chose to limit my number of floats to 4 to keep the process manageable, moved stitches on the left of the center needle to the front of the knit, and then followed with those to its right. One of the many things to explore in hand technique fabrics is finding a way to handle tools that may be more comfortable than others, practicing on single blocks of color first can help establish that. Below both yarns are equal in weight and thinner. The floats formed by the color in the B feeder are also hooked up on the center needle in each vertical group in that color, forming a pattern on the purl side as well.
 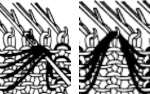 The needle position for selection for B feeder yarn also needs to be maintained. Bringing the needle out to E ensures it will knit on the next pass. In both of my tests, the slip stitch floats on the knit side lie more horizontally than the lifted-up floats on the purl.
 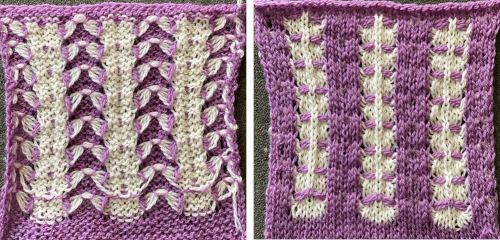 Other ways of working the fabric, along with a history of the FB thread offered by Claudia Scarpa including a single bed slip stitch version with an English downloadable PDF http://ratatatata.it/dragonfly/.
Her youtube video illustrates a different way of managing floats than mine.
JuliKnit offers 2 videos knit on Silver Reed 1, and 2. Both are knit using the ribber, the first method uses holding to gather loops on each of the beds, and the second begins to address automation for needle selection on the top bed using DAK, with the selection on the ribber remaining manual. The stitch illustrations generated in DK offer knit stitch simulations such as these  Executing her versions on a Brother machine requires some interpretation. The fabric is constructed using the ribber in conjunction with the main bed. The vertical columns are 5 stitches wide.
Colors are worked one at a time. If a color changer is to be used, an even number of rows would be required for each pattern segment. For 4 floats followed by an all-knit row, the repeat would be 5 rows high, so one consideration would be operating with the second color from the right, requiring free passes. Studio machines release the top of the knit carriage at an angle from the bottom, so that explains the move seen in the video for the carriage to be moved to the right. Brother machines use the slip stitch setting in either or both directions, to achieve that. Using both buttons avoids any confusion. All needles in use must be in the B position for the “free pass” to avoid dropped stitches. The number of rows gets adjusted in the videos eventually to 6.
When working on the top bed, the ribber is set to slip both ways.
For those unfamiliar with Studio settings a brief review: the Studio SRP60N ribber introduced the option for knitting emulating the lili selection in Brother.  The grey plastic piece on the left of the studio ribber, the autoset lever, when cleared would essentially duplicate setting Brother levers to slip manually in both directions, clearing it again would return it to knit.
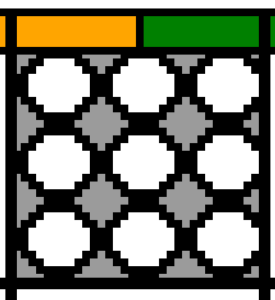
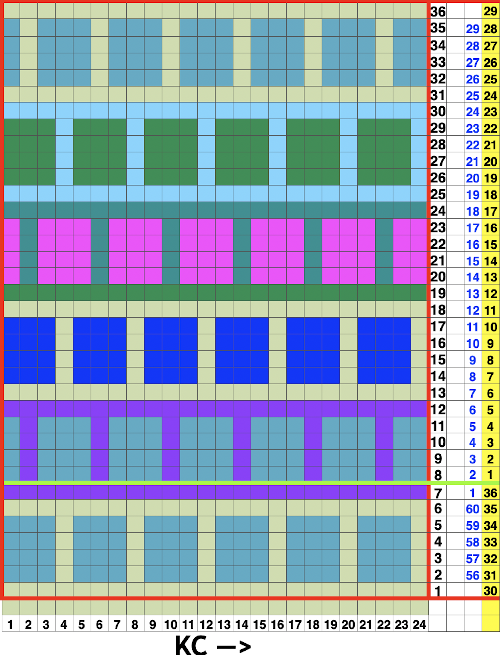
  Cast on either EON or EN rib. Transfer needles in a 5X5 rib beginning and ending with a single needle in work on the ribber on the far left and right, setting up the initial needle arrangement for the fabric. Black dots represent needles in work on both beds, and the red ones the initial needles that will be worked in the holding position on the top bed.
 ![]() The video knits each color for an even number of rows. Bring the first and last needle into work on the ribber before knitting each row. The remaining stitches are knit only on the main bed. The knit carriage is set to knit, the ribber to slip in both directions. Pick up the chosen color on the left, and knit for an odd number of rows, when the carriages are on the right, push held needles back to work position so they will knit on the pass back to the color changer. The ribber knits the next color. A review of the Brother ribber carriage for those not familiar with it
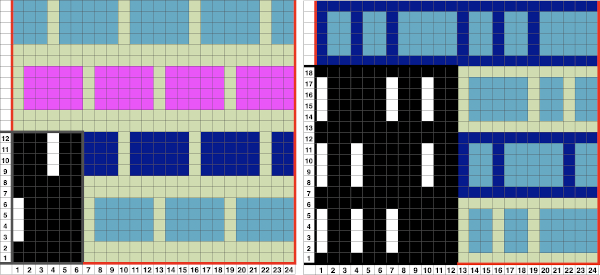
The video knits each color for an even number of rows. Bring the first and last needle into work on the ribber before knitting each row. The remaining stitches are knit only on the main bed. The knit carriage is set to knit, the ribber to slip in both directions. Pick up the chosen color on the left, and knit for an odd number of rows, when the carriages are on the right, push held needles back to work position so they will knit on the pass back to the color changer. The ribber knits the next color. A review of the Brother ribber carriage for those not familiar with it  COL: the main bed will now slip in both directions, set it accordingly. The ribber only knits. The center needle on the top bed that held the butterflies is transferred down to the ribber, illustrated in the red dots over black ones. The center needles in the blank areas on the ribber, blue dots, are brought up to hold, the ribber levers are set to knit in both directions, holding levers are set to hold in both directions as well,
 ![]() knit for an odd number of rows, with carriages on the right, push held needles back to work position so they will knit on the pass back to the color changer. COL: the knit carriage changes back to knit settings, and the ribber slip setting in both directions is restored. The center stitches that formed ribber butterflies are transferred up to the top bed, and needles at the center of the blank areas on the top bed are brought out to hold. The color is changed, and the process begins again.
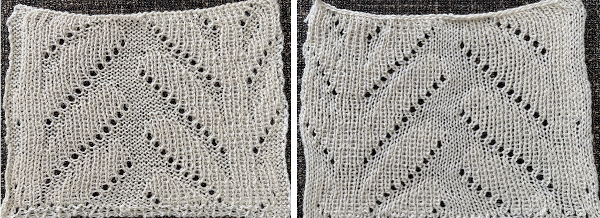
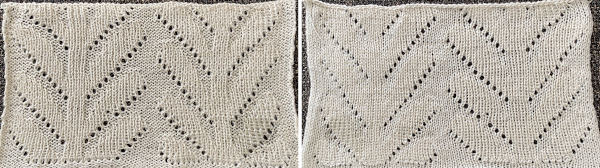
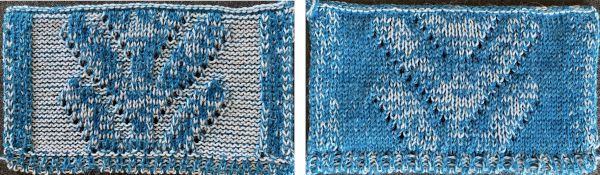
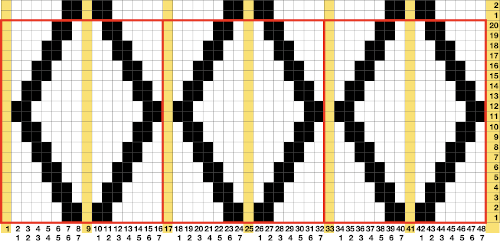
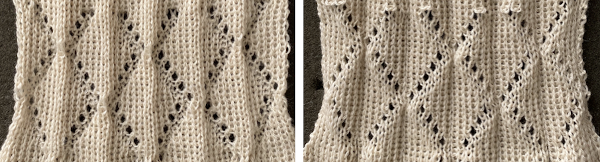
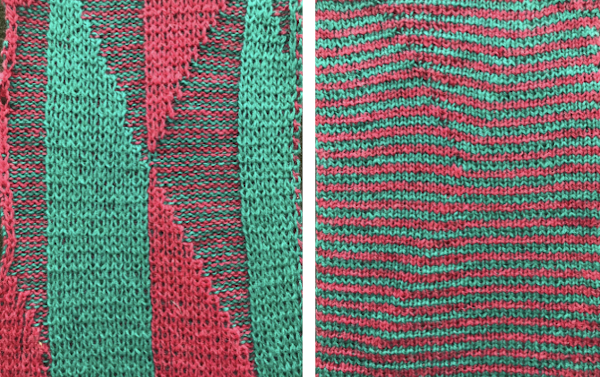
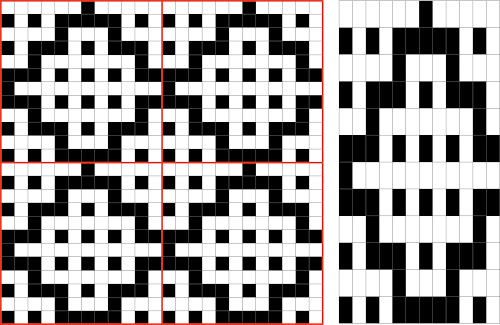
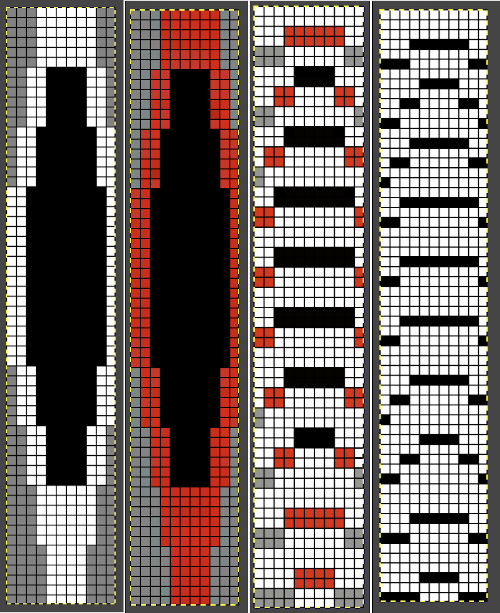
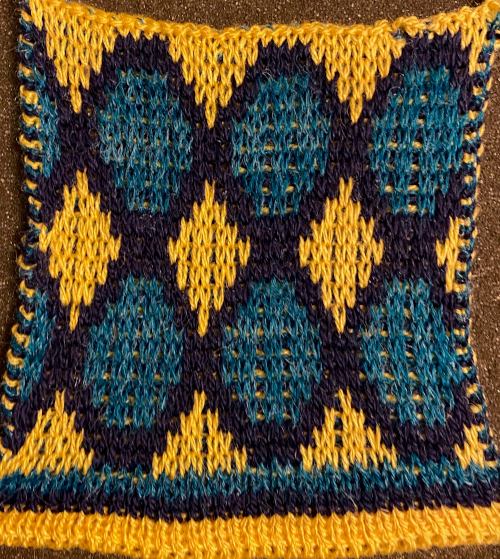
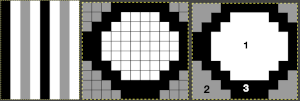
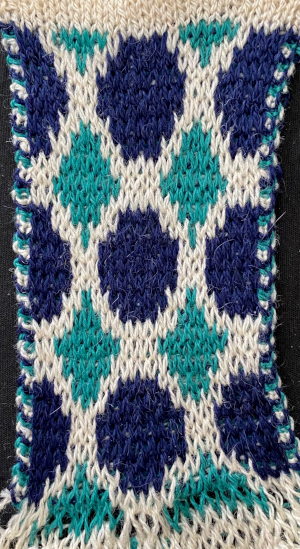
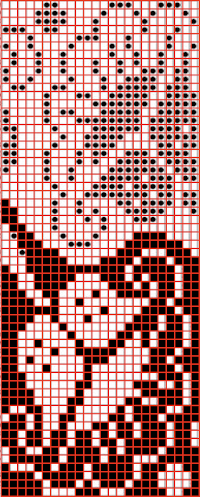
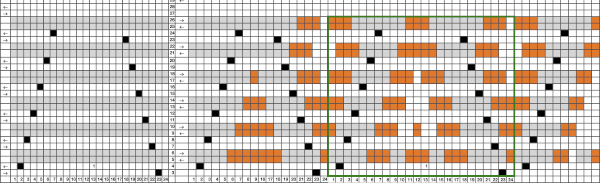
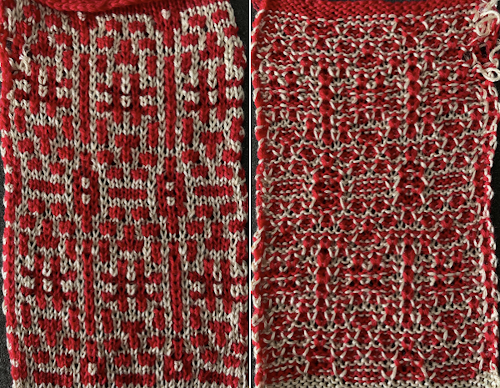
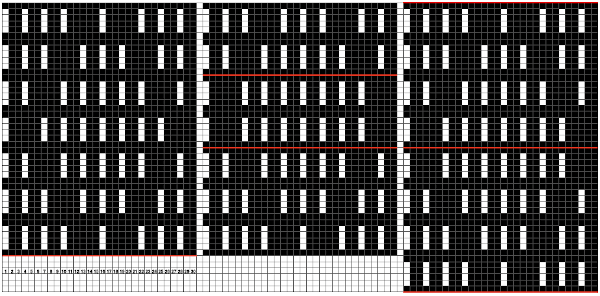
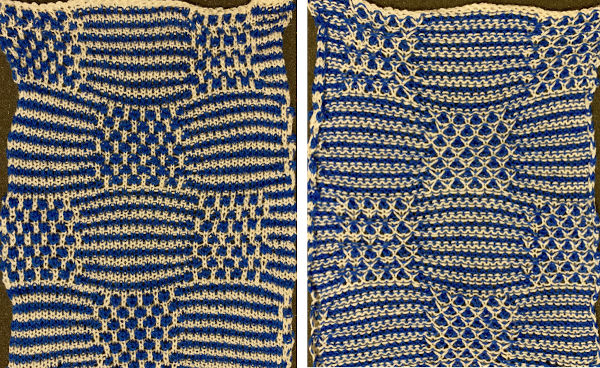
knit for an odd number of rows, with carriages on the right, push held needles back to work position so they will knit on the pass back to the color changer. COL: the knit carriage changes back to knit settings, and the ribber slip setting in both directions is restored. The center stitches that formed ribber butterflies are transferred up to the top bed, and needles at the center of the blank areas on the top bed are brought out to hold. The color is changed, and the process begins again. ![]() My first efforts were met with dropped stitches after a few rows and expletives. My second effort fared no better, I simply could not avoid dropped stitches on either bed, perhaps because of my yarn choice and the small tension it required. Working on the single bed once more, using the slip stitch setting and knitting one color at a time, I achieved a fabric more similar to the original photograph. The chart reflects the number of needles in my test swatch, with a 2 knit stitch border added on each side
My first efforts were met with dropped stitches after a few rows and expletives. My second effort fared no better, I simply could not avoid dropped stitches on either bed, perhaps because of my yarn choice and the small tension it required. Working on the single bed once more, using the slip stitch setting and knitting one color at a time, I achieved a fabric more similar to the original photograph. The chart reflects the number of needles in my test swatch, with a 2 knit stitch border added on each side  Each color knits for 4 rows. At the end of each 4-row sequence, the non-selected needles allow for manipulation of the floats.
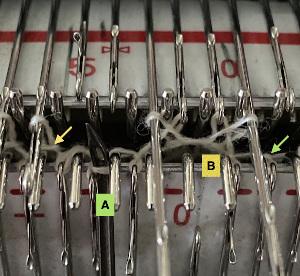
  The transfers in the piece begin on row 5. Before the next row is knit in the alternate color, the slip stitch floats are reconfigured, bringing stitches 1 and 2, 4 and 5 in each group to the knit side of the fabric, leaving the center floats undisturbed.
 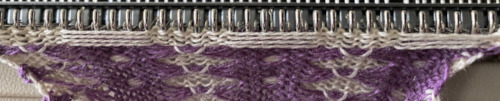 Bring the whole group out to the E position so they will form knit stitches with the first row of contrast as the carriage moves to the right.
  Knit 4 rows. The carriage will once again be on the left unless 2 carriages are in use from opposite sides. The center needle in each group of 5 will be left unselected.
  Lift floats up onto that center needle, and bring it out to E position so that it will form a knit stitch in the next color to be used.
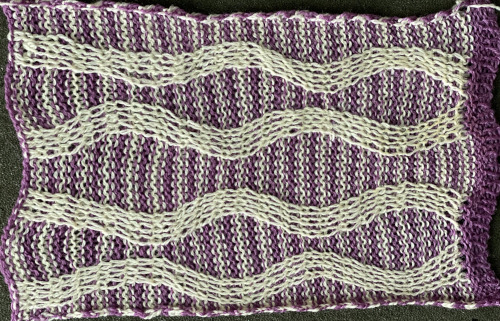
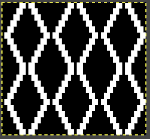
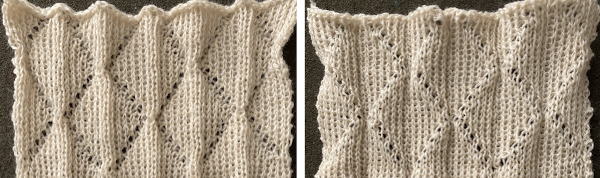
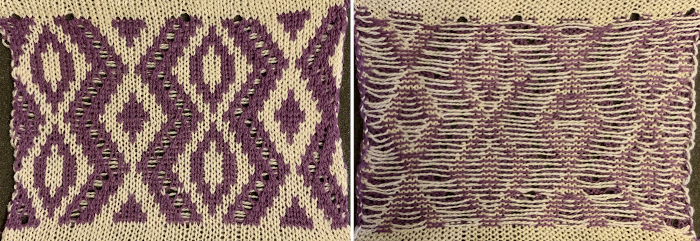
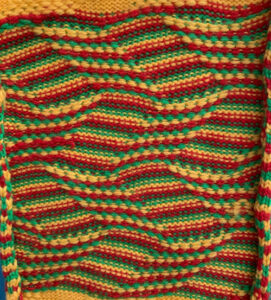
  The final result is closer to the original
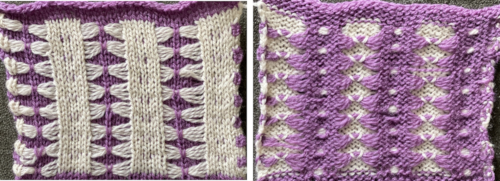
 The extra needle selection prior to the next all knit row helps track the direction of the moves, stitches are moved three at a time, there are no cable crossings
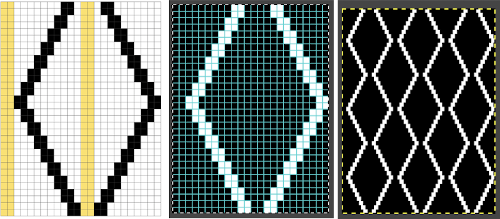
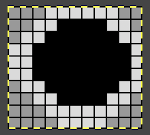
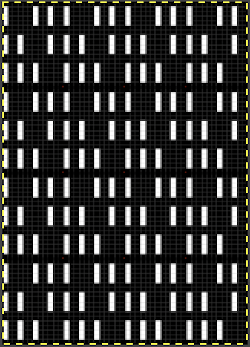
 The next step for me was to explore cable crossings on elongated stitches working double-bed. A basic pattern on any programmable machine for playing with elongated stitches on one bed while knitting every stitch on the other is to program pairs of blank rows followed by solid punched or black pixel rows. The yellow line in this chart illustrates the row on which cabling might occur.
 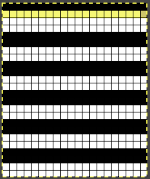 Programming the width of the needle bed allows for only the stitches forming vertical columns in chosen locations to be put into work, allowing one to place groups that will involve crossings anywhere on the chosen pattern width. A base is knit in the ground color, which slips for 2 rows on the main bed, creating the elongated stitches that will be cabled. I had no problem with 2X2 cables,
 Cabling, returned to in a later post, with adjustments, making things work.
 Continuing with shapes on striped grounds, this is the result of a self-drawn pattern
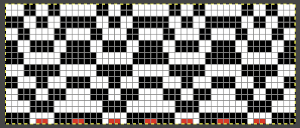
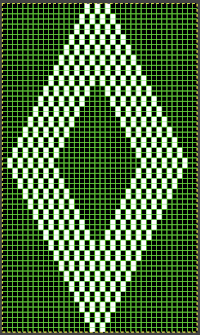
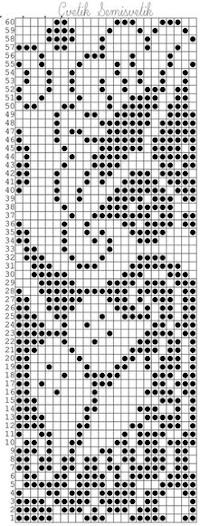
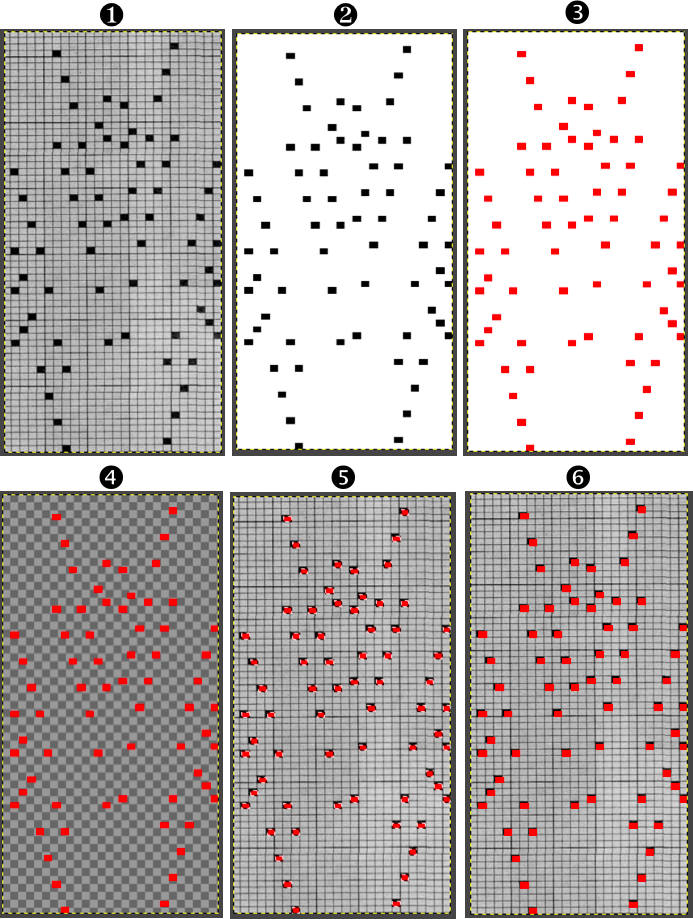
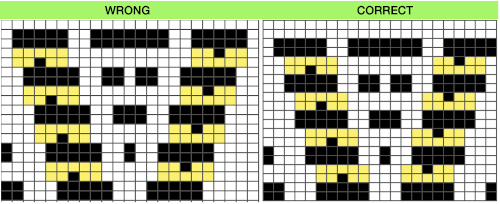
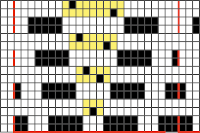
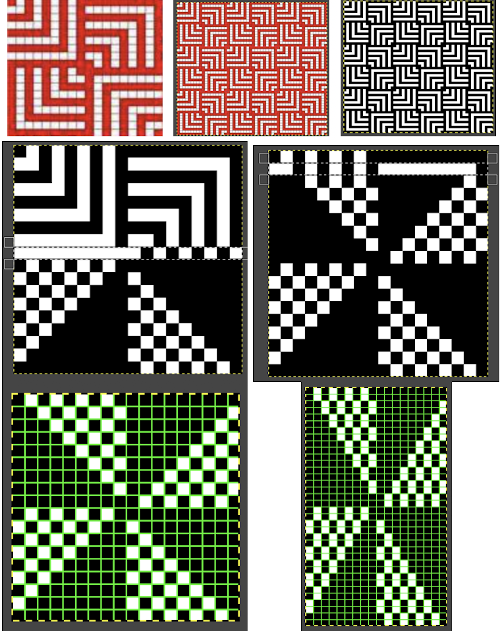
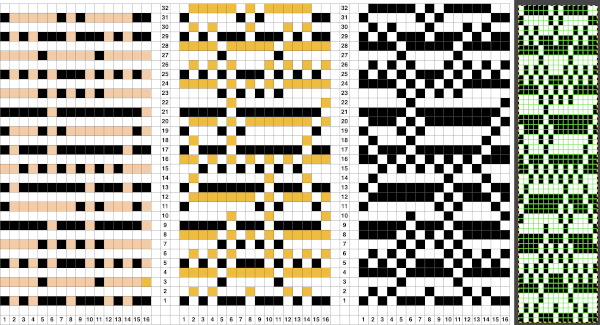
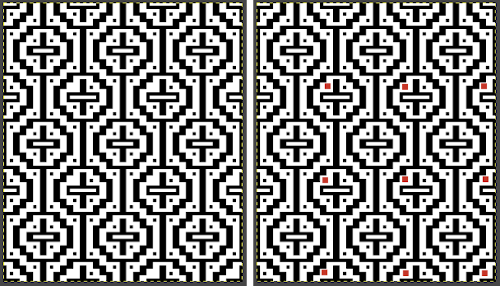
 Punchcards, in theory, may be used as given and set to double length, while for use in electronics drawing the pattern single height and using the double-length setting is also an option. Starting sides and fixing errors have always been more confusing for me when using the double-length feature, I prefer to punch holes or program pixels as I intend to knit them. The isolated reduced repeat for use in the electronic is charted, with an initial one-pixel error in 2 consecutive rows, marked with red cells. In transcribing any design, it is worth checking repeats multiple times after eyeballs and brains have had a rest. This was my start:
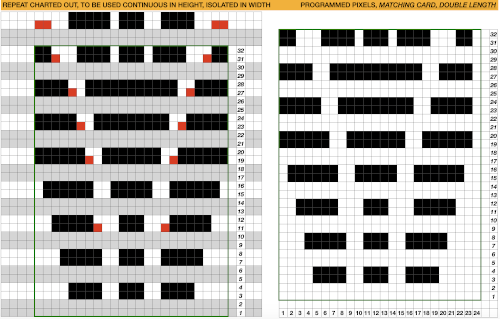 The first test is of an isolated motif. The yellow arrow points to the pixel error, the cyan to the positions where some needles in the full repeat were “accidentally” placed in A position, not B, resulting in pattern stitches not being formed.

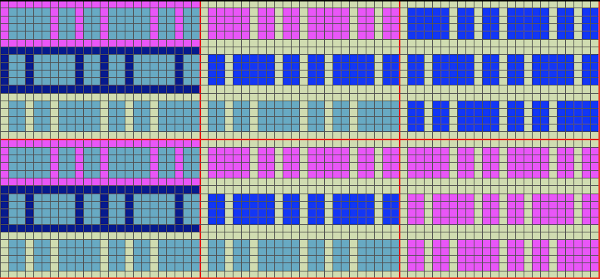
 Two other options for charting the fabric in numbers: A. draw the repeat as given
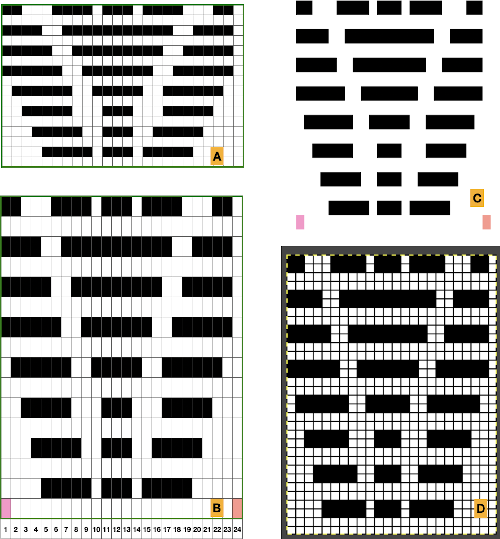 Any simple Fair Isle repeat may also be used. The numbering in the charts matches what is normally seen on the left edge of the tables

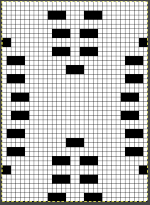
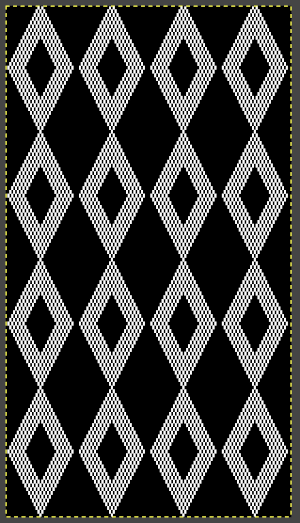
 The world of possibilities grows even further for single color shadow lace, when, examining the same design, one recognizes that the pile knit card, with the blank rows filled in in pattern, is the same as the fair isle version of the repeat, rendered double long
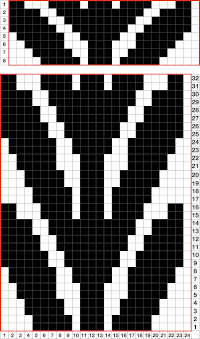
 the file for multiple repeats after color reverse
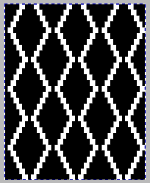

 Take care if copying and pasting single columns to alter a repeat width that the whole column is indeed copied and that if using the pencil tool flood fill is not used unintentionally. The original intent was also to correct the elongated slip stitch segments on the edge of the programmed vertical designs marked in blue, but the paste with errors in red accomplished creating the same issue
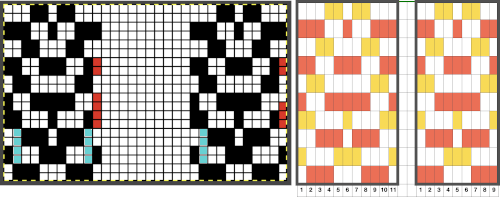
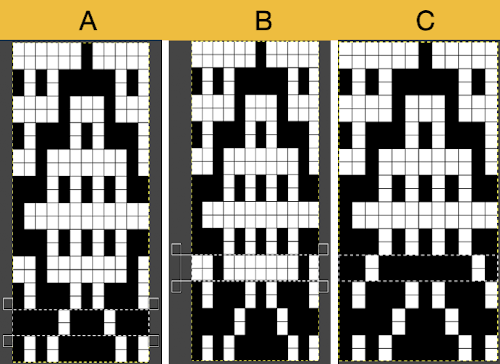
 The first segments were knit using striper backing, with the ribber knitting every stitch, every row, in both colors. When a slip stitch is used with needles out of work on the main bed, end needle selection should be canceled. In A it was not. The result is that end needles alongside the out-of-work column knit with each color in each row. In B, end needle selection was canceled, and one can now see the elongated slipped stitches that result from areas that should have been marked with the contrasting color
 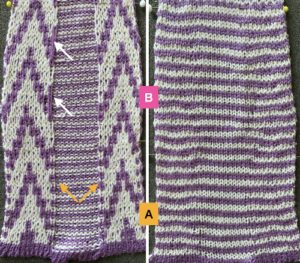 As long as the number of stitches on the ribber is even, lili buttons may be used, affecting the scale of the pattern in both height and width. In A, they were used with the ribber set to slip in both directions, in B, set to tuck in both directions. C marks the return to the N/N setting, with needle transfers to mark a possible pleat.
 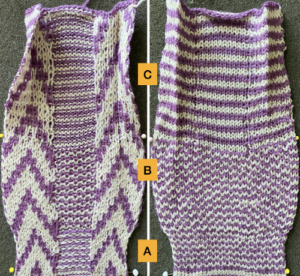 The initial pleat idea charted out for single stitch folds, stitches transferred to ribber in the R columns, to the top bed in the T columns
 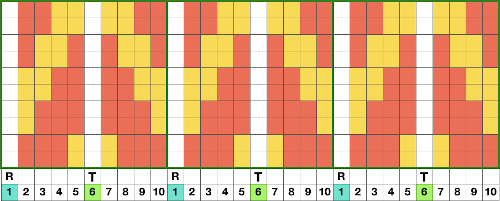 The result is a fairly soft pleat, the choice below was to retain end needle selection.
 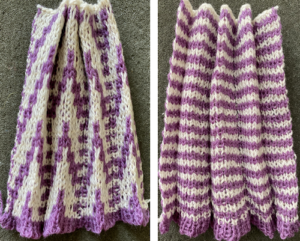 Various ribbed pleat configurations are explored in
  Paired transfers in the planning stages: because the repeat is small and has a single center pivot point, it is rendered once more, adding columns
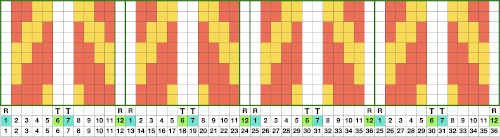
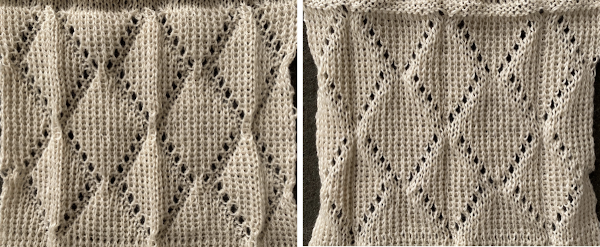
 The resulting fabric relaxed on the left, lightly steamed on the right
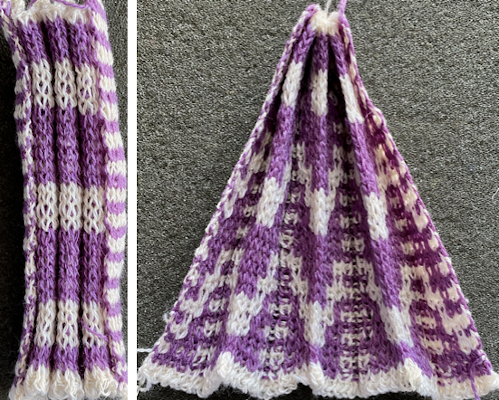
 Note: the color positions in the design have been reversed from those in the first swatch. If “floats” are noted at any time in the spaces where needles are out of work on the ribber, look for dropped stitches.
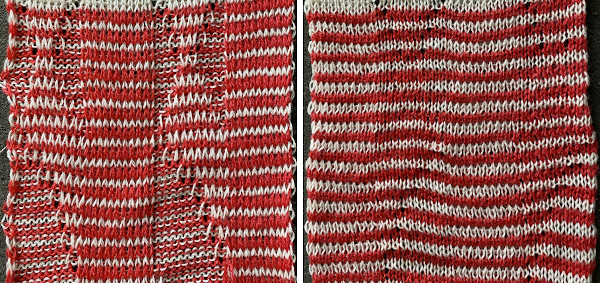 Needles in locations where only the backing is to be shown are transferred down to the ribber. Leaving the eyelets, they were transferred back up to the main bed when brought into work to reverse or change the shape. Addition and subtraction of stitches take place before the next pass with the alternate color. Here movement is random, to get some sense of the effect, it could be made deliberate by following a chart or color separating and automating the pattern, with its starting side on the right.
 What of having shapes appearing in each of the 2 colors on a striped ground? Eliminating some of the guesswork I used the repeat from a previous single-bed blog post on
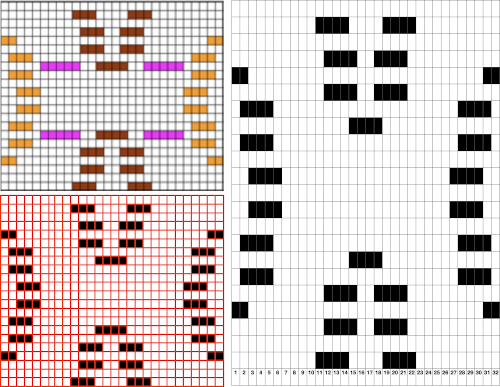
 The resulting sample, the yarn is thin, might have benefited from tighter tension and more contrast.
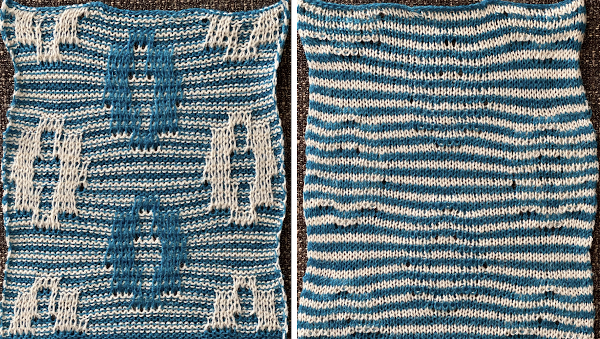
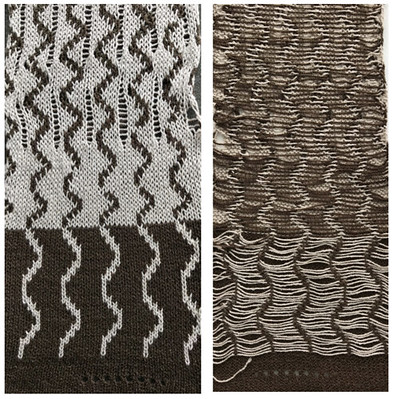
 Proof of concept: the bottom half is knit using the slip stitch setting, the top half in the tuck setting. The added texture on the tuck stitch purl side makes the fabric a more interesting, reversible one, and wider than its companion.
 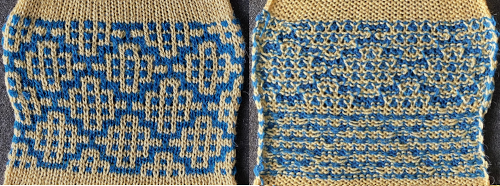 For a different way of working with two-color initial images using only Gimp, see tips in

 Numbers processing to ready the repeat for final gimp editing:
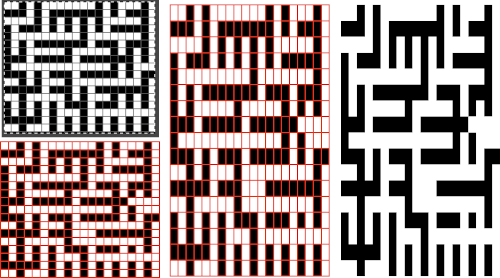
 Getting back to clearer pattern results: when using electronics, it is possible to create far wider and taller repeats for download. The technique to achieve them uses the same process. That said, there are quicker ways to attain the final repeat illustrated in the 2024 posts on using Gimp color to alpha through the Layer> Transparency option or Colors> Color to Alpha.
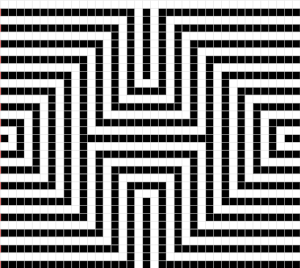
 the isolated repeat, double-length
 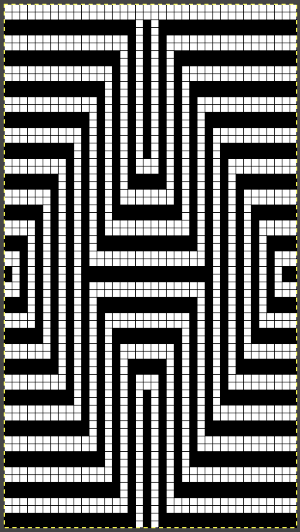 the color separation in progress
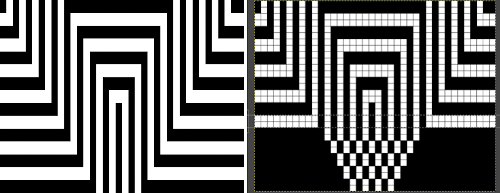 When knit, that white cell pair of rows break up the overall shapes and shifts the pattern in the top and bottom half
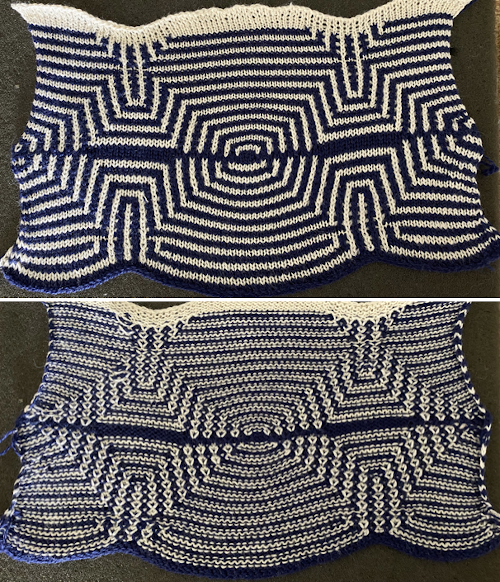
 The final adjusted repeat
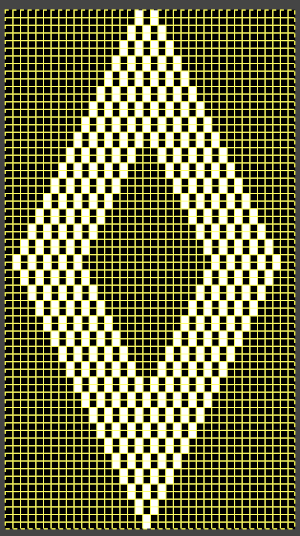
 knit using the tuck stitch setting in both directions, KCI, first row left to right, leading with the dark color
 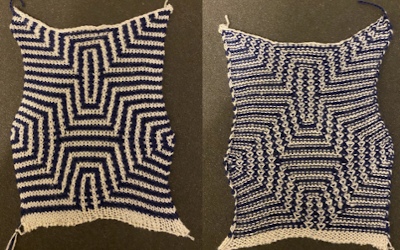 and here with the lighter color
 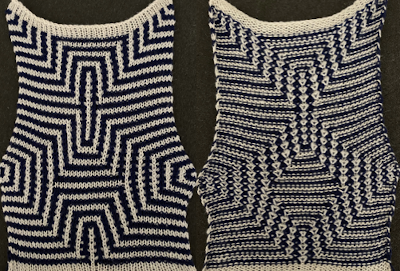 In progress, on the km
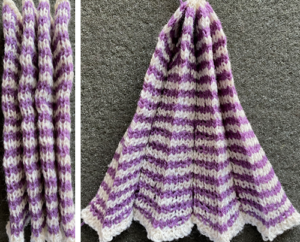
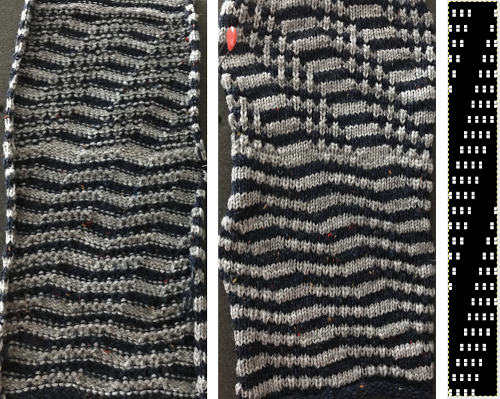
 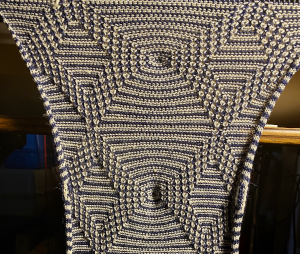 the relaxed, 3D-ish view on the reverse
  why projects can take longer than planned
 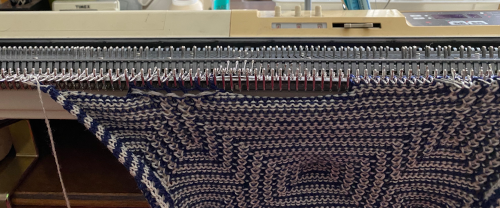 The finished, relaxed scarf with pressed edges only, retaining the conical striped forms
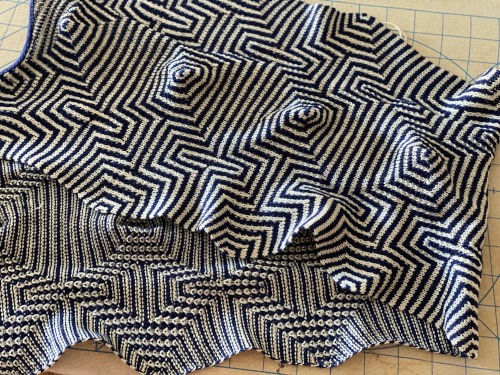 The repeat knit double length, changing colors every 2 rows, becomes something quite different, with a sharp curl to the purl side
 with my color changer in this threading sequence throughout
 where normally each color in each design row knits twice. Because selection occurs for pairs of rows, the first preselection row is from right to left. To decrease the backing rows, the ribber is set for birdseye. I prefer to have an end needle on each end on the ribber, keeping in mind that the total number of needles in use there needs to be even. The machine provides reminders as to which color should be knitting. My samples are knit using KCI on the top bed. Because the preselection happens twice, it is easy enough to knit in pattern from left to right,
  when the carriages have reached the right side, simply use a ribber comb to push all needles back to B.

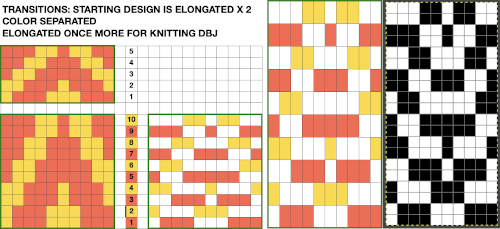
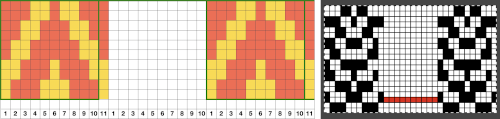
 Speeding things up with color separation, beginning with the method that will have each color, each design row knitting twice. The repeat is 10 rows high, so it is expanded X6 to 10 by 60 rows. In the final result, the second row for each color in the separation is in turn erased. The red was added to make all 3 colors visible while working the separation, avoiding confusion with the white ground. The knittable result as usual is in a black and white png
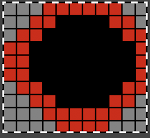
 The ribber can also be set to knit every row, resulting in elongation on the knit side, while creating an interesting striper backing
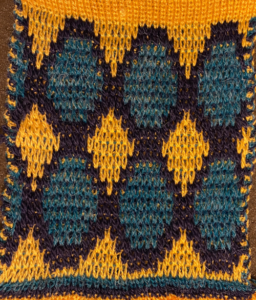
 Comparing this version to the birdseye backed one for repeat height
 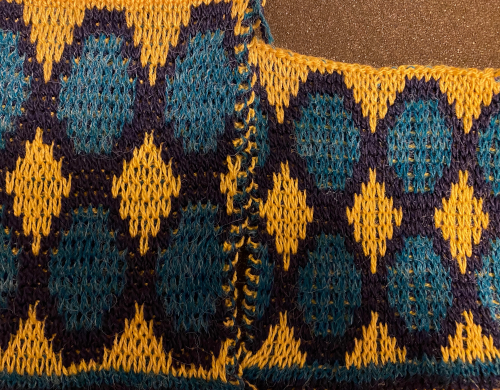 Comparisons: HoP, pushing back needles to B, and color separation results. In the latter, the design is likely elongated in part due to a change in the distribution of thinner yarns to larger design areas with no tension adjustments
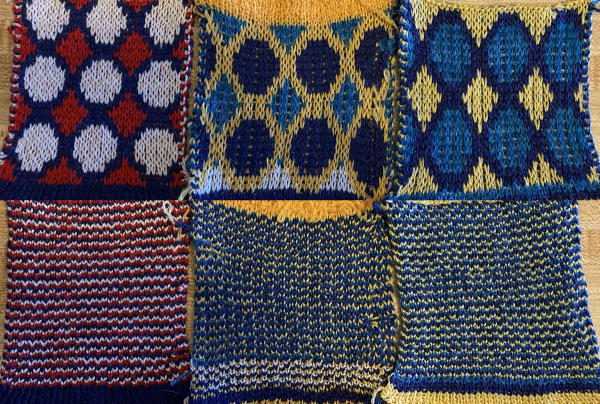

 The Ayab lettering as opposed to numbers move from right to left. The manual states that the color separation order is: white C, grey B, black A with their sequence = C (3), B (2), A(1). If the prompts for changing colors as given are followed it provides a very valuable in tracking them, but if out of habit one knits in the usual 1,2,3 sequence, the color placement occurs in an unexpected order and may result in errors. The on-screen letter prompt corresponding to the anticipated color change sometimes occurs with the knit carriage on the right, sometimes as it approaches the changer, and the size of the font was hard for me to see since the screen was not close enough for easy visibility.
 The small file makes for a quick test of proper color selection for each of the three colors used
 Having some idea of stitch counts for each color in the design in the first few rows can help identify proper, planned color placement errors
 My first swatch using the heart of Pluto separation and a greyscale motif
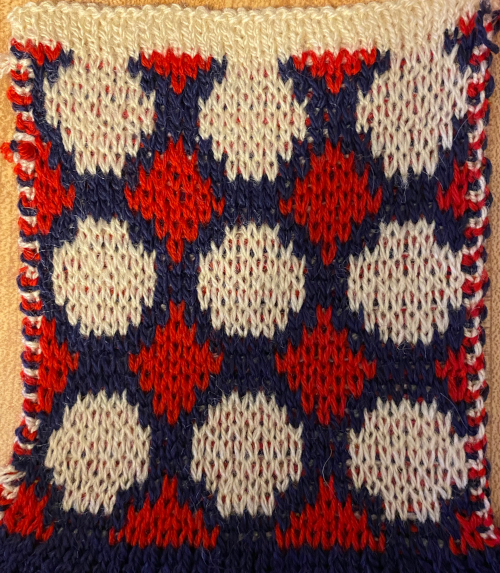
 My tested color change sequence is #1, #2, #3 colors throughout, I disregarded the prompts for color changes at the bottom of the Ayab screen. Some things to ponder: in pieces that require color changes, starting with waste knitting in the same colors can help assess the best tension, whether each color will be picked up properly, and if the colors work well together. Looking at these 3 small tests, it appears that a choice should be made when casting on about using color 1 or 2 for the preselection and cast on rows. If the setting to slip is forgotten for the first move to the left, the color in the feeder will knit every stitch rather than a pattern selection. Always check settings when on the right, making certain lili buttons are set as well. This pattern does not contain 3 colors on every row. In addition to that, when working DBJ with other color separations one is likely used to seeing knit bed needle selections on every row. That is not true here, is a function of the technique, not a patterning error. On rows that have colors missing, when that color is in use, the main bed slips, the ribber works every other needle, first in one direction, then the other, adding to the row count on the purl side of the knit.
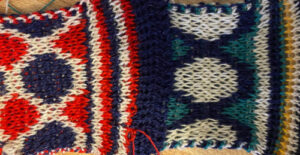
 The mess at the bottom was due to the green yarn getting caught on the needle bed and not knitting the necessary stitches on the ribber, so dropped stitches were formed
 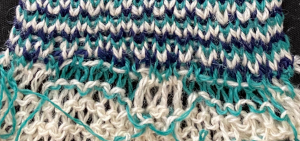 The assumption is that if the C, B, A rotation and prompts are to be followed, the middle color 2 can stay in place, and the placement of 1 and 3 can be exchanged.

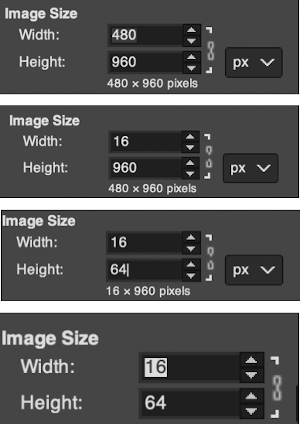
 The units in many such illustrations are not square, and the goal is to end up with a PNG where each square unit represents one stitch, one row.
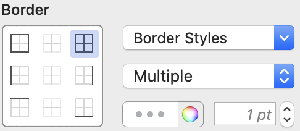
 and alter the cell borders to a bright, contrasting color. I chose red, 3-point thickness.
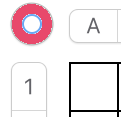
 Copy and paste the completed table. Make certain there is a different color cell in any white squares at the far corners of the image, in this case, upper right and upper left (yellow), remove cell borders
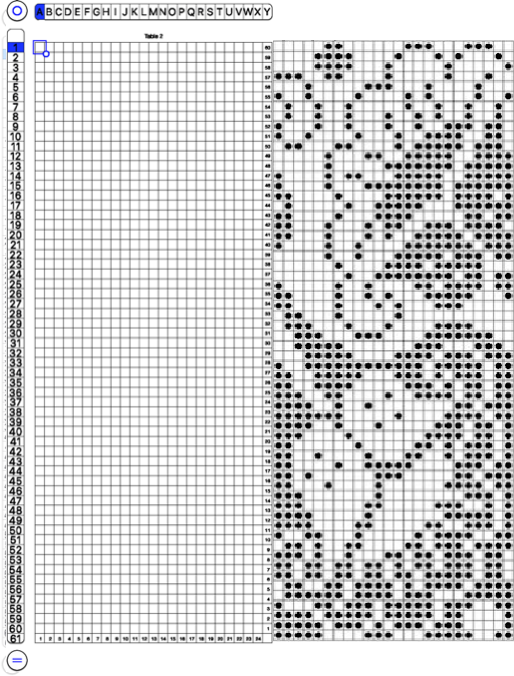
 Proceed as for the first image, being mindful of an unnecessary row at the bottom. The saved image can be tweaked in size by turning off Constrain Proportions and adjusting values for width and height for proper placement under the table grid. It soon becomes evident that the card is composed of smaller repeat segments, which in turn can be copied and pasted making for quicker work in filling in the whole punchcard row requirement.
 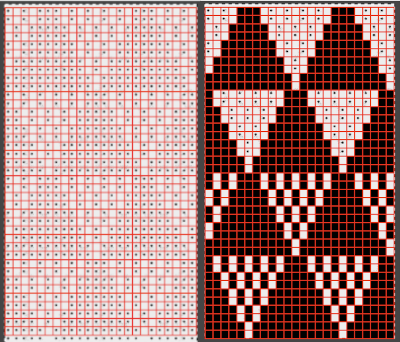 Check the repeat alignment by tiling it.
 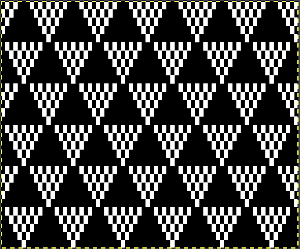 The smallest adjusted electronic repeat, 12X20 pixels.
  The converted, partial punchcard repeat
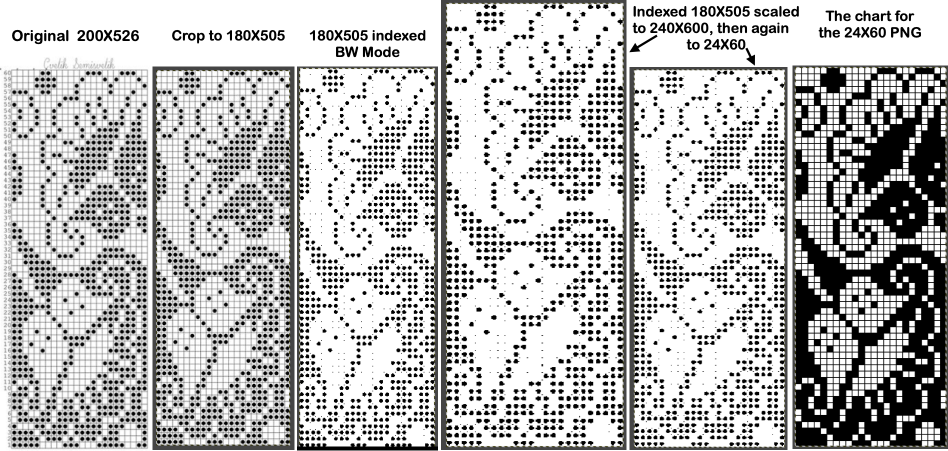
 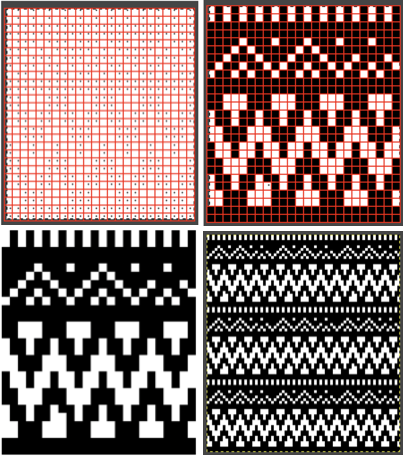 2023: ArahPaint‘s weave from grid tool makes working with the full repeat possible. The final repeat was cropped by 2 rows at the top to 24X206 to avoid a 4-row solid color line produced when the original was tiled vertically.
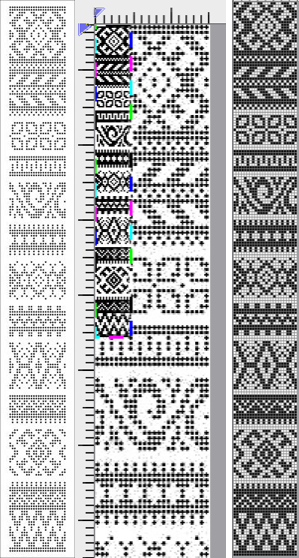
 if used, will change the numbering on the side of the card, but not the design content
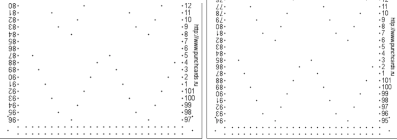
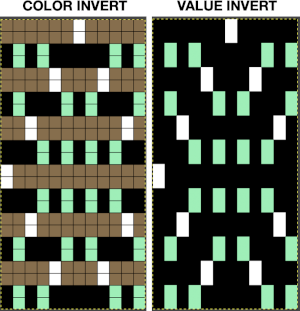
 In the past I have found lace repeats, in particular, to be particularly cranky when scaled down in Gimp due to the paucity of black cells. After the above steps, I decided to try color invert, resize, and color invert again, which in this instance, produced what appears to be an accurate repeat. Of course, the final png is likely to need mirroring for use in some electronic models
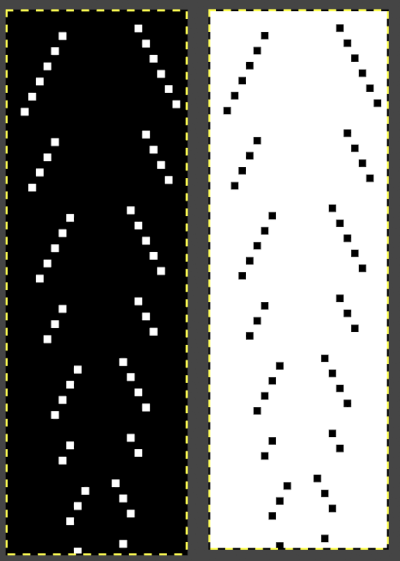
 2023: a different approach:
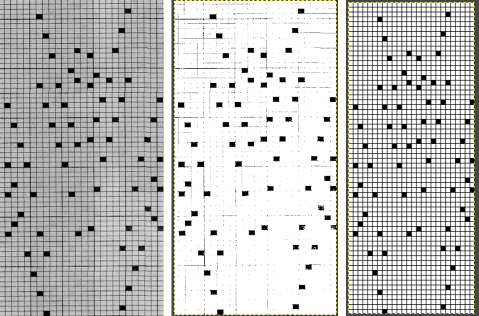

 offers 4 punchcards for use with this technique
 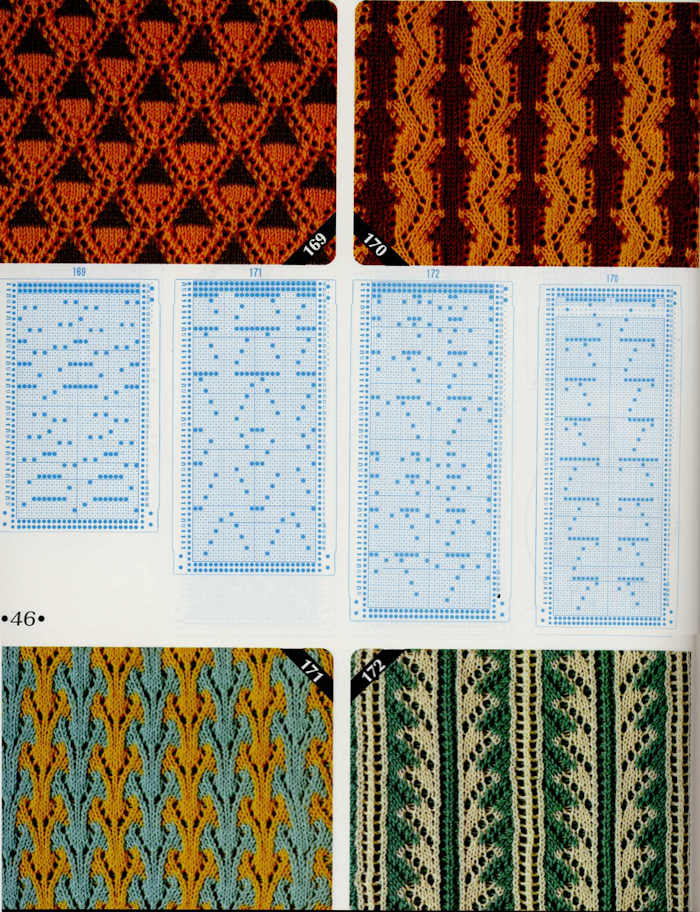 I chose to work with #170. The lace carriage in the Toyota models operates from the right side rather than the left as in Brother. The direction of the arrows marked on the card actually indicates movements for the carriage operating from that side. That fact is taken into consideration planning a possible Brother punchcard repeat. Lace direction arrows are matched based on the punchcard image being mirrored horizontally. The card in its original version is imaged on the left, mirrored on the far right, the proposed Brother punchcard in the center
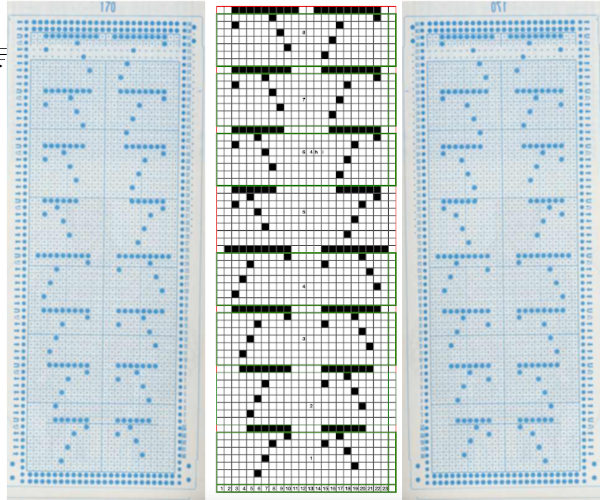
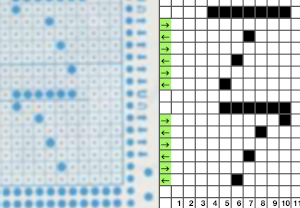 The proposed Brother punchcard repeat is now expanded for use on the electronic machine, ready for converting to .bmp in Gimp. Numbers in the middle of the chart on the left helped keep track of repeat segments. I also used red dots initially to mark segments as I had completed in the expanded the repeat, then erased them
 I expected something like this
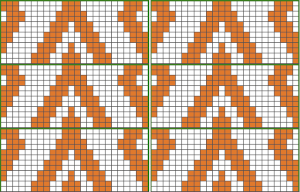
 Regrouping: the easiest place to insert eyelets is in the dominant, background-color
 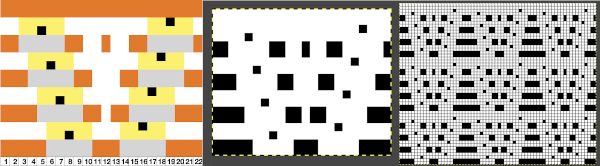 The 930 .png
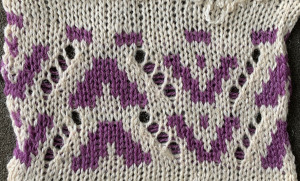 Can the exchange of the color positions in the yarn feeder create colored shapes with eyelets on the white ground? not only does it not do so in a way I liked, but my machine was having none of it as well
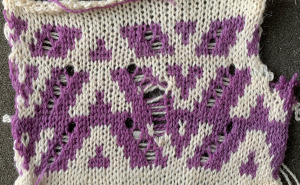
 It’s good to start with a small repeat.
 Taking it to continuous shapes and checking them in repeat: red cells represent transfers to the right, cyan ones the transfers to the left. The empty cells adjoining each of both colors represent the location of the doubled-up stitch after the transfer is made
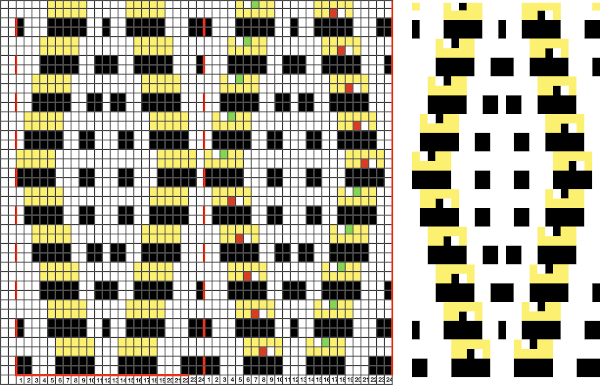
 I like to check tiling for the repats along the whole process
 Though the repeat is 24 stitches wide, it is not suitable for use on the punchcard machines in this format, its tiled test
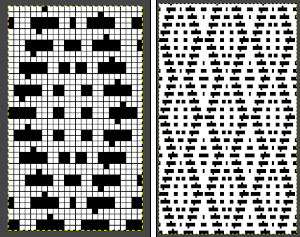
 Adding another contrast color stitch to shapes will make the number of stitches on either side of the eyelets consistent
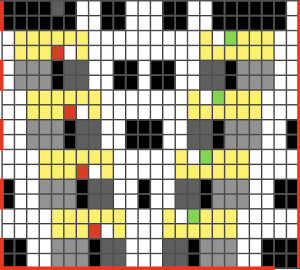
 and with the addition of two blank rows at the top of each segment.
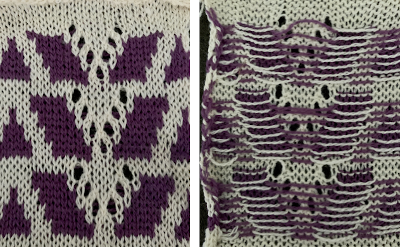 The possibilities are endless, with some patience, they can be manipulated to meet personal preferences and taste.


 Generally when creating these patterns on Brother machines, patterning selection varies for each pairs of rows. I got distracted while making the above swatch by a phone call, got to the point where there is a very obvious solid black all knit row in the repeat, but “forgot” its presence. I assumed I was having a selection or a carriage issue and scrapped the knitting off. Note to self: “remember to always check the programmed design before you do that again in the future”.

 The working design repeat is 16X16. Create a new table that is 16 cells wide, twice its height, 32. While holding down the command key, select all the odd-numbered rows planned for the final chart repeat, any errors can be corrected by clicking again on the same spot, still holding the key down. The process may be done in steps, releasing the key in between selecting groups

 will swap black and white cells in that row. Continue the process on every other row. It is not necessary to select the tool each time, as you advance and select the next row, the one just left remains briefly outlined in white dashes, making it easier to advance correctly in the design.
 This repeat posed by a quandary. The file may be used as-is and doubled in length after download. For doubling the height in Numbers, prior to importing the final screengrab into gimp, please see post:
  and
and 


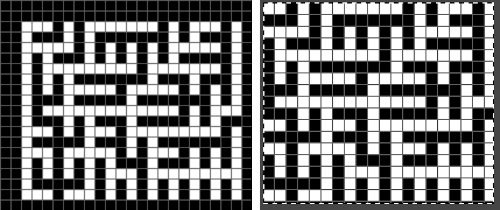
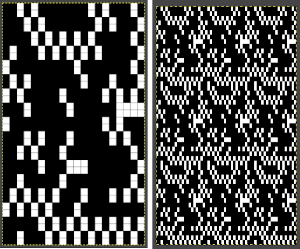
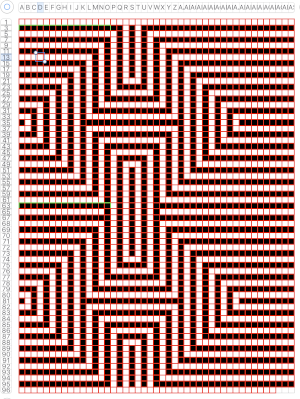
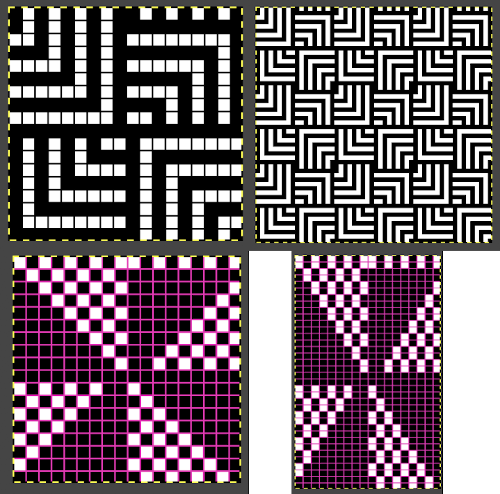
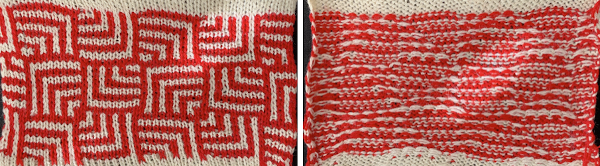
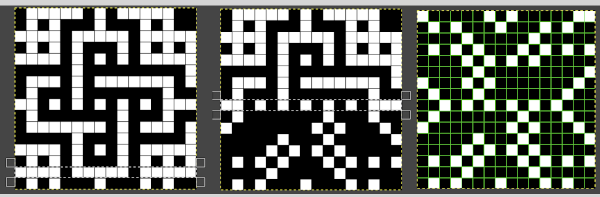
 adapted for maze knitting, eliminating long floats, to be lengthened to double-height
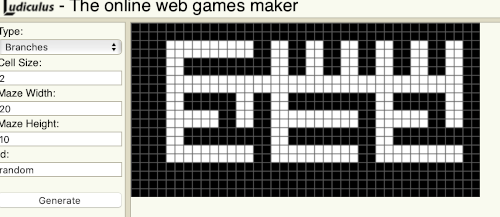
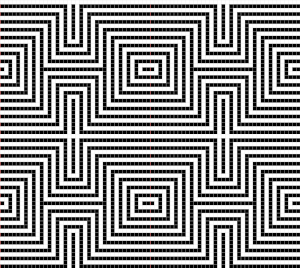
 Using the maze generator by
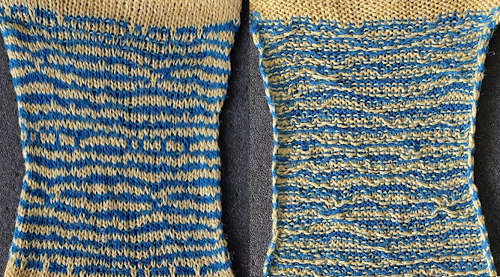
 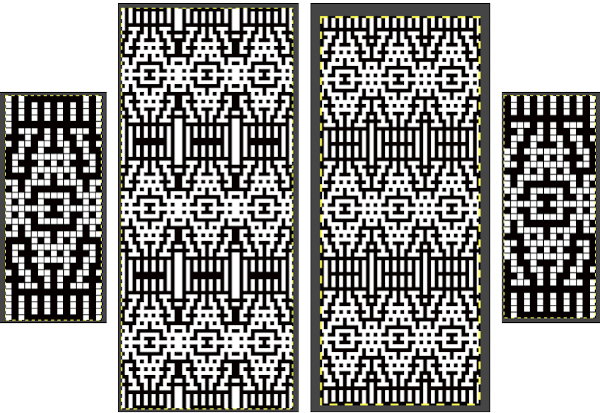 The proof of concept swatch for the version on the right, knit in tuck stitch
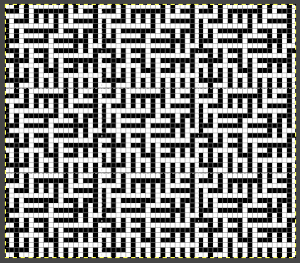
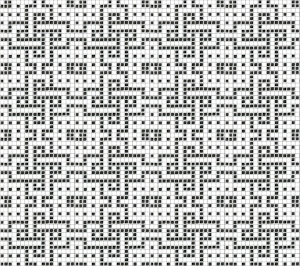
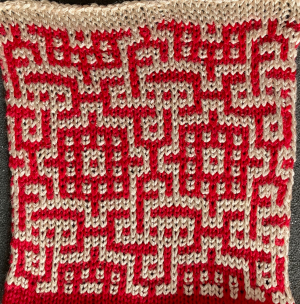
 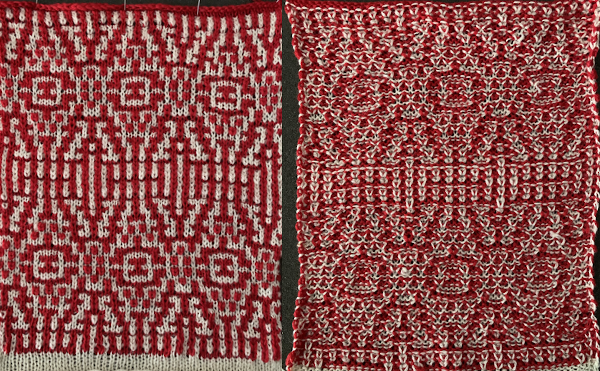 the double-length BMP ready for knitting, 14X68
 Since the knit carriage needs to move to and from the left-hand side of the machine with each color change, an even number of rows in each repeating segment is recommended, but not necessarily required. The first preselection row is generally moving from right to left. End needle selection on helps the edge stitches knit. At times end needles will need to be pushed forward to knitting position by hand. Depending on how the repeat is placed on the needle bed, with some experience with a tuck or slip stitch, one can decide whether keeping the end stitches in the pattern creates a better effect at vertical edges. Analyzing 2 random repeats
 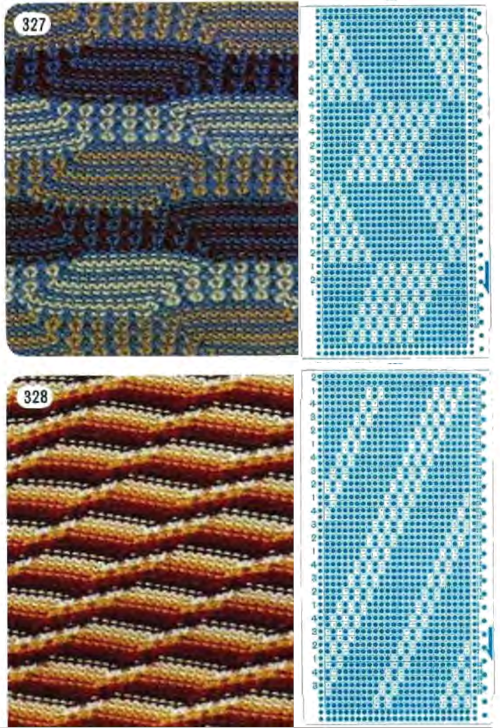 The respective .bmps
 Four tucked rows is probably the limit on Brother machines unless one is working in fine yarns. In the first interpretation, the ground knits for 2 rows on all preselected needles. In the second, the surrounds of the interior striping knit for single rows only at the top and bottom of the repeat. Electronic repeats A and B on the right may be as small as a single 4X12 unit.

 the “corrected” repeat without additional rows, some possible color changes can follow the colored chart suggestions
 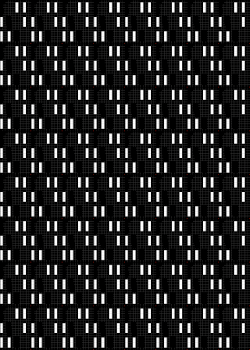 Moving on to electronics, playing with symmetry the repeat now becomes 30 stitches wide, the tiled image check for the unaltered version on the left.
 Tuck knit in a solid color
 Slip stitch in all variations has purl side edges which curl to a greater degree, the short skipped areas were probably due to too tight tension of too quick a carriage pass to the opposite side
 slip stitch with the addition of a third color in the rotation
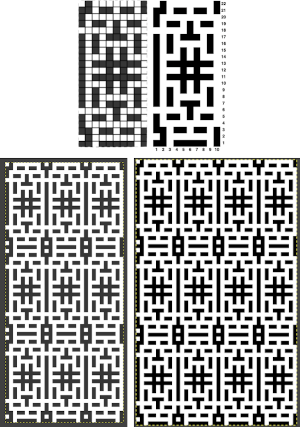
 The associated punchcard:
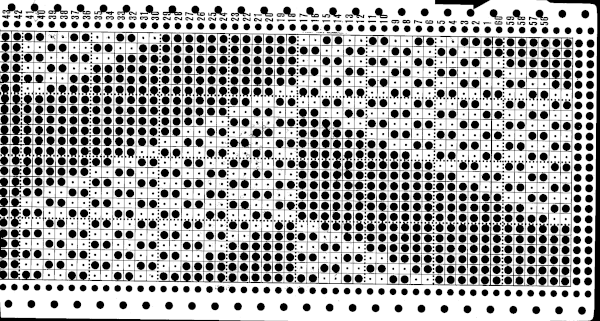
 Brother yarn changers are numbered, from right to left, and their published card designs color suggestions reflect that. The lace extension rail must be used as the knit carriage needs to clear the color changer on that side in order for the colors to change properly.
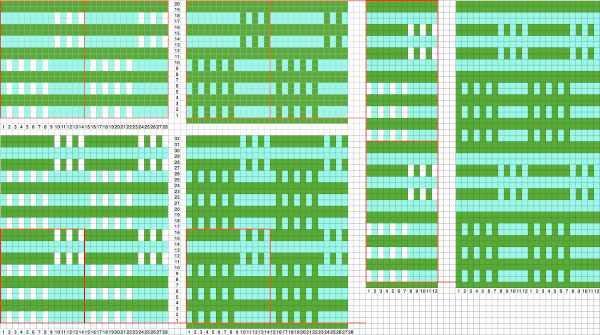
 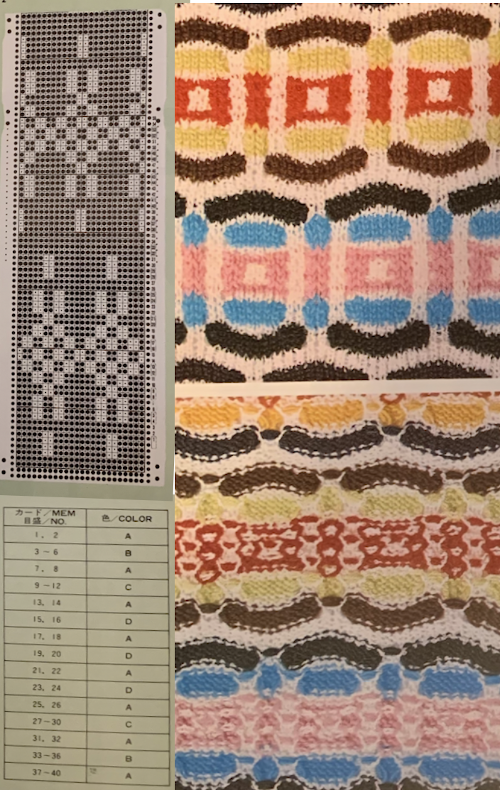 This swatch pattern from a Japanese magazine illustrates the difference in the formation of the tucked loops when two blank squares exist side by side. The repeat is 10X22, colors are assigned letters rather than numbers here as well
 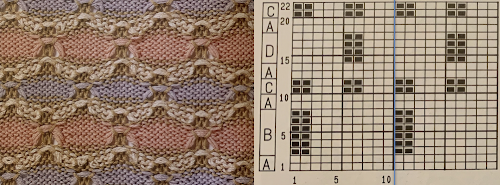 Another rule breaker: odd numbers of tucked rows with no added all knit rows. Experimenting with such repeats results in less organized all-over patterns, here colors are changed every 2 rows,
 These repeats take shapes in another direction which becomes more textural and interesting when blank stitch areas are expanded for use in slip stitch setting
 This pattern, with color changes every 2 rows and two-row tuck sequences has an assumed interesting pattern shift.
 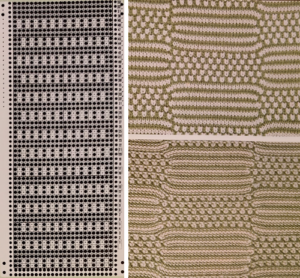 The tiled X2 horizontal repeats lined up side by side show that extra knit stitches have been added, shifting tuck stitch rows by one stitch in alternating directions, but just because it is published, it does not necessarily make the repeat correct. Those striped areas can only occur if there are solid all punched areas.
 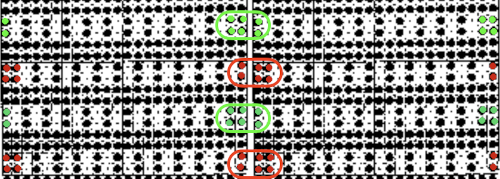 Keeping the constraints of a 24 stitch repeat, reducing the width of segments to 12 stitches rather than 24, the original repeat as amended
 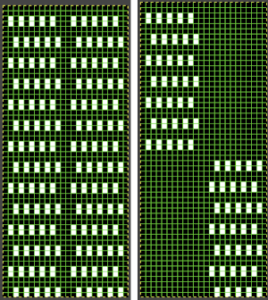 The tiled results for each
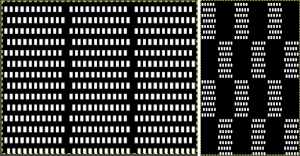
 An approach to designing such patterns can begin with a template for color changing every 2 rows and taking colored squares away to indicate stitches that will be slipped or tucked.
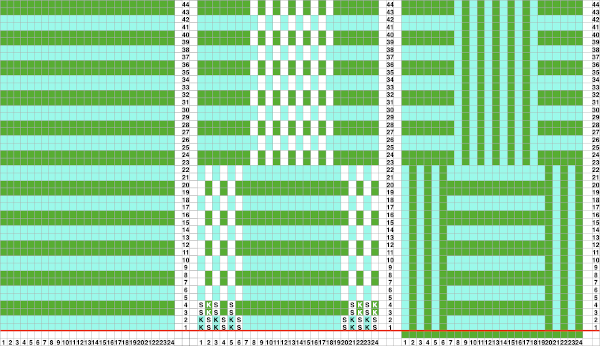
 Japanese magazine publications often recommended many color changes, each for varied numbers of rows. Sometimes more is less. The number of colors may be reduced, and changing the numbers of rows used for each color as well can expand the number of fabrics produced from a single repeat. Good note keeping is a necessity if the intent is to easily reproduce the fabric at a later time.
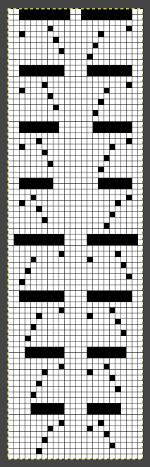
 Adapting punchcard designs for use in electronics becomes easier once one is familiar with the stitch structure. This is a cousin of 328, 13 stitches X 52 rows. Tiling as in all designs helps sort out errors or missing pixels.
 and slip stitch changing colors alternately every 2 rows, then every 4:
 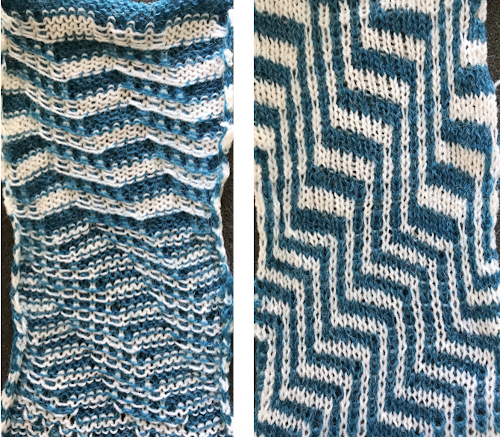 My blog posts on working with and designing mosaics (suitable for tuck and slip) and mazes (slip stitch only, multiple side by side unpunched holes or white squares in any row), in reverse historical order