Periodically the question of printing blank templates for DIY drawings or images from published sources to scale to produce traceable images used to mark cards for punching is asked in forums and very recently in Ravelry.
I primarily use Apple and open-source free software in my work.
Creating knit graph paper on Mac, using Excel and Numbers began with Working in Excel 2008 and Mac Numbers 3.2.
The topic was revisited by me here.
A far more recent variety of printable tapes for multiple gauge knitting machines is offered by Claudia Scarpa in her 2022 blog post.
With some exploration, trial, effort, and good note keeping goals can often be achieved with tools on hand.
The concepts for retaining aspect ratio can be applied to other platforms, programs, and printers.
Suggestions exclude using banner paper or legal size sheets.
The assumption is made that only 8.5 X 11 inches stock is available for use.
Acrobat Reader free downloads provide limited functions.
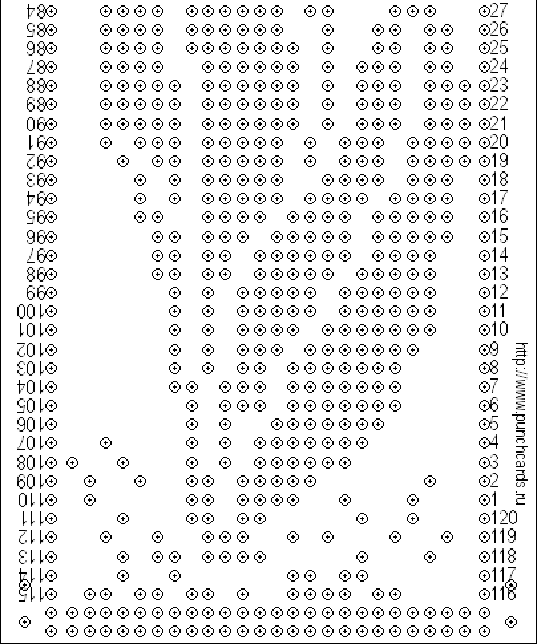
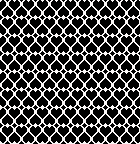
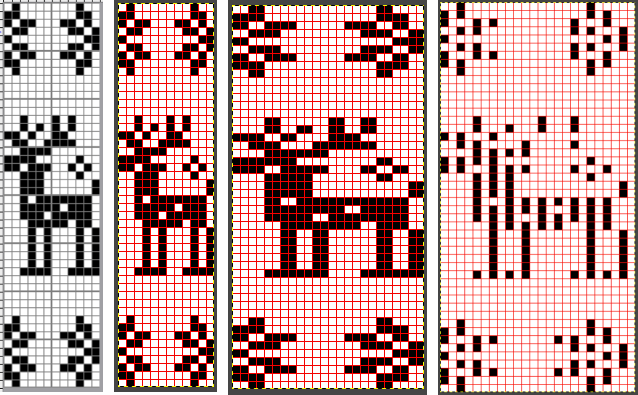
Factory punchcards are marked in what appears visually to be a square grid.
Using a ruler measuring in mm, the blank 24X60 punching content measures 108 mm in width and 300 mm in length.
The 300 mm content length will be adjusted depending on the height of the design repeat and whether the 4 rows of all-punched squares need to be considered in the printout.
The individual squares on the factory blanks measure 4.5 mm in width and 5 mm in height.
Cards can be joined together with snaps for longer repeats, and the additional pieces ought to be a minimum of 20 rows in height for the card to feed smoothly and accurately. Some added taping will further ensure it continues to do so if the card will be used often or in very long projects.
Two editable spreadsheets to download:
Traceable punchcard templates for DIY designs
1. Numbers 13, the greyed-out rows represent the first two all-squares-punched rows
Depending on the program used to process the file, there may be some juggling between the use of cm and mm values, a matter of a decimal point.
The shared table without numbers measures 10.8X22 cm.
The shared numbered table includes an extra column border marked needed to match the full blank card width markings, 14.2 cm in width, and the same length as the first table, 22cm.
2. A test PDF for a template including row numbers: punchcard-blank 35.
To print to scale using Acrobat Reader, select ![]() Matching results for both templates with a superimposed factory card segment.
Matching results for both templates with a superimposed factory card segment. 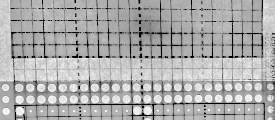 Custom needle tapes
Working in cm, considering that needles are 4.5 mm, 0.45cm apart, eliminates the need for conversion to points, the format used when planning to use the resulting charts for conversion to pixels per stitch PNGs.
Both Gimp and Numbers alter some of the values by default very slightly, as seen here in Numbers for 1-10 cm needle spacings for designing blocks for needle tapes. 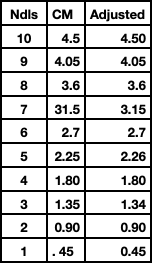 To maximize the available printing space, under print, setup, change all margin values from any preset default, seen on the left, to 0.54
 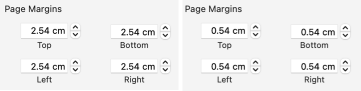 Although the print setup shows page numbers in cm, the page orientation measures are given in mm
 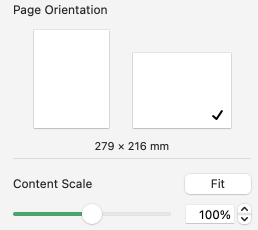 The 2.26 mm, 5 stitch cell unit tape in place on the machine
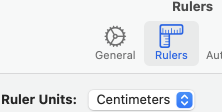
 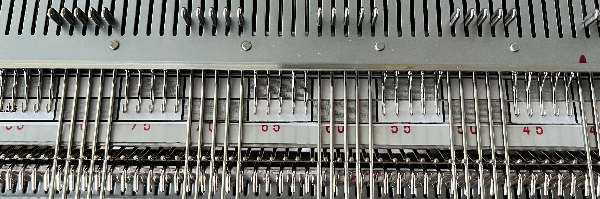 To change rulers in Numbers 13.2 to the Centimeter setting, and thus avoid the need for any conversions of the values to points, from the Numbers Menu at the top of the screen Choose Numbers >Settings, click and scroll on Ruler Units from the pop-up menu, then choose an increment, in this case, centimeters.
When returning to drafting for pixel charts, repeat the process for changing rulers back to points. 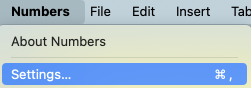
 The math in calculating table cell size is simple.
This export is a revised copy for use in Numbers 09 using cm rulers: needle-tapes-only.
If working in a later OS, this prompt may appear 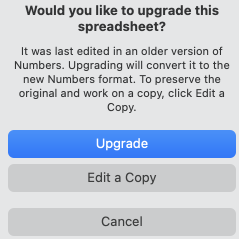 The matching document created in Numbers 13.2:
needle tapes only_numbers 2
Tapes printed in single blank units may be colored in or scribbled on easily, depending on end use  The same concept could be used to generate printed blank graph paper for intarsia and/or to obtain a sense of changes in aspect ratio resulting from knit stitches forming a rectangular grid while designing using pixels per stitch is commonly on a square one.
The mm ruler settings allow entering the values from the swatch gauge measured in mm and calculated to include decimal points.
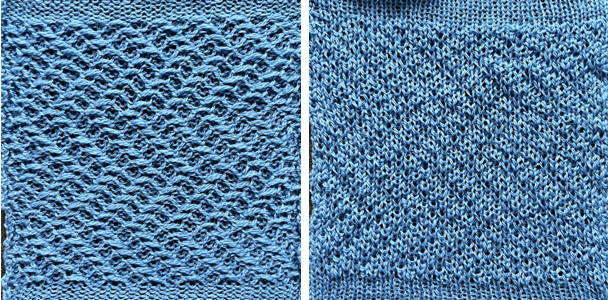
The chart grid on the left is shown in 6/4 proportion, a common width-to-height knit stitch ratio, while on the right it is in equal units. 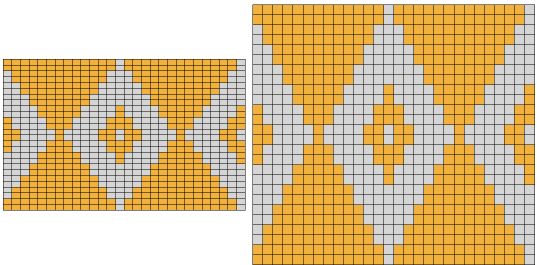 The elongation in most knitting is often reduced by the choice of technique or if working in DBJ, by choosing ribber settings such as slip stitch with lili buttons.
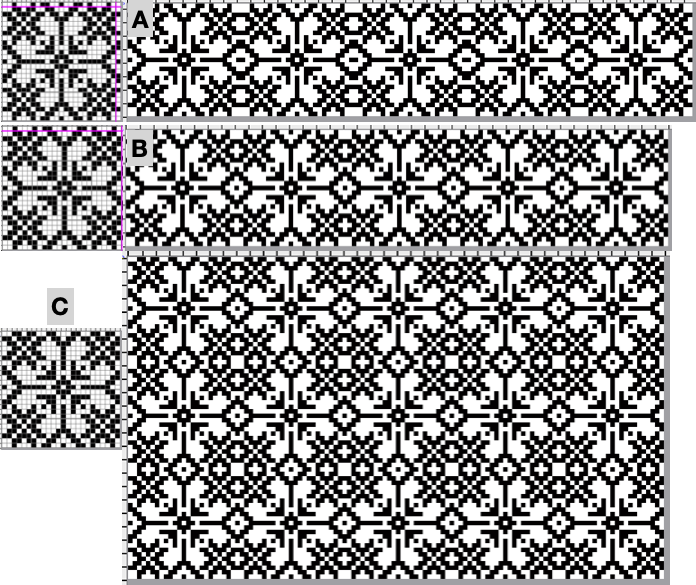
Online published repeats converted to traceable printouts for punching cards
It is possible to produce print-to-size copies of punchcards to trace in a variety of ways.
One alternative is to use Mac Numbers to ready the image for doing so.
Two jacquard tests began with images from a source for massive punchcard repeat collections regularly mentioned in forums (translated to English link ), and at times in my previous posts.
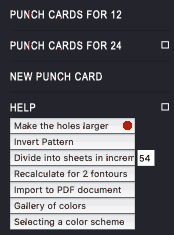
The first is for a border design, #4245 shown here with the holes made larger. 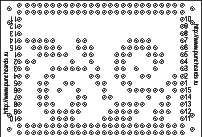 The second design is a far longer one, number 4937
 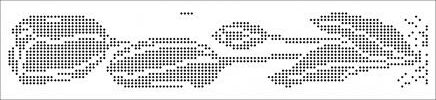 In the help menu on the right, select the first option, make the holes larger
 Save the image or simply drag and drop it into a new sheet in an existing Numbers document or create a new blank doc removing the default table.
Click on the image, and in the top menu right, choose image arrange.  With Constrain Proportions left checked, change the image width to 14.2 cm punchcard full standard width. The height will be adjusted automatically.
The first printout test. Some of the dots were also marked with a pen, not necessary if tracing over a light source. 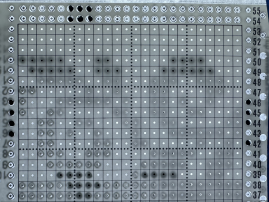 Numbers will split far longer images into segments/sheets, in this case, 3.
The top of the image is displayed on the first sheet, moving down rows to the start of the design in the following “sheets”.
Page margins are all set at .54 cm. Adjusting header and footer values changes and shifts the position of the segments to obtain full dots on each printout.
Scale contents to 100%, choose to print all sheets or any single one. 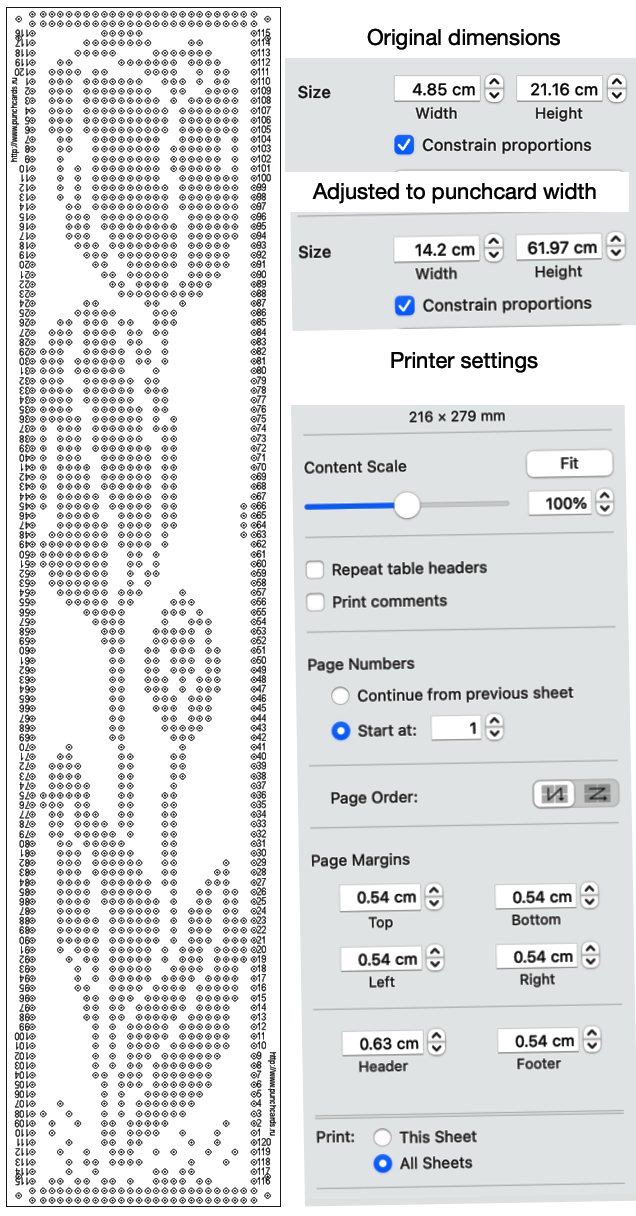 The printout is shown with a card laid over it, placed over a lightbox of sorts.
 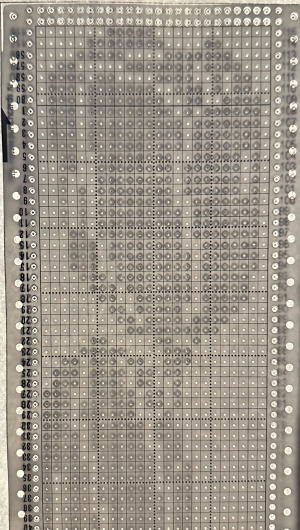 If a spreadsheet is not your preference, the same can be achieved with published cards using Gimp and Mac Preview. Printing from Gimp, even if the display is set to 100% appears not to appear to offer an option for dividing the file in scale automatically on more than one page.
A recent Ravelry query asked about printing individual cards from downloaded PDF sets for Brother machines, including this card for Brother Lace 18, from the set S  Open the full downloaded document, display the thumbnails by selecting the view button in the toolbar, and pick Thumbnails.
Select the thumbnail to print, it will be highlighted, and drag and drop the thumbnail for the punchcard to the desktop, it will be in PDF format as well.
Click on the chosen file, select open with Gimp, and an import PDF window will appear, as seen for this Fair Isle Design 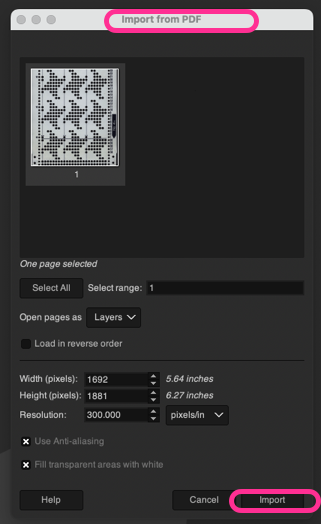 Because transfer lace cards have so few holes to punch and the placement is critical, the lace card 18s was chosen for testing.
Select Import and an image composed of 2550X3300 pixels will open, surrounded by white space.
Using Crop to Content will reduce it to 1485X3052.
Scale it by choosing mm values, and type in the 142 mm card desired width, reduced automatically to 141.99 mm. 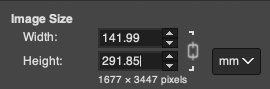 The value for the full, scaled image will still be displayed in pixels at the top of the work window, now 1677X3447 pixels.
Since the repeat is longer than 40 rows, it can be divided into two segments using the mm value. These are the cm and pixel values for my cropped top segment, exported as a PNG. The saved PNG was opened in Preview and with the option for scaling to 100% ![]() produced a good traceable result despite the printer needing a new ink cartridge.
produced a good traceable result despite the printer needing a new ink cartridge. 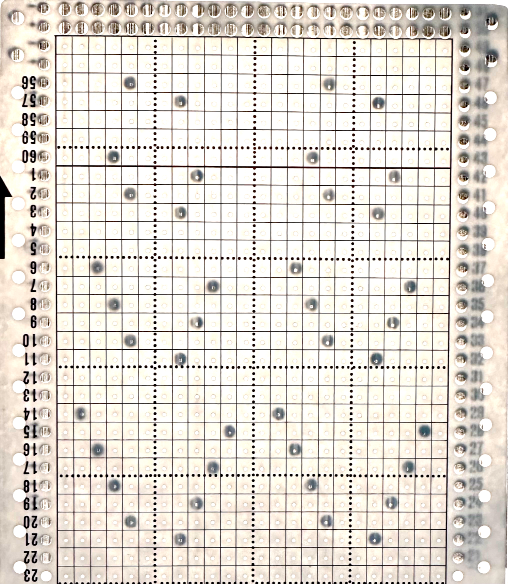 Letting Preview split the image into large enough segments can be achieved by altering page margins.
 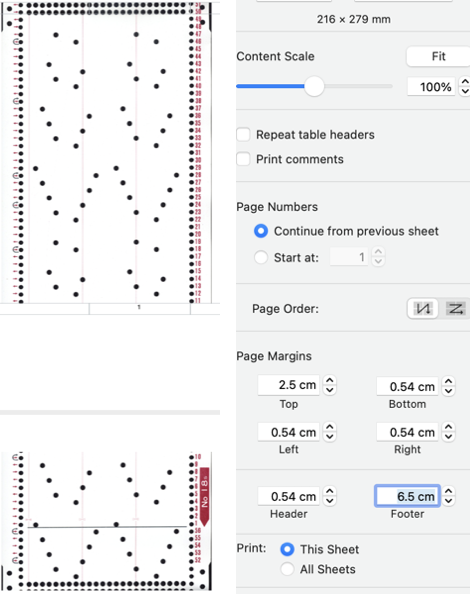 The bottom of the above split printed is good enough considering the starting image was a tad rotated to the left and incomplete.
 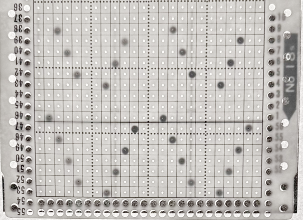 A fail, a screengrab from the PDF full page, working with a PNG and printing from Gimp: the grab, 910X1522, cropped to content 694X1526, scaled to the same mm values,
  yields an image with a very different pixel count from the PDF converted values,
  and cropped to a segment 694X642 pixels and printed from Gimp was not to scale,
  In the downloadable PDF for that fair isle design #4 from the R series, the punchcard is presented in the two segments required to meet the full punched height for knitting.
The bottom segment opened and scaled in Gimp first as a PDF Import and then as a screengrab PNG, resulted in the same failure in maintaining equal pixel aspect values with scaling for printing as seen with 18S 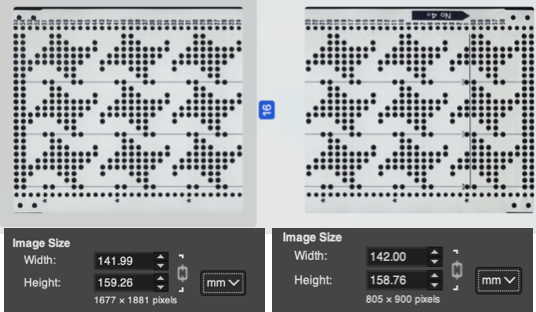 The process was followed on the tulip file PNG: a segment was cropped from the bottom of the saved “larger hole” image, scaled to cm value, and printed in proper aspect ratio,
 What of images from Brother Punchcard Volume 5, especially for those lace cards with so few dots?
Choose an image, open it in Gimp, crop it to the edges of the punchcard design
scale the image by multiplying both the number of stitches and the number of rows by 5  The result printing from Preview (and more ink)
 Dak is a Windows-only program. There are multiple volumes of stp files usable only in DAK, downloadable for free, including those for Brother Punchcard Volume 5.
The stp format is only read by the program, and stitch designs cannot be exported in other formats ie. PNGs.
Other posts have suggested hacks for converting screengrabs from DAK to PNGs for use in electronic machines.
I use InSync to move files between my Mac and PC and download to the 930 from there, using img2track.
There are many related ways to achieve the same task using only the PC.
If the goal is to use punchcard templates generated in DAK for traceable printouts to mark cards for punching, both Mac Preview and Numbers may once again be used.
The fixed full width for 24 stitches on a blank card is 108 mm.
Dak loads the files from the punchcard book in the smallest repeat for correct tiling when available, so lace #771 stp opens as a 12X34 stitch repeat.
A screengrab segment of the DAK window. 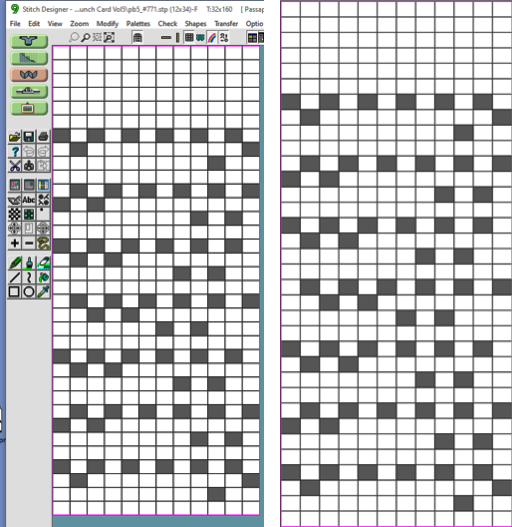 With the repeat isolated and cropped in Gimp, the entered values of 54X170 were adjusted to these by the program, the PNG was saved.
 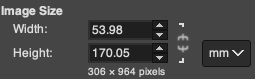 If Numbers is used for printing, under Image/Arrange, adjust the image size
 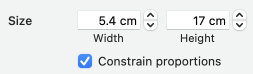 Or if opened in Preview, set the print scale to 100%
 ![]() The results for both matched
The results for both matched 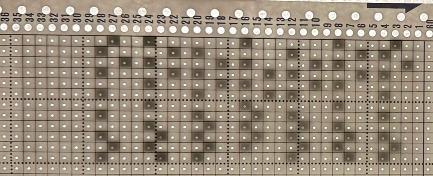 Analyzing the repeat, note the blank first row, not usually seen in a Brother transfer lace design.
Checking the Volume 5 source after the fact identifies the repeat as intended for lace combined with knit weaving, a different knit structure.
DBJ color separations other than the KRC built-in function in Japanese electronic machines require other software or manual color separations.
DAK performs a variety of separations easily and quickly.
In Volume 5, pattern #53 is shown as punched for fair on the left, and separated for DBJ on the right. 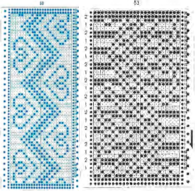 If the # stp is opened in DAK as the 2-color jacquard design.
To knit a traceable punchcard template for the DBJ, the print option generates usable images.
This screen grab of the DAK window shows the jacquard design in the background.
The Page Dimensions window icon outlined in red when selected offers 3 ways to mark the black cells including as dots.
Choosing other (mm) and entering 600 for both values will produce results in a size that allows their being grabbed and saved in full.
The program will conveniently split the design into pages if needed.
The center image shows the generated template for the specific stp, the right one, the image opened in Gimp on the Mac with the content cropped to the dotted chart, 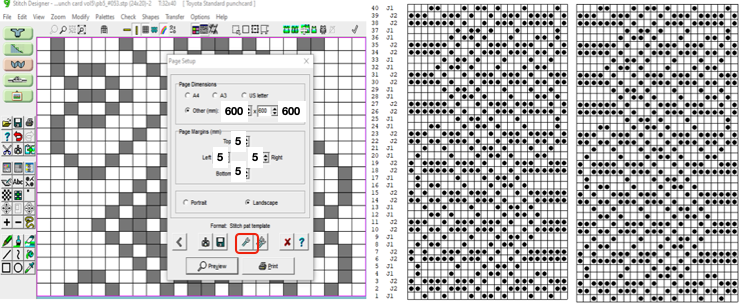 and scaled,
  saved, and, in this case, printed using Preview. The punchcard is superimposed beginning with #1 only for an added visual check, punching always begins immediately above the first two all-punched rows
Category: GIMP
free image editing program for Mac and Windows
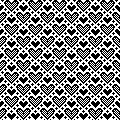
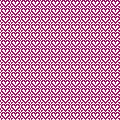
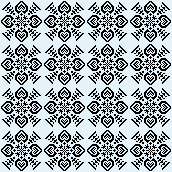
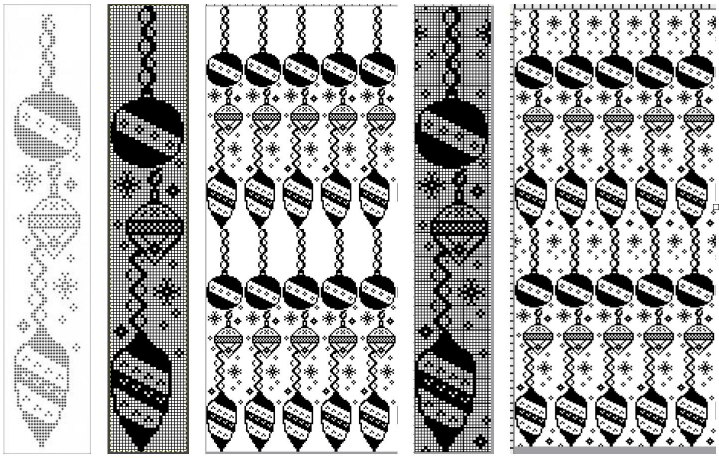
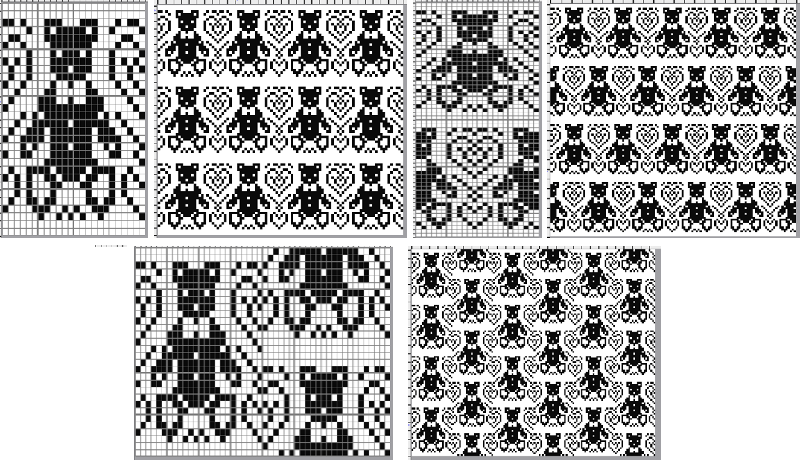
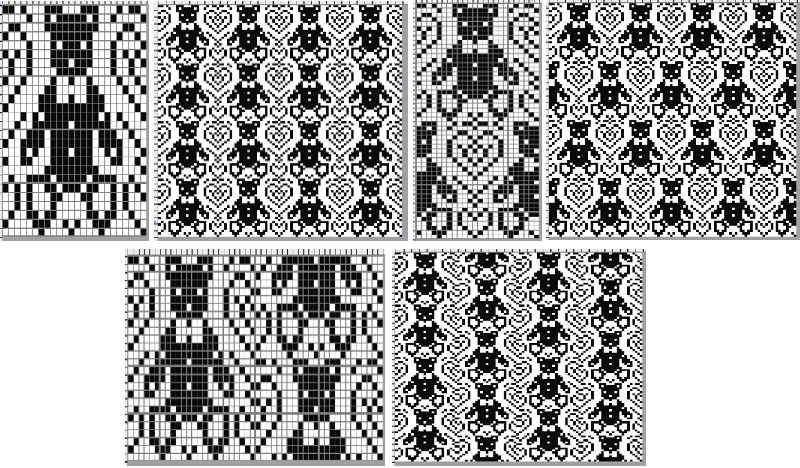
Seasonal knits inspired by published repeats 2_hearts
Charts are included for repeats suitable for punchcards, where the designs must repeat in height to a minimum of 36 rows.
Some reminders: the BW pngs here are intended for import into a paint program or image processor where they can be magnified to suit, with a grid view for counting cells to consider the width of floats if used in single bed fair isle, adjust the design in DIY variations, or import into download programs as provided.
The tiled repeats help to visualize how the final appearance on the knit side.
While the pngs are shared in BW indexed mode, when dragged to desktops or otherwise copied and are opened in image processors, they may change to RGB mode by default and will need to be converted back to BW indexed mode prior to use for import and download to knitting machines.
Some machine models will automatically mirror the image horizontally, depending on brand and model year as does Ayab software.
When direction matters, ie in representational designs or transfer lace, the mirroring may be performed on the image provided before using it, or by using the appropriate button or command after downloading to electronic machines.
Punchcard users can mirror after the fact by simply turning the card over before inserting it, after marking and numbering at least the starting row on its reverse.
To retain symmetry in developing half-drop or brick repeats, having an even number of stitches and rows in the original design is useful. Some designs are broken up in ways that are subject to use based on personal visual preferences.
If used for blankets, the repeats can be tiled to dimensions leaving room for coordinated borders.
12X10 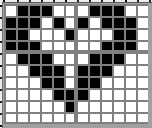
![]()
 12X10 to 12X20 brick
![]()
 12X10 to 24X10 half drop
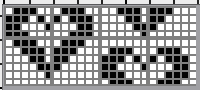
![]()
 24X24
24X24 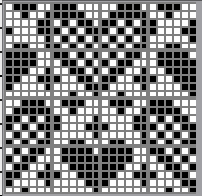
![]()
 24X28
24X28 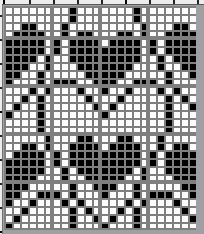
![]()
 10X8
10X8
![]()
 32X32
32X32 ![]()
 34X34
34X34 ![]()
 43X43
43X43 ![]()
 adjusted to 44X44, an all symmetrical suitable as a single motif or in larger formats
 ![]()
 brick 44X88
 ![]() brick tile
brick tile  half drop tile 84X44
 ![]()
3 color 14X3, requires a different color separation than KRC, each color in each row needs to be knit twice ![]()
 the 2-color version
 ![]()
 From weaving drafts: a mosaic-like design
  the 68X58 png
  cropped to 67X58 to avoid double stitches
its half drop repeat 134X68 
 the source for a much smaller repeat
  the 14X20 png
 ![]()
 When all you need is a border, repeats that may be used vertically or horizontally, presented in punchcard configuration, 24X21:
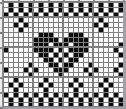
![]()
![]() 24X20, rotated for horizontal use would become usable on electronic models only
24X20, rotated for horizontal use would become usable on electronic models only 
![]()
![]()
From To mesh or not to mesh 9: more on mock filet design ![]()
 See the post for additional repeats and my method of developing the design.
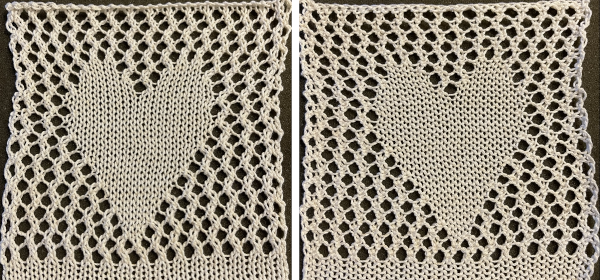
I could not find the source for this Pinterest find on the upper left, which results in a combination of large mesh  and single transfers to create the heart shape.
The initial 24X44 png ![]() brick repeat, 24X88
brick repeat, 24X88
![]() with more knit stitches between shapes, 36X88
with more knit stitches between shapes, 36X88 ![]() the knit rows separating the stripes of heart motifs are highlighted in red.
the knit rows separating the stripes of heart motifs are highlighted in red.
On Brother machines the KC does advance the repeat in standard lace, so each of those red stripes is reduced to two rows of blank cells, resulting in the 36X88 repeat charted on the far right 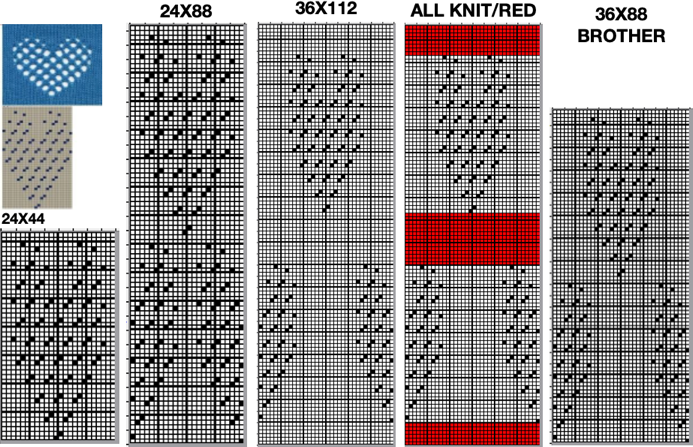 A small proof of concept knit in 2/18 wool
 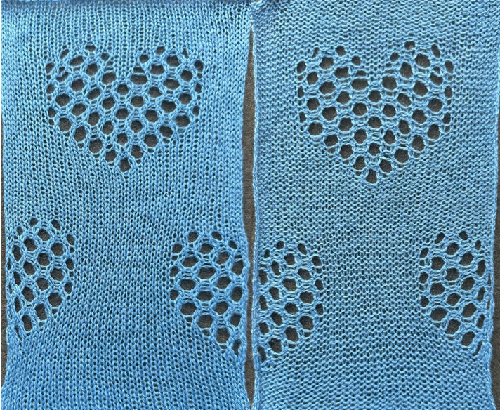 A Studio 560 was my first electronic model machine, owned decades ago. Among the mylars saved even though the machine was sold many years ago, I found this repeat, 24X47 cells, the last offered in this series. Studio mylar sheets were marked in 6X5 blocks instead of Brother’s 5X5. The punchcard repeat chart here is outlined in 6X6 blocks of cells, the convention in Brother punchcards.
 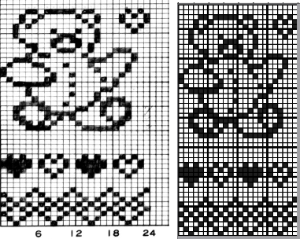 the png
 ![]()
![]()
A series also shared in the post Seasonal knits inspired by published repeats 1
two from the various groupings
24X39![]() 24X78
24X78 ![]()
Small to large repeat figurative designs inspired by filet crochet charts
Reducing figurative designs to repeats for knitting on a low needle counts results in loss of definition.
Filet crochet charts can serve as a starting point for repeats, but usually are planned on more than equivalent 24 stitch counts, so results of adapting them are often usable on electronic machine models only.
The knitting technique used to execute the design determines whether the lengthwise aspect ratio is affected or not.
1: the source image
2: processed using Mac Numbers
3: opened in Gimp
4: the grid color can be altered to view and match stitch counts
5: the color reversed image to visualize the possible appearance of doing so in the knit
6: a small border frame is added, bringing the figure color to the edges of the knit piece, and the figure is mirrored, helping to make a choice about its orientation on the the knit side  Depending on the model machine used, the motif may appear as drawn on the purl or on the knit side, mirroring it when direction matters may be done using machine settings or mirroring before download.
On my 930 mirroring was not necessary, the swatch was knit on 40 stitches, with the added frame.
The figure alone, 35X72 pixels ![]() shown on 6X6 grid blocks
shown on 6X6 grid blocks A DBJ swatch with birdseye backing
  A sitting companion, inspired by random Pinterest find, processed using ArahPaint, not knit tested, 49X65 pixels
 ![]() shown on a 5X5 pixel grid
shown on a 5X5 pixel grid  Graduating to pillow or blanket size, a bit of romance in advance of February, from a Priscilla Filet Crochet book, the original was in a nearly oval format.
A border was added to complete the original to full oval shape,
black pixels were added to complete the inner shape, and the BW image was extracted and saved.
Working in RGB mode, the border needs to be adjusted for symmetry, not fully complete here, and bucket pattern fill may be used to customize it or any frame 
 the 117X154 modified oval chart and png
 color inverted 107X154 for DIY modifications to other shapes
  A 137X184 RGB version with editable border
  Mythological inspiration from a Priscilla source
A: the original
B: processed with GIMP
C: processed with Arah 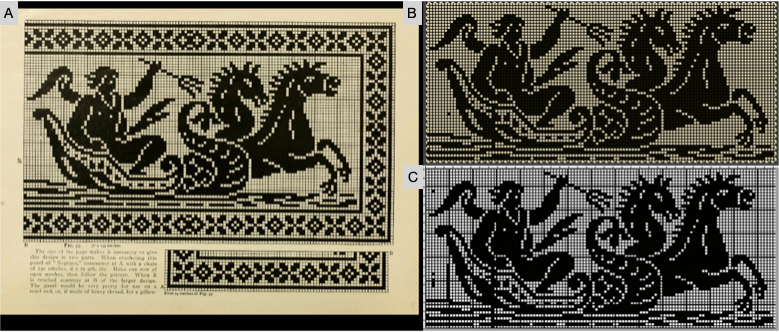 the final png chart, with some pixels removed
 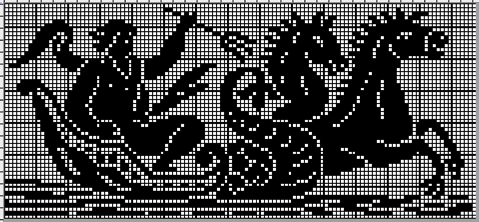 and the 118X54 png
  A 142X81 pixel version that includes a border
 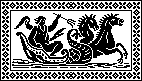 From previous posts:
74X54 Celtic design 
43X53 squirrel ![]() This image is not from a filet crochet chart but from one of my Studio 560 mylar sheets dating back decades. It is used to illustrate the possibility of mirroring in different directions to produce far larger designs ie wall hanging or blankets.
This image is not from a filet crochet chart but from one of my Studio 560 mylar sheets dating back decades. It is used to illustrate the possibility of mirroring in different directions to produce far larger designs ie wall hanging or blankets.
Alone it could serve as a scarf, with the image rotated and perhaps even mirrored at the opposite end of the scarf to match directions when draped around the neck 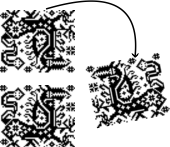 The 60X50 cell repeat
  It takes a few clicks of a mouse and a couple of program windows nowadays to make the addition of single cells at the top, bottom, or sides of such large designs that avoid tiling intersections with double cells if that is the goal.
It is also easy to manipulate the chosen designs to visualize the appearance of a final piece. Printing the pixelated results in a larger format can aid informed choices before any actual knitting.
Adding a single cell blank column on the right, and one with a few pixels on the bottom a blank row on the top, 61X52  in a 122X104 repeat that with coordinated borders could approach the use of most of the needle bed
 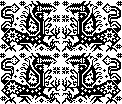 with the initial shape mirrored horizontally and then drawn in repeat a column with double pixels appears again at the center of the design
  staying with that, but making shapes go around
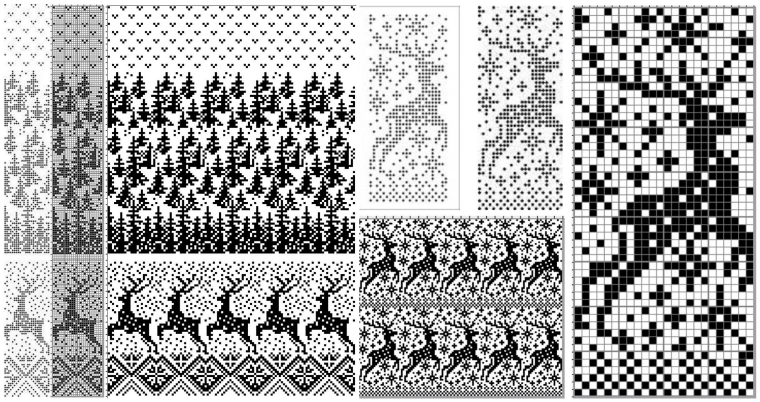
Seasonal knits inspired by published repeats 1
In previous posts, ie Numbers and GIMP: online punchcard patterns to electronics 2, I shared some ways of converting online images from varied published sources.
This series was edited using primarily ArahPaint and some Gimp, both are available for free.
DAK users have the ability to achieve similar results in that universe, producing stp proprietary files. There is no export (or import) available to other formats ie png or bmp possible.
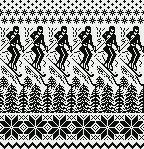
Fair isle is not in my preferred wheelhouse, especially in season-specific designs, but that said, I have been sharing these repeats in the FB machine knitting forum and thought I might make them available to others here as well.
The pngs are editable for further DIY modifications.
 24X189
![]() 24X94
24X94 ![]() 24X85
24X85 ![]() cropping given repeats for desired tiling, # 1068
cropping given repeats for desired tiling, # 1068 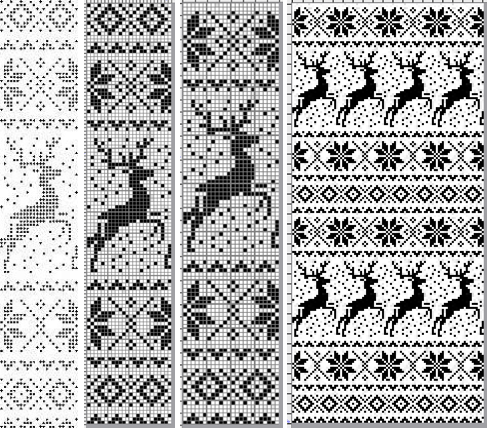 the original 24X119 png
 ![]() cropped to 24X105
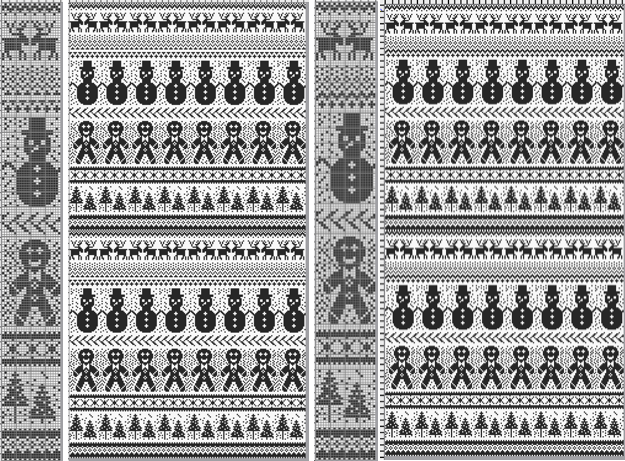
cropped to 24X105 ![]() My first encounter with “naughty reindeer” was during a Brother dealer-sponsored small machine knitting club meeting. A present update, using a Pinterest find as the source
My first encounter with “naughty reindeer” was during a Brother dealer-sponsored small machine knitting club meeting. A present update, using a Pinterest find as the source  the original 24X60
 ![]() with 2 rows added to 24X62
with 2 rows added to 24X62![]() in brick repeat, 24X124
in brick repeat, 24X124 ![]()
A 40 stitch Madag design  40X68_1
 ![]() 40X68_2
40X68_2 ![]() A 24 stitch version, with the moose, and without
A 24 stitch version, with the moose, and without  the original, 24X152
 ![]() cropped to 24X118
cropped to 24X118 ![]() with the moose edited out, 24X84
with the moose edited out, 24X84 ![]() Snowmen and trees
Snowmen and trees
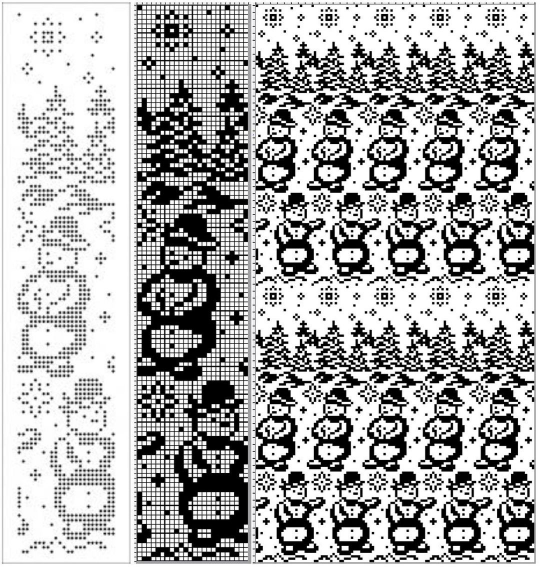 24X120
![]()
 24X50_1
 ![]() 24X50_2
24X50_2 ![]() testing tiling before knitting, editing out unwanted symbols
testing tiling before knitting, editing out unwanted symbols 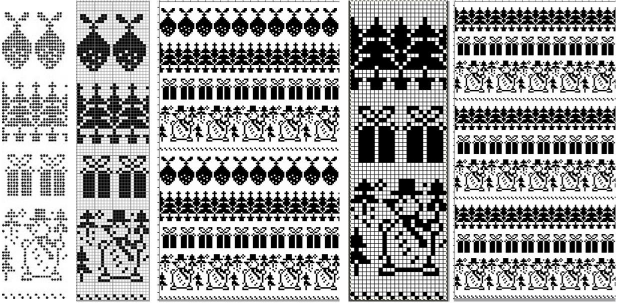 the original 24X99
 ![]() the edited 24X74
the edited 24X74 ![]()
 As a 24 stitch repeat, this is suitable only for single motifs, since repeating them horizontally would join the darker ball shapes. Adding a blank pixel column on the far right changes the horizontal alignment. A few pixels added at the top of the motif form an unbroken join vertically, the final 25X146 shown on the right
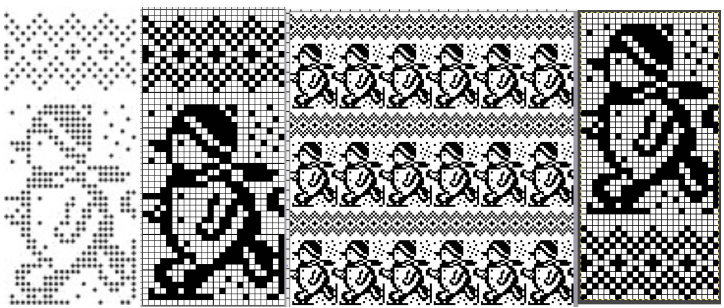
 ![]() This Santa was identified as being attributable to Knittery, a company long defunct that offered pre-punched cards for purchase. Images where the background is punched out make it possible to introduce striping it with the color changer or using the chart for duplicate stitch embroidery on a knit ground.
This Santa was identified as being attributable to Knittery, a company long defunct that offered pre-punched cards for purchase. Images where the background is punched out make it possible to introduce striping it with the color changer or using the chart for duplicate stitch embroidery on a knit ground. 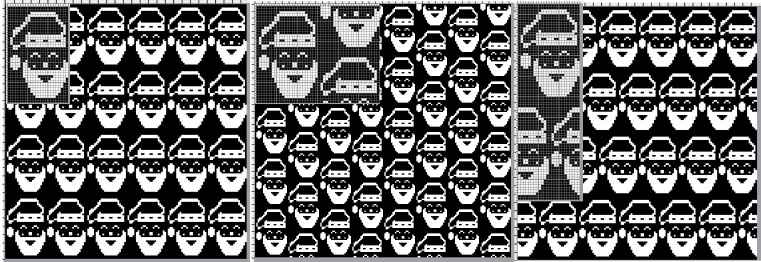 the original, 24X38
 ![]() in half drop, 48X38
in half drop, 48X38 ![]() and in brick repeat, 24X76
and in brick repeat, 24X76![]()
the original, 24X185 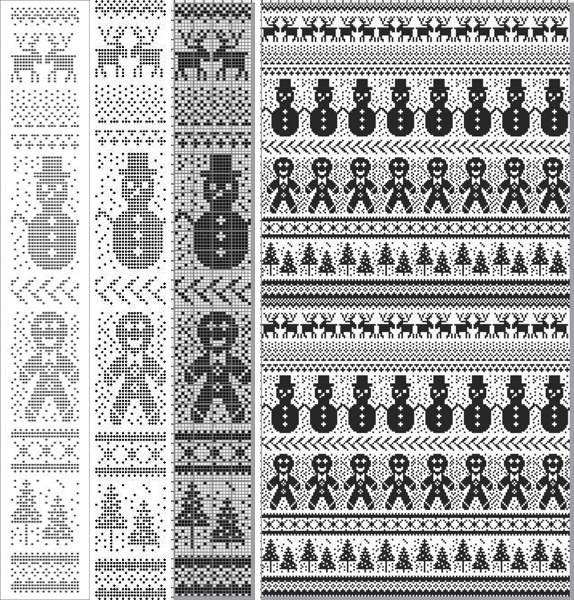
![]() with the elimination of some rows, first at the very top
with the elimination of some rows, first at the very top 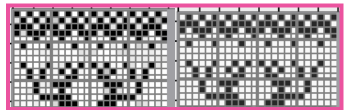 and then just above the snowman’s hat
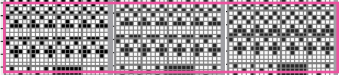
 the final 24X182 png
 ![]() The question as to how to adjust repeats for use on 12 stitch knitting machines often comes up in forums.
The question as to how to adjust repeats for use on 12 stitch knitting machines often comes up in forums.
Continuing in the seasonal vein, the easiest method is to begin with a 12-stitch repeat that occupies only half of the card vertically and twice in width. Here the original “half” is 12 stitches wide, 46 rows tall.
One method for the conversion is to work on a spreadsheet:
Begin with a table 24 cells wide, adding enough rows to the expected planned height to repeat the snowflake border, 46 cells in total
configure the cell borders for easy viewing, ie with a 3 pt red lines
hide 12 columns beginning with the second from the left
fill in black cells matching the original design or the DIY version
unhide all 12 columns for the final repeat 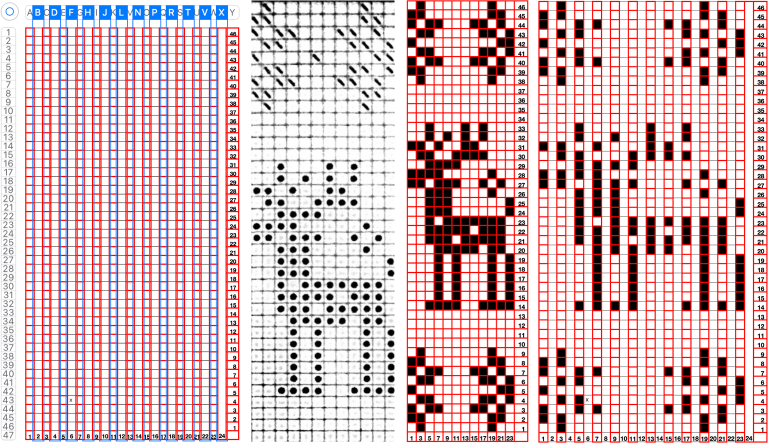 When converting the screen grab from a spreadsheet to png in Gimp, before scaling to final size, a first scaling may be required to make certain the result is divisible by the expected number of stitches and rows using the broken chain link, and then scaled again with closed chain link, the first png
 ![]() Working in Gimp or any paint program
Working in Gimp or any paint program
draw the “original” and save it, mine now has 2 added rows, one above and one below the deer, making it 12X48 pixels ![]() scale it to twice the original width
scale it to twice the original width ![]() configure the grid properties for contrast/easy viewing
configure the grid properties for contrast/easy viewing
fill in every other column with white using a straight line white pencil. To do so, select a pixel with the mouse, hold the shift and command keys down to draw the lines, and release the mouse to stop. The first white pixel may be placed within an easy-to-follow section of black ones and then the mouse may be held and moved up and down to complete each column. Save the result.
 Proof that it is always a good idea to draw the initial image in repeat before committing to color separations or any downloads and actual knitting:
  Two possible alternatives in adjusting the design to one’s preference are marked in 6X6 grids in ArahPaint to match markings on blank Brother factory blank cards:
the first removes a snowflake border and is reduced to 12X39 pixels, ![]() the second adds 4 rows at the top of the second snowflake border, 12X52
the second adds 4 rows at the top of the second snowflake border, 12X52 ![]() the number of rows between motif segments can be varied for planning the introduction of stripes in added colors
the number of rows between motif segments can be varied for planning the introduction of stripes in added colors 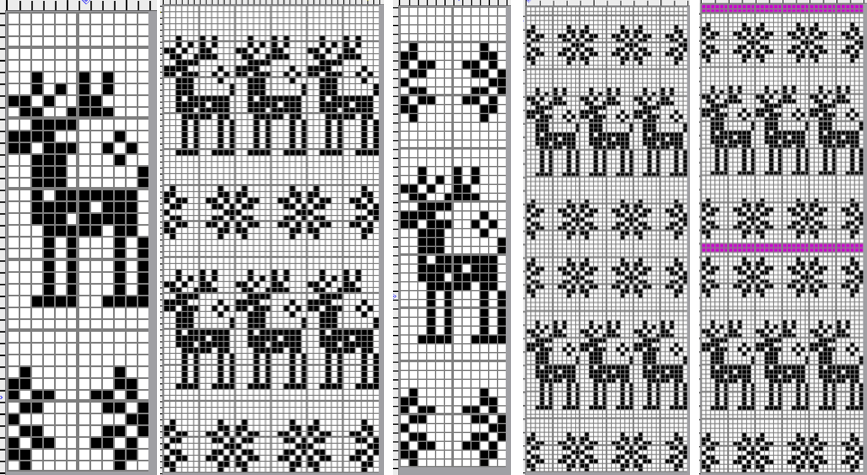 If only Gimp is available, I have not found a way to vary colors in grid borders in blocks other than to use guides, appearing as dotted blue lines.
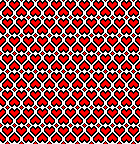
  A break from reindeer, teddy bears and hearts follows, perhaps for a baby gift or to save for Valentine’s Day. When clear horizontal borders are added to motifs, the half-drop repeats will produce mixed results.
 the pngs:
24X39![]() 24X78
24X78 ![]() 48X40
48X40 ![]() 24X60
24X60![]() 24X30
24X30![]()
48X30 ![]()
24X26
![]() 24X52
24X52 ![]()
48X26 ![]() Bell motif variations
Bell motif variations 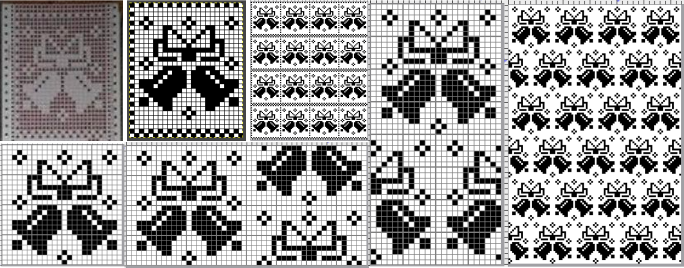
24X30![]() 24X48
24X48 ![]() 48X24
48X24 ![]() The last in this series, a nutcracker motif inspired by a larger scale cross stitch design, reduced by me to a workable 24 stitch MK design with varied borders and collaged small motifs in the background
The last in this series, a nutcracker motif inspired by a larger scale cross stitch design, reduced by me to a workable 24 stitch MK design with varied borders and collaged small motifs in the background 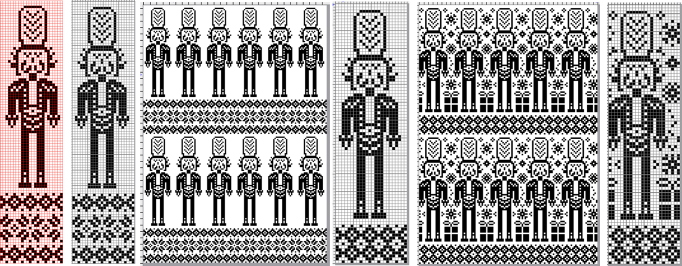 24X101
 ![]() 24X87
24X87 ![]() 24X87 with added background designs
24X87 with added background designs ![]() Considerations in choosing a design are guided by its end use, tiling the repeats leaves fewer surprises in any actual knitting.
Considerations in choosing a design are guided by its end use, tiling the repeats leaves fewer surprises in any actual knitting.
This might appear in casual observation to be a “snowflake”.
The full 25X25 pixel version can be isolated, with matching fragments around the whole. Magenta lines indicate cropping points depending on end use if double stitches not immediately obvious or planned are to be eliminated. 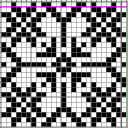
![]() A: the full design as a potential knit border
A: the full design as a potential knit border
B: trimmed a one-pixel width column on the right to 24X25 while retaining matching top and bottom rows ![]() C: trimmed the single top row as well to 24X24 for an all-over execution, drawn in repeat for an opportunity to evaluate whether the design as it now appears produces the initial imagined shapes and effect
C: trimmed the single top row as well to 24X24 for an all-over execution, drawn in repeat for an opportunity to evaluate whether the design as it now appears produces the initial imagined shapes and effect ![]()
 Then there is the optical effect change that happens with color invert, for which an easy test may be made during knitting by simply switching yarn color positions in the knit carriage sinker plate
24X24
![]()
 12/2024 additions beginning with punchcard suitable repeats
24 X24 designs with addition and subtractions of pixels on a base repeat, along with visualizing the difference in appearance resulting from color reverse![]()

![]()
![]()
 24X22
24X22 ![]()

 24X68
24X68 ![]()
 electronic additions
playing with color reverse
17X17![]()
![]()

 34X17
34X17![]() ArahPaint
ArahPaint ![]() 34X34
34X34![]()
 from mylar sheets 20X22
 ![]()
 22X34
22X34 ![]()
 26X26
26X26
![]()
 28X36
28X36 ![]()
 32X32
32X32![]()
![]()
 36X36
36X36![]()
 StitchWorld 3 #75, 32X34
![]()
 38X40
38X40![]()
 40X41
40X41![]()
![]() StitchWorld 2, 40X64
StitchWorld 2, 40X64 ![]()
 inspired by a weaving chart: diamond diagonals with interior flakes, 40X41
![]()
![]() Passap 163, 20X40
Passap 163, 20X40 ![]()
 Passap 162, 37X37
 ![]()
 from the Russian site: #5383, 24X255
![]()
 gone skiing #6669, 24X149
 ![]()
 #5697, 24X120
![]()
 Early new model electronic machines offered large scale designs as mylars or downloadable files. It is possible to work with the images of the files from the associated manuals or books.
 #18-2, 108X184
 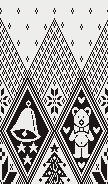 #18-1, 108X200
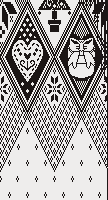 in repeat, 216X384
  #10, full working repeat 151X150
 ![]() Check tiled repeat for any rogue pixels or to choose specific segments
Check tiled repeat for any rogue pixels or to choose specific segments ![]() #14, 120X200
#14, 120X200 
 #22, 120X173, individual flakes can be isolated and combined in different ways

.
Swatches based on adapting random online published repeats
I still surf Pinterest daily and often encounter published punchcard repeats that catch my eye.
Many need some interpretation and editing for use in specific machine models.
The first inspiration: 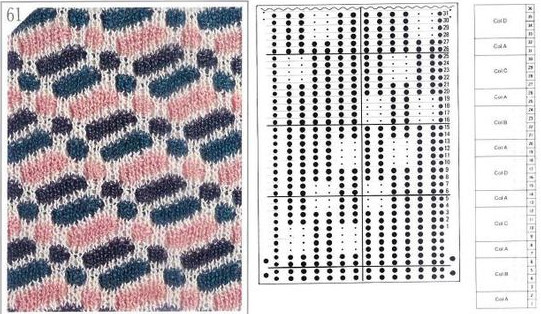 is knit using 4 colors, alternating 2 rows of a base color, then rotating color changes for 4 rows for each of 3 contrasting ones.
Counting up from the bottom of the illustration after the marks for the typical two all-punched rows, it would appear this is a Studio punchcard, but starting row 1 as visible outside the card reader can simply be changed for any other brand knitting machine.
The every other stitch configuration is for an every other needle repeat used in early machines such as the Juki.
A full reference volume  An illustration of the card use
  If using thicker yarns on a standard machine that grinds at the loosest tension, this configuration can retain the full design while knitting every other needle/EON.
The adaptation began using Mac Numbers, the repeat was isolated and traced, and the 12 blank columns were then hidden  producing a result scaled in indexed B/W mode to 12X36 pixels. The tiled design, checking alignments.
 ![]()
 The proof of concept
  Periodically tuck stitch designs that appear to break the usual rules for the stitch are discussed.
This design is intended for a push-button machine capable of 24 stitch repeats, uses symbols in the associated chart interpreted to mean tuck loops form for 2 rows and knit along with all other stitches every third row.  The working repeat is made up of 8 pixels in width, and 36 pixels in height.
![]()
 This next design is likely published for use with the Studio color changer, which is marked with letters for each color,
 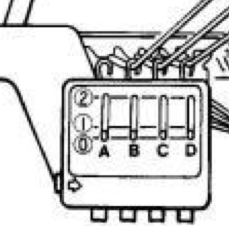 rather than with numbers as in Brother models.
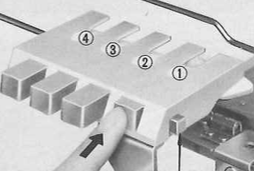
It is intended as a slip-stitch. The bottom swatch relies on color changes every 3 rows, which would need to be performed manually.
In the elongated version, colors are changed using the color changer, every 6 rows.  The design was first tested in thin yarns using the electronic 24X84 elongated PNG
 ![]() tested for alignment
tested for alignment  and displays interesting 3D variations, the purl side is remindful of shadow pleating
  Changing colors every odd number of rows is a tad fiddly.
The use of the color changer is not an option.
With the three yarns fed through the yarn masts, it became hard to keep them from twisting around each other. Ultimately, that problem was solved by hand-feeding one of the three colors with the cone on the floor, in front of the machine, as one would place yarns for weaving.
Brother knitters are familiar with yarn placements in the sinker plate.
Position A is for knitting when using only one color or for the ground color in fair isle patterning. There is a “gate”, which is closed, and the B color/contrast motif color is placed in that front position, knitting the yarn in needles preselected to needle position D on the next carriage pass.
It is tempting to leave the gate open when switching colors by hand frequently, and that may work for a while, providing tension is placed on the yarn manually to keep the yarn back. If at any point the yarn shifts forward (green arrow), with no needles in position D, stitches will be dropped.
Textured stitches can make for more complicated correction of errors or dropped stitches.
Taking the extra seconds to close the gate (red markings) after each color change avoids what became fondly known as “dropitis” in my classes. 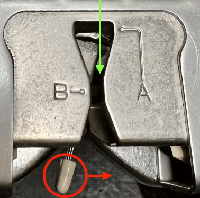 The proof of concept: two of the yarns used were acrylic, so steaming to reduce the curling of the swatch flattened the texture.
 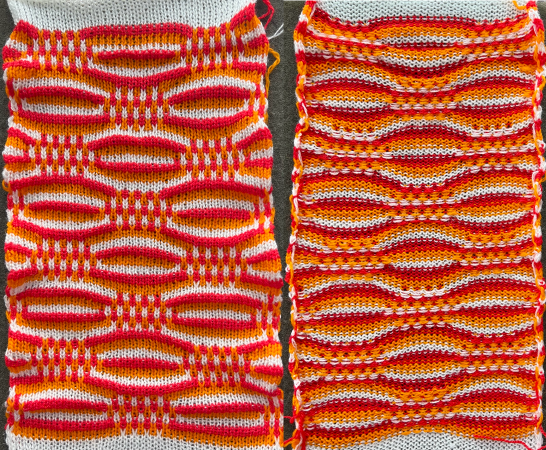 At one point Studio published a newsletter with cover art composed of simple drawings, such as this, for #143, which spiked my curiosity,
  and led to these explorations:
the pattern and symbols refer to tuck stitch, but technically the design is executed using short rows and transfer techniques.
The programmed repeat selects needles, making tracking actions easier.
End needle selection is canceled.
No cam buttons are in use.
The knit carriage is set to hold.
Stitches on the single needles selected on rows, 2, 12, 22, etc, are transferred onto the needle on their left. The empty needle is then pushed back to A position, out of work, creating a ladder.
The groups of 3 preselected needles are pushed out to hold, the D position, before continuing.
After every 2 rows knit, a stitch on the left is pushed back into work, until lastly, the empty needle is returned to the B position.
All needles will then knit for one row filling in the empty needle with a loop and a full knit stitch on the next pass where transfers begin again. 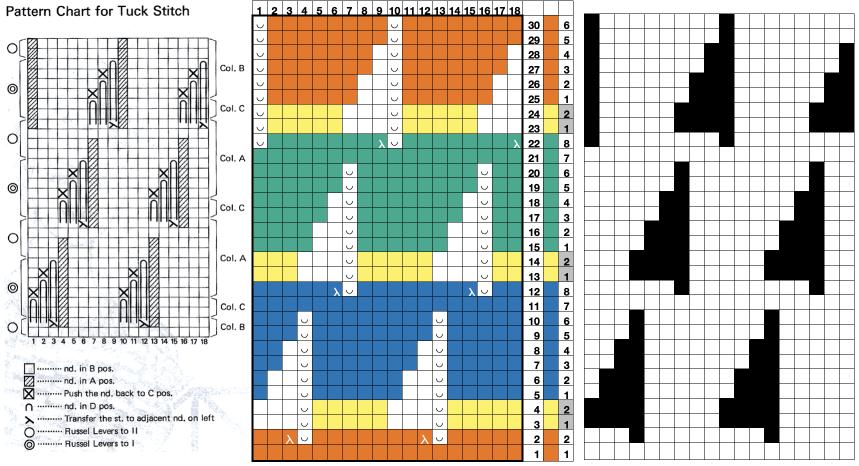 A brief summary of stitch manipulations
 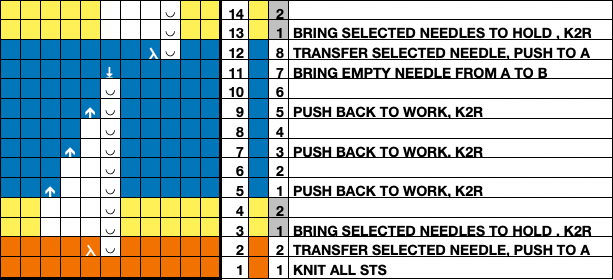 Images of the work in progress, a small claw weight single claw hung on edge stitch helps keep side edges equal in length:
preselected needles initially manually brought to hold position after the first carriage pass to the right
 after the second carriage pass to the left, with the first needle on the left in each group pushed back into work
  the second needle on the left in each group is returned to work
 one needle in each group remaining in hold pushed back into work
 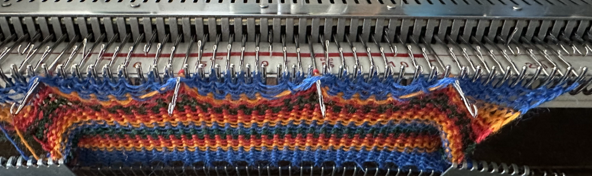 at this point the empty needles have been brought to the B position,
  single preselected needles have been transferred to the left, and a pass is made forming loops on the empty needles/ eyelets
  The original 18X30 repeat, some machine models and download software may require that it be mirrored horizontally,
 ![]() repeated to 44X30 with a planned distribution of plain stitches at sides, knit in 2/18 wool blends:
repeated to 44X30 with a planned distribution of plain stitches at sides, knit in 2/18 wool blends: 
![]()
 Converting random transfer lace designs poses different challenges, and since the time at which the reference post was published, there have been several Gimp updates.
Lace designs contain few black and white pixels and, at times are brand-specific. Multiple transfer lace in Studio models begins with 2 blank rows, while Brother begins with a design row, and ends with 2 blank rows. As given, the inspiration repeat is designed for Studio/Silver Reed.
When using any program, ie Gimp, ArahPaint, or even Dak, the original scanned or screengrabbed design needs to be aligned horizontally and vertically to window borders for accurate conversions.
Gimp:
Before any scaling of images, establish stitch and row counts. In this case, they are published as being 16 stitches X 96 rows.
The process for converting the same lace design using Gimp 2.10.34 on the Mac, beginning work in RGB mode:
1. drawing a straight line to the side of the cropped image reveals a slight lean to the right
2. using Image, Transform, and Arbitrary Rotation -0.30 improves the alignment 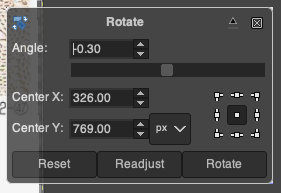 3. using the rectangle tool, crop to the borders of the published image.
In this instance, the cropped image measuring 199X938 pixels is at first scaled to multiples of 10 for both width and height, note the broken chain link
4. 160X960 pixels. 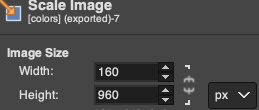 5. Image mode is changed to B/W indexed, and the image is scaled once more to 16X96, the size of the expected repeat, note the intact chain link
 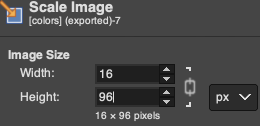 6. the final repeat, when studied, matches that from the results in the previous post
 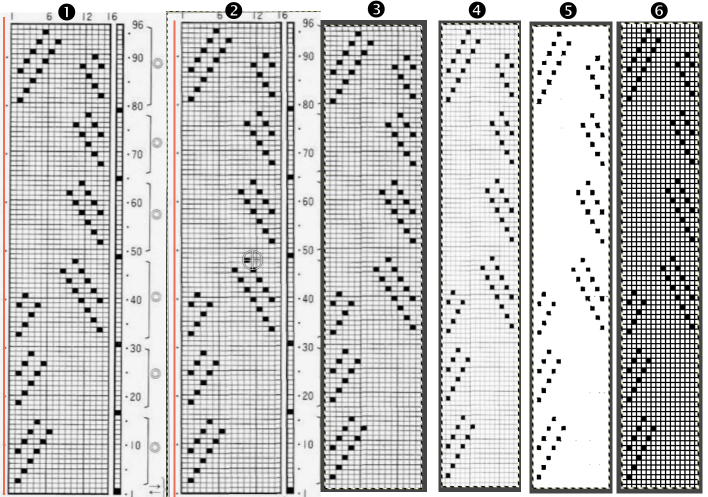 1: the result using ArahPaints tools, including its guess weave from grid, compared to
2: the Gimp final image and
3. borrowed from the previous post illustrating other considerations before actual knitting, 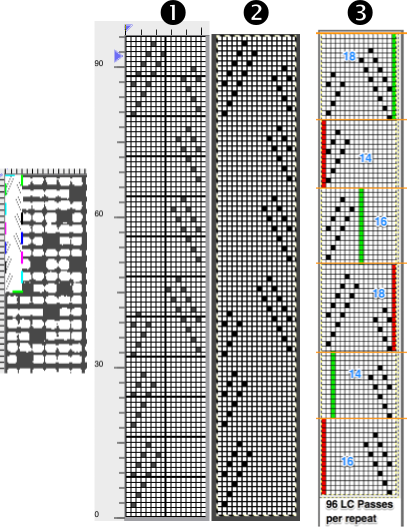
which include:
if using the repeat on Brother machines, the first 2 blank rows of the design are shifted to the top.
The 16-stitch design width makes it suitable only for electronic models.
The final PNG is actually downloaded as a fair isle pattern while maintaining the required needle selection for lace, and the knit carriage remains set to knit throughout while the lace carriage selects and transfers.
The machine, depending on the model, may by default mirror the result vertically, so the final PNG can be mirrored and saved as here, prior to knitting on the 930, ![]() or the mirror function in the machine may be used after programming.
or the mirror function in the machine may be used after programming.
I prefer to save my files in the orientation required for the actual knitting as a means to avoid confusion or errors.
Working in Arahpaint, rotating an image turns it on its center point. To rotate a layer, selection, or image, from the Image menu, choose Rotate. 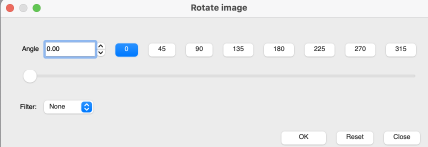 Selections can be made at offered angles, or specified degrees can be entered in the degree field, or select an area, move the pointer outside the bounding border, and then drag on any one of the small boxes at each corner while pressing the left mouse button.
 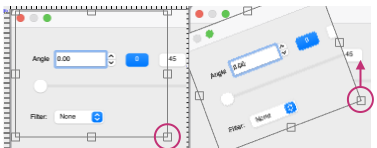 To align the image,
1. load the lace inspiration
2. choose Image, select Rotate Image, and draw a line that follows the orientation of the image. The color will be based automatically on the palette being used, and altering the pencil pixel size or color has no effect.
The program then rotates the image and will inform you of the rotation angle, and the drawn line becomes straight.
To confirm alignment, click the OK or Close button in the Rotate Image window.
3. use the rectangle tool to select the content for the full design repeat, and crop the aligned image to the selection. 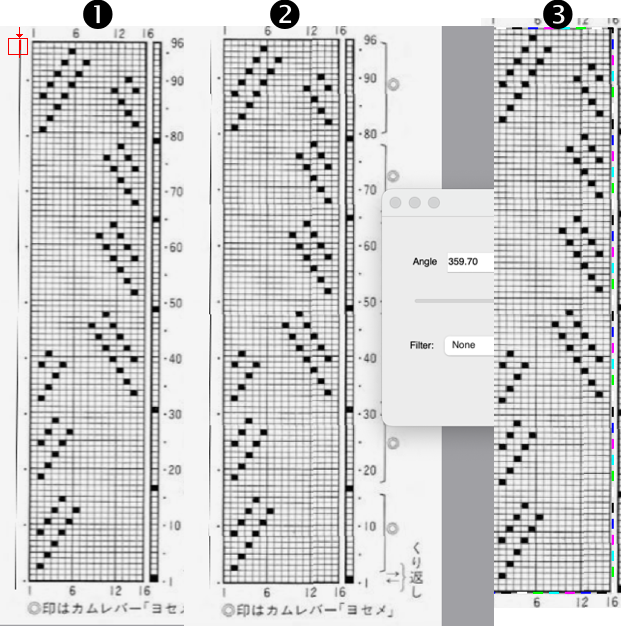 4.-9. continue with the steps using the tool Guess Weave from Grid, producing the same final PNG. In summary, they are:
4. crop the selected image to size
5. change the color palette to 8-bit, adjust background and foreground colors
6. reduce the number of colors to B/W, adjust the threshold, and set the number of colors to 2
7. the resulting image
8. use the guess weave from the grid tool, crop the bounded image to the selection, magnify the results to visually check the repeat, and save the PNG if satisfied
9. the final 16X96 pattern design repeat, matching the Gimp result. 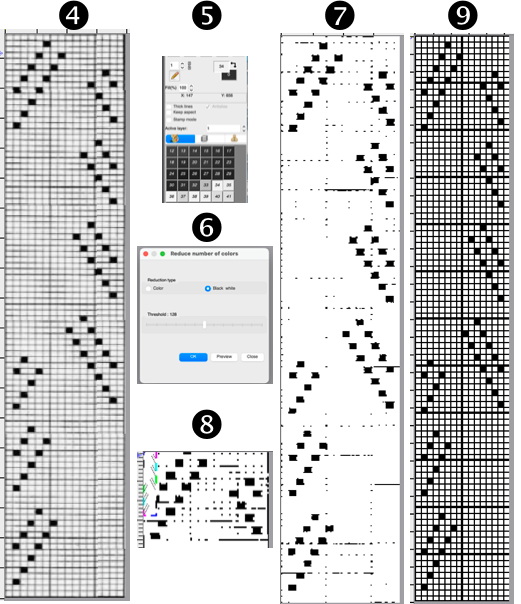 The associated swatch
 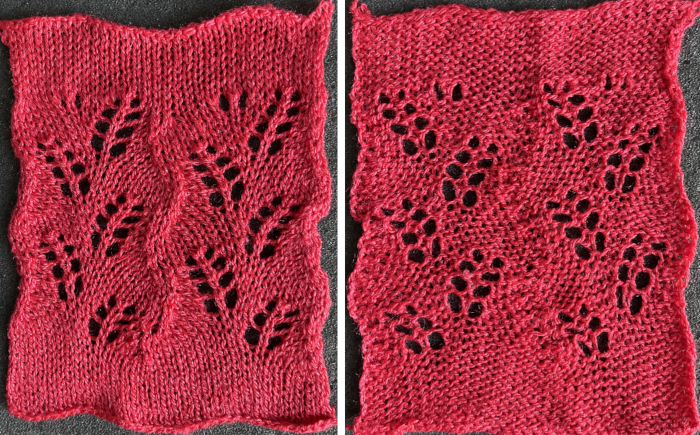 This Pinterest find is credited to Tatiana Demina, and is intended for use on Studio punchcard machine models.
  Studio machines are capable of transferring and knitting in single carriage passes. Studying the image of the card, it can be seen that there are no blank rows anywhere, and punched holes on alternate rows indicate transfers alternating first to the left, and then to the right.
The swatch was knit using the same technique described recently in the post Unconventional uses for punchcards 2: thread lace cards for “filet” mesh
The original 24X56 design 
![]() was lengthened X2 to, shown here also doubled in width to 48X112
was lengthened X2 to, shown here also doubled in width to 48X112 ![]() to match the direction of the transfers, the hint offered in the inspiration source can be followed down to indicate the first row of transfers need to be made to the right,
to match the direction of the transfers, the hint offered in the inspiration source can be followed down to indicate the first row of transfers need to be made to the right, 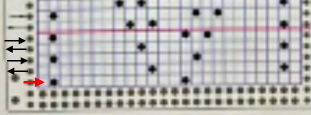 hence the knitting begins with the knit carriage on the left, the lace carriage on the right. As the LC moves to the left it preselects needles, and as it returns to the right it transfers them to the right.
The LC is removed from the knit bed.
The KC knits a single pass to the right and remains there.
The LC is returned to the knit bed on the left, preselects needles on its pass to the right, and transfers them to the left as it returns to that side, and is removed from the bed.
The KC knits one row to the left and stays there.
The LC is returned to the bed on the right and the process is repeated.
Preselection of needles is made by the LC toward the knit carriage, transfers are made away from it.
Whether the repeat needs to be mirrored again may depend on the machine model or the software used to download the file to it.
The direction of the first row of transfers provides the necessary clue, they need to be to the right. If to the left, mirror the pattern horizontally and begin again.
The swatch was knit in a wool-rayon blend, the results point to the difference in appearance and gauge with a change in color and type of yarn used when compared to the inspiration image 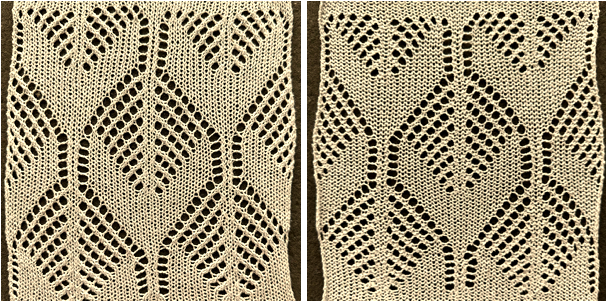 The context for this can be found in To mesh or not to mesh 8: more Numbers meet Gimp
 the 60X74 png
  and the proof of concept
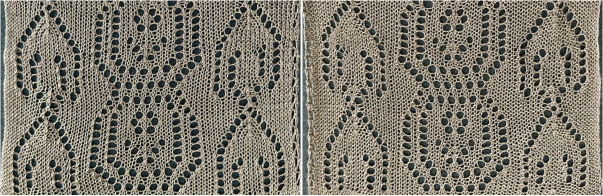
Gimp 4, pattern fill, dithered portraits, and more.
The latest version of Gimp for Mac includes many small changes which come with no announcements and take a bit of sorting out to recognize or problem-solve.
There are good collections of Youtube videos intended for use on much larger files, with fewer color restrictions than images used for knitting.
A dock is a container that holds a collection of dialogs.
I work in single-window mode and had an issue a few times recently with the tool dock and dialogue disappearing from the left.
The method that worked for me:
on a Mac, select the link to the Preferences/Settings window found in the GIMP application menu, next to the Apple menu. 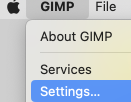 Scroll down in the left pane until you see the Windows Management entry. Click on it to open the relevant settings pane. Look for the giant button labeled Reset Saved Window Positions to Default Values, seen on the bottom right.
  Click on it, and GIMP will pop up a small notification box letting you know that the save will go into effect the next time GIMP loads.
Click OK there, and click OK again in the main Settings window.
Close GIMP and reload it, and familiar settings should be back.
To prevent a reoccurrence of the issue, it is possible to lock the associated tab, permanently fixing the dialogue. To do so, click on the small shape next to the Tool Options Menu text on the top right, then select Lock Tab to Dock. 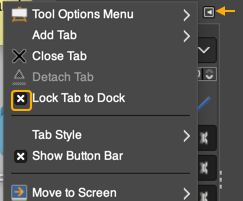 Tool icons are also changed at times, leading to puzzlement when steps used in the past do not work. An example,
 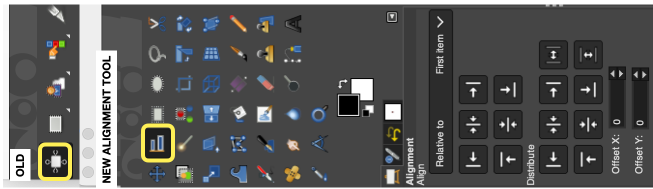 The layers menu no longer offers the difference mode used previously in custom color separations.
From the manual: “If you need to stay compatible with older GIMP versions or you need to use the legacy layer modes for other reasons, look for the icon to the right of the layer modes selection.
This drop-down menu will let you choose between Default and Legacy. If you choose the latter, the layer modes list will only show the legacy layer modes and all modes will have “(legacy)” behind their name (the selected mode will use the short version (l). ”
To make the dialog available:  click on Legacy to switch mode selections.
 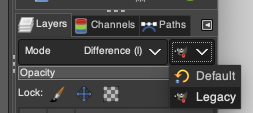 My posts are at times generated in response to questions I have received through forums or direct contact via my blog, but most often by my exploring whatever rabbit hole attracts my attention for a period of time before leaping into the next.
A quick way to fill with a design/ drawing in repeat is to choose and open an image, ie this rose, indexed B/W 28X30 pixels ![]() Magnify ie to 800X, go to Edit, and Copy Visible to save it to the clipboard as long as the program is open
Magnify ie to 800X, go to Edit, and Copy Visible to save it to the clipboard as long as the program is open
Choose File, New, in size that is a multiple of the original ie 84X90.
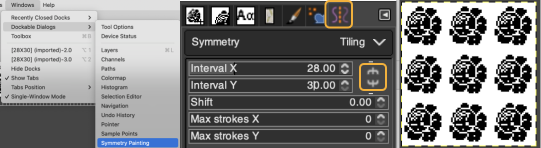
Select the brush tool  In the Windows menu choose Dockable Dialogues and select Symmetry Painting, then Tiling.
After entering the desired values, as you move onto the canvas, a brush icon and crosshair will appear, along with a square bordered with a dotted edge representing the clipboard brush in full size,  place it touching the left upper corner for a straightforward tiled repeat, an alternative to the familiar method using Filter, Map, Tile. Undo and repeat if needed.
 For a brick repeat
 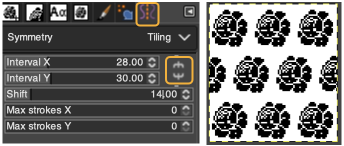 For easy and quick drawing in any repeat configuration including random, I recommend using ArahPaint.
For other tiling repeats, I have found Gimp offset limiting, offering this as an alternative method for, in this case, a half-drop design.
Work in matching magnifications as steps are advanced.
Begin with the rose, use filter, map, and tile it to twice its height, 28X60 ![]() Open a new file, twice its height and width, 56X60 pixels.
Open a new file, twice its height and width, 56X60 pixels.
Using rulers as guides for the half drop, place a center vertical guide at 28, horizontal guides at 15, and 45  click on the 28X60 selection at the top of the work window, copy and paste it on the file marked with guides first on the left side, click on the rectangle tool to fix the layer
paste it again on the right, placing a full rose in the center square outlined in the column,
paste again and move the selection above or below to fill in the empty third of the column
select the rectangle tool again to fix the layer, save the 56X60 file,  filter, map, and tile again to test the alignment ie here, 168X80
 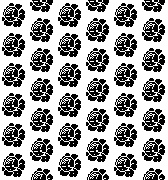 the icons selections at the top of the work windows change as steps are completed
  A visual summary of the 28X60 image placements
  A pattern is a small image that fills areas by placing copies side by side, while a brush is used for painting.
In drafting A collection of geometric design blocks built with squares, rectangles, and lines and considering optical design development, Gimp fill with pattern gained my focus once more.
Pattern fill was discussed in Gimp update for Mac 2
In developing pattern-fill libraries, and saving them, using larger pixel group pngs rather than the smallest repeat needed makes identifying them easier.
These suggestions are for drafts on 8X8 pixel grids.
They may be used to pattern fill from the clipboard while the program is open, or exported as .pat files, adding them to a “my pattern” folder through program settings, where they will be available after Gimp is quit and reopened.
Always tile/draw-in-repeats to check alignment prior to saving.
Color-reversed versions are also useful.
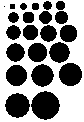
Once the basics are tested, one may begin to move towards shapes and more complex repeats, particularly if using electronic machines.  A library of circles, some in dimension used in developing truchet tiles, drawn using the built-in Gimp circle brush, from 5 to 24 and 28 pixels in size.
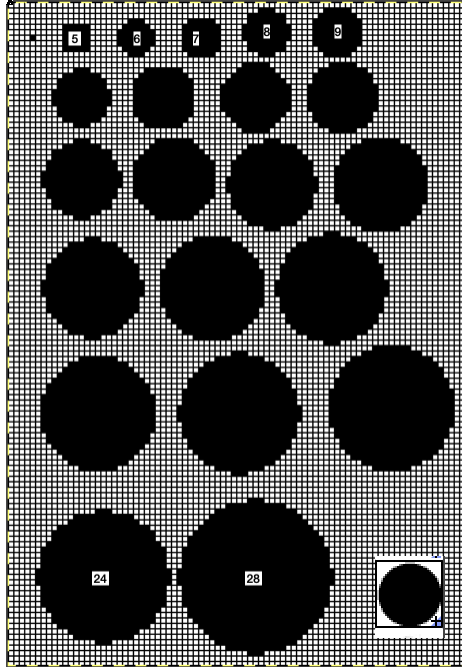
 Developing dot designs merit a separate thread as well as more on symmetry painting.
The patterns may be saved as color or black-and-white files.
Passap users should know even though they may see this icon from some old company-shared files along with their own .cut ones,  they are not compatible with Gimp software or any other outside the DAK universe that I know of, where they were an earlier format later replaced by the stp format.
There are always many ways to approach DIY, staggered lines of equal size with alternate color starting points can fill in spaces between each other.
Gimp has offset and symmetry drawing functions.
As a long-time repeat builder, if working in Gimp alone, I prefer working with multiple images open to using layers, and visually making the drops or shifts in the repeats manually by copying and pasting on progressive-size canvases.
Starting out with colored squares in RGB mode allows for filling in each color with multiple different BW patterns, for these samples I am using only 2 linear pattern fills, beginning with a 40X40 design ![]()
![]() tiled X5
tiled X5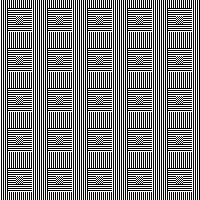 in brick repeat
 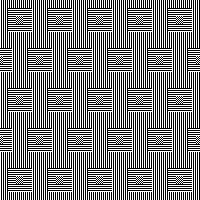 and in half drop
 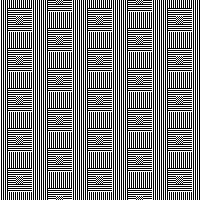 Introducing other shapes, 16X16

![]()
 brick configuration, 32X32
![]()
 half drop, 32X16
 ![]()
 Keeping that black outline, but still rendered in B/W
![]()
 Eliminating the outline, retaining a quarter circle, 16X16
![]()
![]()
![]()
![]()
 Using mirroring, and cropping the repeat using several canvases, eliminating double lines in the process, 30X30.
 ![]()
 The maximum size in width for large items in a single piece is generally between 180 and 200 stitches on 5 mm and 4.5 mm respectively.
Gimp comes with many built-in assorted patterns which can serve as a starting point. Here a 160X160 canvas is filled with a Gimp pattern, planning a 20 stitch border on all sides.  Convert image mode to greyscale,
  using Colors/Curves adjust values to an input of 47, and an output of 203,
 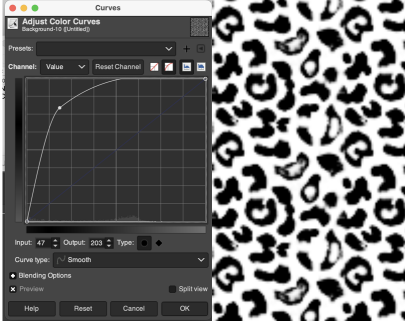 and if planning to knit the piece in only 2 colors, convert the result once more to indexed B/W mode
  To add any desired border, open a new file, in this case, 200 by 200, working in RGB mode, and fill it with any color other than black.
Copy and paste the image above onto it, it will be automatically centered  Choosing another built-in pattern, the red border is pattern filled
  To eliminate the yellow, use fuzzy select by color, and check that the bucket fill tool is set to fill with the background or foreground color again.
Press the shift key, and replace the yellow with white.
Convert mode to indexed B/W once more, and export as png.
 If desired, using a grid view and pencil tool, additional black borders can be added.
The shift command keys on the Mac used in conjunction with the pencil tool help render straight pencil lines.  Any of the larger files developed as tiled designs can be cropped to different dimensions depending on preference and end-use.
Decades ago, before software design aids, there was a knitting challenge circling around to include hidden language or undesirable language in a not necessarily easy-to-read format in knitting, beginning with hand-scripted text, which was then mirrored in width and height.
This was my version of DBJ vertical design, with the photo rotated and repeated to visualize what the appearance might be on a larger piece.
 There are some really interesting examples of hiding messages in textiles throughout history and even books written on the topic, it is referred to as steganography, which means hidden writing.
When I was teaching there were often as many as 15-20 students knitting in the studio at the same time, and I felt a need for an expletive outside the less civilized 4 letter word that came to mind when multiple emergency yell shouting my name for help occurred at a single time.
Hints on using text: Gimp to create text for knitting
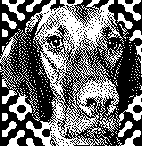
This image, rendered in Gimp with superimposed text and filled with patterns in both the text and in the background illustrates my answer to that problem.  I have often seen illustrations of artworks for sale online using portraits with superimposed all-over patterns.
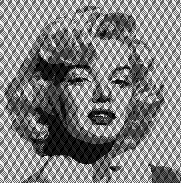
This concept for a possible knit began with an AI-generated foursome using Midjourney 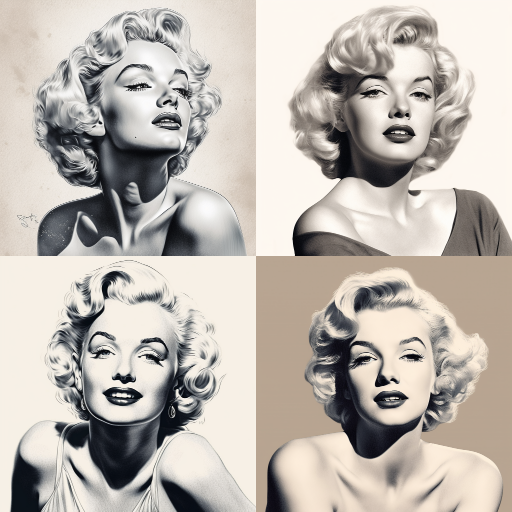 My chosen image, originally 700X700, with image mode changed from RGB to greyscale, indexed to 3 colors, scaled and trimmed to 181X183
![]() selecting a random brush for superimposed pattern, 30X40
selecting a random brush for superimposed pattern, 30X40 ![]() file, new, exact dimensions as portrait, white ground, 181X183, fill with pattern,
file, new, exact dimensions as portrait, white ground, 181X183, fill with pattern,  layer, transparency, color white to alpha,
  copy and paste on portrait file, fix layer, save .png
  Image ready for download using img2track
  For use on a 930, the design is broken down into multiple tracks by the software, each to be downloaded in sequence as a new pattern.
  Placing the portrait with white color to alpha on top of the BW pattern filled ground produces a slightly different result
 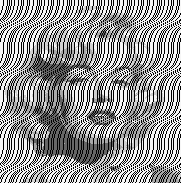 The same repeat, with a few pixel changes
 ![]() Using a different punchcard pattern repeat
Using a different punchcard pattern repeat ![]()
 with a different pattern fill, the portrait becomes more hidden
 ![]() A video on achieving a similar effect using Arahpaint
A video on achieving a similar effect using Arahpaint  If the goal is only to change the background, there are several options for that as well.
One way to remove a background containing varied shapes, and return to an often-used of my old friend Rocco,
the file, 150X154,  add an Alpha Channel
 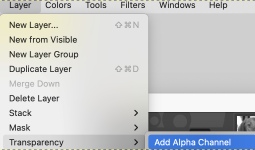 The Free Selection tool, or Lasso, allows for creating a selection by using a pointer.
Since GIMP-2.10.12, selection modes now, in 2.10.34, work differently.
Marching ants/dots come with a continuous line, meaning that the selection is not validated yet and that you can still change the selection shape (the mouse pointer comes with the Move icon) but keyboard commands may no longer work. When satisfied with the changes hit enter/ return key on Mac to validate the selection. ![]() Enlarge the image to make following and marking its outline easier.
Enlarge the image to make following and marking its outline easier.
Freehand selection can be made in small segments at a time connecting short lines, or long, continuous strokes.
First, create a starting point by clicking on your image.
A yellow dot will appear. As you move along the edge of the image, the colored dot reappears every time you stop, with the previous locations turning into empty circles.
When it is reached, if you click on the endpoint, it turns filled and is accompanied by a moving cross.  Use the return key to pause if needed.
Pressing and releasing the mouse pointer allows you to mix free-hand segments and polygonal segments.
If you click on the endpoint, dragging alters the shape.
When the endpoint is on top of the starting point, click to close the selection.
Double-clicking on the endpoint closes the selection with a straight line.
You can go outside the edge of the image display and come back in if you want to.
Escape cancels all continuous selection segments.
When the lasso selection is completed there will be visible dotted lines around the selection 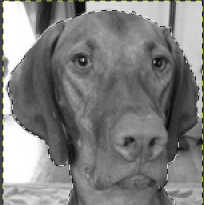 Color invert the result
 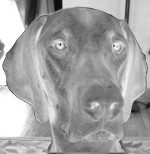 Open a new, white canvas of the same size and magnification, and copy and paste the color inverted one on it
 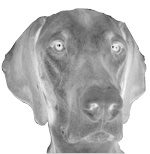 Use color invert once more, Rocco is now on a black ground
  Using the result in online dithering programs provides a different result than when dithering the full greyscale image. This result is from using https://29a.ch/ditherlicious/
 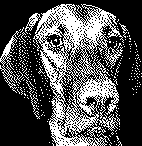 If the result is an instant favorite, and the goal is to fill the ground with a pattern, use the lasso tool again to eliminate the black more carefully than I did, repeat the steps to color invert, copy and paste on red,
 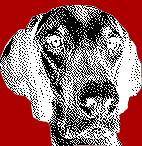 Color invert once more,
 Fill the background with a chosen pattern, convert image mode to indexed B/W, and export the resulting file

 If the image is to be knit using 3 (or more) colors per row, this is one of the myriad possible results using my favorite dithering option, https://app.dithermark.com.
  Returning to the greyscale image on the black ground, the latter can be bucket filled directly with any chosen pattern
 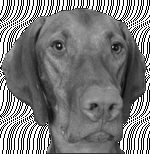 To superimpose a pattern on the whole image, fill a white canvas in the same dimensions with the pattern
 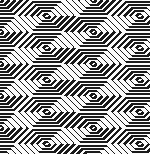 use Layer, transparency, color white to alpha
  Copy and paste the result on the original
 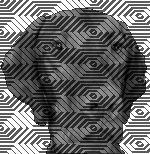 Full greyscale is not knittable.
What about using the AI portrait in B/W or 3-4 color knitting?
172X172 ditherlicious 2-color,
 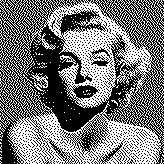 and dithermark using the built-in pattern selector for 4-color.
  The image will be elongated in actual knitting, this window from img2track on the left is set for 4 colors. Changing selection to 2 colors and opening the same image, it is converted to B/W
 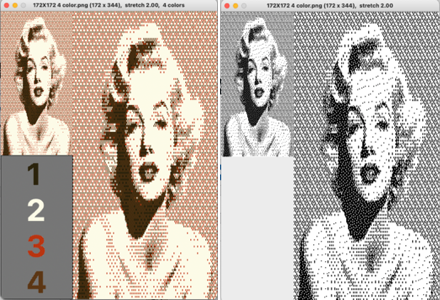 3-color with diagonal hatching
 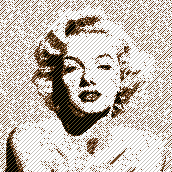 2-color
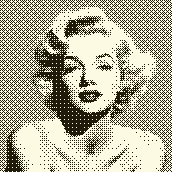 Though visually some images may appear as though more than 2 colors are in use, here is the comparison using img2track between opening the above on the left, and, on the right, after changing the image mode to B/W indexed using Gimp
 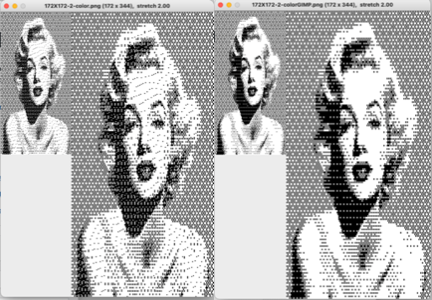 with added cross-hatching followed by image mode to B/W in Gimp simply to note visual differences
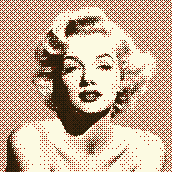
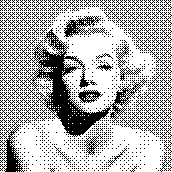
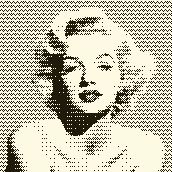
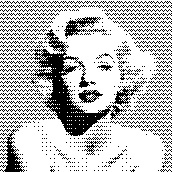 and a different cross-hatch, with a value balance change, in B/W mode
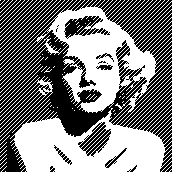
Blistered dbj 3
Names referring to the same knit fabric can vary between machine manuals for specific models and brands or references in books, magazines, and articles depending on the dates they were published.
My earlier share on the topic:
Blistered stitches dbj 1
Blistered DBJ 2 and technique variations on a single repeat, introduced some of the concepts involved.
Beginning with any random published repeat can offer the start of exploring a range of fabrics. This was a Pinterest punchcard share, markings indicate it was intended for Brother machines 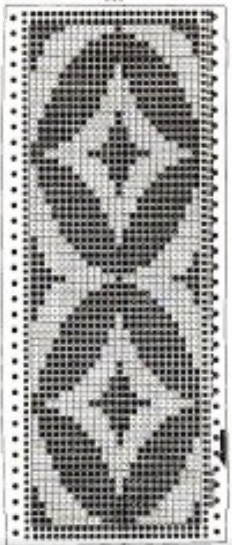 Methods for obtaining color separations for specific knits have been discussed in other posts.
Brother models can use the cam buttons to perform a function in one direction only, ie by using only one tuck or slip button, the machine will knit when the carriage reverses movement to the opposite side.
Developing specific color separations makes the files usable on other machine brands and models, makes it easier to return to specific rows in error corrections, and is my personal preference in test swatching and complete pieces.
Drawing the initial design in repeat provides a visualization of the resulting secondary shapes and the number of needles required for tiled variations in finished pieces based on gauge.
The first design is intended for use in every needle rib, with the knit carriage knitting in one direction, and using slip or even tuck in the opposite direction.
The 24X32 design extracted from the inspiration punchcard 
![]() A: the rendering scaling the design twice in length
A: the rendering scaling the design twice in length
B: making the choice to color invert it in planning slipped stitches on the larger number of white pixels
C: superimposing black lines on every other row beginning with row 2 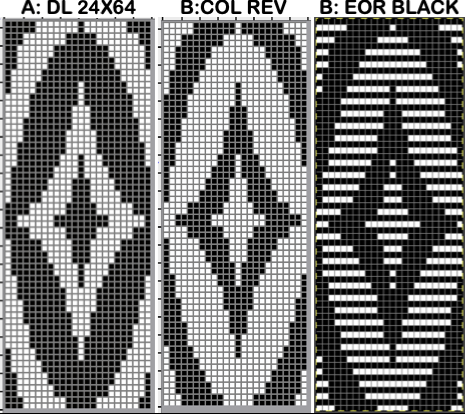 A quick review of the steps involved in working with Gimp:
begin with magnification for easy viewing, ie. 800X, view grid if preferred
the starting brush can be as small as this 2-pixel ![]() select it and save it to the clipboard by choosing copy visible, making it available to bucket fill images, or export the same design as a .pat file and save it in the appropriate settings folder for future use.
select it and save it to the clipboard by choosing copy visible, making it available to bucket fill images, or export the same design as a .pat file and save it in the appropriate settings folder for future use.  A: the original design repeat rendered in black and white
B: layer, transparency, color white to alpha
C: file, new, white ground, matching size, filled with a pattern of pairs of horizontal all-white pixel rows beginning with white on row one, followed by all-black pixel rows on row 2
D: copy B and paste it on C, and export the file as png 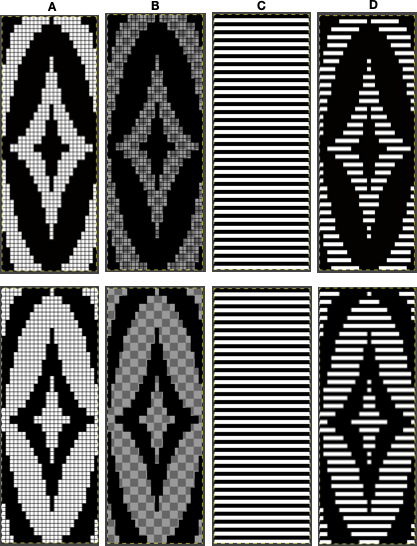 The chosen repeat may not be color reversed after programming it using the machine’s built-in electronic functions.
White pixels slip, stitches on the main bed in non-selected areas would not knit off for extended periods ie where red marks occur, and noticeable problems would develop quickly 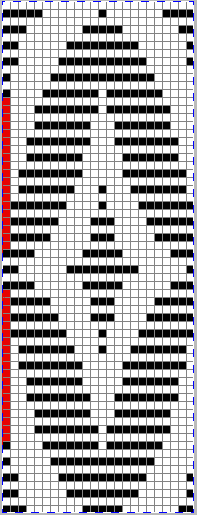 Beginning proofs of concept for this version, 24X64
 ![]() knit on 60 stitches using it drawn in repeat X3, 72X64, and programmed as a single motif
knit on 60 stitches using it drawn in repeat X3, 72X64, and programmed as a single motif  The result is a very subtle contrast lacey knit
 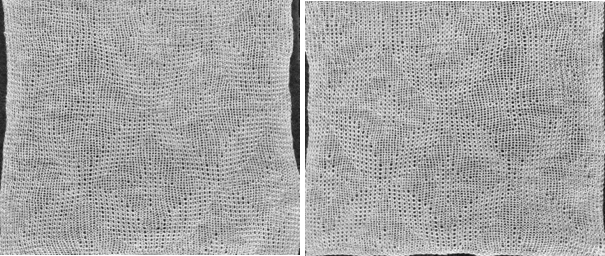 The yarn thickness and color were changed. The pattern begins using the slip setting and transitions to tuck, also in only one direction. Because the ribber is knitting every stitch between stitches on the top bed holding side-by-side loops down, tucking on multiple side-by-side needles can be performed, producing a wider, stretchy knit that also lies flat.
 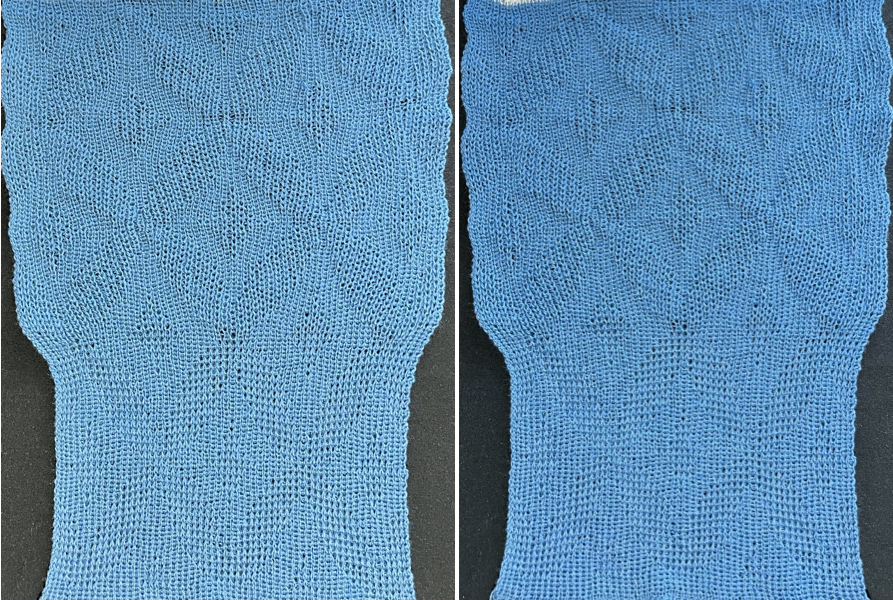 True blisters/pintucks generally knit rows on the top bed alone forming pockets that are eventually sealed by all knit rows.
Slip stitch settings are used.
The design is at first lengthened X5, then every 5th row is filled with black pixels or punched holes.
A begins in smaller groups of gathers, testing for any errors or problems, while B allows for deeper folds. 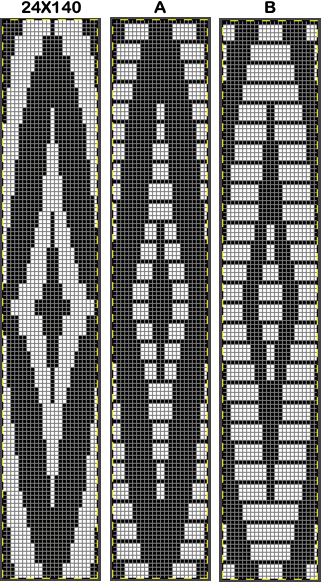 A:
A: ![]() the mark shows the stitches on the top bed begin to slip far too many rows
the mark shows the stitches on the top bed begin to slip far too many rows
due to using the color reverse option in the 930 before continuing to knit. 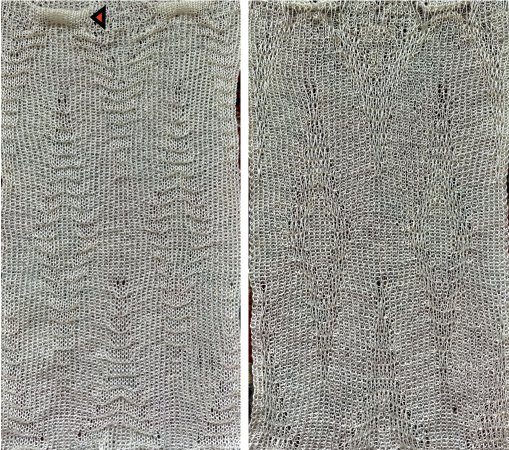 With a switch to the blue yarn, all-knit spaces between the pockets now begin to appear gathered. Slip stitch results in narrower knits, noticeable in the ruffled effects on every needle rib above the cast ons
 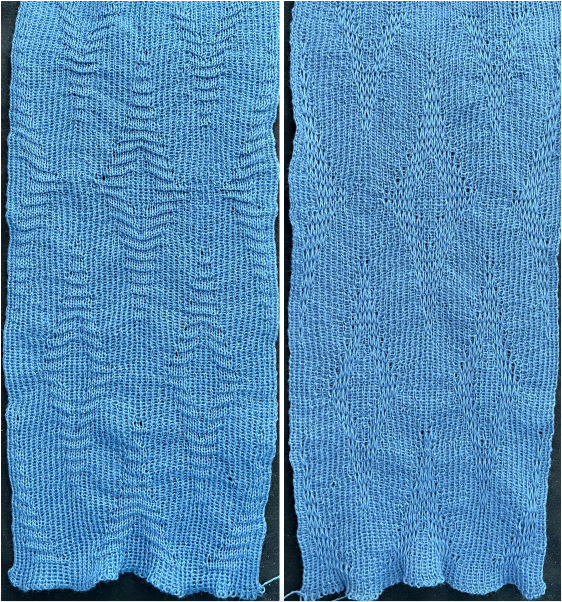 B:
B: ![]() the extra row of slipped stitches result in a far more textured knit
the extra row of slipped stitches result in a far more textured knit 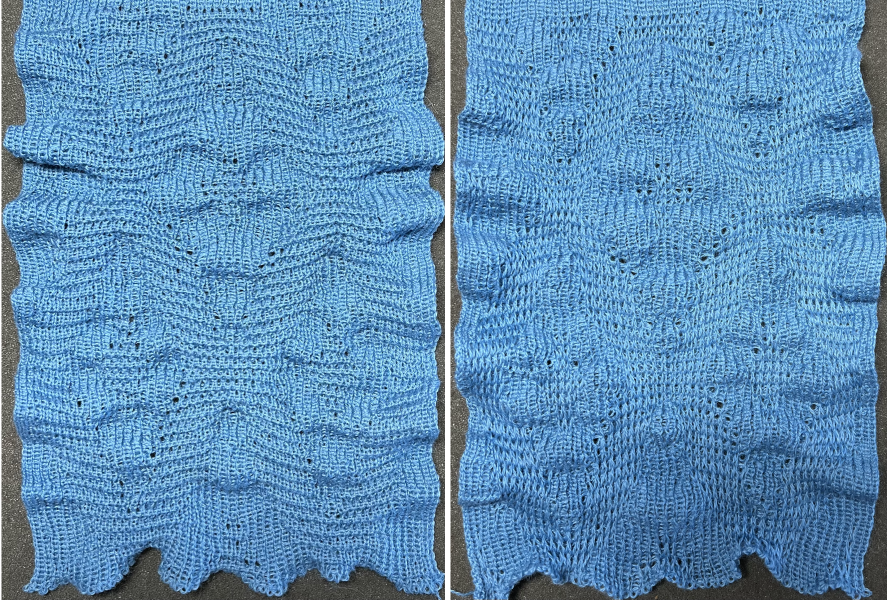 Developing other layouts for the same design, brick 24X128
 ![]()
 half drop 48X64
 ![]()
 Eliminating unwanted extra stitches from the original, modified to 24X28 pixels
![]() drawn in repeat to 144X168
drawn in repeat to 144X168  brick version 24X56
 ![]()
 half drop 48X28
 ![]()
 adding those all knit rows
 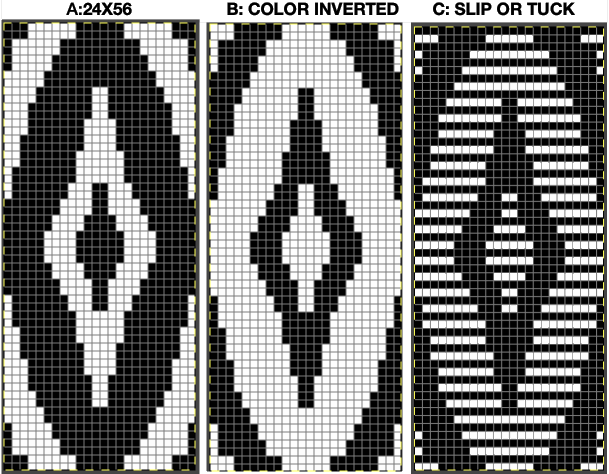 Viewing repeat alignments
 ![]()
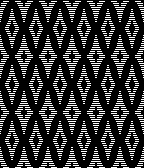 The 24X112 brick repeat suitable for punchcards, not tested,
![]()
 and the half drop, 48X56
 ![]()
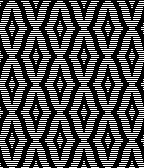 tested using a 10/2 cotton and lightly steamed and pressed. Knit on 80 stitches, it measures 17 inches in width and 11 in height.
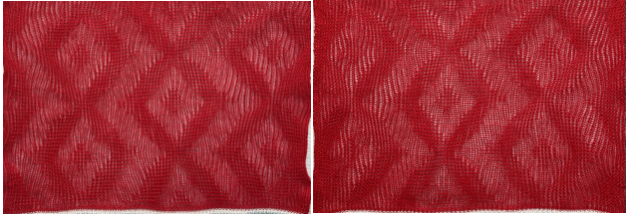 an attempt at a more detailed look
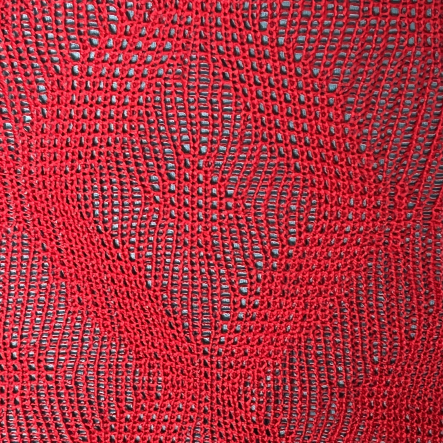
A collection of geometric design blocks built with squares, rectangles, and lines
I have grown fond of playing with ArahPaint’s functions: guess weave from grid, and drawing in repeat, and am constantly amused by the speed with which most design repeats and color separations can now be drafted when compared to the very first efforts in the days of anyone trying to use Excel spreadsheets to accomplish the same tasks.
Drafts designed for handweaving provide endless inspiration for knit design.
In conjunction with ArahPaint, Gimp remains a frequent go-to as well, along with Numbers for Mac for when spreadsheet tables meet charting or design needs.
The programs are free, there is no need to purchase expensive design programs in order to develop DIY motifs.
Developing tiled repeats suitable for multiple stitch types, including tuck , offered some repeats that began with geometric blocks built with squares, rectangles, and lines, some of which are suitable for punchcard knitting.
Many are included here again to serve as a cumulative collection of possible springboards for use as is or for developing more personal variations.
A reminder: the pngs below were saved as indexed, B/W files.
When downloaded, they may be converted automatically to RGB mode.
Prior to downloading any to machines, check their image mode, and if it is RGB, convert it back to B/W indexed. The pixel dimensions text for designs suitable for punchcard machines are highlighted in a different color.
More repeats are available in the post on Working with diagonal patterning in machine knitting
Larger pngs may be subdivided to change their appearance or alignment of specified numbers of cells.
To begin with, cells may be filled in any color, with mode and color changes to indexed BW if for electronic download
8X8 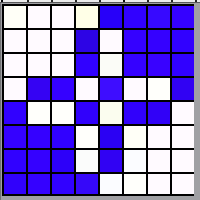 punchcard full repeat
 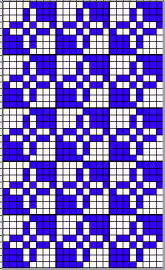 its png
![]() 12X12
12X12
![]()
 visualized drawn in repeat X12
  and modified using drawing X12 in random repeat for use in electronic machines
 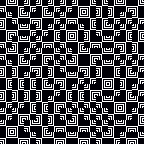 introducing dotted squares, another 12X12
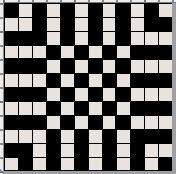
![]()
 19X19
19X19![]()
 18X18, shown tiled X 9 in both width and height
![]()
 and modified using random
  A Ravelry query prompted these designs
22×22
![]()
 22X30
22X30![]()
 32X32
32X32
![]()
 44X54
44X54 ![]()
 66X60
66X60

 The present series:
20X20![]()
25X23![]()
26X23![]()
35X35 ![]()
 68X68
68X68 
 A visit to a quilting blog led to these explorations, beginning with a 20X20 repeat, rotated in 4 directions to be combined in new 40X40 repeats for different movements.
 ![]()
![]()
![]()
![]() A first simple 40X40 grouping
A first simple 40X40 grouping 
![]() tiled X5 in width and height, also color reversed to visualize the result with the potential exchange of the yarn positions in the color-changing sequences
tiled X5 in width and height, also color reversed to visualize the result with the potential exchange of the yarn positions in the color-changing sequences 
 Dividing the repeat in half, color inverting the 20X20 segment on the right,
 ![]() combining it with the left half
combining it with the left half ![]()
 And with color inverted quarter segments
 ![]()
 In the following designs, the meeting points are slightly offset.
 ![]()
 and lastly, aiming for more of a diagonal
 ![]()
 Varying shapes
12X12 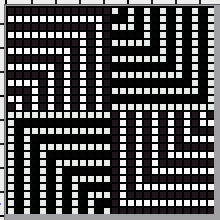
![]() drawn in repeat X13
drawn in repeat X13  26X26
26X26 ![]() drawn in repeat X6
drawn in repeat X6 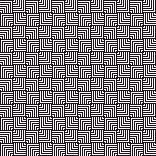 with color inverted quarters
 ![]() drawn in repeat X6
drawn in repeat X6 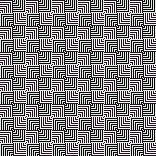 16X16
16X16![]() drawn in repeat X10
drawn in repeat X10  drawn in repeat selecting random
  24X24
24X24
![]()
 24X20
24X20
![]()
 24X24
24X24

![]()
 Developing related series, stop or continue, choose a preferred design anywhere along the way
47X47 ![]() 94X94 with segment rotations
94X94 with segment rotations  drawn in repeat X2
  a few rows and columns removed, 43X43
 ![]() 86X86
86X86
 a series beginning with 68X64 pixels


 A purposeful effort to create outlines, 22X24
 ![]()
 55X59
55X59 
 Alternating outline colors, 50X72

 Using pixelated lines to break up blocks
8X28 ![]()
![]()
 16X16
16X16 ![]() drawn in repeat X10
drawn in repeat X10  14X14
14X14![]() drawn in repeat X11
drawn in repeat X11 24X24
24X24![]()
 24X24 with quarter-turned segments
![]() drawn in repeat X7
drawn in repeat X7
 24X47
24X47 ![]()
 cropped to 24X40, for different symmetry
 ![]()
 Developing repeats evocative of samplers
48X48 ![]()
 64X64
64X64 
 An electronic repeat with shifting angles, 32X32
 ![]()
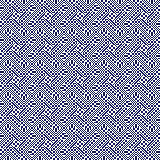 magnified 2X2 for a better view
 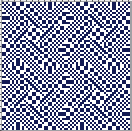 Color inverted quarter segments composing a slightly glitched pattern evocative of tartans, 128X128
 112X112
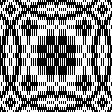
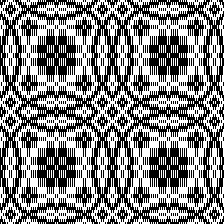 Tiny details, large repeat, 48X98
 ![]()
 34X140
 74X74
74X74 
 The start of a different potential family, 93X32
 ![]()
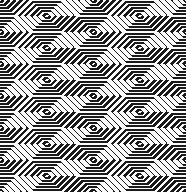 Introducing circles or parts of them to the library, 19X20
 ![]() tiledX10
tiledX10 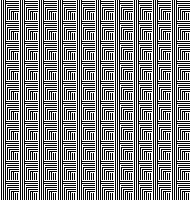 random variations
 36X40
36X40
![]()
trimmed and redrawn to 36X79 ![]()
Truchet tiling design inspiration 1
For many years my knitting of accessories and wearable pieces was my source of income, guided by what pricing the local market would bear, the limitations of mylar sheets or that of an early Passap interface to program repeats, and the amount of time required to complete each piece.
There is practicality and ease in playing with colors using small motifs single-bed, and varying materials and yarn plies allowed me to aim for limited edition designs without looking at identical finished products more than once or occasionally a few times.
At first, Ayab and then img2track changed the playing field in terms of downloading and programming designs.
Eventually, my knitting moved from production pieces for sale to creating samples for my blog almost exclusively.
I have had a long and continued interest in math-based designs, and knit a line of accessories using automata-inspired repeats, often limiting the repeats in size to ones that would align vertically without having to program multiple DBJ segments, reducing the possibility of programming errors in scarves that would often require around 1200 knit rows in length.
A 930 followed the 910, this, knit in July 2021, was my first try at using img2track to download multiple tracks.  There are many ways to yield math-based patterns, and nowadays online generators and reference sites abound, making it possible for nongeeks to use the resulting files to create knit suitable designs.
Some recent Truchet tile images shared on Instagram brought me back to exploring math-based images and what by default needs to be executed as larger-scale design motifs in knitting.
Sebastian Truchet was a Carmelite priest whose “Memoir sur les Combinasions” was published in 1704. It is a wealth of patterns built up from a simple motif, which you can see here
http://gallica.bnf.fr/ark:/12148/bpt6k3486m.image.f526.langFR and in which he discussed squares, half black, half white, split into triangles, with four possible orientations for each tile. He was also the inventor of the point system for indicating the sizes of typeface fonts.
His method of tiling by the combination of manipulating four-letter codes, A, B, C, and D, in rotations using triangular shapes inspired new variations in tilings.
Cyril Stanley Smith introduced two alternatives to the basic Truchet tile in 1987. One uses only diagonal lines to create maze-like designs where the coloring is removed and only the boundaries remain. The other, resulting in the designs produced in this post, uses quarter circles that may be filled or used as outlines and rotated to form the final shapes. ![]()
 Distinctions in naming the tiles are not often made. “Truchet” is the commonly used generic term.
Some articles on the tilings:
Generalizations of truchet tiles, Multiscale Truchet Patterns, The Tiling Patterns of Sebastien Truchet and the Topology of Structural Hierarchy, and More on tiles, fun with portraits.
Basic elements include contrasting triangles, quarter circles, and diagonal lines.
One may find code for programming DIY in various GitHub links. Python is far beyond my interest or skill, there are many ways to achieve the designs.
Spreadsheets are also programmable, but require the development of formulas.
Developing patterns from online sources, beginning with the Smith variation using quarter circles: the Wolfram site is a computing and math one well worth exploring, the files there are Computable Document Files, a document standard developed by Wolfram Research. They can be saved and opened using the Wolfram CDF Player, which is a standalone application and a Web browser plug-in provided for free.
To preview search results in a browser: https://demonstrations.wolfram.com/TruchetTiles/.
Ad blockers may interfere with proper previews in Safari but appears to not be an issue using Chrome as the browser.
Files cannot be saved from the preview results other than as screengrabs.
What is cdf
For permanent access to preferred CDFs:
CDF Wolfram player download is available for Mac and Windows, you will be asked to provide an email address.
After the player is installed and opened, click on the central option,  and search for your area of interest.
  Any demonstration may be saved for future use, most are customizable to varying degrees.
In my first effort, I used colors and left the black outlines. The second, simpler method of editing follows below it. 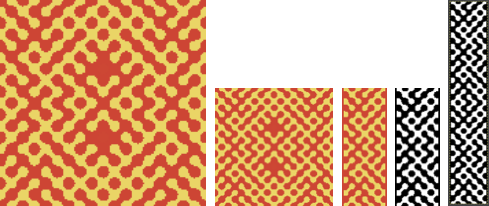 The swatch png, 58X150, includes 2 stitch vertical borders in the dark color. The machine was set to the built-in KRC color separation for DBJ. Some of the circular shapes have been already edited, but if I were to reuse the repeat, I would clean up more of the design shape edges
160 design rows were knit, measuring 7.5 inches by 20.5.
The dark color is a chenille from an unmarked cone with uncertain yardage. The space-dyed is an 8/2 rayon slub.
Tension was set at 5/5, the knit carriage on KCI, and the ribber using lili buttons for birdseye backing. KCII may be used as well if preferred, the side vertical edges will have a slightly different appearance. 
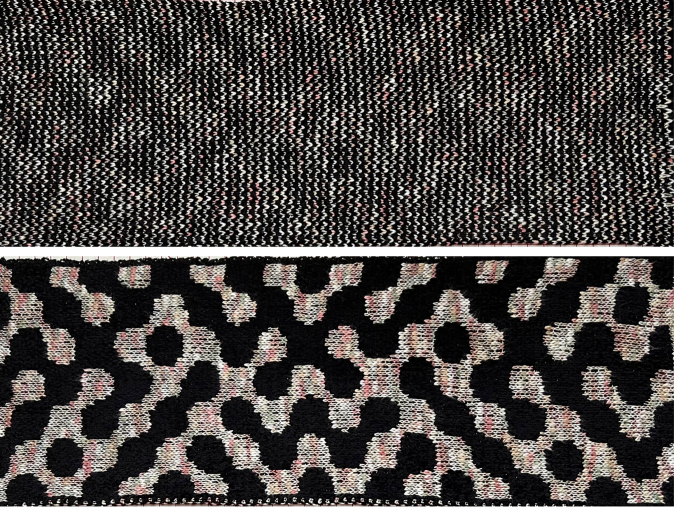 Developing an added repeat:
the working file in the cdf is a default 600 by 600 pixels. If the goal is to save a black-and-white downloadable png, the present plan is to fill in portions of the design with black while leaving others in white.
Checking tiling insures continuous designs at any point in the process.
It is possible to directly scale size in the cdf, but the shape outlines become broken in the automatic % reduction, so the filling-in process I suggest fails to be contained. 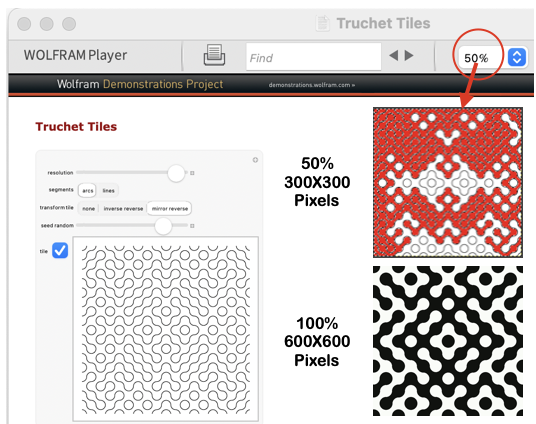 In this exercise, none of the other available parameters were changed. When the player is launched, click on the tile, it will be surrounded by an orange line,
  copy the image, and it can then be pasted directly into Gimp.
  Change the Image Mode to BW Indexed before proceeding further.
Using the fuzzy select tool  click on any area in the design, it will be surrounded by dotted lines
 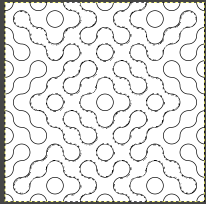 select bucket fill, to fill the selected area with black.
Edit, undo will revert to the previous steps in sequence at any point.
If satisfied, select the rectangle tool.
Clicking on the selected area 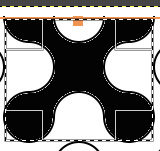 will allow its use for copying and pasting the outlined segment on a new canvas or cropping the area to the selection for saving while clicking anywhere in the Gimp work window fixes the results. The dotted lines disappear. Repeat the process on the remaining image.
 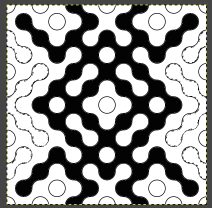 The processed file will measure 600X600 pixels.
Anyone working with large-scale images and reducing file size to make them available for knitting as single panels on a standard machine is familiar with the loss of detail and the need for cleanup of edges as incremental decreases in file size are attempted.
Magnifying any of these will help evaluate forms and scaling decisions for final repeats to be used in knit test swatches.
Downloading or copying and pasting them from here for personal use may change the image mode to RGB in the process, check mode and convert them to indexed BW if needed before any further use.
300X300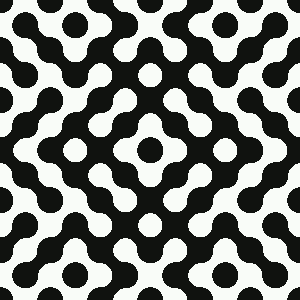 200X200 pixels
 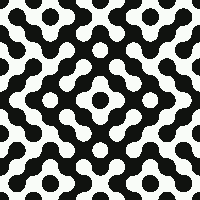 150X150 pixels
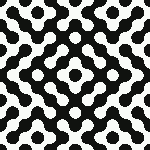
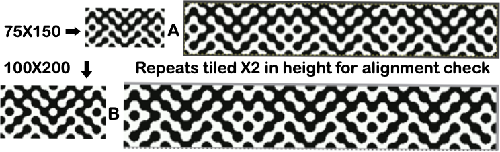 The proof of concept was knit using the 100X200 repeat without any pixel cleanup.
 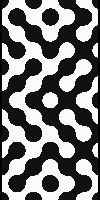 The blue yarn is a 2/20 wool, and the white is a 2/28 Italian yarn of unspecified fiber content from my stash. Both beds were set at 2/2. The KRC setting separated the colors so each color in each row knits only once, but it takes 2 passes to complete one row, so 100 design rows translate to 200 rows of knitting. In this instance, img2track used on the 930 broke up the design into 2 tracks, a 66-row first track, followed by a 134-row one.
Each track needed to be programmed sequentially.
The ribber was set for birdseye backing, which in this case results in an interesting shadowing of the pattern 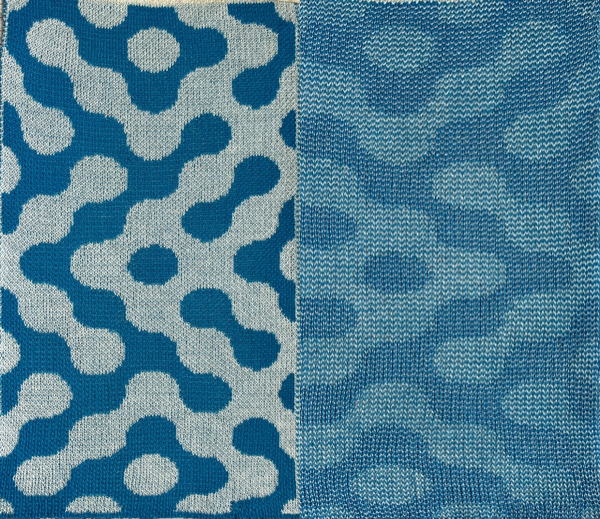 Comparing the two swatches:
 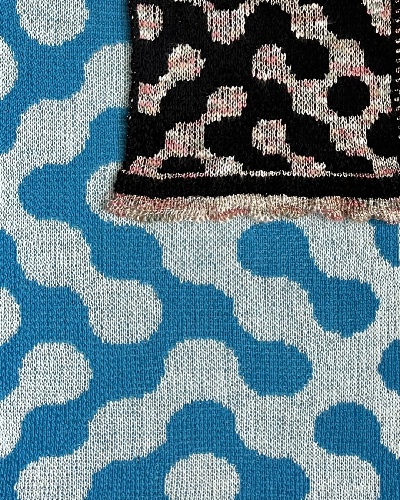 Variations in tiles made by changing variable view options
 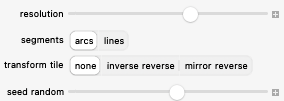 will still align when combined, easily producing a range of new designs at merging points. Use guides to help narrow down segments of interest, here they are placed at even 100-pixel intervals on two adjoining 600-pixel images.
 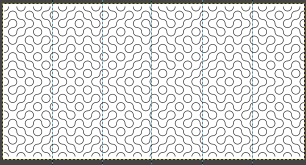 To remove a single guide after placing it, go to Edit, Undo Add the Horizontal or Vertical Guide. To remove all guides, go to View, and uncheck Show Guides.
And for those not averse to developing any larger motifs from scratch, the limitations of any geometric shape, when reduced to low-resolution knitting, mean the search must begin for what one determines to be a pleasing circular form. 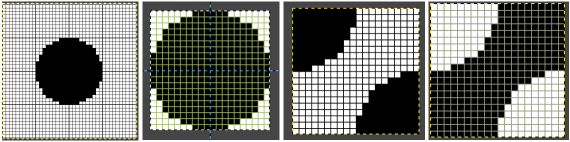 My original circle was placed on a 40X40 grid with outlines every 10 cells, the central circular 20X20 repeat was isolated and split into quarters, in turn generating these 2 tiles out of the 8 total required, also 20X20, with the second the color-reversed image of the first.
 ![]()
![]() A similar approach can be used in color to visualize the initial 8 tile repeats and their rotations in order to form new shapes. This technique may be useful in planning floor tile patterns but is cumbersome for developing knit designs.
A similar approach can be used in color to visualize the initial 8 tile repeats and their rotations in order to form new shapes. This technique may be useful in planning floor tile patterns but is cumbersome for developing knit designs. 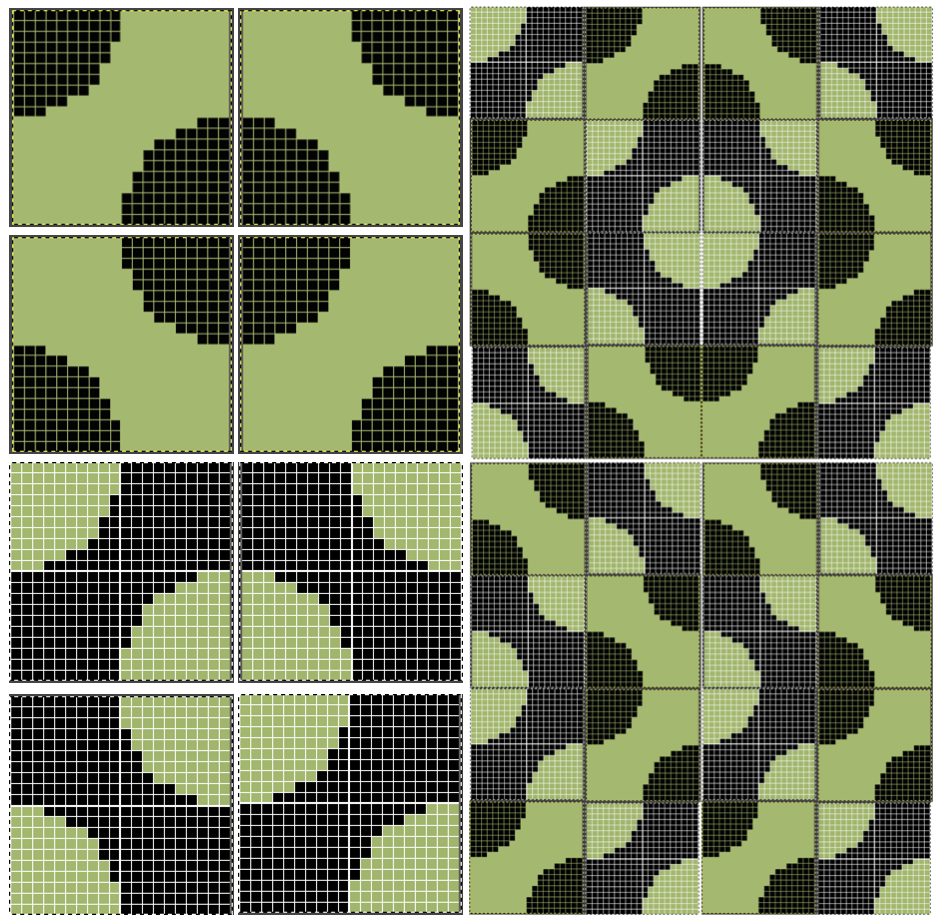 Facilitating and speeding up the process: in my post on using ArahPaint and Gimp in knit design, I briefly touched on the Drawing-in-repeat feature in Arah to produce random tiling.
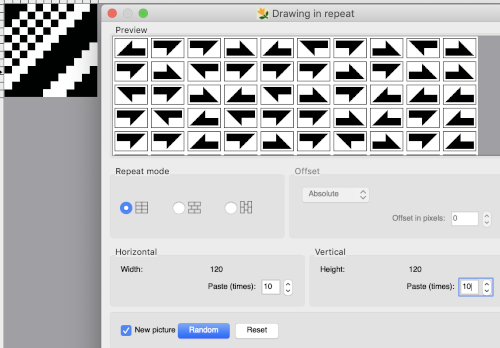 Thanks to the developer there now is a video, viewable on Instagram and Facebook, on how to use the feature for this type of tile, which allows for very quick DIY versions that can be trimmed as needed for knitting. This is my very first try, a how-to will follow in the next post.
 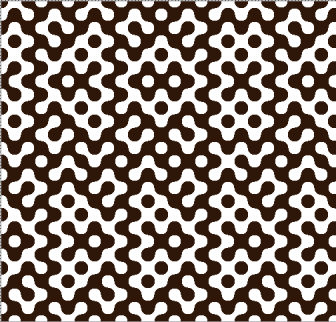 And the second, composed of triangular forms
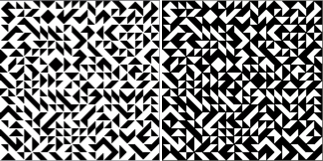 For spreadsheet users, this one generates the various tiles in Google Sheets and a related article.
Figurative designs in mosaic knitting
Designs may be developed to incorporate lines and grids by outlining motifs, filling in the results with grids or lines, and even color inverting the results.
From an early 2013 post:
Each number on the grids below represents 2 consecutive rows of knitting. The design may be elongated in the drawing of the final repeat itself prior to punching holes, marking mylar or pixels, or elongated using the built-in setting in the KM used, whether electronic or punchcard.
Color changes are required every 2 rows.
The grids:  After a motif has been separated, usually color 1 is represented in row 1, and all odd-numbered rows
color 2 is represented by row 2 and all even-numbered rows
long horizontal lines in mazes usually occur on odd-numbered rows
even-numbered rows typically have no more than 2 black squares marked side by side
on odd-numbered rows, the white cells slip
on even-numbered rows, the black cells slip
odd-numbered rows are knitted in the primary color (black cells)
even rows are knitted in the contrasting color (white squares)
Forming shapes and or text on the vertically symmetrical grid:
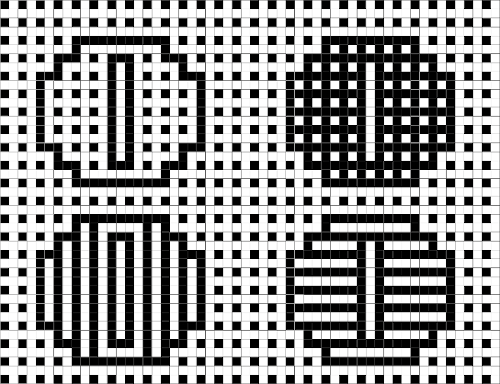
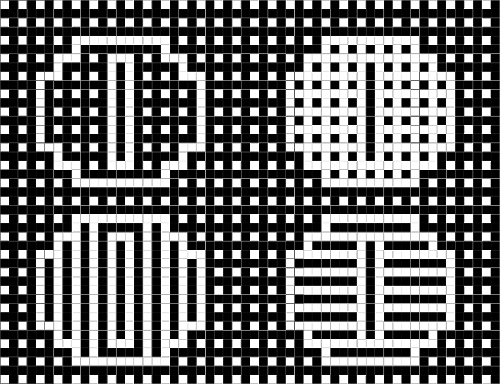 2023
2023
These single-bed knits are ideal when float control is an issue, or when one wishes to reduce the bulk of fair isle techniques. There are, however, geometric design restrictions and the resulting patterns may be too “busy” for some.
Separated designs interrupted by black or white lines rather than single-cell dots are knit using slip stitch on the single bed, or in every needle rib with the knit carriage set to slip or even tuck in both directions on the top bed, and the ribber set to knit in both directions, a very different fabric.
The basic procedures for drawing figurative repeats may be worked out using graph paper or image processing programs, depending on what tools are available.
Working in Gimp, generate a file in a basic grid, which in turn may be tiled to any dimensions needed. ![]()
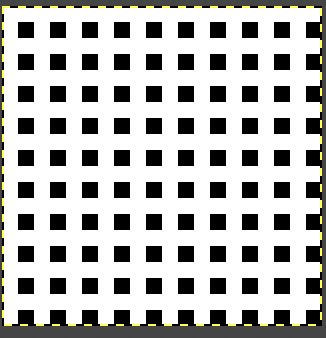

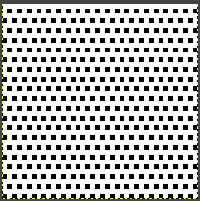 Using the bottom grid is problematic in creating figurative mosaics using the connect-the-dots technique. Attempted vertical lines do not connect cleanly.
  Cautious planning is required in executing figurative designs.
Clean-up will often result in solid color surrounding shapes or the addition of some short solid lines.
Doodling with blocks on both grids in a spreadsheet. 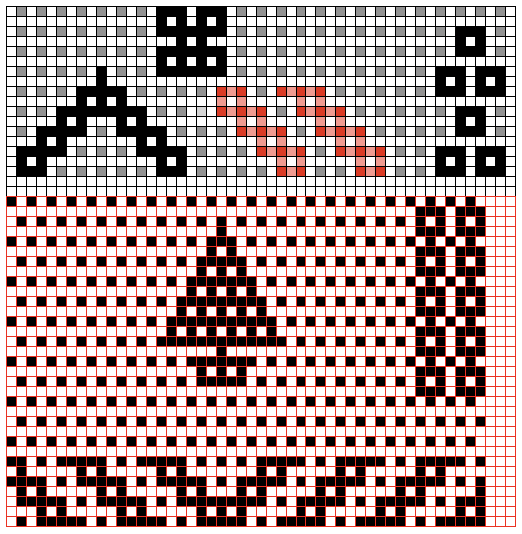 Text becomes more complicated if one seeks to emulate favorite fonts or to work on a small scale.
A spreadsheet using multiple colors may make the drawing easier to start with. By necessity, repeats will once more need to be large.
With practice, one develops favorite ways of reaching the chosen goal.  Large shapes may be superimposed on either dotted grid for final editing depending on what sort of border one wishes to add in designs for end-use in large pieces such as blankets.
  Figurative drawing occurs on rows marked with black pixels on the grid where black dots line up vertically.
White rows remain blank except where the black dots in the shape’s outline need to connect vertically.
After the outline for the motif is created, the filling-in of the shape is executed connecting dots once again.
By necessity, these shapes need to be large.
My first design is 68 stitches wide by 40 high. ![]()
 Processing the image is done on the same design. When color-separating Mosaics the design is not elongated.
Using the steps described in previous posts on a copy of the initial file: color invert, ![]()
 It is interesting to observe that the knitted result matches this image.
The file may begin as black and white indexed, but prior to adding colors the mode needs to be changed to RGB.
Add a third color beginning on every other row beginning on row 1,  using layer, transparency, and color to alpha, the third is removed, leaving black and white.
  The alpha file is copied and pasted on the original resulting in a knittable mosaic repeat that requires elongation X2.
Check that the file is in indexed BW mode prior to saving it for knitting, it will need to be elongated X2 if used as is. ![]()
 The above doubled in height, now 68 stitches wide by 140 high, may be knit as is.
 Those solid black areas are OK. On the corresponding design rows, needle selections on nearly every needle will take place, those needles will knit the color in use at the time.
The tuck setting is possible, the final appearance will be quite different. For my swatch, I used the slip setting.
Slip-stitch pieces tend to have vertically straight side edges, while tuck ones tend to have wavy ones.
The floats on the purl side are still only 2 stitches wide.
The all-knit areas are not reduced in height, so they ripple initially and became flattened with blocking in this case, but caused the top and bottom of the horizontally striped segment to curve.
Starting knitting using the light color as opposed to dark will color invert the design.
The blue yarn used here is wool and the yellow is acrylic.
The swatch was steamed and pressed.
The dark color is dominant. 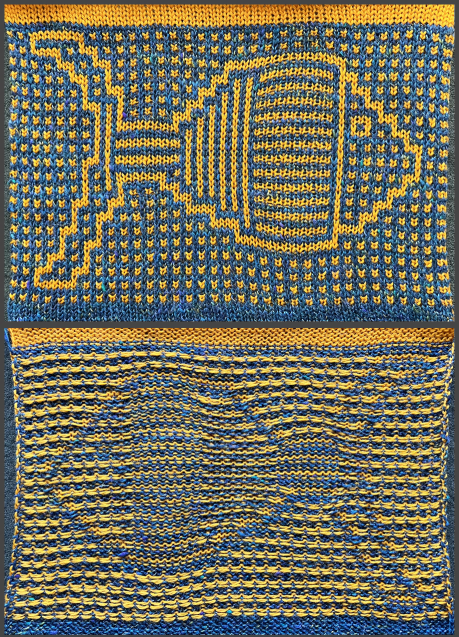 Visualizing the color inverted image using the photograph of the swatch rather than actually knitting it:
 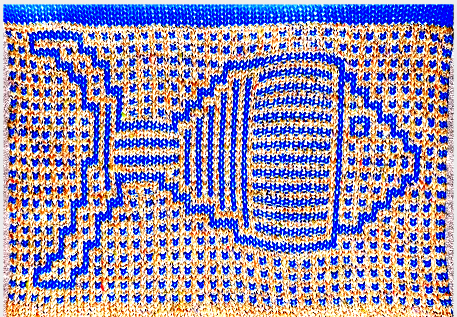 A 48X46 heart to play with for DIY
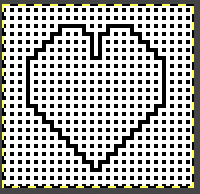
![]() Beginning in a spreadsheet followed by transitioning to Gimp can use a similar dot-to-dot design concept. It offers the opportunity to make adjustments before fixing on placement for the final black pixels over other colors. Moving away from dot to dot to “visually pleasant” does not necessarily work.
Beginning in a spreadsheet followed by transitioning to Gimp can use a similar dot-to-dot design concept. It offers the opportunity to make adjustments before fixing on placement for the final black pixels over other colors. Moving away from dot to dot to “visually pleasant” does not necessarily work.
The flower design chosen and committed to for the moment is 37X32, visualized on possible backgrounds, and placed on a final one drawn with straight diagonal lines in pattern, for the test knitting ![]()
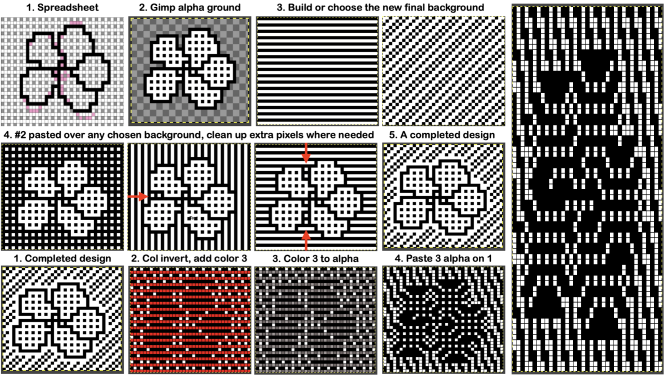 Aside from whether accurate tiling is possible for that final repeat, it has far too many white rows uninterrupted by black squares. As in any slip-stitch fabric, a stitch is held in every white cell or unpunched area location until a black cell or punched hole follows it, the result is very elongated single stitches on the knit side:
 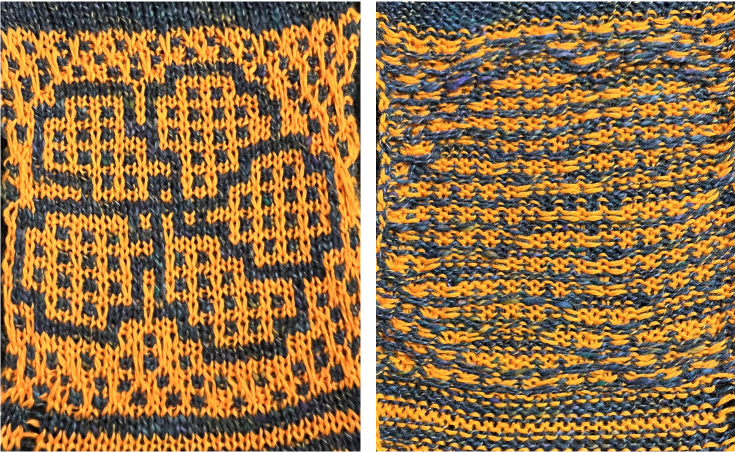 There is a limit as to how big a part of any final mosaic repeat can truly be freeform.
It helps to develop a library of personal grid variations, to be willing to observe some basic rules, and to have an affinity for the overall look of the results.
In terms of the basic grids, the horizontal stripes have already been shown in the fish to produce 2-row all-knit stripes in alternating colors where they are placed in the design.
The vertical stripes create this result when proofed, and it can be recognized in the png for the body of the fish  Developing a DIY background: I find it easier to work on such designs on a large table in Numbers, which allows for placing a variety of colors and in the same document more easily, and then converting the outcome to a BW indexed png in Gimp.
  The smallest isolated repeat, in this case, is a square, 20X20
![]()
 Make certain it tiles correctly before proceeding:
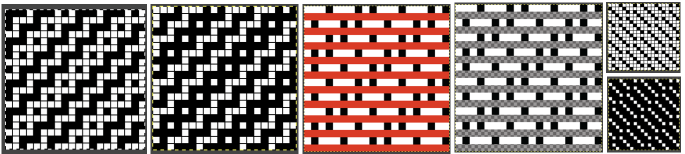 The final file doubled in length shows no areas where extended slip stitch rows might be an issue. This step is not necessary as one begins to trust the process.
  Returning to that flower, on the white-to-alpha ground, a 37X32 saved file, open it in Gimp.
Open a second file, using the background-repeat, and tile it X2 in both height and width to a matching 40X40 size.
Copy and paste the flower onto it in what appears to be a visually pleasing location, clean up the surrounds, and save the png. 
![]() Proceed with the now familiar steps:
Proceed with the now familiar steps:  The final repeat must be elongated X2, color inverting may provide a better sense of what cells knit or slip, and it may be used to knit the design.
  The working 40X80 repeat:
 ![]()
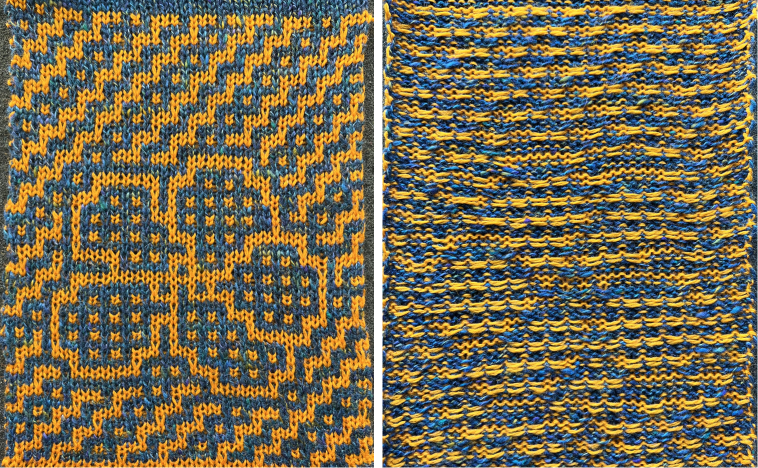 Once again, the completed swatch visually matches the original file, color inverted.
The latter provides a sense for guessing if the knit results are pleasing and it offers a way to explore different colorways or matching yarn colors.
Pursuing the dot-by-dot concept can lead to endless DIY designs. Playing with motif scale in Numbers: 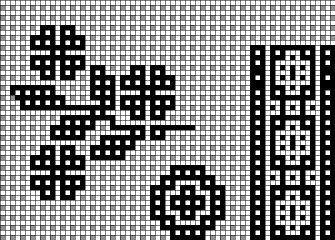 Isolating part of the design in Gimp: 42X44
 ![]() A variation using multiples on an 80X80 canvas.
A variation using multiples on an 80X80 canvas.  Loving that DIY background? To create a frame
1. choose a finished canvas size, ie 120X120, and fill it by tiling the DIY background
2. open a second file to, in this case, 80X80, in any color including white. I chose yellow as a way to place black border lines more easily
3. copy and paste the second file onto the first
4. add a solid color border at the inner and outer edges of the frame, outlining the shape at its center. 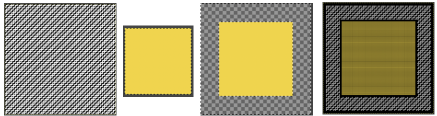 At this point, any image also 80X80 may be simply opened in Gimp, copied, and pasted over the yellow.
 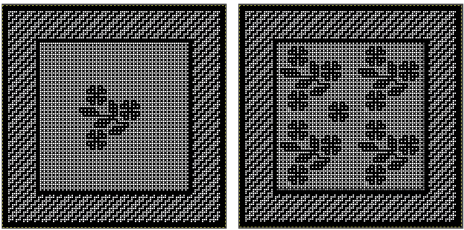 Files to play with: the frame with a transparent center
 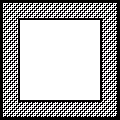 to be pasted in place on other graphic files,
  Here with a dot-to-dot center to draw on,
 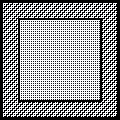 and the file with central flower motifs to use or edit further.
  The final choice then needs to be made as to how to use the final image.
One option is to separate the motif for use as a single bed 2 color slip stitch, and the second is to simply use the built-in KRC color separation in electronic machines to knit it as DBJ.
Motif definition requires large-scale designs limited by patience and imagination.
Autofill, command key and other shortcuts can help execute them more easily and quickly in spreadsheets as a first step.
This start of a hummingbird, inspired by a small segment of a Pinterest find, is already 54X101 pixels, ending my exploration of these knits for the moment. 
When editing or developing large images a series of guides may be useful. To configure them, see post Gimp update for Mac 2
May 2025, working in ArahPaint
a simplified motif, 47X53![]() brush
brush
![]() filled ground
filled ground![]() trimmed to 42X48
trimmed to 42X48![]() drawn in standard repeat
drawn in standard repeat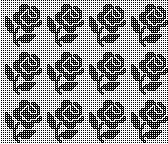 color inverted
![]() 42X48 striped with 8X2 brush for developing transparencies
42X48 striped with 8X2 brush for developing transparencies ![]() copied and pasted on color reversed, yellow color to alpha
copied and pasted on color reversed, yellow color to alpha![]() copied and pasted on the first trimmed image, brown color to alpha for the half height color separation, check that the number of colors is set to 2
copied and pasted on the first trimmed image, brown color to alpha for the half height color separation, check that the number of colors is set to 2 ![]() brick repeat, shifted by 24, 84X48
brick repeat, shifted by 24, 84X48 doubled in height, 84X96 for knitting in slip stitch with color changes every 2 rows
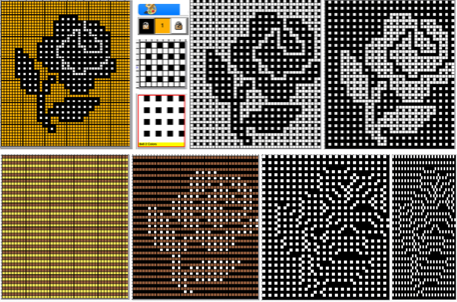 if in doubt, the matching result separating the desired repeat, half drop, shift by 24, 84X48
 ![]()
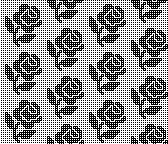
 the proof of concept
  for DIY 42X96 with shift of 21 pixels
 ![]()
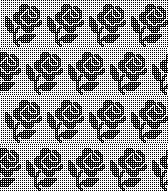 the untested final repeat, 42X192
![]()