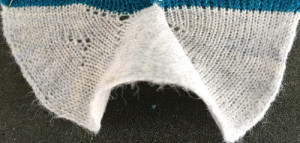
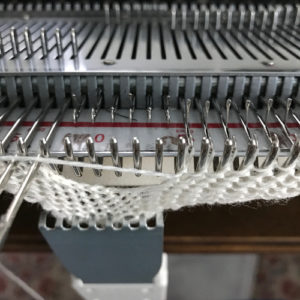
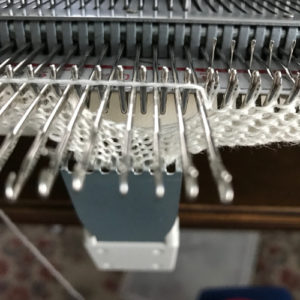
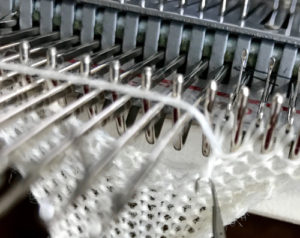
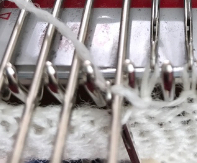
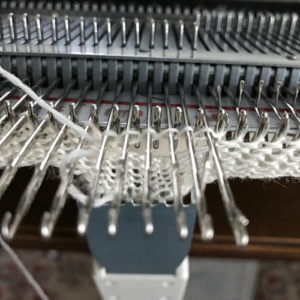
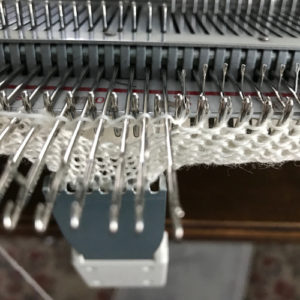
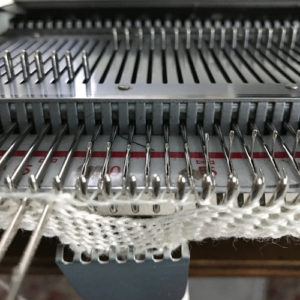
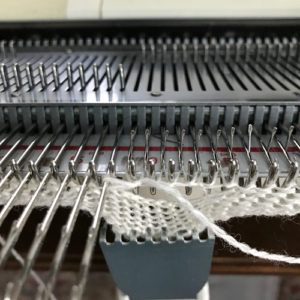
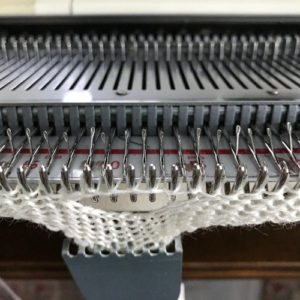
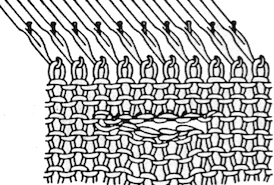
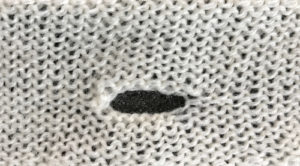
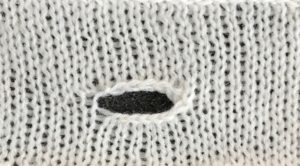
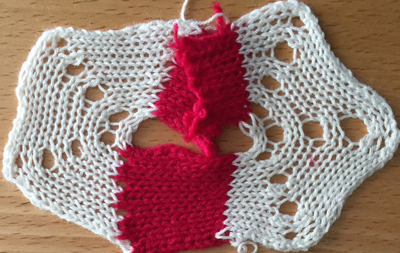
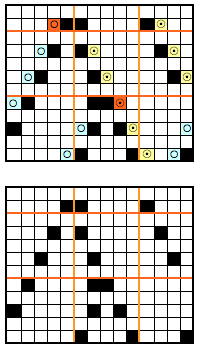
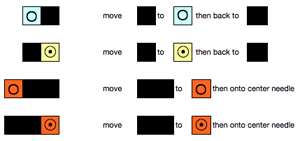
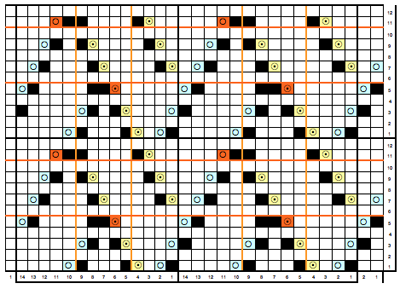
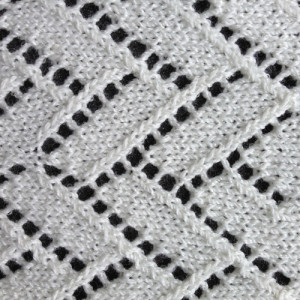
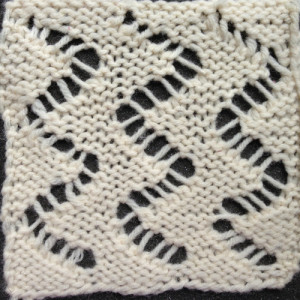
Single bed slits aka horizontal “button holes”

Related blog posts:
2022  More buttonholes and slits with illustrations including ribber variations.
I have previously shared posts exploring assorted meshes including some with large eyelets.
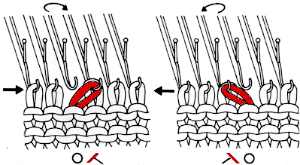
The formation of eyelets is sometimes offered as a buttonhole option in publications, a review of the stitch movements involved and the associated symbols:  The first knit row will form a loop on the empty needle, while the second row knit with the next carriage pass completes the stitch
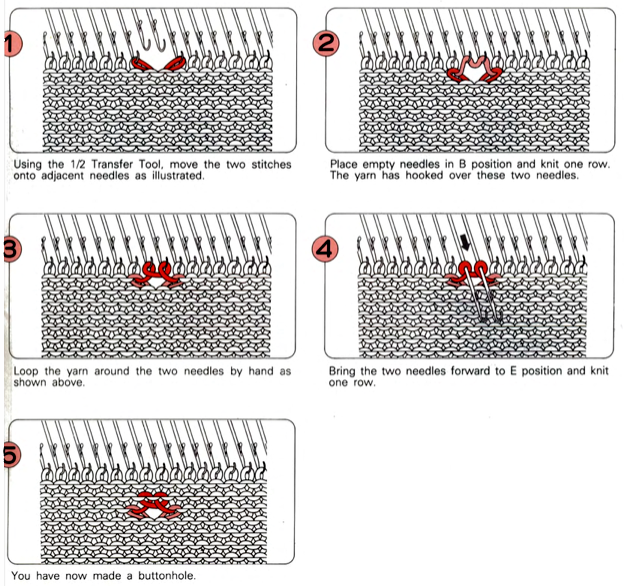
A larger eyelet, with directions found in most manuals, is not really the best option if used as a buttonhole. That said, these 2 methods render round, clean-edge larger eyelets   This version is from the Brother Knitting Techniques Book, begins to address wider openings in knits

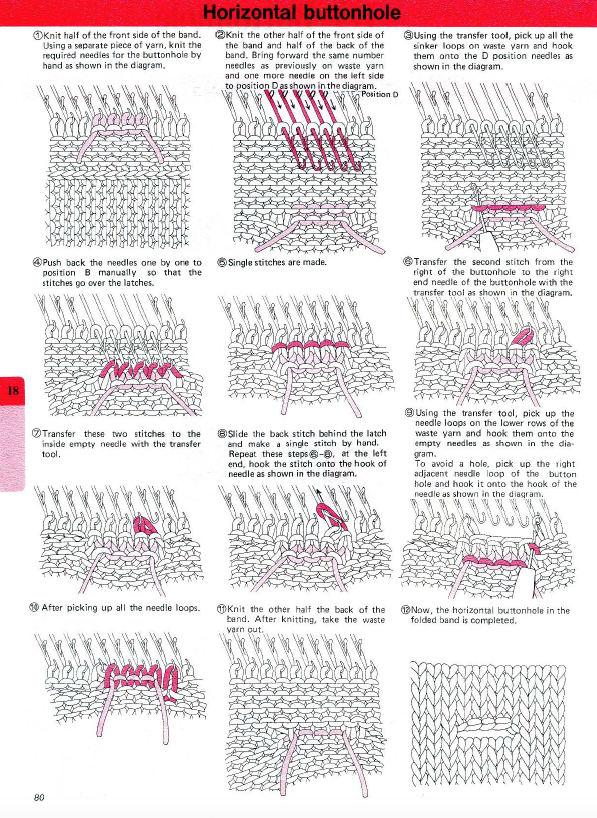
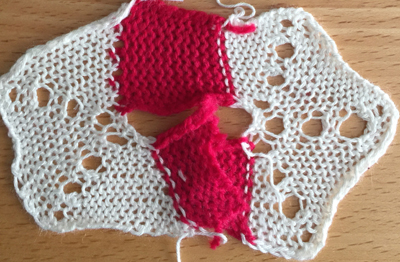
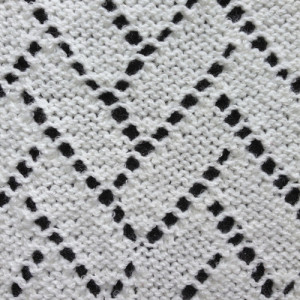
screenshot_42Many hand-knitting patterns are published, often in garter stitch, using slits that one may think of as larger “buttonholes” to create a range of interesting fabrics. Trying to produce such slits single bed, without the use of additional strands of yarn and in turn, having yarn ends to weave in, leaves few options.
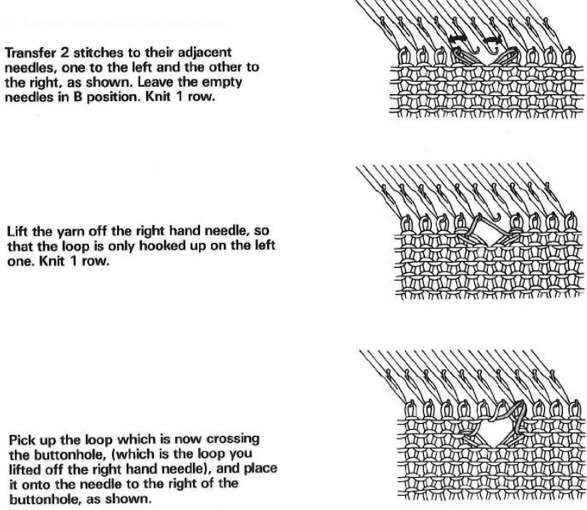
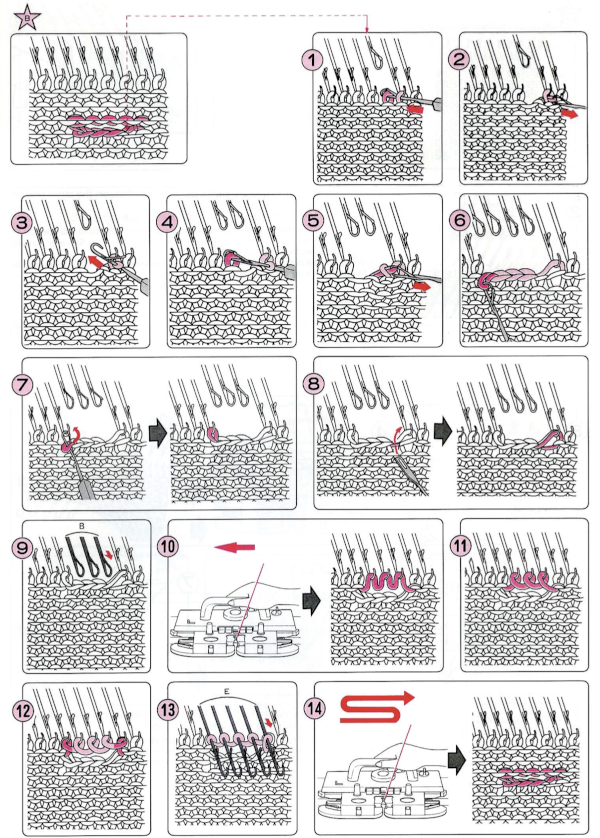
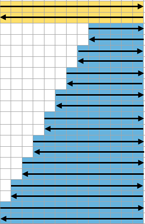
This method may also be used when creating multiple slits across a row. Holding is used to break the knitting into segments. The drawn illustrations show steps are taken, not needle positions.
COR, for the bottom of the slit:
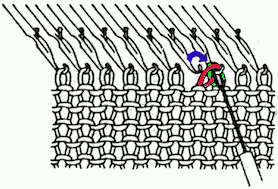
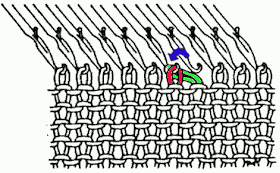
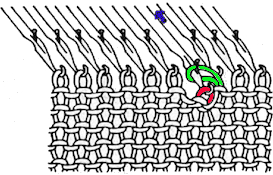
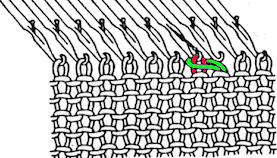
1. transfer the first stitch in the buttonhole group onto the adjacent needle to its right bhole_012. transfer the pair of stitches together onto the now empty needle to their left. The knit carriage, holding the yarn, will be on the rightbhole_023. push the needle forward until the first stitch (green) passes over the needle’s latch bhole_044. push the needle back to the work positionbhole_045. the forward stitch (red) is now knit through the one behind the latch  bhole_05This essentially binds off a stitch.
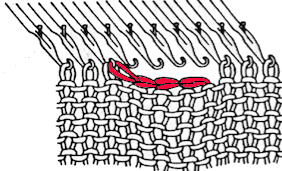
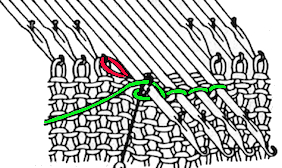
Repeat steps 1-5 until the number of bound-off stitches required is met; the last stitch in the group is then transferred onto the adjacent needle to its left. The bottom edge of the “buttonhole” is now complete. bhole_06aTo make the top edge of the buttonhole/ slit bring its corresponding needles out to hold, and cast on the desired number of stitches with the latch tool from right to left. bhole_07aIn order to best accomplish this with COR set KM for holding, push empty needles back to A position, knit up to now empty “buttonhole” needles img_4069bring empty needles out to hold img_4070insert latch hook from back to front through below the last stitch now knit on the right screenshot_36twist tool clockwise screenshot_37bring empty needles out to hold img_3966come up between the first 2 needles on the group’s right screenshot_38continue with latch tool bind off, the last loop in the chain is hung on needle already holding 2 stitches from the last bind off transfer img_4071tighten up the loop 
img_4072
return “buttonhole”  stitches into needle hooks, back to B position
img_4073COL: set KM to slip in both directions and move to right img_4074COR: cancel holding, adjust tension, knit across remaining stitches to Limg_4075COL: cancel slip <–>, continue knitting screenshot_08img_4077img_4078This version is from an ancient Brother manual, always test techniques on swatches using the yarns intended for the final piece

A hand-knit response to a Pinterest request: variations in rib with holes

Charting shapes for automating short row knitting and programming

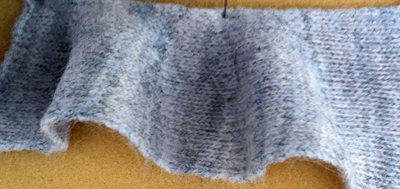
In machine knitting, stitches are usually brought out to hold opposite the carriage. If multiple stitches are brought out to hold on the carriage side, floats are created. Triangles stacked vertically as seen in the previous post will create a spiral curve along the line where stitches are held. The carriage needs to get to the opposite side and back after each ‘decrease’ or ‘increase’, so pairs of rows are used to execute and reverse angles in short row shaping. When multiple rows are knit independently from the rest of the knit, slits are created. In two-row sequences, these are generally similar to holes created in lace, in longer sequences much larger slits are produced. The latter are often used as planned design elements. The small holes being visible may not pose a problem for the knitter. If they do, wrapping the adjacent needles can help eliminate them, but the doubled yarn in the wrapped needle may create small, sometimes visible bumps on the knit side of the finished piece, creating a secondary pattern.

Reducing eyelet size: in traditional wrapping  required needle(s) are brought out to hold, and the yarn is wrapped under and around the last needle in the hold position on the carriage side before knitting the next carriage pass

                        COR                                                              COL                                both

The “automatic method” for wrapping

Decreasing: if COR (COL), 1 stitch to the hold position at a time, set the machine for holding. Bring one needle on the same side as the carriage into the hold position. Pass the carriage to the opposite side. COL (COR) repeat if shaping is 2-sided, or if shaping is only on the starting side, knit back to it, and with COR (COL) repeat process. Increasing single stitch: bring 1 needle always opposite the carriage into the work position.

Decreasing:  more than 1 needle or stitch at a time: if COR (COL), place 1 fewer needle than required into hold on the opposite side as the carriage, knit 1 row to left (right), toward the needle in hold. When COL (COR), bring into hold the last, additional needle. COL (COR) repeat the directions if shaping is 2-sided, or if shaping is only on the starting side, knit back to it, and with COR (COL) continue decreases on the single, opposite side.

Increasing:  to remove stitches from holding, COR (COL) place the desired number of needles into the working position on the side opposite the carriage, knit one row, repeat with COL (COR) if shaping is on both sides, or knit back to starting position COR (COL) and continue increases on the single, opposite side.

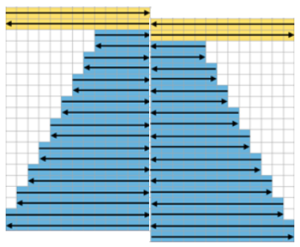
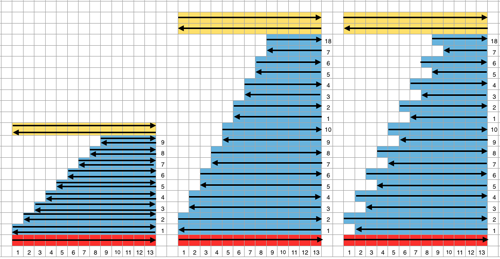
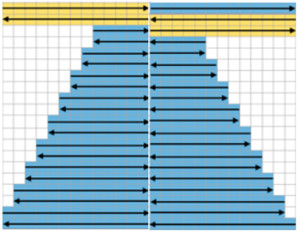
Charting out shapes knitting or programming stacked equal triangles/spirals: the wedge illustrated in the previous post single spiral wedge“Air knitting” is often used to think out fabric issues before swatching using yarn. Drawing lines to follow the carriage movement direction required to keep the knitting continuous, whether on graph paper or within software programs can help sort out shapes that will work in short rowing. Holding needs to happen in 2-row sequences. Below, black lines and arrows indicate the direction of knitting for each row, in this instance beginning with COR. Blue = knit stitches, yellow = all knit rows at the completion of each wedge (2 or multiple of 2, depending on planned design). This repeat is suitable for knitting a continuous strip with ruffling/spiraling at various degrees, not for ‘pie’ shapes.
offset

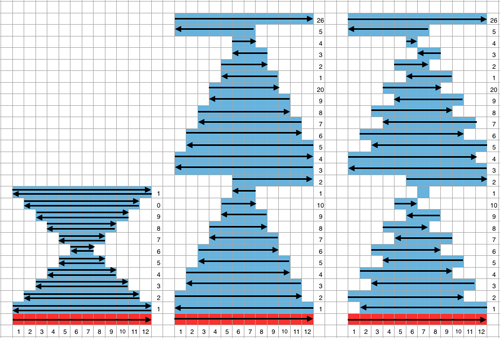
Working out the repeat: the red line represents the starting, selection (KC), knit row, the numbers at the bottom the width of the repeat, the numbers to the side its height. The first repeat A results in the fewest punched holes, drawn squares, or programmed pixels, requiring being knit double length. The remaining repeats (B, C) are drawn double length, standard card rotation is used. Eyelets form at the held edge. C takes automatic wrapping to decrease eyelet size at the held edge into account. When any sequences are programmed for knitting using slip stitch, the end needle selection is always canceled by using KCII or turning non-needle selection cams in punchcard models.

A                                 B                                    C rufflethe start of a miter shape: blue repeat, extra knit rows in yellow, auto hold on the bottom rightscreenshot_45
Going 3D: in many designs, the original repeat may simply be mirrored to be executed. If this is done here, one can see there is no longer a continuous knitting line, directional arrows are moving in opposite directions or toward each other from the center point
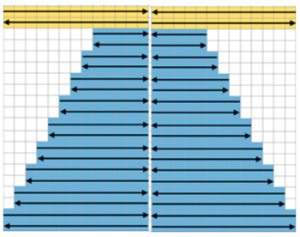
offset1restoring continuity offset 2and shifting rows around to create a workable repeat offset 3one shape knit 3 different ways:  red row = KC II, all knitdouble spiral
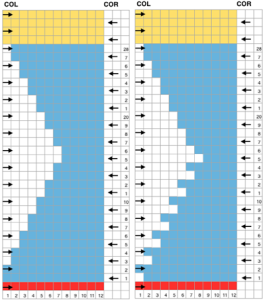
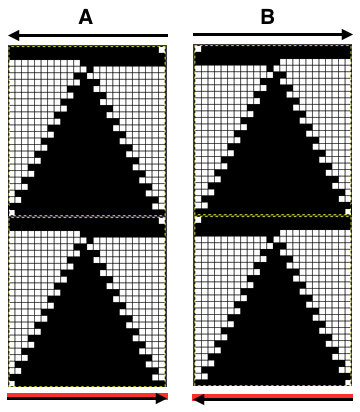
An executable 24 stitch, 26 rows repeat:  black arrows alone indicate movement of carriage on the first row of the repeat, black arrows on red line indicate starting point and direction of movement of carriage for KCII rows. A begins to knit repeat with COR, B with COL. whole repeatsThe triangle’s vertex can be squared off, the height of the repeat shortened, to make 3D shapes much rounder ball1X8ball1X8
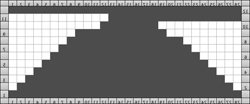
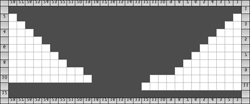
Not just for electronics: some punch card repeats to try (also suitable for any machine). End needle selection is canceled.  Selection rows are always toward the first pair of rows knit in a holding pattern, so for the first 2 cards, they would be from right to left. Single rows are punched but 2-row sequences are needed, so cards must be elongated X 2; miter shaping repeat is shown on the left, spiral on the right. Narrower shapes may be created and knit on the appropriate segment of the 24-stitch repeat needle positions. Use needle tape markings as guides for placement. The preselection row is from right to left, the pattern repeat begins with COL. All punched, extra series of pairs of rows of knitting may be added at the top. Note: just a few rows may not be added with a small segment of an additional card with clips, the whole repeat may have to be split into sections to allow for the extra rows and their smooth passage through the card reader. As an alternative, more rows of all holes could be added to the original card when first punched, tested, and then trimmed if not needed. It is useful to try out the repeat as a hand technique first in any of these instances, to determine personal preference.
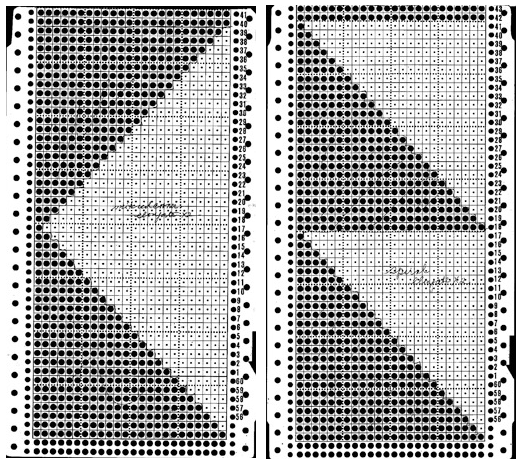
miter_spiral1

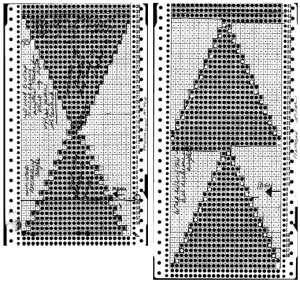
Going 3D: punch only actual holes (black pencil marks were originally used to mark squares that needed to be unpunched for the auto wrap on right, not the best choice for B/W scans). Two-row sequences are punched, so no elongation is needed for either repeat. Miter shaping is shown on the left, spiral on right; mem <– indicates the direction for KC row; decreasing angles are auto-wrapped, increasing angles need not be as seen in the top of miter on left, where needles are returned back to work to create the reverse shape.3Dmiter_spiral corrected
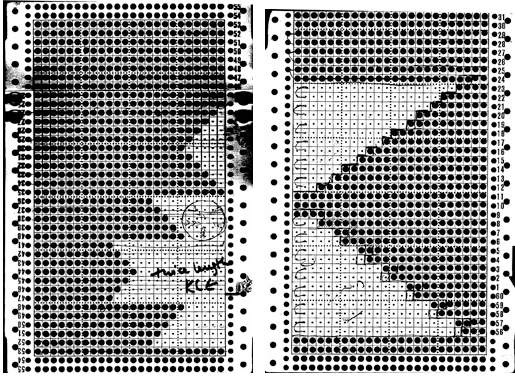
Some ruffle possibilities: all knit rows were added to the card on left with snaps, and are composed of all punched holes. The number of all knit rows between held segments determines the spacing between wedges and the degree of spiraling of the final fabric. KC row needs to be R to L for A, left to right B. Holding sequences are now staggered, changing the angle of the resulting curves. A short float is created where 2 stitches are brought to hold on the carriage side.                                                      

A: elongate X 2                              B: use as is         ruffle-pair-
The recommended minimum for punchcard length is generally stipulated to be 36 rows. Card A without the added rows is 28 rows high (the last 2 rows are for card overlap when adding snaps), so the repeat below, with the extra segment removed, would need to be punched twice
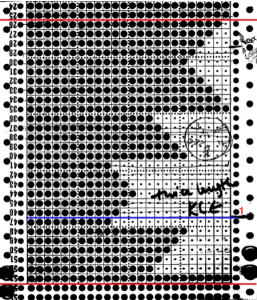
A single_correctedeyelet pattern reflects shaping500668

500_

500_676

B: dotted lines outline segment: yellow dots on the purl side, the 1 needle floats ruffle_floatone possible card revision: red dots indicate punched holes, stitches in hold as the carriage moves from the left to the right ruffle16_CORany difference in the swatch, in this yarn, was almost imperceptible; results would vary depending on yarn thickness and fiber content.
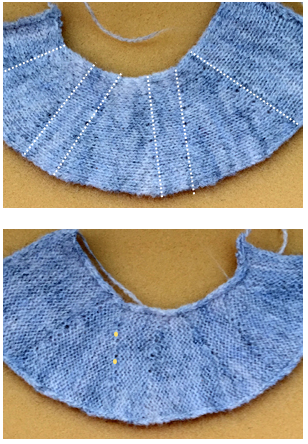
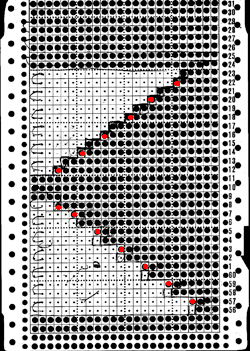
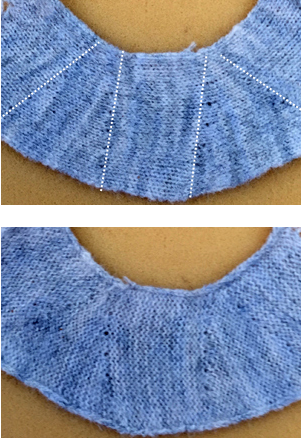
rufle not floatthe swatch as a “ruffle”ruffle_show

Revisiting miters, spirals, going square, round, and more

There are times in knitting when math becomes a necessity. With online libraries, tools, and fairly intuitive software, drafting angles and shapes is now much easier. I will be teaching a class that includes miters and spirals at a seminar next month, leading me to revisit the topic. Most published pattern instructions will give starting carriage locations, but shapes may be constructed counterclockwise or clockwise depending on preference. With an understanding of how the shapes are formed and stacked, they may in turn be automated (depending on their size and the type of km) using the slip stitch setting. Stitches that are to be knit on each row are programmed as pixels, black squares, or punched holes.

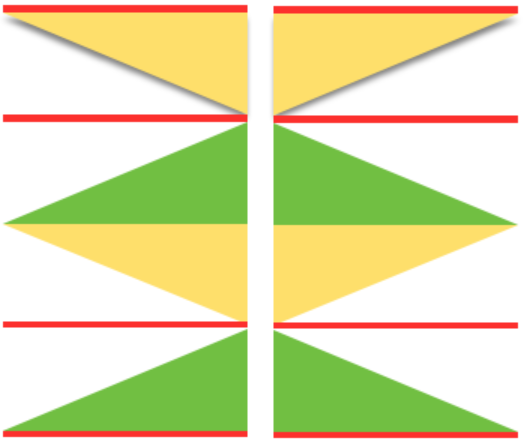
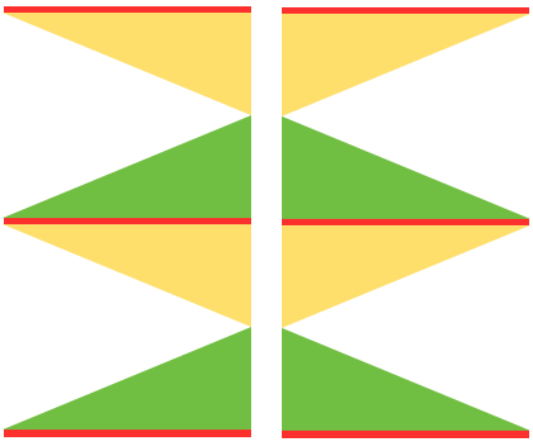
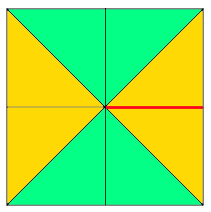
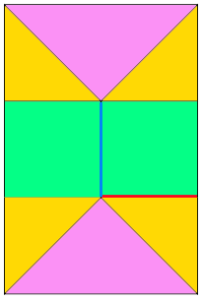
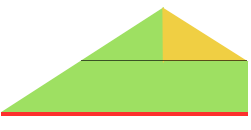
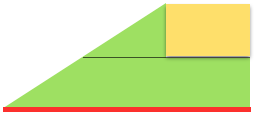
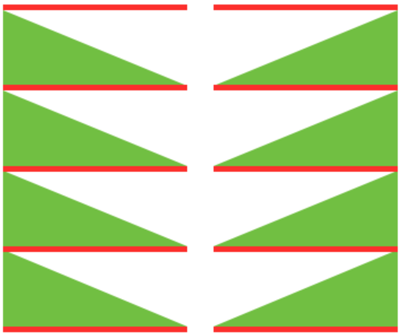
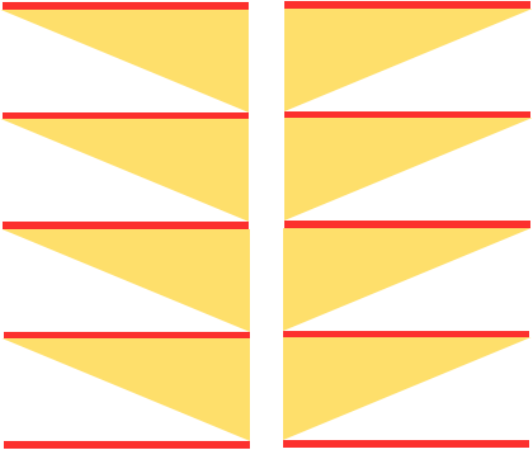
Miter shaping may occur on the side or in the center of each triangular shape; a minimum of 2 knit rows usually occur at designated spots. Adding more knit rows and playing with angles of triangles will create ruffling effects, other angular shapes, pleats, and more. I have returned to using  Mac Numbers, their shapes, and charts to generate most of the images below. Here the colored areas represent knit stitches, white negative (white) spaces stitches in hold. Red lines represent all knit row(s)/ spots for seaming at the top and bottom of sequences. Seaming is easiest when done by joining all knit rows. Stitches are always brought into hold opposite the carriage side and returned to work on the carriage side. In the shaping guide, COL= carriage on the left, COR= carriage on right.

knitting each segment

COR                                   COLwedges

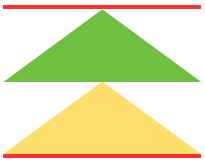
Yellow triangle segment: bring all needles out to hold, and push them back into work on the carriage side at the determined rate until all needles are back in work. Green triangle segment: with all the needles in work, begin to bring stitches into hold opposite the carriage at the determined rate until all the needles are in hold.

If seaming is desired in miter shaping with resulting eyelets at the sides of the triangle, the full wedge is split between the top (yellow segment) and the bottom of the piece (green segment). Knitting always starts with at least one or 2 rows of knitting (depending on whether the finished shape is to have a grafted seam.  For the full wedge: * yellow segment, bring all needles out to hold, and push them back into work on the carriage side at the determined rate until all needles are back in work. Reverse shaping with green segment: with all the needles in work, begin to bring stitches into hold opposite the carriage at the determined rate until all the needles are in hold. End with knit rows (red line) across all stitches*. Repeat from * to * for the desired number of full segments, end at the top with a yellow segment if needed, followed by a knit row(s) (red line) before binding off or seaming.
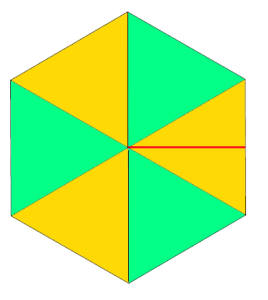
shaping with resulting eyelets at the sides of the triangle: the final shape COReyelet at sidethe knitting sequence with top/bottom 1/2 triangle segments shown

COR                                   COLfinal at sides

For miter with shaping and resulting eyelets at the center of the triangle: begin with all knit row(s) (red line) at the start. To shape a full wedge: *green segment is worked bringing stitches into hold opposite the carriage at the determined rate until all the needles are in hold. Shaping is next reversed with the yellow segment, pushing needles back at the determined rate until all needles are returned to work. End with all knit rows (red line) *. The sides of this miter are all knit rows, an easier place to seam/ graft joins if needed.

shaping with resulting eyelets at the center of the triangle: the final shape COReyelet at center2the knitting sequence

COR                             COLfinal at centera tiny test shaping at side                              shaping at center

400_661

400_662

In the following images, the red or blue lines indicate seams or joins

segments composing a square shape 
square_seam
adding squares or rectangles to alter the square
squarextra_seamsadding triangular segments: hexagonpentagon_seam expanding it with rectangles, shaping at sides
dodecadon extra_seams2shaping at the centerhexagon extra_seams going 3D: triangular pocket with the point at the center 3dmiter

combining shapes: this one is often seen in tams (hats); bottom shaping is on only one side, and at the top, it occurs on both sides

tam1tam2adding rectangles or squares to alter the shape
tam3

bringing needles out to hold opposite the carriage

Spiral stack 1/ green full triangle: knit row (s), *with all the needles in work begin to bring stitches into hold opposite the carriage at the determined rate until all the needles are in the hold position, end with all knit row(s) (red line).

COR                                   COLspiral stack1 cor

Spiral stack 2yellow full triangle:  knit row (s), *bring all needles out to hold, push them back into work on the carriage side at the determined rate until all needles are back in work, end with all knit row(s) (red line).

COR                                   COLfull stack 2

3D spiral 3Dspiral

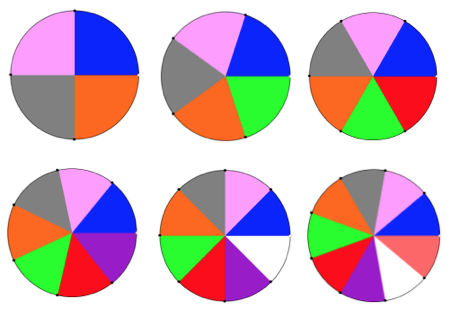
If the object is to construct a circular shape, the greater the number of panels, the smoother the outer edge of the piece. Some of the pie-bilities: so many pies

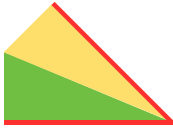
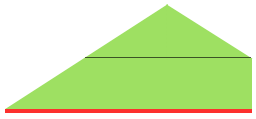
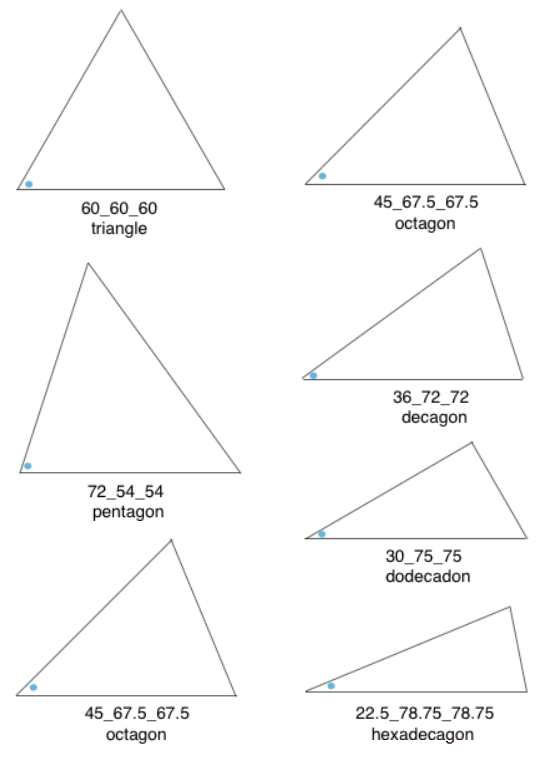
In all instances above the radius and therefore 2 sides of each wedge remain equal in size, and therefore are composed of the same number of stitches. The triangle knit to achieve these shapes are isosceles triangles, where 2 of 3 sides are equal in length and in this case, the number of stitches. The 2 equal sides are usually referred to as legs, the remaining one as the base. The 2 base angles are equal as well. The remaining angle is the vertex one. In knitting, this will be the pivot point for the wedges, the center point of the “pie” shape. In the illustrations below the vertex, angles are marked by blue dots. Its angle value is the first represented in the numbers immediately below each shape, with the other 2 numbers indicating the remaining, equal 2 angles. The sum of all 3 should equal 180 degrees.all angles Taking it to a shape: octagon (half the total # of wedges shown). In colored shapes spiral, stacking equal triangles is shown on left; full triangle, divided into 2 segment shaping for miter on right.octagon col

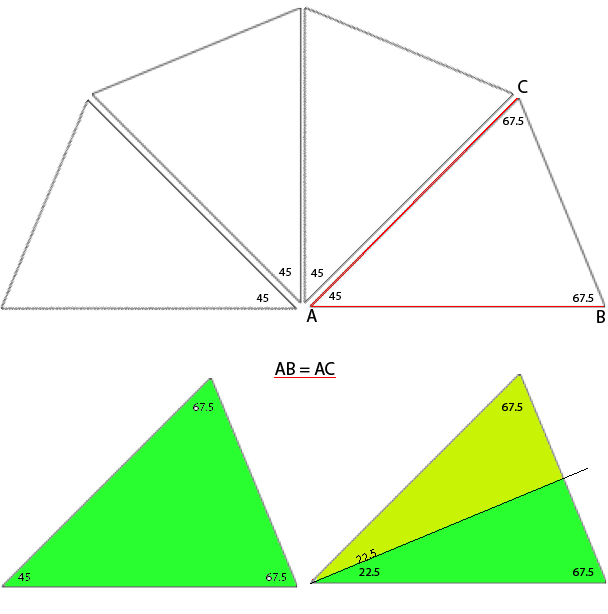
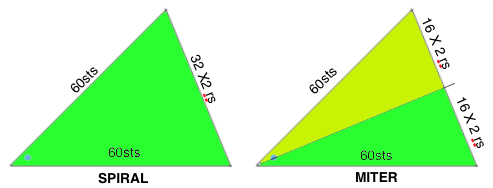
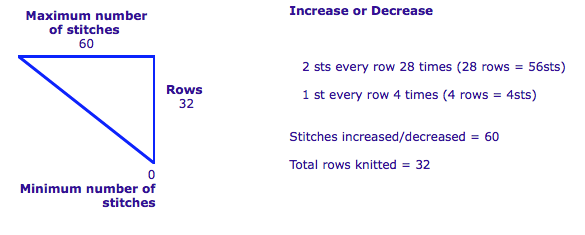
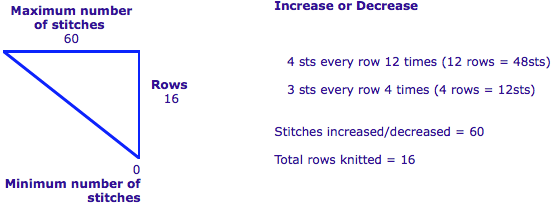
Oh, yes, the math! The desired shape may be drawn to scale using any number of tools. Wedges may in turn be shaped following the scale drawing on any charting device such as knit-leaders, or stitches and rows required may be calculated on actual full drawing measurements. In knitting, the equal sides (AC, AB) of the triangles are formed by stitches and the height of the triangle (CB) by rows. If the finished size matters, an accurate gauge is required. One approach to calculating the base (CB) is to think of the whole shape as a complete circle, in this case, divided into 8 “pie” wedges, with congruent sides (radius) measuring 10 inches each. To find the circumference of the circle, multiply the diameter (20) inches by pi 3.14 = the total in this case, of 62.8, rounded off to 63. Divide that number by the number of sections (8) = 7.85, rounded off to 8 inches (rows). If the stitch gauge is 6 stitches and 8 rows per inch, each triangle would be 60 stitches wide, and 64 rows high. Holding happens every other row, opposite the carriage, so the total number of rows is divided by 2 = 32 for knitting a spiral. The stitches are distributed along one edge over a total of 64 rows in height. The goal is to reduce the shape down to the next to the last group, followed by two rows knit over all the stitches at the end of each section. This will cause a small hole at the center of each completed pie due to extra rows knit. For a miter 2 triangular shapes are required for each wedge, so holding sequences are recalculated with shaping now occurring over 16 rows for knitting a miter. screenshot_09 color

An online calculator is available to help calculate the number of stitches brought into hold opposite the carriage or into work on the carriage side, sequence preference should be tested on swatches where the gauge is significant

  spiral screenshot_02miter Miter online

Magic formula (X represents times)magic formula

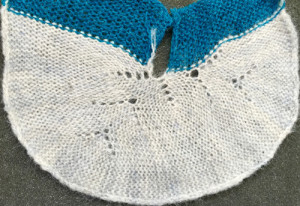
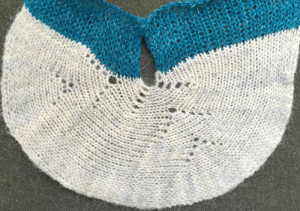
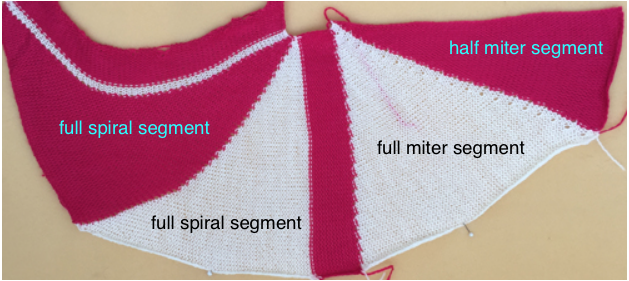
In the photo below I chose to start with all the needles out to hold,  pushing them back into work across the knit for the spiral. For the miter again, I began with all needles in the hold position, pushing back the required needles into work; for the top half of each wedge needles were returned to hold opposite the carriage at the same rate, forming the upper half of the “pie slice”. The swatch is not worked at the same rate as the shapes calculated above. It is shown on its purl side with color changes to highlight the intersections where wedges begin to repeat. The yarns used are random acrylics, in different weights. photo miter spiral

A previous post on short-row knitting with links to other online sources 2013/12/18/holding-stitches-short-rows/.
A category search in my blog roll for miters and spirals will link to blog posts including pies:
2011/06/18/knitting-math-and-pies1/
2011/06/22/back-to-that-pie-a-bit-of-holding/  breaking and mixing up pie wedges:
2014/07/21/miters-and-spirals-visualizing-charting-and-more-3/ .
A garter bar short row trim:
2013/02/28/garter-bar-short-row-trim/.
Charting shapes: using Gimp and Mac Numbers:
2014/07/14/miters-and-spirals-visualizing-charting-and-more-1/
Executable charts and shapes, automating them with slip stitch:
2014/02/24/holding/ short-rows-hand-tech-to-chart-to-automating-with-slip-stitch-1/
2014/02/20/wisteria-cousin-revisited-holding-using-slip-stitch/
2013/01/21/automating-pleating/ 2013/12/28/short-rows_-balls-tams-3d-rounds/  2015/09/07/a-tale-of-2-donuts/
2011/03/29/lace-meets-hold-and-goes-round/
2011/03/29/the-doilies/

Hand knit “dragon scales”

A detail of half fisherman machine knit “dragon scales”  ribber version of the stitch500_606

and its related posts :
https://alessandrina.com/2016/01/09/ribber-pitch-a-bit-on-racking-chevrons-horizontal-herringbone/
https://alessandrina.com/2016/01/13/racking-2-vertical-chevrons-herringbone/
https://alessandrina.com/2016/02/02/vertical-racking-3-automating-half-fisherman-in-pattern-2/

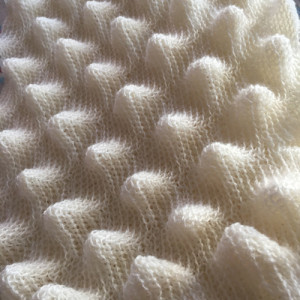
My last experiments led to a search for a possible hand-knit “scale” version. Similar shapes may be achieved through holding, but here the effect is created through the use of increases and decreases.
The test for the repeat was knit in a 4-ply acrylic.
As with the machine knit version, the pockets become more pronounced as the fabric relaxes, without blocking.
Garter-stitch was used in the first sample for texture and speed.
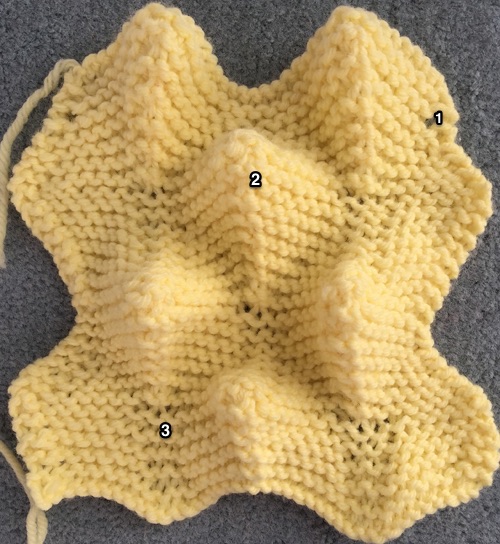
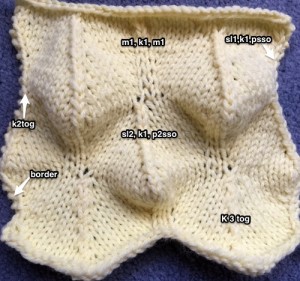
Everyone has preferred methods for increasing (M1) or decreasing/ combining 3 stitches into one. I tried picking up from the row below or casting on single stitches (#1), but found the least noticeable methods to my eye, using this yarn and stitch type, were to knit in front and back of the stitch (#3) where an increase was required, and to knit 3 together (#2) for the decreases.

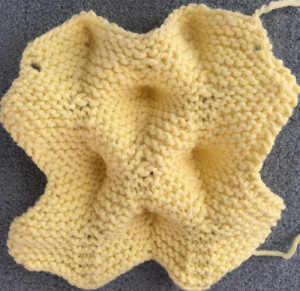
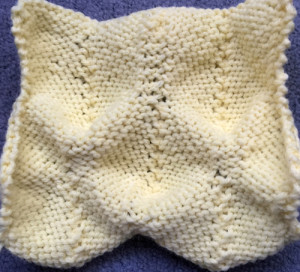
numbered_636the reverse structure curves in a similar way to the machine-knit 500_637

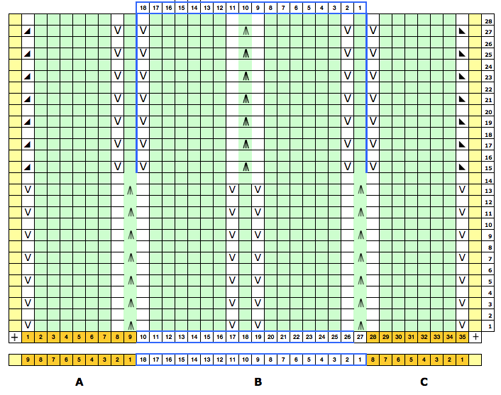
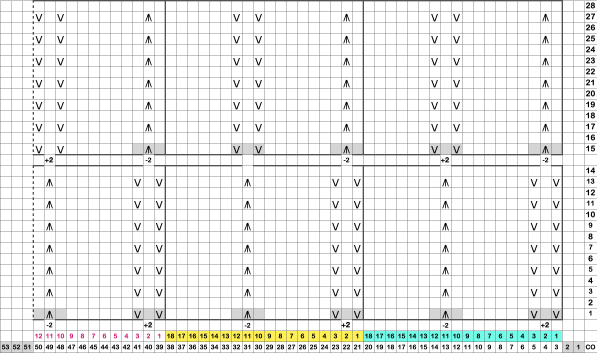
The number of stitches remains constant on each row knit; the chart reflects side panels (A, C). The central 18 stitches (B) may be repeated multiple times to achieve the desired width. Border stitches may be added in any number, and are knit on every row.

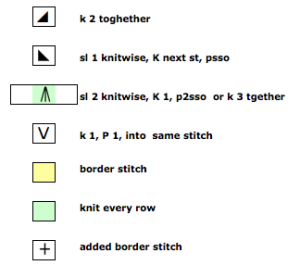
screenshot_06scale_symbolsA 2024 chart shifts the repeats and keeps stitch counts constant with M1, K1, M1 increases adding 2 stitches, and Sl 2 knitwise, k1, PSSO or K3 together decreasing 2 stitches in each segment. The original fabric changes dramatically when every other row is purled. This swatch was knit with a single-stitch garter stitch border, and I experimented with increases and decreases.
The M1 sts were created by picking a loop up knitwise from the row below for the increase. The slight shift in the pattern center where decreases and increases meet helps define a point on the “scale” shape.
The same yarn and needle size were used as in the first sample.
A softer, thinner yarn knit using a smaller needle size would benefit either variation. To my eye, the all-garter stitch version was more successful and pleasing.

knit as “outside”, default shapes  knit front reverse  500_643purl as “right side” after poking scales out 500_639its reverse500_646

For a less pronounced, “scaly” relative using lace eyelets in the design, please see
https://alessandrina.com/2015/01/09/a-swatch-experiment/    https://alessandrina.com/2015/03/28/machine-knit-dragon-scales-update/

Tuck and garter stitch: from hand knit to machine knit hand tech pattern

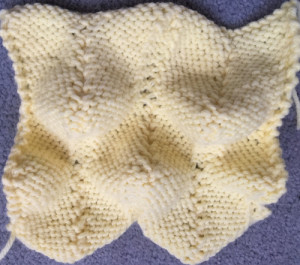
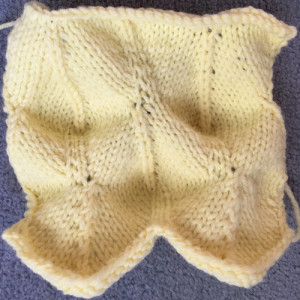
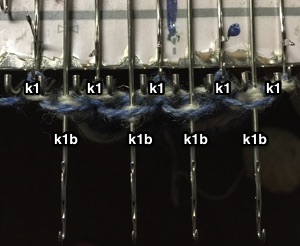
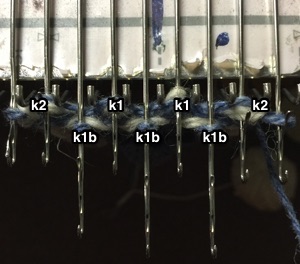
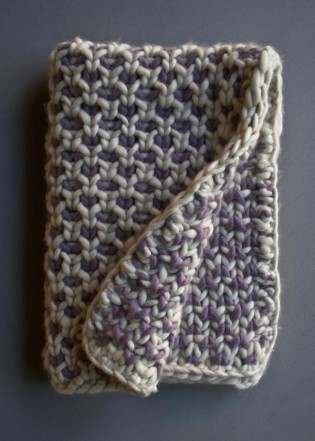
A Ravelry question on the possibility of executing a particular fabric on the machine has led to the experiments in this post. The pattern that led to the discussion is a free hand knit one,  shared and published on the Purl SOHO website and on Ravelry. The gauge for their project is 4.75 stitches = 4 inches in stitch pattern, it includes garter rows. Such rows may be executable on home knitting machines by transferring from ribber (Passap front bed) to main bed, alternating with reversing the process at a predetermined frequency, depending on stitch type. K1b is the hand knit equivalent of tuck for that stitch on that row, adding to the mix.  Not practical for G carriage use, as the latter does not form tuck loops, and hand retooling would be required for all k1b stitches.

Using holding to create tuck stitches in non-auto patterning days was commonly used, and I chose to do so here. As machine knitters, we are conditioned to believe that single color rows are impractical to execute and that the yarn would need to be cut on each side after the one row. Color changers are on one side or the other, making striping with frequent color changes is practical if executed in even multiples of rows. Transfer carriages are available that will help move stitches from one bed to the other, I personally have never had the patience to work with them enough to get good at using them without dropping stitches, so I went back to even lower tech than usual, using the garter bar on the bulky, and beginning pattern row 1 with COR.

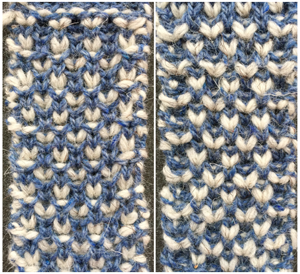
Before attempting nearly every row turns, it is helpful to have some practice with turning work over using a garter bar, develop a sequence of repetitive actions, keeping careful notes as to what works for you, and using contrasting yarns in tests to better understand stitch structure. In my sample the white yarn was thicker than the blue, reversing colors or balancing yarn thickness would change the visual look of the fabric.  Beginning on small samples helps work out issues and the making of the decision to try on a larger project or simply as a border.

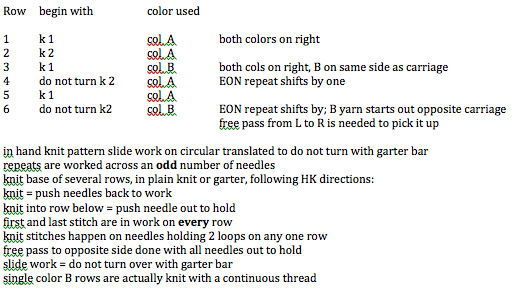
Analyzing the pattern repeat:

screenshot_43tools to help with EON needle selection tools

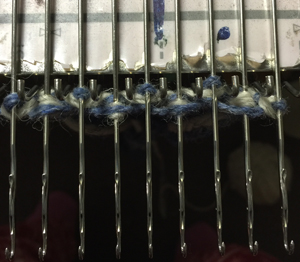
the results of rows beginning with k1 sequence after the row is knit, note the “tuck” loops on top of E position needles, which will be knit off on the next row knit K1_after knit

a row that begins with a k2 sequence, before it is knit; the needles holding the single, blue stitch will form the loops on top of the needles as the yarn moves across to the opposite sidek2_before knit

E position prior to transferring stitches onto garter bar, also for a free pass to the opposite side to pick up yarn after stitches are removed on bar free pass473

1            begins and ends with K 1; COR select needles, col A * knit row, COL, bring all needles out to hold, remove on garter bar, free pass carriage to theopposite side, COR, flip garter bar over, replace stitches onto needles push all stitches against gate pegs *

2            begins and ends with k 2; COR select needles for row 2, col A repeat * to* end COR

3            begins and ends with k1; COR select needles for row 3, change to col B, knit one row, do not turn, do not cut yarn; COL bring all needles out to hold, a free pass to the right to pick up col A on next knit row, end COR

4            begins and ends with k 2; col A, COR select needles for row 4, repeat from * to *

5             begins and ends with k 1; COR select needles for row 5, col A, repeat from * to * do not turn

6            begins and ends with k 2; COR select needles for row 6, change to col B, repeat from * to *

publisher’s project photo

beautyberry-blanket-600-12-315x441

my swatch, knit on a whopping 9 stitchesrav blanket 300


Working with generated mazes: GIMP charting 2

My previous posts on using gimp to generate charts and images suitable for knitting: 1, 2, 3, 4. I am working in Mac OS 10.10 now, so there may be some variations in results from earlier OS or for Windows versions users.

the edited repeat from the previous postcropped

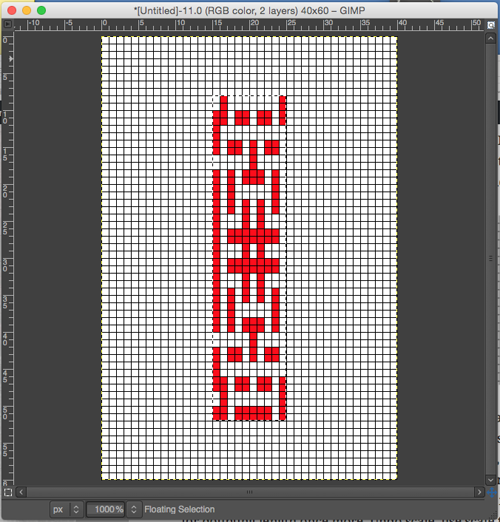
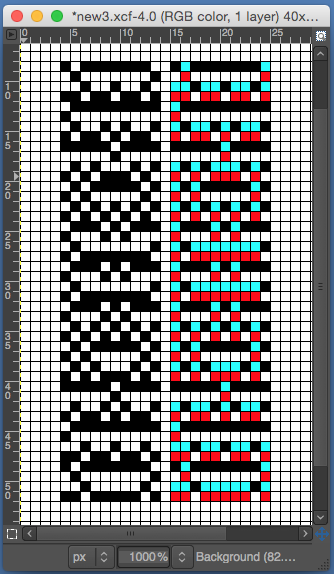
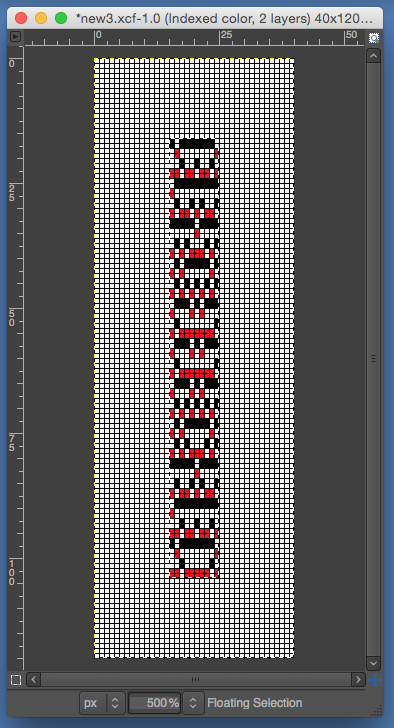
It is possible to knit this design in DBJ with the same separation as for knitting it as a maze, both are 2 color slip stitch patterns, the maze separation is less laborious. To process for use in DBJ, the image needs initially to be doubled in length. The easiest way to achieve this is to create a new gimp document, several times the size of the repeat, select and copy the corrected repeat, in turn pasting it in the new, larger canvas. I used 40 by 60; color 1 is red, color 2, white, most of my charting is done at 1,000 times magnification

copy and paste

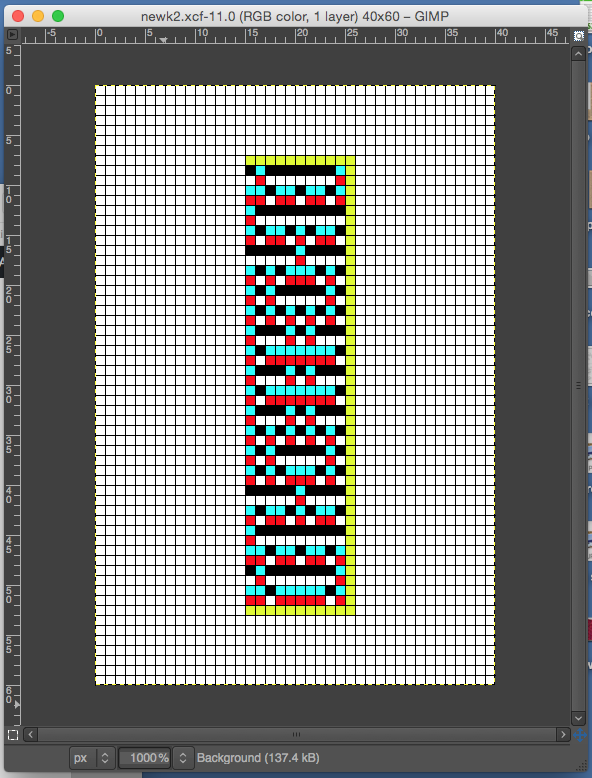
drawing a vertical line in nonpertinent color to border areas having several rows with no second color present, as seen below, may help define end or start of selections when attempting to invert colors. Color invert may be achieved in RGB mode, not indexed. Below the inversion occurs on “even-numbered” every other row. The program in my OS now showed the previously red squares in blue, the alternate squares in black.

screenshot_16
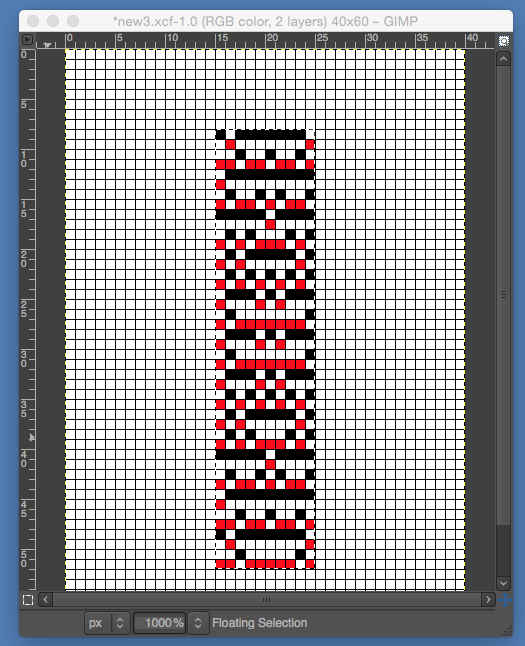
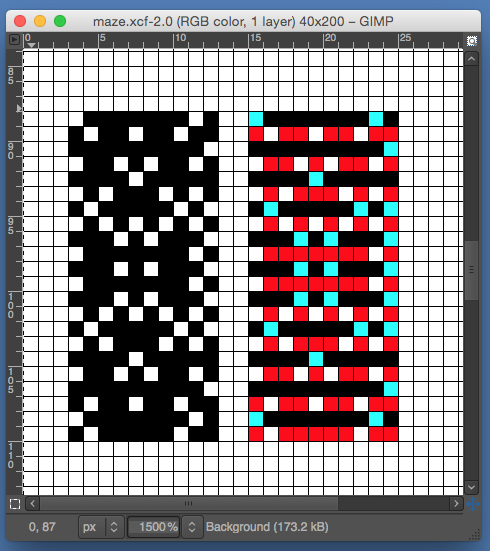
After using color invert, nonpertinent color (blue) may be erased (using the pencil tool, each square on the grid is a single-pixel) as well as those yellow “border” squares. In the image below the black squares on the left represent all holes that will be punched out in the card. One drawback of this program, because of the scale using single pixels, is that no text to include row numbers etc. is possible. The final repeat is 10S X 44 R.
screenshot_24_DBJ

If one wants to avoid using double length in the automated machine settings, the image of holes to be punched may be doubled in length. To do so color mode needs to be changed to indexed (4 colors) to retain image clarity.screenshot_19

screenshot_20X2

 fabric knit in DBJ, long stitch on left, bird’s eye backing on right 500_2355

Maze and mosaic knitting, my previous posts: drawing motifs, from design to pattern (Excel), from pre-punched cards,  and references and pubs. The repeat worked out for slip stitch and edited down to 2 colors. Again, the black squares on the left represent all holes that will be punched out in the card.

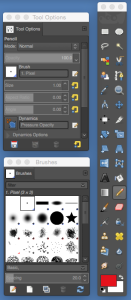
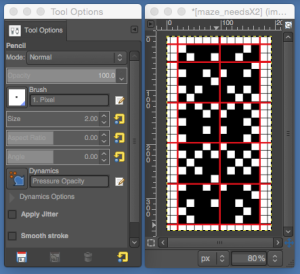
screenshot_21-mazeTo further mark the repeats in blocks, making charts easier to follow in absence of numbers, the subject of drawing straight lines comes up. Most of the online tutorials for using gimp are for its Windows version. The pencil tool may be used. Normally, tool options are displayed in a window attached under the Toolbox as soon as you activate a tool. If they are not (Mac), you can access them from the image menu bar through Windows → Dockable Windows → Tool Options, which opens the option window of the selected tool. In theory “Ctrl: this key changes the pencil to a Color PickerShift: This key places the pencil tool into straight line mode. Holding Shift while clicking Button 1 will generate a straight line. Consecutive clicks will continue drawing straight lines that originate from the end of the last line.” On my Mac, I worked out this method: first select color and pencil tool. Place a pencil dot where you want the line to start. If you press the shift key, a crosshair will appear, press the command key in turn as well for straight-line mode, click where you want the line to end. Consecutive clicks will continue drawing straight lines that originate from the end of the last line. Pressing both the shift and the command one at once after the initial pencil mark will call up the color picker and require a color selection and an OK.

windows: dockable itemswindows_dockable dialogues

gimp lines

separation for maze knitting 10S X 22R, elongate X2
maze_needsX2 borderknit as a single bed slip stitch, changing colors every 2 rows screenshot_01as dbj 500_2361

The dropped stitches were a problem when using the ribber on one of my two 910s, that adventure can be the topic for another post.

Working with generated mazes: GIMP charting 1

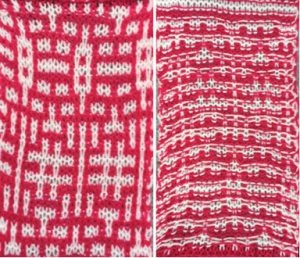
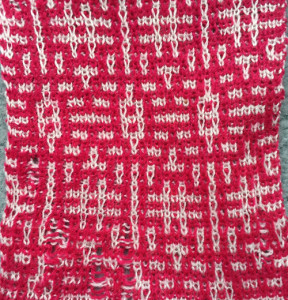
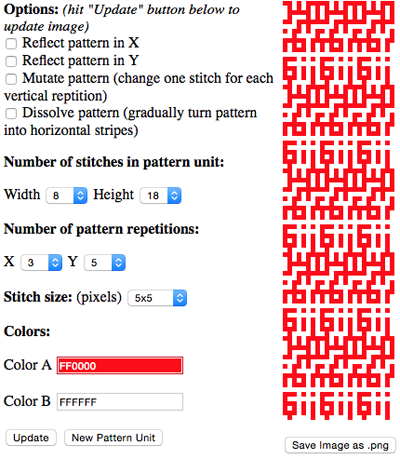
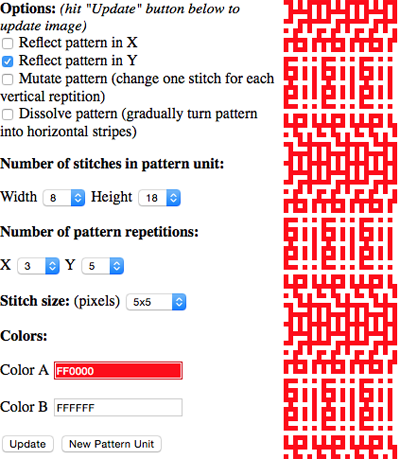
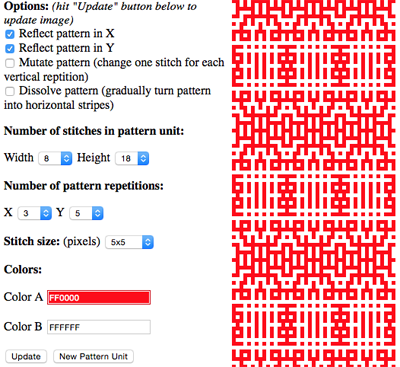
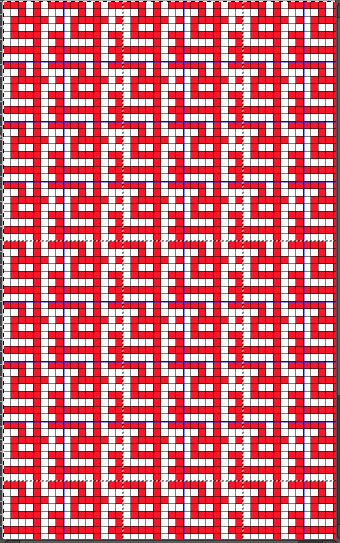
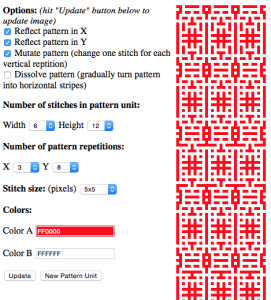
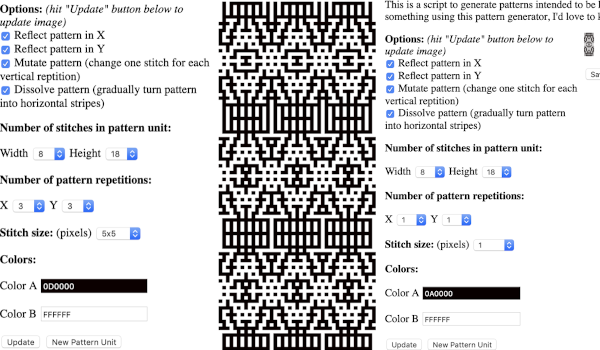
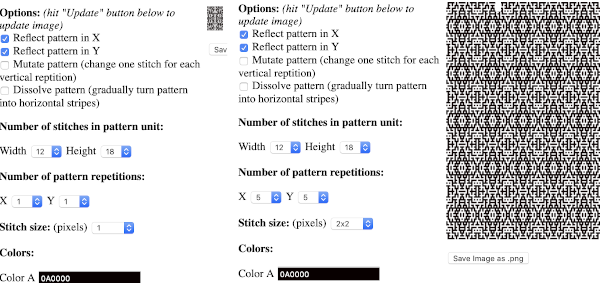
Laura Kroegler shares an online generator for “mosaics”unikatissima offers them for mazes and cellular automata. Representations of such patterns have cropped up in relation to hacked knitting machines and electronic downloads such as those seen in the Claire Williams blog, and in published information by Fabienne, who of late also has a Kickstarter project. Such patterns may be charted for hand knitting or for use on punch card machines once the size of the repeat is taken into consideration. Mirroring either vertically or horizontally can make the image far more interesting, but that has to be a consideration in planning if the stitch repeat has a constraint of a 24 stitch limit. A beginning unit 6 stitches wide will allow for the horizontal mirror to be repeated twice on the punchcard. The minimum punchcard length is 36 rows. The maximum scroll down to height in the Kroegler generator is 20, so for the least punching, an 18-row max would “fit”. The caveat here is that if the generated pattern is to be knit as DBJ or as a single bed slip stitch, those 18 rows need to be color separated accordingly. For the design to be charted out easily, it may be saved, and then in turn gridded in Photoshop or Gimp with the grid matching stitch size in the generated pattern preview (ie below note X and Y values are 5 X 5, so grid used would be 5 X 5 pixels as well).
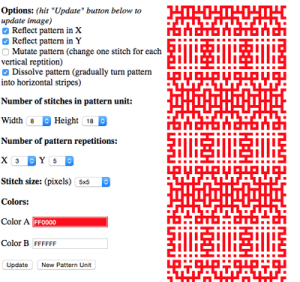
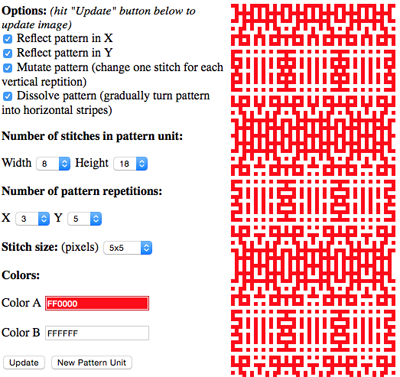
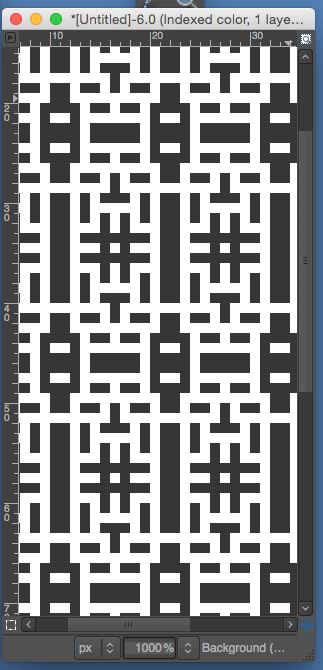
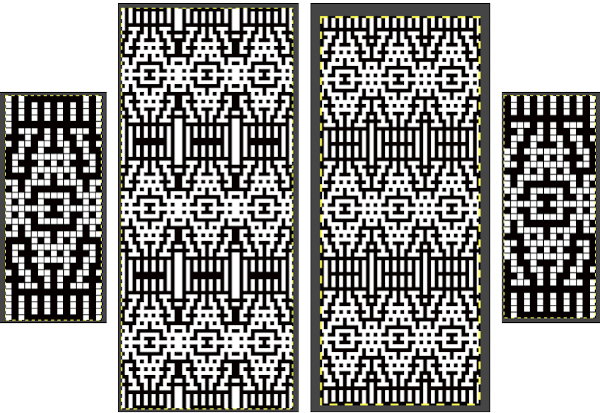
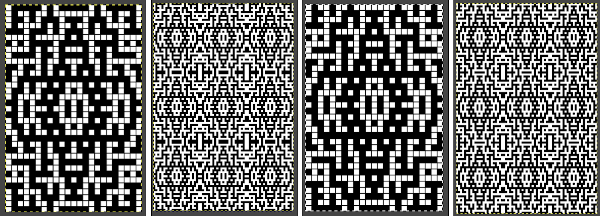
After reviewing the tiled generated pattern, the image may be carefully captured from the screen and saved. I worked with an 8-stitch repeat for my tests. Below are screen grabs of the resulting patterns after some of the various options offered were tried. Mirroring this repeat horizontally makes it too wide for a punch card (16 X 2=32).

38_400

40_400

42_400

46_400

44_400

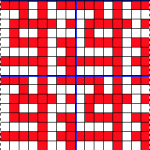
using a 5X5 grid after capturing a portion of another generated image, using a simple 8X8 repeat, outlining single repeats, thinking punchcard machinescreenshot_34

checking the result tiled to predict possible knit “look”screenshot_28

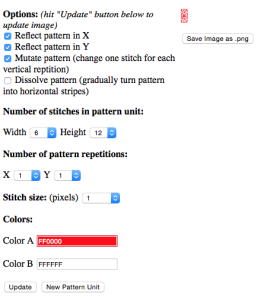
If working with a 6 stitch repeat, horizontal mirroring becomes possible for punchcard machines, perhaps making things more interesting; the program can generate a single repeat as a png, and punching holes is a drag so maybe length remains on the short side in anticipation of the punching holes and color separating for knitting the motif as either DBJ or single bed slip stitch, so here goes: having the generated image produced so each stitch and row is represented by a single pixel allows one to work within any program preset to superimpose a 1X1 grid:screenshot_07

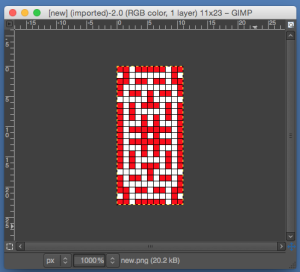
screenshot_08my saved png, supposedly for an 8X12 repeat newgridded in gimp, revealed as  11W X 23 Hscreenshot_09

testing tiling: oops!screenshot_10

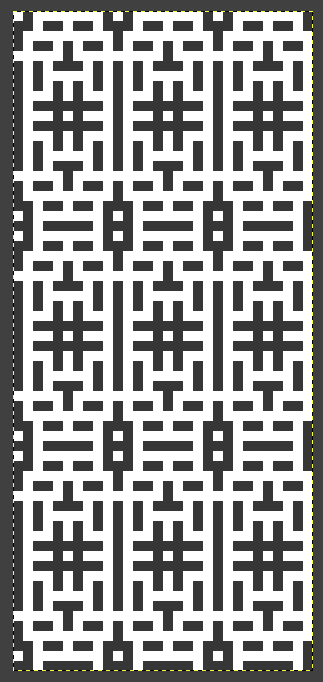
the trimmed repeat, eliminating double lines, 10 St W X 22 Rows Hcropped

tiled, looking closer to original, cropped_tiledand then there is the knitting of it if one chooses to do so as single bed  “floatless fair isle” as opposed to double bed dbj

For the latest version of gimp for Mac OS, version history may be found at the gimp website, for Mac Yosemite and Mavericks’ latest information on version 2.8.14.

2020: latest Gimp update for Mac, my Mac OS: Mojave 10.14.6, now swatch testing on a 930 with image2track cable and software, which allows for easy use of larger repeats. Newer thoughts and observations: the maze can be generated using only black and white. If all boxes for options are checked as seen below, there will be shifts in the overall design. A small, working BMP may be saved for download, but only part of the overall repeat will be selected by the generator. Quitting the generator, and opening it once more entering the same options will generate a new image, so saving and naming each is a good habit to form the BMP in Gimp, explored in two renditions, eliminating double lines The proof of concept swatch for the version on the right and knit in tuck stitch the double-length BMP ready for knitting,  14X68

One more, using different option selections the BMP in Gimp, explored in two renditions, eliminating double lines My latest process for the required color separation


A block lace pattern on the KM 1

A friend recently posted a forum query on a published pattern that has led to my exploring another hand to machine knit transfer lace. The “flemish block lace” design from the second treasury of knitting patterns by Barbara Walker, p. 270 seemed to be the lace pattern motif used. Here is a partial detail from the fabric that began the discussion

try to copy

Below is a chart for the Walker repeat produced with Intwined. The repeat is a multiple of 14 + 3 border stitches, the first row is purl, but I could not enter an all purl for row one and not have the remaining symbols altered by the program, which assumes in lace the first row is knitflemish block lacethe program’s generated HK instructions for one repeat plus 3 border stitches screenshot_04In attempting the machine knit version I chose to use the HK chart for my transfers as it stood, the directions of the transfers being mirrored vertically did not matter to me.

This design has “chains” traveling along some of the edges of the diagonal shapes. A lot of moving stitches in groups of 2 or 3 is required to achieve the look. It may be possible to achieve the fabric knitting with the aid of a lace carriage,  but planning the punchcard or electronic repeat and correcting any dropped stitches pose special challenges. My first samples were knit on the bulky KM, working in width of the 17 sts illustrated above.

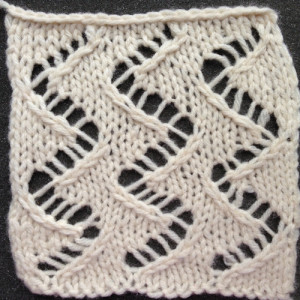
I began to test transfers by moving stitches every row. Interesting things happen when single rows are knit on the machine as opposed to the traditional 2 in multiple transfer lace, as well as the resulting shape being half the number of rows long. The eyelet yarn lies single, without the twist usually seen, and begins to look more like ladders (see previous posts on zig zag ladder lace).

knit sideIMG_1938purl sideIMG_1939

with 2 knit rows between transfers (the missing eyelet in marked spot is due to operator error) the familiar look of multiple transfer lace appears1940

IMG_1941

below the swatch image is flipped horizontally for a different perspective, approaching the original hand-knit inspiration1940looking at charting differently, back to Excel: single repeat

BW repeat_12

                    checking alignment, adding border stitches4 repeatbw                                                adding colorcolored repeat

moves                    checking alignment, adding border stitches4 repeat color2The next consideration might be how to make executing the pattern easier on a standard machine. Needle pre-selection may be used to guide hand transfers. Working out the electronic repeat, represented by black squares:isolating mylar rep                                         the transfer directions

transfers                        the chart in repeat , including bordersmylarx4_borderThere is no transfer on row 3 of the repeat next to border on the chart left, it is omitted in the bottom of the chart, shown on the top half. End needle selection is canceled throughout. The resulting test swatch, one operator error transfer missing on mid left:

                                                    knit side 500_1945                                                     purl side500_1944One of the issues I encountered during the initial tests was that of occasional needles “sneaking”/ dropping back on the machine, so ladders rather than eyelets were formed. The needle retainer bar is old, and I like to work lace with the ribber off and a tilted main bed, explaining the possible cause.

“Button holes” and “make many – increase” “lace”

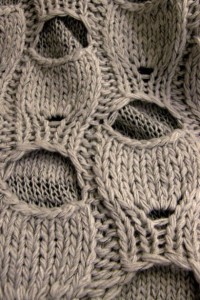
An image often found on Pinterest, with its source attributed to a Vero Moda garment and accompanied by a “how-to” request, led me to give “designing” it a shot. Here, I believe, 2 layers of a garment are pictured, resulting in the stocking stitch knit that appears behind the eyelets. augudAnalyzing the fabric: a wide, flat rib is created. The equivalent of “buttonholes” with a fewer cast on than bound off stitches is in use, creating the narrowing effect at the top of each slit, four stitches are “lost”. Making multiple stitches from one (4 in this case) restores the original stitch count and returns width to the fabric. To make 4: Knit 1, purl 1, knit 1, purl 1 into the same stitch, or in this case, the bar between the 2 center stitches. Executing this is not “practical” on the knitting machine. Below is one possible method that could be adapted for groupings with slits of varying sizes.

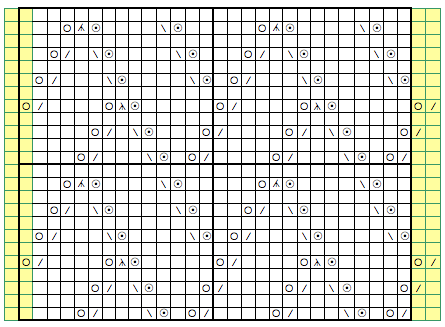
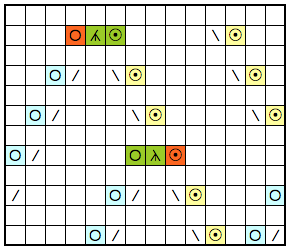
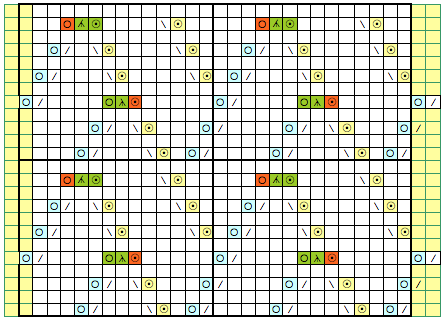
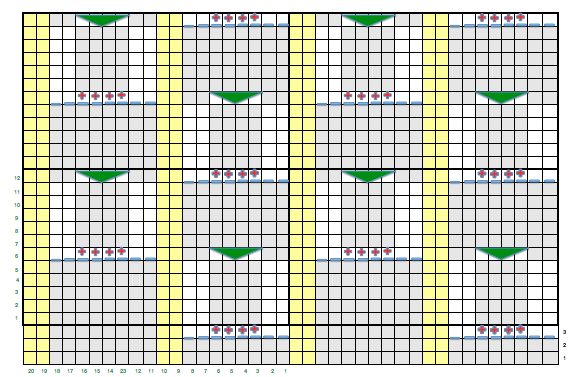
My chart, showing 4 repeats (black border) and 3 added starting rows. Green numbers on the bottom indicate the repeat’s width (20 stitches), and on the left its height (12 rows). Slits are created every 6th row, with the right side facing. Two more stitches would be added on the far right for each side to match in the finished piece. Side borders and top and bottom bands could be made wider and longer respectively, knit in garter stitch to keep edges flat. repeatX4_31

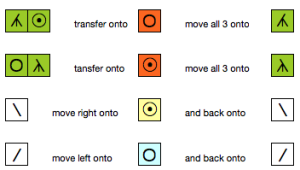
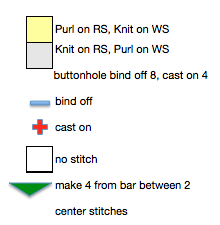
the symbols used

screenshot_30

my unblocked sample, knit on 32 stitches in worsted weight acrylic, using #8 needles

IMG_1907


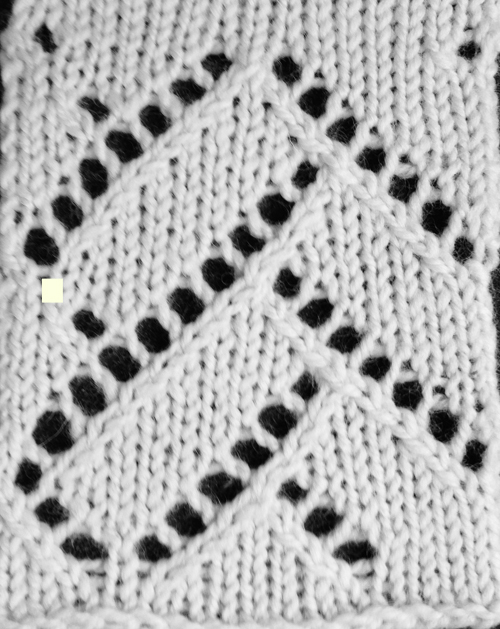
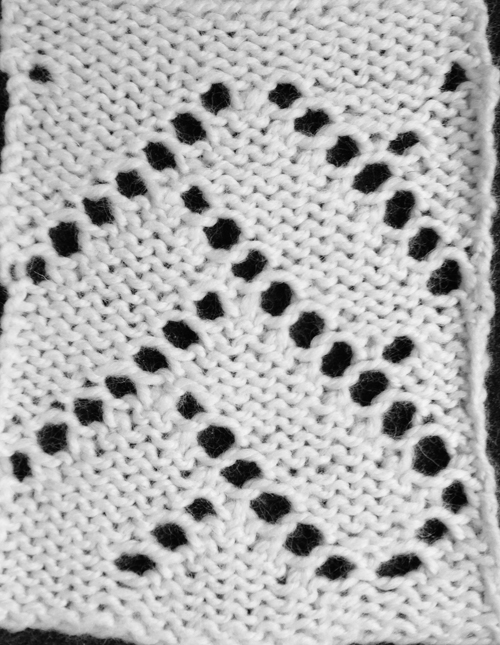
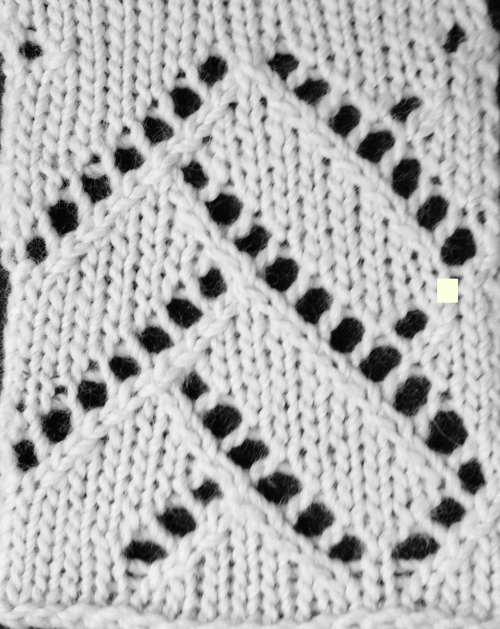
Zig Zag ladder lace 2: hand knit

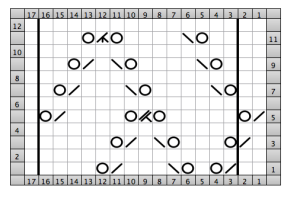
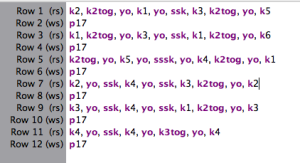
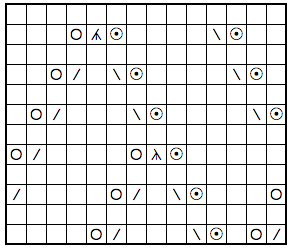
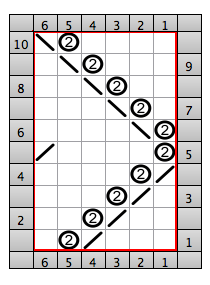
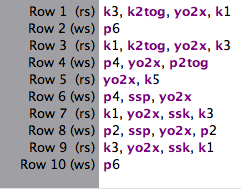
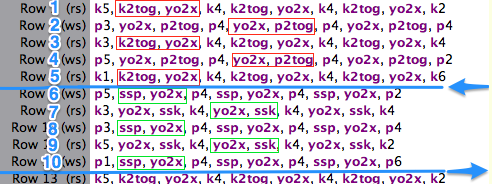
I work primarily on a Mac, Maverick OS. Intwined software has had some issues operating in Mac consistently in the latest OS versions. The chart to text can be a really nice feature. The repeat, drawn here with symbols in the built in stitch library, shows errors in row 2 and 4 of the accompanying text.single repeatmistakes single

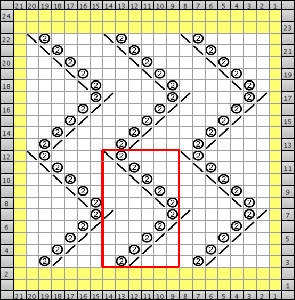
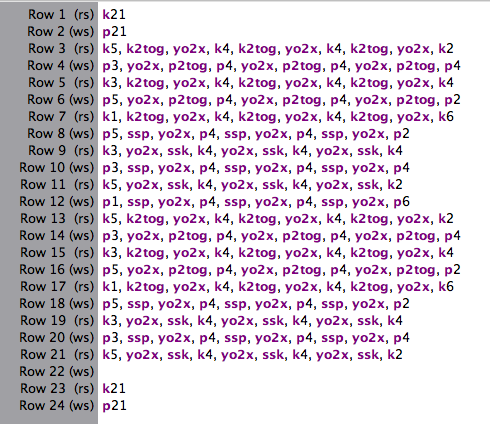
On a larger canvas, the original repeat is outlined below in red. Yellow indicates knit border stitches around ladder lace pattern repeats; row 22 is absent from the text that accompanied the larger chart.

full chart

full directionsSkitch is a free program, available for both Mac and Windows, that allows the opportunity for of highlighting or further editing a graphic. Taking the information above, here I added numbers that reflect actual repeat rows, used the arrows as a reminder of change in direction of zig zag, and the red outlines vs green indicate changes in type of knit decrease. It is easy to add as much or as little additional information as one feels helpful. There are controls for line thickness, shadows, etc.

actual repeat

JKnit is another program that may be of interest to anyone who prefers to track their projects, progress, and much more on their iPad or iPhone. The Lite version is free for both devices.

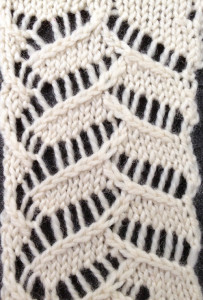
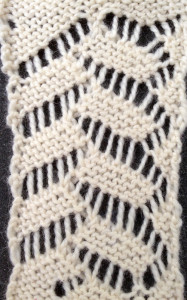
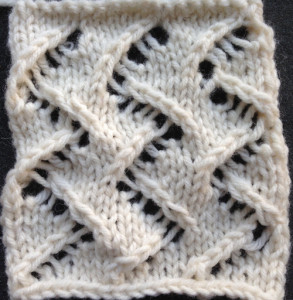
Below is an image of the hand knit swatch, unblocked, which appears three dimensional; transfer  lace has traditionally been blocked to lie flat and maximize eyelets. The fabric may be very interesting without blocking. If a slightly thicker yarn with “memory” is used, the piece may be steamed lightly, and the pattern segments will tend to shift in and out from the flat surface, whether the piece is hand or machine knit.IMG_1901
The yarn used was a “throw away” swatch testing acrylic. A very quick, light press and a bit of steam and here it is in the resulting killed, forever flattened version

IMG_1905  and it reverse side

IMG_1906