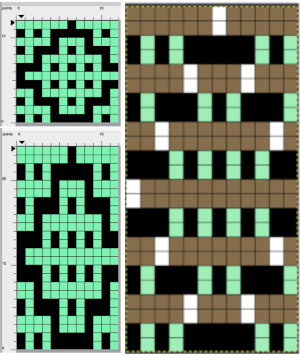
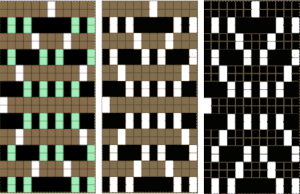
Revisiting older posts often brings to mind new or slightly different ways of looking at and achieving the same tasks.
Links to some related previous posts:
DAK DBJ color separations, templates, and other software
Revisiting Ayab_multiple colors per row DBJ 2
Revisiting Ayab_multiple colors per row DBJ 1
Img2track_multiple colors per row dbj, each color knitting only once
DBJ: more than 2 colors per row 3
DBJ: more than 2 colors per row 2 img2track
DBJ: more than 2 colors per row 1
Color separations for knit designs in only 2 colors are more straightforward than those for 3-4 colors.
The built-in KRC function in Japanese models will yield results automatically where each color knits in each design row only once, reducing the elongation in the designs often seen when employing other techniques.
Japanese machine models for home use (not the semi-industrial ones) have a color changer that resides on the left, and aside from whether each color in each row knits once or twice, the combined carriages need to move to and from the color changer on the left for each color selection.
The color-changers for brands differ slightly and matter in cross-brand use if one relies on published separated designs and pictured swatches.
Yarn changers for:
Brother 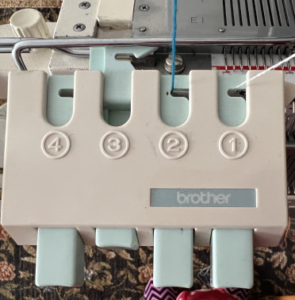 Studio
 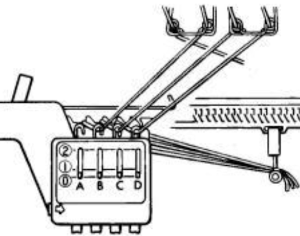 Sometimes the placement of the colors within palettes will result in the colors not being read and downloaded properly.
As described in the Ayab post: when using each color, it is coded in a range of 8-bit values. For 4 colors, it would be 0-63 color A; 64-127 color B; 128-195 color C; 196-255 color D.
When only 2 colors are in use, in manual color separations, the ultimate goal is to produce BW-indexed PNGs. They are then downloaded and programmed as one would FI patterns, palette placement is not a concern.
Working in default or limited palettes produces familiar visual clues in DIY, to save custom palettes see ArahPaint and Gimp in knit design 3
If the goal is to imagine the results in colorways based on yarns planned for use in the finished piece, that can be easily achieved after the fact.
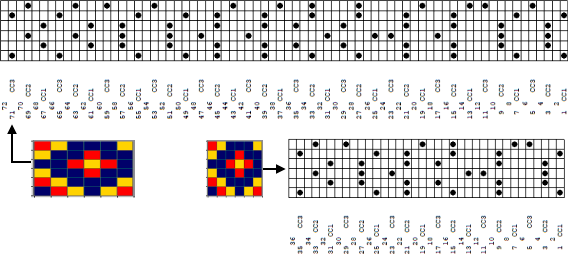
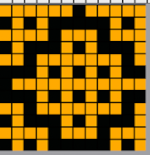
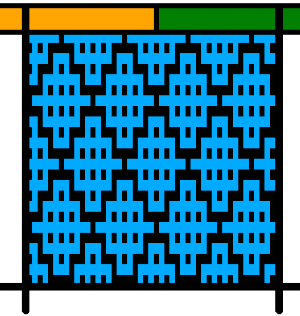
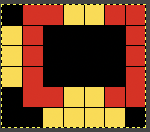
This design has been used in past posts and is 6 stitches wide; ![]() hence, repeated X4 in width will also be suitable for punchcard machines. Looking at it again:
hence, repeated X4 in width will also be suitable for punchcard machines. Looking at it again:
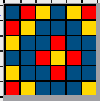 checking alignment when tiled
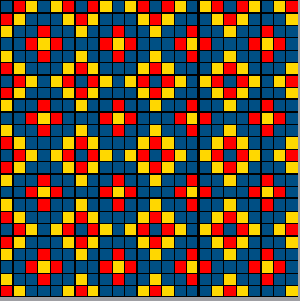 Stitches on needles not worked on the top bed are held while stitches in the other color(s) knit, and get longer. Some degree of alteration in the aspect ratio in the appearance of the design on the knit side in the final result is to be expected, also influenced by the addition of varied knitting techniques and carriage settings.
 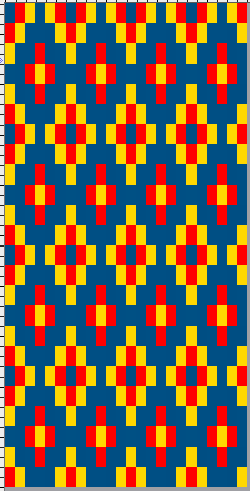 Methods I have explored in DIY repeat the same color sequence throughout even when any one of the colors is not represented in that design row: one way to decrease the visual lengthening of designs in dbj is to eliminate a row of knit stitches from each pair of passes by pushing Brother’s preselected needles back to the B position on the top bed before knitting from the right back to the left, thus skipping all needles in work on the top bed.
The HOP separation in Ayab performs this function automatically in addition to shuffling around repeat segments while keeping a fixed color rotation, making repeats that fail with other separation methods knittable.
In images where not all colors are represented on every row, there are more knit rows on the ribber than on the main bed, even with birdseye backing, another added cause of stitch elongation observable on the knit side.
When using birdseye backing, the ribber will knit every other stitch, alternating needles on each pass. An even number of needles is required. Patterning is akin to using a 1X1 card on the knit bed.
By the time the carriages have returned to the left only one row of knitting on every needle will be completed on the ribber.
The setting is not available in every model machine, including very early Brother ones.
When knitting in tuck or slip stitch, stitches grow in length until they are knit off again. This remains true when working in DBJ fabrics as well.
Yarn and tension choices can affect the final appearance.
There will be some degree of bleed-through behind the elongated stitches.
Blocking also influences the final appearance of the completed knit.
Exploring possibilities:
The initial 6X6 file is converted to stp and opened in DAK resulted in the following messages and pattern error corrections 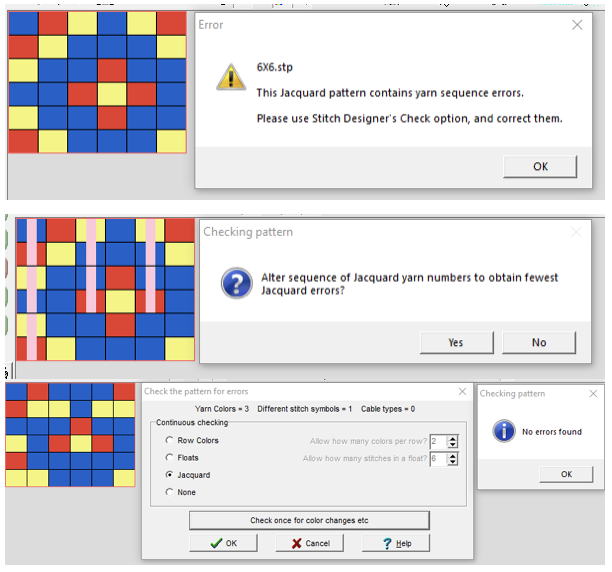 A second design was also tested in DAK and yielded the same error messages:
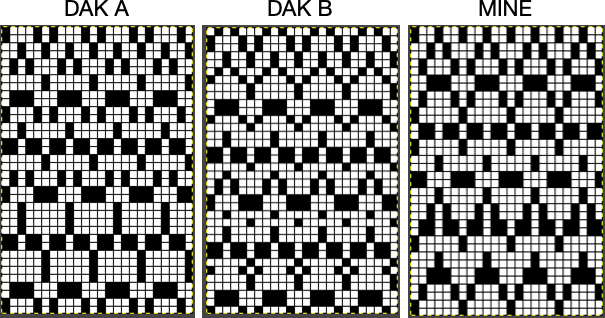
 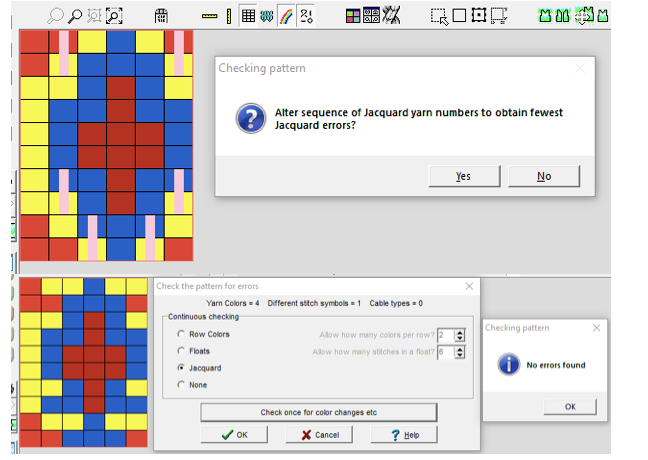 The 6X6 stp doubled in length to 6X12 cells allow for the option of selecting the type of dbj color separations, creating files that can, in turn, become PNGs for working outside the program, and for printing traceable templates for punchcards. That work is achieved through hacks since DAK does not allow direct import or export of file formats other than its proprietary ones ie stps or txt for use with Kniterate.
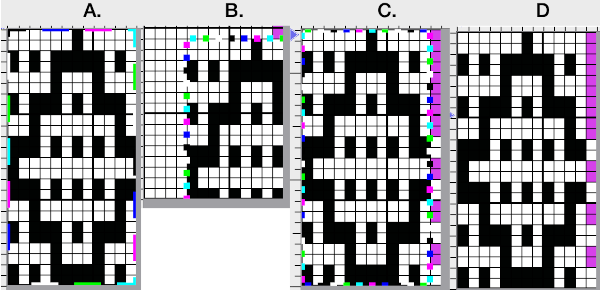
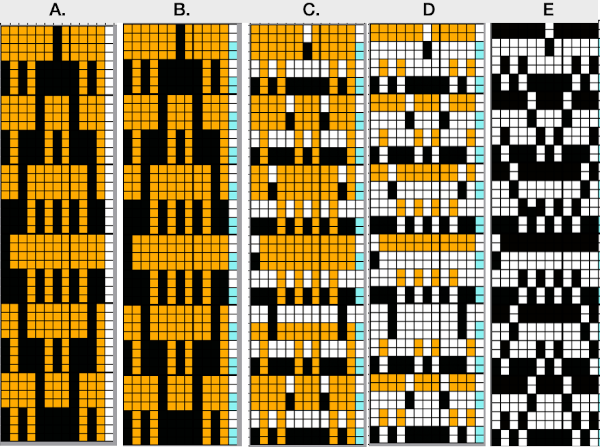
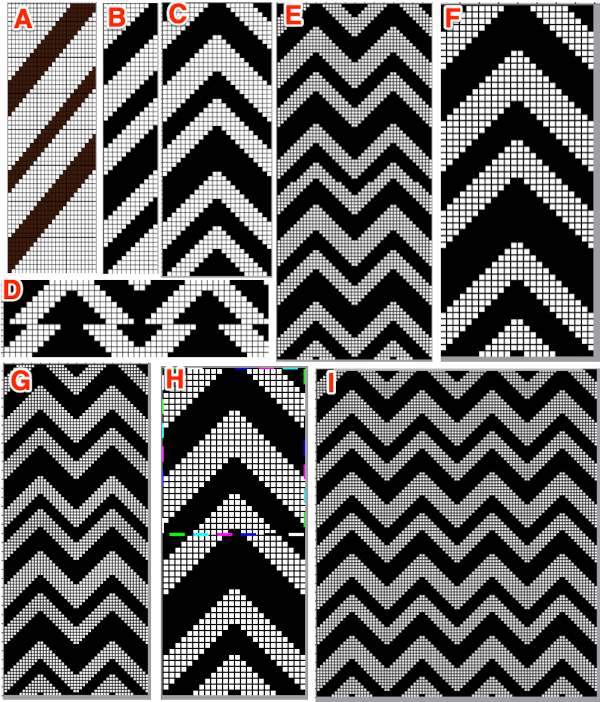
 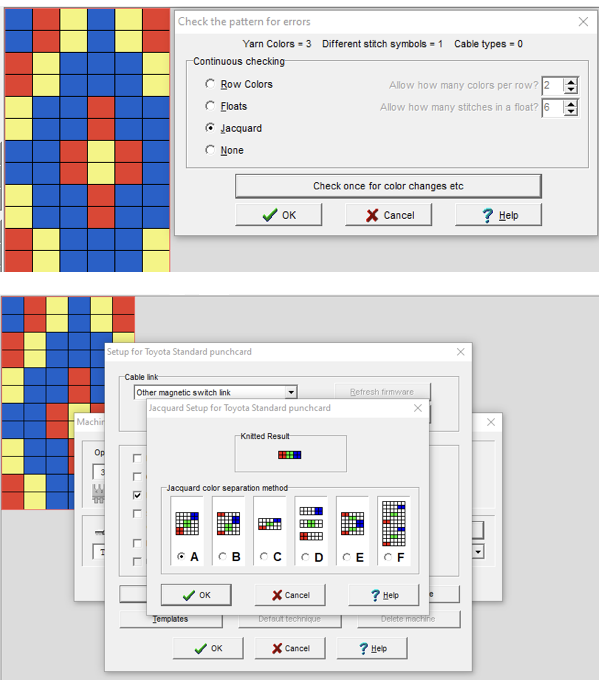 A closer look at the diagram of the color sequence options in each
 The characteristics of the more commonly used methods in review:
Method A works on pairs of rows, 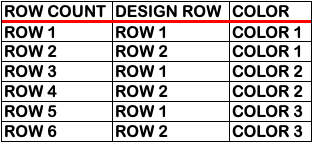 Method B creates the same separation as the default built-in KRC one in Japanese electronics with each color in each design row knitting only once,
  Method C separates each color row into separate rows of knitting, rows do not have to be repeated in pairs in DIY, and the double-length switch will need to be used in Japanese knitting machines
  It is possible to generate an output of the separation and to process it to generate files usable in img2track or for printing traceable punchcard templates.
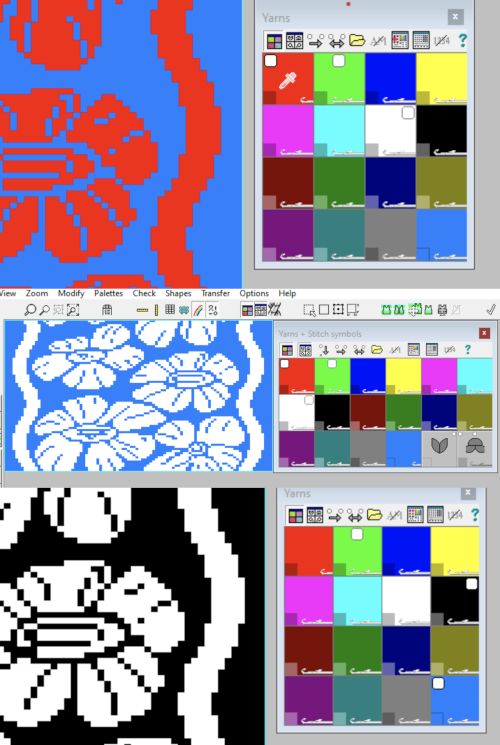
The program does have an option to save a bmp but the save is of the separation on a grid with added data, not as a file immediately usable in other programs. Click on the floppy disk icon outlined in red to save as bmp as an alternative to screengrabs. 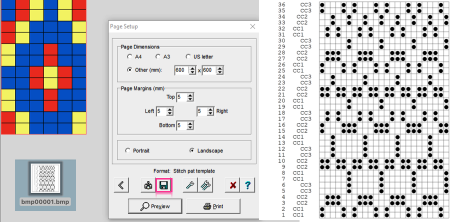 Using the same 6X12 file, the generated printable templates and associated converted PNGs:
A 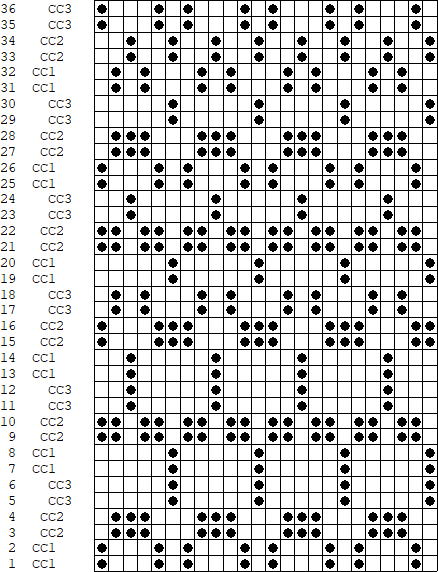
![]() B the repeat here is also for the original lengthened X2, and 36 pixels high with no segments repeated. The essential difference is that the first preselection row is made from left to right, with the pair of rows for color 1, design row 1 split between the top and bottom of the separation.
B the repeat here is also for the original lengthened X2, and 36 pixels high with no segments repeated. The essential difference is that the first preselection row is made from left to right, with the pair of rows for color 1, design row 1 split between the top and bottom of the separation. 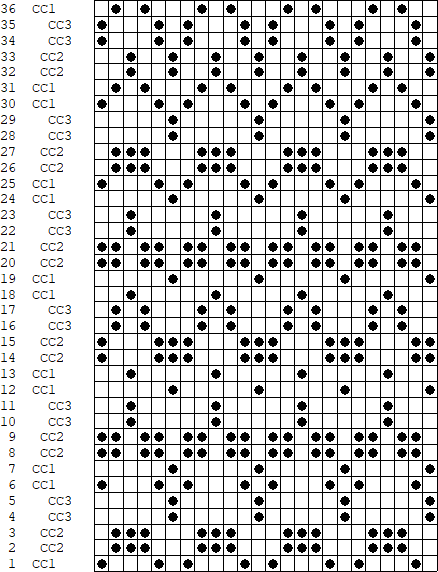
![]() C
C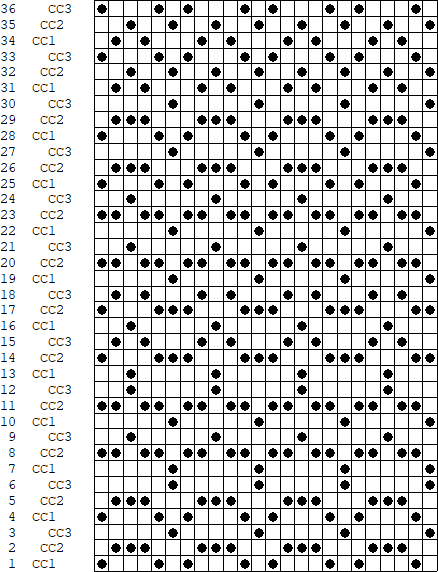
![]() elongated X2=24X72, handy for other knit structures, but not for reducing elongation in DBJ
elongated X2=24X72, handy for other knit structures, but not for reducing elongation in DBJ ![]() Using img2track set at knitting in 3 colors, there is no error message, but the 6X6 file will not produce the planned design.
Using img2track set at knitting in 3 colors, there is no error message, but the 6X6 file will not produce the planned design.
A proof of concept is provided in the post DBJ: more than 2 colors per row 2. 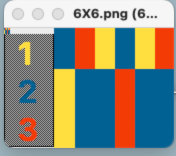 Starting with the double-length 6X12 file, each color in each design row will be knit twice:
 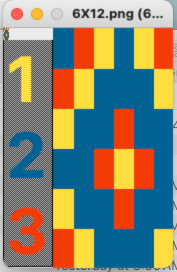 and the machine will offer prompts for its pre-determined color change sequences.
Most recently, my separation experiments using Gimp use transparency methods and are are shared in the reverse order of their development
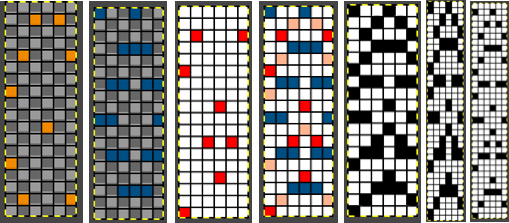
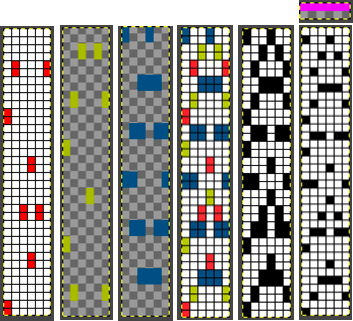
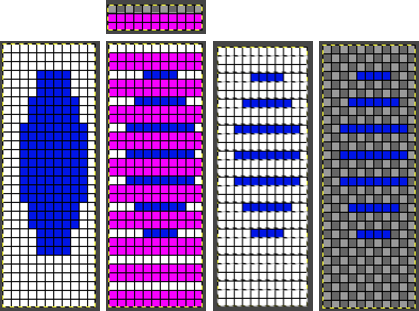
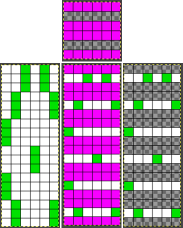
#3 The briefest and last method: working in RGB mode, begin by multiplying the pattern in height X3, to 6X18 ![]() Isolating the red color on a white ground:
Isolating the red color on a white ground: 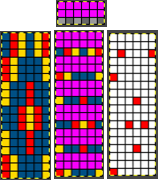 isolating the yellow on a transparent ground:
 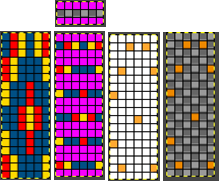 isolating the blue on a transparent ground:
  copying and pasting the isolated yellow and blue with transparent grounds in turn onto the red design isolated on the white ground
changing all 3 colors to black
doubling the image in length to 6X36
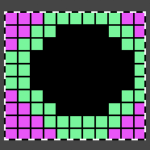
remove every second row using the pencil tool or bucket fill it with the 6X2 pattern, and change the cyan to white. Any other color can be used instead of the magenta at that point
change Mode to BW indexed, and save the final file for knitting. ![]()
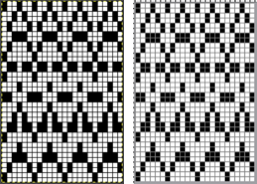
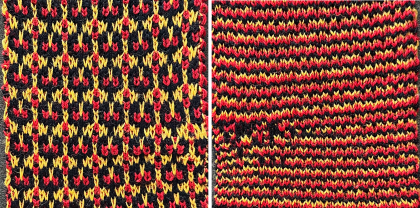
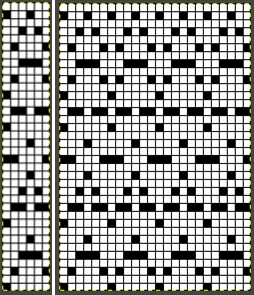
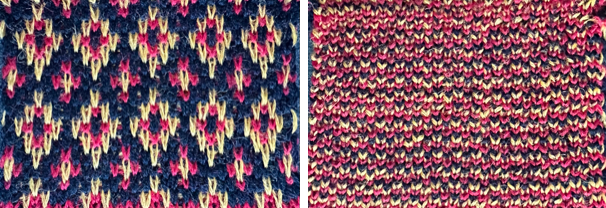
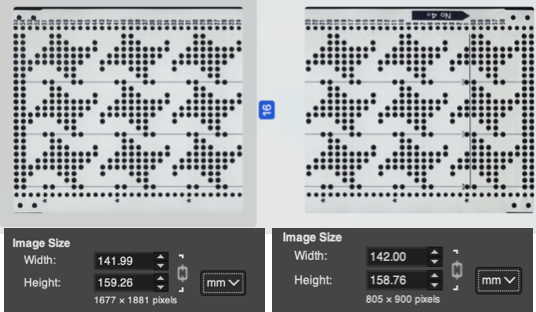
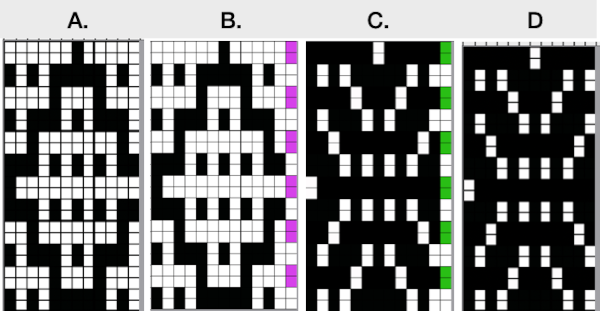
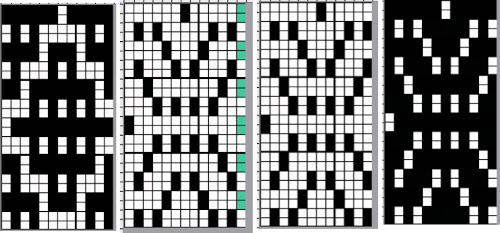
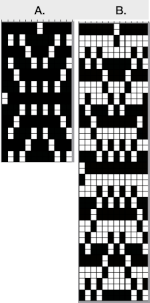
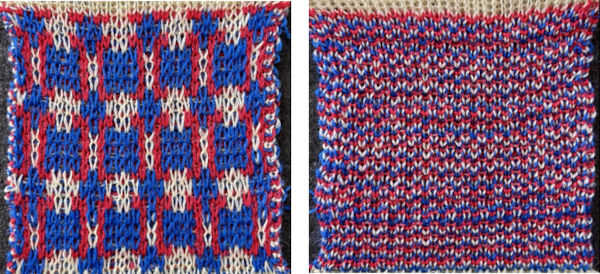
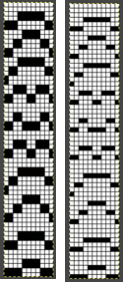
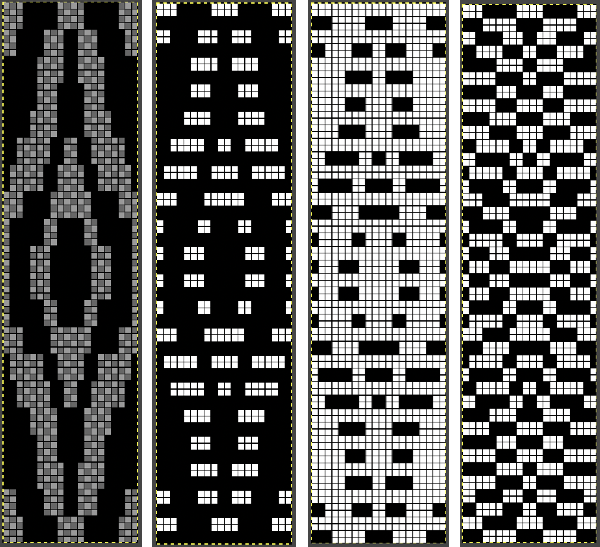
 Comparing the results for the full repeat from other methods on the left, with the one using this method on the right
Returning to that 6X6 repeat that was prone to error in both DAK and img2track, with each color represented once in each row, exploring the possible separation to knit each color only once, and using a final 6X18 PNG ![]() led to patterning failure.
led to patterning failure.
The Image menu progression of its process in Gimp: the number of thumbnails grows and one can travel through the images using simple clicks until any image is discarded or the program is quit, the X appears aside the file viewed in the work window.  Each color was isolated on a white background, with guides placed horizontally across every pair of pixel rows.
  Pairs of rows of each color were copied and pasted in alternating sequences on an all-white file longer than 18 pixels rows and the results were trimmed to a 6X18 file for a knitting test.
 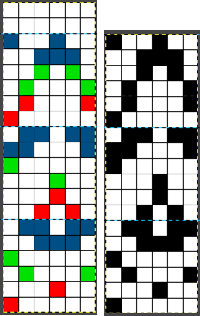 Though the built-in KRC separation takes that first design row and moves it to the top of the repeat, thus knitting a single row with color 1 and completing it in a pair on the last row of the program, the first knitting test began with preselection from the right, and color 1 knitting for 2 rows.
 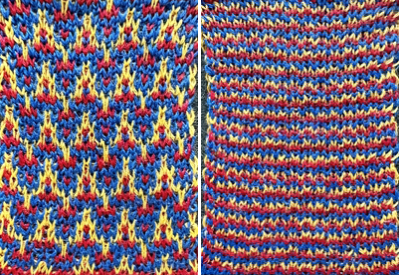 A second try at an 18-row repeat, also a design fail, with odd breaks in the lili action on the ribber, seen in Passaps when pusher selections on the back bed are disrupted.
![]()
 When the motif was doubled in length, and the same method was used, the results matched the 24X36 file.
The 6X6 design, however, expanded and separated to a 6X18 file may be used in machines with color changers on each side, with a different color sequence, see DAK Method E notes toward bottom of post.
#2 Working with the 6X6 design lengthened X6 to 6X36
![]()
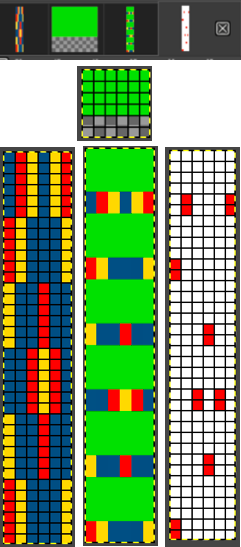
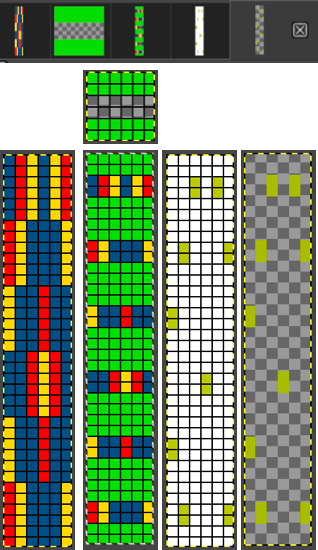
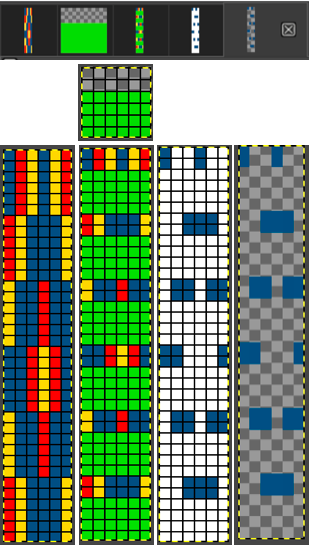
 with every other row rendered in all white cells
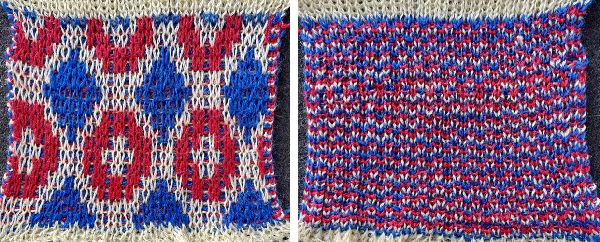
![]() The proof of concept swatch
The proof of concept swatch
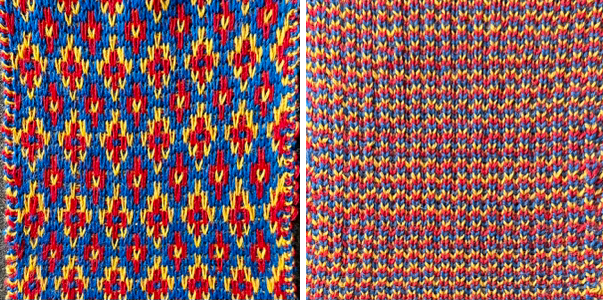
DAK owners see the 36-row file and similar knit sample for the Half Milano separation F toward the bottom of the post.
In my #1, first separation draft, the 6X10 file is elongated X6, to 6X60, considering that each color in each design row will be carried for two passes. ![]() The latest Gimp version for Mac is 2.10.36
The latest Gimp version for Mac is 2.10.36
Sometimes there are differences in commands in the Windows version.
Begin the work in RGB Mode.
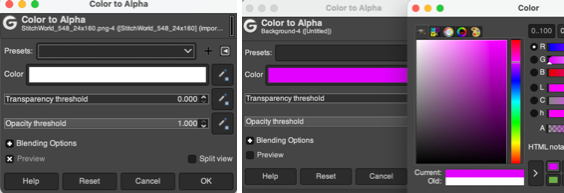
The color-to-alpha command in Gimp makes all pixels in a selected color transparent.
The option can be activated through the Layers Menu by choosing Layer> Transparency> Color to Alpha or the filter via Colors> Color to Alpha from the pull-down menus at the top of the work window.
No threshold or blending adjustments are needed in the small 8-bit files used in designing knits.
Some previous repeats using colors to alpha in 2-color separations can be found in the posts
Color separations for larger scale mosaics and mazes
and on Using Layers in Gimp for Color separations
Magnify the image to a comfortable viewing size, ie 800% or more.
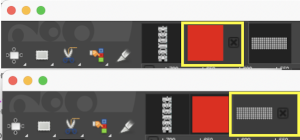
When the color to alpha dialog window opens, there will be a small preview of the image you are working on on the upper right that relates to how many images are available for processing in the work window at the time. ![]() When the color white is in the mix using the 8-bit files, the preset color selection for transparency in the color bar is white.
When the color white is in the mix using the 8-bit files, the preset color selection for transparency in the color bar is white.
To change the color selection, click on the white color, the palette window will appear, select the new color, and click OK.
 To Bucket Fill with pattern: create a custom brush size, matching the starting design width in pixels. The number of rows varies with intent. White is used as one of the colors, and the second color can be any other.
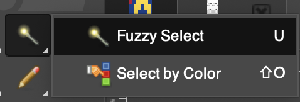
Click on the rectangle tool and then on the pattern thumbnail, an icon for it will appear on the upper right of the work window. The brush will be copied to the clipboard and will be available to use to pattern fill until the program is quit. It can also be saved for future use as explained in other posts. 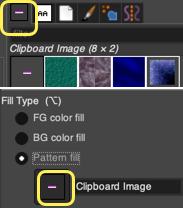 To fill specific groups of pixels with FG or BG colors, click on the select by color tool,
 ![]() and then on the color you wish to change, use bucket fill, selecting foreground or background color.
and then on the color you wish to change, use bucket fill, selecting foreground or background color.
The fuzzy select/magic wand tool mentioned in previous posts is designed to select areas of the current layer or image based on color similarity. It appears to the left of the select-by-color tool. It can be used when pixels in that color need to be changed in contained single areas rather than throughout the whole image.
If using the bucket fill with foreground or background color alternating with fill with pattern, remember to switch between the two as needed.
If an error is made, use Image> Edit> Undo to move back to any previous steps.
If at any point the image in the work window is surrounded by dotted lines, click on the rectangle tool and then again in the work window to essentially fix the layer.
The Image menu provides access to nearly any operation you can perform on an image.  Clicking on any one of those images will produce a dotted outline around it
  making it identifiable and usable in work such as for copy and paste followed by bucket fill with pattern,
  or for navigating between series of open files.
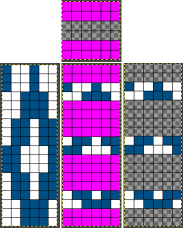
#1 the longhand first practice run began with the 6X10 file multiplied in height X6 to 6X60. Good practice for sorting out a technique, but guessing the aspect ratio in the final knit would be bothersome. ![]() 1. has the first 2 of the 6 design rows rendered transparent, so when used to fill the original, only rows planned for color 1 are left exposed
1. has the first 2 of the 6 design rows rendered transparent, so when used to fill the original, only rows planned for color 1 are left exposed
2. will leave design rows 3 and 4 exposed for color 2
3. will leave design rows 5 and 6 exposed for color 3
Repeat these steps on the original design 3 times, and save each completed step until comfortable with working on several files open at once.
A. select by color, bucket fill each with white except for the color red
B. select by color, bucket fill each with white except for yellow, if the color seems too hard to identify, change it to another
C. select by color, bucket fill each with white except for blue. 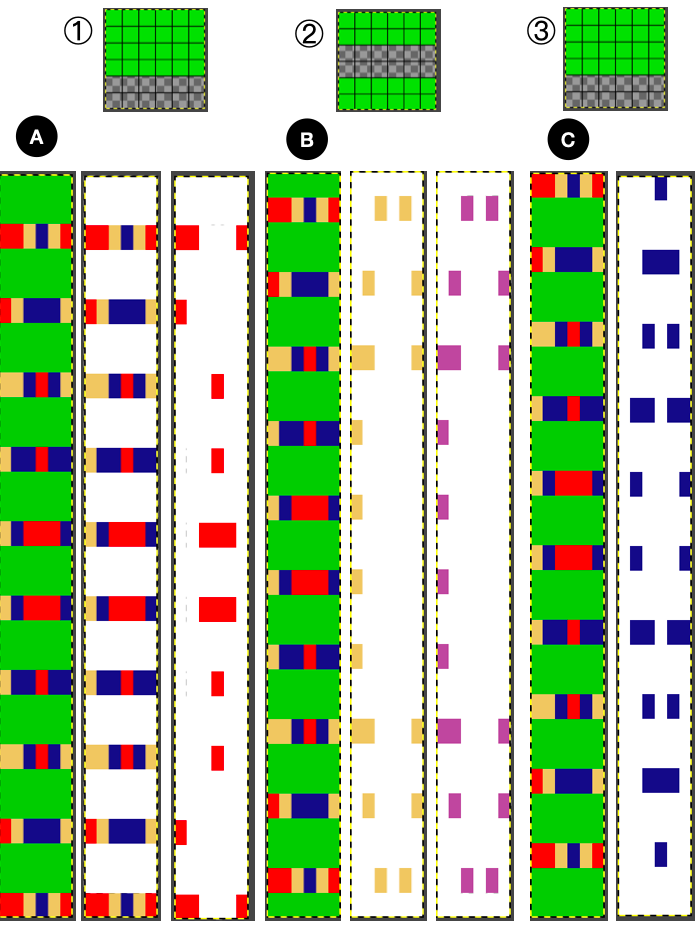 The red and white in the last step in A are left undisturbed, while the white background in the last steps in both B and C is rendered transparent, as seen in 2 and 3. Both 2 and 3 are copied and pasted onto A, rendering the final tricolor image, 4.
Using select by color and bucket fill, the three colors are replaced with black, 5.
A last brush bucket fill, 6, leaves only the first row of black cells exposed, changing the cyan to white and converting the final result to BW-indexed mode, 7, is saved for knitting with each color in each row knitting only once. 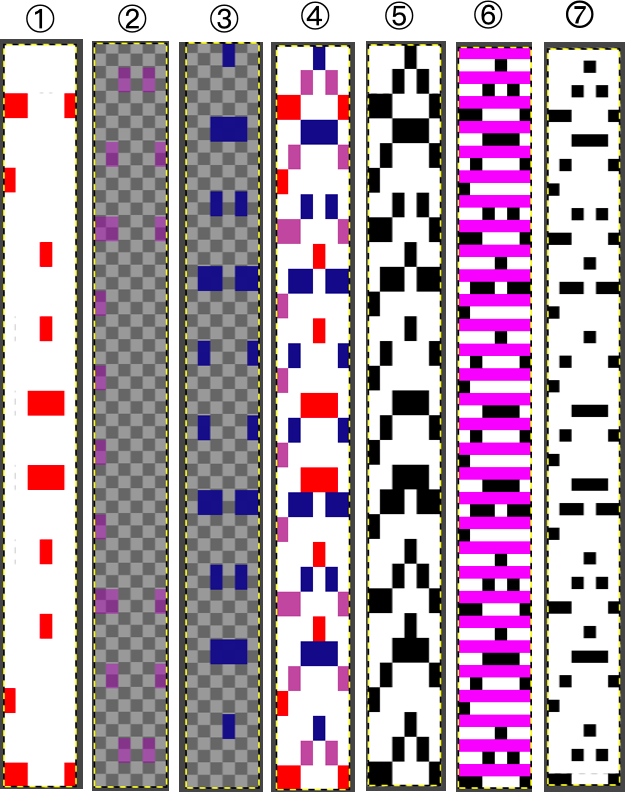 When all 3 colors are not represented on every row,
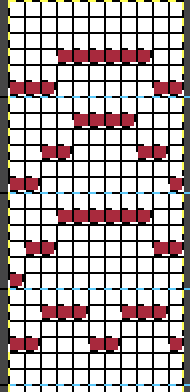
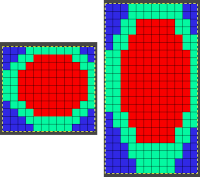
The 11X10 image was used in previous posts, 
![]() tiled,
tiled, 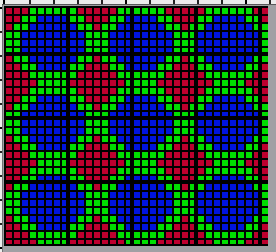 the tiled elongation:
 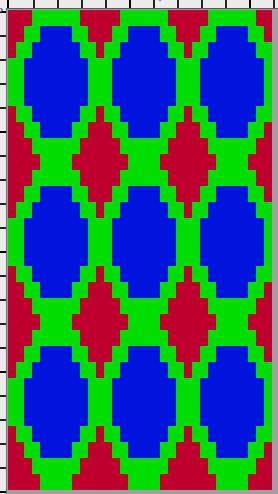 The separation uses method#3: the process with the image lengthed X3 to 11X30 representing each color in each design row once:
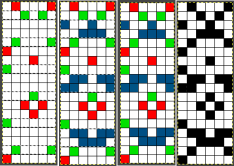
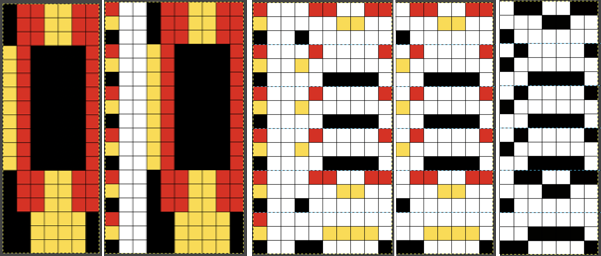
 ![]() working with Gimp transparency, isolate the red, retain the white ground
working with Gimp transparency, isolate the red, retain the white ground 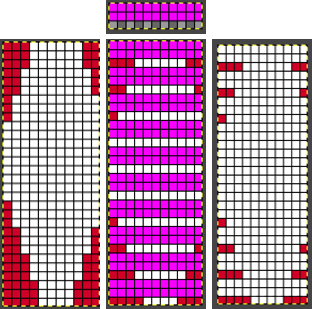 isolate the green, render it on a transparent ground
 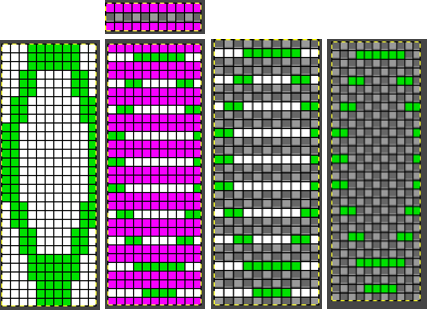 isolate the blue, render it on a transparent ground,
  copy and paste the green and blue rendered on transparent grounds onto the red on the white ground initial image, obtaining a 3 color separation.
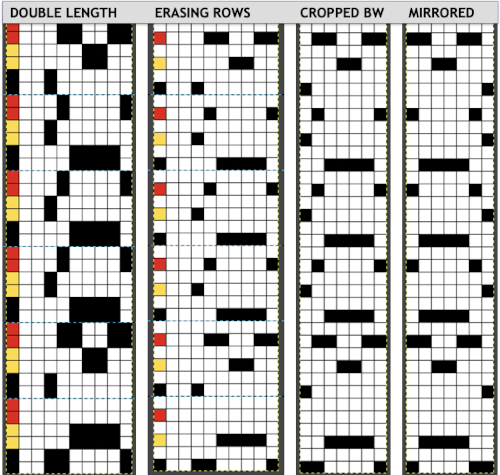
Replace colors with black. For knitting each color in each design row for 2 passes double the file in height to 11X60 pixels. To knit each color only once in an attempt to further reduce changes in aspect ratio, erase every second row. Images for knitting are saved in BW-indexed mode. 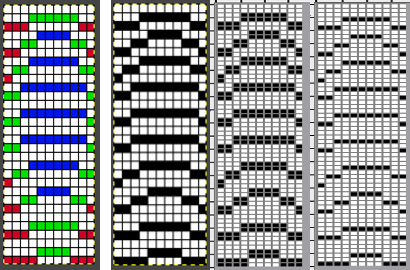 The DAK template (set for 950i) and img2track screen image compared to my result:
 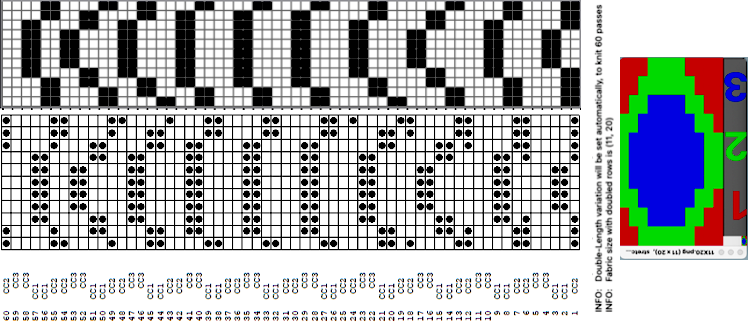 the 11X60 PNG, all pixels,
![]() and with black pixels on every second row changed to white
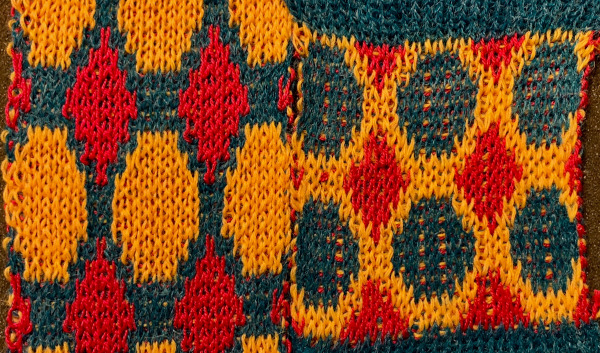
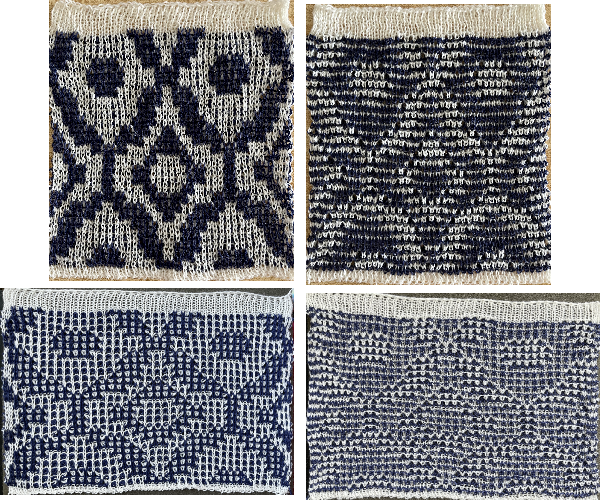
and with black pixels on every second row changed to white ![]() The proof of concept swatch: the vertical lines between pairs of stitches result from the drag on the ribber stitches to the right and then the left as the birdseye pattern is formed, they are frequently also seen in ladderback dbj.
The proof of concept swatch: the vertical lines between pairs of stitches result from the drag on the ribber stitches to the right and then the left as the birdseye pattern is formed, they are frequently also seen in ladderback dbj.
The yarns used are not of equal thickness.
Balanced yarn weight and tighter tensions would diminish both those lines and any bleed-through behind the stitches on the knit side.
The dropped stitches on the purl side indicate the need for troubleshooting the condition of ribber needles and their latches.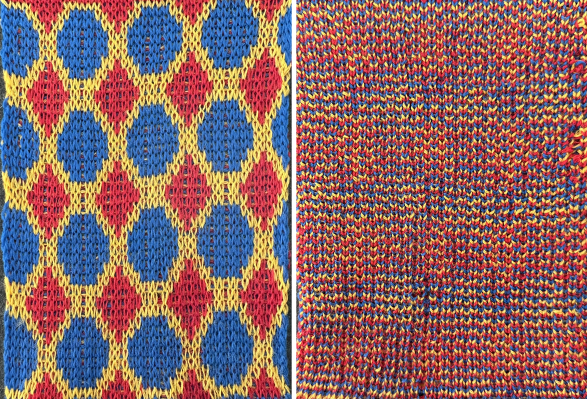 Img2track_multiple colors per row dbj, each color knitting only once used the same 11X10 repeat, explored the results using HOP, pushing needles back to B manually EOR, and a color separation with the same 11X60 final file.
An additional way to decrease changes in the aspect ratio of the original design
relies on eliminating as many passes as possible, by eliminating design rows with “no color” out of the color change rotations.
The color changes in continuing identical sequences vs skipping any one of the colors from the rotation when not in use: 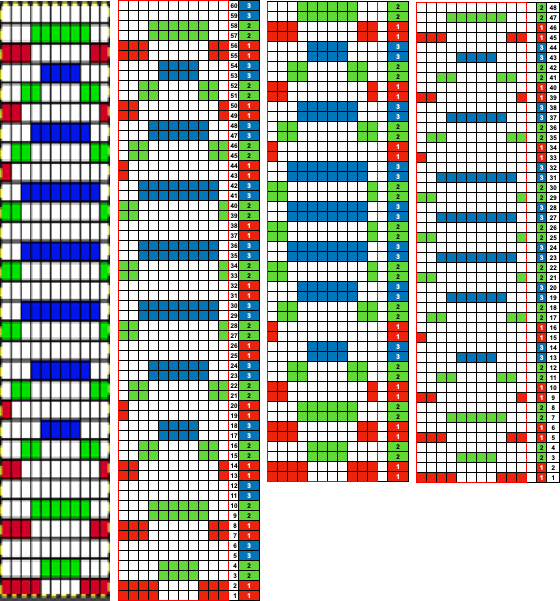 The 11X60 repeat is now to 11X48
 ![]() its companion with every other second row of black cells erased.
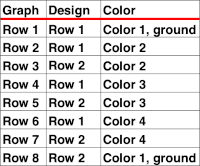
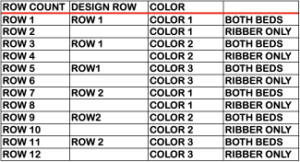
its companion with every other second row of black cells erased. ![]() Both create the need to track what color to use and when. If the machine or software cannot provide prompts and reminders, a spreadsheet is easy and quick to create, listing colors and corresponding row counts:
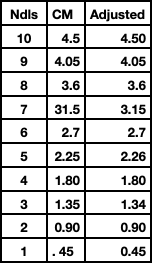
Both create the need to track what color to use and when. If the machine or software cannot provide prompts and reminders, a spreadsheet is easy and quick to create, listing colors and corresponding row counts:  Tracking those shifting color changes is more than my bandwidth and patience allow.
As I was working on this post, a friend asked about the separations for 3 color designs in the StitchWorld Pattern Book #3.
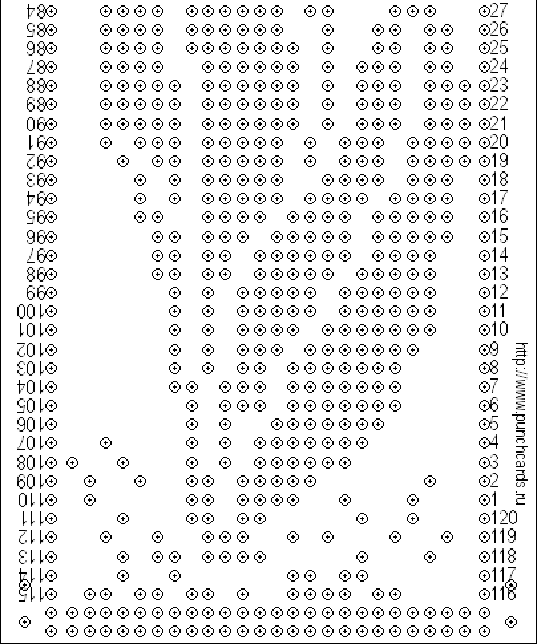
I randomly chose # 484, with the swatch pictured on p 57 and the design separation repeat found on pp 96-98. 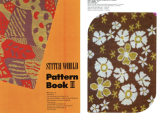 The shortest segment can be quickly converted to a knittable 140X50 PNG.
  Other factors to be considered and examined:
the color-changing sequences are provided on each side.
Each design row appears different from the row below it, raising the question as to whether each color is knitted only once.
The built-in KRC function in Japanese electronic machines automates that option when only 2 colors are used.
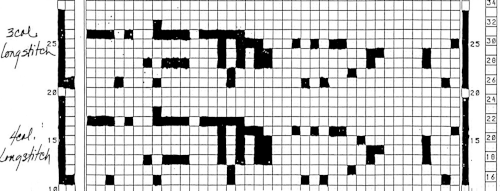
Passap E6000 users have a programmable reader technique that accomplishes the same for 3 and 4 colors.  This SW III segment is for rows 521-570, p98, with two more full pages in the pub beginning on p 96 with rows 1-260, and p 97 with rows 261-520.
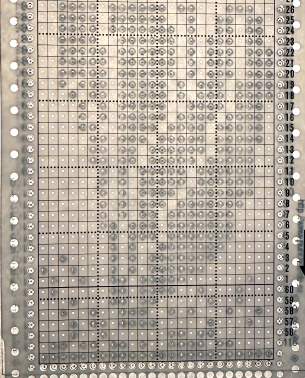
Gimp Guides were placed on a screengrab of the file and it appeared each number was associated with 2 design rows.  The color numbers are not in fixed sequences and differ on each side, as seen in this magnified view.
 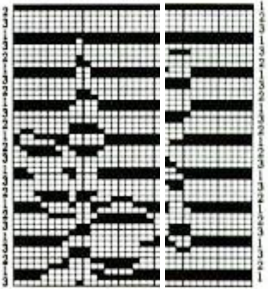 Found when browsing through the SW III pub for added clues: the fair isle section symbols are suggestive of the CK35 Brother semi-industrial machine, produced in small numbers decades ago.
  The CK 35 has a color changer on each side.
 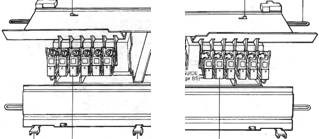 From the manual regarding their use:
 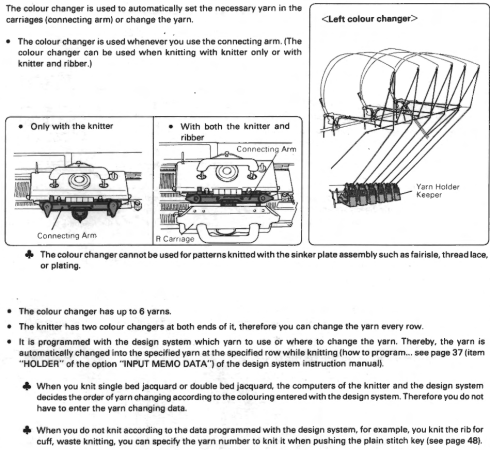 If the files are intended for the CK 35, additional information is needed for emulating or adapting them for use on home knitting models, not always possible.
The same is often true when traveling between machine brands manufactured in different countries.
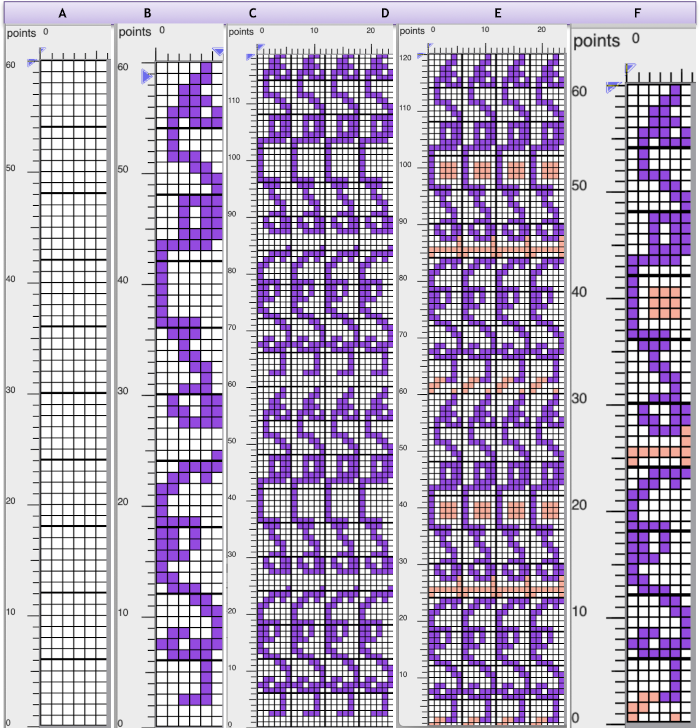
DAK owners can use Method E jacquard separation for machines with a color changer on each side, like the Brother CK 35. According to the manual, the process works on pairs of rows and separates each row into a pass with each color.  A sample separation with no error messages when the 6X6 file is opened.
 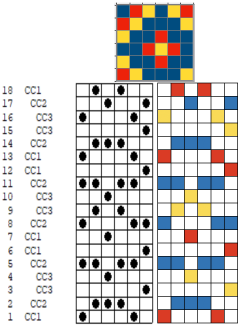 Untested DIY for the same separation:
The 6X18 repeat opened in Gimp, using a single-pixel pencil to fill in all except the color for that row with white. 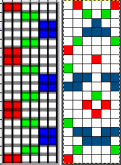 Using the custom brushes and bucket-fill with the pattern, begin with isolating the red color, retaining the white background,
 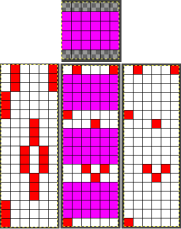 repeat to leave the isolated green exposed, and convert the magenta color from the brush to alpha
  repeat with the isolated blue,
  in two steps, copy and paste the green and white on alpha and the blue and white on alpha on the red-on-white ground image, the tricolor final result, which matches the result from the pencil color replacements, is then rendered in BW for knitting.
 The last DAK Method F is referred to as suitable for Half Milano. It is directly translatable for use in the Japanese models.
  The corresponding separations for both the 6X6 and its elongated sibling, 6X12
  The 36-row repeat was quite different from mine, but a knitting test resulted in a matching result
  while trying out the 11X10 design in DAK resulted in obvious patterning fails, likely because the repeat is not an even number of pixels in width.
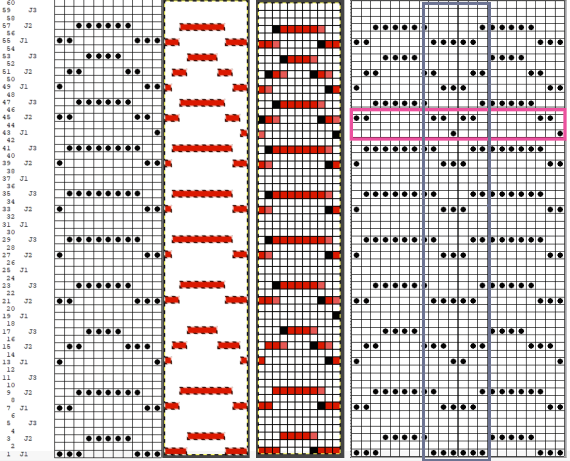
A repeated knit test of my 11X60 repeat, the arrow points to operator error when I failed to notice the color changer was carrying 2 colors at once. 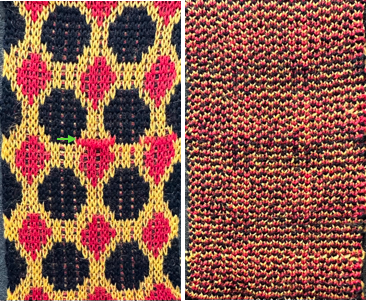 It is possible to superimpose final repeats on each other to look for errors and differences. The DBJ separation in DAK was 60 rows high as well, but it appears to be inaccurate, pointing to possible unidentified errors when working with a stp that is an uneven number of pixels in width.










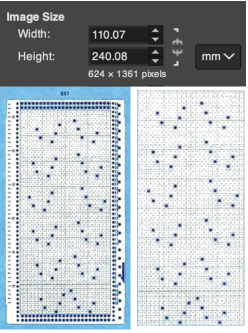
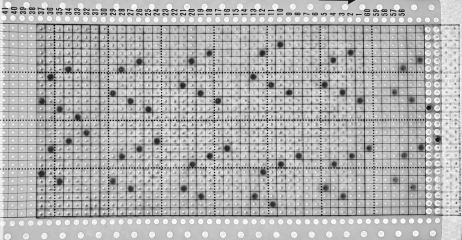
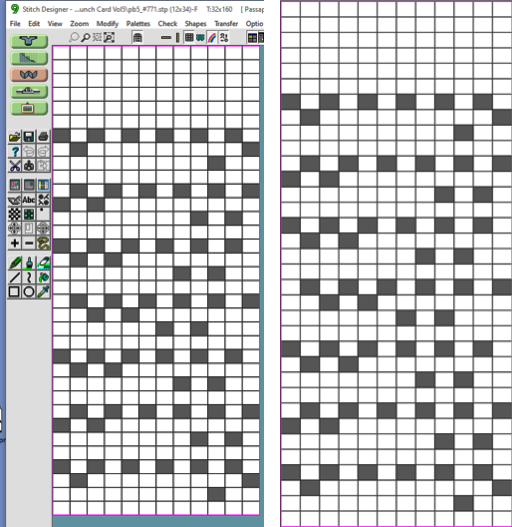


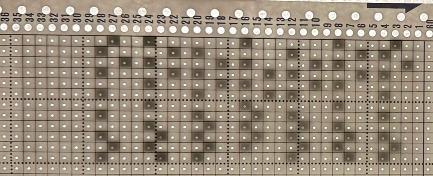


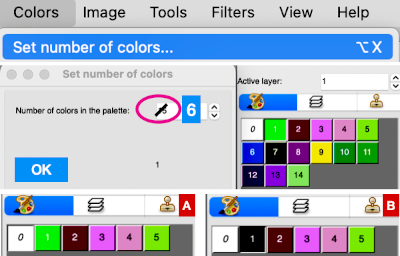
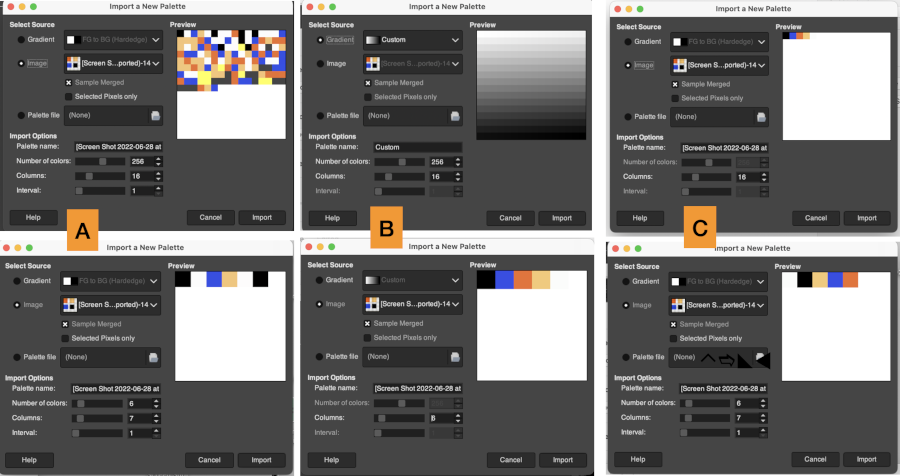
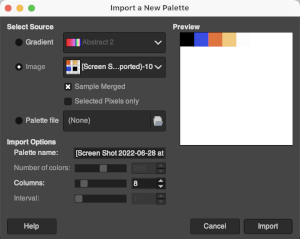


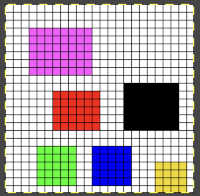

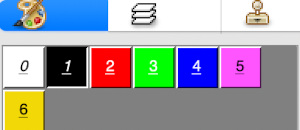


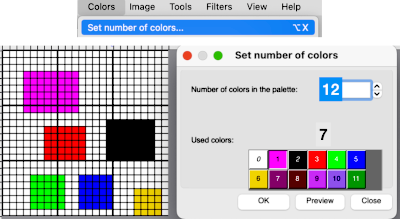
 Designing for fair isle, or when attempting to visualize and illustrate slip and tuck fabrics with frequent color changes, more colors may be required even though the final download will be in black and white. There is a quick way to add random colors assigned by the program and based on the initial palette:
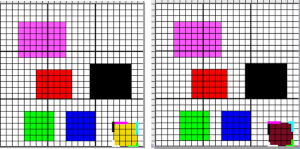
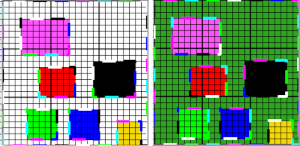


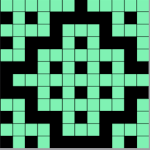




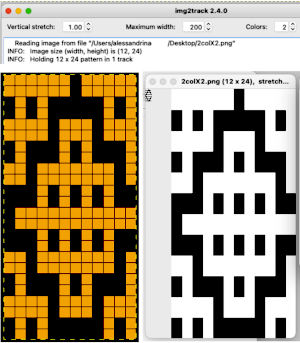





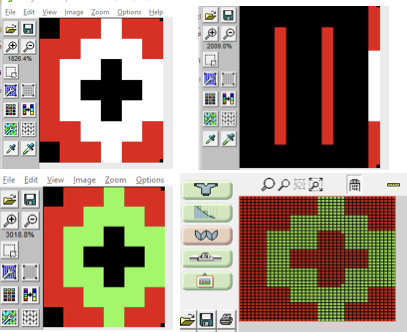


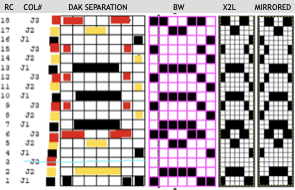
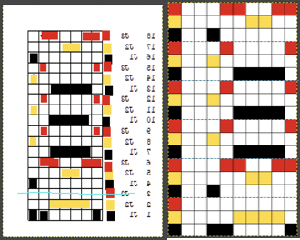
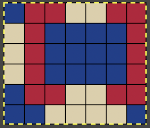
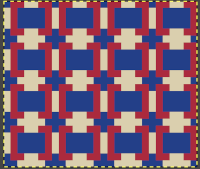
 Here it is shown modified, with rows containing fewer than 3 colors marked.
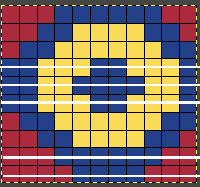

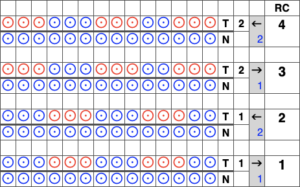


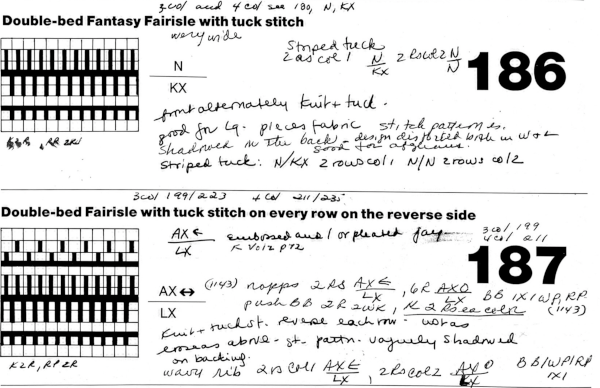 In Fantasy Fairisle knitting using 187 with alternating up and down pushers on the back bed and AX with 2 arrow keys would match Brother ribber knitting with lili buttons used on an even number of needles set to tuck.
 For the 1-pixel grid in Gimp to be visible on an editable image, a magnification of at least 800 is required. The options offered by default
 can be changed to suit by simply typing in a new number.
 the processed image
 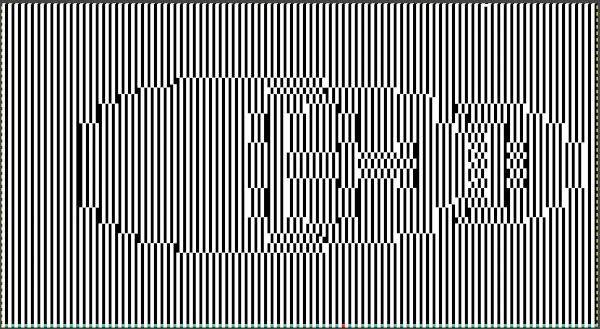 the trimmed 98X182 png
  doubled in length once more to 98X364
  Knitting process on a 930 using img2track:
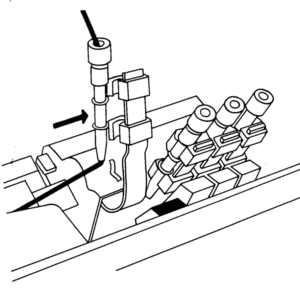
 A reminder: in my experience, the Brother cast-on combs are usually chrome-colored, Studio grey, and Passap, and I believe Superba ones were traditionally green. The first 2 were designed for 4.5 mm machines, the latter for 5mm. The different mm spacing does not make the 5 mm combs suitable for casting on on Brother, but they can be poked through the knit in progress. I like to leave the first comb and weights on, insert the new comb closer to the beds, and then move the weight up, and then remove the lower position comb.
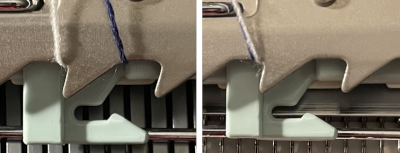
 In the Brother model, sometimes the yarn is left in the wrong place below eye level rather than its own individual one corresponding to its button, and both yarns are picked up with the next color change.
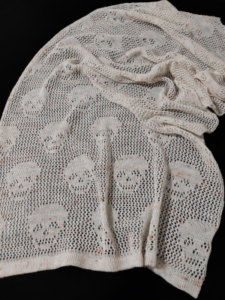
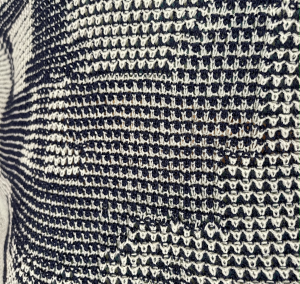
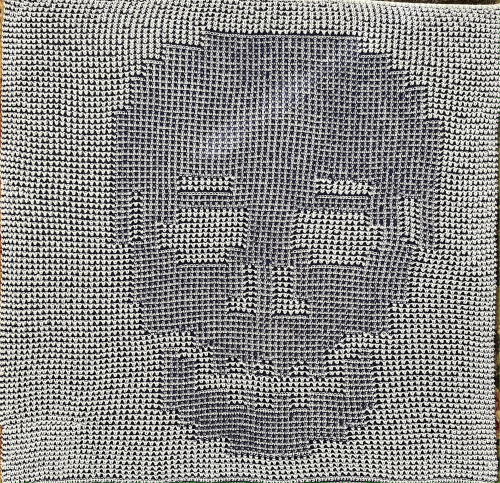 a close-up of the texture at an angle
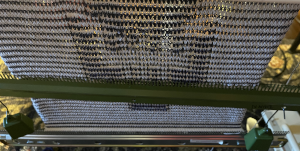
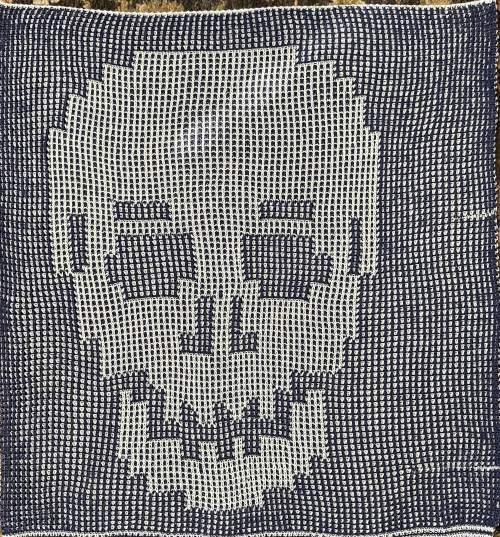
  Claudia Scarpa developed a skull variation using only layers in Gimp
 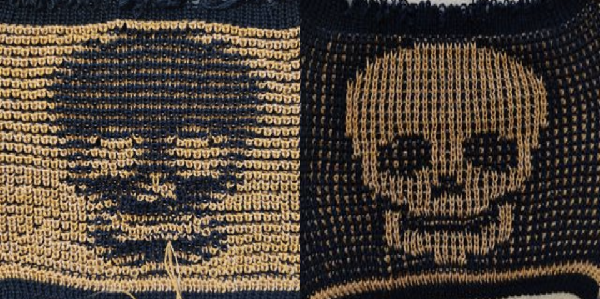 and has been kind enough to create a
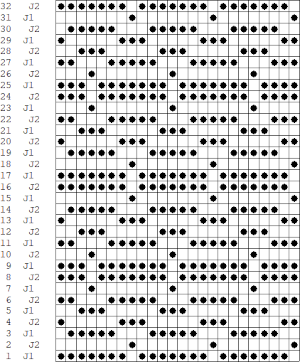
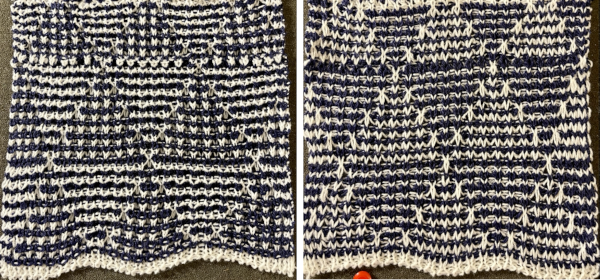 It is possible to work some repeats on some machines with the ribber also set to tuck both ways with EON needle selection.
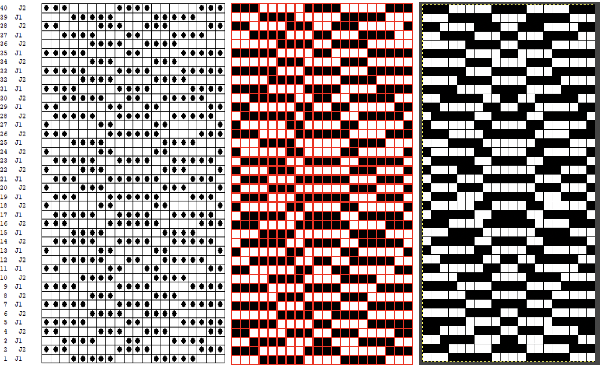
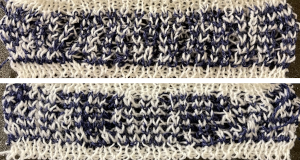 When using the Dak stitch design module, the color separation is automated. Choose any design repeat. This happens to be a 20X20 one, chosen from the thumbnail assortment, so not suitable for punchcard models. “Printing” the template using choosing the option of using dots rather than squares to represent knit stitches makes the resulting print screengrab easier to trace.
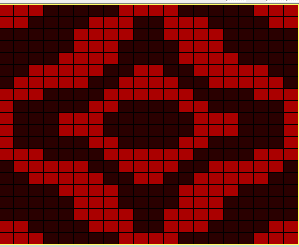 the 20X20 repeat as a BW png
  The result is screengrabbed, opened in Gimp, converted to BW mode, and scaled to the 20X40 expanded design size. Unless the double-length function in the machine is also used, it will need scaling again to double length prior to download.
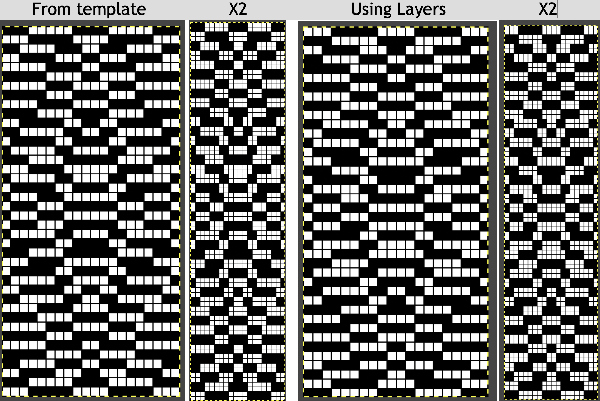
 The final image double length, showing the difference between the separation using the template, and that using layers as in Claudia’s video, which appears different but is actually the same repeat, color reversed.
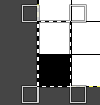
  Using bucket fill for the ground in the second layer, as described in the video, the captured clipboard image can be very small
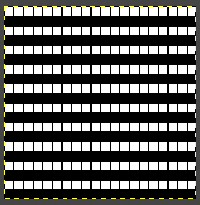 Alternately, the initial design may be scaled X4 to 20 X 80 pixels
 bring the ribber needles up into work between them
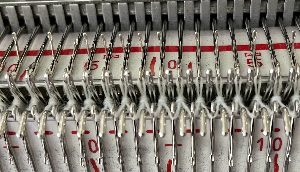 drop the ribber

 As for more than 2 colors per row, performing the color separations may be achieved
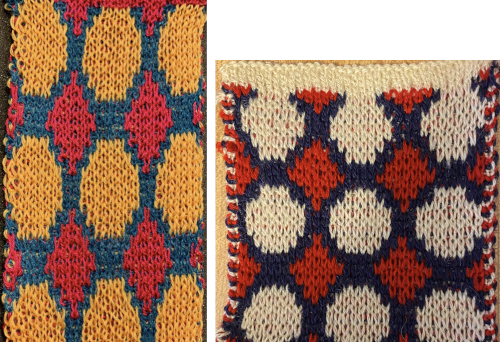
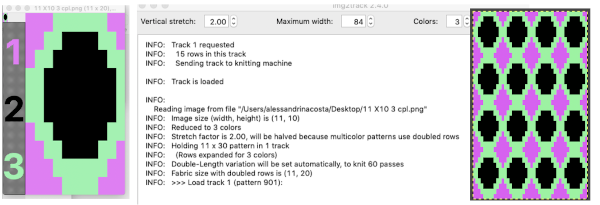 A “hack”
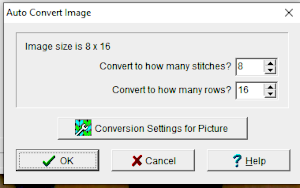
  stitch and row counts should match, and save the stp
 The separation methods in DAK:
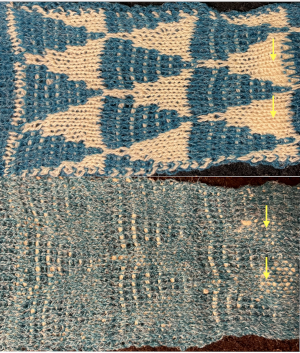
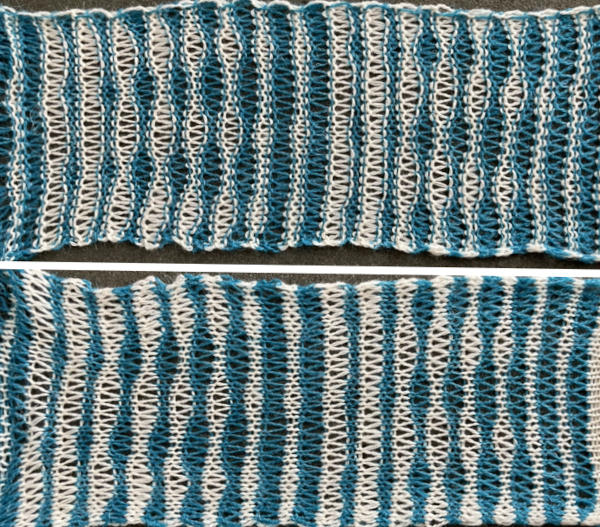
 Yarn choice and design make a big difference. Here the yarn is far too thin, and the repeat too narrow in width, but the possible result is illustrated. The main bed is set to slip in both directions throughout. The ribber setting needs to slip in both directions for every other pair of rows. When the ribber slips, the main bed will knit the color that will create the pockets, where there are many single stitches selected here, the KC was set to KC1. When the color is changed and the ribber is set to knit again, stitches in that color will knit on both beds, sealing the fabric in those areas and forming a solid color background on the reverse side. Here the white forms the pockets, and the floats after a pair of passes are seen in this photo.
  Because the yarn is so thin there is a considerable grin through on both sides, the areas marked with arrows indicate where the white pockets were lightly stuffed with yarn ends
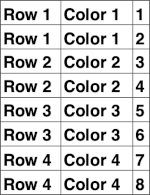
 If pngs are created outside the program, they may be doubled in length unless the repeat is designed that way.
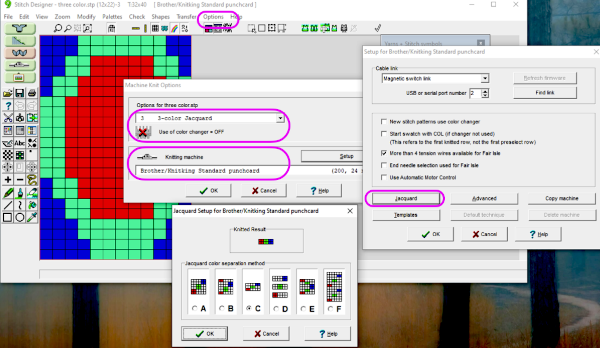 How the different jacquard setups process the specific repeats:
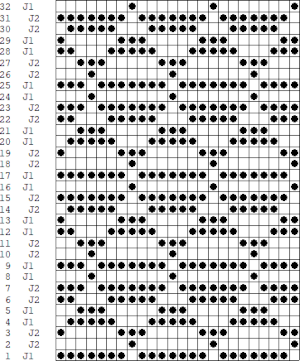 Passap card reader techniques saved from long ago experiments.
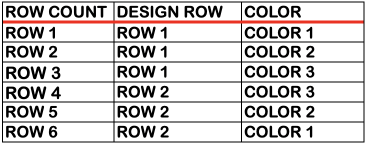
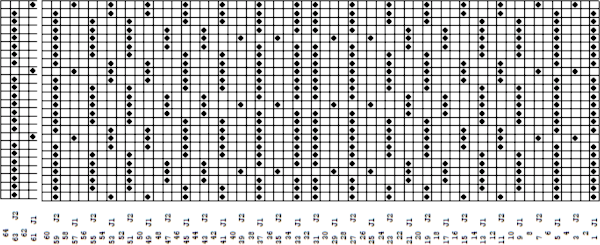
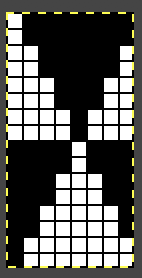
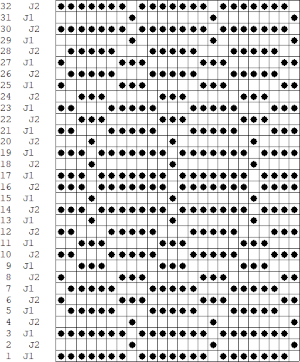
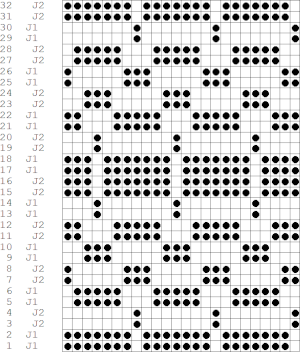
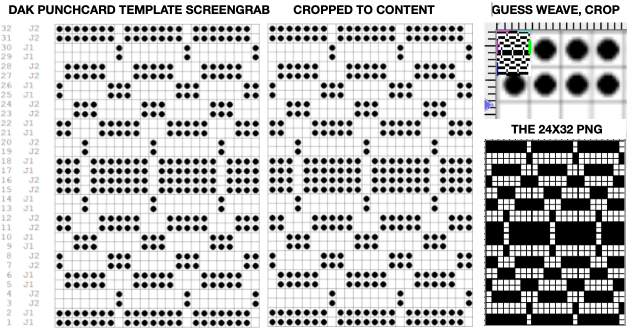
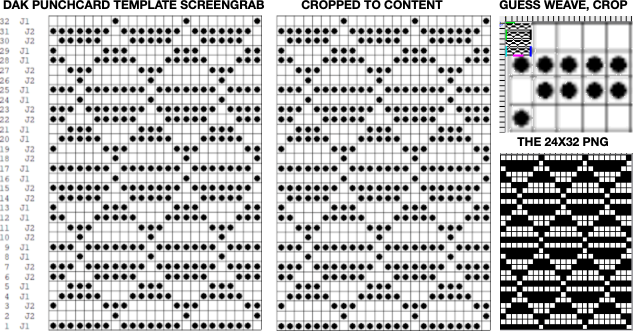
 Processing the template using numbers: a table is created twice the length of the 8X16 triangle repeat, followed by hiding the 32 odd-numbered rows, positioned in front of the scaled punchcard template, stitch markings are traced
 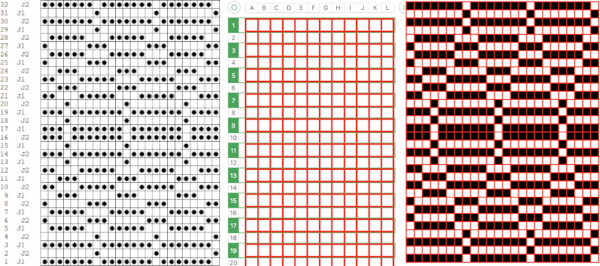 the rows are then unhidden, the repeat is checked, matched here to the F jacquard separation in Dak
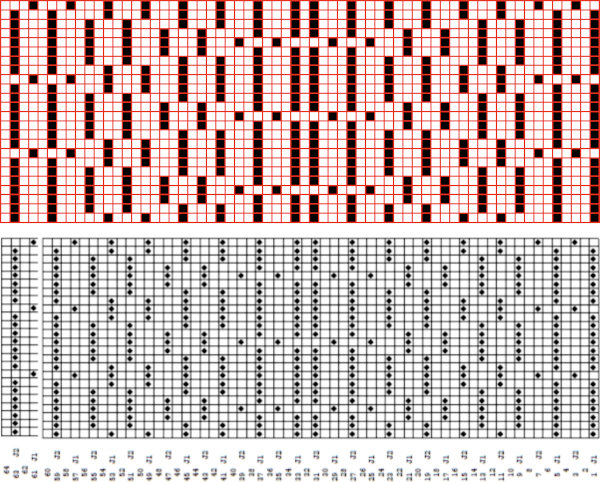 The numbers table is processed in Gimp to obtain the png for knitting the now 24X64 pattern
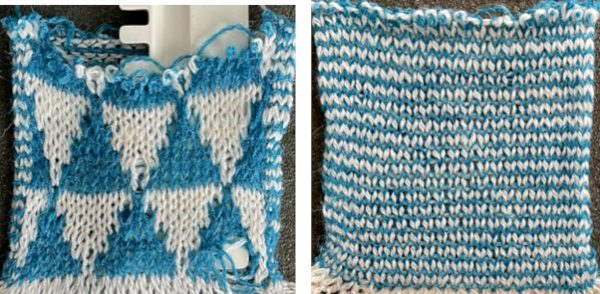
  and the pattern executed as a tubular FI knit: I had yarn issues, hence the dropped stitches. Both swatches were knit to approximately the same point in the pattern repeats, there are obvious quality differences in width and length. In tubular knits, there are differences in the width and height of the knit on each side. The front is a slip stitch with floats, drawing the fabric in, while the ribber knits every stitch every other row. With a good choice of yarn and pattern, loosening the tension on the top bed may ease this problem. As often happens, casting on and binding off need special considerations ie to allow for any fabric stretch when off the machine or to leave a tubular knit open at either or both ends if that is the goal.
  DAK has been a purchase made out of curiosity, and my use of it has been very limited since my designing needs are met by using other programs that are free to users and generate and accept files in multiple formats, while the Brother Knitleader or even simple use of the magic formula solves knitting any desired shape in any gauge.
 When automating the repeat edits are possible and very easy using the lace module, these first drafts were created in Numbers,
 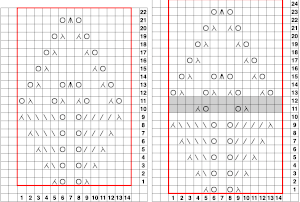 I have to admit the first time I tried to knit both the associated png, mirrored and not, I experienced patterning errors. Whether due to operator fatigue, static, or any other possible cause, on a different day both designs knit successfully, and my appreciation of the module is growing steadily. The results for this, a complex shape, are quick and awesome when compared to the amount of time it would take to draft the pattern outside the program.
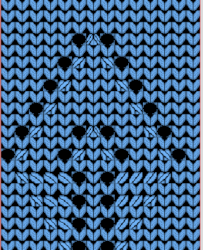
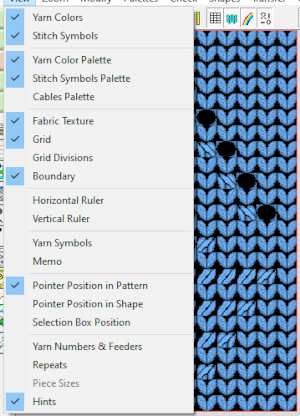
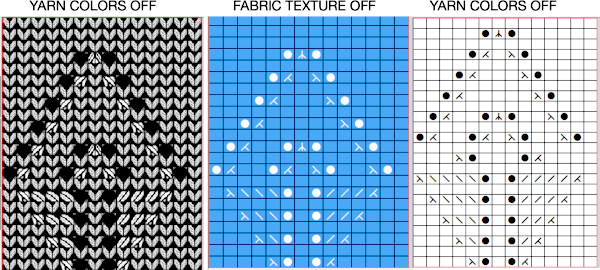 An stp was created, the template is marked 74 rows in height, filled in as the stp was generated, right side facing
  Numbers and Gimp reduced the template to a png 14 stitches wide by 52 rows long, needed to be mirrored using the number one button on the 930 for successful knitting,
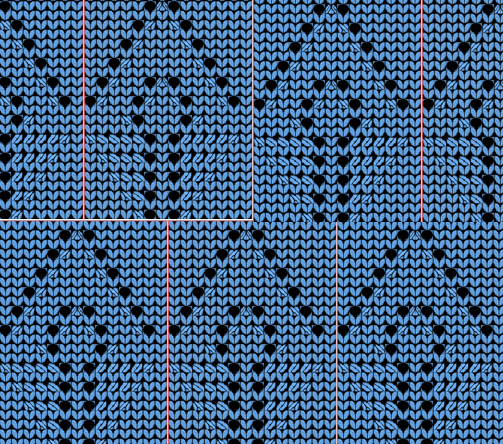
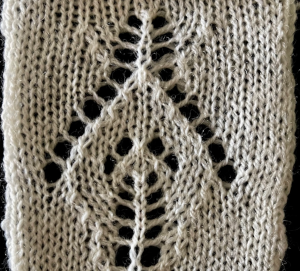 matches the original illustration. Dak makes slight modifications very easy. The untested brick repeat, 28X104, developed using Arah followed by its png
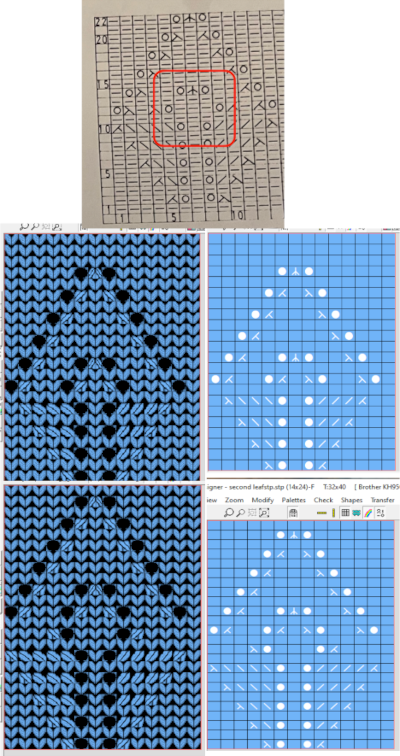 The amended design drawn in repeat in dak visualizing the knit,
  The print preview template:
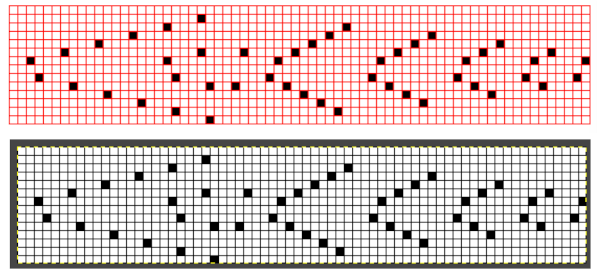 the resulting png, 14 stitches by 68 rows, also knit using the number one button on the 930
  The brick repeat developed in Arah, now 28 stitches by 136 rows,
  its png
  A test for the second brick repeat, here visualizing results with a screengrab of the stp.
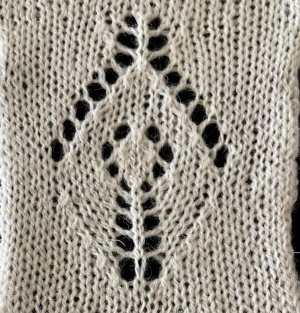
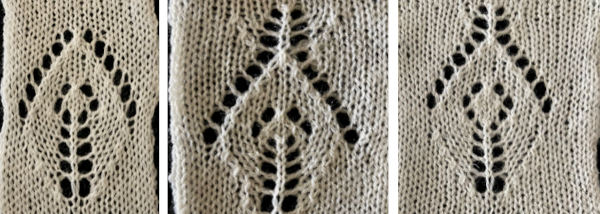
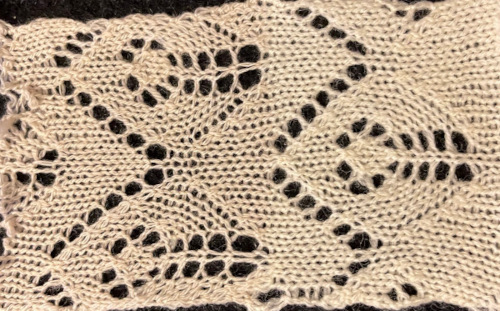
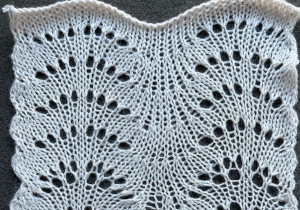
  The test swatch is for a single repeat width, the initial yarn used ran out, hence the color change, the second yarn was thinner and broke, but there is enough to get a sense as to how the overall alignment of the knit shapes will appear, including that horizontal chevron between the shifting leaves. The png required mirroring when used on the 930.
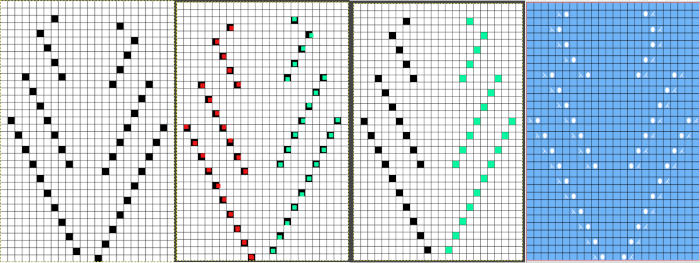
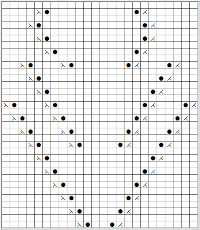
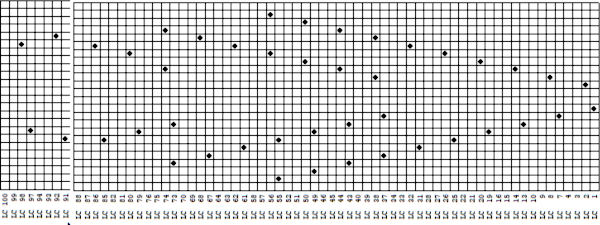 it would need to be drawn eliminating the pairs of blank rows between transfers to match the original repeat because all those carriage passes are consecutive. Drafts with no blank rows between alternating transfers are not accepted by the program and ruled out in any template preview as well.
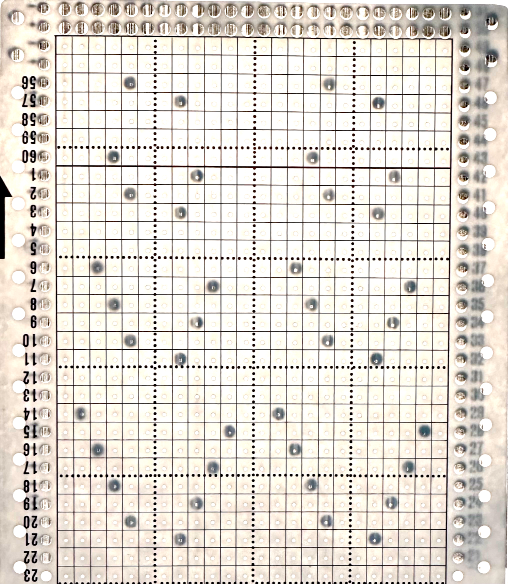
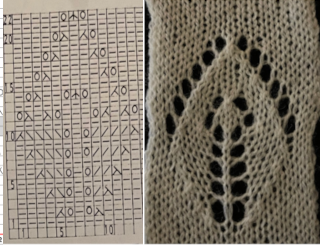
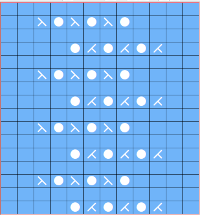
  The complexity of working with a “simple” repeat: over the years I accumulated a notebook full of copies from Japanese magazine pages with what I believed to offer interesting potential, this repeat happened to be one. The markings for the knit rows on the right, and the two blank rows at the bottom identify it as suitable for Studio punchcard machines, and it would appear to be easy to translate for knitting on Brother thanks to those 2 blank rows between transfer cell markings.
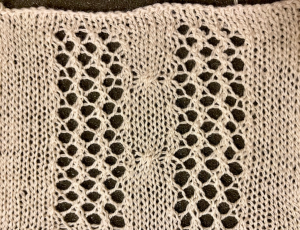
 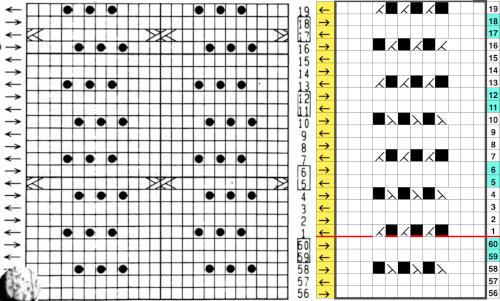 Developing the Brother repeat in Numbers for beginning with transfers to the left. The repeat is recognizable as a mesh variant, more information for mesh design repeats may be found in the
  the repeat on the right was created in Gimp.
 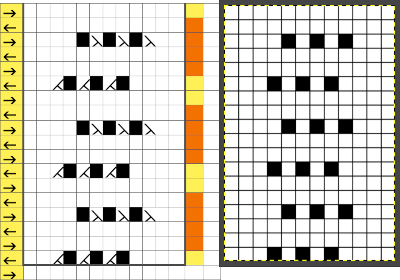 The 12X18 png
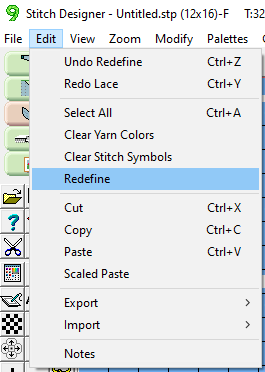
  Creating the stp: the size of the png was used to create the image file, which required cropping, in Dak this would be the menu language after activating the proper tools. the stp size is 12X16,
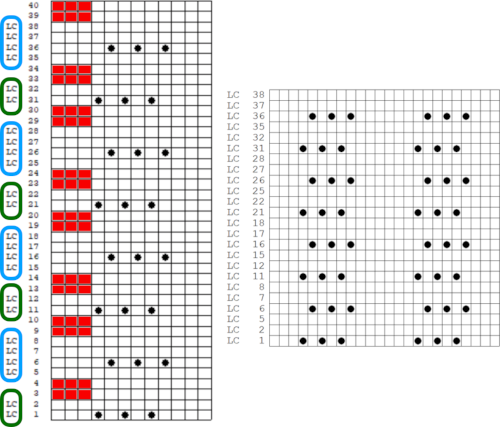
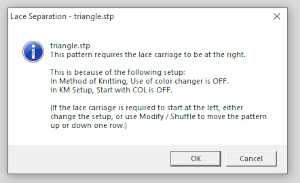
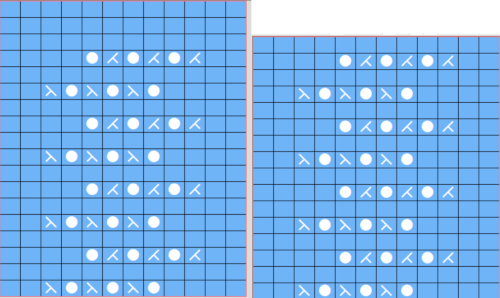 The template generated for a Brother punchcard machine illustrates the problems and some of the confusion if the template repeat is used for actual knitting, especially on the punchcard machines. Drawing the eyelet and dragging the mouse one cell to the left is the intuitive way to draw for transfers to the left. The symbols appear to be right-side facing by default and if they are in turn mirrored by the program prior to saving, when the templates are generated, the intent for use of the design would match. The numbers on the left are in the punchcard template, adjusted by cropping the two extra rows in the Brother electronic template by the software, do not reflect the actual design row numbers. The starting row is wrong for the Brother lace carriage operation from the left to produce the first row transfers to the left in actual knitting. As far as determining sequences for knit row placement, that is left up to the punchcard knitter’s experimentation. The minimum repeat for a punchcard to roll continuously is 36 rows, that fact needs to be considered if punching cards. The repeat shift for the first transfers to happen toward the left is illustrated on the right.
 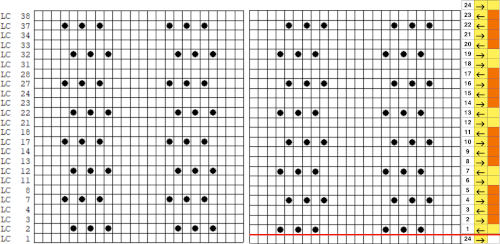 As initially given, with the lace carriage starting on the left, the first transfer row would be to the right. In many cases, this may not matter, but in this instance, where the knit rows happen after 2 or 4 LC passes respectively, the template offers another instance of the fact that the knitter using it needs to have previous understanding and experience in creating the particular stitch type. This version does not have an accompanying swatch.
 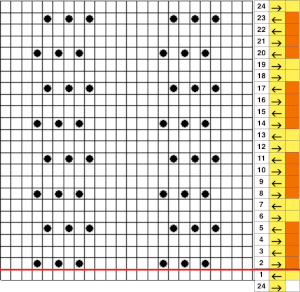 Analyzing the electronic template for interactive knitting: it is correct in marking rows for LC operation from the left with the first transfer row made to the right, matching the above chart.
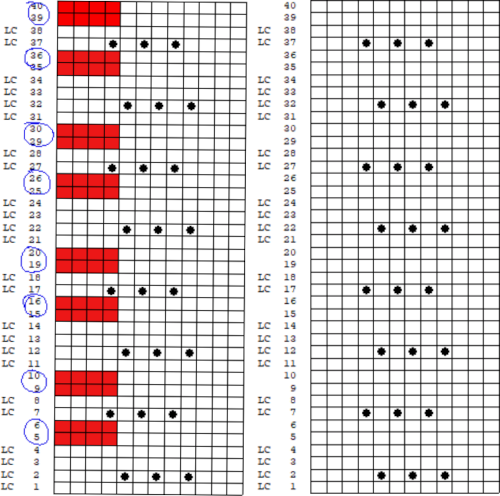
 For good measure, the repeat is also drawn as stitches and produced the punchcard template with a first blank row identical to that generated when using symbols
 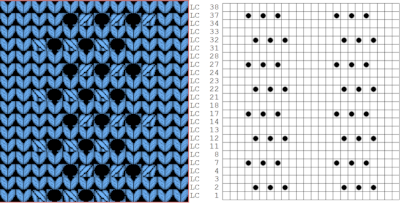 Using the pencil tool to draw the transfers differently resulted in a series of error alerts, so not an option.
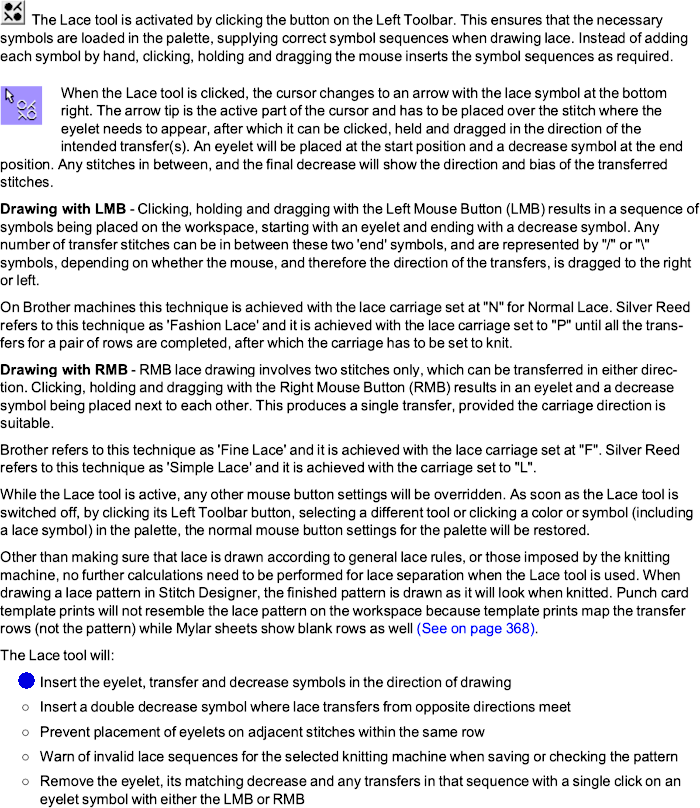


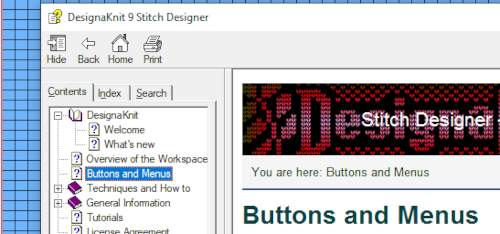
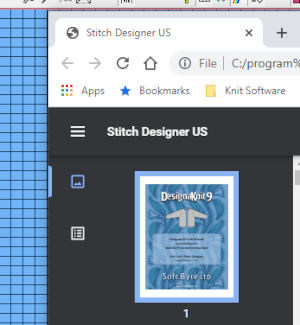 When manuals are chosen in any module, there is an option offered to download the associated pdf
  by clicking on the arrow key
  Update:
  The lace module is an extremely attractive solution for speeding up the lace design process whether from published charts or DIY. The left mouse button is used to draw as usual, but the right mouse button is used when drawing shared transfers in fine lace on Brother, or simple lace in Studio km.
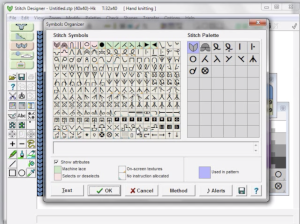
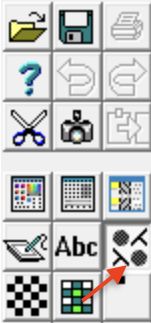 The designer may enter patterns on this view as well, but I prefer to work with symbols
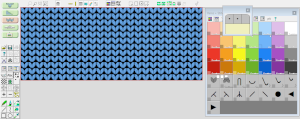 It is best to begin testing with a small repeat when exploring new techniques, find his format easier to use than drawing on “stitches”. There are several options for the canvas ground color, the default is in blue. As a first step, saved as an stp, Dak opened my saved file as pictured in this view.
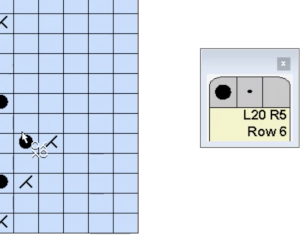
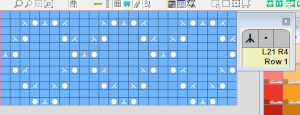 DAK row numbers do not refer to design rows, they reference row counts as would be seen in any row counter registering carriage passes
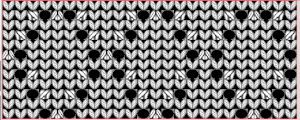 If a symbol is missing from the drawing, the program alerts the knitter to the error. Here there are no eyelets represented.
 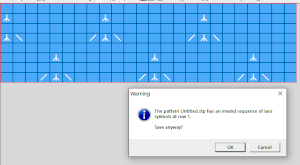 There was no warning for the error in the last row of the test stp, where in the last row two stitches were being moved in opposite directions on the same row. If the content is considered accurate, this window will appear, the safe button will be highlighted, click OK
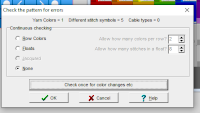
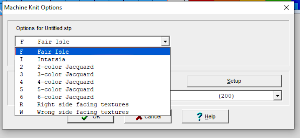
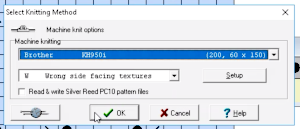
 wrong side facing is chosen for the purl side view.
  Stitch pattern print previews, using default settings for layout:
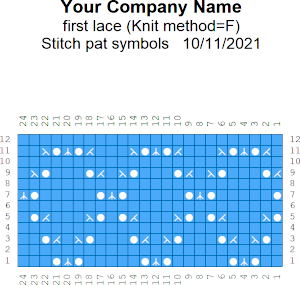
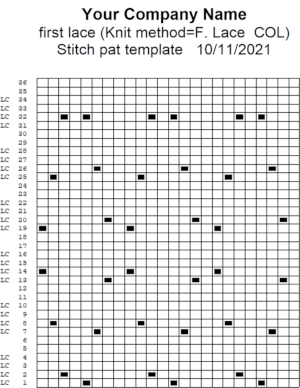
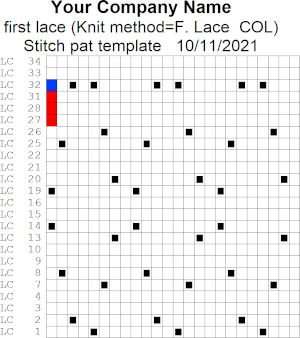
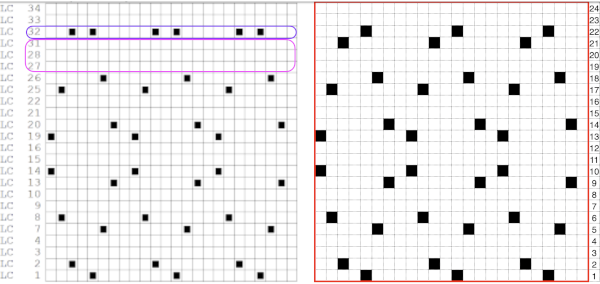
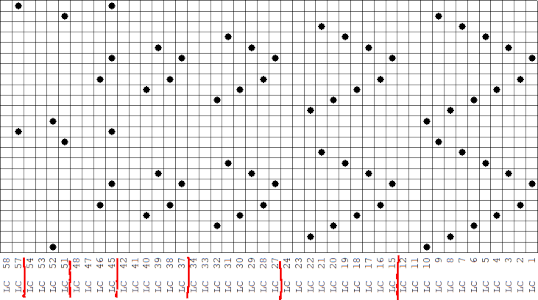 This stp pattern was also created using the pencil tool in combination with symbols. In the print preview, there were 2 errors in the Dak printouts, the three blank rows rather than 2 in the outlined section between transfers, and transfers in 2 different directions occurring on the same row with the same carriage pass. I have no way to test whether the same issue would occur in interactive knitting using my own stp file. My repeat, drawn in Numbers on the right, is numbered in design rows.
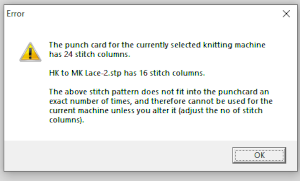
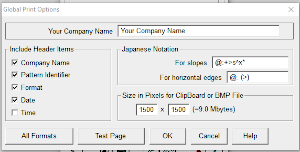 choices can also be made on how to represent stitch units If the plan is to create a punchcard template and the repeat is too wide, an error message appears
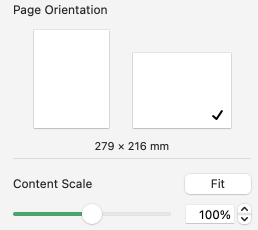
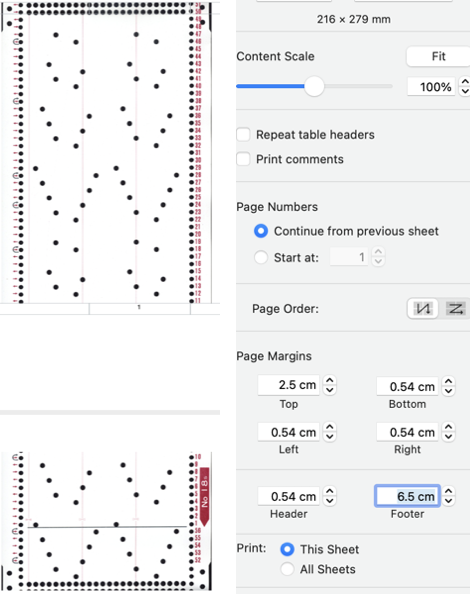
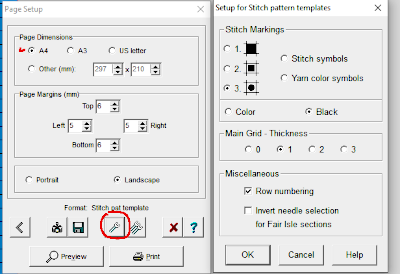
  Paper size measurements in page set up other than US letter
 other associated menu choices
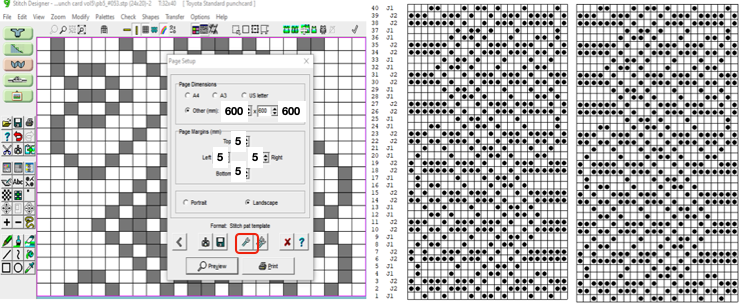
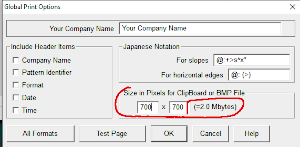
  It is possible to save the template as a bmp of the full image. The size of the file is shown to the right of the pixel count number settings for the clipboard or bmp file, which will vary in proportion to the stitch and row count. Click on the floppy disk icon to save.
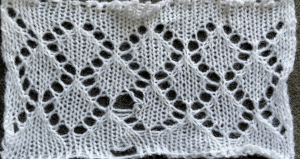


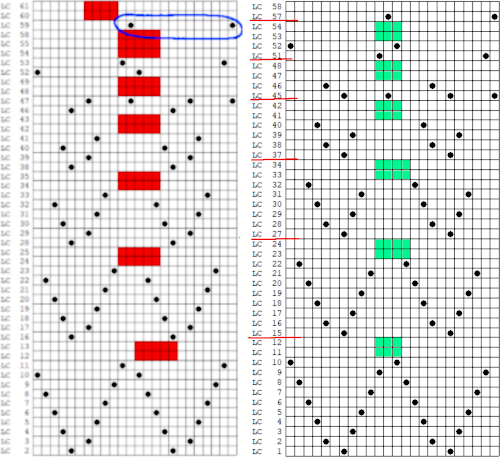
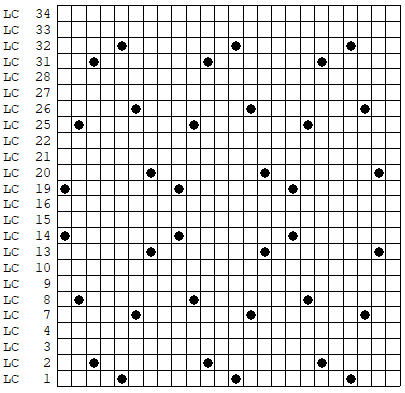 As an additional lace template test, I repeated the process on a portion of an stp file shared generously shared by a DAK FB group knitter along with photos of a completed, lovely lace sweater using it. The results are shown sideways because of the repeat length. The 950i template places four rows at the end of each lace sequence, while as seen in the published repeat of a different lace beside it, there should only be 2. The carriage passes made by the KC in traditional lace knitting though they advance the row counter, do not advance the pattern unless it is selecting needles as well, ie in trims that combine lace with the slip stitch setting. Exceptions to the 2 blank rows rule occur when the lace shape reverses direction such as in zig-zags, or when plain knit or pattern rows are planned deliberately to mix and interact with the lace design.
 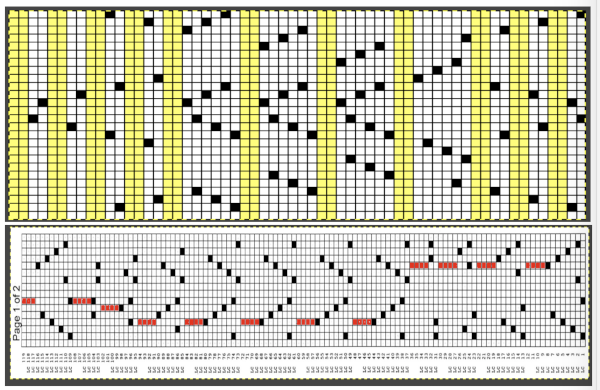 Please see the previous
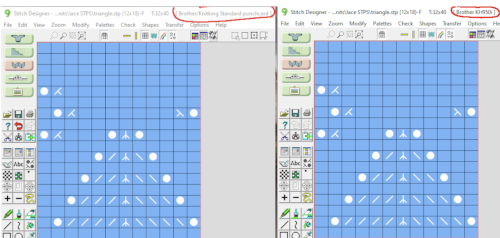
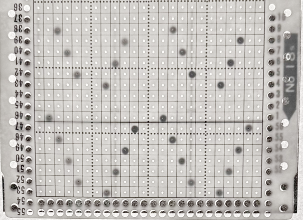
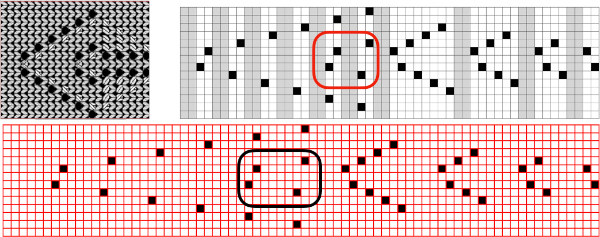
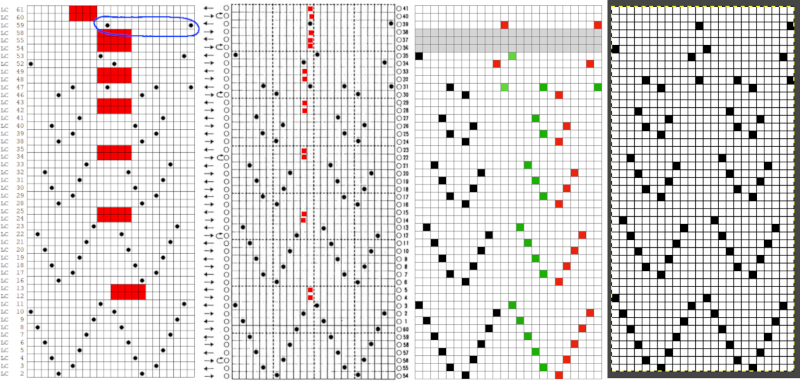
 The electronic preview continues to have a series of 4 blank rows between transfer segments. The punchcard template has 2 blank rows between each transfer segment and matches the published pattern with a 3-row exception toward the top of the card. The renderings below begin with the DAK punchcard template on the left with its confused numbering, the extra empty row at the bottom of the repeat was eliminated. The overall repeat is mirrored. It is followed by the published pattern associated with the chart, pixels are then marked for left and right transfers, followed by my amended final repeat, which when knit on the 930 required mirroring.
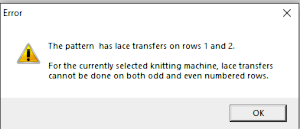
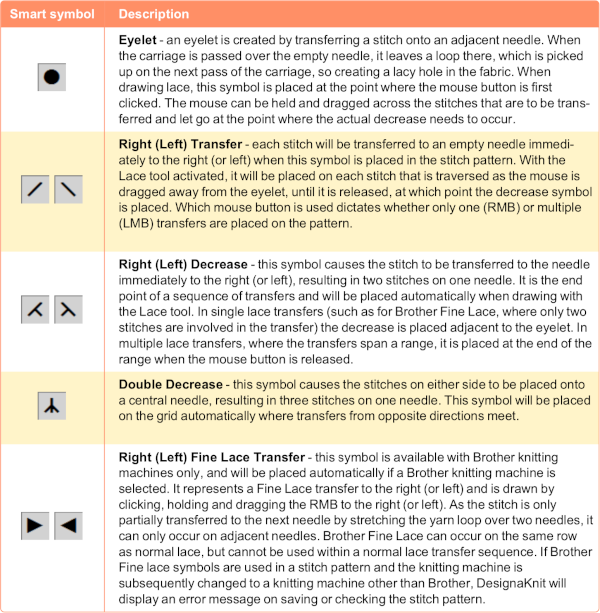
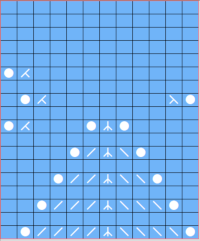
  Lace tool use instructions begin on page 299 of the third module user manual, Stitch designer. From the manual: when the Lace tool is clicked, lace patterns can be created by using the LMB or RMB to click and hold on the stitch cell where the eyelet needs to be, after which the mouse can be dragged in the required transfer direction and let go on the stitch that needs the corresponding decrease. Intermediate transfer stitches will be added automatically where appropriate. If the button is clicked and the stitch pattern has a method that is incompatible with lace, the warning that is shown on the right will be displayed. The Wrong side facing texture is probably the most natural choice because this is generally considered the normal method of knitting on Japanese knitting machines. Sections of Lace and Fair Isle may be used in the same stitch pattern and either Fair Isle or Wrong side facing texture are good choices when working with lace patterns.
 The associated template preview for the punchcard nearly matched the one that was obtained with the pencil tool chart, but had some differences: the previous image was mirrored although no dak settings were changed. As in all punchcard template numbering, the knit row numbers are skipped in the sequence on the left, so they will not match design row numbers, and the small flower motif is placed differently
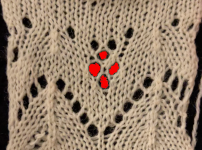 A wider swatch
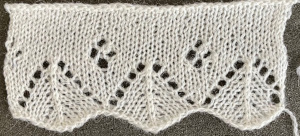 When attempting to use this repeat for a continuous one, unless the total number of rows is an even number, the second repeat will reverse the direction of the transfers, resulting in mispatterning and multiple side-by-side empty needles. Changing the total repeat to 48 rows by adding another blank row places all transfers properly. The 12X48 png
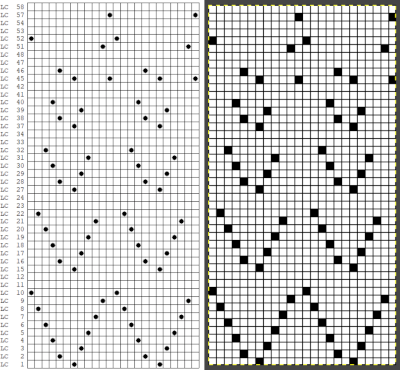
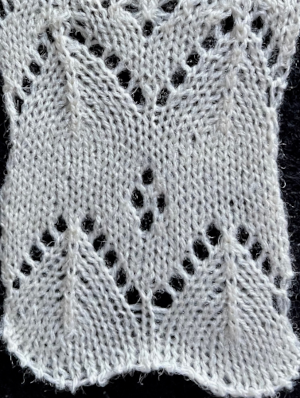 A half drop repeat is also possible. To achieve this test of a repeat drawn in a paint program, I knit 2 rows after the last “flower” eyelet and had to flip the repeat horizontally before continuing for the top half of the repeat, producing a very different look.
 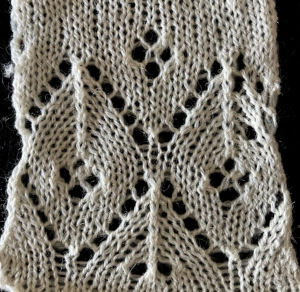 There is a transfer error in the knit swatch on the right where I “repaired” a dropped stitch. Edits would be needed if one is determined to make this pattern automated as a continuous design.
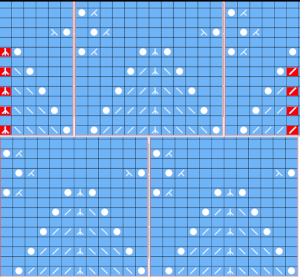


 my edit in a spreadsheet, the yellow cells mark rows missing in order to get the lace carriage back to the left side before the next pair of all knit rows.
 the Arah image was saved as a png, knit on my 930 using img2 track, and mirroring
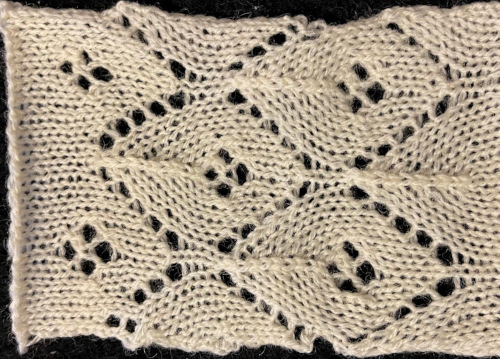


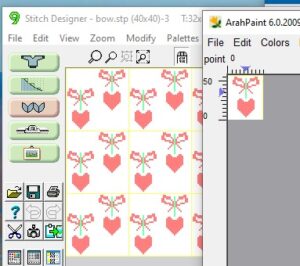 There is a handy option in Dak when thumbnails are chosen from the image menu, one can browse through saved folders containing compatible file-formats including the images in those Brother magazine downloads. The small preview will identify the specific file size. When you left-click on your choice, it will appear enlarged at the bottom left of the view window, it has been moved from its corner in my screengrab,
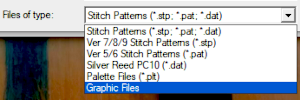
  left-click OK on the enlarged image, and it will open in the program window. Minimize the size until no further reduction is allowed by using the magnifying glass or the scroll function in the mouse. This is a different operation from scaling the original to a different size. The save-as option for the image offered at that point is:
 For choices emulating export in other paint programs, right-click on the image, choose copy, open a paint program (Arahpaint is my favorite at this moment), and from its image menu choose paste.
 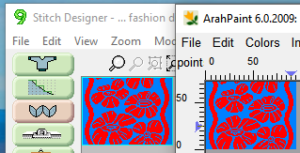 Using Arah’s color exchange, the image may then be converted to black and white for 2-color work and is saved in a format usable with other software and in other machines.
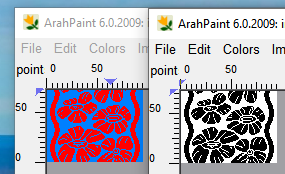
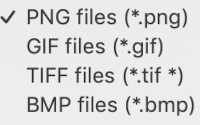

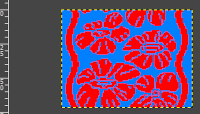 but if the image needs to then be reduced to BW, Arah is the easier and predictable tool to use.
 It is useful to establish working history using the same design motif. In the first image, left-click on red, the from color, right-click on white, the to color, click on the double arrow to make and apply the change
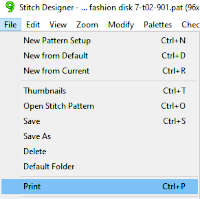
 The print dialogue allows for saving patterns as bmps.
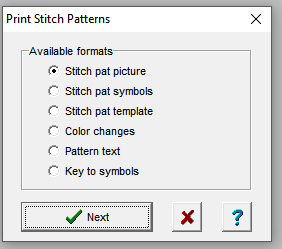
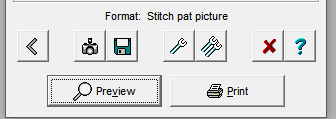
 choices may then be made about file name and the location for the save,
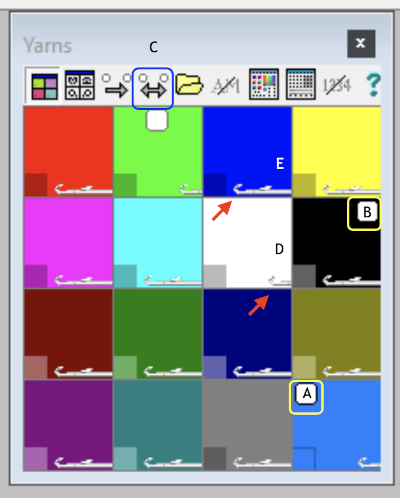
  If there are no “short” needles in the image being processed as in the last screengrab above, there will be an error message onscreen, pointing out problems in the numbers of colors present in rows ie more than 2 for FI. This is fixed by clicking on either the “needles” of one of the two active colors in the yarn palette to make one color the ground, and the other the contrast. The results from this process for printable bmp files are shown below, not for a bmp that may be used to knit the pattern on an electronic machine using a different download method. Here the resulting stitch pattern picture is shown in color reverse as well.
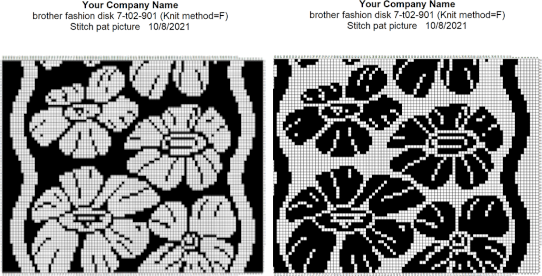


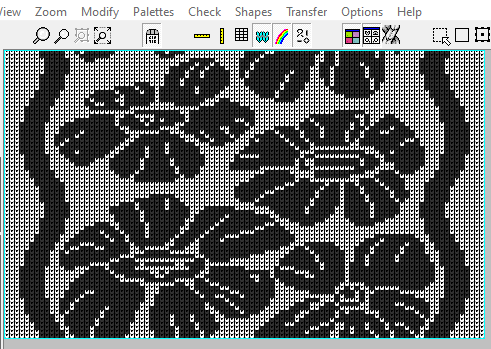
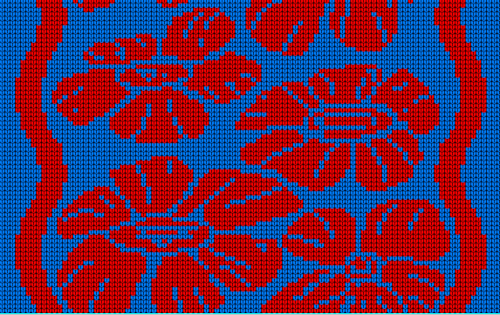 At this time I am continuing to knit on my machines with punchcards and using Ayab, or img2track on my electronics, have no immediate plans to change that, hence my interest in using DAK software features while keeping in mind the possibility of using the final repeats on other machine models.
 The information available to me as I began this post:
 When exploring design potential in any paint program, it is best, to begin with, to use a small repeat that can be clearly identified when tiled in various configurations, resized, and pixel edited. If drawing is with the goal to produce a BW bitmapped image for download of 2-color patterns, drawings can happen in those colors to start with. If color separations are planned in the development of the design, then 2 color images including black may be preferable.
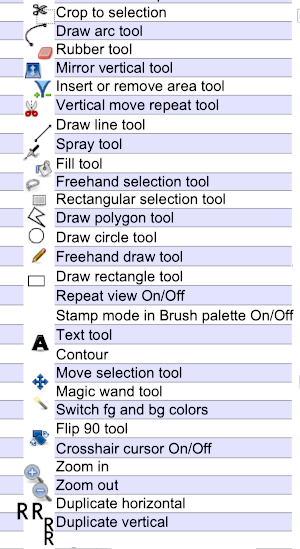
 To work on the image, magnification will be required. This may be achieved several on the Mac, one is to click repeatedly on the magnifying lens icon in the toolbox, and the other is to press any number from 0 to 9 on the keyboard, and the zoom will instantly change for 1 at 100%, to 6 for 600%, to 0 for 1000. The latter is minimal for building repeats on a viewable grid, the magnifying lens may be used to reach a comfortable starting view. The zoom level for both increases and decreases may be changed during drawing operations as well.
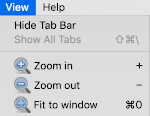 and the program may be used in full-screen mode on your device by making the very last selection in the View menu.
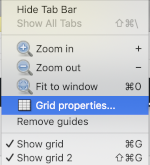
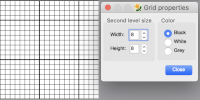
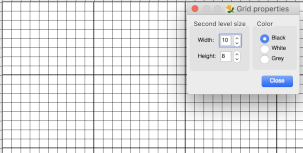
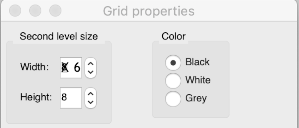
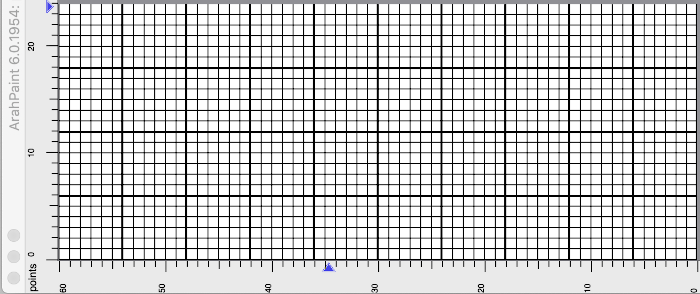

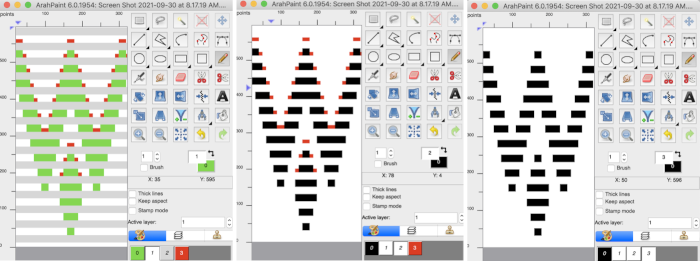
 In addition to the image grid, like Gimp, ArahPaint 6 also allows for positioning aids: guides. They are horizontal or vertical lines that are temporarily displayed on an image. To create a guide, double-click on the dark blue arrow displayed on one of the rulers in the main window. The guide is then displayed as a dashed line following the pointer. To move a guide after it has been created, hover a mouse pointer over the blue arrow and click and drag it to remove the guide to a new location. To delete a guide, double-click on the arrow. After a guide is created, another triangle in a different shade of blue appears below it. Use that to create the next guide, repeat as often as wanted both horizontally and vertically. To remove all guides choose View, Remove Guides.
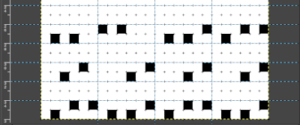
 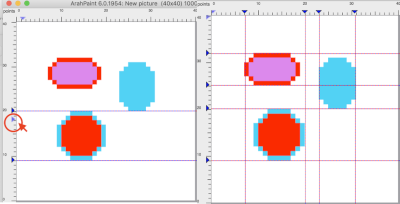 One use for the lines can be to mark plain knit rows between transfer markings in lace punchcards as illustrated in this Gimp image
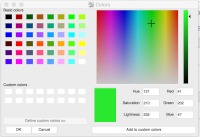
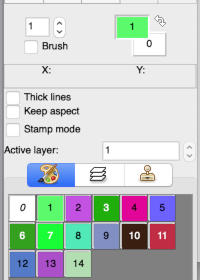 The foreground (upper square) and background color (lower square) are used in drawing operations. They are numbered 1 and 0, not to be confused with the same numbers assigned to colors in the working palette. The starting palette may be altered to include black. Double-click on the foreground color at the top, the #1, not in the space below the palette icon. A color selection window will appear, choose, and click OK. This change is lost if one quits the program.
 If satisfied with the drawn repeat, use the selection tool to isolate the final motif.
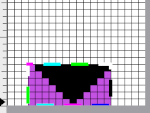
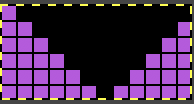
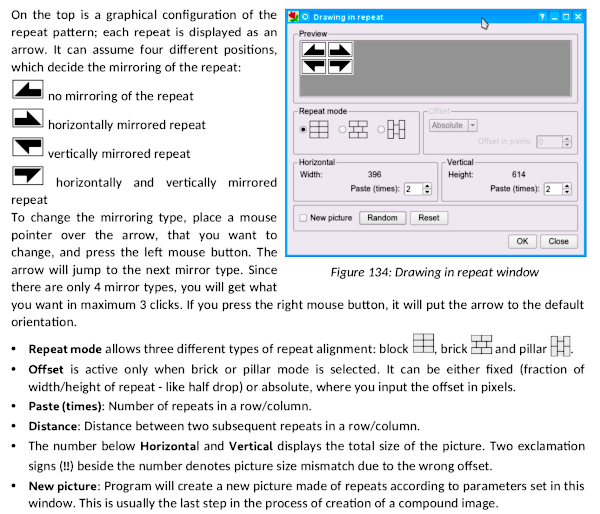
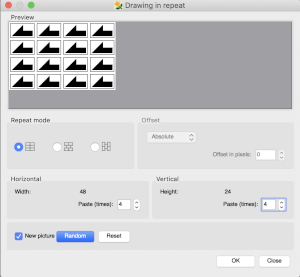
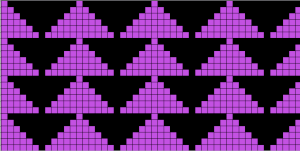
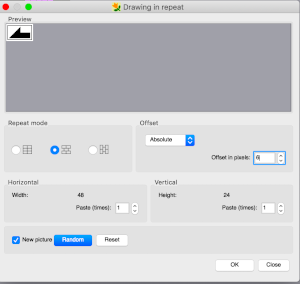
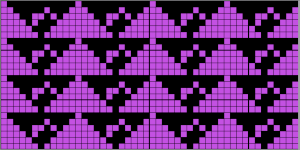
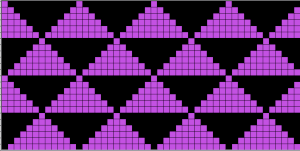 Pillar repeat also using offset in pixels
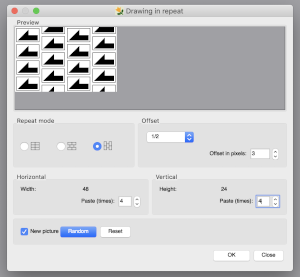
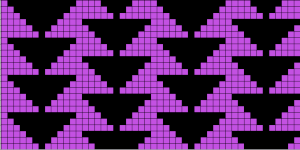 Other offset options through the use of fractions
 Playing with mirroring positions, producing a minimum 2 by 2 repeat,
  the result looks akin to the pillar repeat drawing above, but tiling again to check for alignment may yield surprises that can be viewed as design features or errors,
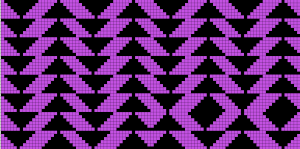
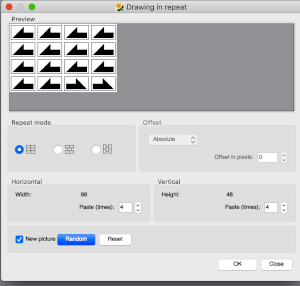
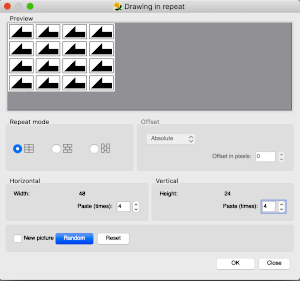
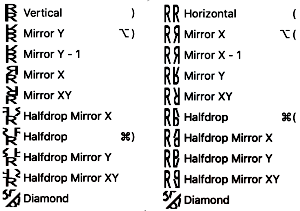
 Repeats may be built in a more controlled manner using the image/duplicate X menu,
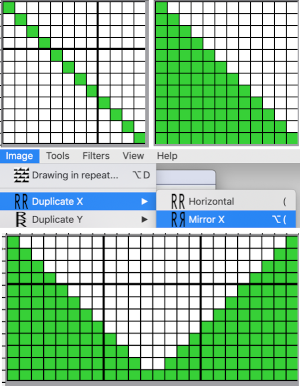 a half drop was added
 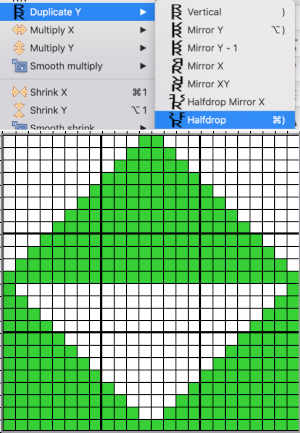 and the repeat was tiled to test alignment
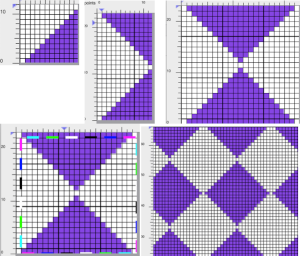
  The duplicate tool enables the repeat of an image or part of an image in a fast way. All duplicate tools with the exception of Mirror X-1 and Diamond work similarly to the drawing in repeat tool if the new picture option is enabled. The mirror X-1 works the same as the normal mirror, except the last pixel of the image is omitted from the image
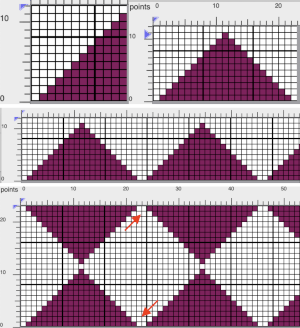
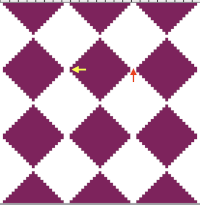 Eliminating those double pixels can be achieved by cropping. The first mirror is for Y-1, the cropped image is tested for tiling by drawing in repeat
  Drawing lines: use the straight-line icon button to activate the tool, select the line thickness by selecting a number of pixels to be used then move the mouse pointer to a line starting point on the canvas and press the left side of the mouse, dragging it until the line is of the desired length and angle. When the line is at that desired length release the mouse.
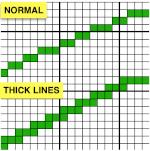
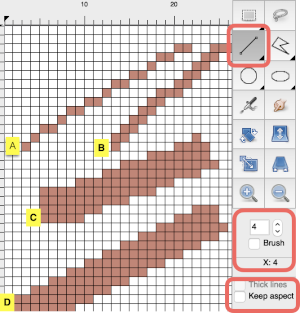 The thick lines option works only at line width 1, which will keep the single pixels connected
  If you double-click on the line icon, the Straight-line icon is activated. Now you can draw horizontal, vertical, or diagonal lines. If you move a mouse horizontally—it doesn’t need to be perfectly straight, the drawn line is horizontal. If the angle between a line and the horizontal axis exceeds the angle of 23 degrees, the drawn line will be diagonal at 45 degrees. If you move the mouse toward the vertical axis, the line will be drawn as a vertical line.
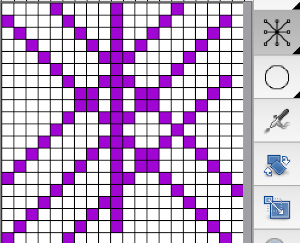

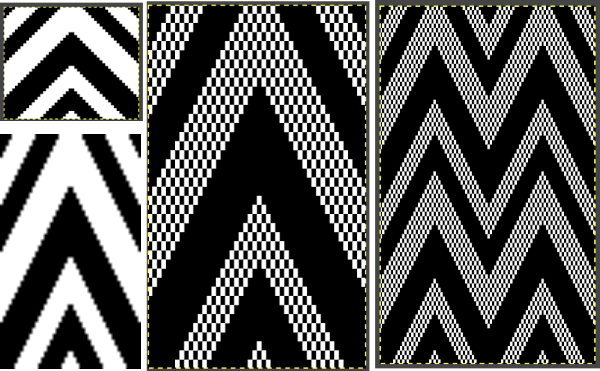
 The same process, using an 8X8 repeat drawn in repeat X3 in width to 24 stitches and X5 to 40 rows in height meeting the punchcard minimum height
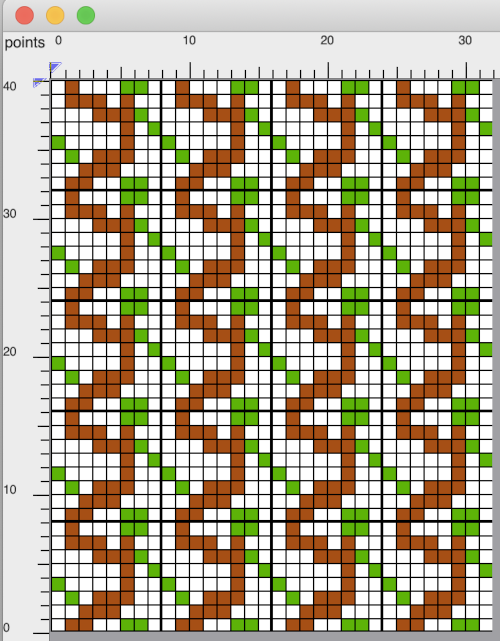
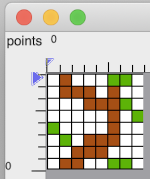
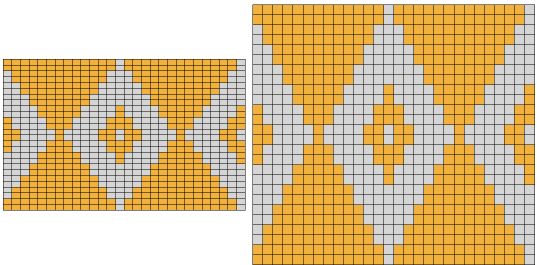
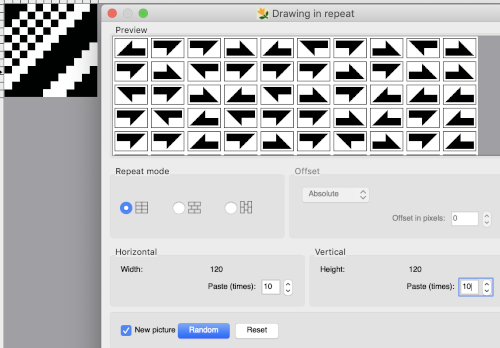 Finding the repeat first on the complete resulting new image on left and testing its tiling, followed by finding the repeat again, cropping to the selection, and tiling that as well on the right
  If the goal is to knit a scarf, 72 stitches wide, crop either repeat to a chosen 72 stitches in width, tile in length in either program to visually check alignment. If knitting in DBJ for approximately 1200 rows is the goal, one may obtain a visualization of the results ie for 1296 consecutive rows.
  A black pixel border could be added to the 72 stitches by copying and pasting the image on a larger canvas that will accommodate that border, or the border may be added by filling in pixels vertically to the edges of the original. Some repeats to play with: the 120 X 96 png
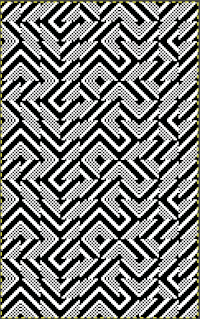 I can see the process becoming addictive once a single personally pleasing starting repeat is developed, and its, in turn, becoming a possible source for collections of designs.
 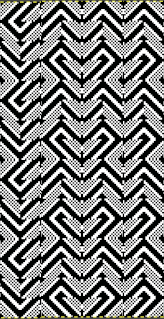 October 2021: I have recently purchased both a PC and DAK software. At the moment I am not planning the purchase of any cables, the initial patterns
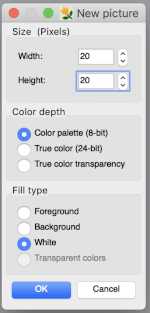
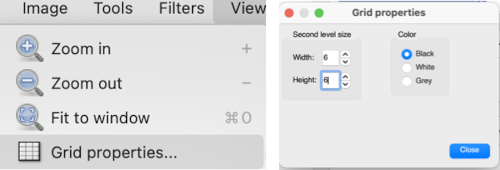
  Create a new picture in the same dimensions, fill in the proper cells
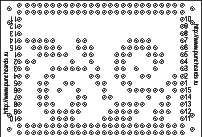
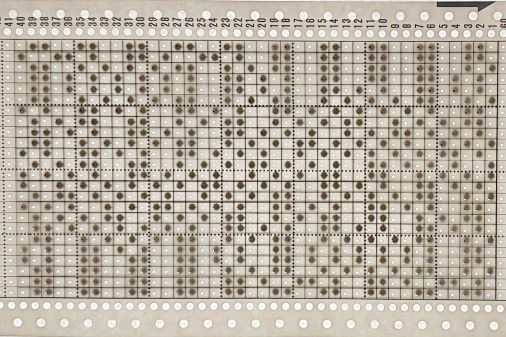
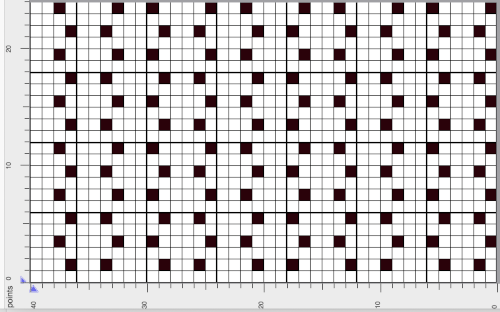
 The resulting punchcard image
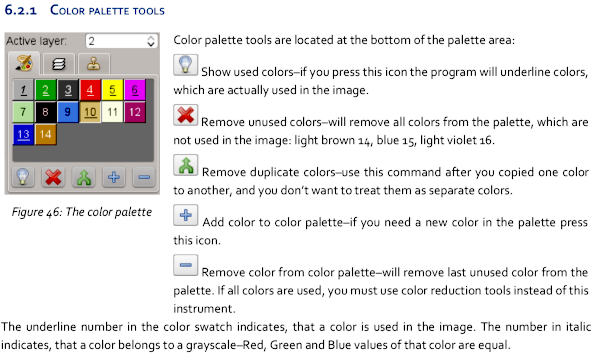
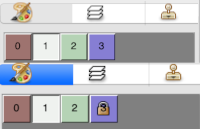 The color exchange was easy and straightforward with self-drawn images in the opening palette when creating new documents in Gimp. It failed when working on a segment of published patterns. The Arah manual helped me find the solution. Converting the images from true color mode to color palette mode: the original image and its palette, this is not a “correct” working repeat,
 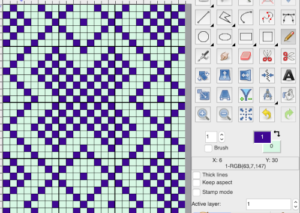 Converting for use with an expanded palette
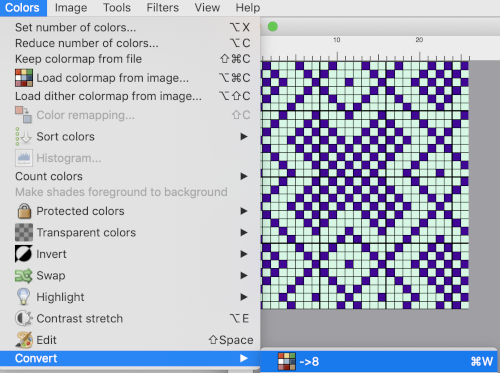 To change the color of the foreground, double click on it, choose black from the upper left corner of the colors window, the image and its foreground color will change accordingly.


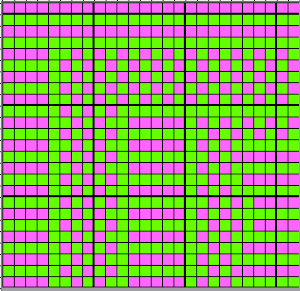
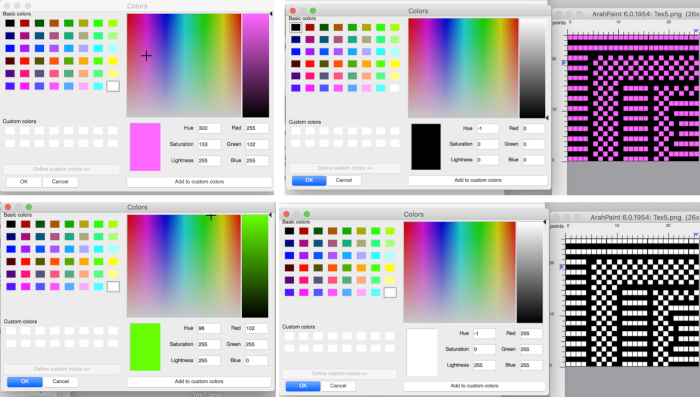

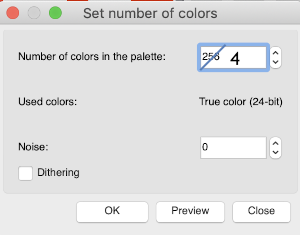 This repeat would work fine with a reduction to 3 colors, but the proof of concept uses a reduction to 4 colors for both repeats. The two shades of green will need to be exchanged separately, each shade is processed using the sliders on the far right, also note the crosshair.
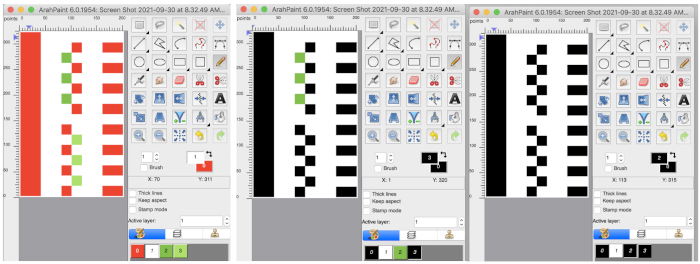
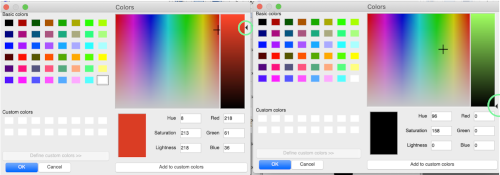




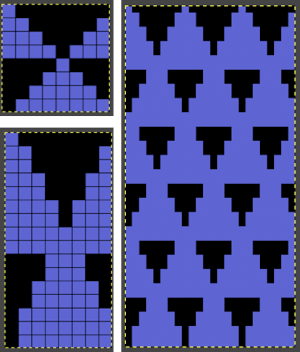 With added experience, I discovered part of the problem is that after restarts or working on multiple images, the interpolation setting changes randomly to cubic, and issue are resolved if the setting is changed to none again.
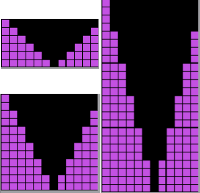 The Arah scaling appears to be quicker and far more accurate also when used on some published images that would require a lot of clean-up after resizing in Gimp. That said, when working with very large images Gimp offers the opportunity for controlled scaling to any size, keeping the image aspect ratio or not. This reference is described in translation as a pattern design course for Silver Reed knitting machines.
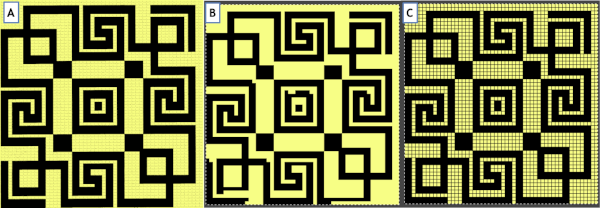
 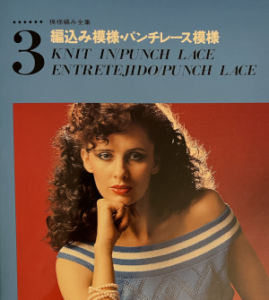 The publication offers many large-scale repeats that are suitable for punch lace, but also for what translates to “braided patterns” which when studied may be intended for fair-isle with enormous floats or for DBJ. No stitch and row counts are given, the goal is to match the manual 54X56 stitch and row count.
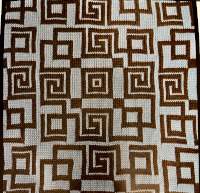
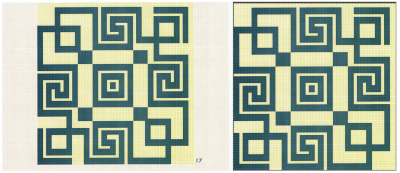 In Gimp, reducing colors: A
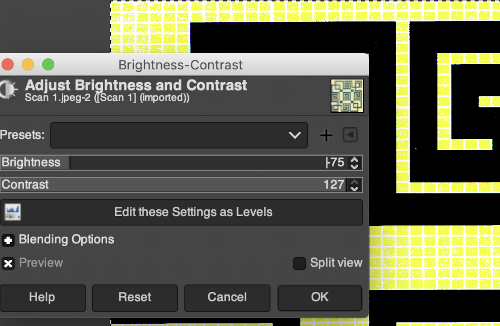
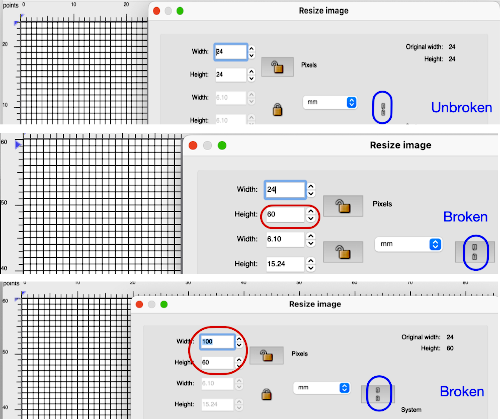
 Use scale image to desired dimensions, checking first that values are a full multiple of the expected final repeat pixel count. If not, scale first to a full multiple of each value with aspect ratio off (broken chain link), then scale again with aspect ratio on (intact chain link), edit with a superimposed grid, cleaning up the repeat: C.


 single click on the yellow above to place it in this selection, double click on it
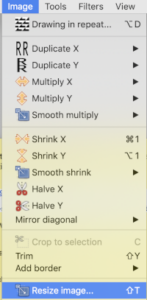
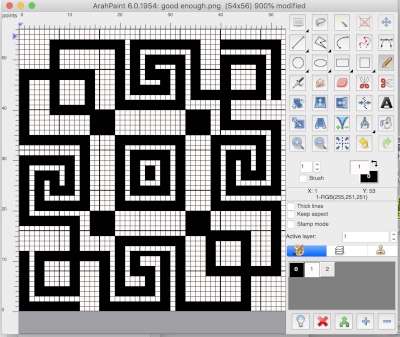 ArahPaint will also scale larger images in pixel units. Resizing may be achieved through the use of the image menu Resize option,
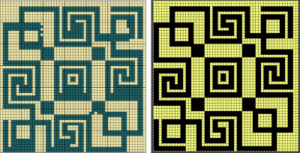
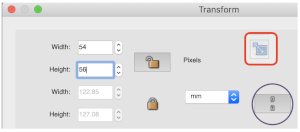 I found the final Arah scaling to be less accurate and requiring more cleanup than the repeat obtained using both programs

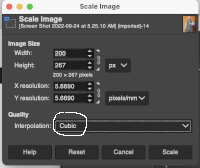
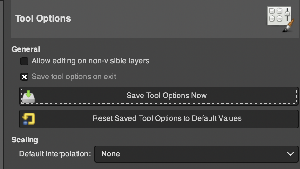
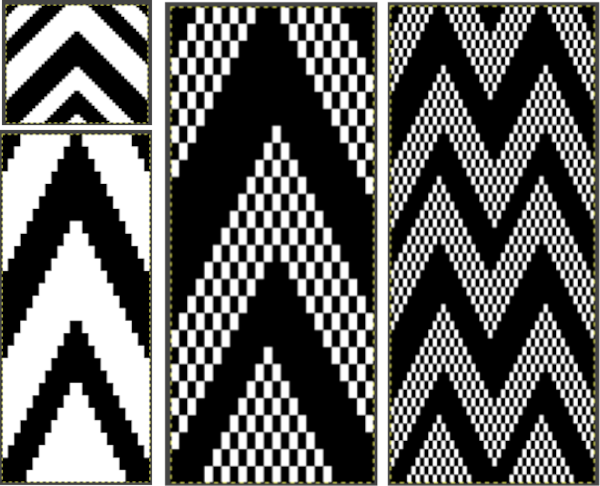
 Planning a repeat suitable for a punchcard, the uncropped repeat F is opened in Gimp, and pattern fill is used in white areas to ready the file for tuck knitting. The image is then map tiled to check alignment once more, and if satisfactory, it can be saved, ready to be knit
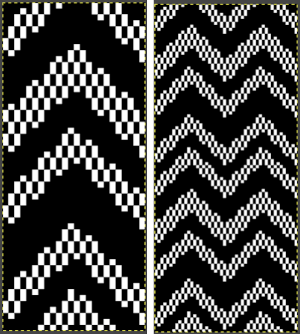
 With experience, one can quickly imagine ways to clear errors and alter images. Electronic machines free us from repeat width constraints. Widening the zag repeat to 48 stitches, working in Arah, check vertical alignments first,
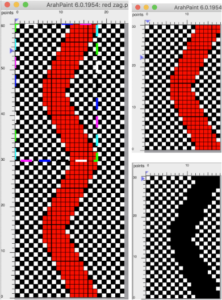
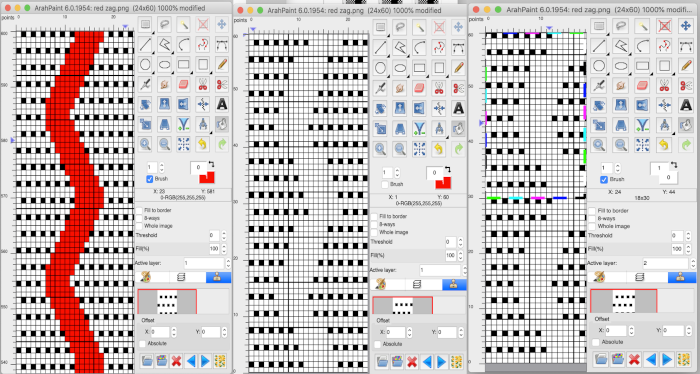
 Working on a possible tuck repeat using only Arah Paint: draw and save the image you wish to superimpose on the ground. I chose to use the color red for visibility. Draw a new image, keeping magnification constant, ie using 0 for 1000 X. Draw a repeat unit for the brush you wish to use, choose repeat from the View menu, click on the stamp icon shown outlined in red, and the available brush will appear immediately below it.


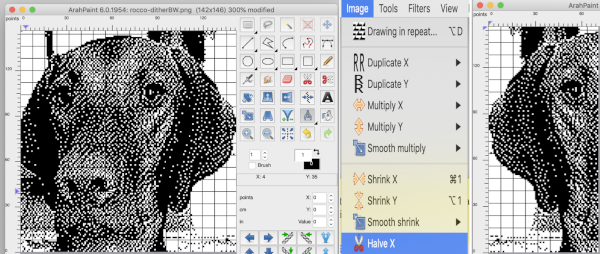
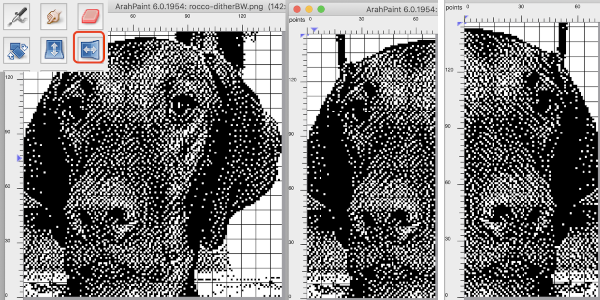
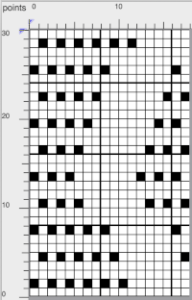 Lots of knitters appear to be interested in large, nonrepetitive images. Depending on the machine used and its memory, the repeat may need to be split horizontally or vertically. Before electronic machines, many art-to-wear pieces were created by knitting repeats broken down horizontally into the punchcard widths, completing the height of each panel and then joining the strips together. Nowadays there are online tools for many tasks including dividing large images. For DIY, in the first instance, Arahpaint is used to split the “large” file in half horizontally, the resulting image saved. The action happens from left to right, so to achieve the split for the second half, the full-size original is flipped horizontally, split, and flipped again. Followers of my blog have seen the images of my friend Rocco recurring intermittently over the years. Dividing the image horizontally
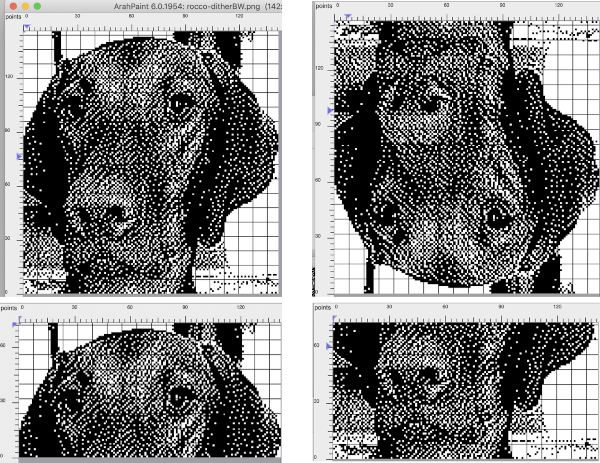
 The same may be done vertically in a matter of seconds beginning with Image, Halve Y, and then using the mirroring tool
 Color separations: the critical difference in the use of the Arah rectangle tool from that in Gimp is that it cannot be used for sequential selections of pairs of rows in color separations such as those for DBJ or mosaics. In those instances, the Arah image, scaled to the appropriate height may be saved, then opened, and processed in Gimp. For DBJ with each color in each design row knitting twice, design the shape and scale in length in Arah, save and open in Gimp for the separation, see post on working with
 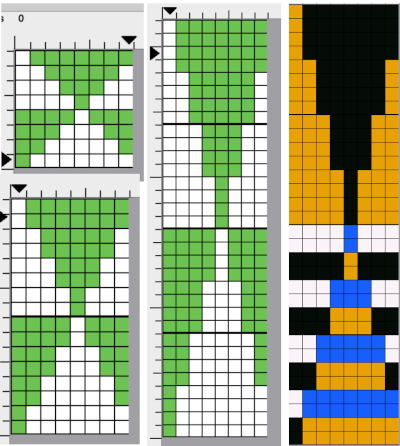 Mosaics: draw the desired repeat in Arah, double it in height, save the image, open in Gimp and proceed with mosaic color separation