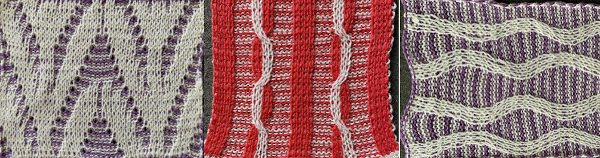
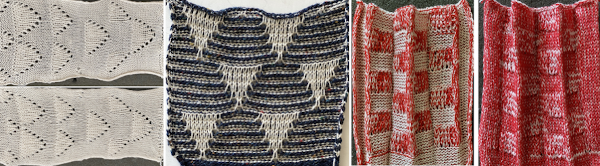
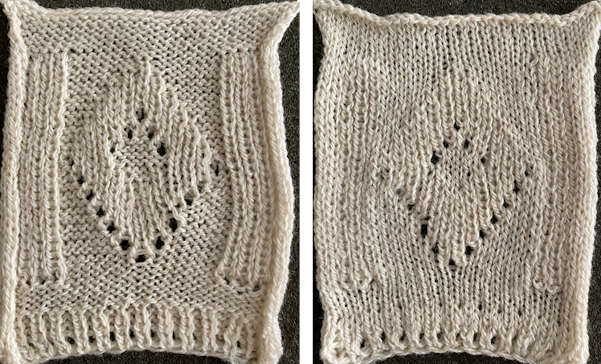
Color separations meet Gimp rows color invert and custom scripts

This will be another work-in-progress post, a rough draft.
It is released early and will receive frequent edits and additions.
I have just begun to exchange information with two individuals, with the intended possible outcome resulting in providing Vibe coded scripts for GIMP or free online generators to automate the desired separations.
“Vibe coding” is an approach where an AI generates code from natural language prompts.

The goal is to include and consider punchcard machine users, meeting the limitations of stitch width where motifs must fit together within the 24-stitch limit, so individually they must be composed of factors of that number: 1, 2, 3, 4, 6, 8, 12, and 24.
Each card height, to feed properly,  requires a minimum of 36 rows punched for continuous designs. Cards not on rolls are a standard 60 rows in height, multiple cards may be joined together if needed.
Needle selection is centered and fixed on the needle bed.
Added info is found in  Brother KMs: punchcards and their use.

I learned about machine knitting from what others presented during international and local seminars at the height of the craft, or published in magazines and hardbound editions. Stitch Painter with BitKnitter and DAK were at their inception.
Susanna Lewis has always been a personal favorite and a huge influence.
As time went on, I became interested in processing much larger files using whatever tools I became aware of in image processing or paint programs to generate patterns for producing the fabric I wanted to knit.
As a machine knitter, any charts or files I shared often began with numbering on the right and from the bottom up in Excel.
Row numbering on the right was a convention in blank punchcards and published charts; transfer lace passes added numbers and symbols on the left.
An added consideration in charting: while in 2-needle hand knitting, the work is turned over upon completion of each row, so charts are read in turn from the right and then from the left when purl rows are included in the chart. Knitting on the machine is fixed unless there is hand manipulation, ie, with a garter bar, and the knitter’s view is only of the purl side. In automated punched or downloadable patterns, every row is commonly represented, including punched holes with blank squares or black and white pixels.
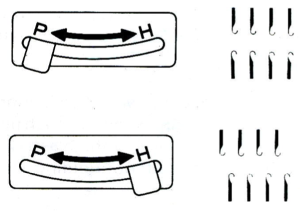
Electronic models have a double-height button; in punchcard models, the card lock lever can be pushed back to the long triangle position.
I avoid elongation in long pieces, finding it easier to track unraveled rows to return to the proper program row and color when any errors or stitch mishaps occur.
Although the majority of my designing is now using ArahPaint, Gimp became my early go-to as a companion to spreadsheet programs, first Excel, then Mac Numbers.
Presently I have returned to using Gimp 2.10, finding the later 2 updates unpredictable when working with 8-bit images.
There are added baseline considerations in color separations, for example, the initial file must contain an even number of rows.
Experiments are beginning with black and white indexed images, and the goal is to conclude the process with PNGs in that same mode.

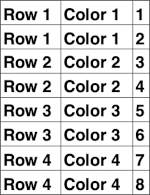
Mosaic color separations are different from those for DBJ.
The knit, also known as floatless fair isle to machine knitters, aims to have floats usually no wider than 2 stitches and for only one color, as opposed to 2 with each pass of the carriage in fair isle.
It is executed with color changes every two rows and cam buttons set to the tuck or slip stitch setting in both directions.
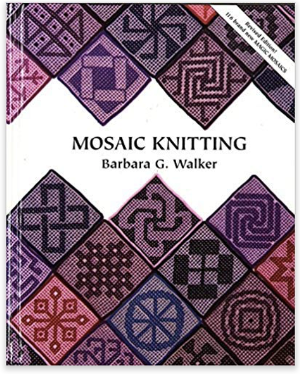
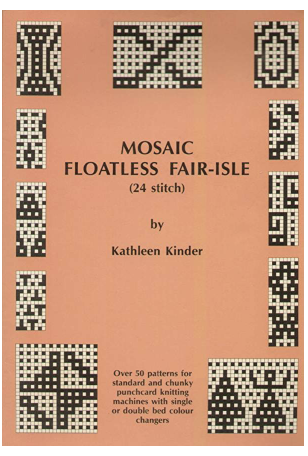
Two classic references: hand knitting for 24 and 40 stitch machines. In mosaics and maze conversion, the original file is not rendered double height before being separated. In other knit structures, the original file is commonly doubled in height before the separation, solving by default the even # row requirement.
Aside from the automatic color separation and what comprises the original file input, ie, indexed BW mode and an even number of rows, depending on the manual separation, the actual file on completion of the separation may need to be altered again before knitting, doubled in height.
The last double height can be achieved by altering the separated PNG before downloading it to electronic models. Symbols for that vary depending on machine or model year, in this case, 910 houses and trees, #4. The 950i  uses ships, but the button placements are in the same positions, and perform the same tasks, or the placement of the card lock lever in punchcard machines. I prefer punching or programming repeats that do not require the built-in elongation selections. Returning to specific rows after interruptions in knitting or correcting patterning errors during it are easier to track.
Whether the color separations are performed manually or with automated tools, the prerequisite is that the input file aligns properly when tiled. Often, published designs have added rows that will double when drawn in repeat, solved by cropping rows at the top and at one side, as addressed in other blog posts.

Using Gimp color invert.
A starting file,  used repeatedly in previous posts on mosaic knitting, 12X18.A brief review of DIY steps involved, taken for granted when performed unseen by software, follows.
The expected results can be visualized by tiling the repeat in Gimp using Filters> Map> Tile, and entering a multiple of the design, accepting the default ratio 120X180, or breaking the chain and entering a second number, ie, 126. The view of a magnified segment.  When working with Gimp, rectangle select, the aspect ratio can be set to the width of the repeat, 12, and 1 for the height of the selection.
Hold down the shift key to process the whole image beginning at the top left and continuing on every odd-numbered row.
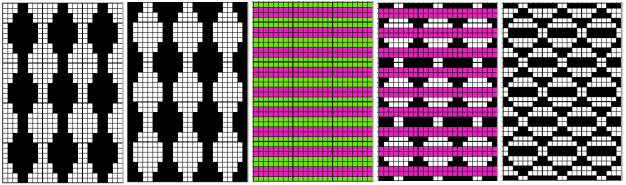
The handles and dotted lines appear as one moves down toward the bottom. If a selection error is made moving down, while still pressing on the shift key, select edit, undo to remove the selection. The reversal takes place by choosing Colors > Invert only on selected rows after release of the shift key. With every other odd-numbered row selected and inverted,  the 3 images on the left show the separation, and the last on the right shows the separated file scaled to double height, which is actually needed to knit the mosaic successfully. When selectively scaling, ie, only for height, check that the chain is broken, and interpolation is selected/ changed to None. The change can be made permanent by altering the Tool Options default interpolation in program settings. The 12X36 file is ready to knit and is also shared in repeat. The first preselection row is from right to left, and the color changer.

This repeat for a larger design, 38X34, was separated using the custom filter, with the knit-ready result, 38X68, obtained in a single step

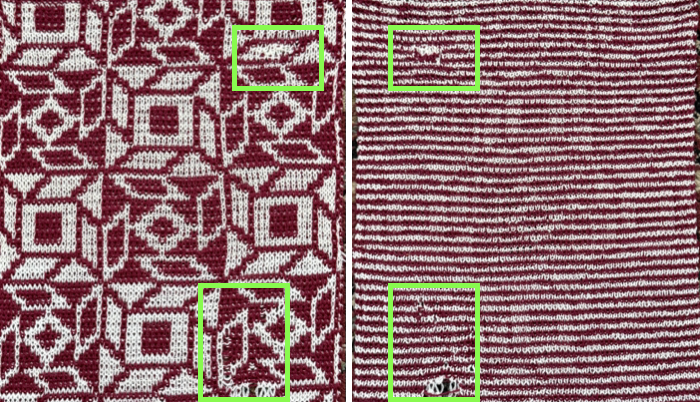
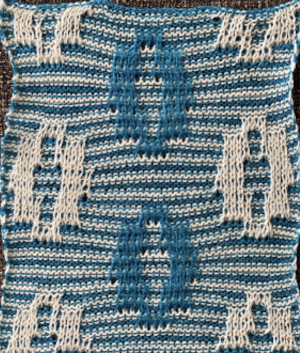
A design that combines the mosaic grid work with the straight horizontal design found in mazes began with a 26X26 repeat, followed by rotations and additions of a 26X20 partial repeatresulted in a 66X24 PNG   that, when viewed tiled on the screen, looked OK   the single repeat, separated using the script,66X48, was swatched using the slip stitch setting.

Both tuck and slip shorten the end knit along the all knit stitches beside them, which in this case form wide horizontal stripes. Those stripes in turn become distorted, seen here at the top and bottom of the swatch; the degree of 3D effect depends on the ratio of slip or tuck counts to knit stitches.
The repeat adjusted to a slightly different alignment if I were to personally use it in a final piece, 66X26, separated to 66X52The question then becomes whether more is less.
The original 26X26 design, separated to 26X52, shown drawn in repeat X3, 78X52, was test-knit using the tuck setting. The yarns used are Silk City wool crepe purchased as seasonal remnants decades ago. Its fiber content is typically 80% wool and 20% manufactured fiber like rayon or viscose. The surface of the swatch is far more 3D than its slip stitch relative. Returning to a 2015 post on working with online generated mazes, and the selection with the isolated repeat, 14X34rendered in BW the script “mosaic” separation,  14X68color inverted for knitting using either tuck or slip stitch setting. The sample, knit in tuck stitch for 134 rows, measures 9.25 inches in height.

DOUBLE JACQUARD
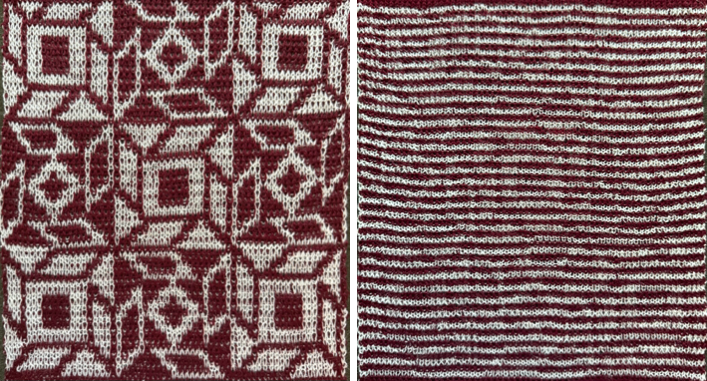
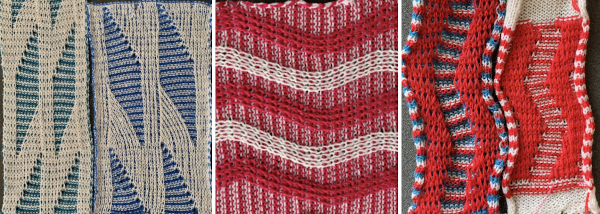
The abridged view of the same steps in the separation for knitting the original 12X18 row design as DBJ, where each color in each design row knits twice.  

The final file is composed of pairs of identical rows.
The process begins with the original image doubled in height, in this instance,  to 12X36.  Every alternate row is color-inverted, and then doubled in height for knitting to 12X72

12X72The first preselection row is from right to left, toward the color changer in Japanese KM models.
Because each color in each design row knits twice, the design is very elongated, even when knit with birdseye backing. The random color choice was not the best in the related sample. If the goal then becomes to have each color knit only once to reduce aspect ratio distortion, or if other knit stitch structures and combinations are planned, additional processing is required.
For strictly 2-color knitting, with BW starting images, electronic knitting machines automate each pixelated BW row for knitting each color only once per row with the flick of a button, generally labeled KRC.
The starting side for the preselection row is from left to right.
The 2 rows for the first color are split between the top and bottom of the programmed repeat.
The actions performed automatically: In the post ArahPaint in knit design 6: color separation,  this suggested method proved faulty when tested here. The result shows the dramatic difference in scale when each color in each row knits only once, but there are noticeable white stitches that are breaking vertical red lines, not intended and not the result of a programming error. Analyzing the result: the first and last row of the design are unaffected by the separation, and when knitting lengths, that same design row will repeat twice.
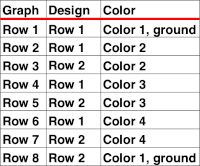
This proposed method shifts the first design row to the top, maintaining the 12X36 dimensions, and is then color-inverted, rendering a 12X36 file that is ready to knit. The first preselection row is from right to left toward the color changer.
regrouping, 12X36 with the bottom row shifted to the top, the separation, also 12X36The steps in the separation
1: the original image, 12X18
2: the original doubled in height, 12X36
3: move the bottom row to the top of the repeat, still 12X36
4: as an optional guide, a column was added on the right, increasing the width to 13 pixels, marking pairs of rows to be inverted. The added pixels were originally red; when color inversion was used, they were also converted to blue pixels
5: number 4 with the blue and white pixel column removed, the ready-to-knit repeat, also 12X36. The swatch is knit using birdseye backing, an added technique that helps to maintain the aspect ratio of the original design.
The visible extra white loops on the side are due to yarn feeds in mast issues that have gotten added to my list of “well, I have not run into this before!”  

Duplicating the KRC model, with added changes, but the same result: the hand-selection method to illustrate the color invert steps, from left to right: the 8X8 PNG start,
rendered double height to 8X16,
with the bottom row moved to the top,
the separation illustrated with marks for the placement of the inverted rows in blue,
and the knittable final repeat, 8X16Sample color separated using a Vibe-Coded script to obtain the 8X16 result:
the goal is to knit each color in each design row only once, matching the electronic automated electronic KRC selection, with a critical difference: the preselection row is from the right, followed by color changes every 2 rows. Testing a larger design repeat, 43X44color separated to 43X88knit with birdseye backing, with preselection starting from the right

More to ponder: the method used to have each design row knit twice produces files that can be altered again in double bed work for other stitch structures, or used as they are in single bed slip stitch that knits carrying one color at a time for 2 rows.

Reviewing charts for different separations, including use of more than 2 colors: depending on the published source, sometimes letters are assigned, others numbers, and they sometimes differ in identification sequences.
Continuing with Double bed separations, the longest to execute manually, while considering different stitch structures:
 

Swatches > seasonal knits 2025

Some repeats are immediately identifiable as not suitable for fair isle knitting due to the length of some of the floats.
Any of the PNGs in the blog can be enlarged to check on any areas with more than 5 black or white pixels side by side, the guideline for the suggested maximum.
The original width and height of design are not clues by default, issues may not be evident until after the motifs are drawn in repeat.
In wearables, a compromise can be reached by taking any of a number of measures, or even by adding lining or iron on facing (woven or stretch), depending on end use.
This 30X30 repeat plays with rotating a half shape around the full first design, forms suitably short floats, while this 18X24 design has several areas that merit attention. This design plays with paired color reversals to create secondary patterns, identifiable here as would-be six sided snowflakes, and is a clear candidate for knitting as DBJ.
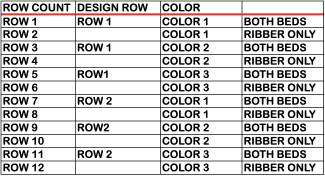
Each row of double jacquard consists of two rows of slip stitch patterning, one with ground yarn, the other with contrast.
It is not only newbies that encounter problems with any technique.
There are some days that offer the opportunity for testing patience, persistence, and expletive vocabulary.
The first knitting attempt was with the ribber set to knit every stitch on every row for striper backing, using 2/10 wools. The carriages were hard to push and with some lovely holes including these, even after tension and weight adjustments. Troubleshooting included:
with weather changes especially, think about static, a culprit often named in situations otherwise not explainable
checked needles, they looked fine, had some sticky latches, oiled them
checked alignment, OK
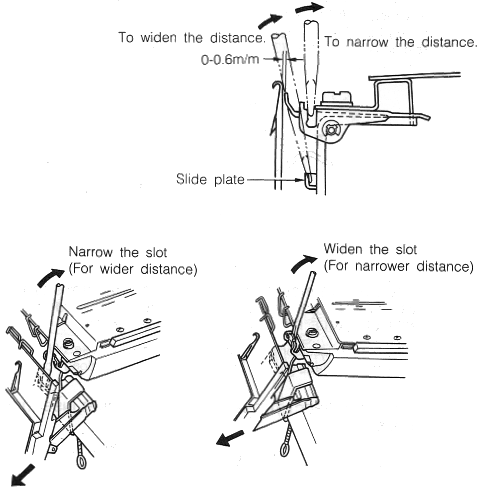
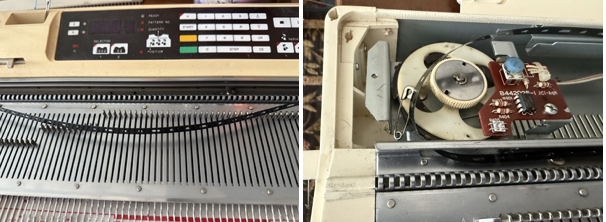
discovered the ribber had dropped slightly on one side, raised that side to match the space between the beds on the other, and on the first next carriage pass there was this.That safety pin was not placed for special effect or aspect ratio, it probably entered through the slots that allow the belt to rotate, but where it came from remains a mystery.
With the yarn selection changed to thinner, similar color 2/20 wools, there were no dropped stitches> holes.
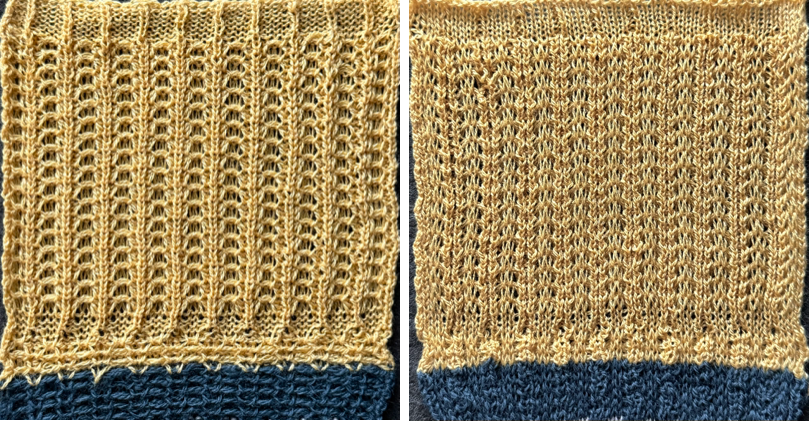
The first test, with striper backing, measured 9.35X10 inches, and with birdseye backing, 7.75 X 6.75 inches


Passap to Brother 7: more Duomatic inspiration

My early posts were often quite brief, and some of the explored techniques were never returned to despite my intentions.
A shawl tale was written in 2009.
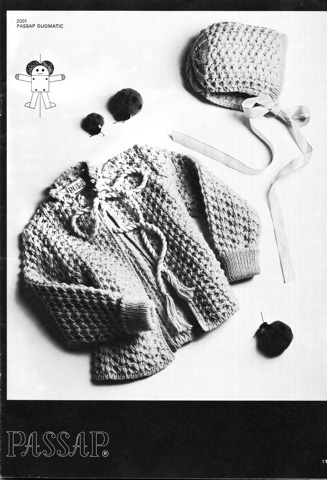
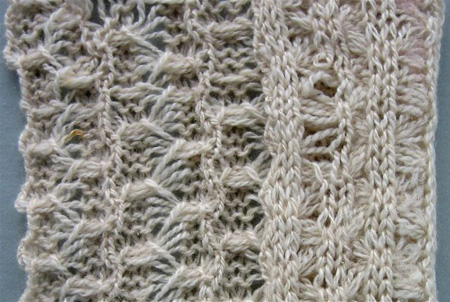
The designs explored in this post can be found in the Passap Duomatic baby book. A closer look: My attempt at a hand technique at that time, and the declaration of a planned challenge, “creating a downloadable stitch pattern that will automatically select appropriate needles and duplicate this texture.” It only took 16 years!
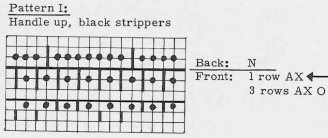
The pattern chart: on the Japanese machines, the beds are reversed. The back bed = ribber in our case, is set to knit every row.
Locks is the Passapese for carriages.
Many patterns can be achieved by lock settings and arrow keys without added programming. In Brother machines, a small cousin of the function is found in the use of lili buttons.
When an arrow key is pressed, it tells the Passap machine to engage the pushers.  Depending on the direction of the movement of the locks, the pushers will be lifted or pushed down. Their initial position is set up manually.
The left arrow key changes pusher selection when the locks move to the left.
The right arrow key changes pusher selection when the locks move to the right. Use of both arrow keys simultaneously will change the pusher selection every row.
With the Zero key, no arrow selected, the pushers do not change their position on that pass, repeating the selection.
Pushers preselect for the next pass, as happens with needle preselection in Brother.
AX is the tuck setting for Passap, pushers selected up knit, selected down tuck.
When setting up these patterns, it is best to have a needle on the ribber on each side, not observing the usual “needle rule” for rib knits.
When working on both beds, the default illustrations have a space > dot between needles in work to permit the illustration of needles between them on the opposite bed, so the chart is not for an every other needle design. In this instance,  stitches > needles in work occur in pairs on the top bed.
Programming the repeat: the first pass will knit or tuck alternate pairs of stitches.
The needle selection then stays fixed for 3 rows and reverts to the first selection, a 4-row design. Stitches will be tucked side by side, breaking another common rule.
The ribber needles in this case are extra, not transferred down to the ribber from the knit bed as in some of the fabrics recently explored in other posts.
They are brought into work between pairs of knit stitches on the top bed, represented by the red lines in this chart.

Because of their location, the ribber should be set for half pitch.
With use the beds can shift, for tips on ribber alignment please see post:
A bit on ribbers: Japanese KMs, alignment, and symbols 1.
The stitches on the ribber are outlined with cyan, the triple tuck loops as those needles are brought forward on the knit bed for knitting with white. The proof of concept, programmed on 46X24: The darker color was thicker, knit well, but since this was a test, seeing stitch formation while checking for accuracy mattered. Testing the pattern on the knit bed first determines any problems with the design before the ribber is brought into work, limiting visibility as the knit progressed.
The same repeat, with stitches transferred down to the ribber, leaving empty needles on the top bed, knit on every other needle with 2/8 wool, produced an interesting texture, but quite a narrow knit, 3.5 inches wide. Racking on EON rib: some considerations.
A different design, with the repeat cut in half widthwise for a more traditional tuck stitch configuration, 
also with stitches from the ribber between stitches on the main beda knot in the yarn knit right through and was missed, easy to do when working double bed if the yarn travels with no hesitationThis design uses a simple racking pattern, easy to execute in thin yarns, but not as impactful. In Brother the ribber performs the racking movements.
Both beds are set for plain knit.
The needle set up is on half pitch.
Cast-on for the test swatch was with the racking position starting on 8, with the plan to rack to 10, knit 2 rows, rack back to 8, knit 2 rows, and repeat, performing all position changes with the carriages on the left.
The yarn used is a 2/18 wool/silk blend that resisted the technique regardless of tension and weight adjustments, and began breaking, but there is enough knit to visualize the result. Pattern 2053 is for reversible checkerboards that use tuck settings on both beds,The strippers in the Passap system help push down on loops and knit stitches, anchoring them in a way simply not possible in Brother models. Even if a choice were to be made to push down between the beds with a hacked tool, the Brother needle preselection renders that impractical.
The concept behind the Duomatic version is then switched to automated patterning with the tuck setting on the main bed, and the ribber set to knit every row.
The two rows with one arrow key result in the repeat shifting locations by repeating the same selection, as seen in this chartThe 8X40 design was knit on 48 stitches, these knits are quite wide, loose bind off are required when the pieces are completed.
Each sample knit measures 11.5 inches in width.
Where 4 side by side needles are tucking for four rows, the stitches on the ribber may have a tendency to jump off, resulting in loops not being anchored, so those areas require special attention. The proof of concept for the above repeat in one color and then with color changes every 2 rows

More variations including racked ones are explored in Fisherman_ English tuck stitch rib 1_ checks patterns_ Brother, Passap.

Just because snowflakes are six sided crystals

I have been using Gimp for more than a decade, but the last 3. and 3.+ versions have had bugs that broke familiar functions, among them saves are now in greyscale, RGB mode is disabled, there are file naming issues, and editing and saving preferences are only temporarily saved.
It took a bit of digging to find a 2024 version that appears to work more predictably: https://gimp.macupdate.com/app/mac/14597/gimp/old-versions.

ArahPaint has become my primary design tool. In the past year, some new features have been added, but have not yet been documented here.
There are 6 previous blog posts with suggestions on how to use the program in knit design.
This post shares my doodles in the development of a theme, not specific step-by-step instructions on how to achieve them.
Learn more about ArahPaint on the related Facebook page, YouTube shorts and videos, and by browsing the excellent manual available to download.
Some sections to explore in the PDF: using tools pp. 19-23, drawing straight lines, verticals and diagonals, and shapes pp. 28-30, working with colors 35-59, and repeat modes 63, 90-95. Brick repeats are narrow and long, suitable for punchcard model machines when meeting the 24-stitch restraint rules. Pillar or half-drop, depending on offset, are wide by default and only usable in electronic machine models.
A very brief review of some of the techniques used in the following designs: as the straight line tool is used, an angle for the line appears above the palette area, the value will change following the mouse movement, and the line will stay in place with the release of the mouse. The tool menu offers options for easy transformations and rotations on the whole canvas, on the chosen full image, or selected portions of it using rectangle select. Parts of the design may be copied and changed before pasting into place or in a new window. Working in multiple color palettes, double-clicking on either foreground or background selections allows for changes to those specific selections. Changes may be made using double clicks sequentially to first protect one or more of the colors to selectively work on the background, then again, to render any color transparent, and a third time to revert to the original palette. I work on a Mac desktop with an M1 chip and OS 26.0.1.
The forms classified as snowflakes in knitting, cross stitch, etc., are often multiples of 4 segmental shapes at 45-degree angles.
That said, a snowflake is technically defined as a single, delicate, six-sided crystal of snow that falls from the sky.
This is the start of a coloring book virtual approach to accommodate the math for a 2D fair isle or DBJ design using pixels.
The more familiar views are developed using 60-degree guides and can vary in complexity. Some of the more complex designs become suitable for applied duplicate stitch or beading to improve the definition of stitches. The base grids are 61X61 pixel canvases to allow for single stitch centers/ pivot lines.
Working with double line thickness lines, a 46X46 shape.The PNGs below are not fully developed designs, and are intended for download and use to yield DIY versions that meet your own size and preferences.
Beginning with a 61X61 template with a single pixel pivotal point, the hexagon shape is identified, and it is drawn at 30-degree angles with symmetrical diagonal line placements. Superimposing color blocks and lines, 

the shape rendered all blue, with the blue protected, fill ground with white, crop the result to 34X34, convert to BW. The tiled half drop repeat has negative space that will accommodate smaller added designs in DIY if preferred, 68X34 

A 15-degree template, with single-line pivot points, to render all lines in grey or any preferred color, lock the white, follow with color bucket-filling with the chosen color. Unlock any protected color(s) before proceeding.
The new canvas is 60X60 for visibility and initial pattern drafting.
The full size is retained in the first attempted repeat; note the six-pointed star shape.

Cleaning up, editing pixels,
another 60X60 design
adjusting for a smaller size and a slightly more circular effect
cropped to 44X44 in brick, 44X88
half drop, 88X44, determining missing pixels, adding others to form complete shapes.
A different approach, using colors to plot a 6-pointed star in a different orientation, follows color changes for observing different-sized “flakes”, edited as preferred.

Opportunities to explore negative spaces
30X34
30X68 60X34

30X34 with a bolder outline. Not forgetting those cubes, a start in BW, keeping whole star shapes. A “small” 28X32 motif formed following lines in the template.   33X33 with different shapings. Superimposed equal-size stars with one rotated, 38X38. If there is a need to go big, 32X58.Pondering double-thickness lines, the rotated star shape, 72X60. The possibilities for shifting color placements can lead to endless shape variations.
The final choice then becomes as to the best method for executing any of this as a knit fabric, and whether using 3 or 4 colors is practical, whether the designs will become distorted, the rabbit holes are endless.
For a source of inspiration for more variations and shapes, visit
https://numericaldesign.blogspot.com/2016/07/exagonos-02.html
https://patterninislamicart.com/s/published-material/drawings-diagrams-analyses/publication/geometric-patterns-borders , a sample from the pubA template for pursuing more the ideas using color, 78X44tile as many times as needed for the base canvas,  or begin with the same design rendered in black and white.And here, a version of finding Waldo, look to find the different size flakes 😉

Revisiting double bed knits with stitch transfers between beds

A reminder for Brother machine users. When automating any pattern by programming the top bed, if there are any needles out of work, end needle selection must be canceled, or stitches on either side of the empty needles will knit, not tuck, slip, or knit in the proper color, altering the planned design.
This latest repeat is worked using hand transferring stitches at regular intervals between the main bed and the ribber.
To facilitate tracking, the transfers were executed every 10 rows with the guidance of a marked-up, custom-printed needle tape.
The knitting can begin on the top bed with waste yarn.
Even weight is needed for the stitches to form properly.
The ribber is set to full pitch, P > point to point, during the knitting of the piece.
It is possible to start on waste knitting and to use the ribber comb for an open cast on the top bed.
Alternatively, the single bed comb may be used, with ribber weights evenly spaced apart on it before transferring stitches down to the ribber, or a ribber comb may be poked through the waste knitting evenly, followed by the addition of weights.
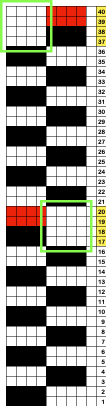
1: the initial needle transfer set up, on a multiple of 7 stitches +2. The cells marked with red on the tape represent stitch groups that are never returned to the main bed during the knitting of the piece
2: the transfer set up for the first 10 row group
3: the transfer set up for the alternate 10 row group.

The first and third images from the left show the piece when first removed from the machine, and the other pairs show the swatch after steaming and pressing. The yarn used is a 2/8 wool. Since the fiber has memory, it retains its spring back after blocking and resting, but with some loss of the 3D effect.
Man-made fibers and some natural ones would flatten completely and permanently with pressing/ steaming. When testing pattern design ideas that require few needles in work on the ribber, it is possible to cast on the single bed, weigh the knit evenly, and transfer or bring needles into work as needed.
The ribber cast on comb can be used to cast on the single bed using the ribber arm, not the single bed sinker plate.
Doing so, EON (every other needle) on the first row, followed by bringing the remaining needles into work before the next carriage pass, matches the EON e-wrap cast on single bed and allows immediate use of the ribber weights.
Arrangements on the machine for the first pair of samples.
Working with cell repeats in spreadsheets serves as an aid in plotting out the required actions before committing to a design and reproducing the chosen file in BW mode.
In this instance, the needles represented by the yellow cells were transferred down to the ribber first, with the empty needles pushed back to OOW (out of work), A position.
A row was knit, and then the ribber needles represented by the orange cells were brought into work to complete the ribber needle pairs.
The ribber pitch can be in P for straight transfers, but needs to be on H when there are needles side by side with those on the top bed.
The knit carriage is set to tuck in both directions.
As in any case with NOOW on the top bed, end needle selection is canceled to preserve the pattern.
This first 8X14 design repeat is usable on punch card models as well as electronic ones, and produces horizontal striped effects.The needle arrangement on the machine:The appearance of those side-by-side stitches on the ribber forms columns that are quite different than those achieved by transfers to the ribber that match in numbers to needles emptied on the top bed and taken out of work there.
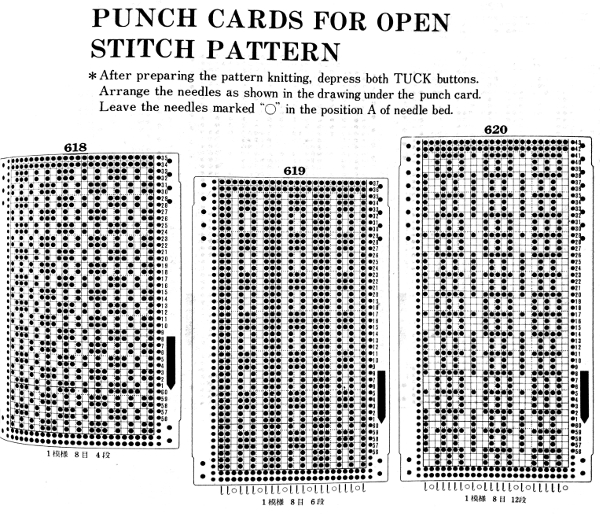
The half drop, 16X14 version. Breaking the tuck rules of side-by-side loop formation: The needle arrangement on the machine for the 11X24 repeat in half drop, 22X24Tuck lace published designs may be used, instead of taking needles out of work, transfer needles in those blank vertical column locations down to the ribber. The 24X48 PNG tot pattern #620A few of the previous experiments and samples in double bed knitting with stitch transfers between beds, at times only once, at others in repeating pattern blocks.
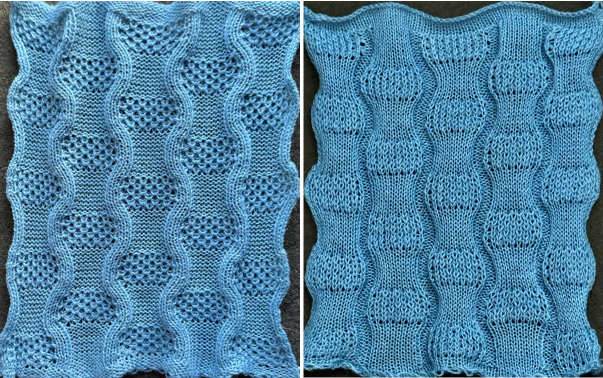
Knit and purl blocks to create folding fabric_ “pleats”
More fabrics with knit bed tuck patterningUnconventional uses for punchcards 3: lace in rib
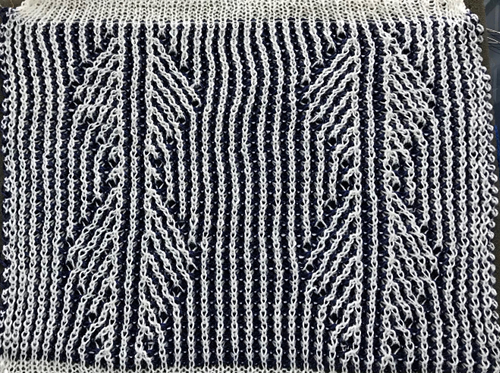
Lace transfers meet fisherman rib, 2 color ribbed brioche on Brother machines 2. Ribber fabrics with stitch transfers between beds 1Slip stitch patterns with hand transferred stitches, double bedBrother shadow lace, rib transfer carriage Combining knit carriage needle selection with racking   More to explore
Transfers between needles on either or to and from both beds
Double bed embossed patterns
Bowknot aka butterfly or dragonfly stitch in more than one color
Slip stitch patterns with hand-transferred stitches, double bed
Ribber fabrics with stitch transfers between beds 1
Ribber fabrics with stitch transfers between beds 2
Origami-inspired 2: more pleats and folds using ribber
Pleats: ribbed, folding fabrics
Lace transfers meet fisherman rib in 2 colors on Brother KM 1

A tale of crustaceans and critters

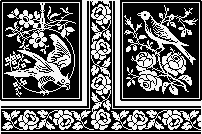
Ancient filet crochet books are often a source of inspiration for potential knits.
The files resulting from the PNG conversions collected here are not necessarily knit ready if they are to be used for DBJ.
If the planned design is to be used as a continuous pattern, with a return to row 1 after reaching its top, the designs must be an even number of rows in height to start with. 
Archive.org offers one search method for historical results.
The site is free to use; small donations are optional.
I have seen many references from this site and from https://mkmanuals.com/ downloaded and being sold online.
I live on the East Coast of the US, where crustaceans of all types are easily available in seafood sections of markets and restaurants.
This plate from a 1912 pub initially caught my eye.
The first repeat tested was knit in DBJ with birdseye backing,I was not happy with the swatch, measuring 8.75 X 8 inches, and got distracted, as often happens, by other rabbit holes.
The present 76X76 PNG  was used to test knit in DBJ with striper backing; the result was definitely more square, measuring 11X11 inches.
Although the two swatches share the same color way, they are knit using different yarns.
Plied yarns were problematic with feeding evenly and getting hung up on gate pegs, a first in my many years of knitting DBJ.  After several stubborn starts and switching to a different single ply shade of white, knitting went smoothly.
Each lobster occupies less than a quarter of the full repeat, 19 stitches, illustrating some of the limitations in detail when reducing identifiable images to 8-bit small designs. Not to be left out, the crab in the lower border, on the same page, 30X25

Inspired by the above and other filet crochet references:
an army of frogs that began with a border chart;  the 27X83 PNG  

in half drop, 81X83

a punchcard version, 24X56

Other design repeats from the same and similar other sources to play with in electronic DIY:
ladybug, 27X27 bunnies:
30X29103X37
squirrels
41X1roosters
39X3939X4159X59fictional
30X2931X31
50X5161X52

75X76Bordered, larger-scale tiles
57X57
87X8587X8787X8787X8792X91

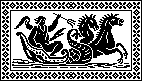
93X9395X95previously shared 165X230 to trim, edit, and make your own, 202X134.  A touch of mythology, 152X81.one to crop for DIY, 165X230 179X223 222X349

For an updated list of links to previous posts, please see the  blog index, new listing DESIGN REPEAT COLLECTIONS


Playing with cube shapes

A collection of geometric design blocks built with squares, rectangles, and lines looked at combinations that were 2D but could play with the illusion of movement. These repeats look at cubes in growing sizes.
The larger repeats have long floats and are more suitable for DBJ than FI.
For easy manipulation, mirror the images horizontally.
To mirror punch cards, flip them over and insert them into the card reader. Depending on the complexity of the design, numbering the back of the card can be useful.
8X14

Its mirrored version 8X22
10X20
10X20
12X2220X10
20X36color inverted Exploring mirroring and rotations of the design repeat to achieve the start of DIY secondary shapesLarger design repeats become more suitable for DBJ. The conventional max in FI  single bed knitting is 5 needles, for either or both colors.
24X28  added variations may be made easily by mirroring or rotating the original, ie,
mirrored horizontally,  rotated 90 degrees counterclockwise, 28X24
24X44The opportunity to explore 3 colors per row

Exchanging colors to match yarn stash or to find secondary shapes in RGB/ expanded palette mode. A ribbon effectChoosing from previously developed design repeats, DIY 3 color versions can easily be achieved through filling in the dotted areas.  Testing the changes in orientation using the ArahPaint tools to mirror first horizontally and then vertically.
A different design with a vertical orientation, 12X26repeated to the same number of pixels/ potential stitches as the above. Cubes that float, a 12X18 repeat suitable for punchcard models, the effects with color invert, two ways of adding a third color.Developing a more complex geometric shape, 24X20, built by taking away or adding color pixels to create new forms. Working in multiple colors, software assistance visualizes complex shapes built from small units rotated to form new ones.
These were gleaned from Wolfram Math exploring Neat Alternating Tilings of the Plane, in their computational design format, CDF; the linked tilings site permits testing live interactive demos. The version of the CDF player operating on my Mac is 13.3. Nothing appears to be working properly in the latest available one, 14+, tested and now uninstalled.
Triangular unit variations ie,  are found in the blog post Truchet/Smith inspired designs 2 meet ArahPaint.
Side-by-side stitches forming lines or intersections in pairs of pixels are unavoidable.
Here, there are vertical lines that form and will shift with the rotation of the files. The colors can easily be replaced in coloring book style to match yarn colors or personal taste.
A small unit, the vertical line is highlighted in the closeup image, 8X824X24different color-way, altering the visual impact by mirroring or rotating the file to shift the placement of the dark color. Inspired by quilt blocks, playing with palette variations
24X24with added lines of the dark colorMore collections to explore are listed below. For an updated list/ more, see blog index, new listing DESIGN REPEAT COLLECTIONS
Hound’s tooth FI variations were in a very early post, which offered only charts. PNGs for the designs are now in the process of being added
Playing with diamond and argyle repeats
Developing tiled repeats suitable for multiple stitch types includes some optical illusions
Seasonal knits inspired by published repeats 1 winter, holiday
Seasonal knits inspired by published repeats 2, hearts
Weaving drafts as inspiration for other textile techniques
Seasonal knits inspired by published repeats FW 2025
Working with diagonal patterning in machine knitting

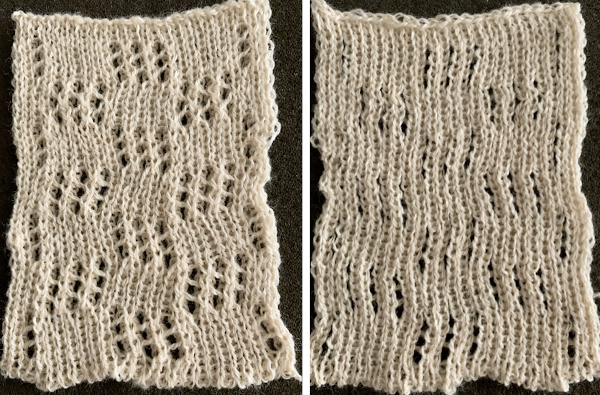
Added play with lace designs 1

This experiment began with this full published punchcard chart, 24X40 cellsThe related PNG, 24X20, was tested on the 930 electronic machine.
Weight and tension adjustments led to avoiding dropped stitches, familiar to many with experience using the lace carriage (LC) to make the needle selections and transfers.
The side borders can be planned to be vertical columns of knit stitches or with shaping created by the transfers. Reverse engineering, from punchcard repeat to a hand technique chart begins with color coding the transfers, cyan to the left, magenta to the right.
The punchcard machine automatically reverses programmed motifs, but in charting for hand techniques place the symbols and their direction are as intended with the purl side facing.
This  startled to the first draft for use on the bulky.Needle beds and tapes may be marked in a variety of ways to help track hand techniques. Custom needle tapes on any model can be printed to scale and inserted under needles for similar guidance.
Claudia Scarpa has published tapes for a large range of needle spacings on her blog. They are numbered and in colors to match factory tapes for both full needle beds.
Mac experiments on printing needle tapes and punchcard templates to scale and other tips shares 4.55mm bed downloadable documents.
Each table cell in my bulky DIY measures 22X26 points in a Mac Numbers, an editable spreadsheet: bulky tape
The related PDF file, needle tapes only bulky , printed to the correct scale using these setting adjustments.The 23-cell table screen grabbed, opened in gimp, cropped to content, 1177X91,
also printed to proper scale and offers the opportunity to fill individual cells or blocks with specific colors using the fuzzy select/ magic wand tool
The 9mm tape is shown in place with markings chosen to match the chart for alternate pairs of rows.The result is with knit rows after each series of transfers.A side-by-side view/comparison,  highlighting differences in the number and size of the eyelets. Readjusting the repeat, shown in progress; the rows marked with red cells take into consideration the actions of the automated LC selection.
The transfer in each segment is made first, and then subsequent selections and transfers are made until the final eyelet is formed in the desired place for each of the following segments.
The yellow cells represent blank rows in the cards.
Multiple transfer tools, in this case a 2-prong one, can be used to make the multiple stitch transfers in single moves.
The final repeat is collapsed to place eyelets in the proper location and is reduced to 8 rows in height.The knitting in progress on the bulky machine illustrates transfer rows, and shares its appearance with this test on the 930 knit using 3/8 woolThis 31 stitch swatch was executed first on the bulky km following a chart, measures 8.75 inches, 22.25 cm in width at its widest point.On the standard machine, a 31 stitch X 15 row PNG program was used to help track transfers.
The chosen yarn was a 2/8 wool, the swatch measured 4.25 inches at its widest point, as opposed to the bulky, 8.75 inches at same.
Here the swatches are compared side by side.

Seasonal knits inspired by published repeats FW 2025

With the approach of fall and winter once again, the post with Seasonal knits inspired by published repeats 1 was discussed in Ravelry.
This share adds to the library of collected repeats, aiming for daily updates.
When choosing any design, view or print the tiled image or selected portions magnified as much as possible, after giving the eyes a rest, before committing to knitting, which can sometimes be followed by disappointment.
Recently, I have begun to use the 930 Lace Carriage for preselecting needles in B position, moving toward the knit carriage, and then removing it, instead of switching to slip stitch for a free pass when needed and risking confusion in returning yarns to their proper position or forgetting to switch cam buttons for proper technique.
Charts will be provided for designs suitable for punchcard use.
18X24
22X2022X2224X22 24X24

24X24
The difference achieved by inverting colors in the PNG or switching placement of the yarns in their feeders:

25X2626X2626X2626X2626X2626X26
27X27 two ways
30X30 with half segments repeating39X3034X3234×32  color inverted tiling40X40
42X40isolated from tiled repeat, 42X4046X46 two wayscombining repeats
48X48
65X6572X72
Developing DIY repeats for color striping or with color-inverted tiles can begin with any motif drawn in repeat with areas where pixels repeat in even numbers across rows or columns, lining up horizontally, vertically, or both.
If the goal is to knit a single bed fair isle, consider float management to secure the 10 stitch floats, as in this case, alter the repeat, or simply choose another.
There are several approaches for generating new designs from those already developed. One is to begin with a tiled version, choosing possible breakup points, which are highlighted here in magenta. The manually isolated repeat, 27X54, with the bottom half color-inverted.The design, drawn in repeat X 3, formed alternating color inverted horizontal bands with pairs of pixels at the tiling vertex. Making the choice based on personal preference to eliminate the extra pixels, using ArahPaint mirror X-1, 53X54.Color inverting each quarter for pattern blocks, 53X54,mirrored X-1, 52X54A slightly different approach, starting with the 27X27 file, undisturbed, draw in repeat X2 in height, and using rectangle select choose the part of the design with the double row of pixels as the point for dividing the image into 3 segments, using rectangle select and colors > invert all, to form the new 27X54 file, for the horizontal repeat.The same file drawn in half-half-drop repeat for alternating tiles of the pattern, 54X54.The 27X27 doubled in width, 54X27,with the center 27 pixel section color inverted,for vertical stripes. Adding a few pixels for float control?
Problem area 1Problem area 2The proof of concept, knit on 61 stitches.Punchcard knitters can also add holes to specific areas for float control, such as in the 24X22 repeat shared at the top of the post.Card programmed designs are centered, mirrored horizontally, and repeated in fixed locations across the needlebed. The needle tape markings serve as guides.
When making pieces, if the goal is to place the center of the design other than in the default location, one solution is to move the work to a different place on the needle bed; the other is to shift the motif before punching the card.
Here, the chosen design is drawn in repeat to 48X22, the center segment is isolated, and cropped to the new 24X22 motif, shown on the right with the new holes to punch highlighted in magenta.The chart for the full card, the PNG.The proof of concept swatch: repeating motif components on a more open background, beginning with 50X50From A tale of crustaceans and critters, a large tile, 87X87,
from Color separations for larger-scale mosaics and mazes

Alternating color tuck stitch shapes on striped ground
The post Single bed tuck and slip stitch fabrics 1  reviews some of the differences between the two stitch types, and the characteristics of appropriate pattern repeats.
Single bed tuck and slip stitch fabrics 2: adding color introduces visualization and samples, executing both with frequent color changes while Visualizing maze or mosaic potential from tuck or slip stitch repeats begins with designs that are already developed/published and constructs the visualization of the potential results with frequent color changes.
DIY repeats bring together approaches and ideas developed over time.
A color separations post published more than a decade ago, first looked at achieving this design repeat using Excel, and the topic was revisited this year in Revisiting old color separations, testing present software methods, leading to present testing of the concept using the same software tools to produce a tuck knit pattern with alternating color shapes while observing the conventional tuck stitch rules.
In this case, if each color is to knit tucks for 2 rows, then it must be represented by cell units that are formed in single width, and 2 rows in height/ across each pair of rows.
Using only BW pixels, the process began with a 13X26 PNGdoubled in height to 13X52, redrawn on a larger canvas, to 14X56using ArahPaint drawn in half-drop repeat, offset by 28 or by 1/2 using the pull-down choice.    28X56Relatively small designs are easy to manage.
A first alternative: in one half of the repeat, erase or fill in with white the first 2 rows of black squares in the design, while in the second half of the repeat, do so with rows  3 and 4, and test alignment by drawing the design in repeat.Visualizing placement of tuck stitches on striped ground:
1. the original repeat
2. the revised repeat
3. the striped ground in any chosen colors
4. #2 with white color to alpha copied and pasted on #3
5. in any final knit when programming the design, the black cells in #4 need to be white for tuck stitches, and the ground a solid black.
Both #4 and #5 prove that held stitches/tuck loops in both colors are not represented together on any pair of rows. A second alternative uses ArahPaint on half the repeat at a time to allow for the 2-row upward shift between designs
1. adjust the grid width to 14, providing a vertical guide along the vertical midline
2. fill a 14X56 new image with a first 4-row brush3. copy and paste it on #1 right, after rendering the green color in 4 transparent5. a new 14X56 image filled with a second 4X4 brush6. copy and paste it on #4 left, after rendering the magenta color in 4 transparent7. the final repeat The test knit repeat, 28X56, is centered in a 60X56 canvas with an added two-stitch vertical border on each side; end needle selection is canceled.   The repeat may be used as is. To meet tuck rules, it then must be color reversed using the machine’s appropriate button after downloading, or color reverse the PNG before saving, and use that as is. The change to the second lighter color yarn was made to facilitate the ability to visually check the proper formation of stitches on the purl side during the test knitting of the swatch. The repeat may be reduced for use in punchcard models.and is drawn in repeat to obtain the brick configuration on the left, and then the software tool is used to find the single 24X48 repeat on its right.
The colored chart visualizes the placement of the tuck loops on a 2-color striped ground.
Punchcard knitters may mark the black cells and follow with punching all other squares, as indicated by the black cells in the chart on the far right.
24X24 PNG before the color separation for electronic knitting, before color reversal, and after it. It is possible to use the punchcard reader to repeat each row twice. The 24X24 version of the separated repeat,however, would need to be punched twice to accommodate the length necessary for the card to roll properly continuously, so not labor-saving.
Punching as required without added adjustments, such as using elongation, can make it easier to correct any errors during knitting.
Exploring the appearance of a smaller repeat by comparing results using the same yarns:

16X24 color reversed and tested on 48 stitches, 48X48 PNGThe repeat may be made usable for a punch card machine by spacing the design to 12X24 stitch vertical segments and punching the white ground. The addition of a few pixels forms continuous shapes. The design drawn in repeat and color reversed for test knitting on the 930, 48X48 pixels,  results in appearance and movement with a change in colorway, with more 3D texture than appears in the images.