Lace patterns for drop stitch: cast on as preferred, transfer MB stitches to ribber, where all stitches will be knit on every row. The main bed will be knitting the stitches that will be dropped (lace carriage will not be used), cancel end needle selection, program your repeat, push in both part buttons. As the carriage moves across the bed selected “lace” pattern needles will knit, the non-selected will be skipped.
Continue to knit until no needles are selected. At that point disconnect the main bed and ribber carriages, change the setting on the main bed to knit, remove the yarn from the feeder, bring the knit carriage alone across for 2 rows, and stitches will be dropped. After the disconnected carriage is returned to the opposite side, rethread, and connect again to the ribber carriages, set the knit carriage to slip and it once again will knit selected needles. Repeat the process for the length of the swatch. If on an electronic machine with 2 carriages: the number of rows is usually an even number, so an additional knit carriage with no yarn could be positioned on the opposite side to the one selecting pattern, set to do plain knitting, holding no yarn, and it will drop the stitches on “plain knit rows” on lace card without requiring the other additional steps and cam button changes.
Transfer lace on the top bed: the question periodically comes up with regards to the possibility of using the lace carriage when knitting every needle rib fabric. The lace carriage does not operate with the ribber bed in use in the standard up position, there is not enough clearance between the beds for it to travel from one side to the other across the needle bed. It is possible to drop the ribber down one click, opening up the space between the beds, supposedly to allow for the use of thicker yarns.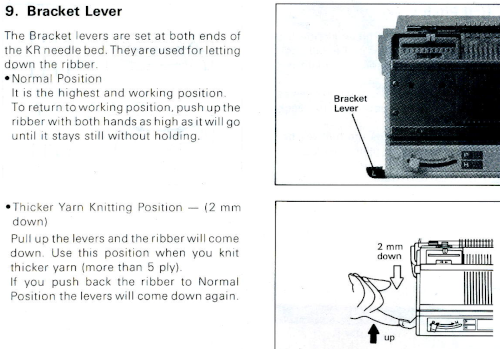
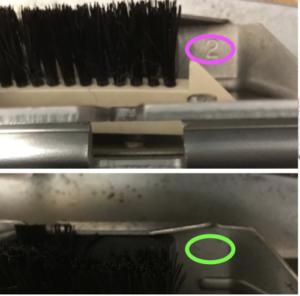
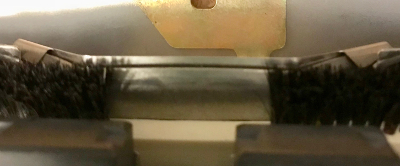
My machine is old enough for the ribber to be bowed in the center, increasing the space between the beds there. Trying to use that position for every needle rib in my desired yarn I got yarn breakage in the center of the bed, some skipped stitches, and the sides of the needle bed were still up too high for the LC to have a clear passage. The problem appeared to be due to its brushes hitting the gate pegs. With the brushes removed, but with some grinding against those same gate pegs the LC was able to move along the top bed. 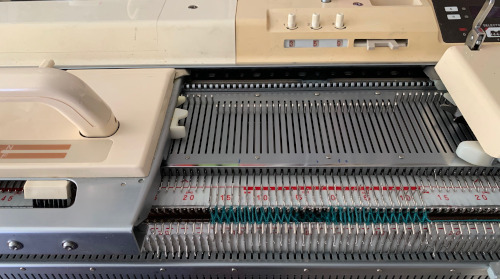 At least on my machine, I am giving up on the idea of using it, even if only to preselect needles, let alone make transfers.
This page is from the Ribber techniques book. The fact that transfers are broken up with blocks where there are no transfers, including some with stitches transferred to the opposite bed, makes it easier to track transfers than if using all over designs. Standard pronged tools are sufficient to move the single stitches or groups of three. 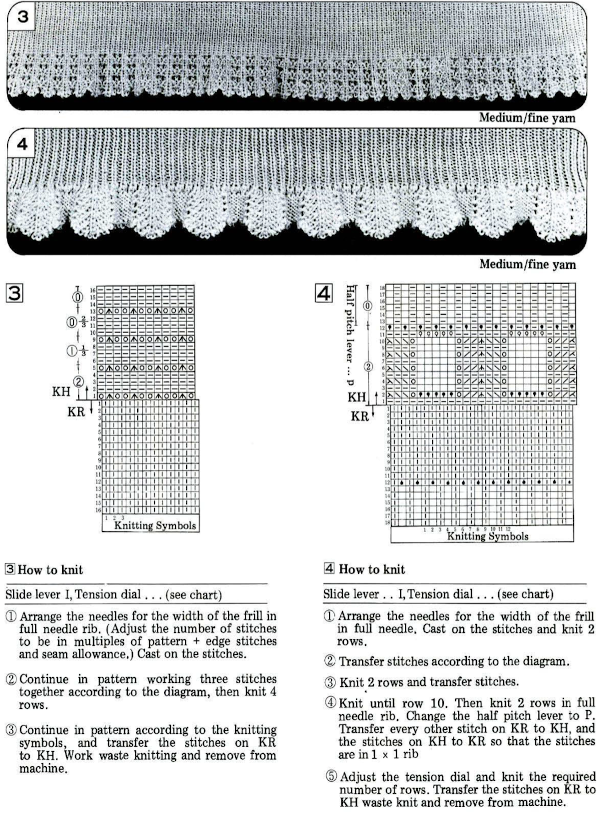
It is possible to transfer larger groups of needles on the main bed to create lace patterns, done of necessity in two-color brioche, but here I am seeking to modify lace punchcards so that the fabric based on them may be created successfully with as few errors and dropped stitches as possible.
My first attempt was made using a second knit carriage set to slip in both directions to preselect needles for transfers, using a small lace repeat to test the idea. The advantage of this method is that the original lace repeat does not need to be altered in any way. The disadvantage, aside from requiring a second carriage to use, is that the width of the piece on the machine is limited. The ribber carriage is in use and needs to remain at least in part on the machine bed on the far right, limiting the number of needles for possible use on the right side of 0 to about 20.  The same work could be done using only one knit carriage as well, but that would require changing the cam buttons from slip in both directions to knit and back to slip at the appropriate points, one of the methods that make it possible to knit lace on the 260 bulky machines
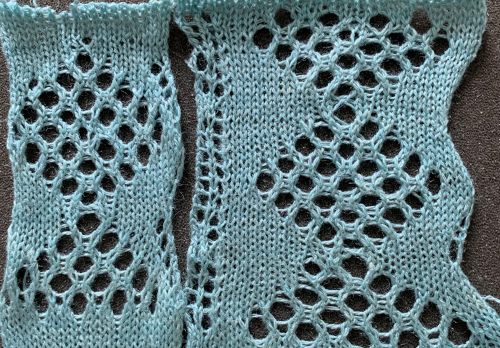
The repeat used is for this swatch is from StitchWorld, and is knit using the second knit carriage for needle preselection. Because each block contains lace transfers in only one direction, the fabric, even though it is a rib, reflects that in the biasing first in one direction, then in the opposite.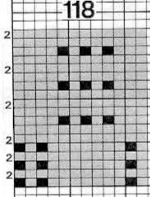
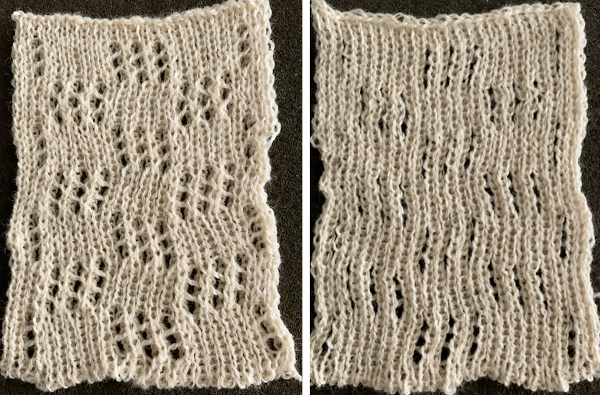
It helps to be clear as to whether one is producing lace repeat for use in a punchcard or an electronic model which in turn will require mirroring, such as when using Ayab or when using slip stitch selection with the knit carriage in combination with lace carriage selections to create shaped lace edgings. Testing on a small swatch will help determine whether mirroring is required for any specific design. Electronic machines usually produce the design as seen on the knit side, punchcard machines as they would be seen on the purl, thus making mirroring a requirement depending on the source for the design.
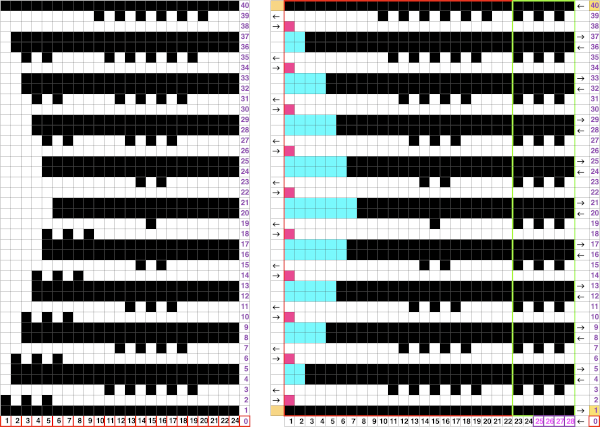
I usually begin by modifying my chosen repeat in a spreadsheet. On the left, the pairs of blank rows in the original repeat are temporarily colored in grey. It helps to be consistent. One repeat begins with a full motif, the other with half, which can be confusing when first starting out. The plan is to begin by producing a trim or edging, an all-over pattern for significant lengths appears daunting. Dropped stitches in single bed lace are no fun, in rib they may not even be noticed until the knitting is off the machine. The difference between the two repeats: the 2 grey rows on the left are replaced by black pixels or punched holes, with a blank row placed above and below each of the black row pairs. The design is now expanded from a 40-row height to a 50-row one suitable for use in a punchcard machine 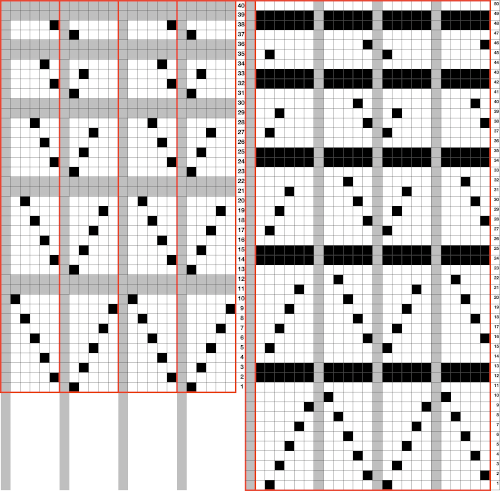 This explains some of the desired knitting actions
 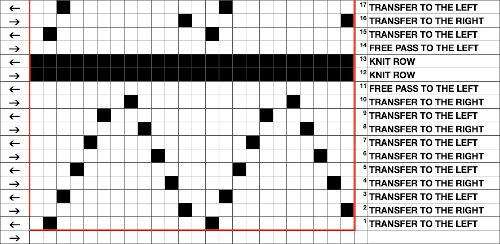 Using the method described in other posts, this was the screengrab imported into Gimp. The grey line is a reference point. Cropping the image to content will allow the last blank row to be preserved by having the grey one there. After the crop, it can be bucket filled with white, or when the image is, in turn, bitmapped to B/W, you may find it disappears. Image scale is then used to reduce the repeat for knitting.
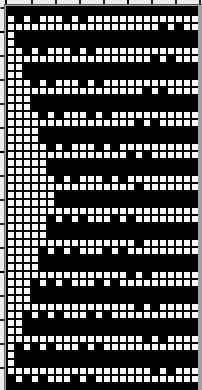
 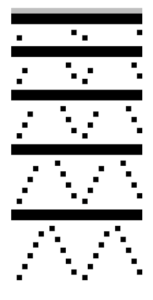 This is the repeat used to knit the swatch in my 930. If working from it, punchcard knitters need to mirror designs from an electronic source such as this and will find it easier to do so by turning the card over, marking the holes that require punching on that side, doing so, and then inserting the card in the reader in its usual orientation.
 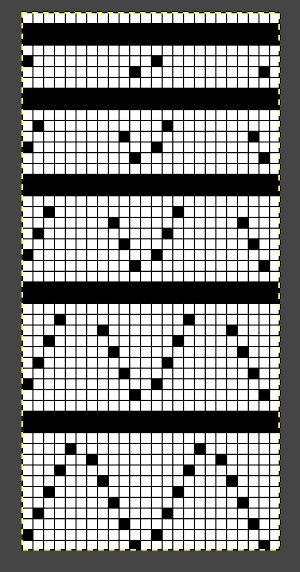 The 930 .png:
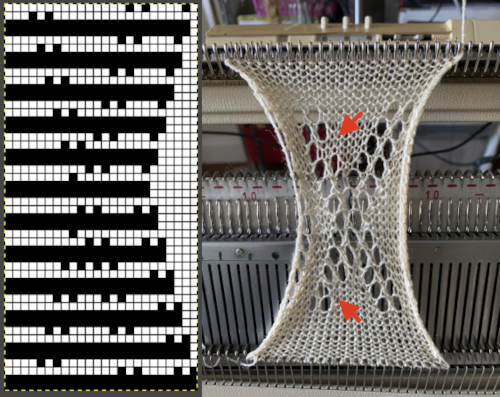
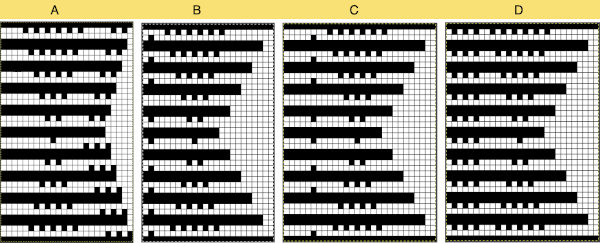
 ![]() Prior to knitting the pattern using the ribber, it pays to test the repeat single bed to get a sense of where the knit rows occur and to make certain the transfers are happening in the correct direction and in what place on the needle bed. There should be no side by side empty needles, and in this design, the first pairs of transfers result in 3 stitches on one needle in the center of each shape, not side by side holes as seen here in the false start prior to mirroring the image
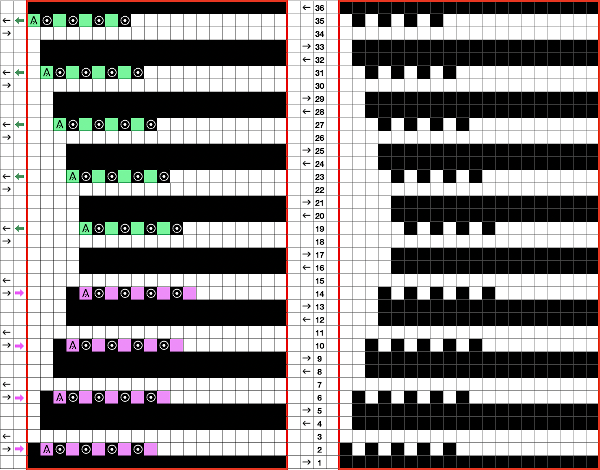
Prior to knitting the pattern using the ribber, it pays to test the repeat single bed to get a sense of where the knit rows occur and to make certain the transfers are happening in the correct direction and in what place on the needle bed. There should be no side by side empty needles, and in this design, the first pairs of transfers result in 3 stitches on one needle in the center of each shape, not side by side holes as seen here in the false start prior to mirroring the image  Making things work: both carriages will be operating to and from the left-hand side. The process is facilitated by the use of an extension rail and a color changer. The knit carriage alone will operate to preselect the needles that will need to be hand transferred to create the lace pattern. With the following modification of the repeat, all transfers are made moving away from the knit carriage. So if the KC is on the right, transfer to the left, if it is on the left, transfer to the right. The paired carriages will create the two all-knit rows between lace segments. The blank rows above and below the two all punched or black pixel rows are there to return the carriages to the proper, left side to begin preselection for the next row of transfers. If any end needles are preselected on the knit bed, push them back to B.
It is best to knit 2 rows of full needle rib before beginning transfer, that will ensure that stitches on both beds are formed properly. I did not, had a spot on the cast-on where the loops were not properly placed on the comb, and that is reflected in the area that looks like a stitch was dropped. 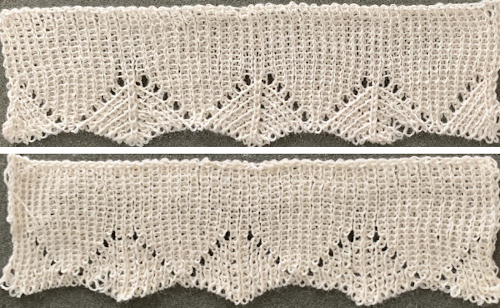 Begin with a zig-zag row from left to right, knit 2 circular rows, carriages will be on the right. Knit a sealing row to the left, followed by 2 all knit rows, ending with carriages once more on the left side.
COL: remove the yarn from the Knit carriage, hold it in color changer by pushing the adjacent feeder number
separate the 2 carriages
cancel end needle selection
KC is set to slip in both directions, it will remain there for the duration of knitting the pattern, make certain all main bed needles are in the B position
KC operates alone to the right and preselects the first row of transfers
COR transfer preselected needles to the left, away from the carriage. Make certain all needles are in the B position before the next carriage pass. KC will preselect for transfers to the right as it returns to the left side. Repeat the process until all needles are preselected for an all knit row as you knit back to the left
COL pick up the yarn, engage the ribber carriage knit 2 rows on all needles
Repeat: *COL: remove the yarn from the Knit carriage, separate the 2 carriages, operate KC alone making transfers away from the carriage until all needles are preselected as you knit to the left. COL pick up the yarn, engage the ribber carriage knit 2 rows on all needles** until ready to continue in every needle rib.
This method is slow, I found it oddly meditative. It offers an opportunity to review stitch formation, thus avoiding dropped stitches. Hand transferring lace preselection on the single bed as well can sometimes make a fabric achievable that is otherwise cursed by dropped stitches and fiber issues.


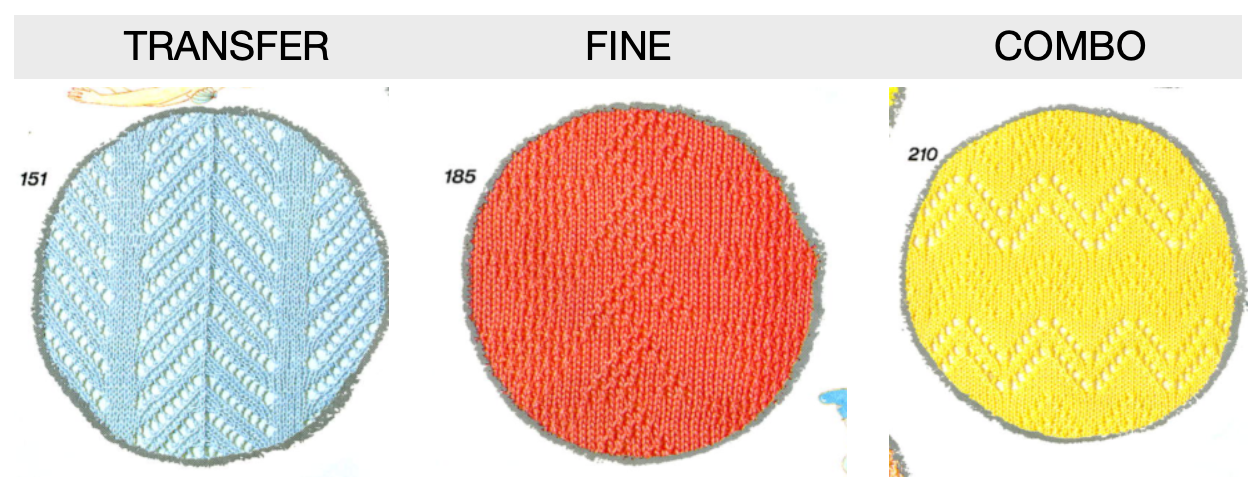
 There have previous posts on automated lace edging on Brother machines, ie
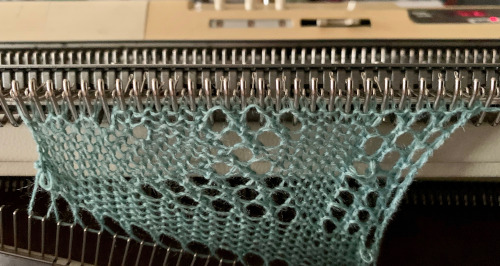
 The test swatch in progress
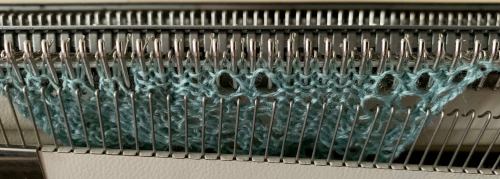
  I used a short cast on comb for weight across the piece, moving it up cautiously on a regular basis
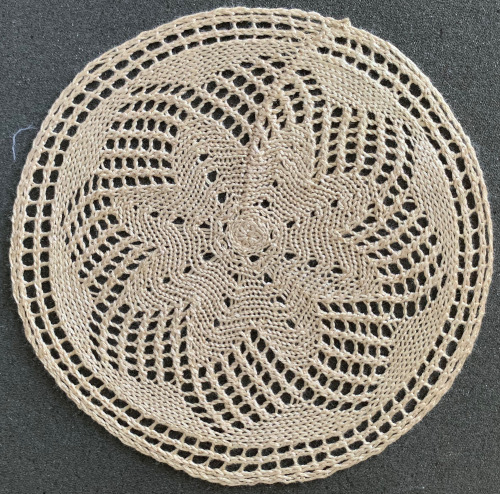
  It is helpful when starting in waste yarn or simply using plain knit rows at the bottom of a test swatch to choose a clearly contrasting color. Here I did not do so, the drawn line is to help define the start of the shape formation created by the holding sequences and eyelets. The eyelet on the outermost edge of the circumference “disappears” as that edge gets stretched to the max. Two eyelets in the diamond shapes are not formed properly
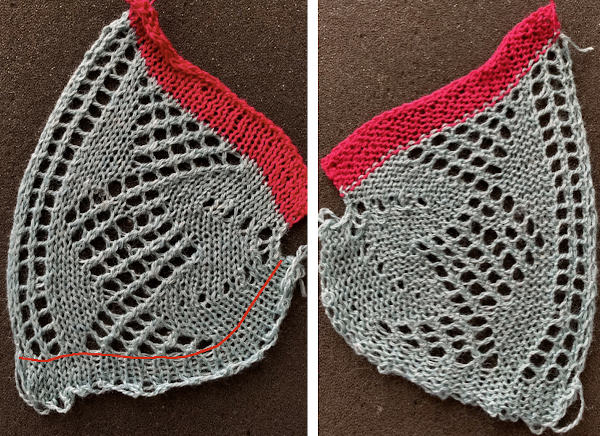
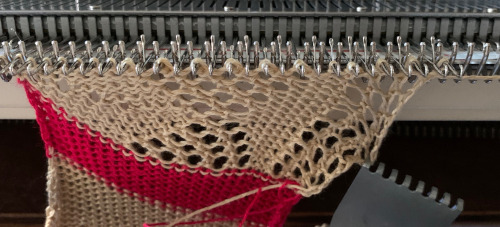 knitting without a knit gauge can be dangerous, here a guess is made as to how many more units might be required to make the final shape go round
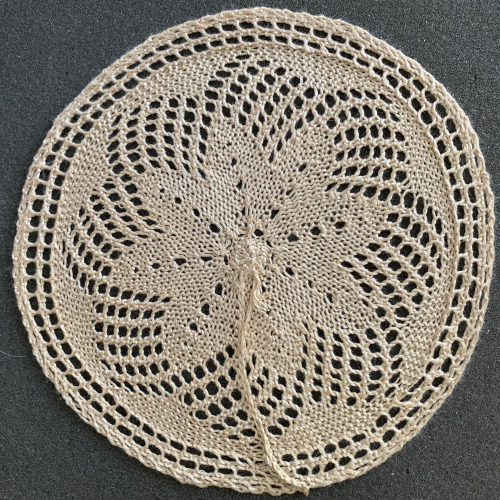
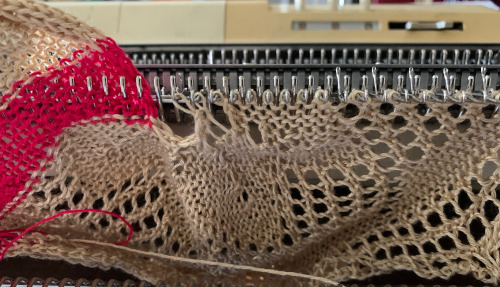 I committed to 8 wedges, another attempt at a check for size prior to seaming the shape.
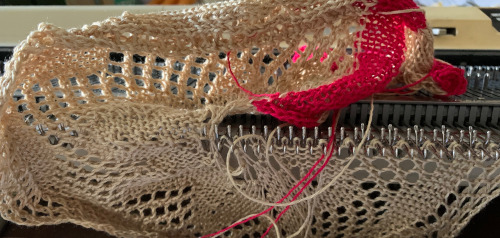 Before joining the stitches permanently, a quick look to see if there was enough knitting to form that pie
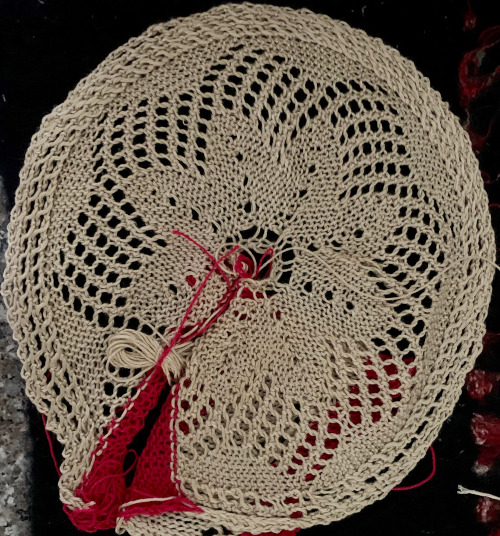
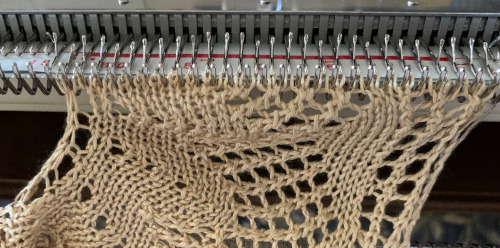
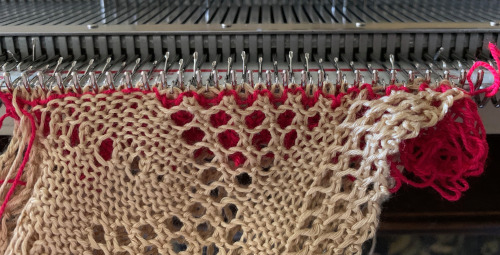 The least satisfactory and most visible join is the latch tool bind off. Grafting by hand off the machine is the least so. For the sake of ease in identifying open stitches easily, both methods would benefit from a couple more all knit rows between each segment as seen in the repeat in the original doily post in spite of the fact that the shape around the very center opening will change.
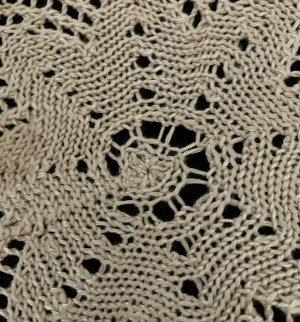
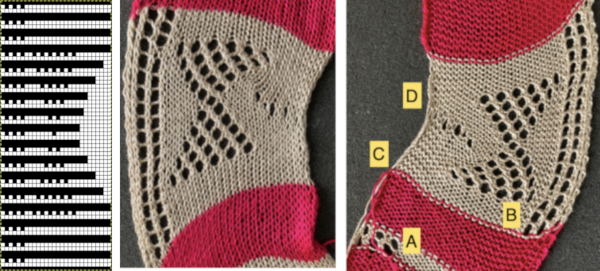 Planning for diamond rather than bow shapes, the repeat was changed from a 28X68 one to a wider, 32 X 64
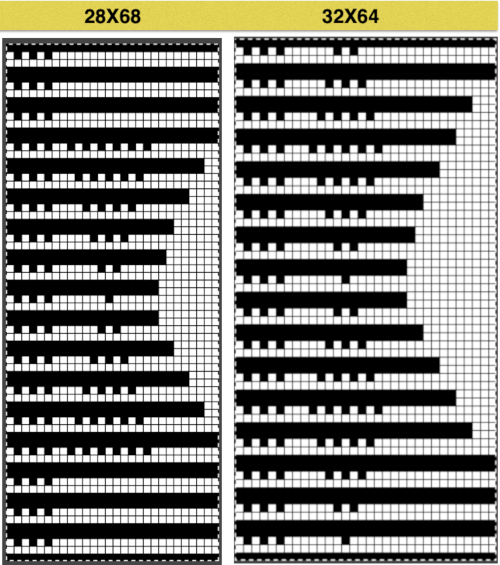
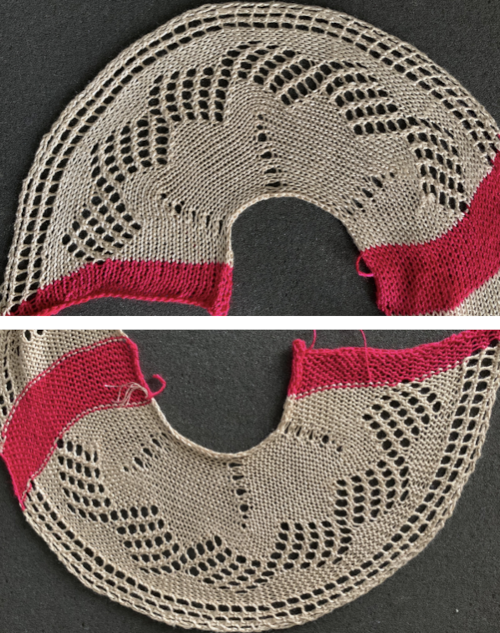
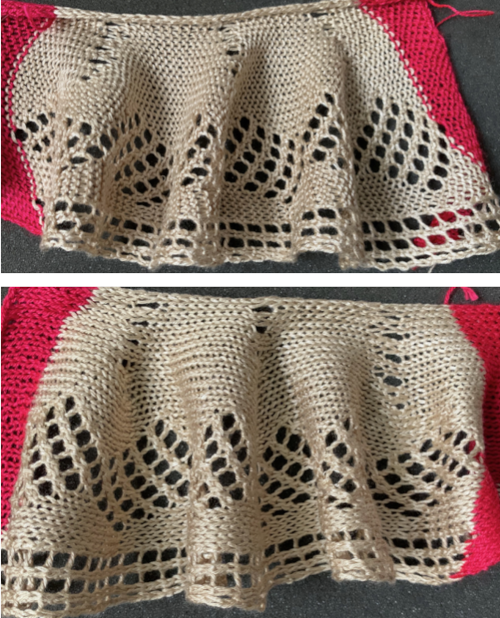

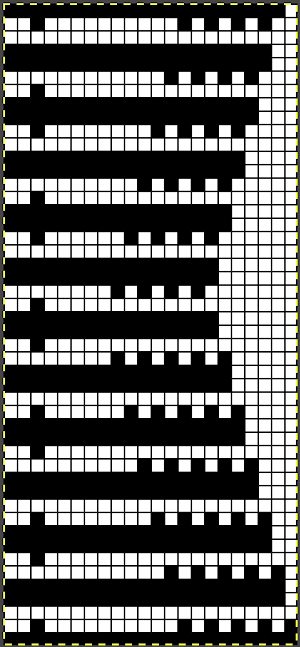 its 22X48 png
 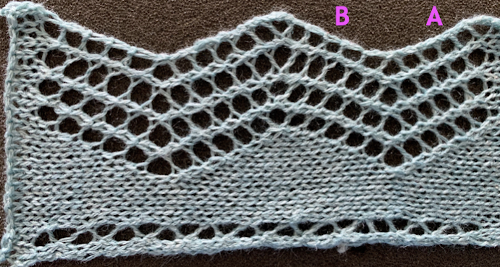 Most of the more recent proof of concept swatches have been knit on a 930 using img2track for downloads.
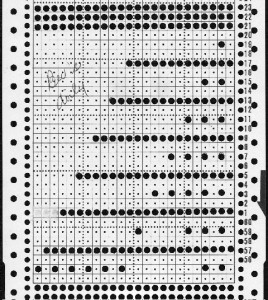 When using the slip stitch setting and changing the number of needles in work, or having ladders created by having needles out of work in the A position, the knit carriage end needle selection needs to be canceled (KCII).
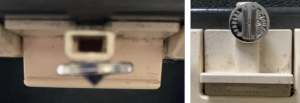
 In a working later model LC, end needle selection is in work (W) with the slots in the horizontal position, out of work (OW) in the vertical position.
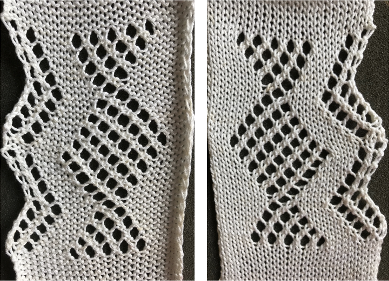
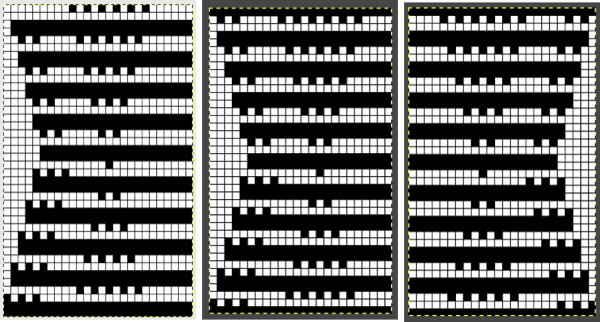
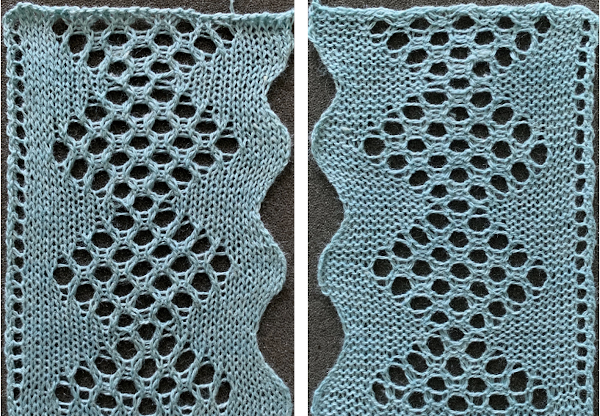
 The resulting, more successful swatch
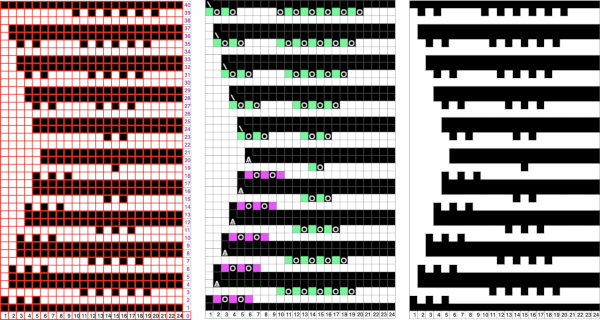
  revisited 2024, the repeat PNG
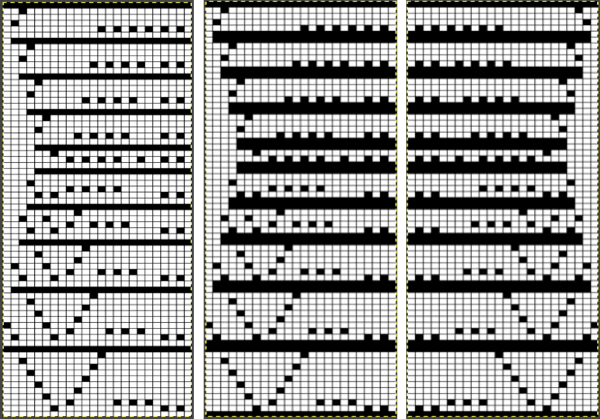
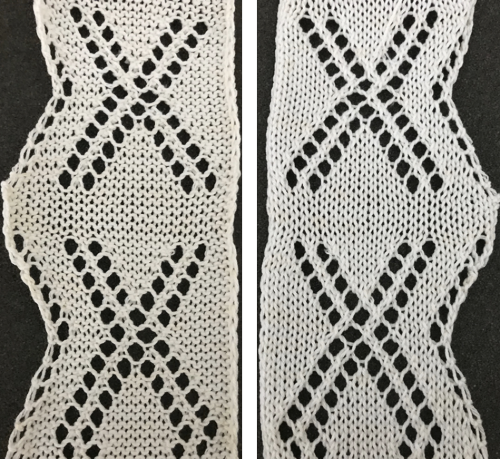 Charting it out anew: on the right is the amended repeat adding 4 more rows to the top of the original
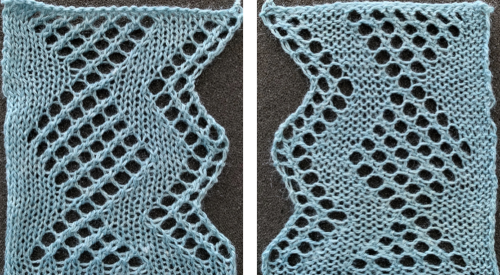
 The resulting swatches:
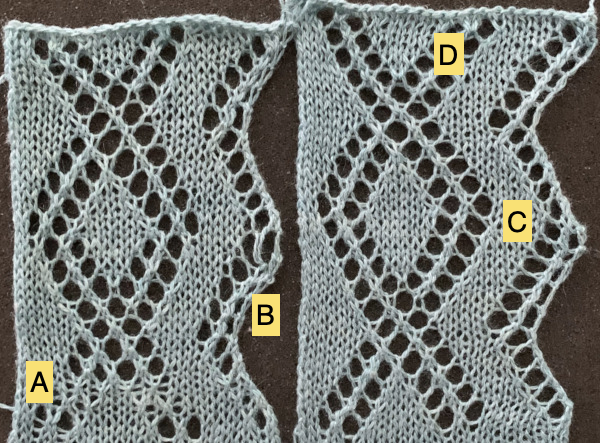 These charts illustrate the above repeat on the left. On the right, the edge transfers are imagined reduced to single eyelets on the increasing angle. In turn they would result in a wider area of knitting in the zigzag shape between the curved edge and the diamond shape. Another possible solution follows, using expanded graphs with extra LC passes
 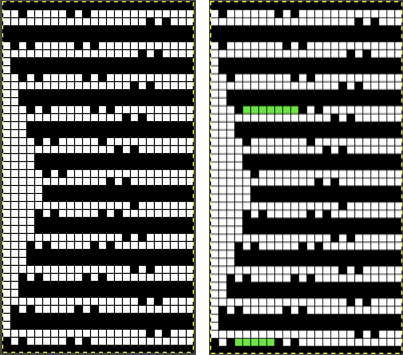 Returning to the above repeats after a break in 2024, a new design, 24X48 is more resolved, columns of knit may be added along the straight edge, with or without planned eyelets, and the shape at the center of the XX also offers enough room for forming a DIY smaller shape.
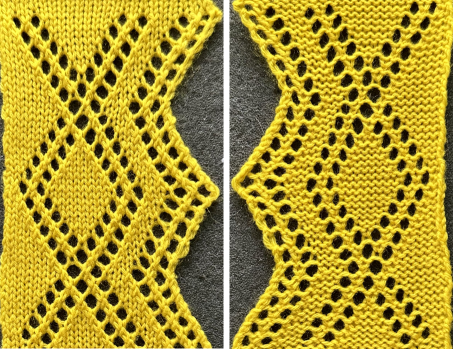
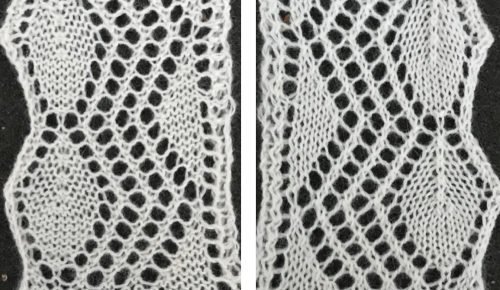 2020, a 24 X70 stitch version beginning at the widest part
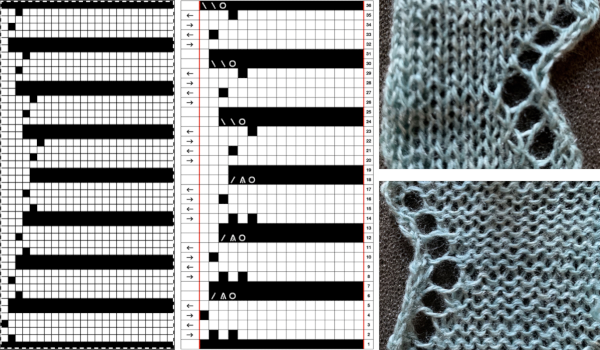
 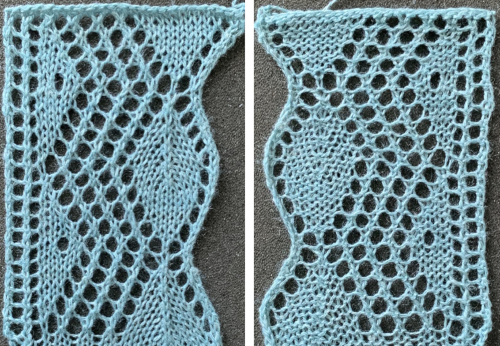 The curved edge is noticeably different and more uniform than in edgings where the increasing angle is formed only by a single stitch being transferred to the next needle on the left, creating an eyelet immediately to its right.
 Moving on to the Brother published chart at the bottom of the 2018 post: the original is on the left, readjusted for planning to begin with the decreasing curve in the center, and charted for download on the right (mirrored in turn for use on the 930). The original was said to be 68 rows high but proved to be 72. It is also 18 stitches at the widest point, not 24. I did not follow the publication’s directions for alternating between fine and normal lace either, simply left the LC set to N.
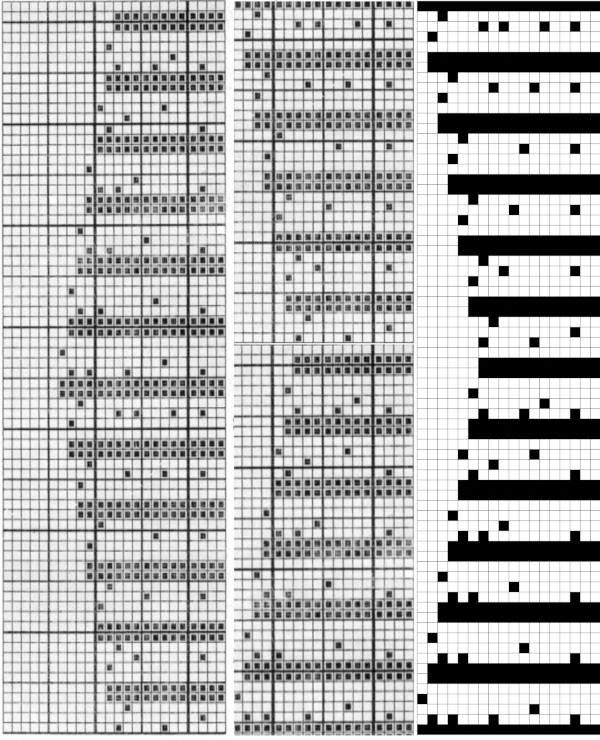 the png for the repeat as drawn, 18X72 pixels
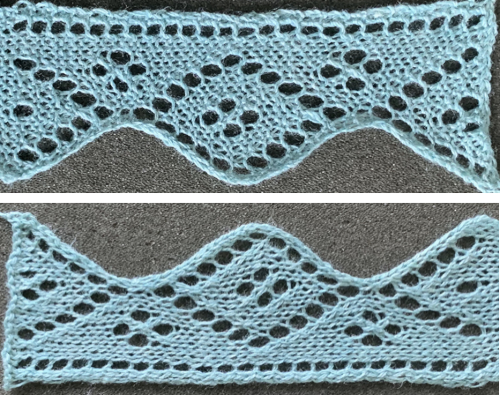 A fellow Ravelry member reminded me of Tessa Lorant’s lace publications. I had forgotten I actually owned this single one from 1981.
 Upon examining it, I rediscovered her patterns, many for hand knitting with accompanying written row by row instructions and charts, others at the back of the pub, with punchcard machine repeats.
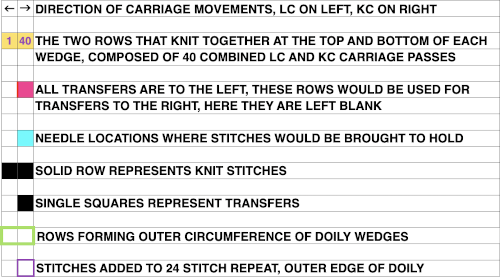
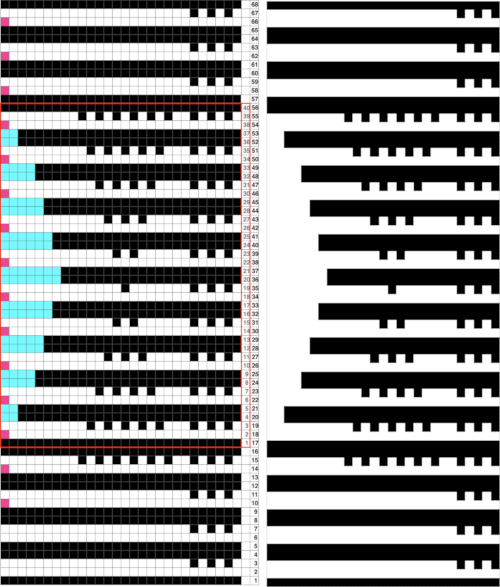
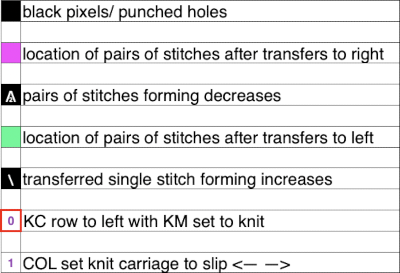
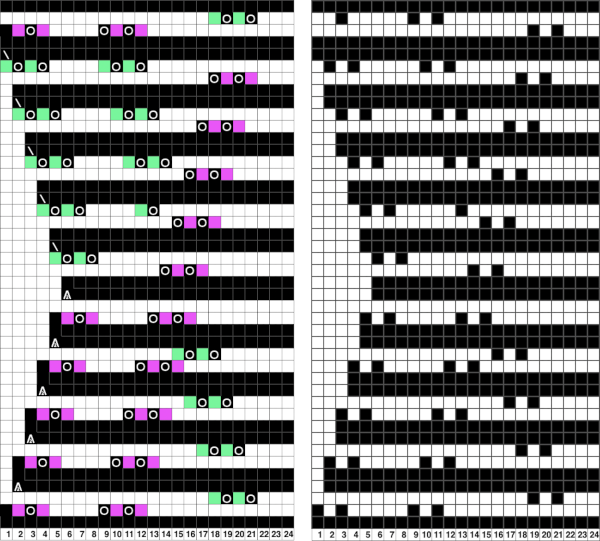
 Working one chart through to knitting: the bottom left image shows part of the original card. Magenta squares indicate transfers to the right and cyan ones to the left. The straight edge border with the larger number of eyelets was a bit fiddly to knit, so the second option is also offered and tested.
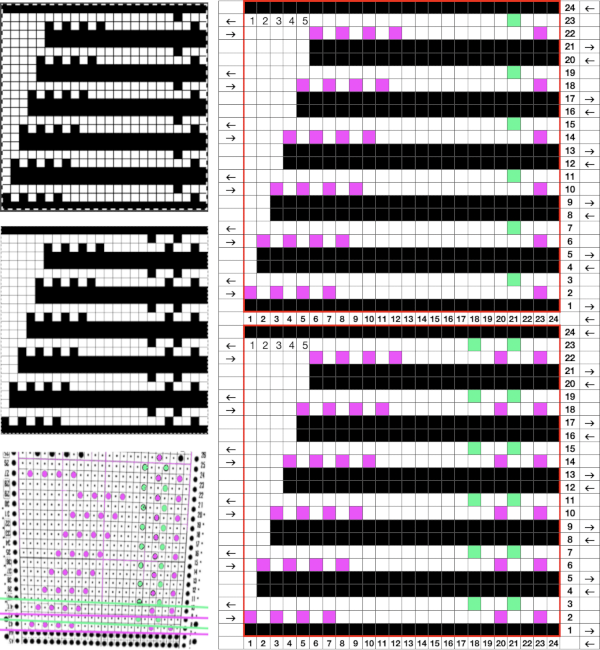
 I knit to the left after all the needles were preselected at the end of the decreases and then cast on over the empty needles on the left, bringing them out to hold so they would be knit for the second row as the knit carriage returned to the right side. A garter carriage weight seemed to be enough to help anchor down the newly formed stitches during subsequent transfers.
  Making a pattern design more one’s own: part of the original design from p. 52, split so the pattern may begin on the widest part of the repeat, punchcard “holes” marked for left and right transfers
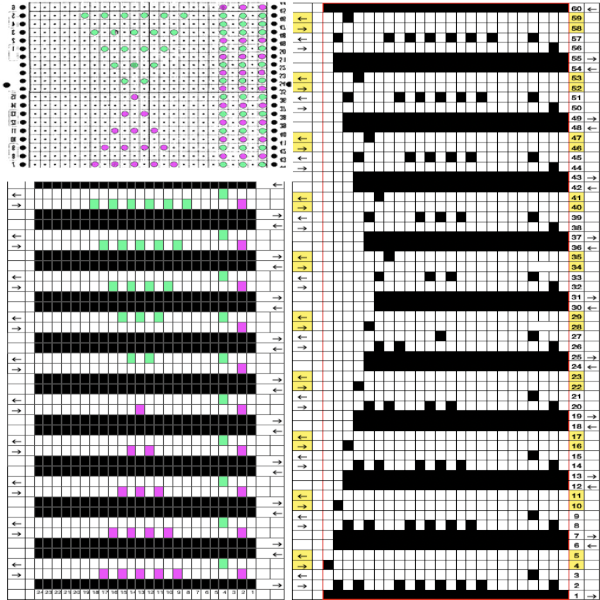
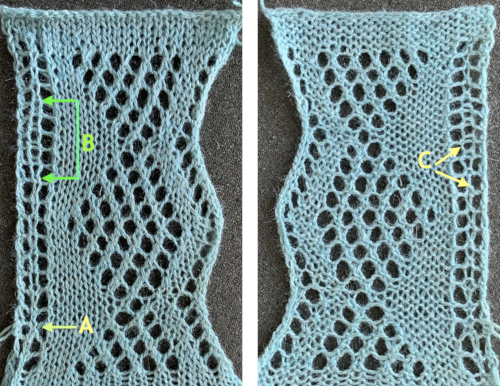 The last Tessa sample, from page 60, brings up the topic of large eyelet lace, also revisited in a recent
 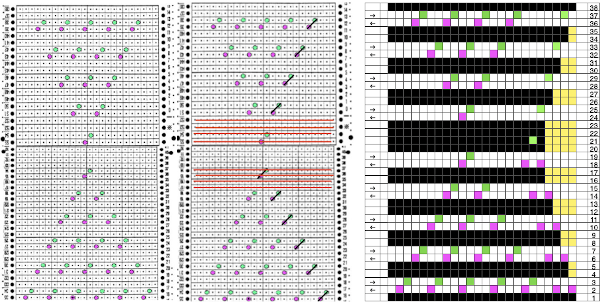 More transitions in planning, a 32X32 repeat:
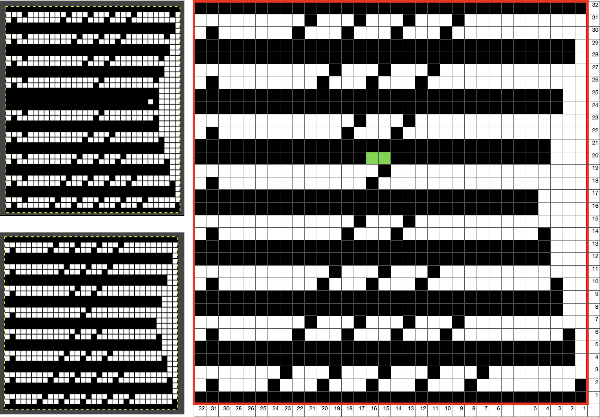
 Consideration needs to be made in terms of whether some small ladders are a design element or not, hooking up “floats” helps reduce or eliminate them on decreasing angles on both sides of the shape, but the resulting eyelets appear a bit larger and different than the rest.
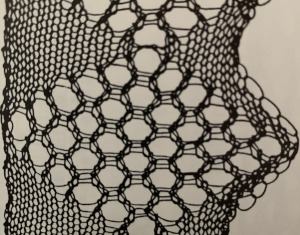
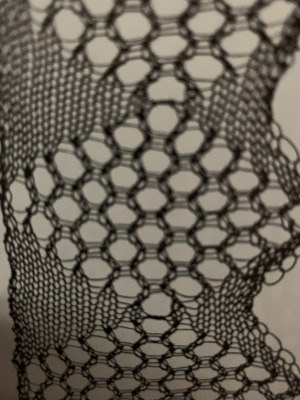
 The Tessa trims are knit in fine yarns. This shows a portion the inspiration large eyelet trim, note the appearance of the space between the two center eyelets is different
 My version with the floats hooked up and onto the needles with no multiple stitches already on them at the center eyelet as the pattern shifts:
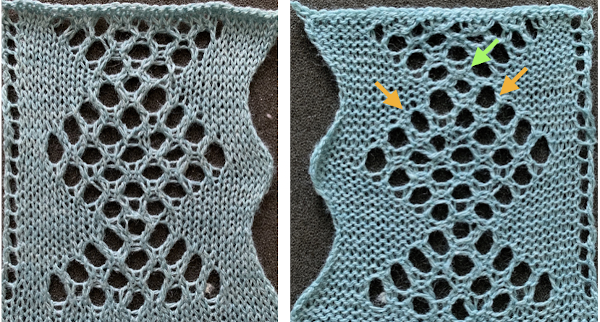
 At the top of the piece I did have to deal with closing the eyelets to facilitate 2 knit rows and binding off. I prefer to work from left to right, dealing with the right side of the loops first: drop loop on the right side, use a tool to enter the float created from its back
 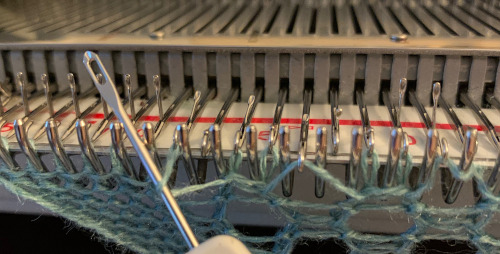 twist tool and yarn clockwise
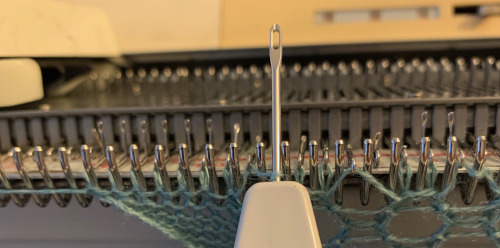
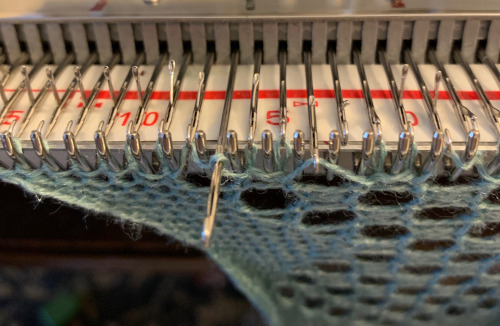


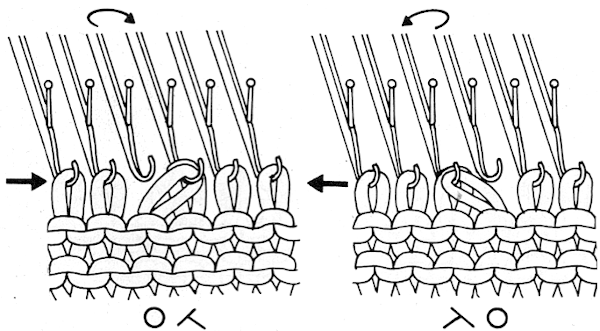
 single complete transfers
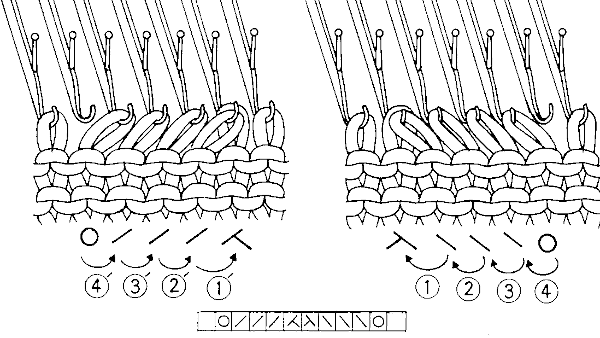
  Multiple transfers may be made either as a hand technique or expanded for use in electronics. Because single stitches are moved with each carriage pass, pattern repeats can become quite long, with few punched holes or black pixels
  Use a smooth yarn that has some stretch and does not break easily. Because the yarn will be transferred to and from or in addition also being shared between needles in fine lace, some extra yarn may be needed for proper stitch formation. In overall meshes begin testing using a tension at least one whole number higher than when using the same yarn for stocking stitch. Too loose a tension can result in dropped stitches or loops getting hung up on gate pegs, too tight and the stitches will not knit off properly or drop, or the yarn may even break. When eyelets are few, tension adjustments may not be needed.
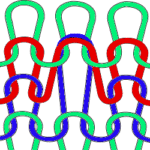
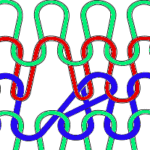
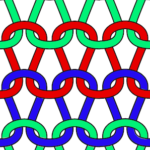
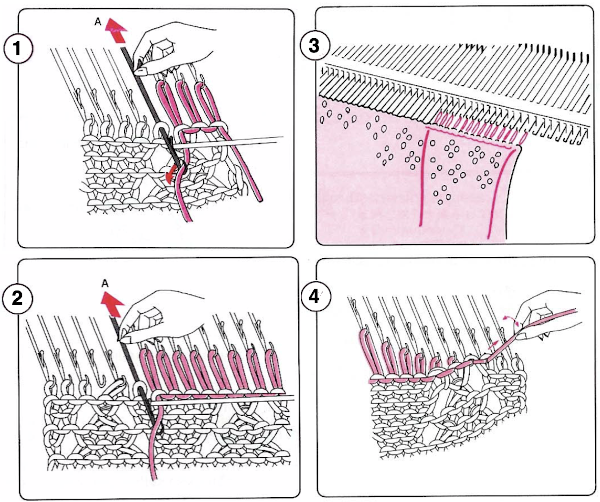
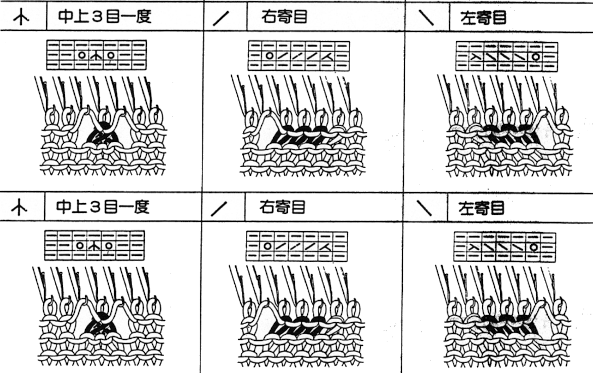 A comparison of hand-to-machine stitch symbols with illustrations and more information:
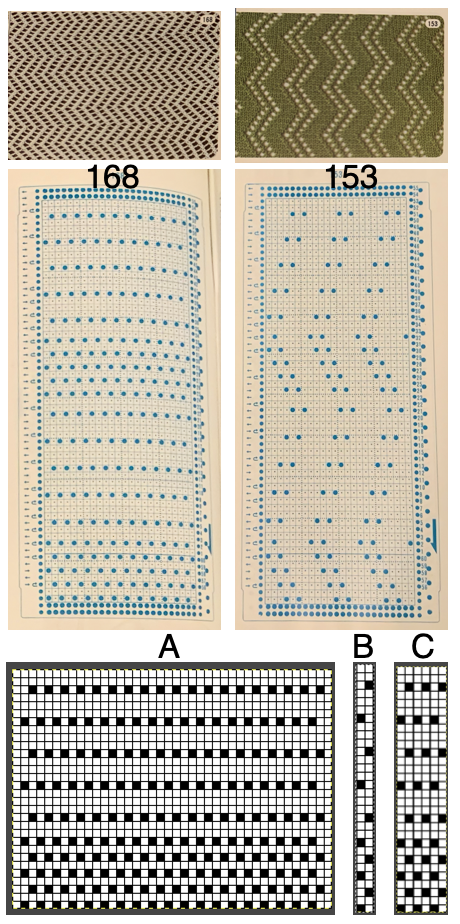
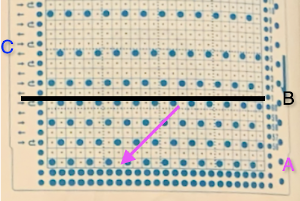 The two rows at the bottom of the card reflect the overlap when punchcard snaps are in use to keep the pattern continuous.
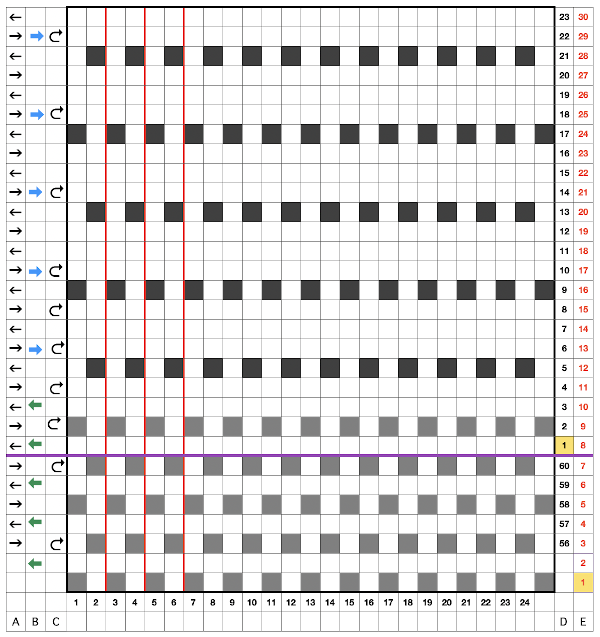 Column identification at the bottom of the chart:
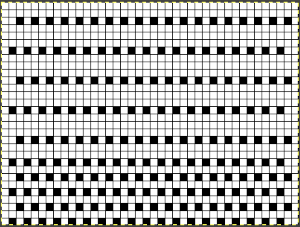
 Spacing out the zigzags, another 24X30 repeat. This is the minimum repeat for electronic KMs as well, knit stitch spacing (white squares) can be planned to suit
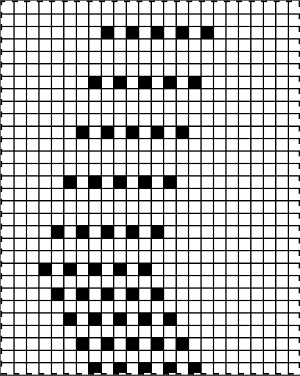
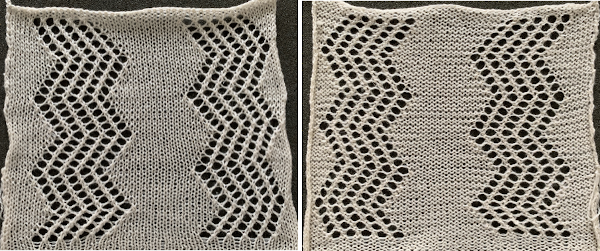
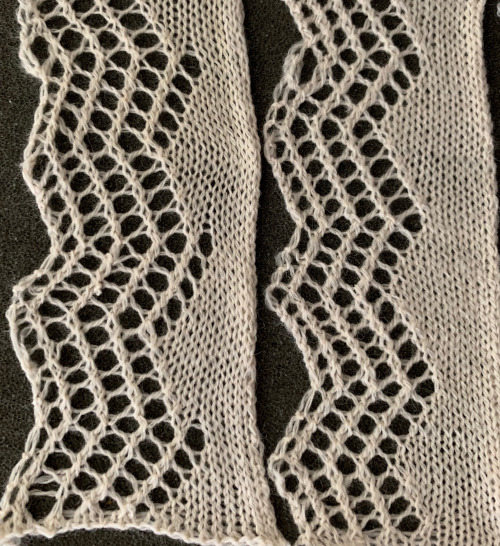 The transfers of the stitches by the LC while using the knit carriage set to slip in both directions to create the knit rows, and will automatically create increases and decreases along the left edge. Due to this fact, there will be one less eyelet in each transferred row than the number of pixels/punched holes in its corresponding pattern row.
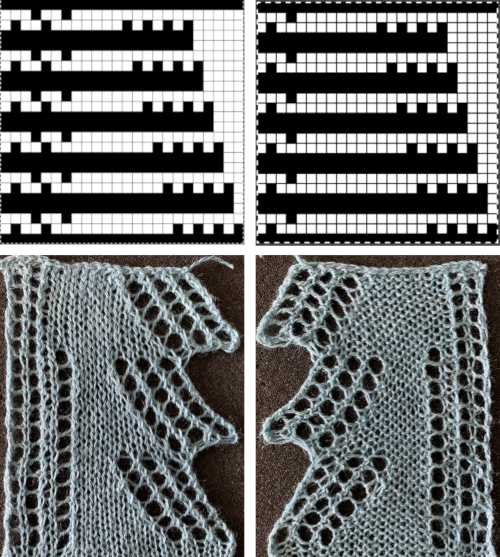
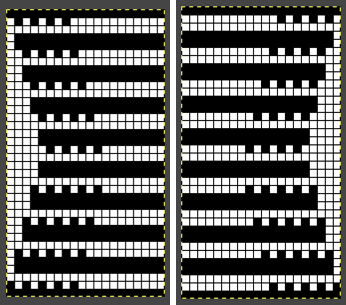
 The pattern repeat on the left below is as I drew it and intended it, on the right, it is mirrored for use to knit it on my 930
 The first preselection row is from right to left, the knit is centered with 10 stitches on each side of 0.
 The above fact allows for planning transfers in both directions while still keeping the routine of 2 passes for each carriage to and from their original home.
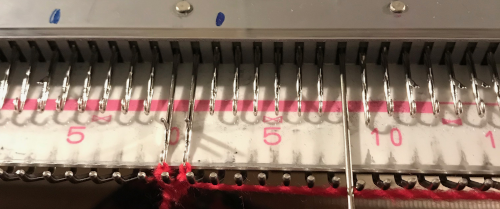
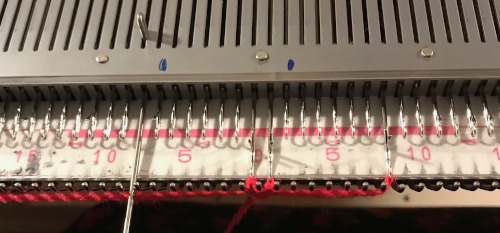
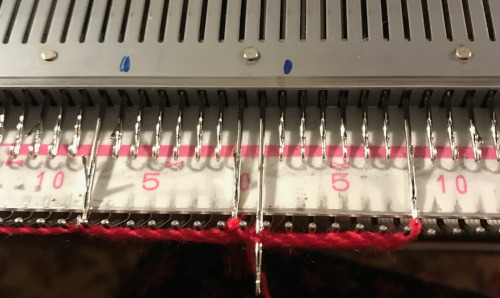 e wrapping with second yarn before moving to left
 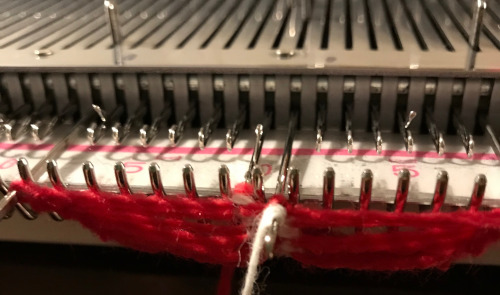 e wrapping with second yarn prior to returning to right, completing a sideways figure 8, end stitches out to E before prior to each carriage pass
 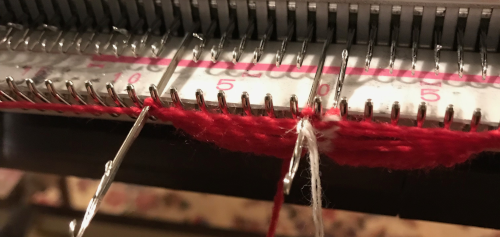 When the required number of rows has been knit, end COR. Unravel the first stitch on the right,
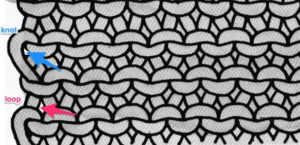
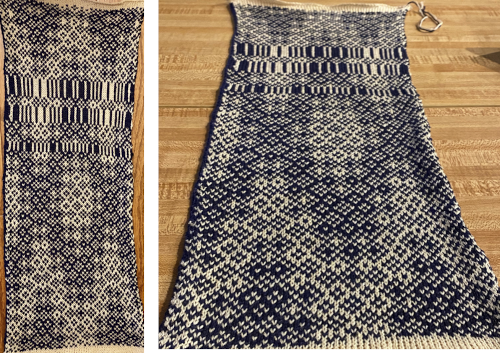
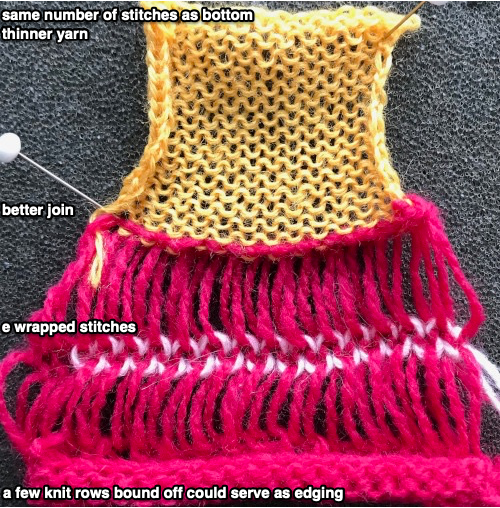
 Using thinner yarn for knitting after the join even if on the same number of stitches, will gather the fabric
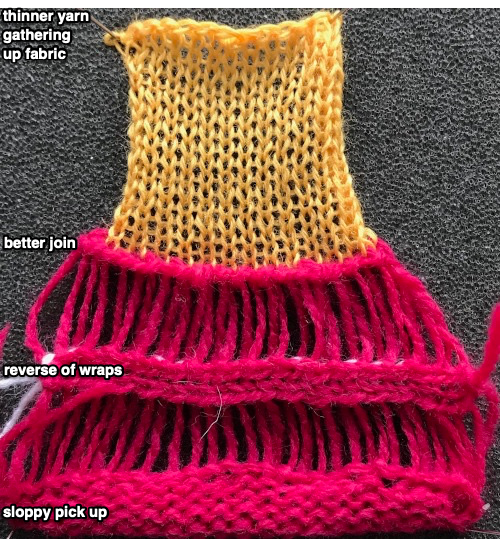 More on seaming and joining knits
 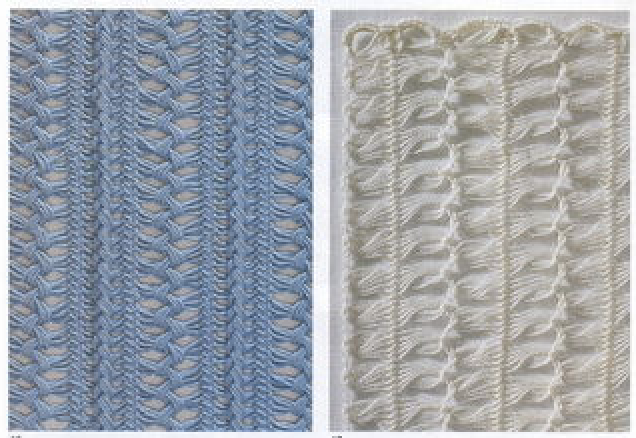 strips of different colors used
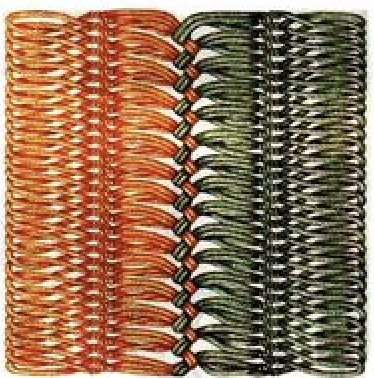

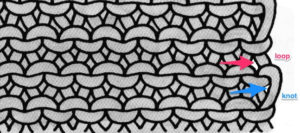
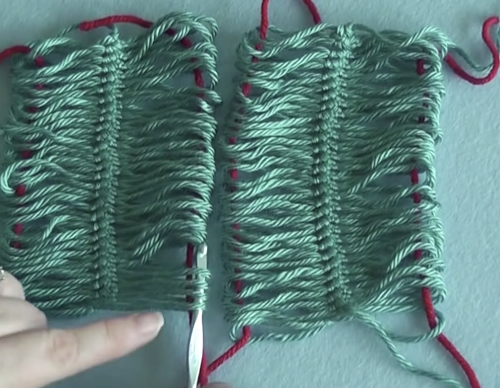
 The convention for joining strips of machine knitting by crocheting or latching side loops together suggest having a ladder space (white square, one or more may be used) and a side edge stitch on either side in segments of the final piece ie. afghan strips.
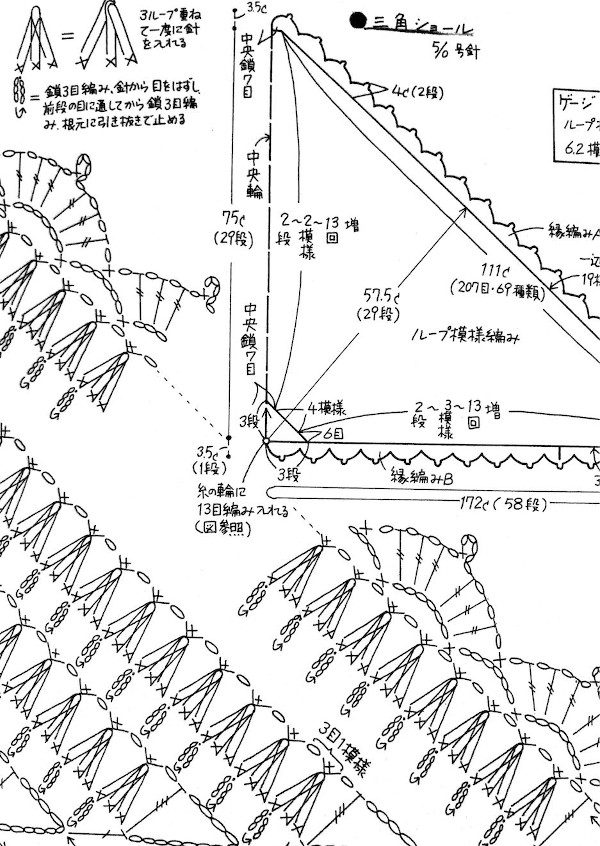
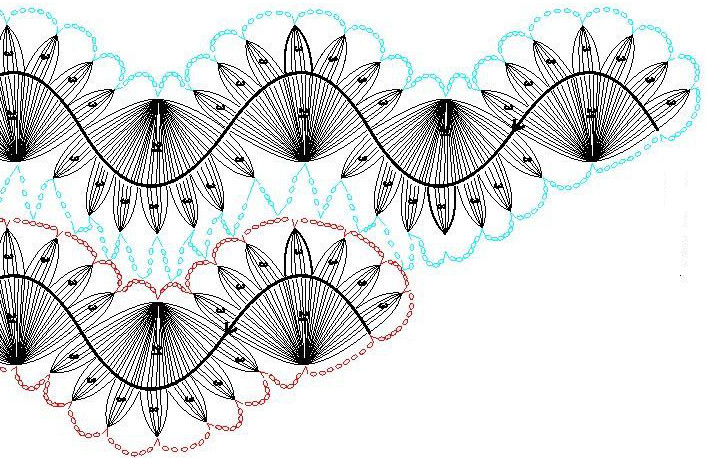
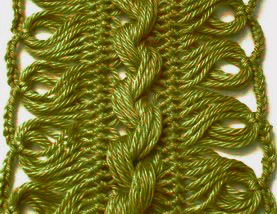 A partial illustration from Pinterest from an unknown source showing how the loops coming together to make shapes might be charted out: the ovals represent chain stitches, the v slip stitches, the different colors the finish of a complete strip’s edge
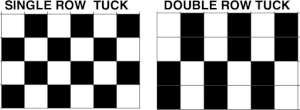
  Tuck lace is a fabric produced with needles out of work in combination with tuck patterning on the main bed. Patterns for it can serve as the starting point for either the center strips in double-sided loop fabrics or they can be worked in repeats with wider ladder spaces between them for a far quicker “pretend” version. This is one of my ancient swatches for the technique from a classroom demo, using the 1X1 punchcard, shown sideways to save space.
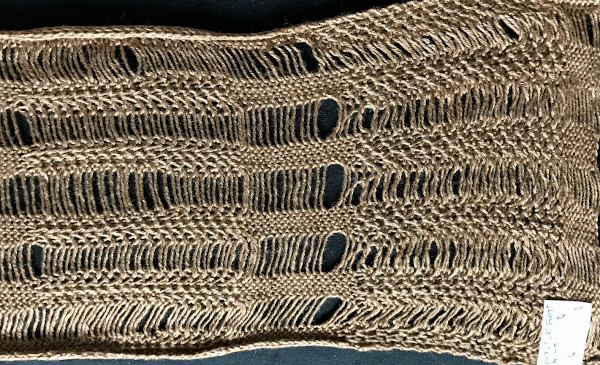 The card is used at normal rotation. Any time there are needles out of work, end needle selection is canceled to maintain patterning throughout including on end needles of each vertical strip. Tuck <– –> is used resulting in texture as opposed to simple stocking stitch and ladder fabric (center of the swatch). In the right segment, the ladder threads are twisted, in the one on the left they are not. This is what is happening: for twisted ladders on an even total number of needles have an even number in the selected pattern (4), and an even number out of work (6). This is one fabric that definitely benefits from the use of some evenly distributed weight and a good condition sponge bar. End needle selection must be canceled
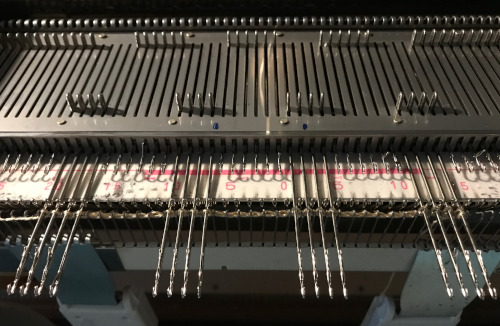
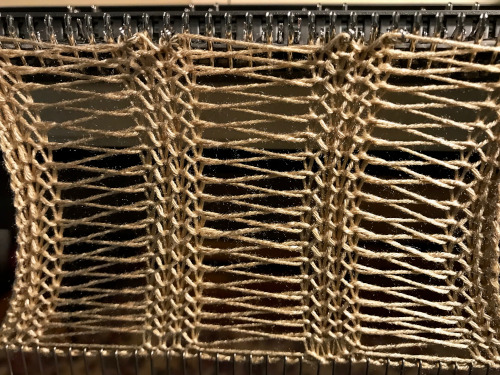 Here the stitches are arranged with an odd number in work (3), an odd number out of work (7)
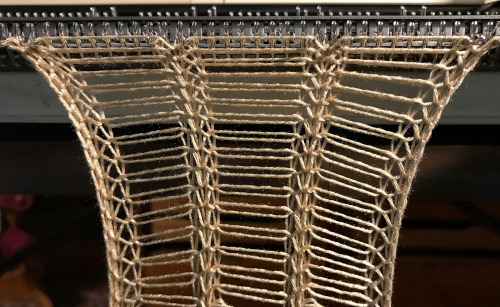

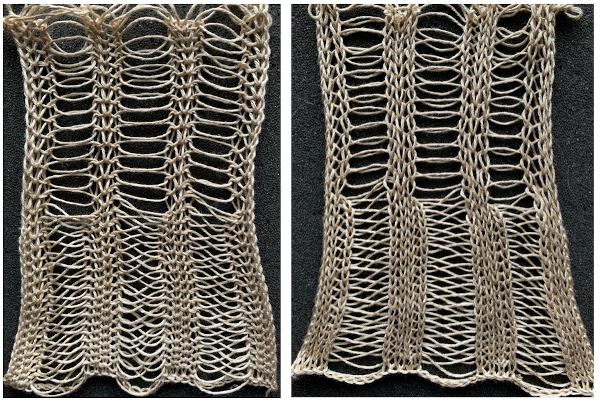
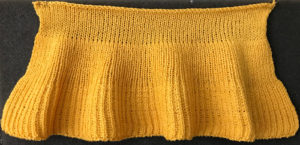
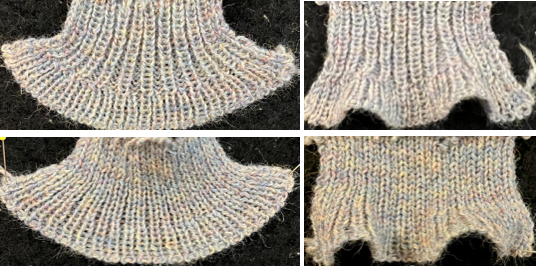

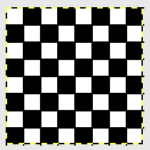 Working it on Brother becomes a bit fiddly. Whether working on a punchcard or electronic KM, it is possible to introduce patterning on either or both beds as seen below. I preferred the look obtained with the racked cast on at the start. Setting up the Brother machine: program the repeat, half pitch for every needle rib, air knit to place the pattern on the bed so that the first needle on the left (or right if you prefer) is preselected forward and will produce a knit stitch on the first row knit. The yarn used is a 2/24 acrylic
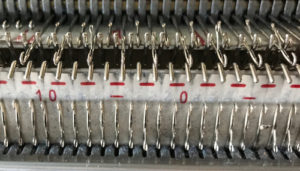
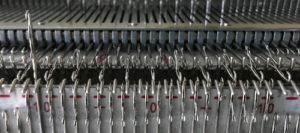 now another needle on the ribber is brought in to work on the far left, it will tuck with lili selection when moving from left to right
 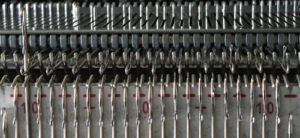 remember the ribber rule with lili buttons: an even number of needles must be in work, this shows the start and end of selection on the ribber on alternate needle tape markings, as required

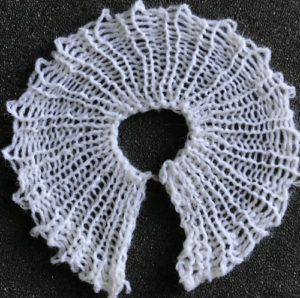
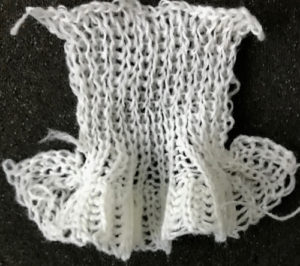
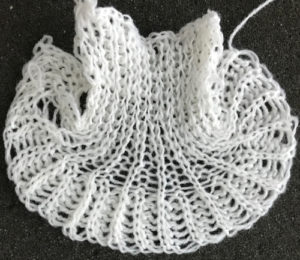 Both pieces compared for width and rippling
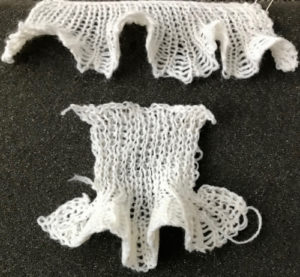



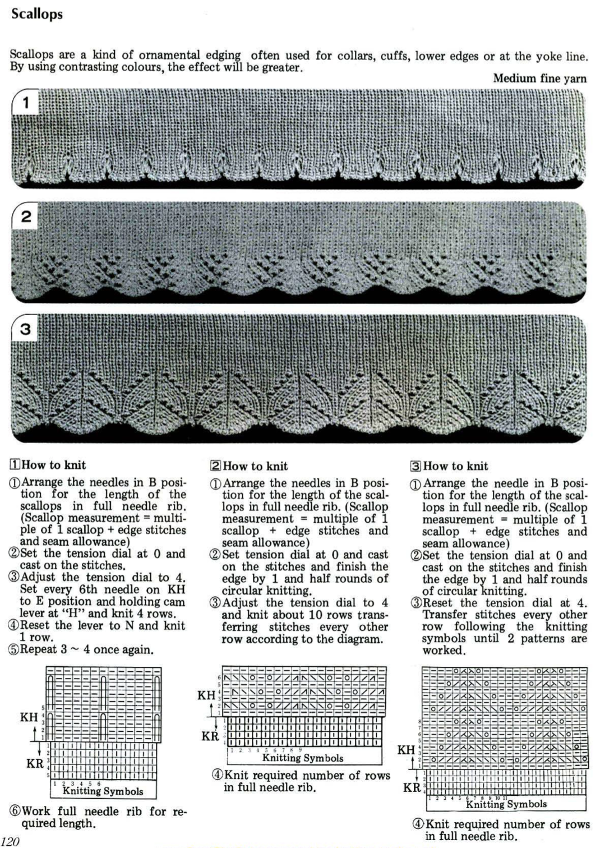
 An intro to scallops: p.120