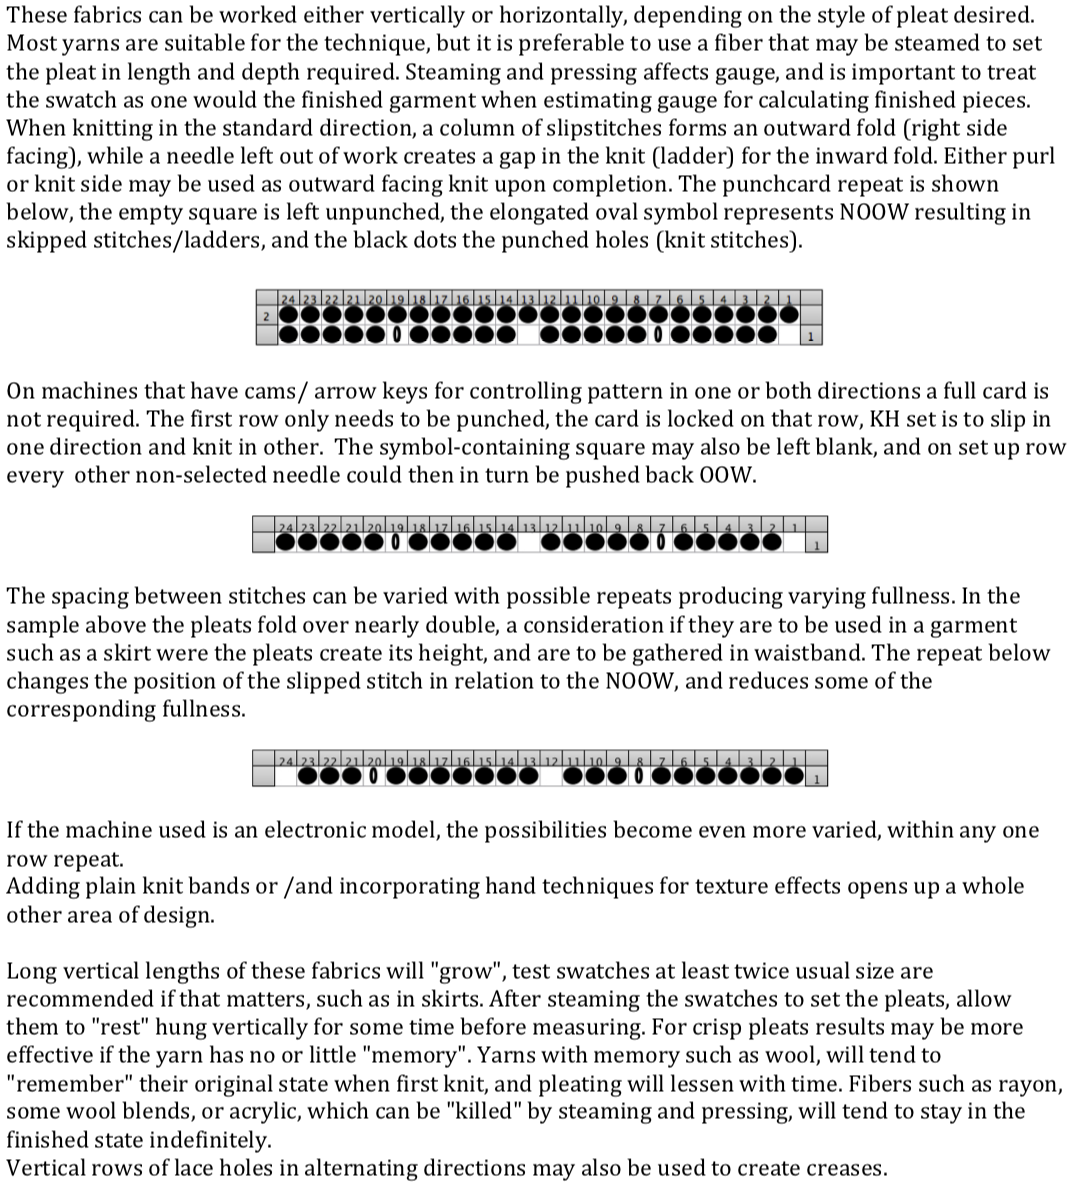
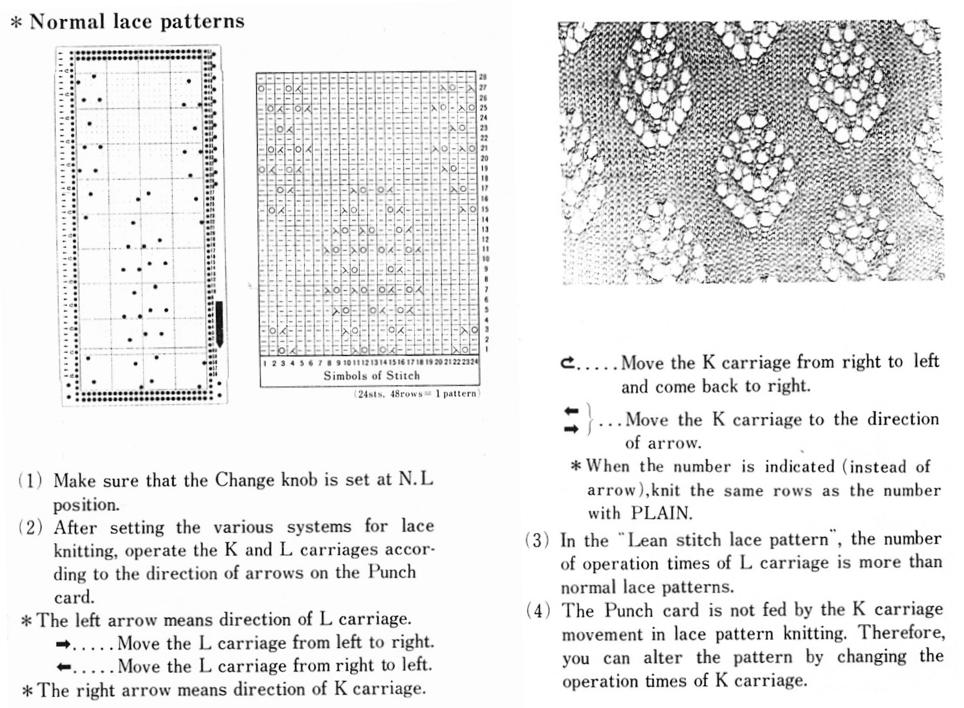
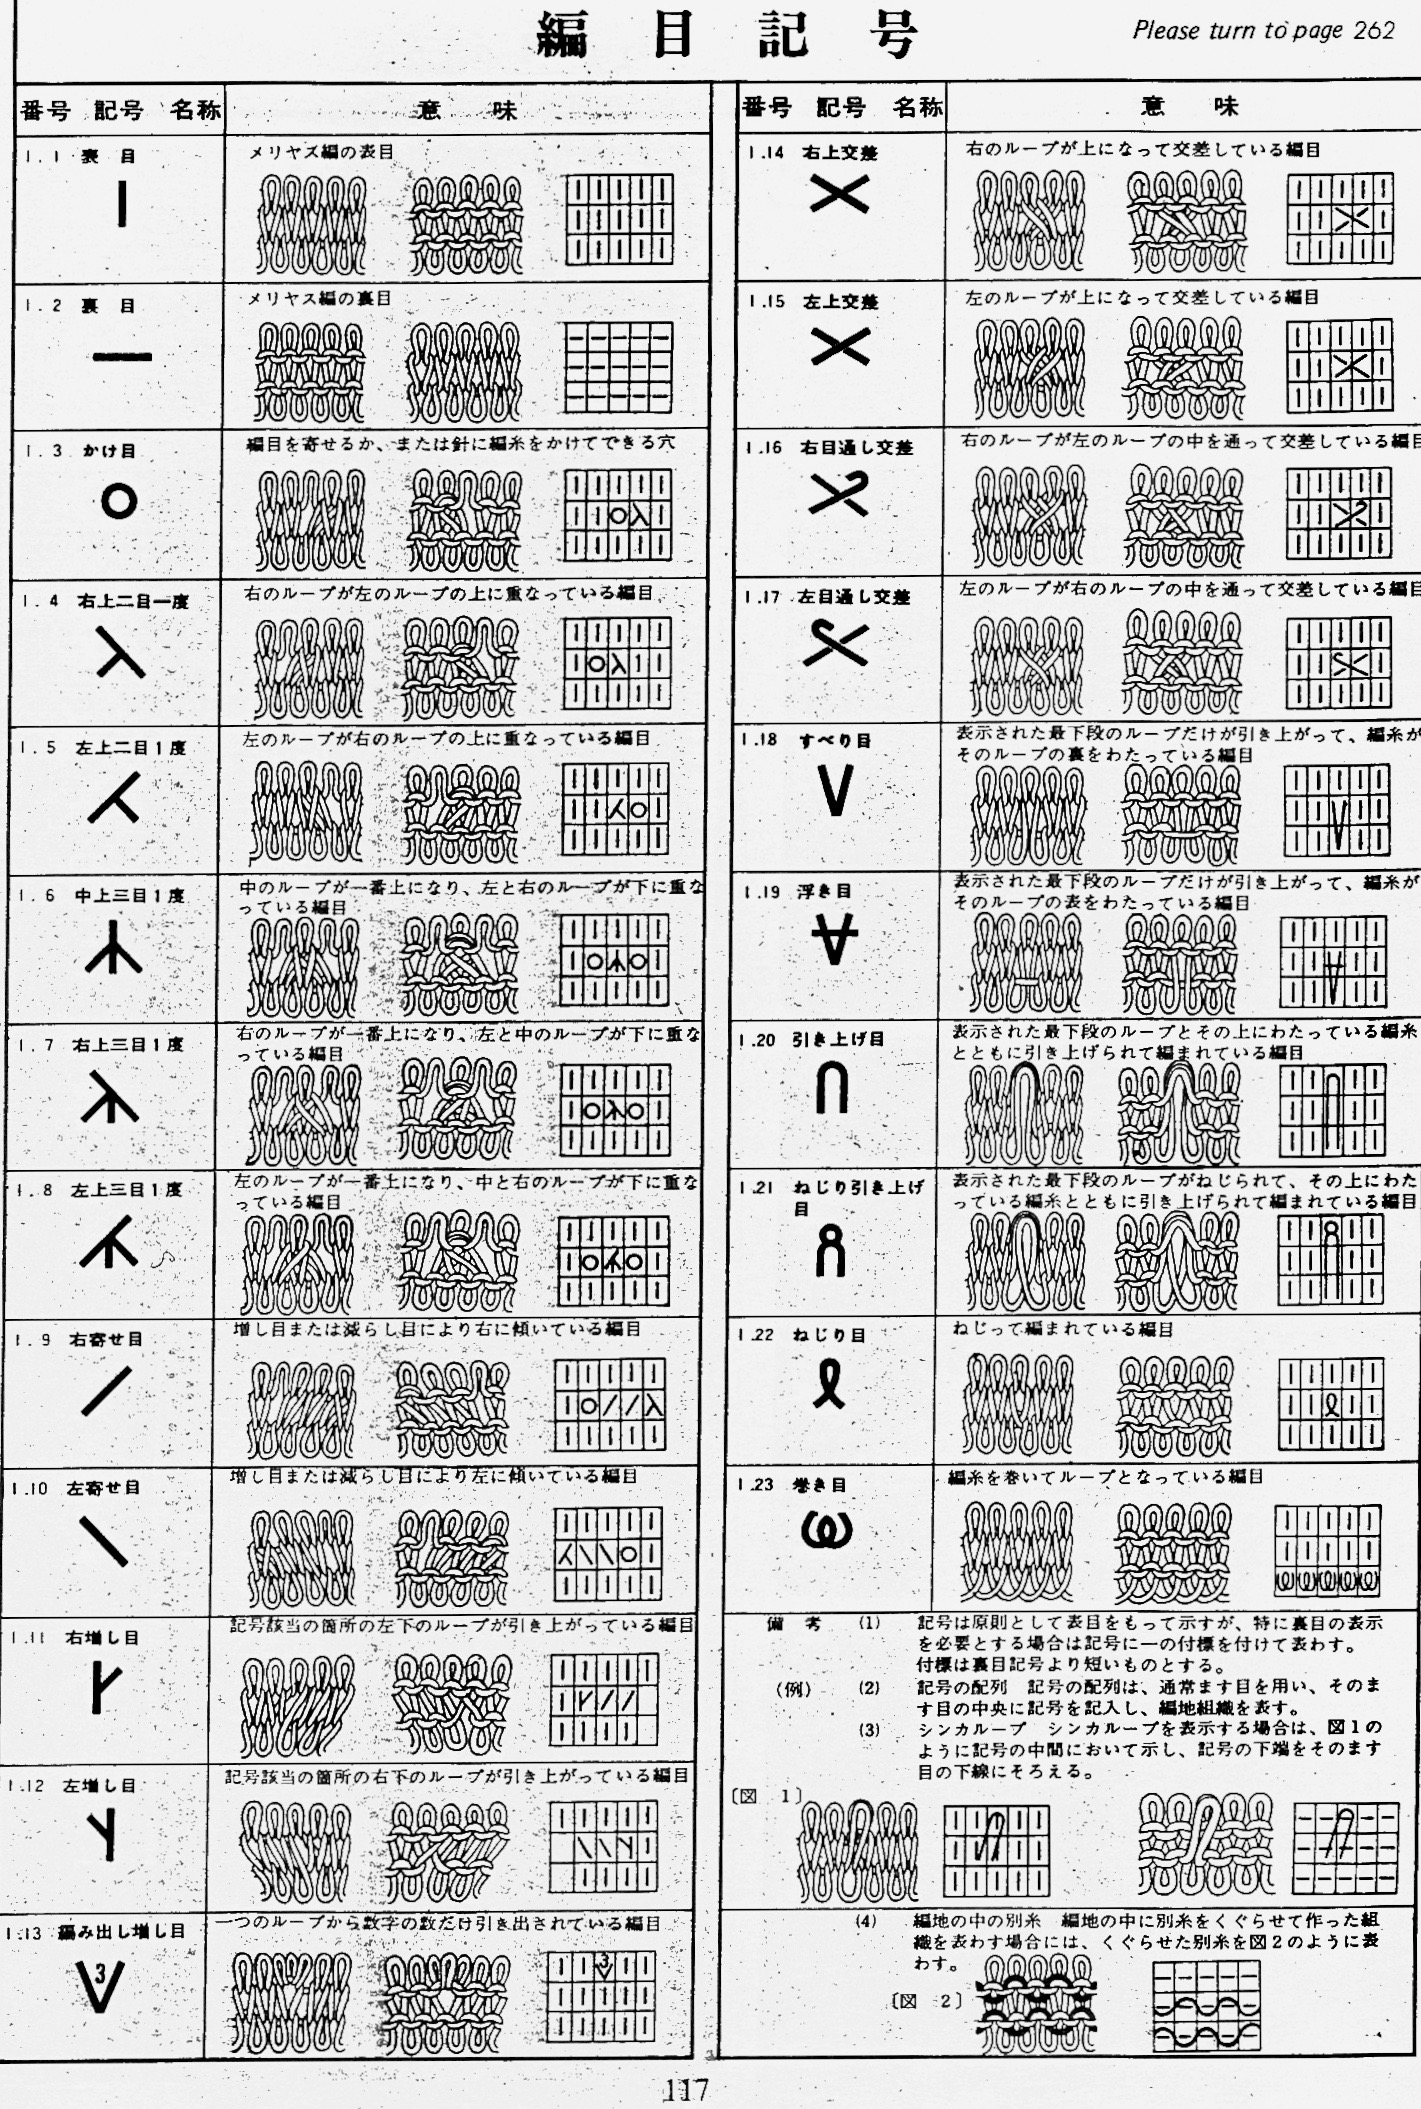
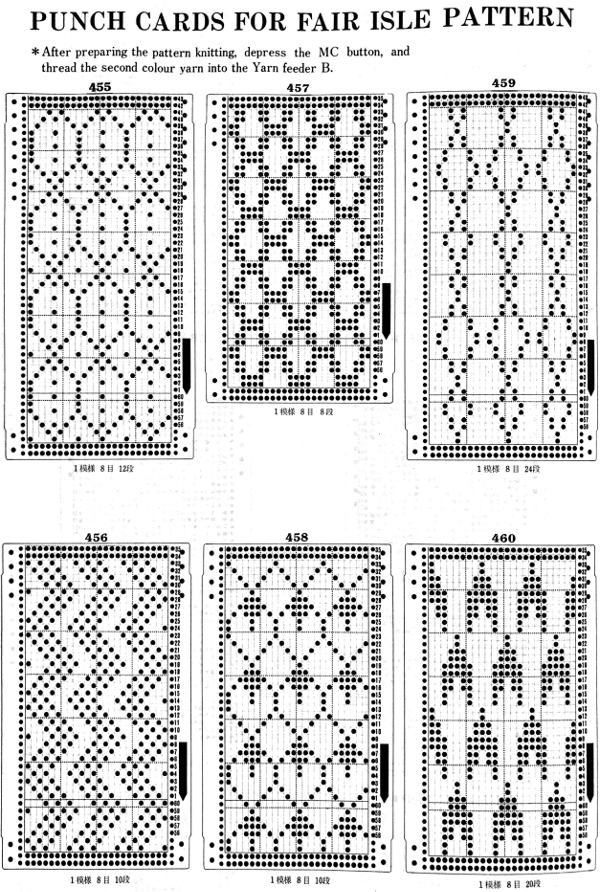
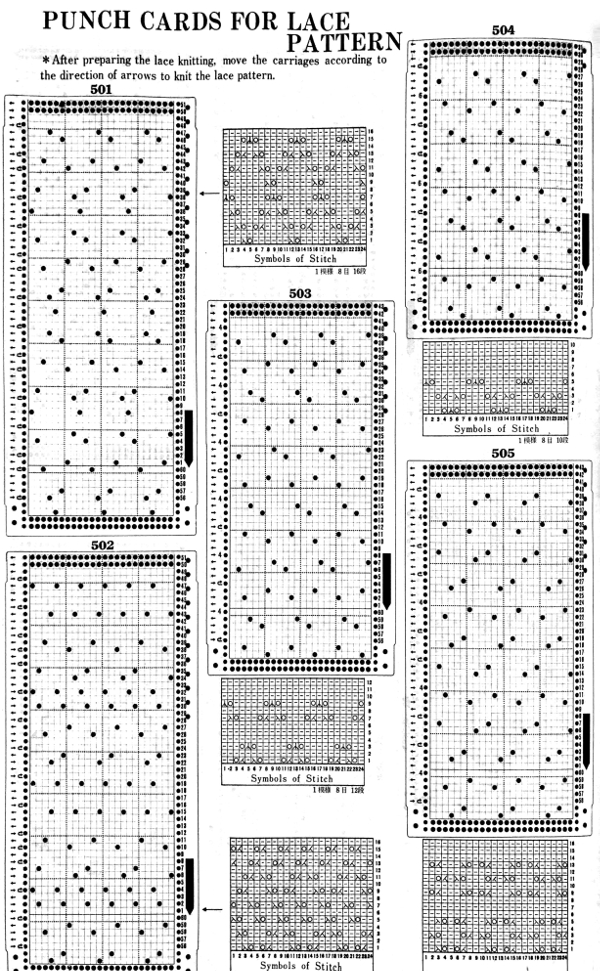
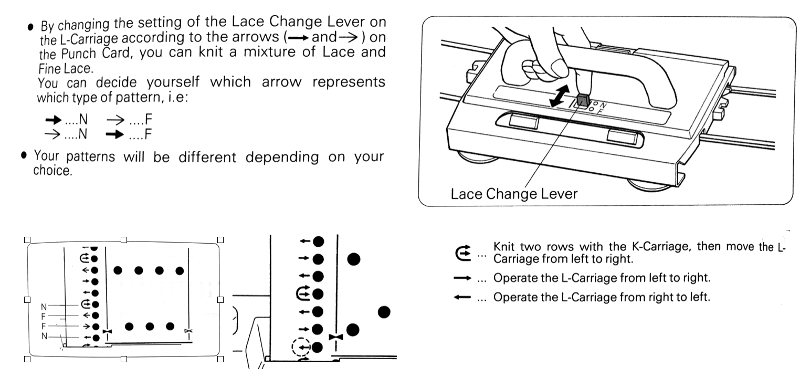
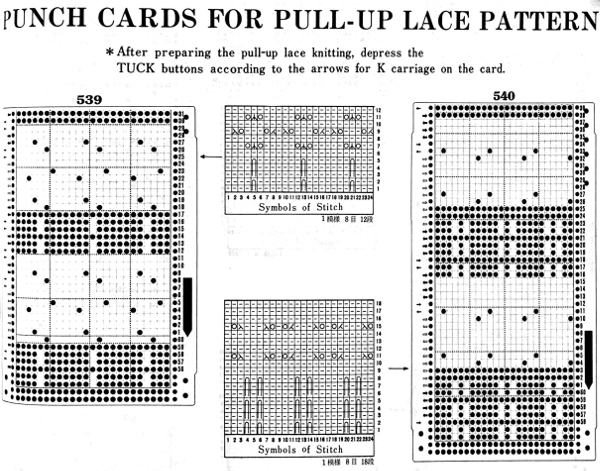
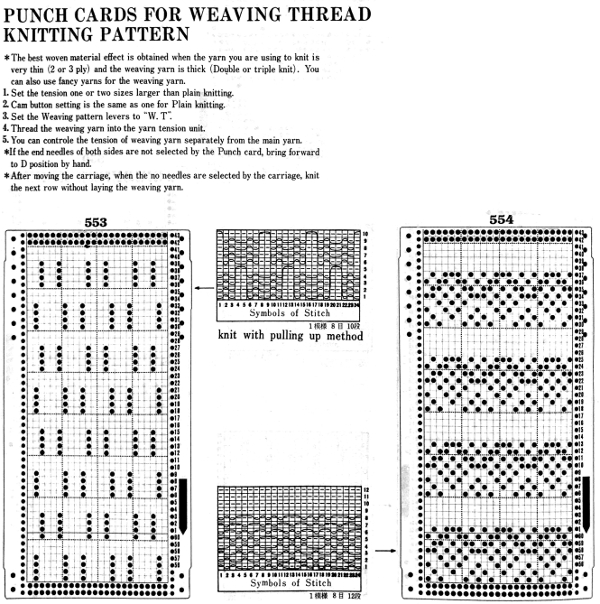
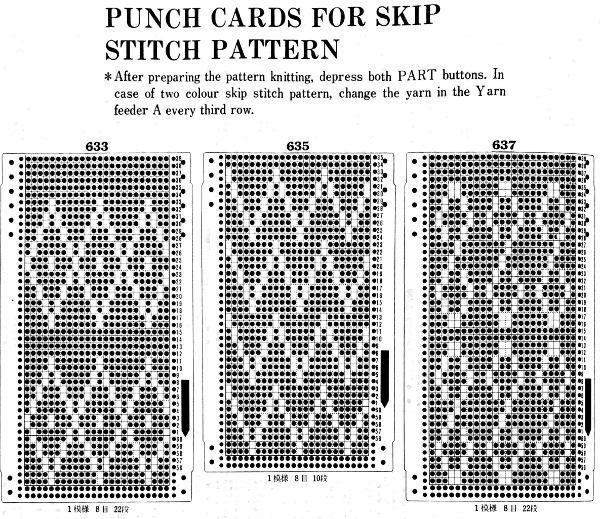
Early Brother punchcard volumes showed symbol charts alongside punchcard repeats. The translations at times were not the best. Here is some of the advice offered for woven lace patterns: 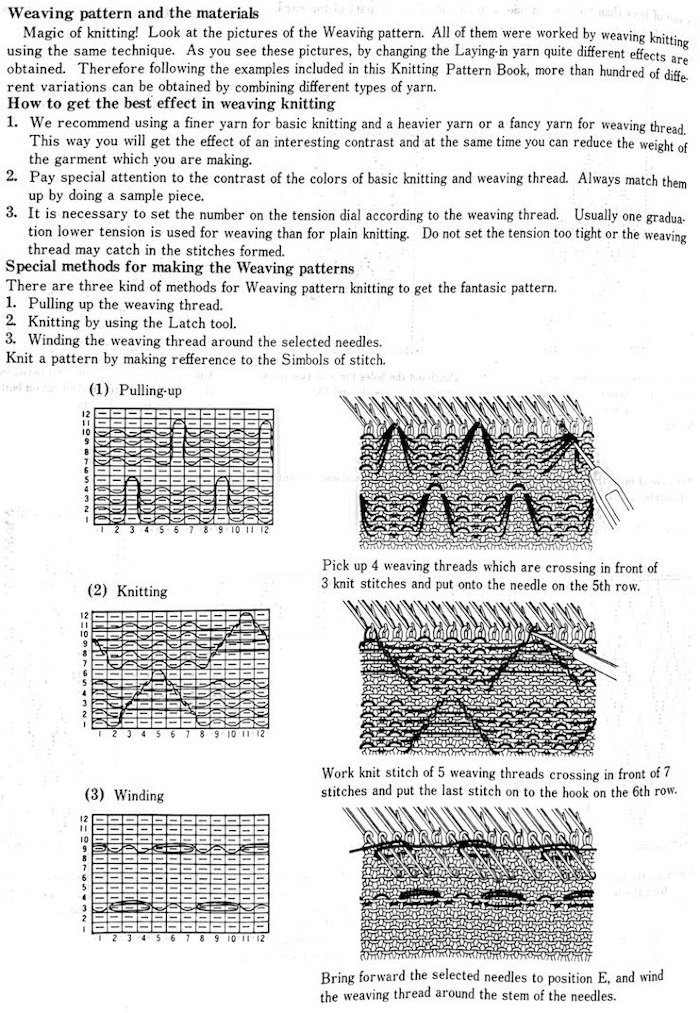
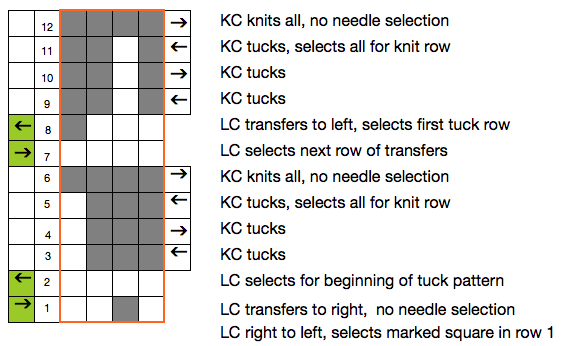
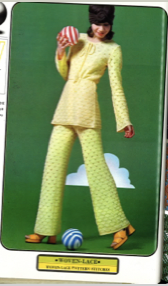
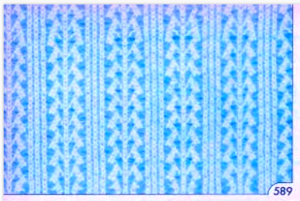
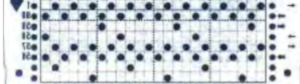
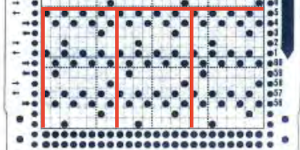
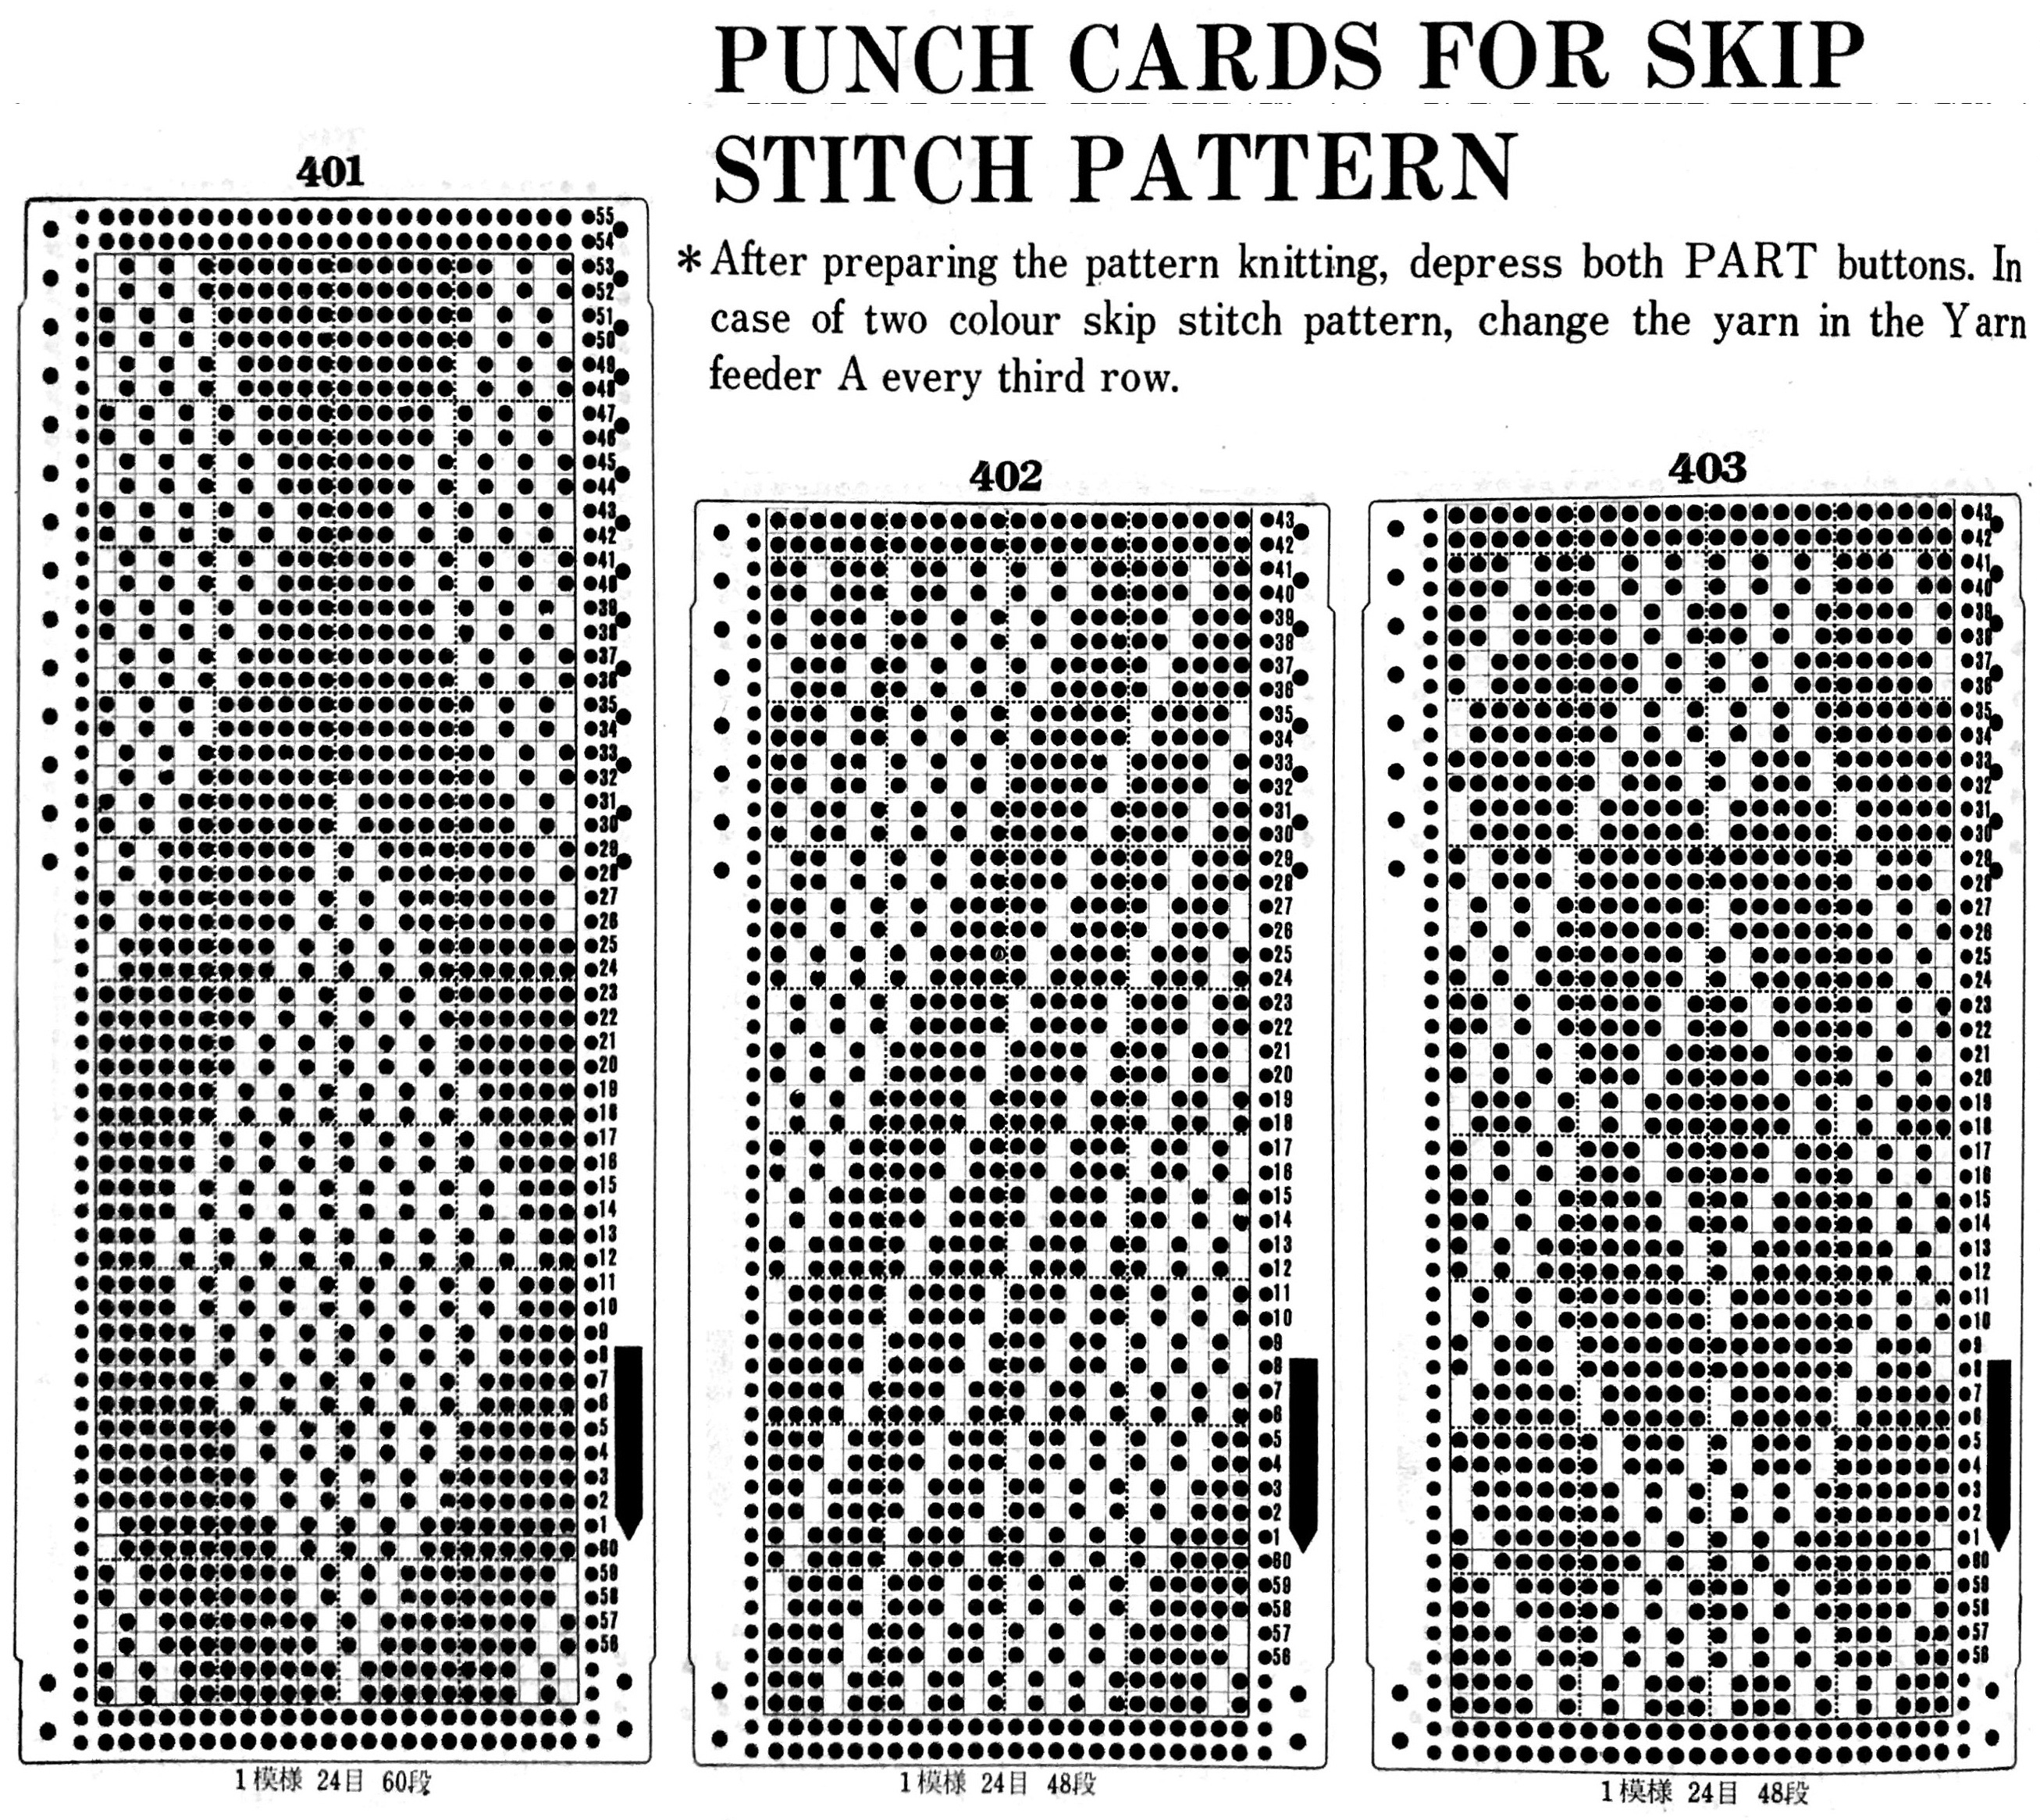
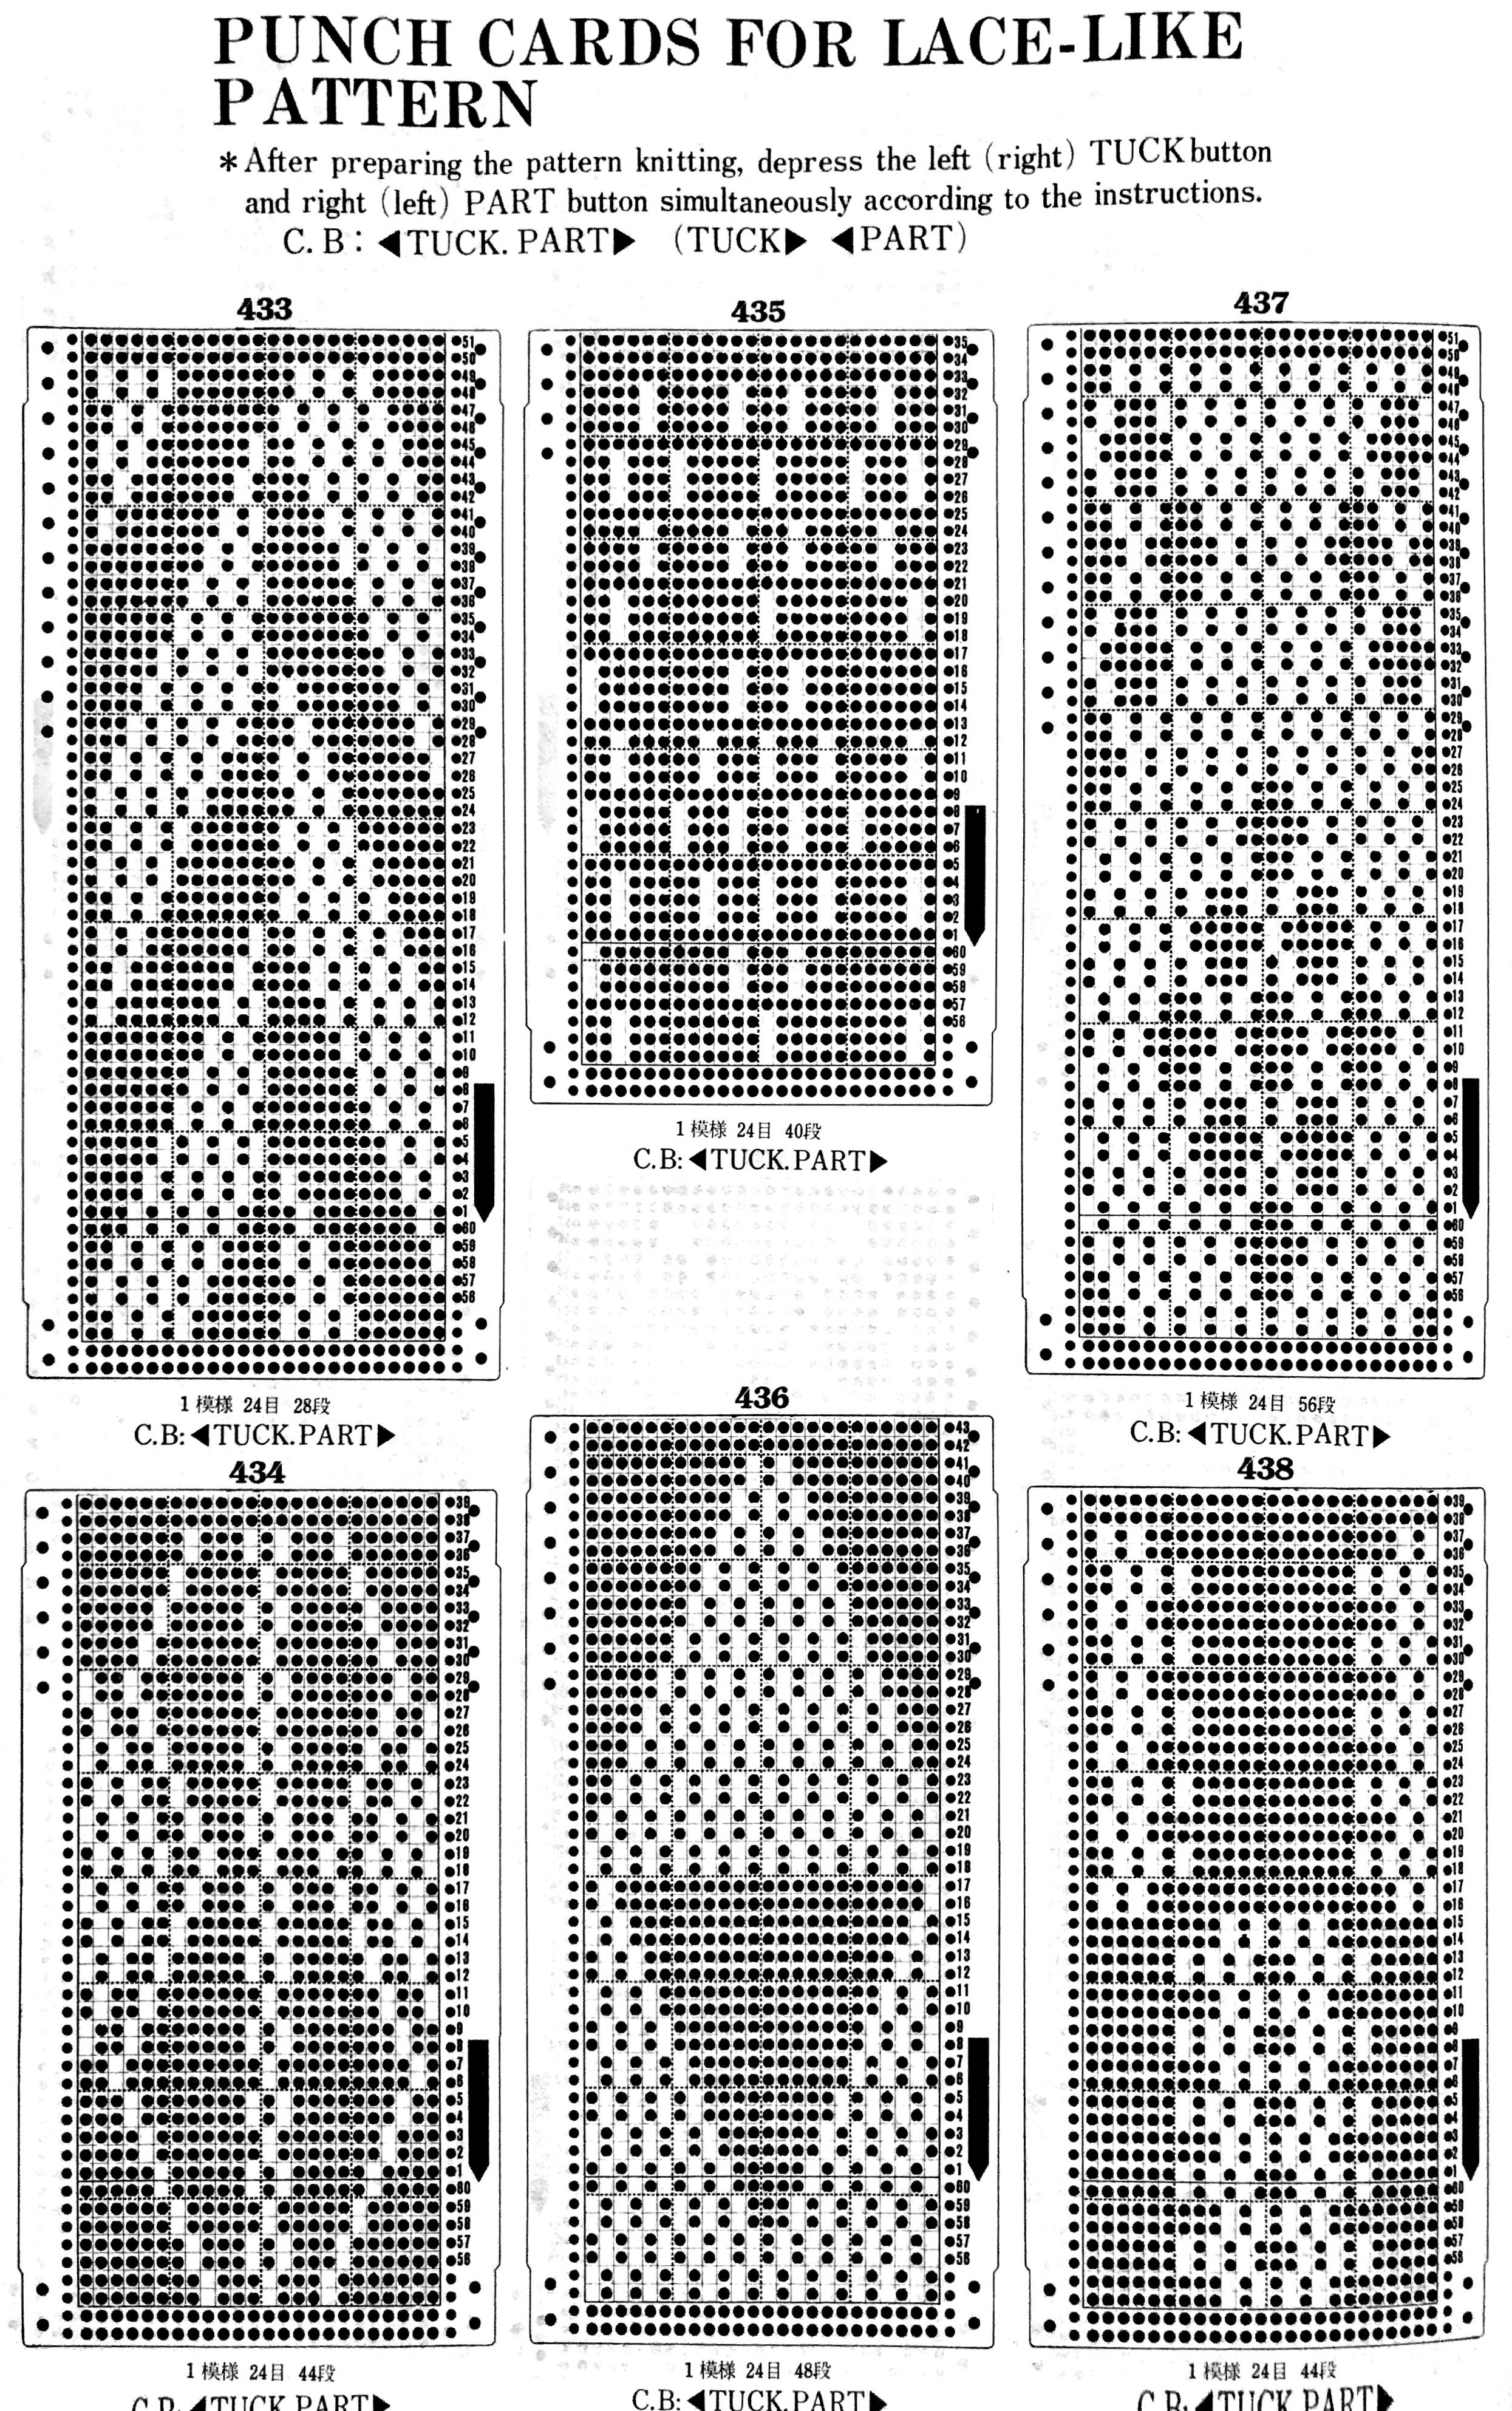
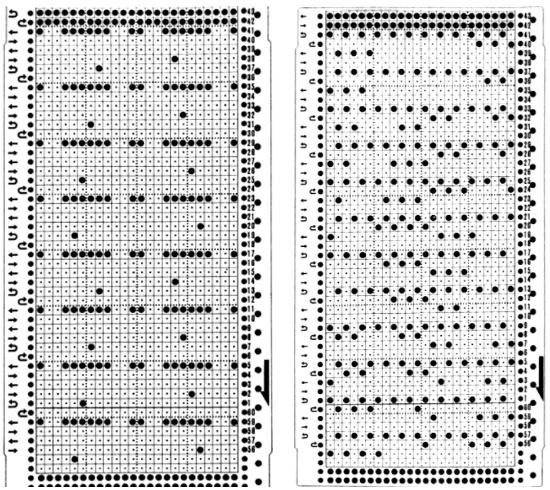
This was one of the first such punchcard volumes published by Brother after the pushbutton earlier models were replaced by ones with card readers  It has the added data on how each of the fabrics might look visualized in a chart prior to its expansion as a card in full repeat. This is the top half repeat of a card for pull up weaving combined with lace along with the directions for execiting the knit
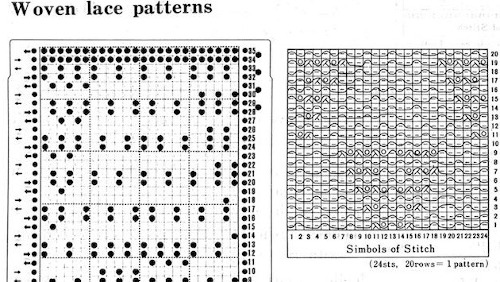

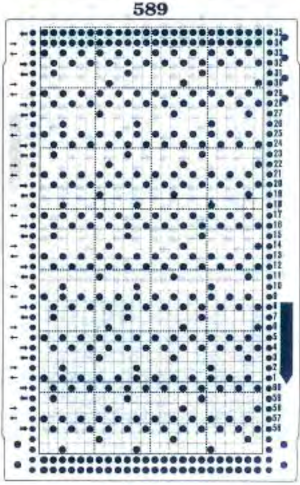
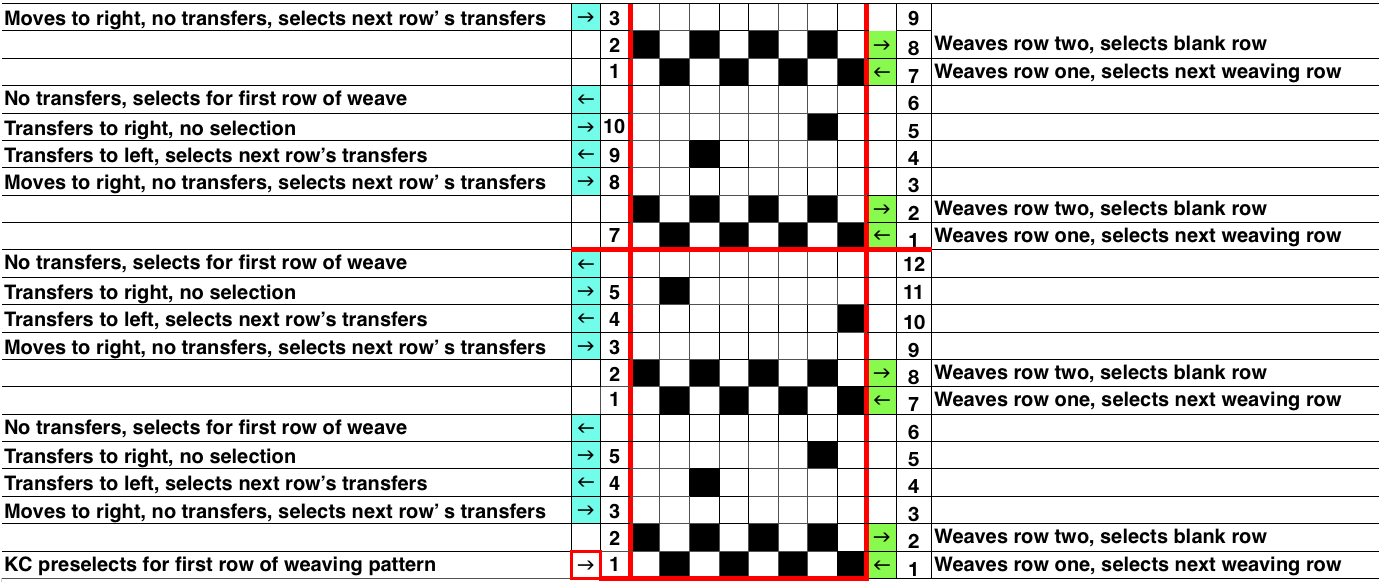
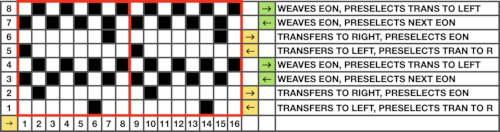
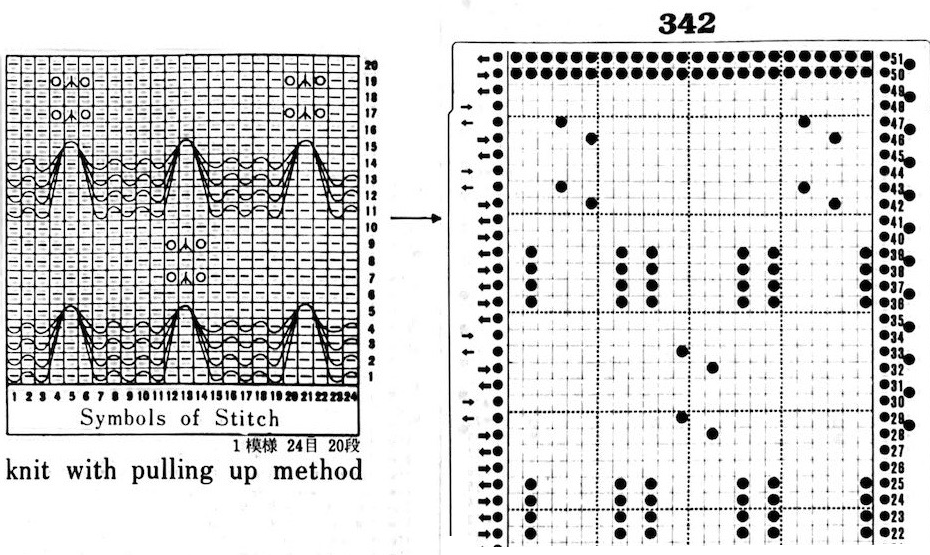 My experience with trying to knit CARD # 589, led me to notice immediately that all carriage passes, if the arrows are followed, are made from the same side. That avoids the repeated selections when carriages first start operating from the opposite sides. My interpretation of what the card is achieving:
 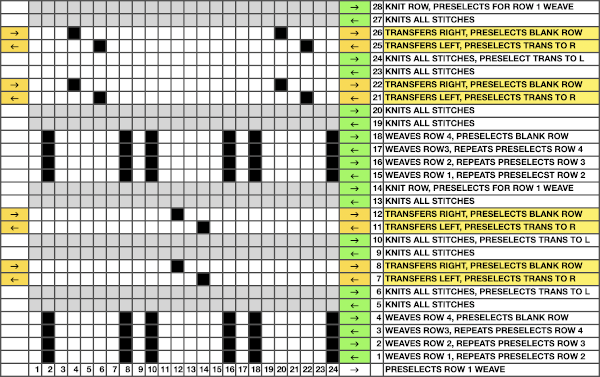 Taking carriages on and off the same side of the machine is nothing I would be inclined to do for any length on any machine. In theory, the identical repeat above could be used on an electronic KM in that way, but I did not get very far with that method before giving up.
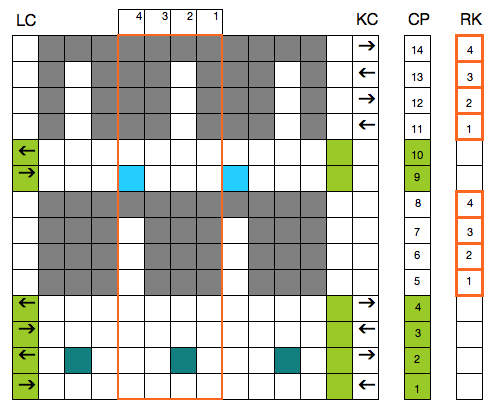
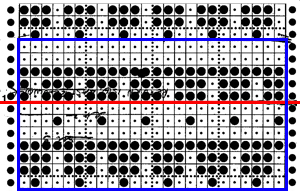
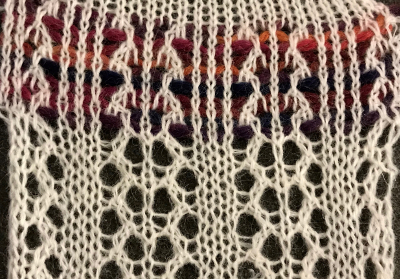
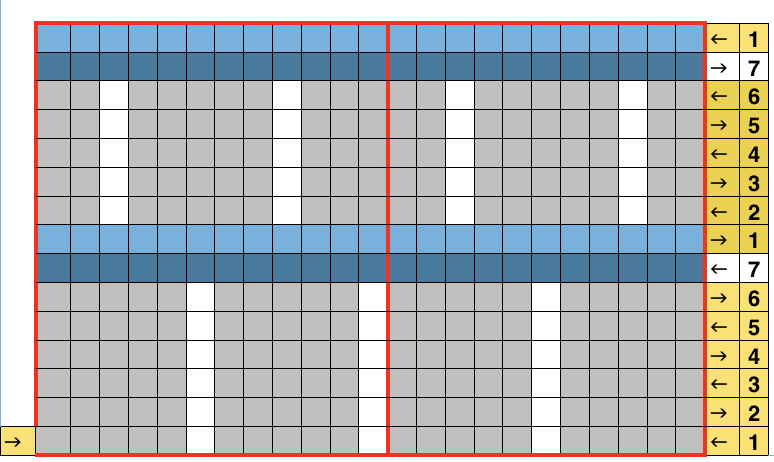
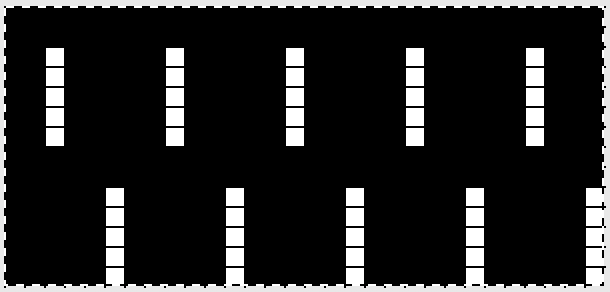
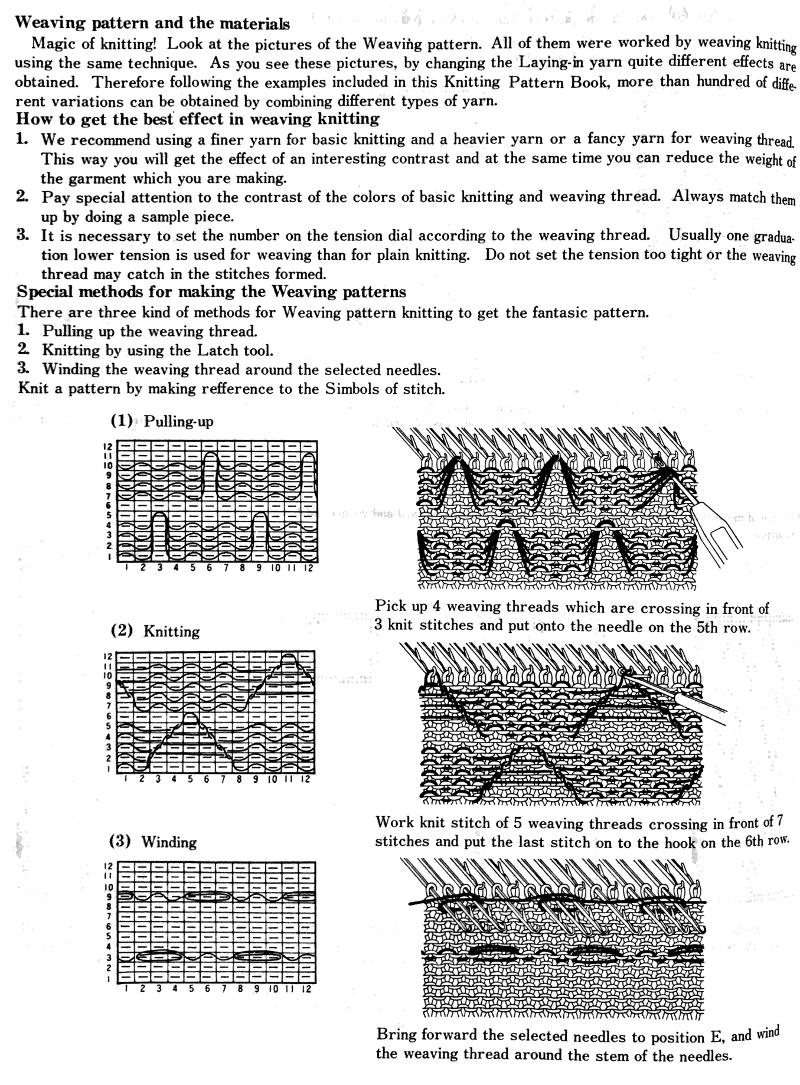
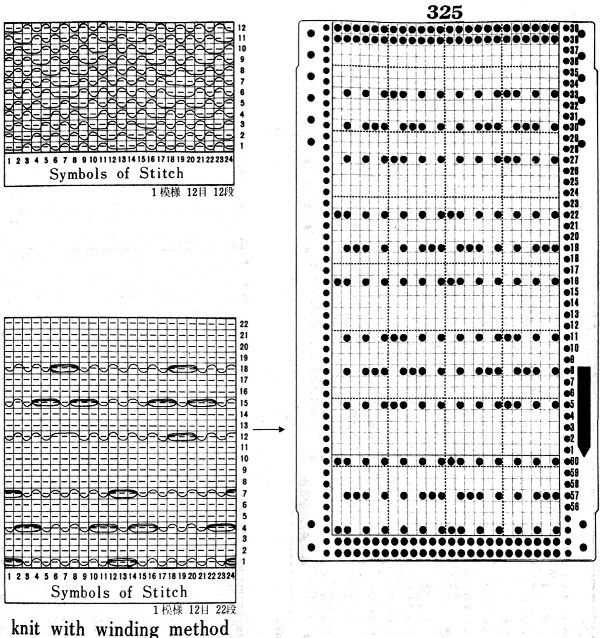
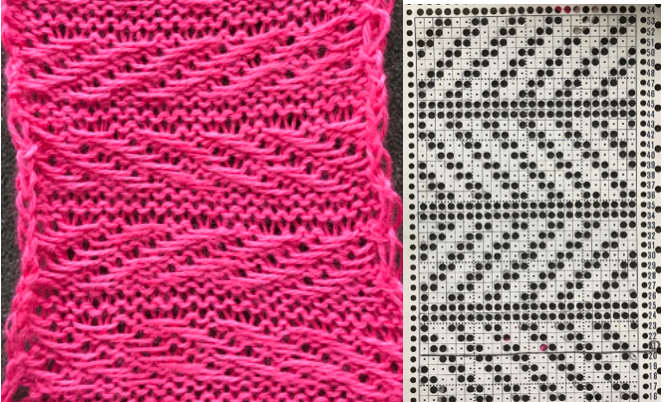
The expanded the repeat for use on my 930, with programmed all-black pixel rows for any pairs of all knit rows, made for smooth, easy knitting  The weaving yarn used in patterns such as these will be held in the hooks of the needles, combined with the knit stitch already there. In this instance that adds up to 5 loops that need to knit off smoothly on the next knit row, so yarn thickness choice meets with limitations.
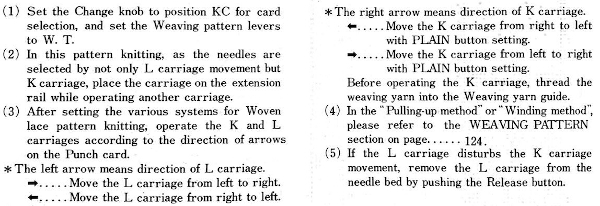
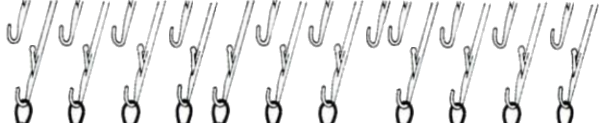
The first preselection row is made from left to right with the knit carriage, it resumes patterning on the right, beginning the weaving pattern. End needle selection is on, KC I.
When the knit carriage is on the right and all but those single needles are selected on design rows 5 and 23, pick up the floats from the weaving yarn with a single eye tool and lift them onto the non selected needles, then bring the same needle out to E position before moving the carriage to the left to create the first all knit row.
Before transfer rows using the lace carriage, if any end needles have been selected in pattern push them back to B before traveling with it to the opposite side. The electronic repeat, followed by its .png 
![]()
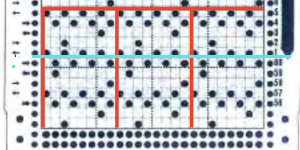
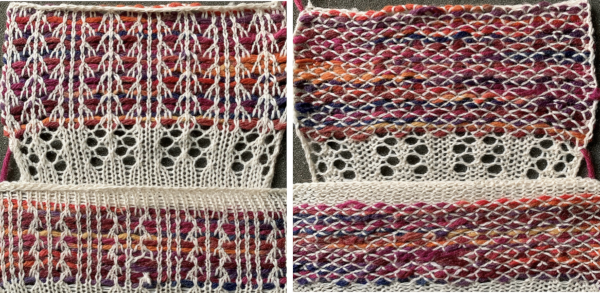
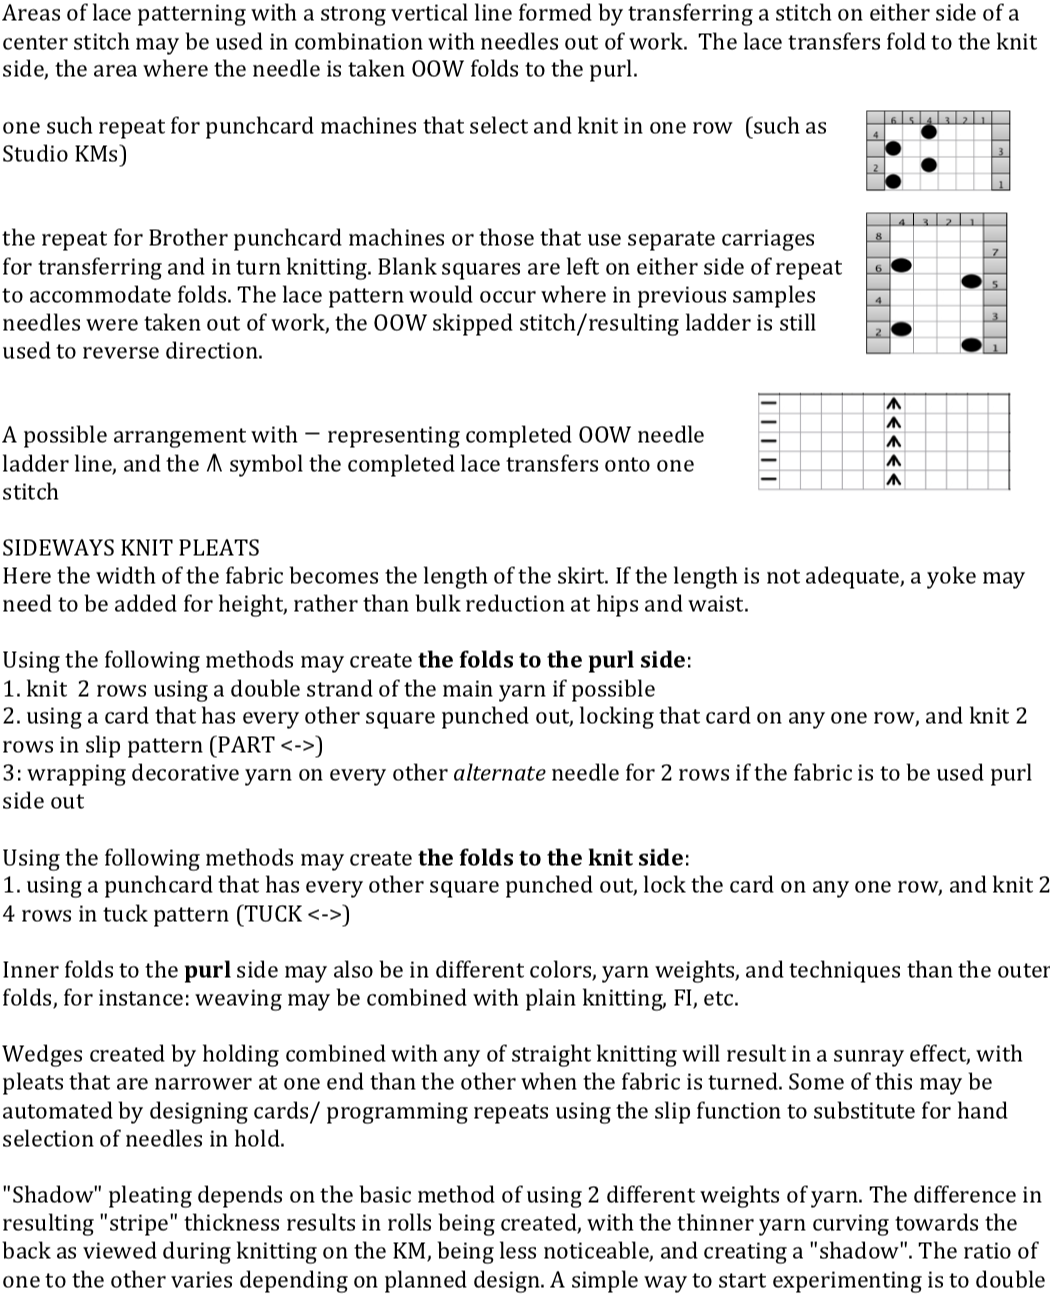
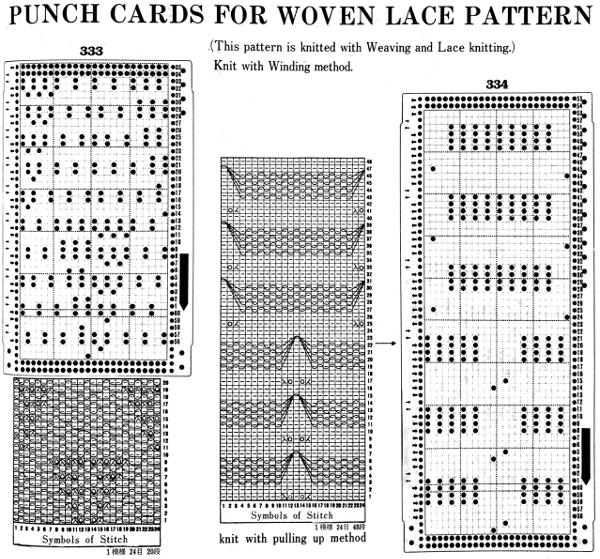
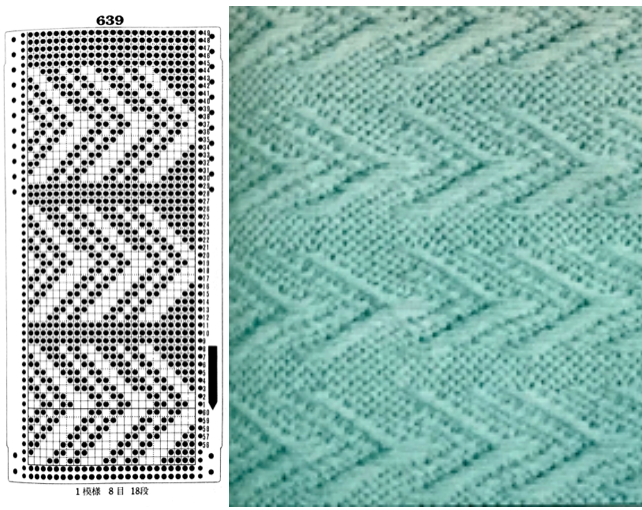
Later punchcard volumes ie 4 and 5 took into account the repetition issues when carriages select needles for patterns from opposite sides, and that may be the best place for card designs that may be knit following arrows as shown, in the traditional manner. This design has fewer woven rows, a larger lace motif 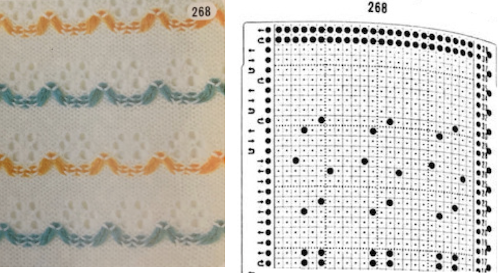 Volume 4 offers only this advice: “the empty needles are selected at the second lace pattern, but this is not a trouble, and you may pass the L carriage to the side which is indicated on the punchcard”. I take that to mean that after a transfer if the same needle is selected again, don’t be concerned, keep moving the carriage in the direction of the arrows.
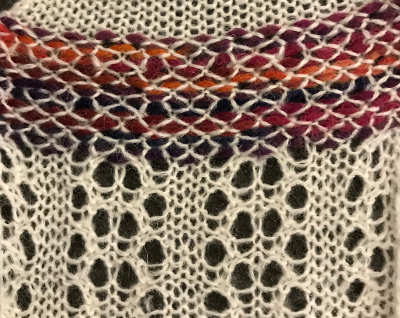
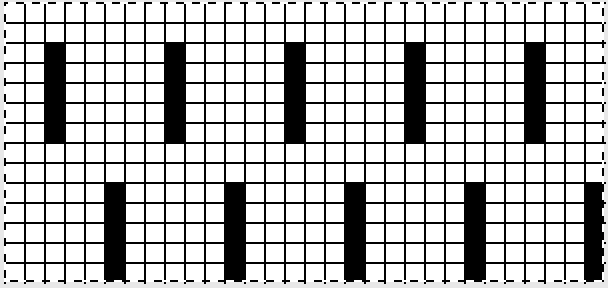
 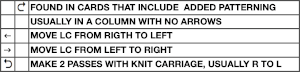 Because the weaving is for only 2 rows, the use of laid in, thicker yarn is well tolerated. The punchcard repeat amended for use on electronic, shown prior to mirroring
 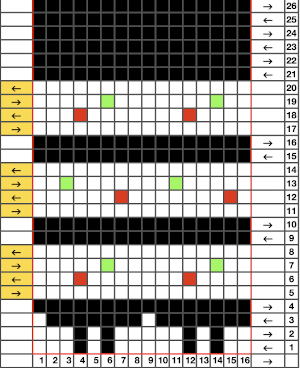 its .png
![]()
 A resource offering many more design patterns:
  for swatches in color see pattern # 321-360.
 There is often a discrepancy in previewing contents of downloads between thumbnail page markings and those on the document scan. In this case, diagrams begin on manual page 278-284, thumbnail # 284 – 290.
E-wrapping or other weaving techniques may be used on “weaving” row preselected needles, needles can also be hand-selected in knit areas in any other programmed lace repeat to add details on the chosen row(s) without engaging the card reader. Knit 2 plain rows, select weaving needles, wrap the yarn over or around them in the desired configuration, knit 2 plain rows again, and resume lace patterning. Varieties of wraps for use on every needle with yarn similar in weight to the ground, or every other needle with thicker yarn. 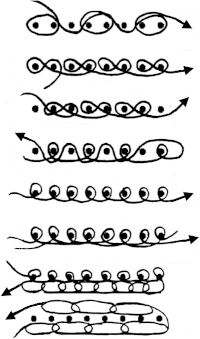 Once the desired effect is achieved, a repeat could in turn be configured and punched or programmed to make the process easier to track.
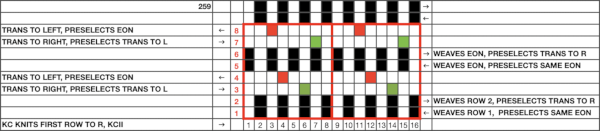
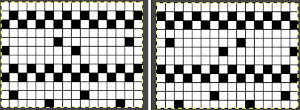
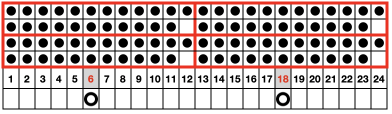
 At the time, I made a long, convoluted effort to produce the fabric. I am returning to the topic and comparing 2 cards in this post, the original 589, and a new-found cousin, 259. Looking to the published cards for clues, remember that markings for carriage movements related to the first design row at the bottom of the card begin on the left of the card, above the Brother line numbered 1 on the right. The start of both cards:
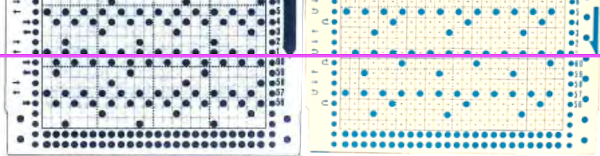
 As the carriage moves to the right, the card will advance a row.
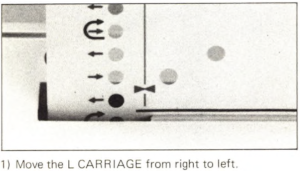
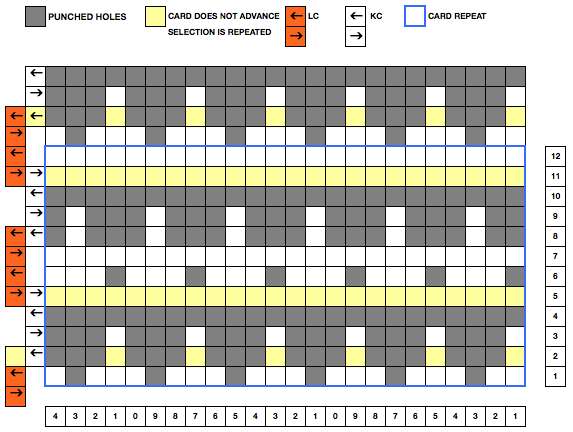
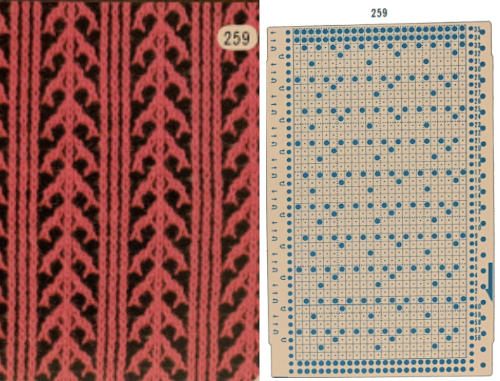 259 shows the traditional approach combining the two techniques that take into account the fact that when the second selecting carriage starts to move from the opposite side, the punchcard does not advance, repeating the same preselection. Added discussion of the differences in repeats for both machine types may be found in the post: Doilies:
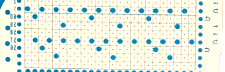

 The pattern is simply not workable as given using both carriages selecting needles from opposite sides of a punchcard machine, each moving for 2 rows.
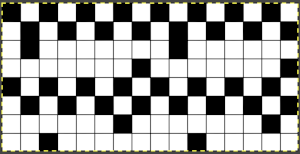
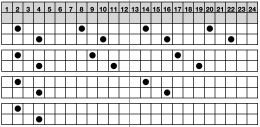
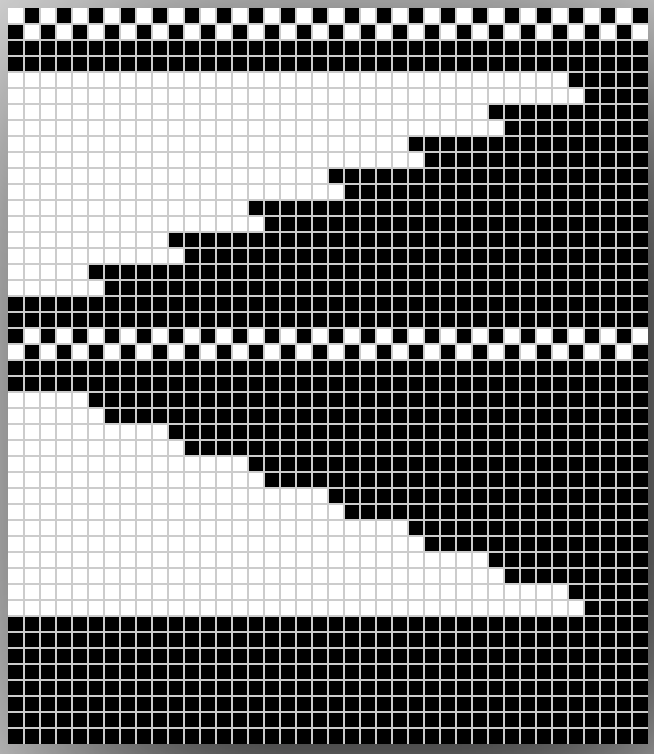
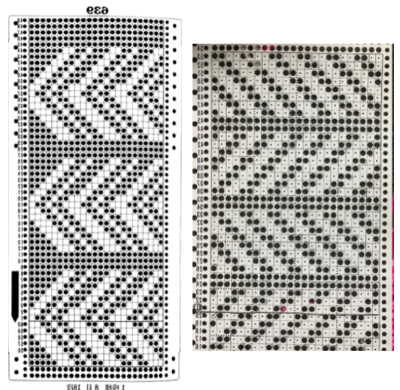
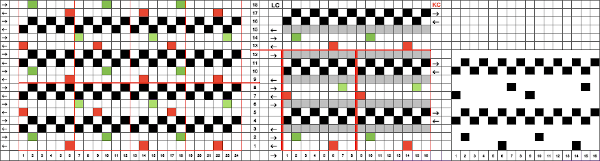 the smallest, single repeated in width X 2 for use on my 930
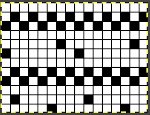 its .png
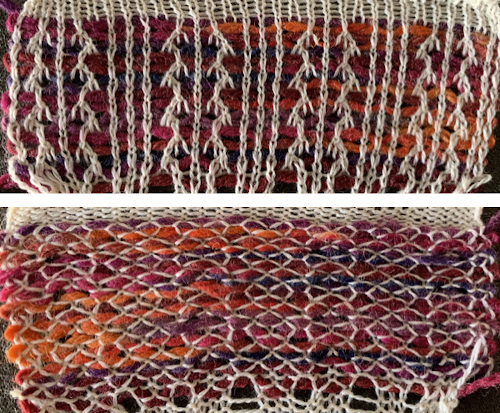
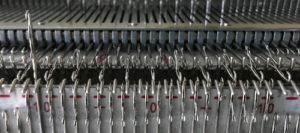
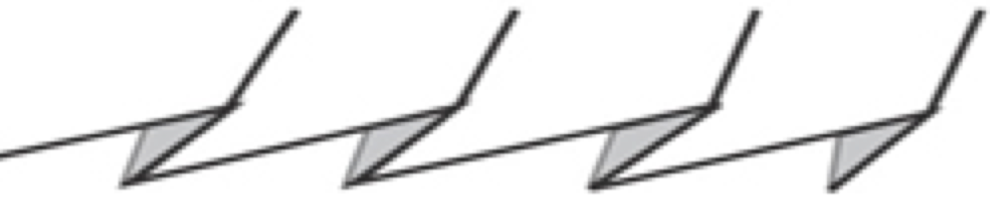
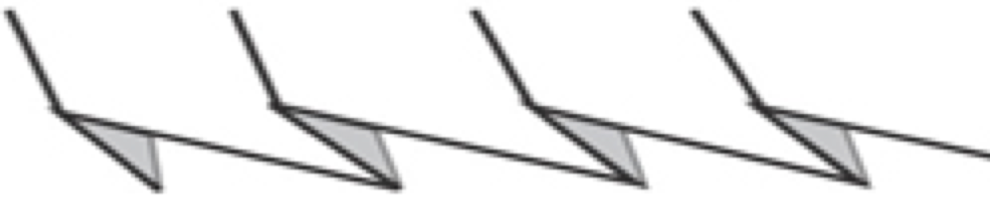
 comparing the sequences for both starts, weaving on left, lace on the right
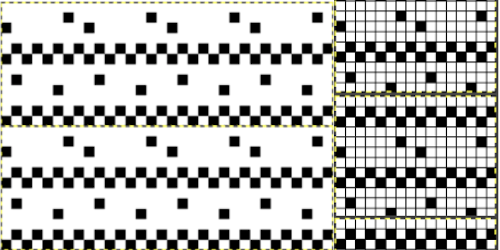
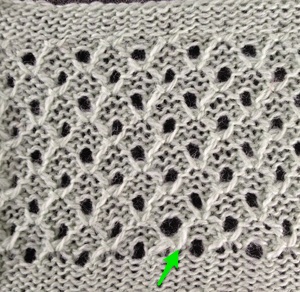
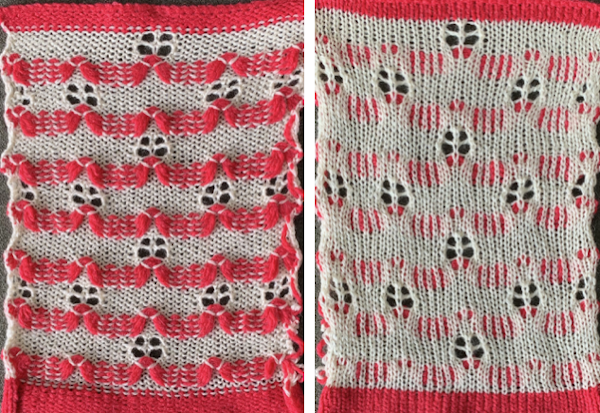
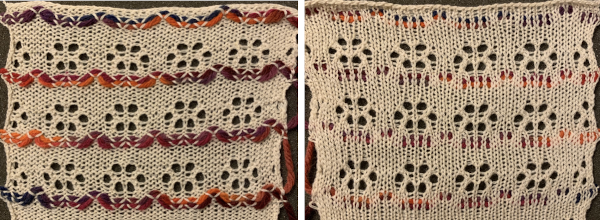
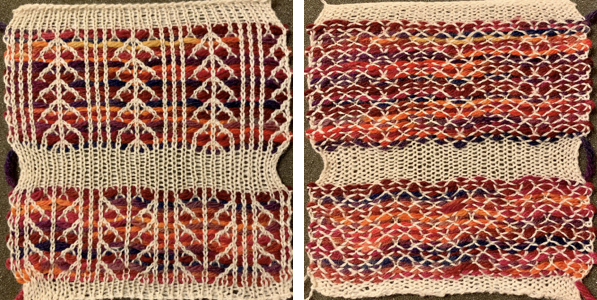
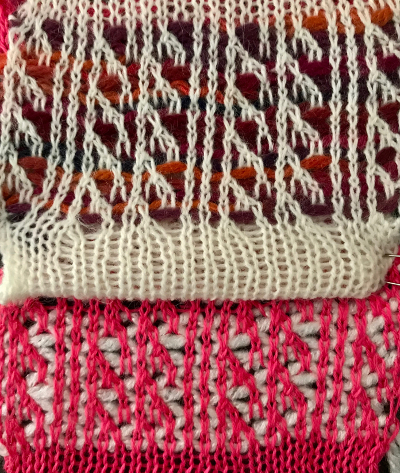
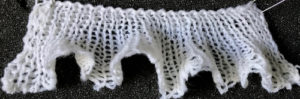
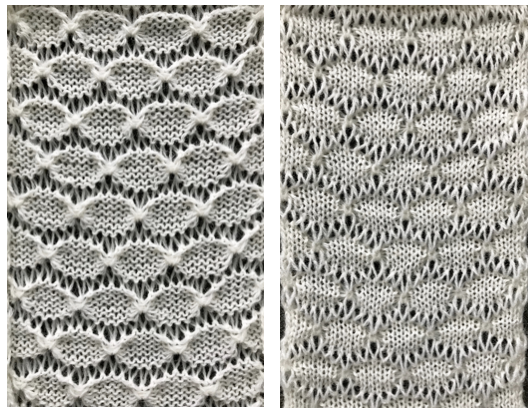
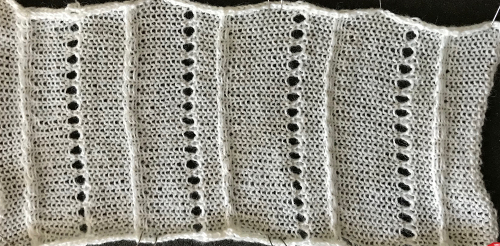
 a sample using 2 different weight yarns; irregular weaving may require changing the yarn, or adjusting the tension used for the background yarn
 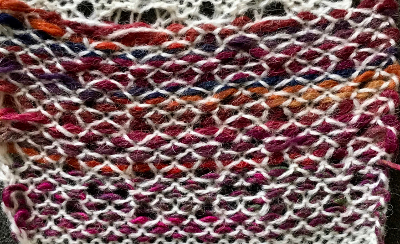 I like to test these repeats first in transfer lace, to sort out the best tension and yarn to use, errors in programming,
 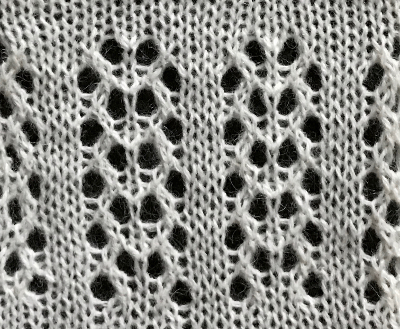 Taking another look at the original punchcard and those arrows on the left-hand side, a detail I had originally missed, they all start from and return to the right, the line thickness changing marking the alternate carriage
 As I was trying to understand what was happening, I was also able to produce a swatch using the original #589 card, using a method that, however, produced all lace transfers to the right, and differed from the desired effect:
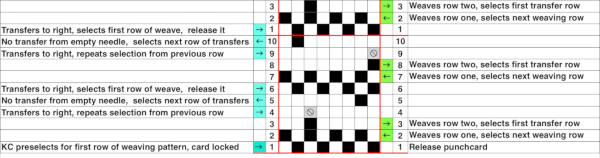 the knit, produced at the time on both my punchcard machine and with my 910 also requiring an LC release on its third pass,
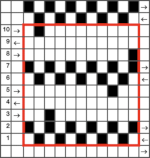

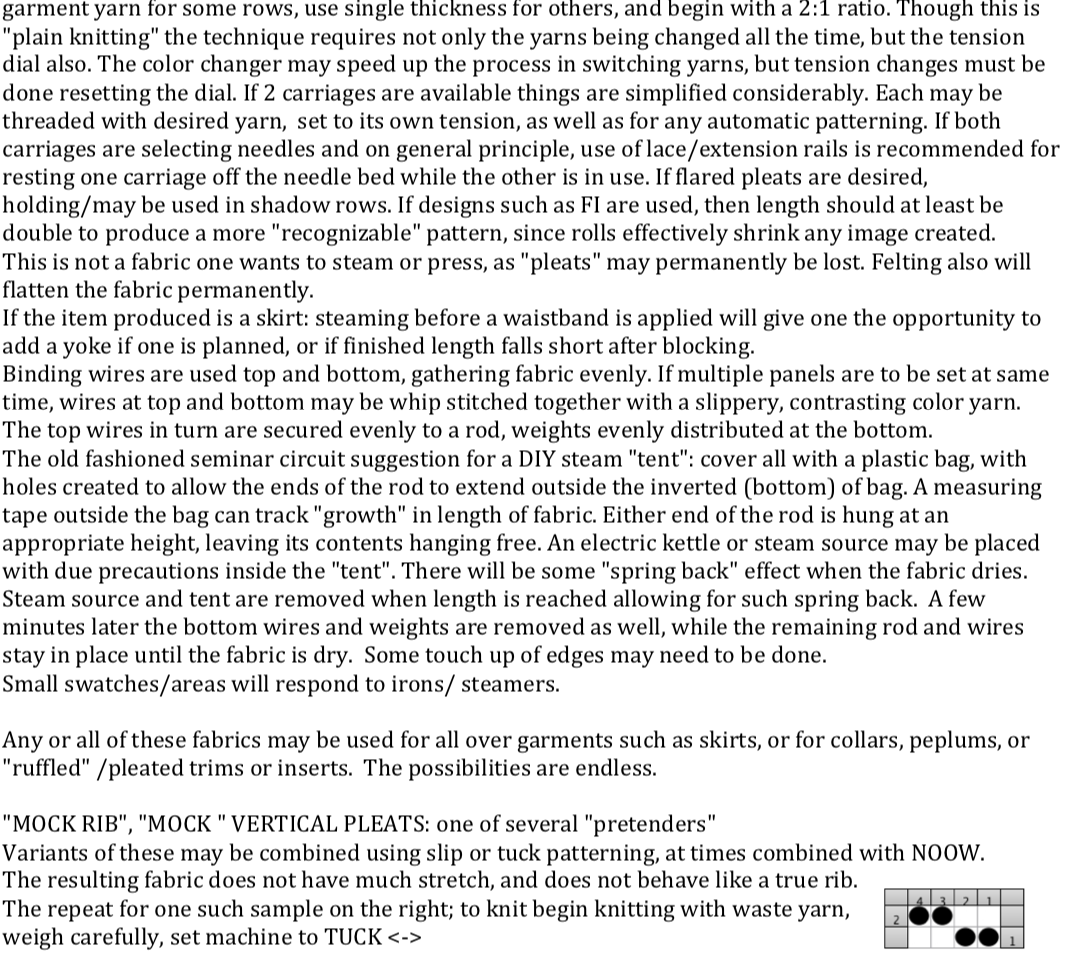
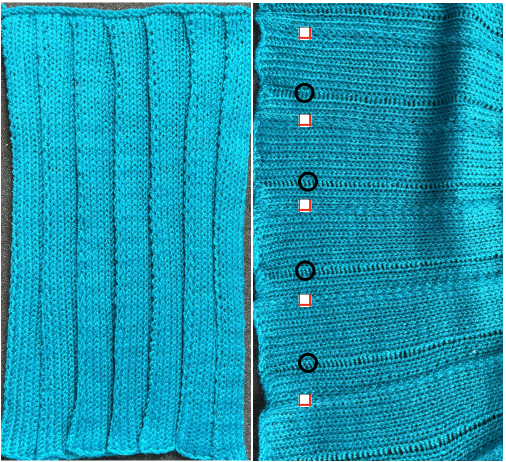
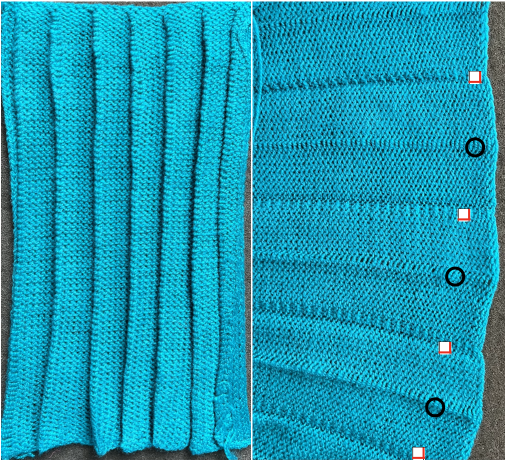
 Working it on Brother becomes a bit fiddly. Whether working on a punchcard or electronic KM, it is possible to introduce patterning on either or both beds as seen below. I preferred the look obtained with the racked cast on at the start. Setting up the Brother machine: program the repeat, half pitch for every needle rib, air knit to place the pattern on the bed so that the first needle on the left (or right if you prefer) is preselected forward and will produce a knit stitch on the first row knit. The yarn used is a 2/24 acrylic
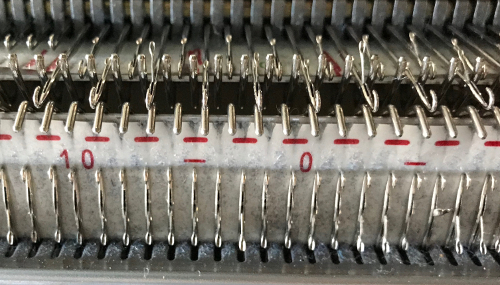
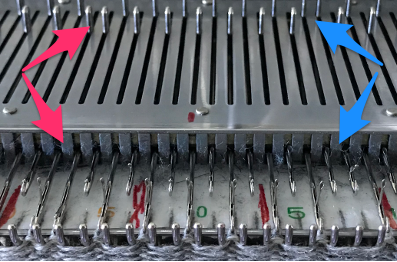
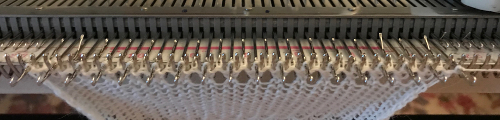
 now another needle on the ribber is brought in to work on the far left, it will tuck with lili selection when moving from left to right
  remember the ribber rule with lili buttons: an even number of needles must be in work, this shows the start and end of selection on the ribber on alternate needle tape markings, as required


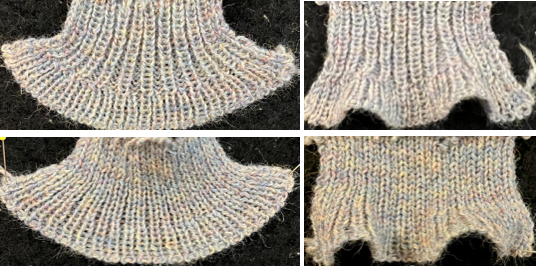
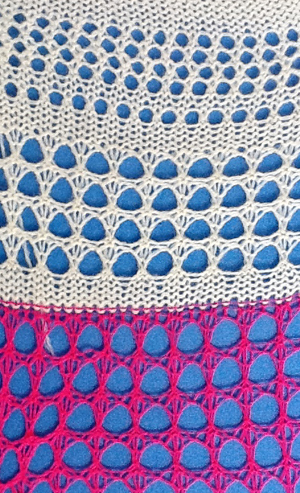
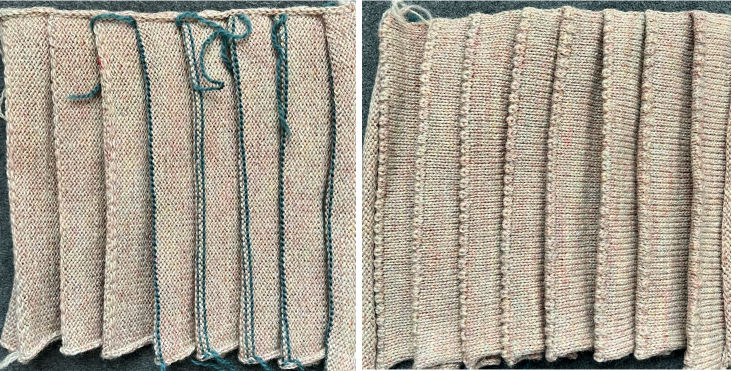
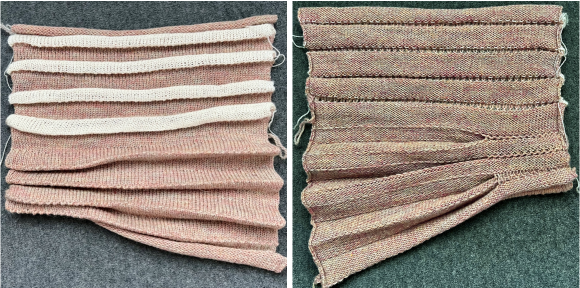
 Both pieces compared for width and rippling
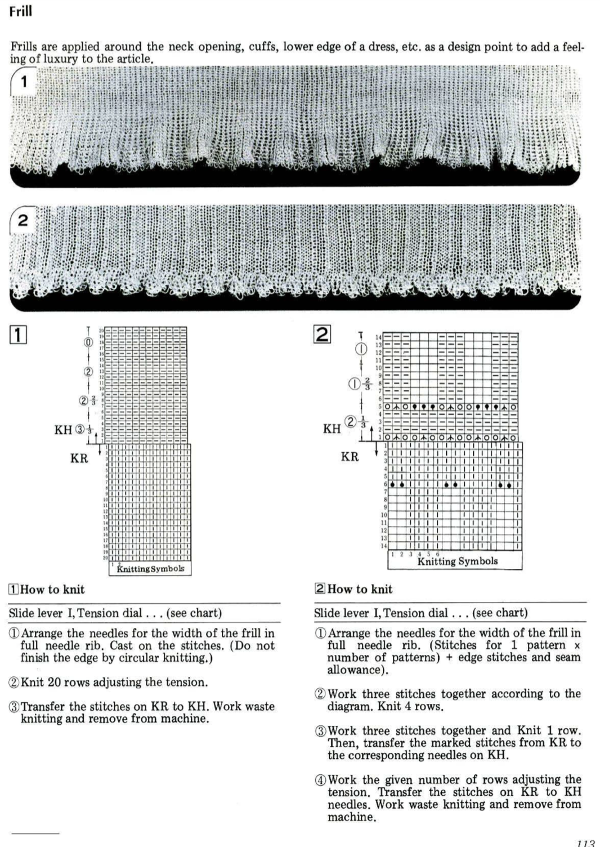
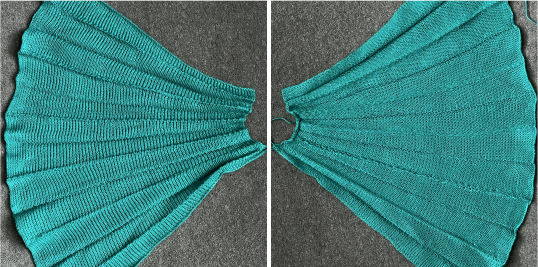
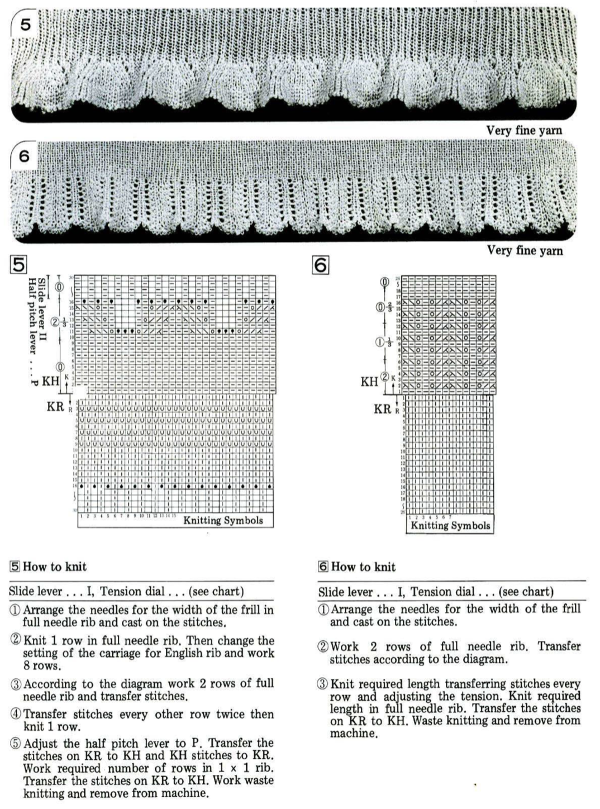 An intro to scallops: p.120
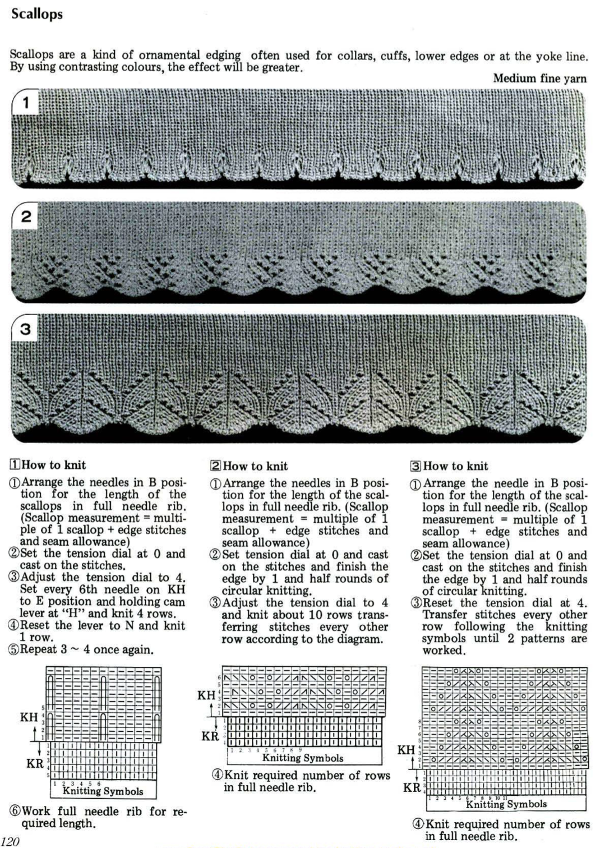

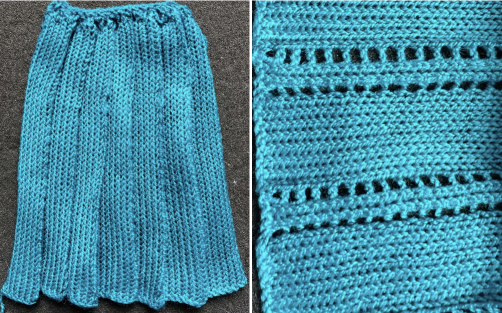


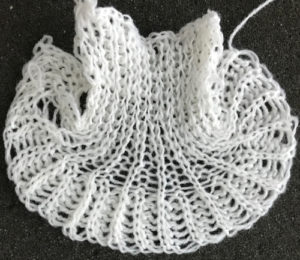
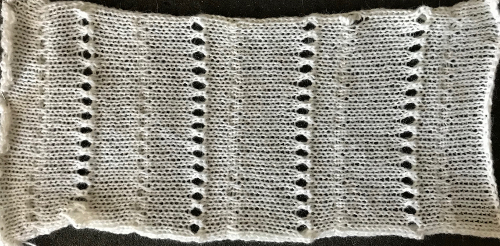
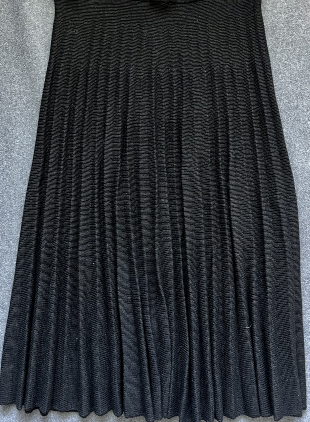
 The fabric narrows considerably as it is stretched lengthwise to set the stitches. Several panels would be required for a garment such as a skirt. Such an item would need to be pulled into shape, pinned, and hot pressed. Fiber content will determine the crispness of the pleats after blocking, and their retention after cleaning. The swatch below is turned sideways for the sake of space.
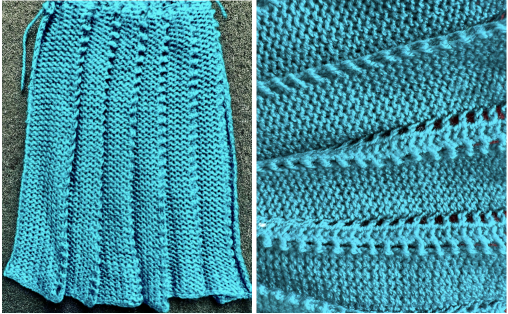
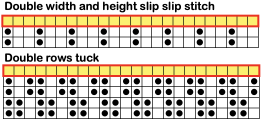
 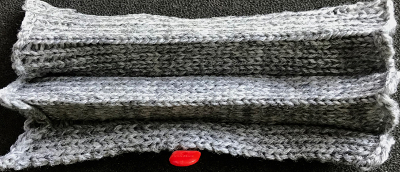 More variations with folds can be made by varying the “rules” commonly recognized for creases. Working sideways once more: on a punchcard machine, using card # 1 locked, cast on making certain every other needle as well as the first and last are selected.
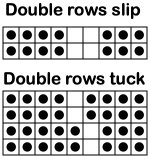
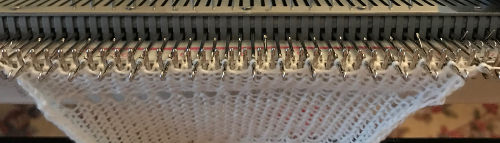 Cancel the slip setting, complete the next knit section, and transfer every other needle to the adjacent one on either the right or left.
 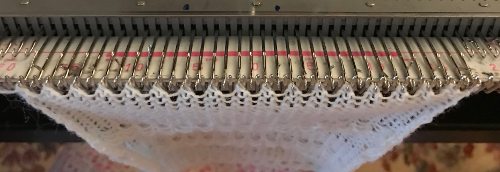 The needles holding 2 stitches may be brought out to the hold position as each transfer is made, or pushed out to hold after the fact to insure the stitches have been transferred and will knit off properly. The number of needles in work remains constant.
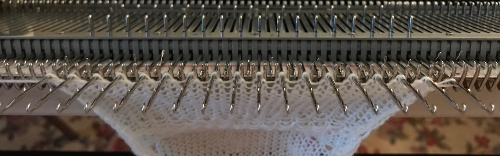
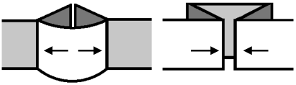
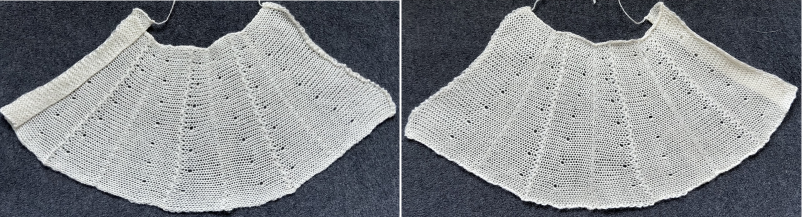
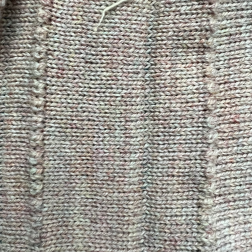
 The slipped stitches form the inside folds in the pressed swatch, while eyelets and tuck stitches fold a picot edge to the outside.
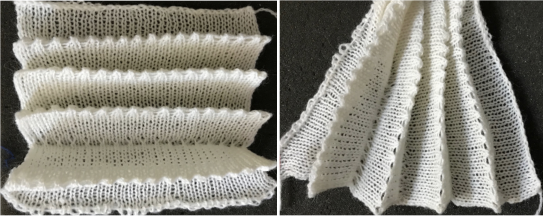


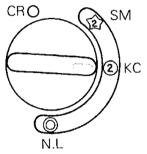
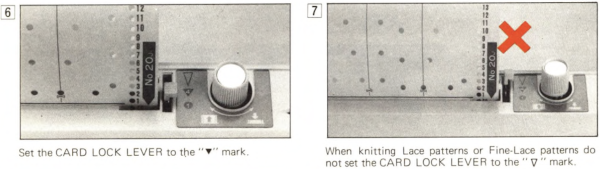
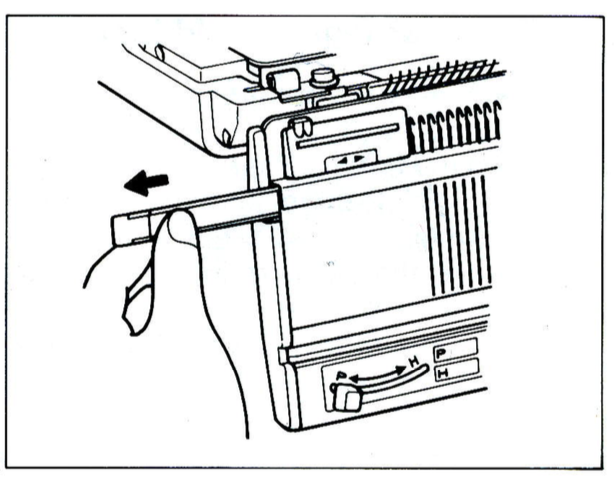
 the punchcard change knob has selections for single motif and pattern knitting (KC)