Some of the previous blog posts containing applicable samples:
Ribber fabrics with stitch transfers between beds 1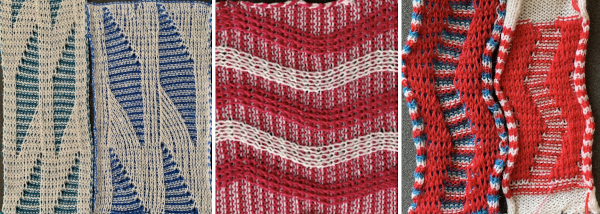 Slip stitch patterns with hand transferred stitches, double bed
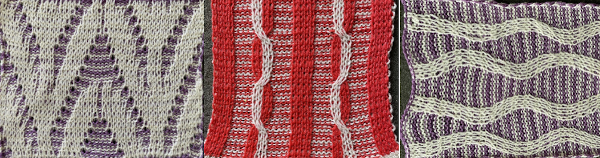
 Brother shadow lace, rib transfer carriage
 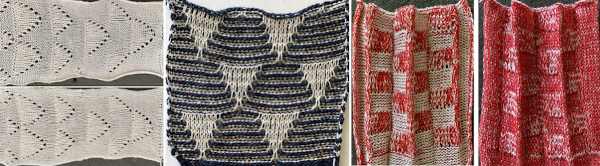 Combining knit carriage needle selection with racking
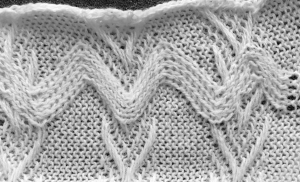
 Racked patterns 5: Passap/Brother 2
directions and samples from manuals including racking on tuck stitch and other ground variations, this on a tucked ground, in a thin yarn 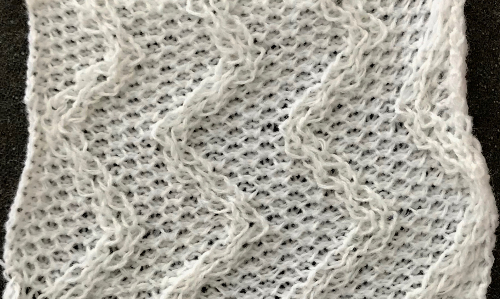
Embossed, raised textures are familiar in single bed work using stitch structures such as tuck, slip, weaving, gathered and ruched hand techniques, and in double bed as pile, blister, lace, and ripple patterns.
When embossing is done double bed, the background fabric is knitted in purl stitches on one bed, and the raised design or panel in knit stitches on the other. The first method produces double knit patterns where all needles are working on the back bed, coupled with selected needles for the pattern on the opposite be. The raised, embossed portion is a double knit, showing relief on a purl ground. The second method is to use knit/ purl combinations, easiest to execute with a G carriage.
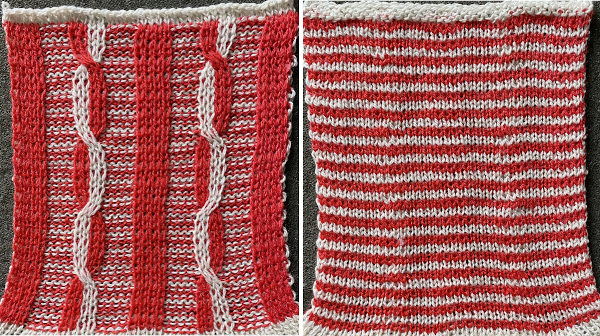
The striped ground occurs in areas where there are no needles in work and selected for patterning on the main bed. A cabled pattern to try: color changes in these instances are every 2 rows.
Because there are needles completely out of work on the main bed along with pattern selection, this is an instance where end needle selection must be canceled.
The first preselection row is from right to left toward the color changer.
Any transfers or stitch manipulations between or on either bed are made before the first pass to the right with the next color.
The knit carriage is set to slip both ways on the first pass in pattern from the left and stays there, the ribber is set to knit in both directions throughout. Depending on the yarn and the pattern distribution the all striped areas will be longer than those gathered by slipped rows. As usual, begin with a plan. After the first preselection row, transfers are made down to the ribber as indicated at the top of the chart. Cable transfers are made after every 14 knit rows, with stitches crossed on rows 15 and 31. After the cable cables are twisted, the stitches in the color that is going to knit in the next pass are brought out to E so they will knit in that color before the pass to the right, and again before the pass to the left, rows 16 and 32, Y.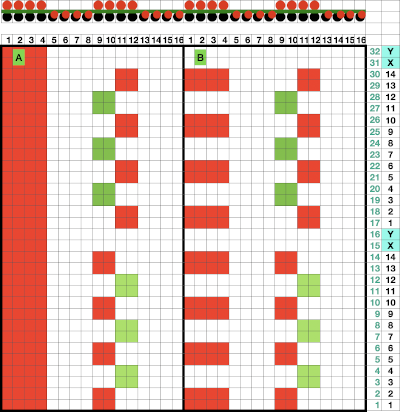 If the intent is to have solid vertical columns of color, those areas as in column marked A, need to be adjusted for using alternating colors as well. Using the repeat on the left of the chart
  After the first preselection row to left, transfers are made down to the ribber, stitches that will compose cables are selected in the pattern,
 colors are changed after return to the left, and every 2 rows, stitches in the color that does not knit become elongated.
  Because column A was not color separated for alternating colors, each color in the corresponding needles will knit with every two carriage passes, and the result will be a striped vertical column
 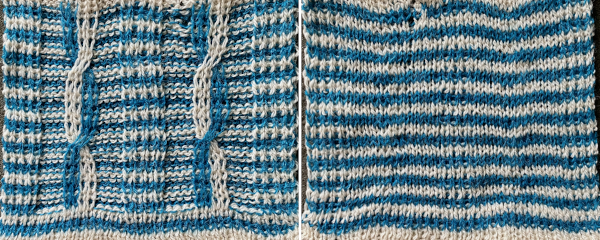 Cable twists should be planned to retain the correct movent, can alternate each time or repeat in series, charts for location and direction of twists are helpful to avoid errors. The solid vertical columns here are planned in only one color, could be programmed to alternate as well. The repeat used in my swatch includes a solid column on each side of the finished piece, the color swap in the twist at the top can be an unplanned error or serve as a deliberate design change
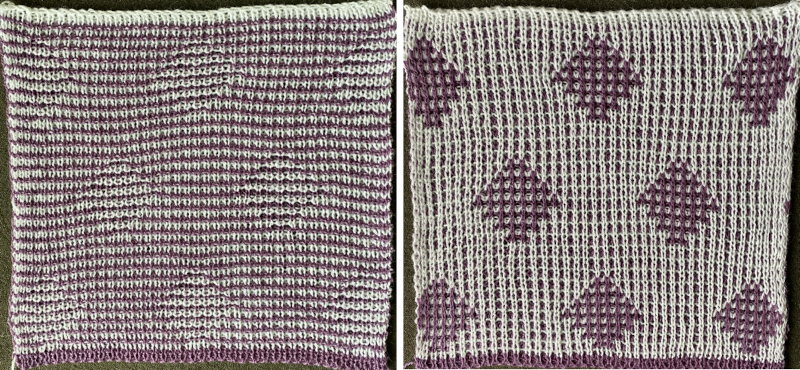
Analyzing the stitch structures involved for planning 2 color DIY:
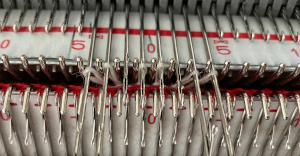
two-color ribs on a striped ground require cards or electronic repeats that select each color alternately. Fabric where the backing on the ribber or back bed in machines such as Passap knits all stitches every row is often referred to as half or full Milano. The backing may be also be knit using slip/ tuck settings.
Working in a single color, in half Milano and every needle rib course is followed by a plain knit row on the opposite bed, it is a 2-row repeat. In full Milano fabric, a row of every needle rib is followed by a plain knit row on one side of the fabric, and then by a plain knit course on the other. The repeat is three rows high. On every third row, the ribber carriage must be set to slip for one row, in the direction in which the carriage will be moving, prior to knitting a row with every needle preselection on the top bed. The setting is changed back to knit for 2 rows when the carriages reach the opposite side. The required cam change will happen on alternate sides.  Both sides of the fabric have small stitches alternating with longer ones formed by slipped rows. half Milano
  full Milano
 Often an all slip setting is used on the top or front bed, the result has less elasticity than a full needle rib, and the knit will have a tendency to curl toward the side which shows fewer knit rows, so in a finished piece side borders in the same stitch type should be considered.
Adding color changes in the ground requires altering the repeats.
Hand techniques may be used to modify ribs by cabling, racking, transferring stitches to the backing. When knitting again on empty needles, if you want eyelets, simply keep knitting. If not, hang the pull loop from the adjacent stitches on the opposite bed before resuming knitting.
Cable color placement must be reversed at the cable crossing.
Racked sequences are made along with stitch transfers.
To emboss other than vertical ribs the needle selection needs to be changed every 2 rows. This can be done manually, following a chart, or with programmed patterning whether with punchcard or electronic options.
Plaiting can produce 2 color variations without color separations.
When increasing stitches, moving the adjacent stitch onto the new needle, leaving it empty, will change the eyelet location a stitch away from the edge.
When moving stitches for decreases, lateral transfers may be made with multiple stitch transfer tools for different effects.
Transfer carriages can speed up the process.
To start the pattern one can begin with a cast on only on the ribber or back bed, or transfer non-selected stitches after the first preselection row on Brother as seen in most of my previous swatches, with 2 rows knitting on the backing alone, and 2 rows of the main color knitting on both beds. With either cast on, the preselection row is made toward the color changer with needles in work position on the main bed, so the knit carriage needs to be set to slip so as not to pick up unwanted loops on the top bed as it moves toward the color changer, and will remain set to slip both ways throughout the pieces.
As mentioned, the term Milano refers to ribs composing weft knit structures where one side of the fabric knits more rows than the other.
In half Milano, a single long stitch is created in the pattern color, in full Milano small stitches alternate with a row of longer stitches created when traveling back to the color changer.
The preselection start is determined by the type of long stitch, and how the repeat is programmed. I prefer to start my repeats with knit rows.
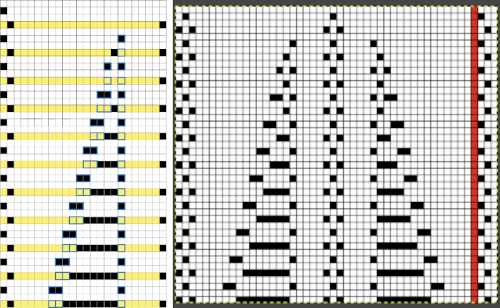
A half Milano swatch is begun with all stitches on the ribber bed, COR: the needle actions for each design row if patterning were on every needle are shown below. Designing may be easier to plan or chart on a template, followed by actions for each pattern design row with the second color. Half Milano on left, full Milano on right for use in 2- color-work. 

 Half Milano stitch formation on the left, full on the right
 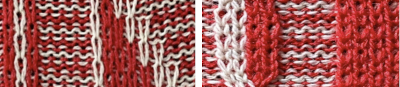 Planning for a half Milano shape design outlined with added borders and with vertical columns at intervals in the alternate color: every 4th row is marked in yellow as the underlying template. A simple shape is charted out, marked with black cells, the pattern starts with a knit row. Preselection in slip stitch is made toward color changer, black pixels will pick up stitches moving to the right, slip top row moving to the left. Decreasing to maintain the dominant color shape is not necessary, while the border, in this case, is shaped by decreases made by transferring non-selected needles to the ribber before knitting with that color from left to right. Border cells are added immediately up and to the side of those planned for knitting on the previous row, their respective cells are outlined in green. Software programs make it easy to alter the repeats and add borders if wanted
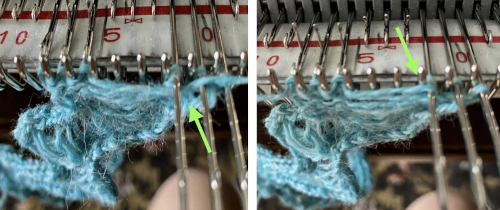
 Actual knitting will indicate whether adjustments are needed in making the repeat continuous vertically or with some added striped ground only rows in between. I had not noticed a stitch hung up on a gatepeg, explaining the distortion in the row marked by yellow arrows, where the yarn was caught and pulled up.
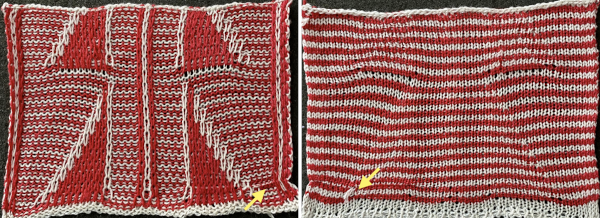
These techniques share some features with the category of double bed appliqué, where one bed knits the main fabric while the other creates the shapes, which are attached to the fabric as you knit. In the finished fabric the purl side is the right side, the ground may be created in a solid color or striped. Both shapes are knit at the same time, as opposed to performing the technique on a single bed. As usual, the color changers should be threaded so that yarns feed smoothly and do not cross. With simple shapes as in shadow lace, no punchcard may be necessary, while cards or electronic repeats simplify the steps and help prevent mistakes.
In Japanese machines, for each row in the charts 2 rows are knit in the background first on the ribber, followed by 2 rows in the shape color on the alternate bed.
Smooth yarns and contrasting colors that still allow identifying knit structures easily are best. There is a limit to the number of colors that may be knit at once. Beginning with hand techniques: it is good to chart out the design before tackling it, and with color changers limited to holding 4 colors, if planning several shapes, the sequences in the color changes may need to be plotted out ahead of knitting as well.
Purl loops are the tops of the stitches in the row immediately below the stitches on the needle on the opposite bed, marked in green, while sinker loops consist of the yarn that is between the stitches on the needles, marked in red. Hanging the purl loops will help to eliminate or reduce the size of the eyelets. Take care not to use the sinker loops between the stitches, marked in red. 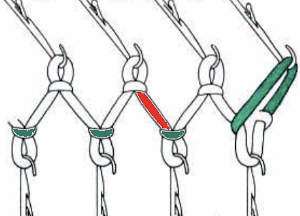 In executing the fabric as a hand technique, the main bed is still set to slip in both directions, the ribber to knit every row
1. Knit 2 rows on the ribber alone
2. Bring needles to be worked in the pattern at the upper working position D or E, hang loops from ribber if there are increases if preferred, knit a row
3. Bring needles in pattern manually to D or E again, knit the second row of the appliqué
Repeat steps one and 2
In published directions color 1 usually refers to the ground color, which knits on the ribber only. Color 2 generally knits on the patterning bed as well. When most needles are in work on either bed, the tension for the yarn on that bed approaches the one used for that same yarn if it were being used single bed.
Punching all squares in 2 consecutive rows, or programming 2 all-pixel rows filled in completely across followed by two unpunched blank or all white pixel rows makes the process quicker. Punching or filling in single rows may be done as well, but requires elongation X2.  Increases or decreases may be done on more than single stitches, and less frequently than with every pattern pass.
Fully fashioned shaping alters the edge of the appliques and places the eyelets in pattern, at or away from the edges. In Brother machines preselection of needles needs to be retained after any stitch manipulations.
Adding shapes with additional eyelets: practice shaping, keep notes, fully fashioned=FF  Begin with simple shapes, examining the quality of increases and decreases, whether single or multiple, eyelet formation. Picking up from the row below before the next pass with the contrast color eliminates eyelets
 picking up from row below at any point during knitting
  decreases in the number of stitches, in contrast, may be made by transferring down to the ribber prior to changing back to the ground color
  Simple increases or decreases are made by moving stitches laterally in either or both directions. Increases may be made by moving contrast color stitches laterally, followed by the choice as to whether to fill in the empty needle or allow it to create an eyelet.

 Fully fashioned increases or decreases are made by moving a stitch or a group of them to the adjacent needle/s to the left or the right and then taking the double stitches back to the original position, leaving a single empty needle for the planned eyelet formation. There should not be multiple needles with no stitches on them unless the goal is to expose a stripe of ground
 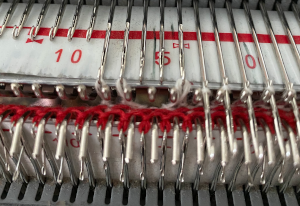 typically, in these exercises, there should be single empty needles after transfers, making certain proper needle selection for the pattern group is maintained
 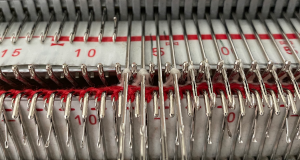 Combining eyelets with lateral increases
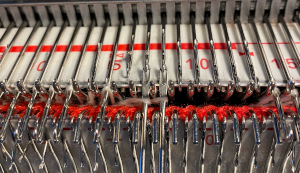

 When transferring stitches, watch for any loops getting caught on gate pegs, as seen on the left below, increases and decreases may be pre-formed on more than single stitches
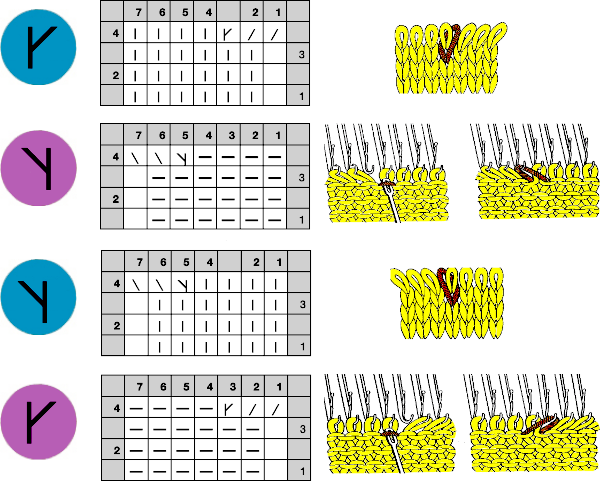
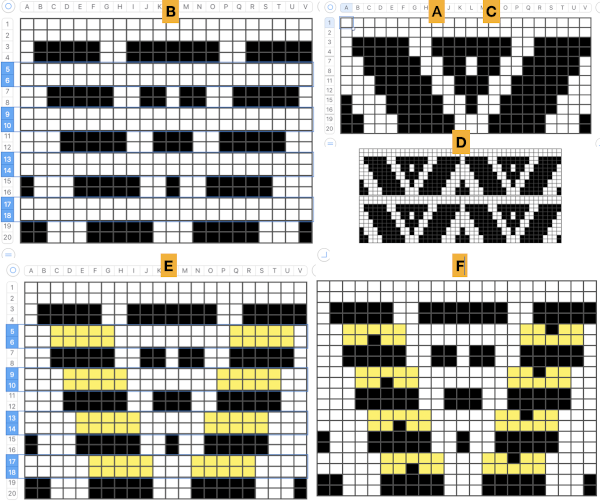
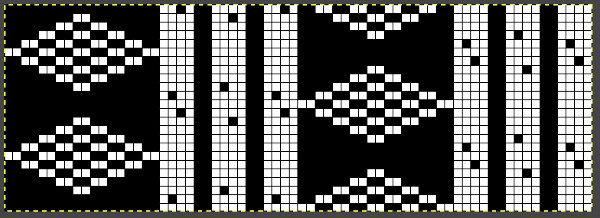
Planning a medallion: cyan cells represent transfers to the left, the magenta to the right. 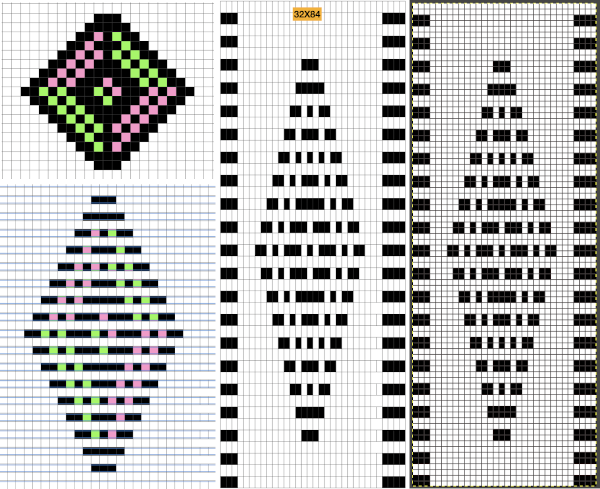
 At the top of the single medallion, the stitches were transferred to the ribber prior to knitting with the same color once there was no needle preselection for it on the top bed.
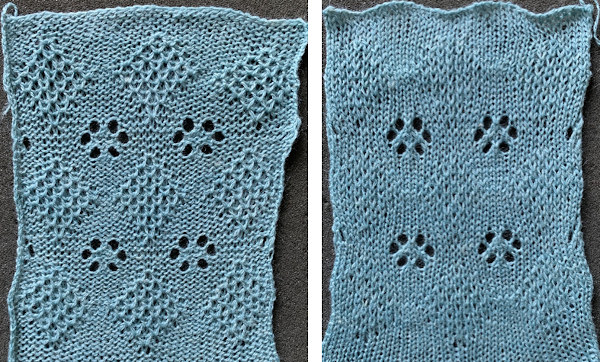
Programming repeats to help track needle transfers as well: it is possible to start with a published repeat, though once the principle is understood, required markings for DIY become easier. Electronic machines leave one free in planning repeat width. In this test, a repeat from the Stitchworld pattern was used. In its built-in memory format, it will not work, the repeat needs to be altered. Each sequence of passes with the LC consists of 4 passes, followed by two rows knit with the KC. Two rows are added to each lace passes sequence, which will knit on the ribber only, in the contrasting color. Transfers to left and right are marked in cyan and magenta. The specific software used or machine model may require that the repeat be flipped horizontally prior to being knit, true on my 930. Markings on the left are for ribber actions and settings, those on the right for the main bed. K indicates that that bed will be slipping, K that it will knit. 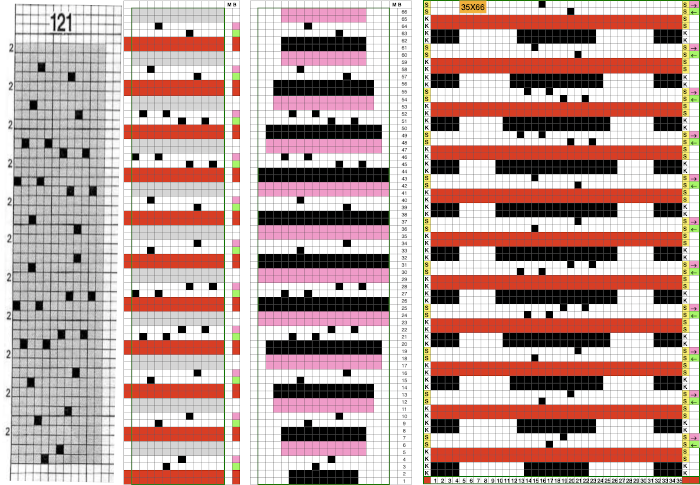 The first preselection row after the chosen cast on is from right to left with end needle selection canceled and the knit carriage already set to slip in both directions, with all required needles on the top bed in the B position.
Transfers are made prior to carriage passes made with the pattern color, in this case, white. If a transfer patterning row follows a white row on the ribber, extra white rows will appear on the striped ground seen in this test, where the ribber remained set to knit every row in both colors 
 To eliminate the extra white rows, the main bed stays set to slip every row, the ribber settings alternate. It is set to slip for two rows immediately after knitting with the red yarn, then will be reset and knits for 4 consecutive rows. Transfers to create eyelets are made on selected needles on each of those two rows, always toward the carriage, even as the transfers themselves change directions as the angles of the shape decrease toward its center on the top half of the design. After the first transfer and the carriages travel to the right, a long float will be evident, will “disappear” on the return to the left.
 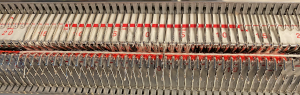 Patterning selection will reappear as the carriages return to the left.
 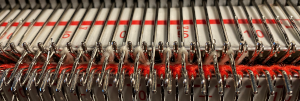 The color is not changed. The ribber is set to knit in both directions again, forming stitches on both beds for the first two rows, followed by a color change and knitting in the red, on the ribber only for 2 rows, completing a sequence of 4 knit rows before the ribber being set once more to slip. For consistency, I changed the settings on it to slip before picking up the white, changed it again after preselection of lots of needles meant the top bed stitches needed to be knit on both beds again. The first proof of concept, observing choices: as with other samples, the first patterning row after all stitches are transferred to the ribber
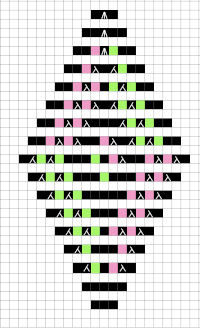
 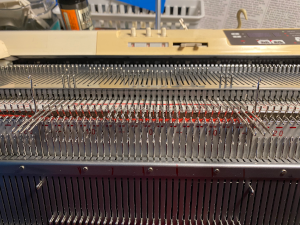 requires a choice as to whether to pick up from the row below or simply allow empty needles to pick up loops on the next pass, the choice throughout here, marked A. Reducing stitches may be done by transferring down to ribber, B, or lateral transfers, C. D marks the spot for a possible shape design shape. Arrows on the purl side point to the direction of transfers, cyan to left, magenta to the right
 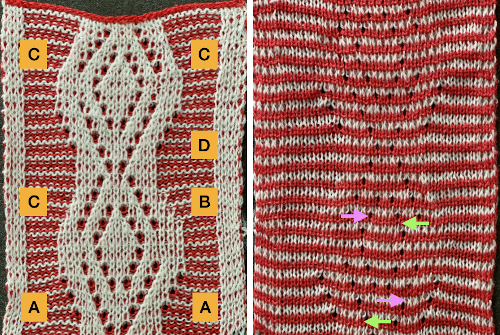 As with single bed lace, the first pass after transfers creates loops on empty needles, which here need to be kept in upper work, D position after transfers. For non Brother knitters, Brother positions are A, B, D, E, skipping C.
 Knitting over the loops on the next pass on that bed completes the stitch. This design is knit as continuous, the striping at the bottom is wrong because the red was not picked up after the first 2 rows knit in pattern with white, most sequences for the remaining fabric are 4 passes with white in the feeder, followed by 2 in the red. All eyelets here are reduced in size by picking up from the row below, all transfers for decreases are made laterally, the border is set to a width of 4 stitches, the pivot point for the repeat has been narrowed
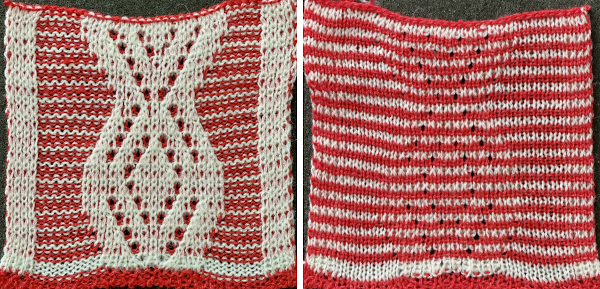
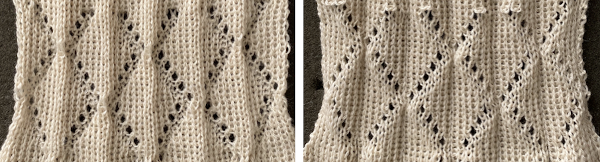
 the differences at the edges of the shapes.
 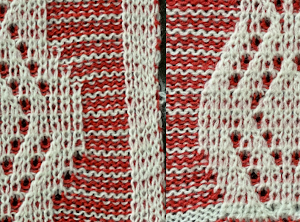 Many of the same principles may be applied to designs using tuck stitch settings, where the striping will appear vertically rather than horizontally
2 color ribbed brioche stitch on Brother knitting machine 1
Lace transfers meet fisherman rib, 2 color ribbed brioche on Brother machines 2
Geometric shapes on ribber fabrics with tuck stitches 1
More on Lace transfers in single color rib
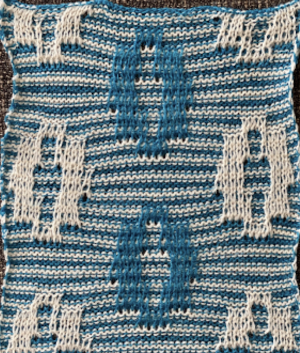
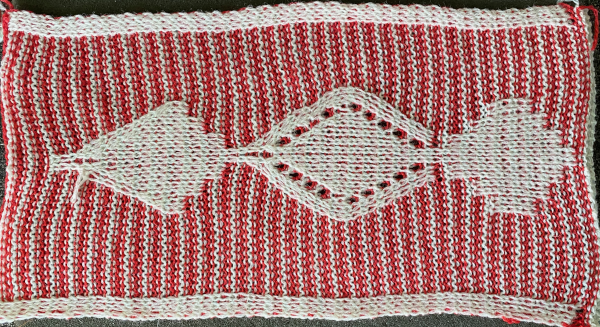
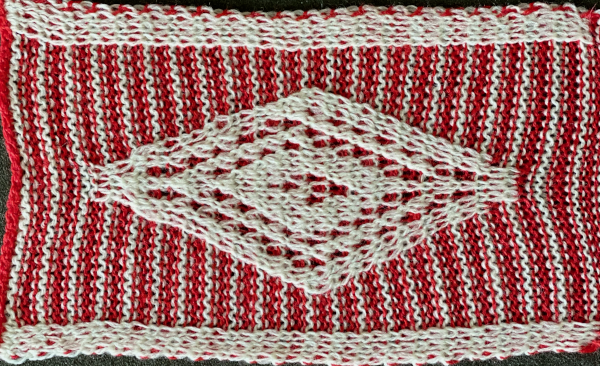
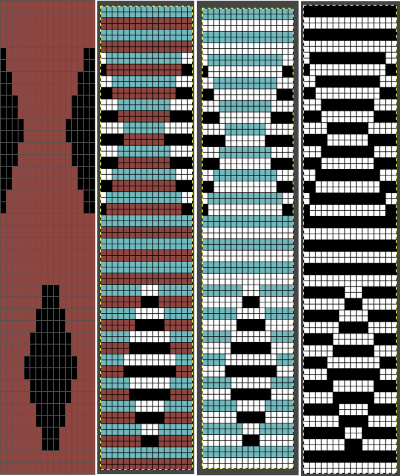
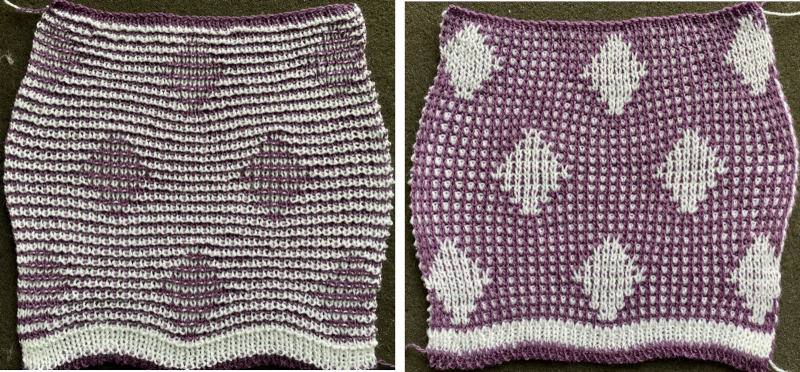
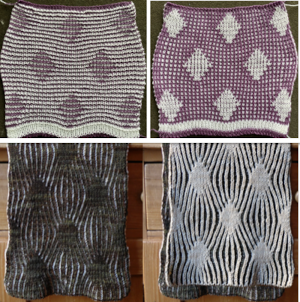
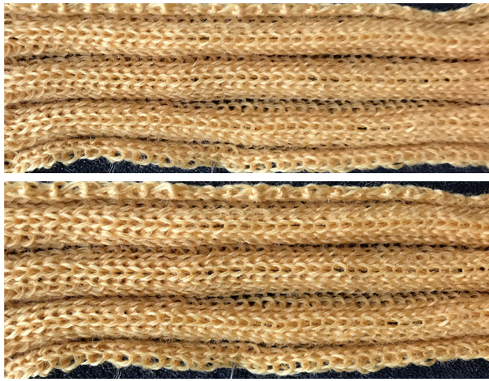
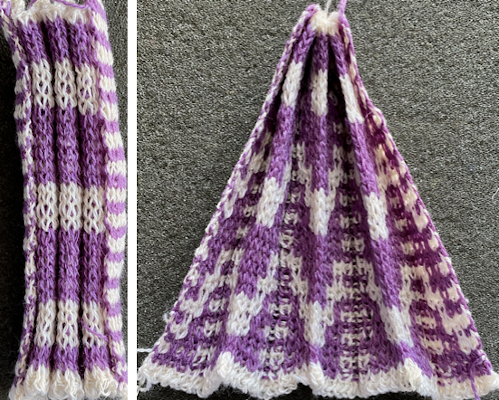
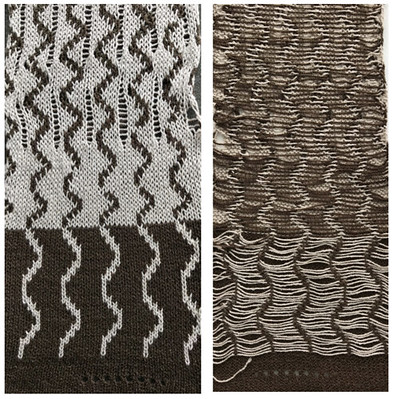
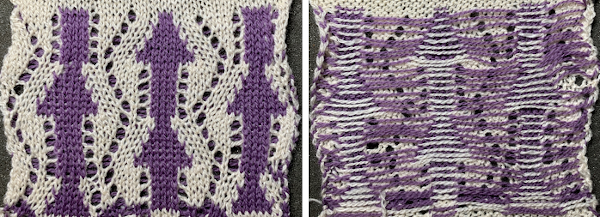
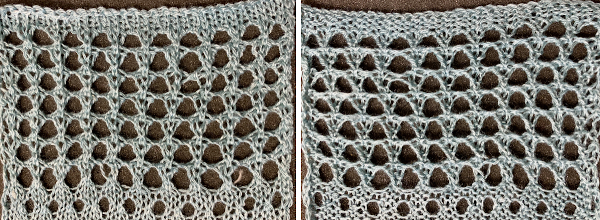
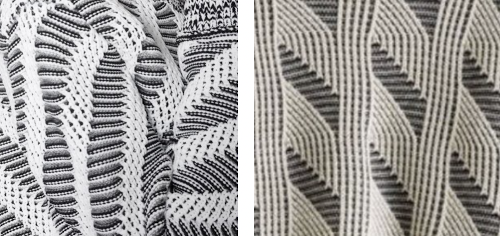 The inspiration fabric recently found online, source not known
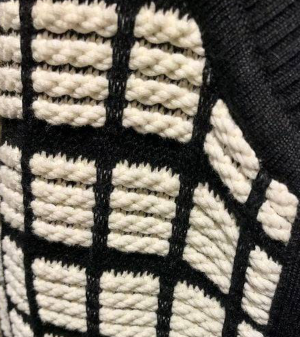 Analyzing the structure: it appears the fabric is knit with slip stitch textured patterning on the top bed, and occasional needles in work on the ribber creating elongated stitches that float on top of the light-colored rows.
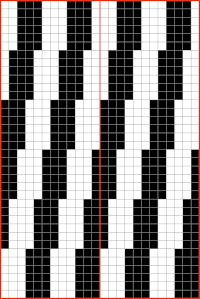
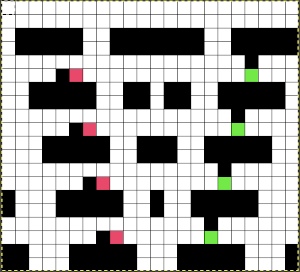
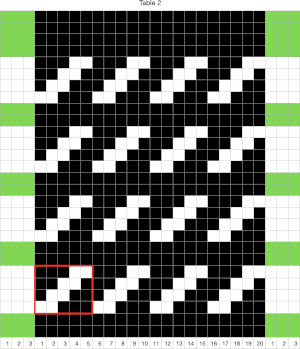 In slip stitch patterning the white pixels slip, the black pixels knit. This repeat is 20 stitches wide, so not usable for a punchcard machine. The first draft is 20 stitches wide by 32 rows high
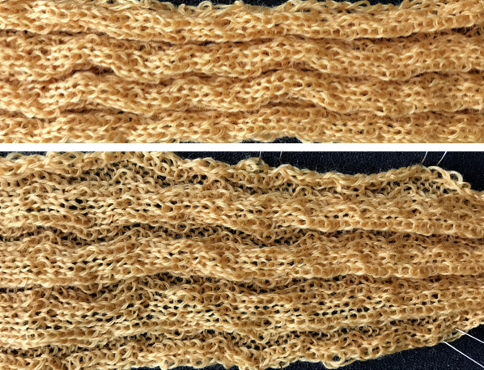
 Any adjustments in the dark color stripe between will need to be made within the repeat itself, the floats in the light color will be wider by using a simple color reverse. The color reversed, modified repeat is now 20 stitches wide by 28 rows
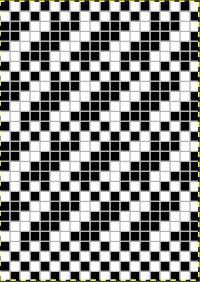
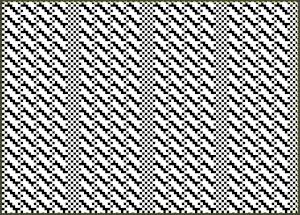
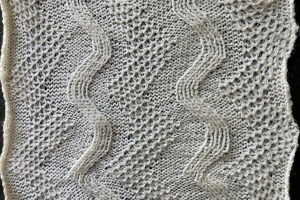
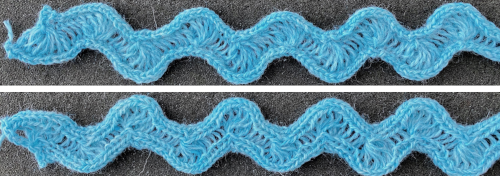
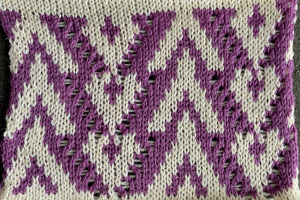
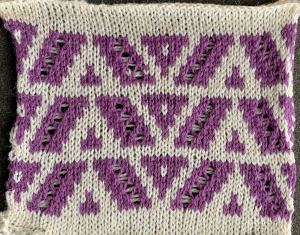
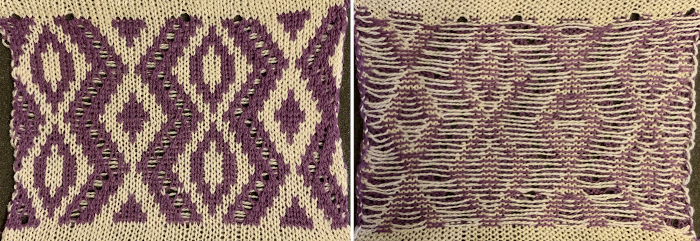
 A comparison to the mirrored original inspiration, likely knit in thicker yarns
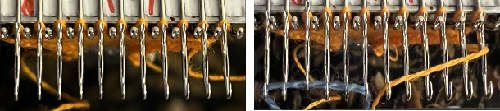
 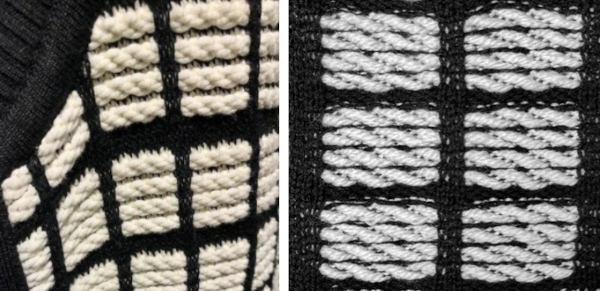 The knitting process: with any textured or very lacy knits casting on and binding off require special consideration.
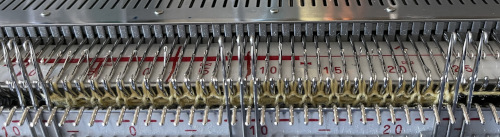 Read the first row of the pattern, cam set to KC1 to ensure end stitches are knit when patterning occurs only on the top bed.
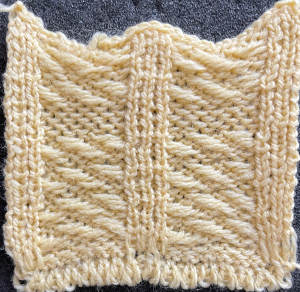 The cast on was deliberately loose. To tighten it up at the edge of the body of a narrower knit, every other loop can be picked up with a latch tool or crochet hook moving toward the yarn end at the cast on edge and is pulled through the previous one, producing a chain stitch. When the end of the row is reached, the yarn is pulled through the last chain and secured.


 an alternative symbol for the same technique.
  The techniques may be used in variations, using 3 or 4 stitches. Yarn and tension are significant factors when any number of stitches are moved across a fixed span on a metal bed machine.
 Tuck stitch groups of stitches are gathered in needle hooks, commonly with knit stitches on either side of the gathers.
 More on tuck and slip stitch
 Stitches may be twisted in the body of a knit on the machine by inserting a tool front to back through the stitch, twisting it to the right or left, rehanging the stitch in the same location.
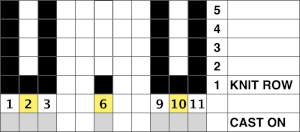
 When a ladder needs to be eliminated, there are several ways to deal with returning any empty needles to work. If an empty needle is brought back into work, the first pass to the opposite side will create a loop on the empty needle, the second pass will complete the stitch on that needle, and an eyelet is created. If one wishes to minimize the eyelet, one method is to pick up the purl ridge from the row below on either the right or the left of the empty needle, as illustrated in the fully fashioned increase chart, another is to twist the last ladder and rehang the twisted loop. If multiple needles are out of work, then an e wrap cast on by twisting stitches on every other needle is needed unless needles are brought back into work one at a time, creating secondary eyelet patterns.
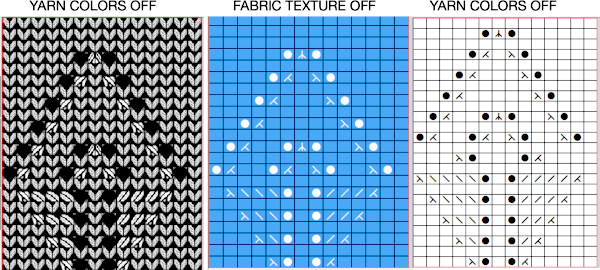
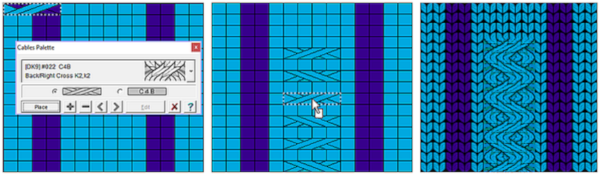
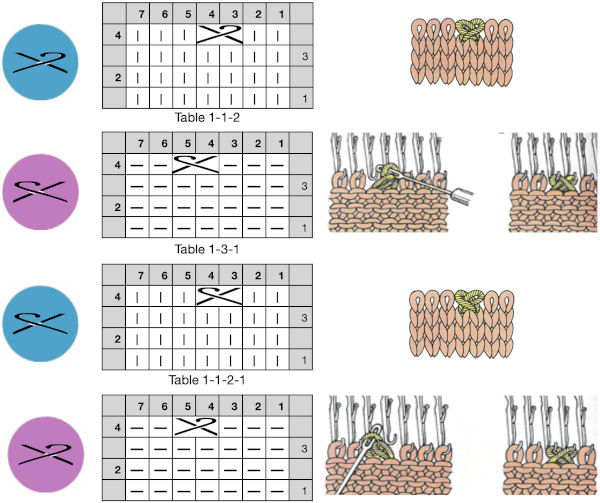
 Many cables that can be created in hand knitting are not executable on the knitting machine because of the fact that the yarn needs to move across fixed widths on a metal bed and the moved stitches need to be large enough to allow the knit carriage to form new stitches properly as it travels back to the opposite side on the following pass. There are techniques that can help to make wider cables possible, it is best to test crossing tolerance before planning or following full repeats whether published or self-drawn.
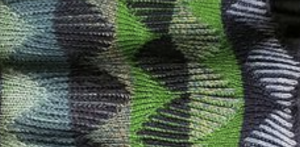 The plan is to create a repeat which may be knit using color changes every 2 rows. Each design row knits each color twice, so the standard built-in KRC separation is not a consideration, though the same cam settings may be used in those fabrics as well.
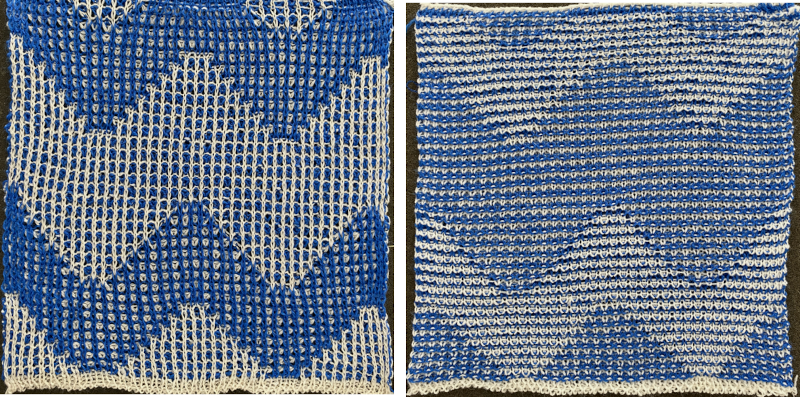 Lock settings are easier to achieve on the Passap than switching out cam buttons in Brother machines. This was knit using 4 carriages. Color one knits with the main bed set to tuck both ways, color two knits with the main bed set to slip both ways. The slip stitch reduces the width of the fabric considerably
 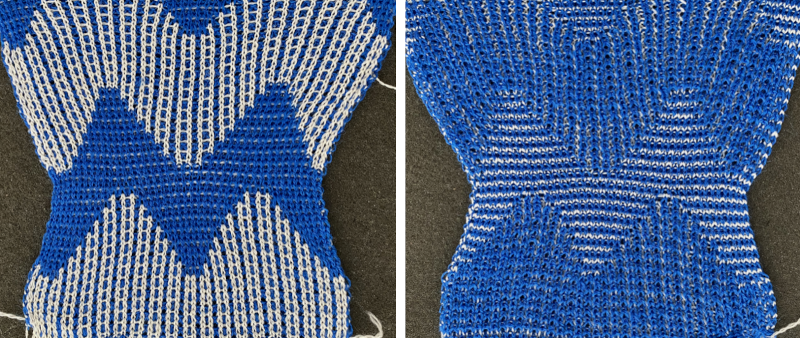 Here each color alternately tucks and slips. The choice of cam buttons matters, tucking first from left to right, slipping from right to left, with cam buttons set COL after the first preselection row
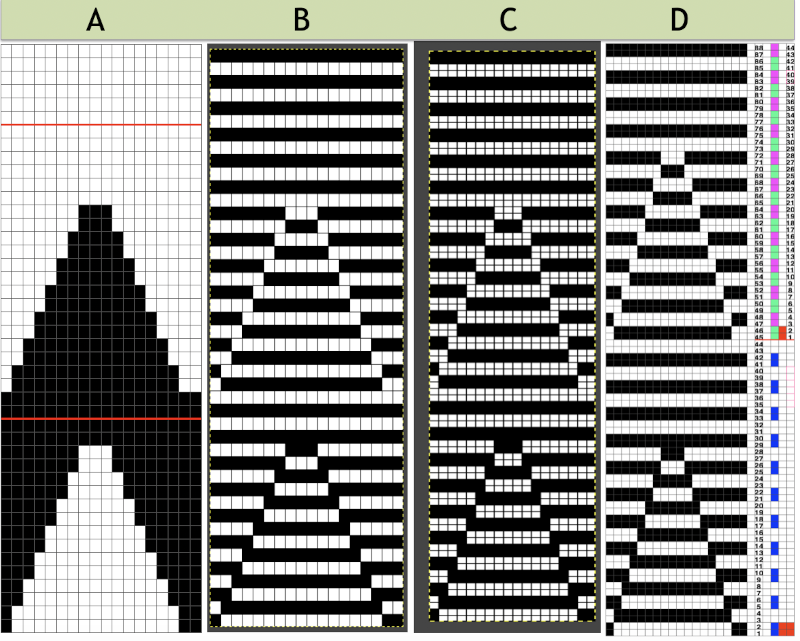
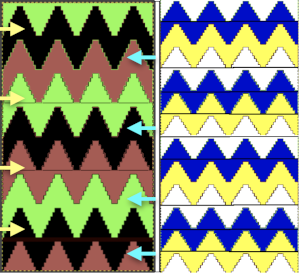
 This last cam setting appears to my eye to produce a texture “close enough” to the inspiration fabric. Attempting to add more colors: the repeat, D, is still 18 X 88 but is now shifted slightly.
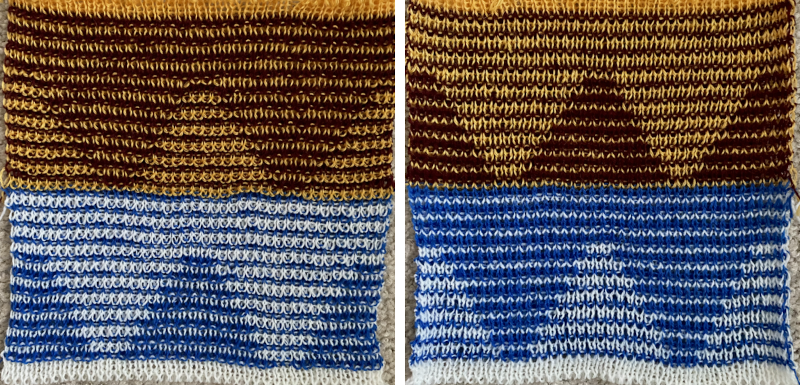
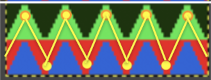
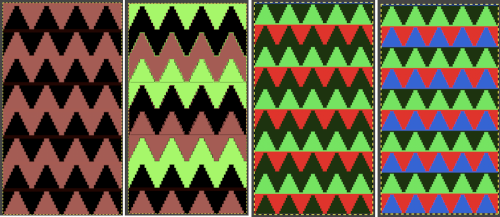 The existing repeat may be reduced further to 18 X 64, eliminating some of those extra rows in the center of the chevron shape
 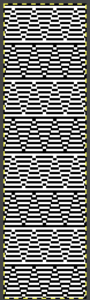 Whether or not the design is intended to retain chevron shapes in alternating textures, actions may be plotted pre knitting in any way that visually makes sense to the person designing the pattern and tools available to them.
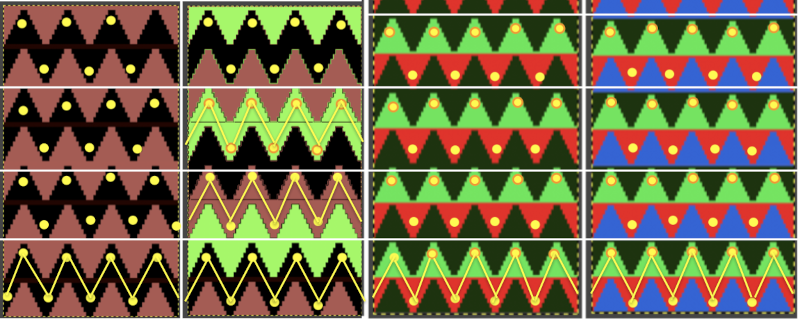
 Reversing the png so that the more textured stitches will begin with the color in yarn position 1
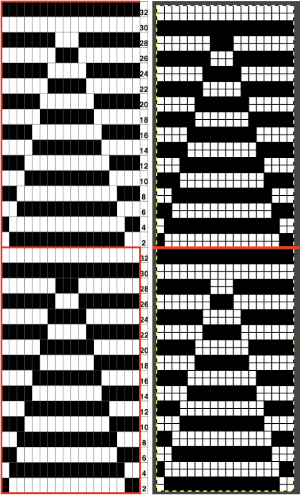 Adding colors can be planned cautiously or allowed to happen randomly depending on the preferences of the designer and end-use. Ribber fabric designs are not visible until several inches have been knit, too late to catch color sequence errors. Some machines allow for memo placements or sounds to help track color changes, but only within the initially programmed repeats. A quick spreadsheet can provide customizable checkboxes or added information. For an attempt to retain chevron shapes in different textures:
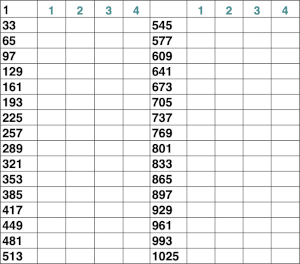

 A PDF including row numbers and space for notations
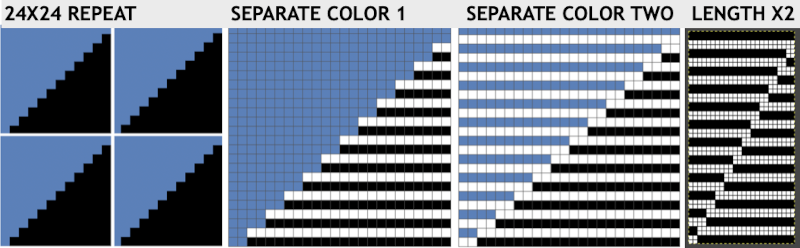
 Continuing on a 24 stitch repeat, the original design may be rendered at double height and separated once more, doubling the separation height to 96 rows
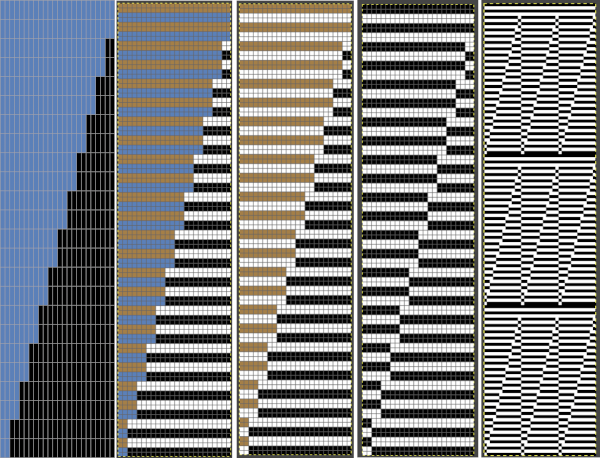
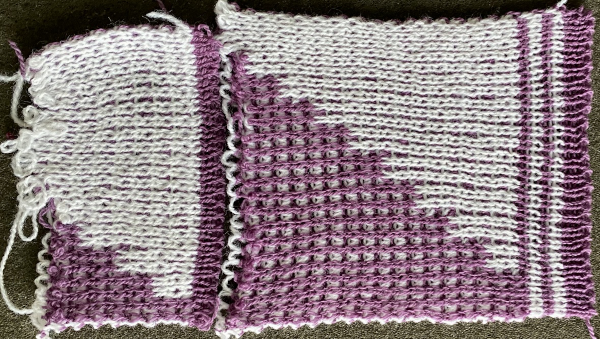
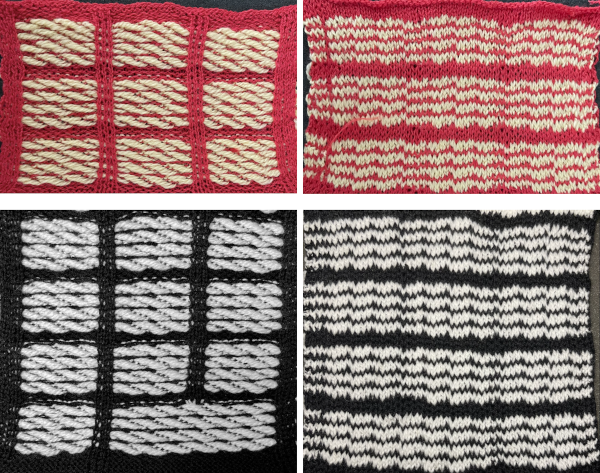
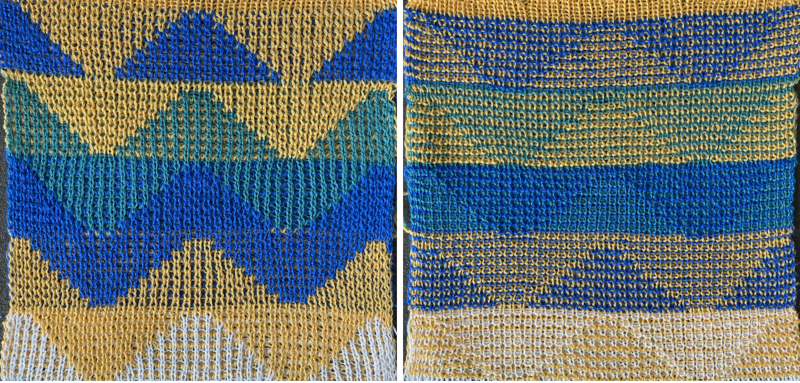
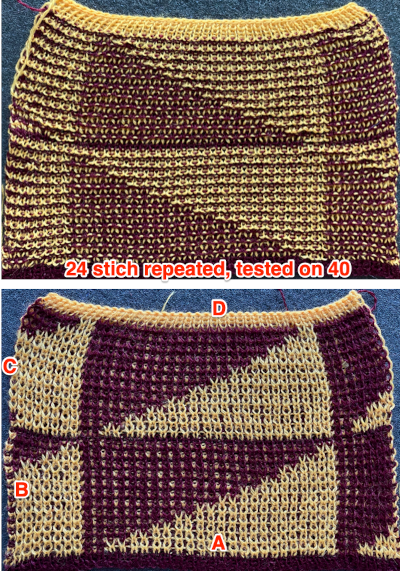
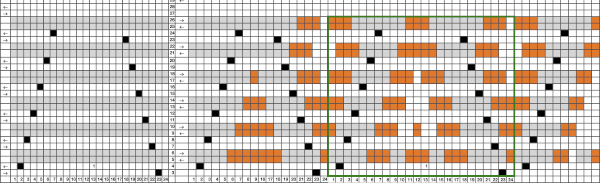
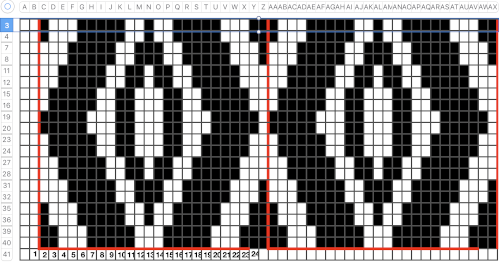
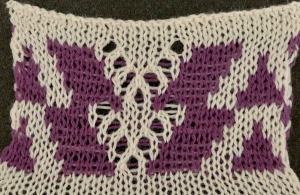
 Another even more complex inspiration from a sweater attributed to Falke, Spring 20 collection, using similar stitch structures, but in addition, also transferring stitches between beds exposing a purl striped ground.
 Segments marked with green cells may be grouped in a variety of ways to create repeats in different widths, asymmetrical ones are also a possible consideration
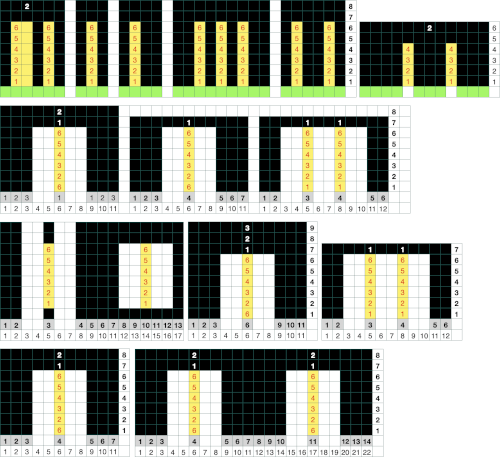

 The usual single bed tension for this yarn might be 7 or 8, depending on stitch type. The greater the number of knit stitches on either bed, the closer the tension will have to be adjusted to that used in stocking stitch for the same yarn. Wool also has memory, will want to roll to knit side at the top and bottom, to the purl side along vertical edges, steps often need to be taken to reduce the rolls. Using this repeat
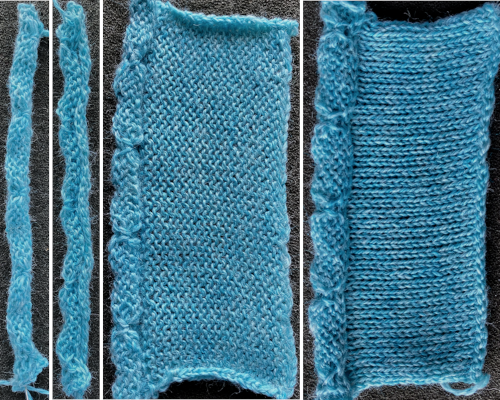

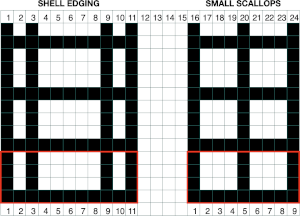
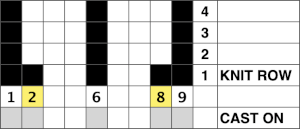
 A variety of edgings may be produced by simply hooking up ladder floats created by leaving needles out of work after X number of rows. In this instance chain cast on over 11 needles, dropping the center 5 chains and taking the corresponding needles out of work.
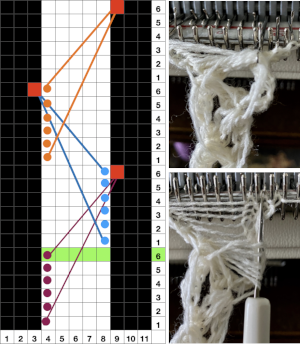
 This variation uses the thicker blue yarn, knit at tension 4; 12 rows are knit before hooking up the lower groups of six ladders, which makes the floats easier to pick up or count using a single eye tool. Repeating selection on the same side allows the trim to be easily bent around corners
 Trims using holding alone border on the possibility of automation using slip stitch programming. A simple one to start: cast on 7 stitches, with the center needle out of work. Knit a few rows, set knit carriage to hold.
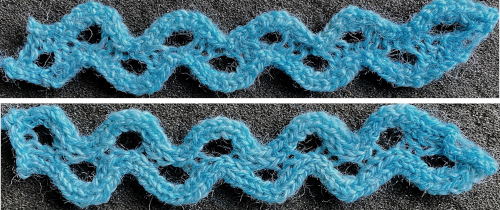


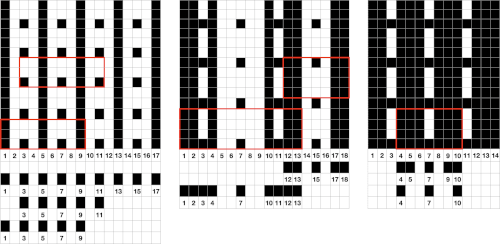
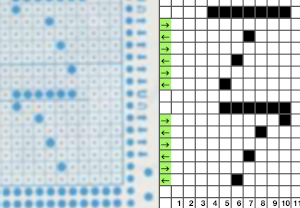
 This is from a Japanese language manual for the 891(1987-89) punchcard machine, which appears to introduce the idea of replacing the use of the knit carriage and plaiting feeder with one specifically designed for intarsia
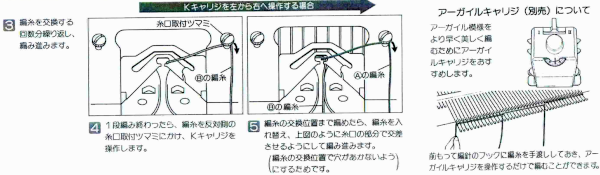
 Brother punchcard machines do not advance pattern rows when two carriages are used for needle selection as each carriage begins to move from the opposite side, the same preselection is repeated. This means editing is required at times if the same designs are to be used on electronic machines, particularly true in lace combination fabrics. The process has been discussed in posts on automating lace edgings with slip stitch settings.
 this is how the yarn is laid over those 2 needles after the first tuck row is completed,
  and both when using the card and in the first electronic repeat there will be a third tuck loop that is laid over the needle holding the 3 stitches. This is the appearance of the stitch formations just prior to an all-knit row
  Here analyzing the actions of the punchcard, marking rows according to card actions, the repeat is expanded to include the extra duplicate rows. Though the repeat remains 24 stitches wide, it is no longer usable for use on a punchcard machine.
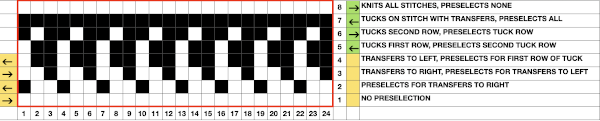


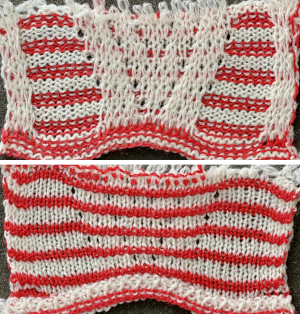
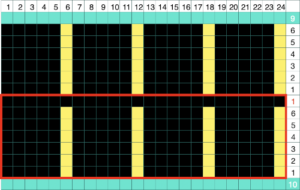
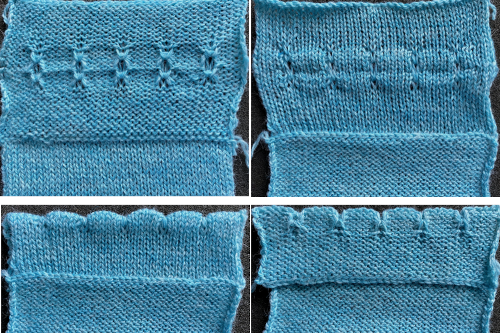
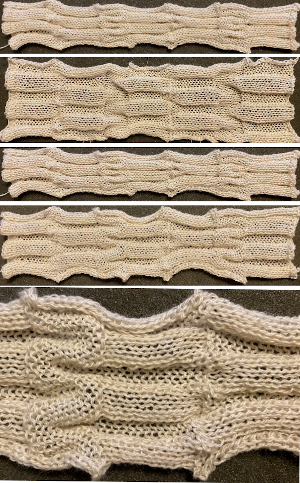
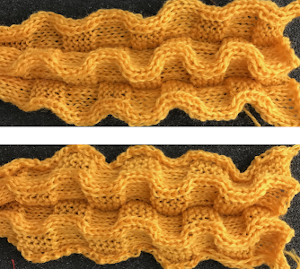
 Here the fold is created by 2 stitches tucking for 2 consecutive, then knitting on the same needles for 2 rows on regularly spaced pairs of needles on either bed. Most knitting is on a single bed. A lacey series of eyelets begin to appear, and in some random racking at the top of the swatch, the possibility of developing a secondary pattern due to the combination of racking and tucking begins to show. The middle image is of the fabric slightly stretched. Passap
 Brother: the ribber can do the stocking stitch background, every needle in work, carriage set to knit. The setup is the same as the Passap diagram. A repeat with 2 black rows of squares followed by 2 white can be programmed on the top bed. On every needle selected rows, pairs of needles will knit, on the white, no selection rows the same pairs of needles will tuck for 2 rows.
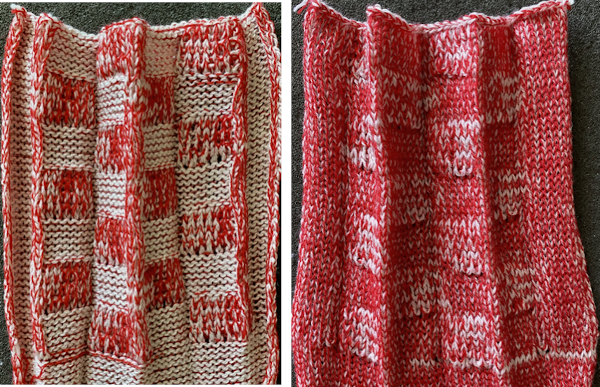
  Moving away from vertical ribs becomes significantly easier if one has a G carriage. The alternative option is to create geometric folds that require transferring between beds. Any of these fabrics are best knit in a yarn that has memory and can spring back. Yarns such as acrylic can be permanently flattened by pressing, resulting in loss of texture. A quick experiment: black cells represent knit stitches, blue purl ones
 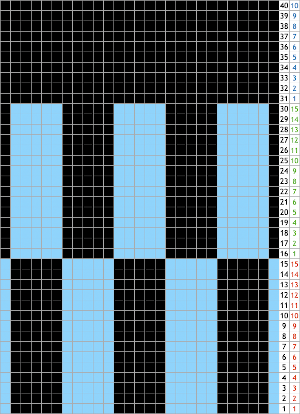 The needle setups: after casting on, transfer for a stitch configuration based in this case, of blocks that are 5 stitches wide. A single needle on the opposite bed is used on each outside edge of all needles in work.
 The repeat, 10 stitches by 40 rows.
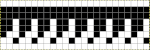
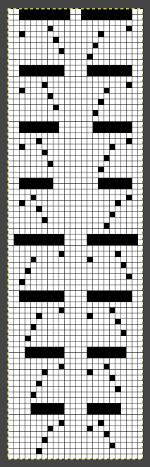
 Pleated one color “shadow lace” in
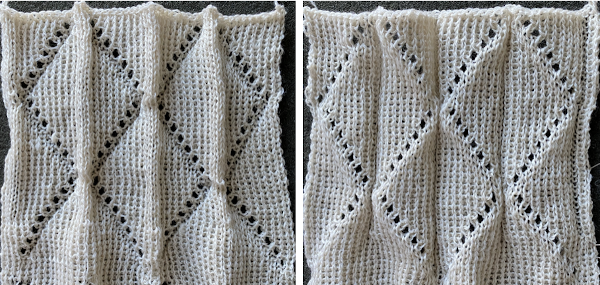

 offers 4 punchcards for use with this technique
 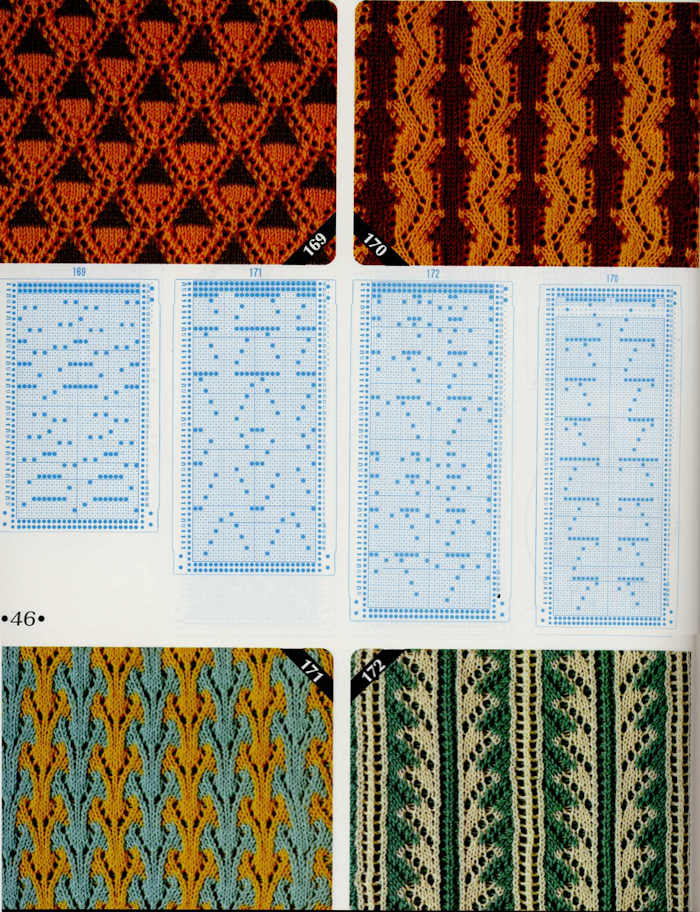 I chose to work with #170. The lace carriage in the Toyota models operates from the right side rather than the left as in Brother. The direction of the arrows marked on the card actually indicates movements for the carriage operating from that side. That fact is taken into consideration planning a possible Brother punchcard repeat. Lace direction arrows are matched based on the punchcard image being mirrored horizontally. The card in its original version is imaged on the left, mirrored on the far right, the proposed Brother punchcard in the center
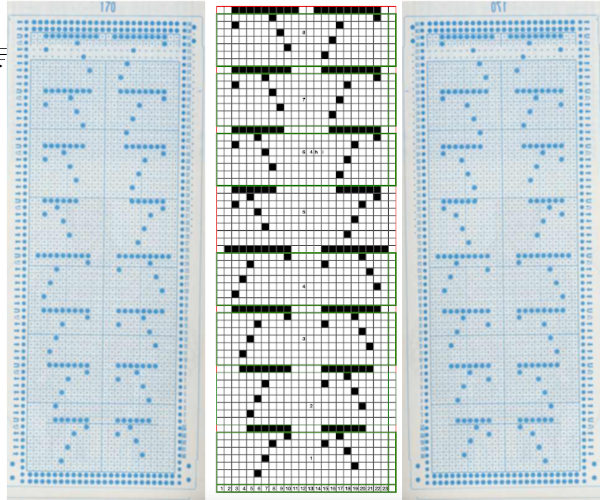
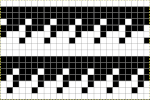
 The proposed Brother punchcard repeat is now expanded for use on the electronic machine, ready for converting to .bmp in Gimp. Numbers in the middle of the chart on the left helped keep track of repeat segments. I also used red dots initially to mark segments as I had completed in the expanded the repeat, then erased them
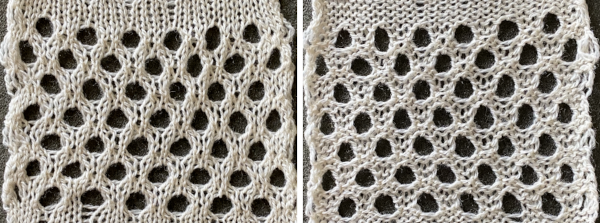
 I expected something like this
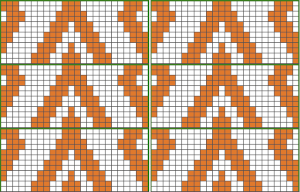
 Regrouping: the easiest place to insert eyelets is in the dominant, background-color
 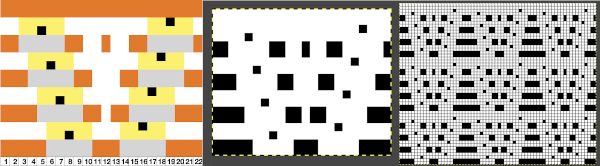 The 930 .png
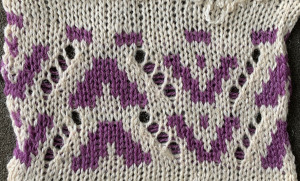 Can the exchange of the color positions in the yarn feeder create colored shapes with eyelets on the white ground? not only does it not do so in a way I liked, but my machine was having none of it as well
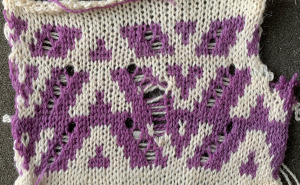
 It’s good to start with a small repeat.
 Taking it to continuous shapes and checking them in repeat: red cells represent transfers to the right, cyan ones the transfers to the left. The empty cells adjoining each of both colors represent the location of the doubled-up stitch after the transfer is made
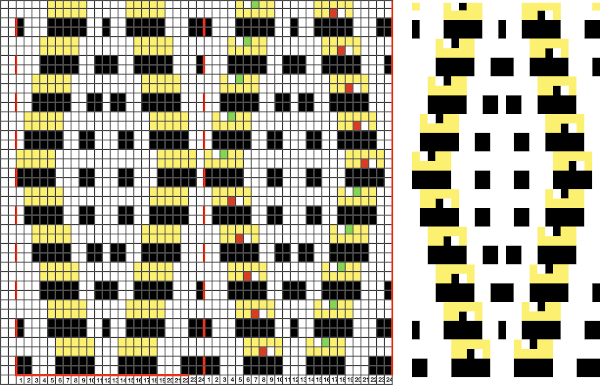
 I like to check tiling for the repats along the whole process
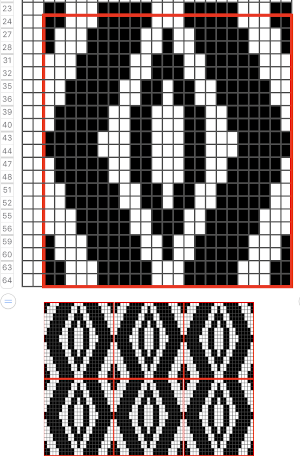 Though the repeat is 24 stitches wide, it is not suitable for use on the punchcard machines in this format, its tiled test
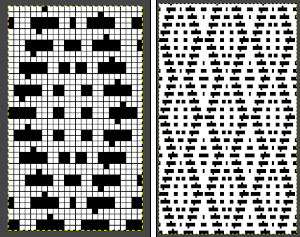
 Adding another contrast color stitch to shapes will make the number of stitches on either side of the eyelets consistent
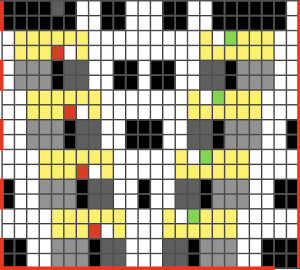
 and with the addition of two blank rows at the top of each segment.
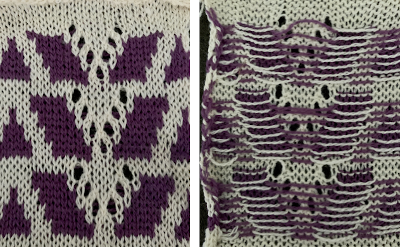 The possibilities are endless, with some patience, they can be manipulated to meet personal preferences and taste.
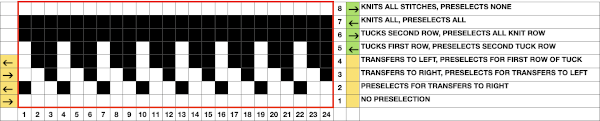
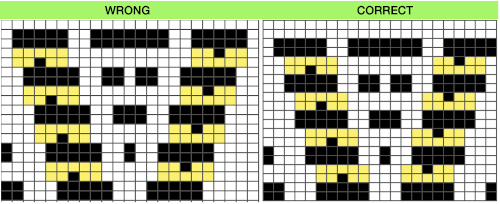
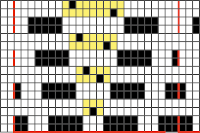
 Working out an electronic repeat: the punchcard repeat is on the bottom, the expanded electronic one on top, yellow cells highlight rows with tuck stitches
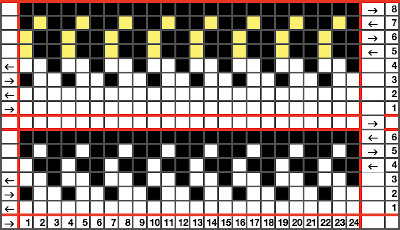
 Returning to Volume 4, here is a combination of lace and tuck repeat that appealed to me. I am repeating a process akin to that used in programming the
 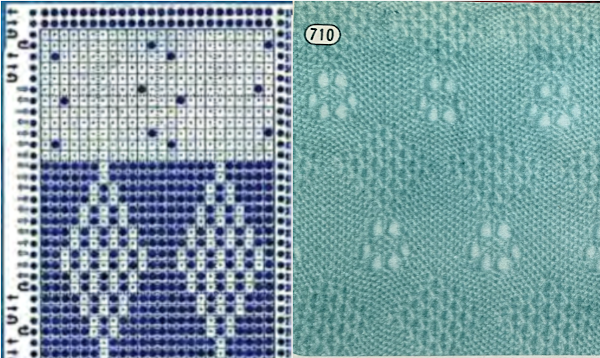 The actions of the 2 carriages on the electronic, the repeat prior to mirroring
 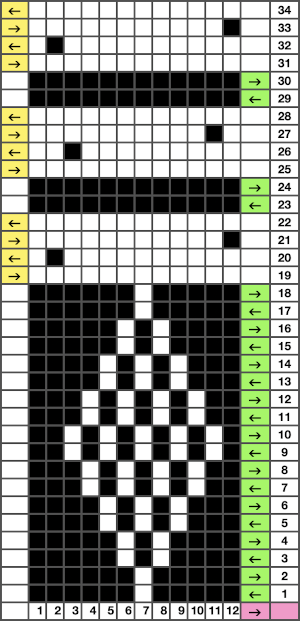 mirrored for use on the 930
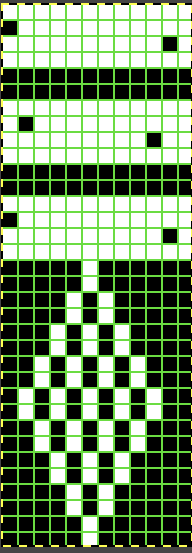