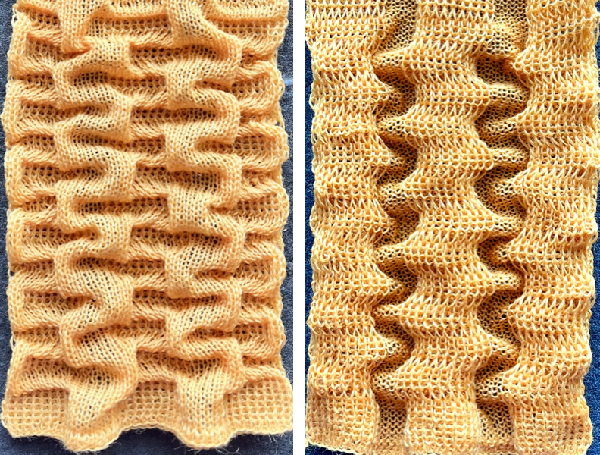
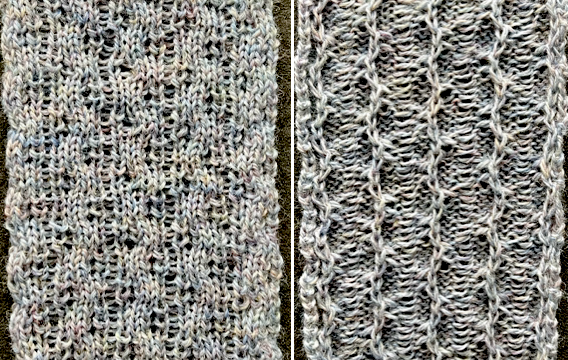
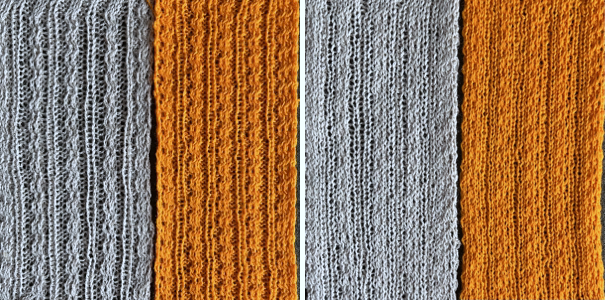
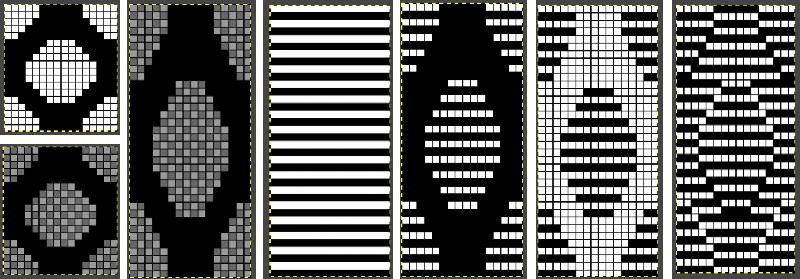
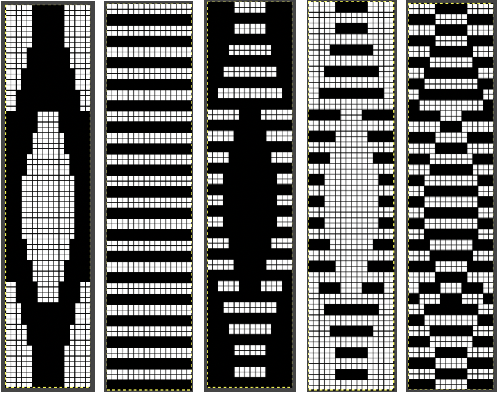
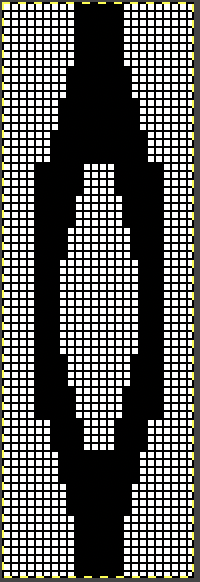
Building more textures in needles out of work spaces

A collection of previous posts exploring some variations on the topic:
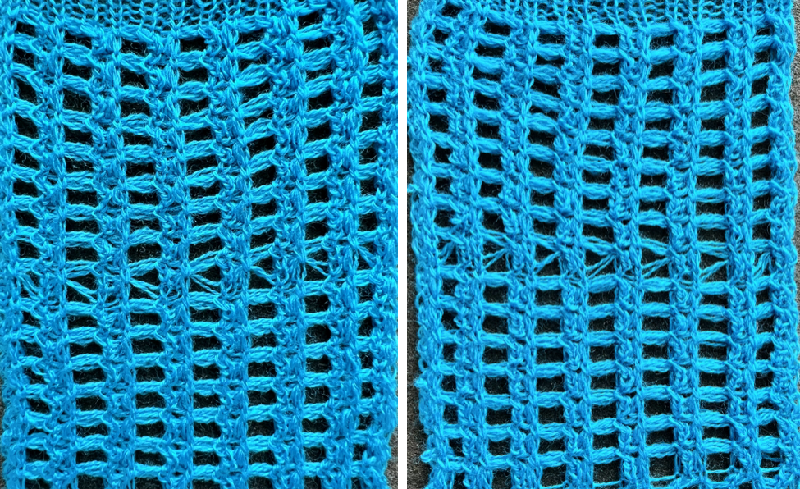
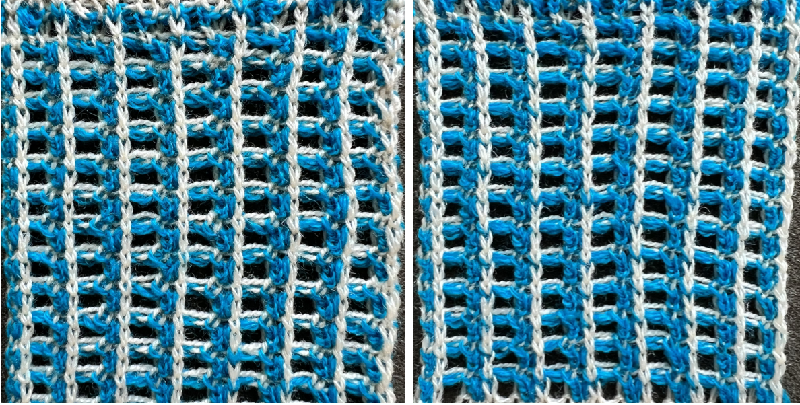
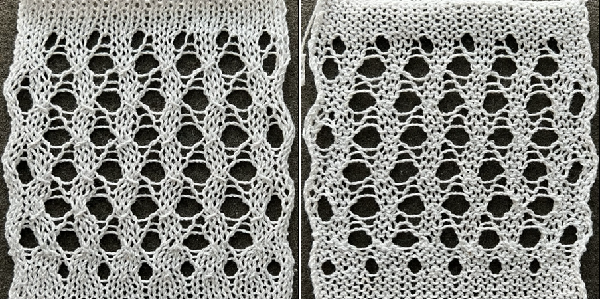
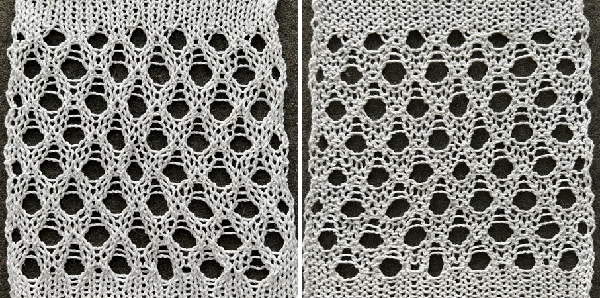
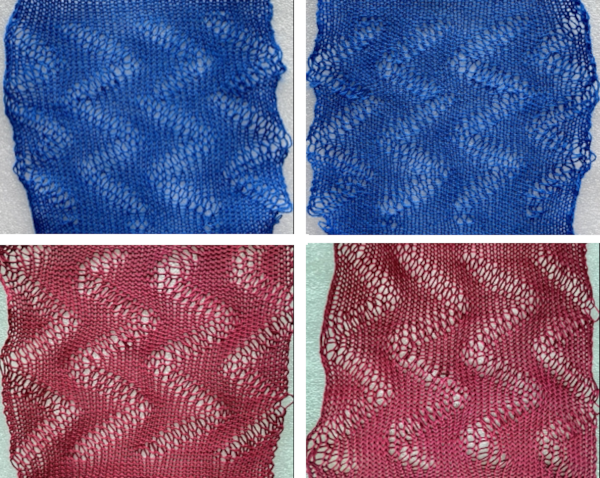
Ladders with lace, (leaf) “making things work” 1 3/15

Ladders with lace, (leaf) “making things work” 2 3/15
Ladder lace 8/13 Instructions reviewed in 2022, one of the accompanying swatches: Ladders and Lace 8/13. MK ladders, and a bit of crochet 12/16
Tuck “lace” trims (and fabrics 1) 6/17
Tuck “lace” trims (and fabrics 2) 6/17
Tuck “lace” trims or fabrics 312/17
Automating tuck stitches combined with “lace” 2 6/17
Combining tuck stitches with “lace” 1 3/15
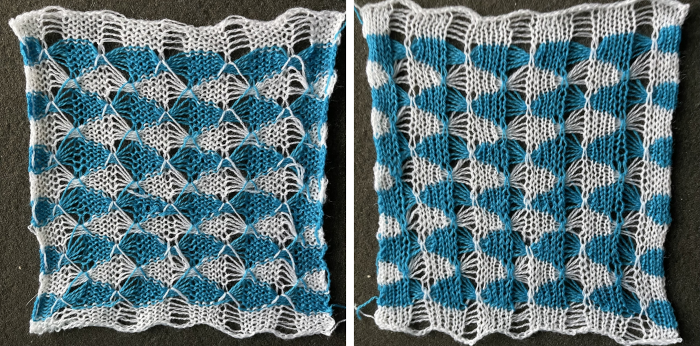
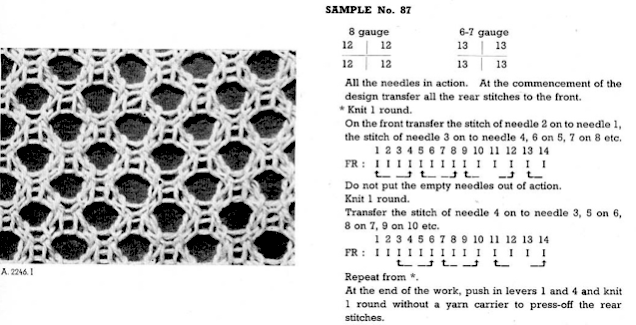
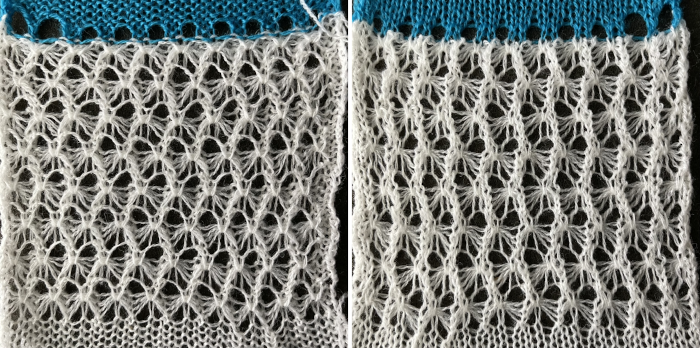
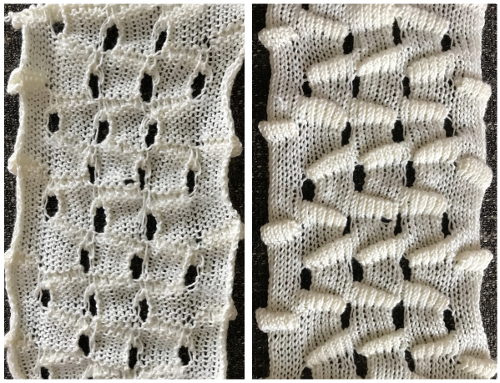
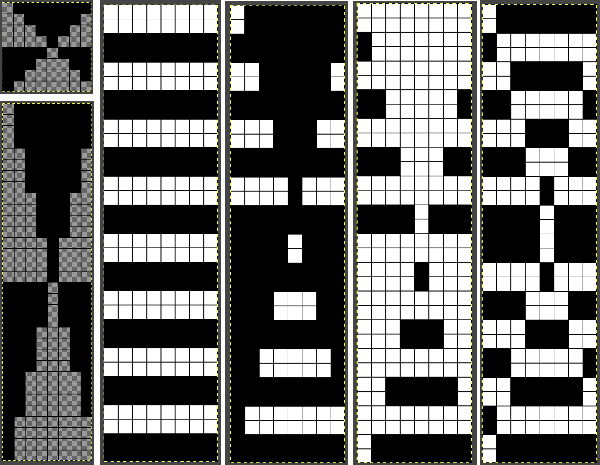
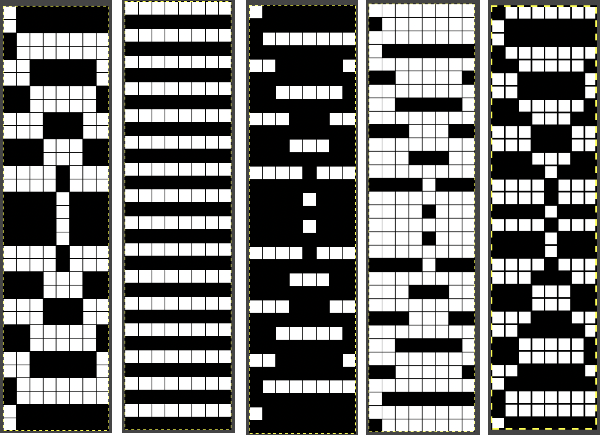
Many fabrics other than the traditional ones familiar to hand knitters and machine knitters that create eyelet patterns by transferring and combining stitches with yarnovers often include the term lace in their name, one such is ladder lace.
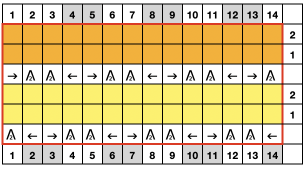
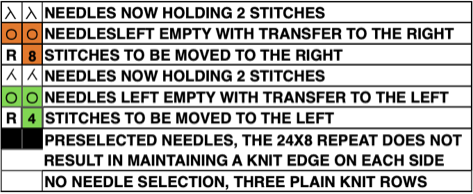
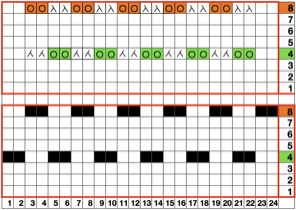
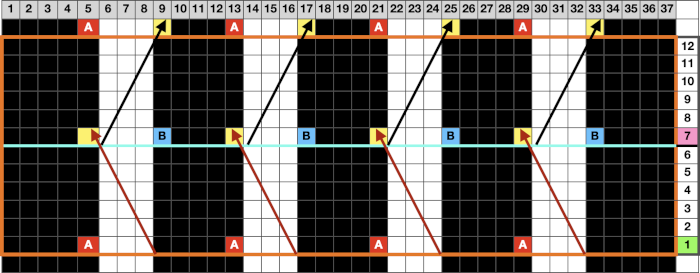
No matter what machine is in use, charts may be developed and followed that include row-by-row directions for needles out of work and any movement of stitches to alter the look of the floats created in the resulting spaces.
Knitology offers endless video inspiration for lovers of hand techniques including ones relying on patterns including ladders.
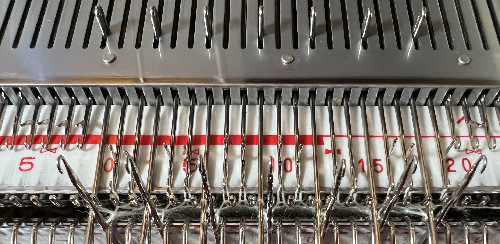
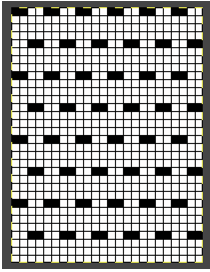
There are several aids in maintaining the desired repeat in NOOW (needles out of work). When establishing the initial needle configuration, punchcard knitters can punch a single row to match the required needle selection if the repeat works within the 24-stitch constraint, and use locked preselection to make transfers in base knitting.
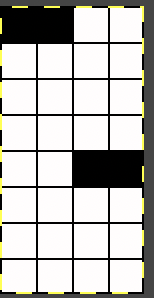
Electronic knitters may use the same concept, I prefer if doing so to plan for programming the width of the stitches in use on the needle bed, adding pixels for knit borders on either side. Punchcard users may need to disregard some needle selections to form them.
Another option for hand technique tracking in addition to marking the needle tape or even the needle bed is to print custom needle tapes created in a spreadsheet.   They can be marked as needed to guide hand technique selections, with colors added if preferred, and are easily swapped out if corrected or additional tapes are needed for different segments of the same technique.
A variety of printable tapes for multiple gauge knitting machines is offered by Claudia Scarpa in her blog post.
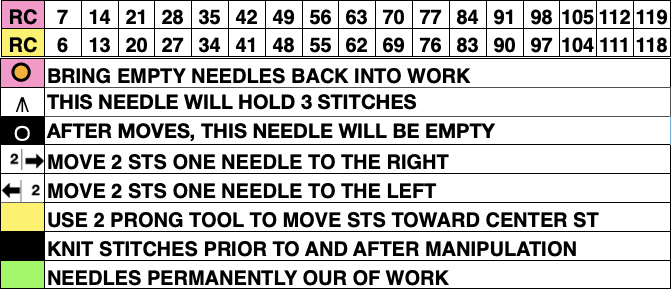
A series of printable sheets for tracking row counts at even intervals may be found at the bottom of this post.
In laddered fabrics, the edge stitch on either side of the float may widen and grow in size over time.
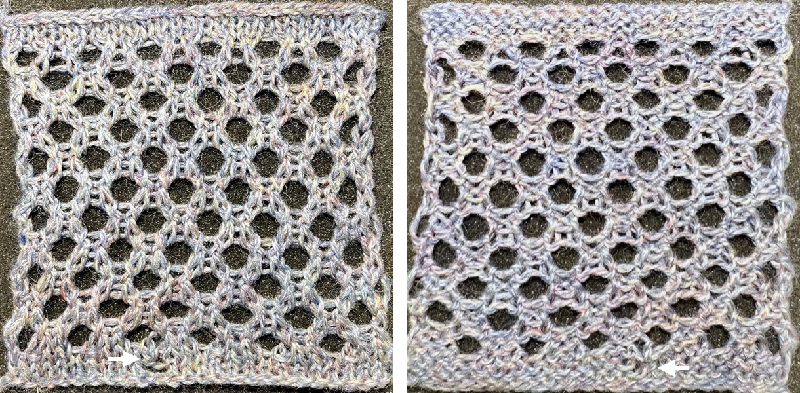
The 8/13 swatch uses lace transfers that produce doubled-up stitches to help with stitch stability.
Adding hand techniques serves a similar purpose in wide or varying ladder space designs created on the knit bed.
The length of the item produced combined with the added weight in the finished piece as it is hung or worn may quicken any lengthening and narrowing of the piece, requiring blocking again or at the very least pressing and steaming.
The fiber used makes a difference in the retention of the blocked shapes, in this case, man-made fibers may serve better than wool with its spring back.
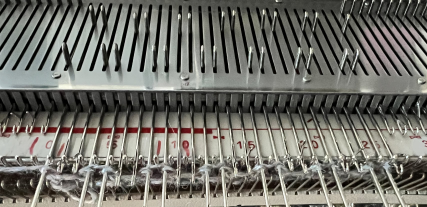
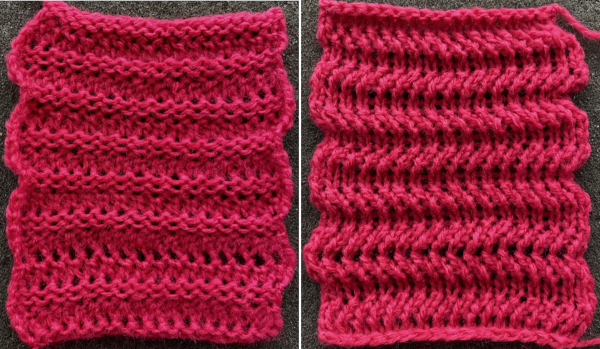
If a needle is emptied, if left forward or brought back to the B position, it will pick up a loop on the next pass, and when followed by a second knit row, an eyelet is formed in the loop location.
If a loop on a previously empty needle is dropped after it is formed, the resulting ladder grows in width.
Latching ladders while on the machine creates knit stitches on the purl ground.
Stitches may be removed and returned to the needle bed, cable crossings may be involved.
Picking up the heels of specific stitches on designated rows below and placing them on the knit stitches to the right or left of the ladder space is a way of adding non-vertical shaping.
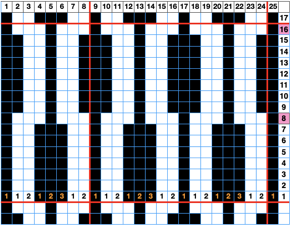
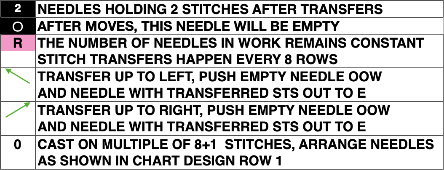
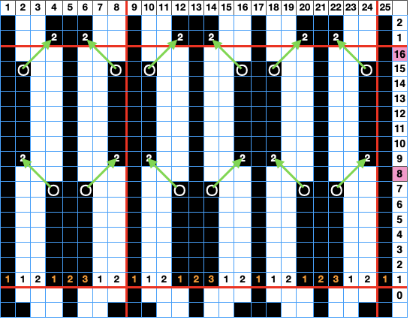
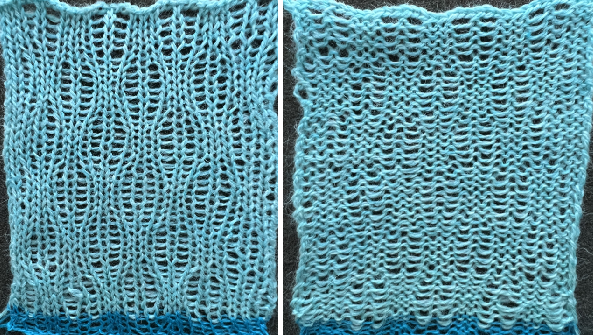
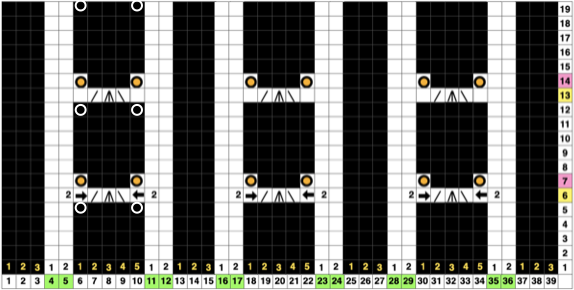
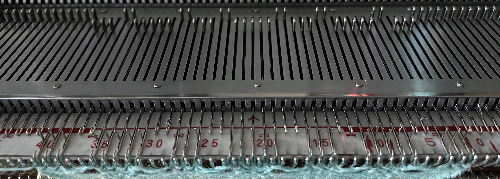
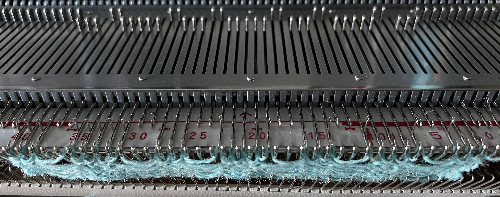
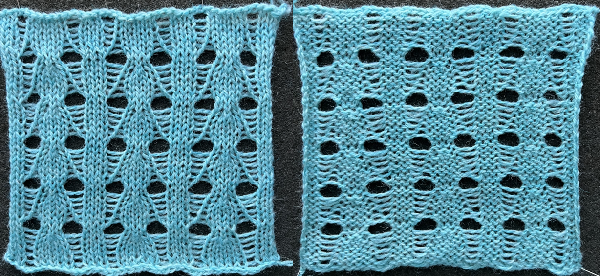
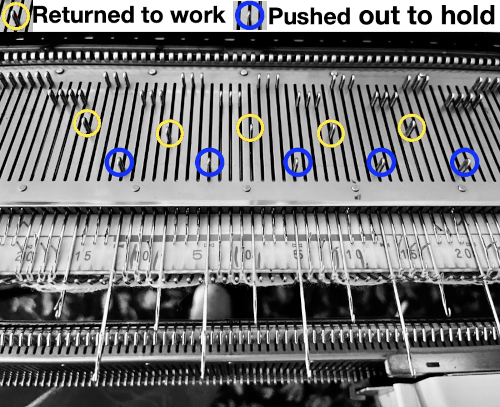
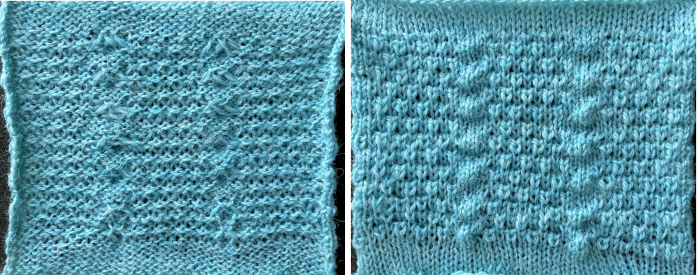
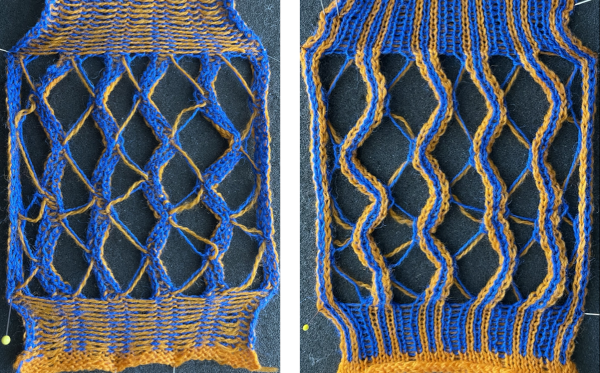
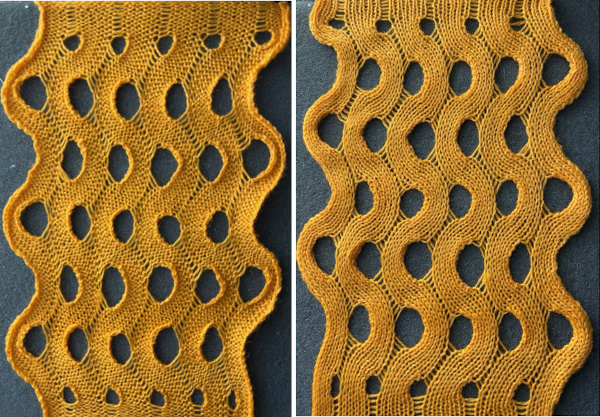
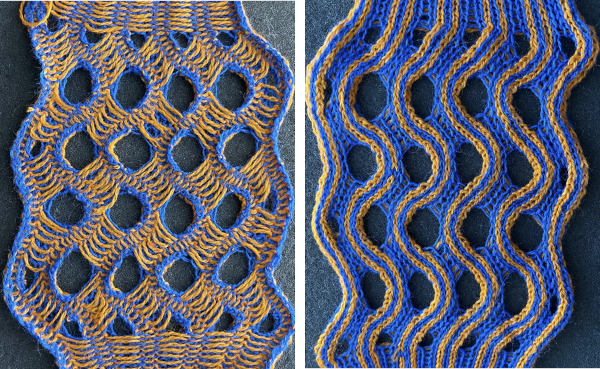
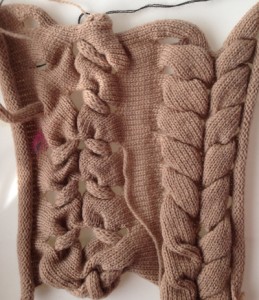
If experimenting with the number of rows knit before adding hand techniques, keep good notes in order to be able to reproduce segments in an all-over pattern. Beginning patterning with simple transfers in stocking stitch ground, here the needle configuration shifts but remains constant throughout. My proof of concept swatch is knit in 2/8 wool.  Visualizing the necessary actions:  The proof of concept: 
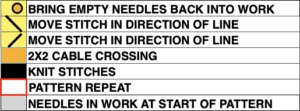
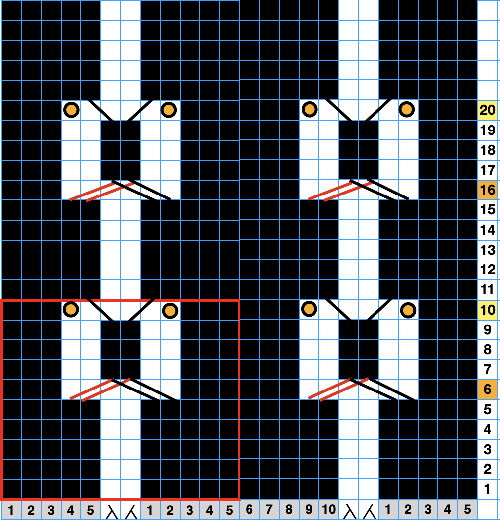
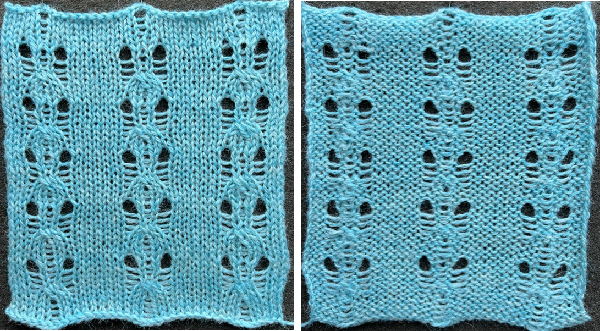
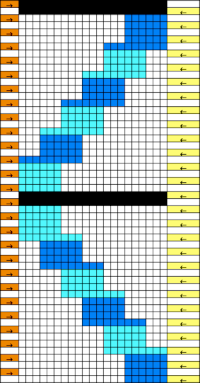
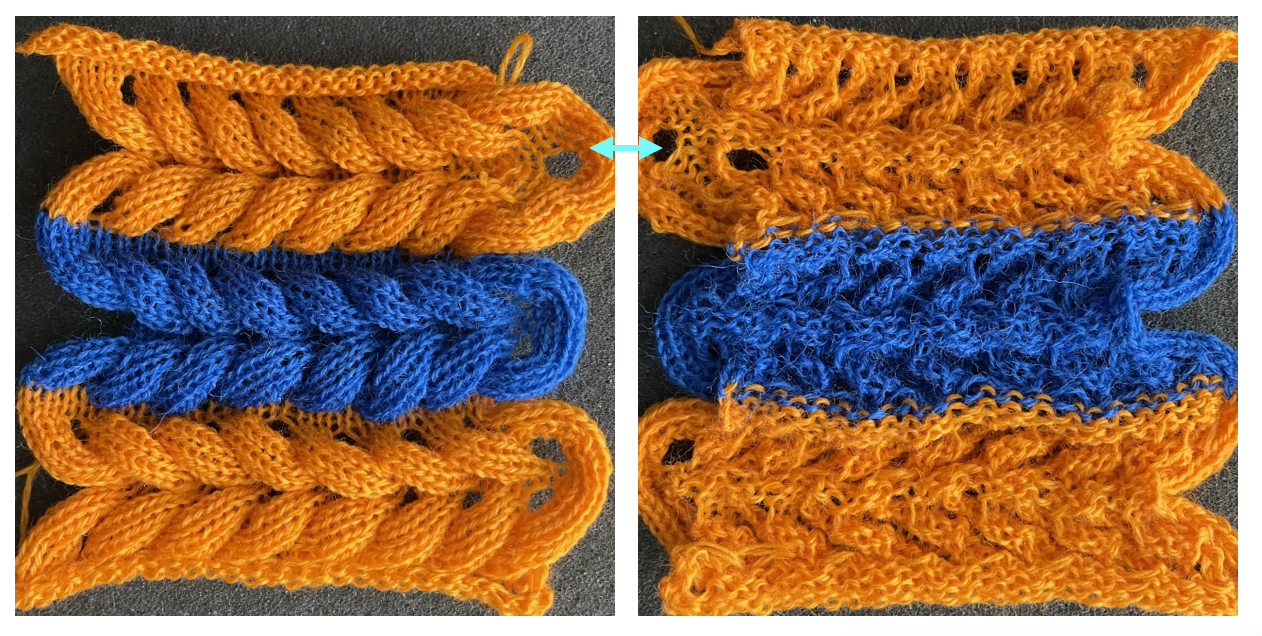
Adding 2X2 cable crossings: this repeat is 12 stitches wide.
A chain cast-on allows for dropping the 2 chains in the location of the starting ladders, with some weight applied to the starting rows one may proceed to the first cable crossing.
On row 6, and then again at 10-row intervals from there, the designated pairs of stitches are crossed consistently in the same direction. The needles aside from the crossing are pushed back to the A position.
Knit 4 rows.
On row 10, and then again at 10-row intervals from there move the left stitch of the pair of the center needles to its left, and the right stitch to its right, restoring the empty column at the center of the chart. Return the remaining empty needles to the B or E position
Knit 6 rows.
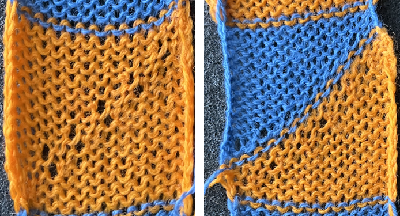
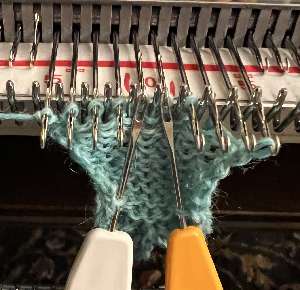
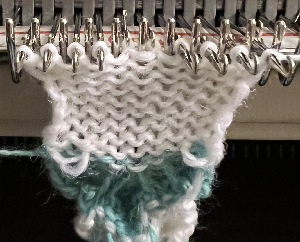
Repeat the process, ending with 6 knit rows. This variation uses transfer lace stitch crossings to produce larger eyelets than seen in the above swatch. Row counts for specific hand techniques can be tracked in a written or printed document if preferred. The knitting in progress: the initial needle spacing:  Emptied needles are in the process of being returned to work after the transfers to restore the initial setup, the first knit row will create loops on those needles, and the stitch is completed with the next knit pass from the opposite side     The growing pattern becoming apparent After updating the 8/13 post, these experiments continue exploring the above concept. The yarn now used is a wool rayon, which appeared not to split, and retains blocking if it is used.
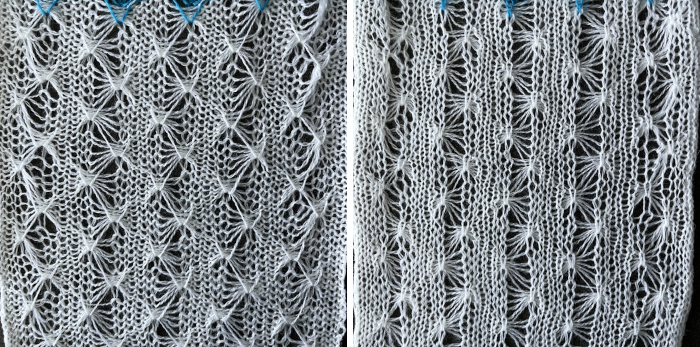
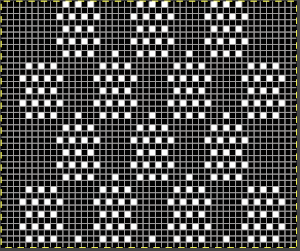
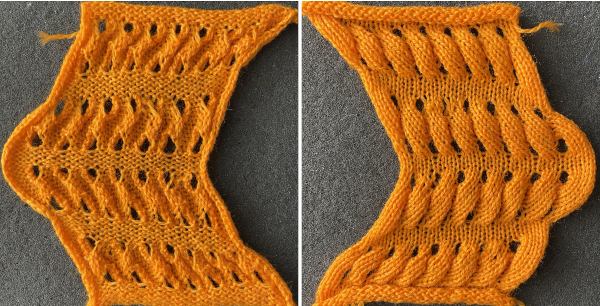
The samples use an 8-row repeat with different transfer methods. The first uses two-stitch transfers. The 24-stitch version is suitable for a punchcard, 48 rows in height. the smallest electronic repeat  tiled to a 28-stitch repeat for the electronic, in the width of my planned swatch, only for the required 8-row height The now familiar double loops Beginning ladders A partial row view of stitches moved 2 at a time toward the higher end stitch count, treating the loops as one would stitches e-wrapping one of the two loops consistently in the same direction at the top of the piece will form equal eyelets on the next pass  Working with multiple loops held in hooks of specific needles: the following swatches were actually the beginning for what became the above thread
I tend to web surf in the early morning hours. Sometimes that includes coming across YouTube videos where contributors show fantastic dexterity at handling tools while developing complex fabrics using only hand techniques.
This is one example:
https://www.youtube.com/watch?v=IoJbbInlxck.
As usual, I attempted to automate as much as I could and failed to be able to execute a truly similar fabric.
In my first modified version, I introduced knit rows as seen below to make tracking of hand techniques easier and to facilitate knitting stitches/ loops groups.
The result is of course quite different from the swatch in the video.
To knit: begin with a permanent cast on over the planned number of needles. In this case, 2 needles are included to form vertical all-knit borders on both sides.
I knit most of my proof of concept swatches on an electronic machine and download a plain design repeat with a stitch count equal to the entire width of the number of needles in use on the bed.
On a punchcard model, the all-knit border needles would have to be brought out to E on every row for them to knit with each carriage pass.
Using provided repeat pngs as shared may require mirroring the repeat horizontally depending on the download program and the knitting machine model used, as well as changing the image mode back to indexed BW since downloaded designs from the posts may be converted to RGB mode as they are copied.
If working on a finished piece, knit several rows of waste yarn, followed by a row of ravel cord and a permanent cast-on, otherwise simply knit enough to hang a comb and some weights, required for most tuck knitting.
I happen to have a 2/20 wool as my go-to for most experiments that result in 4 or more loops building up in the needle hooks.
The beginning concept: hand transfers and automated tuck patterning 
The programmed repeat is planned for two rows of knit stitches between sets of loops  After the cast-on and base knit rows, program the machine and preselect the first pattern row. The starting side does not matter unless the use of the color changer is planned, in which case, the first preselection row would need to move toward it.
Because some needles are taken out of work, end needle selection is canceled.
After the first preselection row, the machine is set to tuck in both directions.
My test repeat was programmed as a single motif on the 930, with the image mirrored horizontally.
Each pattern segment is 6 rows high, the full repeat is 12 rows tall. Color changes could be introduced every 6 rows.
Following the chart for the first segment, transfer the A marked nonselected location needles to the adjacent preselected ones on their left, push the emptied needles out to A position, OOW after each transfer, and its adjacent needle with the combined stitches/loops out to E position.
After 4 tuck stitch rows, push any needles previously placed out of work to A position out to E so they will knit appropriately on the next pass as part of an all-knit row.
As the carriage moves to the opposite side, the second all-knit row will preselect. As the carriage again moves once again to the previous side, it will knit the whole row, while preselecting for the first hand-technique row once more.
Prior to the next carriage pass, transfer each of the marked B location nonselected needles to the adjacent preselected ones on its right, push the emptied needles out to A, OOW after each transfer, and its adjacent needle with the combined stitches out to E.
Form loops for 4 more rows, and push any needles previously placed back to A position out to E so they will knit appropriately on the next pass, forming an all-knit row. As the carriage moves to the opposite side, the next all-knit row will preselect, followed by preselection for loops and transfers again as the carriage moves again to the previous side knitting every stitch.
Repeat the process for the desired length.
End the piece with at least 2 all-knit rows after a full or half design repeat. Cast off loosely to compensate for the widening due to the type of stitch formation. This fabric is executed as a hand technique/ short rows with no automated tuck patterning assistance.  I have found when using the tuck automated setting in Brother models there is often a limit for accumulating no more than 4 strands in the hooks of the needles, while in using holding, manually pushing needles out to hold and back to work can be far more forgiving.
In this instance, loops are formed for 6 consecutive rows.
There are no all-knit rows. The color changes were made every 6 rows prior to knitting across the newly adjusted needle positions.


Pretend/ mock cables 4

The blog post Pretend/ mock cables 3  presented the concept of using tuck stitch patterning and needle preselection, a Brother feature, as a guide to creating a version of mock cable crossings.
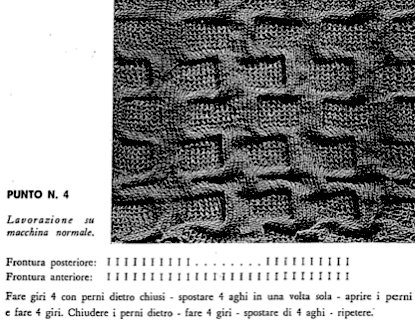
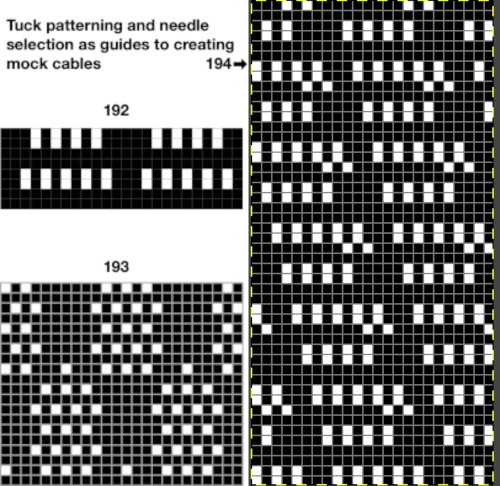
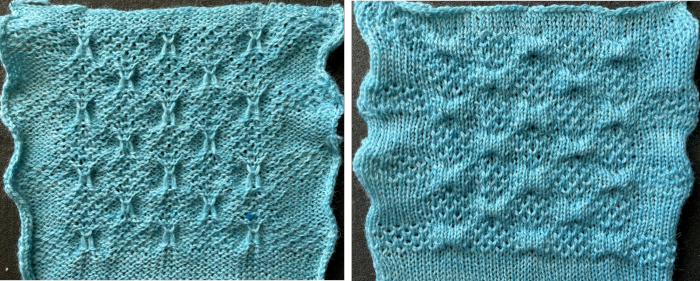
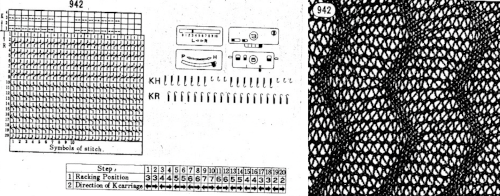
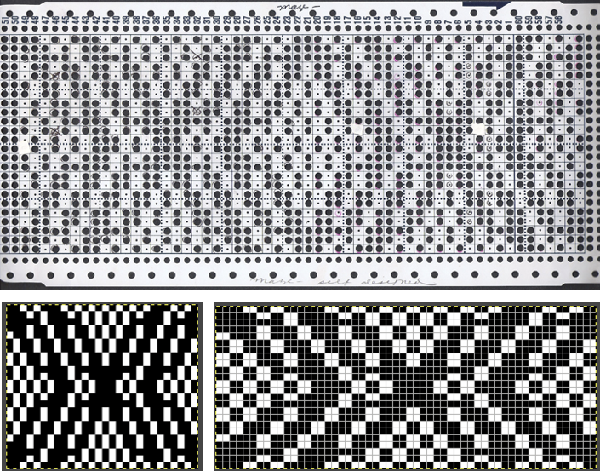
These designs are from an ancient Japanese publication.  Technically the results are not very cable-like for these three concepts, but they share the principles behind the technique. I am offering this information as a way of interpreting and adapting the suggestions in the publication. There has been some editing of the originally shared repeat suggestions after testing them in proof of concept swatches.
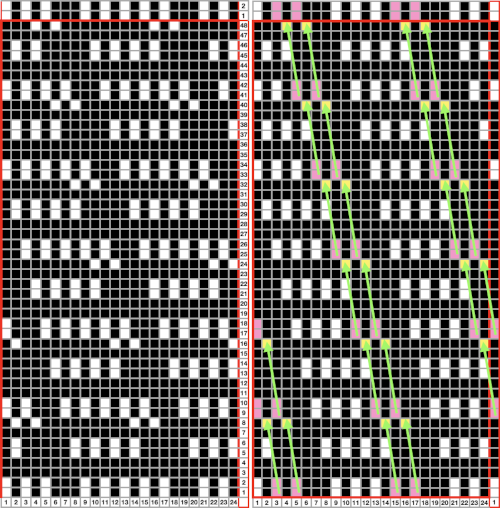
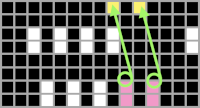
The scanned inspiration source:    The punchcard repeats: symbols are used in the above chart. The elongated short inverted U shapes, with some in bold type, represent the tuck stitch locations and needles that will hold loops in a pattern. The longer, thinner inverted Us suggest which tuck loop(s) will be raised and hooked up on new locations to create the desired textured effects.
Punchcards mirror the design horizontally when in use, so the texture will appear as shown in the swatch photos on the knit side when the design is worked based on the illustrated charts on the right.
When using the tuck setting, unpunched holes will create loops on nonselected needles, punched holes will create knit stitches. Electronic patterns will use black and white pixels to result in the same selections.
Deliberately not punching holes or adding white pixels may be used to provide a marker on all knit unpunched or black pixel rows for hand techniques to take place, ie in the repeat planned for 194.
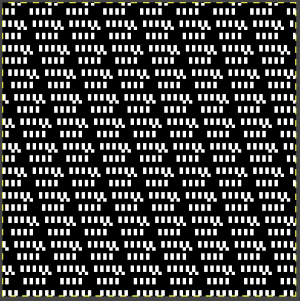
With the charts as guides, partial punchcard repeats for the three designs: Punchcards ideally require a minimum of 36 punched pattern rows to roll accurately, the single, smallest repeat segment is adequate for knitting on electronic machines.
I knit primarily on a 930 and prefer to tile the repeats in width to the number of needles in my samples. The single motif button, default on the 930, need not then be reset and the design will be automatically centered. It is not a necessary step. Centering any single repeat across the needles in use or otherwise placing it may be achieved by programming its position. In punchcard machines, the selection is fixed across the 24 stitch markings on the needle tape, other positioning may be achieved by shifting the knitting in its position on the needle bed.

My illustrations are achieved by using both Mac Numbers and Gimp.
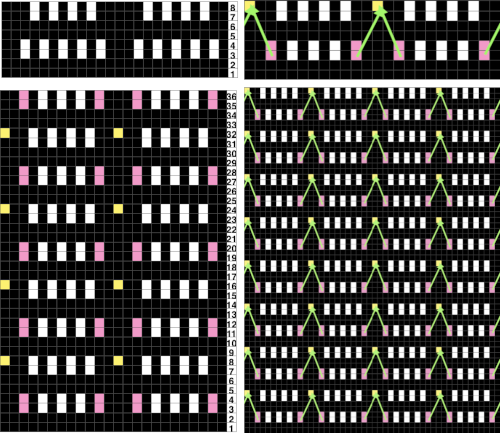
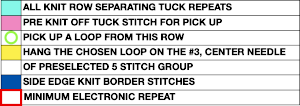
Adding color to help visualize hand techniques, and tiling to check alignments:
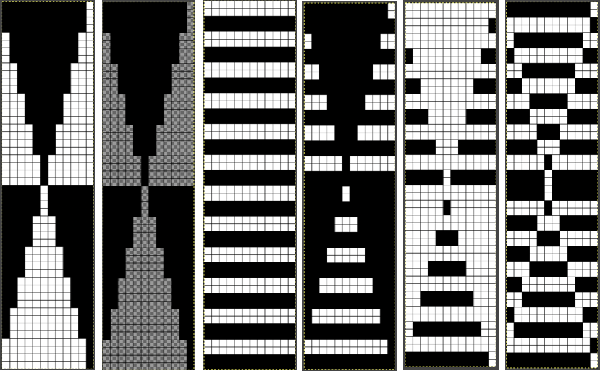
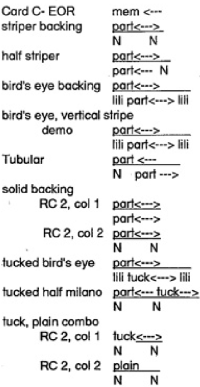
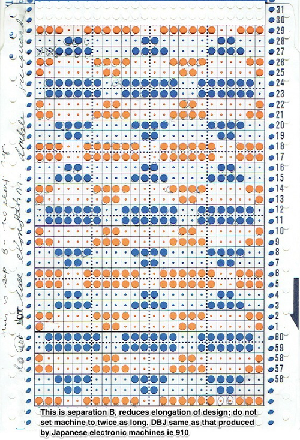
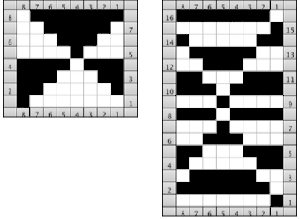
192 is 8 rows in height, more than that is needed to indicate the locations for hooking loops up. It appears this happens on white squares in the published original chart, which translate to knit stitch locations, the punched holes in the card.
For some transfer locations, no needle selection clues are provided, and they are made based on visual identification.
If the transfer is to be made onto a preselected needle, push the appropriate needle back to the B position.
Visually follow the rows down to locate the appropriate tuck loop(s),
lift them onto the needle just put it back to B,
and push that same needle out to the E position after the hook up in order to form a knit stitch with the next carriage pass.
The repeat with the most frequent hand technique is 192, with hookups every 8 rows    Using light color yarn makes it easier to identify the closely packed stitch structures.
The tool used to pick up and rehang stitches can vary depending on personal preference.
Programming the design as an 8-row pattern allows for easier tracking in a design that requires actions to be taken at that specific interval.
Another view: I had a hard time finding the proper spot for picking up loops and needed extra magnification in addition to my bifocals to sort that out.
The wool used for the test swatches is a 2/8 weight.
Because transfers in the scanned publication are made on a tuck stitch row, these designs may be easier to execute on a Studio machine.
As Brother knits that last tuck row, it preselects every needle for the knit row that will happen with the next carriage pass from the opposite side. I found the location easier to track for the hand technique a row early, before the every-needle preselection.
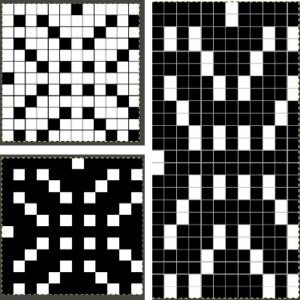
The effect is subtle and time-consuming, a consideration if planning larger pieces of knitting. 193 is 20 rows high, with hookups every 10. In the concept swatch, some of the tuck stitches were eliminated, seen here in a 48 stitch wide repeat, allowing for a released edge on either side. The tiled X2 in height repeat checks its vertical alignment.  This time as many of the compounded knit and tuck loops as possible were moved, producing more detailed surface textures on the knit side 194 is 48 rows high, with hookups also every 8 rows.  The single 24X 48 png is followed by the tiled 48 stitches wide version and the tiled Gimp alignment check   The visualization of stitch/loop movements The hand technique occurs after an all-knit row, which in cards would be all punched, in electronics all black pixels.
In Brother kms, while the first all-knit row is made, the next with isolated pairs of preselected needles will occur.
Prior to moving the carriage to the opposite side, hook up from highlighted locations, and bring needles out to E after doing so. As the carriage travels across the bed again, all knit stitches will form while preselecting for the subsequent tuck stitch row. A rhythm will develop eventually.
Notes to self:
some days it is not good to be near a knitting machine
cables and intensive hand techniques are still on my avoid if at all possible list
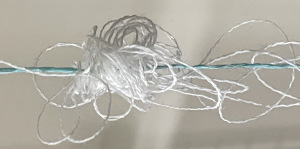
keep an eye on broken ends of yarn in old cones at least periodically before knitting across whole rows
if knitting lengths of this technique, or even a large swatch, removing the ribber if it is in use will facilitate the process. Remember to check its balance when it is recoupled with the main bed
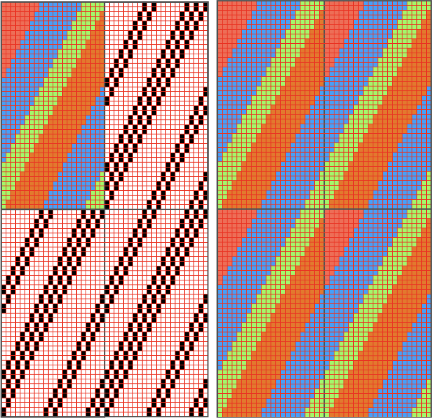
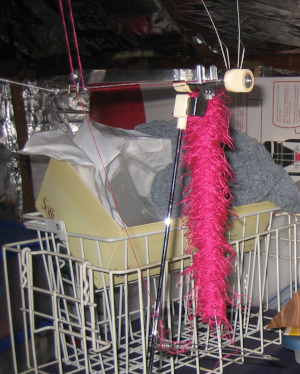
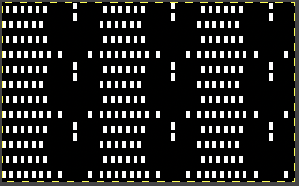
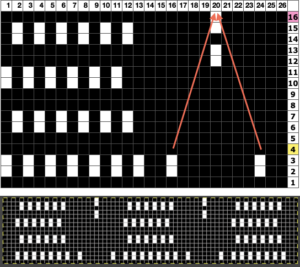
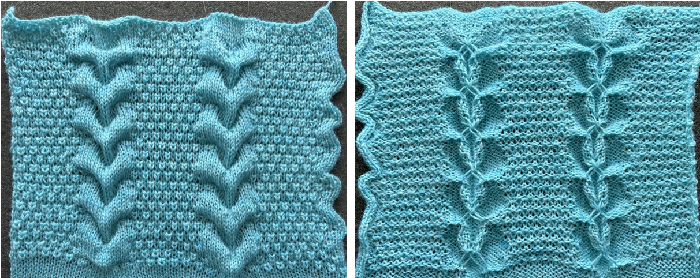
while you are busy keeping an eye out on what to pick up and which stitches did not form properly or are jumping off the main bed, remember to look up at the yarn mast periodically, especially if the tension appears to change suddenly An improvement, however, over this masterpiece a decade ago when working in my attic supplementary studio space 😉 Although all hooking up aka ruching is in the same direction, there is no apparent biasing. This fabric is quite compressed, not for someone without a lot of focus, patience, and good eyesight. This pattern emulates the wishbone trim familiar to many knitters. It is the easiest in the series to execute, with the most textured result. The knit repeat used in the swatch is 26 stitches wide and can be trimmed easily to 24 stitches wide for use with punchcard machines.
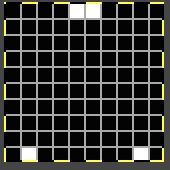
The heels above the designated tucked stitches at the bottom of each repeat are lifted up and onto the single unselected needle of an all-knit row.
End needle selection is on, and the tuck setting in both directions is used after the initial preselection row.
Though initially an all-knit border was planned on each side, several knit stitches were eliminated on one side of the swatch. The difference is seen in the edges of the work, where all-knit stitches are allowed to roll, creating a very different “trim” than where tuck patterning was left uninterrupted. Such rolls can make satisfactory added details along accessories such as scarves, where a few rows of all knit stitches may also be allowed to roll to the purl side at the top and bottom of the piece as a finishing alternative.
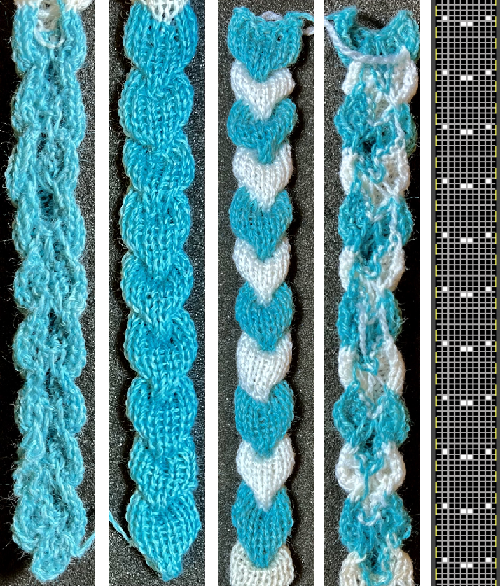
The 26X16 single repeat.  Tiled repeat, checking alignment  Charted information   The proof of concept swatch A mock cable trim may be knit separately, in any color or even multiple colors, and applied as you knit on a large piece or stitched on after the fact.
One variation as a hand technique: after a closed cast-on on 10 stitches, knit 10 rows.
Pick up the second stitch from each side of the original cast-on row, and hook up on needles 5 and 6 on each side of the center. Knit 10 rows.
Pick up the second stitch from each side 10 rows below, hang on needles 5 and 6 on each side of the center, and repeat to the desired length.
Color changes may be added every 10 rows when all knit selection is made.
The slip stitch setting in this case is used to track and facilitate the process.
End needle selection is on, with the knit carriage set to slip in both directions, with the first preselection row made after at least one base knit row.
Weight may not be necessary depending on how comfortable one is with managing the knit without them and the yarn being used.
The repeat, in turn, is tiled twice in height in the shared png A short slip stitch float will form in the location of the white pixels at the bottom of the chart and when the selection is made to match the top row of the repeat, the single float is picked up and hung on the unselected needles, Those needles are brought out to E position after the transfers.
At that point, prior to the next carriage pass, the color may be changed. The short single skipped stitch floats are shown more clearly in this image. When changing colors it is best to use yarns of the same thickness that will knit easily at the same tension, not done in the first shape in this sample.
If using 2 carriages operating from opposite sides to carry different color(s) remember that extension rails will need to be used, as both will be selecting needles and will anchor onto the belt to do so.
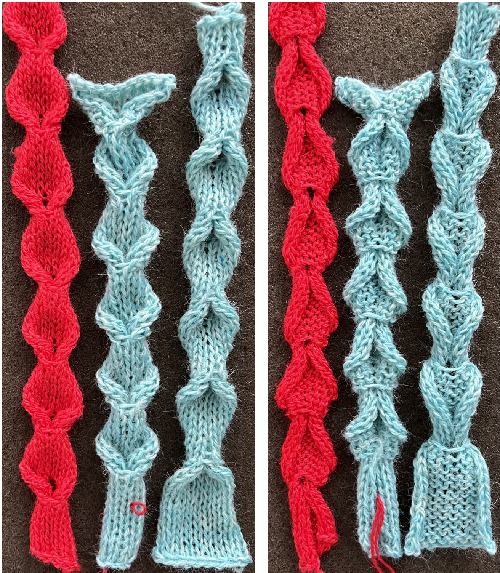
Floats will happen at the side(s) as colors are carried up, but they and cut yarn ends can be hidden when the trim is applied. Here a fixed number of stitches +1=11 is knit for a fixed number of rows
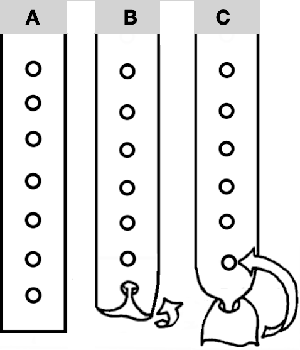
an eyelet is created every 10 rows A
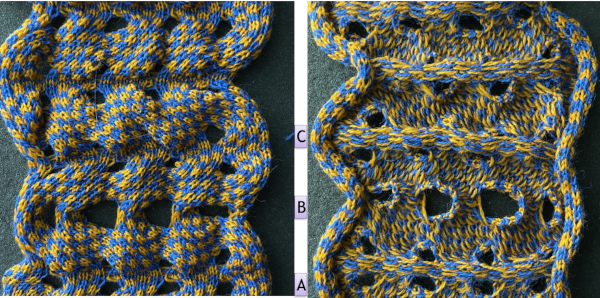
A single eyelet was sufficient to allow for feeding the trim through on the same side and from the bottom up, B and C, upon completion of the planned strip length. The red sample on the left is knit with 2/18 silk/wool, the blue is 2/wool. It is best to avoid any fiber that will pill easily.
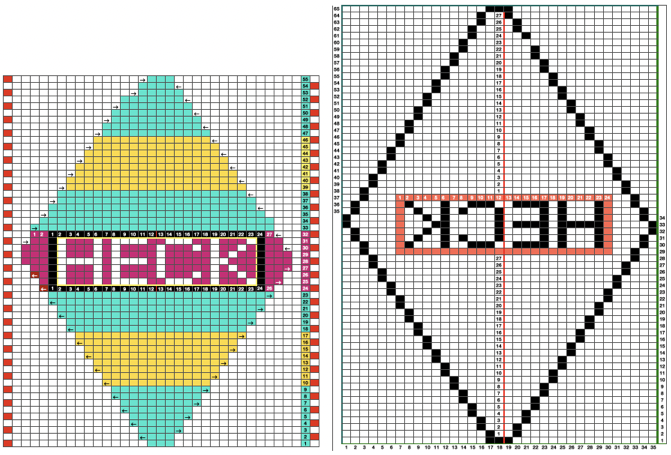
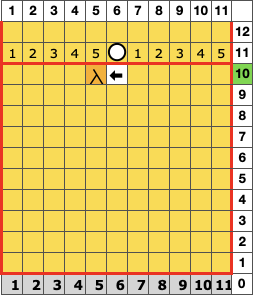
The blue samples were knit for 65 rows each. In DIY, begin a test by casting on an odd number of needles (11, chart row 0)
if all needles are not properly formed after a permanent cast-on, bring all needles out to E for the first 2 or 3 rows
insert a claw weight
knit the same number of rows as cast on -1 (10)
transfer a needle to the left or right so as to maintain an even number of needles on each side after the transfer, making certain the empty needle is in the work position before the next carriage pass (chart row 10)
as you knit to the opposite side a loop will form on the empty needle, the eyelet location (chart row 11)
a carriage pass to the opposite side will form the full stitch in the loop location (chart row 12)
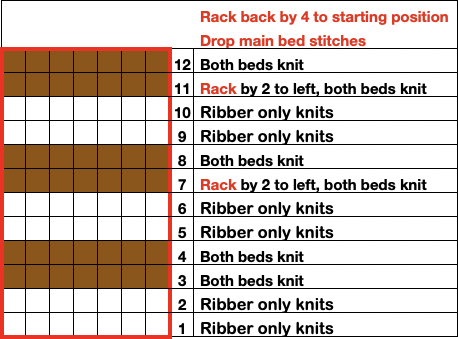
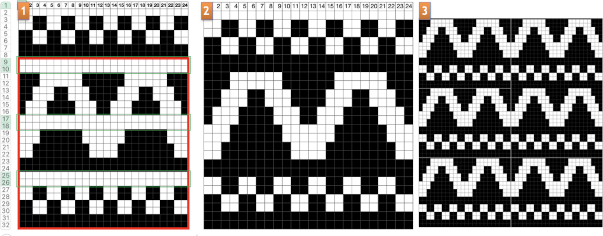
The charted working repeat for the trims below is outlined in red 

Adding fair isle patterning to short row patterns creating eyelets

In Brother knitting one of the issues encountered when combining fair isle patterning with short rows is that if the fair isle pattern is to be maintained, one must hand-select needles to the proper position prior to knitting across needles newly returned to work.
The short row method here is a modified version of that used in the “wisteria” post, with the addition of needles regularly left out of work.
Analyzing what is happening in fabrics in this group: the working repeats need not be symmetrical, but for the purposes of beginning to understand the moves required and developing an awareness of how the stitches on the needle bed behave, it is easier to begin by using hand selection that is rhythmic and consistent.
Avoiding dark colors is helpful in recognizing dropped stitches in time to pick them up.
With some exceptions, most machine-knitting short-row patterns are worked in two-row sequences with stitches brought out to hold opposite the carriage and into work on the carriage side.
Typically the first row of eyelets will be approximately half size, and the knitting may be stopped at the top of the piece to match that.
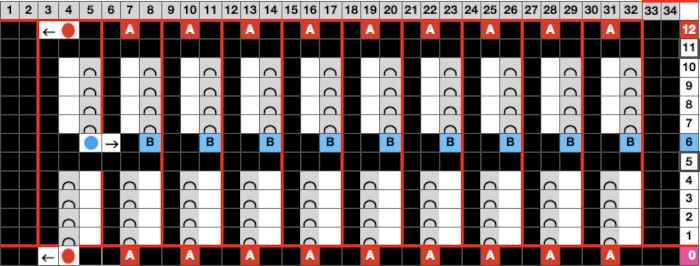
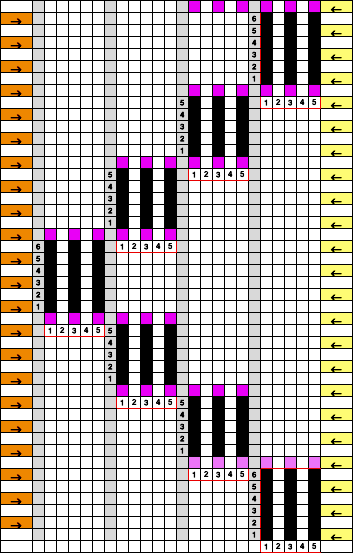
This chart begins to visualize a pattern composed of vertical columns with colors knit on every other needle, produced using the repeat. The arrows indicate carriage movements.
The grey cells represent needles out of work.
The blocks of black and white columns represent the colors in the FI pattern selected and relate to the A and B yarn feeders. In this exercise, preselection is kept constant to facilitate maintaining proper patterning as needles are pushed back into work. Often, after an initial number of rows, all but the first group of stitches in the pattern are brought out to hold. In my swatch, the fair isle pattern had already been established across the needle bed for several rows.
Here one would begin with the knit carriage on the right, COR.
COR: the first group is knit for an even number of rows, ending COR.
COR: a number of needles are pushed back into work on the left, FI needle position is restored with needles placed in proper positions, knit on one row on the combined groups to the left
COL: bring the first group’s needles out to hold, knit an odd number of rows, ending COR.
Repeat moves and selections until the last group of stitches is reached, knit an even number of rows, and end COL.
COL: reverse the process, moving from left to right.
This method results in threads appearing between the short rowed shapes. The first preselection row is made from left to right. End needle selection is canceled. Cast on is over a multiple of 6 stitches ie 36, with every 6th needle out of work. I began the sequence COR with 10 rows knit, returning COR, followed by 9 as the odd number of rows once the next group of needles is brought into work, and the last group worked is pushed out to hold, then reduced the even number to 8, the odd to 7 in the top half of the swatch.
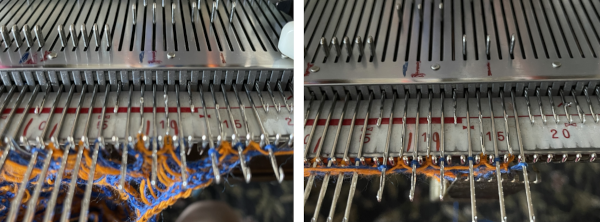
Here the work is seen on the machine, on the left, COR, and the needle selection for the pattern in the next group to its left is restored. On the right: after knitting to the left, the initial group of needles worked is brought out to hold before continuing to knit.
A mini version in a single color Changing the holding sequence to eliminate the long threads between held shapes, beginning once more to sort out the how-to before adding fair isle patterning: cast on 36 stitches, with every sixth out of work moving from left to right, knit several rows. To knit: each group of 5 stitches in work has a reference number, 1-6
first pattern row:
COR: Set the machine for hold, leaving only group 1 in work
COR: knit 8 rows on the first group of stitches on the right (1)
push second group (2) into work and knit 8 rows, returning to COR
COR: push the third group (3) into work and knit one row to the left
COL: push group (1) on its right out to hold, knit 7 rows across the remaining  10 stitches, returning to COR
COR: bring a new group on the left into work, knit one row to the left
COL: bring the group to its far right out of work, repeat the process across the row
when the second to last 2 groups on the left (6 and 7) are reached, knit  8 rows on both, returning to COL
COL: push the second to the last group out to hold (6)
COL knit 8 rows on the last group on the left (7)
COL, reverse the process repeating all selections moving from left to right for the second pattern row. Begin the process by knitting 8 rows first on the first group of five stitches on the left, which will now have been knit for 16 rows in order for the stitches to create the large eyelets that will now form.
In my swatch, I occasionally varied the odd number of rows knit between seven and 9. Even a couple of rows can make a noticeable difference depending on the color of the yarn, the tension used, and other usual suspects. Test out the idea in the swatch to help make the decision as to whether unraveling is required to keep a constant quality to the holes as the project grows, and to practice unraveling rows back to the proper location. If fair isle patterning is added, corrections become a bit more complicated.
The resulting proof of concept swatch:  With the addition of the fair isle patterning: note that here, when the last set of needles was reached, they were not worked twice before reversing direction, so the edge eyelets are of a different size than those in the remainder of the row, forming smaller waves on each side.   Any openwork fabric will likely be wider than that knit in stocking stitch or fair isle on the same number of needles, making it necessary to consider providing stretch in any rows knit at the bottom or the top of the planned project or using the contrast as part of the final design.
Adding hems to the above technique is also possible

The short row repeat used here is a modified version of the “fern leaf” one in the post. The sequences are different, every needle is in work.
I began by casting on 36 stitches, knitting 12 rows for the even number, and 11 for the odd, with random variations.
Results need not be symmetrical either in the length of the shapes or in the direction of the knit, but rhythmic repetition can help one understand stitch formation, other changes that follow can then be deliberately planned rather than accidents or errors, keeping notes while the work is in progress, will help reproduce effects.   The knitting method, and tips: the fair isle repeat is 2 stitches wide by one row high, and the respective cells are bordered in red, it may be programmed to suit.  When using a punchcard model, the card could simply be locked on any row with every other cell punched. The result will be vertical lines on every other needle, slanting in the direction in which short-rowed shapes are knit.
I chose to begin my design with the first needle on the right selected to pick up the color in the B feeder and used that as the basis for adjusting selections in subsequent groups of stitches.
Electronic machines have the option of mirroring the pattern to change that, punchcard knitters can move the knitting one needle to the right or to the left to get the selection they prefer.
As additional needles are brought into work, the A and B yarn feeders selections need to be restored so as to maintain proper FI patterning.
If you have not worked with this type of technique before, it is good to start using a light color and to work in small stitch groups, not adding added patterning until later.
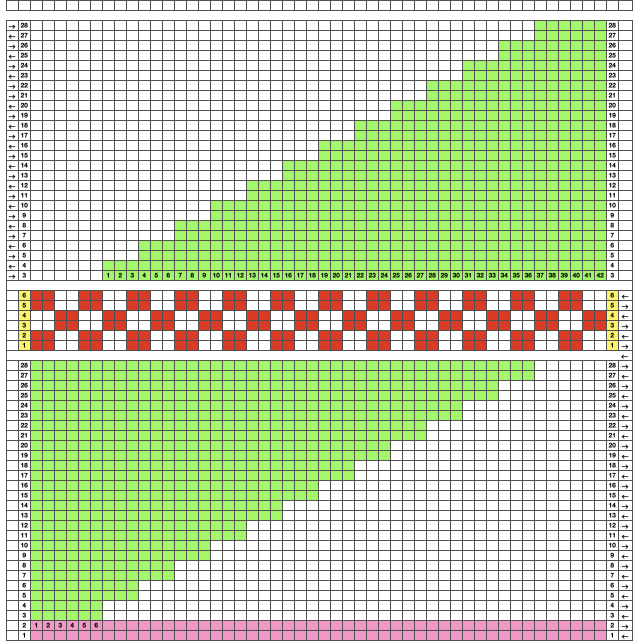
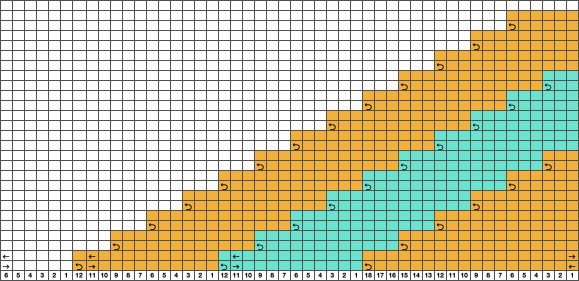
Attempting to visualize the movement of the stitches across the needles in work: the colored cells illustrate the movement of stitches across the needle bed as they are brought in and out of work, and the number of held rows is altered to reduce the chart’s height, does not match the directions for the test swatch that follow it exactly. The black cells represent all knit rows. 1. Cast on the desired number of stitches, in this case, 27, a multiple of 3, and knit several rows at tension appropriate for stocking stitch when using the same yarn
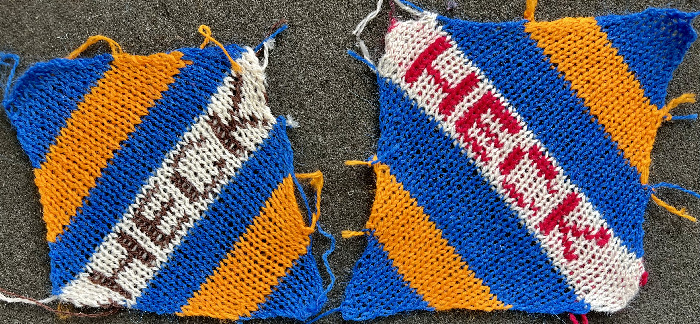
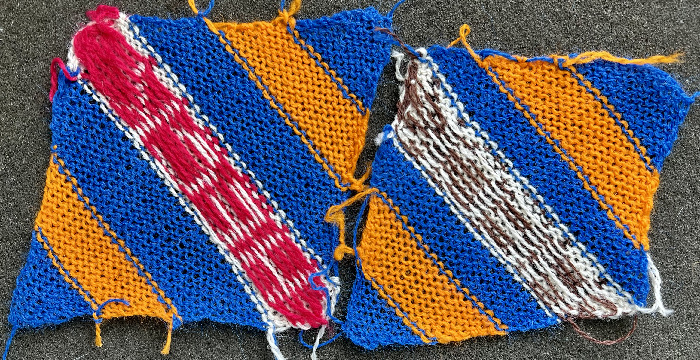
2. COR. Set the machine to not knit stitches brought out to the hold position.
3. Leave 6 needles (3X2, double the number in each working group) on the right in the work position, and push all the remaining stitches out to hold.
4. Knit 10 rows (an even number), ending COR.
5. Push back the first 3 needles on the left back into the work position
6. Knit one row from right to left (9 needles), end COL, and push the 3 needles on the right out to the holding position (6 needles will now be in work again).
7. Knit 9 rows (odd number) ending COR
8. Repeat steps 5-7 until you reach the last 6 stitches, knit 10 rows (even number) over these last 6 (3X2, double the number in each working group) needles, ending COL.
9. Set the machine to knit all needles out in the hold by pushing needles back or releasing the hold lever, and knit 4 rows over all the needles. It is possible to vary the number depending on one’s preference, but for me, only two rows simply were not aesthetically enough.
10. Holding lever on H, reverse shaping from left to right, beginning again on 3X2=6 needles, (double the number in each working group).
Reverse the process, moving in the opposite direction, beginning with knitting an even number of rows on the first chosen group of stitches on the left.
The difference in the edging of the swatch, marked by arrows, is due to a variation in the sequence for working on the specific group of stitches. If performed as an error, it will appear as an obvious deviation if not corrected while the work is in progress. The same action may also be performed deliberately as part of the overall design.
Color changes may be made easily where the 4 rows are knit in between segments on every needle used. End with 2 rows in the first color, knit with two rows with the second color before returning to the holding sequences. 
Worked on a significantly smaller scale in one color.
This far more symmetrical result than the first effort worked in the vertical stripe fair isle pattern on 40 stitches: begin with some FI patterning, end COR
COR: bring all but the first 8 needles closest to the carriage out to hold,
Proceed as described for the single color design, but this time 4 stitches are pushed into work and returned out of work rather than 3. Knit 12 rows when even numbers are required, 11 for the odd number.
Four rows of fair isle patterning are knit at the end of each repeating segment.
It is possible to work with far larger groups as well, thus providing an opportunity for adding larger fair isle patterns into the mix. Cast on 48 stitches.
In this sample various size eyelets were produced, using 12 rows, A, which did not seem to yield the degree of 3D texture I wanted. More rows were tried where larger holes appeared, B. Four rows of fair isle patterning separated each row of the held shapes.
To produce a more symmetrical knit, begin working short rows COR with a group of 16 (8X2) stitches on the right, knit for 20 rows as the even number (in the range of 8X2X1.5), 19 for the odd, returning groups of 8 stitches into work knitting moves across the needle bed, ending the pattern with working 20 rows on the last 16 stitches in work on the left. Knit 4 rows restoring fair isle needle selection across the needle bed, returning COL. COL reverse shaping.   Knitting all the holding sequences in the same direction for multiple rows as in any eyelet fabric will result in a knit that biases to a degree proportionate to the number of stitches and rows in each unit. The start of yet another idea:


Geometric shapes in drop stitch lace 4, stitch release, added racking

Though written in 2017, the post on revisiting drop/release stitch lace 1 has had new swatches and updated design ideas added. It includes information on how to use punchcards intended for other fabrics as possible design ideas and a cumulative list of previous posts on drop stitch lace.
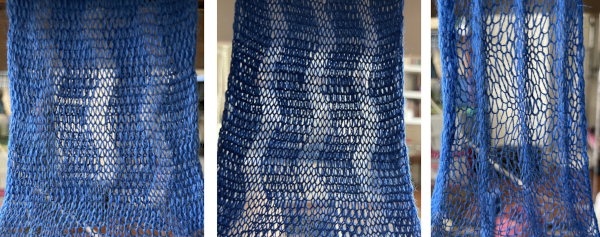
The Brother publications have offered this idea for end release drop stitch in one of their volumes of punchcard patterns.  Many published designs recommend beginning the knitting with the racking handle in the center position, 5 of 1-10 positions in Brother, and 0 of 6, 3-3 in Passap. Often the starting position is relative and when a lot of racking is involved, they may be varied, though not the sequences in terms of the number of movements, to different starting points if that seems to offer an easier way to track position numbers. It is one of the many things that once the method is sorted may be adjusted to personal preference. Some of my swatches below were started with the racking position on 10, some with it on 5.
Many knitters in forums appear to have success with end release drop stitch. My experience has been that episodic release of the stitches even as often as after 2 rows knit yields far more predictable results. It is how I worked my shawls produced in the technique, including these two, knit in days when I did not always photograph all my pieces Giving end release another go, this was my initial needle set up. With the majority of the needles in work on the main bed, the larger stitches in the final fabric will dominate. The stitches after the cast on have been transferred down to the ribber. The work on the machine, with stitches on the main bed released at the end of the swatch. There is a long stitch DBJ single color pattern happening which may prove to be an interesting fabric if no stitches are dropped, to preserve it, all stitches would be transferred to the top bed, and bound off.
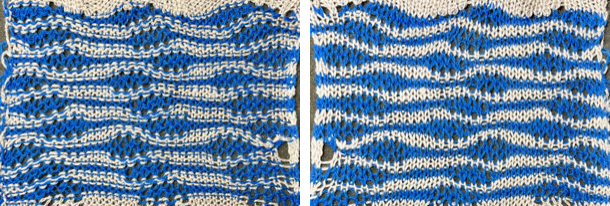
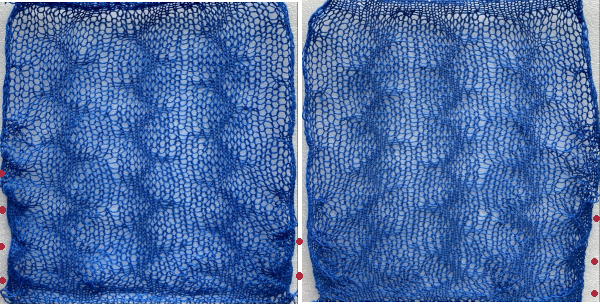
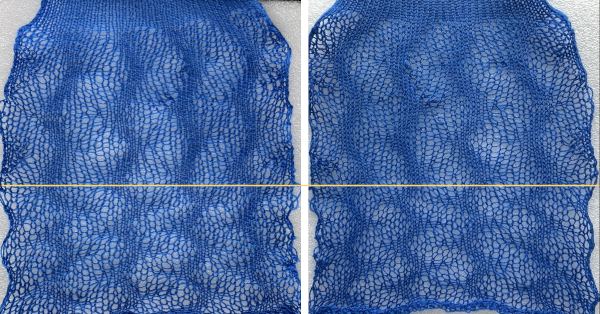
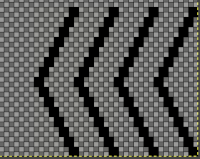
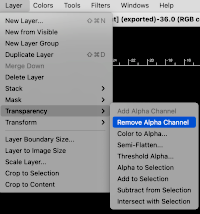
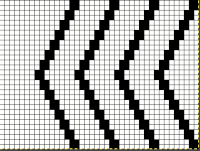
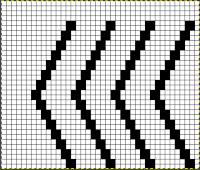
Here the racking took place in single positions after every knit row. Dropping stitches on completion of the swatch, particularly along the edges was so fiddly and such a nuisance I simply gave up in spots, some indicated by red dots.  This watch had stitches released at the end of each shape, racking in the top portion occurred after every 2 rows knit Here the same design was knit using different yarns. The first is knit using the same blue wool, the second a tightly spun rayon. So many fabrics can be automated, sometimes the fabric is a vague look-alike cousin of the original, close enough to be a reasonable compromise. Slip stitch patterning across the top bed can offer a quick solution to bypassing a lot of hand manipulation. Assuming that was possible for this fabric, my starting repeat, 10X30 pixels: and the plan would be to knit it in a 40 stitch swatch, placed in a way so that the “mock racking” would move equally from side to side. Working on a larger than needed canvas, the design can be placed on a magnified work area with a visible grid, at the chosen starting point. If the background is left as white in BW images, moving repeat spacing may erase black pixels as copy and paste in place are used. The solution is to make the background transparent using the Layer menu, as explained in other posts on using Gimp. To save the repeat as a BW bmp or png, remove the alpha channel The final repeat is 40 stitches wide, 34 high, with blank rows added to its top to serve as a place to drop stitches and have knitting happening on the ribber only.
Depending on the download program or the knitting machine model number, repeats are automatically mirrored, so if direction matters, mirroring of the repeat may need to be performed once more.
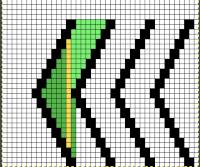
Why the repeat will not work for drop stitch: if the KC is set to slip in both directions, the function will happen on all needles in work on the top bed. On any given row, only black pixels (or punched holes) will knit. The slipped/ skipped stitches keep elongating until a black pixel replaces the white one in that needle location. The degree of elongation is illustrated in the chart in color for part of the repeat, the yellow marks the widest gap between knit stitches. If knit as is the repeat will soon cause serious knitting problems and carriage jams.  Though designing for one type of fabric may fail, this repeat or similar could be used successfully double bed in other ways, using hand transfers on the top bed or down to the ribber. In this case, I chose to transfer down to the ribber, which avoids concerns about restoring correct needle selection, and the repeat was not mirrored for use on my 930, so the resulting knit appears as drawn on the purl side, but is mirrored on the knit side.
The fabric is far removed from the drop stitch idea, but as for drop stitch lace, stitches after the cast on are transferred to the bottom bed.
Newly selected empty needles will create eyelets with the next 2 carriage passes, and texture will appear on both sides at the transfer down locations.
The shapes created do not travel on the knitting bed any longer.
End needle selection needs to be canceled at any time that slip stitch patterning is used and does not occur on every needle on the top bed.
If the pattern is to be interrupted by all knit rows here seen as rows with no preselection in the programmed repeat, then any needles with stitches on them need to be transferred down to the bottom bed before continuing to knit.
As preselection begins again, those needles should be filled by picking up from the stitches below them on the ribber, and then the process may be repeated.

Pintucks 1 vs shadow pleats


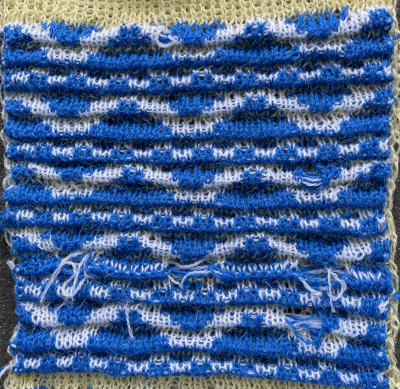
Pintucks are in the family of ripple stitches. The size of both is limited by the number of rows that may be knitted before the stitches on the bed creating the ripples begin to ride up and off the needles. The number of rows possible for the rolls varies with the model knitting machine used and the type of yarn. The Passap strippers make their knitting easier. Generally, extra weight is required.
Basic pintucks are formed across the width of the fabric, no punchcard selection is required. For some basic instructions on forming them in a single color see the blog post on Shadow pleats knitting. Its follow-up, Shadow pleats with added patterning made me curious about the possibility of creating 2 colors, FI patterned pintucks.
For a very brief period of time, some designs were published creating similar effects by hooking up elongated fair isle patterns at regular intervals on the knitting bed.  The preselection for the next row knit in Brother machines poses interesting issues in restoring and maintaining the proper pattern throughout the design.
A lot of changing cam button settings can make many fabrics almost possible but not practical on home knitting machines. Some of the constant switchings of functions may be achieved by knitting with separate pairs of carriages selecting the pattern, which in electronic models advances every row, making this an electronic “special”.
Ribber fabrics produced with 2 knit carriages selecting needles introduced the idea of using a KC with a modified sinker plate to make some fabrics easier and includes a knit sample of patterned ripple fabric.
The goal here is to try to create rolls evocative of the shadow pleated swatches in a double knit.
Because of the rolling on the knit surface, designs should be lengthed at least X2. The initial test used the same pattern as that in the shadow pleated samples with the number 4, double-length key selected on the 930. The carriage setups The width of the fabric is limited. Though the KC on the right may be moved off the machine if needed, the coupled carriages cannot be since the ribber and KC used on the left do not lock together in any way, and with the stops removed the ribber carriage could conceivably slip completely off its bed. The end of the belt still needs to be cleared, but this is about as far as one can safely move, with the KC just clear of the set mark on the left of the top bed. End needle selection is used in both knit carriages.
Extension rails are required.
The coupled carriages although selecting needles will be knitting on both beds to begin and end the fabric and to seal the folds setting the pleats.
To begin, test the tolerance for the number of rows knit on the top bed only. It is possible to coax extra rows by pushing fabric down between the beds by inserting a thin knitting needle between the beds at the start of the pintuck or halfway through and weighing each end. Longer rolls and hems tend to flatten.
The main bed will be knitting on every needle and FI is essentially a slip stitch, so the tension needs to be at least that for the yarns used in single bed knitting. More pronounced rolls may be produced if the tension and stitch size are adjusted accordingly.
Normally the sealing row would be knit in the light FI color. In these samples, the yellow yarn is used to help assess how those knit rows interact with the folds and to what degree they are visible.
The first try:
1. tested a solid color 8-row pintuck a single time, then switched to 6-row sequences and continued. Even though a contrasting color is used to seal the tucks, it is not immediately visible
2. the second carriage is set to FI and begins to operate from the right. Out of habit, I knit with weaving brushed down, a bad idea in this instance
3-4. this fair isle design is used double-length and forms some very long floats repeatedly, not the best choice even for single bed FI, definitely problematic here, time to regroup.
Comparing the surface to the shadow pleat fabric For a different execution of the same design using a different main color on a different knitting day, see the bottom of the post.
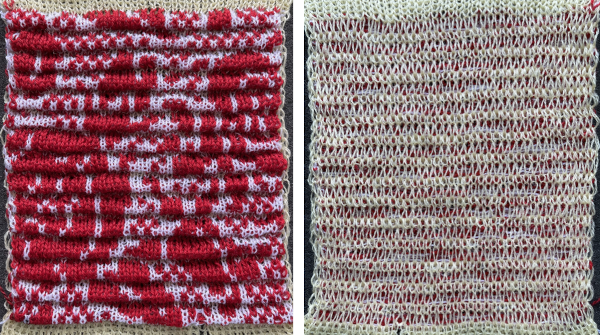
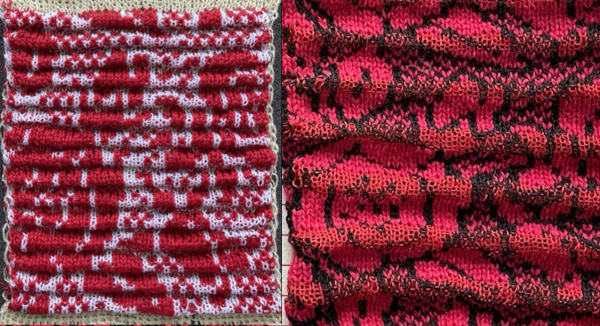
Moving on to a simpler, random, smaller, 12X10 repeat planned for knitting on a 33 stitch swatch and rendered double-height planning six-row pintucks, Visualizing the possible design along with placement of sealing rows represented by all-white pixel rows in the diagram. The single 8-row fold advances the remaining pattern by 2 rows, resulting in a subtle change in the design: My swatch used white for the ground as in the above right, the 8-row transition is marked by the red arrow.  Knitting was easy and smooth, the 8-row tuck required a bit of coaxing. The fabric lies flat, does not have the drape of the single bed shadow pleats, it is not suitable for the same end-use.
Plain every needle rib knit is quite a bit wider, a consideration for casting on and binding off or transitioning to another fabric if this technique is used as part of a different fabric. This file was also downloaded and lengthened X2 The pattern is not very pronounced, but the short floats make for easy knitting. Comparing the fabric to the single bed shadow pleat using the same design The pintuck main bed FI yarn could be slightly thicker. Since the 6-row sequence appears to work well, if the fabric is to be pursued, the design could be planned and adjusted accordingly.
Issues encountered in DIY deliberate design planning: beginning in Numbers, a table is set up with enough rows to accommodate more than the height of the planned design. Since the fabric planned would knit 6 rows on the top bed, then followed by 2 rows on both beds not affecting the design, starting at the bottom of the table, use the command key and work on hiding 2 rows following groups of 6 for the height of the table  The theoretical design in beginning stages:
1: the rows marked in green are hidden
2. a design is drawn using 2-row blocks and shaping
3: it is tiled, appears worth pursuing.
The expected carriage actions, color reversing the repeat so that the dark color will knit in feeder A of the FI single bed sinker plate Points to consider while removing the use of the ribber from the equation:
both knit carriages are set for the end needles to select. When knitting fair isle this is necessary to keep the contrast color knitting from separating from the base color along the design edge. If at any point there are single-color stripes, the end needles if selected need to be pushed back to the B position, or the second color will catch the first and last needles in work, forming a float from side to side. If the yarn is removed from the B feeder and end needles are not pushed back to B, stitches on them will drop. My first try The transition to color reverse shown tiled Leaving the contrast color in the B feeder on the all knit black pixel rows created the first mess. Because of preselection, the return to knit dark rows has every needle coming forward as the single bed KC is traveling back to the right, resulting in another mess.
Regrouping so the first pair of rows with no preselection will knit the dark color, the second pair of rows with no preselection will knit using the paired carriages, sealing the fabric, the larger geometric shape has 2 rows with no needle selection nearly at its halfway point.  The broken threads are due to stitches getting hung up on gate pegs, missed until more knitting had been completed. With more attention, knitting went more smoothly, and the planned design is identifiable.    Perhaps as a farewell to the topic or out of sheer stubbornness now that the above had been knit and I have had some practice, I returned to the more straightforward knitting of that double-length flower pattern with far improved results. Some of the floats trapped behind the long stitches created on the ribber can be seen bleeding through on the right. Comparing the scale once again to the shadow pleats This fabric may fall in the category that need not be knit simply because one can. That said it may serve well in bands joined onto larger pieces, or any use for it may only be limited by patience and imagination.


Using Layers in Gimp for color separations

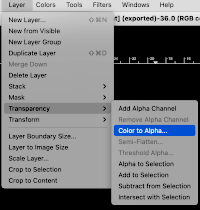
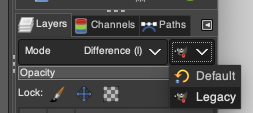
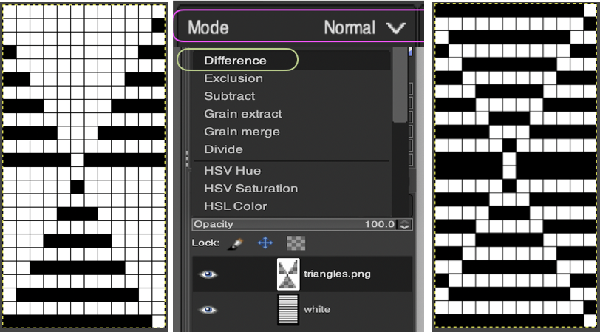
2023 The layers menu in Gimp 2.10.34 no longer offers the difference mode.
From the manual: “If you need to stay compatible with older GIMP versions or you need to use the legacy layer modes for other reasons, look for the icon to the right of the layer modes selection.
This drop-down menu will let you choose between Default and Legacy. If you choose the latter, the layer modes list will only show the legacy layer modes and all modes will have “(legacy)” behind their name (the selected mode will use the short version (l). ”
To make the dialog available: click on Legacy to switch mode selections.  In December 2022 I began to experiment with layer transparency please see the post Gimp Update for Mac 3.  Over the years I have developed personal methods for creating color separations for many types of knit fabrics, born from lots of experimentation when published resources were absent or extremely limited.
I continued to share methods as they evolved from increasing familiarity with specific programs or as I was introduced to new ones.
Since I began to use paint programs including Gimp I had very limited experience using layers and did not consider how they might be used in color separations for BW knit repeats.
In my last post on fantasy fair isle ribber fabrics, Claudia Scarpa shared her layers method and subsequently published a Youtube video for obtaining a separation for a very similar fabric to the one I developed beginning with a large design motif that in her instance was also placed specifically on a larger ground.
Her method for separations in 2 color work sparked my interest in using the steps to yield knitting patterns for varied textures and stitch types, beginning with dbj.
Using
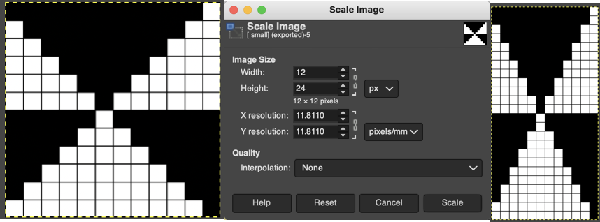
will display layer options in my Mac on the bottom right side of the screen A simple geometric shape is scaled in Gimp to twice its height, check that Quality Interpolation is set to None. I have sometimes had issues with scaling in Gimp, particularly when working with small repeats. The cause appears to have been that the Quality, Interpolation, needs to be set to None and may randomly change while working through several steps in processing any image or after a program restart. Arahpaint scaling is still an excellent option for knitters who have it available.
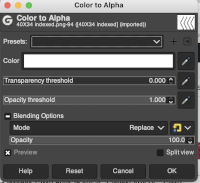
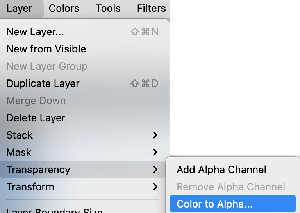
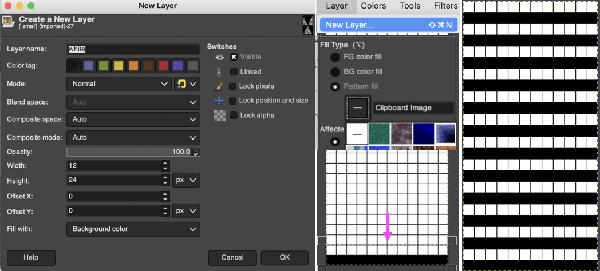
the white ground of the resulting image is rendered transparent by using Color to Alpha and will constitute the first layer for the separation process Select New Layer from the Layers menu (see chart), choosing the background or foreground color so as to have a white screen. It will share properties with the alpha repeat such as pixel count, magnification, and the grid view if used.
Use the pencil tool to draw a repeat that will be used to fill the new layer, followed by using the rectangle tool to select what will become the pattern used to bucket fill the whole layer.
The latter may be the smallest possible selection or even that of complete rows as in my chart. Copy the selection, it will be saved to the clipboard and remain available for filling from pattern unless the program is quit unless it is saved as a pattern for future use.
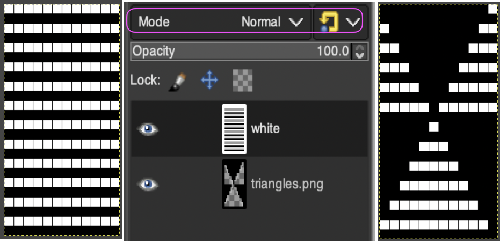
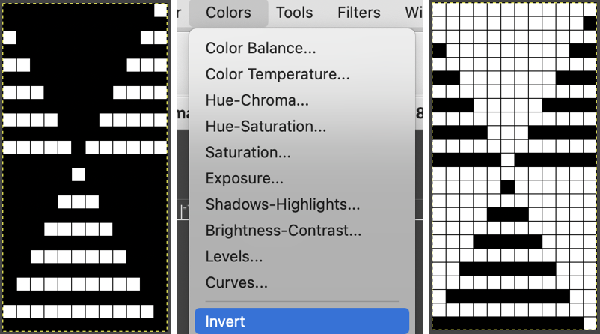
After using the rectangle select tool, remember to click in the window outside the image to set the layer prior to using the bucket fill tool in the pattern fill setting or the whole layer will simply fill in with a single color. In the layers dialogue, use the mouse to drag and drop the alpha image icon for the triangle layer onto the newly created one. The selected icon will appear surrounded by a border when chosen, a new icon will appear during the step.  Both layers measure the same pixel dimensions, no placement adjustments are necessary. The mode, highlighted here is changed in a later step.  Color invert the new image  Click on the downward pointer to the right of Normal and select Difference. The result is a repeat that may then be saved and used doubled in height to knit DBJ in a variety of settings.
Elongation after download can be avoided by working with the same initial image scaled in height X4 and following the same process, saving and using the repeat on the far right. The same separation was achieved using other methods in the post on fantasy fair isle.
Possible DBJ settings on Brother machines using the elongated final repeat are shown in this grab, part of the postEOR refers to a repeat that would require double length after the download, the same machine settings apply to any image created in a double-length format prior to download. Are punchcard knitters left out? In the post on the color separation used for the KRC equivalent separation for a punchcard two results were presented, the full card and the starting design shown with the color reversed repeat of the above. The process begins with obtaining the double-length separation after saving the last file on the right as png discard any files still open. Open the saved png and process it the same way, changing the ground Save the last file as png. Punchcard knitters would need to tile the fileX4 in width and in height X2 but the final repeat appears different than that in the punchcard post, the proof of success or failure is in the knitting. If the swatch is knit on electronic models, the first preselection row is made from left to right, as it would be if using the built-in color separation. The main bed for this fabric after the preselection row is set to slip in both directions, the ribber, using an even number of needles, is also set to slip in both directions with lili buttons. The 8X32 png The result from repeating it twice indicates the separation indeed works. When a color separation is downloaded it is used as one would a fair isle. If the motif is representational and direction on the knit side matters, any repeats may have to be mirrored horizontally if they are automatically reversed by either your software prior to download or your machine model after it.

There has been renewed interest in the MK FB group on drop stitch lace recently. I plan to address using this repeat in a future post on knitting the fabric using img2track. The 16X72 double-length png A quicker matching result:
begin with the motif lengthened X4
open a new layer, bucket fill a striped ground, and use transparency to change the white in the result to alpha. The layers are immediately combined into a new image
color invert the resulting file
change layer mode by selecting difference from the menu, save the resulting png
Tiling to visualize alternative repeats, beginning with the 24X72 pixel fileThe file for the image in the center, modified to 24X144 pixelsThe file for the image on right, modified to 48X144 pixels  Removing the color on every other row for use in specialty fabrics ie drop stitch lace using a modified stitch dropping tool with a now edited 24 stitch repeat, suitable for punchcard models:  The image is processed as for the previous separation, the final png is exported. Open the saved in Gimp.
From the Layer menu choose new.
Create a pattern for bucket-fill in pattern using color, in this case, blue.
A new image immediately appears, export it as a png.
Open the saved 3 color png.
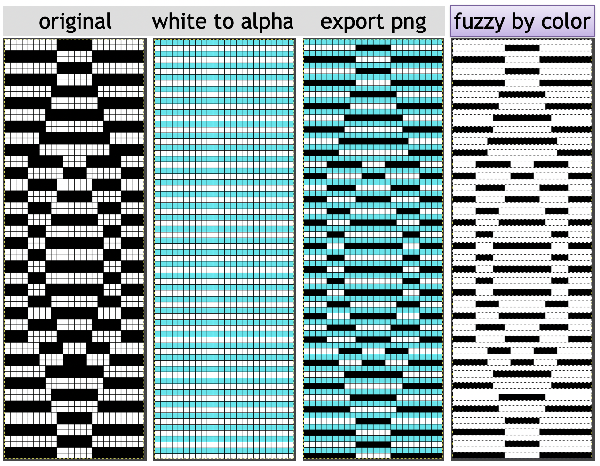
In the tools menu choose the second option for fuzzy select by color, the icon will change. Using the rectangle tool, select a single blue row, after the selection, press and hold down the shift key and repeat selections of multiple rows in the same color. Each selection will be bordered by a dotted line. Release the shift key. Click on the rectangle select tool and then again in the work window outside the image to set it. Dotted lines will disappear. The same action is repeated if working on segments of the full file at a time.
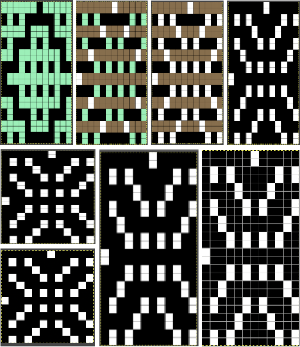
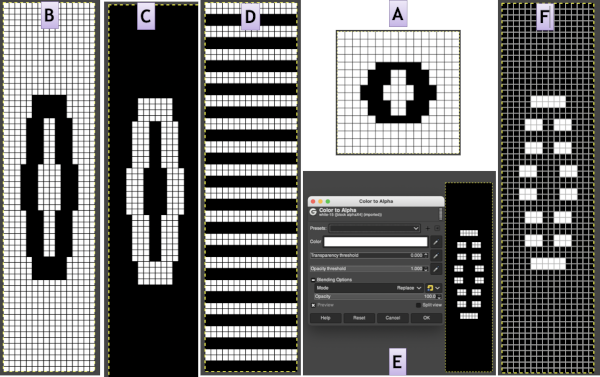
Export the fully altered file as png ready for download, or print a gridded version to follow in punching a card. The 24X72 new png MOSAICS: For proof of concept, I intend to use separations for fabrics accompanied by knit samples in previous posts,  beginning with a mosaic one, achieved in the post. The images shown are for the final repeat as separated there are shown at the top of this new image. Below comparisons are made between the original download file and its companion elongated repeat alongside the same developed using LayersBoth results require scaling X2 prior to knitting, whether by button setting changes in the repeat after download or in Gimp prior to. After reaching the step where the layer mode is changed to Difference (or Exclusion), stop and save the png, using color reverse at this point will revert to previous a previous layers view open the saved png in Gimp, use color reverse, then scale the result doubling its height, save the png for download and knitting without changes in any machine settings. Testing another image separated in a previous post: the original charted image is now rendered in black and white the repeat as png  tile check The process in LayersThe very last file on the right is saved as a png. In turn, it is opened again in Gimp, scaled to twice its height The non-elongated repeat actually matches that in the punchcard, which was knit with the machine set to double length Exclusion is the alternative Layer mode which when following the same process yields identical results. A block slip stitch design from the post requires color inversion and doubling the length. A: design motif
B: lengthen X 4
C: color reverse
D: new layer filled with pattern
E: color to alpha immediately results in F
F: save png for download

Revisiting fair isle, thread lace, 3D surface potential

WORK IN PROGRESS

Tuck and slip stitch are commonly used to produce very effective textured surfaces often accompanied by color changes. Those color changes require knitting with yarn always in the A position in the sinker plate, and color changes are made by replacing the yarn in that position by hand, or by using the color changer. Fair isle and thread lace operate differently, as they carry and work with two yarns at once. Some of these samples were also presented in the post on fair isle variations
For textured surfaces using wire for one of the two colors makes the fabric moldable, here 32 gauge stainless steel wire is used as color 2, card#2 Using end needle selection when there are needles out of work results in single stitch width vertical columns of color that are planned in this instance as guides for sewing machine stitching lines. The width of the fabric is limited because of the number of needles actually knitting the pattern, but the technique offers the opportunity for a coordinated bicolor fringe with placement on the motif from casual to very deliberate, either side may be chosen as the “public one What may be firing in one piece could provide a tube for insertions on either side of the knit.
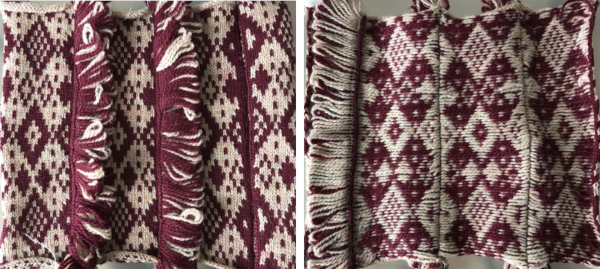
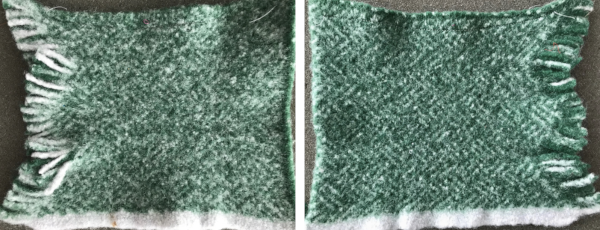
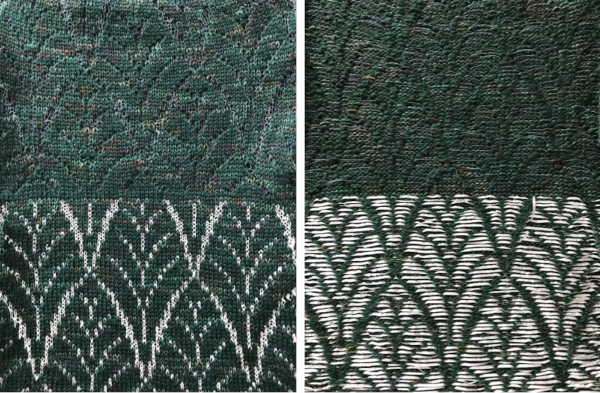
The fringing here is created by having needles out of work with one or two needles in work at their outer edge anchoring the deliberate floats on one side, trimmed when the piece is complete, before felting. The triangles are formed with single decreases followed by increases to reverse the shaping keeping the fringe edge needles in a fixed position. There is some rippling along the shaped edge, but the remainder of the fabric is fairly flat. Felting creates a reversible knit, shrinkage, possible stiffness, and potential limitations in the width of the final fabric are considerations when planning wearables. These factors become irrelevant when the goal is sculptural form.  Creating blistered surfaces the easy way,  leaf pattern variations: poly-cotton and raffia on the bottom, fishing line as the second yarn line on top. I have found the line for 6lb or fewer works best. The knit is flat. Felted rayon chainette and wool; when the main color is wool and the rayon renders the floats there is minimal blistering the result from reversing the yarn positions creates more bubbling
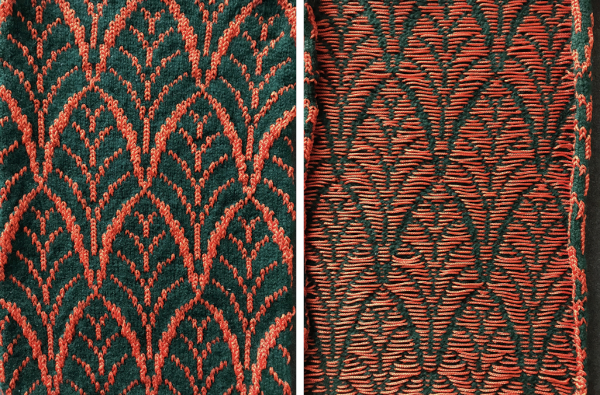
Here elastic is used as the second color in the thread lace setting.  Using wool and acrylic non-felting yarn, the original mylar repeat was altered to twice as long and rendered twice as wide as well the difference in finished width The yarn positions in two color single-pass knitting, remain fixed in their relationship to punched holes. In fair isle patterning, the back feeder, usually labeled A, knits the ground on non-selected needles in the B position. The yarn (red) in the forward, B feeder, knits the stitches on needles selected to the D position which correspond to punched holes or black squares in a mylar, black pixels in a computer file for download. In thread lace, the back A position yarn knit both yarns together, while the forward B position yarn, red thread, knits the forward yarn/color, with the other yarn creating the single set of floats behind it.
Not all machines have a thread lace carriage, I use a punchcard model KC on my electronic machines 
Sinker plates in different model years may also differ.
In terms of blistered fabrics in 2 colors using elastic yarn as one of the two fibers, the results in FI and its double sets of floats are shown on the left, the thread lace version with only the elastic creating the single float on the right.  Thread lace patterning may also be used with a thin, non-felting yarn knitting the areas of the pattern intended for the 3D texture in the forward yarn position. The rear position yarn needs to be wool or other fiber that will felt and shrink with processing. In the finished piece, the wool floats may be left in place, trimmed, or the thin shapes may even be trimmed out leaving openings that do not ravel In addition, large thin fabric shapes can be stiffened over enclosures to create permanent effects in sculptural pieces.


Ribber fabrics with stitch transfers between beds 2

A collection of embossed patterns created by isolated groups of stitches being brought in and or out of work on the ribber
2021/05/09/double-bed-embossed-patterns/
2021/02/25/brother-shadow-lace-rib-transfer-carriage/
2021/03/11/slip-stitch-patterns-with-hand-transferred-stitches-double-bed/
2020/08/13/ribber-fabrics-with-stitch-transfers-between-beds-1
2017/12/20/combining-kc-patterning-with-racking/
The inspiration fabric in the 2020 post and one of the resulting swatches The inspiration fabric recently found online, source not knownAnalyzing the structure: it appears the fabric is knit with slip stitch textured patterning on the top bed, and occasional needles in work on the ribber creating elongated stitches that float on top of the light-colored rows.
Slip stitch textures narrow the fabric width considerably, so the single-color areas would need to be knit in slip stitch as well, here a 1X1 repeat is chosen.
Needles brought up to work on the ribber are planned to interact at intervals with stitches on the top bed. The starting concept working in Numbers In slip stitch patterning the white pixels slip, the black pixels knit. This repeat is 20 stitches wide, so not usable for a punchcard machine. The first draft is 20 stitches wide by 32 rows highThe test swatch: Any adjustments in the dark color stripe between will need to be made within the repeat itself, the floats in the light color will be wider by using a simple color reverse. The color reversed, modified repeat is now 20 stitches wide by 28 rows  The test swatch was executed using the same red/yellow yarn combination, then in black and white using different yarn thickness and tensions.
The width of the spaces between stitches on ribber can be varied, creating shifting size “window panes” resulting in a knit fabric with a very different aesthetic.
The reverse surface is not particularly exciting. A comparison to the mirrored original inspiration, likely knit in thicker yarns The knitting process: with any textured or very lacy knits casting on and binding off require special consideration.
In test-swatching, knit the pattern single bed first to sort necessary tensions and visual appearance, follow with plain knit rows using the dark color,
use the ribber cast on comb to poke through the knit, hang ribber weights, bring needles into work on the ribber, stitches will be formed on it with the next pass. The ribber stitches need to be knit as loosely as possible, test the rib pattern and tensions.
If using only the coupled knit and ribber carriages, the first preselection row is made toward the color changer from right to left, the dark color knits first.
Needle pre-selection changes serve as guides to both color changes and to carriage setting changes on the ribber.
After every other needle preselection, the dark color knits with the ribber set to knit.
When the needle preselection changes to the alternate patterning, the color is changed, the ribber is set to slip in both directions. The main bed only will knit, in this instance, for 4 rows each time.
After every other needle has been preselected again, the color is changed to dark, the ribber carriage is set to knit in both directions, the process is repeated throughout.
I used a modified KC sinker plate and a second knit carriage selecting needles as shown in the 2018 post
A possible alternative for casting on a finished piece:
cast on every other needle rib from right to left
knit 2 circular rows, followed by an all knit row, the carriage will be on the left side once more
transfer all ribber stitches up to the main bed, bring up the desired needles on the ribber to pick up loops for new stitches before the next pass, with the first and last needles in work on the ribber.  Read the first row of the pattern, cam set to KC1 to ensure end stitches are knit when patterning occurs only on the top bed.
Knit to the left.
The first stitch on the left may need to be filled picking up a ridge from the stitch above it to form properly.
The knit carriage is now set to slip in both directions and knitting continues as described previously.
Once a pattern is set up, the same design can be explored in different ways.
Here the swatch was knit in a single color with the ribber set to knit in both directions on every row.
Because there are many more rows on the ribber knitting than on the main bed, the vertical line created by its stitches is not smooth and is forced up at the top of the piece, creating a wavy edge. The cast on was deliberately loose. To tighten it up at the edge of the body of a narrower knit, every other loop can be picked up with a latch tool or crochet hook moving toward the yarn end at the cast on edge and is pulled through the previous one, producing a chain stitch. When the end of the row is reached, the yarn is pulled through the last chain and secured.  


Hand to machine, symbols 6

WORK IN PROGRESS

This document is created using Mac Pages and Numbers, stitch illustrations have been borrowed from magazines and manuals long out of print and edited, the symbols and charts are self-drawn. Using shapes in Numbers now makes the process of creating DIY symbols in the spreadsheet significantly easier than in my early Excel days.
The transfers are illustrated as they would occur if hand-knit or tooled as opposed to created by automated machine functions, blue dots are associated with knit side facing, pink with purl side facing. This series observes single bed work

Cable crossings: To visualize cable crossing in the opposite direction, images can simply be mirrored horizontally More cable crossings including working double bed
Crossing stitches by pulling one through another, an alternative symbol for the same technique. The techniques may be used in variations, using 3 or 4 stitches. Yarn and tension are significant factors when any number of stitches are moved across a fixed span on a metal bed machine.

Slip stitch creates a short float where a needle is not worked and an elongated loop on the knit side of the fabric. There are patterns where the elongated stitch is removed and brought behind the float, to the purl side of the fabric Tuck stitch groups of stitches are gathered in needle hooks, commonly with knit stitches on either side of the gathers.
Tuck stitch with a twisted elongated stitch. The effect will depend on the yarn being used. More on tuck and slip stitch /2020/09/13/single-bed-tuck-and-slip-stitch-fabrics-1/

When combining techniques symbol placement in charts is often up to the creator. In the top sample, 1, a three-row pattern, the first stitch is pulled up, gathers it and the stitch right above it on the shank of the needle, in turn latching the third stitch through the first two, creating a purl stitch on the knit side at the top of the gather, and a knit stitch on the purl.
The next pair of images, 2, illustrates a simple picking up a stitch, stretching it, and hanging it on a knit stitch several rows above. This is also called ruching which may be done over any number of rows, not necessarily in vertical alignment, and may result in episodic pleated effects on the knit side.  Because no “tuck” loops are being combined in needle hooks in addition to the stretched stitch, multiple side-by-side stitches may be hooked up this way. Very short elongated loops ie for one or two rows as marked 3, are not as visible on the purl side and do not create very visible gathers on the knit side.
A single fully fashioned increase is illustrated in the charts. The same technique may be used in the body of the knit, moving stitches in any one row, leaving single needles out of work at regular intervals, and picking up from rows below as pictured on the right to “fill in” empty needles. Stitches may be twisted in the body of a knit on the machine by inserting a tool front to back through the stitch, twisting it to the right or left, rehanging the stitch in the same location.
This technique may be used with multiple stitches to create mock cables, and patterning, whether electronic or punchcard may be used in machines with needle or pusher preselection to track the placement of the twists. E wraps may also be used to cast stitches on side edges of the knitting, whether the result is satisfactory is determined by the knitter’s preference.

When vertical spaces are created between knit stitches, the term often used to describe the floats that are created is ladders. One can drop a worked stitch at the end of the knitting, or in machine knitting, a needle may be left out of work and as it is skipped, the ladder is created. Dropped, previously worked stitches create wider ladders than those with skipped needles When a ladder needs to be eliminated, there are several ways to deal with returning any empty needles to work. If an empty needle is brought back into work, the first pass to the opposite side will create a loop on the empty needle, the second pass will complete the stitch on that needle, and an eyelet is created. If one wishes to minimize the eyelet, one method is to pick up the purl ridge from the row below on either the right or the left of the empty needle, as illustrated in the fully fashioned increase chart, another is to twist the last ladder and rehang the twisted loop. If multiple needles are out of work, then an e wrap cast on by twisting stitches on every other needle is needed unless needles are brought back into work one at a time, creating secondary eyelet patterns. 

Blog posts related to or using symbols, in historical order:
Machine or hand-knit symbols, DIY charts with copy and paste in Gimp, 12/21
Symbols in knitting charts, 11/21
Revisiting lace repeats, symbols, and charting, 10/21
Punch cards to electronics: book symbols and samples, 12/17
More on charting, foreign symbols, and cables, 12/14
Machine or hand-knit symbols, DIY charts with copy and paste in Gimp, 7/14
Machine knitting symbols, 8/13
Hand to machine symbols 5: lace, 12/21
Hand to machine, symbols 4: cables, 2/13
Hand to machine, symbols 3, 2/13
Hand to machine, symbols 2, 1/13
Hand to machine knitting symbols 1, 1/13
Knit terms: translations 2/12

DAK is a program that allows for designing with illustrations created both as symbols, or unique to programs for in-home use, representing the intended fabrics as knit stitches, seen here for a lace repeat. The availability of the symbols does not necessarily translate to knittable fabrics 1, 2, more lace info Cable illustration as from the DAK manual, with single bed and knit and purl stitches represented Many cables that can be created in hand knitting are not executable on the knitting machine because of the fact that the yarn needs to move across fixed widths on a metal bed and the moved stitches need to be large enough to allow the knit carriage to form new stitches properly as it travels back to the opposite side on the following pass. There are techniques that can help to make wider cables possible, it is best to test crossing tolerance before planning or following full repeats whether published or self-drawn.
The same symbols may be used for hand-knit charts, taking into consideration whether working on 2 needles, in the round, with the knit or purl side as the public one, or the fabric is intended as having reversible surfaces.

Geometric shapes on ribber fabrics with tuck stitches 3

Previous related posts:
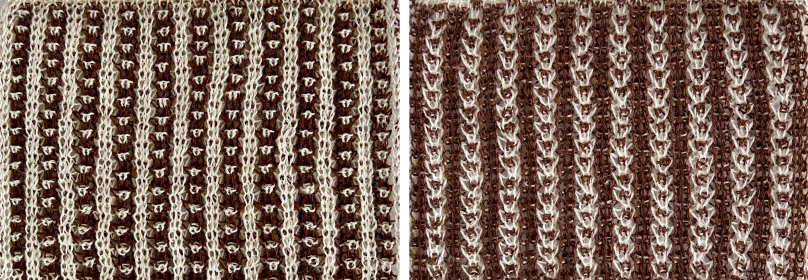
2 color ribbed brioche stitch on Brother knitting machine 1
Geometric shapes on ribber fabrics with tuck stitches 1
Geometric shapes on ribber fabrics with tuck stitches 2; knitting with 4 carriages
The last post on using Gimp:  2021/07/18/gimp-update-for-mac-2/
The method for color separation used for mosaics

The sources of inspiration from hand knitting or industrial knitting machine designs are endless. There are many features that simply cannot be duplicated, sometimes compromises can be reached that can achieve only imitations of the original. To my mind when knitting garments or long pieces the greater the degree of automation, the less likely one is to have patterning errors occur, in ribber fabrics, they are also more complicated to correct than single bed knitting.
I recently came across a pin of a Ravelry hand knit pattern which led to my return to this topic once more, including perhaps the addition of more colors. The plan is to create a repeat which may be knit using color changes every 2 rows. Each design row knits each color twice, so the standard built-in KRC separation is not a consideration, though the same cam settings may be used in those fabrics as well.
The required color separation has been discussed in several posts on the various forms of DBJ, a review:
The initial test repeat is 18 stitches by 44 rows, designed using 2 X 2 blocks, to begin with. How it might appear knit in fair isle:  Transitions in charting visualizations:
A: FI repeat with pattern progression in two-row increments
B: every even-numbered row beginning with row 2 is color reversed
C: B repeat is doubled in length to 18X88 for initial samples
D: repeat adjustment for a first try at introducing 2 additional colors End needle selection is canceled, the first and last needles are in work on each side on the ribber knitting every row, the first preselection row is from right to left, cam buttons are set after the left side is reached. Knitting in these samples began with the blue yarn in the number 2 position in the color changer. The ribber remains set for knitting in both directions throughout, the images on the right do not reflect the amount of surface 3D textures.
with the main bed set to tuck in both directionsLock settings are easier to achieve on the Passap than switching out cam buttons in Brother machines. This was knit using 4 carriages. Color one knits with the main bed set to tuck both ways, color two knits with the main bed set to slip both ways. The slip stitch reduces the width of the fabric considerably Here each color alternately tucks and slips. The choice of cam buttons matters, tucking first from left to right, slipping from right to left, with cam buttons set COL after the first preselection row This last cam setting appears to my eye to produce a texture “close enough” to the inspiration fabric. Attempting to add more colors: the repeat, D, is still 18 X 88 but is now shifted slightly.  Somehow the slip cam button was not set, so the knit carriage tucked in one direction while knitting in the other. I am vaguely reminded of illusion knits. Considering altering both the color choices and placements again. A way to imagine exact color change placements beginning with solid colors repeats once more, which can be followed by new color separations. The existing repeat may be reduced further to 18 X 64, eliminating some of those extra rows in the center of the chevron shape  The new BW image, tiled: Whether or not the design is intended to retain chevron shapes in alternating textures, actions may be plotted pre knitting in any way that visually makes sense to the person designing the pattern and tools available to them. Reversing the png so that the more textured stitches will begin with the color in yarn position 1Using either repeat, color changes now occur after every 32 rows knit. Another color change location clue is in the needle selection change above and immediately following the red border in the chart on the left.  Adding colors can be planned cautiously or allowed to happen randomly depending on the preferences of the designer and end-use. Ribber fabric designs are not visible until several inches have been knit, too late to catch color sequence errors. Some machines allow for memo placements or sounds to help track color changes, but only within the initially programmed repeats. A quick spreadsheet can provide customizable checkboxes or added information. For an attempt to retain chevron shapes in different textures: When using 3 colors, rather than 4, the texture of the zigzags on any specific color, will vary in placement. It is easy to change colors in any chart to approximate those that will actually be used in the knitting.  Proof of concept: each of my yarns is slightly different in both thickness or fiber content from the others, which can be a drawback in resulting textures. As in any 2 color dbj, if 4 consequent rows are knit in one of two colors the positive and negative portions of the image reverse, as seen at the top of the swatch. The green was not intended to be used originally, the white yarn simply ran out. Such accidents at times may provide pleasant improvements. There is bleed-through of each color behind the other in the tighter knit areas as well which contributes to visual color blending, noticeable even in the areas with fewer tucked stitches. Splitting zig-zags into triangles, working color 1 with color 2, followed by color 3 with color 4 pairings A PDF including row numbers and space for notations zig zag
An editable Excel spreadsheet created as an export from numbers zig zag
For Mac owners a Numbers doc. zig zag
A simpler repeat suitable punchcard owners as well using only 2 colors The test swatch and observations: patterning was begun with color 2, yellow.
The yellow yarn is 12/16, the maroon is 2/15 in thickness.
The triangle, because slip and tuck stitch settings are used, is compressed in height, while there is enough tuck happening to still make the knit wider.
The pattern is 24 stitches wide, the swatch was knit on 40 needles. Smaller swatches are fine for testing tension and colors. If committing to larger pieces, tests on at least 100 stitches by 100 rows are needed for gauge calculations in any double bed work or very textured patterns on the single bed.  On some occasions when a far larger number of needles are in use, problems may turn up that require going back to the drawing board in terms of items ie tension settings, weight used, etc.
A: patterning was begun with thicker yarn, the yellow, in color changer position 2, both yarns are 100% wool
B: KCI, end needle selection on, a 2 color “beaded” edge is created
C: KCII, end needle selection canceled, patterning occurs on end needles
D: transferring to the top bed and using the standard latch tool bind off for these fabrics is far too tight  The tiled repeat, 24X48, does keep the stitch quality constant for both colors, Assumptions based on optics of tiling are not always accurate clues to potential patterning errors, here those darker lines are part of the actual design Continuing on a 24 stitch repeat, the original design may be rendered at double height and separated once more, doubling the separation height to 96 rows There are days when either or both machine and knitter need a break. At the start of the first swatch, the cam buttons were not set, resulting in plain knit stripes. At its top, the purple did not get picked up properly from the color changer, and the knitting of course fell off the machine. On a second try, the same issue happened again with the purple yarn. Multiple incidences of such events were fondly nicknamed “dropitis” by my students. The test is on 24 stitches, the width of a single repeat, the triangles are much more balanced in size, this knitter is putting this pattern to rest.  Another try at the diamond shapes that began this topic. The first .png when tiled appeared to not have enough space between the shapes, was amended to this the differences when tiled the color separation can happen completely within Gimp using color invert the white yarn is an acrylic, slightly thicker than the purple toned one. Sometimes simply exchanging yarn positions can change the qualities of the overall fabric. The repeat begins with 2 blank rows. To achieve the tighter white shape as opposed to the honeycomb purple one, at the start of the repeat that color needs to be in use on rows where knit stitches happen as the KC, set on slip to the right, knits needles brought forward to D position. Red in this chart segment marks pertinent rowsBoth with hand knits and commercial knits because of the hand actions possible on both sides in the first, and as many as 4 beds selecting and knitting on the other may be in use at the same time with more complex needles as well, there are fabrics that are difficult or even impossible to duplicate. There often are obvious differences in the results, but the journey may still yield results that are pleasing and worth pursuing. Another even more complex inspiration from a sweater attributed to Falke, Spring 20 collection, using similar stitch structures, but in addition, also transferring stitches between beds exposing a purl striped ground.