I still surf Pinterest daily and often encounter published punchcard repeats that catch my eye.
Many need some interpretation and editing for use in specific machine models.
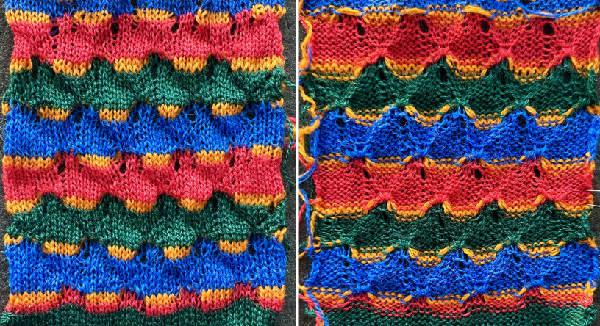
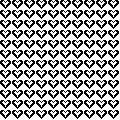
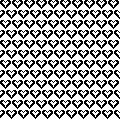
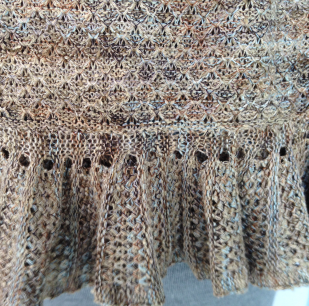
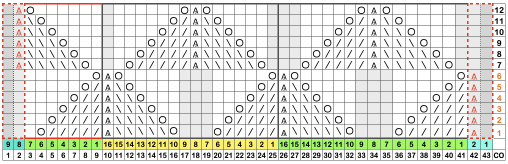
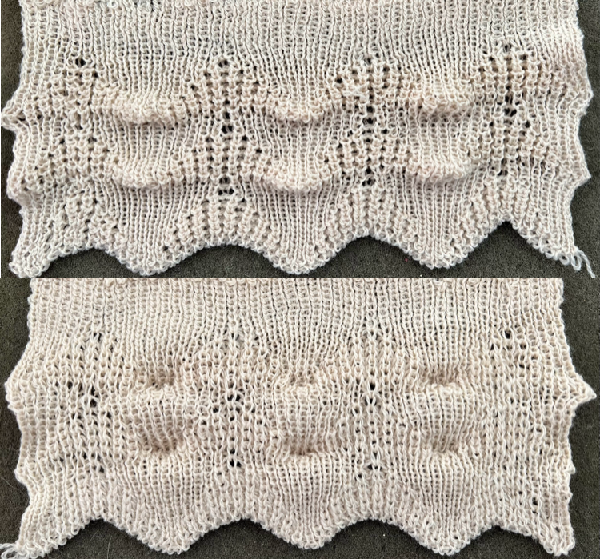
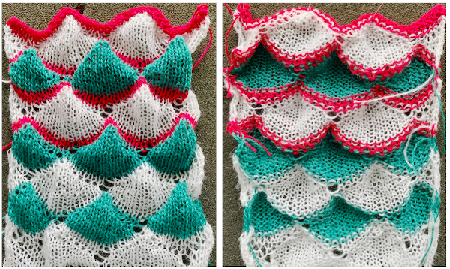
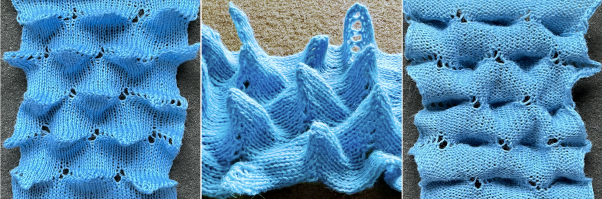
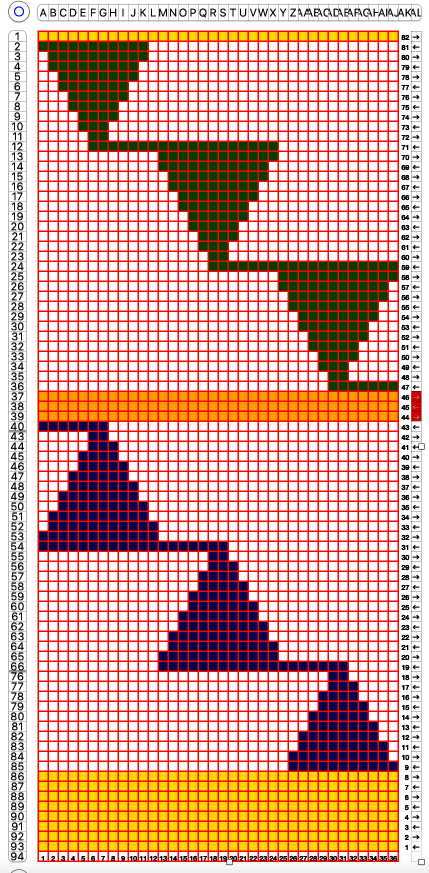
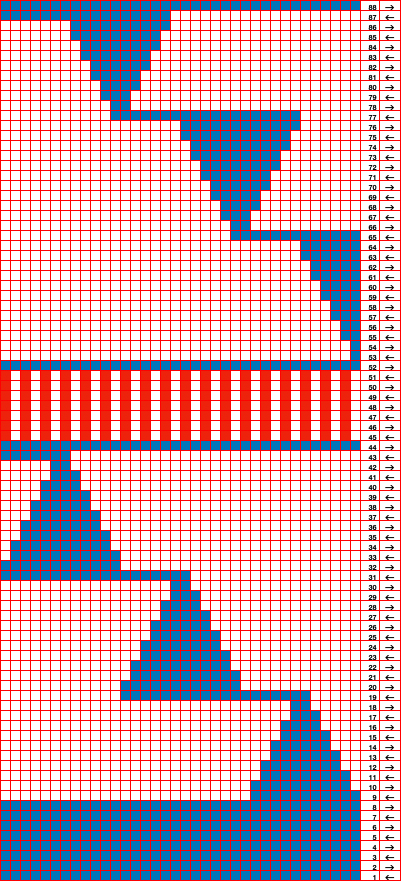
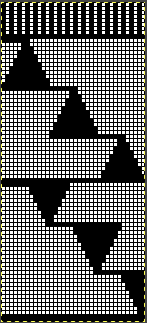
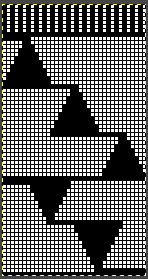
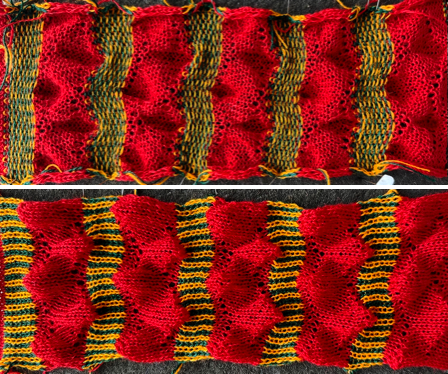
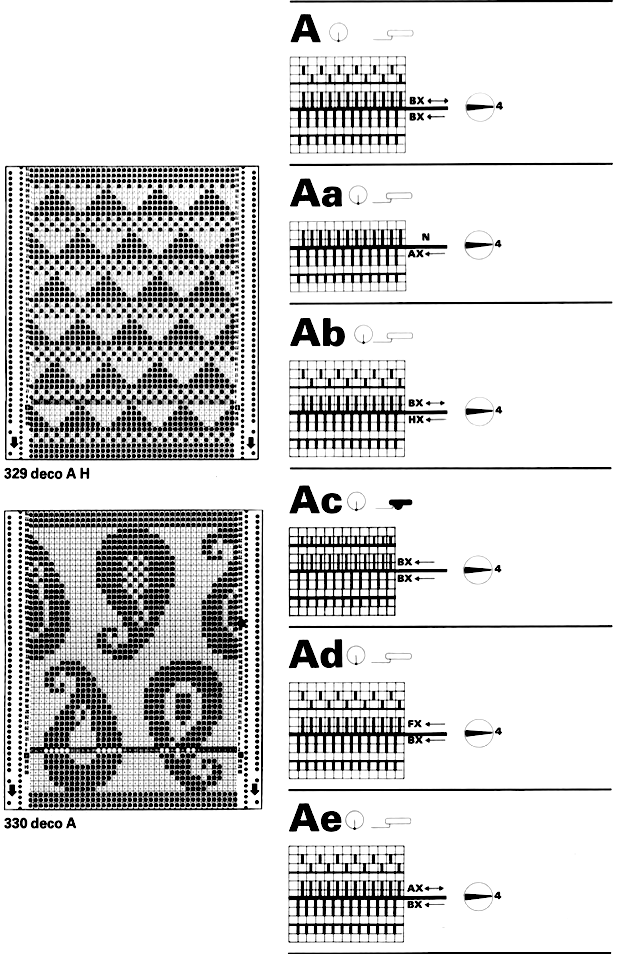
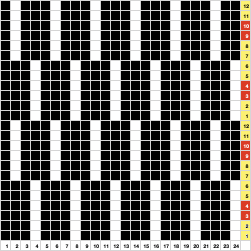
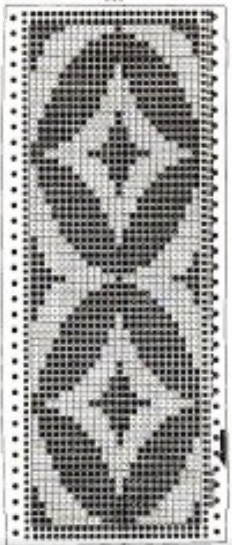
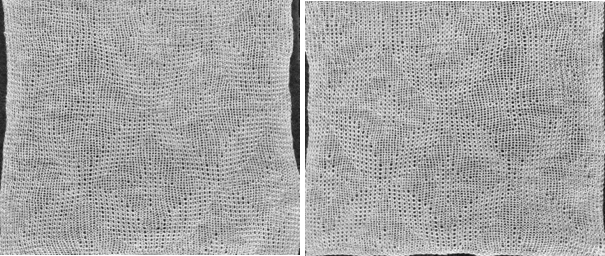
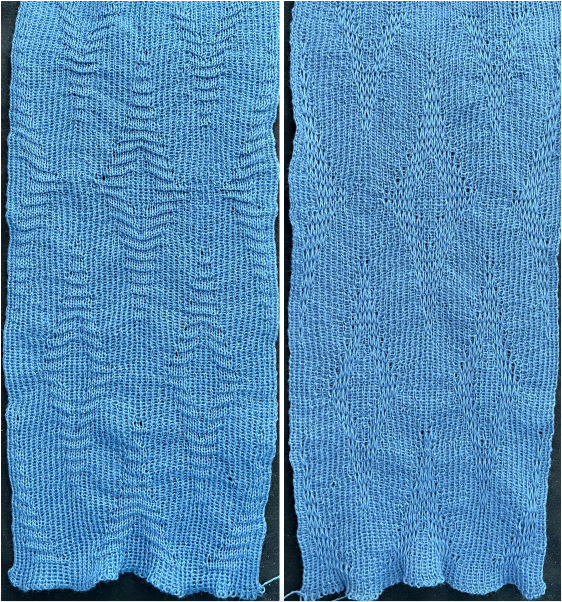
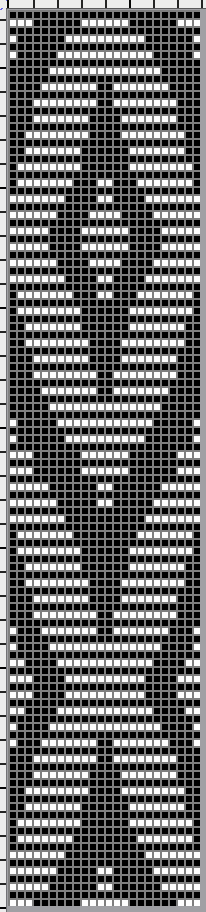
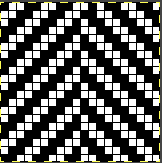
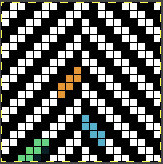
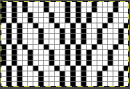
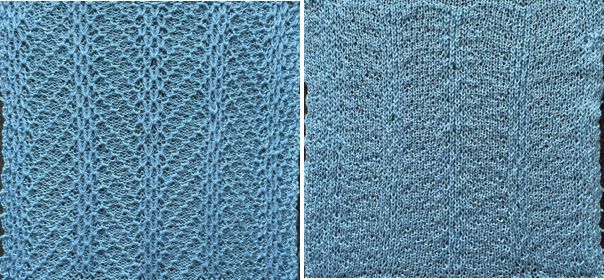
The first inspiration: 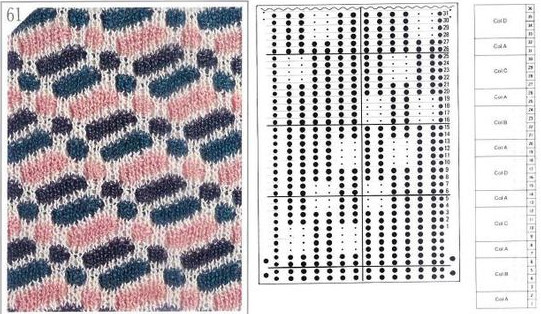 is knit using 4 colors, alternating 2 rows of a base color, then rotating color changes for 4 rows for each of 3 contrasting ones.
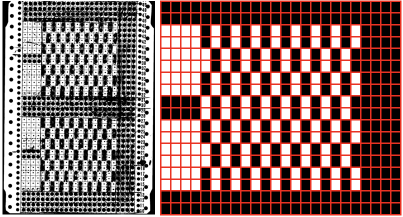
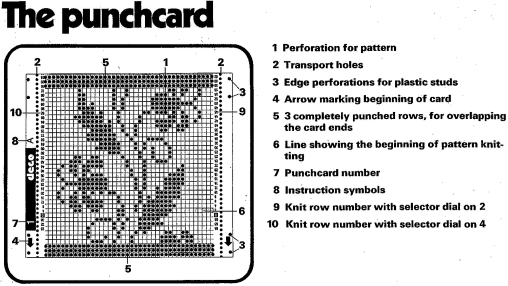
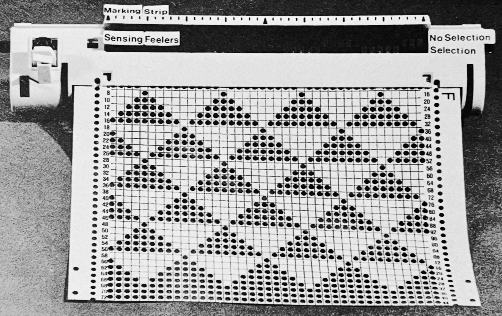
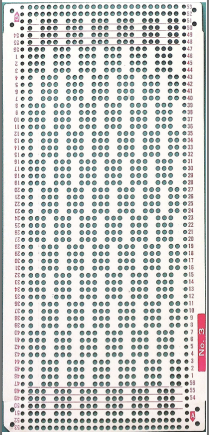
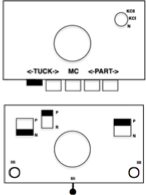
Counting up from the bottom of the illustration after the marks for the typical two all-punched rows, it would appear this is a Studio punchcard, but starting row 1 as visible outside the card reader can simply be changed for any other brand knitting machine.
The every other stitch configuration is for an every other needle repeat used in early machines such as the Juki.
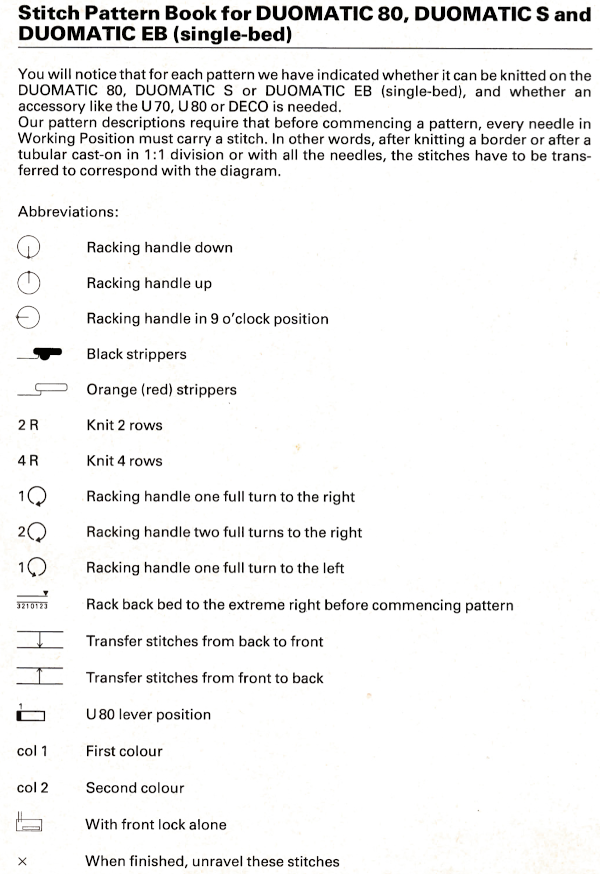
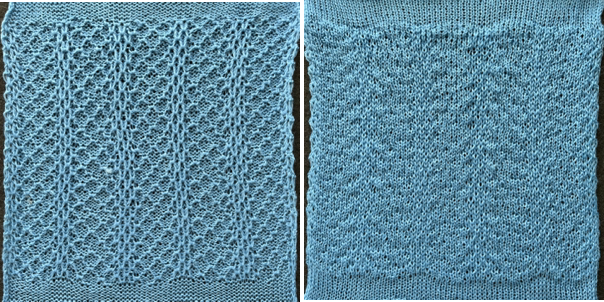
A full reference volume  An illustration of the card use
  If using thicker yarns on a standard machine that grinds at the loosest tension, this configuration can retain the full design while knitting every other needle/EON.
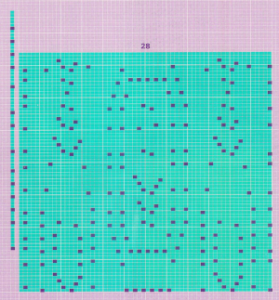
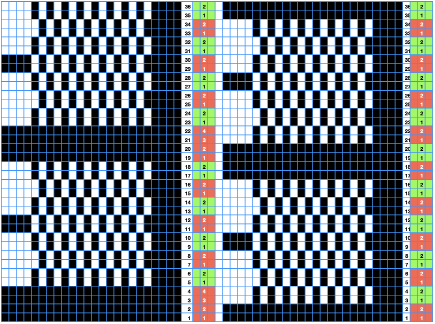
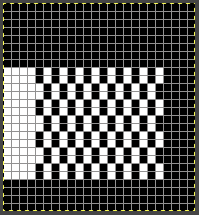
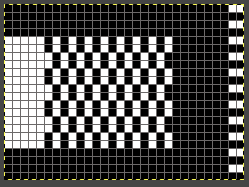
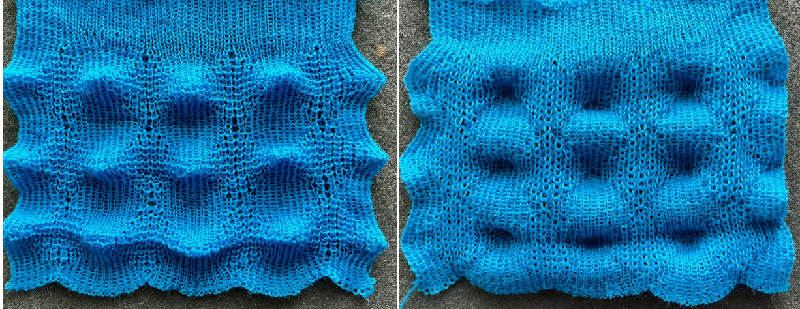
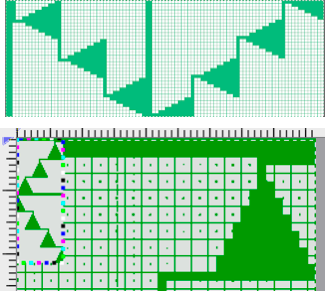
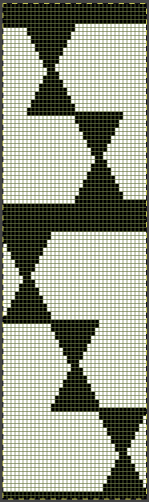
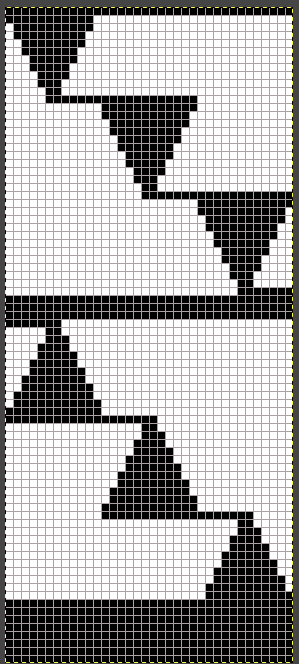
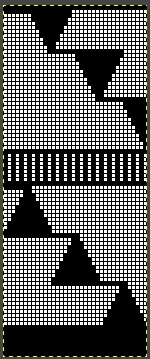
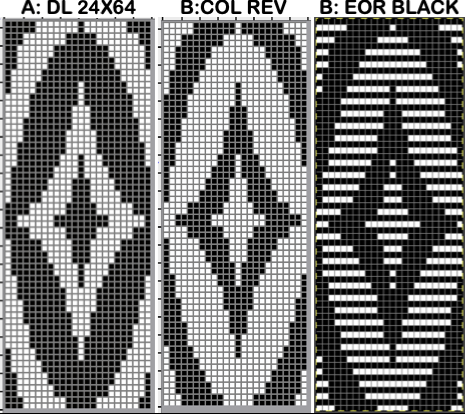
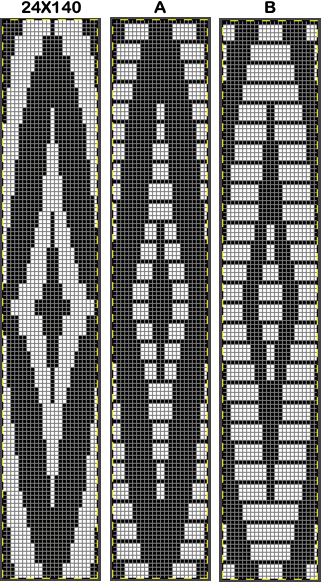
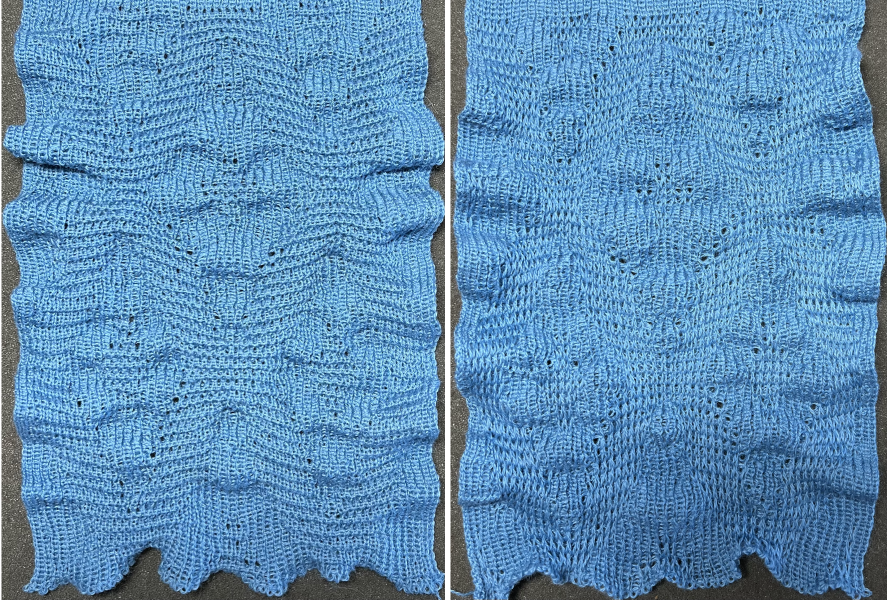
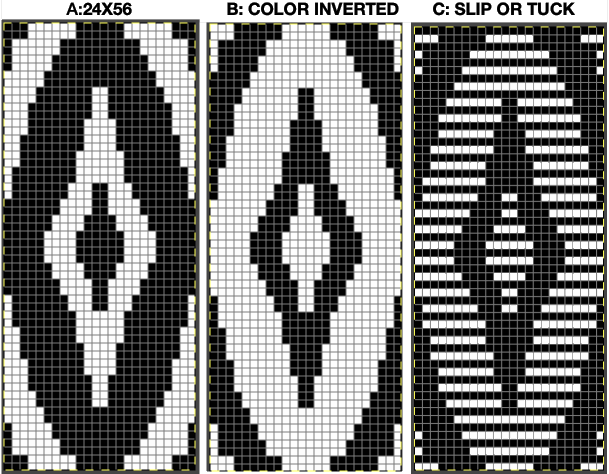
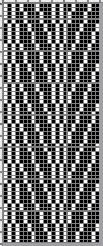
The adaptation began using Mac Numbers, the repeat was isolated and traced, and the 12 blank columns were then hidden 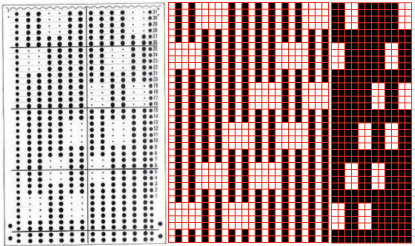 producing a result scaled in indexed B/W mode to 12X36 pixels. The tiled design, checking alignments.
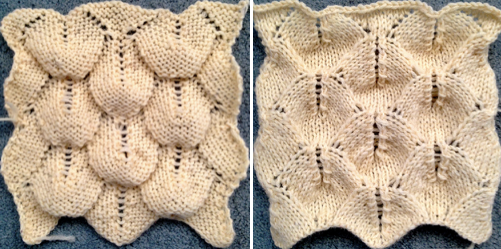
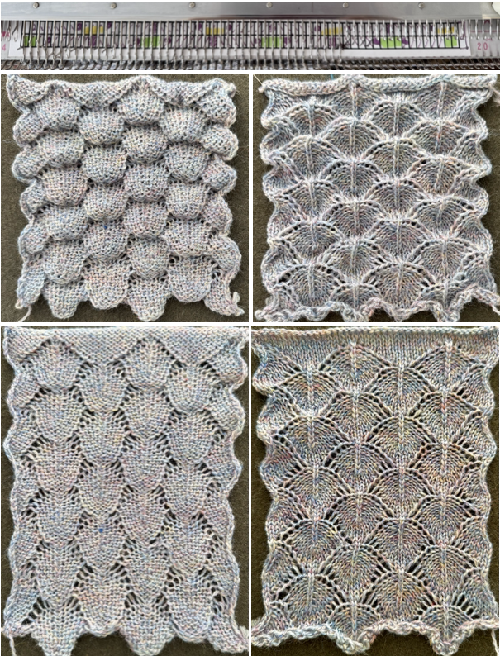
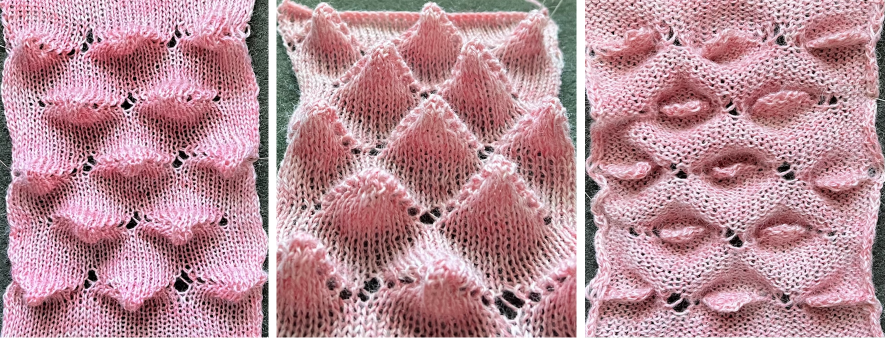
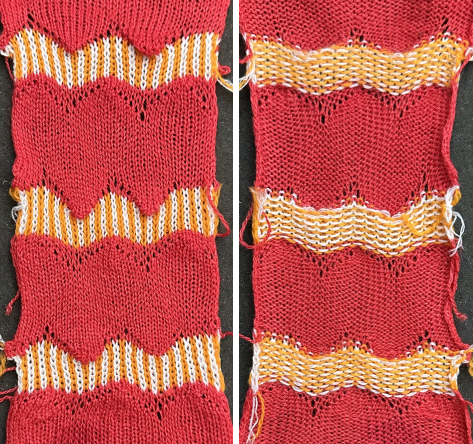
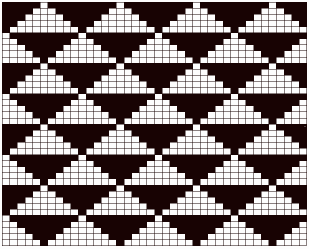
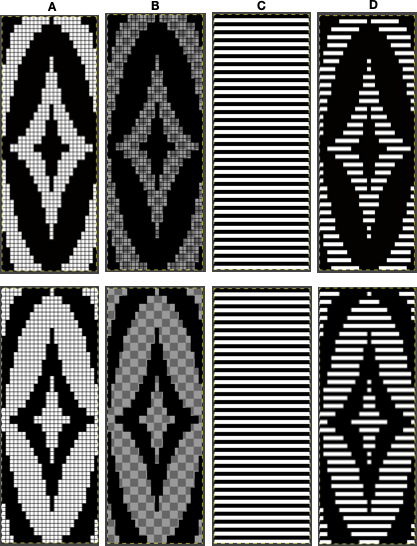
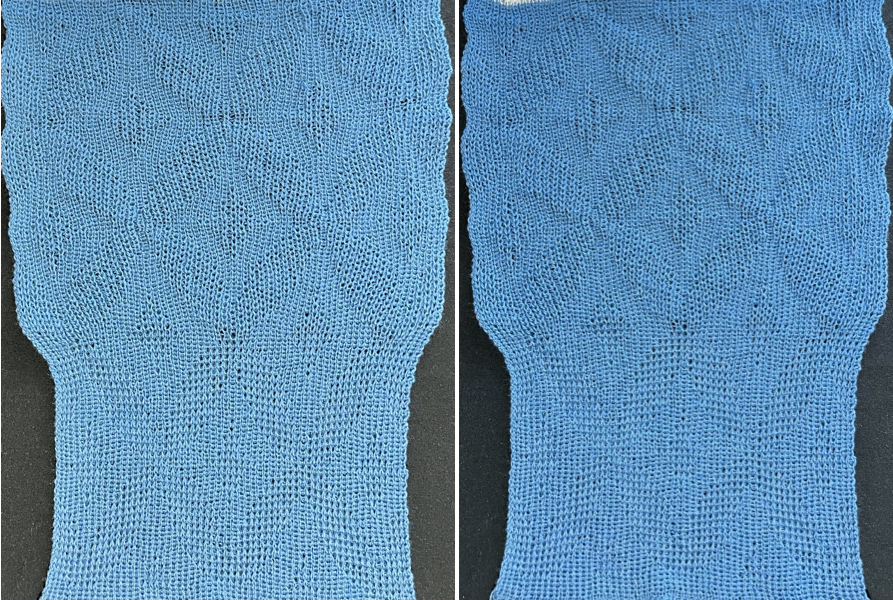
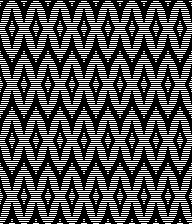
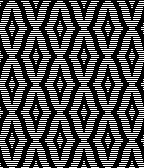
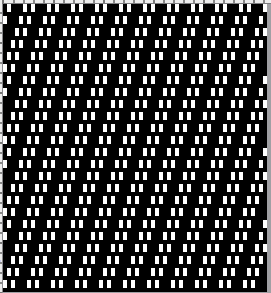 The proof of concept
 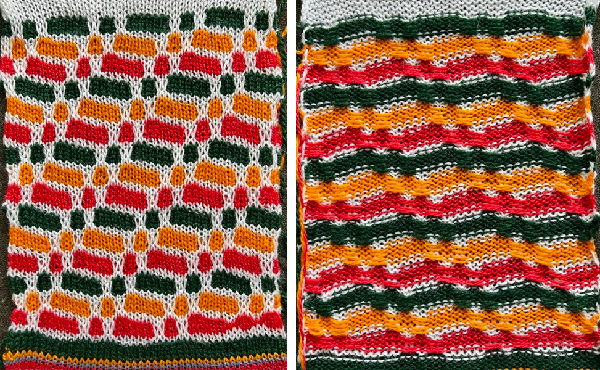 Periodically tuck stitch designs that appear to break the usual rules for the stitch are discussed.
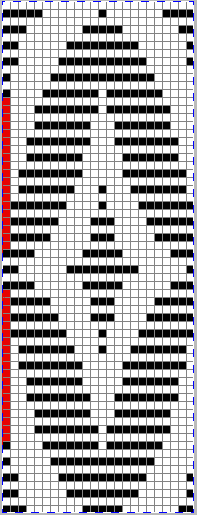
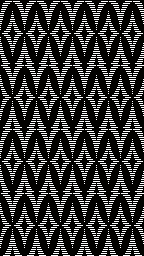
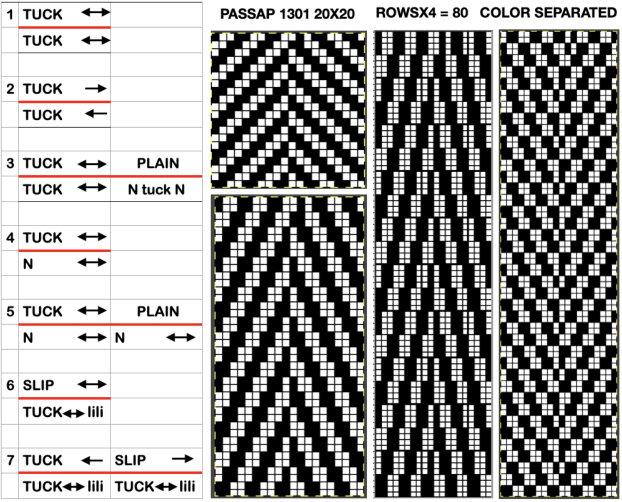
This design is intended for a push-button machine capable of 24 stitch repeats, uses symbols in the associated chart interpreted to mean tuck loops form for 2 rows and knit along with all other stitches every third row. 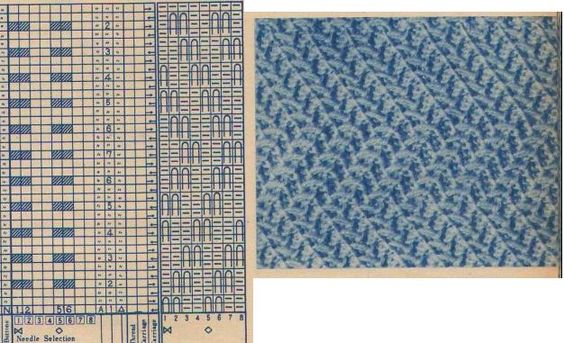 The working repeat is made up of 8 pixels in width, and 36 pixels in height.
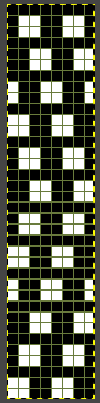

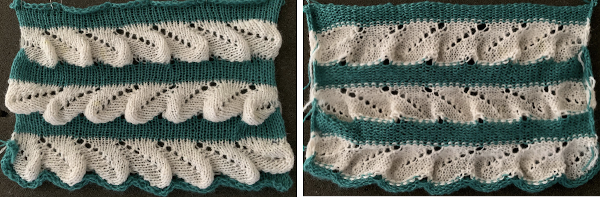
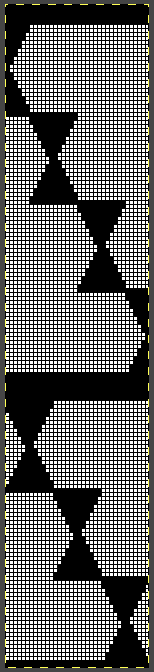
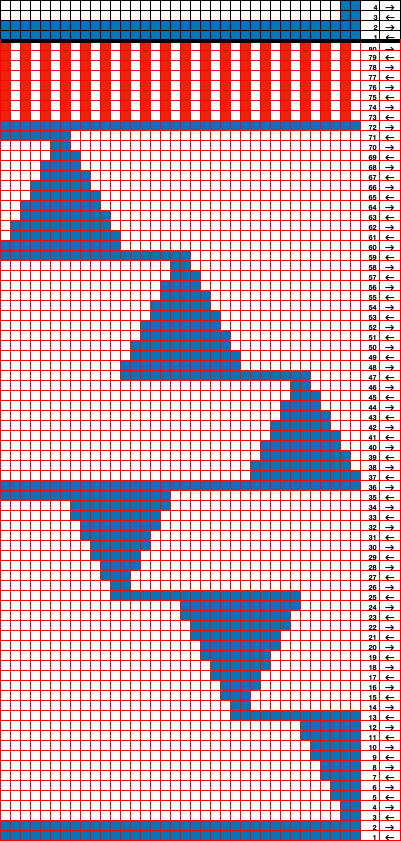
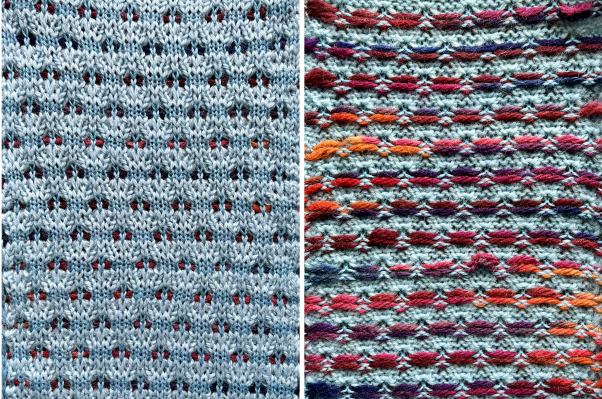
 This next design is likely published for use with the Studio color changer, which is marked with letters for each color,
 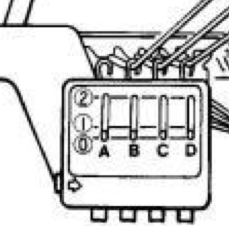 rather than with numbers as in Brother models.
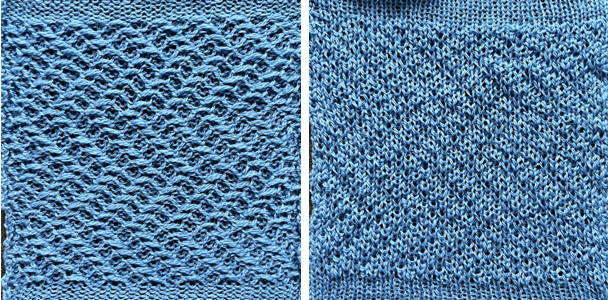
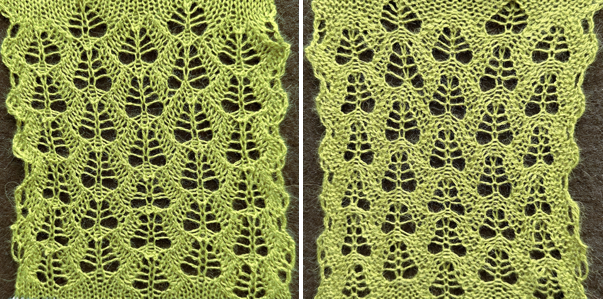
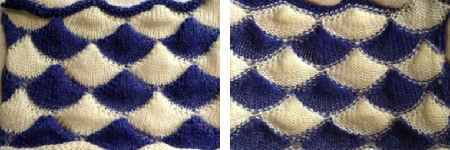
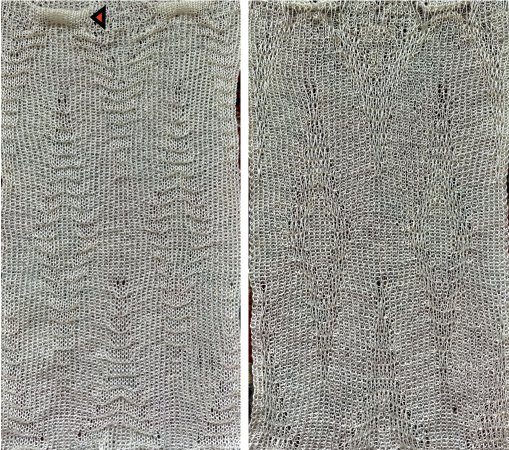
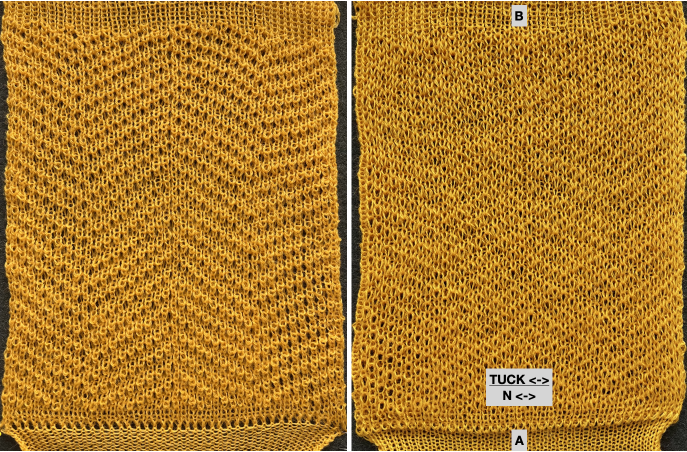
It is intended as a slip-stitch. The bottom swatch relies on color changes every 3 rows, which would need to be performed manually.
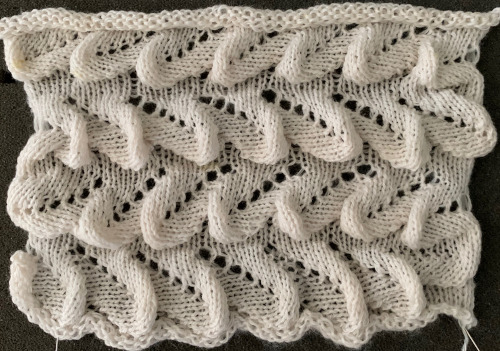
In the elongated version, colors are changed using the color changer, every 6 rows.  The design was first tested in thin yarns using the electronic 24X84 elongated PNG
  tested for alignment
  and displays interesting 3D variations, the purl side is remindful of shadow pleating
  Changing colors every odd number of rows is a tad fiddly.
The use of the color changer is not an option.
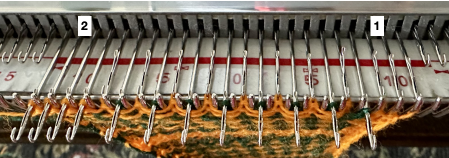
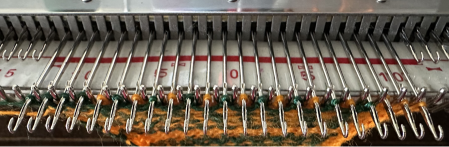
With the three yarns fed through the yarn masts, it became hard to keep them from twisting around each other. Ultimately, that problem was solved by hand-feeding one of the three colors with the cone on the floor, in front of the machine, as one would place yarns for weaving.
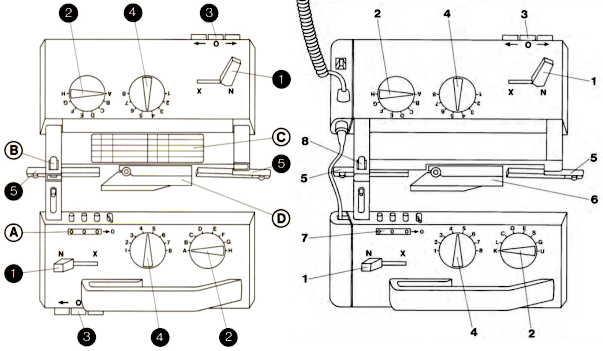
Brother knitters are familiar with yarn placements in the sinker plate.
Position A is for knitting when using only one color or for the ground color in fair isle patterning. There is a “gate”, which is closed, and the B color/contrast motif color is placed in that front position, knitting the yarn in needles preselected to needle position D on the next carriage pass.
It is tempting to leave the gate open when switching colors by hand frequently, and that may work for a while, providing tension is placed on the yarn manually to keep the yarn back. If at any point the yarn shifts forward (green arrow), with no needles in position D, stitches will be dropped.
Textured stitches can make for more complicated correction of errors or dropped stitches.
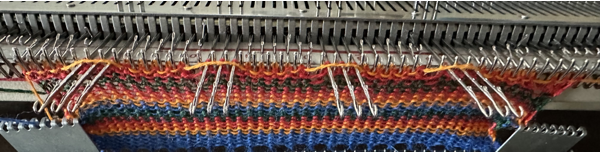
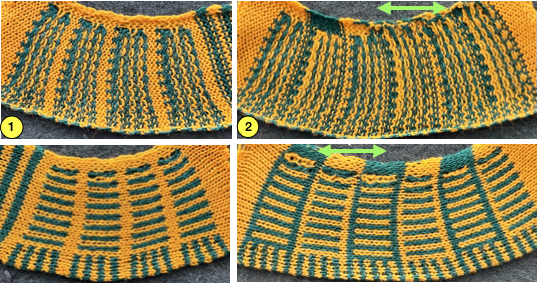
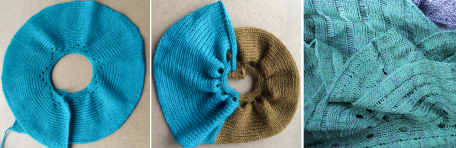
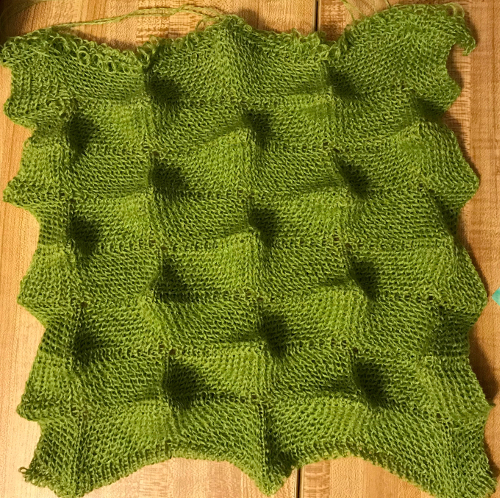
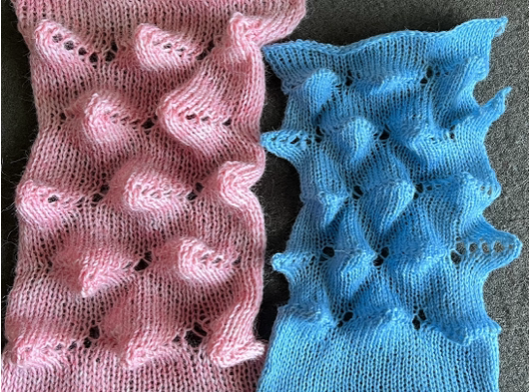
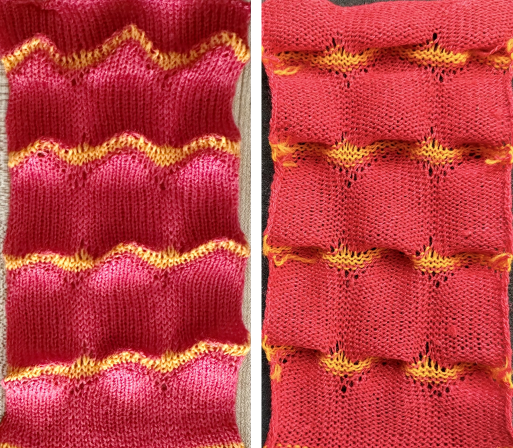
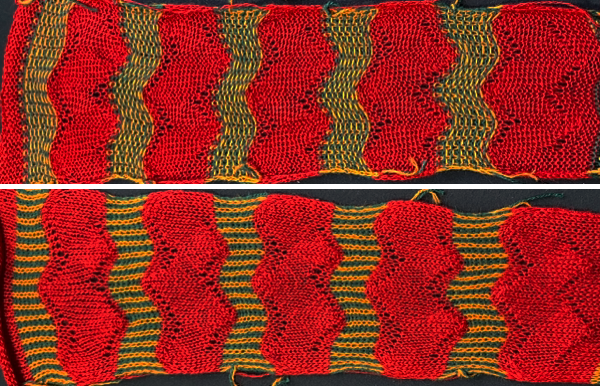
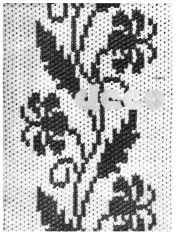
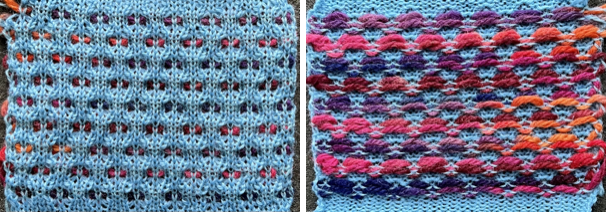
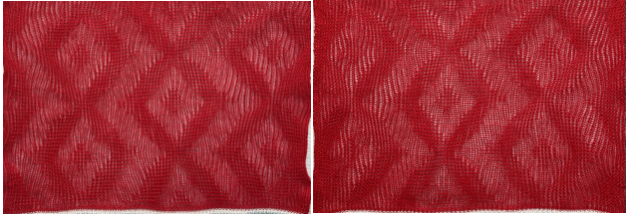
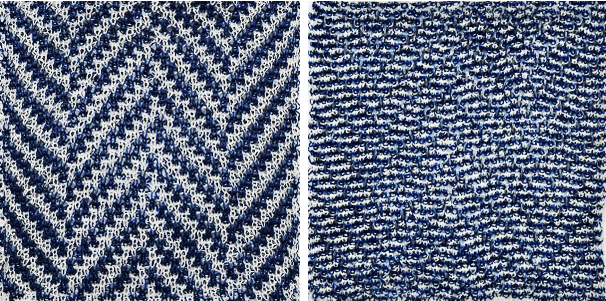
Taking the extra seconds to close the gate (red markings) after each color change avoids what became fondly known as “dropitis” in my classes. 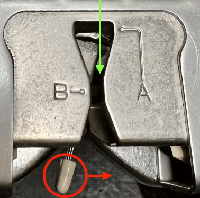 The proof of concept: two of the yarns used were acrylic, so steaming to reduce the curling of the swatch flattened the texture.
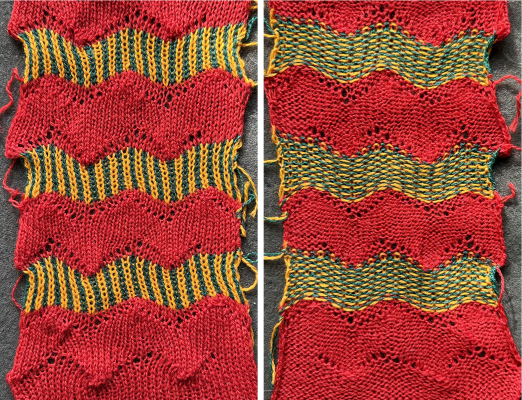
 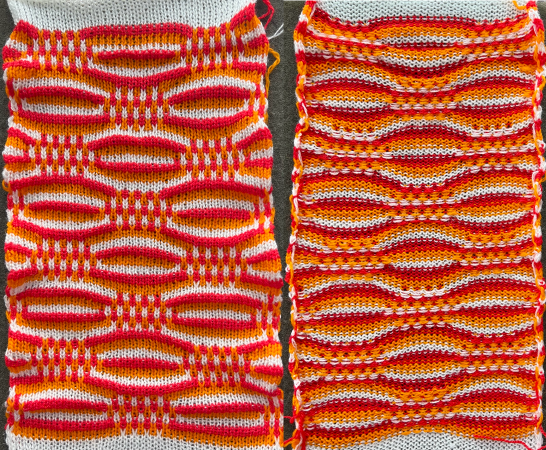 At one point Studio published a newsletter with cover art composed of simple drawings, such as this, for #143, which spiked my curiosity,
 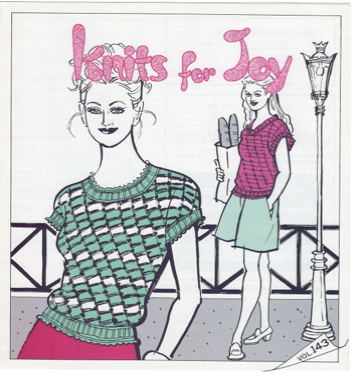 and led to these explorations:
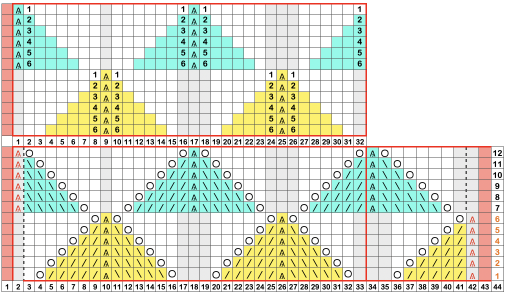
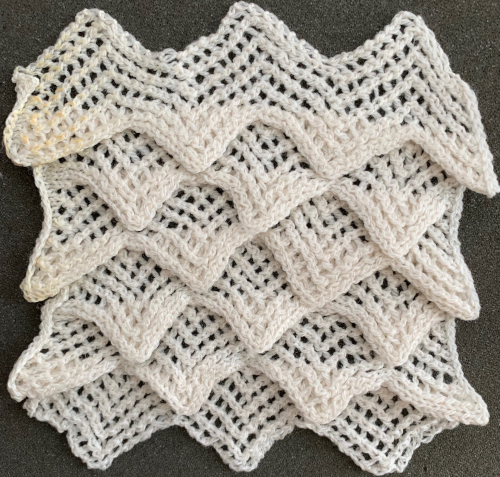
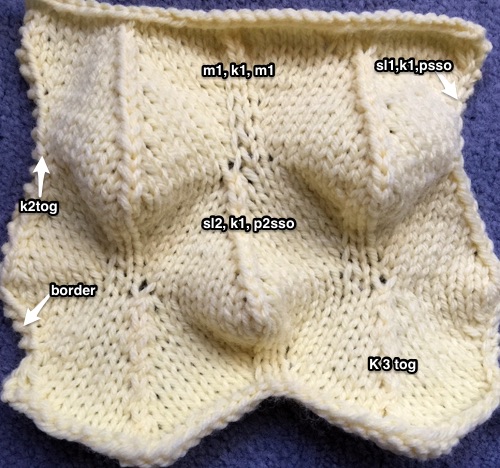
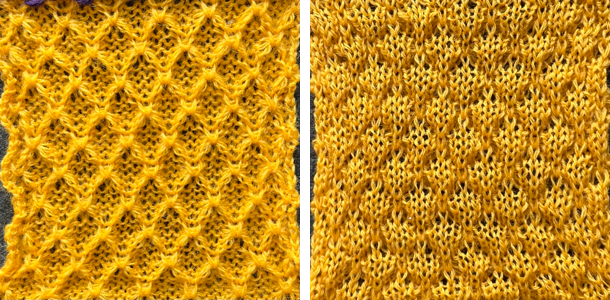
the pattern and symbols refer to tuck stitch, but technically the design is executed using short rows and transfer techniques.
The programmed repeat selects needles, making tracking actions easier.
End needle selection is canceled.
No cam buttons are in use.
The knit carriage is set to hold.
Stitches on the single needles selected on rows, 2, 12, 22, etc, are transferred onto the needle on their left. The empty needle is then pushed back to A position, out of work, creating a ladder.
The groups of 3 preselected needles are pushed out to hold, the D position, before continuing.
After every 2 rows knit, a stitch on the left is pushed back into work, until lastly, the empty needle is returned to the B position.
All needles will then knit for one row filling in the empty needle with a loop and a full knit stitch on the next pass where transfers begin again. 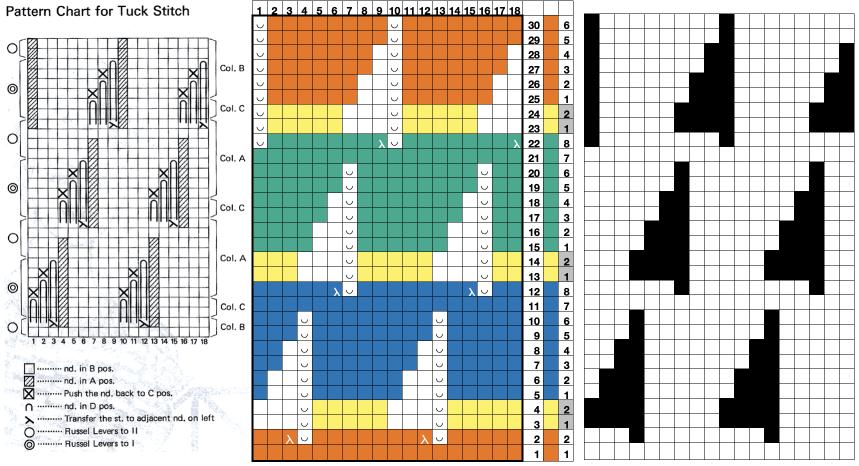 A brief summary of stitch manipulations
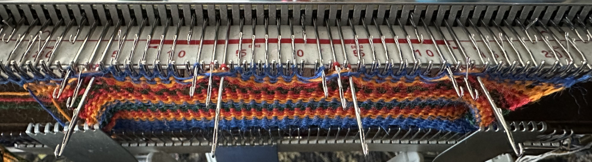
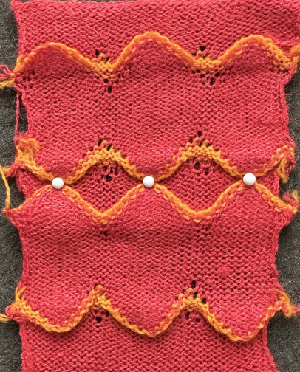
 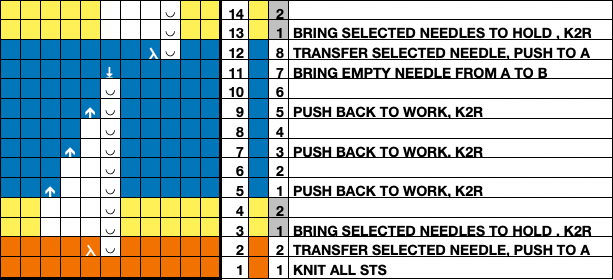 Images of the work in progress, a small claw weight single claw hung on edge stitch helps keep side edges equal in length:
preselected needles initially manually brought to hold position after the first carriage pass to the right
 after the second carriage pass to the left, with the first needle on the left in each group pushed back into work
 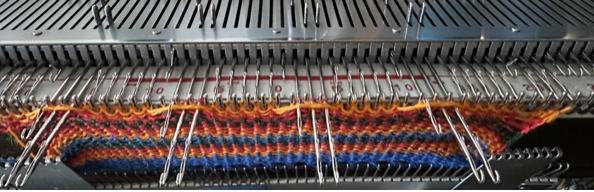 the second needle on the left in each group is returned to work
 one needle in each group remaining in hold pushed back into work
 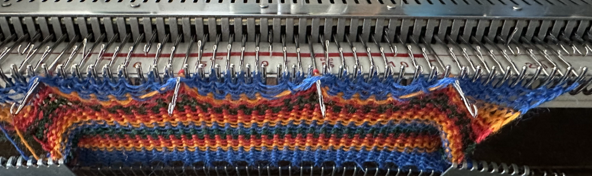 at this point the empty needles have been brought to the B position,
 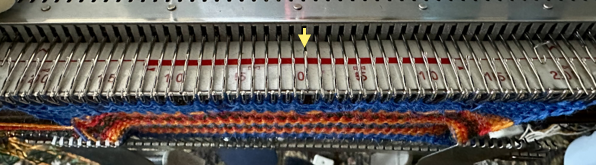 single preselected needles have been transferred to the left, and a pass is made forming loops on the empty needles/ eyelets
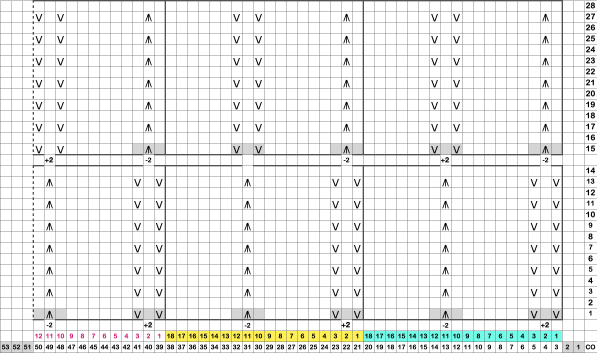
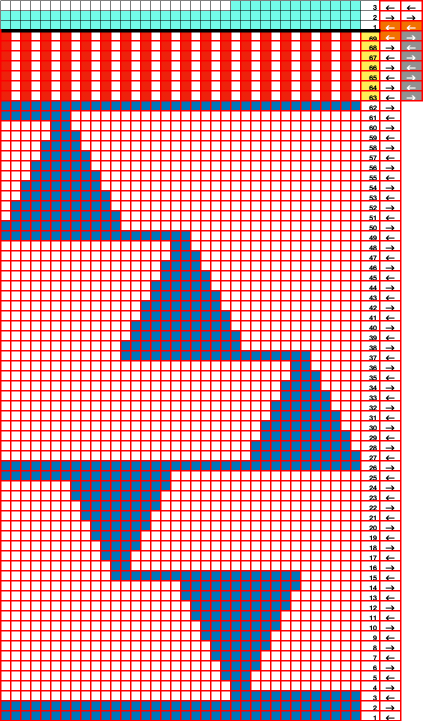
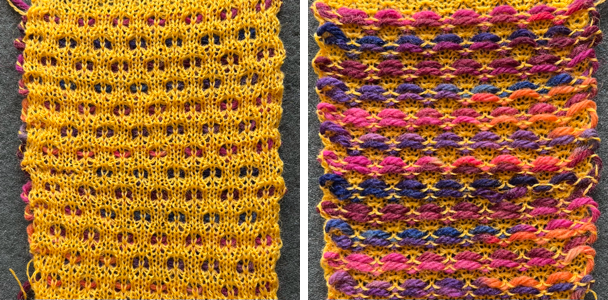
  The original 18X30 repeat, some machine models and download software may require that it be mirrored horizontally,
  repeated to 44X30 with a planned distribution of plain stitches at sides, knit in 2/18 wool blends:

 Converting random transfer lace designs poses different challenges, and since the time at which the reference post was published, there have been several Gimp updates.
Lace designs contain few black and white pixels and, at times are brand-specific. Multiple transfer lace in Studio models begins with 2 blank rows, while Brother begins with a design row, and ends with 2 blank rows. As given, the inspiration repeat is designed for Studio/Silver Reed.
When using any program, ie Gimp, ArahPaint, or even Dak, the original scanned or screengrabbed design needs to be aligned horizontally and vertically to window borders for accurate conversions.
Gimp:
Before any scaling of images, establish stitch and row counts. In this case, they are published as being 16 stitches X 96 rows.
The process for converting the same lace design using Gimp 2.10.34 on the Mac, beginning work in RGB mode:
1. drawing a straight line to the side of the cropped image reveals a slight lean to the right
2. using Image, Transform, and Arbitrary Rotation -0.30 improves the alignment 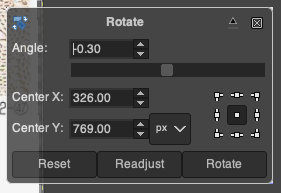 3. using the rectangle tool, crop to the borders of the published image.
In this instance, the cropped image measuring 199X938 pixels is at first scaled to multiples of 10 for both width and height, note the broken chain link
4. 160X960 pixels. 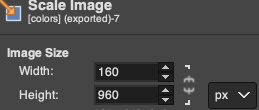 5. Image mode is changed to B/W indexed, and the image is scaled once more to 16X96, the size of the expected repeat, note the intact chain link
 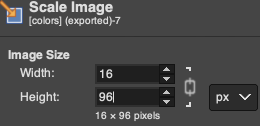 6. the final repeat, when studied, matches that from the results in the previous post
 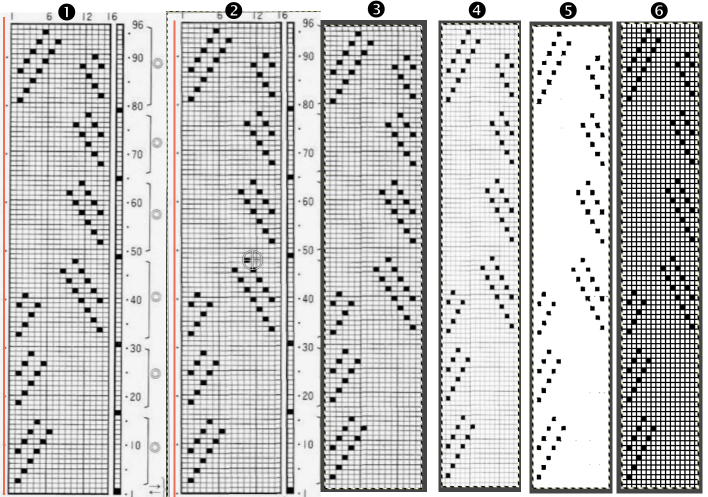 1: the result using ArahPaints tools, including its guess weave from grid, compared to
2: the Gimp final image and
3. borrowed from the previous post illustrating other considerations before actual knitting, 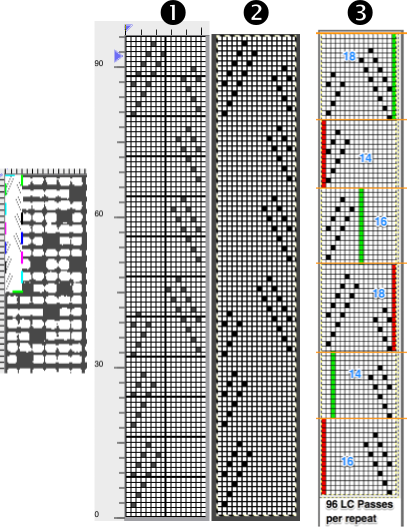
which include:
if using the repeat on Brother machines, the first 2 blank rows of the design are shifted to the top.
The 16-stitch design width makes it suitable only for electronic models.
The final PNG is actually downloaded as a fair isle pattern while maintaining the required needle selection for lace, and the knit carriage remains set to knit throughout while the lace carriage selects and transfers.
The machine, depending on the model, may by default mirror the result vertically, so the final PNG can be mirrored and saved as here, prior to knitting on the 930,  or the mirror function in the machine may be used after programming.
I prefer to save my files in the orientation required for the actual knitting as a means to avoid confusion or errors.
Working in Arahpaint, rotating an image turns it on its center point. To rotate a layer, selection, or image, from the Image menu, choose Rotate. 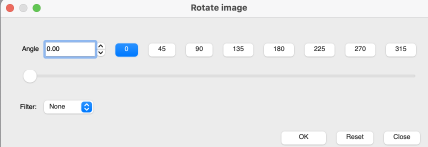 Selections can be made at offered angles, or specified degrees can be entered in the degree field, or select an area, move the pointer outside the bounding border, and then drag on any one of the small boxes at each corner while pressing the left mouse button.
 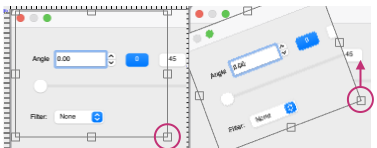 To align the image,
1. load the lace inspiration
2. choose Image, select Rotate Image, and draw a line that follows the orientation of the image. The color will be based automatically on the palette being used, and altering the pencil pixel size or color has no effect.
The program then rotates the image and will inform you of the rotation angle, and the drawn line becomes straight.
To confirm alignment, click the OK or Close button in the Rotate Image window.
3. use the rectangle tool to select the content for the full design repeat, and crop the aligned image to the selection. 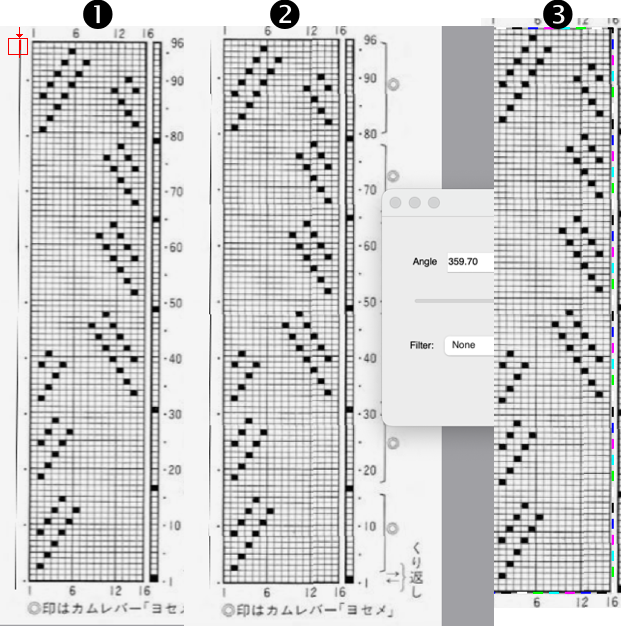 4.-9. continue with the steps using the tool Guess Weave from Grid, producing the same final PNG. In summary, they are:
4. crop the selected image to size
5. change the color palette to 8-bit, adjust background and foreground colors
6. reduce the number of colors to B/W, adjust the threshold, and set the number of colors to 2
7. the resulting image
8. use the guess weave from the grid tool, crop the bounded image to the selection, magnify the results to visually check the repeat, and save the PNG if satisfied
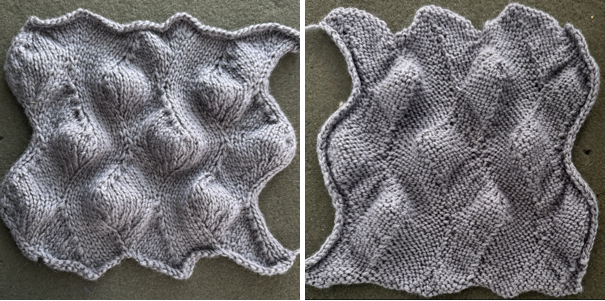
9. the final 16X96 pattern design repeat, matching the Gimp result. 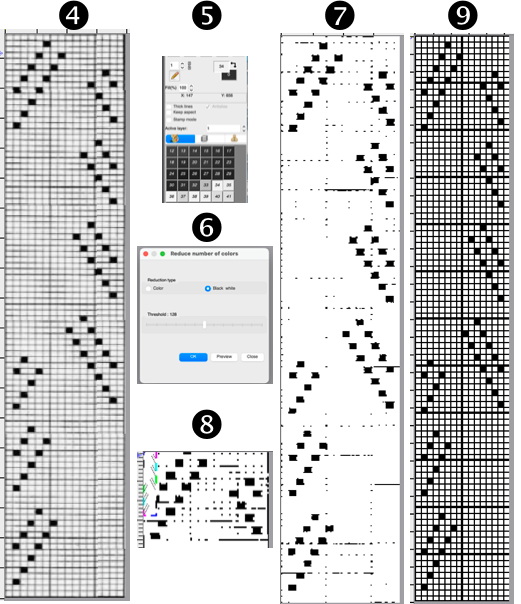 The associated swatch
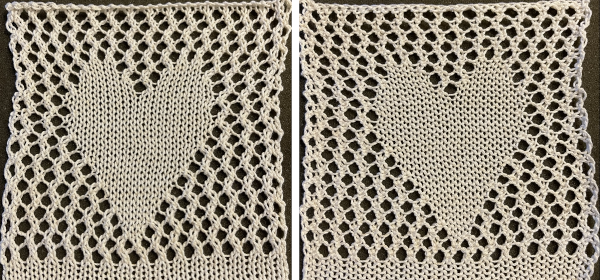
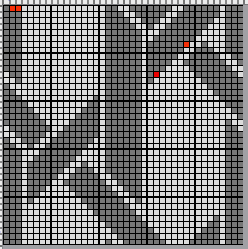
 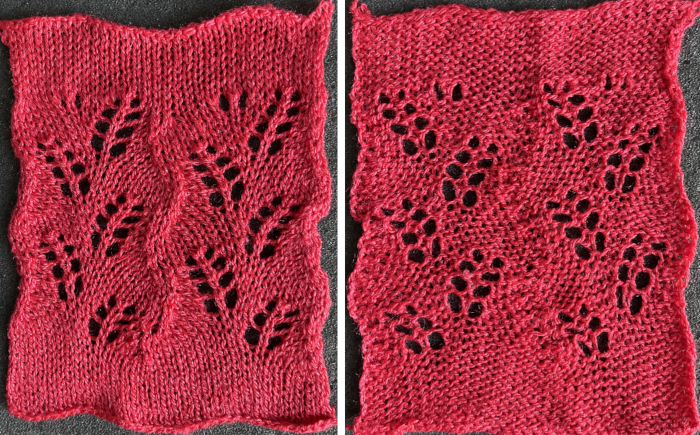 This Pinterest find is credited to Tatiana Demina, and is intended for use on Studio punchcard machine models.
 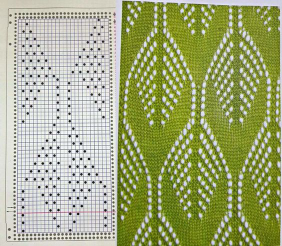 Studio machines are capable of transferring and knitting in single carriage passes. Studying the image of the card, it can be seen that there are no blank rows anywhere, and punched holes on alternate rows indicate transfers alternating first to the left, and then to the right.
The swatch was knit using the same technique described recently in the post Unconventional uses for punchcards 2: thread lace cards for “filet” mesh
The original 24X56 design 
 was lengthened X2 to, shown here also doubled in width to 48X112
  to match the direction of the transfers, the hint offered in the inspiration source can be followed down to indicate the first row of transfers need to be made to the right,
 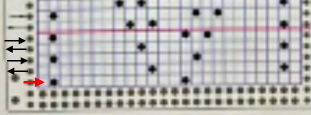 hence the knitting begins with the knit carriage on the left, the lace carriage on the right. As the LC moves to the left it preselects needles, and as it returns to the right it transfers them to the right.
The LC is removed from the knit bed.
The KC knits a single pass to the right and remains there.
The LC is returned to the knit bed on the left, preselects needles on its pass to the right, and transfers them to the left as it returns to that side, and is removed from the bed.
The KC knits one row to the left and stays there.
The LC is returned to the bed on the right and the process is repeated.
Preselection of needles is made by the LC toward the knit carriage, transfers are made away from it.
Whether the repeat needs to be mirrored again may depend on the machine model or the software used to download the file to it.
The direction of the first row of transfers provides the necessary clue, they need to be to the right. If to the left, mirror the pattern horizontally and begin again.
The swatch was knit in a wool-rayon blend, the results point to the difference in appearance and gauge with a change in color and type of yarn used when compared to the inspiration image 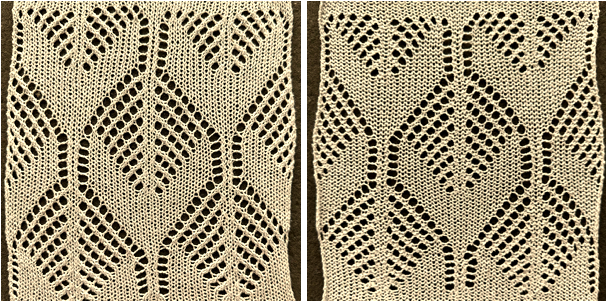 The context for this can be found in To mesh or not to mesh 8: more Numbers meet Gimp
 the 60X74 png
  and the proof of concept
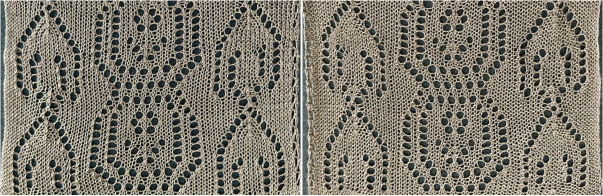
 12X10 to 12X20 brick
 12X10 to 24X10 half drop
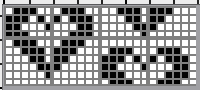
 24X24
24X24 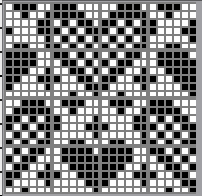
 24X28
24X28 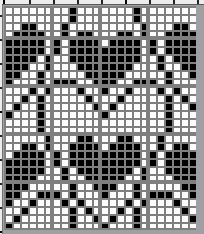
 10X8
10X8 32X32
32X32 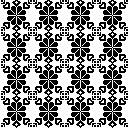 34X34
34X34 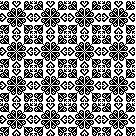 43X43
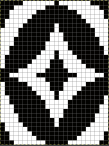
43X43  adjusted to 44X44, an all symmetrical suitable as a single motif or in larger formats
 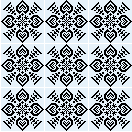 brick 44X88
 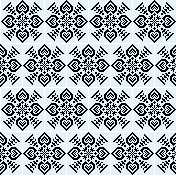 half drop tile 84X44
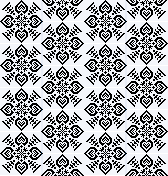
 the 2-color version
  From weaving drafts: a mosaic-like design
 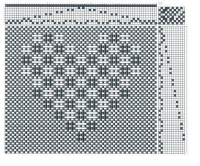 the 68X58 png
  cropped to 67X58 to avoid double stitches
 the source for a much smaller repeat
 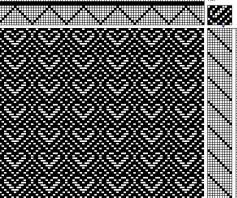 the 14X20 png
 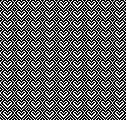 When all you need is a border, repeats that may be used vertically or horizontally, presented in punchcard configuration, 24X21:
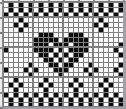
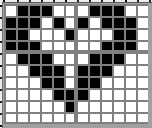
 See the post for additional repeats and my method of developing the design.
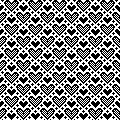
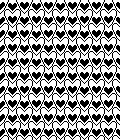
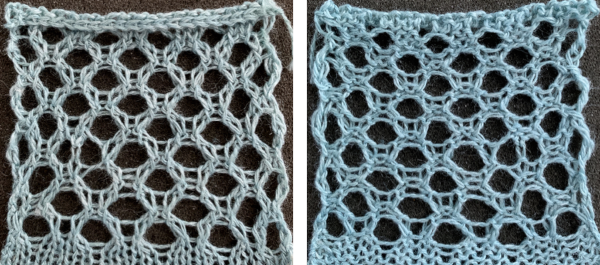 and single transfers to create the heart shape.
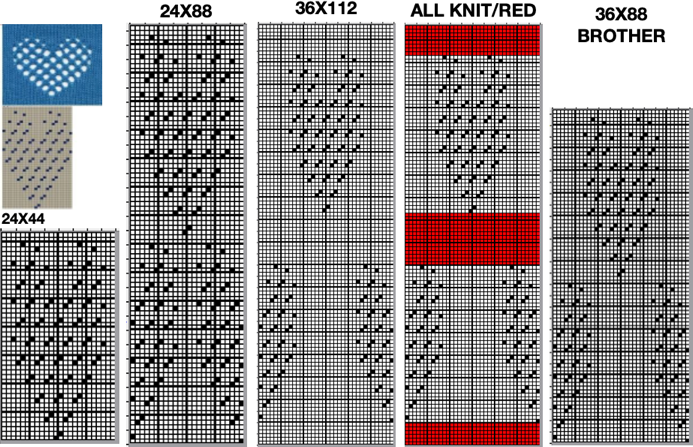 A small proof of concept knit in 2/18 wool
 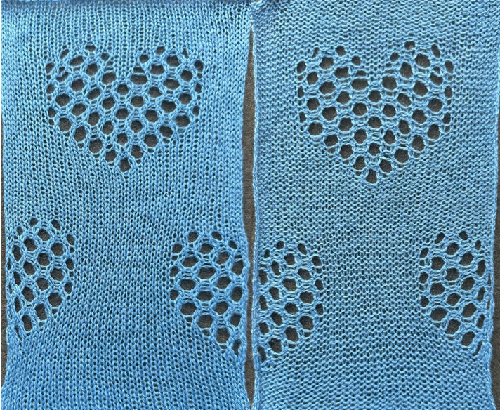 A Studio 560 was my first electronic model machine, owned decades ago. Among the mylars saved even though the machine was sold many years ago, I found this repeat, 24X47 cells, the last offered in this series. Studio mylar sheets were marked in 6X5 blocks instead of Brother’s 5X5. The punchcard repeat chart here is outlined in 6X6 blocks of cells, the convention in Brother punchcards.
 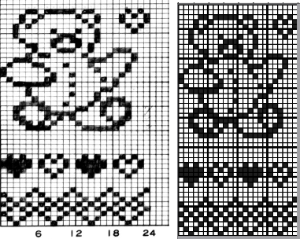 the png
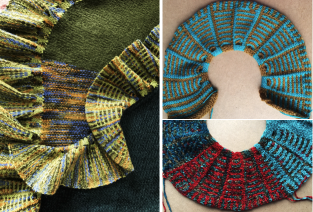


