The latest Gimp update
2023: Threshold in version 2.10.34 is now disabled by default. To activate it or to add other tools ie curves to the tool menu, go to Gimp, Settings, and select Toolbox.
In the Tools Configuration Window, 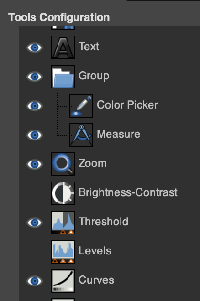 active tools have a common icon to their left, new ones may be selected and added, I chose Threshold and Curves. After clicking OK, a restart is not necessary, the new tools will appear immediately for use in the toolbox.
  The curves tool enables editing for changing the color, brightness, contrast, or transparency of the active layer or a selection. While the Levels tool allows one to work on Shadows and Highlights, the Curves tool allows one to work in any range. It works on RGB images.
2022:The program now allows for setting pencil pixel sizes to odd and even numbers accurately, eliminating the need to save brushes for sizes missing in previous versions  See color exchange notes using the new Fuzzy select tool as opposed to using Color Exchange
Notes in post Numbers and GIMP: online punchcard patterns to electronics 2 contain information on printing punchcard designs to scale for tracing and marking cards prior to punching holes. 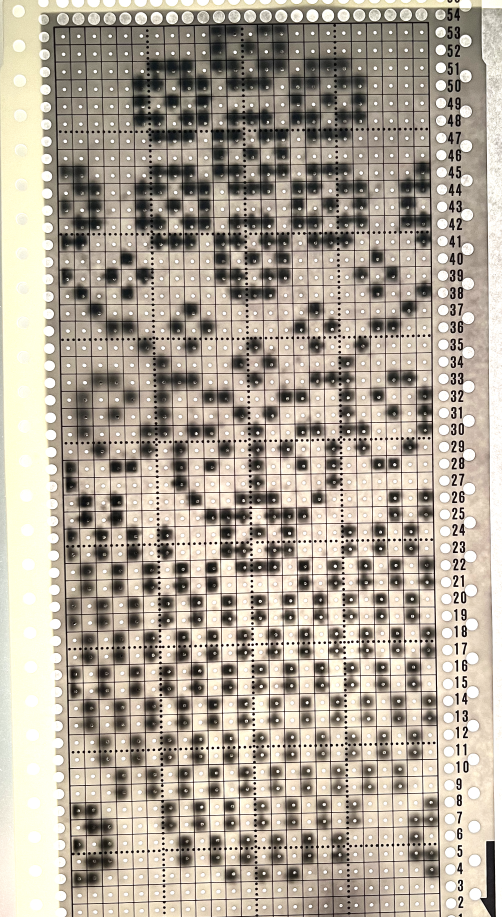 2021: Prior to attempting color separations of any sort, it is useful to have some understanding of how black and white pixels or punched holes relate to knit/ tuck/ slip setting stitch formation and their effect in both single and double bed techniques.
A recent post explored the use of layers for color separations in Gimp. It is a reliable, quick way to execute them, especially on large images. As is often found, the same results may be reached in a variety of ways.
Coupling the use of the shift key with rectangle selection and working in high magnification offers additional options in Gimp.
While working on any gridded and magnified design motif use the rectangle tool to select the rows that will be altered, make the first selection, and after doing so press and hold the shift key, continue to select specific areas, and then choose color invert in this first instance and the action will be applied to all selected areas. If working on parts of the image at a time repeat the steps until the whole image has been processed. Release the shift key when done. The image is set by clicking anywhere in the window outside of it.
In the past, I have used red pixels in an extra column beside the repeat to mark rows that need to be altered. The column is cropped prior to saving the final png for download to the km. The step is not a necessary one.
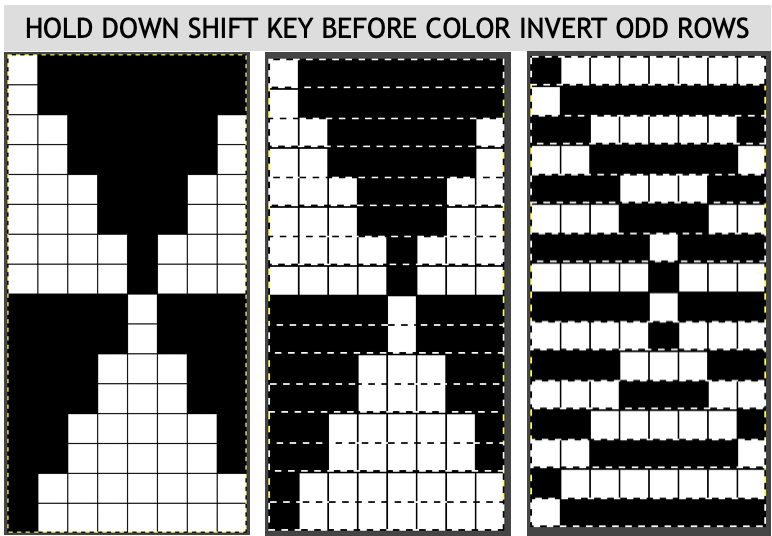
This is an illustration from another post, where color inversion was planned in the repeat selections, each of which is surrounded by dotted lines that will disappear after they are set. 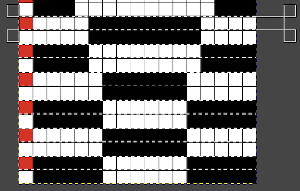 The red cells will change color as well after inversion, making it easier to track the placement of completed choices
 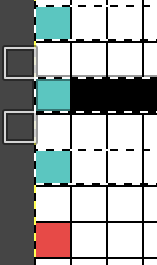 A result from using the method on a large image may be found in the post on fantasy fair-isle.
In the above, they are on what may be thought of as even-numbered rows of the design. If the plan is to use Cut to eliminate those same rows, the red cells need to be shifted down to “odd-numbered” rows. From a repeat in development for a drop stitch lace design 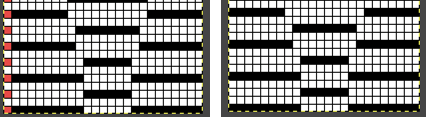 Working through the process with an easily recognized small shape, the often-used small triangle. Scaling in Gimp can become erratic while working on several files. Check that the interpolation is set to none if there appear to be odd scaling issues in the new image. When scaling in one direction only is intended, the chain link must be broken. At each step save the resulting png to make it available for further use ie additional scaling in height and width.
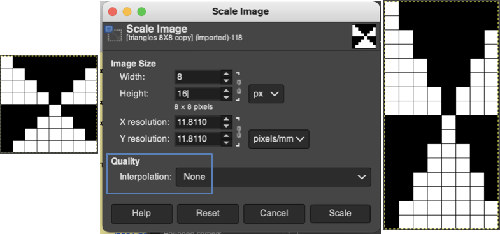
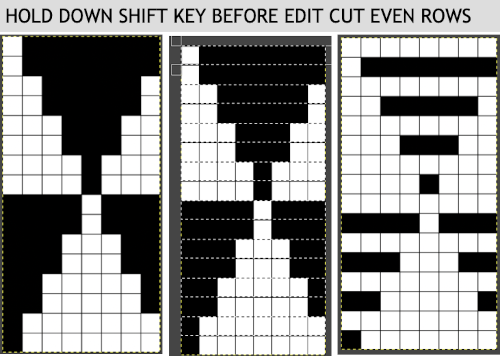 The results with the selection of even rows simply shift the result up a row
 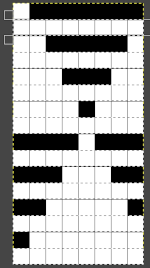 Test in your version of the program to see whether releasing the shift key prior to making edits changes them. Either way, being consistent in the choice makes for less confusing results. Experimentation takes a matter of seconds.
Depending on your need the saved PNG may also be color reversed or scaled to double-length
 using the rectangle tool, either odd or even rows may be chosen, remaining consistent for the height of the repeat in a scale to suit the end fabric goal. Here the original file is lengthened X2
 working with the original file lengthened x4. The selections can happen on every row or every other, whether singly or in pairs. Note the difference between making the first selection on the first pair of rows or the second.
 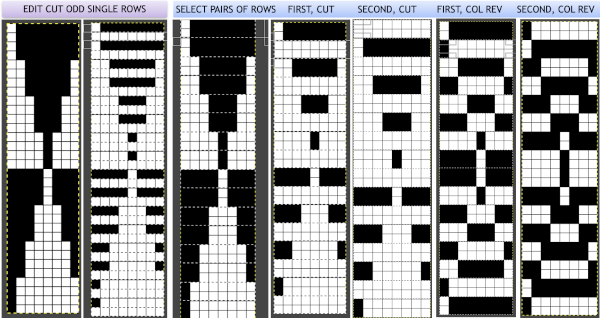 2021: Gimp update for Mac
Supported OS: macOS 10.9 Mavericks or over, to run 2.10.24 in my new iMac, M1, OS12, needed the installation of Rosetta.  Rosetta 2 is an emulator designed to bridge the transition between Intel and Apple processors. In short, it translates apps built for Intel so they will run on Apple Silicon, more info
The previous post on this topic: 2019/10/07/gimp-update-for-mac/
I have been spending more time exploring version 10.22 and am becoming more familiar with new features and design options. There are slight variations in behaviors depending on the Mac OS version. Windows updates happen more frequently. GIMP 2.10.24 for Mac OS is now available.
Gimp has a wide range of paint tools 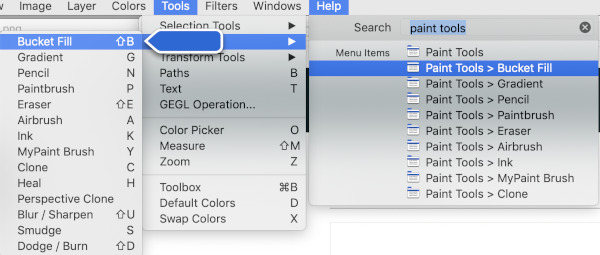 The most commonly used in creating repeats for knit designs are Pencil, Paintbrush, and Bucket Fill.
The Pencil tool is used to draw freehand lines with a hard edge. The main difference between it and the Paintbrush is that although both use the same type of brush, the pencil tool will not produce fuzzy edges.
Present experiments are placed in alphabetical order. Topics:
Brushes and patterns
Canvas resize, offset
Colors exchange
Colors threshold see grid options
Grid options, Guides, Color separations
Symmetry Painting
BRUSHES AND PATTERNS
There are many very good videos on using multiple versions of GIMP on Youtube. Most focus on working with very large images in huge numbers of colors, and brushes or patterns in the tutorials are often larger than the maximum stitch count on our home knitting machines capable of electronic download and with needle counts of 180-200. In addition, punchcard machines have a 24-pixel width repeat constraint. The content of such published material and tutorials can be overwhelming, but isolated techniques for the required binary bit-mapped knit scale are easy to sort out.
Many knitters designing small repeats use very simple programs and enter pixels singly or copy and paste in small groups. Some simple, quick functions in Gimp can simplify and speed up progress considerably. Punchcard knitters may use the same techniques to set up their 24 x X custom length repeats and tile the results to visualize how they line up when knitted in multiples.
Some content paraphrased from the online Gimp manual: in GIMP, a pattern is a small image used to fill areas by placing copies side by side. You can use them with the bucket fill tool. They vary in size and are used for filling regions by tiling, that is, by placing copies of the pattern side by side like ceramic tiles. A pattern is said to be tileable if copies of it can be adjoined left-edge-to-right-edge and top-edge-to-bottom-edge without creating obvious seams, such patterns are used in standard knitting repeats. The same effect may be obtained by using the Filter, Map, Tile option on the drawn image.
With the bucket fill tool, you can choose to fill a region with a pattern instead of a solid color. To make a pattern available, place it in one of the folders in GIMP’s pattern search path which includes two folders, the system patterns folder, which you should not use or alter, and the patterns folder inside your personal GIMP directory. The .gbr (“gimp brush”) format is used for ordinary and color brushes.
Photoshop ABR brushes are also easily imported for use.
Pressing the refresh button causes GIMP to rescan the folders in your pattern search path, adding any newly discovered patterns to the list. This button is useful if you add new patterns to a folder, and want to make them available without having to restart GIMP.
GIMP includes a set of 10 “paint tools”, which, except for the ink tool, use the same set of brushes. The brush pixmaps represent the marks that are made by single “touches” of the brush, which is desirable in working with knit scale bitmaps. Brushes can be selected by clicking on an icon in the brushes dialogue, the current brush is then shown in the Brush/Pattern/Gradient area of the Toolbox. Clicking on the brush symbol there is another way of activating the Brushes dialog.
When you use the Copy or Cut command on an image or a selection of it, a copy appears as a new brush in the upper left corner of the “Brushes” dialog. This brush will persist until you use the Copy command again. It disappears when you close GIMP.
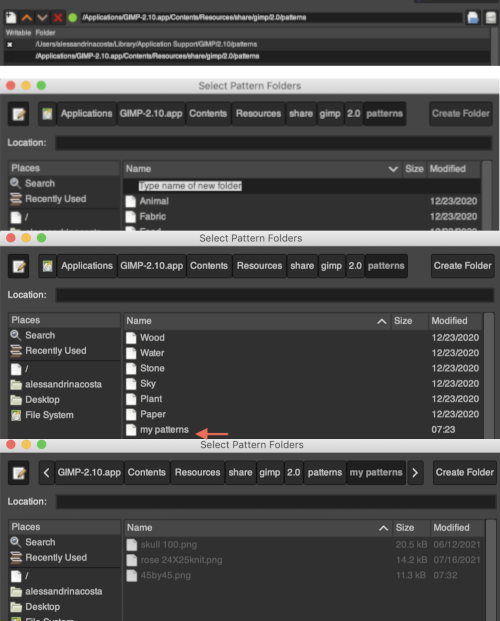
Building a personal brush pattern library on Mac: open software preferences 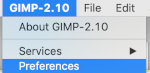 locate folders on the bottom left and click on the plus sign aside folders icon at the bottom left, it will change to a minus sign, and folders become visible
  select brushes, two options will appear. If a proper choice is made for the addition of pattern files, a green button will appear
  single click on the filing cabinet icon on the right,
  a familiar Mac finder window will appear
  double click on the patterns folder, and its own window will appear,
 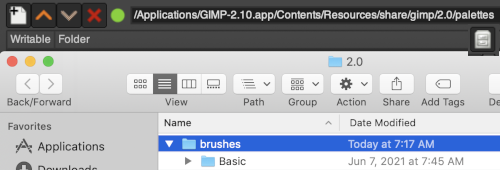 right-click in the window below the last entry, a smaller window appears, choose the add new folder option. It will appear as “untitled”
  and will be added to the existing folders, rename it “my brushes” or any other choice,
  and the new folder will be added within the brushes one
  Its place in the brushes list will be determined by its initial letter, the contents are in alphabetical order.
  For future use, any saved brush may be dragged and dropped into the named personal pattern folder icon, or into the folder after it has been expanded or opened in its own window. My opened brush folder
 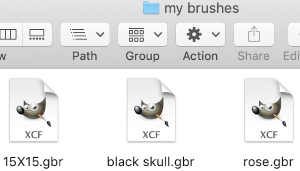 After brushes are added, the refresh button below the brush dockable dialogue may bring them up without having to restart the program.
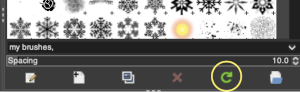 After saving these 3 images as .gbr files and placing them in the appropriate folder

 they appear as available for use
 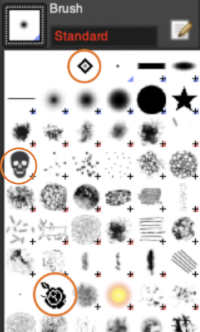 To install .abr files on Mac:
create a new Photoshop folder within the Gimp Brushes one
Download the chosen files, drag and drop the images or folder from the downloads folder into the chosen Gimp one, they will be available after a Gimp restart
The free files I tested were very large in size, did not scale down to use for knitting cleanly, and even though they appeared to be BW they opened as RGBs making the conversion to BW indexed quite dithered. They are composed of assorted leaves and snowflakes. 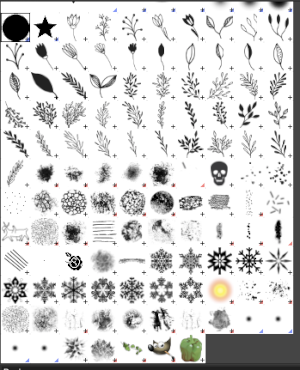 When exporting self-drawn brushes, the option is offered for adding spacing surrounding the shape, here a 10% addition was chosen
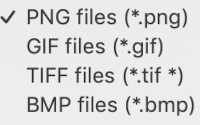
 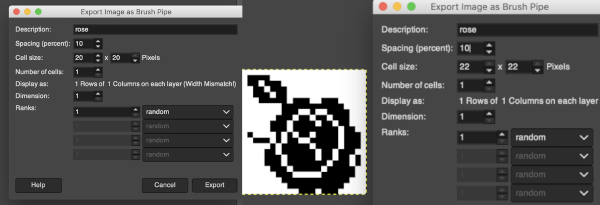 Patterns may be saved in a similar way. Since GIMP 2.2 you can use .png, .jpg, .bmp, .gif, or .tiff files as patterns.
Saving patterns from large to tiny may be achieved using the same method as in saving brushes. 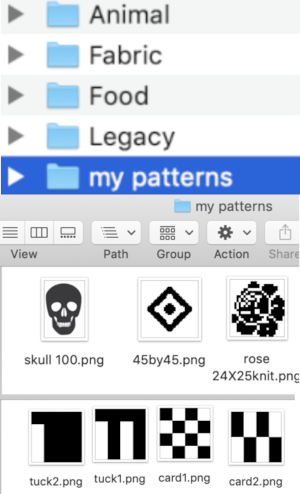 To save personal patterns, instead of choosing the file cabinet icon in preferences, one may choose the folder icon, following a similar series of steps to those above, including verifying the contents of the newly created folder
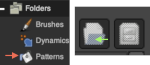
 Use Windows, Dockable Dialogues, choose Pattern. The patterns will show on the right of the Gimp window and are viewable once you click on the fill window below the tools on the left as well.
Open the image to be filled
Click on the paint bucket tool, and select the Pattern fill type.  Click on the paint bucket, then on the pattern you wish to use on right, hover over the canvas with the paint tool, click on it and the image will fill in the chosen pattern.
Or click on the pattern icon, scroll through to the desired pattern, click on it, then on the paint bucket tool, hover over the canvas with the paint tool, and click on it to fill.  The + or _ option scales the size of the pattern view, it is handy when tiny or very large repeats are chosen. The canvas for the pattern fill needs to be large enough to accommodate the pattern in repeat.
If the fill fails, check to see that the bucket fill mode was not somehow changed from normal to one of the many other options  Here the skull is used to fill a 400X400 canvas, an even multiple of its size
 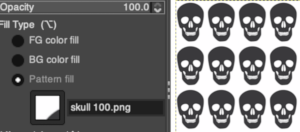 If the canvas is not in a full multiple of the whole pattern, part of the repeat is cropped
  Using the same rose image tiled using the Filter, Map, Tile menu produces similar results when full multiples of the image pixels are not chosen, ie. here the tiling is on an 80-pixel wide canvas as opposed to a full multiple of 25 ie 100
  Designing tiny repeats:
Begin with the image in black-and-white indexed mode.
To draw my repeats, I used 1800X magnification, with grid view, exported the files as png, and dragged them into my own Gimp patterns folder.
If the goal is full punchcard repeat illustrations, then by default the width of the image to be filled needs to be 24 pixels wide, and a minimum of 36 rows high. If working as a tuck stitch, punched squares are black pixels, and unpunched squares the white, creating the tucked loops. Using the bucket tool to fill the image is accomplished with a simple, very quick stroke 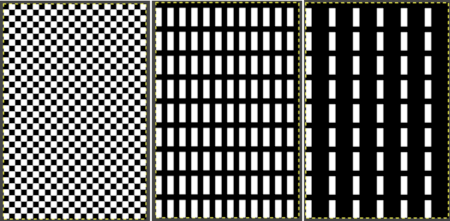 The rectangle tool may be used to isolate a segment of the first repeat and the area may then be filled with a different pattern.
 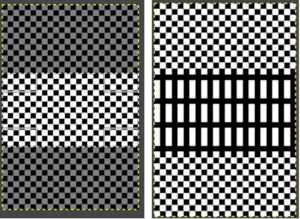 Brushes may be resized as needed, and pasted on the previously filled image, and guides are helpful in their placement.
  added info on pattern fill in Gimp 4, pattern fill, dithered portraits, and more
Canvas resize, offset: working with a 20X20 black and white pixel star  Extra grid rows or columns may be added in a variety of ways to an existing motif including using these menu options
 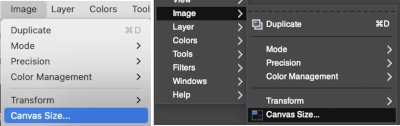 These images illustrate only some of the possibilities. The chain link is used broken
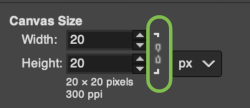 with the exception of when placing the star centered onto the new canvas or when moving it for manual placement onto it. Use Layers choices: resize all visible layers, fill with white. With the new canvas width equal to that of the image, the 10 desired new rows may be added to either the top or the bottom of the file respectively by entering that number in the space for the offset X or Y values, and the resulting new files are shown gridded on the bottom right.
  When choosing the center offset with the chain link intact, the X and Y values will be changed from 0 to 10 in this case by the program based on the new canvas size. To add cells only on the left, the chain link is broken again, and the X offset value is set accordingly.
  Adding 10 cells to the right, 0 offset selection
  It is possible to guide the placement of the motif onto the new canvas in any position. There will not be any visible grid as a guide, so a bit of math planning ahead for the new canvas size will fine-tune the possible placement. Again, the chain link is broken. Choose the center option but before selecting resize, click on the image, drag it to its new location, then select resize. The grid can then in turn be made visible.
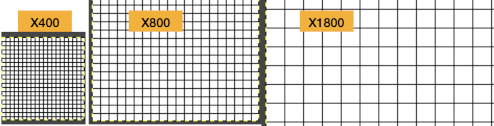
Any of these steps may be undone, adjusted, and repeated as needed.  Grids and Guides: my view was magnified X 2800, and the canvas measured 24 X 36 pixels.
Magnification may be set using the pull-down below the image window, where any number listed may be chosen or typed in and set by hitting the return key, or by choosing the zoom tool. Click only on the image, and the zoom is applied to the whole image. If the pointer is used, click and drag the mouse pointer to create a zoom rectangle. The biggest dimension of the rectangle will correspond to the size of the image window. You can get to the Zoom Tool from the Image menu through , or by clicking the magnifying glass in the toolbox 
 Anyone needing an adjustable grid superimposed on an existing image may use the Configure Grid command to set the properties of the grid and display it over the image while working on it.
One can choose the color of the gridlines, and the spacing and offsets from the origin of the image, independently for the horizontal and vertical grid lines. The configure grid dialogue: 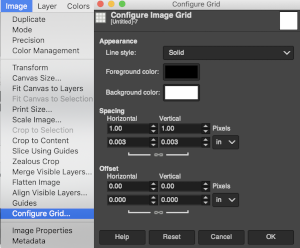 The five different grid styles:
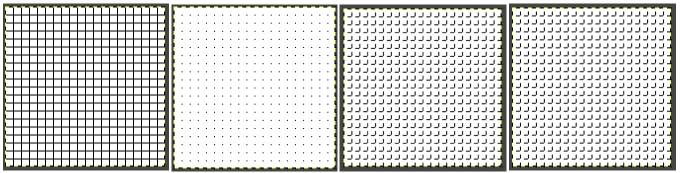
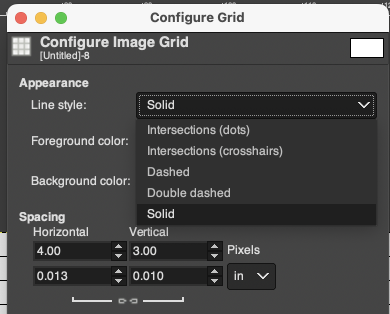 Intersections, dots: the least visible, a simple dot at each intersection of the grid lines.
 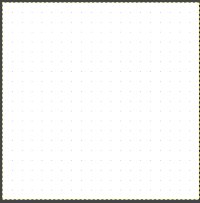 Intersections, crosshairs: a plus-shaped crosshair at each intersection of the grid lines
  Dashed: dashed lines in the foreground color of the grid
 Double dashed: dashed lines, where the foreground and background colors of the grid alternate, look the same as above when the image is in BW indexed mode. It is also hard to discern the separate colors in RGB mode because the dashes are so small and so close together,
  Solid: shows solid grid lines in the foreground color of the grid
 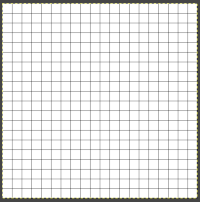 Foreground and Background colors: in RGB Mode, click on the foreground color to select a new color for the grid, click OK
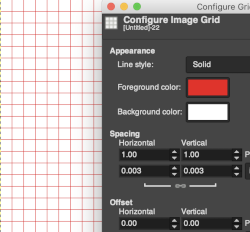
 Spacing: for use illustrations see GRIDS: OPTIONS
Width and height: select the cell size of the grid and the unit of measurement
Offset: moves the origin of the first cell, by the fault the grid begins at the coordinate origin, 0,0
The command enables and disables Snap to Grid. When snap to grid is enabled, and a selection is moved or placed, the grid points pull on it when it approaches making accurate placement easier. If the magnification is high enough, the placement of your pencil or brush will be outlined in a dotted line. Here the snap to the area for a 3-pixel pencil is shown highlighting its possible placement location. 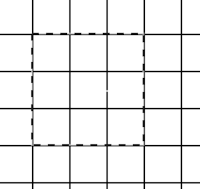 This command is found in the image menubar through , .
The question has been asked in forums again as to how to place knit designs other than on a square grid. If retaining the aspect ratio matters, any image used for download can be scaled in height or width after it is drawn, or even after download depending on the software used.
If the intent is to illustrate the design on a knit-stitch rectangular grid, one may choose to configure the grid for any single image, or for permanent use.
For a permanent change, the default size may be set by changing user preferences, as seen here for a 1X1 pixel grid. 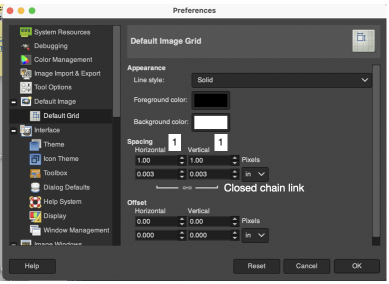 To change results on any single work file use Image, and Configure Grid values to the desired ones.
 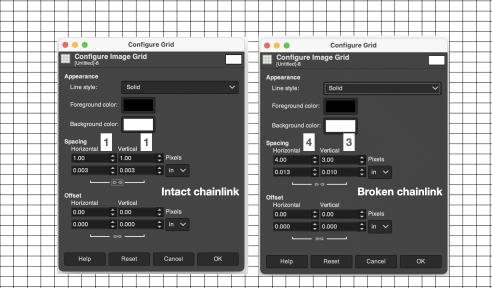 Configuration options for line styles include solid, as shown above.
GUIDES: to configure guides, you can go to Image>Guides>New Guide by Percent, or simply click on one of the rulers in the image window and pull out a guide while holding the mouse Left Button pressed. The guide is then displayed as a blue, dashed line, which follows the pointer. As soon as you create a guide, the “Move” tool is activated and the mouse pointer changes to the Move icon. Releasing the mouse will place it. 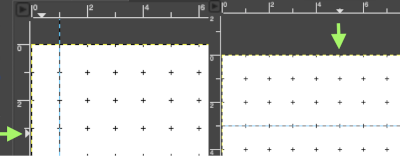 As soon as a guide is created, the “Move” tool is activated and the mouse pointer changes to the Move icon.
 You can create as many guides as you like, positioned wherever you like. If the grid is set to a 1X1 square pixel default with a line border, at any point the Image, Configure, Grid option may be used to change the ground view
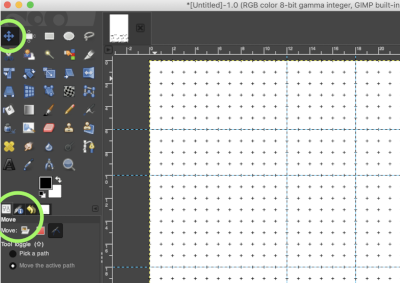
 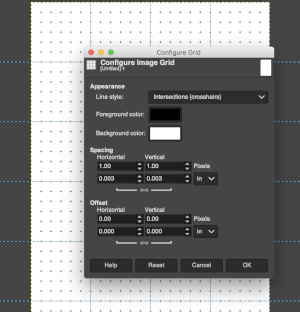 To move a guide, activate the Move tool in the Toolbox, then click on the guide (it will turn red), and drag it to a new location. Click and drag the intersection of two guides to move them together.
 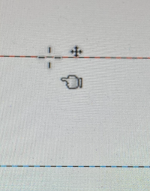 Create as many guides as needed, positioned appropriately for the design. To delete a guide, simply drag it outside the image.
Holding down the Shift key moves everything but a guide, using the guides as an effective alignment aid.
As with the grid, you can cause the pointer to snap to nearby guides, by toggling View, Snap to Guides in the image menu. If you have a number of guides and they are making it difficult for you to judge the image properly, you can hide them by toggling View Show Guides.
You can remove all the guides using the Image, Guides, and Remove all Guides command.
Working on punchcard repeats whether in designing for cards or creating a BMP or PNG for electronic download using a published repeat, guides may be set to outline 6X6 blocks as seen in factory-issued Brother punchcards, or to create custom templates. For example, lace designs have few pixels. Horizontal guides may be added or moved at intervals between repeat segments, making certain the two knit rows are left blank as one continues entering the proper pixels. The vertical guides help in orienting and locating the pixels in design blocks to match the source. 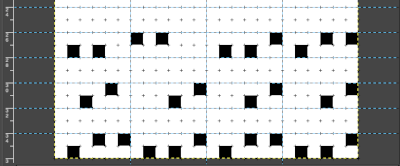 With guides in place, pattern fill may be used, adding shapes using the tools, or brushes to place motifs.
 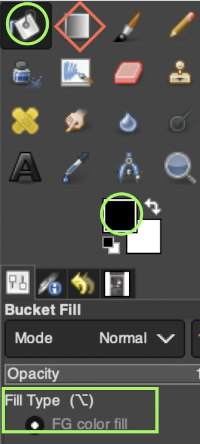 A sample of a knit repeat using the rectangle tool and the paint bucket tool combination to create filled rectangles placed in relationship to guides, creating a tuck pattern with interspersed plain knit rectangular shapes
 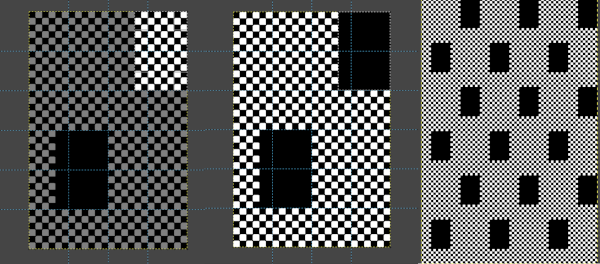 Built-in or custom brushes may be superimposed on a bucket-filled ground. Create an image in the desired width and height, here 24 X 24, and magnify at least X 800 for a grid view.
Fill with a pattern.
Place the chosen brush on the patterned ground, adjust the size and placement of the brush until satisfied, and save the image.
Consider the end-use for the pattern. For example, the designs below left would be suitable for tuck stitch, the same designs would need to be color reversed if the plan is to use them to knit thread lace. 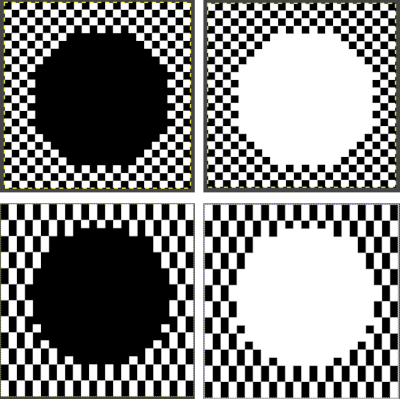 Both the original and the new image should be set to BW-indexed mode. Developing a brick version of the repeat is easy and quick. With the original image open, create a new image with the same width but twice its height, 24X48.
Set the magnification for both images to the same number, adjusting the number of both if needed so the longer canvas is in full view.
Configure the grid as preferred on the new image, and make it visible. Snap to grid is useful, but may not be necessary when working on such a scale.
Copy the full starting image and paste it onto the bottom of the new one.
Guides may be put in place to adjust for the pattern shift in the top half of the new image. A single, center guide, in this case, was sufficient.
If the full image copy is still available, align and paste it again, its left side to the right of the center guide, and anchor it.
Paste its right side to the left of the center guide and anchor that in place also. Undo and repeat steps if needed.
Check the alignment of the full repeat by map tiling, if satisfied, export it as PNG or BMP for future download.  COLOR EXCHANGE 2022 Gimp update offers a selective way to exchange colors using the fuzzy-select or select-by-color tool. The bucket-fill color works differently in some ways from previous Gimp versions.
 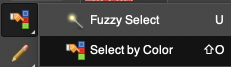 Fuzzy-select will change any contained segment of an image in RGB Mode. Make the selection of the area to be changed, it will become surrounded by a dotted line. Choose bucket fill, change the foreground color to the new one, and click on the outlined area, to the new color. Click on the rectangle tool and then anywhere in the work window to set the image and save it.
 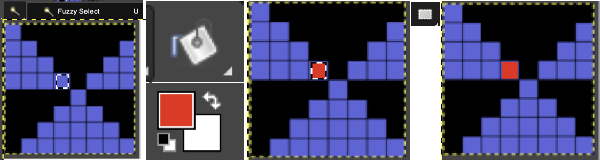 Multiple color exchanges in the same image.
  Edit, and undo can be used to trace steps backward at any point.
Using select by color will select all areas containing that color, making global edits, 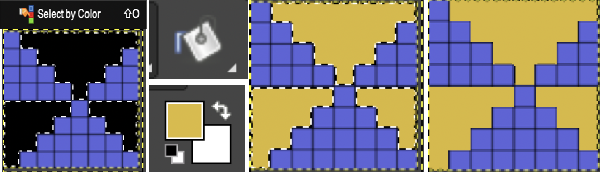 the process may be repeated within bordered segments, retaining their outlines.
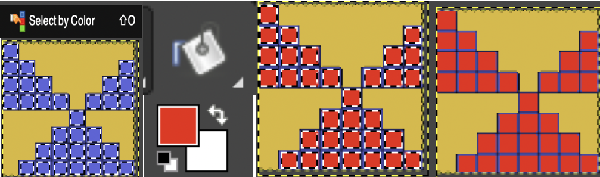 2023 version 2.10.34 use the shift key to fill by color, and the simple bucket fill tool once more to fill in any single, outlined areas
To change color in a solid background, as an alternative to using bucket fill, simply click on the associated icon, drag the desired foreground shade onto the ground, and release the mouse  COLORS EXCHANGE older version
Color exchanges to test designs in different colorways may be made easily and quickly using the program. To test the concept begin with a simple repeat already tested for tiling originally saved in indexed black and white colors
 This icon shows the default foreground and background colors
  Black is the foreground color, and white is the background.
Using such small images I often work with 800X magnification. Open the image, choose sizing, scaling, or magnification if necessary, convert to RGB mode then from the Colors menu choose Map, Color Exchange. 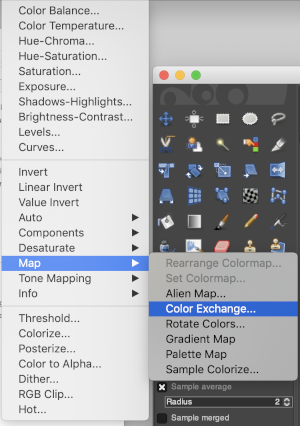 The color exchange window will appear. Here the white “from color” is left undisturbed. Select the dropper next to the “to color”, then click on the image on the color you wish to change, a palette window will appear. Make your choice, the color exchange window will now have substituted the chosen color for black, click OK, and white design areas are now changed to the chosen blue globally.
 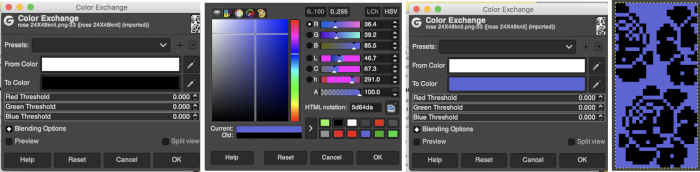 The process may then be repeated with the second color if desired. The color exchange window will show white as the default “from color”. Click on the white bar, choose black from the palette window or use the dropper to select black from the image. The from color will then appear as black. Repeat selection with the dropper from the right of the “to color” bar on any black pixels in the image, choose the color from the palette window to replace it, and the color exchange window will display the new “to color”. Click OK, and job done.
 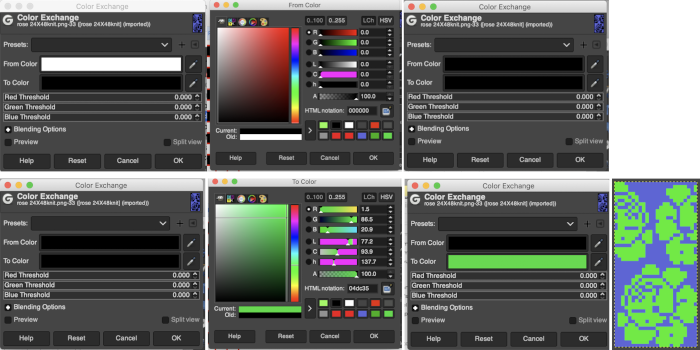 The process may be repeated multiple times on the same design or used on large-scale ones, giving one some idea as to whether or not to really commit to the estimated colors.
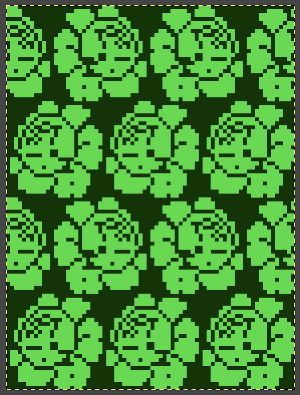
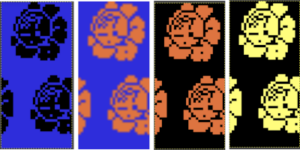
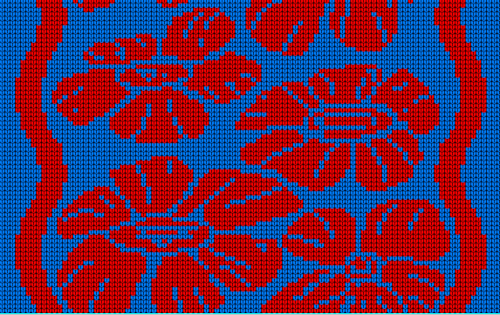
 I recently had reason to review old PC files from my Passap knitting days and came across several cut files that when converted to png format appeared in colors rather than black and white, leading me to experiment with color exchange again. The image for the first experiment is part of a crib blanket by Cheryl Giles
 The process: do not alter the original image ie. by resizing, which seems to change the color mapping responses
load the image in RGB mode
working with the foreground color, click once on the white,  use the color picker to choose a color, in this case, orange, a palette window will appear,
  click OK, and the background color will change accordingly,
  double click on the now orange background to call up its palette window, keep that window open, go to colors filter, map, color exchange
double click on the from color, the white, in the exchange window
match its values to the saved palette window working from the top down, you may find some of the remaining numbers self-correct
in the original image orange, is now exchanged for black 
 continue, repeating the process with the alternate color, in this case, yellow. At that point, the in-process image will appear as solid black. Click on the black in the exchange window to color twice, choose white from the palette selection, click OK, and the conversion is complete.
 It is possible to colorize images originally drawn in black and white. The color exchange options will remain fixed throughout the process. The image may be worked on continuously and exported when color exchanges are completed, or saved and imported again after each step. The color exchange here happens consistently on the chosen background color, changing that quickly becomes familiar and easy. There are times that the repeat being processed will turn black onscreen, trust in the process and continue.
The default color exchange window using color options in the default palette.  The steps for changing the background to red: the image will turn black as you work, click on the TO color selection to pick a color from the default palette to replace the white, in this case, the red,
 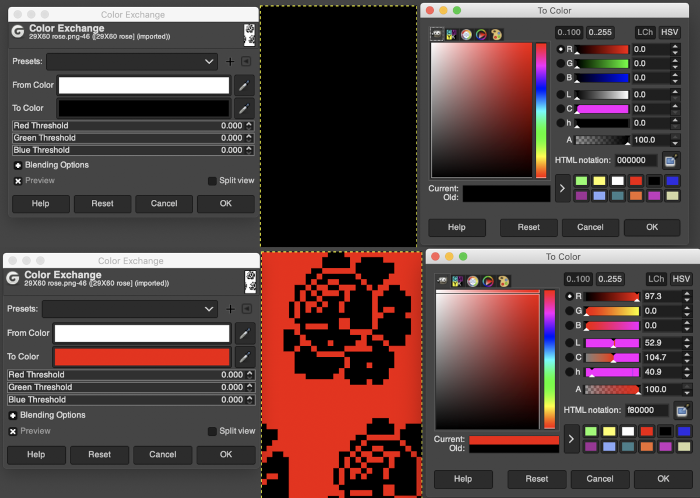 you can click OK, but do not close this last window if you want to continue, the color change will be lost
 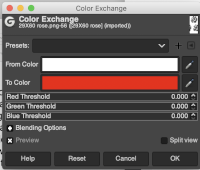 Changing the black to white in summary
 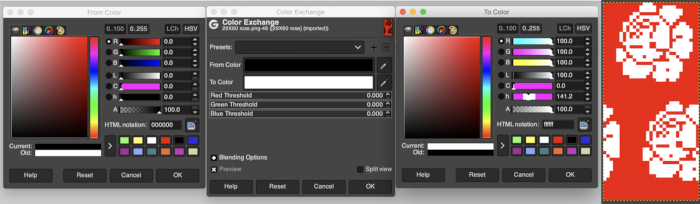 Export the image. The transitions:
 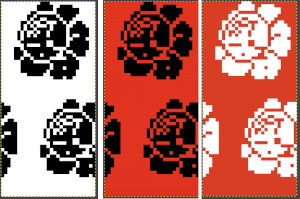 Developing custom palettes in order to visualize different colorways while using the same repeat:
load the image, right-click on the paintbrush icon, and choose palette editor,  this window will open with selections for possible palette choices
 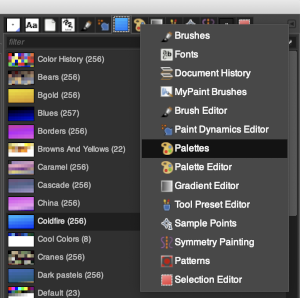 click on your choice, then click on the palette icon, and your color choices will appear, click on the white, to create a new background color. It will change it to the chosen value in this window when you click on that.
 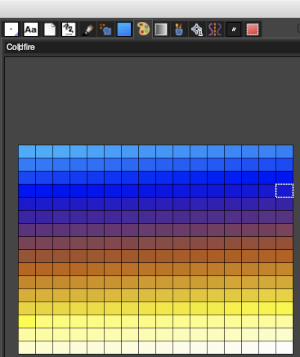 The new color choices appear in the palette in the future unless a choice is made using resetting it to the original. Two selections may be made for new colors at the same time, but the map, color exchange option will continue to work on the background color only. These were my choices for added colors.
 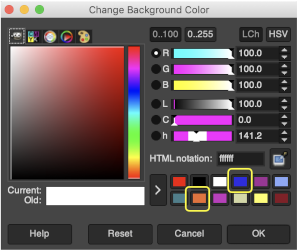 Continuing to work with color changes, changing the white in the BW repeat to blue
 the black to orange
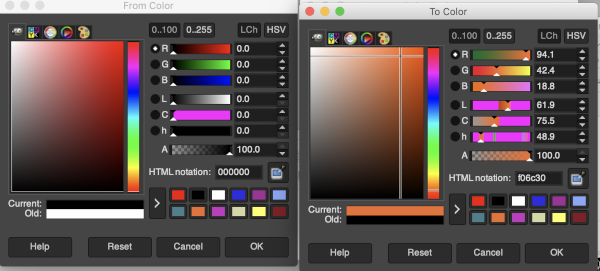
 My success with series of other images in using color exchange has been spotty. Online forums reveal this is a recurrent issue with no clear solutions. Suggestions include stipulating that the cause may be the version of Mac OS in use. Color reductions using ArahPaint achieve consistent results easily and quickly. There are advantages to hybrid conversions.
COLORS THRESHOLD: see GRIDS OPTIONS
GRIDS: OPTIONS
Punchcard users may use this method to visualize which holes to punch, though this particular repeat would need to be reduced in stitch count in order to be usable. Similar charts may be adapted and used for other textile techniques such as cross-stitch or even filet crochet.
Grids help with the precise placement of pixels when designing using pixels to represent stitches and rows. The grid is not visible until it is activated via the View, Show Grid option in the Image menu. To create a custom grid, the Image, Configure Grid from the Image menu brings up a dialogue that allows you to do so. causes the pointer to “warp” perfectly to any grid line located within a certain distance. In most instances, when drawing repeats a 1X1 pixel grid works well on a canvas magnified enough for it to be visible when filling in cells, I recommend a starting magnification of X800.
Anyone needing an adjustable grid superimposed on an existing colored image may now adjust the grid size to suit while viewing the resulting changes. The beginning image and grid size both need to be large enough for the grid to be visible. Use the show grid, and Configure Grid commands  The intact chain link fixes the width and height aspect ratio of grid cells
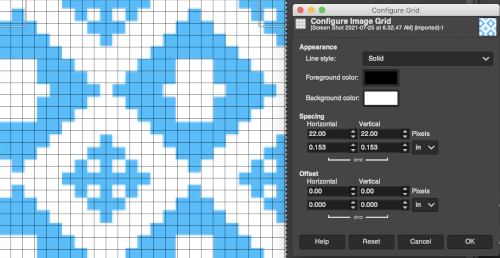 Considering the possible smallest repeat, breaking the chain link, and changing values progressively while viewing the results brings one closer to matching units
 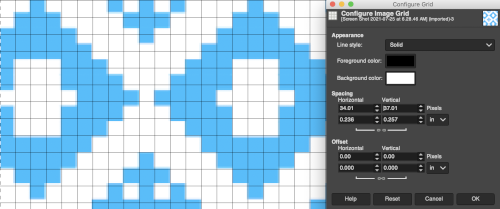 The image itself may be scaled concurrently to tweak grid border alignments. The final grid size below is 18X18, the image size is shown after scaling from a width of 277 pixels (with a broken link at that time) to a final 270 pixels in width
 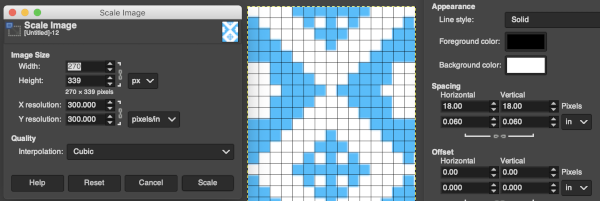 The screengrab of the above center, with a superimposed new grid; note the image, in this case, was also offset for better placement, a 3-pixel pencil was used to isolate the border of the possible smallest repeat
 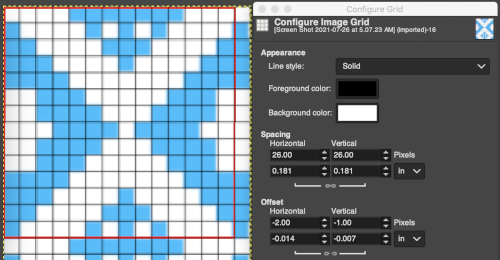 Using Filter, Map, Tile to check alignments
 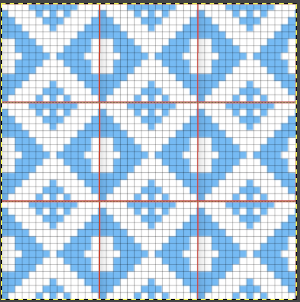 The repeat reduced to 12 stitches, suitable for punchcard, and tiled to check alignments.
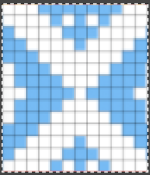
 Translating the colored image to BW indexed may take several steps and some clean-up if only Gimp is used to process it. With the colored large-scale isolated repeat, the image is opened in Gimp. The Threshold tool transforms the current layer or the selection into a black-and-white image, where white pixels represent the pixels of the image whose Value is in the threshold range, and black pixels represent pixels with Value out of the threshold range. It may be activated from the pull-down colors menu or from the toolbox.
  The color image will temporarily disappear, adjust levels.
 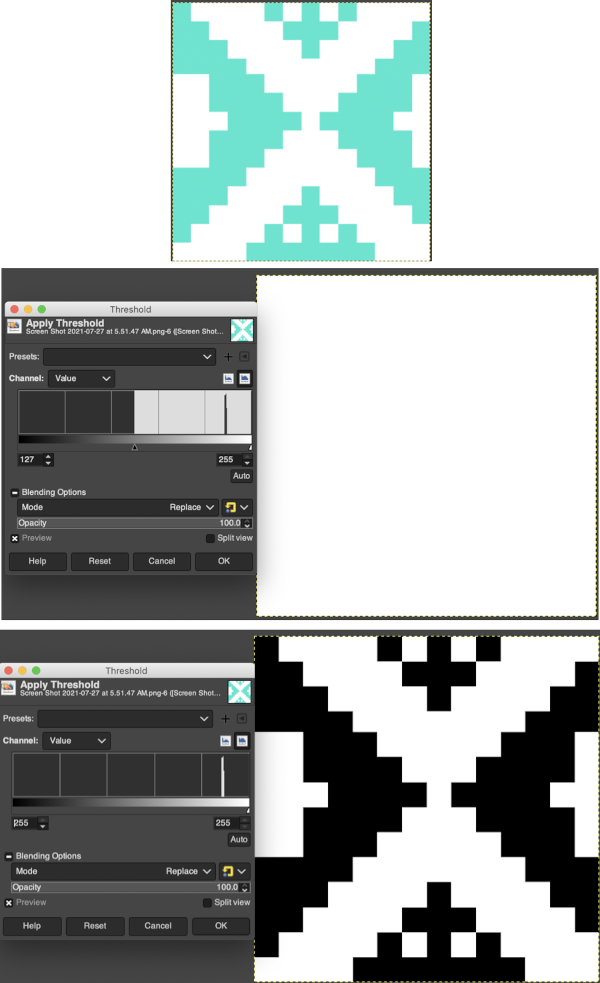 Scaling to repeat size: check the image size, making certain the present dimensions match a multiple of the final repeat count for stitches and rows. If adjustments are required, breaking the chain link allows for each count to be adjusted independently from the other. In the final scaling, use the closed chain link, adjust numbers, magnify the repeat, checking it with a superimposed grid for any missing or out-of-place cells. Check the alignment, then save the single repeat, which in this case is 14X14, ready for download
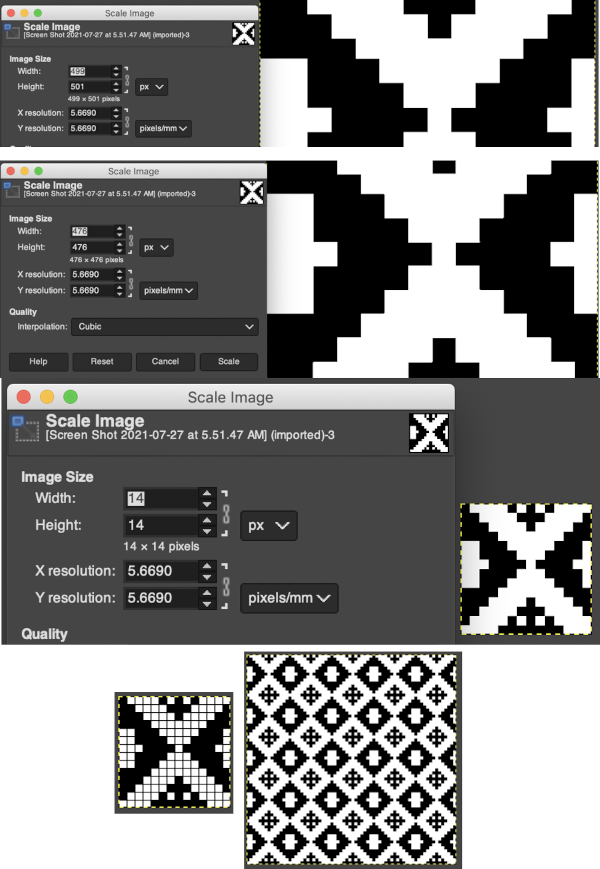
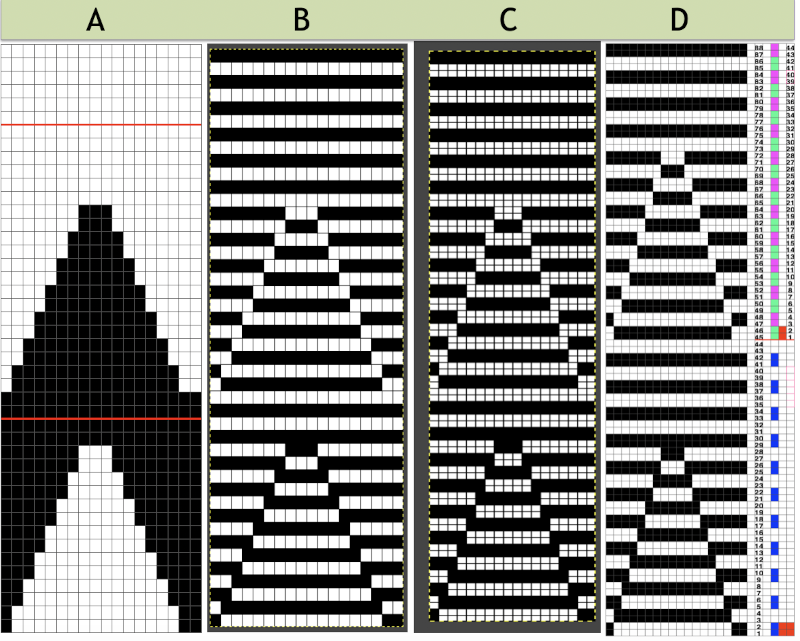
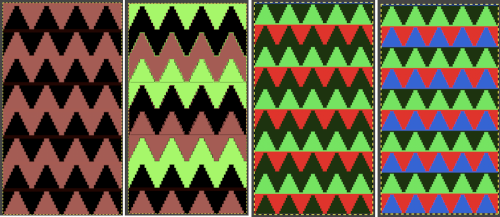
 Color separations: there are occasions where very small repeats need to be scaled in height only for color separations. I have found such scaling to be inaccurate using the option, such as here, both of the small, single repeat, and in scaling its tiled version. The triangle motif was used in many of my early posts on color separations for DBJ and its backing options.
 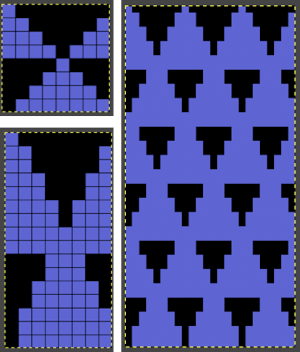 On a long enough canvas, the grid may be adjusted to 1 pixel by four in height. With that number of cells filled in with black in this case, if the 1X4 unit is captured with the rectangle tool, it will appear in the brush menu and will be available for use with the pencil tool for drawing with single strokes until one quits the program unless the unit is saved for future use as described via preferences
 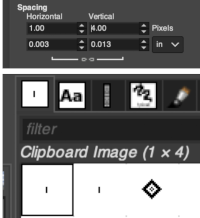 Using RGB mode, the two-color redrawn image is redrawn, A. The grid may be adjusted to 1X 1 again, B. Using magnification, I often use X1800, and pairs of rows may be selected for either color invert or value invert color options. The first will add a third color, seen in the chart bottom, the second will yield a 2 color image, seen in the chart top, B. I have had no success with using keyboard commands for the action using my OS, find it easier visually to deal with the three colors than with the 2, especially in longer repeats. C: the extra color pixels in the rows with black pixels are filled with white. D: the third color pixel rows are filled with black. D the final repeat may be color indexed to BW and saved for download.
 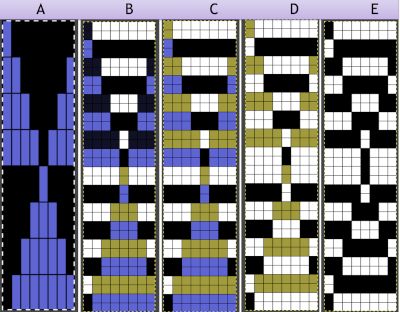 The appearance of the final repeat when color is reversed
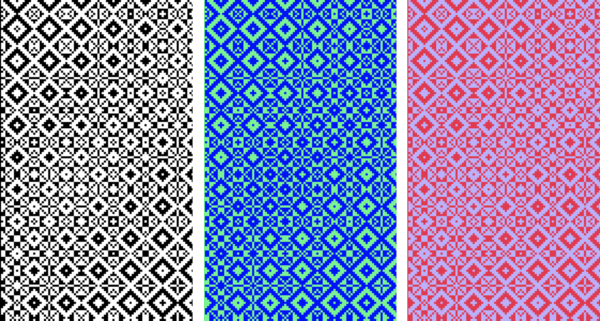
 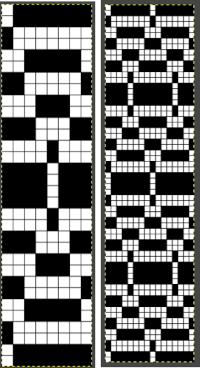 Another comparison of the 2 options for altering every other pair of rows in the specific color separation for a mosaic repeat. There is less filling in of cells with a different color, but in large files especially, I feel the result would become far more visually confusing to track.
 For more details on the specific mosaic, see 2021/01/27/mosaics-and-mazes-charting-meet-numbers-gimp-3/
SYMMETRY PAINTING
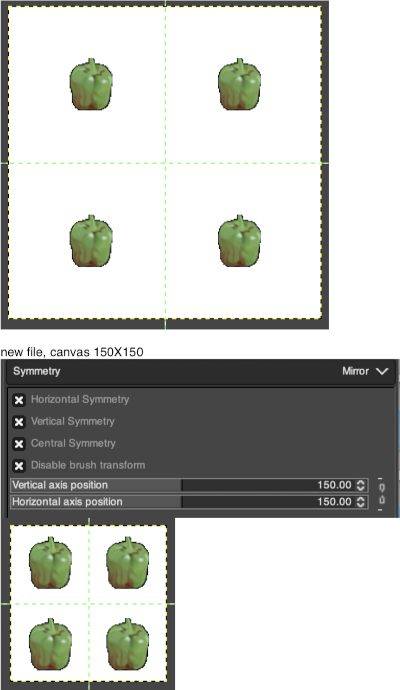
Information summary from the online manual on working with symmetry:
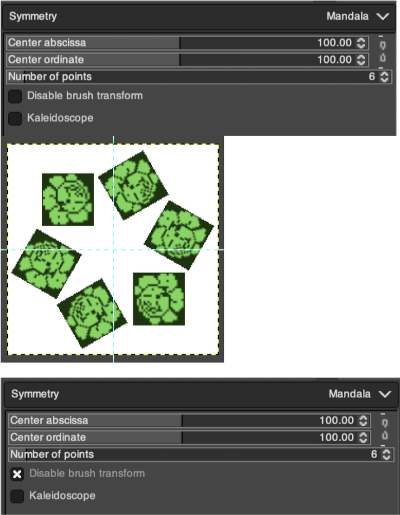
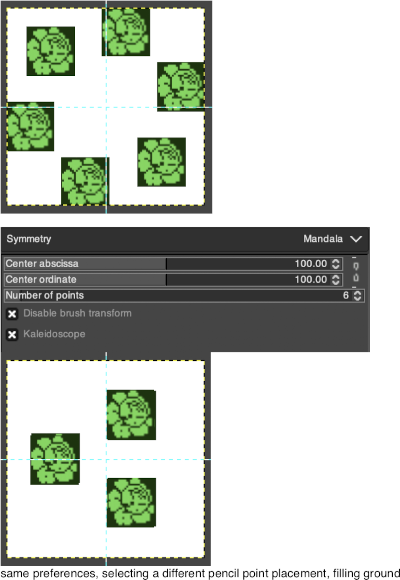
you can access this dialog from the image Menu bar through Windows-Dockable- Dialogs-Symmetry Painting, its icon appears below at the top right  A drop-down list offers four options. As soon as you check a type of symmetry, axes appear as dotted green lines in the image window and you can start painting with the brush you have chosen.
The default position for the symmetry axis is the middle of the image window. You can place the axis where you want using the Horizontal axis position and Vertical axis position.
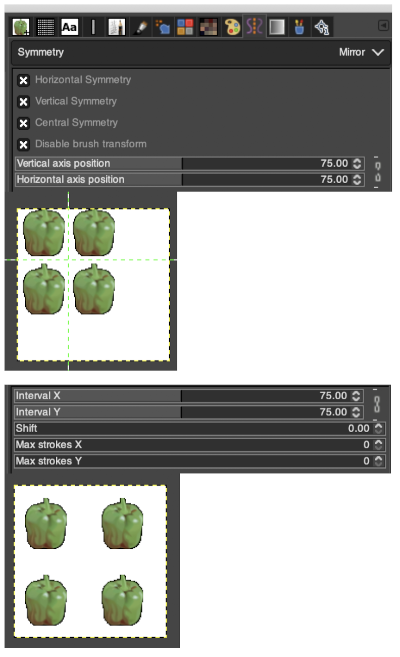
Disable brush transform: when you transform the drawing, the brush itself will end up transformed as well. For instance, in a mirror transform, not only will your drawing on the right of the canvas be mirrored on the left, but the brush itself is obviously “flipped” on the left. If for some reason, you want the drawn lines to be mirrored (or other transformation) but not the brush outline itself, you can check this box.
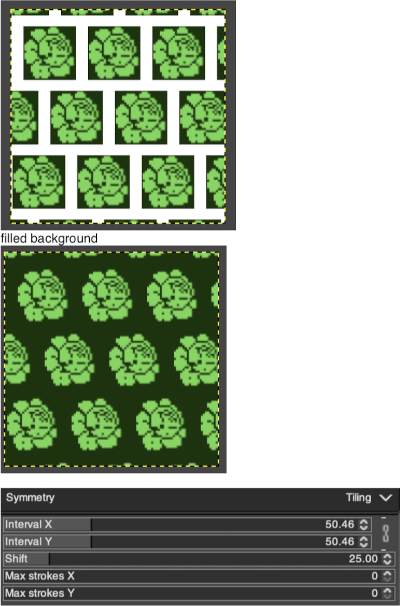
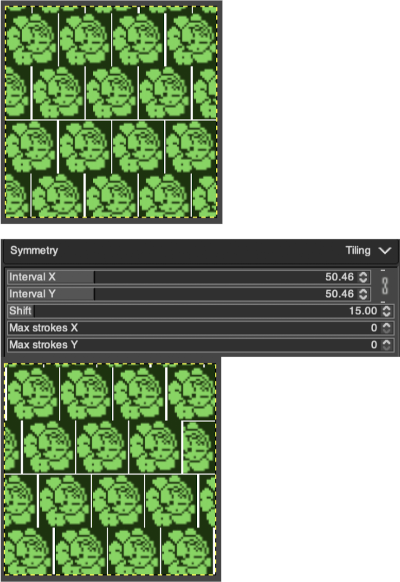
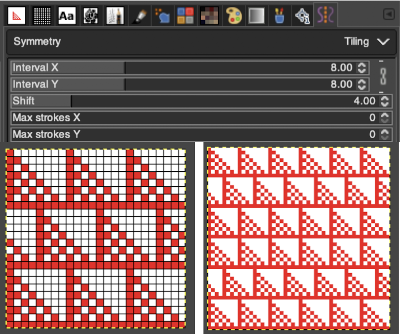
“Tiling” is a translational symmetry, which can be finite (with a maximum of strokes) or infinite. In the latter case, it is the perfect tool to create patterns or seamless tiles, at painting time. This mode covers the image with strokes.
Interval X Interval Y: these are the intervals on the X and Y axis, in pixels, between stroke centers.
Shift: this is the shift between lines on the X-axis, in pixels.
Max strokes X, Max strokes Y: these are the maximal number of brush strokes on the X and Y-axis. The default is 0, which means no limit, according to the image size.
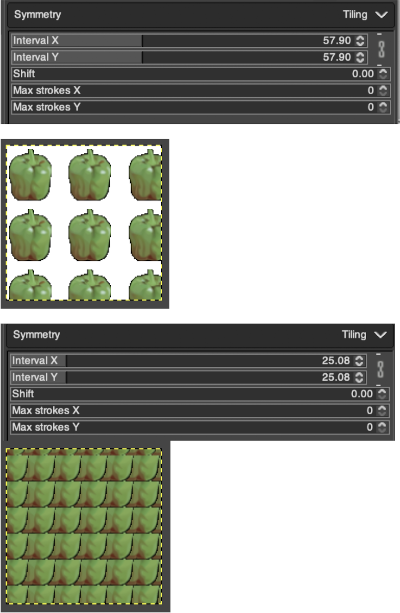
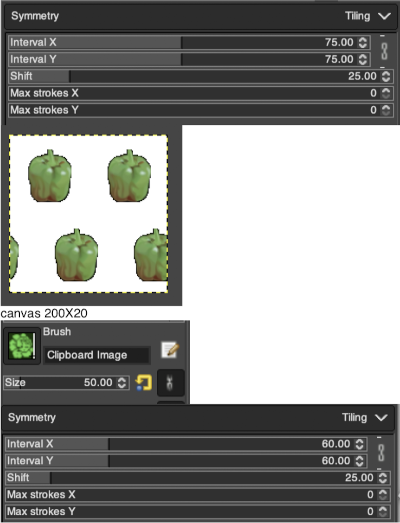
Using a large image, and testing a few iterations helps one understand the process. The pepper brush is provided in the program and is used in the tutorial on the Gimp site. Most such tutorials are intended for working on far larger and higher resolution images, while knitting is binary and at the opposite end of the spectrum in scale and required image size. The original brush is 220 pixels in size, and the maximum number of needles per pixel on standard machines programmable at one time is 200. For exploration, any of the built-in brushes may be used, I began by scaling the pepper to 50 pixels, then moved on to a self-drawn, equal size flower motif. When choosing canvas file size, consider a multiple of the brush size. Drawing repeats uses the pencil tool. 
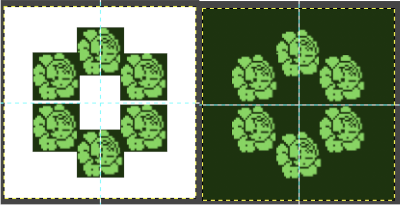 Working with potential knit repeats the scale is reduced further. Magnification is useful for the evaluation of repeats. The smallest repeat segments for use on electronic machines may be isolated. The filter, map, and tile option easily verify how the repeats line up overall. Cropping a 24-stitch width and tiling that also visualizes the suitability of the repeat for use on punchcards with the 24-stitch limitation. Grid view helps identify any need for “clean up”.
This rose is 24 stitches wide by 25 rows in height  Open the chosen file in Gimp. Create a new file in a canvas size considering a multiple of the original.
When the Copy or Cut command is used on an image or a selection of it, a copy appears as a new brush in the upper left corner of the “Brushes” dialog. This brush will persist until you use the Copy command again. It disappears when GIMP is closed.
With the single repeat opened in Gimp, magnified several times, click on the image and use the copy command. The image will appear in the symmetry dialogue. The position may vary depending on whether the program has been closed and relaunched between episodes of testing the process.  Create a new file, large enough to accommodate a multiple of the original number of pixels, add pixels for spacing between or above and below designs, set the magnification to the same number as that of the clipboard image, left-click on the brush icon, choose the image saved in the clipboard
 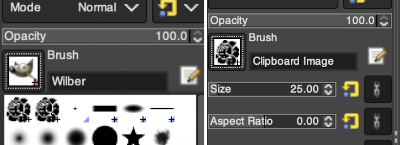 and a type of symmetry and accompanying settings, click on pencil tool, the motif will appear as on the above right, paste the image on the new canvas, undo and repeat setting adjustments until satisfied with the distribution of motifs.
Some ways of varying repeat positions working with motifs in networks were illustrated in the post 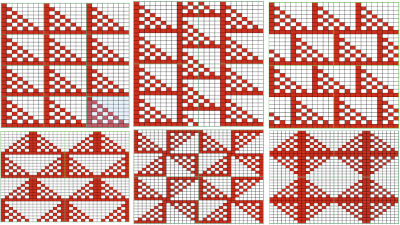 To develop a brick repeat I began with a canvas twice that of the original rose,
  48X50 pixels, isolated the smallest repeat, used the filter map tile option to test its all over alignment
 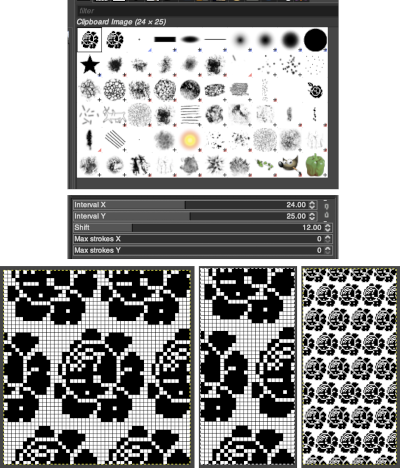 The 24X50 repeat:
  To decrease crowding, using the original image, the new canvas is now 40X60, with the shift decreased from 12 to 8 pixels. The result did not tile properly when mapped, using magnification 800X with a viewed grid the final repeat, 29X60 was isolated
 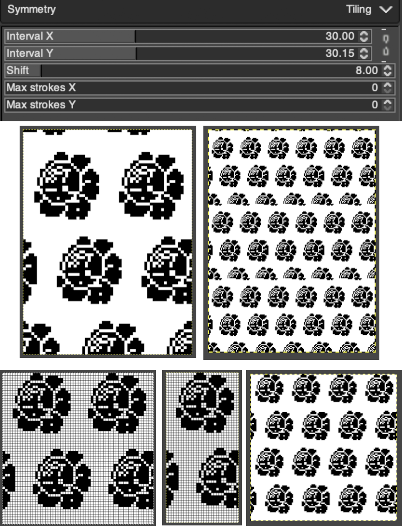 Being more deliberate with the math leads to a full, successful repeat
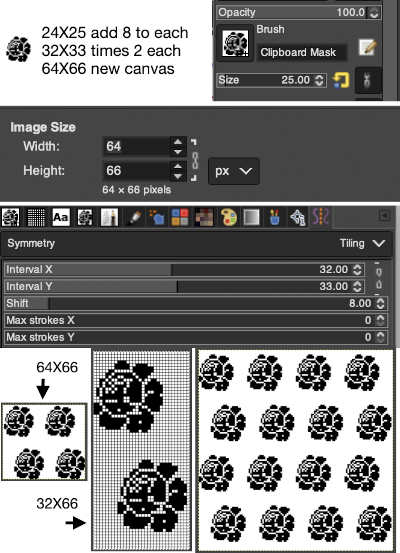
Working on the gridded image, drawing straight lines to isolate color change areas in chosen colors followed by flood filling, one may begin to visualize changing the ground color behind the motif repeats 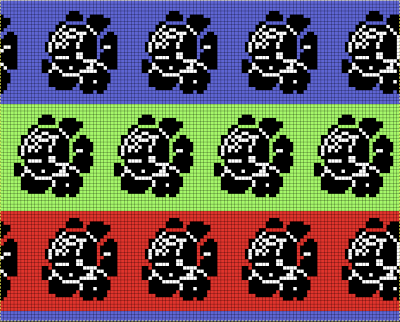 Using that small triangular 8X8 repeat
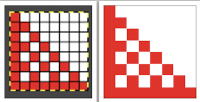
 open in Gimp, or draw any small shape if designed by hand, remove the grid. Before using it as a brush, reduce mode to 2 colors, magnify X800. Open a new file. I found the latter needed to be increasingly small as well for the repeats to be placed accurately. After tiling using symmetry, filter, map, tile from the filter menu to check for multiple repeat alignment.
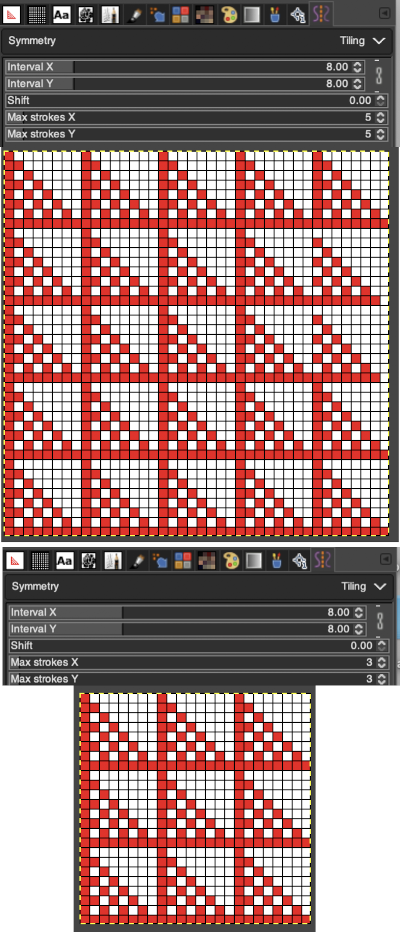
 Again, preemptive math will yield images that avoid further processing. It is up to the user to recognize any problems, the repeat here needs to and can be isolated correctly from the file on the left, it is actually only 16 rows high. Here the adjusted repeat is created on a 24X16 canvas with the same symmetry settings, and filter/mapped/tiled
  There may be multiple ways to achieve the same result with each motif. Here the same repeat is executed two different ways
 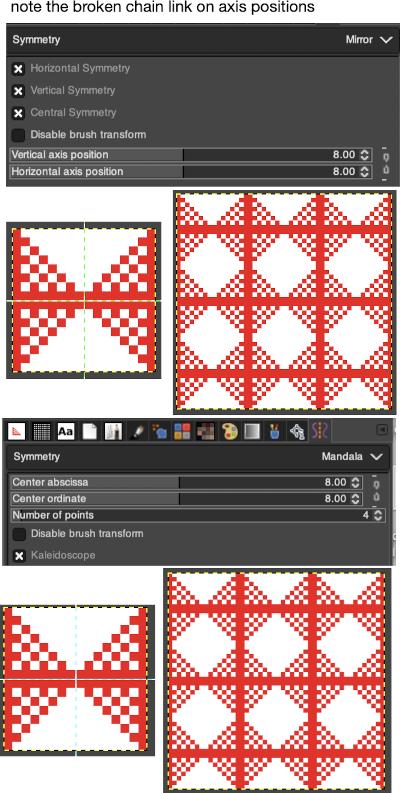 The above repeat was cropped and adjusted to 16 stitch width and 8 row height, the file saved, and the process repeated
  Using symmetry once more, remember to adjust the pencil size.
  For the pinwheel shape
  I was unable to use color exchange successfully on the above images, but with the saved 2 colors indexed red and white repeat both img2track and ayab appeared to load the repeat successfully.
  The map color exchange was successful using the steps described at the top of the post when beginning with the repeat drawn in a black and white version.
A different approach, experimenting with built-in brushes: symmetry preferences remain constant, the brush size is reduced. The results are best if the canvas is created in black and white indexed mode to start with, and shapes reduce with varying degrees of success. The numbers reflect brush sizes in each dot pattern.  Different types of symmetry may be applied to the same image
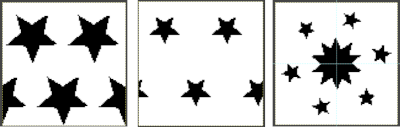
For afghans or wall art, if one is attracted to large shapes, drawing in mandala symmetry on large canvas size is as gratifying and immediate as when using a spirograph, the results happen in seconds, these were drawn using 32 points. Steps may easily be undone along the way as one attempts to make the images more complex. 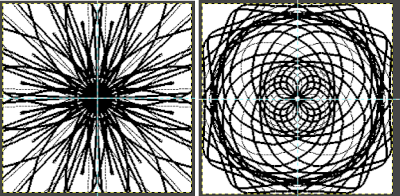
 or KCI for end needle selection, KCII for no end needle selection in electronic models, also advances the pattern a row with each pass. The advances happen in Brother machines when any carriage locks onto the belt and moves past the center 0 marking as it travels from one side of the stitches in work and past them to the other.
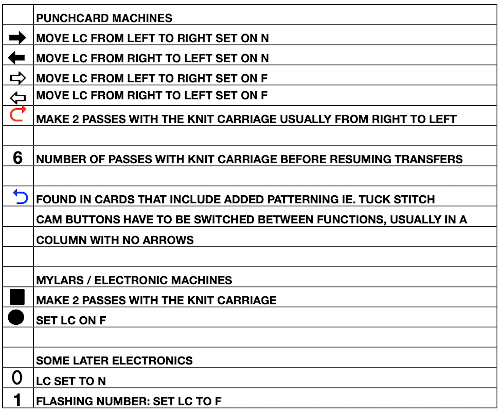 There are many differences in transfer lace design: design transfer segments may vary considerably in the number of lace passes and transfers between each pair, or more in some instances, of knit rows. In the pattern below, only 2 rows of knitting are completed after 20 lace carriage passes, the bottom half is repeated X times, and the top half X times, adding even more complexity. Depending on the knitting machine model, the pattern may also need to be mirrored to knit accurately.
 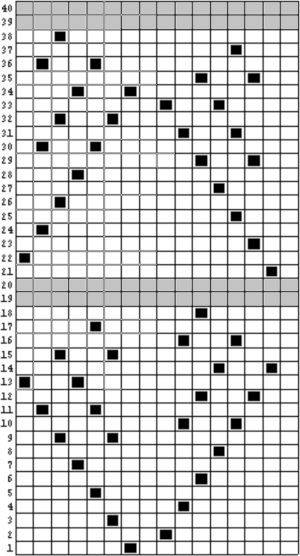 Published punchcard books offer patterns with potential errors usually sorted out. Both punchcard machines and electronics scan the card or mylar inside the machines, several rows down below what is visible to the knitter at eye level on the exterior of the card or mylar slots, so markings on both need to be made accordingly. This is a fact that needs to be considered with cable downloads of the same patterns if entering memos for knit rows. In the case of punchcards, Brother reads 7 rows down, Studio 5. In fabrics other than transfer lace adjusting for the brand is straightforward ie to knit fair isle, tuck, or slip pattern if using a Studio company-supplied punchcard repeat, simply start the Studio card on row 3. If punching your own, design rows match, and if the blank card is marked for Brother, the numbering is accurate by default. Brother transfer lace cards begin with pattern selection, Studio brand with 2 knit rows. In this repeat, a mesh repeat is created first moving to the left, then to the right, the 2 knit rows follow 2 LC passes for transfers to the left, and 4 LC passes for transfers to the right. Brother row one marking is underlined with a blue line, Studio with red
  A Studio repeat adjusted for use on Brother also illustrates that the number of knit rows is only two, the LC passes can vary in number between knit rows. Here LC passes are marked with outlines around pertinent row numbers on the right
  Brother vs Studio: extra knit rows in Brother are not physically left as blank rows in cards, the rows for KC are still 2 blank ones, while in Studio cards there is a blank row for each knit row in the pattern. Both these samples have a 6-knit row sequence. Because Studio begins with 2 blank rows, in the repeat on the right only 4 rows are left blank at the top of the repeat.
  Adjusting for extra knit rows, Studio to Brother
  These samples are from Brother punchcard volume 4:
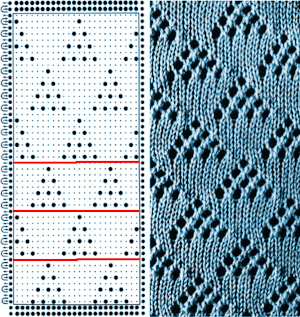 varying numbers of blank rows between repeat segments
 Some electronic examples using the 2-row spacing between transfer segments: this is a page directly from the Stitchworld electronic pattern book
  a pattern published on a full Brother mylar sheet
  this is from a studio mylar, the same holds true in terms of the number of empty rows between transfers,
  that is the reason why most transfer lace patterns unless they are designed as studio simple lace where transfers are made with each carriage pass, patterns may be exchanged between both brands, the only difference being studio starts with 2 blank rows, ends with transfer markings, Brother starts with transfer markings, ends with 2 blank rows.
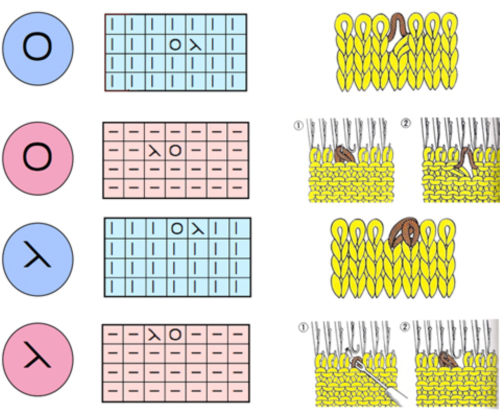
 The LC can move only one needle at a time, so when multiple needles need to move to place the eyelets properly, the options are to use a hand tool to perform the moves or to develop a pattern with multiple transfers in each segment of the final repeat. The full repeats are often very long.
 There is a handy option in Dak when thumbnails is chosen from the image menu, one can browse through saved folders containing compatible file-formats including the images in those Brother magazine downloads. The small preview will identify the specific file size. When you left-click on your choice, it will appear enlarged at the bottom left of the view window, it has been moved from its corner in my screengrab,
 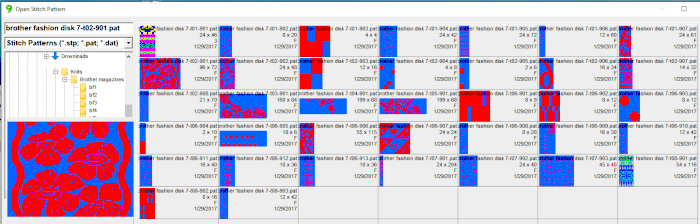 left-click OK on the enlarged image, it will open in the program window. Minimize the size until no further reduction is allowed by using the magnifying glass or the scroll function in the mouse. This is a different operation from scaling the original to a different size. The save-as option for the image offered at that point are:
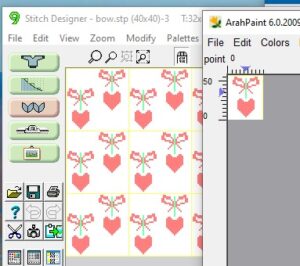
 For choices emulating export in other paint programs, right-click on the image, choose copy, open a paint program (Arahpaint is my favorite at this moment), and from its image it menu choose paste.
 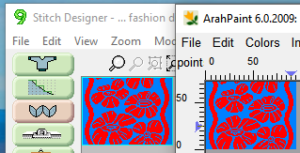 Using Arah’s color exchange, the image may then be converted to black and white for 2-color work and is saved in a format usable with other software and in other machines.
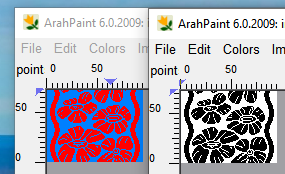

 but if the image needs to then be reduced to BW, Arah is the easier and predictable tool to use.
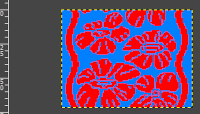
 It is useful to establish working history using the same design motif. In the first image, left-click on red, the from color, right-click on white, the to color, click on the double arrow to make and apply the change
 The print dialogue allows for saving patterns as bmps.
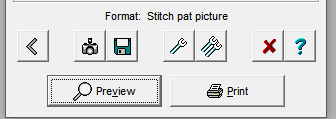
 choices may then be made about file name and the location for the save,
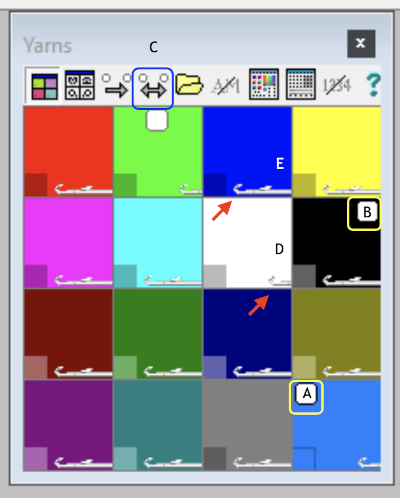
  If there are no “short” needles in the image being processed as in the last screengrab above, there will be an error message onscreen, pointing out problems in the numbers of colors present in rows ie more than 2 for FI. This is fixed by clicking on either the “needles” of one of the two active colors in the yarn palette to make one color the ground, the other the contrast. The results from this process for printable bmp files are shown below, not for a bmp that may be used to knit the pattern on an electronic machine using a different download method. Here the resulting stitch pattern picture is shown in color reverse as well.

 At this time I am continuing to knit on my machines with punchcards and using Ayab, or img2track on my electronics, have no immediate plans to change that, hence my interest in using DAK software features while keeping in mind the possibility of using the final repeats on other machine models.
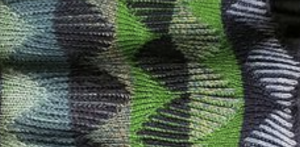 The plan is to create a repeat which may be knit using color changes every 2 rows. Each design row knits each color twice, so the standard built-in KRC separation is not a consideration, though the same cam settings may be used in those fabrics as well.
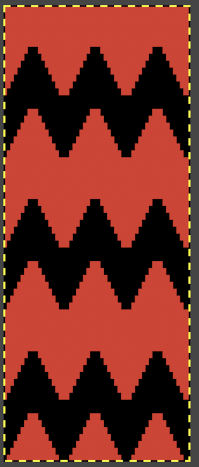
 Lock settings are easier to achieve on the Passap than switching out cam buttons in Brother machines. This was knit using 4 carriages. Color one knits with the main bed set to tuck both ways, color two knits with the main bed set to slip both ways. The slip stitch reduces the width of the fabric considerably
  Here each color alternately tucks and slips. The choice of cam buttons matters, tucking first from left to right, slipping from right to left, with cam buttons set COL after the first preselection row
 This last cam setting appears to my eye to produce a texture “close enough” to the inspiration fabric. Attempting to add more colors: the repeat, D, is still 18 X 88 but is now shifted slightly.
 The existing repeat may be reduced further to 18 X 64, eliminating some of those extra rows in the center of the chevron shape
  Whether or not the design is intended to retain chevron shapes in alternating textures, actions may be plotted pre knitting in any way that visually makes sense to the person designing the pattern and tools available to them.
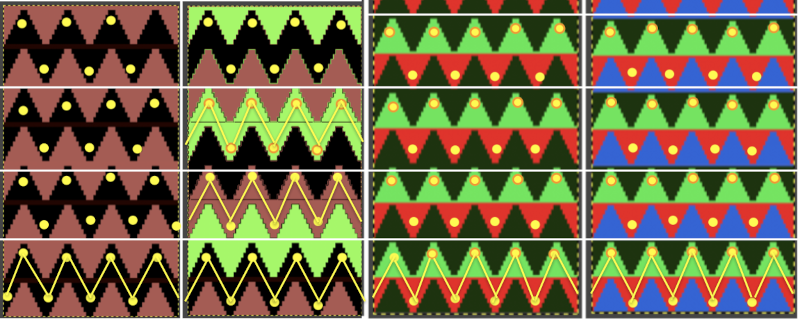
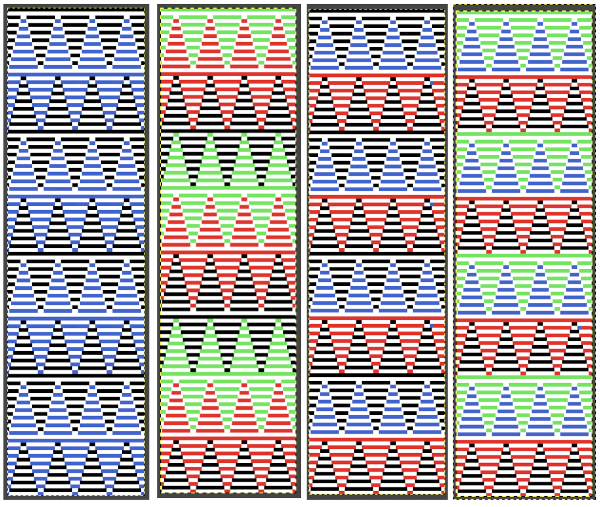 Reversing the png so that the more textured stitches will begin with the color in yarn position 1
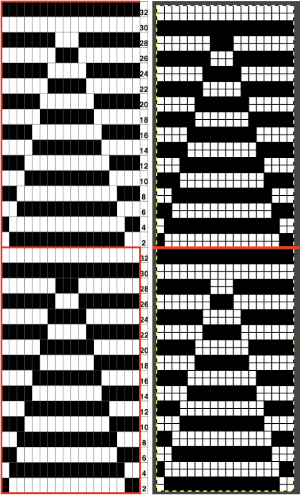 Adding colors can be planned cautiously or allowed to happen randomly depending on the preferences of the designer and end-use. Ribber fabric designs are not visible until several inches have been knit, too late to catch color sequence errors. Some machines allow for memo placements or sounds to help track color changes, but only within the initially programmed repeats. A quick spreadsheet can provide customizable checkboxes or added information. For an attempt to retain chevron shapes in different textures:
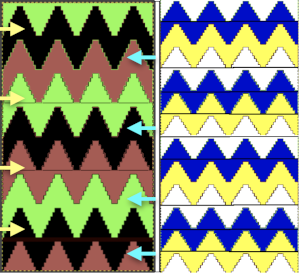

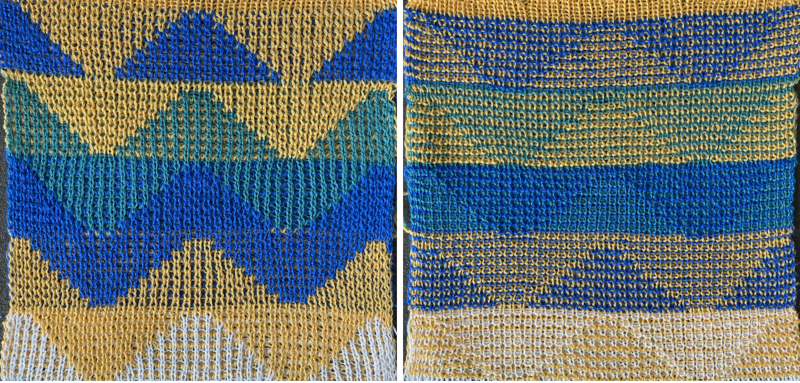
 A PDF including row numbers and space for notations
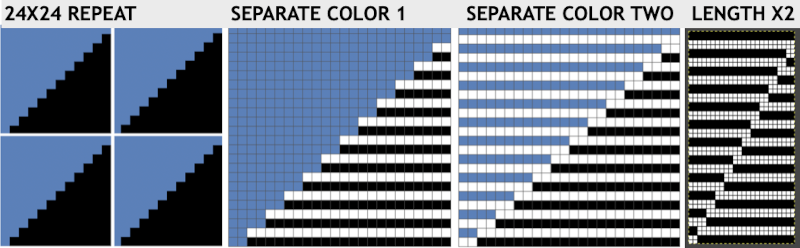
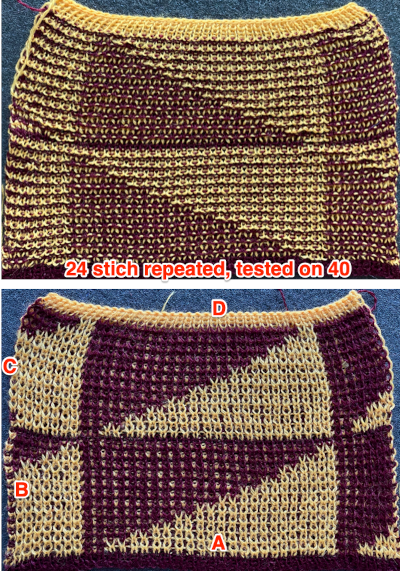
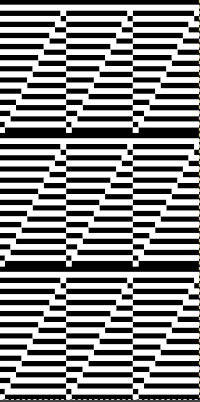 Continuing on a 24 stitch repeat, the original design may be rendered at double height and separated once more, doubling the separation height to 96 rows
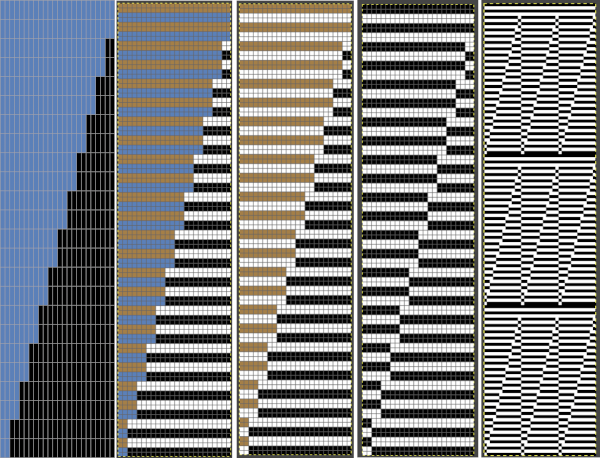
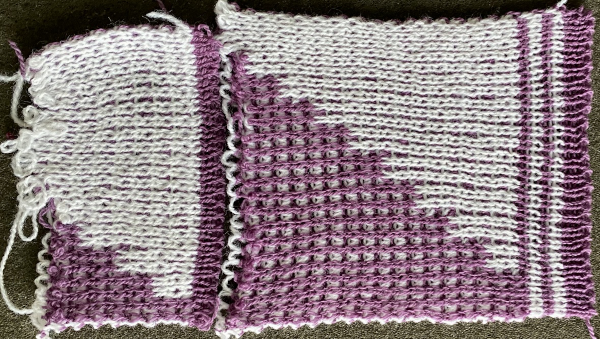
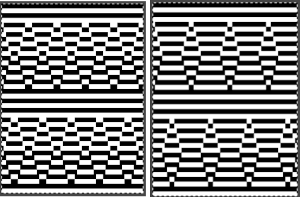
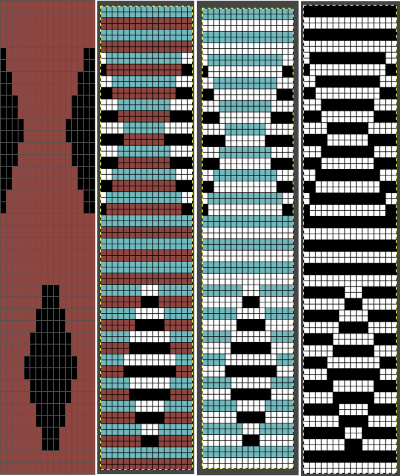
 Another even more complex inspiration from a sweater attributed to Falke, Spring 20 collection, using similar stitch structures, but in addition, also transferring stitches between beds exposing a purl striped ground.

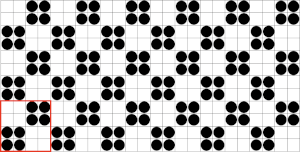 Adding needles out of work by simply choosing to cast on and working on every other needle it does not matter whether even or odd needles are in use, the pattern will be identical but simply shifted over by one needle. For frequent color changes, make the first preselection row toward the color changer to start with, keep notes as to where the repeat color selections happen as experiments are expanded, evaluate color choice as a third or even fourth color are introduced
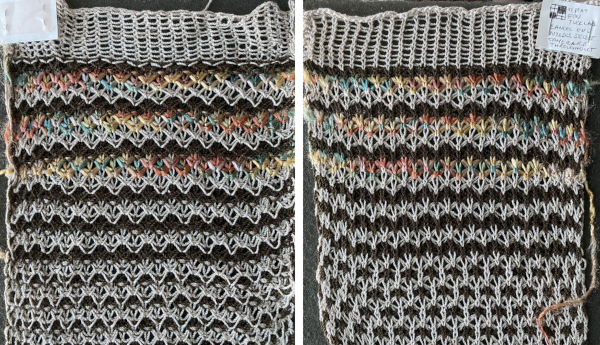
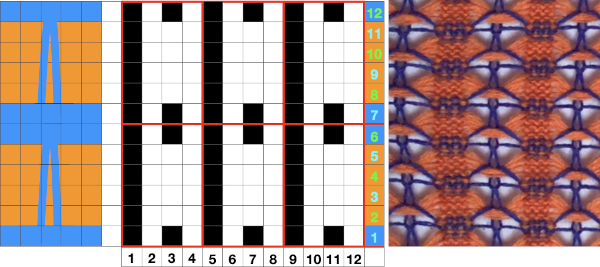 the third tuck row on the machine
 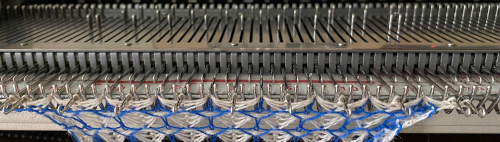 the fourth tuck row with needle preselection for the first all knit blue row
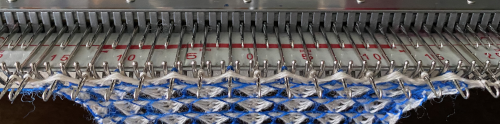
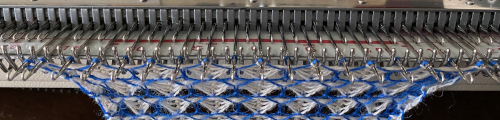
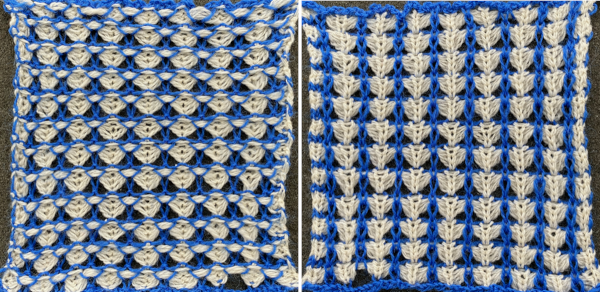
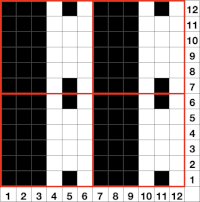
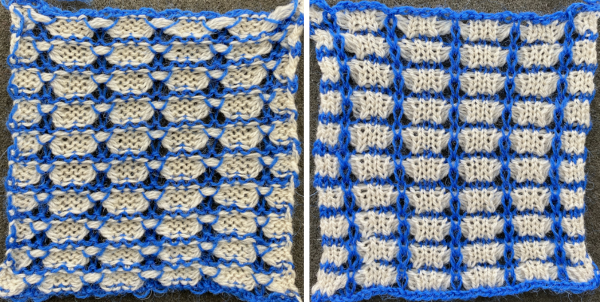 Two from one: the same tuck repeat was altered by changing the needle out of work arrangements. Slub yarn may be used but changes the value of the lines formed by the floats created in the needles out of work gaps.
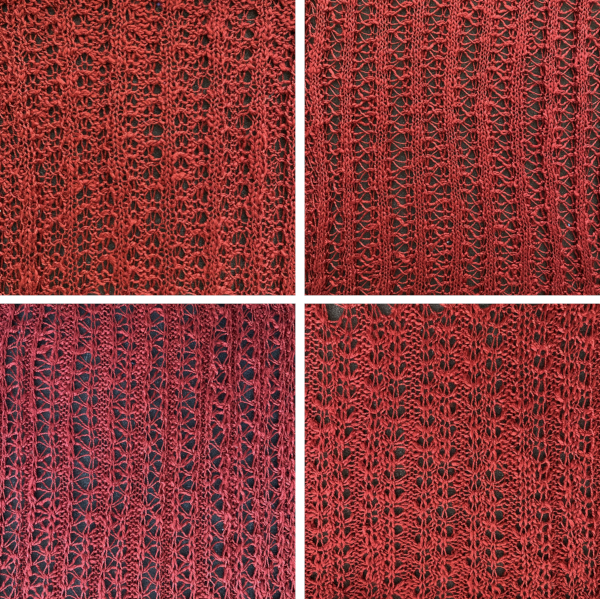

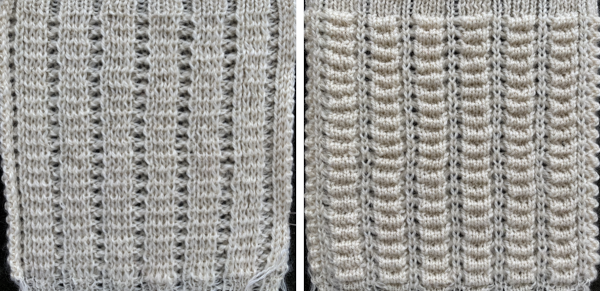
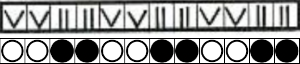 Chain cast on 2 in work, 2 out of work, end with 2 needles in work
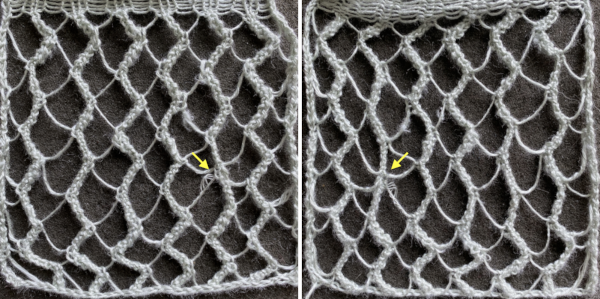 Number 11 is a close relative but worked on every other needle
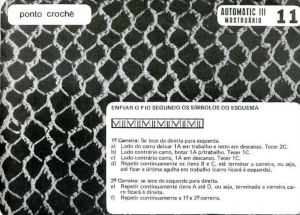
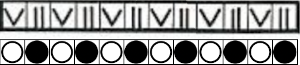 The rayon used in the previous sample, and a 2/8 wool, were less successful than a 2/11 acrylic in knitting the swatch. The stitches need to be as tight as possible while also needing to be able to knit off properly
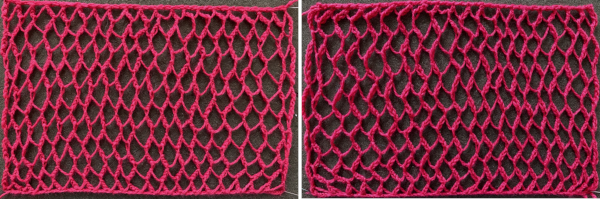 The same directions apply in this instance, the first sample worked with no needles out of work

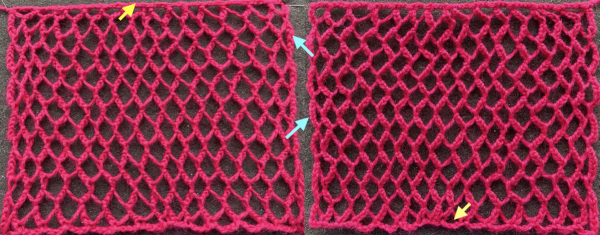 This knit begins on every needle
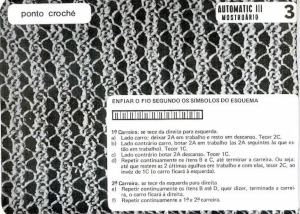
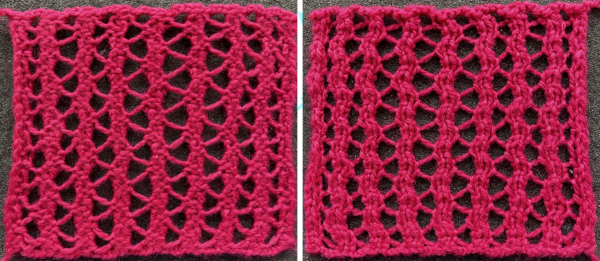 Eliminating those ladders or floats, here eyelets are created where stitches are held for two rows.
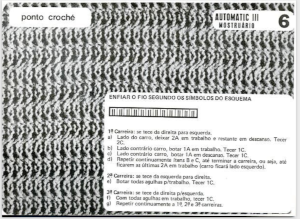
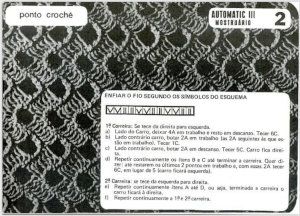
 push first 2 of needles out to hold
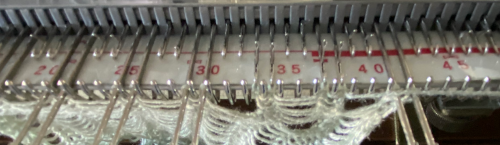

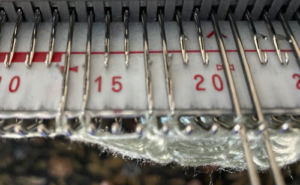 COL knit 10 rows, bring the third pair of needles into work, knit one row
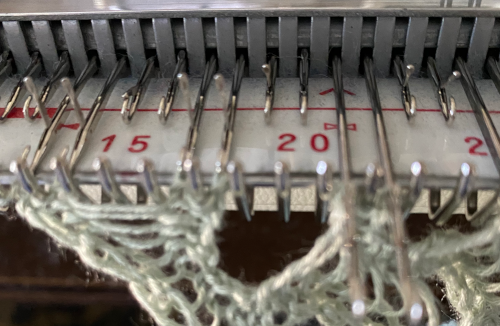
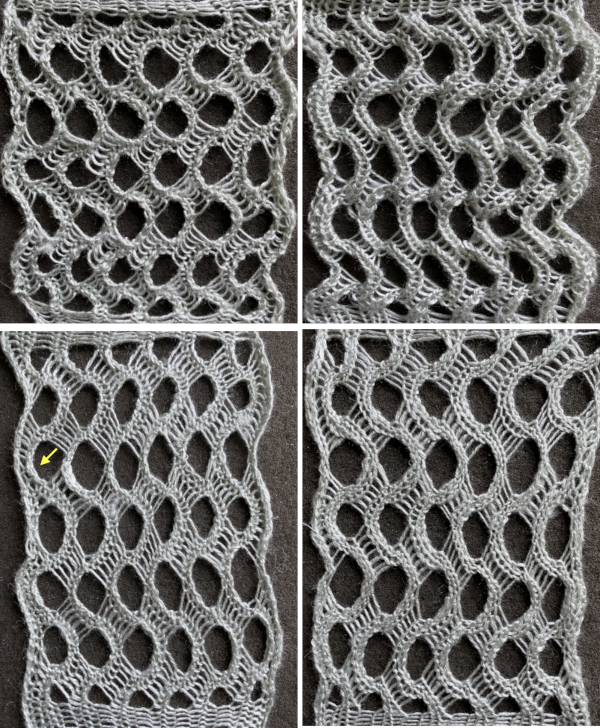
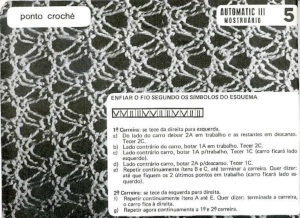
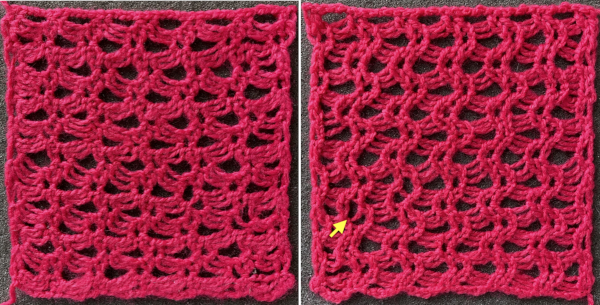 Shell shapes: #4 and # 20 directions are given in the 2017 blog post
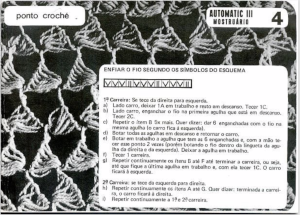
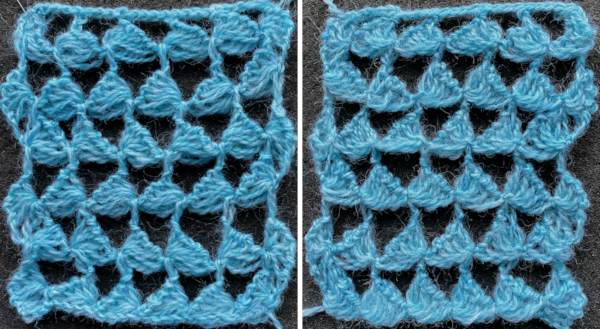
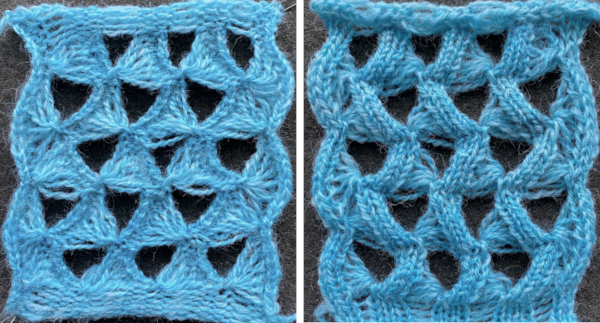 Some of the trims in this pub may be far more easily and quickly executed using tuck stitches.
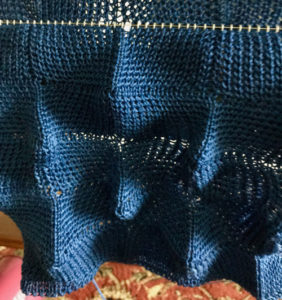 Nearly all my previous dbj pieces have been knit on a Passap E6000. The 930 experience for such repeats is new to me. With some help from Tanya Cunnigham in reviewing the steps required when using img2track, I returned to cellular automata repeat saved years ago.
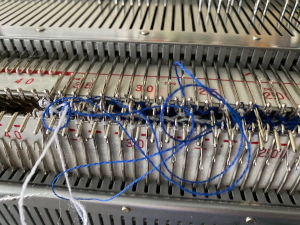 That provided an opportunity to decide I preferred the reverse color placement as well as wanting a thicker ply for the white, resulting in twice the fun with 2 colors, and another scrapped sample
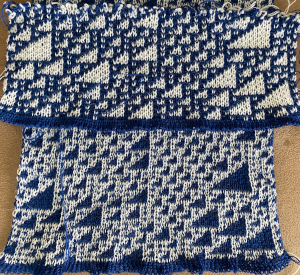
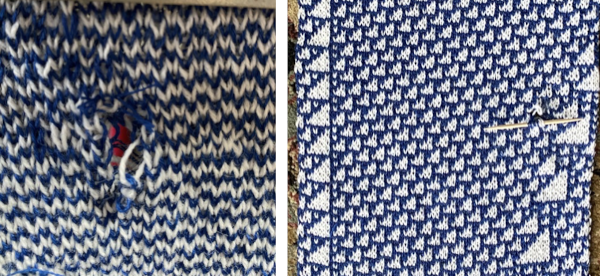 I was able to achieve a reasonable repair on the knit side, but the birdseye pattern on the reverse is a bit scrambled.
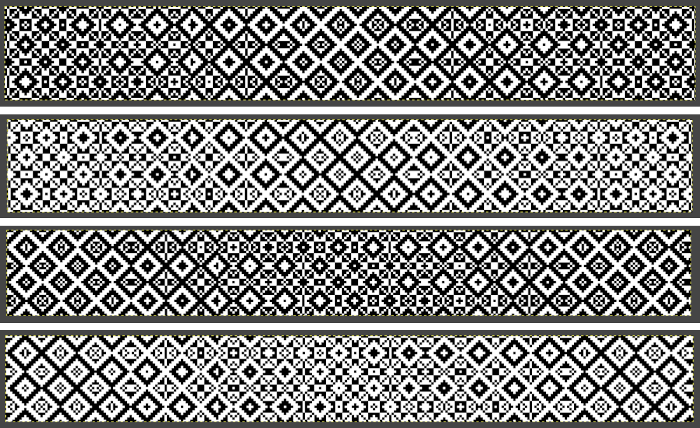 There is also potential for exchanging colors to get a sense of how the pattern might appear in different colorways
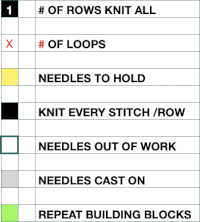
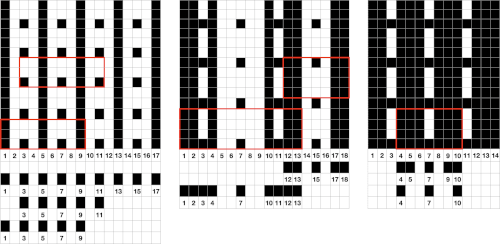 Segments marked with green cells may be grouped in a variety of ways to create repeats in different widths, asymmetrical ones are also a possible consideration
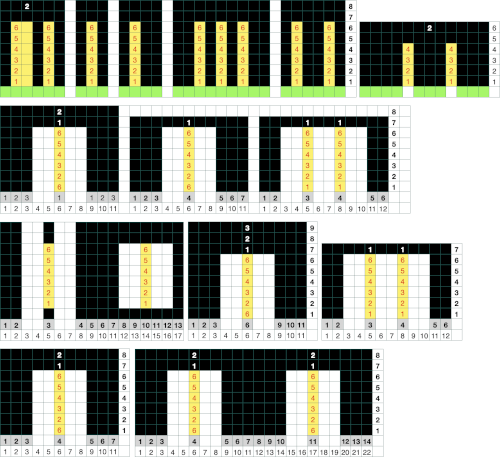
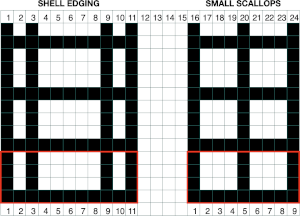
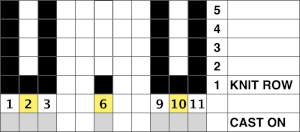

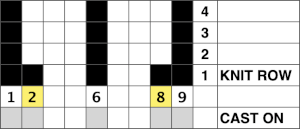
 The usual single bed tension for this yarn might be 7 or 8, depending on stitch type. The greater the number of knit stitches on either bed, the closer the tension will have to be adjusted to that used in stocking stitch for the same yarn. Wool also has memory, will want to roll to knit side at the top and bottom, to the purl side along vertical edges, steps often need to be taken to reduce the rolls. Using this repeat
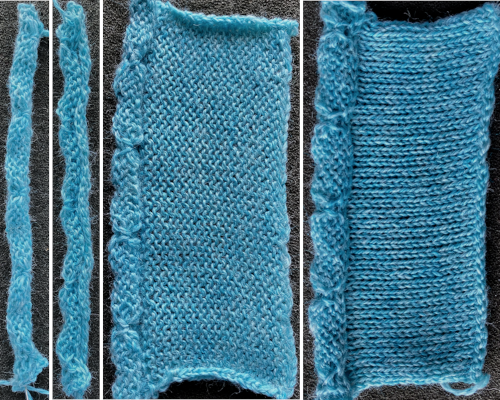
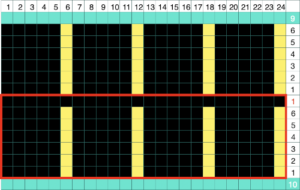

 A variety of edgings may be produced by simply hooking up ladder floats created by leaving needles out of work after X number of rows. In this instance chain cast on over 11 needles, dropping the center 5 chains and taking the corresponding needles out of work.
 This variation uses the thicker blue yarn, knit at tension 4; 12 rows are knit before hooking up the lower groups of six ladders, which makes the floats easier to pick up or count using a single eye tool. Repeating selection on the same side allows the trim to be easily bent around corners
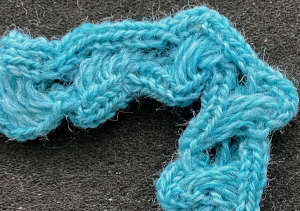 Trims using holding alone border on the possibility of automation using slip stitch programming. A simple one to start: cast on 7 stitches, with the center needle out of work. Knit a few rows, set knit carriage to hold.
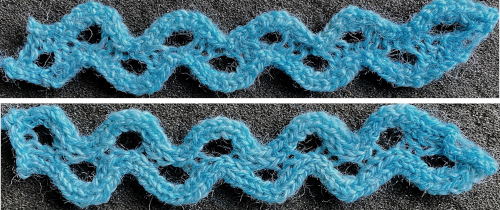
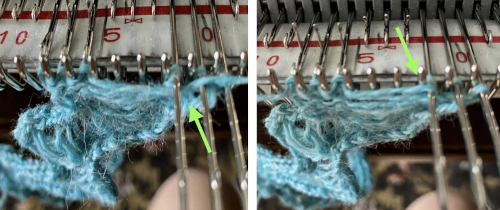
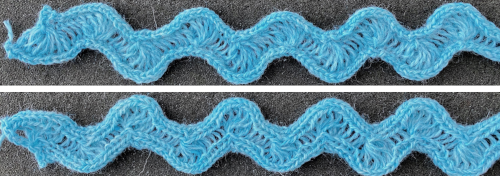
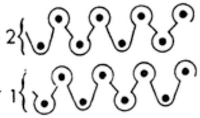 translated for knitting, patterning may be used on either bed, with the opposite bed set to knit every stitch. If patterning is on the ribber, have the first and last needles in work on the main bed.
  The top bed is set to tuck in both directions, the fabric is shown lightly stretched
  and could conceivably be used to create a ruffled edge when followed by narrower stitch types ie. every needle rib or Milano variants
  Changing settings: with the knit carriage set to slip in one direction, knit in the other, the ribber knitting every row
 Needles may be taken out of work to create pleats in every needle ribs, alternating their placement between the 2 beds. Knit stitches stabilize tuck ones. Here every other needle is taken out of work on only one bed. The tuck loops are more visible in any open spaces between the vertical rows of ribbed stitches. The ribber will knit every row on the same needles aligning directly above each other, thus ruling out full pitch.
 The needles are set up so that the first and last are in use on the ribber, ensuring that a knit stitch will be on the side of any tuck stitch selected on the top bed,
  on the top bed the every other needle tuck selection reverses as the direction of the knit carriage does, needles brought forward knit, the ones skipped hold tuck loops in their needle hooks,
  the resulting fabric
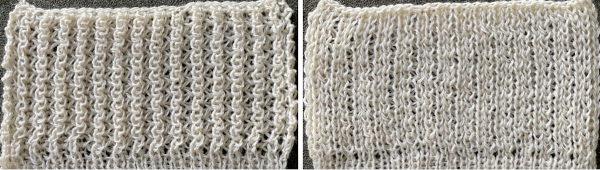
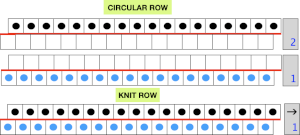 Choosing spacing between needles in work on the main bed
  A working repeat with 4 circular rows, 6 full rows knit
 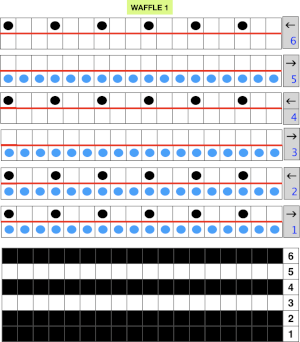 My first swatch in the technique was in response to a Ravelry member share describing the stitch pattern used in a finished garment
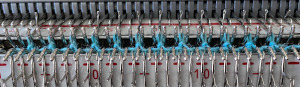 followed by float formation when only the top bed knits
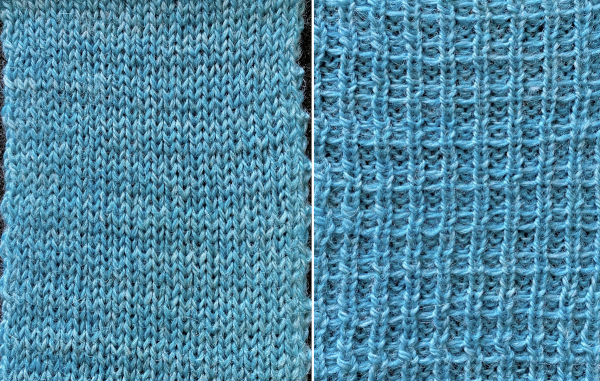 The resulting grid may be used as a guide for hand techniques off the machine in isolated areas or all over
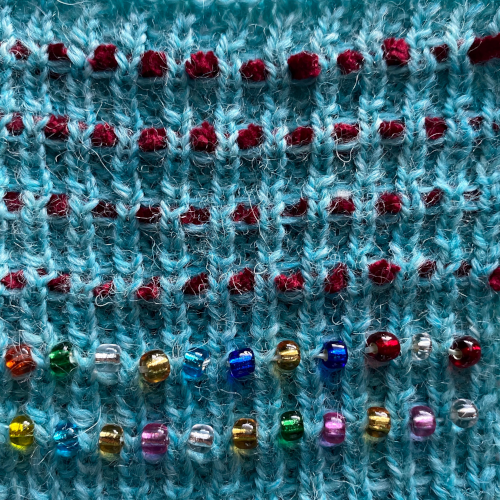
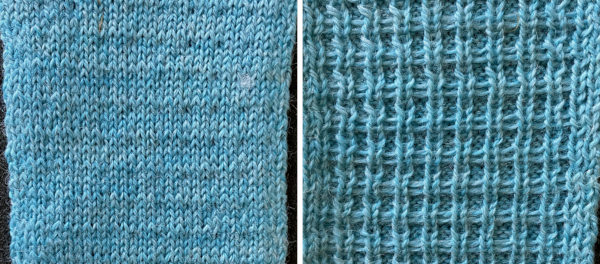 Needle arrangements may be varied to accommodate thicker yarns, or alter the texture by varying both the number of knit rows and circular ones
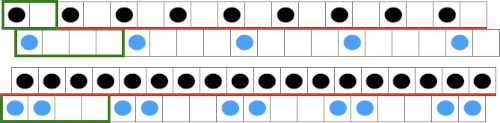
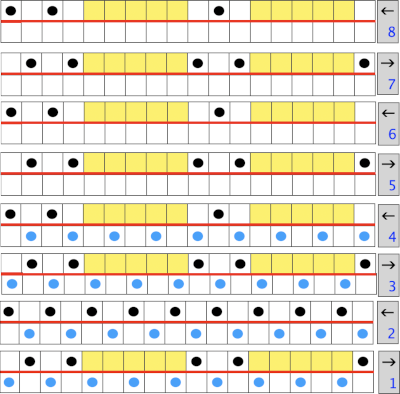 Because the top bed needles are in pairs, the EON selection remains evident, each of the first 2 passes completes one row of knitting.
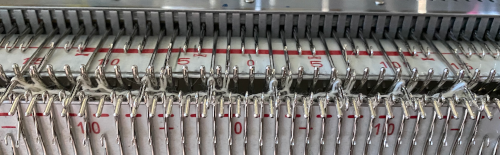
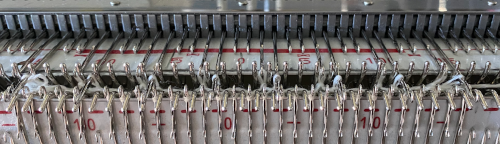 When only the top bed knits, floats are formed between the needles in work
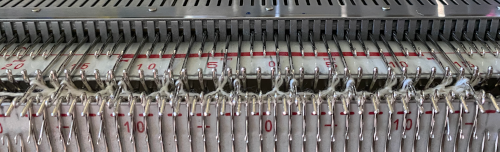
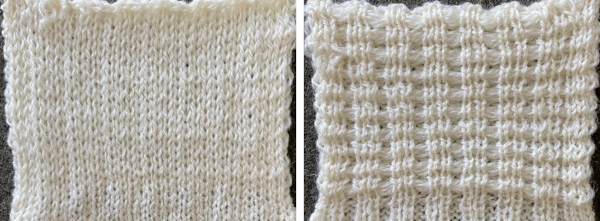 Half Milano with tucked long stitch: the main bed needles will tuck one row, then slip one row. The ribber needles will first knit a row, then slip a row while the second bed knits both rows. Then the ribber needles knit one row then slip a row while the second bed knits two rows.
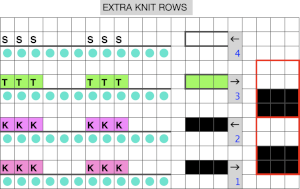


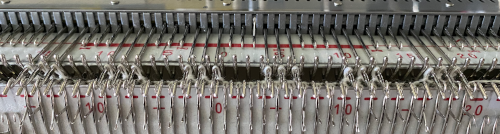
 the tuck row is formed with the knit pass to the right, no preselection
 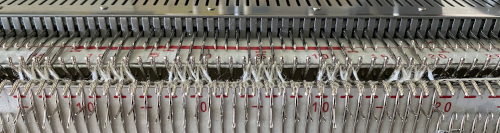 the row of stitches is skipped on the way to the left, preselecting for the next first knit row, tuck loops visible on top of the hooks of the selected needles
 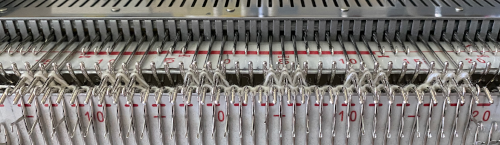 the process is repeated. The resulting fabric:
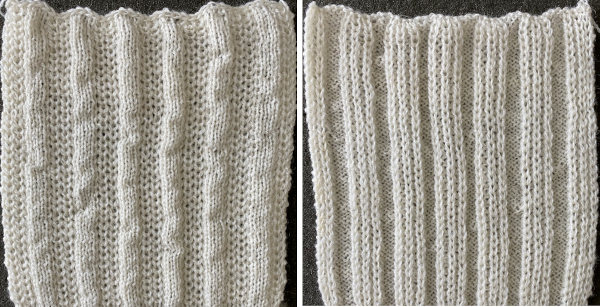
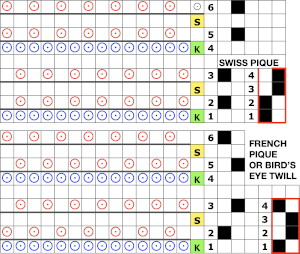
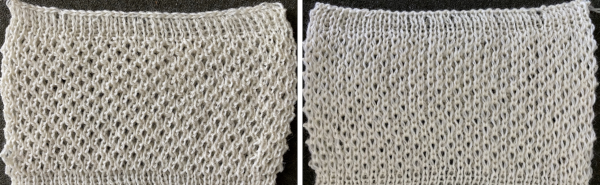 In DIY the potential for exploration is endless. As always, if needles are out of work on the main bed, end needle selection is canceled. Here slip setting in both directions is used, along with needles out of work on both beds, the 1X1 needle repeat is programmed.
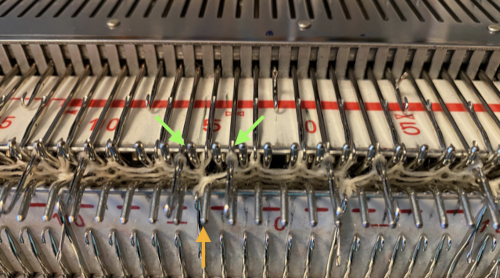
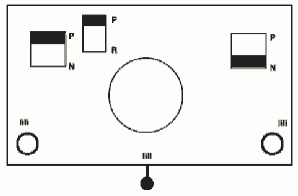 the result has floats on the purl side, a slightly pleated look on the knit side.
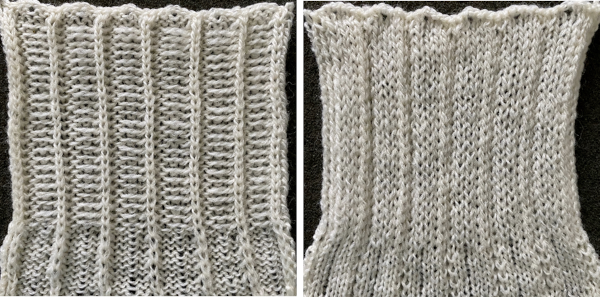
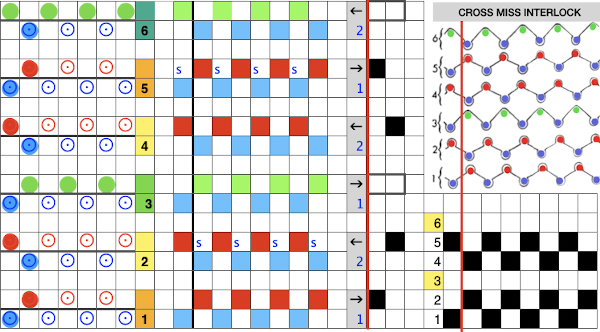
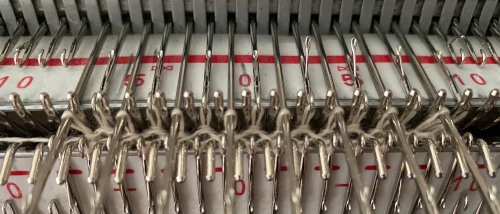 After both no preselection row bring alternate needles out to hold using any EON needle tool. In my case, COL, I began with needle 1 on the left on row 3, alternating beginning with needle 2 on the left on row 6. The number of rows in between hand techs is an odd one, so sides for the hand tech will alter as well. This shows the tuck loops formed EON as the carriages travel to the right.
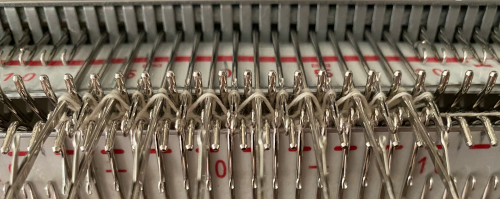 Prior to resuming pattern knitting, needles with loops on them need to be returned to the B position, maintaining the EON needle preselection for the next pass
 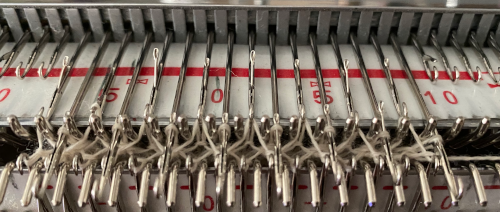 Repeat the process when design row 6 is reached, beginning with needle 2 on the left. The texture appears on the purl side of the piece, shown on the left
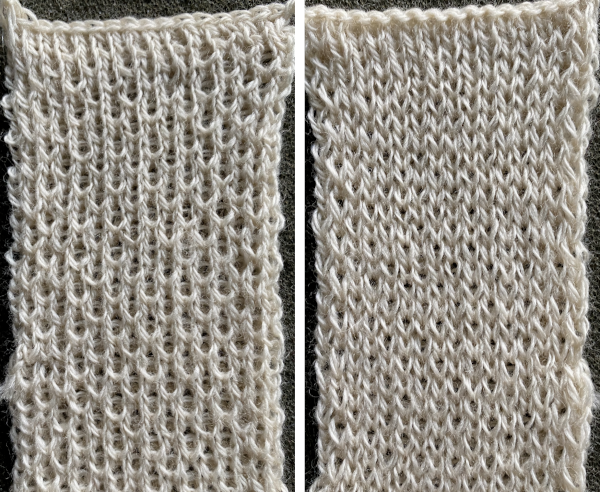 This repeat uses 6 passes as well. The tuck loops on the top bed occur above slipped stitches in the previous pass, which may be replicated, but the real problem is that every third row on the ribber is also having to tuck on specific needles with no knit stitches between them. The tuck loops happen directly above knit stitches formed in the previous row if the tucking lever is changed manually from R to P on those rows. That is a lot to juggle, a no.
 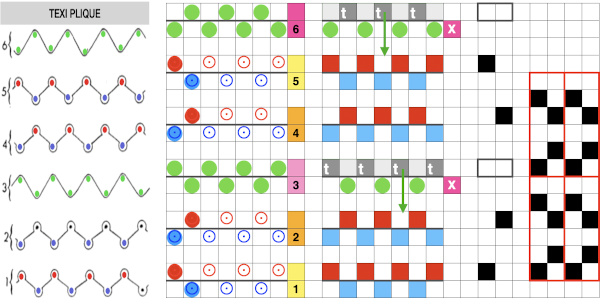 Here the eon tuck would fall on slipped stitches in the previous pass, so that is doable. It is possible to fool the lili selection into believing there are extra needles in work on each side of the ribber, which can “make” the first stitch on either side knit rather than slip or tuck. The method is used in creating a
 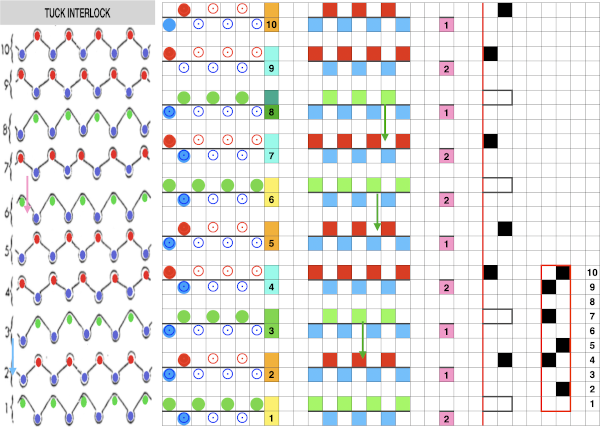 This pattern repeat is a short one, the changes are more regular on the ribber. The hand tech tuck stitches could be formed for 2 rows with all stitches getting worked back to B position in between those preselected for the next pattern row. The lili buttons need to get fooled after alternating pairs of rows, the start of several nos for me.
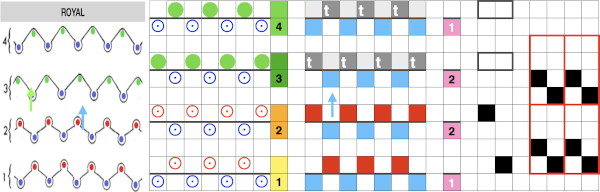


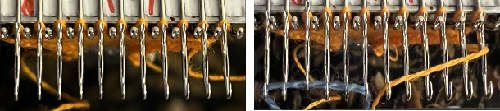
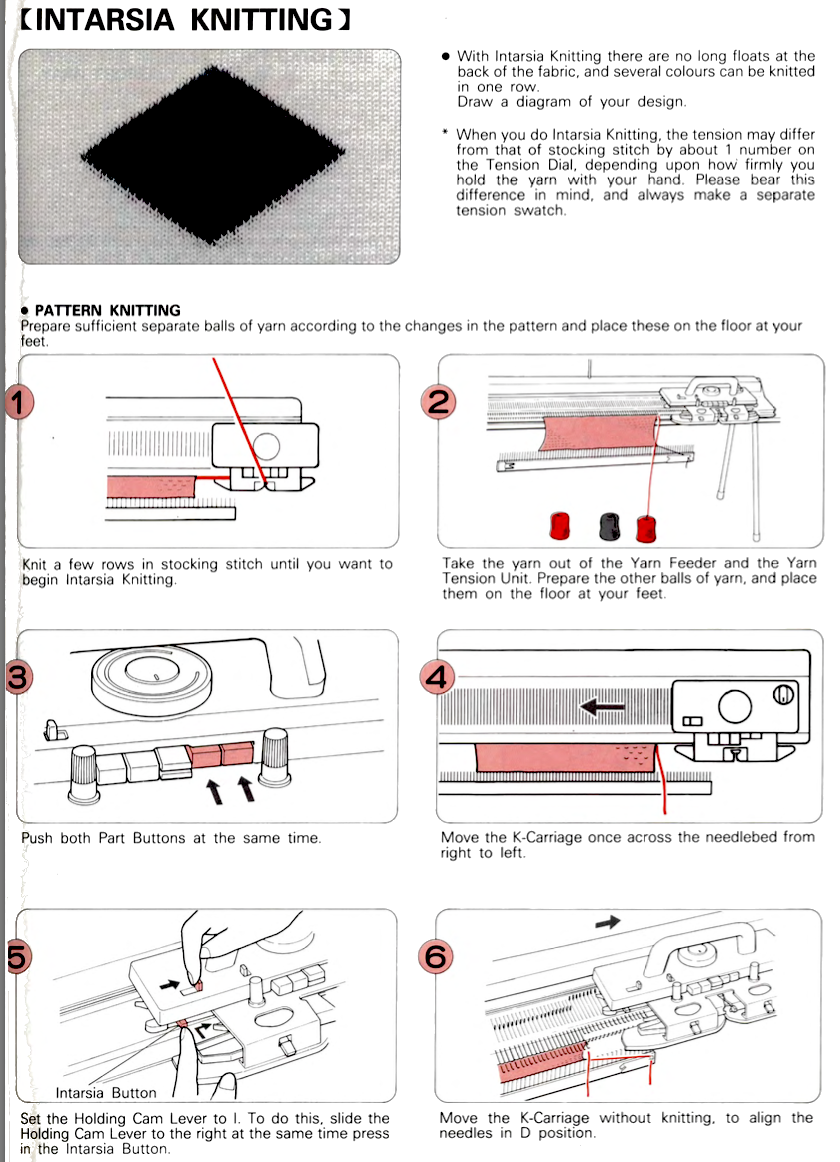
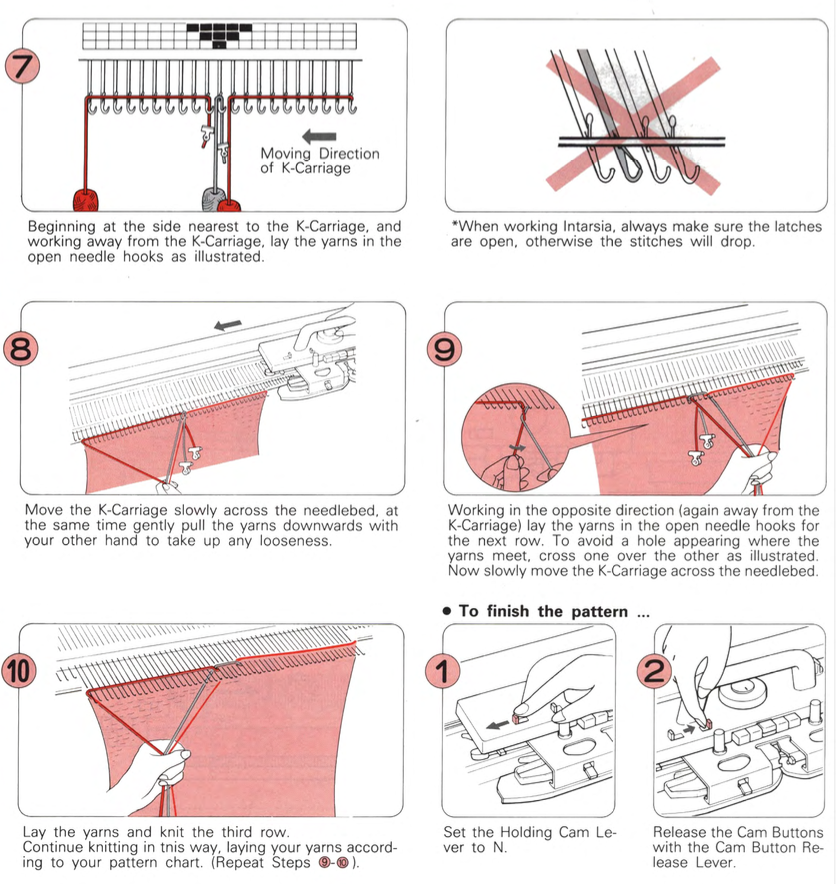
 This is from a Japanese language manual for the 891(1987-89) punchcard machine, which appears to introduce the idea of replacing the use of the knit carriage and plaiting feeder with one specifically designed for intarsia