The latest version Gimp Download site
I am self-taught. As I learn new tools, my workarounds may be convoluted and more complicated than they need to be and evolve with time. I do not delete older posts or their content, but do occasionally add links to later posts or dated notes.
I began designing and charting in the days of having to draw on graph paper and cutting up results to see if the repeats would tile properly when knit, or to place them for alignment variations such as half drop or brick.
Scanning amounted to tracing with a marker onto blank sheets of acetate or tracing paper.
The availability of commercial acetates for purchase at seminars, printed in pairs of matching horizontally striped sheets in lines separated in a variety of widths, offered an advance in scaling designs to a knit aspect ratio.  Copy machines became useful friends.
DBJ designs in the punchcard studio, when I began teaching, were accomplished at first with the use of cards themselves as templates and overlays, involving a series of time-consuming methods for each type of separation ie. 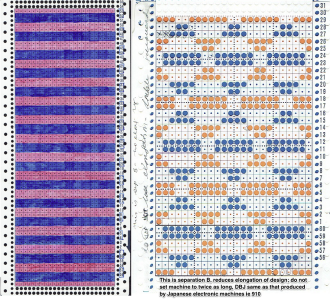 So many such processes are now nearly instantaneous by comparison.
Earlier this year the post Using Layers in Gimp for color separations explored several fabrics beginning with B/W motifs.
Sometimes lightbulbs go off leading to other ideas for achieving results in quicker or easier ways.
This color separation method for mosaics continues to use Layers but in a different approach.
A spreadsheet may still be used if preferred to draw the initial draft of the design, working in black and white only would be fine, and the import could then be processed in Gimp.
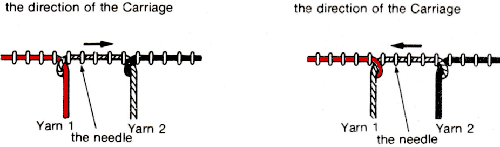
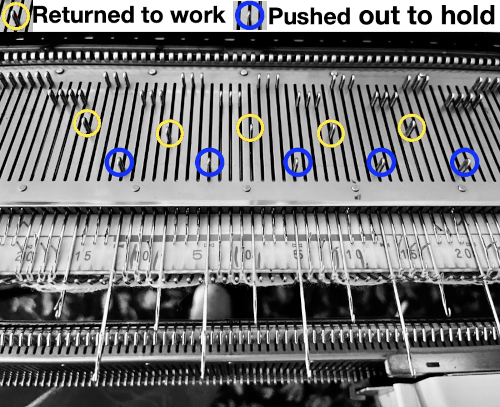
Mosaics and Mazes are generally knit with color changes every 2 rows using either the slip stitch or tuck carriage setting in both directions. Beginning with any DIY or published design, to knit the motif using the tuck setting, there are basic rules to remember.
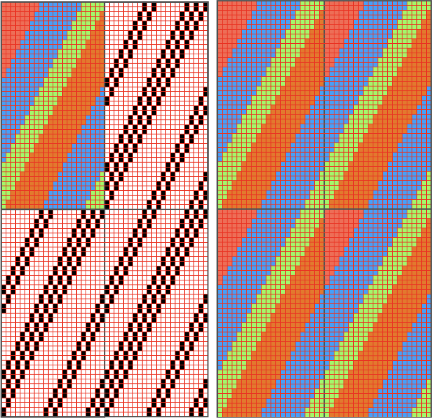
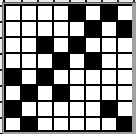
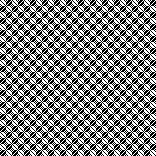
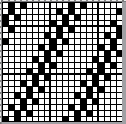
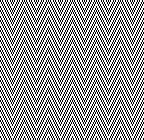
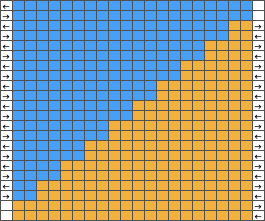
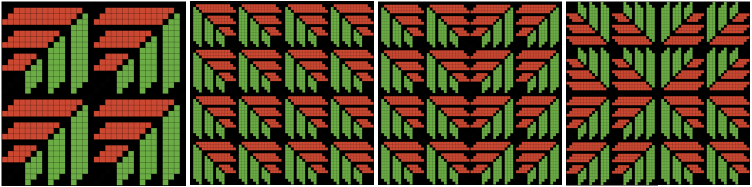
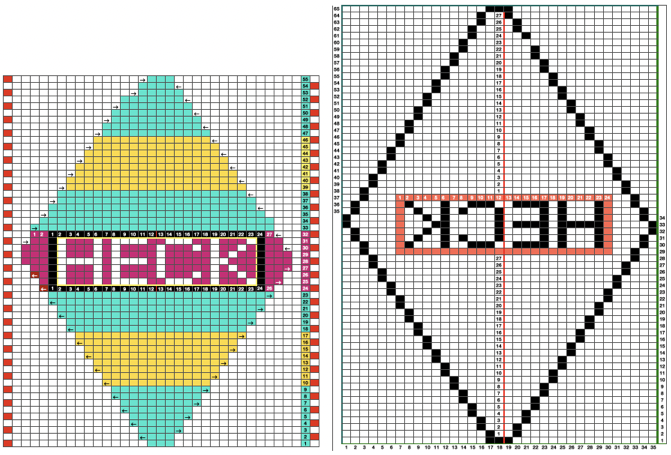
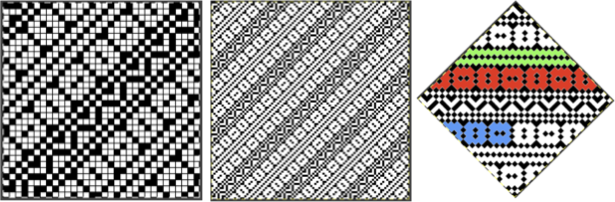
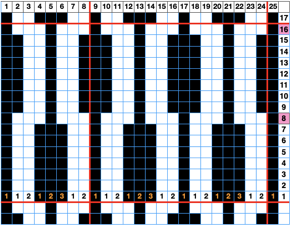
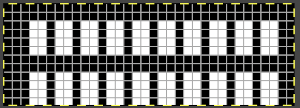
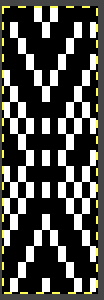
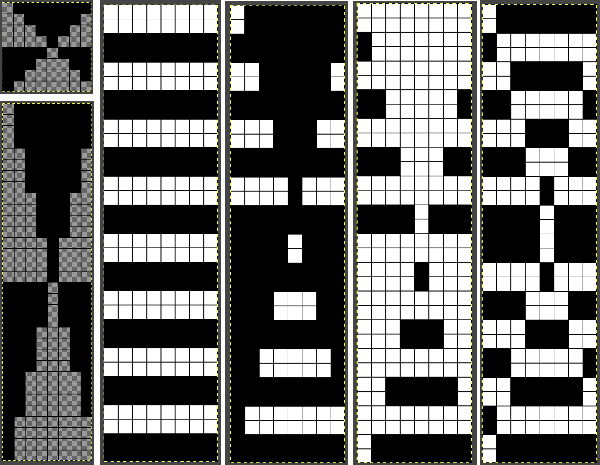
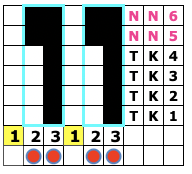
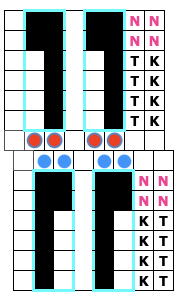
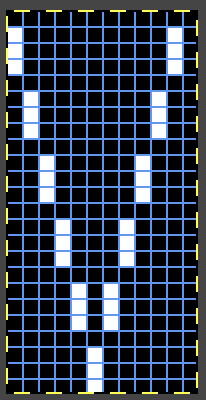
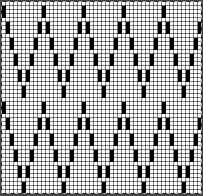
This illustrates possibilities using a random 6-stitch repeat, A.
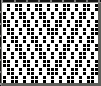
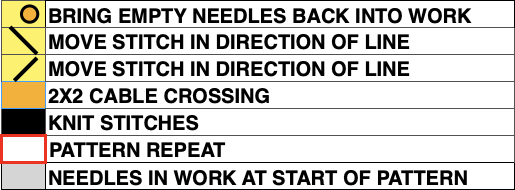
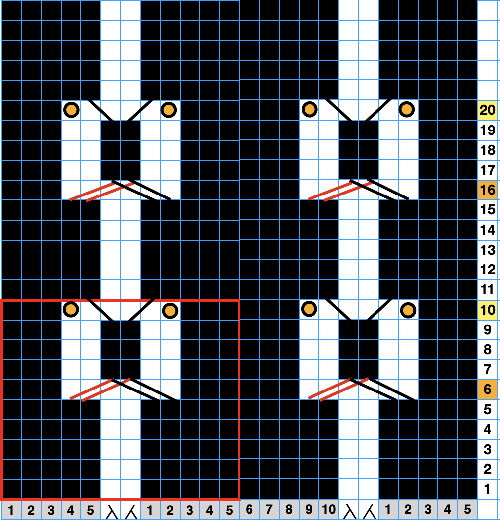
If the plan is to set the knit carriage to tuck in both directions, the design would need to be color-reversed to B. 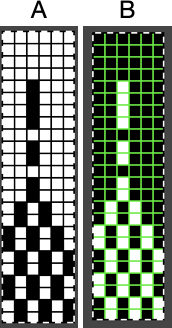 The white cells in B represent loops held on corresponding knitting machine needles, the limit in Japanese standard machines is often 4. Black cells represent knit stitches, generally seen in groups or on either side of tuck stitches/ white cells, to anchor the loops down for proper stitch formation. There are some infrequent exceptions to that rule.
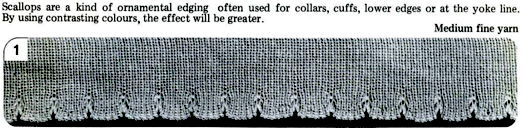
When uncertain as to results in developing DIY designs, begin with a published repeat to build up confidence. This is a hand-knitting resource for endless inspiration, no separations are provided in the book text. 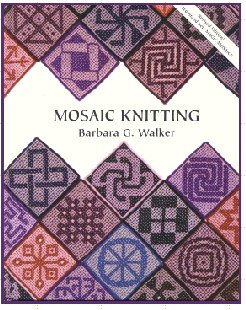 There are always many ways to achieve the same task depending on the specific program used, one’s level of skill, and individual thought process.
This method uses multiple windows in progression.
When starting out, save the result in each step for added practice or in case any step is accidentally deleted.
This is by Kathleen Kinder, published in Floatless Fair Isle, p. 87 
 Though the final designs are saved as black and white pngs or bmps, to work using colors in separations, the mode needs to be set to RGB.
 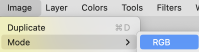 For very small repeats, use view, show grid,
magnify 1800X, type in a number for a preferred value, ![]() or use the command key in Mac and the scroll wheel of your mouse to do so. Using the pencil tool draw the repeat in black and white
or use the command key in Mac and the scroll wheel of your mouse to do so. Using the pencil tool draw the repeat in black and white ![]()
 Selecting file, new, open a canvas in the same size and magnification, with each step a new icon appears at the top left of the Gimp window
 ![]() to select any file, simply click on the corresponding icon, use Edit Copy or command C, and then edit, paste or command V to place files onto new selections.
to select any file, simply click on the corresponding icon, use Edit Copy or command C, and then edit, paste or command V to place files onto new selections.
Copy and paste the first image onto the blank canvas and colors-invert the result ![]()
![]()
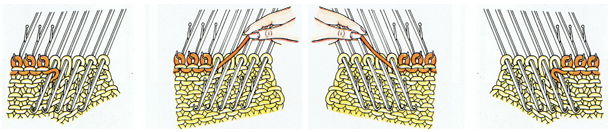
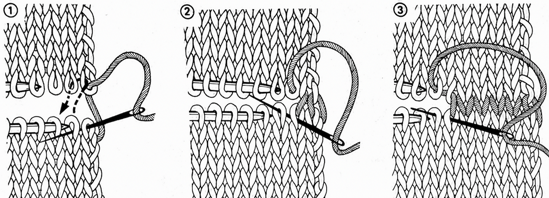
 To draw straight lines on a Mac, use the pencil tool to place the starting pixel. Hold and drag the mouse to the desired endpoint. As this is done, a guiding line will appear. When the endpoint is reached and the mouse is released, that line disappears and the selected area will fill with the chosen color.
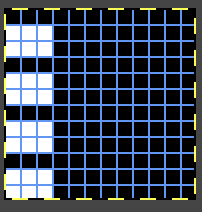
When using the 2-pixel brush, the mouse must be placed slightly into the second row of cells before dragging it for the line to remain straight and in the proper rows. If an error is made, choose Edit, Undo, to eliminate any step. 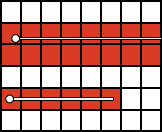 Continue to work on the color inverted file, and beginning with row 1 fill in every other row with a distinctly different color.
 ![]()

![]() To fix any layer before continuing, click on the rectangle select tool, and then again anywhere in the work window.
To fix any layer before continuing, click on the rectangle select tool, and then again anywhere in the work window.
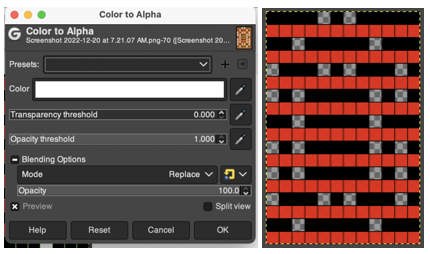
Getting rid of the red: 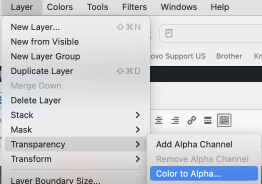 this will be the immediate appearance of the image in the window, disregard it.
 Right-click on Color/white, choose the foreground or background color
 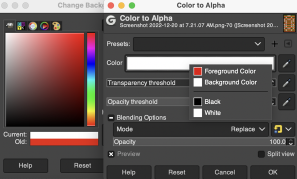 or left-click on the Color bar, and click again to choose the color from the palette window.
  Choose rectangle-select cool, click on the result to fix the image, and the color window will disappear. The result:
 ![]()
![]()
 Copy and paste the file onto the initial image, there will be dotted lines upon the placement,
 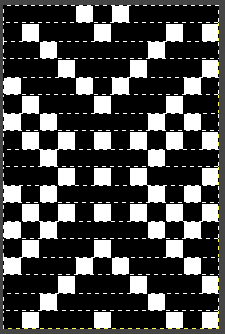 Click on the rectangle tool again, and then in the work window for the final png repeat.
 ![]() Change the image Mode to Indexed BW if its end use is a download to an electronic machine
Change the image Mode to Indexed BW if its end use is a download to an electronic machine ![]()
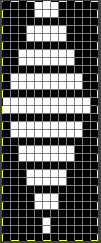
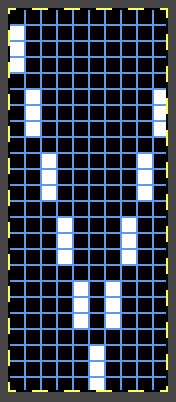
 Why is it different than the Kinder repeat? It is easier in drawing to color in white squares as opposed to black, so the repeat in the pub is the above, color reversed.
 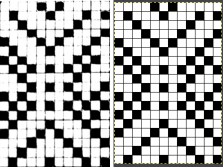 Punchcard machine users may mark the black squares and then punch all others.
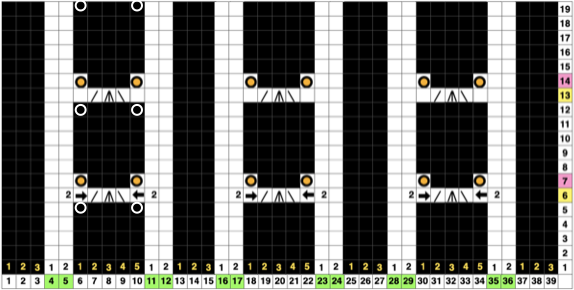
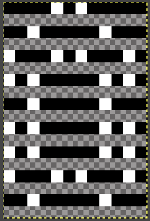
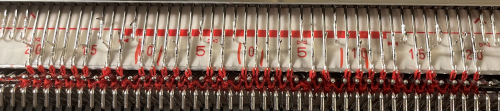
The last step: if colors are to be changed every 2 rows, remember to use double length or to program/punch the last png double length. ![]()
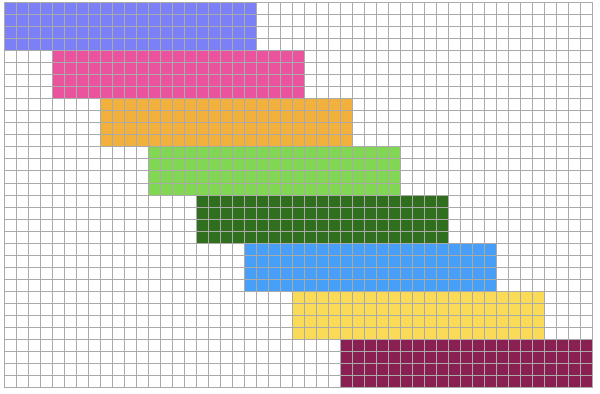
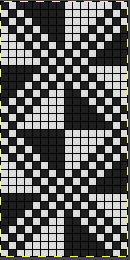
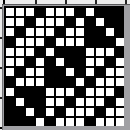
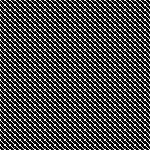
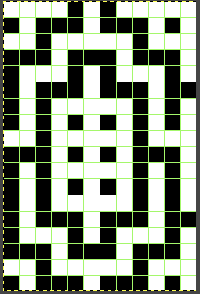
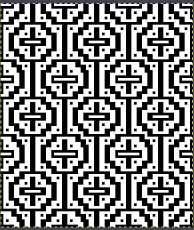
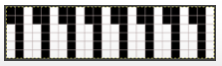
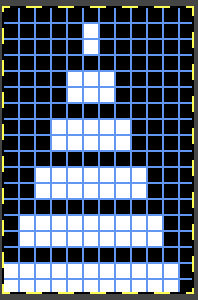
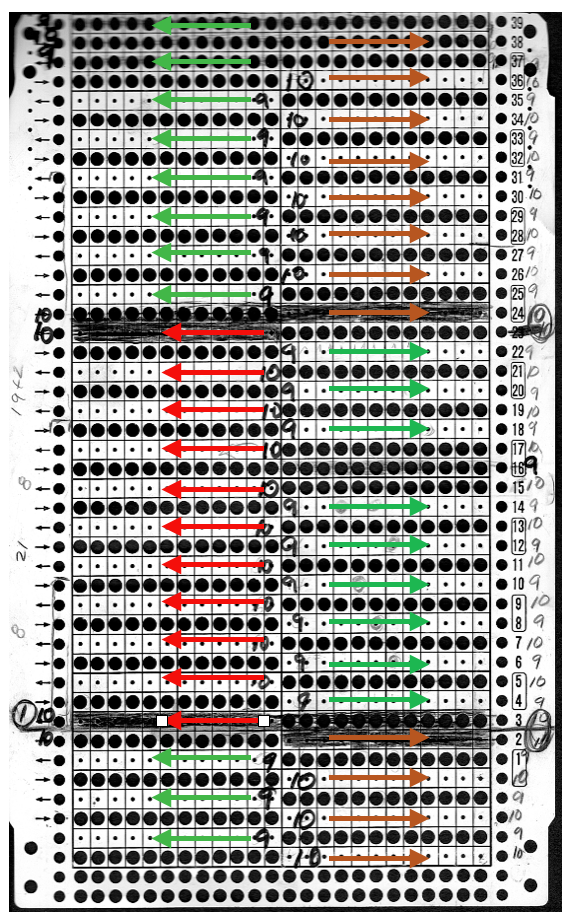
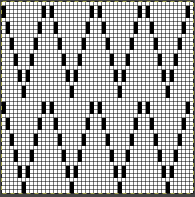
 An illustration for the full double-length punchcard repeat. The above, 12X36 repeat was color reversed and tiled twice to meet the 24-stitch width requirement. The 36-row height also meets the minimum height requirement for punchcards to roll in continuous patterning.
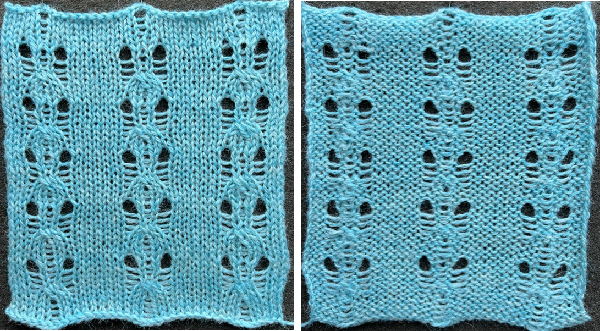
Mark the black cells in the image below on the card, and punch all the white ones. 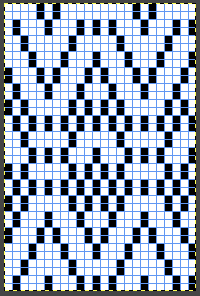 These fabrics are often more interesting using the tuck setting than the slip stitch one.
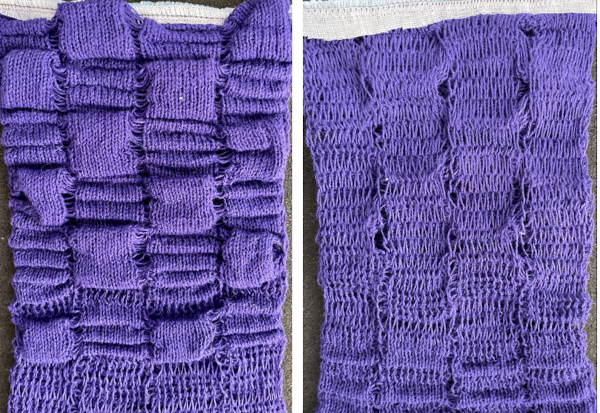
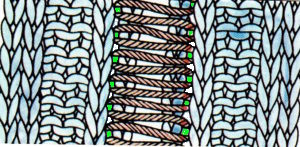
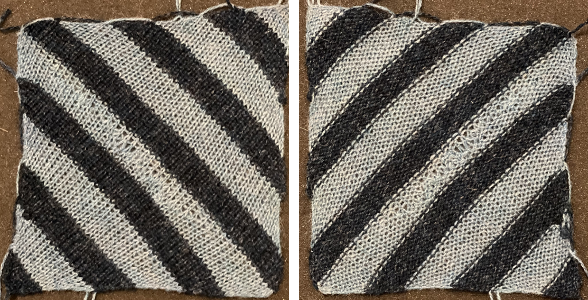
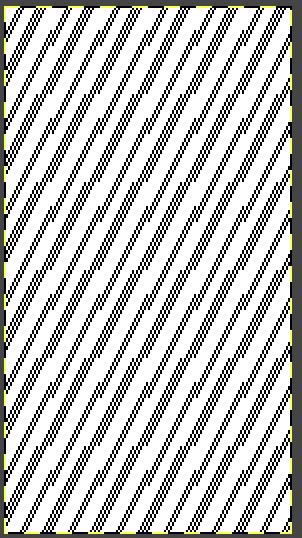
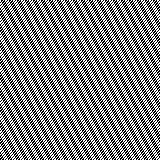
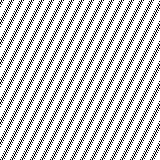
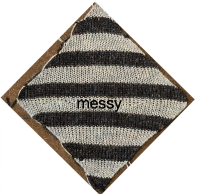
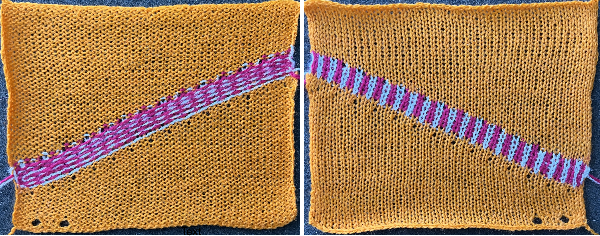
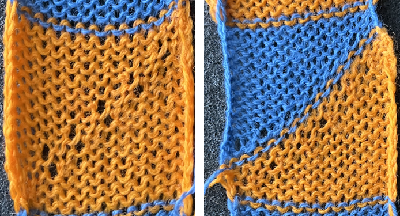
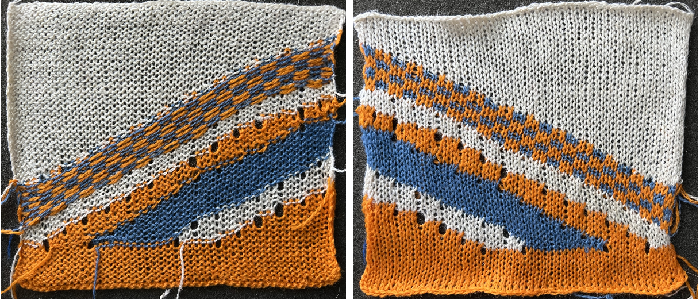
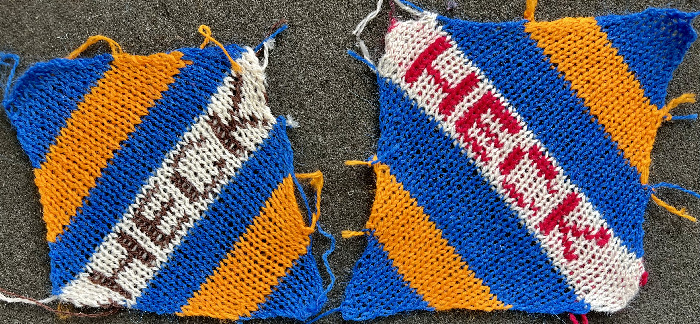
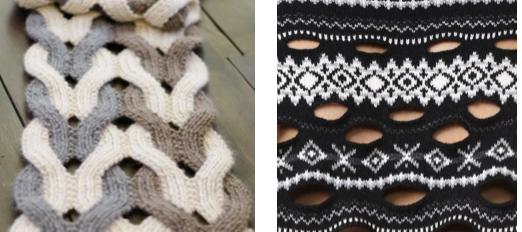
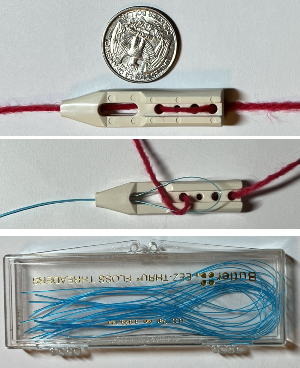
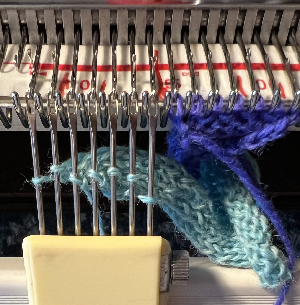
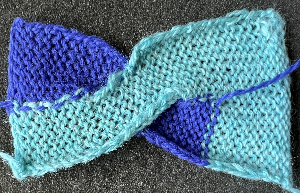
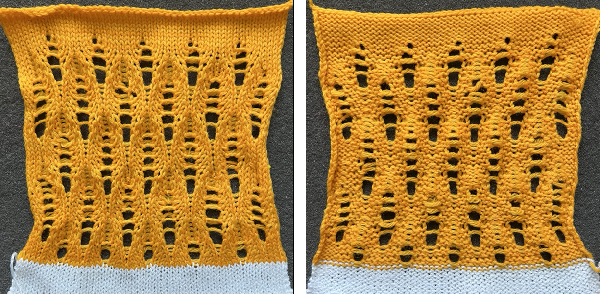
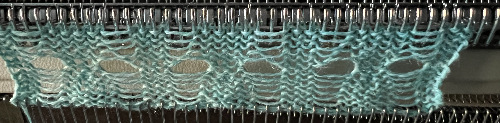
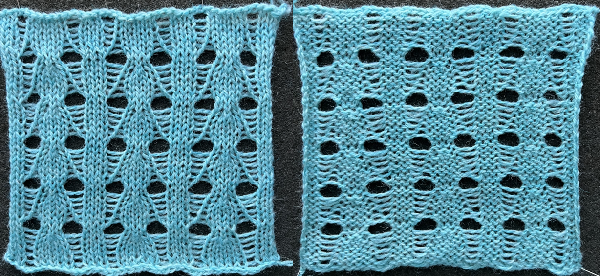
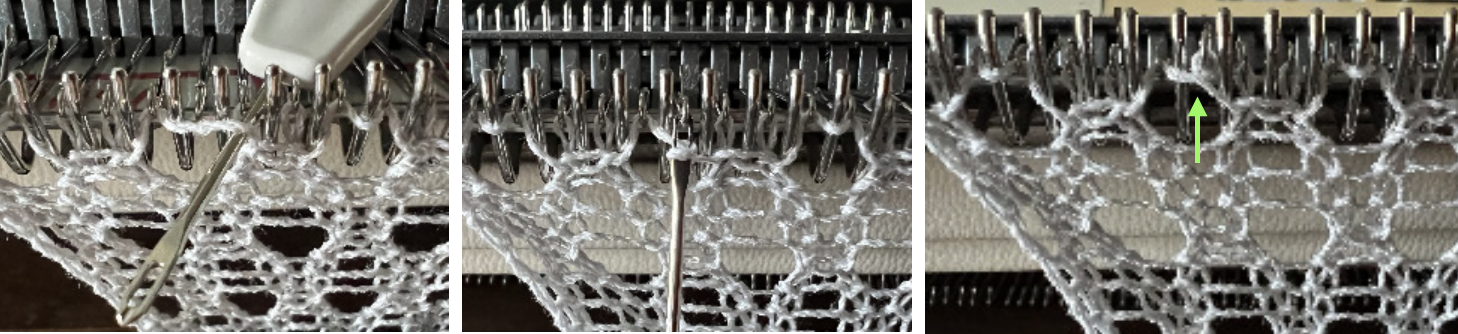
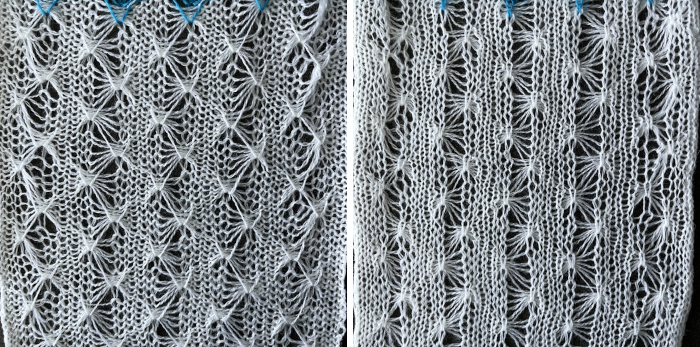
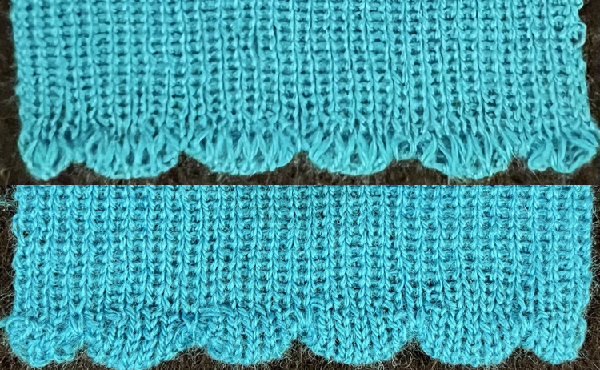
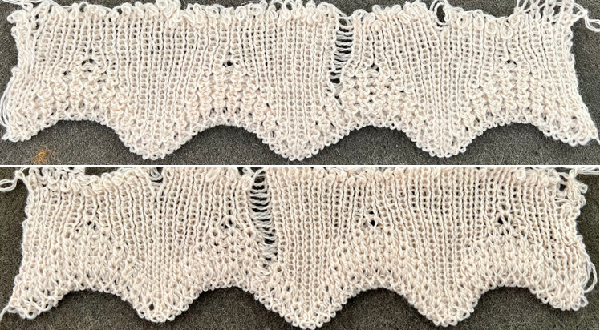
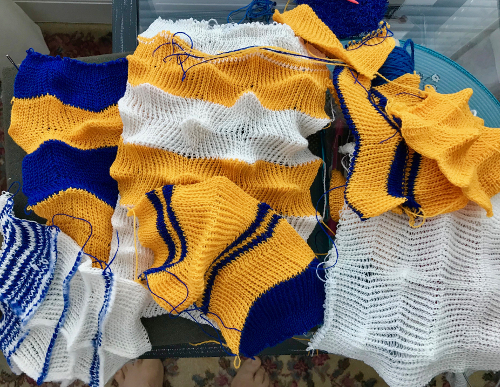
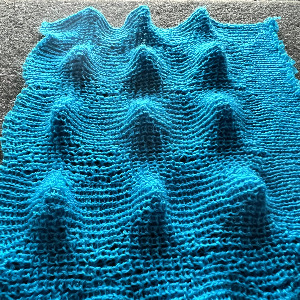
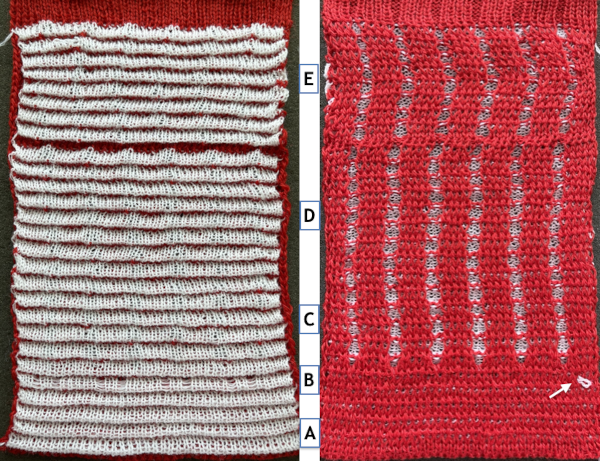
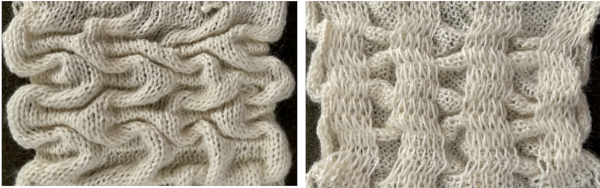
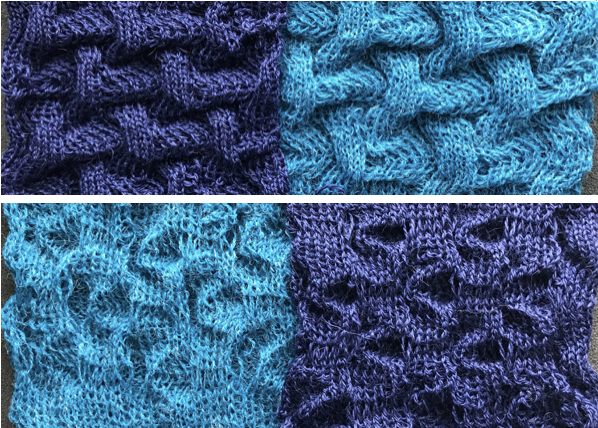
I have a lifetime supply of copper yarns from my jewelry-making days. This repeat is more a maze than a mosaic. Using a fishing line or wire can sometimes also produce interesting effects.
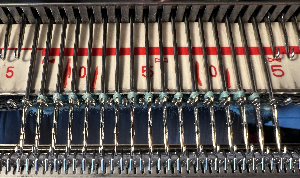
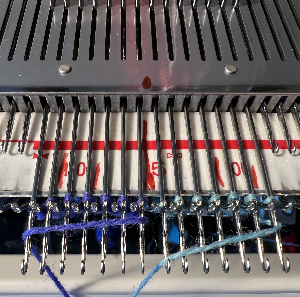
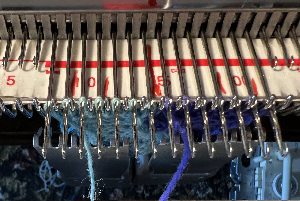
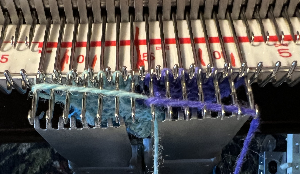
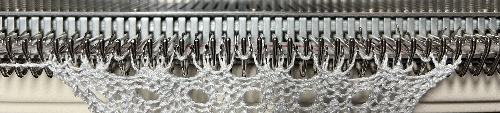
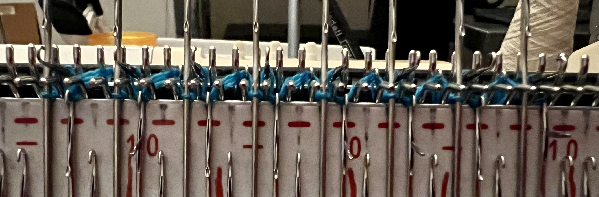
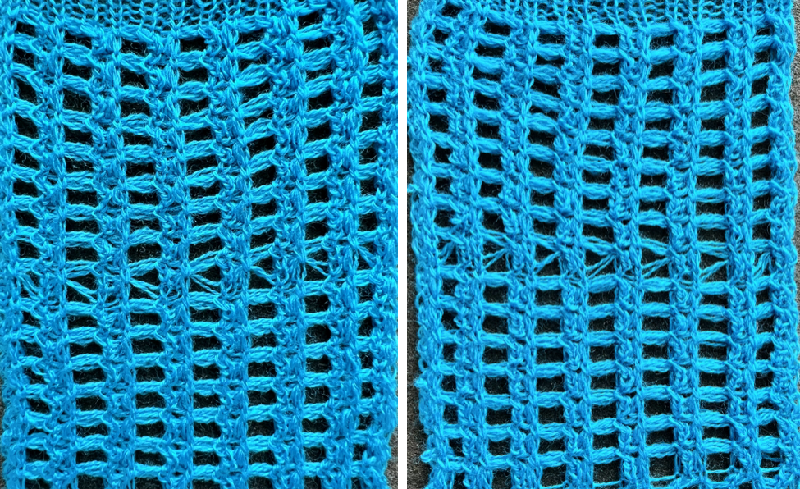
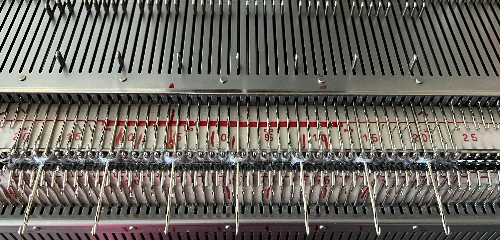
The blue yarn is composed of 3 strands of 2/48 cashmere/ wool.
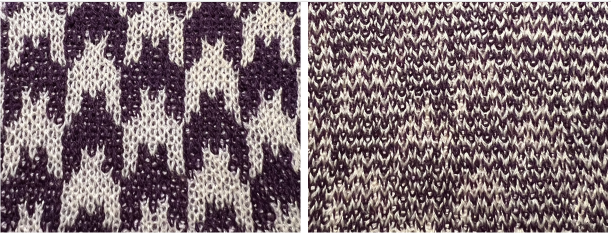
The wire is a 32 gauge coated copper magnet wire which tends to flatten the final knit. On the machine, it is hard to recognize repeats due to the very short floats, and the unusual fiber rows can appear to be see-through 
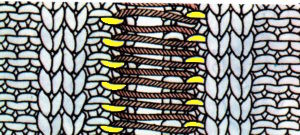
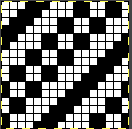
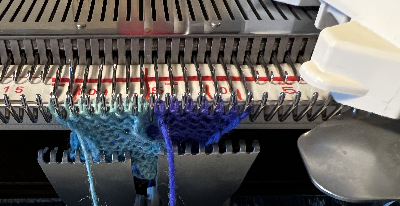
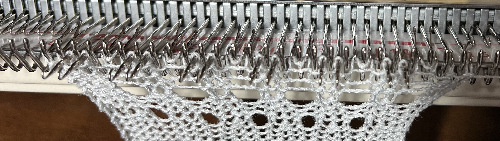
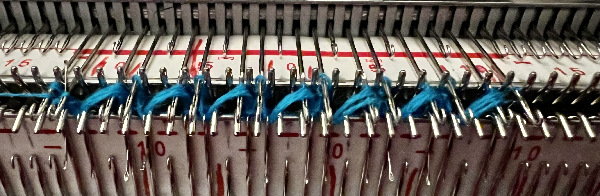
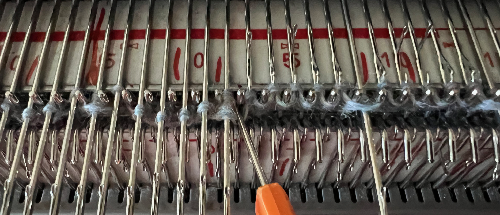
 Using a light color wool rayon as the second color.
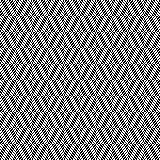
 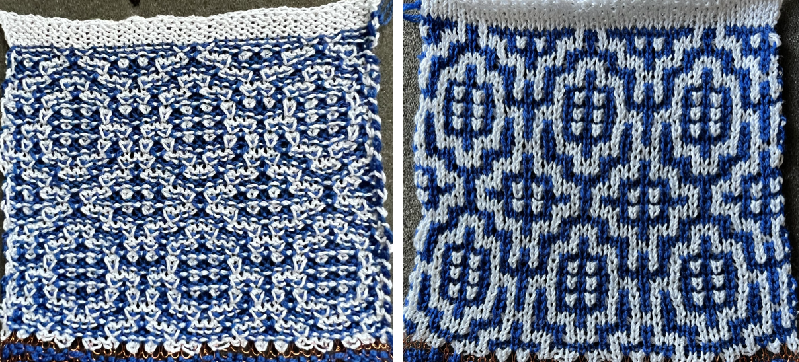 Using a separated 16X16 repeat from the 2020 post to knit a swatch for Instagram, I noticed a solid 3X3 block in the center of one of the shapes. Because the wire is see-through to some extent, the white stitch floats behind the blocks are noticeable.
  The copper wire used was 40 gauge, 3 plied. The higher the gauge number the thinner the wire strands, nearly invisible when threaded and while being used. Because the knit tension was as tight as possible, the stitch definition is lost in a few spots.
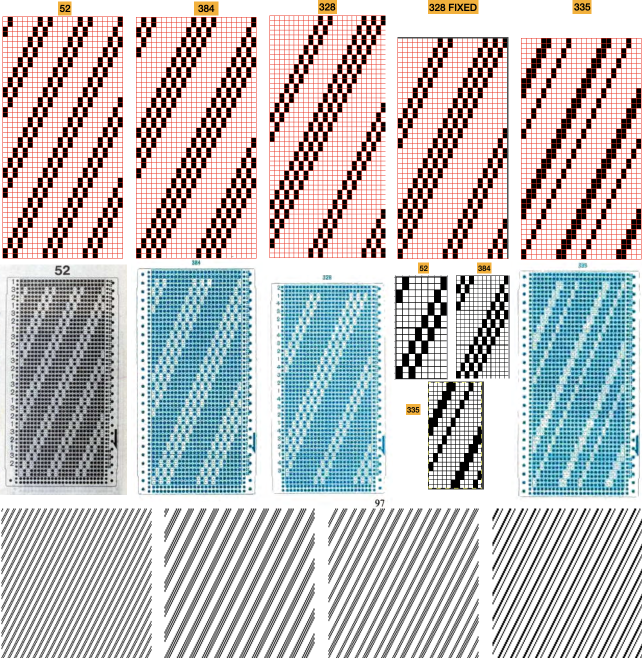
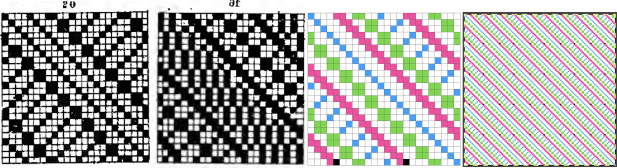
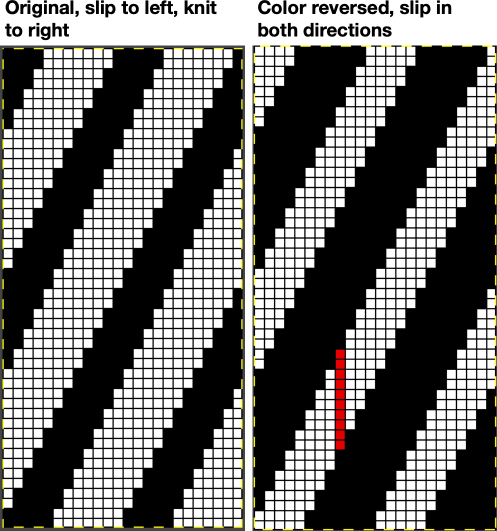
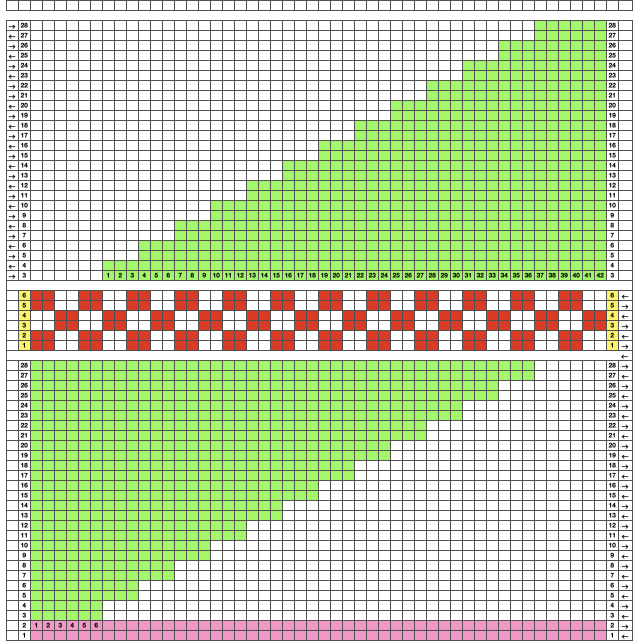
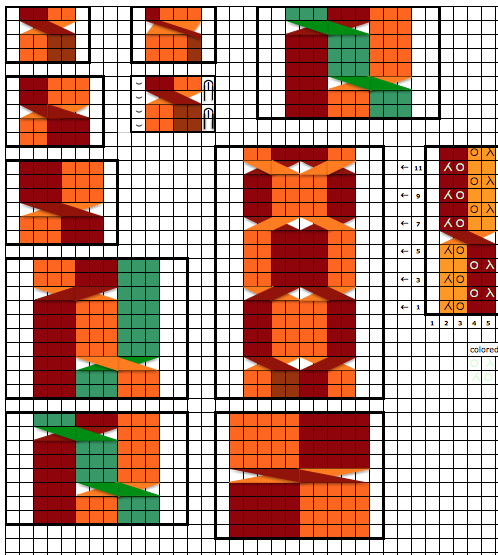
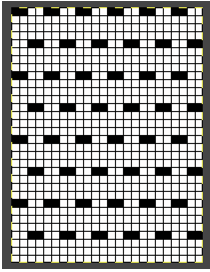
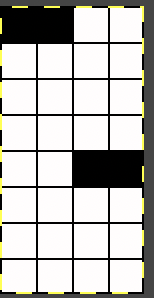
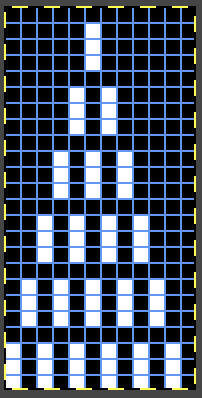
The original design motif, on the left, was missing a white cell in the location of the red cell. It was quickly converted using only Gimp. 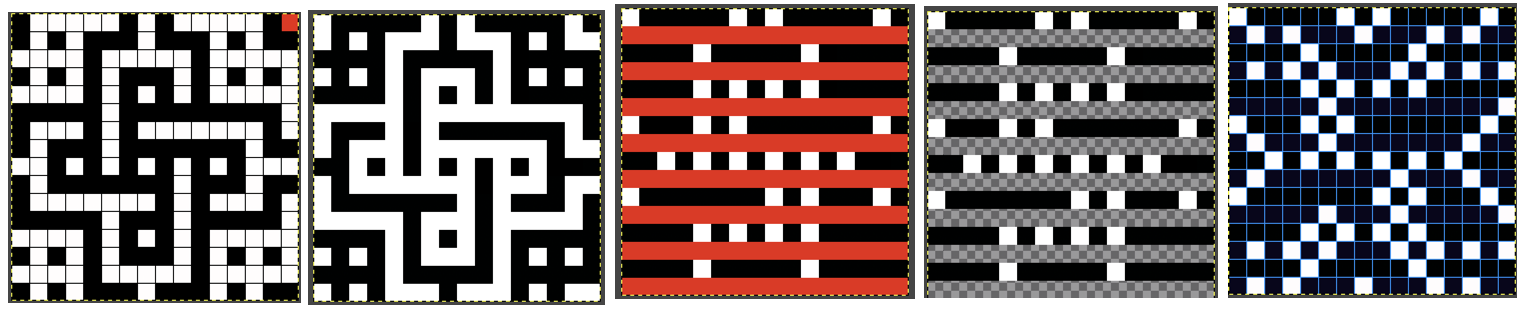 Comparing the old repeat to the new, that problem pixel may easily be located.
 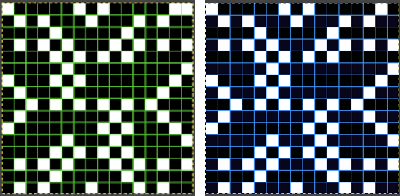 The corrected file before lengthening X2,
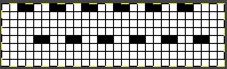
 ![]() double length
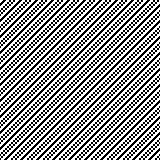
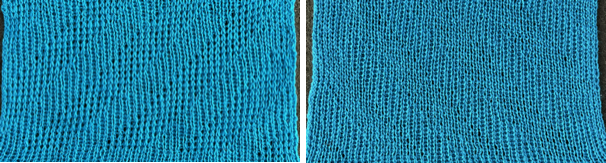
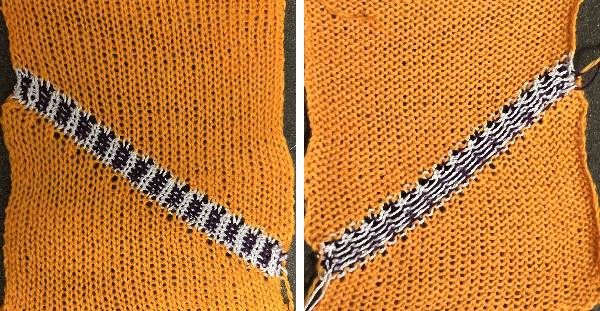
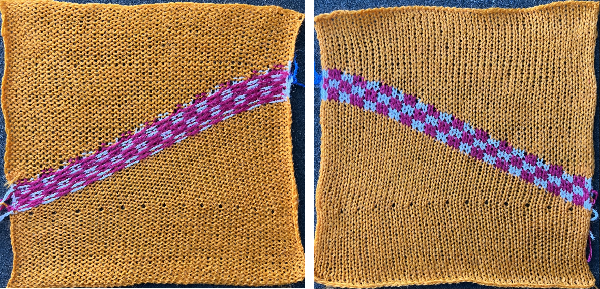
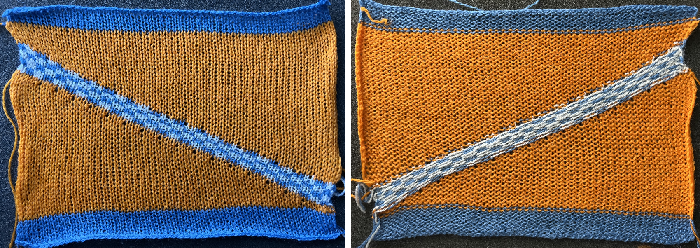
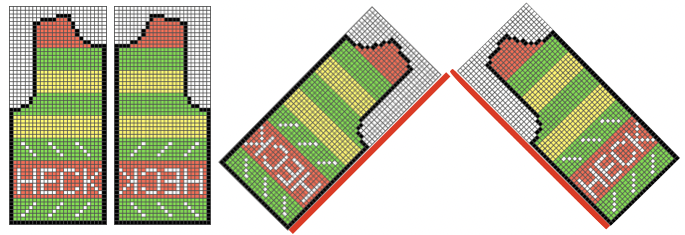
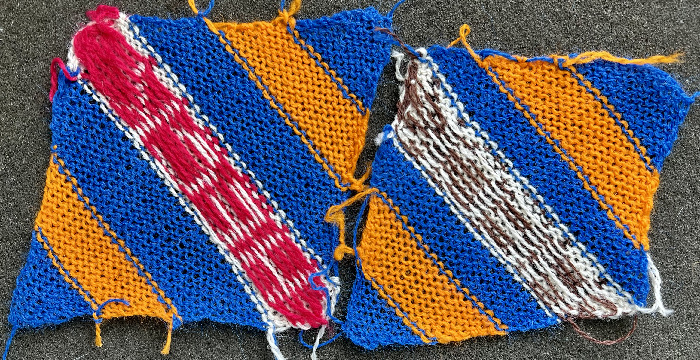
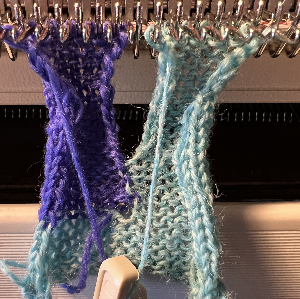
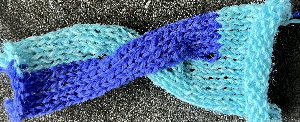
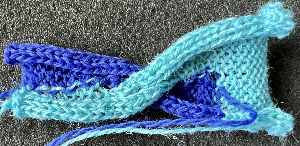
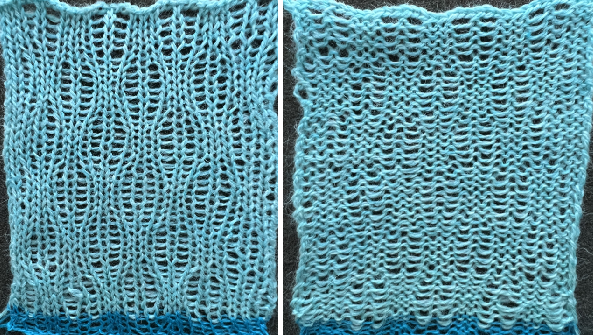
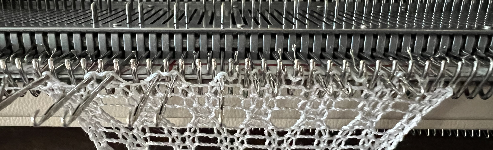
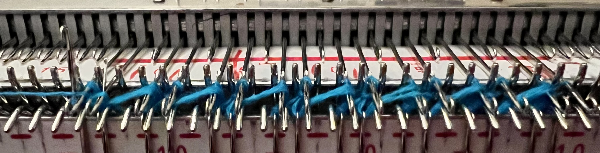
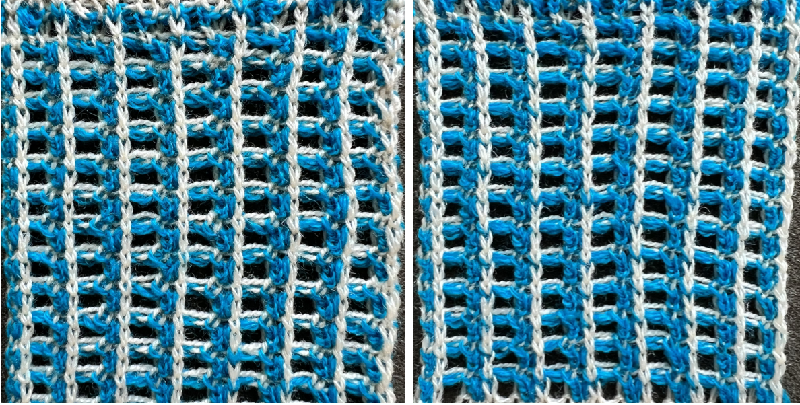
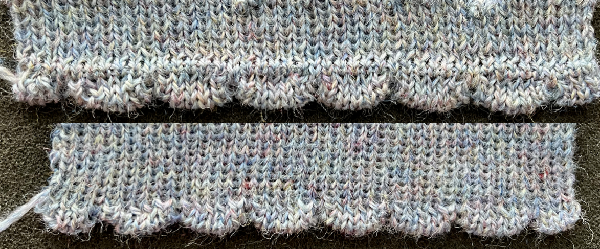
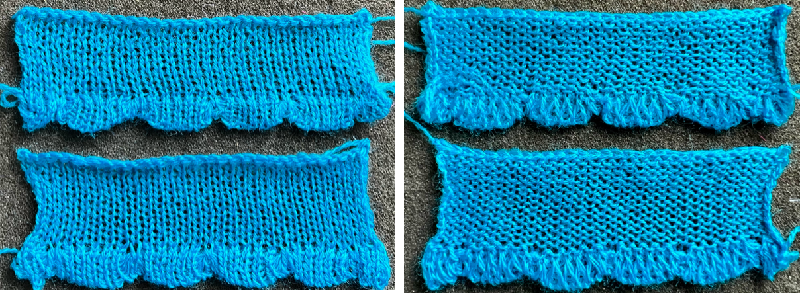
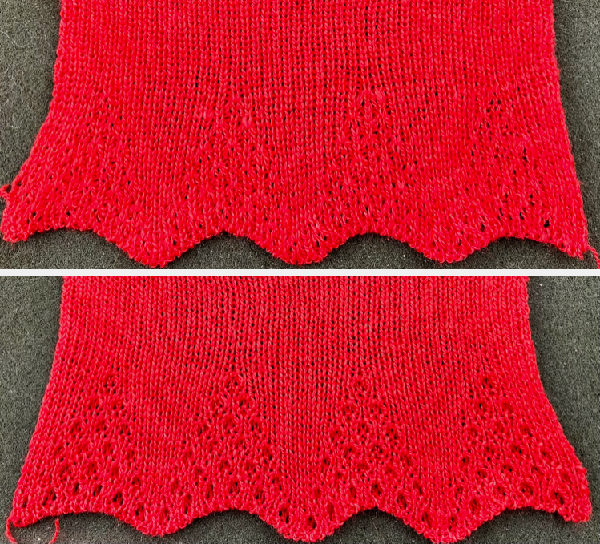
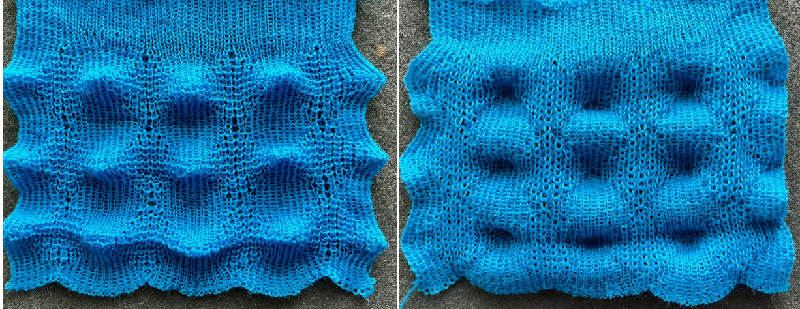
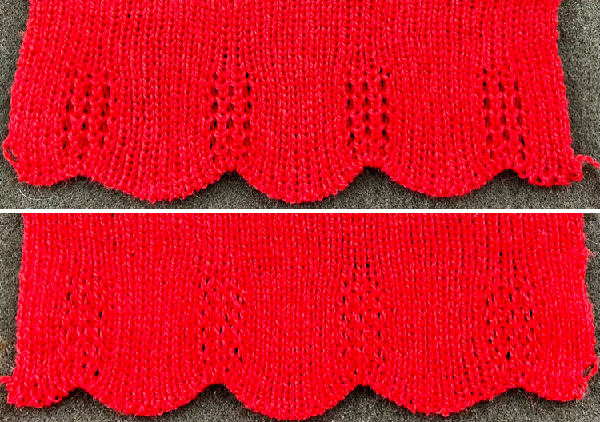
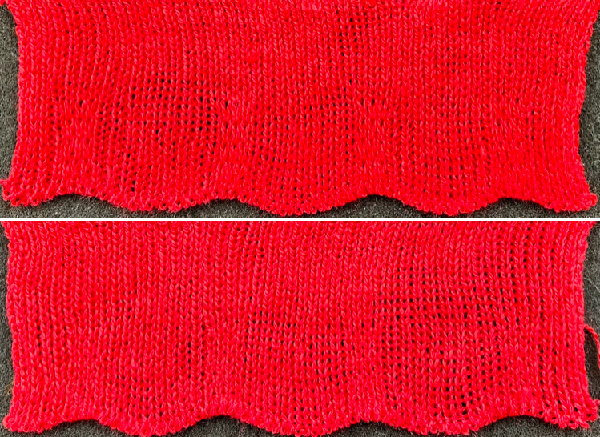
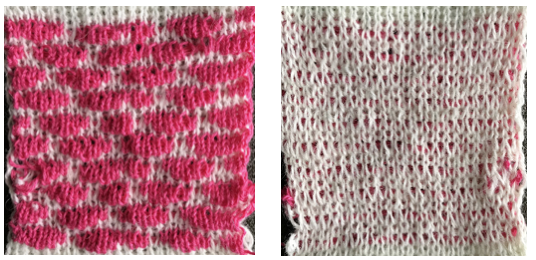
double length ![]() Proofing a pattern is best done using comparable weight, familiar yarns. Here thin poly and 4-pound fishing line are used as the second color
Proofing a pattern is best done using comparable weight, familiar yarns. Here thin poly and 4-pound fishing line are used as the second color 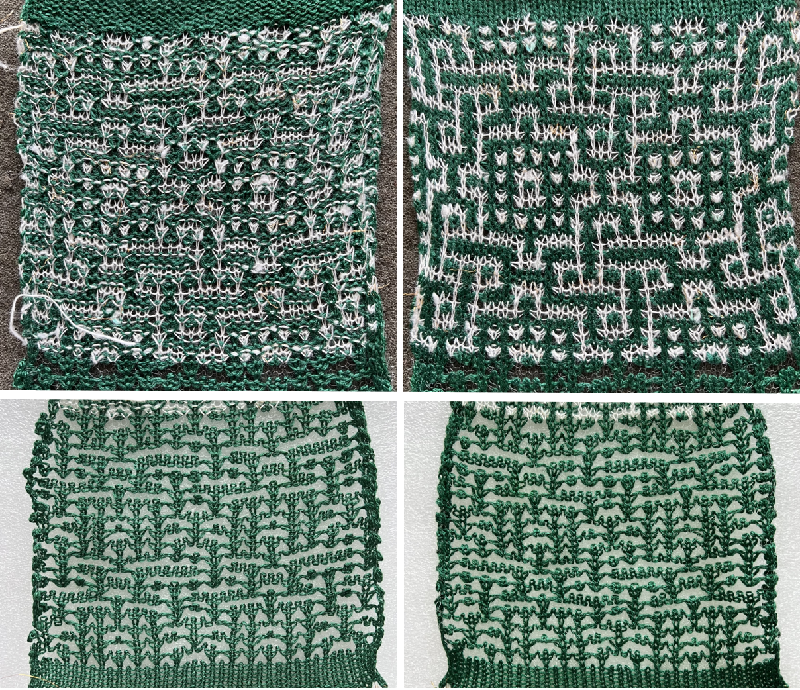 It takes a bit of squinting to see the match.
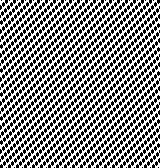
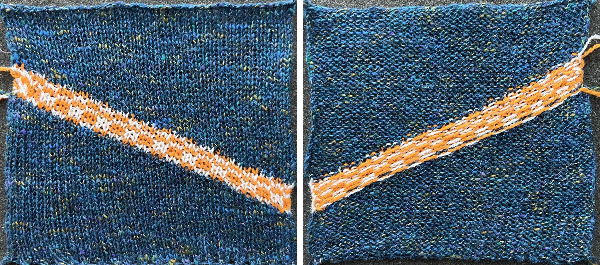
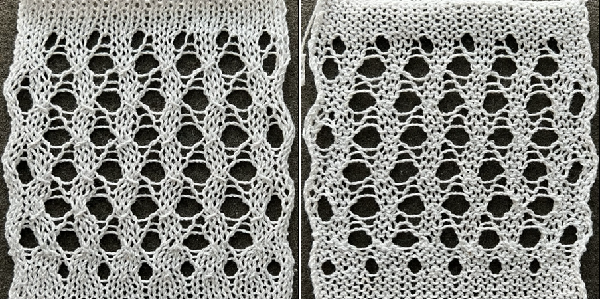
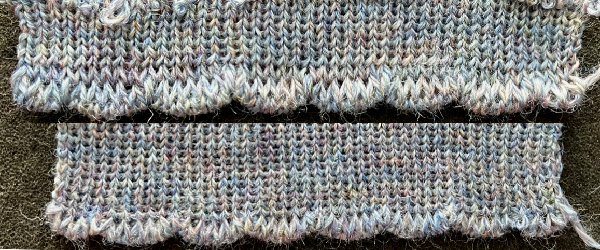
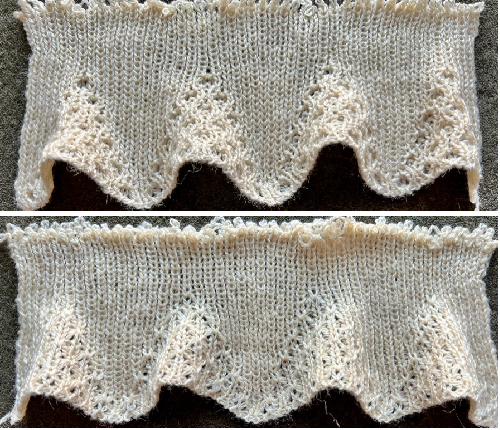
 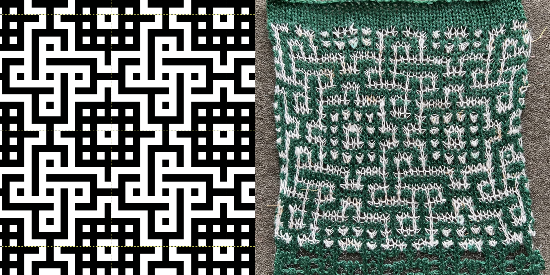 Testing the same repeat in more “friendly” and equal-thickness yarns
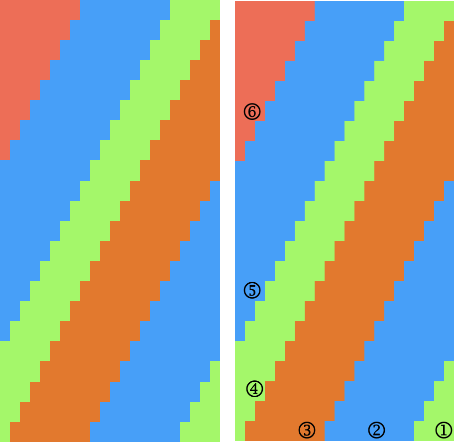
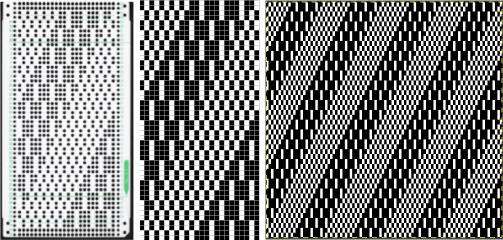
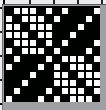
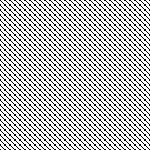
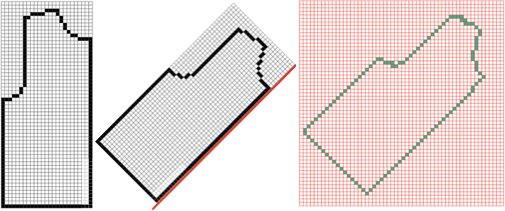
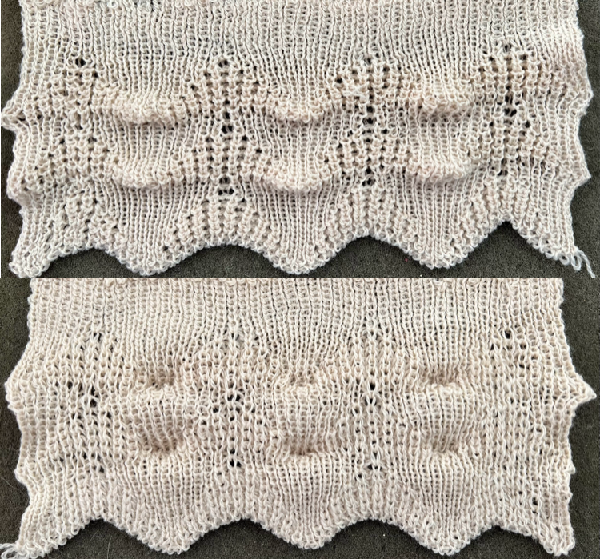
 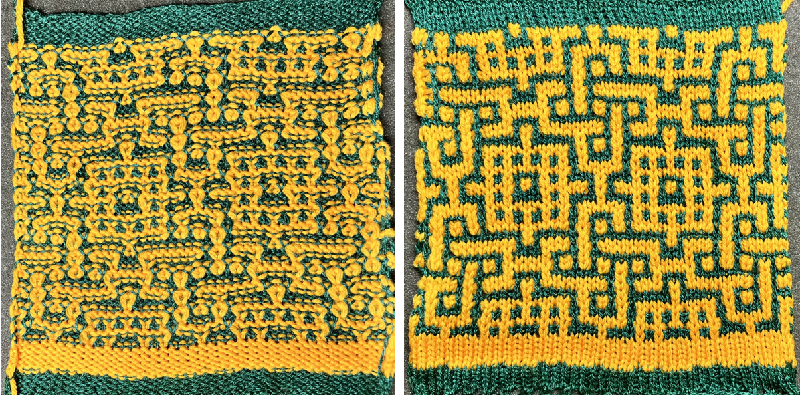 This 24X28 repeat from the earlier post is reworked in this method
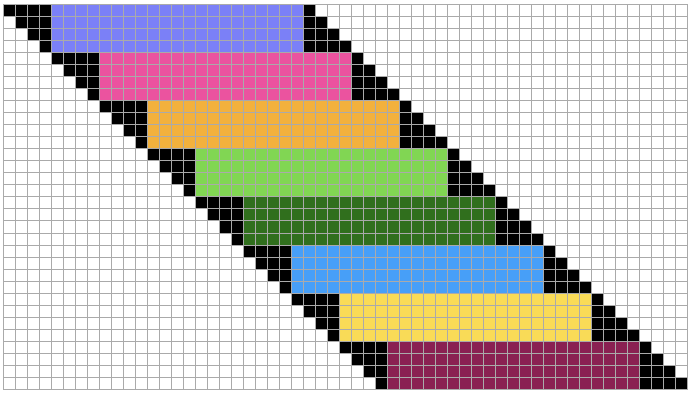
 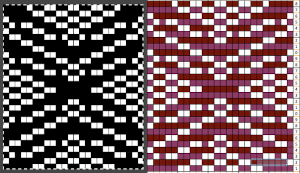 repeating the process described here, it took longer to render the repeat than to perform the color separation. The tiled alignment check
 The steps are in sequence and produce a result matching that achieved in the previous post.
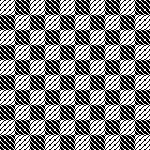
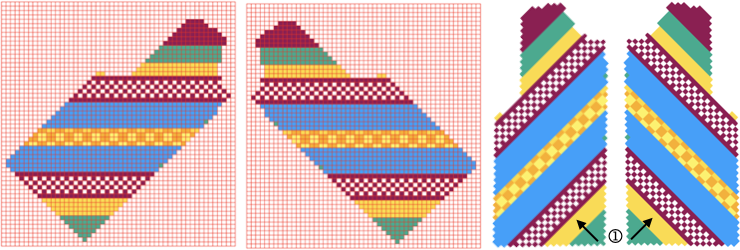
 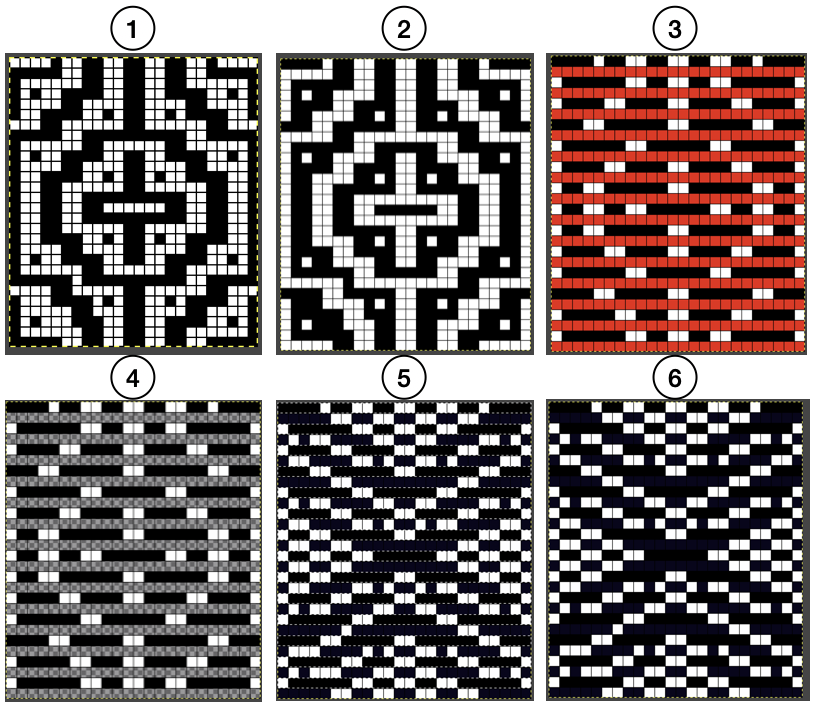 A reminder: step #6 result would need to be doubled in height, whether by altering the file prior to download or by using the built-in functions in the machine after the download. The theoretical color separation to knit the mosaic as DBJ where each color knits twice,
 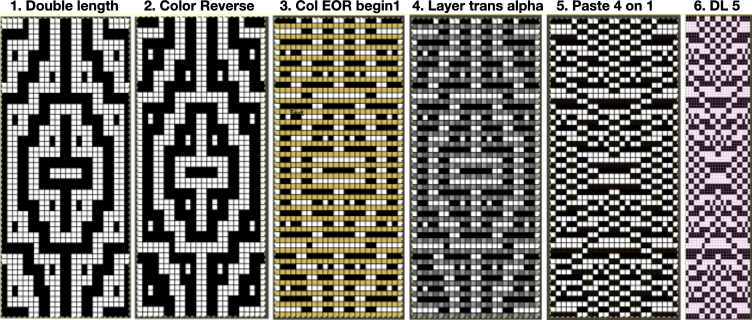 the repeat single length, 24X56
 ![]() double length, 24X112
double length, 24X112 ![]()
Double jacquard using punchcard machines shared manual methods for including one avoiding the elongation by matching the electronic built-in KRC color separation. Using Layers in Gimp for color separations introduced an approach using only Gimp.
There are times that the 2-color separation for DBJ which knits each color in each design row twice is necessary for the intended knit technique.
When testing new methods, one may begin with files that have already been proofed. This file is created so no elongation is required, beginning with the shape  elongated X4.
From the layers post, the double-length separation where each color in each design row knits twice ![]()
 Duplicating the result using layer/ transparency
 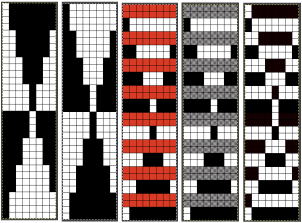 Longer repeats can become more complicated to separate. Testing the results by necessity requires larger swatches.
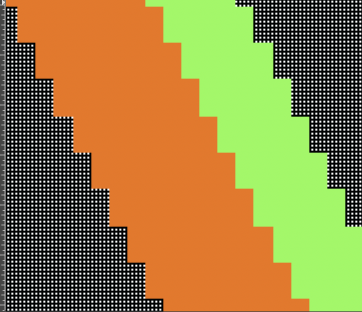
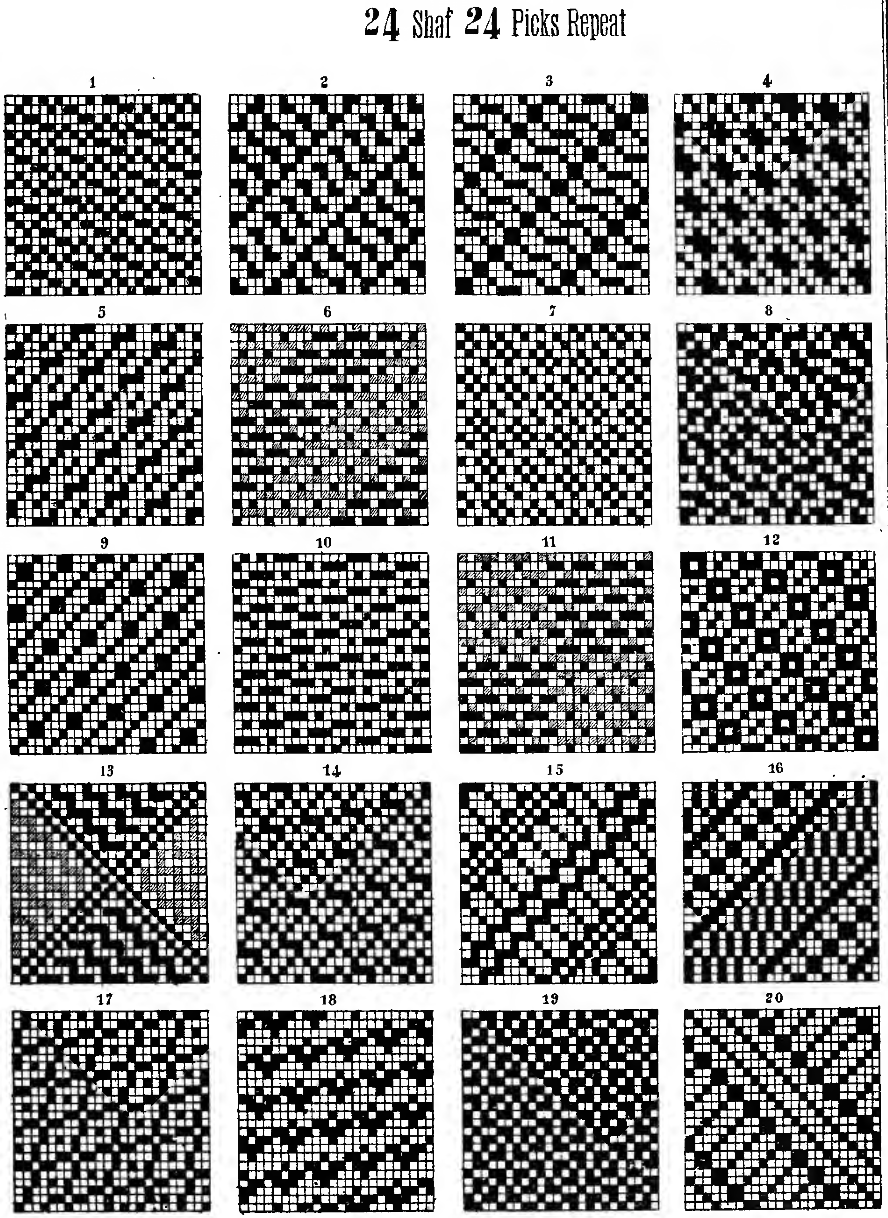
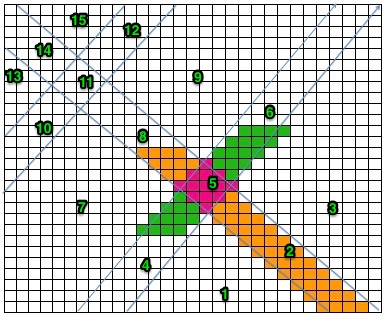
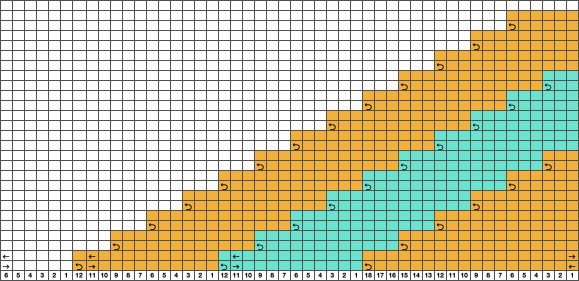
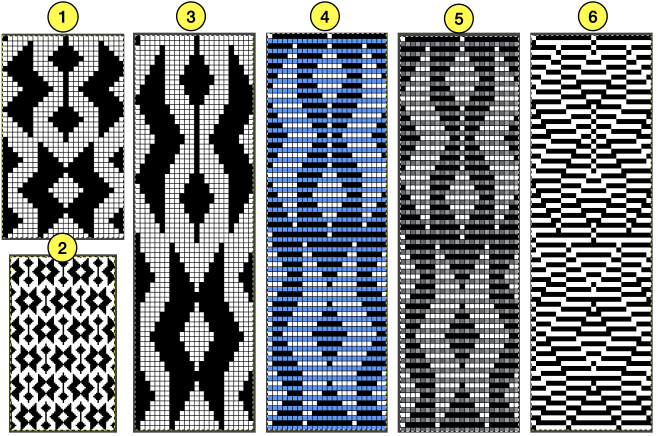
Using Stitchworld #548, a 24X40 repeat, as with mosaics![]() 1: draw the desired repeat in Gimp
1: draw the desired repeat in Gimp
2: when the drawing is completed, tile the repeat to check alignment, save the image if desired, or discard it
3: in the original window, scale the image to double its original height, now 24X80
4: using file, new, open an image on a white ground in the same size and magnification, a minimum of 800X, with grid view, as the first window
color invert
continuing on the same image, changing magnification as needed for ease of visibility ie 1800 X, choose a palette color, and using the pencil tool fill in every other row beginning with design row 1 using it
5. using color to alpha will remove the blue color in this case, and the image will change in appearance, the blue is now transparent. Copy the result.
6: use the second image, and paste it directly onto the one in the first work window.
For the repeat to knit successfully as DBJ, the resulting 24X80 file ![]() will need to be lengthened X2 to 160 rows in height for accurate patterning to occur.
will need to be lengthened X2 to 160 rows in height for accurate patterning to occur. ![]()
 The design lengthened X4, using a 2-pixel pencil beginning on rows 3 and 4,
produces a 24X160 file that requires no elongation. 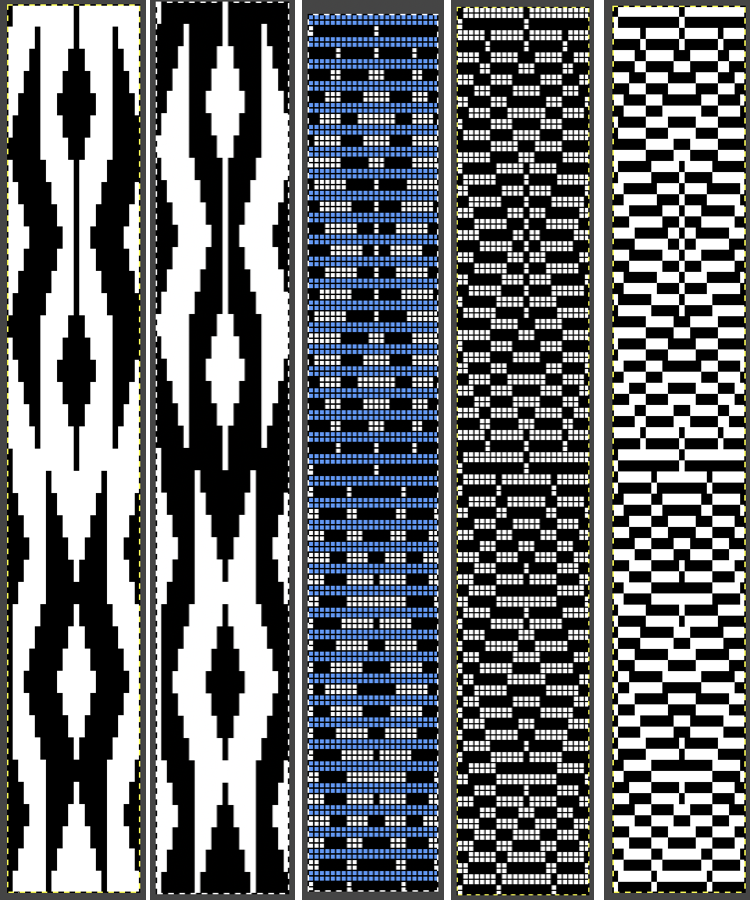 In this DBJ version, the first preselection row is made toward the color changer, followed by color changes every 2 rows.
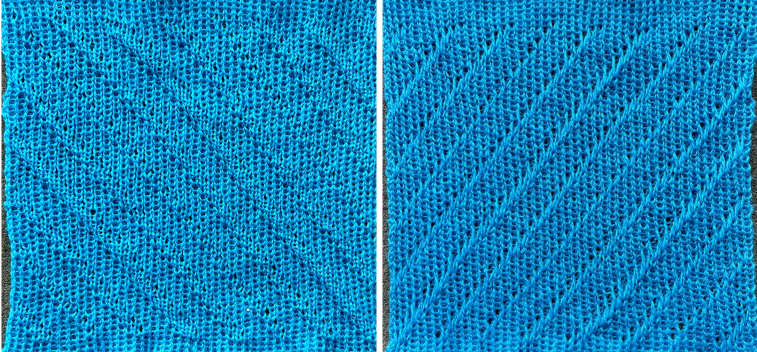
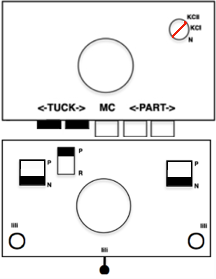
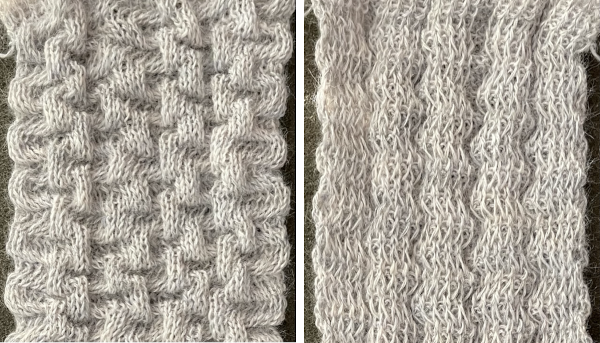
My proof of concept is knit with the knit carriage set to slip/slip and the ribber setting left to N/N, creating long stitches.
The height of the design, any bleed-through, elongation, drape, and stretch, are variables influenced by carriage setting changes on either or both knit and ribber carriages.
By default, DBJ knitting requires many more carriage passes than 2 color patterns knit single bed as fair isle.
My swatch does not begin at design row 1 because I forgot to set the knit carriage to slip after the first preselection row and color changing on the left. 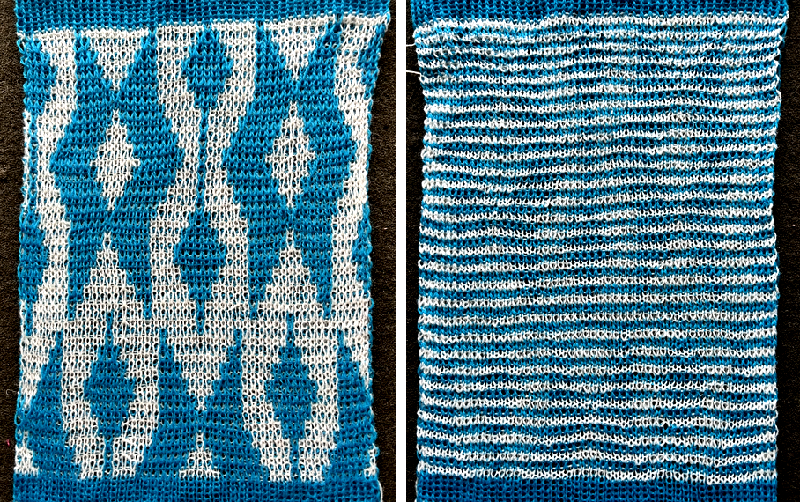 Scaling the knit for a sense of the degree of elongation
 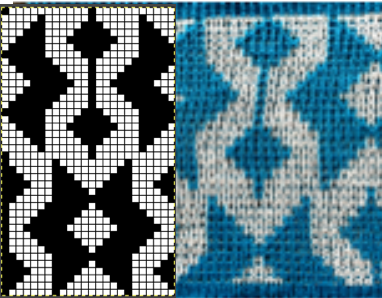 The above separation is the default one in Passap knitting machines.
Japanese electronic knitting machines perform the separation where each color in each design row knits only once automatically by engaging the KRC function.
Punchcard users can achieve the same results for repeats that meet the width constraints using a maximum of 24 stitches or factors of 24 in width.
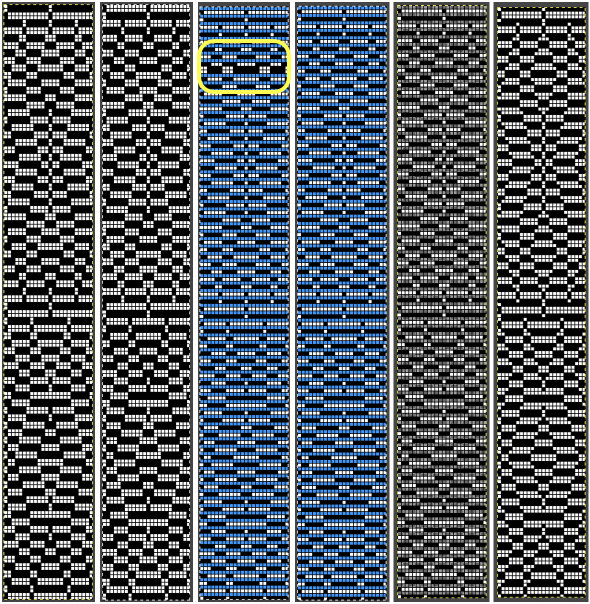
The separation where each color only knits once from the layers post began with the result where each color in each design row knits twice: 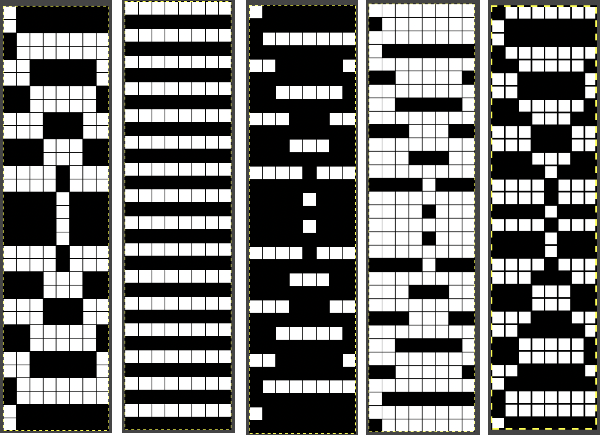 My first effort using layer transparency to separate for each design row color knitting only once begins with the double length separation opened in Gimp, not necessary as seen in notes that follow.
Using the pencil tools, marking begins on the second and then even numbered design rows.
When # 5 is color reversed, it matches the separation using layers in the above far right  Using the same concept, the first test began with the separation already completed for the repeat that would knit each color in each row twice.
Toggling magnification helps to make the height of the repeat manageable. Errors are easy to spot and correct if noticed early, a few rows of pencil marks can simply be undone. Save the final png, also 24X160. ![]()
 The separated design is suitable for punchcard machines, my swatch is knit on a 930. Since these separated designs are programmed as fair isle designs, there will not be any color change prompts provided by some machine models.
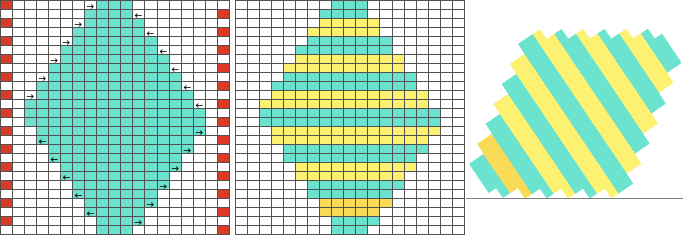
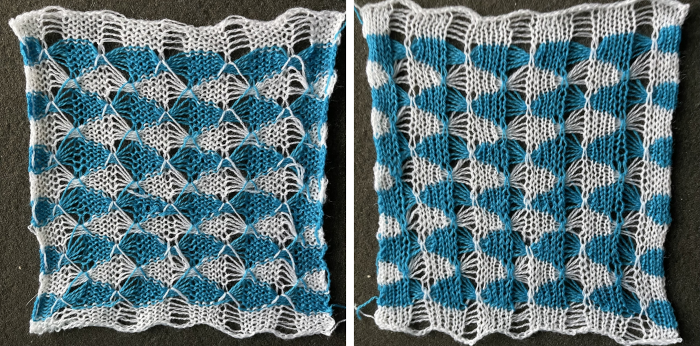
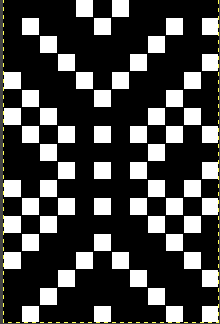
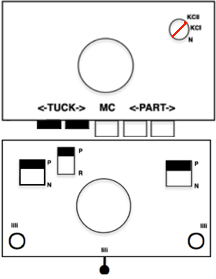
The first preselection row, as when using the KRC function, is made from left to right. The knit carriage is set to slip both ways. The ribber carriage is also set to slip both ways on an even number of needles, and lili buttons are in use. 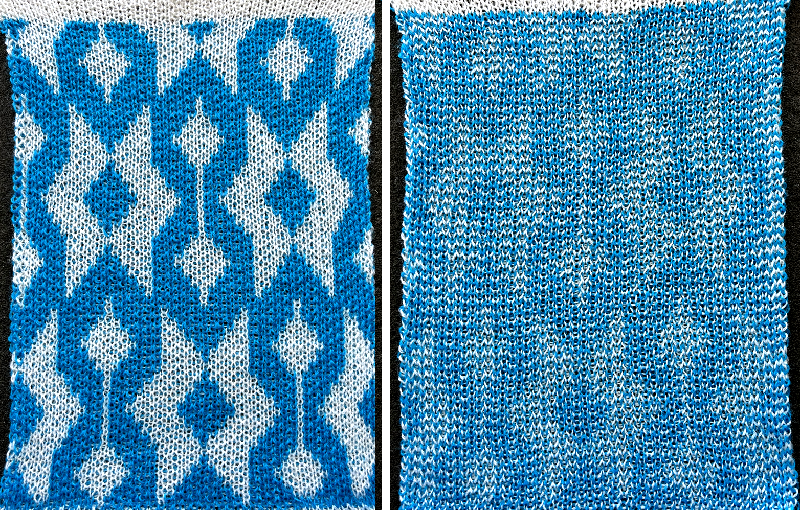 The visual difference in scale between the two different techniques and color separations.
 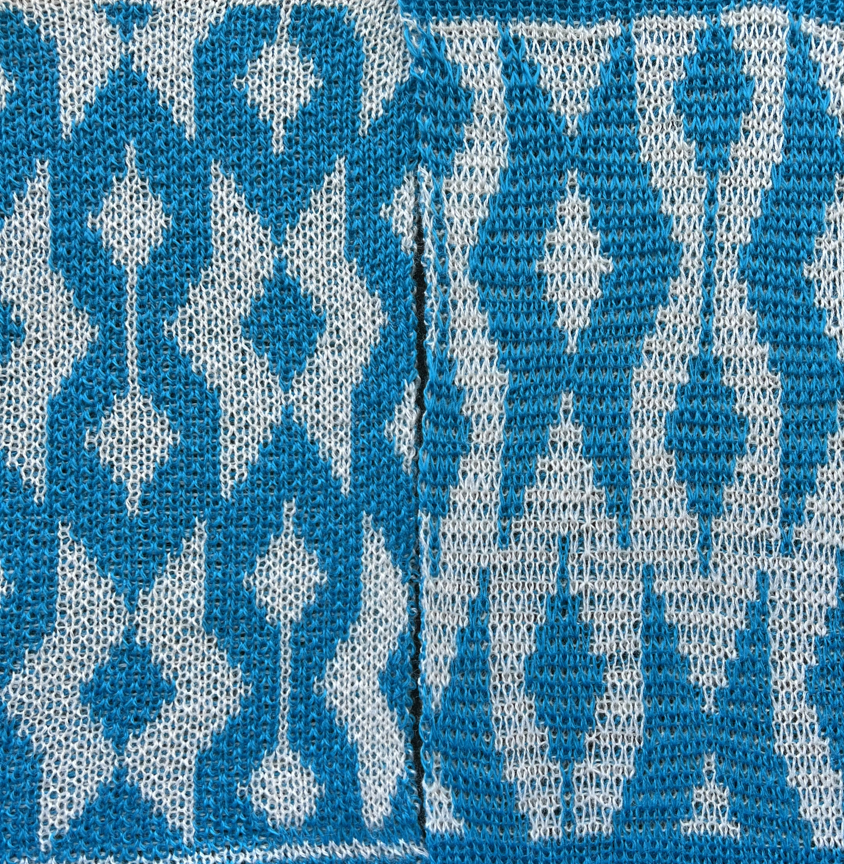 The simplified method begins with the original design scaled X2 to 24X80. The 2-pixel pencil tool is used to mark the resulting design beginning on rows 2 and 3, skipping the next 2 rows, and repeating the process
![]()
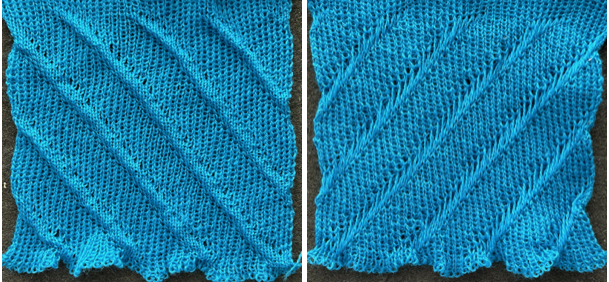
 Committing to a larger test swatch:
 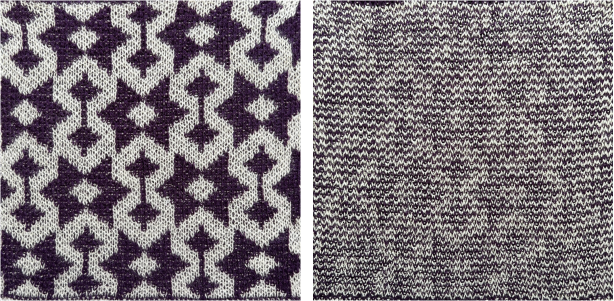 The repeat though successful in this case is different from half the first one obtained the long way, the concept merits testing with other motifs.
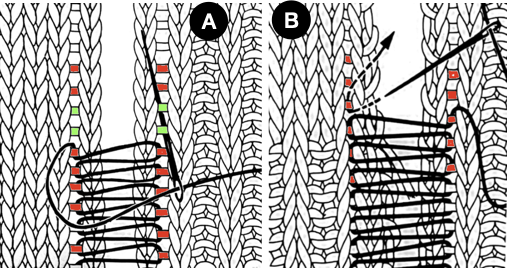
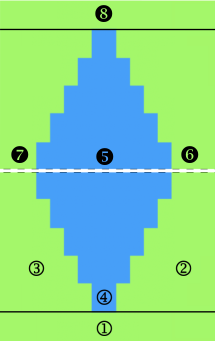
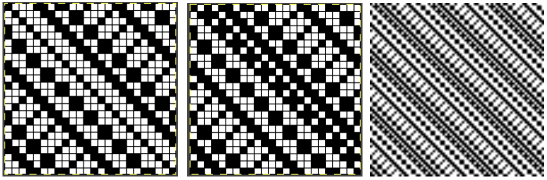
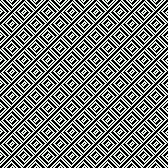
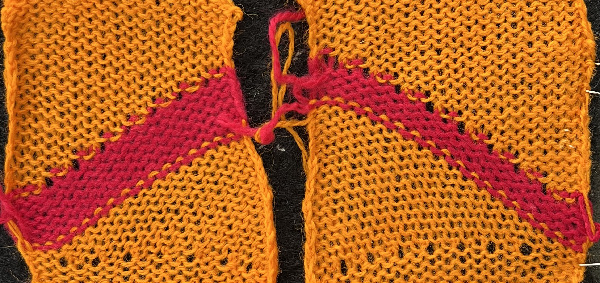
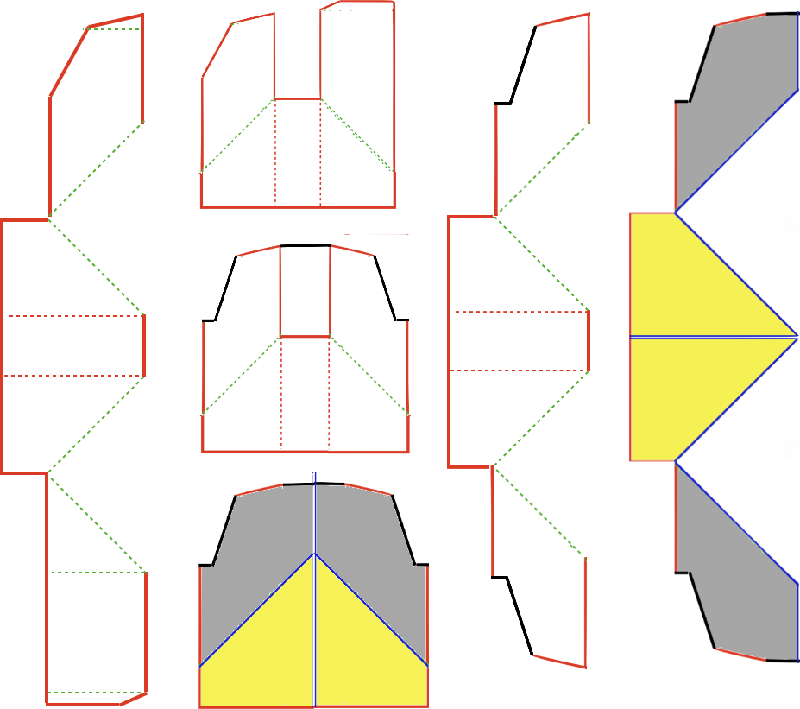
 Years ago I shared the way punchcard knitters may create a DBJ card using a series of templates. The starting 8X8 design was often used in my 2 color DBJ posts. On the right, it is repeated across 24 cells, as it would be in a punch card.
 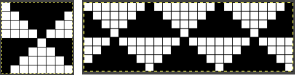 Using layer/Transparency/Alpha the same results can as when using the card templates may be attained in just minutes. Here each color in each row would be knit only once:
  In this case, the final result would need to be elongated X2 in order to knit each color in each design row twice.
  This separation requires no elongation.
  If the plan is to print a template to aid in marking a card prior to punching, one way to determine the required template size is to measure a punchcard with a ruler in mm.
The width of the card is fixed to a print width of 108 mm since the card will always be 24 cells wide. No calculation is required.
In height, the 60 rows on the factory blank card measure 300mm, 5mm for each cell.
I cropped the chosen image to the top 39 rows and scaled it to 108X195 mm.
(39X5).
When printing on US letter size, with no adjustments other than to the image, the limit appears to be no more than 45 rows per page. 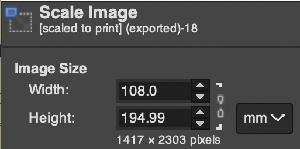 I was not able to print directly from Gimp.
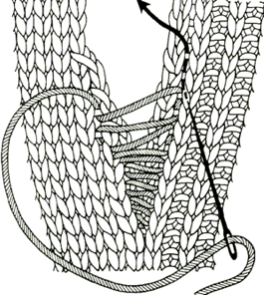
The file, exported, opened in Preview, and then printed, is shown with a card superimposed on the printout over a makeshift light box, ready for easy punchcard marking even though the printed cells were not all of the same ink density. 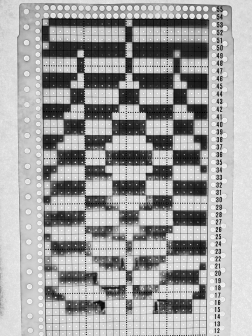

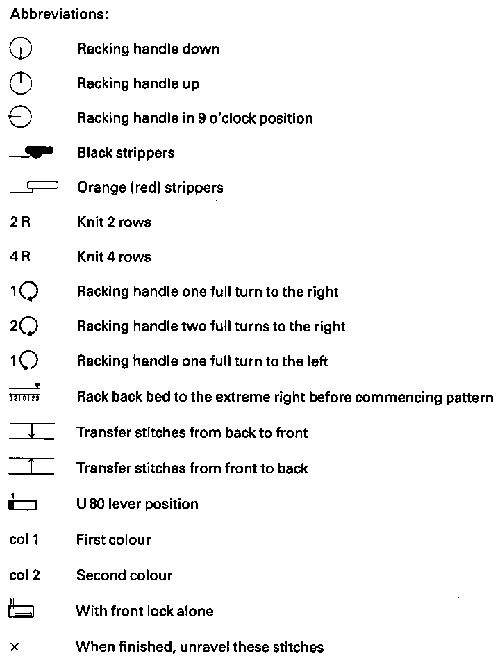


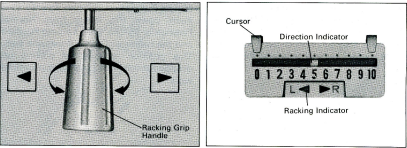
 Adding complexity with transfers from one bed to the other to racking